1
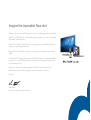
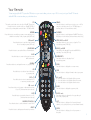
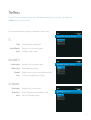
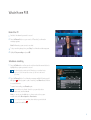
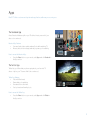
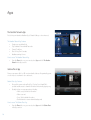
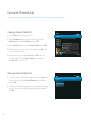
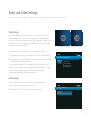
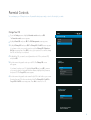
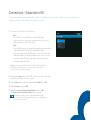
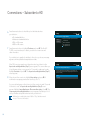
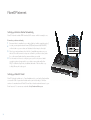
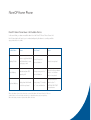
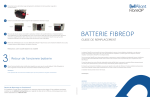
Welcome to Bell FibreOP
™
Contact Us
Customer Service
If you have questions about your FibreOP TV service, subscriptions, or billing, contact us:
Phone:
Online:
Mail:
1 866 FIBREOP (1 866 342-7367)
fibreop.ca
Bell FibreOP
PO Box 624
Sudbury ON
P3E 4P8
Technical Support
If you need technical support for your FibreOP TV HD PVR or receivers, contact us:
Phone:
Online:
1 866 FIBREOP (1 866 342-7367)
http://fibreop.ca/service/support
Imagine the impossible. Now do it.
Thank-you for choosing FibreOP, and welcome to the most advanced network in the world.
FibreOP is our 100% fibre optic network that connects straight to your home so everything
works faster, easier and better.
FibreOP TV is the best TV experience giving you everything you expect and exciting new
features you won’t find anywhere else.
FibreOP Internet is the fastest Internet. No one else gives you the fastest overall Internet
speeds.
Combine FibreOP TV and FibreOP Internet with FibreOP Home Phone - delivering reliability
you can trust - in a FibreOP Bundle and you can have it all. The best whole home solution
for today and tomorrow.
We hope you are as excited about experiencing FibreOP as we were developing it.
And remember, if you ever have any questions; do not hesitate to contact us.
Sincerely,
Dan McKeen
Senior Vice President, Customer Solutions
FibreOP TV
FibreOP TV is the best TV experience. Now, you can enjoy:
• 100% digital stunning picture and sound quality
• Access the most popular channels in your starter package
• 1st HD receiver FREE
• Incredible Whole Home PVR
• Best Whole Home HD
• Ultimate Video on Demand
• NEW! Apps on your TV. ONLY with FibreOP
• Easy to use Guide
2
Feature Spotlight
Here are just a few of the features that make FibreOP TV the best entertainment experience!
Best Whole Home PVR
Watch what you want, when you want, where you want.
Our PVR lets you watch, record and pause TV from any room in your home.
Never miss your favourite show.
Record up to four shows at once from any TV.
Hold onto more recordings.
Store up to 400 total hours and 125 hours of HD programming.
Best Whole Home HD
Don’t just watch the action, experience it!
Every FibreOP TV receiver is HD-ready allowing you to get HD movies, sports
and shows on all HD capable TVs in your home.
Ultimate Video on Demand
Get the most HD movies and shows on demand.
Choose from tons of hours of the best movies and shows, including new release
movies available for rent the same day as dvd of HD titles.
Browsing made simple.
Browse and find movies - it’s astonishingly easy with the super-fast
On Demand library.
3
Feature Spotlight
A new TV experience
Easy-to-use features that put the power of TV in your hands.
Sharp, new program guide makes finding what’s on better than ever.
Watch one show while checking what else is on. Picture-in-picture conveniently
displays a program, its title and time remaining.
Find the hottest shows and movies based on titles, keywords or cast members,
up to 14 days in advance.
Most Amazing Apps
Twitter, Facebook, The Weather Network, music and more to come.
Twitter lets you follow what people are saying about your favourite TV
shows - right on your TV screen.
Facebook
Access Facebook features right on your TV without missing a second of
your show.
The Weather Network gives your detailed forecasts and more for up to 10 cities.
Twitter
Galaxie lets you listen to every genre of music – right from your TV.
Beam lets you beam online videos from your iPhone, iPod Touch or iPad right to
your TV.
The Weather Network
Galaxie
Beam
4
Your Remote
To start enjoying FibreOP TV, press the STB button on your remote after you turn on your TV. You must point your FibreOP TV remote
at the HD PVR or receiver when you push the buttons.
STB
AUX
STB
FF
REW
T
CORD
RE
PAUSE
OPP
SSTTO
Press this button to record the program you are watching, or to
schedule a recording in the program guide. (PVR only)
RE
STOP, PAUSE, and PLAY
RDED
CO
TV
O
DEMAN
TV/VIDEO
Press this button to switch between FibreOP TV and your
DVD player or other device. (Universal remote mode only)
DD
WW
FF
D
N
IID
V/V E
PLAY
RREEPPLLAAYY
REW and FF
Press these buttons to rewind or fast-forward
live or recorded programs. (PVR only)
Press this button to switch your set top box on or off. You
can also control the power of your TV, DVD player, or
auxiliary devices in universal remote mode.
DVD
TV
O
RECORD
POWER
WE
PO R
This mode controls the set top box (your FibreOP TV receiver).
Press this button to resume using your FibreOP TV PVR or
receiver if you changed the remote mode to TV, DVD, or AUX.
MENU
Press these buttons to stop, pause, or play live TV or
recorded programs. (PVR only)
SE
PIP
TERAC
IN
REPLAY and FWD
VE
TI
PIP BBRROOWWSE
GO
LEARN
BACK
ON DEMAND
Press FWD to skip ahead 30 seconds and REPLAY to
rewind by 7 seconds. (PVR only)
Press this button to access the Video on Demand store.
BACK
OK
Press this button to return to the previous screen
while in the menu.
RECORDED TV
EXIT
ARROWS
Press these buttons to navigate the menu or program guide.
Press these buttons to display a list of
recorded programs.
INFO
A
MENU
C
B
Press this button to display the on-screen menu.
OK
Press this button to select an item in the menu
or program guide.
+
+
GUIDE
CH
PG
VOL
LAST
MUTE
-
-
1
VOL + and -
4
5
6
GHI
JKL
MNO
7
8
9
PQRS
TUV
WXYZ
0
ENTER
SPACE
ZOOM
MUTE
Press this button to mute the volume of your TV.
(Universal remote mode only)
NUMERIC KEYPAD (0-9)
Press these buttons to select a channel or enter a PIN.
DELETE
Press this button to backspace when entering numbers.
Press this button to display information about a program.
A, B, and C
EXIT to TV
Press this button to return to watching live TV
or resume a paused program.
Press these buttons to increase or decrease the volume
of your TV. (Universal remote mode only)
INFO
DELETE
2
3
ABC
DEF
A – Press this button to display the Settings screen.
B – Press this button to display the Favourites screen.
C – Press this button to display the Search screen.
GUIDE
Press this button to display the program guide.
CH/PG + and Press these buttons to channel surf or page through
lists in the program guide.
LAST
Press this button to display a list of recently viewed
channels, or to quickly return to your last channel viewed.
ENTER
Press this button to display options for programs or
the guide.
5
TV Basics
Learn the basics of controlling your HD PVR or HD receiver.
Turn on your HD PVR or HD receiver
1 Press STB and then Power on your remote, or press Power on the PVR
or receiver.
2 Your remote has four buttons on the top: STB, TV, DVD and AUX.
By pressing these buttons you are changing what device the universal remote
is controlling.
Note that “STB” stands for set top box (your FibreOP TV receiver). In most
cases the installer has configured your STB button to control BOTH the
receiver and your television.
To learn how to program and use more universal remote features,
refer to fibreop.ca/service/support or the Motorola Remote Control
User Guide provided with your FibreOP TV remote.
To turn on your TV and receiver at the same time
1 Press STB on your remote to place it in the mode that controls the TV
and receiver.
2 Press Power on your remote, which will turn on both devices at the same time.
Depending on how you point your remote, this can result in one
device turning on and the other remaining off. To resolve this issue,
press the power button directly on the device that is powered off.
6
6
TV Basics
Change TV channels
To change channels:
• Use the numeric keypad to enter the channel number.
OR
• Press the CH/PG (Channel/Page) buttons on the remote.
See what’s playing on other channels or time slots
8:02 PM
SHOHD
416
Swarm
1 HOUR 57 MIN LEFT
1 Press one of the arrow buttons on the remote. The browse panel appears at the
Next:
The Firm
bottom of the screen.
2 Use the Up or Down Arrow buttons to step backward or forward through
channels. The browse panel displays the title, a picture-in-picture video for the
current time slot, and information for each channel.
3 Use the Left or Right Arrow buttons to browse programs playing later on the
channel selected in the browse panel. The browse panel displays the title and
more information about future programs.
4 Press OK to watch the program shown in the browse panel or to find out more.
5 Press Exit to close the browse panel and return to your original program in full
screen, or wait 10 seconds and the browse panel will disappear.
Basic TV Navigation
FibreOP TV is easy to use. There are two main interfaces on screen:
1 The Guide: Brings up a grid of channels and time slots. You get to the Guide by
pressing “Guide” on the remote.
2 The Menu: Allows you to access features like search, PVR, video-on-demand,
and settings. You get to the Menu by pressing “Menu” on the remote.
The next few pages will explain the features of The Guide and the Menu in detail.
7
The Guide
The main way to find what you want to watch on FibreOP TV.
1 Press the Guide button to open the program guide. The Guide screen appears.
• The guide lists all programs scheduled for the next 14 day
Guide
8:03 PM
Storage Wars
8:00-8:30 PM • 27 MIN LEFT
• The Browse panel at the bottom of the screen displays program information
• The Preview window displays the program that is currently available on the
channel being browsed
2 Press the arrow buttons or CH/PG buttons to page up or page down through
the list of channels.
3 Press FF button while viewing the guide to skip ahead 24 hours.
You can also press the Enter button while viewing the guide to access
additional shortcuts.
4 When you find a program you want to watch, highlight the title and press OK.
Alternatively, press the Guide or Exit button to dismiss the Guide and return
to live TV.
8
“High End Heist” - The buyers head to Torrance, Calif., commonly known as an
‘antiquers’ town.
TUE 5/1
8:00PM
8:30PM
9:00PM
415 A&EHD
Storage Wars
Storage Wars
Storage Wars
416 SHOHD
Swarm
418 FB
Facebook for FibreOP TV
Facebook for FibreOP TV
433 CITYH
How I Met...
30 Rock
Last Man...
434 CBCEH
This Hour Has 22...
NHL Playoffs
435 GLBEH
Entertainment...
Entertainment...
Glee
5:30PM
Storage Wars
Cougar Town
The Menu
The FibreOP TV menu is designed to help you access all the features and settings of your TV service. To get started, press
the Menu button on your remote control.
The main menu has the following categories organized left to right on screen:
Menu
TV
TV
8:07 PM
Recorded TV
On Demand
Apps
Help
Settings
Guide
Favourite Channels
Guide
Favourite Channels
Search
See what’s playing on each channel.
Display a list of your favourite channels.
Find what you want to watch.
Recorded TV
View Recordings
Add Recordings
Scheduled
Series
Search
Menu
Display a list of your recorded programs.
Schedule additional recordings.
Check the status of your upcoming scheduled recordings.
Recorded TV
8:08 PM
On Demand
Apps
Help
Settings
View recordings
Add recordings
Scheduled
Series
Prioritize your scheduled series’ recordings.
On Demand
Current rentals
Browse videos
Search
Display a list of your current rentals.
Browse On Demand programs available for rental.
Search for On Demand programs.
Menu
On Demand
8:08 PM
Apps
Help
Settings
Current rentals
Browse videos
Search
9
The Menu
Apps
Menu
Facebook
Twitter
The Weather Network
Galaxie
Beam
Lets you access the most popular features, right on your
TV, without missing a second of your show.
Lets you follow what people are saying about your
favourite TV shows – right on your TV screen.
Apps
8:11 PM
Help
Settings
Facebook
Twitter
Galaxie
The Weather Network
Gives your detailed forecasts and more for up to 10 cities.
Lets you listen to every genre of music – right from your TV.
Beam lets you beam online videos from your iPhone, iPod
Touch or iPad right to your TV.
Menu
Help
Help
8:13 PM
Settings
English Video Tutorials
Video Tutorials
Contact Us
Watch a variety of tutorials to learn more about FibreOP TV.
French Video Tutorials
Contact Us
View contact information for FibreOP TV.
Settings
General
Television
Audio
Parental Controls
Restart System
10
Modify your on-screen language settings and access
system information.
Change settings for your program guide, favourites list,
screen aspect ratio, or closed captioning.
Menu
Settings
General
Enable/disable surround sound and descriptive video.
Television
Control access to mature content and program rentals.
Parental controls
Restart the HD PVR or receiver.
Audio
Restart System
8:13 PM
Whole Home PVR
The FibreOP TV Personal Video Recorder (PVR) gives you total control over the digital television experience.
The following pages include information on:
• Controlling live TV
• Recording programs
• Watching programs
• Manual recordings
• Whole home PVR
Whole Home PVR Features
With our new Whole Home PVR, one PVR powers your whole home. Start watching
a recorded show in one room, finish in another. And you can record shows and play
them back from any TV in the house!
How does it work? All the receivers in your home are connected back to your PVR.
These secondary TVs have full access to all the features you would expect on your
main PVR receiver.
This means you can:
• Set up and change recordings from any TV in the house
• Watch recordings from any TV in the house
• Stop a recording in one room and then resume it on another TV.
• Pause live TV on any TV in the house
• Multiple people can watch the same recording on different TVs at the same time
• See scheduled recordings and manage conflicts on call TVs in the house
• Record up to 4 programs at the same time
• Watch up to 3 recordings on different TVs at the same time.
Turning the receiver off when not in use, so that the green light is not
illuminated around the power button, ensures that other TVs in the house
are able to watch and record as much as possible.
11
Whole Home PVR
Pause Live TV
1 You can pause live programs with your FibreOP HD PVR receiver. Press
the Pause button on the remote control to pause the program for up to 60
minutes. The image freezes and a progress indicator temporarily appears
on-screen displaying the following information:
• The time at which you paused the program (shown as a vertical line with the
time below it)
• How much of the program has been held since you paused it (shown as the
shaded area after the pause)
If you pause for longer than 60 minutes, the program automatically begins
playing again from the point at which you paused it.
2 Use the playback controls on your remote control to pause, fast-forward or
rewind any part of the program that remains after pausing the program.
The progress indicator updates to display the following information:
• The place you are watching in the recorded portion of the program
(shown by a vertical line with the time below it)
• How far you can rewind or fast forward the save portion of the program
(shown by the shaded areas before and after the point in the program you
are currently watching)
• The point at which you’ll be watching live TV again (shown as the right most
end of the shading)
Resume Live TV
1 Press the Play button to resume playing the program.
2 Press the Rewind or Fast-Forward buttons to rewind or fast-forward the
current program. To increase the rewind or fast-forward speed, press the
button multiple times. Press the Play button to resume watching the program
at normal speed.
12
Whole Home PVR
Record live TV
Recording
1 Switch to the channel you want to record.
2 Press the Record button on your remote. A “Recording” confirmation
message appears.
Note: On Demand programs cannot be recorded.
3 To stop recording at any time, press Stop. A confirmation window appears.
4 Highlight Stop recording and press OK.
Schedule a recording
1 Press the Guide button on the remote control and use the arrow buttons to
highlight the program you want to record.
Recording
Storage Wars
Avoid missing the overtime period! Changing your recording time to
stop from 5 to 60 minutes later ensures you don’t miss the end of
your show!
2 Press the Record button. A confirmation message and the following symbol
will appear . If the program is part of a series, press Record a second time
to record the series.
To cancel a recording, press Record again.
RECORDING IN HD • 8:00-8:30 PM • 27 MIN LEFT
“High End Heist” - The buyers head to Torrance, Calif., commonly known as an
‘antiquers’ town.
TUE 5/1
8:00PM
8:30PM
9:00PM
5:30PM
415 A&EHD
Storage Wars
Storage Wars
Storage Wars
Storage Wars
416 SHOHD
Swarm
418 FB
Facebook for FibreOP TV
Facebook for FibreOP TV
433 CITYH
How I Met...
30 Rock
Last Man...
434 CBCEH
This Hour Has 22...
NHL Playoffs
435 GLBEH
Entertainment...
Entertainment...
Cougar Town
Glee
Set recordings using Search. Search for a program title, select a
search result, and select Record.
Note: you can also press the Info button to learn more about the program
and then select either Record episode or Record series.
If you set up a recurring recording, three red dots appear beside the
program title in the Guide
.
13
Whole Home PVR
Watch recorded programs
1 Press the Recorded TV button on the remote control.
The Recordings screen appears.
2 Press the Left or Right Arrow buttons to view the list of recordings by date
or by title.
Program info
Summary
Play
Keep until
Erase
Series info
8:21 PM
People Search
American Idol
10 FOX • THU 4/26, 9:00 PM
KEEP UNTIL SPACE NEEDED
“1 Voted Off” - Another finalist is eliminated from the competition.
No cast information available
8+ (PG), Original air date: 26-APR-12, CC, 1 hour 6 minutes.
3 Select the recording you want to watch and press OK.
4 The Program info screen appears. Highlight and press OK for one of the
following options:
Play – to play the recording
Erase – to erase the recording
Keep until – to specify when the PVR should automatically erase the recording.
List upcoming recordings
Recordings
1 Press the Recorded TV button on the remote control.
The Recordings screen appears.
2 Press the Right Arrow button to select Scheduled on the menu bar.
Scheduled
8:22 PM
Series
TODAY
Pretty Little Liars
9:00 PM
Glee - “Choke”
9:00 PM
TOMORROW
3 A list of all upcoming recordings appears. Press the Up or Down Arrow buttons
to scroll through the list. If you want to find out more about a program or
change the recording settings, highlight the program and press OK.
If you cancel a recording that is in progress by pressing the Record
button while in the program guide, this also cancels any future
recurring recordings of the program.
14
General Hospital - “Kate’s Medical File”
American Idol - “Finalists Compete”
Pretty Little Liars
SERIES RECORD • 220 MUCH • 5/1, 9:00 PM
Four 16-year-old girls are reunited over the disappearance of their friend.
4:00 PM
9:00 PM
1 of 19
Whole Home PVR
Manual Recording
Recordings
1 Press the Recorded TV button on the remote control. The Recordings
screen appears.
8:29 PM
Add recording
Scheduled
Series
Recorded Program or Series From:
Guide
2 Press the Right Arrow button to highlight Add Recording on the menu bar.
3 Press the Down Arrow button to highlight Channel and time under the
Create A Manual Recording With: heading. Press OK. The Channel and time
screen appears.
Search
Create A Manual Recording With:
Channel and time
4 Use the numeric keypad to enter the channel number you want to record.
Note: some channels are not available for manual recording.
5 Press the Down Arrow button to highlight the Date field. Press OK if you
want to choose a different date for your recording.
6 Press the Down Arrow button to highlight the Start field. Use the numeric
keypad and the right or left arrow buttons to enter the start time and end
time in hours and minutes. Press OK to switch between AM and PM.
Manual record
8:30 PM
Channel and time
Record
Don’t record
CHANNEL
A&EHD
415
DATE
Tue 5/1
| Change
STOP
START
8: 00
7 Press the Down Arrow button to highlight the Keep Until field. Press OK to
PM
9: 00
PM
KEEP UNTIL
select Space needed or I erase. Choose your preference and press OK.
Space needed
| Change
8 Press the arrow buttons to highlight Record and press OK. A confirmation
message appears. Press Exit to TV to return to live TV.
Recording
Add recording
Scheduled
Series
Recorded Program or Series From:
Guide
Search
Create A Manual Recording With:
Channel and time
15
Video On Demand
Enjoy the hottest movies and shows at your fingertips with On Demand. It’s like having a video store right in your living room. Catch
up on primetime shows from CBC, OWN, A&E, as well as lots of popular children’s shows - for free. You can even add more On Demand
content by subscribing to one of our premium movie packages like The Movie Network™ and HBO™ or Super Channel™.
The video on demand store is organized into the following sections:
1 Current Rentals – a list of all the movies and shows in the store you are
currently renting.
2 English – this section includes all English movies available for rent. It also
includes free TV content and TV content for rent.
3 Francais - this section includes all French movies available for rent. It also
includes free TV content and TV content for rent.
4 Subscription – this section includes all English free movies and TV
shows associated with the premium channels you subscribe to
(TMN, Superchannels, etc).
5 Par abonnement – this section includes all French free movies and TV shows
associated with the premium channels you subscribe to (Super Ecran, etc).
Each large section of the store has several sub categories to make finding
the type of programming you want to watch easier than ever. Once you find
something that interests you, you can learn more with the on-screen info,
people search, free previews and more!
Use people search by scrolling to the right on any summary page to
find more movies featuring your favourite actors and directors.
16
Program info
Summary
8:36 PM
People Search
Rent for $6.99
Alvin and the Chipmunks: Chip-Wrecked
Watch preview
1 HR 28 MIN
$6.99 • RENT FOR 2 DAY(s)
Available until 12:00 AM September 24 2012
The vacationing Chipmunks and Chipettes are turning a luxury cruise liner into
their personal playground, until they become “chipwrecked” on a remote island.
(CC)
Jason Lee, David Cross, Jenny Slate, Justin Long, Directed by Mike Mitchell.
FAM (G), Released 2011.
Apps
FibreOP TV offers customers exciting interactive applications, with many more coming soon.
The Facebook App
Access Facebook features right on your TV without missing a second of your
show - at no extra cost.
MAY 1|4:11PM
Jane Customer
Watching Big Bang Theory with
the fam.
You are watching:
Big Bang Theory
Facebook App Features
•
See news feeds, status updates, and wall posts while watching TV.
•
Browse photos, write messages, and rate programs you’re watching.
CTVHD
Share your view
I give this
show a...
How to access the Facebook App
•
Press the Menu button on your remote, select Apps and click Facebook in
the Apps section.
News Feed (44)
Home
Wall
Friends
Photos
Support
Bell Aliant
AutoScroll
Logout
What’s on your mind?
The Walk So Kids Can Talk was a huge success this year. Over 40 locations, over $2M raised and counting,
and thousands of participants. Thanks to our employees for making the day such a success. Check out
some of the photos.
About an hour ago
Like
The Twitter App
Twitter lets you follow what people are saying about your favourite TV
shows – right on your TV screen. And it’s at no extra cost.
Twitter
•
•
•
•
App Features
Post and follow tweets.
Share what you’re watching.
View tweets from other fans.
See top tweets and trending topics.
How to access the Twitter App
•
Press the Menu button on your remote, select Apps and click Twitter in
the Apps section.
17
Apps
The Weather Network App
First to bring an interactive Weather App to Greater Sudbury - at no extra cost.
The Weather Network App Features
•
Create your own default city
•
City Searches & Personalized Favourites
•
Current Conditions
•
Short & Long Term Forecasts
•
Weather warnings & more
How to access The Weather Network App
•
Press the Menu button on your remote, select Apps and click The Weather
Network in the Apps section.
Galaxie Music App
Now you can access all of our 90+ music and radio stations, all organized by genre,
on one simple to use channel - at no extra cost.
Galaxie Music App Features
•
Grouped into genres such as Rock, Pop, Country, Smooth and Mix it
provides instant access to channel information and currently playing song.
•
Visually inviting on-screen experience, including:
– Album, song title & artist information
– Album cover art
– Song / Artist-related information
– Genre-themed on-screen channel backgrounds
How to access The Galaxie Music App
•
Press the Menu button on your remote, select Apps and click Galaxie Music
in the Apps section.
18
Program Info and Managing TV Feeds
Program Info
Program info
1 Press the Info button on the remote to display more information about
Summary
a program.
Watch
If you are in the Video-on-Demand store you can rent or watch a preview.
Record episode
Alternate audio
Subtitles
The Big Bang Theory
402 CTVHD • 4:00 PM–4:30 PM
26 MIN LEFT
Record series
2 Press the Up or Down Arrow buttons to select the option that interests you
4:13 PM
People Search
More showtimes
and press OK.
"The Lizard-Spock Expansion" - A smitten Howard thinks he's
found his soul mate, until the woman, Dr. Stephanie Barnett (Sara
Rue), meets Leonard. Howard invites Stephanie to drive the...
3 Press the Left or Right Arrow buttons to explore other menus such as
People Search, Alternate Audio, or Subtitles. The options available in the
menus vary depending on the program.
4 Press Exit to TV to dismiss the Program info screen.
Recording conflict
9:43 PM
Recording conflict: Cajun Pawn Stars - “Sweet and Sour”
Manage Live TV and PVR Feeds
Cajun Pawn Stars won’t record because too many other recordings are scheduled at the same time.
Resolve conflict
FibreOP TV allows you to watch, pause and record programs on all the TV Sets
in your home.
Don’t record Cajun Pawn Stars
Cajun Pawn Stars conflicts with Glee, Pretty Little Liars, NHL Playoffs, and William & Kate: One Year Later.
If you try to view or record more High or Standard Definition feeds than
you have available, a screen appears with options to resolve the conflict. For
example, you can turn off another STB or stop a recording to free up a feed
for this TV.
To minimize the potential for conflicts, you should turn off any receivers not
being used to watch TV (the green light around the Power button should
be off). Turning off your PVR receiver does not prevent it from recording
programs or sending programs to other TV’s.
Recording conflict
9:43 PM
Choose a program without a red dot to record it.
Save changes
Cancel changes
CONFLICT
9:30-10:00 PM
Cajun Pawn Stars - “Sweet and Sour”
GLEE - “Choke”
Pretty Little Liars
NHL Playoffs
Remember, with time shifting, you have more than one chance to
view or record many programs!
William & Kate: One Year Later - “William & Kate: One Year Later”
WON’T RECORD • 287 HIST • 5/1, 9:30 PM
“Sweet and Sour” - The gang checks out a rare first album by Jerry Lee Lewis; a
local deputy sheriff wants to hawk a Civil War-era revolver.
19
Favourite Channels List
Find your favourite programs fast by creating a Favourite Channels List of the channels you watch the most!
Create your Favourite Channels List
Settings
1 Press the Menu button on the remote control.
2 Press the Right Arrow button to select the Settings menu. Press the
Down Arrow button to highlight Television and press OK.
3 Press the Down Arrow button to select Favourite channels and press OK.
4
Highlight the boxes beside your favourite channels and press OK to add
or remove them from the list.
5
Press the arrow buttons to highlight Save and press OK to save your
Favourites Channels List. The Television Settings screen reappears.
Press Exit to TV to return to live TV.
9:46 PM
Favourite channels
Press OK to add or remove channels from your favourites guide.
Save changes
Don’t save
Uncheck all
2 HELP - Bell Aliant Instructional Channel
View checked
3 CBC - CBAT (CBC - New Brunswick)
4 GLOB - Global Maritimes
5 CTV2 - CTV Two Atlantic
6 CTV - CTV (CKLT New Brunswick)
7 CBS - WBZ
6 of 259
Access your Favourite Channels List
1 To access your Favourite Channels List at any time, press the Menu button
on the remote control. Highlight Favourite Channels under the TV menu
and press OK.
2 Use the Favourite Channels List just like the program guide; press the arrow
buttons on your remote to highlight the channel you want to watch, and
press OK.
20
Menu
TV
9:47 PM
Recorded TV
Guide
Favourite Channels
Search
On Demand
Apps
Help
Settings
Audio and Video Settings
Here are some tips for setting up your audio and video equipment to get the best experience from FibreOP TV.
Video Settings
Annoyed by black bars on the top and bottom of your screen? Or perhaps it
seems like part of the picture is cut off? You might need to change the aspect
ratio of your TV screen to match the program you’re watching. For example, most
HD programming is shown in widescreen format (16:9), while most SD programs
are shown in full screen format (4:3).
16:9 (Widescreen) format
4:3 (Fullscreen) format
There are two ways to control how the picture is displayed on screen:
1 By adjusting your TV settings. Please refer to your TV set manual for details.
2 By adjusting your receiver settings in the settings menu under Television and
“Screen aspect ratio and high definition”.
Settings
9:50 PM
Screen aspect ratio and high definition
Choose the aspect ratio and resolution for your TV, then shoose Continue.
Continue
4:3 standard definition
Cancel changes
Widescreen standard definition
Once you have optimized your TV set and receiver settings for your favorite
channels, you may still find certain programs that you want to adjust. To toggle
your video settings easily, press Enter on the remote while watching
a program and change the options under aspect ratio.
720p on high-definition screens
1080i on high-definition screens
Audio Settings
By accessing the Audio section of the settings menu you can change:
1 Descriptive video: turn descriptive video on or off.
Settings
Audio
2 Digital audio output: select stereo or surround sound settings.
9:51 PM
Parental controls
Descriptive Video
Digital audio output
21
Parental Controls – The Choice is Yours
You can prevent children from viewing live programs, recorded programs, and rented videos you do not want them to see.
Set Up Parental Locking
Parental Locking is the heart of FibreOP TV’s parental controls. Your FibreOP TV
PVR or receiver has Adult Locking enabled by default. This means shows with
ratings of R, V/AO and AO require the PIN to view.
Menu
9:52 PM
Settings
General
Television
Audio
Your FibreOP TV PVR or receiver comes preprogrammed with a default
PIN of 1234. In order to ensure the security of your account, it is strongly
recommended that you change your PIN to something that only you know.
Your FibreOP TV PVR or receiver also has a series of built-in security questions.
You must set them up if you want to change your PIN. To do so, follow the
instructions on the next page.
Parental controls
Restart System
Settings
9:53 PM
Parental locking
After your PIN and security questions are set, you can visit the Parental locking
Settings screen to:
•
•
•
•
•
Lock specific channels.
Lock programs by rating.
Lock unrated movies and TV programs.
Change your PIN.
Turn off Adult locking, or turn it back on.
Enter your 4-digit PIN
**
To create or change settings, please enter your 4-digit PIN.
When activated, your 4-digit PIN will be required to access controlled programming.
PIN Management
Manage Security Questions - Select Questions
Answer Questions
Select 3 of the following questions so you
can use them to reset forgotten PINs
Last 3 digits of Social Insurance Number?
Age when you were married?
Number of pets you had as a child?
Year you graduated from high school?
You have selected 3 questions
22
9:55 PM
Parental Controls
You can change your PIN anytime, turn off parental locking temporarily, or turn it off entirely if you wish.
Change Your PIN
1
Open the Settings screen, highlight Parental controls and press OK.
The Parental controls screen appears.
2 Highlight Reset PIN and press OK. The PIN Management screen appears.
Setting
9:57 PM
Parental controls
Parental locking
Rental locking
Reset PIN
3 Highlight Change PIN and press OK. The Change PIN - Pick PIN screen appears.
If you have not set your security questions yet, the Change PIN - Questions
Not Set screen appears. Press OK to set up your questions. You cannot change
the PIN until this step is completed.
4 Highlight the PIN you want to reset (parental control PIN or purchase PIN)
and press OK.
5 Use the numeric keypad to enter your old PIN. The Change PIN screen
Settings
9:57 PM
PIN Management
will appear.
If you have forgotten your PIN, highlight Forgot PIN and press OK to answer
your security questions instead. Enter the answers, highlight Verify Answers,
and press OK. The Forgot PIN screen appears.
Change PIN
Forgot PIN
Manage Security Questions
PIN Change History
6 Use the numeric keypad to enter a new 4-digit PIN in the field on your screen.
Re-enter the new PIN in the second entry field. The Change PIN - Pick PIN or
Forgot PIN - Pick PIN screen reappears. Press Exit to return to live TV.
PIN Management
9:57 PM
Change PIN - Pick PIN
Parental Control PIN
Purchase PIN
Select a PIN to change or press BACK on
the remote control when done
23
Parental Controls
After setting your PIN for Parental Locking, you can specify which channels, ratings, or programs to lock.
Lock or Unlock Programs
1
Open the Parental locking screen.
2 Press the Down Arrow button on your remote control to select the Change
button next to one of the following options, depending on what you want to
lock or unlock:
Setting
9:59 PM
Parental controls
Parental locking
Rental locking
Reset PIN
Channels – allows you to lock individual channels.
Canadian classifications – AO, R, V/AO, 18+, 14+(PG), 8+(PG), FAM(G), NR.
Note: if you choose to lock a classification or rating, all ratings above it are
automatically locked too. For example, if you lock movies rated R, the PVR
automatically locks NC-17 movies.
Unrated Content – educational programs and older programs are often unrated.
Adult (Lock/Hide Titles) – programs that feature explicit sexual content, violence, and
coarse language.
Note: If you lock adult programs this automatically locks the Canadian classifications
R,V/AO and AO and the program information for adult content does not appear in the
program guide.
3 Select the items you want to lock or unlock in the category. If you want to
unlock all items in a category, highlight Unlock all and press OK.
Settings
10:00 PM
Parental locking
Lock
Channels
4
Turn off locking
Highlight Save and press the OK button to return to the Parental locking
screen. You can also select Don’t Save to exit without saving your changes.
5 Press the Exit To TV button on your remote to return to live tv.
Locked: 8 PBS
Canadian classifications
Locked: R, V/AO and above
Unrated content
None locked
Adult (lock/hide titles)
6 You can watch a locked program at any time by selecting it in the program
guide and entering your PIN. To “relock” programming after entering your PIN,
return to the Parental controls, enter your PIN, highlight the Lock option and
press OK on your remote.
24
Adult locking disabled
Change
Change
Change
Change
Parental Controls
Turn Off Parental Locking Temporarily
1 Open the Parental locking screen.
2 Use the arrow buttons on your remote control to highlight Turn off locking, and press OK.
3 Highlight Unlock all TV for 4 hr, and press OK. The Parental locking Settings screen closes,
and the last channel tuned is displayed on the screen. The “unlocked” icon appears next to
Parental locking in the Parental controls screen.
To turn Parental locking back on after temporarily turning it off:
• Press Power on your remote to put the PVR or receiver in standby mode; then press
Power again, or
• Open the Parental locking screen and enter your PIN. Select Lock and press OK.
25
Even More Great Features
And this is just the beginning. FibreOP TV has loads of other
great features for you to explore:
1 Our On Demand tutorials by pressing Menu on your remote, and navigating
to the Help option.
2 Watching our tutorial on Channel 2 in the program guide.
3 Going online to fibreop.ca
26
Connections – Set up the Basic Components
This section provides basic instructions on how to connect your FibreOP TV components. Although a FibreOP technician installs your
service, you may use this information if you have unplugged the components or add new components such as a DVD player or home
entertainment system. If you need to move your FibreOP TV service from one room to another, call 1 866 FibreOP to have a FibreOP
technician visit your home.
Ethernet wiring
The diagrams in this section show typical setup scenarios for FibreOP TV
components. When connecting other components to your system, refer to the
user guides for each component that you plan to connect. Connect one device
at a time. If many components are being connected, make sure each connection
is correct before proceeding with the next connection.
Pb
TO WALL
(VIDEO IN)
Y
NETWORK
HDMI
L
R
OPTICAL
TO TV
(VIDEO OUT)
USB
POWER
+12V
DC
TO TV
(VIDEO OUT)
USB
POWER
+12V
DC
Pr
S VIDEO
VIDEO OUT
AUDIO OUT
To modem
Coaxial wiring
In-Home Wiring
Your FibreOP TV installer wires your home for FibreOP TV using either Ethernet
or coaxial cable. If your home is wired with Ethernet cable, the FibreOP modem
is connected to the NETWORK port on the set top box (receiver), as shown in
the diagrams on the opposite page. If the installer uses existing coaxial cable,
the FibreOP TV signal is delivered through a coaxial cable connected to the TO
WALL port on the set top box.
Pb
TO WALL
(VIDEO IN)
Y
NETWORK
HDMI
L
R
OPTICAL
Pr
S VIDEO
VIDEO OUT
AUDIO OUT
To modem
Standard Definition
Connection Options
Depending on the type of your home entertainment system, your components
are connected using different combinations of audio and video cables.
In the diagrams on the opposite page, RCA cables are shown. For optimum
performance of FibreOP TV, choose the best connection type supported by your
television and A/V components.
For more information on how to reconnect or add components,
go to fibreop.ca
Good
Coaxial cable
Best
S-video cable + RCA
cables for audio
RCA cables
High Definition
Ensure the receiver is clearly visible from where you watch TV.
Always point the remote at the receiver.
OR
HD CONNECTIONS For HD service, you must connect the set top box to your
TV using an HDMI cable or component for video and RCA for audio.
Better
HDMI cable
Component Y Pb Pr
cable + RCA cables for audio
27
Connections – Set up the Basic Components
Standard Definition Setup
High Definition Setup
To view TV, tune
into Channel 3 or 4
on the TV set.
To view TV, select
Video1 or Video2 on
the TV set.
Set top box
Pb
TO WALL
(VIDEO IN)
Y
L
NETWORK
HDMI
R
Pb
TO TV
(VIDEO OUT)
OPTICAL
USB
POWER
+12V
DC
Pr
S VIDEO
VIDEO OUT
Set top box
TO WALL
(VIDEO IN)
Y
L
NETWORK
HDMI
Set top box
R
TO TV
(VIDEO OUT)
OPTICAL
USB
Pb
POWER
+12V
DC
TO WALL
(VIDEO IN)
Pr
S VIDEO
AUDIO OUT
VIDEO OUT
Y
L
NETWORK
HDMI
R
AUDIO
L
OUT
Pb
Y
Television
28
L
L
R
VIDEO OUT
AUDIO OUT
(Optional Step)
(Optional Step)
IN
AUDIO
Pr
VIDEO
HDMI
Television
AUDIO OUT
Pr
S VIDEO
(Optional Step)
POWER
+12V
DC
(e.g. VCR/DVD/Blue Ray)
OR
HDMI
VIDEO
R
VIDEO OUT
(e.g. VCR/DVD/Blue Ray)
HDMI
USB
Component Y Pb Pr
cable + RCA cables
for audio
HDMI Cable
(e.g. VCR/DVD/Blue Ray)
TO TV
(VIDEO OUT)
AUDIO OUT
S VIDEO
RCA Cables
R
OPTICAL
Pr
Television
Pb
Y
Connections – Subscribe to HD
To get the best viewing experience with an HD compatible TV, call 1 866 FibreOP to subscribe to HD. Before you can enjoy HD, you must
update your set top box video settings and connections to your TV.
1 Connect your TV to the set top box as follows:
Video
• To use HDMI, connect the HDMI ports with an HDMI cable
• If you are using component video, connect the video ports using a
three-pronged component Y Pb Pr cable
Audio
• If using HDMI, the audio will transmitted through the same cable as the
video and will transmit Surround Sound and Dolby Digital.
• If you are using an optical (S/PDIF) cable to set up Surround Sound or
Dolby Digital audio, connect home theatre receiver to the set top box
• If you are using an RCA-type audio cable, connect the audio ports
using the red and white leads
Menu
10:03 PM
Settings
General
Television
Audio
Parental controls
Restart System
Note: If you want to enable Surround Sound or Dolby Digital, access Digital
Audio Output in the Audio section of your settings menu and select the
Surround Sound option. Save your change.
2 Hold down the Power button until the PVR or HD receiver restarts. Wait a few
moments for the FibreOP TV menu to appear.
3 Press the Menu button on the remote and highlight Settings. Press OK.
4 Highlight Television and press OK.
5 Highlight Screen Aspect Ratio and High Definition and press OK.
The Screen aspect ratio and high definition screen appears.
HD channels sometimes show non-HD, standard definition (SD)
content. This content is displayed at a 4:3 aspect ratio with black bars
at the sides of the screen.
29
Connections – Subscribe to HD
6 Press the arrow buttons to check the option that best describes
your television:
•
•
•
•
4:3 standard definition
Widescreen standard definition
720p on HD screens
1080i on HD screens
Settings
10:05 PM
Screen aspect ratio and high definition
Continue
Cancel changes
Choose the aspect ratio and resolution for your TV, then shoose Continue.
4:3 standard definition
Widescreen standard definition
720p on high-definition screens
1080i on high-definition screens
7 Press the arrow buttons to highlight Continue and press OK. The FibreOP
TV PVR or receiver attempts to detect your television screen size and
other information.
If your television is capable of switching to the option you chose, a message
appears confirming that the change has been made.
If the PVR or receiver needs more information about your television, the
Aspect ratio and high definition (Step 1) screen appears. This screen allows you
to test the new setting on your screen for 15 seconds to make sure it works.
Highlight Start test and press OK. The Aspect ratio and high definition (Step 2)
screen appears.
Settings
Your TV may not be able to display 1080i on high-definition screens. To verify if this is the correct
setting for your TV, choose Start test. If you don’t see anything during the test, wait 15 seconds and
then choose another setting.
Start test
8 If the picture is the correct size, highlight Keep setting and press OK. A
confirmation message appears before returning to live TV.
If you see a black screen or the picture is not the correct size, wait 15 seconds
for the test to end. The Aspect ratio and high definition (Step 3) screen
appears. Highlight I saw a black screen. Choose another setting. Press OK. The
Screen aspect ratio and high definition screen reappears. Repeat steps 6 to 8
until you find the setting that works best with your television.
HD televisions usually display best in 1080i or 720p. Check the manual
for your TV for more information.
30
10:06 PM
Aspect ration and high definition (Step 1)
Cancel changes
FibreOP Internet
FibreOP Internet is the fastest internet.
• No one else gives you the fastest overall Internet speeds.
• Stays fast for your whole family and all their devices.
• No usage caps or fees and a FREE wireless modem.
• Add anti-virus, parental control, anti-spyware, and personal firewall all for only $3.95/mo.
31
FibreOP Internet
Setting up Wireless Home Networking
Setting up FibreOP Email
FibreOP Internet includes up to 5 email addresses for your family. Each mailbox
comes with 2GB of space and includes anti-spam functionality to limit the
number of unwanted email. FibreOP email also includes webmail access to your
Email account. You can access webmail at http://webmail.fibreop.ca.
32
2
3
TECTED
Wi-Fi PRO
SETUP
s
Wireles
USB
HPNA
4
1
LAN
Inte
rn
Ether
et
net
Eth
erne
WA
N
er
Pow
Connecting a device wirelessly
1 Ensure wireless is enabled on your device (laptop, tablet, smartphone, etc...)
2 Locate your assigned network name (SSID) and password (WPA/WPA2)
on the sticker on your modem, as illustrated in the image to the right
3 Select your assigned name from the list of available appearing on your
device, follow the connection steps as outlined in your device user guide
(or on the screen) and enter the password when prompted
4 For information on how to configure your specific computer or tablet
operating system, please refer to your device user guide and/or the
FAQs/Troubleshooting Guide, located at the back of this booklet or go
to http://fibreopinfo.ca/support
t
FibreOP Internet includes FREE wireless/Wi-Fi access – which is ready to use.
FibreOP Internet
FibreOP Internet Security Services
With FibreOP Internet, you have the option to add a complete suite of Security Services
Including:
Anti-Virus
• Helps protect your PC from viruses
• Provides 24/7 protection
• Automatically updates for greater protection
Personal Firewall
• Helps protect your personal information from computer hackers
• Presents real-time alerts
• Provides logs of blocked connections
Parental Control
• Helps to keep your family safe from inappropriate content
• Blocks over 32 million websites
• Allows you to schedule restricted access
Anti-Spyware with Fraud Protection
• Helps protect your PC and privacy from spyware
• Removes any spyware found
• Automatically updates for greater protection
• Blocks fraudulent or “phishing” sites
Internet Security is something our company takes very seriously. These products
are provided to protect your PCs and family, while we also have an Acceptable
Use Policy designed to protect all of our customers. For more information (and to
download the latest version of our Security Service products) please go to
http://internetsecurityservices.net/
33
34
FibreOP Home Phone
FibreOP Home Phone delivers reliability you can trust so you can always be in touch.
Enjoy a fully loaded Home Phone service with:
• Reliability you can trust
• FREE unlimited features including new Voicemail to Email
• 5¢/min. World Long Distance plus unlimited calling options available
• Crystal clear voice quality
Voicemail Temporary Password: When prompted for your temporary password enter your 7 digit
telephone number. The system will prompt you to change this temporary password to a new one.
35
Feature Spotlight
36
Feature
Brief Description
Call Director
Answer your calls where you want when you want.
Call Display
See a caller's name and number before you pick up the phone.
Call Waiting
Notifies you of a second incoming call when you're on the phone.
Call Return
*69 Last Call Return - provides you with the number of your last caller. It can be used
with Call Waiting if you ignored the ‘beep’.
*66 Busy Call Return - gives you a special ring when a busy line is free.
Call Forwarding
Press *72 and wait for the rapid dial tone.
-Dial the number you want your calls forwarded to.
-If call is answered, Call Forwarding is set.
-If the called number is busy or doesn’t answer, hang up immediately and repeat the
above steps. When you hear 2 beeps, hang up and your Call Forwarding is now in effect.
-If you forward your calls to a long distance number, you will be charged for the long
distance call (not the person calling you).
-To cancel Call Forwarding, pick up the receiver and press *73.
Ident-a-Call
Add up to two additional phone numbers to your existing line, each with a different
sounding ring.
Feature Spotlight
Feature
Brief Description
Three Way Calling
Add a third person to your call so that you share the call with them.
- While on a call with a second party put them on hold by pressing your link, switchhook, or flash button and wait for 3 tones.
- Key in the number of the third party. When answered, press link again and you will be
in a three-way conversation.
- Should the third party not answer or if the line is busy, press link again to return to
the original caller.
Voicemail
Takes messages while you’re away from the phone, or even while you’re using the
phone! An intermittent dial tone and/or a flashing light on your phone will notify you
when a message is waiting.
Dial *99 (temporary password is your 7 digit phone number)
TalkMail
Receive voice messages without requiring voicemail.
Dial *99 (temporary password is your 7 digit phone number)
37
FibreOP Home Phone
FibreOP Home Phone Power Unit and Back-up Battery
Like all competitive voice products on the market today, your FibreOP Home Phone
installation includes a power supply that is connected to your household power.
This power unit includes a back-up battery that will provide telephone service for
approximately 8 hours in the event of a power interruption.
AC
POWER
AC
POWER
LOW
BATTERY
REPLACE
BATTERY
MISSING
BATTERY
LOW
BATTERY
REPLACE
BATTERY
MISSING
BATTERY
?
Silent Alarm Button
The power supply lights indicatethe following:
AC Power light – When this light is ON the Power Supply is being powered by
Commercial Power. When this light is OFF the power supply is using battery power.
Low Battery light – When this light is on the Power Supply is being powered by the
battery. When this light is flashing the battery has about 10% power remaining.
Replace Battery light – When this light is on the battery needs to be replaced.
Missing Battery light – When this light is on the battery is missing.
38
FibreOP Home Phone
FibreOP Home Phone Power Unit Audible Alarms
In the event that you hear an audible alarm from the FibreOP Home Phone Power Unit
the following table will assist you in understanding why the alarm is sounding and the
appropriate action to take.
Audible Alarm
Means
Alert Sound
Action
Backup Mode
Power supply has failed
and the battery is now
supplying power
1 time/ 1 beep for 1
second duration
No action required
Low Battery
The battery has 10%
capacity left
4 beeps every min for ½
second duration
Press blue silence alarm
button – no further
action is required
Replace Battery
Battery has failed and
should be replaced
1 beep every 15 minutes
for ½ second duration
Press blue silence
alarm button1 –
Call 1 866 342-7367
for assistance
1 Once the alarm silence button has been pressed the alarm will remain silent for 24 hours
at which time it will sound again reminding you that the battery requires replacing.
When the battery has been replaced the alarm will clear.
39
40
Bell FibreOP Services
TERMS & CONDITIONS
READ THIS AGREEMENT CAREFULLY. IT IMPOSES OBLIGATIONS ON YOU WITH RESPECT TO PURCHASING, USING, and CANCELLING Bell FibreOP
Internet, Television, and Telephone Service (THE ‘SERVICES’).
For the purposes of these Terms & Conditions, “Bell FibreOP” or “the Company” refers to the legal entity Bell Aliant Regional Communications, LP. ‘Customer’
includes the person accepting this Service Agreement and any other person using the Service or having access to any equipment or software of either the
Customer or Bell FibreOP with the implied or express permission of the Customer.
Purchasing, PAYING FOR, and Cancelling Service:
1.
2.
3.
4.
5.
6.
7.
Where the Customer purchases the Service at a contract rate for a specified number of months (the “Contract Period”), Bell FibreOP guarantees that the
contract rate will be continued for the Contract Period. At the end of the Contract Period, Bell FibreOP will (unless otherwise notified by the Customer)
continue to provide the Service and bill the customer at the regular non-contract rate.
Where the Customer purchases the Service at a contract rate for a Contract Period, and chooses to cancel their service prior to the end of the Contract
Period, the Customer will be charged an early termination fee of $20 for each month remaining in the term, which is not a penalty but rather an estimate
of anticipated damages which Bell FibreOP would likely suffer as a result of early termination. This early termination fee will be waived where the
cancellation occurs within the first 30 days of Service, or as otherwise determined by Bell FibreOP in its sole discretion.
If the Customer cancels the Service, the termination will be effected thirty (30) days from the date of the notice of cancellation to Bell FibreOP, and the
Customer will be charged the regular service fees plus all applicable taxes for that 30-day termination period (in addition to the cost of non-returned Bell
FibreOP equipment, and other applicable fees and charges.) This requirement of 30 days notice will be waived in any case where the early termination
fee of $20 for each month remaining in the term is charged.
The Customer will, upon cancellation or termination of the Service, return the Bell FibreOP equipment or will reimburse Bell FibreOP for the replacement
value of said equipment.
If a service call is required to restore Service which has been terminated for non-payment, a service restoration charge will apply.
Past due accounts will be subject to late payment charges. Other fees and charges may also be assessed on delinquent accounts. For example, cheques
which are dishonoured or returned for insufficient funds, or a refused bank account/credit card pre-authorized debit will be subject to an “NSF Fee”.
Any questions or discrepancies regarding invoice charges must be reported to Bell FibreOP within 90 days of the billing date. Failure to contact us within
this time period will constitute acceptance of all charges.
USING FIBREOP INTERNET SERVICE
8.
The Customer will have access to the Internet to be operated from a single personal computer or a Bell FibreOP authorized network, available on Bell
FibreOP’s PC Local Area Network Server. Bell FibreOP’s PC Local Area Network Server is not to be a point of connection for an unauthorized network of
computers.
9. Any software or other computer program provided to the Customer remains the property of Bell FibreOP and/or its suppliers may not be copied in whole or
in part. Bell FibreOP may add or remove software, computer programs, documentation, and any other content made available in association with the Service
without prior notice or liability to the Customer.
10. The Customer will ensure wireless home network is secure and accessible only by household wireless networked devices within the customer’s home or
household property.
11. The Customer will abide by the Bell FibreOP Internet Acceptable Use Policy in using Internet Service or Bell FibreOP Email.
12. Bell FibreOP will not be responsible for any damage caused by any installation of equipment and/or software, whether such equipment and/or software is
installed by Bell FibreOP, the Customer, an Authorized Dealer, or any other party.
41
USING EMAIL
13. Any Bell FibreOP email account which has not been accessed by the Customer in 60 days will be considered inactive and placed in a “suspended” state.
While in this state, the account will not receive email and these emails will be bounced back to the originator. If the account is not reactivated by the
Customer within an additional 60 days after being suspended, the account will be deleted.
USING FIBREOP TELEVISION SERVICE
14. Customer will only access the TV Service from the Bell FibreOP supplied connection and set top box. Customer may use Bell FibreOP equipment only at
the TV Service address identified on Customer’s invoice.
15. Customer agrees to pay all charges related to pay-per-use programs ordered from Customer’s address, regardless of who places the order for those
programs.
16. Any unauthorized attachments to Bell FibreOP’s cable or equipment, interfering or tampering with our cable or equipment, and/or unauthorized use of our
signals are prohibited and may constitute theft under the Criminal Code of Canada.
17. Customer agrees not to reproduce by any means any part of the network signal, except as specifically authorized by Bell FibreOP in writing; however,
Customer may use videotape recorders, personal video recorders or other similar devices for private, non-commercial duplication of video programming.
18. Customer agrees not to participate in the exhibition or distribution of the TV Service in a commercial or public setting or in any location which charges an
admission fee, cover charge or like fee.
USING FIBREOP TELEPHONE SERVICE
19. The Service will not be available during network outages, including during planned hardware or software upgrades. Additionally, if there is a power
outage which lasts so long that the battery back-up attached to the equipment at the Customer’s premises has been depleted, the Service will not be
available. For clarity, an outage in the Service will also impact a customer’s ability to contact emergency services during the outage.
20. The Customer is solely responsible for the supply of electrical power necessary for the Service to function. Unless otherwise specified by Bell FibreOP, the
Customer is responsible to replace the battery when prompted to do so by the battery back-up.
21. The equipment at the Customer’s premises may have to be configured in certain ways or maintained in certain locations for the proper operation of the
Service, and therefore, the equipment should not be moved, tampered with or relocated.
22. The Customer is responsible to inform all persons who may be present at the Customer’s premises, including residents, guests, and other persons, of the
limitations described in this section.
23. In addition to the limitations of liability which generally apply to the provision of the Service, the Company and its providers will not be liable to the
Customer or any third party for any inability to use the Service as a result of the limitations described in this section or the Customer’s failure to comply
with the requirements set out in this section. This includes the inability to contact emergency services if the Service is unavailable.
LIMITS ON BELL FIBREOP’s LIABILITY
24. The Customer assumes total responsibility and risk for use of the Service. Bell FibreOP makes no representations or warranties of any nature, whether
express or implied, in relation to any matter connected to this Agreement including the Service, the network, the equipment and/or the software. Bell
FibreOP does not guarantee uninterrupted Service. The company shall not be liable to any customer, user or other person for damages resulting from
interrupted Service due to failures or scheduled upgrades on the network, omissions, interruptions, delays, errors or defects in transmission, failures or
defects in Bell FibreOP’s facilities, or any other cause.
25. The Customer will be responsible for all losses or damages to Bell FibreOP equipment located on the Customer’s premises. If the Customer deliberately or
through a lack of reasonable care, causes loss or damage to our equipment, the Customer may be charged the cost of restoration or replacement of the
equipment, with the cost to replace a set top box not exceeding $300.
26. Bell FibreOP’s liability to the Customer for any claim for damages will not exceed the total amount paid by the Customer to Bell FibreOP during the total
period giving rise to the claim. Bell FibreOP is not liable for any direct, indirect, special, punitive or consequential damages from events including loss of
use, lost profits, damages to third parties, deletion of files and inability to use the Service.
42
27. The Customer will assume total responsibility and risk for the Customer’s selection of the self-install option. The Customer will indemnify Bell FibreOP
for any damages, losses, injuries, claims, demands, penalties, costs and expenses connected with any act or omission by the Customer in relation to the
installation and use of the service.
OTHER TERMS & CONDITIONS
28. The Customer agrees that Bell FibreOP, or other parties acting on its behalf, may collect information necessary to the delivery and maintenance of the
Services, which information will be treated in accordance with Bell FibreOP’s Privacy Policy.
29. The Customer will allow Bell FibreOP access to the Customer’s premises at all reasonable hours to install, inspect, repair, maintain, replace, disconnect
and/or remove the service and/or Bell FibreOP’s equipment.
30. All Bell FibreOP equipment remains the property of Bell FibreOP and may not be encumbered, loaned, leased or sold. The Customer will obtain
appropriate insurance coverage for such equipment.
31. The Customer will not use any equipment, telecommunication facilities or access connections provided by Bell FibreOP other than as expressly permitted
in this Agreement. The Service may not be used for illegal activity, for unauthorized access to other computer systems or in a manner that negatively
impacts the service levels of other users.
32. These Terms & Conditions are supplementary to any more general Terms of Service that apply to Bell FibreOP’s Regulated and Unregulated Services. In
case of any conflict, these Terms & Conditions apply rather than any more general Terms of Service.
33. Bell FibreOP may terminate or amend this Agreement at any time in its sole discretion without notice or liability.
43
FSC LOGO
12BELLFIBOP15_WELGDE_SUD_Jan 2014_EA