1
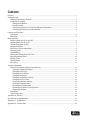
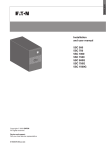
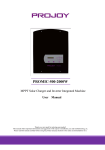
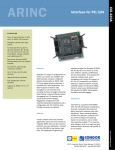
ProFusion iS
ProFusion® iS
User Guide
Caution
RISK OF ELECTRIC SHOCK!
DO NOT OPEN!
NO USER-SERVICEABLE PART INSIDE!
This symbol is intended to inform users that internal parts may cause electrical shock and injury.
This symbol is intended to inform users of important operational instructions and clarifications.
WARNING!
To reduce the risk of fire, electric shock, or injury:
Do not use ProFusion® iS if it has been exposed to water.
Do not use ProFusion iS if it has been dropped and or damaged.
Do not use ProFusion iS with a damaged power cord.
Do not unplug by pulling on the cord.
Do not restrict case airflow by blocking or inserting objects into
case ventilation openings.
Do not use in environments with excessive heat, humidity, magnetic fields, or dust.
Place ProFusion iS only on a stable surface of sufficient size and
strength where it will not be exposed to excessive vibration.
Do not overload power outlets.
Route all cables safely. Do not place any items on or against the
cables.
Do not allow children to operate without supervision.
Use only attachments that are approved by DMX, Inc.
Where the AC line power plug or an appliance coupler is used as
the disconnect device, the disconnect device shall remain readily
operable
Contents
Features..........................................................................................................................................................................................1
Getting Started
Checking the Package Contents.................................................................................................................................... 2
Installation and Setup....................................................................................................................................................... 2
Placement Guidelines................................................................................................................................................. 2
Rack Placement............................................................................................................................................................. 2
Connecting ProFusion iS to Your Amplification Equipment......................................................................... 3
Connecting ProFusion iS to Your Network.......................................................................................................... 3
Controls and Functions
Front Panel............................................................................................................................................................................. 4
Rear Panel.............................................................................................................................................................................. 5
Basic Operation
Powering ProFusion iS On and Off................................................................................................................................ 6
Updating ProFusion iS via CD......................................................................................................................................... 6
Control Panel Menu System............................................................................................................................................ 7
Navigation Buttons ............................................................................................................................................................ 7
ProFusion iS Device Information................................................................................................................................... 8
Changing Styles................................................................................................................................................................... 9
Style Blocking....................................................................................................................................................................... 9
Viewing and Setting Date and Time............................................................................................................................. 9
Adjusting Volume Levels................................................................................................................................................ 10
Muting a Zone.................................................................................................................................................................... 10
Standby Mode ................................................................................................................................................................... 11
Messaging............................................................................................................................................................................ 11
Advanced Operation
Network Connectivity (Ethernet Update Only)...................................................................................................... 12
Viewing the Network Settings............................................................................................................................... 13
Changing the IP Type................................................................................................................................................ 13
Changing the IP Address......................................................................................................................................... 14
Changing the Subnet................................................................................................................................................ 14
Changing the Default Gateway............................................................................................................................. 15
Changing the FTP Server......................................................................................................................................... 16
Testing the Network Settings................................................................................................................................ 16
Viewing the Update Status..................................................................................................................................... 17
Updating the Configuration................................................................................................................................... 17
Updating the Content & Configuration............................................................................................................. 18
Stopping an Update.................................................................................................................................................. 18
Scheduling........................................................................................................................................................................... 18
System Diagnostics........................................................................................................................................................... 19
Appendix A: Glossary............................................................................................................................................................. 20
Appendix B: Troubleshooting............................................................................................................................................. 21
Appendix C: Specifications.................................................................................................................................................. 23
Appendix D: Contact DMX .................................................................................................................................................. 23
Safety Agency Listings
This product was tested and found to be fully compliant with
FCC Part 15 Subpart B/Class A
CE Class A
C-Tick/Class A
cTUVus TUV CB Scheme
RoHS Compliant
WEEE marked
This device complies with Part 15 of the FCC Rules. Operation is subject to the
following two conditions:
(1) this device may not cause harmful interference, and (2) this device must
accept any interference received, including interference that may cause
undesired operation.
Contains FCC ID: VOEWL0118 (if optional Wi-Fi module installed)
Changes or modifications not expressly approved by the party responsible for
compliance could void the user’s authority to operate the equipment.
NOTE: This equipment has been tested and found to comply with the limits for
a Class A digital device, pursuant to Part 15 of the FCC Rules. These limits are
designed to provide reasonable protection against harmful interference when the
equipment is operated in a commercial environment. This equipment generates,
uses, and can radiate radio frequency energy and, if not installed and used in
accordance with the instruction manual, may cause harmful interference to radio
communications. Operation of this equipment in a residential area is likely to
cause harmful interference in which case the user will be required to correct the
interference at his own expense.
© DMX, Inc. 2011. All rights reserved.
DMX and PROFUSION are registered trademarks of DMX, Inc.
All other trademarks are the property of their respective owners.
Features
What is ProFusion iS?
As our leading on-premise system, the ProFusion iS digital audio and video delivery system provides extensive commercial-free music and video programming, engaging message marketing, flexible scheduling,
and the ability to play different types of music in various areas of your business. ProFusion iS provides total
control over what your customers hear and see.
M U S I C DE S I G N
Music and Video for your Unique Business. ProFusion iS puts your DMX music and video programming into
action effortlessly. Our experienced music and video content design teams ensure your music and video is
aligned with the goals you have for your business and brand. Our music design team is recognized around
the world as the best in the business.
S C H ED U L I N G
Easy Music and Video Management. The ProFusion iS scheduling allows your music and video to target
specific customer demographic types as well as change the tempo of your business by the hour, day, week,
as well as for seasonal or promotional events. Manage the music and video that you want your customers to
hear and see.
MESSAGE MARKETING
Effective Customer Communications. The right message at the right time has the power to engage a customer and inform, educate, or entertain. ProFusion iS supports your business’s message marketing needs by
seamlessly integrating your music and video programming with the right message, at the right time.
RE L I A B I L I T Y
Dependable Platform. ProFusion iS is commercially built for extended life in heavy-use environments. Each
internal component is carefully selected and tested for maximum reliability. Thousands of ProFusion products installed as far back as the year 2000 are still servicing our customer’s in-store media needs today.
H A N D S - F REE U P D A T E S
A Connection You Can Count On. ProFusion iS has been designed to deliver new music, video and configuration updates, quickly and cost efficiently using your company’s existing network. ProFusion iS dramatically
cuts the time it takes to receive new music and video. ProFusion iS also supports updates via disc. If you
choose to receive your updates via disc, each month you will receive a disc containing new music that will
update your ProFusion iS using its built-in DVD-ROM.
C O N V E N IE N C E
Simple-to-Use Design. ProFusion iS is engineered for easy integration with most commercial amplification
and visual equipment. ProFusion iS includes a simple-to-use control panel and menu system that allows you
to control your music and messaging at your fingertips. Simply connect your ProFusion iS and begin enjoying your music, messaging, or video programming.
1
Getting Started
Checking the Package Contents
•
•
•
•
•
•
•
(1) ProFusion iS playback device
(1) ProFusion iS User Guide
(1) External Power Supply (US version AC line power cord supplied)
(1) Composite video + stereo audio cable w/ m-m RCA
(1) HDMI cable
(1) S-video cable
(1) CAT5 cable
Any additional or different cables required to complete the installation will need to be obtained separately. Please keep all packaging material for later use in case your ProFusion iS must be re-shipped.
Installation and Setup
Placement Guidelines
•
•
•
•
•
ProFusion iS is designed to be placed horizontally and right-side up. Other positions may cause problems with
air flow within the case and may significantly shorten the lifespan of the components.
ProFusion iS should be placed in a clean, well-ventilated area. Do not stack items on or against your ProFusion iS
as this can create excessive heat and/or static electricity charge problems.
ProFusion iS should only be placed on a surface of adequate strength and stability and free of excessive vibration.
Ensure all cabling is routed properly and safely. This will avoid tripping hazards that could pull your ProFusion iS
off the surface you have placed it on.
Ensure your ProFusion iS is plugged into a properly grounded, always-on AC electrical outlet.
Note: Do not plug your ProFusion iS into a switched outlet, such as power strips or other outlets that
may be inadvertently turned off. This can lead to improper shutdowns which will likely shorten the life
of the equipment.
Rack Placement
•
•
If your ProFusion iS is going to be installed in a rack, at least 3.5” (8.89cm)(2RU) vertical rack space will be required.
Do not improvise a rack mount solution; instead, install a rack shelf suitable for approximately 3.9lb (1.77kg) of
weight, and place your ProFusion iS on the shelf.
Note: ProFusion iS has been designed to be mounted in a rack. Please contact DMX Customer Service if
you would like to order a rack mount kit.
2
ProFusion iS User Guide
Connecting your ProFusion iS to your amplification equipment:
Always connect audio and video cables prior to powering on your ProFusion iS
•
•
•
Turn volume on your amplification equipment completely down and then turn power off before installing your
ProFusion iS.
Only plug your ProFusion iS power supply into a properly wired outlet which is in good working order. Use of
switched outlets, power strips and extension cords should be avoided.
To avoid being inadvertently powered off, never plug your ProFusion iS into a switched outlet.
Connecting ProFusion iS to Your Amplification Equipment:
STEP 1
Connect the white RCA plug of the audio cable into the RCA jack labeled Zone1/L on the rear panel
of your ProFusion iS. Connect the other white end of the RCA cable into the corresponding input of
your amplification equipment.
Note: If your ProFusion iS is configured for a single mono zone, use only the RCA jack labeled Zone
1/L to feed your amplification equipment. The RCA jack labeled Zone 2/R is active only when the
ProFusion iS is configured to provide a single stereo zone or two mono zones.
STEP 2
If your ProFusion iS has been configured with one stereo zone or two mono zones, connect the red
RCA plug of the audio cable to the RCA jack labeled Zone 2/R on the rear panel of your ProFusion iS.
Connect the other red end of the RCA cable to the appropriate input of your amplification equipment.
Connecting ProFusion iS to Your Network
Connecting your ProFusion iS to your company’s network:
STEP 1
Connect one end of a CAT5 Ethernet cable to the Ethernet port located on the rear panel of your ProFusion iS.
STEP 2
Connect the other end of the CAT5 Ethernet cable to your network equipment (router, hub, or
switch).
It is highly recommended that a connectivity test is performed after changing any network
settings. See Testing the Network Settings for instructions.
3
Controls and Functions
Front Panel
The front panel of ProFusion iS is used to change music and video styles, stop playback, and access the Control
Panel menu system.
The Front Panel
LCD Control Panel: The ProFusion iS has a 2x20 LCD display on the front panel. While in Playback Mode, the
LCD control panel will display the title and artist information of the content currently playing.
Standby Button: The Standby button is used to start/stop the ProFusion iS playback.
Note: Do not hold in the Standby button when powering ProFusion iS on or off.
Power LED (light): When the power to the iS is turned on from the power button on the back panel, the far
left light on the control panel labeled “Power” will be lit.
Ethernet LED: The “Link” display light on the front panel indicates that the iS is connected to a network via
Ethernet and is downloading new content.
IR LED: The “IR” display light on the front panel indicates that a remote control is being used.
WiFi LED: The “WiFi” display light on the front panel indicates that the iS is connected to a WiFi network and is
downloading new content.
DVD ROM Drive: The optionally installed DVD-ROM is used to update ProFusion iS via CD with the latest
configuration, software and content. Your ProFusion iS may not have a DVD-ROM drive present on the front
panel.
DVD-ROM Drive Eject Button: This button is used to open and close the DVD-ROM drive when updating your
ProFusion iS via CD.
HDD LED: The “HDD” display light on the front panel indicates that the iS software is accessing content from
the Hard Drive.
: The front panel circle, which is the larger circle on the right side of the IR LED, is the remote control sensor
and does not light up.
4
ProFusion iS User Guide
Navigation Buttons: The front panel control buttons labeled with an up arrow p , down arrow q, left arrow
t , right arrow u and asterisk * are used to move through the options that appear on the 2x20 LCD. The
asterisk * button is similar to the ENTER button on a keyboard and is used to select menu options from the
Control Panel menu system.
Rear Panel
The rear panel of ProFusion iS has a variety of connections that are used to integrate it with your existing
amplification equipment and Ethernet network.
(From left to right)
If a (optional) WiFi module is inserted inside the iS, the first connector on the far left of the iS is for the WiFi
antenna.
Pb is 1 of 3 component video out.
Pr is 2 of 3 component video out.
CVBS is the composite video out.
Y is 3 of 3 component video out.
Zone2/R in the Audio section is the right RCA audio out.
Zone 1/L in the Audio section is the left RCA audio out.
S-Video is the S-Video video out.
SPDIF is the SPDIF coax digital audio out for stereo audio (if desired over RCA).
HDMI is the HDMI video out.
The Ethernet Port is used to connect ProFusion iS to your network in order to receive configuration, content
and software updates.
USB: The two USB ports on the back of the iS are not currently used.
SD: The SD card slot holds an SD storage card that stores music channels and audio messaging content.
The iS should never be operated by anything other than an approved power supply provided by DMX.
On/Off: This is the main power switch for the ProFusion iS. This button must be in the ‘On’ position for the
ProFusion iS to operate. All functions stop immediately in the ‘Off’ position.
5
Basic Operation
Powering ProFusion iS On and Off
Always use the Power button on the back panel of the ProFusion iS to power off ProFusion iS before
unplugging it from an electrical outlet. Failure to do so may result in damage to the device.
Powering On ProFusion iS
STEP 1 Place the main power button on the rear of the ProFusion iS in the ‘On’ position.
STEP 2 The power indicator will illuminate. After approximately 10 seconds the LCD control panel will illuminate and display dmx profusion is.
STEP 3 Playback will begin after approximately 25 seconds. The LCD control panel will display the title/artist
information of the content currently playing.
Note: If your ProFusion iS is powered on during a time the device is not scheduled for playback, the
LCD control panel will display music stopped and the time playback is scheduled to begin.
Powering Off ProFusion iS
If your device is configured to receive its updates via Ethernet, your ProFusion iS must remain powered on at all times.
STEP 1 Press the Standby button once (do not hold the button in).
STEP 2 Approximately 10 seconds after the pressing the Standby button, ProFusion iS will enter a Standby
Mode. At this time playback on all zones will stop. The ProFusion iS can receive updates via Ethernet in
this mode. See section on ‘Standby Mode’.
STEP 3 Once ProFusion iS is in Standby Mode; press the Standby button once to complete the shutdown pro-
cess. This will take approximately 20 seconds. The ProFusion iS will not receive updates via Ethernet in
this mode.
STEP 4 It is now safe to place the main power button on the rear of the ProFusion iS in the ‘Off’ position. NOTE:
Never remove the ProFusion iS power cord before pressing the “Standby” button twice, waiting for the
LCD display to turn off and then placing this button in the ‘Off’ position
Updating ProFusion iS via CD
ProFusion iS can be updated via Ethernet or CD. It is important to update your device as soon as you receive
any update CDs. Please note that customers with devices configured for Ethernet updates may still receive CD
updates, and should load them as soon as they arrive.
Always verify the update disc is clean and free of scratches, smudges and fingerprints. To clean a CD use a lintfree cotton cloth and wipe against the tracks, starting in the middle of the disc and wiping towards the outside
of the disc. Do not wipe in a circular motion as this can create scratches.
6
ProFusion iS User Guide
Updating your ProFusion iS via CD:
STEP 1 If your update contains multiple CDs, load disc #1 first.
STEP 2 Hold the CD face up and by the edges.
STEP 3 Press the DVD-ROM eject button to open the tray.
STEP 4 Insert the CD into the center of the DVD-ROM tray.
STEP 5 Push the tray in fully (it will remain latched when properly closed).
STEP 6 Approximately 15 seconds after the tray has closed, the update will automatically start. The update
will take anywhere from 60 seconds to 10 minutes, depending on the type and size of the update.
STEP 7 The DVD-ROM tray will automatically eject once the update has completed and the control panel will
display the status of the update.
Note: Contact DMX Customer Service if an update produces an error code. Please note the error
code number when contacting DMX for assistance.
Control Panel Menu System
ProFusion iS Control Panel menu system allows you to perform numerous tasks, including:
•
•
•
•
•
•
Stopping and starting music playback
Adjusting volume levels
Enabling and disabling messages
Initiating configuration and content updates
Modifying and testing network settings
Creating Custom schedules
Navigation Buttons
Using the Control Panel NAVIGATION buttons:
•
•
•
•
To enter the Control Panel menu system, press the * button in the center of the NAVIGATION buttons.
To scroll through menu options, press the NAVIGATION UP or NAVIGATION DOWN button.
To select menu options, press the * button.
To return to previous menus, press the NAVIGATION UP or NAVIGATION DOWN button until the current line
indicator (>) is on BACK, then press the * button.
7
Control Panel Menu Permissions
Upon request, your ProFusion iS Control Panel menu system can be configured so any of the following menu
options are disabled:
•
•
•
•
•
•
Changing volume levels
Changing date and time
Changing styles
Changing and creating schedules
Disabling and enabling messages for playback
Initiating configuration and content updates via network update
Note: If you require any menu permissions disabled or enabled, contact DMX Customer Service.
ProFusion iS device information
The Device Information menu option provides some key information about your specific ProFusion iS.
The Device Information menu option contains the following: Device ID, software version, configuration
version, device description and Mac Address.
Accessing the Device Information menu option from the title/artist information screen:
STEP 1 Press the * button to access the Control Panel menu system.
STEP 2 Press the NAVIGATION DOWN button until the current line indicator (>) is on Device Information menu
option, then press the * button. STEP 3 The following information will be displayed; Device ID & software version. Press the NAVIGATION
DOWN button to view configuration version, device description and MAC Address.
Device ID
The Device ID is a unique number specific to your ProFusion iS. It ensures that custom configurations and
settings are applied only to your specific ProFusion iS.
Note: When calling DMX for assistance, please confirm your Device ID prior to calling.
Software Version (Ver)
Software version indicates which release of ProFusion software is currently installed on your ProFusion iS.
Configuration Version (Conf)
Configuration version refers to a set of specific settings such as scheduling, playback start and stop times, and
other settings unique to your device. This number also ensures that an older configuration update to your
ProFusion iS will not overwrite the current configuration settings.
8
ProFusion iS User Guide
Device Description
The device description usually references your company name and location. This information is optional and
may not be present.
Changing Styles
Your ProFusion iS is configured to follow a pre-determined schedule. You may override the schedule by
changing the style. If requested, the ability to change styles may be disabled on your ProFusion iS. If you
attempt to change styles and the control panel displays you do not have permission to use this feature. The ability to
change styles has been disabled.
If your ProFusion iS is scheduled to stop playback at a certain time, the control panel will display music stopped.
You may manually begin playback by selecting any available style.
Changing styles:
STEP 1 Using the NAVIGATION UP or NAVIGATION DOWN button, change the title/artist information displaying on the LCD control panel to the desired zone for the style change.
STEP 2 Press the * button to access the Control Panel menu system.
STEP 3 Press the NAVIGATION UP or NAVIGATION DOWN button until the current line indicator (>) is on
Change Style, then press the * button.
STEP 4 Use the NAVIGATION UP or NAVAGATION DOWN button to scroll through the list of available styles.
STEP 5 When the current line indicator (>) is on your desired style, press the * button to change to the new
style. The song currently playing will fade down and the new style will immediately begin.
Style Blocking
ProFusion iS has the capability to restrict availability of certain music and video styles to certain times of
the day. This feature helps to ensure that only proper music and video styles are played to target client
demographics and store image. Style blocking also ensures ProFusion iS users will not inadvertently select an
inappropriate musical style.
Setting Date and Time
If your ProFusion iS receives its updates via Ethernet, it may be configured to synchronize the date and time
with the server each time it connects.
9
Setting Date and Time
Setting the date and time from the title/artist information screen:
STEP 1 Press the * button to access the Control Panel menu system.
STEP 2 Press the NAVIGATION DOWN button until the current line indicator (>) is on Set Date and Time, then
press the * button.
STEP 3 Press the NAVIGATION UP or NAVIGATION DOWN button to change the month.
STEP 4 Press the * button if only the month needs to be changed. If you need to make further changes to the
date or time, press the NAVIGATION RIGHT button to move to the day, time, and AM/PM setting, and
the NAVIGATION UP or NAVIGATION DOWN button to modify each option. Once the current date and
time have been set, press the * button.
Adjusting Volume Levels
To maximize sound fidelity, it is recommended that volume levels are adjusted from your
amplification equipment, not from the ProFusion iS.
ProFusion iS supports independent volume levels for each zone of audio. Any changes in volume level will
affect only the selected zone.
Adjusting the volume level for a desired zone from the title/artist information screen:
STEP 1 Press the * button to access the Control Panel menu system.
STEP 2 Press the NAVIGATION UP or NAVIGATION DOWN button until the current line indicator (>) is on Volume Control, then press the * button.
STEP 3 Press the NAVIGATION UP or NAVIGATION DOWN button until the current line indicator (>) is on the
desired zone, then press the * button.
STEP 4 Press the NAVIGATION LEFT button to decrease the volume level and the NAVIGATION RIGHT button to
increase the volume level.
STEP 5 Once the appropriate volume level has been set, press the * button to accept the change.
Muting a Zone
Muting a desired zone from the title/artist information screen:
STEP 1 Press the * button to access the Control Panel menu system.
STEP 2 Press the NAVIGATION UP or NAVIGATION DOWN button until the current line indicator (>) is on Volume Control, then press the * button.
STEP 3 Press the NAVIGATION DOWN button until the current line indicator (>) is on Mute <Desired Zone>,
then press the * button.
10
ProFusion iS User Guide
Turning the mute off for a desired zone from the title/artist information screen:
STEP 1 Press the * button to access the Control Panel menu system.
STEP 2 Press the NAVIGATION UP or NAVIGATION DOWN button until the current line indicator (>) is on Volume Control, then press the * button.
STEP 3 Press the NAVIGATION UP or NAVIGATION DOWN button until the current line indicator (>) is on the
desired zone, then press the * button. Entering the Volume Control menu option for the selected zone
will restore the previously set volume level for the zone.
STEP 4 Press the * button to exit the Volume Control menu option.
Standby Mode
If it is necessary to stop playback on all zones immediately, press the Standby button once.
The music from all zones will fade down as your ProFusion iS enters Standby Mode. When your ProFusion iS is
in Standby Mode, all functionality remains active but all zones will stop playback.
To resume playback on all zones when in Standby Mode, press the * button. Your ProFusion iS will re-enter
Playback Mode with the appropriate scheduled styles playing on all zones. To shut down your ProFusion iS
from Standby Mode, press the Standby button again.
Note: If your ProFusion iS is configured for Network update, it will update at its scheduled time while in
Standby Mode.
Messaging
If your ProFusion iS is configured to utilize Messaging, the playback of messages will be scheduled to play
at specific times and days. Changes to Messaging, including scheduling, should be configured by DMX for
your ProFusion iS. If necessary, the Message Control menu option will allow you to suspend a message
immediately.
Message Control
Turning messages on or off from the title/artist information screen:
STEP 1 Using the NAVIGATION UP or NAVIGATION DOWN button, change the title/artist information displaying on the LCD control panel, to zone with the message that you would like to play.
STEP 2 Press the * button to access the Control Panel menu system.
STEP 3 Press the NAVIGATION DOWN button until the current line indicator (>) is on Messaging Control, then
press the * button.
STEP 4 Press the NAVIGATION UP or NAVIGATION DOWN button until the current line indicator (>) is on Message Control, then press the * button.
Note: If “No Messages” is displayed, there are no messages available for that zone.
11
STEP 5 Press the NAVIGATION UP or NAVIGATION DOWN button until the current line indicator (>) is on the
desired message, then press the * button.
STEP 6 Press the * button to toggle between ON and OFF, then press the NAVIGATION RIGHT button to accept
the change. When the message is set to ON, it will playback according to its schedule and when set to
OFF, the message will be suspended.
Note: If your ProFusion iS receives a configuration update that still includes a suspended message,
the message playback status will revert to ON. If changes to your Messaging are needed, contact
DMX Customer Service.
Message Playback
Forcing playback of a message from the title/artist information screen:
STEP 1 Using the NAVIGATION UP or NAVIGATION DOWN button, change the title/artist information displaying on the LCD control panel, to zone with the message you would like to play.
STEP 2 Press the * button to access the Control Panel menu system.
STEP 3 Press the NAVIGATION DOWN button until the current line indicator (>) is on Messaging Control, then
press the * button.
STEP 4 Press the NAVIGATION UP or NAVIGATION DOWN button until the current line indicator (>) is on Message Playback, then press the * button.
Note: If “No Messages” is displayed, there are no messages available for that zone.
STEP 5 Press the NAVIGATION UP or NAVIGATION DOWN button until the current line indicator (>) is on the
desired message, then press the * button.
STEP 6 Press the * button to play the message. The currently playing content will stop and the message will
play. Once the message has completed playing, the previous style will resume.
Advanced Operation
Network Connectivity (Ethernet Update Only)
The Network Control menu option provides information regarding the network configuration for your
ProFusion iS, the ability to modify and test the current network configuration, and an option to initiate
updates.
ProFusion iS utilizes the FTP protocol to connect to its designated server for updates. In order to connect, your
firewall will need to allow FTP traffic from your ProFusion iS to its designated update server.
12
ProFusion iS User Guide
Viewing the Network Settings
The View Settings menu option displays the current network configuration for your ProFusion iS. This includes
the IP type (DHCP or Static), IP address, subnet mask, default gateway, and the IP address of the FTP server
your ProFusion iS will connect to for updates.
Viewing the network settings from the title/artist information screen:
STEP 1 Press the * button to access the Control Panel menu system.
STEP 2 Press the NAVIGATION DOWN button until the current line indicator (>) is on Network Control, then
press the * button.
STEP 3 Press the NAVIGATION UP or NAVIGATION DOWN button until the current line indicator (>) is on View
Settings, then press the * button.
STEP 4 Press the NAVIGATION UP or NAVIGATION DOWN button to scroll through the settings.
STEP 5 Press the NAVIGATION LEFT button to return to the previous menu option and the NAVIGATION RIGHT
button to exit to the title/artist information screen.
Modifying the network settings incorrectly will likely render your ProFusion iS unable to connect
for updates. Proceed only at the direction of your network administrator or DMX.
Changing the IP Type
Changing the IP type from the title/artist information screen:
STEP 1 Press the * button to access the Control Panel menu system.
STEP 2 Press the NAVIGATION DOWN button until the current line indicator (>) is on Network Control, then
press the * button.
STEP 3 Press the NAVIGATION UP or NAVIGATION DOWN button until the current line indicator (>) is on Set
Configuration, then press the * button.
Note: The Set Configuration menu option requires an unlock code. If access to the Set Configuration menu option is needed, contact DMX Customer Service.
STEP 4 Press the NAVIGATION UP or NAVIGATION DOWN button until the current line indicator (>) is on Set IP
Type, then press the * button.
STEP 5 Press the NAVIGATION UP or NAVIGATION DOWN button to toggle between DHCP and Static and press
the * button to select the desired type.
It is highly recommended that a connectivity test is performed after changing any network settings.
See Testing the Network Settings for instructions.
13
Changing the IP Address
Changing the IP address from the title/artist information screen:
STEP 1 Press the * button to access the Control Panel menu system.
STEP 2 Press the NAVIGATION DOWN button until the current line indicator (>) is on Network Control, then
press the * button.
STEP 3 Press the NAVIGATION UP or NAVIGATION DOWN button until the current line indicator (>) is on Set
Configuration, then press the * button.
Note: The Set Configuration menu option requires an unlock code. If access to the Set Configuration menu option is needed, contact DMX Customer Service.
STEP 4 Press the NAVIGATION UP or NAVIGATION DOWN button until the current line indicator (>) is on Set IP
Address, then press the * button.
STEP 5 Press the NAVIGATION UP or DOWN button to set the value for the first digit of the first octet (group of
numbers), then press the NAVIGATION RIGHT button to move to the second digit of the first octet.
Note: IP addresses such as 192.168.1.100 should be entered as 192.168.001.100.
STEP 6 Press the NAVIGATION UP or NAVIGATION DOWN button to set the value for the second digit of the
first octet, then press the NAVIGATION RIGHT button to move to the third digit of the first octet.
STEP 7 Press the NAVIGATION UP or NAVIGATION DOWN button to set the value for the third digit of the first
octet, then press the NAVIGATION RIGHT button to move to the first digit of the second octet.
STEP 8 Repeat steps 5 – 7 for the remaining octets, then press the * button to accept the change.
It is highly recommended that a connectivity test is performed after changing any network
settings. See Testing the Network Settings for instructions.
Changing the Subnet
Changing the subnet from the title/artist information screen:
STEP 1 Press the * button to access the Control Panel menu system.
STEP 2 Press the NAVIGATION DOWN button until the current line indicator (>) is on Network Control, then
press the * button.
STEP 3 Press the NAVIGATION UP or NAVIGATION DOWN button until the current line indicator (>) is on Set
Configuration, then press the * button.
Note: The Set Configuration menu option requires an unlock code. If access to the Set Configuration menu option is needed, contact DMX Customer Service.
STEP 4 Press the NAVIGATION UP or NAVIGATION DOWN button until the current line indicator (>) is on Set IP
Subnet, then press the * button.
14
ProFusion iS User Guide
STEP 5 Press the NAVIGATION UP or NAVIGATION DOWN button to set the value for the first digit of the first
octet (group of numbers), then press the NAVIGATION RIGHT button to move to the second digit of the
first octet.
Note: Subnet addresses such as 255.255.0.0 should be entered as 255.255.000.000.
STEP 6 Press the NAVIGATION UP or NAVIGATION DOWN button to set the value for the second digit of the
first octet, then press the NAVIGATION RIGHT button to move to the third digit of the first octet.
STEP 7 Press the NAVIGATION UP or NAVIGATION DOWN button to set the value for the third digit of the first
octet, then press the NAVIGATION RIGHT button to move to the first digit of the second octet.
STEP 8 Repeat steps 5 – 7 for the remaining octets, then press the * button to accept the change.
It is highly recommended that a connectivity test is performed after changing any network
settings. See Testing the Network Settings for instructions.
Changing the Default Gateway
Changing the default gateway from the title/artist information screen:
STEP 1 Press the * button to access the Control Panel menu system.
STEP 2 Press the NAVIGATION DOWN button until the current line indicator (>) is on Network Control, then
press the * button.
STEP 3 Press the NAVIGATION UP or NAVIGATION DOWN button until the current line indicator (>) is on Set
Configuration, then press the * button.
Note: The Set Configuration menu option requires an unlock code. If access to the Set Configuration menu option is needed, contact DMX Customer Service.
STEP 4 Press the NAVIGATION UP or NAVIGATION DOWN button until the current line indicator (>) is on Set
Default Gateway, then press the * button.
STEP 5 Press the NAVIGATION UP or NAVIGATION DOWN button to set the value for the first digit of the first
octet (group of numbers), then press the NAVIGATION RIGHT button to move to the second digit of the
first octet.
Note: IP addresses such as 192.168.1.1 should be entered as 192.168.001.001.
STEP 6 Press the NAVIGATION UP or NAVIGATION DOWN button to set the value for the second digit of the
first octet, then press the NAVIGATION RIGHT button to move to the third digit of the first octet.
STEP 7 Press the NAVIGATION UP or NAVIGATION DOWN button to set the value for the third digit of the first
octet, then press the NAVIGATION RIGHT button to move to the first digit of the second octet.
STEP 8 Repeat steps 5 – 7 for the remaining octets, then press the * button to accept the change.
It is highly recommended that a connectivity test is performed after changing any network
settings. See Testing the Network Settings for instructions.
15
Changing the FTP Server
Changing the FTP server IP address from the title/artist information screen:
STEP 1 Press the * button to access the Control Panel menu system.
STEP 2 Press the NAVIGATION DOWN button until the current line indicator (>) is on Network Control, then
press the * button.
STEP 3 Press the NAVIGATION UP or NAVIGATION DOWN button until the current line indicator (>) is on Set
Configuration, then press the * button.
Note: The Set Configuration menu option requires an unlock code. If access to the Set Configuration menu option is needed, contact DMX Customer Service.
STEP 4 Press the NAVIGATION UP or NAVIGATION DOWN button until the current line indicator (>) is on Set
FTP Server, then press the * button.
STEP 5 Press the NAVIGATION UP or NAVIGATION DOWN button to set the value for the first digit of the first
octet (group of numbers), then press the NAVIGATION RIGHT button to move to the second digit of the
first octet.
Note: IP addresses such as 66.150.1.5 should be entered as 066.150.001.005.
STEP 6 Press the NAVIGATION UP or NAVIGATION DOWN button to set the value for the second digit of the
first octet, then press the NAVIGATION RIGHT button to move to the third digit of the first octet.
STEP 7 Press the NAVIGATION UP or NAVIGATION DOWN button to set the value for the third digit of the first
octet, then press the NAVIGATION RIGHT button to move to the first digit of the second octet.
STEP 8 Repeat steps 5 – 7 for the remaining octets, then press the * button to accept the change.
It is highly recommended that a connectivity test is performed after changing any network
settings. See Testing the Network Settings for instructions.
If your iS device is configured for network updates, it is mandatory that you obtain an install pin number. When TEST
SUCCESSFUL appears on the top line of the iS LCD display, the second line will display the install pin number. This number
must be called into DMX and printed on the work order. This step is not necessary or possible on CD update devices.
Testing the Network Settings
Initiating a test connection from the title/artist information screen:
STEP 1: Press the * button to access the Control Panel menu system.
STEP 2: Press the NAVIGATION DOWN button until the current line indicator (>) is on Network Control, then
press the * button.
STEP 3: Press the NAVIGATION UP or NAVIGATION DOWN button until the current line indicator (>) is on Set
Configuration, then press the * button.
16
ProFusion iS User Guide
Note: The Set Configuration menu option requires an unlock code. If access to the Set Configuration
menu option is needed, contact DMX Customer Service.
STEP 4: Press the NAVIGATION UP or NAVIGATION DOWN button until the current line indicator (>) is on Test
Network Connection, then press the * button to initiate the Test Network Connection option.
STEP 5: ProFusion iS will attempt to connect to its designated server. If the Test Network Connection is successful, the LCD control panel will display test successful on line one. Line two will display the install pin
number.
If the Test Network Connection fails, the LCD control panel will display the message test failed indicating the
nature of the connectivity problem with an error code. Note the error code and after verifying your local connections and network access, please call DMX for further assistance.
Viewing the Update Status
The View Update Status menu option displays the current connectivity status of your ProFusion iS. If your
ProFusion iS is not currently connected, the View Update Status menu option will display the results of the last
connection attempt.
Accessing the View Update Status menu option from the title/artist information screen:
STEP 1 Press the * button to access the Control Panel menu system.
STEP 2 Press the NAVIGATION DOWN button until the current line indicator (>) is on Network Control, then
press the * button.
STEP 3 Press the NAVIGATION UP or NAVIGATION DOWN button until the current line indicator (>) is on View
Update Status menu option, then press the * button.
STEP 4 If your ProFusion iS is currently connected, the View Update Status menu option will display the current connection activity.
If your ProFusion iS is not connected, the View Update Status will display connection idle, along with the
status of the last connection attempt.
Updating the Configuration
The Update Configuration menu option allows you at any time to connect and check for configuration
changes and software updates. This menu option will not download any available new content. Initiating a
configuration only update from the title/artist information screen:
STEP 1 Press the * button to access the Control Panel menu system.
STEP 2 Press the NAVIGATION DOWN button until the current line indicator (>) is on Network Control, then
press the * button.
STEP 3 Press the NAVIGATION DOWN button until the the current line indicator (>) is on Update Configuration
menu option, then press the * button to initiate the configuration update.
17
Updating the Content & Configuration
The Update Content & Configuration menu option allows you at any time to connect and check for
configuration changes and software updates, as well as new music content. With this menu option, ProFusion
iS will download any available configuration changes, software updates and new music content.
Note: If new content is available for download, your ProFusion iS may be updating for a long period of
time. It is advisable to check with your network administrator before selecting this menu option.
Initiating a content and configuration update from the title/artist information screen:
STEP 1 Press the * button to access the Control Panel menu system.
STEP 2 Press the NAVIGATION DOWN button until the current line indicator (>) is on Network Control, then
press the * button.
STEP 3 Press the NAVIGATION DOWN button until the current line indicator (>) is on Update Music & Config
menu option, then press the * button to initiate the content and configuration update.
Stopping an Update
The Stop Updating menu option allows you to terminate an active update. ProFusion iS will resume the
download where it left off the next time it connects for an update.
Stopping an update from the title/artist information screen:
STEP 1 Press the * button to access the Control Panel menu system.
STEP 2 Press the NAVIGATION DOWN button until the current line indicator (>) is on Network Control, then
press the * button.
STEP 3 Press the NAVIGATION DOWN button until the current line indicator (>) is on Stop Updating menu
option, then press the * button to terminate the connection. It may take up to one minute for the connection to terminate. When the update has stopped, the control panel will display connection idle.
Scheduling
ProFusion iS scheduling supports the ability to play specific styles at designated times, days, and seasonal or
promotional events. This ensures the correct style of music is playing for your locations at the correct times
and days.
Your ProFusion iS will arrive with pre-configured dayparting. If necessary your dayparting schedule can be
overridden from the Control Panel menu system. The Schedule Control menu option allows you to view and
change the current Schedule Mode and add/remove Custom schedules from your ProFusion iS.
ProFusion iS supports the following Schedule Modes:
DMX Schedule: the default schedule specifically configured for your ProFusion iS.
18
ProFusion iS User Guide
Custom Schedule: a schedule created from the Control Panel menu system that designates a time a specific
style will start.
No Schedule: when selected, this mode will stop playback until a style is selected using the STYLE buttons.
Selected styles will continue to play until a new style is selected or the Schedule Mode is changed.
Changing the Schedule Mode from the title/artist screen:
STEP 1 Press the * button to access the Control Panel menu system.
STEP 2 Press the NAVIGATION DOWN button until the current line indicator (>) is on Schedule Control, then
press the * button.
STEP 3 Press the NAVIGATION UP or NAVIGATION DOWN button until the current line indicator (>) is on Select
Schedule, then press the * button.
STEP 4 Press the NAVIGATION UP or NAVIGATION DOWN button until the current line indicator (>) is on the
desired Schedule Mode, then press the * button.
Creating a Custom Schedule from the title/artist screen:
STEP 1 Press the * button to access the Control Panel menu system.
STEP 2 Press the NAVIGATION DOWN button until the current line indicator (>) is on Schedule Control, then
press the * button.
STEP 3 Press the NAVIGATION UP or NAVIGATION DOWN button until the current line indicator (>) is on Add
Custom Schedule, then press the * button.
STEP 4 Press the NAVIGATION UP or NAVIGATION DOWN button until correct the hour is set for your Custom
Schedule.
STEP 5 Press the NAVIGATION RIGHT button to move to the minutes, and AM/PM setting, and use the NAVI-
GATION UP or NAVIGATION DOWN button to modify each option. Once the correct time has been set
press the * button.
STEP 6 Press the NAVIGATION UP or NAVIGATION DOWN button until the current line indicator (>) is on the
desired style, then press the * button.
STEP 7 Press the NAVIGATION RIGHT button to exit to the main screen.
System Diagnostics
The System Diagnostics menu option, used for troubleshooting, can only be accessed with the assistance of a
DMX Customer Service agent.
19
Appendix A: Glossary
* Button: This button, located in the middle of the
NAVIGATION buttons, is similar to an Enter button on
a keyboard. The * button is used to select options
from Control Panel menu system.
Configuration: A set of unique settings such as
scheduling, playback start and stop times, and
settings specific to your device.
Control Panel Menu System: A software interface
that allows the user to perform numerous tasks,
including: stopping/starting playback, adjusting
volume levels and modifying/testing network
settings.
Custom Schedule: A scheduled style and start time
for a desired zone, that created by the user from the
Control Panel menu system.
Dayparting: The ability to play specific styles at
designated times and days, so the correct style of
music is playing for your locations at the correct times
and days.
Firewall: Networking hardware configured to permit
or deny specific network traffic between locations.
FTP Server: A server which ProFusion iS connects,
using the FTP protocol, for music, messaging, and
configuration updates.
MAC Address: A Media Access Control address (MAC
address) is a unique identifier assigned to device for
communications on a network.
Navigation Buttons: A set of four buttons (LEFT,
RIGHT, UP and DOWN), located to the right of the
LCD Control Panel and to the left of the Standby
button, used to navigate the Control Panel menu
system.
Playback Mode: ProFusion iS is playing music based
on its Schedule.
20
ProFusion iS User Guide
Standby Button: The Standby button is used to
power on and off ProFusion iS as well as put it into
Standby Mode. When ProFusion iS is powered on
and the Standby button is pressed once, it will enter
Standby Mode. Press the Standby button again to
shutdown.
Standby Mode: A feature that allow the user to stop
playback on all zones immediately by pressing the
Standby button once.
Style: A unique musical experience referring to a
particular type of music such as Jazz, Classic Rock, etc.
Style Blocking: A configuration restriction that
prevents certain styles from being selected from the
front panel during specified hours.
Title/Artist Information: Information displayed on
the main screen of the Control Panel menu system for
each available zone during music playback, regarding
the content currently playing.
Zone: ProFusion iS has the capability to support up
to two independent audio outputs that allow for
unique music types for different areas of a business.
Appendix B: Troubleshooting
This section provides a basic troubleshooting guide for the most common issues. If this list does not help you
resolve your issue, or if you have an issue that is not listed below, please contact DMX Customer Service for
assistance.
General Issues
No power
Possible Solution
Verify the power cord is properly connected to your ProFusion iS.
Verify the power cord is connected to a known working electrical outlet.
Control panel displays Machine
Expired
Contact DMX Customer Service.
Control panel displays You do not
have permissions to use this feature
The menu option selected is disabled as requested for this ProFusion iS.
Contact DMX if permissions for this menu are needed.
playback Issues
Music does not start at the correct
time
Verify the date and time is correctly set.
Verify the Schedule Mode is set to DMX Schedule.
Control panel displays Music Stopped Verify the date and time is correctly set.
audio Issues
Verify the audio cable is connected to the correct audio output of your
ProFusion iS and the correct input of your audio equipment.
No or low volume levels
Verify the volume level for your ProFusion iS is sufficiently turned up.
Verify the volume level of the amplification equipment your ProFusion iS is
connected to is sufficiently turned up.
disc update Issues
Verify the CD is free of scratches, smudges, or fingerprints.
Disc update not properly installing
Verify the CD has been properly inserted in the DVD-ROM tray.
Confirm the Device ID on the CD matches the Device ID of your ProFusion iS.
Disc update taking longer than 10
minutes
Allow the update to run for at least 15 minutes. If the update has not
completed, shutdown your ProFusion iS and wait 15 seconds before powering
the device back on. After the device beeps once, eject the CD and verify it is
free of scratches, smudges, or fingerprints. Attempt the update again. If the
update continues to take longer than 15 minutes, contact DMX Customer
Service.
Confirm the Device ID on the CD matches the Device ID of your ProFusion iS.
Control panel display Incorrect CD for If the Device ID on the CD matches the Device ID of your ProFusion iS, and the
this device
update continues to produce the Wrong Device ID error message, contact DMX
Customer Service.
disc update Issues (cont.)
Possible Solution
21
Control panel display Incorrect CD
Type
Verify the CD has “ProFusion iS” printed on the right-side of the disc.
Contact DMX Customer Service.
Verify you are loading the most recent update. The disc will have the date created printed on them.
Control panel displays Old Config Ver
If your ProFusion iS is configured to receive its updates via Network, it may
have received newer configuration from a Network update. Continue loading
any CDs you received as your ProFusion iS will update any content on the CDs.
network update Issues
Control panel displays Update Connect Error after an Ethernet update is
attempted
Control panel displays FTP Test
Failed after Test Network Connect
attempted
22
Verify the network settings for your ProFusion iS are correct for your network.
Verify your network firewall is configured to allow FTP traffic from your ProFusion iS to its designated server.
Verify the Ethernet cable is properly connected to your ProFusion iS and your
network equipment.
Verify the network settings for your ProFusion iS are correct for your network.
Verify your network firewall is configured to allow FTP traffic from your ProFusion iS to its designated server.
ProFusion iS User Guide
Appendix C: Specifications
Connections
Dimensions
Audio: (2) RCA female jacks
Network: (1) RJ-45 Ethernet port
SPDIF: (1) Coaxial audio
HDMI Video: (1)
Component Video (Y-Pb-Pr): (3) RCA female jacks
S-video (Y/C): (1)
Composite Video: (1)
USB: (2) USB 2.0 ports
Length: 10.12” (25.7cm)
Depth: 7.96” (20.2cm)
Height: 2.69” (6.8cm)
Total rack units: (2RU) 3.5” (88.9mm)
Weight: 3.0lbs; 3.9lbs fully configured (1.36/1.78kg)
For detailed output specifications, please contact DMX.
Power Specifications
Power Supply: external AC to DC power transfer
device
Input Voltage (AC~): 100-240Vac Nominal
(90-265Vac Maximum)
Input Frequency: 47- 63Hz
Input Current: 0.6Amax at 90Vac
(0.3Amax at 265Vac)
Output Voltage (DC): 12Vdc
(range 11.4Vdc - 12.6Vdc)
Output Current: 2A
Output Watts: 24W
Output Ripple: Low frequency ripple
( < 100KHz ) <= 120mVpp
Conditions
Working Temperature: 32°F to 105°F; 0°C to 40°C
Working Humidity: 5%-90% (Non-condensing)
Storage Temperature: -4°F to113°F; -20°C to 45°C
Storage Humidity: 0-98% (Non-condensing)
Appendix D: Contact DMX
Worldwide Customer Support Centers
United States: +1 800 345 5000 Africa: + 27 11 780 3000
Brazil: + 55.11. 3457.0654 Canada: +1 800 350 0369
or on the web at dmx.com
23
iN CANAdA CALL 800.350.0369
uPdATed 08.01.11
800.345.5000 m dmx.com