1
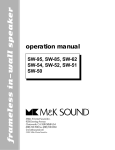
operation manual
SURROUND-55 MkII Tripole®
K-4 Tripole®
Miller & Kreisel Sound Corporation
9351 Deering Avenue
Chatsworth, CA 91311-5858
(818) 701-7010 fax (818) 701-0369
www.mksound.com
©2001 Miller & Kreisel Sound Corp.
TRIPOLE® SURROUND SPEAKER
TABLE OF CONTENTS
1.
2.
3.
4.
5.
6.
7.
8.
9.
10.
11.
12.
13.
INTRODUCTION...........................................................................................................3
THE TRIPOLE SURROUND SPEAKER...........................................................................3
M&K HIGH-FREQUENCY PRISM SYSTEM (Surround-55 Only)...................................3
SPEAKER HOOK-UP........................................................................................................4
INSTALLATION OF YOUR SURROUND SPEAKERS....................................................5
PLACEMENT OF THE TRIPOLE SURROUND SPEAKER........................................6
SPEAKER PHASING TEST......................................................................................8
M&K WALL AND STAND OPTIONS...............................................................................8
SPEAKER DAMAGE & HOW TO AVOID IT....................................................................8
CABINET MAINTENANCE..............................................................................................9
IF YOU NEED SERVICE..................................................................................................9
M&K 10 YEAR WARRANTY..........................................................................................10
SPECIFICATIONS.........................................................................................................10
DIAGRAMS
FIGURE 1
FIGURE 2
FIGURE 3
FIGURE 4
FIGURE 5
FIGURE 6
FIGURE 7
FIGURE 8
FIGURE 9
FIGURE 10
WIRING WITH THE SURROUND SPEAKER.................................................4
BRACKET & SPEAKER ORIENTATION...........................................................6
SURROUND SPEAKER PLACEMENT (ONE ROW OF LISTENERS)...........6
SURROUND SPEAKER PLACEMENT (TWO ROWS OF LISTENERS)........6
SURROUND SPEAKER PLACEMENT (REAR WALL).....................................6
MULTIPLE SURROUND SPEAKERS..............................................................7
ST-SERIES WALL BRACKET OPTIONS............................................................8
ST-SERIES STAND AND LDM OPTIONS...........................................................8
SURROUND-55 FLUSH MOUNT BRACKET TEMPLATE.................................11
K-4 FLUSH MOUNT BRACKET TEMPLATE..................................................12
2
TRIPOLE® SURROUND SPEAKER
1.
INTRODUCTION
Congratulations! Your new M&K Tripole® speaker will give you years of unmatched enjoyment and
excitement while listening to your favorite multichannel musical and audio/video sources, whether they are Dolby
Digital, MLP, DTS, Pro-Logic, or enhanced stereo modes.
We encourage you to read this owner’s manual, as there is a great deal of information provided here to help
you get the best possible performance.
If you have any questions about your speaker system, please contact your M&K dealer or call the M&K
factory directly at (818) 701-7010, from 8:30 AM to 5:00 PM Pacific Time, Monday through Friday. We will be
happy to help you with any question. Additional information may also be obtained on our web site
www.mksound.com or you may send us an e-mail to [email protected].
2.
THE TRIPOLE® SURROUND SPEAKER
M&K’s exclusive Tripole® design is a new concept in surround channel speaker design, offering the
performance aspects of two different types of speakers. Think of it as a dipole surround speaker that includes
a very high quality direct radiating speaker in the same cabinet.
As a Tripole, the front baffle drivers (direct radiator) operate full range. The side Dipole drivers also
operate, so sound is radiated on three axes. This means that the speaker can simultaneously produce a
directional stereo image in the surround channels and an enveloping sound that wraps around the listeners.
The directional qualities and stereo imaging may be preferred for playing back the "split" (stereo) surrounds of
5.1 channel discrete digital recordings.
The Tripole® design is also ideal for the back surround channel of a Surround-EX 6.1 system. If you have
such a system, we recommend using two Tripole® surround speakers to reproduce this channel.
3.
THE M&K HIGH-FREQUENCY PRISM SYSTEM (Surround-55MkII Only)
Your Surround-55MkII Tripole® speaker utilizes M&K's exclusive High-Frequency Prism System to optimize
imaging and coverage of sound throughout the listening area. This system is designed to take into account the
effect of the curved mesh metal grilles on your speakers. Therefore, your Surround-55s are designed for the
best sound when the grilles are in place. We recommend that you leave the grilles on the speakers for all
listening.
You will note that the tweeter in your Surround-55MkII speakers is mounted at a slight angle (4.7 degrees).
This mounting is an integral part of the High-Frequency Prism System. When the speakers are mounted
properly, the tweeter will be angled away from the listening position. That means that the surround channel
speakers should be mounted with the tweeter angled towards the back wall of the room (when the speakers are
mounted on the side walls), and with the tweeter angled toward the closest side wall (when the speakers are
mounted on the back wall of the room).
When the speaker is mounted in this fashion, its stereo imaging and coverage of sound are optimized for a
very wide listening window that extends from the on-axis position towards the center of the room. If the
speaker is mounted with the tweeter pointed in the other direction, its sound quality will be adversely affected.
NOTE: When the speaker is mounted above the listeners’ heads, make certain that the tweeter on
the front baffle is at the bottom.
3
TRIPOLE® SURROUND SPEAKER
FIGURE 1
4.
SPEAKER HOOK-UP
LEFT CHANNEL SPEAKER / RIGHT CHANNEL SPEAKER
Your surround speakers come in two versions - a Left Channel speaker and a Right Channel speaker. It is
critical that the correct speaker be used in each channel.
On the back panel of the speaker, there is an arrow with the printed nomenclature "Point Arrow Towards
Screen." To correctly install the Tripole® surrounds, be sure that the arrow printed on each speaker is pointed
towards the television screen. The arrows will not be visible once the speaker is installed.
To confirm that the Surround-55 speakers are correctly installed, check the angle of the tweeter (see Section
3 above). The tweeter for each speaker should be pointing towards the back wall (or the nearest side wall).
WIRING THE SURROUND SPEAKER
The Positive ( + ) lead from your amplifier or receiver should be connected to the RED ( + ) "INPUT"
terminal, and the Negative ( — ) lead from your amplifier or receiver should be connected to the BLACK ( — )
"INPUT" terminal. See Figure 1.
SPEAKER WIRE
The sound quality that you get from your speaker can be affected by the type of speaker wire that you use
to connect them. While it is possible to use speaker wire as thin as 22 gauge to hook your surround speaker
up, wire of less than 16 gauge will compromise their sound quality. For wire runs of up to 10 feet, 16 gauge wire
is acceptable. For runs up to 20 feet, you should use a minimum of 14 gauge. For up to 30 feet, use a
minimum of 12 gauge, and over 30 feet should use 10 gauge. The smaller the gauge number, the thicker the
wire.
There are a wide variety of premium speaker cables available from a number of specialist manufacturers.
We do not endorse any specific brand of premium cable, but we do recommend the highest quality cable that
fits your budget. Beware, though -- with cables, expensive is not always better. If you have any questions,
contact your M&K dealer for advice.
4
TRIPOLE® SURROUND SPEAKER
5.
INSTALLATION OF YOUR SURROUND SPEAKERS
Your M&K Tripole® surround speaker can be installed in a variety of ways. Choosing the correct location,
however, is extremely critical. READ SECTION 6 (page 6) BEFORE DECIDING WHERE TO INSTALL YOUR
SURROUND SPEAKER.
They can be placed on tall stands (such as the M&K ST series or LDM stands, which are available from
your M&K dealer); they can go on shelves or bookcases; or more permanently mounted using brackets or a
ceiling suspension system.
FLUSH-MOUNT WALL HANGER BRACKETS
Your surround speakers come with a flush-mount wall bracket that can be attached to each cabinet. There
are pilot holes for mounting the brackets on the back baffle of the speaker. Also included are the matching
brackets that attach directly to the wall, as well as all necessary mounting screws and drywall inserts.
In order to use these brackets, see the enclosed template and follow these
instructions.
Attach the brackets to the speaker using the enclosed 3/4" wood screws. You will have to remove the 3/8"
bolt installed in the back of the speaker. Use the pilot holes at the top center of the back baffle of the cabinet.
Either of the matching brackets can be attached to the speaker. The bracket that attaches to the speaker must
point down, and the bracket that attaches to the wall must point up. In both cases, the face with the printing
must face out.
Then determine where you will locate your surround speakers. See Section 6 below for guidelines on where
to locate the speakers. Then, using the template sheet enclosed (which is reproduced on the next page), mark
holes on the wall where the brackets will be permanently mounted. Ideally, one set of these holes should go
into a wall stud, to give you the greatest strength. First, locate the center of the stud.
Tape the four corners of the template sheet to the wall in the location you have selected, using a
carpenter's level to make sure the line marked "LEVEL TEMPLATE TO THIS LINE" is level. The template sheet
has locations marked for the two mounting holes needed to attach the wall bracket to the wall.
Once you are absolutely certain that you have the correct location, you are ready to drill the pilot holes. Go
ahead and drill right through the paper template into the wall. Re-check your measurements (especially
making sure the holes will be level) at least once before drilling.
WARNING: IT IS POSSIBLE THAT ELECTRICAL WIRING MAY BE LOCATED BEHIND
THE WALL IN THE LOCATION THATYOU HAVE SELECTED. BE EXTREMELY CAREFUL
ANY TIME YOU DRILL INTO A WALL.
If you are mounting the bracket to a wall stud, drill two 3/32" holes per bracket. Remember that the
wallboard material is 1/2" or 5/8" inches thick, and you will drill through this before meeting the stud. If you are
mounting the bracket to drywall with the plastic anchors, drill two 1/4" pilot holes per bracket. Once all holes
have been drilled, remove the template from the wall. Press the plastic wall anchors into the 1/4" pilot holes until
they are flush with the wall. Tap them gently into place if necessary.
Once the holes are drilled, place one bracket against the wall, making sure that the "tongue" (the portion
that will engage the bracket on the speaker cabinet) is facing away from the wall and pointing up. Using the two
#6 - 1 3/4" wood screws provided, fasten this bracket to the wall. BE VERY CAREFUL. DO NOT FORCE THE
PLASTIC ANCHORS THROUGH THE WALL OR OVERTIGHTEN THE SCREWS. Install the second bracket in
the same fashion.
That's it! All that is left for you to do is attach the speaker wire to the input terminals (Section 4), and, from
the top, gently slide the speaker into place against the wall. Do the same for the other channel.
5
TRIPOLE® SURROUND SPEAKER
FIGURE 2
6. PLACEMENT OF THE TRIPOLE®
SURROUND CHANNEL SPEAKER
A
B
When the speaker is mounted above the
listeners’ heads, make certain that the tweeter on
the front baffle is at the bottom. See Figure 2.
Your Tripole® surround speakers are
specifically designed to be used as surround
channel speakers in a multichannel audio system
(either Home THX or non-THX). The instructions
given here apply to surround channel applications,
including Dolby Digital, MLP, DTS, and
multichannel music modes such as ambience
recovery or acoustical environment synthesis.
(A) Position the bracket on the speaker as pictured when
the speaker is to be located above the listeners’ear level.
(B) Proper orientation of the front of the speaker when it’s
located above the listeners’ear level.Notice the tweeter is
located towards the bottom of the baffle.
FIGURE 3
Your surround speakers can be installed in a
wide variety of locations, but in some rooms their
installation can be quite a challenge to install. In
general, the surround speakers should be located
high on the walls and either to the sides or behind
the listening position. If you have questions, please
contact your M&K dealer or the M&K factory.
a. POSITION RELATIVE TO SEATING
The surround speakers should be located
adjacent to the seating position. If there is one row
of seats, the Tripole® surround speaker should be
located directly to the left and to the right of this row
of seats. See Figure 3. If there are multiple rows of
seats, then the Tripole® surround speaker should be
located directly to the left and right of the geometric
center of the listening area. See Figure 4.
FIGURE 4
If the surround speakers cannot be located
exactly adjacent to the seating area, it is better for
them to be located slightly towards the back of the
room, behind the listening positions, rather than in
the front of the room, between the listening position
and the screen.
It is also acceptable to locate the speakers on
the back wall of the room. In this case, they should
be located symmetrically relative to the back
corners. See Figure 5. Another good location is in
the corner itself. In addition to the flush mount
brackets provided with your speakers, M&K makes
a variety of very high quality speaker mounting
brackets that can be used to mount the speakers to
the side or back walls, as well as in the corner itself.
FIGURE 5
b. HEIGHT
In general, the surround speakers should be
located near the ceiling. Placement above the
6
TRIPOLE ® SURROUND SPEAKER
FIGURE 6
listeners' heads is very important, with the cabinet's bottom at least two feet above a seated listener's head. In
fact, if at all possible, the speakers should be
located above a standing listener's head, approximately 6 to
7 feet off the floor, so that people walking around the room will be unable to localize them.
c. WALL LOCATION
The surround speakers can be mounted on either the side walls or on the back wall, or even directly in a
corner. They can be flush on the wall, on shelves, on brackets, etc. The Tripole’s® great flexibility makes it very
forgiving of room placement that is less than optimum.
The Tripole® will give you a combination of an enveloping sound with directionality. You will hear directional
effects, and even imaging when the recording has these qualities. yet at the same time, you will also hear a
diffuse sound from the Dipole drivers mounted on the left and right cabinet baffles.
If the sound lacks the directionality you desire, point the front baffles directly at the main listening position.
Either M&K ST-wall brackets or Omnimount® brackets are very useful for this. If the sound is too directional,
angle the speakers towards the back wall or the side wall surface directly behind them. By reflecting sound
behind the listening position, you may increase the sense of envelopment in the sound.
d. USING MULTIPLE PAIRS OF SURROUNDS
Some listeners prefer multiple pairs of surround speakers. In very large rooms, this may even be
necessary. Also, some surround processors and receivers have both side and rear surround channel outputs.
Multiple pairs of surrounds can make a dramatic improvement and provide a deeper and broader surround
effect. When using multiple pairs of surround speakers, a symmetrical installation pattern works best. For
example, one pair could be mounted on the back wall of the room, mounted equidistant from the back corners,
wit the other pair mounted on the side walls of the room, equidistant from the same back corners.
e. USE WITH SURROUND-EX AND OTHER 6.1 CHANNELS SYSTEMS
When using the Tripole® surround speaker with a 6.1 channel system, we strongly recommend using two
speakers to reproduce the back surround channel. See Figure 6. These speakers should be mounted on the
7
TRIPOLE ® SURROUND SPEAKER
center area of the back wall, symmetrical to the wall’s center line.
Follow your processor or receiver’s instructions for proper calibration.
FIGURE 7
Note: Under ideal conditions, the back surround speakers
should be located between 30-45 degrees behind the listener. See
Figure 5. In some listening situations, this may not be possible.
Please experiment with various locations within your listening
situation to locate the optimum location for the back surround
speakers. If you have any additional questions, please contact your
M&K dealer or M&K factory directly.
If you are using this speaker for the rear surround channel of a
Surround-EX system, the speakers should be mounted so that the
arrows point towards each other (towards the center).
7.
SPEAKER POLARITY TEST
In any system using a subwoofer separate from Satellite
speakers, especially in multichannel surround sound applications, a
polarity test must be performed to insure proper phase in the system,
thereby achieving optimum sound in the critical bass frequencies.
We recommend using a test disc to test the phase of all the
channels. Test by comparing the phase of the channels until you
have established that all channels have identical polarity.
8.
M&K WALL AND STAND MOUNTING
OPTIONS
FIGURE 8
ST- STAND OPTION
We recommend our M&K’s ST-Wall brackets, for the greatest
greater flexibility in mounting your surround speakers. A version
designed for corner mounting, known as the ST-Corner/Tilt is also
available. See Figure 7.
Another option for the Surround-55 is a wall mount bracket that
allows the speaker to be mounted flush to the wall. This type of
mount can work quite well, however it does limit the ability of the
speaker to be rotated or aimed.
For the K-4 Tripole® Surround speaker, we recommend using our
ST-BT5 wall bracket.
If wall mounting is not ideal for your particular application, M&K
also offers the LDM and ST series of floor mount stands for the
surround speaker. See Figure 8.
9.
SPEAKER DAMAGE & HOW TO AVOID IT
An important factor to consider with any loudspeaker system is
the potential for speaker damage. Even though your surround
speakers have extremely high power handling ability, they still can be
damaged by relatively low powered amplifiers.
PEDESTAL STAND OPTIONS
TRIPOLE® SURROUND SPEAKER
While very few M&K Satellites are actually returned for service, the vast majority of those returned are not
for manufacturing defects. Instead, they are returned because they have been overdriven, almost always
because the amplifier or receiver used was driven into clipping distortion. This damage is considered abuse,
and is not necessarily covered under warranty.
This clipping distortion occurs when the demands of the music are greater than the amplifier's available
power. It can occur at 20 watts with a small amplifier, or at 400 watts with a large amplifier. Regardless, when
this happens, the amplifier's output waveform (which usually looks like a smooth arc) is "clipped" off, exhibiting
a flat top instead of the arc.
This flat top contains multiples of the original amplified frequencies, sometimes at higher levels than the
original signal itself. For tweeters, this can be very damaging, as this distortion is well above the audible range,
where you will be unable to hear it, and where the tweeter is more vulnerable to damage.
When an amplifier clips, its sound becomes harsh and grating, and a break-up is often audible in the bass
frequencies. It will become uncomfortable to listen to, compared to a slightly lower volume level. When you are
listening at high volume levels, be aware of the onset of clipping distortion, and turn the volume down slightly if
the sound takes on the character described above.
When tone controls or equalizers are used to boost frequencies, the problem occurs much more rapidly.
Even a small boost of low or high frequencies can easily double the power requirement and lead to amplifier
clipping at moderate levels. Therefore, you should use your tone controls judiciously, avoiding extreme boosts
of the bass and treble controls, especially when you are listening at high volume levels.
The best way to avoid speaker damage is to use common sense. Use moderate boosts of tone controls or
equalizers, at the very most. Listen carefully for any harshness and break-up, especially at high volume levels,
and turn down the volume when needed. If you cannot get enough volume, you may need to consider a
higher-powered amplifier. If you have any questions about this, please contact M&K, and we will be happy to
discuss it with you further.
10.
CABINET MAINTENANCE
Treat the cabinet as you would any piece of fine furniture. Its black vinyl finish does not require any special
maintenance; regular dusting with a lint-free cloth and periodic cleaning is all that is required. Do not use any
solvent based cleaners, as they may damage the cabinet surface.
11.
IF YOU NEED SERVICE
Contact your dealer or M&K with a complete description of the problem. Please have the unit's model and
serial numbers (found on the back of the cabinet), date of purchase, and your dealer's name. You can call M&K
between 8:30 AM and 5:00 PM Pacific Time, Monday through Friday, at (818) 701-7010. If you call outside these
hours, leave a message, and we will return your call. Alternatively, you may send us an e-mail to
[email protected].
DO NOT RETURN YOUR SPEAKERS TO THE FACTORY FOR
SERVICE WITHOUT OBTAINING PRIOR AUTHORIZATION.
TRIPOLE® SURROUND SPEAKER
12.
M&K 10 YEAR WARRANTY
All M&K speakers (except for subwoofers) carry a ten year limited parts and labor warranty. This warranty
is transferable to new owners. It does not cover abuse, misuse, repairs by unauthorized service stations,
speakers without serial numbers, and those damaged in shipping or by accident. If you have any questions
about the warranty, please contact M&K.
13.
SPECIFICATIONS
SURROUND-55MkII Tripole®
IMPEDANCE:
MINIMUM POWER:
RECOMMENDED POWER:
MAXIMUM POWER:
FREQUENCY RESPONSE:
DIMENSIONS:
WEIGHT:
DRIVERS:
4 ohms
25 watts RMS
50 watts RMS to 200 watts RMS
200 watts RMS unclipped peaks
87 - 20 KHz (± 3dB)
10 3/16” x 6 7/8” x 8 1/4” (HWD)
12 lbs.
1
1” Tweeter
1
5 1/4” Mid/Woofer
2
3” Mid/Tweeters
K-4 Tripole®
IMPEDANCE:
MINIMUM POWER:
RECOMMENDED POWER:
MAXIMUM POWER:
FREQUENCY RESPONSE:
DIMENSIONS:
WEIGHT:
DRIVERS:
4 ohms
25 watts RMS
50 watts RMS to 150 watts RMS
150 watts RMS unclipped peaks
100 - 20 KHz (± 3dB)
7 3/8” x 6” x 6 3/8” (HWD)
6 lbs.
1
1” Tweeter
1
4” Mid/Woofer
2
2.5” Mid/Tweeters
FIGURE 9
FIGURE 10
Surround-55MkII/K-4 Tripole
06/14/01 pt/qrk
PN # 70004