1
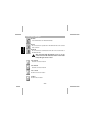
MemoPen Data
Bedienungsanleitung
Owner’s Guide
Notice d’ utilisation
Manuale d’istruzioni
Contents
English
General ………….................…....…......4
Security instructions …............…..….5
Product information
Function …..…….....…...........…….….6
Name of each part …...…....……........7
Name of displayed features ................8
Starting operation
Install/replace the batteries.............…9
Switch on …................…........……….9
Clock setting ........................…....….10
Check of remaining
battery capacity ...….……....……......12
General function
Hold .….......…….….…...........………13
Erase all / Reset …….....…...........…13
Display of date and time .............….13
Playback volume adjustment ...........14
Auto-Off when not in use .................14
Special functions (Voice Recorder)
Record / Play Mode ..…............…….15
Display recording information …...…15
Microphone sensitivity ..…...........….16
Voice operating system (VOS) .........16
Remaining recording time ................17
Folder ….….…............………....……17
Lock message file .........................…17
Hearing AID Function .......................18
Automatic Telephone recording ........18
Record (Voice Recorder)
Record …................…….….….........20
Pause during recording ..…...........…20
Index ................................................21
Record monitoring ............................21
Playback
Playback .....………............…………22
Play speed control ............................22
Fast Forward and Rewind
during playback.…............................23
Search for voice file numbers ...........23
Scan function …...........……….....….23
Pause during playback .….............…23
Repeat part of a message ...........….24
Continous play..……..…............……24
Repeat a single voice file .................25
Edit messages
Add to the end of a message ….......26
Divide a message .............…..…...…26
Combine messages ............………..27
Move a message.……..............…….28
Erase
Erase ......………………............……29
Erase a single voice file ........….......29
Erase all files in one folder ....….......29
Erase all / Reset …….....…...........…30
Technical information
Specifications .…..........…...…….…..31
Declaration of Conformity .…............32
-2-
Contents
English
Software installation
System requirements .…............……33
Software .……………….............…….33
Connection to the PC .……................33
Software installation .……...........…...34
Power Voice manager
Manager window ….………...............39
Manager function PC ..……...............39
File information MemoPen Data ........40
Manager function ..…...........………...41
Files upload to PC ….........................43
File select ....…………….…............…43
Files download to MemoPenData .....43
File erase at MemoPenData .............44
Folder erase at MemoPenData .........44
PV Player
Software PC window .…................…45
Voice Player function ..…..............….45
PV Player ..........................................46
File open ...……………..........….........46
Message play..……………............….46
Write a message .……...........……….46
Repeat a voice file ............................47
Volume adjustment .....…...........…….47
Send a message by email .…............47
-3-
General
Pay attention to the copyright. It is strictly prohibited by law
to record the recorded message again for commercial use or
any other purpose except for private enjoyment.
General instructions
English
Don’t use the unit while driving a car or riding a bike.
Don’t place the unit on unstable places, if falling down, people may be injured.
The unit is not a toy, please beware of children.
If you connect the unit to other electronic devices, please read also the security
instruction of this device.
If you have any question regarding the unit, how it works, the safety or the correct
connection please contact our technical support or ask any specialist.
The seller will not be liable for any damages caused by misuse of the product and any
claim from third parties.
The seller is not responsible for any lost messages, which may be caused by repair, or
any similar action.
The product cannot be used with external power sources, only batteries are allowed.
Environment conditions
Don‘t leave the product close to magnetic cards like credit cards. The magnet of the
loudspeaker can damage the information on this card.
Don‘t drop or shake the unit, it might be damaged.
Avoid too high pressure to the LC-display, it might be damaged.
Don‘t leave the unit on places where the temperature is higher than 60°C, e.g. in
cars with closed windows in the summertime, near heaters or any other type of heat
source.
Don‘t use the unit in rooms with high humidity e.g. bathrooms.
Don‘t use the unit at dusty places.
If you use the unit close to electromagnetic fields or mobile phones, unwanted noise
could be recorded.
-4-
Security instructions
If you connect the unit to other electronic devices, please read also the security
instruction of this device.
Don’t leave empty batteries in the unit.
Don’t try to recharge normal batteries (which are included)
Batteries can be extremely dangerous if accidentally swallowed. Therefore keep the
unit out of reach of small children.
Please do not throw the batteries into the regular garbage.
Please also do not throw them into fire or any heat source.
Technical problems
In case any foreign material or liquid gets into the product, please immediately remove
the battery. Before you use it again, ask your authorised dealer to check the product
carefully.
Please do not hesitate to contact our service center.
Packaging material
Please don’t keep any packaging material within reach of small children. It can
become a dangerous toy.
Maintenance
Please remove the batteries in case you don’t use the product for a longer period of
time. Leaking batteries can damage the product. Store the product at a clean and dry
place.
For cleaning use dry and soft cloth.
-5-
English
Batteries
Product information
Function
English
Pause function
Hold function
Scan function (plays just the first 3 seconds of every voice file during playback)
Playback repeat
Auto power off when not in use
3 different recording modes:
long play (1002 min), standard play (460 min) and high quality mode (302 min)
3 x 99 messages individually selectable
Hearing aide
Automatic numbering of the message
Adjustable microphone sensitivity
Display for remaining recording time
Time stamp
Recording with VOS (voice operating system)
File erasing lock
Edit-functions:
Adding to the end of a message
File combining
File dividing
File move
USB-Port to upload files to PC
-6-
Product information
English
Name of each part
-7-
Product information
Name of displayed features
VOS function
English
folder
battery capacity
mode
recording
erasing lock
remaining recording time
recording date
message number/
date
time in minutes
and seconds
hold
operating icon
repeat
-8-
Starting operation
Before you install/replace the battery make sure that the MemoPen Data is in StopMode.
To open the battery door, push the battery door and slide it into the arrow direction.
Install two AAA (Micro) - batteries into the battery compartment. Pay attention to polarity of the battey +/- and close the battery door.
Switch on
Make sure that the HOLD-switch is in the OFF position and press one of the following
buttons REC/STOP, PLAY/STOP or FUNC/DISP to switch on the unit.
If you press the REC/STOP button for more than 3 sec. the
MemoPen Data starts to record a new message.
-9-
English
lnstall/replace the batteries
Starting operation
Clock setting
If you turn on the MemoPen Data the first time or the batteries were removed
for more than 3 minutes, the clock-setting menu appears automatically, on
the display SET DATE flashes.
English
For each voice message the Memopen Data records the time and the date. In order to
have the correct time you have to set the clock
The Y for year is flashing. Press the / button (jog slide key) to set the
year (e.g 02) and confirm it by pressing the MENU-button (jog slide key).
Now the month e.g. 10 is flashing. Press the / button (jog slide key)
to set the month and confirm it by pressing the MENU-button (jog slide
key).
Now the day e.g. 01 is flashing. Press the / button (jog slide key) to
set the day and confirm it by pressing the MENU-button (jog slide key).
Now the clock-mode e.g. 12H is flashing. Press the /
button (jog slide key) to chang from 12 to 24 hours format
and confirm it by pressing the MENU-button (jog slide
key).
- 10 -
Starting operation
Now the minute e.g. 13 is flashing. Press the / button (jog slide key)
to set the minute and confirm it by pressing the MENU-button (jog slide).
If you remove the battery for more than 3 minutes, the clock
settings are lost.
Check the remaining battery capacity
Switch on the unit and watch the battery symbol on the display.
Battery full
Battery still good
Battery replace soon
Battery empty
In case nothing appears on the display after replacement of
the battery, please check the polarity of the battery again.
If still nothing is shown on the display, please remove the
battery and contact your local dealer. In case you do not
remove the battery, unit might get hot and can inflame.
- 11 -
English
Now the hour e.g. 13 is flashing. Press the / button (jog slide key) to
set the hour and confirm it by pressing the MENU-button (jog slide key).
Starting operation
If low batt is flashing you have to change the batteries.
English
- 12 -
General functions
Hold
Erase all / Reset
With this function you can set the MemoPen Data into the original conditions, all data
stored on the MemoPen Data will be erased.
Press the ERASE button and the REC/STOP button at the same time until
(more than 7 sec.) the ALL CLEAR flashes on the display (meanwhile ALL
ERASE is flashing). To erase the files, finally press the ERASE button again
(during ALL CLEAR is flashing). In case you want to cancel the erase mode
press any other button.
This procedure erases all files in all folders, including the
locked files.
Display of date and time
The date and time is shown all the time even in Standby-mode.
To see the actual date/time press the FUNC/DISP-button for more than 1
second during Stop-, Play or Recording-Mode. In the upper line you can see
the month and day and time in the bottom line.
In case you have selected the 12 hour clock format it shows
a P for PM.
- 13 -
English
To protect the keys against unintentional settings, set the HOLD switch
into the ON position. In this case the recorder keeps the function that was
selected before, setting the HOLD mode until the HOLD switch is set to the
OFF position. By pushing any key during the HOLD- mode the display will
show HOLD and the
icon.
General functions
Playback volume adjustment
To adjust the volume, press the Volume +/- button, it can be done in 21 steps
from 0 (min.) to 21 (max.). If you press one of those buttons, the display
shows VOL and the actual volume.
English
Auto-Off when not in use
If for more then 1 minute the unit is not in use, it switches off automatically.
- 14 -
Specical functions
Record/ Play Mode
1. Make sure that the HOLD-switch is in the OFF position and press one of
the following buttons: REC/STOP, PLAY/STOP or FUNC/DISP to switch
on the unit.
2. Press the MENU button (jog slide key) 2 x for a short time, on the display
MOD appears.
3. Use the / button (jog slide key) to select the Record/ Play Mode. On
the display SP for Standard Play and HQ for High Quality appears.
Display of recording information
To see the recording date/time from a recorded message, proceed as follows:
1. Make sure that the HOLD-switch is in the OFF position and press one of
the following buttons: REC/STOP, PLAY/STOP or FUNC/DISP to switch
on the unit.
2. Select a file where the message is stored (ref. File Specical-Function
(Voice Recorder)).
3. Press the / button (jog slide key) to select the message.
4. Press the FUNC/DISP-button for more than 1 second. The actual date/
time appears on the display.
5. Press the FUNC/DISP-button for a short time again. The display now
shows REC DATE and the date and time when the message was
recorded.
- 15 -
English
There are two record/play modes available: Long Play (LP), Standard Play (SP) and
High Quality (HQ). The High Quality - mode (HQ) has 304 minutes play time with
high speech quality, the Standard Play- mode (SP) has 548 minutes play time with
a little lower speech quality and Long Play- mode (LP) has 1002 minutes play time
this speech quality is in most cases sufficient.
Specical functions
Microphone sensitivity
English
There are three possibilities for microphone sensitivity: low LO, normal NOR and high
HI. If the low LO sensitivity is selected, you should speak directly into the recorder and
it records only the voice without any unwanted noise. To record a conversation during a
meeting you should select the high (HI) sensitivity, under all other condition normal will
be the best.
1. Make sure that the HOLD-switch is in the OFF position and press one of
the following buttons: REC/STOP, PLAY/STOP or FUNC/DISP to switch
on the unit.
2. Press the MENU-button (jog slide key) 3 x for a short time, on the display
appears MIC.
3. Use the / button (jog slide key) to change the sensitivity. On the
display HI for high microphone sensitivity NOR for normal microphone
sensitivity and LO for low microphone sensitivity appears.
The microphone sensitivity can also be changed during
recording.
Voice operating system (VOS)
The voice operating system is designed to save memory capacity. This means it records
only the voice. If there is a speech pause, the recorder stops automatically. After this
pause the recording starts again automatically.
1. Make sure that the HOLD-switch is in the OFF position and press one of
the following buttons: REC/STOP, PLAY/STOP or FUNC/DISP to switch
on the unit.
2. Press the MENU-button (jog slide key) 4 x for a short time, on the display
VOS appears.
3. Use the / button (jog slide key) to select the VOS on or off. On the
display ON for VOS on or OFF for VOS off appears.
VOS can be switched on/off during recording.
- 16 -
Specical functions
With this function you can see the remaining recording time, it shows in minutes and
seconds. The calculation is based on the selected recording mode HQ,SP or LP.
Proceed as follows:
1. Make sure that the HOLD-switch is in the OFF position and press one of
the following buttons: REC/STOP, PLAY/STOP or FUNC/DISP to switch
on the unit.
2. Press the FUNC/DISP-button for more than 1 second. The actual date/
time appears on the display.
3. Press the FUNC/DISP-button 2 x for a short time again. The display now
shows the remaining time in minutes and seconds.
Folder
To store messages according to their priority, up to 3 folders are available. (A,B,C)
1. Make sure that the HOLD-switch is in the OFF position and press one of
the following buttons: REC/STOP, PLAY/STOP or FUNC/DISP to switch
on the unit.
2. Press the MENU-button (jog slide key) 1 x for a short time, on the display
FOLD appears.
3. Use the / button (jog slide key) to select the folder where messages
are to be stored or played. The selected file is shown on the display.
Lock message file
To avoid unintentional erasing of message files, you can lock the message.
1. Make sure that the HOLD-switch is in the OFF position and press one of
the following buttons: REC/STOP, PLAY/STOP or FUNC/DISP to switch
on the unit.
2. Use the / button (jog slide key) to select the messages you want to
lock.
3. Press the MENU-button (jog slide key ) 5 x for a short time, on the display
LOCK appears.
- 17 -
English
Remaining recording time
Specical functions
4. Use the / button (jog slide key) to select LOCK on or off. On the
display ON for lock on or OFF for lock off appears.
With the Reset-function the locked messages will be erased
too.
Hearing AID function
English
At this function the MemoPen Date works as an amplifier. All noise witch comes to the
microphone you can hear amplified at the earphone.
1. Make sure that the HOLD-switch is in the OFF position and press one of
the following buttons: REC/STOP, PLAY/STOP or FUNC/DISP to switch
on the unit.
2. Press the FUNC/DISP-button for a short time, on the display HEAR
appears. The hearing AId function is stwitched on now.
3. To switch off the hearing AID function press the FUNC/DISP-button 2 x for
a short time.
Automatic Telephone recording
The line adaptor is only as accessory available it is not
included
Recording a telephone conversation is only allowed if the
telephone partner agreed.
With this function you can recording telephone conversations automatically. The voice on
the telephone line controls the recording (start/stop)
1. connect the MemoPen Data with your telephone according to the
drawing.
- 18 -
2. Make sure that the HOLD-switch is in the OFF position and press one of
the following buttons: REC/STOP, PLAY/STOP or FUNC/DISP to switch
on the unit.
3. Press the FUNC/DISP-button 2 x for a short time, on the display TEL
appears. The automatic telephone recording function is switched on
now.
4. To switch off the Automatic Telephone recording function press the
FUNC/DISP-button for a short time.
The line adaptor is only useable for
telephones with pin configuration AB
inside the plug
- 19 -
nc
a b nc
English
Specical functions
Record
Record
English
The recording can be done with the internal microphone (at the top of the unit) or by an
external microphone (as option available).
Proceed as follow:
1. Make sure that the HOLD switch is in the OFF position and press one of
the following buttons: REC/STOP, PLAY/STOP or FUNC/DISP to switch
on the unit.
2. Select the folder where you want to store the message (ref. Special functions Folder).
3. Place the recorder close to the mouth or any other sound source you
want to record, and press the REC/STOP button to start the recording.
4. REC appears on the display for about 2 seconds, now the recording
mode is started. The number of the recorded message, the selected play
mode and the recording time is shown on the display. Also the REC icon
appears on the display and the operating icon starts to move.
The recorder numbers the messages automatically.
To stop the recording, press the REC/STOP button.
Unless the HOLD switch is in ON position, it is impossible to
stop the recording.
Pause during recording
To make a pause during recording, press the FUNC/DISP button. The display shows PAUSE and the operation icon is flashing. To restart the recording, press the FUNC/DISP - or REC/STOP button. The number of message
do not be increased.
- 20 -
Record
Index
To set a new index number during recording, press the FF button (Jog slide key)
and the message number increases.
Record monitoring
During the recording you can listen with the earphone, which is included as accessory,
to what you are recording.
Never change the battery during recording, the messages
might get lost.
In case there is no more recording time left or the index of 3
x 99!messages is full, it is impossible to record a new message. The display shows Full. Please delete some old messages (ref. Erase).
- 21 -
English
If you have reached the max. number (99) of messages in
one folder, there is no further increase.
Playback
Playback
English
1. Make sure that the HOLD-switch is in the OFF position and press one of
the following buttons: REC/STOP, PLAY/STOP or FUNC/DISP to switch
on the unit.
2. Select the folder where the voice file to be played is stored (ref. Special
functions Folder).
3. Press the PLAY/STOP button.
4. For approximately 2 seconds the display shows play, then the display
changes to playtime. The operating icon starts moving.
In case no special voice file is selected, the voice file played last, will start again. The
display shows the number of the voice file, the playtime and the operating icon starts.
You can listen to the message either with the internal speaker or with the duo earphone which is included as accessory.
To stop the playing mode press the PLAY/STOP button again.
The number of the last voice file is shown on the display.
If at stop-position no buttons are pressed within 1 minute, the recorder switches off
automatically.
Play speed control
To playback the voice file you can select 3 different speeds. Normal, slow –30% or fast
+ 30%.
1. Start playback (ref. playback).
2. Press the PLAY/STOP -button until (approx. 1 sec.) the display shows NOR.
3. Use the / button (jog slide key) to select between FAST, SLOW and
NOR.
- 22 -
Playback
There are two possibilities for Fast Forward and Rewind during playback:
1. By pressing the / FF/REWIND button (jog slide key) for a short time during
playback, the recorder goes to the next voice file or to the previous one and starts
automatically to play this message.
2. By pressing the / FF/REWIND button (jog slide key) for a longer time during
playback, the recorder moves forward or backwards within the voice file. This allows
you to search any part in the voice file and play it again.
If you push the / FF/REWIND button (jog slide key) too
short, the recorder moves to another voice file.
Searching for voice file numbers
To search for a voice file number, press the / FF/REWIND button (jog slide key)
at stop mode. To increase/decrease the voice file number one by one, press the /
FF/REWIND button (jog slide key) only a short time. By pressing this button for a long
time, the voice file number will increase/decrease fast. To playback the voice file press
the PLAY/STOP button.
Scan function
To start the scan function press the PLAY/STOP button (more than 2
sec.) until the display shows SCAN. Now the scan mode is started and
the recorder plays 5 sec. of each message starting by number 1. To stop
the scan mode, press the PLAY/STOP button and the recorder plays the
complete message.
Pause during playback
To make a pause during play mode, press the FUNC/DISP button, the display shows PAUSE and the operating icon is flashing. To continue the voicefile just press the FUNC/DISP- or the PLAY/STOP button again.
- 23 -
English
Fast Forward and Rewind during playback
Playback
During pause mode, the Auto Power Off (APO) function is
switched off.
Repeat part of a message
English
With this function you can repeat part of a message.
Start playback (ref. playback). When you reach the point from which you
want to have your message repeated, press the MENU button (jog slide key)
for a short time. The display shows the repeat
icon. The message is
still played until you reach the point where you press the MENU button (jog
slide key) for a short time again to finish the part you want to repeat. The
icon, and the repeated playback starts. If
display now shows the
you don’t select a second point to stop the repeating of the message, the
message will be repeated from the selected point to the end of the message.
To stop the repeated playback, press the PLAY/STOP- or the MENU- button
(jog slide key).
Continous play
With this function all messages in one folder can be played one after the other automatically.
1. Make sure that the HOLD switch is in the OFF position and press one of
the following buttons: REC/STOP, PLAY/STOP or FUNC/DISP to switch
on the unit.
2. Press the MENU-button (jog slide key) 6 x for a short time, on the display
CONTI appears.
3. Use the / button (jog slide key) to select the continuous play (on or
off). On the display appears ON for continuous play or OFF to stop the
continuous play.
4. To start the continuous play, use the / button (jog slide key) in order
to select the message from which you want to start the continuous play
and press the PLAY/STOP-button.
- 24 -
Playback
This function allows you to repeat a voice file continuously.
Start playback (ref. playback). Press the MENU button (jog slide key) for
more than 1 sec. to repeat the voice file continuously. The display shows
the
icon. To stop, press the MENU button (jog slide key) for a short
time or the PLAY/STOP button.
- 25 -
English
Repeat a single voice file
Editing messages
Add to the end of a message
1. To add to a recorded message, start the playback (ref. playback) of the
message which should be extended.
2. Press the REC/STOP button for more than 1 sec. until the display shows
ADD-R.
English
The MemoPen Data starts to record automatically, beginning at the end of the message
(all other feature ref. Recording).
Divide a message
To divide a message proceed as follow:
1. Start the playback (ref. playback) of the message to be divided.
2. Press the PAUSE/DISP button at the point where the message should be
divided. On the display appears PAUSE.
3. Press the MENU button (jog slide key) until the display shows OFF DIV.
4. Use the / button (jog slide key) to select ON DIV. To divide the
message press the MENU button (jog slide key). The second part of the
message has the message number + 1 from the original message. All
message numbers after this message will increase by one.
In case there are already 99 messages in the folder or the
message is shorter than 2 sec., it is impossible to divide
the message. On the display appears CAN NOT.
If the recorded message is long, it takes some time to
divide it. The new message still has the date and lock
information of the original message.
Don’t remove the battery during division of the message. The message will be destroyed and can’t be played
again.
- 26 -
Editing messages
Only messages which follow each other e.g. 05+06 can
be combined. If you want to combine messages which
do not follow each other, you must move one of the messages, so that they follow each other (ref. move message).
To combine two messages proceed as follow:
1. Start the playback (ref. playback) of the message to be divided.
2. Press the PAUSE/DISP button, on the display PAUSE appears.
3. Press the MENU button (jog slide key) until (approx. 1 sec.) the display
shows OFF DIV. Press the MENU button 1 x for a short time again, the
display shows OFF JOIN.
4. Use the / button (jog slide key) to select ON JOIN. The number of
messages are flashing at the display.
5. Press the MENU button (jog slide key) for a short time to finally combine
the two messages.
6. The messages are combined when the display goes back to Stop-Mode.
All message numbers behind this message will decrease by 1.
If the recorded message is very long, it takes some time to
combine it.
The new message has the date and lock information of the
first message.
Don’t remove the battery during combining the message. The
message will be destroyed and can’t be played again.
Messages that are recorded in different recording modes
can’t be combined.
If there is not enough memory capacity available, messages
can’t be combined.
- 27 -
English
Combine messages
Editing messages
Move a message
English
To move messages proceed as follow:
1. Start the playback (ref. playback) of the message, to be moved.
2. Press the FUNC/DISP button on the display, PAUSE appears.
3. Press the MENU button (jog slide key) until (approx. 1 sec.) the display
shows OFF DIV. Press the MENU button 2 x for a short time again, the
display shows OFF MOV.
4. Use the / button (jog slide key) to select ON MOV.
5. Press the MENU button (jog slide key) again. The display shows the letter
of the folder and 00.
6. Use the / button (jog slide key) to select the new folder and the
number for the moved message.
7. Press the MENU button (jog slide key) for a short time to finally move the
message.
8. The messages are moved when the display goes back to Stop-Mode. All
messages behind this message will be renumbered.
With the edit function such as divide, combine and move
messages you have the possibility to delete part of the message or insert a part.
- 28 -
Erase
Erase
Before you erase messages make sure that the recorder is in STOP-Mode. You can
choose either to erase a single message or erase all messages in one folder.
1. Make sure that the HOLD switch is in the OFF position and press one of
the following buttons: REC/STOP, PLAY/STOP or FUNC/DISP to switch
on the unit.
2. Select the folder where the voice file is to be erased (ref. Special functions
Folder).
3. Search with the / FF/REWIND button (jog slide key) the voice files
to be erased.
4. Press the ERASE button until (more than 2 sec.) ERASE starts flashing
on the display. The recorder plays the voice files for 5 seconds to make
sure that the right voice file is selected.
To erase the voice files, finally press the ERASE button again
(during the ERASE is flashing).
The numbers of all voice files behind the erased file will
decrease.
Erase all files in one folder
1. Make sure that the HOLD switch is in the OFF position and press one of
the following buttons: REC/STOP, PLAY/STOP or FUNC/DISP to switch
on the unit.
2. Select the folder you want to erase (ref. Special functions Folder).
3. Press the ERASE- and the REC/STOP button at the same time until
(more than 3 sec.) the display shows ERASE and ALL is flashing. Release
the two buttons.
To erase the message finally press the ERASE button again
(during ALL is flashing). In case you want to cancel the Erase- 29 -
English
Erase a single voice file
Erase
mode press any other button.
Erase all / Reset
English
With this function you can set the MemoPen Data into the original conditions, all data
stored on the MemoPen Data will be erased.
Press the ERASE button and the REC/STOP button at the same time until
(more than 7 sec.) the ALL CLEAR is flashing on the display (meanwhile
ALL ERASE is flashing).
To erase the files, finally press the ERASE button again
(during ALL CLEAR is flashing). In case you want to cancel the
erase mode press any other button.
This procedure erases all files in all folders, including the
locked files.
- 30 -
Record time:
LC-Display:
Battery lifetime:
External connection:
Loudspeaker:
Output power:
Record source:
Frequency response:
Power source:
Keys:
Weight:
Dimension:
Accessory included:
Accessory option:
LP Long play 1002 minutes
SP Standard play 460 minutes
HQ High Quality play 302 minutes
for all functions
Approx. 18 hours recording mode
Approx. 20 hours playback with speaker at volume 5
Earphone jack 3,5 mm Mono
Microphone jack 3,5 mm Mono
USB jack
20 mm, 8 Ohm dynamic
Speaker 200 mW/8 Ohm at 10% THD
Earphone 3 mW/32 Ohm at 10% THD
Built-in or external condenser microphone
500 Hz to 3500 Hz LP/SP mode
500 Hz to 5100 Hz HQ mode
3V DC with 2 pieces AAA Alkaline battery
Tact key
Record/Stop,
Play/Stop,
Pause/Display,
Erase,
Volume +/Jog slide key
Menu
Fast Forward/Rewind,
Slide switch
Hold
Approx. 38 g without batteries
28,2 x 111 x 13,8 mm (W x H x D)
Instruction manual,
Stereo-earphone,
1 Battery,
USB Cable,
Software
Art. No.
53001 External microphone
53002 Audio cable
- 31 -
English
Specifications
Declaration of Conformity
EC-Declaration of Conformity
marking
English
We, Manufacturer/Importer
Dnt Drahtlose Nachrichtentechnik
Entwicklungs- und Vertriebs GmbH
Voltastr, 4
D-63128 Dietzenbach, Germany
Declare that the product
Digital Voice Recorder
MemoPen Data
Is in conformity with
Council Directive 89/336/EEC (EMC Directive)
EN55022:1998 Class B
EN50024:1998
Contact person:
Helmut Flugel
Tel. +49 (0)6074 37140
Fax +49 (0)6074 371437
Email [email protected]
Dietzenbach Nov. 15th, 2002
H.Flugel
- 32 -
Software installation
CPU
Memory
OS
Others
: IBM compatible, Pentium 133 MHz or higher
: recommended more than 64 MB
: Windows 98/2000/ME/XP
: sound card
4 x CD-ROM drive
USB Port
Software
There are two different programs on the attached CD-ROM:
1. Power Voice Manager to up-/download voice files from the MemoPen Data to your
PC or reverse.
2. PV Player to play the voice files on your PC or to send them by email.
Connection to the PC
Before you connect the MemoPen Data to your PC, you have
to install the driver software, otherwise Windows can’t find
the driver.
To upload files from the MemoPen Data to your PC or files from your PC to the MemoPen
Data you have to connect the MemoPen Data via USB-Cable to your PC.
1. use the small plug and plug it into the MemoPen Data
2. plug the bigger plug into the USB-Port of your PC
Is everything installed and connected correctly, the connection icon of
MemoPen Data is blue (ref. Power Voice Manager) and PC Link is shown
on the display.
- 33 -
English
System requirements
Software installation
Software installation
Before you start the installation, please close all other applications.
English
1. Insert the CD-ROM in your CD-ROM drive, the installation starts automatically.
Does the installation not start, proceed as follow:
Start-button at the desktop and choose
Run...
a. Click the
b. Type following: <drive name>:\install.exe. If your CD-ROM drive is named D, then
please type d:\install.exe.
2. The installation software detects the language of your PC and installs the Power Voice
software in the same language.
3. Click to Install to go ahead.
- 34 -
English
Software installation
4. Read the display instruction carefully and go ahead with Next>.
5. If you agree to install the software into the recommended folder C:\Program Files\
PowerVoice go ahead with Next>. Otherwise select Browse… to select or create
another or new folder where you want to install the software.
6. Confirm with Next> to install the software.
- 35 -
Software installation
7. Choose the program manager group where the Power Voice start icon should be
placed and confirm with Next>.
English
8. To copy all necessary program files to your PC click on Next>.
- 36 -
Software installation
English
9. To finish the installation, click Finish>.
10. The software installation is now completed. To register the programs at the registry,
you have to restart the PC. Click to OK.
11. After the restart of your PC, use the USB-Cable to connect the MemoPen Data with
your PC.
12. Found New Hardware appears now on the screen.
If the message doesn’t appear, there can be two reasons:
1. The USB-Port from the PC is disabled. This can be changed
in the BIOS-menu. The instructions, how to do it, is mentioned in the User Manual of your PC, if not, ask your PC
dealer.
2. You have connected the MemoPen Data with your PC
before you have installed the software. In this case you
- 37 -
Software installation
have to uninstall the complied software and delete the
entry of an unknown device at the Device Manager. This
entry you can find under Start > Settings > Control Panel >
System > Hardware > Device Manager. After that you have
to restart your PC and install the software again without
having connected MemoPen Data.
English
- 38 -
Power Voice Manger
Power Voice manager window
English
folder,
files
and
functions
of PC
folder,
files
and
functions
of MemoPen
Data
Manager-function PC
UP
on folder up
Make a new folder
create a new folder
Cut
copy file to scratch disk
Copy
copy file
Past
insert file
- 39 -
Power Voice Manger
Delete
all marked files will be deleted
Large icon
shows files as large icon
English
Small icon
shows files as small icon
Details
shows detail information of files
Voice Player
starts the Voice Player program
Filter
Select to display all files or only voice files with the extension .wav or .ts*.
File information MemoPen Data
Name (Folder A,B and C)
The file name is automatically generated by the MemoPen Data and can’t be
changed.
The name of the voice file always starts with the letter of the folder name (e.g. Folder
A with A). The extension of the folder depends on the recording mode .tsh for High
Quality-Mode (HQ) .tss for Standard Play-Mode (SP) and .tsl for Long Play-Mode
(LP).
- 40 -
Manager function
USB connection
red = no connection to the MemoPen Data
green = the MemoPen Data is connected
Refrech
refrech the File information of MemoPen Data
Erase
erase all marked files from the MemoPen Data
- 41 -
English
Power Voice Manger
Name (Folder D)
The same name as the original file on the PC.
Lock
There is Lock if the voice file is locked against unintentional erasing.
Size
Shows the size of the voice file in bit format.
Rec Time
Shows the duration of the recorded voice file in hours, minutes and seconds.
Mode
Indicates the recorded recording mode HQ for High Quality-Mode and SP for Standard Play-Mode.
Date
Shows the date and time when the file was recorded. The format is: month, day,
year, hour, minute and second.
Power Voice Manager
All Erase
erase all marked files from the MemoPen Data
English
Upload
The selected files are uploaded from the MemoPen Data to the selected
folder on the PC.
Download
The selected files are downloaded from the PC to the selected folder on
the MemoPen Data.
Only voice files with the extension .tsl, .tss or .tsh
can be stored in the folder A,B and C. In the folder
D any file type can be stored.
Voice A Folder
Shows the voice files in folder A
Voice B Folder
Shows the voice files in folder B
Voice C Folder
Shows the voice files in folder C
Folder D
Shows the files in folder D
- 42 -
Power Voice Manger
Connect the MemoPen Data to your PC as described under Connection to the PC
and run the Power Voice Manager.
Click to the folder
(A,B,C) from which you want to upload voice files to the
PC.
Select the folder on the PC where you want to store the voice file from the MemoPen
Data.
Select the file(s) (ref. Select files) you want to upload and click to
Upload.
File select
There are 3 possibilities to select files:
To select a single file, just click to the file.
To select several files which are one after the other, click to the first file, press the
Shift-button, hold it pressed and click to the last file, you want to select. All files
between the first and the last are now marked.
To select several files which are not one after the other, click to the first file, press the
Ctrl-button, hold it pressed and click to all files, you want to select.
In the default settings of Windows, marked files have a blue
background.
Files download to MemoPen Data
Voice and all other files which are stored in the PC, can be downloaded to the MemoPen
Data.
Only voice files with the extension .tsl, .tss or .tsh can be
stored in the folder A,B and C. In the folder D any file type can
be stored.
Connect the MemoPen Data to your PC as described under Connection to the PC
and run the Power Voice Manager.
Select the file you want to download.
- 43 -
English
Files upload to PC
Power Voice Manager
Click to the folder
(A,B,C,D) to which you want to download files from
the PC.
Click to Download to start the data transfer.
English
The files in the folder A,B and C of MemoPen Data are automatically named by the MemoPen Data and can’t be changed.
They start with the letter of the folder name and have 4 digits.
The file names in folder D do not be change.
File erase at MemoPen Data
It is possible to erase a single or several files at the MemoPen Data.
Connect the MemoPen Data to your PC as described under Connection to the PC
and run the Power Voice Manager.
Select the file you want to erase (ref. File select) and click to
Erase.
If you are sure to erase the selected, file click Yes to confirm.
Folder erase at MemoPen Data
With this function the complete folder can be erased.
Connect the MemoPen Data to your PC as described under Connection to the PC
and run the Power Voice Manager.
(A,B,C,D) you want to erase and click to
All
Select the folder
Erase.
To erase the folder confirm with OK.
- 44 -
PV Player
PV Player software PC window
recording time
minimize
close
English
play time
volume
Voice-Player function
Rewind
File open
Play
Repeat the file
FF
About the program
Pause
Send Mail with player
Stop
- 45 -
PV Player
PV player
With this program you can listen to the stored voice files or write down what you hear with
your word processing program. The functions Rewind, FF, Play, Pause and Stop can be
controlled by special keyboard combinations. An additional player is not necessary.
File open
English
To open a voice file click to
open, choose the folder where the voice file is
stored and click to the voice file you want to listen to.
Message play
There are two possibilities to start playback of a voice file:
1. Use your explorer and double click to the voice file you want to playback. The
Power Voice player program starts automatically and opens the voice file. The
playback starts.
2. Start the Voice player program, click to
open, choose the folder
where the voice files are stored and click to the voice file you want to playback.
To playback the file click to play.
Write a message
To write down the voice file, the Voice player program and your word processing program
have to run at the same time. Start the Power Voice player program and open (ref. Message play) the file you want to write down. Change to your word processing program and
start to playback the voice file.
To control the Voice player program there are special key combinations available:
To playback the voice file press
+
Ctrl
+
F2
- 46 -
PV Player
To rewind the voice file press
+
Ctrl
+
F3
+
Ctrl
+
F4
F5
F6
To stop the voice file press
+
+
+
Ctrl
+
To pause press
Ctrl
Repeat a voice file
This function allows you to repeat a voice file continuously.
Click to
REPEAT to repeat the voice file continuously. The voice file will
REPEAT again.
repeat untill you click to
Volume adjustment
To adjust the volume, click to volume control and drag the slider up to increase the volume
and down to reduce the volume.
Send a message by email
The stored voice files can easily be sent by email.
To send, start the Voice player program and open (ref. File open) the file you want to
Mail.
send by email. To send the file click to
The selected voice file will be sent in .wav file format. WAV files can playbacked at all
Windows operating system, the wav player is a standard of Windows.
- 47 -
English
To fast forward the voice file press
English
- 48 -
- 49 -
English
English
- 50 -
- 51 -
English
Warranty regulations
1. In general the European warranty regulations are valid. Warranty starts with receipt of
unit. In a warranty case, please submit the unit together with invoice, unit pass and error description. Without these documentary evidence we are not obliged to a warranty
performance.
2. During warranty period we repair all constructional or material defects which are
caused by a manufacturing fault. It is in the decision of the manufacturer to change
or replace defective parts/units. Further claims are excluded. Changed parts will
automatically go over into our property. We will not be held responsible for future damages.
3. Manipulation on the unit through non-authorized companies/persons automatically
leads to an end of warranty period.
4. Excluded of warranty claims are damages due to improper treatment, not following the
manual, oxidation of batteries, permanent usage.
5. The initial warranty period is not extended because of repair or replacement of parts.
6. These warranty regulations are valid in the Federal Republik of Germany.
Drahtlose Nachrichtentechnik
Entwicklungs- und Vertriebs GmbH
Voltastraße 4
D-63128 Dietzenbach
Tel.
+49 (0)6074 3714-0
Fax
+49 (0)6074 3714-37
Internet
http://www.dnt.de
Email
[email protected]
Info Hotline
Tel.
+49 (0)6074 3714-31
Email
[email protected]