Download Belkin DockStation P74321ea User manual
Transcript
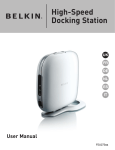
High-Speed
Docking Station
Belkin Tech Support
US: 310-898-1100, ext. 2263
800-223-5546, ext. 2263
UK: 0845 607 77 87
Australia: 1800 235 546
New Zealand: 0800 235 546
Singapore: 800 616 1790
Europe: www.belkin.com/support
Belkin International, Inc.
501 West Walnut Street
Los Angeles, CA 90220, USA
310-898-1100
310-898-1111 fax
Belkin B.V.
Boeing Avenue 333
1119 PH Schiphol-Rijk, The Netherlands
+31 (0) 20 654 7300
+31 (0) 20 654 7349 fax
Belkin Ltd.
4 Pioneer Avenue
Tuggerah Business Park
Tuggerah, NSW 2259, Australia
+61 (0) 2 4350 4600
+61 (0) 2 4350 4700 fax
Belkin Ltd.
Express Business Park, Shipton Way
Rushden, NN10 6GL, United Kingdom
+44 (0) 1933 35 2000
+44 (0) 1933 31 2000 fax
© 2007 Belkin International, Inc. All rights reserved. All trade names
are registered trademarks of respective manufacturers listed. Windows,
Windows Vista, and Microsoft are either registered trademarks or
trademarks of Microsoft Corporation in the United States and/or
other countries.
P75420
High-Speed
Docking Station
User Manual
F5U273
Table of Contents
1. Introduction .....................................................................1
2. Installation.......................................................................2
3. Troubleshooting Guide — General and Video ................ 16
4. Troubleshooting Guide — Ethernet and Network .......... 23
5. Troubleshooting Guide — Audio and Devices ................ 25
6. Information .................................................................... 27
Introduction
Congratulations and thank you for purchasing the High-Speed
Docking Station from Belkin (the Docking Station). It plugs into
your notebook computer for one simple, fast connection for
all your peripherals through your notebook’s ExpressCardTM
slot. Now you can connect to more than one monitor at a time,
or to just one big-screen monitor, for a superior, digital video
experience. Your keyboard, mouse, printer, scanner, camera,
MP3 player—and lots more—can stay plugged in, or you can
connect easily in seconds, anytime you want.
The following is a list of frequently asked questions that should
address most circumstances that will arise when you use the
Docking Station.
1
2
3
4
5
6
1
Installation
1
Installation for Windows Vista™
IMPORTANT: INSTALL SOFTWARE FIRST.
2
DO NOT connect the Docking Station before installing the
software, or the system may fail to work correctly.
3
Go to http://www.belkin.com/highspeeddock/support/ to
check for updates and download the latest driver for Windows
Vista before installing.
4
5
6
Operating-System Support
NOTE: Currently, the Docking Station supports only 32-bit
versions of Windows® XP and Windows Vista; 64-bit versions
of Windows XP and Windows Vista do not work with the
Docking Station.
NOTE: You must have administrator privileges to install the
Docking Station drivers. If you do not have administrator
privileges, log off Windows® and log in with a user name that
has these privileges before beginning the installation.
NOTE: During the installation, the screen may flicker. This is
normal. The flickering occurs while the system detects and
installs the Docking Station.
1. Insert the CD included in this package into your notebook’s
CD-ROM or DVD drive.
2. Follow the on-screen instructions to ensure a proper setup.
While the software is being installed, if the message,
“Windows can’t verify the publisher of this driver software.”
appears (it may appear more than once), click “Install this
2
Installation
driver software anyway”. This product has been thoroughly
tested to work with all Windows operating systems.
1
After the software installation is complete, a prompt will
direct you to connect the Docking Station to your
notebook computer.
2
CONNECT HARDWARE LAST
3
NOTE: Set the switch on the ExpressCard adapter to the
“B” position.
When the message, “Please insert the High-Speed Docking
Station into your notebook ExpressCard slot. Then, click ‘OK’.”
appears, connect your Docking Station to the notebook and
click “OK”.
After that, you will be prompted to restart your computer.
Please do so at that time.
IMPORTANT: Do not disconnect the Docking Station from the
computer. It must be plugged into the computer to finish the
installation process.
3
4
5
6
Installation
1
2
3
4
5
6
How do I uninstall the Docking Station’s drivers?
1. Click on the “Start” menu, then open the Control Panel.
2. Click on “Uninstall a program”.
3. Select “C-Media CM106 Sound Driver” and then click on
“Uninstall/Change”.
4. Select “Belkin Notebook Expansion...” and then click on
“Uninstall/Change”.
5. Your drivers are now successfully uninstalled from
your computer.
How do I switch the default audio device?
Your Docking Station features a built-in, 5.1 surround-sound
audio controller. When you connect the Docking Station to
your notebook, it may switch the default audio device from
your notebook to the dock. If you want to hear the audio from
your notebook, you may need to change the default audio
device in Windows Vista.
1. Click on the “Start” menu, then open the Control Panel.
2. Click on “Hardware and Sound”, then click on “Manage
audio devices”.
3. Set “High Definition Audio Device” as your default device if
you want to hear the audio from your notebook.
4
Installation
How do I enable 5.1 surround sound?
1. Click on the “Start” menu, then open the Control Panel.
1
2. Click on “Hardware and Sound”, then click on “Manage
audio devices”.
2
3. Select “C-Media CM106 Audio Device”, then
click “Configure”.
3
4. Select “5.1 Surround” from Audio Channels, then
click “Next”.
4
5
6
5
Installation
1
2
3
4
5
6
Installation for Windows XP
IMPORTANT: INSTALL SOFTWARE FIRST.
DO NOT connect the Docking Station before installing the
software, or the system may fail to work correctly.
Go to http://www.belkin.com/highspeeddock/support/ to
check for updates and download the latest driver for Windows
XP before installing.
NOTE: You must have administrator privileges to install the
Docking Station’s drivers. If you do not have administrator
privileges, log off Windows and log in with a user name that
has these privileges before beginning the installation.
NOTE: During the installation, the screen may flicker. This is
normal. The flickering occurs while the system detects and
installs the Docking Station.
While the software is being installed, if the message, “The
software you are installing has not passed Windows Logo
testing... ” appears (it may appear more than once), click
“Continue Anyway”. This product has been thoroughly tested
to work with all Windows operating systems.
After the software installation is complete, a prompt will
direct you to connect the Docking Station to your
notebook computer.
CONNECT HARDWARE LAST
NOTE: Set the switch on the ExpressCard adapter to the
“B” position.
6
Installation
When the message, “Please insert the High-Speed Docking
Station into your notebook ExpressCard slot. Then, click ‘OK’.”
appears, connect your Docking Station to the notebook and
click “OK”.
After that, you will be prompted to restart your computer.
Please do so at that time.
How do I uninstall the High-Speed Docking
Station’s drivers?
1. Click on the “Start” menu, then open the Control Panel.
2. Click on “Add or Remove Programs”.
3. Select “C-Media USB Sound Driver” and then click on
“Uninstall/Change”.
4. Select “Belkin Notebook Expansion...” and then click on
“Uninstall/Change”.
5. Your drivers are now successfully uninstalled from
your computer.
How do I switch the default audio device?
Your Docking Station features a built-in, 5.1 surround-sound
audio controller. When you connect the Docking Station to
your notebook, it may switch the default audio device from
your notebook to the dock. If you want to hear the audio from
your notebook, you may need to change the default audio
device in Windows XP.
1. Open the Control Panel and select “Sounds and
Audio Devices”.
2. On the “Audio” tab, under “Sound Playback”, select a
device other than “USB Audio”.
7
1
2
3
4
5
6
Installation
1
2
3
4
5
6
How do I connect devices to the Docking Station?
NOTE: Always keep the Docking Station connected to
the power adapter supplied with the product. The
Docking Station will not function without the power
adapter connected.
You may connect devices to the appropriate port on the
Docking Station while your notebook is running. A slight
delay is normal before the notebook recognizes the
new device.
USB 2.0 Ports
Connect any USB device to one of the Docking Station’s five
USB ports.
NOTE: If you connect a USB device to the Docking Station
and it does not work as expected, test the device by
connecting it directly to one of your notebook’s available
USB ports.
Ethernet Port
The Docking Station’s Ethernet port is a USB 2.0-to-FastEthernet adapter. Connect a network cable (sold separately) to
the Ethernet port for high-performance network access. The
Ethernet-port indicators’ lights work as follows:
• The light at the bottom of the port lights solid when there
is a network connection.
• The light at the top of the port lights solid when there is
network activity.
8
Installation
Video Ports (VGA or DVI)
Connect a VGA cable (sold separately) to the VGA
video-output port on the Docking Station and to an external
monitor. If you have a DVI-capable monitor, you will get better
performance by connecting a DVI cable to the DVI videooutput port on the Docking Station and to the
external monitor.
NOTE: Use this cable instead of the VGA cable and NOT in
addition to it.
Either cable can be connected and disconnected at any time
without unplugging the Docking Station from the ExpressCard
slot on your notebook. The Docking Station supports all
analog CRT and LCD monitors.
How do I disconnect the Docking Station?
1. lf the Docking Station is transferring data through one of its
connections, wait until the data has finished transferring.
2. If you are watching a DVD or other streaming video, please
stop it before disconnecting.
3. If you are connected using the Ethernet port, close your
network connection.
4. Disconnect the ExpressCard cable and/or remove the
ExpressCard from the notebook computer.
You can disconnect the Docking Station while the computer
is running. However, DO NOT reconnect the Docking Station
while the notebook is running. In most notebook computers
this will function correctly, but in a few it will cause a system
error that could require you to reset your computer.
9
1
2
3
4
5
6
Installation
1
2
3
NOTE: lf the video output of the Docking Station is configured
in Extended Mode (see “Video Modes”, below) when you
disconnect the Docking Station, any open windows on the
external monitor move to the primary notebook screen. When
the Docking Station is reconnected to the notebook, the video
output is again configured for Extended Mode on the external
monitor. However, windows that were previously on the
external monitor will stay on the primary notebook screen.
4
Video Modes
5
• Primary Mode
• Extended Mode
• Mirror Mode
6
The Docking Station’s video output works in three modes:
Primary Mode
Primary Mode displays what would usually be on your
notebook on the monitor attached to the Docking Station.
This mode allows you to use a larger monitor but turns your
notebook’s screen off so that you can type on your computer
without the distraction of two of the same displays. Be sure
to have a monitor attached to your Docking Station BEFORE
entering into Primary Mode, as doing so without the monitor
will disable your notebook’s screen and you could lose your
display until the Docking Station is unplugged.
To set up the Docking Station to use Primary Mode, follow
these steps:
1. Position the mouse on top of the “B” icon in your
computer’s system tray.
10
Installation
2. Select “Primary Mode”.
3. Your displays may flicker at this time and you may be asked
to restart your computer.
1
Extended Mode
2
Extended Mode lets you use more than one display with your
notebook computer, which offers several advantages. For
example, in Extended Mode, you can:
3
• Read email on one display and open attachments
on the other
4
• Expand a spreadsheet across both monitors
5
• Increase your working area for graphics-editing by putting
all the pallets and toolbars on the second display
• Keep your desktop on the notebook monitor and watch a
DVD on your external monitor
To set up the Docking Station to operate in Extended Mode,
follow these steps:
1. Position the mouse on top of the “B” icon in your
computer’s system tray.
2. Select “Extended Mode”.
3. Your displays may flicker at this time and you may be asked
to restart your computer.
11
6
Installation
1
2
3
4
5
6
Mirror Mode
Mirror Mode creates an identical display of your notebook
screen on the external monitor. This is useful, for example,
if you want to use a larger desktop monitor rather than a
small notebook screen. In Mirror Mode, the Docking Station
automatically selects settings (screen resolution, color quality,
and refresh rate) for the external monitor that will allow the
best resolution based on your notebook’s settings.
NOTE: lf you do not see some icons on your external
monitor because the monitor display size is different from
your notebook’s screen size, scroll over those icons on your
notebook and the monitor display will shift to display
the icons.
Switching from Extended Mode to Mirror Mode
If you change the video output to Extended Mode and then
want to switch back to Mirror Mode, follow these steps:
1. Position the mouse on top of the “B” icon in your
computer’s system tray.
2. Select “Mirror Mode”.
3. Your displays may flicker at this time and you will be asked
to restart your computer.
Adjusting Video Settings
For any display mode you use, you can adjust the resolution
of either the monitor attached to your Docking Station or your
notebook display.
Resolution refers to the number of columns and rows of pixels
utilized by a display. In general, the higher the
12
Installation
number of columns and rows, the more clear and crisp your
computer screen will appear.
1
There are two ways to change your display resolution: (1),
through the Belkin system-tray application; or (2), through the
Windows Control Panel.
2
To change the resolution using the Belkin
system-tray application:
3
1. Position the mouse on top of the “B” icon in your
computer’s desktop system tray (usually at the
bottom-right of your desktop screen) and right-click on it.
4
2. Position the mouse on top of “Resolution” and a
pop-up menu will appear showing several
resolution-setting alternatives.
3. Left-click on the resolution setting you wish to use.
To change the resolution using the Windows Control Panel:
1. Position the mouse anywhere on your notebook’s desktop,
then right-click and select “Properties”.
2. On the “Display Properties” screen, click the
“Settings” tab.
3. To change the screen resolution or color quality, select
those options on the screen. For an external monitor, you
can select any resolution or color quality supported by that
monitor.
4. To change the refresh rate, click “Advanced” and then click
“Monitor”.
5. Select a refresh rate from the “Screen refresh rate”
pull-down list. Click “OK” to close the “Monitor” tab.
6. Click “OK” again to close the “Display Properties” screen.
13
5
6
Installation
1
2
3
4
5
6
What happens when my notebook goes into standby or
hibernate mode?
If the notebook goes into standby or hibernate mode, and the
Docking Station is connected to a notebook and an external
monitor, the external monitor display goes blank.
Closing the lid of your notebook while using your Docking
Station may cause your computer to enter these modes and
disable your external monitor. To avoid this problem, Belkin
has created an application that overrides a lid-activated
hibernation mode while your computer is attached to the
Docking Station. We highly recommend installing this
application when you run the installation. However, if you did
not install this driver at initial installation, you can do so at any
time by repeating the driver-install process and selecting the
application at the appropriate point.
If your notebook goes into hibernate mode, the external
monitor display keeps the same settings it had before the
notebook went into hibernate mode when the notebook
returns to an active state. However, if the external monitor is
set for Extended Mode, windows that were previously visible
on the external monitor will not move back to that secondary
monitor. In addition, if the external monitor is in Extended
Mode and the notebook requires a login after standby or
hibernate mode, the login screen appears on the primary
notebook monitor, not the external monitor.
14
Installation
How do I uninstall the Docking Station drivers?
To uninstall your Docking Station drivers:
1. Click on the “Start” menu, then open the
“Control Panel”.
2. Click on “Add or Remove Programs”.
3. Select “C-media USB Sound Driver” and then click on
“Remove” at the bottom of the screen.
4. Select “Belkin High-Speed Docking Station.....” and then
click on “Remove” at the bottom of the screen.
5. Your drivers should then be successfully uninstalled from
your computer.
15
1
2
3
4
5
6
Troubleshooting Guide
1
2
3
4
5
6
If your Docking Station does not operate as expected, check
these items to try and correct the problem. If the problem
persists, please call Belkin Technical Support at
800-223-5546 ext. 2263.
General
The Docking Station does not appear to be on.
1. Check to be sure that the power adapter included with the
Docking Station is plugged into the Docking Station and
into a working electrical outlet. Do not use the adapter that
came with your notebook or adapters other than the one
supplied with the Docking Station.
2. If the bottom light on the front of the Docking Station is not
green, the power adapter is not working properly: be sure
that the power adapter is plugged into a working electrical
outlet. If the light is still not lit, there may be a problem with
the Docking Station. Please call Belkin Technical Support
so that we may replace your product.
My notebook will not “connect” to the Docking Station.
1. Unplug the Docking Station from your notebook and restart
your computer.
2. Insert the installation CD into your notebook’s CD-ROM or
DVD drive.
3. If the CD does not automatically begin, double-click on the
CD-ROM drive icon in Windows Explorer.
4. Follow the instructions on the installer to reinstall
the CD.
5. If the Docking Station still does not connect, you can test
its operation with these steps:
16
Troubleshooting Guide
a. Make sure that the power adapter is connected to
the Docking Station.
b. Plug a USB device, such as a USB mouse, into one of
the USB ports of the Docking Station. Restart
your notebook.
c. If Windows now finds new hardware, refer to “Installing
the Software Drivers” above and follow the steps to
reinstall the software drivers. If installation is successful,
the USB device plugged into the Docking Station should
work properly. If Windows does not find new hardware,
there may be a problem with the Docking Station.
Video
The display on my monitor is blank.
1. Make sure that the ExpressCard is firmly in place in your
notebook’s ExpressCard slot, that the cable is connected
to your notebook, and that the power adapter is connected
to the Docking Station and to a working power outlet. Make
sure that the video cable is securely connected to the VGA
or DVI video-output port and secured with the fixing screws
on both sides.
2. Make sure that the notebook connected to the Docking
Station is running properly and is not in standby or
hibernate mode. When the notebook is in standby and
hibernate mode, the monitor display is always blank.
17
1
2
3
4
5
6
Troubleshooting Guide
1
2
3
4
5
6
If you check both of the above and your monitor still does
not display correctly, you may need to reinstall the Docking
Station driver. Follow these steps to make sure that the driver
is properly installed:
1. Unplug the Docking Station from your notebook and restart
your computer.
2. Insert the installation CD into your notebook’s CD-ROM or
DVD drive.
3. If the CD does not automatically begin, double-click on the
CD-ROM or DVD drive icon in Windows.
4. Follow the instructions on the installer to reinstall
the drivers.
When I close the lid of my notebook, the external monitor
goes blank.
By default, most notebooks go into standby or hibernate mode
when the lid is closed. To change this, you need to change the
option in Windows.
For Windows XP
1. Click on the “Start” menu, then open the Control Panel.
2. Click on “Performance and Maintenance”, then
“Power Options”.
3. Click the “Advanced” menu button.
4. Select “When I close the lid of my portable computer:” and
change the option from “Stand by” or “Hibernate” to “Do
nothing”.
18
Troubleshooting Guide
For Windows Vista
1. Click on the “Start” menu, then open the Control Panel.
2. Click on “Hardware and Sound”.
3. Click “Change what the power buttons do” under
“Power Options”.
4. Select “When I close the lid” and change the option from
“Sleep” or “Hibernate” to “Do nothing”.
When I close the lid of my notebook, the external monitor
displays blurred images or other errors.
Some applications, particularly DVD-player software, have
difficulties with external monitors when the lid of a notebook
is closed. To avoid this problem, we recommend doing one of
the following:
1. Open the DVD-player software and play the movie AFTER
closing the lid on your notebook.
2. While the DVD is playing, pause the movie before closing
the lid. After closing the lid, un-pause the movie.
My external monitor displays a blurred image.
We recommend that you auto-adjust the external monitor
occasionally to realign its settings with the video output of
the Docking Station. This action should fix most of the issues
related to the video quality on the external monitor. Refer to
your monitor’s user manual for the auto-adjust procedure.
19
1
2
3
4
5
6
Troubleshooting Guide
1
On my notebook’s “Display Properties” screen, I do
not see an entry for the “Default Monitor on Belkin
High-Speed Docking Station....”
2
1. Make sure that the Docking Station is powered on and
connected to the ExpressCard port.
3
2. Make sure that you have successfully installed the software
drivers as described in the “Installing the Software Drivers”
section, above.
4
3. Restart your notebook.
5
My monitor shows an “Unknown Resolution Mode” or
similar message.
6
An error message might appear if the screen resolution is
set to a number that is not supported by either the Docking
Station or the external monitor. Select a lower screen
resolution until the Windows display appears on the monitor.
The external monitor connected through the Docking
Station is flickering.
Flickering is usually associated with CRT monitors and caused
by a low refresh rate. Always try and use the maximum refresh
rate available for your monitor.
Monitor refresh rates can be adjusted as follows:
1. Position the mouse anywhere on your notebook’s desktop;
right-click and select “Properties”.
2. On the “Display Properties” screen, click the
“Settings” tab.
3. To change the refresh rate, click “Advanced” and then click
“Monitor”.
20
Troubleshooting Guide
4. Select a refresh rate from the “Screen refresh rate” pulldown list. Be sure to select a refresh rate that is supported
for the resolution and color-quality settings, as indicated in
the table above. Click “OK” on the “Monitor” tab.
5. Click “OK” to close the “Display Properties” screen.
DVD playback is controlled by your notebook’s system and
by the DVD application, not by the Docking Station. Many
DVD-software packages are not capable of displaying a video
image on a secondary monitor using the Docking Station’s
Extended Mode. If you encounter this problem, change the
video mode to Mirror or Primary Mode and try again. Belkin is
actively working with DVD-player software authors to enable
more modes on their software. As of the time of publication of
this User Manual, however, the chart below outlines the known
video-playback capabilities of many popular DVD-software
packages.
Mirror
Mode
WinDVD® 7.0
Extended
Mode
Primary
Mode
X
X
PowerDVD 7.0
X
Media Player Classic (6.4.8.4)
X
X
DVD X Player (4.0)
X
X
Nero ShowTime (3.0.1.3)
X
X
KMPlayer (2.9.2.1100)
X
X
X
21
2
3
I cannot play a DVD using the Docking Station.
Video Mode
1
X
4
5
6
Troubleshooting Guide
1
2
3
4
5
In Mirror Mode, if the external monitor screen goes blank
when you try to play a DVD, then your system and the DVD
application do not support DVD playback through the Docking
Station.
In Extended Mode, if this message appears on the external
monitor screen—“Due to limitations of your notebook’s
display device, this video can only play back on one of your
monitors. Please, move the video window completely onto
that monitor.”—or, if an error message containing the word
“overlay” appears, we recommend that you move the
DVD-playback application to your notebook and restart
the application.
6
22
Troubleshooting Guide
Ethernet Connection
My Ethernet connection is not working.
1. Be sure that the power adapter is plugged into the Docking
Station and into a working electrical outlet,
that the correct drivers are installed, and that the network
cable is connected to the Docking Station’s Ethernet port.
2. On your notebook, open the Control Panel and select
“Network Connections”. Move the cursor over the “Local
Area Connection” icons. One icon will display “USE 2.0 Fast
Ethernet Adapter”.
3. Double-click on this icon. If the “Connection Status”
indicates a network connection, the port is correctly
configured and the Ethernet connection should
work properly.
4. If the status does not indicate a connection, test the cable
by plugging it into the network port on your notebook. If
the status still does not indicate a connection, the problem
is with the cable or the network and is not related to the
Docking Station. If the status indicates a connection but there
is still a problem with the operation of your Ethernet device,
a problem might exist with the Docking Station. Please call
Belkin Technical Support at 800-223-5546 ext. 2263.
23
1
2
3
4
5
6
Troubleshooting Guide
1
2
Network Connection
My network connection is not working.
In order to connect to some networks, you may have to know
the NIC-card address for the network card on the notebook.
Follow these steps to locate the address:
3
1. Make sure the Docking Station is connected to your
notebook using the ExpressCard cable.
4
2. Open the Control Panel on your notebook and select
“Network Connections”. The following icons are displayed:
Local Area Connection, Wireless Connection (if your
notebook has wireless capabilities), and Local Area
Connection x (where x is a number, such as 2, 3, or 4). The
third icon corresponds to the network connection for the
Docking Station.
5
6
3. Right-click on that icon and select “Properties”.
4. On the “General” tab, look for the adapter name containing
“USB-to-Fast Ethernet Adapter”. Roll the cursor over the
adapter name to display the
NIC-card address.
24
Troubleshooting Guide
Audio
I cannot adjust the volume from my notebook’s keyboard.
It the volume control does not work using the volume-control
keys on your notebook, use the mouse to adjust volume
using the controls from the notebook’s system tray. We also
recommend using Microsoft® Internet Explorer and pointing
your browser to update.windows.com to update to the most
recent version of Windows.
I cannot hear anything through my notebook’s speakers.
Some computers automatically turn off their notebook
speakers when the Docking Station is plugged in and
default to the dock speakers. To enable your notebook
speakers again:
1. Close all programs on your notebook.
2. Open the Control Panel and select “Sounds and Audio
Devices” (in Windows XP, select “Sounds, Speech and
Audio Devices”).
3. On the “Audio” tab, under “Sound Playback”, select a
device other than “C-Media USB Sound Device”.
4. On the “Audio” tab, under “Device Volume”,
click “Advanced”.
5. Uncheck the “Mute All” box.
Devices
Devices on the Docking Station’s USB ports do
not operate.
You must install the software drivers (as described in the
“Installing the Software Drivers” section, above) in order for
USB devices to work with the Docking Station. If you plug
a device into a USB port on the Docking Station before you
25
1
2
3
4
5
6
Troubleshooting Guide
1
2
3
4
5
6
install the drivers, your notebook will not recognize the device
and the device will not work. lf the software is installed and
devices do not work, follow these steps:
1. Be sure that the power adapter is plugged into the Docking
Station and into a working electrical outlet, and that the
ExpressCard is firmly connected to the notebook.
2. Unplug and re-plug the USB cable into the same USB port.
If this does not correct the problem, plug the device into a
notebook USB port. If the device still does not work, there
may be a problem with the device.
3. If the device works, plug the device into each of the
Docking Station’s USB ports to verify that it works with
each. If some ports do not work, there may be a problem
with the Docking Station. Call Belkin Technical Support at
800-223-5546 ext. 2263.
Technical Support
Technical support is available to all registered users
of Belkin products.
Web Support
You may find the answer to your problem in the Frequently
Asked Questions (FAQ) section of the “Support Center” area
on the Belkin website: www.belkin.com.
Telephone Support
There is no charge for technical support except long-distance
charges where applicable. Please visit www.belkin.com for
telephone-support hours.
Registering Your Belkin Product
Register your Belkin product online at www.belkin.com.
26
Information
FCC Statement
DECLARATION OF CONFORMITY WITH FCC RULES FOR
ELECTROMAGNETIC COMPATIBILITY
We, Belkin International, Inc., of 501 West Walnut Street, Compton, CA
90220, declare under our sole responsibility that the product:
F5U273
to which this declaration relates:
Complies with Part 15 of the FCC Rules. Operation is subject to
the following two conditions: (1) this device may not cause harmful
interference, and (2) this device must accept any interference received,
including interference that may cause undesired operation. This
equipment may only be operated indoors. Operation outdoors is in
violation of 47 U.S.C. 301 and could subject the operator to serious
legal penalties.
CE Declaration of Conformity
We, Belkin International, Inc., declare under our sole responsibility that the
F5U273, to which this declaration relates, is in conformity with Generic Emissions
Standard EN55022:1998 Class B, EN50081-1, and with Generic Immunity
Standard EN50082-1:1992.
27
1
2
3
4
5
6
Information
1
2
3
4
5
6
Belkin International, Inc., Limited Lifetime
Product Warranty
What this warranty covers.
Belkin International, Inc., warrants to the original purchaser of this Belkin
product that the product shall be free of defects in design, assembly, material,
or workmanship.
What the period of coverage is.
Belkin International, Inc., warrants the Belkin product for the lifetime of
the product.
What will we do to correct problems?
Product Warranty.
Belkin will repair or replace, at its option, any defective product free of charge
(except for shipping charges for the product).
What is not covered by this warranty?
All above warranties are null and void if the Belkin product is not provided
to Belkin International, Inc., for inspection upon Belkin’s request at the sole
expense of the purchaser, or if Belkin International, Inc., determines that the
Belkin product has been improperly installed, altered in any way, or tampered
with. The Belkin Product Warranty does not protect against acts of God (other
than lightning) such as flood, earthquake, war, vandalism, theft, normal-use wear
and tear, erosion, depletion, obsolescence, abuse, damage due to low voltage
disturbances (i.e. brownouts or sags), non-authorized program, or system
equipment modification or alteration.
How to get service.
To get service for your Belkin product you must take the following steps:
1. Contact Belkin International, Inc., at 501 W. Walnut St., Compton CA
90220, Attn: Customer Service, or call (800)-223-5546, within 15 days of the
Occurrence. Be prepared to provide the following information:
a. The part number of the Belkin product.
b. Where you purchased the product.
c. When you purchased the product.
d. Copy of original receipt.
2. Your Belkin Customer Service Representative will then instruct you on how to
forward your receipt and Belkin product and how to proceed with your claim.
28
Information
Belkin International, Inc., reserves the right to review the damaged Belkin
product. All costs of shipping the Belkin product to Belkin International, Inc.,
for inspection shall be borne solely by the purchaser. If Belkin determines, in its
sole discretion, that it is impractical to ship the damaged equipment to Belkin
International, Inc., Belkin may designate, in its sole discretion, an equipment
repair facility to inspect and estimate the cost to repair such equipment. The
cost, if any, of shipping the equipment to and from such repair facility and of
such estimate shall be borne solely by the purchaser. Damaged equipment must
remain available for inspection until the claim is finalized. Whenever claims are
settled, Belkin International, Inc., reserves the right to be subrogated under any
existing insurance policies the purchaser may have.
How state law relates to the warranty.
THIS WARRANTY CONTAINS THE SOLE WARRANTY OF BELKIN
INTERNATIONAL, INC., THERE ARE NO OTHER WARRANTIES, EXPRESSED
OR, EXCEPT AS REQUIRED BY LAW, IMPLIED, INCLUDING THE IMPLIED
WARRANTY OR CONDITION OF QUALITY, MERCHANTABILITY OR FITNESS
FOR A PARTICULAR PURPOSE, AND SUCH IMPLIED WARRANTIES, IF ANY,
ARE LIMITED IN DURATION TO THE TERM OF THIS WARRANTY.
Some states do not allow limitations on how long an implied warranty lasts, so
the above limitations may not apply to you.
IN NO EVENT SHALL BELKIN INTERNATIONAL, INC., BE LIABLE FOR
INCIDENTAL, SPECIAL, DIRECT, INDIRECT, CONSEQUENTIAL OR MULTIPLE
DAMAGES SUCH AS, BUT NOT LIMITED TO, LOST BUSINESS OR PROFITS
ARISING OUT OF THE SALE OR USE OF ANY BELKIN PRODUCT, EVEN IF
ADVISED OF THE POSSIBILITY OF SUCH DAMAGES.
This warranty gives you specific legal rights, and you may also have other rights,
which may vary from state to state. Some states do not allow the exclusion or
limitation of incidental, consequential, or other damages, so the above limitations
may not apply to you.
29
1
2
3
4
5
6


