1
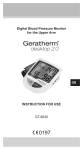
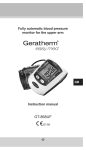
Digital Blood Pressure Monitor
for the upper arm
GB
INSTRUCTION MANUAL
GT-5907
Contents
Designated use ......................................................... 28
Precautionary measures .......................................... 29
Warranty ..................................................................... 31
Information you should know before
operating the unit ...................................................... 31
About the unit
Function description ................................................ 32
Explanation of displays............................................ 33
Preparation for use
Installing/Replacing batteries .................................. 34
Attaching the pressure cuff ..................................... 34
Posture during measurement .................................. 35
Operations
Setting the clock and date .......................................
Measuring blood pressure ......................................
WHO classification of blood pressure
for adults .................................................................
Recalling memories .................................................
Erasing memories ..................................................
36
37
39
40
40
Care and maintenance ............................................... 41
GB
Disposal ..................................................................... 43
Error messages ......................................................... 43
Specifications ............................................................. 45
Quality standard ........................................................ 46
Symbol index ............................................................. 46
Annex ......................................................................... 47
Designated use
This unit uses the non-invasive measurement method in
order to measure systolic and diastolic blood pressure, as
well as the heart rate.
The measurement is conducted on the upper arm.
All values can be read on an LCD screen.
This unit has been developed for home and professional
use and should only be used by adults. The cuff circumference is 22 to 30 cm (8.7 to 11.81 inches).
28
Precautionary measures
• This manual and the product are not substitutes for visiting the doctor.
Neither the information contained herein nor this product
may be used to diagnose or treat health problems, or to
prescribe drugs. If you have or suspect that you have a
medical problem, please seek immediate advice from
your doctor.
• Do not conduct any measurements if the temperature is
low (below +5 °C) or high (over +40 °C), or if the relative
humidity is over 90 %, as this can lead to inaccurate readings.
• Wait 30 to 45 minutes, before taking a measurement if you
have just had a caffeinated drink or a cigarette.
• Relax for at least 5 to 10 minutes before taking a measurement.
• Please wait 3 to 5 minutes between measurements, so
that your blood vessels can return to the state they were
in prior to measurement. You may have to adapt the waiting time to your personal physiology.
• It is recommended that you use the same arm for each
measurement (preferably the left) and take the measurement at about the same time every day.
• Sit down comfortably with your elbows placed on the table
and both feet on the ground. Please do not interlock your
legs during the measurement.
• Wrap the cuff snug around your upper arm and lay your
arm on a flat surface at the same level as your heart.
• Take the measurement at room temperature in a quiet and
stress-free environment.
• The unit should not be moved or shaken during the measurement. Please do not speak during the measurement.
• Please keep in mind that blood pressure naturally varies
depending on the time of day and is affected by many
different factors. Blood pressure is usually highest at work
and reaches its lowest level during the sleep phase.
• Blood pressure measurements should be assessed by a
doctor or trained healthcare professional who is familiar
with your medical history. If you use the unit and regularly
record the results, please keep your doctor informed with
regard to the ongoing changes in your blood pressure.
• If you suffer from a cardiovascular disease (such as
atherosclerosis), diabetes, a liver or kidney disease, severe hypertension or peripheral circulatory disorders, etc.,
please consult your doctor before using this unit.
• This unit is not suitable for use by people with cardiac
arrhythmias.
29
GB
Precautionary measures
GB
• The blood pressure measurements conducted with
this unit are equivalent to measurements obtained by a
trained observer in accordance with the values achieved
using the cuff/stethoscope auscultation method and are
within the specified EN 1060-4 standard limits.
• If the cuff causes any discomfort during the measurement,
press the “START” button to turn off the unit immediately.
• If the pressure is over 300 mmHg and the cuff does not
deflate automatically, pull off the Velcro strap to detach
the cuff.
• Do not use this appliance on infants, children or persons
who cannot express their own intentions.
• To avoid accidental strangulation, keep the product away
from children and do not place the hose around the neck.
• Measuring too frequently may result in circulatory disorders, which can cause unpleasant sensations such as localised bleeding under the skin or temporary numbness in
your arm. These symptoms do not usually last long. However, if you have not recovered after some time, please
consult your doctor.
• Please take into consideration the electromagnetic compatibility of the unit (e.g. disruptions to the power supply,
radio frequency interference, etc.) see annex. Please
only use the unit indoors. To avoid inaccurate results due
to electromagnetic interference between electrical and
electronic equipment, please do not use the unit near
mobile phones or microwave ovens. In the case of devices whose maximum power exceeds 2 W, the minimum
distance from your blood pressure monitor should be 3.3
metres.
• The unit is not waterproof. Never immerse this instrument
in any liquids.
• Do not use the instrument if you think it is damaged or if
you notice anything unusual.
30
Warranty
The warranty for this blood pressure monitor is valid for any
error on the part of the manufacturer under normal use for
3 years from the date of purchase. If your unit does not
function properly due to defective parts or assembly, we will
repair it free of charge.
With the exception of the battery and cuff, all parts of the
unit are subject to this warranty. Damage caused by improper handling of your unit is not guaranteed.
We recommend that the accuracy of the unit be checked
after 2 years from manufacturing date by an authorized
laboratory.
This checking procedure is not a service provided under
the warranty.
Information you should know before
operating the unit
What is blood pressure?
A force is created by the heart as the ventricleforcibly ejects
blood into the blood vessels and through the vascular system. Another force is created by the arteries as they resist
the blood flow. Blood pressure is the result of these two
forces.
What are systolic and diastolic pressures?
Systolic pressure is the highest pressure at the height of
the heart‘s contraction. Diastolic pressure is the lowest
pressure when the heart is resting.
Is my blood pressure normal?
See the blood pressure classification chart released by the
WHO (World Health Organization) on page 39 for evaluation of your blood pressure level.
What about low blood pressure?
In general, a lower blood pressure reading is better unless
causes unpleasant symptoms such as fainting and/or lightheadedness.
31
GB
Information you should know before
operating the unit
Fluctuation and variation in blood pressure
The following chart shows possible blood pressure fluctuations during a 24-hour period.
mmHg
systolic
diastolic
The following factors will influence blood pressure measurement results and cause variations:
GB
• Bathing
• Breathing
• Conversation
• Drinking alcohol
• Exercise
• Moving
• Mental tension
• Eating
• Temperature changes
• Thoughts
• Smoking etc.
About the unit
Function description
Based on oscillometric method and silicon integrate pressure sensor technology, blood pressure and heart rate can
be measured automatically and non-invasively which helps
to ease the operation. The Geratherm med control have 2 x
99 memories with date and time display, a big LCD screen
and arrhythmia detection. The RCC (radio controlled clock)
function can automatically receive the German radio clock
signal (DCF77) to adjust the clock accurately. And the colour LED for indicates the class according to WHO of your
blood pressure. Also the monitor has the function of averaging the latest three records.
32
About the unit
LCD Display
M EM
Memory
STA
RT
access for power supply
cuff
On/Off Button
The cuff is designed to fit arm sizes between
22 and 30cm (8.7 to 11.81 inches.)
Explanation of displays
Date/
Time
RCC Low Batterie
GB
Systolic
WHO
classification
Diastolic
Pulse
Group
Memory
Irregular Heart Beat
(IHB)
33
Preparation for use
Installing/ Replacing batteries
1. Insert the batteries into the battery
compartment matching correct polarities “+” and “-”.
2. Replace all batteries if the low battery
indicator appears.
3. Remove the batteries if the unit will
not be used for a long period of time.
4. REMOVE all of the BATTERIES
when utilizing an optional AC adapter.
Note:
It is recommended that the same type of alkaline batteries be used to avoid incompatibility. Rechargeable
batteries with a voltage of 1.2V are not suitable for
this product.
Keep batteries away from small children. Do not
throw batteries into fires: they could explode.
GB
Attaching the pressure cuff
1. Wrap the cuff around the left
arm. The arm should be bare.
2. Fasten the cuff. Don’t pull it
too strongly or make the cuff
too tight. The edge of the cuff
should be approximately 1 inch
from the crease of your elbow.
2. Attach the cuff on the right arm
as shown in the figure if it is not
possible to measure on the left
arm.
34
Preparation for use
Posture during measuring
1. Sit upright and ensure that
the cuff is at heart level. Relax and retain a natural posture during measurement.
2. Measure and record blood
pressure at the same time every day to establish your
blood pressure pattern.
AC adapter (accessory)
Use the device only with a medical approved stabilized AC adapter (6V, DC, 600mA).
Note:
1. No batteries are required during operation using
the AC adapter.
2. If AC adapter power is interrupted during measurement, the unit must be reset by disconnecting the
AC adapter from the unit.
3. Only use medical approved adapters that comply
with the specifications in this manual. Using other
adapters could cause damage your blood pressure monitor.
35
GB
Operations
Setting the clock and date
1. Clock Mode
Once you install the batteries, with two “beep”, the LCD
will display the time and date by turns. At the same time,
the machine enters the Radio Controlled Clock Mode with
twinkling. After the RCC receiving, the
the RCC symbol
machine enters the Clock Mode and the LCD displays the
time and date by turns. And the COLOUR CHANGE LED
will twinkle with the colour changed in random turn.
2. Radio Controlled Clock(RCC) Receiving
GB
a. Initial receiving:
Once you install the battery, the machine enters the
RCC Receiving Mode. The RCC symbol twinkles during
the receiving process. If clock data received, the time
and date will be adjusted automatically. And then enter
the Clock Mode. If no clock data received, the machine
enters Clock Mode and keeps the time and date unchanged.
When the machine is in the RCC Mode, you can skip
RCC receiving and enter the Clock Mode by pressing
“START” button.
b. Forced RCC Receiving
When the machine is in Clock Mode, keep on pressing both the button “START” and “MEM” at the same
time for two seconds, you will enter forced RCC mode
and the RCC symbol is twinkling. If clock data received,
the time and date will be adjusted automatically. And
then enter the Clock Mode with two “beep”. If no clock
data received, the machine enters Clock Mode with long
beep and keeps the time and date unchanged.
You can skip forced RCC Mode by pressing the button
“START”. Then the machine enters the Manual Clock Adjusting mode.
c. Periodical receiving
The machine will automatically receive the RCC signal
at the time 2:05 and 14:05 every day. You can skip the
receiving process by press the button “START” to enter
clock mode.
36
Operations
3. Manual Clock Adjusting
Normally, the time and date can be adjusted by RCC
signal automatically. But you also can try manual clock
adjusting if no RCC signal or weak signal.
a. When the machine is in Clock Mode, press the “START”
and “MEM” button at the same time (abt. 2 sec.), the
machine enters Forced RCC Receiving mode, then
press “START” button, the machine enters manual
Clock Adjusting Mode.
b. The number of year will twinkle first. Press “START”
button continuously, the numbers of month, day, hour
and minute will twinkle in turn. While the number is twinkling, press “MEM” button to increase the corresponding number. Keep on pressing the button “MEM”, the
number will increase fast.
c. You can exit the Clock Adjusting Mode by pressing button “START” when the number of minute is twinkling,
then enter the Clock Mode.
d. When you change the batteries, the clock will be reset.
You can readjust clock or let the monitor modifying the
clock by RCC automatically.
Measuring blood pressure
a. After your body is in a comfortable
position, press the “START” button.
After a long “beep”, BPM will verify
itself with LCD display all automatically, and the COLOUR CHANGE
LED will lighten with 3 colours by
turn (picture 1).
pic. 1
b. Then the LCD twinkle the current group sign and show
the total of memories in this group. Now you can modify the current group number by pressing the “START”
button, and confirm the current group by pressing the
“MEM” button.
37
GB
Operations
c. Once you choose the group, and
if it already has memory, LCD will
show the latest result with the LED
indicator (picture 2).
If machine does not have memory
before, the LCD will show six “0”.
d. One second later, LCD shows a
single “0”. While the “down arrow” pic. 2
does not twinkle until the air pressure is stable, and then it begins to measure automatically.
e. Then the monitor begins to pressurize automatically.
During the measurement, the current pressure will display on the LCD, and the bars will automatically rise up
or fall down with the current pressure in the cuff. The
heart sign will glimmer with the heartbeat during the
pressure are falling down.
GB
f. After measurement, the result of
systolic, diastolic and pulse rate
will all display on LCD. And irregular heartbeat symbol and blood
pressure classification indicator
will twinkle (picture 3). The result
will be automatically memorized by
itself. And the COLOUR CHANGE
LED will also indicate the blood pic. 3
pressure classification.
g. During the measurement, you can turn off the monitor
by press the “START” button.
h. Pressing “START” button after measuring, machine will
be turn off, or it will be automatically shut down after 1
minutes of none use.
Note:
If the symbol “
” appears, it means the unit has
detected irregular pulse during measurement. If the
symbol appears regularly please consult a qualified
physician for professional advice.
38
Operations
WHO classification of blood pressure for adults
diastolic pressure mmHg
Severe Hypertension (Grade 3)
Moderate Hypertension (Grade 2)
Mild Hypertension (Grade 1)
High - Normal
Normal
Optimal
systolic pressure mmHg
Blood pressure
classification
Optimal
Systolic BP
mm HG
Diastolic
BP mm Hg
Color
indicator
< 120
< 80
Green
Normal
120 – 129
80 – 84
Green
High – Normal
130 – 139
85 – 89
Yellow
Stage 1
Hypertension
140 – 159
90 – 99
Red
Stage 2 Hypertension
160 – 179
100 – 109
Red
Stage 3 Hypertension
>= 180
>= 110
Red
Please note that other risk factors (e.g. diabetes,
obesity, smoking, etc.) need to be taken into consideration and may affect these figures. Consult with
your physician for accurate assessment.
39
GB
Operations
Recalling memories
a. Under the clock-displaying mode, press button “MEM”
will enter the mode of recalling memories. LCD will
show how many results it has in the current group. Now
you can modify the current group number by pressing
the “START” button, and confirm the current group by
pressing the “MEM” button.
b. When the group is selected, the average of last three
records will be displayed. If machine does not have
memory before, the LCD will show four “0”.
c. After that the latest result will be displayed, which is 01
for memory number. The time which you measured will
also be displayed. Continuously press the “MEM” button, previously memories will show by turns.
d. All memories have the WHO classification and the COLOUR CHANGE LED will also indicate the blood pressure classification.
GB
e. If it has no memory (or all memories have been deleted),
then LCD will show “0” for systolic, diastolic, and show
“00” for the numbers of memory, heart rate.
f. Press “MEM” button again after the last memory, the
machine will power off. Under the memory-displaying
mode, it will be automatically power off after 1 minute
of none use. Or you can press “START” button to shut
down the machine.
Erasing memories
When it displays one memory (no matter which memory),
holding on pressing “MEM” button for three seconds, all
memories will be deleted with three “beep”. LCD will show
the “- -” before you release the button, then it comes to the
mode without memory.
40
Care and maintenance
Do not drop the unit. It is
not shock-proof.
Do not modify or disassemble the unit or the arm cuff.
GB
Do not twist the arm cuff.
Use a cloth moistened with
water or neutral detergent
to clean the body of the unit
and then wipe it dry.
41
Care and maintenance
Avoid thinning agents,
benzine, and other harsh
cleaners.
Keep the unit in a suitable
place.
Avoid high temperatures,
direct sunlight, high humidity level, and dust.
GB
Remove the batteries if the
unit will not be
used for a long time.
Do not press the START
button if the cuff has not
been properly wrapped
around the arm.
It is recommended the cuff should be disinfected 2 times
every week if needed (For example, in hospital or in clinique). Wipe the inner side (the side contacts skin) of the
cuff by a soft cloth squeezed after moistened with Ethyl alcohol (75-90%), then dry the cuff by airing.
42
Disposal
Observe the applicable regulations when disposing of the
device and batteries. This product must not be disposed of
together with domestic waste.
All users are obliged to hand in all electrical or electronic
devices, regardless of whether or not they contain toxic
substances, at a municipal or commercial collection point
so that they can be disposed of in an environmentally acceptable manner.
Please remove the batteries before disposing of the device/
unit.
Do not dispose of old batteries with your household
waste, but at a battery collection station at a recycling site or in a shop.
Error messages
Abnormality
LCD Display
shows abnormal result
LCD shows
low battery
symbol
Reason
Checkout
The cuff position was
not correct or it was
not properly tightened
Apply the cuff
correctly and try
again
Body posture was not
correct during testing
Review the
“BODY POSTURE DURING
MEASUREMENT” sections
of the instructions
and re-test.
Speaking, arm or
body movement, angry, excited or nervous during testing
Re-test when
calm and without
speaking or
moving during
the test
Irregular heartbeat
(arrhythmia)
It is inappropriate
for people with
serious arrhythmia to use this
blood pressure
monitor.
Batteries low
Change the
batteries
43
GB
Error messages
GB
LCD shows
“Er 0”
Pressure system is
unstable before measurement.
LCD shows
“Er 1”
Systolic pressure
detect fail
LCD shows
“Er 2”
Diastolic pressure
detect fail
LCD shows
“Er 3”
Pneumatic system
blocked or cuff is too
tight during inflation
LCD shows
“Er 4”
Pneumatic system
leakage or cuff is too
loose during inflation
LCD shows
“Er 5”
Inflation above
300 mm Hg
LCD shows
“Er 6”
Pressure is over
15 mm Hg for longer
than 3 min. At the start
of measurement the
pressure reading must
be below 15 mm Hg.
LCD shows
“Er 7”
EEPROM accessing
error
LCD shows
“Er 8”
Device parameter
check error
LCD shows
“Er A”
Span error
BPM no
response when
you press
button. BPM
hang
Incorrect operation or
strong electromagnetic
interference
Don’t move
and try again.
Place the cuff
correctly and
try again
Measure
again after
5 minutes. If
the monitor is
still abnormal,
please contact
the local
distributor or
the factory.
Take out batteries for five
minutes, and
then reinstall
all batteries.
Technical alarm:
Should the recorded blood pressure (systolic or diastolic)
lies outside the limits specified in “Specifications” the technical alarm will appear on the display indicating either “HI”
or “Lo”. You should seek medical assistance and check the
accuracy of your procedure.
The limit values for the technical alarm are factory set and
cannot be adjusted or deactivated.
The signal shown on the display will disappear automatically after about 8 seconds.
44
Specifications
Model No.
GT-5907
Display System
Liquid Crystal Display
Measuring Method
oscillometric method, automatic
Power Source
4 alkaline “AA“ type batteries
air inflation and measurement
(1.5V) or AC adapter (6V, DC,
600mA)
Measuring Range
blood pressure measuring
range: 0 to 300 mmHg
Heart pulse rate range:
40 to 180 pulse beats /min
Accuracy
±3mmHg (blood pressure)
Memory
2 x 99 times with time and date
Low Battery Indicator
yes
±5% (pulse rate)
displaying
Auto Power-Off
after 1 minute
Battery Life
Approx.200 measurements
IP Classification
IPX0 (no protection)
Cuff size
22 to 30 cm (8.7 to 11.81 inches)
Operating Environment +5°C to +40°C; RH ≤ 90 %
Storage Environment
-20°C to +55°C; RH ≤ 90 %
Dimensions
160mm x 115mm x 69mm
Weight
364 g (monitor) +90 g (batteries)
Specifications are subject to change without notice for
purposes of product improvement.
45
GB
Quality standard
Geratherm® is certified in accordance with Council Directive 93/42/EEC and EN ISO 13485 and is entitled to affix
the CE-mark CE 0197 (Notified Body: TÜV Rheinland LGA
Products GmbH).
The blood pressure monitor conforms to
• EN 1060-1 (Non-invasive sphygmomanometers part 1:
General requirements) and
• EN 1060-3 (Non-invasive sphygmomanometers part
3: Supplementary requirements for electromechanical
blood pressure measuring systems)
• EN 1060-4 Non-invasive sphygmomanometers, Part 4:
Test procedures to determine the overall system accuracy of automated non-invasive sphygmomanometers
Symbol index
Follow instructions
for use
Type BF Equipment
Keep dry
Batch code
(mm/yyyy; month/year)
GB
90%
Store at a max. relative
humidity of 90 %
SN
Serial number
+55°C
Store between -20 °C
and +55 °C
Manufacturer
The device must not
be disposed of with
household waste.
Caution! Read the
instruction manual!
-20°C
46
Annex
Information on electromagnetic compatibility (EMC)
Electronic devices such as PCs and mobile phones can
lead to the exposure of medical devices in operation to
electromagnetic interference from other devices. This can
lead to malfunction of the medical device and create a potentially unsafe situation.
Medical devices should also not interfere with any other
devices.
The EN 60601-1-2 standard regulates the requirements for
EMC (electromagnetic compatibility) and defines the levels
of immunity to electromagnetic
interference and the maximum electromagnetic emission
levels for medical devices.
This blood pressure monitor, which is manufactured by
Geratherm Medical AG, complies with the EN 60601-1-2
standard in relation to both immunity and emissions.
However, special precautions should be observed:
please only use the device indoors and not in the vicinity
of mobile phones or microwave ovens. In the case of devices whose maximum power exceeds 2 W, the minimum
distance from your blood pressure monitor should be 3.3
metres.
47
GB
Annex
Guidance and manufacturer´s declaration – electromagnetic emissions
The device is intended for use in the electromagnetic environments listed below, and
should only beused in such environments:
Emissions test
Compliance
Electromagnetic environment - guidance
RF emissions CISPR 11
Group 1
RF energy is used only to maintain
device’s operation. Therefore, its RF
emissions are so low that it’s not likely to
cause any interference in nearby electronic equipment.
RF emissions CISPR 11
Class B
Harmonic emissions
IEC 61000-3-2
Class A
Voltage fluctuations / flicker
emissions IEC 61000-3-3
complies
The device is suitable for use in all
establishments, including domesticestablishments, and those directly connected
to the public low-voltage power supply
networkthat supplies buildings used for
domestic purposes.
Guidance and manufacturer´s declaration – electromagnetic emissions
The device is intended for use in the electromagnetic environments listed below, and
should only beused in such environments:
GB
Immunity test
IEC 60601 –
test level
Compliance
level
Electromagnetic environment
- guidance
Electrostatic
discharge (ESD)
IEC 61000-4-2
± 6 kV contact
± 8 kV air
± 6 kV contact
± 8 kV air
Floors should be wood, concrete
or ceramic tile. If floors are
covered with synthetic material,
the relative humidity should be at
least 30 %.
Power frequency
(50/60 Hz)
magnetic field
IEC 61000-4-8
3 A/m
3 A/m
Power frequency magnetic fields
should be at levels characteristic of a typical location in a
typicalcommercial or hospital
environment.
Recommended separation distances between portable and mobile RF communication
The device is intended for use in an electromagnetic environment where radiated RF
disturbancesare under control. User can help prevent electromagnetic interference by
keeping the device at a minimum distance from portable and mobile RF communications
equipment (transmitters). Below table details the maximum output power of transmitter:
Rated maximum Seperation distance according to frequency of transmitter / m
output power
of transmitters
in Watt
0.01
0.1
1
10
100
150 kHz to 80 MHz
d = 1.2 √P
80 MHz to 800 MHz
d = 1.2 √P
800 MHz to 2.5 GHz
d = 2.3 √P
0.12
0.38
1.2
3.8
12
0.12
0.38
1.2
3.8
12
0.23
0.73
2.3
7.3
23
For transmitters rated at a maximum output power not listed above, the recommended
separation distance d in metres (m) can be estimated using the equation applicable to the
frequency of the transmitter, where P is the maximum output power rating of the transmitter in watts (W) according to the transmitter manufacturer.
NOTE 1:
NOTE 2:
At 80 MHz and 800 MHz, the separation distance for the higher frequency range applies.
These guidelines may not apply in all situations. Electromagnetic propagation is affected by absorption and reflection from structures, objects
and people.
48
Annex
Guidance and manufacturer´s declaration – electromagnetic immunity
The device is intended for use in the electromagnetic environments listed below, and
should only be used in such environments:
IEC 60601 – Compliance
Immunity test
Electromagnetic environment - guidance
test level
level
Portable and mobile RF communications
equipment should be used no closer to any
part of the device, including cables, than
the recommended separation distance
calculated from the equation applicable to
the frequency of the transmitter.
Recommended separation distance:
Conducted RF
IEC 61000-4-6
Radiated RF
IEC 61000-4-3
3 Vrms
150 kHz to
80 MHz
3 V/m
80 MHz to
2.5 GHz
3 Vrms
d= 1.2 √P
3 V/m
d = 1.2 √P
80 MHz to 800 MHz
d = 2.3 √P
800 MHz to 2.5 GHz
where P is the maximum output power rating
of the transmitter in watts (W) according
to the transmitter manufacturer and d is
the recommended separation distance in
metres (m).
Field strengths from fixed RF transmitters,
as determined by an electromagnetic site
survey,a should be less than the compliance
level in each frequency range.b
NOTE 1:
NOTE 2:
Interference may occur in the
vicinity ofequipment marked
with the following symbol:
At 80 MHz and 800 MHz, the higher frequency range applies.
These guidelines may not apply in all situations. Electromagnetic
propagation is affected by absorption and reflection from structures,
objects and people.
Guidance and manufacturer´s declaration – electromagnetic immunity
a)
Field strengths from fixed transmitters, such as base stations for radio (cellular/cordless) telephones and land mobile radios, amateur radio, AM and FM radio broadcast
and TV broadcast cannot be predicted theoretically with accuracy. To assess the
electromagnetic environment due to fixed RF transmitters, an electromagnetic
site survey should be considered. If the measured field strength in the location in
which the device is used exceeds the applicable RF compliance level above, the
device should be observed to verify normal operation. If abnormal performance is
observed, additional measures may be necessary, such as reorienting or relocating
the device.
b)
Over the frequency range 150 kHz to 80 MHz, field strengths should be less
than 3 V/m.
Geratherm Medical AG
Fahrenheitstraße 1
98716 Geschwenda
Germany
www.geratherm.com
49
GB