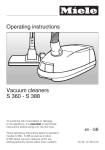
1
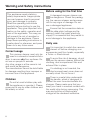
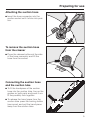
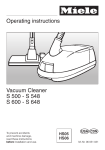
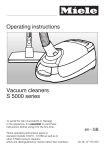
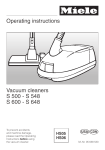
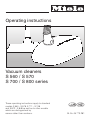
Operating instructions
Vacuum cleaners
S 560 / S 570
S 700 / S 800 series
These operating instructions apply to standard
models S 560 - S 578, S 711 - S 748
and S 812 - S 848 as well as to other models
which are distinguished by
names rather than numbers.
WO
M.-Nr. 05 773 281
Contents
Caring for the environment
Description of the appliance
Warning and Safety instructions
Preparing for use
Using the accessories
Floorhead . . . . . . . . . . . . . . . . . . . . . . . . . . . . . . . . . . . . . . . . . . . . . . . . . . . . . . . . 14
Crevice nozzle . . . . . . . . . . . . . . . . . . . . . . . . . . . . . . . . . . . . . . . . . . . . . . . . . . . . 14
Crevice nozzle extension . . . . . . . . . . . . . . . . . . . . . . . . . . . . . . . . . . . . . . . . . . . . 14
Dusting brush . . . . . . . . . . . . . . . . . . . . . . . . . . . . . . . . . . . . . . . . . . . . . . . . . . . . 15
Upholstery nozzle . . . . . . . . . . . . . . . . . . . . . . . . . . . . . . . . . . . . . . . . . . . . . . . . . 15
Operation
Unwinding and rewinding the mains cable . . . . . . . . . . . . . . . . . . . . . . . . . . . . . . 16
Auto-reverse. . . . . . . . . . . . . . . . . . . . . . . . . . . . . . . . . . . . . . . . . . . . . . . . . . . . . . 16
Switching on and off . . . . . . . . . . . . . . . . . . . . . . . . . . . . . . . . . . . . . . . . . . . . . . . 17
Regulating the suction . . . . . . . . . . . . . . . . . . . . . . . . . . . . . . . . . . . . . . . . . . . . . . 18
Opening the air inlet valve . . . . . . . . . . . . . . . . . . . . . . . . . . . . . . . . . . . . . . . . . . . 21
Blowing out . . . . . . . . . . . . . . . . . . . . . . . . . . . . . . . . . . . . . . . . . . . . . . . . . . . . . . 22
Setting down, transportation and storage
Maintenance and care
Purchasing new dustbags and filters . . . . . . . . . . . . . . . . . . . . . . . . . . . . . . . . . . 24
When to change the dustbag . . . . . . . . . . . . . . . . . . . . . . . . . . . . . . . . . . . . . . . . 25
Replacing the dustbag . . . . . . . . . . . . . . . . . . . . . . . . . . . . . . . . . . . . . . . . . . . . . 26
When to change the exhaust filter . . . . . . . . . . . . . . . . . . . . . . . . . . . . . . . . . . . . . 27
Exhaust filter change indicator . . . . . . . . . . . . . . . . . . . . . . . . . . . . . . . . . . . . . . . 28
Replacing the "SUPER air clean" filter . . . . . . . . . . . . . . . . . . . . . . . . . . . . . . . . . . 29
Replacing the "ACTIVE air clean" filter and the "ACTIVE HEPA" filter . . . . . . . . . . 30
Replacing one type of filter with another . . . . . . . . . . . . . . . . . . . . . . . . . . . . . . . . 31
When to change the dust compartment filter (motor protection). . . . . . . . . . . . . . 32
To replace the dust compartment filter . . . . . . . . . . . . . . . . . . . . . . . . . . . . . . . . . 32
When to change the thread lifters . . . . . . . . . . . . . . . . . . . . . . . . . . . . . . . . . . . . . 33
To replace the thread lifters . . . . . . . . . . . . . . . . . . . . . . . . . . . . . . . . . . . . . . . . . . 33
Cleaning and care
Problem solving guide
After sales service
Optional accessories
Electrical connection
2
Caring for the environment
Disposal of packing material
Disposal of your old appliance
The transport and protective packing
material has been selected from materials which are environmentally friendly
for disposal and can normally be recycled.
Old appliances may contain materials
which can be reclaimed or recycled.
Please contact your dealer, your local
waste collection centre or scrap merchant about potential recycling
schemes.
Ensure that any plastic wrappings,
bags etc. are disposed of safely and
kept out of the reach of babies and
young children. Danger of suffocation!
Rather than just throwing these materials away, please ensure they are offered for recycling.
Before disposing of an old appliance
first make it unusable. Disconnect it
from the mains, cut the cable off the appliance as close to the cleaner as possible and cut the plug off. The plug cut
from the cable should be rendered useless and then disposed of and on no
account be inserted into any socket
elsewhere in the house (electric shock
hazard).
Make appropriate arrangements for its
safe disposal and make sure that the
appliance presents no danger to children while being stored for disposal.
Disposing of the dustbag and
filters
These are made from environmentally
friendly materials and can be disposed
of with the normal household waste.
The dustbag should only be disposed
of in this way if it has been used exclusively for general household dust.
3
Description of the appliance
Some models are supplied with a Miele Electrobrush or Turbobrush as standard
(not illustrated). These brushes are supplied with their own operating instructions.
4
Description of the appliance
a Hand piece
b Air inlet valve
c Locking button
d Telescopic tube *
e Slide control *
f Socket for Electrobrush * (only on models with a push button on the lid)
g Dust compartment lid catch
h Dust compartment filter (for motor protection)
i Dustbag
j Floorhead
k Carrying handle
l Parking attachment
m Exhaust filter *
n Mains cable with plug (plug varies depending on country)
o Cable rewind
p Suction power selector *
q Park system
r Exhaust filter change indicator (Re-set button 7) *
s Overheating warning light , *
t On / Off switch
u Accessories compartment
v Dustbag change indicator
w Release button for accessories compartment
x Hose connector
y Suction hose
The illustration shows the maximum number of features available on these Miele
vacuum cleaners.
Those features marked * depend on the model and may vary or not be available
on your model.
5
Warning and Safety instructions
Before using for the first time
This appliance meets statutory
safety requirements. Inappropriate
use can however lead to personal
injury and damage to property.
Read the operating instructions
carefully before starting to use this
appliance. They give important information on the safety, operation and
care of the appliance. This way you
will prevent the risk of accident or
damage to the appliance. Please
keep these operating instructions in
a safe place for reference, and pass
them on to any future users.
Correct usage
This vacuum cleaner must only be
used in a domestic household situation to vacuum dry floor surfaces. Do
not use on people or animals.
Any other usage is at the owner’s risk
and could be dangerous.
The manufacturer cannot be held liable
for damage resulting from improper or
incorrect use of the appliance.
Children
Do not let small children play with
the appliance or operate it. Please
supervise its use by older children and
the elderly or infirm.
6
A damaged vacuum cleaner can
be dangerous. Check the packaging, the vacuum cleaner and accessories for any signs of damage. Do not
use a damaged appliance.
Ensure that the connection data on
the data plate (voltage and frequency) match the mains electricity
supply. It is essential that they match to
avoid damage to the appliance.
Daily use
It is important to switch the vacuum
cleaner off before changing over
accessories and floor heads, especially
a Turbo- or Electrobrush.
To avoid the risk of damage, do not
use the vacuum cleaner without the
dustbag, dust compartment filter and
exhaust filter in place.
If a dustbag is not inserted, the
dust compartment cover does not
normally close. Do not force it.
There is a metal inlay underneath
the handle, which is designed to
protect the user from electrostatic discharges. Please make sure that you
keep your hand in constant contact with
this metal strip during vacuuming. This
way any build-up of electrostatic
charge will be rendered ineffective.
Warning and Safety instructions
Do not vacuum up liquids or damp
dirt. This will cause major faults
and could seriously impair the functioning and electrical safety of the appliance. Wait until any freshly cleaned or
shampooed carpets or floor coverings
are completely dry before attempting to
vacuum.
Do not vacuum up anything which
has been burning or is still glowing
e.g. cigarettes, ashes or coal, whether
glowing or apparently extinguished.
The cleaner might catch fire.
Do not vacuum up toner dust.
Toner, such as that used in printers
and photocopiers can conduct electricity. The filter system in the vacuum
cleaner may not filter it completely and
so the toner could be blown back into
the atmosphere by the fan.
Do not vacuum up any inflammable
or combustible liquids or gases
and do not vacuum in areas where
such substances are stored. The
cleaner might explode.
Do not pull or carry the appliance
by the cable. When disconnecting
from the mains socket pull by the plug
not by the cable.
- Keep the cable away from sharp
edges and do not let it be squashed,
for example, under a door.
- Avoid running the vacuum cleaner
over the cable.
A damaged cable, plug or socket is a
safety hazard. The appliance must not
be used if any of these have suffered
damage.
Monitor the change dustbag indicator and change the dustbag if
necessary. Check the exhaust and dust
compartment filters at the same time
and change them too if necessary. A
full bag or blocked filter will reduce the
suction power of the cleaner. A temperature limiter switches the vacuum
cleaner off automatically if it gets too
hot, see section "Problem solving
guide".
Do not vacuum up items which are
heavy, hard or have sharp edges.
They could cause a blockage and damage the appliance.
Floor attachments, accessories
and tubes must not be used at
head level to avoid the risk of injury,
e.g. to eyes and ears.
7
Warning and Safety instructions
Using accessories
The socket on the vacuum cleaner
(depending on model) must only
be used for the Miele Electrobrush
specified for use with this appliance.
To avoid the risk of injury when
vacuuming with a Miele Electro- or
Turbobrush do not touch the rotating
roller brush.
It is not advisable to vacuum directly with the handle, i.e. without
an accessory attached as the rim could
get damaged and you could hurt yourself on sharp edges. Danger of injury.
Miele vacuum cleaner bags are
disposable and intended to be
used only once. Do not attempt to
re-use. Blocked pores reduce the efficiency of the cleaner.
Use only genuine Miele dustbags,
filters and accessories. This ensure
optimum performance of the vacuum
cleaner throughout its life.
Cleaning, maintenance and repairs
Always disconnect the vacuum
cleaner from the mains supply for
maintenance work and for cleaning.
Switch off at the wall socket and remove the plug. Pull on the plug and not
the cable.
Do not let the vacuum cleaner get
wet. Clean only with a dry cloth or
slightly damp cloth when disconnected
from the mains supply. If moisture gets
into the appliance there is the risk of an
electric shock.
8
Repairs may only be carried out by
a suitably qualified and competent
person in accordance with national and
local safety regulations. Repairs and
other work by unqualified persons
could be dangerous.
If the cable is damaged it should
be replaced together with a complete cable rewind by a Miele service
technician.
Disposing of an old appliance
When disposing of an old appliance cut the cable off the appliance as close to the cleaner as possible and cut the plug off. The plug cut
from the cord should be rendered useless and then disposed of and on no
account be inserted into any socket
elsewhere in the house (electric shock
hazard). See section "Disposal of your
old appliance" earlier in this booklet for
further advice.
The manufacturer cannot be held liable for damage caused by non-compliance with these Warning and
Safety instructions.
Preparing for use
Attaching the suction hose
^ Insert the hose connector into the
suction socket until it clicks into position.
To remove the suction hose
from the cleaner
^ Press the release buttons at the side
of the hose connector and lift the
hose from the socket.
Connecting the suction hose
and the suction tube
^ To fit the handpiece of the suction
hose into the suction tube, line up the
guides on both parts and push in until they audibly lock together.
^ To release the hand piece from the
suction tube press the locking button
(see arrow) and pull the hand piece
away from the suction tube.
9
Preparing for use
Connecting the suction tube
sections
(depending on model)
Both sections of the suction tube have
locating arrows marked on them. When
connecting the two sections, ensure
that the two arrows point towards each
other.
Adjusting the telescopic suction tube
(depending on model)
One part of the telescopic tube is
packed inside the other and can be adjusted to suit your height for comfortable vacuum cleaning.
^ Press the telescopic tube release
button (see arrow) to release the
tubes and adjust to the required
height.
Adjusting the triscopic suction
tube
(depending on model)
The triscopic tube has three sections.
Two sections are packed into a third
outer tube.
^ Pull the bottom tube out as far as it
will go. It will click into position.
Press release button a, to push it
back in again.
^ Press button b to release the telescopic tubes and adjust to the required height.
10
Preparing for use
Attaching the floorhead
^ Push the suction tube into the
floorhead and turn it clockwise or
anti-clockwise until it clicks into position.
^ To release the floorhead from the suction tube, press the locking button
(see arrow) and pull the suction tube
away from the floorhead.
The floorhead can be used for all normal cleaning of carpets and rugs. It can
also be used with the brush protruding
to vacuum hard flooring which is not
susceptible to scratching. For hard
flooring, such as stone and floors which
are susceptible to scratching, e.g. parquet, we recommend using the special
Miele floor brush (see "Optional accessories").
It is also important to observe the
flooring manufacturer's cleaning and
care instructions.
Vacuum carpets and rugs with the
brush retracted:
^ Press the foot switch to the g position.
Clean hard flooring which is not susceptible to scratching with the brush
protruding:
^ Press the foot switch to the h position.
Electrobrush / Turbobrush
Some models may be supplied as standard with an Electrobrush or a Turbobrush in addition to the normal floorhead (see "Optional accessories").
Please refer to the separate operating
instructions supplied with these
brushes for instructions on use and
maintenance.
11
Preparing for use
Accessories supplied
Other tools, in addition to the floorhead(s), are supplied with the vacuum
cleaner to help deal with various types
of cleaning.
a Crevice nozzle
b Crevice nozzle extension
(depending on model)
c Dusting brush
d Upholstery nozzle
e Filter grille
The filter grille e is supplied separately
in the box only with those models which
are fitted with an "ACTIVE air clean" or
"ACTIVE HEPA" exhaust filter as standard. The filter grille is required if you
wish to replace one of these filters with
a "SUPER air clean" filter.
Adapter and blower connection socket
(depending on model)
The adapter and blower connection
socket enable the vacuum cleaner to
be used for blowing out air, e.g. for
dusting off multi-layered radiators and
blowing dust out of inaccessible corners (see "Operation - Blowing out").
12
Preparing for use
To open the accessories compartment
^ Press the release button and the lid
will open.
^ Take out the accessory you require.
^ Press down firmly on the lid to close
it.
S 812 - S 848 series accessories
compartment
The extension for the crevice nozzle is
located in the compartment underneath
the crevice nozzle.
13
Using the accessories
The different tools can either be fitted to
the hand-piece or, as required, to the
suction tube.
Floorhead
Also for cleaning stairs.
Crevice nozzle
For cleaning in folds, crevices or corners.
Crevice nozzle extension
(depending on model)
This accessory can be used to extend
the length of the crevice nozzle. Further
length is provided by pulling out the inner section.
^ Press the locking button to pull the
extension piece out or to push it in.
14
Using the accessories
Dusting brush
For cleaning skirting boards, ornate or
carved articles, etc. The head of the
dusting brush can be swivelled to attain
the best cleaning position.
Upholstery nozzle
For cleaning upholstery, mattresses,
cushions, curtains, covers etc.
15
Operation
Unwinding and rewinding the
mains cable
Unwinding
^ Hold the plug and unwind cable to
the required length:
– S 560 - S 578: max. approx. 6.5 m
– S 711 - S 748: max. approx. 6.5 m
– S 812 - S 848: max. approx. 8.5 m
,When vacuuming for longer than
30 minutes, pull the cable out to at
least 2/3 of its total length, even when
working close to the wall socket.
Otherwise there is a danger of overheating and damage.
Rewinding
^ Switch off at the wall socket and remove the plug.
^ Press the rewind switch. The cable
will rewind automatically.
Auto-reverse
(depending on model)
To switch on this function, move the
slide switch to "Auto-Reverse". When
this function is switched on the rewind
brake on the cable drum is released. It
pays out the exact amount of cable required and gathers in excess cable so
that the cable automatically adjusts itself to the distance between the appliance and the wall socket.
16
Operation
Switching on and off
^ Press the On-Off switch.
Vacuuming
^ When vacuuming pull the cleaner behind you on its wheels. You can stand
it upright for vacuuming stairs and
curtains etc.
,When vacuuming especially fine
dust, e.g. sawdust, sand, plaster,
flour, talcum powder etc., electrostatic charges build up naturally. Under certain conditions these charges
will be released. To avoid the unpleasant effects of these discharges,
a metal inlay has been incorporated
into the underside of the handle.
Please make sure that you keep your
hand in constant contact with this
metal strip during vacuuming. This
way any build-up of electrostatic
charge will be rendered ineffective.
17
Operation
Regulating the suction
The suction power can be regulated to
suit the type of flooring. The higher the
wattage the more powerful the suction.
Reducing the suction power reduces
the amount of effort required to manoeuvre the floorhead. Setting the suction power selector according to the
degree of soiling and type of flooring
being cleaned will save energy. Smooth
or lightly soiled flooring is easily
cleaned using the Economy setting.
Fitted carpets and thick pile carpets require the most powerful setting to remove ingrained soiling.
Some models also have symbols on the
controls. The symbols indicate the type
of use the settings are suitable for.
a - curtains, lightweight fabrics
b - upholstery, cushions
c - thick pile carpets, rugs and
runners
d - for energy-saving daily use
e - lightly soiled textured carpets
f - textured hard flooring, and for
intensive cleaning of carpets
The controls vary from model to model.
These are described on the following
pages.
18
Operation
Rotary selector
^ Turn the rotary selector manually to
the suction power setting you require.
Slide selector
^ Move the slide selector manually to
the suction power setting you require.
19
Operation
+ / - controls
Press the controls to select the suction
power you require.
^ Press the + control to select a higher
setting.
^ Press the - control to select a lower
setting.
When switched on the vacuum cleaner
operates at the power setting last used.
A single short press on the control
moves the suction power up or down
one setting at a time. If the control is
held down, the suction power setting
will automatically move through the
power settings until the control is released.
+ / - controls with Automatic
setting
There are six power settings and an
Automatic setting available. The display
shows the power level in watts.
^ Press the + control to select a higher
setting.
^ Press the - control to select a lower
setting.
When switched on the vacuum cleaner
operates at the power setting last used.
A single short press on the control
moves the suction power up or down
one setting at a time. If the control is
held down, the suction power setting
will automatically move through the
power settings until the control is released.
20
Operation
Automatic setting
If the Automatic setting is chosen the
vacuum cleaner automatically adjusts
the suction power to suit the surface
being cleaned. This ensures the correct
power setting for the type of floor or
carpet being cleaned.
^ Keep pressing the - control until the
Automatic setting is activated.
^ Press the + control to de-activate the
Automatic setting.
,Do not use the Automatic setting
to vacuum lightweight materials or
curtains. These could be sucked in
and possibly damaged.
Opening the air inlet valve
Opening the air inlet valve reduces the
suction power quickly for brief periods,
e.g. to prevent damage to the fringes of
a rug when moving from cleaning a carpeted floor to a rug, or to prevent something being vacuumed up by mistake.
^ Open the air inlet valve far enough to
reduce the suction power.
The floorhead will be easier to manoeuvre. Close the valve up again
when you are ready to use full power
again.
21
Operation
Blowing out
(depending on model)
The adapter is used to attach the suction hose connector to the blower connection socket so that the vacuum
cleaner can be used to blow out air,
e.g. for dusting off multi-layered radiators and blowing dust out of inaccessible corners so that it can be vacuumed
up. It can also be used to blow out the
suction hose if it gets blocked.
^ Press the release button for the dust
compartment lid and raise up the lid
up as far as it will go.
^ Take out the exhaust filter or the filter
grille if this has been fitted and replace with the blower connection
socket.
^ Close the dust compartment lid.
^ Attach the adapter to the hose connector.
^ Now open the accessories compartment and insert the adapter into the
blower outlet.
After use, pull firmly on the adapter to
remove it from the hose connector.
Remove the blower connection socket
and refit the exhaust filter or filter grille.
22
Setting down, transportation and storage
Park system
A Park system has been designed for
conveniently parking the vacuum
cleaner during pauses.
^ Fit the lower clip on the floorhead into
the slot on the back of the vacuum
cleaner from above (see illustration).
Switching on and off with the Park
system
(depending on model)
Parking the floorhead in this way whilst
vacuuming automatically switches off
the cleaner. Lifting the floorhead out of
the Park system switches the cleaner
on again.
If your vacuum cleaner is equipped
with + / - suction power selector controls you can de-activate or activate the
Park system's On-Off function.
^ Switch the vacuum cleaner off with
the On-Off switch.
^ Press and hold the + and - controls in
and at the same time switch the
vacuum cleaner on with the On-Off
switch.
Transportation and storage
^ Stand the vacuum cleaner upright
when it is not being used and during
storage.
^ Fit both clips on the floorhead into the
two point holder on the side of the
cleaner.
This makes the cleaner easier to carry
or store.
23
Maintenance and care
,Always disconnect the vacuum
cleaner from the electrical supply for
maintenance work and for cleaning.
Switch off at the wall socket and remove the plug.
The Miele filter system consists of three
filters.
– Dustbag
– Exhaust filter
– Dust compartment filter (for motor
protection)
These will need to be replaced from
time to time to ensure that your vacuum
cleaner performs efficiently.
Use only genuine Miele dustbags,
filters, accessories and optional accessories. This ensures optimum
performance of the vacuum cleaner
and that the dustbag is used to capacity.
Purchasing new dustbags and
filters
Replacement dustbags and filters can
be obtained from your local Miele
Dealer or directly from the Miele Spare
Parts Department.
When ordering dustbags for your
vacuum cleaner ask for bags with the
code
– F/J/M for models S 560 - S 578 and
S 711 - S 748
– G/N for models S 812 - S 848.
Always quote the model number given
on the data plate located underneath
the appliance.
A "SUPER air clean" filter and a dust
compartment filter are supplied with every packet of Miele dustbags.
If you wish to purchase exhaust filters
or dust compartment filters separately,
please quote the model number of your
appliance when ordering to ensure you
get the correct items.
You can replace the exhaust filter supplied with the vacuum cleaner with one
of the other Miele exhaust filters if you
wish (see "Replacing one type of filter
with another").
24
Maintenance and care
When to change the dustbag
Change the dustbag when the colour
marker in the dustbag change indicator
fills the display.
Dustbags are designed for single
use only. Do not attempt to re-use
them as suction would be reduced.
Checking the dustbag change indicator
^ Attach the standard floorhead to the
suction tube. Do not use any of the
other floorheads or attachments as
they will cause the dustbag change
indicator to give a false reading.
^ Switch the vacuum cleaner on and
turn the rotary selector (if applicable)
to the highest power setting.
^ Lift the floorhead off the floor a little. If
the red marker completely fills the
dustbag change indicator you should
replace the dustbag with a new one.
How the dustbag change indicator
works
The indicator is designed to measure
the air permeability of a dustbag containing common household dust. Normal household dust would contain a
mixture of dust, hair, carpet fluff,
threads, grit etc.
However, if the vacuum cleaner has
been used to suck up fine dust, such
as plaster, brick dust, cement or flour,
the pores of the dustbag become
blocked very quickly. This affects the
air permeability of the bag and the
marker will indicate that the bag is "full"
even when it is not. If this happens you
must still change the dustbag because
suction power will be greatly reduced
by blocked pores in the dustbag.
If, on the other hand, you have vacuumed up a lot of hair and carpet fluff
which typically contains a lot of air the
indicator may fail to react even though
the bag is full. You should still change
it!
Both these extremes can occur.
25
Maintenance and care
Replacing the dustbag
^ Press the release button for the dust
compartment lid and raise the lid as
far as it will go.
^ To remove the dustbag hold the bag
by the collar and pull it out of its
holder.
The dustbag has a closing flap which
closes automatically when the dustbag
is removed to prevent any dust escaping.
It can then be disposed of with the normal household waste as long as it has
only been used for vacuuming up normal household dust.
Do not unfold the new bag when you
take it out of the packet. This way it will
not get trapped when you shut the dust
compartment lid again.
^ To insert a new dustbag, push the
collar securely into the frame as far
as it will go. Otherwise you will not be
able to shut the lid.
^ Close the dust compartment lid
firmly.
26
Maintenance and care
When to change the exhaust
filter
Depending on model your vacuum
cleaner will be fitted as standard with
one of the following exhaust filters:
a a SUPER air clean filter,
b an ACTIVE air clean filter or
c an ACTIVE HEPA filter
Replace the SUPER air clean filter
every time you start a new packet of
dustbags. A SUPER air clean filter is
supplied with every packet of Miele
dustbags.
Replace the ACTIVE air clean or the
ACTIVE HEPA filter
approx. once a year. It should be replaced sooner if it is obviously soiled or
no longer effective. Make a note of the
date on the filter.
See "Accessories available as optional
extras" for descriptions of these two filters.
27
Maintenance and care
Exhaust filter change indicator
Some models are equipped with an exhaust filter change indicator (Re-set
button 7) which is designed for the
change cycle of an ACTIVE air clean or
an ACTIVE HEPA filter.
The indicator lights up after approx. 50
hours of operation which is equivalent
to about a year of average use. The
vacuum cleaner can still be used with
the exhaust filter indicator lit up. However, the suction power will be reduced
as will the effectiveness of the filter if it
is not replaced in good time.
The filter change indicator light will
have no significance if a SUPER air
clean filter (a) has been fitted, but
should still be re-set. The indicator light
will go out when it is pressed.
You can replace the exhaust filter supplied with the vacuum cleaner with one
of the other Miele exhaust filters if you
wish (see "Replacing one type of filter
with another").
28
Maintenance and care
Replacing the "SUPER air
clean" filter
^ Open the dust compartment lid.
^ Release the filter grille and raise it
upwards. Grasp the used SUPER air
clean filter by the clean, unsoiled
section (see arrow) and take it out.
^ Replace it with a new SUPER air
clean filter. It can be inserted either
way up.
^ Lower and secure the filter grille back
in place.
^ Close the dust compartment lid
firmly.
29
Maintenance and care
Replacing the "ACTIVE air
clean" filter and the "ACTIVE
HEPA" filter
^ Open the dust compartment lid.
^ Release the catch and remove the filter.
^ To insert the new filter, fit it so that it
engages at the back and then close
the catch.
^ Close the dust compartment lid
firmly.
Resetting the Exhaust filter change
indicator
If your vacuum cleaner is equipped
with an exhaust filter change indicator
(Re-set button 7), this needs to be
re-set each time the filter is replaced. To
do this the vacuum cleaner must be
connected to the electricity supply.
^ Press on the filter change indicator
light until it goes out. The display is
now back in the starting position
again.
30
Maintenance and care
Replacing one type of filter
with another
Depending on model your vacuum
cleaner will be fitted as standard with
one of the following exhaust filters:
a SUPER air clean,
b ACTIVE air clean or
c ACTIVE HEPA
Please note
1. If you wish to replace the SUPER air
clean filter a with an ACTIVE air clean filter b or an ACTIVE HEPA filter c, it is essential that you remove the filter grille*
before fitting the new type of filter.
2. If you wish to replace the ACTIVE air
clean filter b or the ACTIVE HEPA filter c
with a SUPER air clean filter a, then it is
essential that you also fit the filter grille*.
* filter grille - see "Accessories supplied" section.
Some models have a built-in exhaust
filter change indicator (Re-set button
7), which is designed for the
change cycle of an ACTIVE air clean
or an ACTIVE HEPA filter. The filter
change indicator light will have no
significance if a SUPER air clean filter (a) has been fitted, but should
still be re-set by pressing on the filter
change indicator light until it goes
out.
31
Maintenance and care
When to change the dust
compartment filter (motor
protection)
Replace the dust compartment filter every time you start a new packet of
dustbags.
A dust compartment filter is supplied
with every packet of Miele dustbags.
To replace the dust
compartment filter
^ Open the dust compartment lid.
^ Unclip the filter frame, remove the old
filter and replace with a new one.
^ Close the filter frame.
32
Maintenance and care
When to change the thread
lifters
The thread lifters on the suction inlet to
the floorhead and upholstery nozzle
can be replaced.
Check them from time to time and replace them if the pile has worn down.
To replace the thread lifters
^ Use a knife or similar object to remove them from the slots.
^ Fit the new thread lifters.
If threads or hair have wound round
the bearing on the floorhead roller:
a Use a coin to release the roller pin
(bayonet connection) and pull out
the pin.
b Take out the roller.
Remove all threads and hair etc, then
replace the individual parts in the correct order.
Spare parts are available from your
Miele dealer or from the Miele Spare
Parts Department.
33
Cleaning and care
,Always disconnect the vacuum
cleaner from the electricity supply
for maintenance work and for cleaning. Switch off at the wall socket and
remove the plug (pull on the plug,
not the cable).
Vacuum cleaner and accessories
External surfaces of the vacuum
cleaner and of the accessories can be
cleaned with a dry cloth or a slightly
damp cloth or with a proprietary
cleaner suitable for plastic.
,Do not use abrasive cleaners,
glass cleaners or all-purpose
cleaners!
Because of their chemical composition they could cause serious damage to plastic components.
Dust compartment
The dust compartment can, if necessary, be cleaned using a dry duster,
dusting brush or, if available, a second
vacuum cleaner to vacuum the dust
out.
,Do not let the vacuum cleaner
get wet. If moisture gets into the appliance there is a risk of electric
shock.
34
Problem solving guide
The vacuum cleaner has switched itself off automatically.
A temperature limiter switches the
vacuum cleaner off automatically if it
gets too hot. Some models also have a
warning light , which comes on to indicate that it has overheated.
Overheating can occur if, for instance,
large articles block the suction tube or
the dustbag is full or contains particles
of fine dust. A heavily soiled exhaust or
dust compartment filter can also be the
cause of overheating. Switch off the
vacuum cleaner using the On-Off
switch.
After removing the cause, wait for a period of approx. 20 - 30 minutes, to allow
the vacuum cleaner to cool down. It
can then be switched on again.
35
After sales service
In the event of a fault that you cannot
easily remedy, please contact
– your Miele Dealer
or
– the nearest Miele Service Department. (See address on back page).
Please note that telephone calls may
be monitored and recorded to improve our service.
36
Optional accessories
Electrobrush
(depending on model)
Models designed to take an Electrobrush have a release button on the
cover cap to the connection socket. If
there is no release button on this cover
cap an Electrobrush cannot be fitted.
The Electrobrush is particularly suitable
for intensive vacuuming of carpets
which are subject to hard wear. It is
very effective at removing deep seated
dirt and preventing areas of frequent
use being trodden into a path.
It is also important to observe the
flooring manufacturer's cleaning and
care instructions.
Turbobrush
(supplied as standard with some models)
The Turbobrush is particularly suitable
for vacuuming cut pile carpeting. The
brush is operated by the suction power
of the vacuum cleaner. It has a rotating
brush and is very effective at picking
up thread, hairs and fluff.
It is also important to observe the
flooring manufacturer's cleaning and
care instructions.
Hand-held Turbobrush
(supplied as standard with some models)
The hand-held Turbobrush is intended
for vacuuming upholstery, mattresses,
car seats, carpeted stairs and other
areas inaccessible to the standard
Turbobrush.
37
Optional accessories
Floor brush
(supplied as standard with some models)
Special brush for cleaning hard floors
(parquet, stone, PVC), and flooring
which might be scratched, (e. g. with a
high shine).
Universal brush
For dusting books, shelves, etc.
Radiator brush
(can only be used if attached to the
crevice nozzle)
For cleaning radiators, narrow shelves
and crevices.
38
Optional accessories
Mattress nozzle
(supplied as standard with some models)
For cleaning upholstery, mattresses,
cushions, curtains, covers etc.
Crevice nozzle (300 mm)
For cleaning in folds, crevices or corners.
39
Optional accessories
MicroSet
This set is specially designed for cleaning small objects and difficult to reach
areas (such as PC keyboards, stereo
equipment, intricately carved furniture
and ornaments, models etc).
It consists of:
– Micro-hose with combination nozzle
(crevice nozzle and dusting brush)
– Micro-dusting brush
– Micro-crevice nozzle
– Angled extension
CarClean Set Plus
The CarClean Set Plus has been designed as an accessory for Miele cylinder vacuum cleaners for valeting the interior of cars.
It consists of:
– Hand-held Turbobrush
– Micro-hose with combination nozzle
(crevice nozzle and dusting brush)
– Crevice nozzle (300 mm)
These are supplied in a carry case together with a 3 m long suction hose
with hose clip.
40
Optional accessories
ACTIVE air clean filter
(supplied as standard with some models)
The ACTIVE air clean filter is a special
active charcoal filter which absorbs
odours from the dust collected in the
dustbag. It helps, therefore, to prevent
a build-up of odours occuring. Do not
use aroma capsules in your cleaner if
you use this filter. The charcoal in the filter will absorb their aroma rendering
them ineffective. The ACTIVE air clean
filter can be used instead of the existing
exhaust filter. There is no difference in
filtration level between the ACTIVE air
clean filter and the SUPER air clean filter. See "Replacing one type of filter
with another".
ACTIVE HEPA filter
(supplied as standard with some models)
This is a particle filter conforming to EN
1822 HEPA Classification 12. It is able
to filter out very fine particles and
micro-organisms. The active charcoal
layer absorbs odours from the dust collected in the dustbag. Vacuum cleaners
equipped with this exhaust filter are
particularly suitable for allergy sufferers
and those concerned with a high level
of hygiene. The "ACTIVE HEPA filter"
can be inserted in place of the existing
exhaust filter. See "Replacing one type
of filter with another".
Do not use aroma capsules in your
cleaner if it is fitted with this filter.
41
Electrical connection
All electrical work should be carried out
by a suitably qualified and competent
person in strict accordance with national and local safety regulations.
The voltage and rated load are given
on the data plate located underneath
the vacuum cleaner. Please ensure that
these match the household mains supply.
The appliance must be connected to a
230-240 V/50 Hz a.c. single phase supply via a 10 A plug.
Important
The wires in the mains lead of this appliance are coloured in accordance
with the following code:
Blue = Neutral
Brown = Live
As the colours of the wires may not correspond with the markings identifying
the terminals in your plug, proceed as
follows: The wire coloured blue must be
connected to the terminal marked with
the letter "N" or coloured black. The
wire coloured brown must be connected to the terminal marked with the
letter "A" or coloured red. Neither core
is to be connected to the earth terminal
of a three-pin plug.
Test marks.....................Electrical safety
............................................C-Tick Mark
Electrically suppressed
according to.....................AS/NZS 1044
42
43
Alteration rights reserved / (560/570/700/800) - 1403
M.-Nr. 05 773 281 / V00
This paper consists of cellulose which has been bleached without the use of chlorine.