1
TM
2 # 4 # . . ' . ' ( ( ' % 6 5 2 4 1 % ' 5 5 1 4
5'457+&'
'45+10ETN
DP/2
fF5'457+&'U
:ULWWHQGHVLJQHGDQGLOOXVWUDWHGE\ 5REE\%HUPDQ
&RS\ULJKW
(1621,4&RUS
*UHDW9DOOH\3DUNZD\
%R[
0DOYHUQ3$
86$
3ULQWHGLQ86$
$OO5LJKWV5HVHUYHG
3OHDVHUHFRUGWKHIROORZLQJLQIRUPDWLRQ
<RXU
$XWKRUL]HG
(1621,4
'HDOHUBBBBBBBBBBBBBBBBBBBBBBBBBBB
3KRQHBBBBBBBBBBBBBBB
<RXU
'HDOHU
6DOHV
5HSUHVHQWDWLYHBBBBBBBBBBBBBBBBBBBBBBBBBBBBBBBBBBBBBBBBBBBBBBBBB
6HULDO
1XPEHU
RI
8QLWBBBBBBBBBBBBBBBBBBBBBBBBBBB
'DWH
RI
3XUFKDVHBBBBBBBBBBBBBBBBB
Your Authorized ENSONIQ Dealer is your primary source for service and support. The above
information will be helpful in communicating with your Authorized ENSONIQ Dealer, and
provide necessary information should you need to contact ENSONIQ Customer Service. If you
have any questions concerning the use of this unit, please contact your Authorized ENSONIQ
Dealer first. For additional technical support, or to find the name of the nearest Authorized
ENSONIQ Repair Station, call ENSONIQ Customer Service at (610) 647-3930 Monday through
Friday 9:30 AM to 12:15 PM and 1:15 PM to 6:30 PM Eastern Time. Between 1:15 PM and 5:00
PM we experience our heaviest call load. During these times, there may be delays in answering
your call.
This manual is copyrighted and all rights are reserved by ENSONIQ Corp. This document may not,
in whole or in part, be copied, photocopied, reproduced, translated, or reduced to any electronic
medium or machine readable form without prior written consent from ENSONIQ Corp. The DP/2
software/firmware is copyrighted and all rights are reserved by ENSONIQ Corp.
Although every effort has been made to ensure the accuracy of the text and illustrations in this
manual, no guarantee is made or implied in this regard.
IMPORTANT:
“This equipment generates and uses radio frequency energy and if not installed and used properly,
that is, in strict accordance with the manufacturer's instructions, may cause interference to radio
and television reception. It has been designed to comply with the limits for a Class B computing
device in accordance with the specifications in Subpart J of Part 15 of FCC rules, which are
designed to provide reasonable protection against such interference in a residential installation.
However, there is no guarantee that interference will not occur in a particular installation. If this
equipment does cause interference to radio or television reception, which can be determined by
turning the equipment off and on, the user is encouraged to try to correct the interference by one or
more of the following measures.”
* reorient the receiving antenna
* relocate the instrument with respect to the receiver
* move the instrument away from the receiver
* plug the instrument into a different outlet so that the instrument and receiver are on
different branch circuits
“If necessary, the user should consult the dealer or an experienced radio/television technician for
additional suggestions. The user may find the following booklet prepared by the Federal
Communications Commission helpful: 'How to Identify and Resolve Radio-TV Interference
Problems.’ This booklet is available from the U.S. Government Printing Office, Washington, D.C.
20402. Stock No. 004-000-00345-4.”
CAUTION! Danger of explosion if battery is incorrectly replaced. Replace only
with the same or equivalent type recommended by the manufacturer. Discard used
batteries according to manufacturer’s instructions.
In order to fulfill warranty requirements, the DP/2 should be serviced only by an Authorized
ENSONIQ Repair Station. The ENSONIQ serial number label must appear on the outside of the
unit, or the ENSONIQ warranty is void.
(1621,4'3'3'37676DQG$65DUHWUDGHPDUNVRI(1621,4
&RUS
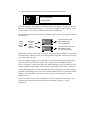
Welcome to the DP/2!
&RQJUDWXODWLRQVRQ\RXUSXUFKDVHRIWKH(1621,4'3<RX·OOILQGLWWREHDSRZHUIXO
DQGIOH[LEOHWRROLQWKHFUHDWLRQRIH[FLWLQJVRXQGV
<RXU'3FRPHVZLWKWZRLPSRUWDQWSXEOLFDWLRQVWKH'38VHU·V*XLGH³ZKLFKJLYHV
\RXDQXQGHUVWDQGLQJRIWKHZD\WKH'3RSHUDWHV³DQGWKHPRUHWHFKQLFDO'3
5HIHUHQFH0DQXDOZKHUH\RXFDQTXLFNO\ILQGVSHFLILFLQIRUPDWLRQDV\RXQHHGLW<RX·UH
QRZUHDGLQJWKH8VHU·V*XLGH
7KHILUVWVHFWLRQRIWKH'38VHU·V*XLGHSURYLGHVDQHDV\WRXQGHUVWDQGWRXU
WKURXJKWKHZRUNLQJVRIWKH'3,W·VFDOOHG8VLQJWKH'3
6HFWLRQGLVFXVVHV7KH'3(IIHFWV,QWKLVVHFWLRQ\RX·OOOHDUQKRZWRFXVWRPL]H
WKH'3·VHIIHFWV
,QWKHILQDOFKDSWHURIWKH8VHU·V*XLGH6HFWLRQ³4XLFN6WDUWV³\RX·OOILQGVWHSE\
VWHSLQVWUXFWLRQVRQKRZWRVHWXSDQGXVHWKH'3LQDYDULHW\RIVSHFLILF
VLWXDWLRQV³LQFOXGLQJSUREDEO\\RXUV,I\RXFDQ·WZDLWWRVWDUWXVLQJ\RXU'3
IHHOIUHHWRMXPSDKHDGWRWKLVVHFWLRQ:KHQ\RX·UHUHDG\WRGLJLQDOLWWOHGHHSHUZH
UHFRPPHQGWKDW\RXUHDG6HFWLRQVDQGWRJDLQDIXOOHUXQGHUVWDQGLQJRIWKH
'3
7KDQN\RXIRUSXUFKDVLQJWKH'3
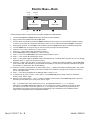
Section 1
Using the DP/2
The Basics
7KH'3LVDVXSHUHIIHFWVSURFHVVRUZKLFKFRQWDLQVWZRVHSDUDWHIXOOSRZHUHGVWHUHR
HIIHFWVER[HVLQVLGH:HFDQWKLQNRIWKHVHLQWHUQDOER[HVDV(IIHFWVQDPHG$DQG%
7KH'3FDQSURFHVVHLWKHUDVLQJOHVRXQGVRXUFHRUWZRRIWKHP7KH'3UHIHUVWR
HDFKRIWKHVHLQGLYLGXDOVRXQGVRXUFHVDVD6RXUFH:KHQ\RXWHOOLWKRZPDQ\6RXUFHV
\RXZDQWLWWRKDQGOHWKH'3DVVLJQVWKHWZR(IIHFWVDFFRUGLQJO\
:KHQ\RX·YHJRWRQHVRXQGVRXUFHWKH'3DVVLJQVERWK(IIHFWVWRWKDWRQH6RXUFH
A
B
,I\RX·UHSURFHVVLQJWZR6RXUFHVWKH'3DVVLJQVRQH(IIHFWWRHDFK
A
B
<RXQRZKDYHWZRFRPSOHWHO\LQGHSHQGHQW(IIHFWVRQHIRUHDFKVRXQGVRXUFH
Square One
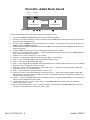
7KH'3GHULYHVLWV$&SRZHUWKURXJKWKHLQFOXGHG36SRZHUVXSSO\
0DNHVXUHWKH'3·VIURQWSDQHOSRZHUEXWWRQLVVZLWFKHGWRLWV´RIIµXSSRVLWLRQ
3OXJWKHVXSSOLHG36SRZHUVXSSO\LQWRWKH'3·VSRZHUVRFNHWORFDWHGRQWKH
ULJKWVLGHRIWKH'3·VUHDUSDQHOZKHQYLHZHGIURPWKHEDFN
3OXJWKH36·VSRZHUFDEOHLQWRDJURXQGHG$&RXWOHW
<RXZRQ·WQHHGDQ\DXGLRFDEOHVDV\RXJRWKURXJKWKLVVHFWLRQRIWKH8VHU·V*XLGH
7XUQWKH'3RQE\SUHVVLQJWKHSRZHUEXWWRQ
7KH8VHU·V*XLGHLVGHVLJQHGWRZRUNEHVWZLWKD'3DVLWFRPHVVKLSSHGIURPWKH
IDFWRU\5HLQLWLDOL]LQJUHWXUQVWKH'3·VVRIWZDUHWRWKHVWDWHLWZDVLQVWUDLJKWRXWRIWKH
ER[
Important:,I\RX·YHDOUHDG\FUHDWHGVRPHQHZ'3HIIHFWVRI\RXURZQRULI
\RX·YHSHUVRQDOL]HGLWVVRIWZDUHLQDQ\ZD\\RX·OOQHHGWRVDYH\RXUFKDQJHVWRD
0,',VWRUDJHGHYLFHEHIRUH\RXUHLQLWLDOL]H5HLQLWLDOL]LQJFOHDUVWKH'3·VPHPRU\
DQG\RXUZRUNZLOOEHORVW6HH6HFWLRQ³6WRUDJHLQWKH'35HIHUHQFH0DQXDOIRU
LQVWUXFWLRQV2QFH\RX·YHVDIHO\VWRUHG\RXUGDWD\RX·OOEHUHDG\WRUHLQLWLDOL]HWKH
'3
How to Reinitialize the DP/2
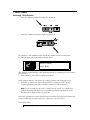
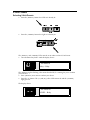
2QWKH'3·VIURQWSDQHOORFDWHWKH{SYSTEM/MIDI} EXWWRQ3UHVVLWDQGKROGLW
GRZQ
'.'%6
&+6
;56'/
1/2#4'
:LWKRXWOHWWLQJJRRIWKH{SYSTEM/MIDI} EXWWRQSUHVV(IIHFWEXWWRQ{B}
#%6+8'
$;2#55'&
$;2#55
#..
/HWJRRIERWKEXWWRQV
2QWKH'3·VGLVSOD\\RX·OOVHH
10(+)
Hit <Write> To
Init RAM Presets
3UHVVWKH5LJKWDUURZEXWWRQRQFH
1RZWKH'3ZLOOGLVSOD\
Hit <Write> To
Reinitialize!!!!
3UHVVWKH{WRITE} EXWWRQRQFH
4+6'
#0%'.
12;
0&1
7KHUHLQLWLDOL]DWLRQFRPPDQGLVH[HFXWHGDQGWKH'3EULHIO\IODVKHVLWVVWDUWXSVFUHHQ
ENSONIQ * DP/2
OS Version X.XX
i
This is the version number of
your DP/2’s software
Using the DP/2 with 1 Sound Source
/HW·VVWDUWE\LPDJLQLQJWKDWZHZDQWWRUXQDVLQJOHVRXQGVRXUFHDQHOHFWULFJXLWDU
WKURXJKWKH'3-XVWDVDJXLWDUSOD\HUZRXOGEHJLQE\OD\LQJRXWWZRHIIHFWSHGDOVRQ
WKHIORRUZH·OOVHWXSRXUWZR'3(IIHFWV
Effect A
3UHVVWKH'3·V{EDIT}EXWWRQ
'.'%6
&+6
;56'/
1/2#4'
7KH{EDIT} EXWWRQ·V\HOORZ/('OLJKWVXS
3UHVVWKH{A} EXWWRQ
10(+) 7KH{A} EXWWRQ·V\HOORZ/('OLJKWVXS
7KHODUJHNQRERQWKH'3·VIURQWSDQHOLVWKHGDWDHQWU\NQRE:HXVHLWWRFKDQJH³RU
´HGLWµ³WKH'3·VVHWWLQJVZKLFKZHFDOOSDUDPHWHUV
7XUQWKHGDWDHQWU\NQREFORFNZLVHWRGLDOLQ9RLFH&KRUXV
A:8 Voice Chorus
8 Voice Chorus
,QDERXWDVHFRQGWKHGLVSOD\ZLOOFKDQJHWR
flashing
m
A:8 Voice Chorus
Mix=57 Volume=99
7KLVDOZD\VKDSSHQVDIWHU\RXGLDOLQDQHZHIIHFW³WKH'3SUHSDUHVLWVHOILQWKHHYHQW
WKDW\RX·GOLNHWRFXVWRPL]HWKHHIIHFW\RX·YHMXVWVHOHFWHG6HFWLRQRIWKH8VHU·V*XLGH
GHVFULEHVKRZWRHGLWWKH'3·V(IIHFWV
,QRXUVFHQDULRZH·YHMXVWSXWRXUILUVWHIIHFWSHGDODFKRUXVGRZQRQWKHIORRU
A
8 Voice Chorus %HDULQPLQGRIFRXUVHWKDWWKH'3·VHIIHFWVDUHRIDPXFKKLJKHUTXDOLW\WKDQDQ\
DFWXDOIRRWSHGDOFDQRIIHU
/HW·VVHWXSWKHVHFRQGSHGDO
Effect B
3UHVVWKH{B} EXWWRQ,WV\HOORZ/('OLJKWV
10(+) 7XUQWKHGDWDHQWU\NQREWRGLDOLQ+DOO5HYHUE
B:Hall Reverb
Hall Reverb
,QDPRPHQWWKHGLVSOD\ZLOORQFHDJDLQFKDQJHDVLWGLGWKHILUVWWLPH³QRZZHKDYH
WZRSHGDOVRQWKHIORRU
A
8 Voice Chorus
B
Hall Reverb
:LWKERWKRIRXUIRRWSHGDOVODLGRXWWKHQH[WORJLFDOVWHSZRXOGEHWRFRQQHFWRXUJXLWDU
WRRXU(IIHFWV,IWKHVHZHUHDFWXDOIRRWSHGDOVZHZRXOGDOVRKDYHWRJUDEDQXPEHURI
FDEOHVWRZLUHWKHPDOOWRJHWKHU
7KH'3HOLPLQDWHVWKHQHHGIRUDOOWKRVHFDEOHV:HWHOOWKH'3KRZZHZDQWRXU
(IIHFWVFRQQHFWHGDQGWKH'3LQWHUQDOO\´ZLUHVµHYHU\WKLQJWRJHWKHUIRUXV
:HUHIHUWRVXFKD´ZLULQJµVHWXSDVD´&RQILJXUDWLRQµRU&RQILJIRUVKRUW$QGVLQFH
ZH·UHFXUUHQWO\ZRUNLQJZLWKRQHVRXQGVRXUFH³RXUJXLWDU³ZKDWZH·UHSXWWLQJ
WRJHWKHULVFDOOHGD´6RXUFH&RQILJXUDWLRQµRU´6RXUFH&RQILJµIRUVKRUW
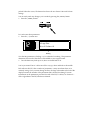
3UHVVWKH{CONFIG} EXWWRQ
10(+)
7KH&RQILJ/('OLJKWVDQGWKHIROORZLQJGLVSOD\DSSHDUV
flashing
m
1 Source Config
1,2 > AB
:KHQDQDUHDRQWKHGLVSOD\LVIODVKLQJWKDWPHDQVWKDWLWFDQEHFKDQJHGE\WXUQLQJWKH
GDWDHQWU\NQRE
$6RXUFH&RQILJLVH[DFWO\ZKDWZH·UHVHWWLQJXSVRZHGRQ·WQHHGWRDOWHUWKLV
SDUDPHWHU
Note: ,Q WKH XSSHUULJKWKDQG FRUQHU RI WKH '3·V IURQW SDQHO DUH WZR
GLDJUDPV GHSLFWLQJ KRZ WKH'3DOORFDWHVLWV(IIHFWVWRWKH6RXUFHVDWKDQG
6LQFHZH·YHJRWRQH6RXUFHWKHJUHHQOLJKWEHORZWKH´VUFµIRU´VRXUFHµ
GLDJUDPLVOLW
E54%
E E
F
F
<RXFDQVHHWKDWWKLVVLQJOH6RXUFHXVHVERWKRIWKH'3·V(IIHFWVDVVKRZQE\WKH´$µ
DQG´%µWRJHWKHULQVLGHWKHVLQJOHER[
,QWKH'3ZHPRYHEHWZHHQSDUDPHWHUVE\XVLQJWKH{<} DQG{>} EXWWRQV
3UHVVWKH{>} EXWWRQRQFH7KHGLVSOD\VKRZV
AB Input Select=
(1) Mono
:LWKWKLVSDUDPHWHUZHWHOOWKH'3ZKDWNLQGRI6RXUFHZH·UHXVLQJ$QHOHFWULFJXLWDU
KDVDVLQJOHJXLWDUFRUGFRPLQJRXWRILWVRLW·VD0RQR6RXUFH7KLVLVDOUHDG\VHWWKHZD\
ZHZDQWLW³ZHQHHGQ·WFKDQJHDQ\WKLQJKHUH
7KH´µRQWKHERWWRPOLQHRIWKHGLVSOD\VKRZVWKDWWKH'3ZLOO´OLVWHQµWR,QSXW
IRUD0RQRVRXQGVRXUFHRXUJXLWDU³DQGVRWKDW·VWKHMDFNZH·GKDYHWRSOXJLWLQWR
Note: 7KHUH DUH DFWXDOO\ WZR ,QSXW MDFNV RQ WKH '3³\RX FDQ XVH
ZKLFKHYHURQHRIWKHPLVPRUHFRQYHQLHQW
7KHUH·V DQ LQSXW MDFN RQ WKH OHIW VLGH RI WKH IURQW SDQHO RI WKH '3 LQ
EHWZHHQWKHSRZHUEXWWRQDQGWKHSKRQHVMDFN
10
1((
219'4
+0276E
$QGWKHUH·VDQ,QSXWMDFNRQWKHEDFNSDQHO
2*10'5
0276F
0276E
/101
:LWKDVRXUFHFRQILJ³DVZHVDZLQWKHIURQWSDQHOGLDJUDP³WKH'3VHQGVLWVVWHUHR
VLJQDORXWWKURXJK2XWSXWMDFNVDQGRQLWVEDFNSDQHO
76276F
76276E
/101
7KLVLVWUXHHYHQZKHQZHKDYHDPRQR6RXUFHVLQFHDOORIWKH'3·V(IIHFWVDUH
WKHPVHOYHVLQVWHUHR
7KH'3KDVDIHDWXUHFDOOHGLQWHOOLJHQWMDFNVZLWFKLQJ³LWNQRZVKRZPDQ\FDEOHVDUH
SOXJJHGLQWRWKH2XWSXWMDFNV,ILWVHQVHVWKDWWKHUH·VQRDXGLRFDEOHSOXJJHGLQWR
2XWSXWMDFNWKH'3VHQGVHYHU\WKLQJRXWWKURXJK2XWSXWLQPRQR
76276F
76276E
/101
7KLVLVKDQG\IRUPXVLFLDQVZKRXVHWKH'3ZLWKDFRQYHQWLRQDOJXLWDUEDVVNH\ERDUG
DPSOLILHURULQDQ\VLWXDWLRQZKHUHPRQRHIIHFWVDUHDOOWKDW·VQHHGHG
Saving Your Set-Up
7KH'3FDQUHPHPEHU\RXUHQWLUHVHWXSIRU\RX³WKH(IIHFWVDQGWKH´ZLULQJµ³VR
WKDW\RXFDQHDVLO\UHFDOOLWDQ\WLPH\RXOLNH:HFDOOVXFKDVHWXSD&RQILJ3UHVHW7KH
ILUVWVWHSLVWRZULWHWKH&RQILJ3UHVHWLQWRWKH'3·VPHPRU\
6LQFHWKH{EDIT} DQG{CONFIG} /('VDUHDOUHDG\OLW\RXGRQ·WQHHGWRSUHVVHLWKHURI
WKHP:KHQ\RXZDQWWRVDYHD&RQILJ3UHVHWERWKWKH{EDIT} DQG{CONFIG} OLJKWVKDYH
WREHRQ
3UHVVWKH{WRITE} EXWWRQ
:H·OOQHHGWRILQGDORFDWLRQZLWKLQWKH'3·VPHPRU\LQZKLFKWRVWRUHRXU&RQILJ
3UHVHW7KHUHDUHSRVVLELOLWLHVRUJDQL]HGLQWRWZRVHWVRIPHPRU\ORFDWLRQVHDFK
:HFDOOWKHVHWZRVHWV%DQNDQG%DQNDQGZHFDQVDYH&RQILJ3UHVHWVWRORFDWLRQV
WKURXJKLQHLWKHUEDQN/RFDWLRQVWKURXJKLQ%DQNDUHHPSW\³LI\RX·UH
UHOXFWDQWWRZULWHRYHUDQ\RIWKH'3·VRULJLQDOVWUDLJKWIURPWKHIDFWRU\&RQILJ
3UHVHWV\RXFDQVDYHXSWRWHQRI\RXURZQ&RQILJ3UHVHWVWKHUH2IFRXUVH\RXFDQ
DOZD\VJHWEDFNWKHRULJLQDO3UHVHWVE\UHLQLWLDOL]LQJ
Note: 7KH '3 DOVR KDV DQ DGGLWLRQDO &RQILJ 3UHVHWV SUHSURJUDPPHG
IRU\RXE\(1621,47KHVHDUHVWRUHGLQORFDWLRQVWKURXJKLQHDFKRIWKH
WZREDQNVDQGFDQ·WEHRYHUZULWWHQZLWKQHZVHWXSV
/HW·VVDYHRXU&RQILJ3UHVHWWRORFDWLRQWKHILUVWPHPRU\ORFDWLRQLQ%DQN
7XUQWKHGDWDHQWU\NQREXQWLOWKHGLVSOD\ORRNVOLNHWKLV
Write to Config
Mono Vocal Setup
´0RQR9RFDO6HWXSµLVWKH&RQILJ3UHVHWZH·OOEHUHSODFLQJ
3UHVVWKH{WRITE} EXWWRQDJDLQWRFRQILUPWKHORFDWLRQZH·YHFKRVHQ7KHGLVSOD\
VKRZV
Edit Config Name
1 Src: Mono In
:KHQWKH'3LVVKRZLQJWKLVGLVSOD\ZHFDQQDPHRXU&RQILJ3UHVHW
Note: 7KH ILUVW ´µ RQ WKH ORZHU OLQH RI WKH VFUHHQ LV XQGHUOLQHG :KHQ D
FKDUDFWHURQWKH'3·VGLVSOD\LVXQGHUOLQHGLWFDQEHFKDQJHGZLWKWKHGDWD
HQWU\NQREMXVWDVZHIRXQGHDUOLHUZLWKIODVKLQJSDUDPHWHUV
$V\RX·OOVRRQVHHWKHQXPHUDO´µLVMXVWZKDWZHZDQWKHUHVRZHQHHGQ·WFKDQJHLW
3UHVVWKH{>} EXWWRQRQFH
7KLVFDXVHVWKHEODQNVSDFHWREHXQGHUOLQHG³DQGWKHUHIRUHFKDQJHDEOH%XWDEODQN
VSDFHKDSSHQVWREHZKDWZHZDQWKHUHDOVR
3UHVVWKH{>} EXWWRQDJDLQ
7KHXQGHUOLQHPRYHVWRWKH´6µ
7XUQWKHGDWDHQWU\NQREFRXQWHUFORFNZLVHWRORFDWHWKHFDSLWDO´*µ
%\FRQWLQXLQJWRXVHWKH{>} EXWWRQWRPRYHWKHXQGHUOLQHDQGWKHGDWDHQWU\NQREWR
GLDOLQFKDUDFWHUVQDPHWKH&RQILJ3UHVHW´*XLWDU);µ´);µLVDFRPPRQ
PXVLFLQGXVWU\DEEUHYLDWLRQIRU´HIIHFWVµ
,I\RXPDNHDPLVWDNHDQ\ZKHUH\RXFDQDOZD\VXVHWKH{<} EXWWRQWRJREDFNDQGIL[LW
:KHQ\RX·UHGRQHWKHGLVSOD\ZLOOORRNOLNHWKLV
Edit Config Name
1 Guitar & 2 FX
3UHVVWKH{WRITE} EXWWRQDJDLQDQGWKH'3·VVFUHHQZLOOIODVK
*** WRITE ***
*** OK ****
7KH'3KDVVDYHG\RXUVHWXSWKH&RQILJ3UHVHWFDOOHG´*XLWDU);µWRPHPRU\
ORFDWLRQ
&RQJUDWXODWLRQV<RX·YHMXVWFUHDWHGDQGVDYHG\RXUILUVW'3&RQILJ3UHVHW
Using the DP/2 with a Single Stereo Sound Source
6XSSRVH\RXZDQWWRXVHWKH'3ZLWKDNH\ERDUGLQVWHDGRIDJXLWDU7KHPDLQ
GLIIHUHQFHKHUHZRXOGEHWKDWPRVWHOHFWURQLFNH\ERDUGVDUHVWHUHRLQVWUXPHQWVZLWKWZR
RXWSXWV³RXUJXLWDURQO\KDGRQH
/HW·VVWDUWLQWKHVDPHZD\ZHGLGZLWKRXUJXLWDUE\VHWWLQJXSRXUWZR(IIHFWV
Effect A
:KHQ\RXZDQWWRGLDOLQDQHZ(IIHFWWKH{EDIT} /('PXVWEHRQ6LQFHLW·VDOUHDG\OLW
\RXGRQ·WKDYHWRSUHVV{EDIT}
3UHVVWKH(IIHFW{A} EXWWRQ
8VHWKHGDWDHQWU\NQREWRFDOOXS)ODQJHU
7KLVVHWVXSRXUILUVWNH\ERDUG(IIHFW
A
Flanger
Effect B
3UHVV{B}
'LDOLQ+DOO5HYHUE
A
B
Flanger
Hall Reverb
<RX·OOQRWLFHWKDWWKLVLVWKHVDPHUHYHUEZHXVHGZLWKRXUJXLWDUVHWXS7KDW·VILQH\RX
FDQXVHWKHVDPH(IIHFWLQDVPDQ\3UHVHWVDV\RXOLNH<RXFDQDOVRXVHWZRRIWKHVDPH
W\SHRIHIIHFWWRJHWKHULI\RX·GOLNH³WZRGLIIHUHQWUHYHUEVIRUH[DPSOH
1RZZHQHHGWRWHOOWKH'3WKDWZH·OOKDYHWZRFDEOHVFRPLQJLQIURPRXUVWHUHR
NH\ERDUG
3UHVV{CONFIG}
2QFHDJDLQWKHGLVSOD\VKRZV
1 Source Config
1,2 > AB
6LQFHZHVWLOOKDYHRQO\RQHVRXQGVRXUFH³RXUNH\ERDUG³WKLVVHWWLQJLVVWLOO
DSSURSULDWH
Important:´1XPEHURI6RXUFHVµGRHVQRWPHDQ´QXPEHURILQSXWVµ(YHQWKRXJK
RXUVWHUHRNH\ERDUGKDVWZRFDEOHVFRPLQJLQWRWKH'3LW·VVWLOOMXVWRQHVRXQG
VRXUFH,W·VD6WHUHR6RXUFH7HOOLQJWKH'3KRZPDQ\VRXQGVRXUFHV\RXZDQWWR
SURFHVVVLPSO\WHOOVLWZKHWKHURUQRWWRGLYLGHLWVSDLURI(IIHFWV
3UHVV{>} RQFH7KHGLVSOD\VKRZV
AB Input Select=
(1) Mono
7KHQXPEHULQWKHORZHUOHIWKDQGSDUWRIWKHGLVSOD\WHOOVXVWKDWWKH'3ZLOO´OLVWHQµ
WR,QSXWMDFNIRUDPRQRVRXQGVRXUFH
2XUNH\ERDUGKRZHYHULVVWHUHR7KLVLVZKHUHZHOHWWKH'3NQRZWKDWZH·OOEH
SOXJJLQJLQWZRFDEOHVIURPRXUNH\ERDUG·VVWHUHRRXWSXW
7XUQWKHGDWDHQWU\NQREFRXQWHUFORFNZLVHVRWKDWWKHGLVSOD\UHDGV
AB Input Select=
(1,2) Stereo
7KH'3ZLOOQRZ´OLVWHQµWR,QSXWVDQGIRURXUVWHUHRVRXQGVRXUFH
:H·UHQRZUHDG\WRVDYHRXUNH\ERDUG&RQILJ3UHVHW
3UHVV{WRITE}
7XUQWKHGDWDHQWU\NQREWRPRYHWRORFDWLRQ³ZH·OOSXWLWULJKWQH[WWRRXUJXLWDU
VHWXSIRUFRQYHQLHQFH7KHGLVSOD\VKRZV
Write to Config
Stereo Vox Setup
3UHVV{WRITE} DJDLQWRFRQILUPWKHORFDWLRQ
1RZZHFDQQDPHWKHQHZVHWXS
8VLQJWKH{<} DQG {>} EXWWRQVDQGWKHGDWDHQWU\NQRE³MXVWDVZHGLGHDUOLHU³
QDPHWKLVNH\ERDUG&RQILJ3UHVHW´.H\ERDUG);µ
Edit Config Name
Keyboard & 2 FX
:KHQ\RX·UHGRQHSUHVVWKH{WRITE} EXWWRQDJDLQDQGWKH'3ZLOOEULHIO\
GLVSOD\
*** WRITE ***
*** OK ****
<RX·YHMXVWVDYHG\RXUVHFRQG&RQILJ3UHVHW1RZWKDW\RXUJXLWDUDQGNH\ERDUG&RQILJ
3UHVHWVDUHVWRUHGLQWKH'3·VPHPRU\\RXFDQUHFDOOWKHPHDVLO\$QGVLQFHWKH'3
UHWDLQVLWVPHPRU\HYHQZKHQLW·VEHHQWXUQHGRIIWKH\·OOEHWKHUHWKHQH[WWLPHDQG
HYHU\WLPH\RXSRZHUXS\RXU'3XQWLO\RX\RXUVHOIHUDVHWKHPRUUHLQLWLDOL]HWKH
'3
Recalling Config Presets
3UHVVWKH{SELECT} EXWWRQ,WV/('OLJKWVXSDQGWKH{EDIT} OLJKW JRHVRXW
6LQFHWKH{CONFIG} OLJKWLVDOUHDG\RQ\RXGRQ·WQHHGWRSUHVVWKH{CONFIG}
EXWWRQ
7XUQWKHGDWDHQWU\NQREFORFNZLVH
$V\RXVFUROOXSZDUGVWKURXJKWKH&RQILJ3UHVHWV\RX·OOVHHWKHQXPEHUVLQFUHPHQW
IURPWRDQGWKHQVWDUWDOORYHUDJDLQIURP7KHILUVWDUHWKH&RQILJ3UHVHWVLQ
%DQNDQGWKHQH[WDUHWKRVHLQ%DQN7KHSUHVHQFH³RUDEVHQFH³RIDGRWLQWKH
ORZHUULJKWKDQGFRUQHURIWKHQXPEHUGLVSOD\WHOOV\RXZKLFKEDQN\RX·UHLQ
7KHQXPHULFGLVSOD\IRUWKH&RQILJ3UHVHWVLQ%DQNORRNOLNHWKLV
i
no dot
7KH&RQILJ3UHVHWVLQ%DQNKDYHDGRWLQWKHORZHUULJKWKDQGFRUQHURIWKHQXPEHU
GLVSOD\
i
dot
Note: 6RPHWLPHV \RX PD\ VHH DQRWKHU VPDOO GRW EHWZHHQ WKH WZR QXPHUDOV
7KLV WHOOV \RX WKDW WKH '3 LV UHFHLYLQJ 0,', LQIRUPDWLRQ 6HFWLRQ ³
6\VWHP0,', LQ WKH '3 5HIHUHQFH 0DQXDO GLVFXVVHV XVLQJ 0,', ZLWK WKH
'3
'LDOXS&RQILJ3UHVHWLQ%DQNQRGRW
7KHUH·VRXUJXLWDUVHWXS*XLWDU);
1 Guitar & 2 FX
A:cho ~ B:rev
7KHERWWRPOLQHRIWKHGLVSOD\LVVKRZLQJXVDEEUHYLDWLRQVIRUWKHHIIHFWVZH·UHXVLQJLQ
WKLV&RQILJ3UHVHW
'LDOLQLQ%DQN³LW·VRXUNH\ERDUG&RQILJ3UHVHW.H\ERDUG);
*REDFNWR*XLWDU);
7KH{SELECT} OLJKWLVIODVKLQJ:KHQ\RXVHOHFWDQHZ&RQILJ3UHVHWWKH'3ZDLWVIRU
\RXWRFRQILUP\RXUFKRLFHEHIRUHLWDFWXDOO\ORDGVLQWKHVHWXS7KLVIODVKLQJOLJKWWHOOV
\RXWKDWWKH'3LVDZDLWLQJ\RXUFRQILUPDWLRQ
3UHVV{SELECT} DJDLQWRFRQILUP\RXUFKRLFHRI*XLWDU);
7KH{SELECT} /(' VWRSVIODVKLQJ7KDW·VDOOWKHUHLVWRLW
Note: :KHQ ZH ZDQWHG WR UHFDOO RXU &RQILJ 3UHVHWV ZH RQO\ KDG WR SUHVV
{SELECT} DQGGLDOLQRXUFKRLFHVLQFHWKH{CONFIG} OLJKWZDVDOUHDG\OLW7KH
LPSRUWDQW WKLQJ WR UHPHPEHU ZKHQ UHFDOOLQJ &RQILJ 3UHVHWV LV WKDW ERWK WKH
{SELECT} DQG {CONFIG} OLJKWV KDYH WR EH RQ EHIRUH \RX FDQ VHOHFW VHWXSV
<RXPD\QHHGWRSUHVVRQHRUERWKRIWKHEXWWRQVWRJHWWKHPWROLJKW
The Flexible DP/2
7KH'3FDQSURGXFHPDQ\GLIIHUHQWW\SHVRIVRXQGVE\FKDQJLQJWKHUHODWLRQVKLSV
EHWZHHQLWV(IIHFWV/HW·VH[DPLQHDFRXSOHRIWKHSRVVLELOLWLHVLQRUGHUWRVHHKRZZHFDQ
WDNHDGYDQWDJHRIWKH'3·VWHUULILFIOH[LELOLW\
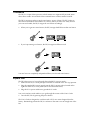
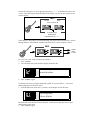
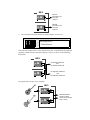
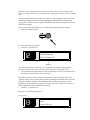
Serial Effects
fF
A
3UHVV{EDIT}
B
6LQFHWKH{CONFIG} EXWWRQ·V/('LVDOUHDG\OLW\RXGRQ·WKDYHWRSUHVVWKDW
Note: :KHQHYHU\RXZDQWWRZRUNRQ\RXUVHWXS·V´ZLULQJµERWKWKH{EDIT}
DQG{CONFIG} OLJKWVPXVWEHOLW
7KHGLVSOD\VKRZV
1 Source Config
1,2 > AB
7KLVLVDSURSRV³ZH·YHJRWRQH6RXUFHDJXLWDU
3UHVV{>} RQFH³ZH·YHJRWWRWHOOWKH'3ZKDWNLQGRILQSXWZHQHHG
AB Input Select=
(1) Mono
7KLVLVDOVRVHWFRUUHFWO\IRURXUJXLWDUZLWKLWVVLQJOHFDEOH
3UHVVWKH{>} EXWWRQRQFHPRUH³WKHGLVSOD\VKRZV
AB Unit Routing=
[A~B] serial
7KLVGLVSOD\JLYHVXVWKHRSSRUWXQLW\WRGHWHUPLQHWKHUHODWLRQVKLS³RU´URXWLQJµ³
EHWZHHQ(IIHFWV$DQG%
Note: 6RPHRIWKH'3·VGLVSOD\VUHIHUWRWKHWZR(IIHFWVDV8QLWV
7KHUH·VDQRWKHUWHUPRQWKHERWWRPOLQHRIWKHGLVSOD\ZKLFKZHKDYHQ·WHQFRXQWHUHG
EHIRUH:KHQ(IIHFWVDUH´ZLUHGµRQHDIWHUWKHRWKHULQDVHULHVZHVD\WKDWWKH\KDYHD
VHULDOUHODWLRQVKLS
Sound
comes
into
the first
Effect
The sound,
with the first
Effect now
added to it,
travels into the
second Effect
The sound,
with both
Effects added,
comes out of
the second
Effect
Note: 6LQFH WKH '3·V (IIHFWV DUH VWHUHR VR LV WKH VRXQG WUDYHOLQJ EHWZHHQ
WKHP:H·UHVKRZLQJWKHVRXQGKHUHZLWKVLQJOHDUURZVIRUWKHVDNHRIFODULW\
:KHQDVRXQGWUDYHOVWKURXJK(IIHFWVDUUDQJHGLQDVHULHVLWEHFRPHVPRUHDQGPRUH
SURFHVVHG7KLVLVRIWHQGHVLUDEOHVLQFHLWDOORZV\RXWRSROLVKXSWKHVRXQGDELWPRUH
HDFKWLPHLWSDVVHVWKURXJKDQ(IIHFW
)RULQVWDQFHDFRPSUHVVRUDQGDUHYHUEZLUHGLQVHULHVPLJKWEHKHOSIXOLQSURFHVVLQJD
OHDGYRFDO7KHYRFDOZRXOGILUVWJRWKURXJKWKHFRPSUHVVRUWRVPRRWKRXWDQ\YROXPH
IOXFWXDWLRQV$IWHUWKDWWKHWLJKWHQHGXSYRFDOFRXOGJRRQWRDUHYHUEZKHUHDQ
DPELHQFHRI\RXUFKRLFHFRXOGEHDGGHG
2QWKH'3GLVSOD\VZHXVHDULJKWSRLQWLQJDUURZ³´~µ³DVVKRUWKDQGIRUWKHZRUG
´VHULDOµZKHQVKRZLQJWKHUHODWLRQVKLSEHWZHHQ(IIHFWV:HFDQVHHWKLVV\PERORQWKH
FXUUHQWGLVSOD\
DP/2
the sound travels in stereo
out of A and into B
A
B
~
A and B’s serial
relationship is
represented by an " ~ ."
:KHQ(IIHFWV$DQG%KDYHDVHULDOUHODWLRQVKLSWKHVRXQGFRPHVLQWRWKH'3WUDYHOV
WKURXJK(IIHFW$WKHQ(IIHFW%DQGWKHQRXWRIWKH'3·VVWHUHR2XWSXWVDQG
DP/2
A
B
Output
Jacks
1 and 2
/HW·VVDYHRXUVHULDOVHWXSLQORFDWLRQLQ%DQN
3UHVV{WRITE}
7XUQWKHGDWDHQWU\NQREXQWLOWKHGLVSOD\ORRNVOLNHWKLV
Write to Config
Mono In Keyboard
3UHVV{WRITE} DJDLQ
:H·OOQDPHRXU3UHVHWXVLQJWKHVKRUWKDQGV\PEROZH·YHMXVWOHDUQHG~IRUDVHULDO
UHODWLRQVKLSEHWZHHQ(IIHFWV$DQG%
:LWKWKHGDWDHQWU\NQREDQG{>} EXWWRQVHWWKHGLVSOD\WRORRNOLNHWKLV
Edit Config Name
EffectA~EffectB
7KHQDPHWHOOVLWDOOWKHDUURZEHWZHHQ(IIHFW$DQG%VKRZVWKDWWKH\KDYHDVHULDO
UHODWLRQVKLSWRHDFKRWKHU
3UHVV{WRITE} DJDLQ
*** WRITE ***
*** OK ****
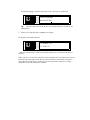
Parallel Effects
fF
A
B
3UHVV{>} WZLFHVRWKDW WKHGLVSOD\RQFHDJDLQVKRZV
AB Unit Routing=
[A~B] serial
7XUQWKHGDWDHQWU\NQREFORFNZLVHVRWKDWWKHGLVSOD\ORRNVOLNHWKLV
AB Unit Routing=
[A+B] parallel
7KHZRUG´SDUDOOHOµQRZDSSHDUVRQWKHERWWRPOLQHRIWKHGLVSOD\:HFDQDOVRVHHWKDW
WKHDUURZLQWKHSDUHQWKHVHVEHWZHHQ´$µDQG´%µKDVFKDQJHGWRDSOXVVLJQ´+µ7KLV
LVWKHV\PEROZHXVHWRVKRZDSDUDOOHOFRQQHFWLRQEHWZHHQ(IIHFWV
,QDSDUDOOHOFRQQHFWLRQEHWZHHQ(IIHFWVERWK(IIHFWVSURFHVVWKHVRXQGVHSDUDWHO\DQGDW
WKHVDPHWLPH
Sound
comes
into the
DP/4+
The sound
is sent
to each
Effect
separately
The sound, with the first
Effect added, comes
out of the first Effect
The sound, with the second
Effect added, comes
out of the second Effect
3DUDOOHOSURFHVVLQJLVXVHIXOZKHQ\RXZDQWWRDGGVHYHUDOGLVWLQFW(IIHFWVWRDVRXQGEXW
QRWWRHDFKRWKHU7KHUHDUHWLPHVZKHQUXQQLQJ(IIHFWVLQSDUDOOHOLVWKHEHVWZD\WRNHHS
\RXUVRXQGFOHDUDQGFOHDQ
+HUH·VDQH[DPSOH6XSSRVH\RX·YHGHFLGHGWRUXQDOHDGYRFDOWKURXJKDIODQJHU(IIHFW
<RX·GDOVROLNHWRDGGDWRXFKRIUHYHUE7KHVZLUOLQJ´VZRRVKµDGGHGE\WKHILUVW
(IIHFW³WKHIODQJHU³VRXQGVJRRGEXWLWDOVRPDNHVWKHVLQJHU·VO\ULFVOHVVGLVWLQFW,I\RX
UXQWKLVIODQJHGYRFDOWKURXJKDUHYHUEWKHO\ULFVZLOOEHFRPHHYHQKDUGHUWRPDNHRXW
$PXFKEHWWHUDSSURDFKZRXOGEHWRDUUDQJHWKH(IIHFWVLQSDUDOOHOZKHUHWKHYRFDOJRHV
VHSDUDWHO\WRWKHIODQJHUDQGUHYHUE<RXFDQWKHQFRPELQHWKHWZRYHU\GLIIHUHQWVRXQGV
WRJHWKHUVRWKDWWKHFOHDQYRFDOZLWKLWVWRXFKRIUHYHUELVPL[HGWRJHWKHUZLWKWKH
IODQJHGYHUVLRQ
%\WKHZD\WKHUHDUHDIHZRWKHUUHODWLRQVKLSVZHFDQVHWXSEHWZHHQRXU(IIHFWV<RX
FDQOHDUQPRUHDERXWWKHPLQWKH'35HIHUHQFH0DQXDO·V6HFWLRQ³&RQILJ
3DUDPHWHUV
:KHQZHGLDOHGLQ´SDUDOOHOµDPRPHQWDJRKHUH·VZKDWZHVHWXS
DP/2
A
the sound
comes into
the DP/4+
the sound goes
separately into
Effects A and B
+
B
the parallel
relationship
is represented
by a plus sign
7KH'3GLJLWDOO\FRSLHVWKHLQFRPLQJVRXQGDQGWKHQVHQGVRQHFRS\WRHDFK(IIHFW
6LQFHWKHFRSLHVDUHGLJLWDOWKH\ERWKVRXQGHYHU\ELWDVJRRGDVWKHRULJLQDO
7KLVLVKRZVRXQGZLOOQRZWUDYHOWKURXJKWKH'3
DP/2
A
+
B
Both DP/2 Effects
remain in stereo
as they share Output
jacks 1 and 2.
/HW·VVDYHRXUQHZSDUDOOHOHIIHFWV&RQILJ3UHVHWWRORFDWLRQ³LQ%DQN³WKLVWLPH
3UHVV{WRITE}
7XUQWKHGDWDHQWU\NQREXQWLOWKHGLVSOD\ORRNVOLNHWKLV
Write to Config
Basic Mixdown
i
The dot tells you this Config Preset is in Bank 2
3UHVV{WRITE} DJDLQ
7KLVWLPHZH·OOXVHWKHV\PEROIRUDSDUDOOHOUHODWLRQVKLS³+³LQRXU&RQILJ3UHVHW·V
QDPH
:LWKWKH{>} EXWWRQDQGGDWDHQWU\NQREVHWWKHGLVSOD\WRORRNOLNHWKLV
EffectA+EffectB
3UHVV{WRITE} DJDLQ
Edit Config Name
*** WRITE ***
*** OK ****
LVGLVSOD\HG
(B)ypass and (K)ill
,QWKH'3LW·VHDV\WRLQVWDQWO\WXUQ(IIHFWVRII
3UHVVWKH{>} EXWWRQIRXUWLPHVWRJHWWR(GLW&RQILJ3DUDPHWHU
(b)ypass (k)ill
A=b B=b
3UHVVWKH{A} EXWWRQWZLFH³LWVUHG/('JRHVRQ
<RXFDQDOVRVHWXSWKH'3VRWKDWSUHVVLQJDIRRWVZLWFKRUVHQGLQJDFRPPDQGRYHU
0,',ZLOODFFRPSOLVKWKHVDPHWKLQJ
3UHVVWKH{CONFIG} EXWWRQ
:KHQDQ(IIHFW·VUHGOLJKWLVRQWKH'3ORRNVWRWKHSDUDPHWHUZH·YHQRZJRW
GLVSOD\HGWROHDUQZKDWZHZDQWGRQHZLWKWKHVRXQGJRLQJWKURXJKWKH(IIHFW:HFDQ
VHHWKDW(IIHFW$LVFXUUHQWO\VHWWR´EµZKLFKVWDQGVIRUE\SDVV
:KHQDQ(IIHFWLVE\SDVVHGVRXQGSDVVHVWKURXJKLWZLWKRXWWKHHIIHFWEHLQJDGGHG,Q
HVVHQFHE\SDVVLQJWXUQVWKHHIIHFWRII
7KH%(IIHFWLVDOVRVHWWR´Eµ6LQFHLWVUHG/('LVQ·WRQLW·VQRWFXUUHQWO\E\SDVVHG
(IIHFWVFDQDOVREHVHWWR´NµZKLFKVWDQGVIRU´NLOOµ:KHQDQ(IIHFWLVVHWWR´Nµ³DQGLWV
UHGOLJKWLVRQ³VRXQGWUDYHOVLQWRWKH(IIHFWDQGLVVWRSSHG1RWKLQJDWDOOFRPHVRXWRI
WKH(IIHFW
<RXFDQDOZD\VWHOOZKHWKHUDQ(IIHFWLVE\SDVVHGRUNLOOHGE\ZKHWKHURUQRWLWVUHG/('
LVIODVKLQJRUVROLGO\OLW:KHQDQ(IIHFWLVNLOOHGLWVUHG/('IODVKHVRQDQGRII,IWKHUHG
OLJKW·VRQEXWQRWIODVKLQJWKH(IIHFWLVE\SDVVHG
3UHVV{A} WZLFHPRUHWRWXUQLWVUHGOLJKWRIIDQG´XQE\SDVVµLW
Note: :KHQDQ(IIHFW·V\HOORZOLJKWLVRQ\RXRQO\QHHGWRSUHVVWKH(IIHFW·V
EXWWRQRQFHWRWXUQWKHUHG/('RIIRUEDFNRQ<RXFDQDOVRE\SDVVRUNLOOERWK
RI WKH (IIHFWV VLPXOWDQHRXVO\ E\ SUHVVLQJ WKH {CONFIG} EXWWRQ XQWLO ERWK RI
WKHLU UHG /('V OLJKW DW RQFH 3UHVVLQJ {CONFIG} DJDLQ ZLOOVZLWFKWKHPEDFN
RII
Using the DP/2 With more Than One Sound Source
6RIDUZH·YHEHHQWDONLQJDERXWKRZWRXVHWKH'3ZLWKDVLQJOHVRXQGVRXUFH%XWWKH
'3FDQSURFHVVWZRFRPSOHWHO\GLIIHUHQW6RXUFHVDWWKHVDPHWLPH
Setting Up a 2-Source Config Preset
/HW·VFUHDWHD&RQILJ3UHVHWWKDWZLOOVLPXOWDQHRXVO\SURFHVVDJXLWDUDQGDEDVV
,IWKH{CONFIG} /('LVQ·WDOUHDG\OLWSUHVV{CONFIG}
3UHVV{<} IRXUWLPHVWRJRWR3DUDPHWHU
7KLVWLPHZHKDYHWZR6RXUFHV³WKHJXLWDUDQGWKHEDVV
7XUQWKHGDWDHQWU\NQREFORFNZLVHWRFKDQJHWKHWRSOLQHRIWKHGLVSOD\WR´6RXUFH
&RQILJµ
$IWHUDERXWDVHFRQGWKHGLVSOD\ZLOOEULHIO\IODVK
Updating
Config
DQGWKHQFKDQJHWR
2 Source Config
1>A 2>B
6LQFHWKH'3QRZKDVWZR6RXUFHVWRSURFHVVLWKDVDVVLJQHGRQH(IIHFWWRHDFK6RXUFH
7KHGLVSOD\VKRZVXVWKDW(IIHFW$´OLVWHQVµWR,QSXWDQG(IIHFW%´OLVWHQVµWR,QSXW
Note: 7KHJUHHQ/('EHORZWKHVUF´VRXUFHµGLDJUDPRQWKH'3·VIURQW
SDQHOOLWXSZKHQZHFKDQJHGWKHQXPEHURI6RXUFHV7KLVVKRZVFOHDUO\WKDW
WKH(IIHFWVKDYHVSOLWLQWRWZRGLVWLQFWSDLUV
/HW·VSODQRXUVRQLFVWUDWHJ\
:H·OOSURFHVVWKHJXLWDUWKURXJK(IIHFW$VRZH·OOKDYHWRSOXJLWLQWR,QSXW$QGOHW·V
UXQLWWKURXJKDJXLWDUDPSVLPXODWLRQ
7KHEDVVZLOOJRWKURXJK(IIHFW%VRZH·OOSOXJLWLQWR,QSXW/HW·VIODQJHWKHEDVV
1RZWKDWZH·YHGHFLGHGZKDWZHZDQWWRGROHW·VVHWXSRXU(IIHFWV7KH{EDIT}/('LV
DOUHDG\OLWVRZHGRQ·WKDYHWRSUHVV{EDIT}
)RUWKHJXLWDU
3UHVV{A} DQGXVHWKHGDWDHQWU\NQREWRGLDOLQLQ%DQN*XLWDU$PS
A:Guitar Amp 1
Guitar Amp 1
i
The dot tells you you’re in Bank 2
-XVWDVWKHUHDUHWZR%DQNVRI&RQILJ3UHVHWVWKHUHDUHDOVRWZREDQNVRIHIIHFWSUHVHWV
WKRVHLQ%DQNEHLQJVLJQLILHG³DVEHIRUH³E\DGRWLQWKHORZHUULJKWFRUQHURIWKH
QXPEHUGLVSOD\
)RUWKHEDVV
3UHVV{B} DQGGLDOLQ)ODQJHULQ%DQNQRGRW
7KH'3SURYLGHV\RXZLWKKHOSIXOFXVWRPL]LQJRSWLRQVUHOHYDQWWRWKHQXPEHURI
VRXQGVRXUFHV\RX·UHGHDOLQJZLWK1HZZLULQJRSWLRQVDSSHDUDQGXQQHFHVVDU\
SDUDPHWHUVDUHUHPRYHG
,QWKLVFDVHZHQRORQJHUKDYHWRFKRRVHZKHWKHURXULQSXWVDUHPRQRRUVWHUHR³VLQFH
HDFK6RXUFHXVHVRQO\DVLQJOH,QSXWMDFNWKH\·UHERWKPRQR6LPLODUO\ZHGRQ·WKDYHWR
GHVLJQDWHDUHODWLRQVKLSEHWZHHQ(IIHFW$DQG(IIHFW%DQ\PRUH:LWKWZR6RXUFHV
WKH\·UHFRPSOHWHO\LQGHSHQGHQWRIHDFKRWKHU
$WWKHVDPHWLPHWKH'3QRZRIIHUVVRPHVSHFLDOIOH[LELOLW\LQKRZZHZDQWRXUWZR
6RXUFHVWRXVHWKH'3·V2XWSXWV
3UHVV{CONFIG}
3UHVVWKH{>} EXWWRQRQFH7KHGLVSOD\VKRZV
AB Output Select
A>1 B>2 DualMono
:KHQWKLVGLVSOD\LVVHWWR´'XDO0RQRµ³DVLWFXUUHQWO\LV³(IIHFWV$DQG%H[LWWKH
'3WKURXJK2XWSXWMDFNVDQGDVWZRLQGLYLGXDOPRQR(IIHFWV
DP/2
A
Effect A
becomes mono
and uses
Output 1
B
Effect B
becomes mono
and uses
Output 2
7XUQWKHGDWDHQWU\NQREFORFNZLVH2QWKHGLVSOD\ZHQRZVHH
AB Output Select
1,2 Mixed Stereo
:KHQWKH$%2XWSXW6HOHFWLVVHWWR0L[HG6WHUHRWKH$DQG%(IIHFWVWKRXJKVWLOO
VHSDUDWHUHPDLQLQVWHUHRDQGVKDUH2XWSXWVDQGDVVKRZQLQWKHIROORZLQJ
LOOXVWUDWLRQ
DP/2
A
the left side of Effect A
and
the left side of effect B
B
the right side of Effect A
and
the right side of effect B
2XUJXLWDUEDVVVHWXSLVQRZFRPSOHWH
DP/2
A
Guitar Amp 1
B
Both DP/2 Effects
remain in stereo
as they share Output
jacks 1 and 2.
Flanger
$QGDVDOZD\VDIWHU\RX·YHVHWXSD&RQILJ3UHVHW\RX·OOZDQWWRVDYHLW³WKLVWLPH
DQ\ZKHUH\RX·GOLNH/HW·VQDPHWKLVILQDOVHWXS´7KDW·V$OO)RONVµ
A Quick Summary
:KHQ\RXXVHWKH'3\RXZRUNZLWKVRPHWKLQJFDOOHGD&RQILJ3UHVHW&RQILJ3UHVHWV
DUHVLPSO\'3VHWXSV
7KHVHVHWXSVLQFOXGHLQIRUPDWLRQRQWKLQJVVXFKDVZKDWNLQGRIVRXQGVRXUFHV\RX
ZDQWWKH'3WRSURFHVVDQGKRZPDQ\RIWKHP\RX·OOEHXVLQJZKDW(IIHFWV\RXZDQW
WRXVHDQGKRZ\RXZDQWLWDOOFRQQHFWHG&RQILJ3UHVHWVDUHVWRUHGLQWKH'3·V
LQWHUQDOPHPRU\(1621,4KDVSUHSURJUDPPHG&RQILJ3UHVHWVIRU\RXDQG\RX
FDQFUHDWH\RXURZQDVZHOO
Moving On...
,QRXUQH[WVHFWLRQ7KH'3(IIHFWV\RX·OOOHDUQKRZWRFXVWRPL]HWKH'3(IIHFWVWR
VXLW\RXURZQQHHGV
Section 2
The DP/2 Effects
Inside this Section
Overview...................................................................................................................................... 1
Setting Up .................................................................................................................................... 2
1-Unit Presets .............................................................................................................................. 4
2-Unit Presets .............................................................................................................................. 11
Overview
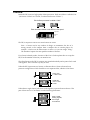
,QVLGHWKH'3DUHWZRKLJKTXDOLW\HIIHFWVSURFHVVRUV(DFKRQHRIWKHVHLVFDOOHGD8QLW
,Q6HFWLRQRIWKH8VHU·V*XLGHZHUHIHUUHGWRWKHPDV´(IIHFWVµ
Each effects processor is called a "Unit."
A
B
Each Unit has a button on the DP/4+’s front panel.
bypassed
bypass
all
A
B
7KH'3FDQSURFHVVRQHRUWZRVRXQGVRXUFHVDWDWLPH
1RWH $ 6RXUFH FDQ EH DQ\ QXPEHU RI WKLQJV DQ LQVWUXPHQW WKH EXV RI D
PL[LQJ FRQVROH RU WKH RXWSXWV IURP D FRPSDFW GLVF RU FDVVHWWH SOD\HU IRU
H[DPSOH $ 6RXUFH FDQ EH HLWKHU PRQR RU VWHUHR³LW·V MXVW RQH VLQJOH ´WKLQJµ
7KHQXPEHURILQSXWVGRHVQRWHTXDOWKHQXPEHURI6RXUFHV
,I\RXKDYHQ·WDOUHDG\UHDGLW6HFWLRQRIWKH8VHU·V*XLGHH[SODLQVKRZWRVHWXSWKH
'3IRUWKHQXPEHURI6RXUFHV\RXLQWHQGWRXVH
7KHHIIHFW3UHVHWVLQWKH'3·VPHPRU\DUHVWRUHGLQGLYLGXDOO\DQGLQSDLUVZKLFKZRUN
ZHOOWRJHWKHU7KLVLVDOVRWKHZD\WKH\·UHXVHG
:KHQWKH'3SURFHVVHVWZR6RXUFHVLWDOORFDWHVWKHWZR8QLWVVRWKDWHDFKRQH
SURFHVVHVDVLQJOH6RXUFH(DFK8QLWKDVLWVRZQVHSDUDWHHIIHFWFDOOHGD8QLW3UHVHW
A
Unit A uses
a 1-Unit Preset
B
Unit B also
uses a 1-Unit
Preset
:KHQWKHUHDVLQJOH6RXUFHERWK8QLWVZRUNWRJHWKHUWRSURFHVVWKDWRQH6RXUFH7KLV
SDLURI8QLWVXVHVD8QLW3UHVHWDVLQWKHIROORZLQJLOOXVWUDWLRQ
A
Units A and B,
working together,
use a single
2-Unit Preset
B
Setting Up
:H·UHJRLQJWRH[SORUHWKH'3·VHIIHFW3UHVHWVXVLQJVWHUHRKHDGSKRQHVVR\RX·OOQHHG
DSDLURIWKRVH,I\RXSUHIHUWRFRQQHFWWKH'3WR\RXUPL[HURUKRPHVWHUHRV\VWHP
IRUOLVWHQLQJVHHWKH'35HIHUHQFH0DQXDO·V3UHIDFHIRUGHWDLOVRQPDNLQJWKRVH
FRQQHFWLRQV
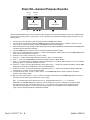
0DNHVXUHWKH'3·VSRZHUEXWWRQLVLQWKH´RIIµXSSRVLWLRQ,W·VLQWKHORZHUOHIW
KDQGFRUQHURIWKH'3·VIURQWSDQHO
&RQQHFWWKHLQFOXGHG36SRZHUVXSSO\WRWKHMDFNRQWKHULJKWVLGHRIWKHUHDUSDQHO
RIWKH'3ZKHQYLHZHGIURPWKHEDFN
&RQQHFWWKHRWKHUHQGRIWKH36WRDJURXQGHG$&RXWOHW
3UHVVWKH'3·VSRZHUVZLWFKWRWXUQWKH'3RQ
/RFDWHWKHLQSXWNQRERQWKHIURQWSDQHORIWKH'3
5+)0#.
2'#-
E
5+)0#.
+02765
2'#-
F
7XUQWKHNQREDOOWKHZD\GRZQFRXQWHUFORFNZLVH
/RFDWHWKHRXWSXWVNQREMXVWWRWKHOHIWRILQSXW
1762765
7XUQLWDOOWKHZD\GRZQ
3OXJ\RXUKHDGSKRQHVLQWRWKHMDFNODEHOHGSKRQHVRQWKH'3·VIURQWSDQHO
&RQQHFWDQHOHFWULILHGLQVWUXPHQW³DQHOHFWULFJXLWDURUV\QWKHVL]HUIRUH[DPSOH³WRWKH
'3·VIURQWSDQHOLQSXWMDFN<RXFRXOGDOVRXVHWKHRXWSXWRIDQDXGLRGHYLFHVXFKDV
D&'RUFDVVHWWHSOD\HU³LQWKDWFDVH\RX·OOOLNHO\QHHGDQ5&$SKRQRWRµSKRQH
SOXJDGDSWHU
,QVHUW\RXULQVWUXPHQW·VµSKRQHSOXJLQWRWKHLQSXWMDFNRQWKHIURQWSDQHORI
WKH'3
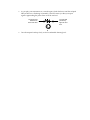
/HW·VVHWYROXPHOHYHOV3XW\RXUKHDGSKRQHVRQ
0DNHVRPHQRLVH³SOD\\RXULQVWUXPHQWRUSUHVVWKH3OD\EXWWRQRQ\RXU&'RU
FDVVHWWHSOD\HU
$V\RXSOD\\RXULQVWUXPHQWHWFWXUQWKHLQSXWNQREFORFNZLVHXQWLOWKHUHGSHDN
/('MXVWDERYHLWLVIOLFNHULQJRFFDVLRQDOO\7KLV/('ZDUQV\RXWKDW\RXULQSXW
VLJQDOLVDSSURDFKLQJWKHSRLQWZKHUHLWZLOOEHWRRORXG
The green LED
should be on
most of the time
5+)0#.
2'#-
The red LED
should only
light now and
then
E
7XUQWKHRXWSXWVNQREXSVORZO\WRILQGDFRPIRUWDEOHOLVWHQLQJOHYHO
1-Unit Presets
Selecting 1-Unit Presets
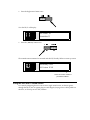
3UHVVWKH{SELECT} EXWWRQLILWV/('LVQ·WDOUHDG\OLW
'.'%6
&+6
;56'/
1/2#4'
3UHVVWKH{CONFIG} EXWWRQLILWVOLJKWLVQ·WDOUHDG\RQ
#%6+8'
$;2#55'&
$;2#55
#..
10(+)
7KH{SELECT}DQG{CONFIG} /('VPXVWEHRQLQRUGHUWRVHOHFW8QLW3UHVHWV
7XUQWKHGDWDHQWU\NQREXQWLOWKHGLVSOD\VKRZV
Select 1U Preset
A:dry B:dry
7KH{SELECT} OLJKWLVIODVKLQJ³WKLVPHDQVWKDWWKH'3LVZDLWLQJIRU\RXWRFRQILUP
\RXUVHOHFWLRQ
3UHVV{SELECT}RQFHPRUHWRFRQILUP\RXUFKRLFH
:H·UHJRLQJWRH[SORUH8QLW3UHVHWVE\ZRUNLQJZLWKWKHRQHRFFXS\LQJ8QLW$
3UHVVWKH{A} EXWWRQ³LWV\HOORZ/('UHPDLQVOLWZKLOHWKRVHLQWKH{B}DQG
{CONFIG} EXWWRQVJRRXW{B}·VUHG/('FRQWLQXHVWRIODVKRQDQGRII
Note: ,I\RXZDQWHGWRZRUNZLWKD8QLW3UHVHWLQ8QLW%\RXZRXOGKDYH
SUHVVHGLWVEXWWRQ:KLFKHYHURQH\RXSUHVVHGZRXOGKDYHUHPDLQHGOLWZKLOH
WKHRWKHU\HOORZOLJKWVZRXOGKDYHJRQHRXW
,IWKH8QLW\RXLQWHQGWRZRUNZLWKHYHUKDVLWVUHG/('OLWSUHVVWKH8QLW·VEXWWRQRQFH
RUWZLFHVRWKDWRQO\LWV\HOORZOLJKWLVRQ³RWKHUZLVH\RXZRQ·WKHDULW
7KHGLVSOD\VKRZV
Select 1U Preset
A:No Effect
7XUQWKHGDWDHQWU\NQREFRXQWHUFORFNZLVHXQWLOWKHGLVSOD\UHDGV
Vocal Plate 1
A:Large Plate
7KLVLV´9RFDO3ODWHµWKHILUVWRIWKH8QLW3UHVHWVVWRUHGLQWKH'3·VPHPRU\
1RWHWKDWWKH{SELECT} EXWWRQLVDJDLQIODVKLQJ³WKH'3LVDZDLWLQJFRQILUPDWLRQRI
\RXU8QLW3UHVHWVHOHFWLRQ
3UHVV{SELECT} WRFRQILUP
1RZ\RXFDQSOD\\RXULQVWUXPHQWHWFWRKHDUZKDWWKH8QLW3UHVHW´9RFDO3ODWHµ
VRXQGVOLNH
:KHQ\RX·UHGRQHOLVWHQLQJWR´9RFDO3ODWHµ\RXFDQDFFHVVWKHRWKHU8QLW
3UHVHWV
7KH8QLW3UHVHWVDUHGLYLGHGLQWRWZRJURXSVRI3UHVHWVHDFK7KHVHJURXSVDUH
FDOOHGEDQNV7KH3UHVHWVLQHDFKEDQNDUHQXPEHUHGIURP
7XUQWKHGDWDHQWU\NQREFORFNZLVH
$V\RXWXUQWKHGDWDHQWU\NQRE\RX·OOVHHWKH3UHVHWQXPEHUVLQFUHPHQWIURPWRLQ
%DQNDQGWKHQVWDUWRYHUDJDLQZLWK8QLW3UHVHWRI%DQN
<RXFDQHDVLO\WHOOZKLFKEDQN\RX·UHLQE\WKHSUHVHQFH³RUDEVHQFH³RIDGRWLQWKH
ORZHUULJKWKDQGFRUQHURIWKHQXPHULFGLVSOD\
7KH8QLW3UHVHWVLQ%DQNORRNOLNHWKLV
7KH8QLW3UHVHWVLQ%DQNKDYHDGRWWRWKHULJKWRIWKHGLVSOD\HGQXPEHU
i
dot
Note: 6RPHWLPHV \RX PD\ VHH DQRWKHU VPDOO GRW EHWZHHQ WKH WZR QXPHUDOV
7KLV WHOOV \RX WKDW WKH '3 LV UHFHLYLQJ 0,', LQIRUPDWLRQ 6HFWLRQ ³
6\VWHP0,', LQ WKH '3 5HIHUHQFH 0DQXDO GLVFXVVHV XVLQJ 0,', ZLWK WKH
'3
'LDOLQDQ\RIWKH8QLW3UHVHWV
3UHVVWKHIODVKLQJ{SELECT} EXWWRQ WRFRQILUP\RXUFKRLFH
6HQGWKH'3VRPHVRXQG
Editing 1-Unit Presets
:KHQ\RX·YHILQLVKHGOLVWHQLQJWRWKH8QLW3UHVHWVJREDFNWR3UHVHWLQ%DQN³
´9RFDO3ODWHµ³DQGSUHVVWKHIODVKLQJ{SELECT} EXWWRQWRFRQILUP
3UHVVWKH{EDIT} EXWWRQ
'.'%6
7KHGLVSOD\FKDQJHVWR
&+6
;56'/
1/2#4'
flashing
m
A:Large Plate
Mix=40 Volume=99
:HFDQQRZFXVWRPL]H´9RFDO3ODWHµ
1RWHWKDWWKHWRSOLQHLQWKHGLVSOD\LVIODVKLQJ0DQ\DVSHFWVRIWKH'3·VVRIWZDUHFDQ
EHFKDQJHGWRVXLW\RXUQHHGV³ZHFDOOWKHVHSDUDPHWHUV:KHQDSDUDPHWHULVIODVKLQJ³
OLNHWKHWRSOLQHLQWKHGLVSOD\³LWLVVHOHFWHGIRUHGLWLQJ:HXVHWKH{<} DQG{>} DUURZ
EXWWRQVWRVHOHFWHDFKSDUDPHWHUDQGWKHQZHXVHWKHGDWDHQWU\NQREWRFKDQJHWKH
SDUDPHWHU·VVHWWLQJ
6LQFHWKHILUVWHIIHFWSDUDPHWHULVDOUHDG\IODVKLQJLW·VUHDG\WRHGLW
7XUQWKHGDWDHQWU\NQREVORZO\FORFNZLVH
:KDW\RX·UHQRZVHHLQJRQWKHERWWRPOLQHRIWKHGLVSOD\DUHWKHQDPHVRIDOOWKH8QLW
3UHVHWVFRQWDLQHGLQWKH'3·VPHPRU\7KHWRSOLQHRIWKHGLVSOD\VKRZVWKHQDPHRI
WKHDOJRULWKPHDFK3UHVHWLVEDVHGRQ³DOJRULWKPVDUHWKHFRPSOH[PDWKHPDWLFDO
IRUPXODHWKDWFUHDWHWKHVRXQGV\RXKHDULQWKH'3<RXPD\KDYHQRWLFHGWKDWD
PRPHQWRUVRDIWHU\RXVWRSWXUQLQJWKHGDWDHQWU\NQREWKHGLVSOD\FKDQJHVVRPHZKDW
:KDW·VKDSSHQLQJLVWKDWWKH'3LVDXWRPDWLFDOO\VHWWLQJXSWKH8QLW3UHVHW\RX·YH
SLFNHG:KHQWKLVRFFXUV7KHERWWRPOLQHVKRZVWKHQHZ3UHVHW·V0L[DQG9ROXPH
VHWWLQJV
<RXFDQHDVLO\XQGRDQ\FKDQJHV\RX·YHPDGHE\SUHVVLQJWKH{UNDO} EXWWRQ
3UHVVWKH{UNDO} EXWWRQ
4+6'
#0%'.
12;
0&1
/HW·VHGLWVRPHRWKHUSDUDPHWHUV
3UHVVWKH{>} EXWWRQRQFH
A:Large Plate
Mix=40 Volume=99
i
flashing
1RZWKH0L[SDUDPHWHULVIODVKLQJ³ZH·YHVHOHFWHGLWIRUHGLWLQJ7KLVSDUDPHWHU
GHWHUPLQHVKRZPXFKRIWKHHIIHFWZLOOEHDGGHGWR\RXURULJLQDOVRXQG
7XUQWKHGDWDHQWU\NQREXSWRGRZQWRDQGEDFNWR
<RX·YHMXVWWXUQHG8QLW$·VHIIHFWPL[DOOWKHZD\XSGRZQDQGEDFNWRWKHPLGGOH
(DFKHIIHFWLQWKH'3KDVDQXPEHURISDUDPHWHUV³PDQ\PRUHWKDQWKRVHZH·UH
FXUUHQWO\VHHLQJ2QFH\RXVWDUWHGLWLQJDQHIIHFWWKHODUJHUHGQXPEHUWRWKHOHIWRIWKH
GLVSOD\EHFRPHVWKHQXPEHURIWKHSDUDPHWHUWKDW·VVHOHFWHGIRUHGLWLQJ)RUPRUH
LQIRUPDWLRQRQWKHSDUDPHWHUVSURYLGHGIRUHDFKRIWKH'3·VHIIHFWVVHH6HFWLRQ³
(IIHFW$OJRULWKPVLQWKH'35HIHUHQFH0DQXDO
3UHVVWKH{>} EXWWRQWZLFH
7KLVWDNHVXVWRWKHWKLUGSDUDPHWHUIRUWKLVHIIHFW
Large Plate
Decay=1.75 sec
i
flashing
7KLVLVWKH'HFD\WLPHVHWWLQJIRURXUUHYHUE7KHWLPHILHOGLVIODVKLQJ³DQGWKHUHIRUH
VHOHFWHG8VHWKHGDWDHQWU\NQREWRFKDQJHWKLVYDOXHLI\RX·GOLNH7RILQGWKLVHIIHFW·V
RWKHUSDUDPHWHUVFRQWLQXHWRSUHVVWKH{>} EXWWRQ:KHQDSDUDPHWHULVIODVKLQJ\RXFDQ
DOWHULWVVHWWLQJZLWKWKHGDWDHQWU\NQRE
<RXFDQDOVRRIFRXUVHJREDFNWRSUHYLRXVO\YLHZHGRUHGLWHGSDUDPHWHUVE\SUHVVLQJ
WKH{<} EXWWRQ
Saving 1-Unit Presets
2QFH\RX·YHFXVWRPL]HGD8QLW3UHVHW\RXFDQZULWHLWLQWRWKH'3·VPHPRU\DQG
WKH'3ZLOOUHPHPEHULWIRU\RX
3UHVVWKH{WRITE} EXWWRQ
4+6' #0%'.
7KHGLVSOD\VKRZV
12;
0&1 Write to 1U Pset
Vocal Plate 1
7KLVJLYHV\RXDQRSSRUWXQLW\WRGHFLGHZKHUHLQWKH'3·VPHPRU\\RX·GOLNHWRVDYH
\RXU8QLW3UHVHW7KH'3SURYLGHVSRVVLEOHORFDWLRQVIRU\RXUZRUNLQ
%DQNDQGLQ%DQN7KH8QLW3UHVHWVVWRUHGLQORFDWLRQVWRLQERWKEDQNV
DUHSHUPDQHQW³WKH\FDQ·WEHZULWWHQRYHU
<RXFDQXVHWKHGDWDHQWU\NQREWRILQGD3UHVHW\RXZRQ·WPLQGUHSODFLQJZLWK\RXU
QHZRQHEXWIRUQRZOHW·VXVHORFDWLRQ
3UHVV{WRITE} DJDLQ
1RZ\RXVHH
Edit 1U PsetName
Large Plate
$WWKLVSRLQW\RXFDQQDPHWKHQHZ8QLW3UHVHWDQ\WKLQJWKDW\RXZDQWXSWR
FKDUDFWHUV)RURXUH[HUFLVHZH·OOQDPHLW´0\)LUVW83VHWµ
1RWLFHWKDWWKH´/µRQWKHERWWRPRIWKHGLVSOD\LVXQGHUOLQHG:KHQQDPLQJ3UHVHWVLQ
WKH'3FKDUDFWHUVZKLFKDUHXQGHUOLQHGPD\EHFKDQJHGZLWKWKHGDWDHQWU\NQRE
7XUQWKHGDWDHQWU\NQREFORFNZLVHWRFKDQJHWKH´/µWRDQ´0µ
7KHGLVSOD\ORRNVOLNHWKLV
Edit 1U PsetName
Marge Plate
3UHVVWKH{>} EXWWRQRQFHVRWKDWWKHXQGHUOLQHPRYHVEHQHDWKWKH´Dµ
7XUQWKHGDWDHQWU\NQREFORFNZLVHXQWLO\RX·YHGLDOHGLQWKHFKDUDFWHU´\µ
&RQWLQXHLQWKLVPDQQHU³XVLQJWKH{>} EXWWRQWRXQGHUOLQHHDFKFKDUDFWHULQWXUQ
DQGWKHQFKDQJLQJLWZLWKWKHGDWDHQWU\NQRE³XQWLO\RX·YHVSHOOHGRXW
Edit 1U PsetName
My First 1U Pset
Tip: 7XUQ WKH GDWD HQWU\ NQRE DOO WKH ZD\ FRXQWHUFORFNZLVH WR GLDO LQ WKH
EODQNVSDFHV
:KHQ\RX·YHILQLVKHGSUHVV{WRITE} RQFHDJDLQ
7KHGLVSOD\PRPHQWDULO\IODVKHV
*** WRITE ***
*** OK ****
DQG\RXU8QLW3UHVHWLVVDIHO\VWRUHGDWWKHORFDWLRQ\RX·YHFKRVHQLQWKH'3·V
PHPRU\
2-Unit Presets
Selecting 2-Unit Presets
3UHVVWKH{SELECT} EXWWRQLILWV/('LVQ·WDOUHDG\OLW
'.'%6
&+6
;56'/
1/2#4'
3UHVVWKH{CONFIG} EXWWRQLILWVOLJKWLVQ·WDOUHDG\RQ
#%6+8'
$;2#55'&
$;2#55
#..
10(+)
7KH{SELECT}DQG{CONFIG} /('VPXVWEHRQLQRUGHUWRVHOHFW8QLW3UHVHWV
7XUQWKHGDWDHQWU\NQRE³XQWLOWKHGLVSOD\VKRZV
1 Src:Mono In
A:dry ~ B:dry
7KH{SELECT} OLJKWLVIODVKLQJ³WKLVPHDQVWKDWWKH'3LVZDLWLQJIRU\RXWRFRQILUP
\RXUVHOHFWLRQ
3UHVV{SELECT}RQFHPRUHWRFRQILUP\RXUFKRLFH
3UHVVWKH{A} EXWWRQ7KH{A} DQG{B} \HOORZ /('VUHPDLQOLWDQGWKH{CONFIG}
OLJKWJRHVRXW
7KHGLVSOD\VKRZV
1 Src: Mono In
A:DRY ~ B:dry
7XUQWKHGDWDHQWU\NQREFRXQWHUFORFNZLVHXQWLOWKHGLVSOD\UHDGV
Best Small Space
A:REV + B:rev
7KLVLV´%HVW6PDOO6SDFHµWKHILUVWRIWKH8QLW3UHVHWVVWRUHGLQWKH'3·V
PHPRU\1RWHWKDWWKH{SELECT} EXWWRQLVDJDLQIODVKLQJ³WKH'3LVDZDLWLQJ
FRQILUPDWLRQRI\RXU8QLW3UHVHWVHOHFWLRQ
3UHVV{SELECT} WRFRQILUP
1RZ\RXFDQSOD\\RXULQVWUXPHQWHWFWRKHDUZKDWWKH8QLW3UHVHW´%HVW6PDOO
6SDFHµVRXQGVOLNH
:KHQ\RX·UHUHDG\\RXFDQDFFHVVWKHRWKHU8QLW3UHVHWV
7KH8QLW3UHVHWVDUHGLYLGHGLQWRWZRJURXSVRI3UHVHWVHDFK7KHVHJURXSVDUH
FDOOHGEDQNV7KH3UHVHWVLQHDFKEDQNDUHQXPEHUHGIURP
7XUQWKHGDWDHQWU\NQRE
$V\RXWXUQWKHGDWDHQWU\NQREFORFNZLVH\RX·OOVHHWKH3UHVHWQXPEHUVLQFUHPHQWIURP
WRLQ%DQNDQGWKHQVWDUWRYHUDJDLQZLWK8QLW3UHVHWRI%DQN
<RXFDQHDVLO\WHOOZKLFKEDQN\RX·UHLQE\WKHSUHVHQFH³RUDEVHQFH³RIDGRWLQWKH
ORZHUULJKWKDQGFRUQHURIWKHQXPHULFGLVSOD\
7KH8QLW3UHVHWVLQ%DQNORRNOLNHWKLV
7KH8QLW3UHVHWVLQ%DQNKDYHDGRWWRWKHULJKWRIWKHGLVSOD\HGQXPEHU
i
dot
Note: 6RPHWLPHV \RX PD\ VHH DQRWKHU VPDOO GRW EHWZHHQ WKH WZR QXPHUDOV
7KLV WHOOV \RX WKDW WKH '3 LV UHFHLYLQJ 0,', LQIRUPDWLRQ 6HFWLRQ ³
6\VWHP0,', LQ WKH '3 5HIHUHQFH 0DQXDO GLVFXVVHV XVLQJ 0,', ZLWK WKH
'3
'LDOLQDQ\RIWKH8QLW3UHVHWV
3UHVVWKHIODVKLQJ{SELECT} EXWWRQ WRFRQILUP\RXUFKRLFH
6HQGWKH'3VRPHVRXQG
Editing 2-Unit Presets
:KHQ\RX·YHILQLVKHGOLVWHQLQJWRWKH8QLW3UHVHWVJREDFNWR3UHVHW³´%HVW
6PDOO6SDFHµ³DQGSUHVVWKHIODVKLQJ{SELECT} EXWWRQWRFRQILUP
3UHVVWKH{EDIT} EXWWRQ
'.'%6
&+6
;56'/
2QO\8QLW$·V/('UHPDLQVOLWVRZH·UHJRLQJWRVWDUWE\HGLWLQJWKH8QLW$KDOIRIWKLV
8QLW3UHVHW7KHGLVSOD\KDVFKDQJHGWR
1/2#4'
flashing
m
A:Small Room Rev
Mix=99 Volume=50
:HFDQQRZFXVWRPL]H´%HVW6PDOO6SDFHµ
1RWHWKDWWKHWRSOLQHLQWKHGLVSOD\LVIODVKLQJ0DQ\DVSHFWVRIWKH'3·VVRIWZDUHFDQ
EHFKDQJHGWRVXLW\RXUQHHGV³ZHFDOOWKHVHSDUDPHWHUV:KHQDSDUDPHWHULVIODVKLQJ³
OLNHWKHWRSOLQHLQWKHGLVSOD\³LWLVVHOHFWHGIRUHGLWLQJ:HXVHWKH{<} DQG{>} DUURZ
EXWWRQVWRVHOHFWHDFKSDUDPHWHUDQGWKHQZHXVHWKHGDWDHQWU\NQREWRFKDQJHWKH
SDUDPHWHU·VVHWWLQJ
:H·OOVWDUWE\HGLWLQJWKHSDUDPHWHUFXUUHQWO\VHOHFWHG³LW·VWKHHIIHFWXVHGE\WKLVKDOIRI
WKH8QLW3UHVHW
7XUQWKHGDWDHQWU\NQREVORZO\FORFNZLVH
:KDW\RX·UHQRZVHHLQJRQWKHERWWRPOLQHRIWKHGLVSOD\DUHWKHQDPHVRIDOOWKH8QLW
3UHVHWVFRQWDLQHGLQWKH'3·VPHPRU\³WKH\·UHWKHEXLOGLQJEORFNVIURPZKLFKZH
FRQVWUXFW8QLW3UHVHWV7KHWRSOLQHRIWKHGLVSOD\VKRZVWKHQDPHRIWKHDOJRULWKPHDFK
8QLW3UHVHWLVEDVHGRQ³DOJRULWKPVDUHWKHFRPSOH[PDWKHPDWLFDOIRUPXODHWKDWFUHDWH
WKHVRXQGV\RXKHDULQWKH'3
$8QLW3UHVHWLVFUHDWHGE\FRS\LQJVLQJOH8QLW3UHVHWVLQWRHDFKRIWKH3UHVHW·VWZR
8QLWV³ZHWKHQHGLWWKHFRSLHVWRVXLWRXUSXUSRVHV:KHQZHVDYHRXU8QLW3UHVHWWR
WKH'3·VPHPRU\ZH·UHVDYLQJWKHFRSLHVDQGDUHWKHUHIRUHOHDYLQJWKHRULJLQDO
XQHGLWHG8QLW3UHVHWVLQWDFW
:KHQZHZDQWWRFKDQJHWKHHIIHFWXVHGE\RQHRIWKH8QLWVLQDSUHH[LVWLQJ8QLW
3UHVHWZHVLPSO\GLDOLQDQHZ8QLW3UHVHWDVDVWDUWLQJSRLQW7KDW·VZKDWZH·UHGRLQJ
QRZ
<RXPD\KDYHQRWLFHGWKDWDPRPHQWRUVRDIWHU\RXVWRSWXUQLQJWKHGDWDHQWU\NQRE
WKHGLVSOD\FKDQJHVVRPHZKDW:KDW·VKDSSHQLQJLVWKDWWKH'3LVDXWRPDWLFDOO\
FRS\LQJWKH8QLW3UHVHW\RX·YHSLFNHG7KHERWWRPOLQHVKRZVWKHFRSLHG3UHVHW·V0L[
DQG9ROXPHVHWWLQJV
<RXFDQHDVLO\XQGRDQ\FKDQJHV\RX·YHPDGHE\SUHVVLQJWKH{UNDO} EXWWRQ
3UHVVWKH{UNDO} EXWWRQ
4+6'
#0%'.
12;
0&1
/HW·VHGLWVRPHRWKHUSDUDPHWHUV
3UHVVWKH{>} EXWWRQRQFH
A:Small Room Rev
Mix=99 Volume=50
i
flashing
1RZWKH0L[SDUDPHWHULVIODVKLQJ³ZH·YHVHOHFWHGLWIRUHGLWLQJ7KLVSDUDPHWHU
GHWHUPLQHVKRZPXFKRI8QLW$·VHIIHFWZLOOEHDGGHGWR\RXURULJLQDOVRXQG
7XUQWKHGDWDHQWU\NQREFRXQWHUFORFNZLVHXQWLO0L[ <RX·YHMXVWWXUQHGGRZQ
WKHHIIHFWPL[IRUWKLVKDOIRIWKH8QLW3UHVHW
(DFKHIIHFWLQWKH'3KDVDQXPEHURISDUDPHWHUV³PDQ\PRUHWKDQWKRVHZH·UH
FXUUHQWO\VHHLQJ2QFH\RXVWDUWHGLWLQJDQHIIHFWWKHODUJHUHGQXPEHUWRWKHOHIWRIWKH
GLVSOD\EHFRPHVWKHQXPEHURIWKHSDUDPHWHUWKDW·VVHOHFWHGIRUHGLWLQJ)RUPRUH
LQIRUPDWLRQRQWKHSDUDPHWHUVSURYLGHGIRUHDFKRIWKH'3·VHIIHFWVVHH6HFWLRQ³
(IIHFW$OJRULWKPVLQWKH'35HIHUHQFH0DQXDO
3UHVVWKH{>} EXWWRQWZLFH
7KLVWDNHVXVWRWKHWKLUGSDUDPHWHU
1RZZHVHH
Room
Decay=0.61 sec
i
flashing
7KLVLVWKH'HFD\WLPHVHWWLQJIRUWKHUHYHUELQWKLVKDOIRIRXU8QLW3UHVHW7KHWLPH
ILHOGLVIODVKLQJ³DQGWKHUHIRUHVHOHFWHG8VHWKHGDWDHQWU\NQREWRFKDQJHWKLVYDOXHLI
\RX·GOLNH7RILQGWKLVHIIHFW·VRWKHUSDUDPHWHUVFRQWLQXHWRSUHVVWKH{>} EXWWRQ:KHQ
DSDUDPHWHULVIODVKLQJ\RXFDQDOWHULWVVHWWLQJE\XVLQJWKHGDWDHQWU\NQRE
<RXFDQRIFRXUVHJREDFNWRSUHYLRXVO\YLHZHGRUHGLWHGSDUDPHWHUVE\SUHVVLQJWKH
{<} EXWWRQ
<RXFDQDOVRHGLW8QLW%WKHRWKHUKDOIRIWKH8QLW3UHVHW
3UHVVWKH{B} EXWWRQRQFHWRFXVWRPL]H8QLW%·VHIIHFWLQWKHVDPHPDQQHU
Note: ,IDQ\RIWKH8QLWV\RXLQWHQGWRZRUNZLWKHYHUKDVDUHG/('OLWSUHVV
WKDW8QLW·VEXWWRQRQFHRUWZLFHVRWKDWRQO\LWV\HOORZOLJKWLVRQ³RWKHUZLVH
\RXZRQ·WKHDULW
Saving 2-Unit Presets
2QFH\RX·YHFXVWRPL]HGD8QLW3UHVHW\RXFDQZULWHLWLQWRWKH'3·VPHPRU\DQG
WKH'3ZLOOUHPHPEHULWIRU\RX
3UHVVWKH{WRITE} EXWWRQ
4+6' #0%'.
7KHGLVSOD\VKRZV
12;
0&1
Write to 2U Pset
Best Small Space
7KLVJLYHV\RXDQRSSRUWXQLW\WRGHFLGHZKHUHLQWKH'3·VPHPRU\\RX·GOLNHWRVDYH
\RXU8QLW3UHVHW7KH'3SURYLGHVSRVVLEOHORFDWLRQVIRU\RXUZRUNLQ
%DQNDQGLQ%DQN7KH8QLW3UHVHWVVWRUHGLQORFDWLRQVWRLQERWKEDQNV
DUHSHUPDQHQW³WKH\FDQ·WEHZULWWHQRYHU
<RXFDQXVHWKHGDWDHQWU\NQREWRILQGD3UHVHW\RXZRQ·WPLQGUHSODFLQJZLWK\RXU
QHZRQHEXWIRUQRZZH·OOXVHORFDWLRQ
3UHVV{WRITE} DJDLQ
1RZ\RXVHH
Edit 2U PsetName
Best Small Space
$WWKLVSRLQW\RXFDQQDPHWKHQHZ8QLW3UHVHWDQ\WKLQJWKDW\RXZDQWXSWR
FKDUDFWHUV)RURXUH[HUFLVHZH·OOQDPHLW´0\)LUVW83VHWµ
1RWLFHWKDWWKH´%µRQWKHERWWRPRIWKHGLVSOD\LVXQGHUOLQHG:KHQQDPLQJ3UHVHWVLQ
WKH'3FKDUDFWHUVZKLFKDUHXQGHUOLQHGPD\EHFKDQJHGZLWKWKHGDWDHQWU\NQRE
7XUQWKHGDWDHQWU\NQREFRXQWHUFORFNZLVHWRFKDQJHWKH´%µWRDQ´0µ
7KHGLVSOD\ORRNVOLNHWKLV
Edit 2U PsetName
Mest Small Space
3UHVVWKH{>} EXWWRQRQFHVRWKDWWKHXQGHUOLQHPRYHVEHQHDWKWKH´Hµ
7XUQWKHGDWDHQWU\NQREFORFNZLVHXQWLO\RX·YHGLDOHGLQWKHFKDUDFWHU´\µ
&RQWLQXHLQWKLVPDQQHU³XVLQJWKH{>} EXWWRQWRXQGHUOLQHHDFKFKDUDFWHULQWXUQ
DQGWKHQFKDQJLQJLWZLWKWKHGDWDHQWU\NQRE³XQWLO\RX·YHVSHOOHGRXW
Edit 2U PsetName
My First 2U Pset
Tip: 7XUQ WKH GDWD HQWU\ NQRE DOO WKH ZD\ FRXQWHUFORFNZLVH WR GLDO LQ WKH
EODQNVSDFHV
:KHQ\RX·YHILQLVKHGSUHVV{WRITE} RQFHDJDLQ
7KHGLVSOD\PRPHQWDULO\IODVKHV
*** WRITE ***
*** OK ****
DQG\RXU8QLW3UHVHWLVVDIHO\VWRUHGDWWKHORFDWLRQ\RX·YHFKRVHQLQWKH'3·V
PHPRU\
:KHQ\RXVDYHD8QLW3UHVHWWKH'3DOVRUHPHPEHUVWKHZD\WKDWWKHWZR8QLWVLQ
WKH3UHVHWDUHFRQQHFWHGWRHDFKRWKHU:HGLVFXVVHGWKHVHFRQQHFWLRQVLQ6HFWLRQ³
8VLQJWKH'3LQWKH8VHU·V*XLGH7KH\·UHDOVRGHVFULEHGLQ6HFWLRQ³&RQILJ
3DUDPHWHUVLQWKH'35HIHUHQFH0DQXDO
Section 3
Quick-Starts
7KLVVHFWLRQRIWKH'38VHU·V*XLGHFRQWDLQVVWHSE\VWHSLQVWUXFWLRQVIRUDQXPEHURI
WDVNVWKH'3FDQSHUIRUP7KHFKDQFHVDUHJRRGWKDW\RX·OOILQGD4XLFN6WDUWWRVXLW
\RXUQHHGV
'RQ·WEHOLHYHIRUDPRPHQWWKRXJKWKDWWKHIROORZLQJ4XLFN6WDUWVUHSUHVHQWDOORIWKH
WKLQJVD'3FDQGR7KH\·UHMXVWPHDQWWRKHOS\RXJHWVWDUWHGZLWK\RXUSRZHUIXOQHZ
HIIHFWVSURFHVVRU
Inside this Section
$FRXVWLF*XLWDU³0LFURSKRQH $FRXVWLF*XLWDU³3LFNXS 'DUWK0HHWV$OYLQ 'UXP.LW³%DOODG5HYHUEV 'UXP.LW³'DQFH+DUG 'UXP.LW³'DQFH6RIW 'UXP.LW³*DWHG5RRP6RXQG 'UXP.LW³*HQHUDO3XUSRVH5HYHUEV 'UXP.LW³5RFN5HYHUEV (OHFWULF%DVV³&OHDQ (OHFWULF%DVV³)XQN (OHFWULF%DVV³5RFN (OHFWULF*XLWDU³&KRUXVHG (OHFWULF*XLWDU³&OHDQ$PS (OHFWULF*XLWDU³&OHDQDQG'U\ (OHFWULF*XLWDU³5RFN ,QVWDQW.DUDRNH .H\ERDUG³(OHFWULF3LDQR3DQQHU .H\ERDUG³6\QWK)DWWHQHU 0&(IIHFWV 0L[LQJLQ0RQR 0L[LQJLQ6WHUHR 3XEOLF6SHDNLQJ 6LQJHU*XLWDULVW 6ROR,QVWUXPHQW³1HZ$JH 6ROR,QVWUXPHQW³5RFN 7HOHSKRQH)LOWHU(IIHFW 8VLQJ)RRW6ZLWFKHV 9RFDO³%DOODG 9RFDO³'XHW 9RFDO³3RS 9RFDO³5RFN 9RFDO³5RFNDELOO\ 9RFRGHU 9RLFH2YHUZLWK0XVLF%HG Acoustic Guitar—Microphone
02765
E F
762765
E F
#52
Hall Reverb
0276
E
+
#94.
VanderPol Filter
This Quick-Start provides a full-bodied reverb and a VanderPol filter, which helps bring out the real-life sound of your guitar.
1.
2.
3.
4.
5.
6.
7.
8.
9.
10.
11.
12.
13.
14.
15.
16.
Turn the DP/2 inputs and outputs knobs down all the way (counter-clockwise).
Plug your guitar’s effect send from your mixer into the DP/2’s rear-panel input 1 jack.
Connect cables from the DP/2’s back-panel Output 1 and 2 jacks to two returns on your mixing console. If you’ve only
got one return available, connect a cable from Output 1.
While playing your guitar, turn the input 1 knob clockwise until the red peak LED just above it is flashing occasionally.
Turn the outputs knob up until your mixer is receiving the proper level from the DP/2.
Press the {SYSTEM/MIDI} button. Press the {>} button until the large red number reads “46.” Use the data entry knob to
dial in “Set All 1U Pset Mixes To Wet=Yes.”
Press the {EDIT} button, and then the {CONFIG} button.
Press the {<} button until parameter 00 is displayed in large red numbers.
Use the data entry knob to set the DP/2 to “1 Source Config.”
Press {>} once. Use the data entry knob to set the AB Input Select to “mono.”
Press {>} once. Set the AB Unit Routing to “parallel.”
Press {>} until “(b)ypass (k)ill” is displayed, and the letter following “A=“ is flashing. Dial in the letter “k” (if “k” isn’t already
displayed). Press {>} again to do the same for Unit B.
Press the {A} button. If its red LED is flashing, press it again. Press {<} until the red numbers are flashing. Use the data
entry knob to dial in #52, Hall Reverb—the “52” will start flashing.
Press the {B} button. If its red LED is flashing, press it again. Press {<} until the red numbers are flashing. Dial in #94.,
Dual Delay. (This will be the second #94 you encounter, and will have a small dot to the right of the numeral.) In a
moment, the “94.” will begin to flash.
To save the set-up, press {CONFIG}. Press {WRITE}. Use the data entry knob to select a location in the DP/2’s
memory. Press {WRITE} again.
Name your set-up by using the {>} and {<} buttons to underline each character, and the data entry knob to dial in the
character you want. When you’re done, press {WRITE} again.
Tip: To customize either of the effects, press {EDIT}, the appropriate letter and {>} or {<} to select its
parameters; use the data entry knob to edit them. You can change the “Volume=“ parameter in an effect to adjust
how much of it you’ll hear. You can also press the {A} or {B} buttons to turn off either of the processors (its red
LED will flash). Press again to turn it back on (the red light will go out). Footswitches can accomplish the same
thing—see the “Using Foot Switches” Quick-Start for details.
Part # 9310 0188 01 - A
Model # MM-87
Acoustic Guitar—Pickup
02765
E F
762765
E F
#85.
~
Parametric EQ
0276
E
#52
Hall Reverb
This Quick-Start provides a full-featured parametric equalizer and rich reverb for your guitar. You can utilize the equalizer to
shape the tonal characteristics of the guitar’s sound.
1.
2.
3.
4.
5.
6.
7.
8.
9.
10.
11.
12.
13.
14.
15.
16.
Turn the DP/2 inputs and outputs knobs down all the way (counter-clockwise).
Plug your guitar cord into the DP/2’s front-panel input 1 jack.
Connect cables from the DP/2’s back-panel Output 1 and 2 jacks to two inputs on your stereo guitar amplifier or mixing
console. If you’re going into a single-input guitar amp, connect a cable from the DP/2’s Output 1 to the amp’s input.
While playing your guitar, turn the input 1 knob clockwise until the red peak LED just above it is flashing occasionally.
Turn the outputs knob up until your amp (or mixer) is receiving the proper level from the DP/2.
Press the {EDIT} button, and then the {CONFIG} button.
Press the {<} button until parameter 00 is displayed in large red numbers.
Use the data entry knob to set the DP/2 to “1 Source Config.”
Press {>} once. Use the data entry knob to set the AB Input Select to “mono.”
Press {>} once. Set the AB Unit Routing to “serial.”
Press {>} until “(b)ypass (k)ill” is displayed, and the letter following “A=“ is flashing. Dial in the letter “b” (if “b” isn’t already
displayed). Press {>} again to do the same for Unit B.
Press the {A} button. If its red LED is on, press it again. Press {<} until the red numbers are flashing. Use the data entry
knob to dial in #85., Parametric EQ. (This will be the second #85 you encounter, and will have a small dot to the right of
the numeral.) In a moment, the “85.” will start flashing.
Press the {B} button. If its red LED is on, press it again. Press {<} until the red numbers are flashing. Dial in #52, Hall
Reverb—the “52” will begin to flash.
Press {>} once. Use the data entry knob to set “Mix=“ to 30.
To save the set-up, press {CONFIG}. Press {WRITE}. Use the data entry knob to select a location in the DP/2’s
memory. Press {WRITE} again.
Name your set-up by using the {>} and {<} buttons to underline each character, and the data entry knob to dial in the
character you want. When you’re done, press {WRITE} again.
Tip: To customize either of the effects, press {EDIT}, the appropriate letter and {>} or {<} to select its
parameters; use the data entry knob to edit them. You can change the “Volume=“ parameter in an effect to adjust
how much of it you’ll hear. You can also press the {A} or {B} buttons to turn off either of the processors (its red
LED will flash). Press again to turn it back on (the red light will go out). Footswitches can accomplish the same
thing—see the “Using Foot Switches” Quick-Start for details.
Part # 9310 0177 01 - B
Model # MM-86
Darth Meets Alvin
02765
E F
762765
E F
Config Preset 60
Pitch Shift 2U
0276
E
This Quick-Start provides an amusing audio transmogrifying effect.
1.
2.
3.
4.
5.
6.
7.
8.
9.
10.
11.
12.
13.
14.
15.
16.
17.
18.
Turn the DP/2 inputs and outputs knobs down all the way (counter-clockwise).
Connect a CV foot pedal (such as ENSONIQ’s CVP-1) to the rear-panel CV•Pedal jack.
Plug a microphone’s effect send from your mixer into the DP/2’s rear-panel Input 1 jack.
Connect cables from the DP/2’s back-panel Output 1 and 2 jacks to two inputs on your mixer or stereo amplifier. If you’re
going to a single-input mixer or amp, use only Output 1.
While speaking, turn the input 1 knob up until the red peak LED above it flashes occasionally.
Turn the outputs knob up until your mixer (or amp) is receiving the proper level from the DP/2.
Set your mixer so that you’re only hearing the output of the DP/2, and none of the original “dry” microphone signal.
Press the {SELECT} button, and then the {CONFIG} button. Use the data entry knob to dial in #60, Pitch Shift 2U. If the
red LEDs in the {A} or {B} buttons light up, press {CONFIG} again.
Press {SELECT} again.
Press the {EDIT} button.
Press {>} once. Use the data entry knob to set the AB Input Select to “mono.”
Press {>} until “(b)ypass (k)ill” is displayed, and the letter following “A=“ is flashing. Dial in the letter “b” (if “b” isn’t already
displayed). Press {>} again to do the same for Unit B.
Press the {A} button. Press {<} until the red numbers are flashing.
Press the {>} button four times so that the “-07” is flashing. Dial in a value of -02.
Press {>} four times and use the data entry knob to set PitchShifter Vc2 Fine to +02.
Using the {>} button and the data entry knob, set Mod1 Src to Cntrl-6 DP4 Analog CV In, Mod1 Destination Parameter
to 03, Mod1 Param Range to Min=30% and Max=99%. Set Mod2 Src to Cntrl-6 DP4 Analog CV In, Mod2 Destination
Parameter to 07, Mod2 Param Range to Min=30% and Max=99%.
To save the set-up, press {CONFIG}. Press {WRITE}. Use the data entry knob to select a location in the DP/2’s
memory. Press {WRITE} again.
Name your set-up by using the {>} and {<} buttons to underline each character, and the data entry knob to dial in the
character you want. When you’re done, press {WRITE} again.
Note: Speak into your microphone with the pedal all the way back to sound like a certain famous promulgator of
The Dark Side. Push it forward—you’re transformed into a chipmunk!
Part # 9310 0188 01 - A
Model # MM-87
Drum Kit—Ballad Reverbs
02765
E F
762765
E F
0276
E
#52
#54
Hall Reverb
Large Plate Rev
This Quick-Start describes how to set up the DP/2 as two complementary drum kit reverb devices, fed by two separate effect
sends from your mixing console. Try using send 1 for your snare and toms, and send 2 for your bass drum and cymbals
(including the hihat).
1.
2.
3.
4.
5.
6.
7.
8.
9.
10.
11.
12.
13.
14.
Connect your mixer’s two effect sends to the DP/2’s rear-panel Input 1 and 2 jacks.
Connect cables from the DP/2’s back-panel Output 1 and 2 jacks to the effect returns—or faders, if you like—on your
mixer. If you’ve only got one return (or fader), use Output 1 (and leave 2 unplugged).
While sending drum sounds through the two effect sends, turn the DP/2’s input knobs clockwise until the red peak LEDs
just above them are flashing occasionally.
Turn the outputs knob up until your mixer is receiving the proper level from the DP/2.
Press the {SYSTEM/MIDI} button. Press the {>} button until the large red number reads “46.” Use the data entry knob to
dial in “Set All 1U Pset Mixes To Wet=Yes.”
Press the {EDIT} button, and then the {CONFIG} button.
Press the {<} button until the large red numbers read “00.” Dial in “2 Source Config.”
Press {>} once. Use the data entry knob to set the AB Output Select to “Mixed Stereo.”
Press {>} until “(b)ypass (k)ill” is displayed, and the letter following “A=“ is flashing. Dial in the letter “k” (if “k” isn’t already
displayed). Press {>} again to do the same for Unit B.
Press the {A} button. If its red LED is flashing, press it again. Press {<} until the red numbers are flashing. Dial in #52,
Hall Reverb—the “52” will start flashing.
Press the {B} button. If its red LED is flashing, press it again. Press {<} until the red numbers are flashing. Dial in #54,
Large Plate Rev. In a moment, the “54” will begin to flash.
Press {>} twice so that the “99” in “Volume=99” is flashing. Dial in a value of 70.
To save the set-up, press {CONFIG}. Press {WRITE}. Use the data entry knob to select a location in the DP/2’s
memory. Press {WRITE} again.
Name your set-up by using the {>} and {<} buttons to underline each character, and the data entry knob to dial in the
character you want. When you’re done, press {WRITE} again.
Tip: To customize either of the effects, press {EDIT}, the appropriate letter and {>} or {<} to select its
parameters; use the data entry knob to edit them. You can change the “Volume=“ parameter in an effect to adjust
how much of it you’ll hear. You can also press the {A} or {B} buttons to turn off either of the processors (its red
LED will flash). Press again to turn it back on (the red light will go out). Footswitches can accomplish the same
thing—see the “Using Foot Switches” Quick-Start for details.
Part # 9310 0177 01 - B
Model # MM-86
Drum Kit—Dance Hard
02765
E F
762765
E F
#60
#84
Non Lin Reverb 3
Phaser-Reverb
0276
E
This Quick-Start describes how to set up the DP/2 as two complementary drum kit effect devices, fed by two separate effect
sends from your mixing console. Try using send 1 for your drums, and send 2 for your cymbals (including hihat).
1.
2.
3.
4.
5.
6.
7.
8.
9.
10.
11.
12.
13.
14.
Connect your mixer’s two effect sends to the DP/2’s rear-panel Input 1 and 2 jacks.
Connect cables from the DP/2’s back-panel Output 1 and 2 jacks to the effect returns—or faders, if you like—on your
mixer. If you’ve only got one return (or fader), use Output 1 (and leave 2 unplugged).
While sending drum sounds through the two effect sends, turn the DP/2’s input knobs clockwise until the red peak LEDs
just above them are flashing occasionally.
Turn the outputs knob up until your mixer is receiving the proper level from the DP/2.
Press the {SYSTEM/MIDI} button. Press the {>} button until the large red number reads “46.” Use the data entry knob to
dial in “Set All 1U Pset Mixes To Wet=Yes.”
Press the {EDIT} button, and then the {CONFIG} button.
Press the {<} button until the large red numbers read “00.” Dial in “2 Source Config.”
Press {>} once. Use the data entry knob to set the AB Output Select to “Mixed Stereo.”
Press {>} until “(b)ypass (k)ill” is displayed, and the letter following “A=“ is flashing. Dial in the letter “k” (if “k” isn’t already
displayed). Press {>} again to do the same for Unit B.
Press the {A} button. If its red LED is flashing, press it again. Press {<} until the red numbers are flashing. Dial in #60,
Non Lin Reverb 3—the “60” will start flashing.
Press the {B} button. If its red LED is flashing, press it again. Press {<} until the red numbers are flashing. Dial in #84,
Phaser-Reverb. In a moment, the “84” will begin to flash.
Press {>} until “Large Plate Decay” is displayed and “2.89” is flashing. Dial in a value of .43.
To save the set-up, press {CONFIG}. Press {WRITE}. Use the data entry knob to select a location in the DP/2’s
memory. Press {WRITE} again.
Name your set-up by using the {>} and {<} buttons to underline each character, and the data entry knob to dial in the
character you want. When you’re done, press {WRITE} again.
Tip: To customize either of the effects, press {EDIT}, the appropriate letter and {>} or {<} to select its
parameters; use the data entry knob to edit them. You can change the “Volume=“ parameter in an effect to adjust
how much of it you’ll hear. You can also press the {A} or {B} buttons to turn off either of the processors (its red
LED will flash). Press again to turn it back on (the red light will go out). Footswitches can accomplish the same
thing—see the “Using Foot Switches” Quick-Start for details.
Part # 9310 0188 01 - A
Model # MM-87
Drum Kit—Dance Soft
02765
E F
762765
E F
#53
#84
Small Plate Rev
Phaser-Reverb
0276
E
This Quick-Start describes how to set up the DP/2 as two complementary drum kit effect devices, fed by two separate effect
sends from your mixing console. Try using send 1 for your drums, and send 2 for your cymbals (including hihat).
1.
2.
3.
4.
5.
6.
7.
8.
9.
10.
11.
12.
13.
Connect your mixer’s two effect sends to the DP/2’s rear-panel Input 1 and 2 jacks.
Connect cables from the DP/2’s back-panel Output 1 and 2 jacks to the effect returns—or faders, if you like—on your
mixer. If you’ve only got one return (or fader), use Output 1 (and leave 2 unplugged).
While sending drum sounds through the two effect sends, turn the DP/2’s input knobs clockwise until the red peak LEDs
just above them are flashing occasionally.
Turn the outputs knob up until your mixer is receiving the proper level from the DP/2.
Press the {SYSTEM/MIDI} button. Press the {>} button until the large red number reads “46.” Use the data entry knob to
dial in “Set All 1U Pset Mixes To Wet=Yes.”
Press the {EDIT} button, and then the {CONFIG} button.
Press the {<} button until the large red numbers read “00.” Dial in “2 Source Config.”
Press {>} once. Use the data entry knob to set the AB Output Select to “Mixed Stereo.”
Press {>} until “(b)ypass (k)ill” is displayed, and the letter following “A=“ is flashing. Dial in the letter “k” (if “k” isn’t already
displayed). Press {>} again to do the same for Unit B.
Press the {A} button. If its red LED is flashing, press it again. Press {<} until the red numbers are flashing. Dial in #53,
Small Plate Rev—the “53” will start flashing.
Press the {B} button. If its red LED is flashing, press it again. Press {<} until the red numbers are flashing. Dial in #84,
Phaser-Reverb. In a moment, the “84” will begin to flash.
To save the set-up, press {CONFIG}. Press {WRITE}. Use the data entry knob to select a location in the DP/2’s
memory. Press {WRITE} again.
Name your set-up by using the {>} and {<} buttons to underline each character, and the data entry knob to dial in the
character you want. When you’re done, press {WRITE} again.
Tip: To customize either of the effects, press {EDIT}, the appropriate letter and {>} or {<} to select its
parameters; use the data entry knob to edit them. You can change the “Volume=“ parameter in an effect to adjust
how much of it you’ll hear. You can also press the {A} or {B} buttons to turn off either of the processors (its red
LED will flash). Press again to turn it back on (the red light will go out). Footswitches can accomplish the same
thing—see the “Using Foot Switches” Quick-Start for details.
Part # 9310 0177 01 - B
Model # MM-86
Drum Kit—Gated Room Sound
02765
E F
762765
E F
#51
~
Large Room Rev
0276
E
#86.
EQ-Compressor
This Quick-Start describes how to get a very popular big rock/pop drum sound.
1.
2.
3.
4.
5.
6.
7.
8.
9.
10.
11.
12.
13.
14.
15.
16.
17.
Turn the DP/2 inputs and outputs knobs down all the way (counter-clockwise).
Connect a mono effect send from your mixer to the DP/2’s rear-panel Input 1 jack. Use this send for mono drum sounds
such as the snare and/or bass drum.
Connect the DP/2’s Outputs 1 and 2 to two effect returns on your mixer. If you’d prefer to use only one mixer return, use
Output 1 and leave output 2 unplugged.
While sending some drum sounds into the DP/2, turn the input 1 knob clockwise until the red peak LEDs just above it is
flashing occasionally.
Turn the outputs knob up until your mixer is receiving the proper level from the DP/2.
Press the {SYSTEM/MIDI} button. Press the {>} button until the large red number reads “46.” Use the data entry knob to
dial in “Set All 1U Pset Mixes To Wet=Yes.”
Press the {EDIT} button, and then the {CONFIG} button.
Press the {<} button until the large red numbers read “00.” Dial in “1 Source Config.”
Press {>} once. Use the data entry knob to set the AB Input Select to “mono.”
Press {>} once. Set the AB Unit Routing to “serial.”
Press {>} until “(b)ypass (k)ill” is displayed, and the letter following “A=“ is flashing. Dial in the letter “b” (if “b” isn’t already
displayed). Press {>} again to do the same for Unit B.
Press the {A} button. If its red LED is flashing, press it again. Press {<} until the red numbers are flashing. Dial in #51,
Large Room Rev—the “51” will start flashing.
Press {>} until “Room Decay” is displayed. Dial in a value of 1.30.
Press the {B} button. If its red LED is flashing, press it again. Press {<} until the red numbers are flashing. Dial in #86.,
EQ-Compressor. (This will be the second #86 you encounter, and will have a small dot to the right of the numeral.) In a
moment, the “86” will begin to flash.
Use the {>} button and the data entry knob to set Compressor Gain to +15, Noise Gate Off Below to -31, Noise Gate On
Above to -25 and Gate Release Time to 40ms.
To save the set-up, press {CONFIG}. Press {WRITE}. Use the data entry knob to select a location in the DP/2’s
memory. Press {WRITE} again.
Name your set-up by using the {>} and {<} buttons to underline each character, and the data entry knob to dial in the
character you want. When you’re done, press {WRITE} again.
Part # 9310 0188 01 - A
Model # MM-87
Drum Kit—General Purpose Reverbs
02765
E F
762765
E F
#53
#52
Small Plate Rev
Hall Reverb
0276
E
This Quick-Start describes how to set up the DP/2 as two complementary drum kit reverb devices, fed by two separate effect
sends from your mixing console. Try using send 1 for your bass drum and cymbals (including the hihat), and send 2 for your
snare and toms.
1.
2.
3.
4.
5.
6.
7.
8.
9.
10.
11.
12.
13.
Connect your mixer’s two effect sends to the DP/2’s rear-panel Input 1 and 2 jacks.
Connect cables from the DP/2’s back-panel Output 1 and 2 jacks to the effect returns—or faders, if you like—on your
mixer. If you’ve only got one return (or fader), use Output 1 (and leave 2 unplugged).
While sending drum sounds through the two effect sends, turn the DP/2’s input knobs clockwise until the red peak LEDs
just above them are flashing occasionally.
Turn the outputs knob up until your mixer is receiving the proper level from the DP/2.
Press the {SYSTEM/MIDI} button. Press the{>} button until the large red number reads “46.” Use the data entry knob to
dial in “Set All 1U Pset Mixes To Wet=Yes.”
Press the {EDIT} button, and then the {CONFIG} button.
Press the {<} button until the large red numbers read “00.” Dial in “2 Source Config.”
Press {>} once. Use the data entry knob to set the AB Output Select to “Mixed Stereo.”
Press {>} until “(b)ypass (k)ill” is displayed, and the letter following “A=“ is flashing. Dial in the letter “k” (if “k” isn’t already
displayed). Press {>} again to do the same for Unit B.
Press the {A} button. If its red LED is flashing, press it again. Press {<} until the red numbers are flashing. Use the data
entry knob to dial in #53, Small Plate Rev—the “53” will start flashing.
Press the {B} button. If its red LED is flashing, press it again. Press {<} until the red numbers are flashing. Dial in #52,
Hall Reverb. In a moment, the “52” will begin to flash.
To save the set-up, press {CONFIG}. Press {WRITE}. Use the data entry knob to select a location in the DP/2’s
memory. Press {WRITE} again.
Name your set-up by using the {>} and {<} buttons to underline each character, and the data entry knob to dial in the
character you want. When you’re done, press {WRITE} again.
Tip: To customize either of the effects, press {EDIT}, the appropriate letter and {>} or {<} to select its
parameters; use the data entry knob to edit them. You can change the “Volume=“ parameter in an effect to adjust
how much of it you’ll hear. You can also press the {A} or {B} buttons to turn off either of the processors (its red
LED will flash). Press again to turn it back on (the red light will go out). Footswitches can accomplish the same
thing—see the “Using Foot Switches” Quick-Start for details.
Part # 9310 0177 01 - B
Model # MM-86
Drum Kit—Rock Reverbs
02765
E F
762765
E F
#51
#50
Large Room Rev
Small Room Rev
0276
E
This Quick-Start describes how to set up the DP/2 as two complementary drum kit reverb devices, fed by two separate effect
sends from your mixing console. Try using send 1 for your drums, and 2 for your cymbals (and hihat).
1.
2.
3.
4.
5.
6.
7.
8.
9.
10.
11.
12.
13.
Connect your mixer’s two effect sends to the DP/2’s rear-panel Input 1 and 2 jacks.
Connect cables from the DP/2’s back-panel Output 1 and 2 jacks to the effect returns—or faders, if you like—on your
mixer. If you’ve only got one return (or fader), use Output 1 (and leave 2 unplugged).
While sending drum sounds through the two effect sends, turn the DP/2’s input knobs clockwise until the red peak LEDs
just above them are flashing occasionally.
Turn the outputs knob up until your mixer is receiving the proper level from the DP/2.
Press the {SYSTEM/MIDI} button. Press the {>} button until the large red number reads “46.” Use the data entry knob to
dial in “Set All 1U Pset Mixes To Wet=Yes.”
Press the {EDIT} button, and then the {CONFIG} button.
Press the {<} button until the large red numbers read “00.” Dial in “2 Source Config.”
Press {>} once. Use the data entry knob to set the AB Output Select to “Mixed Stereo.”
Press {>} until “(b)ypass (k)ill” is displayed, and the letter following “A=“ is flashing. Dial in the letter “k” (if “k” isn’t already
displayed). Press {>} again to do the same for Unit B.
Press the {A} button. If its red LED is flashing, press it again. Press {<} until the red numbers are flashing. Use the data
entry knob to dial in #51, Large Room Rev—the “51” will start flashing.
Press the {B} button. If its red LED is flashing, press it again. Press {<} until the red numbers are flashing. Dial in #50,
Small Room Rev. In a moment, the “50” will begin to flash.
To save the set-up, press {CONFIG}. Press {WRITE}. Use the data entry knob to select a location in the DP/2’s
memory. Press {WRITE} again.
Name your set-up by using the {>} and {<} buttons to underline each character, and the data entry knob to dial in the
character you want. When you’re done, press {WRITE} again.
Tip: To customize either of the effects, press {EDIT}, the appropriate letter and {>} or {<} to select its
parameters; use the data entry knob to edit them. You can change the “Volume=“ parameter in an effect to adjust
how much of it you’ll hear. You can also press the {A} or {B} buttons to turn off either of the processors (its red
LED will flash). Press again to turn it back on (the red light will go out). Footswitches can accomplish the same
thing—see the “Using Foot Switches” Quick-Start for details.
Part # 9310 0188 01 - A
Model # MM-87
Electric Bass—Clean
02765
E F
762765
E F
#86.
~
EQ-Compressor
0276
E
#60.
TunableSpeaker 2
This Quick-Start is designed for bassists recording directly into a mixing console. It provides both a compressor and a clean
speaker simulation to make the direct sound a bit less studio-antiseptic.
1.
2.
3.
4.
5.
6.
7.
8.
9.
10.
11.
12.
13.
14.
15.
Turn the DP/2 inputs and outputs knobs down all the way (counter-clockwise).
Plug your bass into the DP/2’s front-panel input 1 jack.
Connect cables from the DP/2’s back-panel Output 1 and 2 jacks to two inputs on your stereo bass amplifier or mixing
console. If you’re going into a single-input bass amp or mixer, connect a cable from the DP/2’s Output 1 to that input.
While playing your bass, turn the input 1 knob clockwise until the red peak LED just above it is flashing occasionally.
Turn the outputs knob up until your amp (or mixer) is receiving the proper level from the DP/2.
Press the {EDIT} button, and then the {CONFIG} button.
Press the {<} button until the large red numbers read “00.”
Use the data entry knob to set the DP/2 to “1 Source Config.”
Press {>} once. Use the data entry knob to set the AB Input Select to “mono.”
Press {>} once. Set the AB Unit Routing to “serial.”
Press {>} until “(b)ypass (k)ill” is displayed, and the letter following “A=“ is flashing. Dial in the letter “b” (if “b” isn’t already
displayed). Press {>} again to do the same for Unit B.
Press the {A} button. If its red LED is on, press it again. Press {<} until the red numbers are flashing. Use the data entry
knob to dial in #86., EQ-Compressor. (This will be the second #86 you encounter, and will have a small dot to the right of
the numeral.) In a moment, the “86.” will start flashing.
Press the {B} button. If its red LED is on, press it again. Press {<} until the red numbers are flashing. Dial in #60.,
TunableSpeaker 2. (This will be the second #60 you encounter, and will have a small dot to the right of the numeral.) In a
moment, the “60.” will begin to flash.
To save the set-up, press {CONFIG}. Press {WRITE}. Use the data entry knob to select a location in the DP/2’s
memory. Press {WRITE} again.
Name your set-up by using the {>} and {<} buttons to underline each character, and the data entry knob to dial in the
character you want. When you’re done, press {WRITE} again.
Tip: To customize either of the effects, press {EDIT}, the appropriate letter and {>} or {<} to select its
parameters; use the data entry knob to edit them. You can change the “Volume=“ parameter in an effect to adjust
how much of it you’ll hear. You can also press the {A} or {B} buttons to turn off either of the processors (its red
LED will flash). Press again to turn it back on (the red light will go out). Footswitches can accomplish the same
thing—see the “Using Foot Switches” Quick-Start for details.
Part # 9310 0177 01 - B
Model # MM-86
Electric Bass—Funk
02765
E F
762765
E F
#86.
~
EQ-Compressor
0276
E
#78
Flanger
This Quick-Start provides a compressor and a swirling flange effect.
1.
2.
3.
4.
5.
6.
7.
8.
9.
10.
11.
12.
13.
14.
15.
Turn the DP/2 inputs and outputs knobs down all the way (counter-clockwise).
Plug your bass into the DP/2’s front-panel input 1 jack.
Connect cables from the DP/2’s back-panel Output 1 and 2 jacks to two inputs on your stereo bass amplifier or mixing
console. If you’re going into a single-input bass amp or mixer, connect a cable from the DP/2’s Output 1 to that input.
While playing your bass, turn the input 1 knob clockwise until the red peak LED just above it is flashing occasionally.
Turn the outputs knob up until your amp (or mixer) is receiving the proper level from the DP/2.
Press the {EDIT} button, and then the {CONFIG} button.
Press the {<} button until the large red numbers read “00.”
Use the data entry knob to set the DP/2 to “1 Source Config.”
Press {>} once. Use the data entry knob to set the AB Input Select to “mono.”
Press {>} once. Set the AB Unit Routing to “serial.”
Press {>} until “(b)ypass (k)ill” is displayed, and the letter following “A=“ is flashing. Dial in the letter “b” (if “b” isn’t already
displayed). Press {>} again to do the same for Unit B.
Press the {A} button. If its red LED is on, press it again. Press {<} until the red numbers are flashing. Use the data entry
knob to dial in #86., EQ-Compressor. (This will be the second #86 you encounter, and will have a small dot to the right of
the numeral.) In a moment, the “86.” will start flashing.
Press the {B} button. If its red LED is on, press it again. Press {<} until the red numbers are flashing. Dial in #78,
Flanger—the “78” will begin to flash.
To save the set-up, press {CONFIG}. Press {WRITE}. Use the data entry knob to select a location in the DP/2’s
memory. Press {WRITE} again.
Name your set-up by using the {>} and {<} buttons to underline each character, and the data entry knob to dial in the
character you want. When you’re done, press {WRITE} again.
Tip: To customize either of the effects, press {EDIT}, the appropriate letter and {>} or {<} to select its
parameters; use the data entry knob to edit them. You can change the “Volume=“ parameter in an effect to adjust
how much of it you’ll hear. You can also press the {A} or {B} buttons to turn off either of the processors (its red
LED will flash). Press again to turn it back on (the red light will go out). Footswitches can accomplish the same
thing—see the “Using Foot Switches” Quick-Start for details.
Part # 9310 0188 01 - A
Model # MM-87
Electric Bass—Rock
02765
E F
762765
E F
#86.
~
EQ-Compressor
0276
E
#55.
Guitar Amp 4
This Quick-Start provides a compressor and an amplifier simulation for studio bassists.
1.
2.
3.
4.
5.
6.
7.
8.
9.
10.
11.
12.
13.
14.
15.
16.
Turn the DP/2 inputs and outputs knobs down all the way (counter-clockwise).
Plug your bass into the DP/2’s front-panel input 1 jack.
Connect cables from the DP/2’s back-panel Output 1 and 2 jacks to two inputs on your stereo bass amplifier or mixing
console. If you’re going into a single-input bass amp or mixer, connect a cable from the DP/2’s Output 1 to that input.
While playing your bass, turn the input 1 knob clockwise until the red peak LED just above it is flashing occasionally.
Turn the outputs knob up until your amp (or mixer) is receiving the proper level from the DP/2.
Press the {EDIT} button, and then the {CONFIG} button.
Press the {<} button until the large red numbers read “00.”
Use the data entry knob to set the DP/2 to “1 Source Config.”
Press {>} once. Use the data entry knob to set the AB Input Select to “mono.”
Press {>} once. Set the AB Unit Routing to “serial.”
Press {>} until “(b)ypass (k)ill” is displayed, and the letter following “A=“ is flashing. Dial in the letter “b” (if “b” isn’t already
displayed). Press {>} again to do the same for Unit B.
Press the {A} button. If its red LED is on, press it again. Press {<} until the red numbers are flashing. Use the data entry
knob to dial in #86., EQ-Compressor. (This will be the second #86 you encounter, and will have a small dot to the right of
the numeral.) In a moment, the “86.” will start flashing.
Press the {B} button. If its red LED is on, press it again. Press {<} until the red numbers are flashing. Dial in #55., Guitar
Amp 4. (This will be the second #55 you encounter, and will have a small dot to the right of the numeral.) In a moment,
the “55.” will begin to flash.
Press {>} until “Amp PreampGain=30” is displayed. Dial in a value of “+15.”
To save the set-up, press {CONFIG}. Press {WRITE}. Use the data entry knob to select a location in the DP/2’s
memory. Press {WRITE} again.
Name your set-up by using the {>} and {<} buttons to underline each character, and the data entry knob to dial in the
character you want. When you’re done, press {WRITE} again.
Tip: To customize either of the effects, press {EDIT}, the appropriate letter and {>} or {<} to select its
parameters; use the data entry knob to edit them. You can change the “Volume=“ parameter in an effect to adjust
how much of it you’ll hear. You can also press the {A} or {B} buttons to turn off either of the processors (its red
LED will flash). Press again to turn it back on (the red light will go out). Footswitches can accomplish the same
thing—see the “Using Foot Switches” Quick-Start for details.
Part # 9310 0177 01 - B
Model # MM-86
Electric Guitar—Chorused
02765
E F
762765
E F
#65
~
8 Voice Chorus
0276
E
#54
Large Plate Rev
This Quick-Start sends your guitar through a rich chorus effect and then on to a large, clear reverb.
1.
2.
3.
4.
5.
6.
7.
8.
9.
10.
11.
12.
13.
14.
15.
16.
Turn the DP/2 inputs and outputs knobs down all the way (counter-clockwise).
Plug your guitar cord into the DP/2’s front-panel input 1 jack.
Connect cables from the DP/2’s back-panel Output 1 and 2 jacks to two inputs on your stereo guitar amplifier or mixing
console. If you’re going into a single-input guitar amp (or mixer), connect a cable from the DP/2’s Output 1 to that input.
While playing your guitar, turn the input 1 knob clockwise until the red peak LED just above it is flashing occasionally.
Turn the outputs knob up until your amp (or mixer) is receiving the proper level from the DP/2.
Press the {EDIT} button, and then the {CONFIG} button.
Press the {<} button until parameter 00 is displayed in large red numbers.
Use the data entry knob to set the DP/2 to “1 Source Config.”
Press {>} once. Use the data entry knob to set the AB Input Select to “mono.”
Press {>} once. Set the AB Unit Routing to “serial.”
Press {>} until “(b)ypass (k)ill” is displayed, and the letter following “A=“ is flashing. Dial in the letter “b” (if “b” isn’t already
displayed). Press {>} again to do the same for Unit B.
Press the {A} button. If its red LED is on, press it again. Press {<} until the red numbers are flashing. Use the data entry
knob to dial in #65, 8 Voice Chorus. In a moment, the “65” will start flashing.
Press {>} until the “00” in “Rate=00” is flashing. Dial in a value of 02.
Press the {B} button. If its red LED is on, press it again. Press {<} until the red numbers are flashing. Dial in #54, Large
Plate. In a moment, the “54” will begin to flash.
To save the set-up, press {CONFIG}. Press {WRITE}. Use the data entry knob to select a location in the DP/2’s
memory. Press {WRITE} again.
Name your set-up by using the {>} and {<} buttons to underline each character, and the data entry knob to dial in the
character you want. When you’re done, press {WRITE} again.
Tip: To customize any of the effects, press {EDIT}, the appropriate letter and {>} or {<} to select its parameters;
use the data entry knob to edit them. You can change the “Volume=“ parameter in an effect to adjust how much of
it you’ll hear. You can also press the {A} or {B} buttons to turn off either of the processors (its red LED will flash).
Press again to turn it back on (the red light will go out). Footswitches can accomplish the same thing—see the
“Using Foot Switches” Quick-Start for details.
Part # 9310 0188 01 - A
Model # MM-87
Electric Guitar—Clean Amp
02765
E F
762765
E F
#54
~
Large Plate Rev
0276
E
#60.
TunableSpeaker 2
This Quick-Start is designed for guitarists recording directly into a mixing console. It simulates a clean amp set-up by routing
the guitar first through a reverb and then into a clean amplifier effect.
1.
2.
3.
4.
5.
6.
7.
8.
9.
10.
11.
12.
13.
14.
15.
16.
Turn the DP/2 inputs and outputs knobs down all the way (counter-clockwise).
Plug your guitar cord into the DP/2’s front-panel input 1 jack.
Connect cables from the DP/2’s back-panel Output 1 and 2 jacks to two inputs on your stereo guitar amplifier or mixing
console. If you’re going into a single-input guitar amp or mixer, connect a cable from the DP/2’s Output 1 to that input.
While playing your guitar, turn the input 1 knob clockwise until the red peak LED just above it is flashing occasionally.
Turn the outputs knob up until your amp (or mixer) is receiving the proper level from the DP/2.
Press the {EDIT} button, and then the {CONFIG} button.
Press the {<} button until parameter 00 is displayed in large red numbers.
Use the data entry knob to set the DP/2 to “1 Source Config.”
Press {>} once. Use the data entry knob to set the AB Input Select to “mono.”
Press {>} once. Set the AB Unit Routing to “serial.”
Press {>} until “(b)ypass (k)ill” is displayed, and the letter following “A=“ is flashing. Dial in the letter “b” (if “b” isn’t already
displayed). Press {>} again to do the same for Unit B.
Press the {A} button. If its red LED is on, press it again. Press {<} until the red numbers are flashing. Use the data entry
knob to dial in #54, Large Plate Rev. In a moment, the “54.” will start flashing.
Press {>} once. Set Mix= to 23.
Press the {B} button. If its red LED is on, press it again. Press {<} until the red numbers are flashing. Use the data entry
knob to dial in #60., TunableSpeaker 2. (This will be the second #60 you encounter, and will have a small dot to the right
of the numeral.) In a moment, the “60.” will start flashing.
To save the set-up, press {CONFIG}. Press {WRITE}. Use the data entry knob to select a location in the DP/2’s
memory. Press {WRITE} again.
Name your set-up by using the {>} and {<} buttons to underline each character, and the data entry knob to dial in the
character you want. When you’re done, press {WRITE} again.
Tip: To customize either of the effects, press {EDIT}, the appropriate letter and {>} or {<} to select its
parameters; use the data entry knob to edit them. You can change the “Volume=“ parameter in an effect to adjust
how much of it you’ll hear. You can also press the {A} or {B} buttons to turn off either of the processors (its red
LED will flash). Press again to turn it back on (the red light will go out). Footswitches can accomplish the same
thing—see the “Using Foot Switches” Quick-Start for details.
Part # 9310 0177 01 - B
Model # MM-86
Electric Guitar—Clean and Dry
02765
E F
762765
E F
#86.
~
EQ-Compressor
0276
E
#60.
TunableSpeaker 2
This Quick-Start is designed for guitarists recording directly into a mixing console. It provides both a compressor and a clean
speaker simulation to make the direct sound a bit less studio-antiseptic.
1.
2.
3.
4.
5.
6.
7.
8.
9.
10.
11.
12.
13.
14.
15.
Turn the DP/2 inputs and outputs knobs down all the way (counter-clockwise).
Plug your guitar cord into the DP/2’s front-panel input 1 jack.
Connect cables from the DP/2’s back-panel Output 1 and 2 jacks to two inputs on your stereo guitar amplifier or mixing
console. If you’re going into a single-input guitar amp or mixer, connect a cable from the DP/2’s Output 1 to that input.
While playing your guitar, turn the input 1 knob clockwise until the red peak LED just above it is flashing occasionally.
Turn the outputs knob up until your amp (or mixer) is receiving the proper level from the DP/2.
Press the {EDIT} button, and then the {CONFIG} button.
Press the {<} button until parameter 00 is displayed in large red numbers.
Use the data entry knob to set the DP/2 to “1 Source Config.”
Press {>} once. Use the data entry knob to set the AB Input Select to “mono.”
Press {>} once. Set the AB Unit Routing to “serial.”
Press {>} until “(b)ypass (k)ill” is displayed, and the letter following “A=“ is flashing. Dial in the letter “b” (if “b” isn’t already
displayed). Press {>} again to do the same for Unit B.
Press the {A} button. If its red LED is on, press it again. Press {<} until the red numbers are flashing. Use the data entry
knob to dial in #86., EQ-Compressor. (This will be the second #86 you encounter, and will have a small dot to the right of
the numeral.) In a moment, the “86.” will start flashing.
Press the {B} button. If its red LED is on, press it again. Press {<} until the red numbers are flashing. Use the data entry
knob to dial in #60., TunableSpeaker 2. (This will be the second #60 you encounter, and will have a small dot to the right
of the numeral.) In a moment, the “60.” will start flashing.
To save the set-up, press {CONFIG}. Press {WRITE}. Use the data entry knob to select a location in the DP/2’s
memory. Press {WRITE} again.
Name your set-up by using the {>} and {<} buttons to underline each character, and the data entry knob to dial in the
character you want. When you’re done, press {WRITE} again.
Tip: To customize either of the effects, press {EDIT}, the appropriate letter and {>} or {<} to select its
parameters; use the data entry knob to edit them. You can change the “Volume=“ parameter in an effect to adjust
how much of it you’ll hear. You can also press the {A} or {B} buttons to turn off either of the processors (its red
LED will flash). Press again to turn it back on (the red light will go out). Footswitches can accomplish the same
thing—see the “Using Foot Switches” Quick-Start for details.
Part # 9310 0188 01 - A
Model # MM-87
Electric Guitar—Rock
02765
E F
762765
E F
#55.
~
Guitar Amp 4
0276
E
#51
Large Room Rev
This Quick-Start is designed for guitarists recording directly into a mixing console. It gets its big sound by sending your guitar
through a rock amplifier simulation and then into a large room reverb.
1.
2.
3.
4.
5.
6.
7.
8.
9.
10.
11.
12.
13.
14.
15.
16.
Turn the DP/2 inputs and outputs knobs down all the way (counter-clockwise).
Plug your guitar cord into the DP/2’s front-panel input 1 jack.
Connect cables from the DP/2’s back-panel Output 1 and 2 jacks to two inputs on your stereo guitar amplifier or mixing
console. If you’re going into a single-input guitar amp or mixer, connect a cable from the DP/2’s Output 1 to that input.
While playing your guitar, turn the input 1 knob clockwise until the red peak LED just above it is flashing occasionally.
Turn the outputs knob up until your amp (or mixer) is receiving the proper level from the DP/2. The output knobs should
be turned up by an equal amount.
Press the {EDIT} button, and then the {CONFIG} button.
Press the {<} button until parameter 00 is displayed in large red numbers.
Use the data entry knob to set the DP/2 to “1 Source Config.”
Press {>} once. Use the data entry knob to set the AB Input Select to “mono.”
Press {>} once. Set the AB Unit Routing to “serial.”
Press {>} until “(b)ypass (k)ill” is displayed, and the letter following “A=“ is flashing. Dial in the letter “b” (if “b” isn’t already
displayed). Press {>} again to do the same for Unit B.
Press the {A} button. If its red LED is on, press it again. Press {<} until the red numbers are flashing. Use the data entry
knob to dial in #55., Guitar Amp 4. (This will be the second #55 you encounter, and will have a small dot to the right of the
numeral.) In a moment, the “55.” will start flashing.
Press the {B} button. If its red LED is on, press it again. Press {<} until the red numbers are flashing. Dial in #51, Large
Room Rev. In a moment, the “51.” will begin to flash.
Press {>} once. Set Mix= to 43.
To save the set-up, press {CONFIG}. Press {WRITE}. Use the data entry knob to select a location in the DP/2’s
memory. Press {WRITE} again.
Name your set-up by using the {>} and {<} buttons to underline each character, and the data entry knob to dial in the
character you want. When you’re done, press {WRITE} again.
Tip: To customize either of the effects, press {EDIT}, the appropriate letter and {>} or {<} to select its
parameters; use the data entry knob to edit them. You can change the “Volume=“ parameter in an effect to adjust
how much of it you’ll hear. You can also press the {A} or {B} buttons to turn off either of the processors (its red
LED will flash). Press again to turn it back on (the red light will go out). Footswitches can accomplish the same
thing—see the “Using Foot Switches” Quick-Start for details.
Part # 9310 0177 01 - B
Model # MM-86
Instant Karaoke
02765
E F
762765
E F
Config Preset 56
Vocal Remover
0276
E
The DP/2 can remove the lead vocals from many recordings, allowing you to step right in as the lead singer. This Quick-Start
shows how to do it.
1.
2.
Turn the DP/2 inputs and outputs knobs down all the way (counter-clockwise).
Connect the left and right cables from a stereo source (a mixer, cd or cassette player, or turntable, for example) into the
DP/2’s rear-panel Input 1 and 2 jacks.
3. Connect cables from the DP/2’s back-panel Output 1 and 2 jacks to two inputs on your mixing console or stereo guitar
amplifier. If you’re going into a single-input mixer or amp, connect a cable from the DP/2’s Output 1 to that input.
4. While playing the music you want to sing along with, turn the input 1 and 2 knobs clockwise until the red peak LEDs just
above input 1 is flashing occasionally.
5. Turn the outputs knob up until your mixer (or amp) is receiving the proper level from the DP/2.
6. Press the {SELECT} button, and then the {CONFIG} button. If the red LEDs in the {A}, {B}, {C} and {D} buttons light up,
press {CONFIG} again.
7. Use the data entry knob to dial in #56, Vocal Remover.
8. Press {SELECT} again.
9. Press the {EDIT} button.
10. Press the {A} button.
11. Press {>} until the “2000” in “Mid Fc=2000” is flashing. Turn the data entry knob up and down to find the best setting for
reducing the volume of the lead vocal. Small changes in this setting can be the key to success!
Note: If the vocal you’re trying to remove has been processed with reverb or other effects, it may not be possible
to remove it entirely.
Part # 9310 0188 01 - A
Model # MM-87
Keyboard—Electric Piano Panner
02765
E F
762765
E F
#78
~
Flanger
0276
E
#76.
EQ-Panner-DDL
This Quick-Start makes your keyboard swing back-and-forth in the stereo field like an old electric piano. It also provides a
flanging effect for an extra bit of swirl, lovely for ballads.
1.
2.
3.
4.
5.
6.
7.
8.
9.
10.
11.
12.
13.
14.
15.
16.
Turn the DP/2 inputs and outputs knobs down all the way (counter-clockwise).
Plug your keyboard’s output cable into the DP/2’s front-panel input 1 jack. If your keyboard has stereo outputs, plug them
into the DP/2’s rear-panel Input jacks 1 and 2.
Connect cables from the DP/2’s back-panel Output 1 and 2 jacks to two inputs on your stereo guitar amplifier or mixing
console. If you’re going into a single-input guitar amp or mixer, connect a cable from the DP/2’s Output 1 to that input.
While playing your keyboard, turn the input 1 knob clockwise until the red peak LED just above it is flashing occasionally.
If your keyboard’s stereo, turn up input 2’s knob as well.
Turn the outputs knob up until your amp (or mixer) is receiving the proper level from the DP/2.
Press the {EDIT} button, and then the {CONFIG} button.
Press the {<} button until the large red numbers read “00.”
Use the data entry knob to set the DP/2 to “1 Source Config.”
Press {>} once. Set the AB Input Select to “mono,” or if your keyboard’s stereo, to “stereo.”
Press {>} once. Set the AB Unit Routing to “serial.”
Press {>} until “(b)ypass (k)ill” is displayed, and the letter following “A=“ is flashing. Dial in the letter “b” (if “b” isn’t already
displayed). Press {>} again to do the same for Unit B.
Press the {A} button. If its red LED is on, press it again. Press {<} until the red numbers are flashing. Use the data entry
knob to dial in #78, Flanger—the “78” will start flashing.
Press the {B} button. If its red LED is on, press it again. Press {<} until the red numbers are flashing. Dial in #76., EQPanner-DDL. (This will be the second #76 you encounter, and will have a small dot to the right of the numeral.) In a
moment, the “76.” will begin to flash.
Use the {>} button and the data entry knob to set Panner Rate to 65 and Width to 99.
To save the set-up, press {CONFIG}. Press {WRITE}. Use the data entry knob to select a location in the DP/2’s
memory. Press {WRITE} again.
Name your set-up by using the {>} and {<} buttons to underline each character, and the data entry knob to dial in the
character you want. When you’re done, press {WRITE} again.
Tip: To customize either of the effects, press {EDIT}, the appropriate letter and {>} or {<} to select its
parameters; use the data entry knob to edit them. You can change the “Volume=“ parameter in an effect to adjust
how much of it you’ll hear. You can also press the {A} or {B} buttons to turn off either of the processors (its red
LED will flash). Press again to turn it back on (the red light will go out). Footswitches can accomplish the same
thing—see the “Using Foot Switches” Quick-Start for details.
Part # 9310 0177 01 - B
Model # MM-86
Keyboard—Synth Fattener
02765
E F
762765
E F
#65
~
8 Voice Chorus
0276
E
#54
Large Plate Rev
This Quick-Start is for processing a synthesizer with no built-in effects. It runs your dry keyboard through a rich chorus and
then on to a large clean reverb to wake up its sound.
1.
2.
3.
4.
5.
6.
7.
8.
9.
10.
11.
12.
13.
14.
15.
16.
Turn the DP/2 inputs and outputs knobs down all the way (counter-clockwise).
Plug your keyboard’s output cable into the DP/2’s front-panel input 1 jack. If your keyboard has stereo outputs, plug them
into the DP/2’s rear-panel Input jacks 1 and 2.
Connect cables from the DP/2’s back-panel Output 1 and 2 jacks to two inputs on your stereo guitar amplifier or mixing
console. If you’re going into a single-input guitar amp or mixer, connect a cable from the DP/2’s Output 1 to that input.
While playing your keyboard, turn the input 1 knob clockwise until the red peak LED just above it is flashing occasionally.
If your keyboard’s stereo, turn up input 2’s knob as well.
Turn the outputs knob up until your amp (or mixer) is receiving the proper level from the DP/2.
Press the {EDIT} button, and then the {CONFIG} button.
Press the {<} button until the large red numbers read “00.”
Use the data entry knob to set the DP/2 to “1 Source Config.”
Press {>} once. Set the AB Input Select to “mono,” or if your keyboard’s stereo, to “stereo.”
Press {>} once. Set the AB Unit Routing to “serial.”
Press {>} until “(b)ypass (k)ill” is displayed, and the letter following “A=“ is flashing. Dial in the letter “b” (if “b” isn’t already
displayed). Press {>} again to do the same for Unit B.
Press the {A} button. If its red LED is on, press it again. Press {<} until the red numbers are flashing. Use the data entry
knob to dial in #65, 8 Voice Chorus—the “65” will start flashing.
Press the {B} button. If its red LED is on, press it again. Press {<} until the red numbers are flashing. Dial in #54, Large
Plate Rev. In a moment, the “54” will begin to flash.
Press {>} once. Set Mix= to 28.
To save the set-up, press {CONFIG}. Press {WRITE}. Use the data entry knob to select a location in the DP/2’s
memory. Press {WRITE} again.
Name your set-up by using the {>} and {<} buttons to underline each character, and the data entry knob to dial in the
character you want. When you’re done, press {WRITE} again.
Tip: To customize either of the effects, press {EDIT}, the appropriate letter and {>} or {<} to select its
parameters; use the data entry knob to edit them. You can change the “Volume=“ parameter in an effect to adjust
how much of it you’ll hear. You can also press the {A} or {B} buttons to turn off either of the processors (its red
LED will flash). Press again to turn it back on (the red light will go out). Footswitches can accomplish the same
thing—see the “Using Foot Switches” Quick-Start for details.
Part # 9310 0188 01 - A
Model # MM-87
MC Effects
02765
E F
762765
E F
#75
+
Flanger Reverb
0276
E
#97
Pitch Shifter
This Quick-Start provides MC’s and deejays with some special effects. There’s a flanger to make you sound like an alien and
a pitch shifter to send your voice way down into the basement.
1.
2.
3.
4.
5.
6.
7.
8.
9.
10.
11.
12.
13.
14.
15.
16.
17.
18.
Turn the DP/2 inputs and outputs knobs down all the way (counter-clockwise).
Plug a microphone’s effect send from your mixer into the DP/2’s rear-panel Input 1 jack.
Connect cables from the DP/2’s back-panel Output 1 jack to an input on your mixing console or stereo amplifier.
While speaking, turn the input 1 knob clockwise until the red peak LED just above it is flashing occasionally.
Turn the outputs knob up until your mixer (or amp) is receiving the proper level from the DP/2.
Set your mixer so that you’re only hearing the output of the DP/2, and none of the original “dry” microphone signal.
Press the {EDIT} button, and then the {CONFIG} button.
Press the {<} button until parameter 00 is displayed in large red numbers.
Use the data entry knob to set the DP/2 to “1 Source Config.”
Press {>} once. Use the data entry knob to set the AB Input Select to “mono.”
Press {>} once. Set the AB Unit Routing to “parallel.”
Press {>} until “(b)ypass (k)ill” is displayed, and the letter following “A=“ is flashing. Dial in the letter “b” (if “b” isn’t already
displayed). Press {>} again to do the same for Unit B.
Press the {A} button. If its red LED is on, press it again. Press {<} until the red numbers are flashing. Use the data entry
knob to dial in #75, Flanger-Reverb. In a moment, the “75” will start flashing.
Press the {B} button. If its red LED is on, press it again. Press {<} until the red numbers are flashing. Dial in #97, Pitch
Shifter—the “97” will begin to flash.
Press the button once so that the “40” in “Mix=40” is flashing. Dial in a value of 99.
Use the {>}button and data entry knob to set PitchShifter Vc1 Fine to -02, PitchShifter Vc2 Semi to -05 and PitchShifter
Vc2 Fine to +02.
To save the set-up, press {CONFIG}. Press {WRITE}. Use the data entry knob to select a location in the DP/2’s
memory. Press {WRITE} again.
Name your set-up by using the {>} and {<} buttons to underline each character, and the data entry knob to dial in the
character you want. When you’re done, press {WRITE} again.
Tip: You can press the {A} or {B} buttons to turn off either of the processors (its red LED will light). Press again
to turn it back on (the red light will go out). Footswitches can accomplish the same thing—see the “Using Foot
Switches” Quick-Start for details.
Part # 9310 0177 01 - B
Model # MM-86
Mixing in Mono
02765
E F
762765
E F
#54
#87
Large Plate Rev
Dual Delay
0276
E
This Quick-Start describes how to set up the DP/2 as two separate effect devices, fed by two separate mono effect sends from
your mixing console. It provides a reverb and a delay effect, but you can just as easily dial in any effect that you like at Steps
11 and 12.
1.
2.
3.
4.
5.
6.
7.
8.
9.
10.
11.
12.
13.
14.
Connect your mixer’s two effect sends to the DP/2’s rear-panel Input 1 and 2 jacks.
Connect a cable from the DP/2’s back-panel Output 1 jack to an effect return or fader on your mixer. Don’t plug a cable
into the DP/2 Output 2 jack.
While sending signal through the two effect sends, turn the DP/2’s input knobs clockwise until the red peak LEDs just
above them are flashing occasionally.
Turn the outputs knob up until your mixer is receiving the proper level from the DP/2.
Press the {SYSTEM/MIDI} button. Press the{>} button until the large red number reads “46.” Use the data entry knob to
dial in “Set All 1U Pset Mixes To Wet=Yes.”
Press the {EDIT} button, and then the {CONFIG} button.
Press the {<} button until the large red numbers read “00.”
Use the data entry knob to set the DP/2 to “2 Source Config.”
Press {>} once. Set the AB Output Select to “Dual Mono.”
Press {>} until “(b)ypass (k)ill” is displayed, and the letter following “A=“ is flashing. Dial in the letter “k” (if “k” isn’t already
displayed). Press {>} again to do the same for Unit B.
Press the {A} button. If its red LED is flashing, press it again. Press {<} until the red numbers are flashing. Dial in #54,
Large Plate Rev—the “54” will start flashing.
Press the {B} button. If its red LED is flashing, press it again. Press {<} until the red numbers are flashing. Dial in #87,
Dual Delay. In a moment, the “87” will begin to flash.
To save the set-up, press {CONFIG}. Press {WRITE}. Use the data entry knob to select a location in the DP/2’s
memory. Press {WRITE} again.
Name your set-up by using the {>} and {<} buttons to underline each character, and the data entry knob to dial in the
character you want. When you’re done, press {WRITE} again.
Tip: To customize either of the effects, press {EDIT}, the appropriate letter and {>} or {<} to select its
parameters; use the data entry knob to edit them. You can change the “Volume=“ parameter in an effect to adjust
how much of it you’ll hear. You can also press the {A} or {B} buttons to turn off either of the processors (its red
LED will flash). Press again to turn it back on (the red light will go out). Footswitches can accomplish the same
thing—see the “Using Foot Switches” Quick-Start for details.
Part # 9310 0188 01 - A
Model # MM-87
Mixing in Stereo
02765
E F
762765
E F
#54
#87
Large Plate Rev
Dual Delay
0276
E
This Quick-Start describes how to set up the DP/2 as two separate effect devices, fed by two separate mono effect sends from
your mixing console. It provides a reverb and a delay effect, but you can just as easily dial in any effect that you like at Steps
11 and 12.
1.
2.
3.
4.
5.
6.
7.
8.
9.
10.
11.
12.
13.
14.
Connect your mixer’s two effect sends to the DP/2’s rear-panel Input 1 and 2 jacks.
Connect cables from the DP/2’s back-panel Output 1 and 2 jacks to two effect returns or faders on your mixer.
While sending sounds through the two effect sends, turn the DP/2’s input knobs clockwise until the red peak LEDs just
above them are flashing occasionally.
Turn the outputs knob up until your mixer is receiving the proper level from the DP/2.
Press the {SYSTEM/MIDI} button. Press the {>} button until the large red number reads “46.” Use the data entry knob to
dial in “Set All 1U Pset Mixes To Wet=Yes.”
Press the {EDIT} button, and then the {CONFIG} button.
Press the {<} button until the large red numbers read “00.”
Dial in “2 Source Config.”
Press {>} once. Set the AB Output Select to “Mixed Stereo.”
Press {>} until “(b)ypass (k)ill” is displayed, and the letter following “A=“ is flashing. Dial in the letter “k” (if “k” isn’t already
displayed). Press {>} again to do the same for Unit B.
Press the {A} button. If its red LED is flashing, press it again. Press {<} until the red numbers are flashing. Dial in #54,
Large Plate Rev—the “54” will start flashing.
Press the {B} button. If its red LED is flashing, press it again. Press {<} until the red numbers are flashing. Dial in #87,
Dual Delay. In a moment, the “87” will begin to flash.
To save the set-up, press {CONFIG}. Press {WRITE}. Use the data entry knob to select a location in the DP/2’s
memory. Press {WRITE} again.
Name your set-up by using the {>} and {<} buttons to underline each character, and the data entry knob to dial in the
character you want. When you’re done, press {WRITE} again.
Tip: To customize either of the effects, press {EDIT}, the appropriate letter and {>} or {<} to select its
parameters; use the data entry knob to edit them. You can change the “Volume=“ parameter in an effect to adjust
how much of it you’ll hear. You can also press the {A} or {B} buttons to turn off either of the processors (its red
LED will flash). Press again to turn it back on (the red light will go out). Footswitches can accomplish the same
thing—see the “Using Foot Switches” Quick-Start for details.
Part # 9310 0177 01 - B
Model # MM-86
Public Speaking
02765
E F
762765
E F
#94.
+
VanderPol Filter
0276
E
#53
Small Plate Rev
This Quick-Start provides effects to help public speakers sound more clear and natural. The VanderPol filter helps bring out
the real-life sound of your voice, while the reverb offers a touch of ambience.
1.
2.
3.
4.
5.
6.
7.
8.
9.
10.
11.
12.
13.
14.
15.
Turn the DP/2 inputs and outputs knobs down all the way (counter-clockwise).
Plug a microphone’s effect send from your mixer into the DP/2’s rear-panel Input 1 jack.
Connect cables from the DP/2’s back-panel Output 1 and 2 jacks to two inputs on your mixing console or stereo guitar
amplifier. If you’re going into a single-input mixer or amp, connect a cable from the DP/2’s Output 1 to that input.
While speaking into your microphone, turn the input 1 knob clockwise until the red peak LED just above it is flashing
occasionally.
Turn the outputs knob up until your mixer (or amp) is receiving the proper level from the DP/2.
Press the {EDIT} button, and then the {CONFIG} button.
Press the {<} button until the large red numbers read “00.”
Use the data entry knob to set the DP/2 to “1 Source Config.”
Press {>} once. Use the data entry knob to set the AB Input Select to “mono.”
Press {>} once. Set the AB Unit Routing to “parallel.”
Press {>} until “(b)ypass (k)ill” is displayed, and the letter following “A=“ is flashing. Dial in the letter “k” (if “k” isn’t already
displayed). Press {>} again to do the same for Unit B.
Press the {A} button. If its red LED is flashing, press it again. Press {<} until the red numbers are flashing. Use the data
entry knob to dial in #94., VanderPol Filter. (This will be the second #94 you encounter, and will have a small dot to the
right of the numeral.) In a moment, the “94.” will start flashing.
Press the {B} button. If its red LED is flashing, press it again. Press {<} until the red numbers are flashing. Dial in #53,
Small Plate Rev. In a moment, the “53” will begin to flash.
To save the set-up, press {CONFIG}. Press {WRITE}. Use the data entry knob to select a location in the DP/2’s
memory. Press {WRITE} again.
Name your set-up by using the {>} and {<} buttons to underline each character, and the data entry knob to dial in the
character you want. When you’re done, press {WRITE} again.
Tip: To customize either of the effects, press {EDIT}, the appropriate letter and {>} or {<} to select its
parameters; use the data entry knob to edit them. You can change the “Volume=“ parameter in an effect to adjust
how much of it you’ll hear. You can also press the {A} or {B} buttons to turn off either of the processors (its red
LED will flash). Press again to turn it back on (the red light will go out). Footswitches can accomplish the same
thing—see the “Using Foot Switches” Quick-Start for details.
Part # 9310 0188 01 - A
Model # MM-87
Singer/Guitarist
02765
E F
762765
E F
#60.
#54
TunableSpeaker 2
Large Plate Rev
0276
E
This Quick-Start is for singers who perform with a guitar which has a pick-up. It provides a clean and rich amp simulation for
your guitar and a reverb for your voice. MIDI One-Person bands who are using a mono PA system can use this set-up as well,
by plugging in their keyboard (or keyboard sub-mixer) into the front-panel input 1 jack.
1.
2.
3.
4.
5.
6.
7.
8.
9.
10.
11.
12.
13.
14.
15.
16.
17.
Turn the DP/2 input and output knobs down all the way (counter-clockwise).
Plug your guitar cord into the DP/2’s front-panel input 1 jack.
Connect your vocal’s effect send from your mixer to Input jack 2.
Connect cables from the DP/2’s back-panel Output 1 and 2 jacks to the effect returns on your mixing console. If you’ve
only got one effect return on your mixer, use Output 1.
While playing your guitar, turn the input 1 knob clockwise until the red peak LED just above it is flashing occasionally.
While singing, turn up your vocal’s effect sends to a healthy level. Turn the DP/2’s input 2 and knob clockwise until the
red peak LEDs just above it is flashing occasionally.
Turn the DP/2 outputs knob up until your mixer is receiving the proper level from the DP/2.
Press the {EDIT} button, and then the {CONFIG} button.
Press the {<} button until parameter 00 is displayed in large red numbers.
Use the data entry knob to dial in “2 Source Config.”
Press {>} . Set the AB Output Select to “Mixed Stereo.”
Press {>} until “(b)ypass (k)ill” is displayed, and the letter following “A=“ is flashing. Dial in the letter “b.” Press {>} again
and dial in “k” for Unit B.
Press the {A} button. If its red LED is on, press it again. Press {<} until the red numbers are flashing. Dial in #60.,
TunableSpeaker 2. (This will be the second #60 you encounter, and will have a small dot to the right of the numeral.) In a
moment, the “60.” will start flashing.
Press the {B} button. If its red LED is flashing, press it again. Press {<} until the red numbers are flashing. Dial in #54,
Large Plate Rev—the “54” will begin to flash.
Press {>} twice and set Volume= to 50.
To save the set-up, press {CONFIG}. Press {WRITE}. Use the data entry knob to select a location in the DP/2’s
memory. Press {WRITE} again.
Name your set-up by using the {>} and {<} buttons to underline each character, and the data entry knob to dial in the
character you want. When you’re done, press {WRITE} again.
Tip: To customize either of the effects, press {EDIT}, the appropriate letter and {>} or {<} to select its
parameters; use the data entry knob to edit them. You can change the “Volume=“ parameter in an effect to adjust
how much of it you’ll hear. You can also press the {A} or {B} buttons to turn off either of the processors (its red
LED will go on). Press again to turn it back on (the red light will go out). Footswitches can accomplish the same
thing—see the “Using Foot Switches” Quick-Start for details.
Part # 9310 0177 01 - B
Model # MM-86
Solo Instrument—New Age
02765
E F
762765
E F
#86
+
Multi Tap Delay
0276
E
#54
Large Plate Rev
This Quick-Start is for solo wind and reed players performing in a New-Age style.
1.
2.
3.
4.
5.
6.
7.
8.
9.
10.
11.
12.
13.
14.
15.
16.
Turn the DP/2 inputs and outputs knobs down all the way (counter-clockwise).
Connect your instrument’s effect send from your mixer to the DP/2’s rear-panel Input jack 1.
Connect cables from the DP/2’s back-panel Output 1 and 2 jacks to two inputs on your mixing console or stereo
amplifier. If you’ve only got one input available on your mixer (or amp), connect a cable from the DP/2’s Output 1 to that
input.
While playing your instrument, turn the input 1 knob clockwise until the red peak LED just above it is flashing
occasionally.
Turn the outputs knob up until your mixer (or amp) is receiving the proper level from the DP/2.
Press the {SYSTEM/MIDI} button. Press the {>} button until the large red number reads “46.” Use the data entry knob to
dial in “Set All 1U Pset Mixes To Wet=Yes.”
Press the {EDIT} button, and then the {CONFIG} button.
Press the {<} button until the large red numbers read “00.”
Use the data entry knob to set the DP/2 to “1 Source Config.”
Press {>} once. Use the data entry knob to set the AB Input Select to “mono.”
Press {>} once. Set the AB Unit Routing to “parallel.”
Press {>} until “(b)ypass (k)ill” is displayed, and the letter following “A=“ is flashing. Dial in the letter “k” (if “k” isn’t already
displayed). Press {>} again to do the same for Unit B.
Press the {A} button. If its red LED is on, press it again. Press {<} until the red numbers are flashing. Use the data entry
knob to dial in #86, Multi Tap Delay—the “86” will start flashing.
Press the {B} button. If its red LED is on, press it again. Press {<} until the red numbers are flashing. Dial in #54, Large
Plate Rev. In a moment, the “54” will begin to flash.
To save the set-up, press {CONFIG}. Press {WRITE}. Use the data entry knob to select a location in the DP/2’s
memory. Press {WRITE} again.
Name your set-up by using the {>} and {<} buttons to underline each character, and the data entry knob to dial in the
character you want. When you’re done, press {WRITE} again.
Tip: To customize either of the effects, press {EDIT}, the appropriate letter and {>} or {<} to select its
parameters; use the data entry knob to edit them. You can change the “Volume=“ parameter in an effect to adjust
how much of it you’ll hear. You can also press the {A} or {B} buttons to turn off either of the processors (its red
LED will flash). Press again to turn it back on (the red light will go out). Footswitches can accomplish the same
thing—see the “Using Foot Switches” Quick-Start for details.
Part # 9310 0188 01 - A
Model # MM-87
Solo Instrument—Rock
02765
E F
762765
E F
#87
~
Dual Delay
0276
E
#51
Large Room Rev
This Quick-Start is for solo reed and wind players performing rock.
1.
2.
3.
4.
5.
6.
7.
8.
9.
10.
11.
12.
13.
14.
15.
16.
17.
Turn the DP/2 inputs and outputs knobs down all the way (counter-clockwise).
Connect your instrument’s effect send from your mixer to the DP/2’s rear-panel Input jack 1.
Connect cables from the DP/2’s back-panel Output 1 and 2 jacks to two inputs on your mixing console or stereo
amplifier. If you’ve only got one input available on your mixer (or amp), connect a cable from the DP/2’s Output 1 to that
input.
While playing your instrument, turn the input 1 knob clockwise until the red peak LED just above it is flashing
occasionally.
Turn the outputs knob up until your mixer (or amp) is receiving the proper level from the DP/2.
Press the {SYSTEM/MIDI} button. Press the {>} button until the large red number reads “46.” Use the data entry knob to
dial in “Set All 1U Pset Mixes To Wet=Yes.”
Press the {EDIT} button, and then the {CONFIG} button.
Press the {<} button until the large red numbers read “00.”
Use the data entry knob to set the DP/2 to “1 Source Config.”
Press {>} once. Use the data entry knob to set the AB Input Select to “mono.”
Press {>} once. Set the AB Unit Routing to “serial.”
Press {>} until “(b)ypass (k)ill” is displayed, and the letter following “A=“ is flashing. Dial in the letter “b” (if “b” isn’t already
displayed). Press {>} again to do the same for Unit B.
Press the {A} button. If its red LED is on, press it again. Press {<} until the red numbers are flashing. Use the data entry
knob to dial in #87, Dual Delay—the “87” will start flashing.
Press {>} until “Left Input delay” is displayed and “375” is flashing. Dial in a value of 70. Use the {>} button and the data
entry knob to set Left Input Delay Regen to 00, Right Input Delay to 98.00, Right input Delay Regen to 00 and Dual
Delay Cross Regen to 00.
Press the {B} button. If its red LED is on, press it again. Press {<} until the red numbers are flashing. Dial in #51, Large
Room Rev. In a moment, the “51” will begin to flash.
To save the set-up, press {CONFIG}. Press {WRITE}. Use the data entry knob to select a location in the DP/2’s
memory. Press {WRITE} again.
Name your set-up by using the {>} and {<} buttons to underline each character, and the data entry knob to dial in the
character you want. When you’re done, press {WRITE} again.
Tip: To customize either of the effects, press {EDIT}, the appropriate letter and {>} or {<} to select its
parameters; use the data entry knob to edit them. You can change the “Volume=“ parameter in an effect to adjust
how much of it you’ll hear. You can also press the {A} or {B} buttons to turn off either of the processors (its red
LED will flash). Press again to turn it back on (the red light will go out). Footswitches can accomplish the same
thing—see the “Using Foot Switches” Quick-Start for details.
Part # 9310 0177 01 - B
Model # MM-86
Telephone Filter Effect
02765
E F
762765
E F
#86.
~
EQ-Compressor
0276
E
#85.
Parametric EQ
This Quick-Start describes the way to make a voice sound as if it’s being heard through a telephone handset.
1.
2.
3.
4.
5.
6.
7.
8.
9.
10.
11.
12.
13.
14.
15.
16.
17.
18.
19.
Turn the DP/2 input and output knobs down all the way (counter-clockwise).
Plug a microphone’s effect send from your mixer into the DP/2’s rear-panel Input 1 jack.
Connect cables from the DP/2’s back-panel Output 1 jack to an input on your mixing console.
While speaking into your microphone, turn the input 1 knob up until the red peak LED above it flashes occasionally.
Turn the outputs knob up until your mixer (or amp) is receiving the proper level from the DP/2.
Set your mixer so that you’re only hearing the output of the DP/2, and none of the original “dry” microphone signal.
Press the {EDIT} button, and then the {CONFIG} button.
Press the {<} button until the large red numbers read “00.”
Use the data entry knob to set the DP/2 to “1 Source Config.”
Press {>} once. Use the data entry knob to set the AB Input Select to “mono.”
Press {>} once. Set the AB Unit Routing to “serial.”
Press {>} until “(b)ypass (k)ill” is displayed, and the letter following “A=“ is flashing. Dial in the letter “b” (if “b” isn’t already
displayed). Press {>} again to do the same for Unit B.
Press the {A} button. If its red LED is on, press it again. Press {<} until the red numbers are flashing. Dial in #86., EQCompressor. (This will be the second #86 you encounter, and will have a small dot to the right of the numeral.) In a
moment, the “86.” will begin to flash.
Using the {>} button and data entry knob, set Compressor Gain to +05, Comp Ratio to 40:1, Noise Gate Off Below to -96
and Noise Gate On Above to -96.
Press the {B} button. If its red LED is on, press it again. Press {<} until the red numbers are flashing. Dial in #85.,
Parametric EQ. (This will be the second #85 you encounter, and will have a small dot to the right of the numeral.) In a
moment, the “85.” will begin to flash.
Use the {>} button and the data entry knob to set Bass Fc to 500 and Bass Gain to -48.
Set Mid1 Fc to 1000, Mid1 Gain to +15, Mid Q to 03, Mid2 Fc to 2000, Mid2 Gain to +15 and Mid2 Q to 03. Set Treble Fc
to 4KHz and Treble Gain to -48.
To save the set-up, press {CONFIG}. Press {WRITE}. Use the data entry knob to select a location in the DP/2’s
memory. Press {WRITE} again.
Name your set-up by using the {>} and {<} buttons to underline each character, and the data entry knob to dial in the
character you want. When you’re done, press {WRITE}.
Tip: To customize either of the effects, press {EDIT}, the appropriate letter and {>} or {<} to select its
parameters; use the data entry knob to edit them. You can change the “Volume=“ parameter in an effect to adjust
how much of it you’ll hear. You can also press the {A} or {B} buttons to turn off either of the processors (its red
LED will flash). Press again to turn it back on (the red light will go out). Footswitches can accomplish the same
thing—see the “Using Foot Switches” Quick-Start for details.
Part # 9310 0188 01 - A
Model # MM-87
Using Foot Switches
The DP/2 allows you to use the ENSONIQ SW-10 Dual Foot Switch to turn the DP/2’s two effects processors on and off.
To set up your foot pedal:
1. Connect the foot pedal to the Foot Switch 1 jack on the DP/2’s back panel.
1169+6%*
Eg
1169+6%*
Eg
2. Press the {SYSTEM/MIDI} button on the DP/2’s front panel.
3. Press the {<} or {>} button until the large red number reads “06” and the top line of the display shows “Unit A Bypass=.”
4. Turn the data entry knob to dial in “Ftsw 1-L Toggle.”
5. Press {>} until the red number shows “13” and the display reads “Unit B Bypass=.” Dial in “Ftsw 1-R Toggle.”
Each foot pedal is now assigned to its own processor:
674050+6
10#0&1((
674050+6
10#0&1(( Note: Whether it’s the effect being switched on and off—or the sound itself—is determined by each Unit’s
“(b)ypass and (k)ill” setting. See the description of the Bypass/Kill parameter in Section 3—Config Parameters in
the DP/2 Reference Manual.
Part # 9310 0177 01 - B
Model # MM-86
Vocal—Ballad
02765
E F
762765
E F
#94.
+
VanderPol Filter
0276
E
#52
Hall Reverb
This Quick-Start provides a VanderPol filter, for bringing out the real-life sound of your voice, as well as a large, rich reverb.
1.
2.
3.
4.
5.
6.
7.
8.
9.
10.
11.
12.
13.
14.
15.
16.
17.
18.
Turn the DP/2 inputs and outputs knobs down all the way (counter-clockwise).
Plug your vocal’s effect send from your mixer into the DP/2’s rear-panel Input 1 jack.
Connect cables from the DP/2’s back-panel Output 1 and 2 jacks to two returns on your mixing console. If you’ve only
got one return available, connect a cable from Output 1.
While singing, turn the input 1 knob clockwise until the red peak LED just above it is flashing occasionally.
Turn the outputs knob up until your mixer is receiving the proper level from the DP/2.
Press the {SYSTEM/MIDI} button. Press the {>} button until the large red number reads “46.” Use the data entry knob to
dial in “Set All 1U Pset Mixes To Wet=Yes.”
Press the {EDIT} button, and then the {CONFIG} button.
Press the {<} button until parameter 00 is displayed in large red numbers.
Use the data entry knob to set the DP/2 to “1 Source Config.”
Press {>} once. Use the data entry knob to set the AB Input Select to “mono.”
Press {>} once. Set the AB Unit Routing to “parallel.”
Press {>} until “(b)ypass (k)ill” is displayed, and the letter following “A=“ is flashing. Dial in the letter “k” (if “k” isn’t already
displayed). Press {>} again to do the same for Unit B.
Press the {A} button. If its red LED is flashing, press it again. Press {<} until the red numbers are flashing. Use the data
entry knob to dial in #94., VanderPol Filter. (This will be the second #94 you encounter, and will have a small dot to the
right of the numeral.) In a moment, the “94.” will start flashing.
Press the {B} button. If its red LED is flashing, press it again. Press {<} until the red numbers are flashing. Dial in #52,
Hall Reverb. In a moment, the “52” will begin to flash.
Press {>} until “Hall Decay=“ is displayed. Dial in “2.91.”
Press {>} once—”Hall Predelay Time=“ is displayed and the “7” is flashing. Dial in “242.”
To save the set-up, press {CONFIG}. Press {WRITE}. Use the data entry knob to select a location in the DP/2’s
memory. Press {WRITE} again.
Name your set-up by using the {>} and {<} buttons to underline each character, and the data entry knob to dial in the
character you want. When you’re done, press {WRITE} again.
Tip: To customize either of the effects, press {EDIT}, the appropriate letter and {>} or {<} to select its
parameters; use the data entry knob to edit them. You can change the “Volume=“ parameter in an effect to adjust
how much of it you’ll hear. You can also press the {A} or {B} buttons to turn off either of the processors (its red
LED will flash). Press again to turn it back on (the red light will go out). Footswitches can accomplish the same
thing—see the “Using Foot Switches” Quick-Start for details.
Part # 9310 0188 01 - A
Model # MM-87
Vocal—Duet
02765
E F
762765
E F
0276
E
#52
#52
Hall Reverb
Hall Reverb
This Quick-Start provides two singer with their own reverbs. It employs the rich Hall Reverb effect, but you can dial in any
other reverb you’d like at Steps 12 and 13.
1.
2.
3.
4.
5.
6.
7.
8.
9.
10.
11.
12.
13.
14.
15.
Turn the DP/2 inputs and outputs knobs down all the way (counter-clockwise).
Plug one vocal’s effect send from your mixer into the DP/2’s rear-panel Input 1 jack and the other’s into Input 2.
Connect cables from the DP/2’s back-panel Output 1 and 2 jacks to two returns on your mixing console. If you’ve only
got one return available, connect a cable from Output 1 only.
While the first vocalist sings, turn the input 1 knob clockwise until the red peak LED just above it is flashing occasionally.
Do the same with the second vocalist and input 2.
Turn the outputs knob up until your mixer is receiving the proper level from the DP/2.
Press the {SYSTEM/MIDI} button. Press the {>} button until the large red number reads “46.” Use the data entry knob to
dial in “Set All 1U Pset Mixes To Wet=Yes.”
Press the {EDIT} button, and then the {CONFIG} button.
Press the {<} button until parameter 00 is displayed in large red numbers.
Use the data entry knob to set the DP/2 to “2 Source Config.”
Press {>} once. Set the AB Output Select to “Mixed Stereo.”
Press {>} until “(b)ypass (k)ill” is displayed, and the letter following “A=“ is flashing. Dial in the letter “k” (if “k” isn’t already
displayed). Press {>} again to do the same for Unit B.
Press the {A} button. If its red LED is flashing, press it again. Press {<} until the red numbers are flashing. Use the data
entry knob to dial in #52, Hall Reverb—the “52” will start flashing.
Press the {B} button. If its red LED is flashing, press it again. Press {<} until the red numbers are flashing. Dial in #52,
Hall Reverb. In a moment, the “52” will begin to flash.
To save the set-up, press {CONFIG}. Press {WRITE}. Use the data entry knob to select a location in the DP/2’s
memory. Press {WRITE} again.
Name your set-up by using the {>} and {<} buttons to underline each character, and the data entry knob to dial in the
character you want. When you’re done, press {WRITE} again.
Tip: To customize either of the effects, press {EDIT}, the appropriate letter and {>} or {<} to select its
parameters; use the data entry knob to edit them. You can change the “Volume=“ parameter in an effect to adjust
how much of it you’ll hear. You can also press the {A} or {B} buttons to turn off either of the processors (its red
LED will flash). Press again to turn it back on (the red light will go out). Footswitches can accomplish the same
thing—see the “Using Foot Switches” Quick-Start for details.
Part # 9310 0177 01 - B
Model # MM-86
Vocal—Pop
02765
E F
762765
E F
#94.
+
VanderPol Filter
0276
E
#54
Large Plate Rev
This Quick-Start provides a VanderPol filter, for bringing out the real-life sound of your voice, as well as a large, clear reverb.
1.
2.
3.
4.
5.
6.
7.
8.
9.
10.
11.
12.
13.
14.
15.
16.
Turn the DP/2 inputs and outputs knobs down all the way (counter-clockwise).
Plug your vocal’s effect send from your mixer into the DP/2’s rear-panel Input 1 jack.
Connect cables from the DP/2’s back-panel Output 1 and 2 jacks to two returns on your mixing console. If you’ve only
got one return available, connect a cable from Output 1.
While singing, turn the input 1 knob clockwise until the red peak LED just above it is flashing occasionally.
Turn the outputs knob up until your mixer is receiving the proper level from the DP/2.
Press the {SYSTEM/MIDI} button. Press the {>} button until the large red number reads “46.” Use the data entry knob to
dial in “Set All 1U Pset Mixes To Wet=Yes.”
Press the {EDIT} button, and then the {CONFIG} button.
Press the {<} button until parameter 00 is displayed in large red numbers.
Use the data entry knob to set the DP/2 to “1 Source Config.”
Press {>} once. Use the data entry knob to set the AB Input Select to “mono.”
Press {>} once. Set the AB Unit Routing to “parallel.”
Press {>} until “(b)ypass (k)ill” is displayed, and the letter following “A=“ is flashing. Dial in the letter “k” (if “k” isn’t already
displayed). Press {>} again to do the same for Unit B.
Press the {A} button. If its red LED is flashing, press it again. Press {<} until the red numbers are flashing. Use the data
entry knob to dial in #94., VanderPol Filter. (This will be the second #94 you encounter, and will have a small dot to the
right of the numeral.) In a moment, the “94.” will start flashing.
Press the {B} button. If its red LED is flashing, press it again. Press {<} until the red numbers are flashing. Dial in #54,
Large Plate Rev. In a moment, the “54” will begin to flash.
To save the set-up, press {CONFIG}. Press {WRITE}. Use the data entry knob to select a location in the DP/2’s
memory. Press {WRITE} again.
Name your set-up by using the {>} and {<} buttons to underline each character, and the data entry knob to dial in the
character you want. When you’re done, press {WRITE} again.
Tip: To customize either of the effects, press {EDIT}, the appropriate letter and {>} or {<} to select its
parameters; use the data entry knob to edit them. You can change the “Volume=“ parameter in an effect to adjust
how much of it you’ll hear. You can also press the {A} or {B} buttons to turn off either of the processors (its red
LED will flash). Press again to turn it back on (the red light will go out). Footswitches can accomplish the same
thing—see the “Using Foot Switches” Quick-Start for details.
Part # 9310 0188 01 - A
Model # MM-87
Vocal—Rock
02765
E F
762765
E F
#87
~
Dual Delay
0276
E
#51
Large Room Rev
This Quick-Start sends your voice through a short stereo delay effect and then on to a large room reverb.
1.
2.
3.
4.
5.
6.
7.
8.
9.
10.
11.
12.
13.
14.
15.
16.
17.
18.
19.
20.
Turn the DP/2 inputs and outputs knobs down all the way (counter-clockwise).
Plug your vocal’s effect send from your mixer into the DP/2’s rear-panel Input 1 jack.
Connect cables from the DP/2’s back-panel Output 1 and 2 jacks to two returns on your mixing console. If you’ve only
got one return available, connect a cable from Output 1.
While singing, turn the input 1 knob up until the red peak LED above it flashes occasionally.
Turn the outputs knob up until your mixer is receiving the proper level from the DP/2.
Press the {SYSTEM/MIDI} button. Press the {>} button until the large red number reads “46.” Use the data entry knob to
dial in “Set All 1U Pset Mixes To Wet=Yes.”
Press the {EDIT} button, {CONFIG}, and then{<} until the large red numbers read “00.”
Use the data entry knob to set the DP/2 to “1 Source Config.”
Press {>} once. Use the data entry knob to set the AB Input Select to “mono.”
Press {>} once. Set the AB Unit Routing to “serial.”
Press {>} until “(b)ypass (k)ill” is displayed, and the letter following “A=“ is flashing. Dial in the letter “k” (if “k” isn’t already
displayed). Press {>} again to do the same for Unit B.
Press the {A} button. If its red LED is flashing, press it again. Press {<} until the red numbers are flashing. Use the data
entry knob to dial in #87, Dual Delay—the “87” will start flashing.
Press {>} until “Left Input Delay Time=“ is displayed. Dial in “115.00 ms.”
Press {>} until “Left Input Delay Regen=21” is displayed and the “21” is flashing. Dial in “00.”
Press {>} until “Right Input Delay Time=“ is displayed. Dial in “143.00 ms.”
Press {>} until “Right Input Delay Regen=21” is displayed and the “21” is flashing. Dial in “00.”
Press {>} until “Dual Delay Cross Regen=“ is displayed and the “-47” is flashing. Dial in “00.”
Press the {B} button. If its red LED is flashing, press it again. Press {<} until the red numbers are flashing. Dial in #51,
Large Room Rev. In a moment, the “51” will begin to flash.
To save the set-up, press {CONFIG}. Press {WRITE}. Use the data entry knob to select a location in the DP/2’s
memory. Press {WRITE} again.
Name your set-up by using the {>} and {<} buttons to underline each character, and the data entry knob to dial in the
character you want. When you’re done, press {WRITE} again.
Tip: To customize either of the effects, press {EDIT}, the appropriate letter and {>} or {<} to select its
parameters; use the data entry knob to edit them. You can change the “Volume=“ parameter in an effect to adjust
how much of it you’ll hear. You can also press the {A} or {B} buttons to turn off either of the processors (its red
LED will flash). Press again to turn it back on (the red light will go out). Footswitches can accomplish the same
thing—see the “Using Foot Switches” Quick-Start for details.
Part # 9310 0177 01 - B
Model # MM-86
Vocal—Rockabilly
02765
E F
762765
E F
#88
~
Tempo Delay
0276
E
#53
Small Plate Rev
This Quick-Start provides a delay effect that sounds like the tape delay used on vocalists going back to the ‘50’s, as well as a
touch of reverb.
1.
2.
3.
4.
5.
6.
7.
8.
9.
10.
11.
12.
13.
14.
15.
16.
17.
18.
Turn the DP/2 inputs and outputs knobs down all the way (counter-clockwise).
Plug your vocal’s effect send from your mixer into the DP/2’s rear-panel Input 1 jack.
Connect cables from the DP/2’s back-panel Output 1 and 2 jacks to two returns on your mixing console. If you’ve only
got one return available, connect a cable from Output 1.
While singing, turn the input 1 knob clockwise until the red peak LED just above it is flashing occasionally.
Turn the outputs knob up until your mixer is receiving the proper level from the DP/2.
Press the {SYSTEM/MIDI} button. Press the {>} button until the large red number reads “46.” Use the data entry knob to
dial in “Set All 1U Pset Mixes To Wet=Yes.”
Press the {EDIT} button, and then the {CONFIG} button.
Press the {<} button until parameter 00 is displayed in large red numbers.
Use the data entry knob to set the DP/2 to “1 Source Config.”
Press {>} once. Use the data entry knob to set the AB Input Select to “mono.”
Press {>} once. Set the AB Unit Routing to “serial.”
Press {>} until “(b)ypass (k)ill” is displayed, and the letter following “A=“ is flashing. Dial in the letter “k” (if “k” isn’t already
displayed). Press {>} again to do the same for Unit B.
Press the {A} button. If its red LED is flashing, press it again. Press {<} until the red numbers are flashing. Use the data
entry knob to dial in #88, Tempo Delay—the “88” will start flashing.
Press {>} until “TempoDelay Time=“ is displayed. Dial in “1/8 triplet.”
Press the {B} button. If its red LED is flashing, press it again. Press {<} until the red numbers are flashing. Dial in #53,
Small Plate Rev. In a moment, the “53” will begin to flash.
Press {>} once—the “99” in “Mix=41” is flashing. Dial in “35.”
To save the set-up, press {CONFIG}. Press {WRITE}. Use the data entry knob to select a location in the DP/2’s
memory. Press {WRITE} again.
Name your set-up by using the {>} and {<} buttons to underline each character, and the data entry knob to dial in the
character you want. When you’re done, press {WRITE} again.
Tip: To customize either of the effects, press {EDIT}, the appropriate letter and {>} or {<} to select its
parameters; use the data entry knob to edit them. You can change the “Volume=“ parameter in an effect to adjust
how much of it you’ll hear. You can also press the {A} or {B} buttons to turn off either of the processors (its red
LED will flash). Press again to turn it back on (the red light will go out). Footswitches can accomplish the same
thing—see the “Using Foot Switches” Quick-Start for details.
Part # 9310 0188 01 - A
Model # MM-87
Vocoder
02765
E F
762765
E F
Config Preset 55
Vocoder 2U
0276
E
The vocoder is a special effect which first became popular in the 1970’s. With a vocoder, you can use your voice to shape
sounds played on an instrument, making the notes sound as if they’re being spoken or sung. Typically, vocoders are used to
shape keyboard sounds, but any sound is fair game, both as shaper and shapee. This Quick-Start will show you how to
vocode a keyboard with your voice.
1.
2.
3.
4.
Turn the DP/2 inputs and outputs knobs down all the way (counter-clockwise).
Plug a microphone’s effect send from your mixer into the DP/2’s rear-panel Input 1 jack.
Connect a cable from your keyboard to the DP/2’s rear-panel Input 2 jack.
Connect cables from the DP/2’s back-panel Output 1 and 2 jacks to two inputs on your mixing console or stereo guitar
amplifier. If you’re going into a single-input mixer or amp, connect a cable from the DP/2’s Output 1 to that input.
5. While speaking into your microphone, turn the input 1 knob clockwise until the red peak LED just above it is flashing
occasionally. While playing your keyboard, do the same with the input 2 knob.
6. Turn the outputs knob up until your mixer (or amp) is receiving the proper level from the DP/2.
7. Set your mixer so that you’re only hearing the output of the DP/2, and none of the original “dry” microphone or keyboard
signal.
8. Press the {SELECT} button, and then the {CONFIG} button. If the red LEDs in the {A} or {B} buttons light up, press
{CONFIG} again.
9. Use the data entry knob to dial in #55, Vocoder 2U.
10. Press {SELECT} again.
Play a chord on the keyboard, hold the keys down, and speak into your microphone. As you speak, the keyboard notes take
on the shapes of your words, and yet your voice has no effect on the pitch of the notes (nor is it directly heard in the mix).
Tip:
You’ll find the vocoder works best when the keyboard notes and your voice are in a similar pitch range.
Using the vocoder expressively takes a little practice, as it requires a somewhat different type of mouth-to-hand coordination
than you may be used to. Experiment with single-note lines, as well as chords.
Part # 9310 0177 01 - B
Model # MM-86
Voice-Over with Music Bed
02765
E F
762765
E F
Config Preset 89
Ducker & EQ
0276
E
With this Quick-Start, the DP/2 senses the presence of a voice-over announcer and automatically turns the music bed down
when he/she is speaking.
1.
2.
3.
4.
5.
6.
7.
8.
9.
10.
11.
12.
13.
14.
15.
16.
Tip:
Turn the DP/2 inputs and outputs knobs down all the way (counter-clockwise).
Connect your music source to the DP/2’s rear-panel Input 1 jack. Don’t send the music to your mixer—the DP/2 will take
care of that.
For the voice-over, plug a microphone’s effect send from your mixer into the DP/2’s rear-panel Input 2 jack.
Connect the DP/2’s Output 1 to an input on your mixer.
While playing your music bed, turn up the input 1 knob until the red peak LEDs above it is flashing occasionally.
Running the voice-over through the effect send, do the same with input 2.
Turn the outputs knob up until your mixer is receiving the proper level from the DP/2.
Press the {SELECT} button, and then the {CONFIG} button. If the red LEDs in the {A} or {B} buttons light up, press
{CONFIG} again.
Use the data entry knob to dial in #89, Ducker & Gate.
Press {SELECT} again.
Press the {EDIT} button, and then the {A} button.
Press {>} until “Ducker Output Mix” is displayed and “40” is flashing. Dial in a value of 00.
Press {>} until “Threshold” is displayed and “-30” is flashing. Dial in a value of -36.
Press {>} until “Release” is displayed and “90ms” is flashing. Dial in a value of 200ms.
To save the set-up, press {CONFIG}. Press {WRITE}. Use the data entry knob to select a location in the DP/2’s
memory. Press {WRITE} again.
Name your set-up by using the {>} and {<} buttons to underline each character, and the data entry knob to dial in the
character you want. When you’re done, press {WRITE} again.
Use your mixer to adjust the volume balance between the voice-over and the music.
Part # 9310 0188 01 - A
Model # MM-87