1
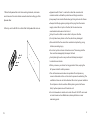
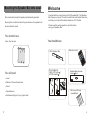
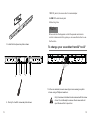
SOUND BAR WITH BLUETOOTH RECEIVER
OTE-3201
LINE/MUTE
CONTENTS
Safety information---------------------------------------------------------- 2-5
Welcome ------------------------------------------------------------------------------6.7
Set up-------------------------------------------------------------------------------------8
Your 2.0 Speaker Bar-------------------------------------------------------------9-13
Remote Controls----------------------------------------------------------------------14
Operating and connecting an external device -----------------------------15.16
Mounting the Speaker Bar onto a wall---------------------------------------17-19
Troubleshooting---------------------------------------------------------------------20
Maintenance ------------------------------------------------------------------------21
1
SAFETY INFORMATION
Maintenance
1.Do not use harsh or abrasive cleaning agents or solvents.
2.Do not attempt to disassemble your product,other than to
install the 32
IMPORTANT SAFETY INSTRUCTIONS - READ CAREFULLY
BEFORE USE.
to 42 extention piece.
3.Do not paint your product.
4.Do not drop, throw or try to bend your product.
5.Do not expose your product to open flames.
!
This symbol indicates that there are important operating
maintenance instructions in the literature accompanying
this unit.
This symbol indicates that dangerous voltage constituting
a risk of electric shock is present within this unit.
Technical specifications
Size
32
42
Output power
12W+12W
Standby power consumption
21
:800(W) 100(D) 56(H)
:1030(W) 100(D) 56(H)
1W
Keep these instructions
Do not use this unit near water.
Clean only with as lightly damp cloth.
Do not block any ventilation openings.
Install in accordance with the supplied Quick Start Guide and
this User Guide.
Protect the power cord from being walked on or pinched,
particularly at plugs,and the point where it exits from the unit.
Do not allow the power cord to overhang the edge of a table.
Unplug this unit when unused for long periods of time.
2
Troubleshooting
!
WARNING! TO REDUCE THE RISK OF FIRE OR
ELECTRICAL SHOCK,DO NOT EXPOSE THIS UNIT TO
RAIN OR MOISTURE.THE UNIT MUST NOT BE EXPOSED
TO DRIPPING AND SPLASHING AND NO OBJECTS
FILLED WITH LIQUIDS SHOULD BE PLACED ON TOP OF IT.
Problem
What to do
NOTE:No naked flames such as candles should be placed
near or underneath the unit .
No power
Check that the power is switched on at the wall.
Check if the power cord is properly connected
to the power outlet.
IMPORTANT SAFETY INSTRUCTION(Continued)
This unit has been produced according to all current safety
regulations.The following safety tips should safeguard users
against careless use and the dangers connected with such use.
Although this appliance has been carefully manufactured and
rigorously checked prior leaving the factory,as with all electrical
appliances it is possible for problems to develop.If you notice
smoke,an excessive build up of heat or any other unexpected
phenomena,you should disconnect the plug from the mains
power socket immediately.
Ensure that the unit is sufficiently ventilated! Never place next
to or underneath curtains!
The mains plug or appliance coupler is used as the disconnect
device, the disconnect device shall remain readily operable.
This set should only be connected to a mains power supply
which matches that stated on the label on the rear of it-do
not attempt to connect it to any other type of supply.
The socket-outlet must be installed near the equipment and
easily accessible.
To prevent overload,don ' t share the same mains supply socket
with too many other items of equipment.
3
No sound
Check that the volume control is NOT at
minimum setting.
Check that it is NOT set to mute.
Check if you have entered password or not.It
No sound
from bluetooth needs to start with password " 0000 ".
first connection
Function
disturbed
The remote
control won' t
work
If none of the above solutions work ,then
switch off and unplug your Speaker
system ,leaving it for 2 minutes and then
switching it back on again.
Inspect or replace the batteries.
Make sure there are no obstacles obscuring the
front of the Speaker.
20
7.Slide the Speaker Bar onto the mounting brackets, and make
Apparatus with Class 1 construction shall be connected to
sure there is a firm and stable connection before letting go of the
a mains socket outlet with a protective earthing connection.
Speaker Bar.
Keep away from rodents.Rodents enjoy biting into electric flexes.
Always hold the plug when pulling out the plug from the mains
8.Finally, use the LEVEL to confirm that the Speaker Bar is level.
supply socket.Do not pull on the flex,the flex can become
overloaded and cause a short circuit.
Set up the unit so that no one is able to trip over the flex.
Do not place heavy items on the flex,which may damage it.
Take note that the flex cannot be reached and pulled by young
children,avoiding injury.
Do not set up the unit near to heat sources.The casing and the
flex could be damaged by the impact of heat.
Avoid placing the unit on any surfaces that may be subject
to vibrations or shocks.
When you leave your home for long periods of time,unplug the
AC power cable for safety reasons.
The unit becomes warm when in operation.Do not place any
covers or blankets on the unit in order to prevent overheating.The
ventilation holes are not to be blocked.Do not set up near radiators.
Do not place in direct sunshine.When placing on a shelf leave
5cm(2
)free space around the whole unit.
Do not allow water or moisture to enter the unit.Do NOT use in wet
or moist areas such as Bathrooms,steamy kitchens or near
swimming pools.
19
4
Do not use this unit when moisture condensation may occur.
1. Use the TAPE MEASURE to decide how high you d like to hang
Any repairs must be carried out by qualified personnel only.
the Speaker Bar on the wall. The Speaker Bar must be hung within
Liquids spilt into the unit can cause serious damage.Switch the
6 feet of an AC power outlet for the attached AC power cord to reach.
set OFF and disconnect the mains power supply,then consult a
qualified service person before attempting to use the unit again.
2.Mark the position of the mounting screws on the wall using a pencil.
Do NOT remove the safety covers.There are no useable or
serviceable parts inside.You may invalidate the warranty.
Qualified personnel must only service this apperatus.
3.Line the LEVEL up on both of your mark sure they are level. If
they ' re not, adjust the marks as needed to make them level.
Take good care of the remote control,do not drop.
Never place hot objects or open flame sources on or close to
4.After you' ve double checked your markings, DRILL holes in the wall
the unit.
High temperatures can melt plastic and lead to fires.
To clean use a soft dry cloth.Do NOT use solvents or petrol
suitable for the wall plugs (not supplied). Be sure to use the correct
types of plugs for your wall.
based fluids. For stubborn stains,you may use a damp cloth
with dilute detergent.
5.Screw the wall mounting screws into the wall plugs.
6.Use the LEVEL to check that the mounting screws are level.
5
18
Mounting the Speaker Bar onto a wall
We recommend having this speaker professionally mounted.
Welcome
Congratulations on purchasing this 2.0 Speaker Bar. The Speaker
Bar allows you to play TV audio content from an attached television,
and from your bluetooth enabled telephone, PC or Tablet.
By using the included wall mounting accessories ,the speaker can
be mounted onto a wall.
Please read the warning section carefully before
using your Speaker Bar.
You should have
4 pcs short screws
You should have
Remote control
2.0CH Speaker Bar
You will need
RCA CABLE 1
LINE OUT Cable 1
AC/DC adapter 1
Level
1
2
Speaker Bar extender
screw 8pcs
3
STANDBY
BASS
3D
LINE / MUTE
BT
Manual or Power Screwdriver
Pencil
Tape Measure
Wall mount fittings
screw 4pcs
Suitable wall plugs for your type of wall
17
6
You may also need
RCA Cables
3.5mm line in cable
2
------
1
Note:
Left(white)
Ventilation
CH(red)
BLUETOOTH
Headphone
Audio output
When placing the Speaker Bar on an entertainment center,
TV
bookshelf,or any type of enclosed space, be sure to allow
at least 2-3 inches of space around the Speaker Bar for
MEMU
ventilation. If the Speaker Bar is enclosed in a tight space,
without ventilation, heat generated from the Speaker Bar
could produce a potential heat hazard.
Bluetooth Settings
Press "STANDBY" button and switch on the unit. Turn "BT" function
on and blue LED will flash 30 seconds. Use your mobile or other
devices with bluetooth transmitters and go to search for speaker
2-3 inches
Bar.Our device name is F-3089N. Once it has recognized, press
password "0000" to connect and pair with.
Bluetooth Auto Connection
It has auto connection function. Just turn on "BT" function and
blue LED flash, sound bar bluetooth will automatically connect
and pair to any device again if it has been done before.
Note:
The BT LED continues to flash if there is no connection.Turn off
by pressing LINE in or power.
7
16
Operating and connecting an external device
Set up
You can connect external devices (Mp3 player ,CD player ,TV etc)
Setting up your Speaker Bar
to the Speaker Bar in several ways.
1.Plug the power cable into a standard three
pin wall socket and switch the
Using a RCA audio cable
power on at the wall.
Make sure you match up the Red (R)and White (L)Audio connectors,
either RCA cable or line in/out cable only.
Using a 3.5mm line-in cable
The remote control battery
You can also connect an external device to your Speaker Bar using
the LINE socket on the jack of the unit as shown .
1.It includes one piece of 2025 battery.
To play the external device you will need to select LINE using the
2.Remove the transparent sheet.
LINE button.
Once the device is connected you can control playback as you
would usually.
Press the VOLUME + and - buttons on the music system to
increase or reduce the volume.
Press the MUTE button to turn the sound off, press it again to
return to the previous volume level.
15
8
Locations of Remote Control
Your 2.0 Speaker Bar
Features Defined
2
1
4
2
5
6
3
8
Features Defined
1.STANDBY button:AC power is connectd but unit is in standby status.
2.BASS button:Bass effect is on.
3.3D button: 3D surround sound effect is on.
4.LINE mode button:It is connected to LINE when it is on.
5.BT mode button: Bluetooth function is on when blue LED
flashs and lights.
6.Remote sensor.Ensure this area is not covered or blocked by
9
3
4
5
7
6
8
7
9
any object.
1
Controls Defined
1: STANDBY button : Press to turn the bar speaker off or on.
2: MUTE button : Press to mute the volume.
3: BASS button : Press to turn on the bass.
4: LINE button : Press to switch to line mode.
5: BT button : Press to switch to Bluetooth mode
6: 3D button: Press to adjust the 3D Effect.
7: VOL- button : Press to reduce the volume.
8: VOL+ button : Press to increase the volume.
14
7.DC:DC jack in,the connection for mains adapter.
8.LINE:RCA and Line in jack.
9.Mounting hole.
Note:
Where a button that appears on both the speaker and remote
control is referenced in this guide you can use either button to use
that function.
3. Install the front panel as photo shown
To change your sound bar from 32" to 42"
8
7
6
5
4 3
2
1
1. At the rear cabinet,loosen screws (6 pcs is necessary) as photo
shown using a Philips screwdriver.
4. Finally, fix it with 8 screws as photo shown
13
!
Only the screws indicated can be removed with the screw
driver. Do not attempt to remove other screws as it will
spoil the sound bar's operation.
10
Re-assemble your sound bar with 42"
extender
2. Take out the front panel as photo shown.
1. Screws (4 pcs) the extender with left and right bars as photo
shown.
3. Pull out the pin socket as photo shown.
2. Insert the pin socket as photo shown
11
12