1
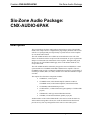
This document was prepared and written by the Technical Documentation department at:
Crestron Electronics, Inc.
15 Volvo Drive
Rockleigh, NJ 07647
1-888-CRESTRON
Crestron CNX-AUDIO-6PAK
Six-Zone Audio Package
Contents
Six-Zone Audio Package: CNX-AUDIO-6PAK
1
Description................................................................................................................................. 1
Hardware Setup ......................................................................................................................... 2
Identity Code ............................................................................................................... 2
Network Wiring........................................................................................................... 2
Audio Source Wiring................................................................................................... 5
Advanced Wiring ........................................................................................................ 5
Software Setup........................................................................................................................... 7
Software System Requirements................................................................................... 7
Installation ................................................................................................................... 7
Four Step Configuration .............................................................................................. 7
System Operation..................................................................................................................... 15
On/Off Button............................................................................................................ 15
Volume and Mute Buttons......................................................................................... 15
Source Selection and Control .................................................................................... 16
Priority Override........................................................................................................ 16
Audio Configuration................................................................................................................ 16
Setup Modes .............................................................................................................. 17
Room Setup Mode Operation .................................................................................... 17
Source Setup Mode Operation................................................................................... 17
Problem Solving ...................................................................................................................... 18
Troubleshooting......................................................................................................... 18
Future Updates .......................................................................................................... 18
Further Inquiries .........................................................Error! Bookmark not defined.
Software License Agreement................................................................................................... 19
Return and Warranty Policies .................................................................................................. 21
Merchandise Returns / Repair Service ...................................................................... 21
CRESTRON Limited Warranty................................................................................. 21
Operations & Installation Guide - DOC. 8169
Contents • i
Crestron CNX-AUDIO-6PAK
Six-Zone Audio Package
Six-Zone Audio Package:
CNX-AUDIO-6PAK
Description
The Crestron Home Six-Zone Audio package (herein known as the CNX-AUDIO6PAK) offers simple intuitive configuration of plug-and-play hardware and Crestron
software. It is packaged and priced specifically to provide the user with a complete
six-zone home audio solution.
The CNX-AUDIO-6PAK is also available as an international version. All of the
features are identical with the exceptions of the international AC power requirements
and power cord and the unit nomenclature of the amplifier. Throughout this guide,
all references to CNX-AUDIO-6PAK apply to the CNXI-AUDIO-6PAK as well,
except where noted.
The CNX-AUDIO-6PAK is anchored by the popular Crestron CNMSX-AV control
system and the new CNAMPX-12x60 Multi-Channel Power Amplifier. The new
CNAMPX-12x60 provides 12 channels of amplification with power specifications of
60 Watts per channel (WPC) at 8 ohms, 90 WPC into 4 ohms and 220 WPC bridged
at 8 ohms.
The complete list of hardware components includes:
•
CNMSX-AV, control system
•
CNAMPX-12x60, multi-channel amplifier (domestic model) or
CNAMPXI-12x60, multi-channel amplifier (international model)
•
CNX-PAD8, audio distribution processor
•
CN-WP12FW-6, 12-button function keypad (quantity 6 CN-WP12FWs
per pak)
•
CNHBLOCK, multi-type network distribution block.
•
CNXIRP, Cresnet Infrared Emitter (quantity 4 per pak)
Another member of the CNX-AUDIO-6PAK is the Crestron Audio Six-Pack CD,
which contains among other software, the Audio Six-Pack Wizard. This Wizard
provides an easy four-step configuration of the entire six-zone audio system.
Operations & Installation Guide - DOC. 8169
Six-Zone Audio Package: CNX-AUDIO-6PAK • 1
Hardware Setup
Identity Code
Every equipment and user interface within the network requires a unique identity
code (NET ID). These codes are assigned a two-digit hexadecimal number from 03
to FE. For your convenience, all hardware devices in the CNX-AUDIO-6PAK have
been assigned unique NET IDs. However, the six keypads are zone specific. Be sure
to install the given user interface into the appropriate room as defined in the Crestron
Audio Six-Pack Wizard. The room/NET ID key is as follows:
•
Room 1 contains keypad with NET ID = 4C
•
Room 2 contains keypad with NET ID = 52
•
Room 3 contains keypad with NET ID = 53
•
Room 4 contains keypad with NET ID = 54
•
Room 5 contains keypad with NET ID = 55
•
Room 6 contains keypad with NET ID = 56
Network Wiring
Refer to the network wiring diagram on the next page when making all network
connections between the hardware devices of the CNX-AUDIO-6PAK.
Four-Wire Network Connector
The four-wire network cable is used to power Crestron devices. Before making any
four-wire network connections, refer to the network interconnection after this
paragraph and the cautions that follow.
Recommended Network Cable, Liberty Wire Reference: Cresnet
TO
CONTROL SYSTEM
SHIELD
BLACK
RED
TO
NETWORK
DEVICE
G
Z
Y
24
24
Y
Z
G
FRONT VIEW
FRONT VIEW
TWISTED
PAIR A
TWISTED
PAIR B
RED
WHITE
BLUE
BLACK
BLUE
WHITE
RECOMMENDED COLOR CODE
GND
(-) Z
(+) Y
24
=
=
=
=
BLACK
BLUE
WHITE
RED
TO OTHER
NETWORK DEVICE
PAIR A
PAIR B
GROUND SHIELD AT CONTROL SYSTEM END ONLY.
24
Y
Z
G
CAUTION: Possible equipment damage if miswired.
2 • Six-Zone Audio Package: CNX-AUDIO-6PAK
Operations & Installation Guide - DOC. 8169
Crestron CNX-AUDIO-6PAK
Six-Zone Audio Package
Network Wiring
NETWORK
WIRING
CONNECTOR
KEYPAD
NETWORK
WIRING
CONNECTOR
KEYPAD
NETWORK
WIRING
CONNECTOR
NETWORK
WIRING
CONNECTOR
KEYPAD
KEYPAD
SIDE
VIEWS
OF
CN-WP12FW-6
NETWORK
WIRING
CONNECTOR
NETWORK
WIRING
CONNECTOR
KEYPAD
1
2
3
4
24
Y
Z
G
5
6
24
Y
Z
G
B
C
D
24
24
Y
Z
G
POWER
Y
Z
a
b
c
E
24
Y
8
24
Y
Z
G
CRESTRON
A
7
KEYPAD
24
Y
Y
Z
Z
Z
G
G
G
ALL CONNECTORSARE IN PARALLEL
CNHBLOCK
CNHBLOCK
NOTE:
DEVICES ARE NOT DRAWN TO SCALE.
CNMSX-AV
S1
CRESNET
A
24 Y Z G
S
B
G
S
C
G
D
S
G
S
E
G
S
F
G
S
G
G
S
H
G
S
1
1
G
2
3
4
5
6
7
8
2
3
4
5
6
7
8
G
S2
24VDC 50W
S5
LAN
INFRARED - SERIAL
D
P
A
COM A
S6
I/O
S7
CRESTRON
COM B
COM C
RELAY OUTPUT
G
100 - 250V ~ 2.3A
50/60 HZ
Electronics, Inc.
Rockleigh, N.J. 07647
COMPUTER
S3
S4
OUTPUT
COM D
COM E
COM F
ATTACH CNXIRP AS DESCRIBED IN
LATEST REVISION OF DOC. 8141.
CNX-PAD8
CRESNET
G
24VDC
1A
24 Y Z G
1
2
3
4
5
6
7
8
ROOMS
SOURCES
1
2
3
4
5
6
7
1
8
LEFT
2
3
4
5
6
7
8
LEFT
RIGHT
RIGHT
CRESTRON ELECTRONICS, INC.
ROCKLEIGH,
N.J.
07647
CNAMPX-12x60
1
2
3
4
5
6
LEFT
PWR
ROOM INPUTS
NET
RIGHT
ATTENTION:
ACHTUNG:
PRECAUCION:
CAUTION:
PARA LA PROTECCION CONTINUADA CONTRA EL USO DEL
AUFGRUND BRANDSCHUTZRECHTLICHER BESTIMMUNGEN,
POUR LA PROTECTION CONTRE LES RISQUES D'INCENDIES
FOR CONTINUED PROTECTION AGAINST FIRE
RIESGO DE INCENDIOS USE SOLAMENTE EL MISMO TIPO Y
BITTE NUR SICHERUNGEN DES SELBEN TYPS UND MIT DER
N'UTILISEZ SEULEMENT LE MEMES TYPE DE FUSIBLE.
HAZARD USE ONLY SAME TYPE AND RATING FUSE.
FUSIBLE DEL GRADO. DESCONECTE LA CUERDA DE LA
SELBEN BELASTBRAKEIT VERWENDEN. TRENNEN SIE DAS
FUENTE ANTES DE CAMBIAR EL FUSIBLE.
GERAT VOM NETZ BEVOR SIE DIE SICHERUNG
DEBRANCHEZ LE CABLE D'ALIMENTATION AVANT DE
2
AVIS:
3
4
24
Y
Z
G
DO NOT OPEN
DISCONNECT SUPPLY CORD BEFORE CHANGING FUSE.
CHANGER LE FUSIBLE.
AUSTAUSCHEN.
1
NET
CAUTION
RISK OF ELECTRIC SHOCK
RISQUE DE CHOC ELECTRIQUE NE PAS OUVRIR
5
6
OVERRIDE/SETUP
LEFT
+
-
+
-
+
-
+
ROOM OUTPUTS
-
+
-
8 OHM / 60 WATTS
+
-
120V AC 60Hz
1440 WATTS MAX. 12A 125V
4 OHM / 90 WATTS
RIGHT
+
-
+
-
CRESTRON ELECTRONICS, INC. ROCKLEIGH, N.J. 07647 USA
Operations & Installation Guide - DOC. 8169
+
-
MADE IN THE USA
+
-
DATE:
+
-
+
-
Six-Zone Audio Package: CNX-AUDIO-6PAK • 3
NOTE: Do not power up system until all wiring is verified. Care should be taken to
ensure date (Y,Z) and power (24,G) connections are not crossed. Data "Y" was data
"+". Data "Z" was data"-".
NOTE: The cable consists of 1-#18 AWG twisted pair, tinned copper 1-#22 AWG
twisted pair with shield, tinned copper. There are six twists per foot per pair. The
jacket is teal color and labeled "CRESNET" every two feet. Liberty Wire carries the
cable (reference: CRESNET) and it is available in plenum or non-plenum versions.
NOTE: A CNTBLOCK, network terminal block, is recommended for testing
purposes and convenience of wiring.
CAT 5 Wiring
CAT 5 wiring is also used to power Crestron devices. Before making any CAT 5
connections, refer to the network interconnection after this paragraph and the
cautions that follow.
CAT 5 Interconnect Drawing
TWISTED
PAIR C
TWISTED
PAIR A
BLUE
TO
NETWORK DEVICE
TO
CONTROL SYSTEM
24
Y
Z
G
G
Z
Y
24
FRONT VIEW
TWISTED
PAIR B
FRONT VIEW
TWISTED
PAIR A
WHITE
w/BLUE STRIPE
TWISTED
PAIR B
TWISTED
PAIR C
TWISTED
PAIR C
TWISTED PAIR D
UNUSED (NOT SHOWN)
TO
NETWORK DEVICE
24
Y
Z
G
RECOMMENDED CATEGORY 5 CABLE COLOR CODE
GND
Z
Y
24
SPARES
= GREEN AND WHITE w/GREEN STRIPE
= WHITE w/BLUE STRIPE
= BLUE
= ORANGE AND WHITE w/ORANGE STRIPE
= BROWN AND WHITE w/BROWN STRIPE
PAIR A
FRONT VIEW
PAIR B
PAIR C
PAIR D (NOT SHOWN)
TWISTED
PAIR A
CAUTION: Possible equipment damage if miswired.
NOTE: Do not power up system until all wiring is verified. Care should be taken to
ensure date (Y,Z) and power (24,G) connections are not crossed.
NOTE: To calculate maximum CAT 5 cable length, use the following equation:
L = 3000/PF
where L = maximum cable length (feet)
PF = total power factor for equipment on run (watts).
4 • Six-Zone Audio Package: CNX-AUDIO-6PAK
Operations & Installation Guide - DOC. 8169
Crestron CNX-AUDIO-6PAK
Six-Zone Audio Package
Audio Source Wiring
NOTE: Use good quality shielded interconnects between source equipment,
CNX-PAD8, and CNAMPX-12x60 to minimize noise. Wire gauge depends on
length of run.
Refer to the audio source-wiring diagram on the next page when making audio
connections between the hardware devices of the CNX-AUDIO-6PAK and the
sources.
Advanced Wiring
If the intent is to use the CNX-AUDIO-6PAK in a configuration other than its basic
design, refer to the individual device Operations Guides when making these
"advanced" wiring connections.
Operations & Installation Guide - DOC. 8169
Six-Zone Audio Package: CNX-AUDIO-6PAK • 5
Audio Wiring
CORRESPONDING
AUDIO SOURCE
LOOP-THROUGH
CNX-PAD8
CRESNET
G
24VDC
1A
24 Y Z G
1
2
3
4
5
6
7
NOTE:
DEVICES ARE NOT DRAWN TO SCALE.
8
ROOMS
SOURCES
1
2
3
4
5
6
7
1
8
LEFT
LEFT
RIGHT
RIGHT
2
3
4
5
6
7
8
CRESTRON ELECTRONICS, INC. ROCKLEIGH, N.J. 07647
CD
CD 2
TAPE
AUDIO
SOURCES
FM
DSS
AUX
CNAMPX-12x60
1
2
3
4
5
6
LEFT
PWR
ROOM INPUTS
NET
RIGHT
ATTENTION:
ACHTUNG:
PRECAUCION:
CAUTION:
PARA LA PROTECCION CONTINUADA CONTRA EL USO DEL AUFGRUND BRANDSCHUTZRECHTLICHER BESTIMMUNGEN, POUR LA PROTECTION CONTRE LES RISQUES D'INCENDIES FOR CONTINUED PROTECTION AGAINST FIRE
RIESGO DE INCENDIOS USE SOLAMENTE EL MISMO TIPO Y BITTE NUR SICHERUNGEN DES SELBEN TYPS UND MIT DER N'UTILISEZ SEULEMENT LE MEMES TYPE DE FUSIBLE.
HAZARD USE ONLY SAME TYPE AND RATING FUSE.
SELBEN BELASTBRAKEIT VERWENDEN. TRENNEN SIE DAS DEBRANCHEZ LE CABLE D'ALIMENTATION AVANT DE
DISCONNECT SUPPLY CORD BEFORE CHANGING FUSE.
FUSIBLE DEL GRADO. DESCONECTE LA CUERDA DE LA
FUENTE ANTES DE CAMBIAR EL FUSIBLE.
GERAT VOM NETZ BEVOR SIE DIE SICHERUNG
CHANGER LE FUSIBLE.
AVIS:
AUSTAUSCHEN.
1
2
3
4
NET
CAUTION
RISK OF ELECTRIC SHOCK
24
Y
Z
G
DO NOT OPEN
RISQUE DE CHOC ELECTRIQUE NE PAS OUVRIR
5
6
OVERRIDE/SETUP
LEFT
+
-
+
-
+
-
+
ROOM OUTPUTS
-
+
-
+
8 OHM / 60 WATTS
-
120V AC 60Hz
1440 WATTS MAX. 12A 125V
4 OHM / 90 WATTS
RIGHT
+
-
+
-
+
CRESTRON ELECTRONICS, INC. ROCKLEIGH, N.J. 07647 USA
L1
-
MADE IN THE USA
+
-
+
DATE:
-
+
R1
L6
ROOM1
SPEAKERS
R6
ROOM6
SPEAKERS
L2
R2
L5
R5
ROOM5
SPEAKERS
ROOM2
SPEAKERS
L3
R3
ROOM3
SPEAKERS
6 • Six-Zone Audio Package: CNX-AUDIO-6PAK
-
L4
R4
ROOM4
SPEAKERS
Operations & Installation Guide - DOC. 8169
Crestron CNX-AUDIO-6PAK
Six-Zone Audio Package
Software Setup
Software System Requirements
The PC where the contents of the Crestron Audio Six-Pack CD are installed should
meet these system requirements.
Minimum Required PC Configuration
Windows 98/NT/2000: 333MHz Pentium II with 64MB RAM
Display Setting of "256 Colors"
Recommended PC Configuration
Windows 98/NT/2000: 700MHz Pentium 4 with 128MB RAM
Display Setting of "High Color (16 bit)" or higher
Installation
Insert the Crestron Audio Six-Pack CD into the PC's CD-ROM drive and select Run
from the Windows start menu. Type the letter for the CD-ROM drive and :\Setup.
There are certain versions of SIMPL Windows, VisionTools Pro-e, and the Crestron
Database required to successfully operate with the Wizard. The minimum required
versions are available from the Crestron Audio Six-Pack CD. The versions are:
SIMPL Windows v1.61.08 or later
VT Pro-e v2.3.1.9 or later
Crestron Database v15.4.0 or later
The latest software versions can also be obtained from the What's New page
(APPBUILD link) or Downloads page (APPBUILD Library) of the Crestron website
(www.crestron.com).
Four Step Configuration
Use the easy four-step configuration of the Crestron Audio Six-Pack Wizard to
complete the six-zone audio system. Refer to the on-line and context-sensitive (F1)
help, if assistance is needed.
Start Audio Six-Pack Wizard
Open the Audio Six-Pack Wizard and begin with the screen shown on the next page.
Operations & Installation Guide - DOC. 8169
Six-Zone Audio Package: CNX-AUDIO-6PAK • 7
Start Screen
To move onto the first step in the configuration of the audio system, click on the
Next> button or click on the square in the left column entitled "Name & Location".
Advance through the Wizard steps using either of these methods.
Step 1: Name the System
From the next screen, shown below, enter a name in the System Name: field. This
name will be assigned to all application files (Audio Six-Pack Wizard, SIMPL
Windows, and VT Pro-e) for the system. In the second field, enter a location to save
all files that are created using the Wizard.
Name the System
8 • Six-Zone Audio Package: CNX-AUDIO-6PAK
Operations & Installation Guide - DOC. 8169
Crestron CNX-AUDIO-6PAK
Six-Zone Audio Package
Step 2: Add Sources
The Crestron Database contains
information collected about devices
that have, at one time, been programmed into a Crestron system.
The User Database is a place to
store information about devices
not yet supported by Crestron.
The Devices screen of the Audio Six-Pack Wizard allows the user to select all the
audio sources in the system that need to be controlled. The Wizard has access to
either the Crestron or User Database. Make a choice by selecting the correct
Database button, as shown in the screen below. A source can be added by first
selecting how to search for it. Decide how to sort the devices by selecting either the
Manufacturer or Type button from the Sort By area.
Add Sources
Use the pull-down arrows to select the Manufacturer, Type, and Model of each
source in the system. Once the three parameters are selected for a single source, click
the Add to System button to automatically enter the source into the list at the bottom
of the screen.
Notice that the Wizard keeps a running list of each source. The list includes the
device name, a description of the source, and the I/O assignment. Continue to add
sources by repeating the procedure in the previous paragraph.
It is possible to assign properties to each source. Double click on an item from the
list of sources or alternatively, double click on the source or right click the source,
then select Properties. The "Device # Properties" window appears with up to three
tabs of its own: Audio, I/O Assignment, and Properties. The pound symbol (#) in the
title of the window indicates the number assigned to the actual device.
Audio Properties
The Audio tab of the "Device # Properties" window, as shown after this paragraph,
identifies the name of the source device and reveals the predetermined input number
to the CNX-PAD8. The input number to the audio switcher can be changed. This
window also displays a list of possible commands, which are selectable as well. The
four commands are mapped to two fixed buttons on the function keypad: left and
right arrow. To execute the Next 1 command the user presses the right arrow button;
to execute the Next 2 command the user presses and holds the right arrow button.
Similarly, to execute the Prev 1 command the user presses the left arrow button; for
Prev 2, the user presses and holds the left arrow button. Click the OK button to apply
Operations & Installation Guide - DOC. 8169
Six-Zone Audio Package: CNX-AUDIO-6PAK • 9
and save any changes made and close the window. The Cancel button closes the
window without saving any changes that have been made.
"Device # Properties" Window – Audio Tab
I/O Assignment Properties
The I/O Assignment tab of the "Device # Properties" window, shown after this
paragraph, enables a change of the port assignment for the source as well as the
controlling device. Click the OK button to apply and save any changes made and
close the window. The Cancel button closes the window without saving any changes
that have been made.
"Device # Properties" Window – I/O Assignment Tab
The Device area displays all control information about the currently selected device,
specifically it reveals how this device is connected to the control system. Click on
the Configure button to modify how this device is connected to the control system.
10 • Six-Zone Audio Package: CNX-AUDIO-6PAK
Operations & Installation Guide - DOC. 8169
Crestron CNX-AUDIO-6PAK
Six-Zone Audio Package
For example, a CD might automatically be assigned to port C of an IR card. To place
this device on port D, simply click the Configure button, select the Port Assignment
tab from the "Device Settings" window, and choose a new port assignment.
The Controller area displays all control information about the device that controls
the currently selected device. For example, if the selected device is an IR controlled
CD, the controller may be an IR card such as the CNXIR-8. The top line of text
displays a description of this controlling device. The list box shows all controllers to
which the current device may be assigned. There are three buttons to modify the
contents of the list box.
•
Click the Configure button to modify the controller location in the
control system.
•
Click the New button to add a controller to the list assuming a valid
controller is available.
•
Click the Remove button to remove the currently selected controller
from the list. Some controllers (i.e., built-in cards) cannot be removed.
NOTE: Expert users can always modify any of the device properties directly in
SIMPL Windows, after the program is generated.
Properties
The Properties tab of the "Device # Properties" window, shown after this paragraph,
lists a set of values for specified functions. Crestron recommends that the default
values are used, but the programmer is free to alter them. Click the OK button to
apply and save any changes made and close the window. The Cancel button closes
the window without saving any changes that have been made.
NOTE: This tab is not available for all devices.
"Device # Properties" Window – Properties Tab
Operations & Installation Guide - DOC. 8169
Six-Zone Audio Package: CNX-AUDIO-6PAK • 11
Step 3: Add Rooms
The CNX-AUDIO-6PAK is designed
to permit control of up to eight
devices from up to six rooms. If the
intent is to control more than eight
devices or control seven or more
devices from a single room, the
designer should consider using the
Application Builder to supplement
the Audio Six-Pack Wizard or use
the Application Builder solely.
The top six buttons on the function keypad are pre-configured for source selection,
where by default the first button (on the top left of the panel) selects Device 1, the
second button (top right) selects Device 2, the third, Device 3 and so forth. In
applications with less than six devices, the extra source selection buttons will have
no function assignment. In those applications with seven or eight devices, the extra
devices will have no source selection buttons in certain rooms of the system. Use
this step to determine which of the available sources can be selected from a given
room.
The CNX-AUDIO-6PAK is designed to provide control from up to six locations.
The Interfaces screen of the Wizard allows the user to assign source control from
each of the six rooms. From the pull-down above the user interface on the screen, as
shown after this paragraph, choose a room. The top six buttons of the keypad need to
be assigned to override the default settings. Move the cursor over one of the buttons
and notice that the perimeter of the button changes to a blue color. Selection of a
button changes the perimeter color to red and enables the Selected Source Button
area of the screen. Select an available source from the Source: field and assign a
label for the button on the keypad. Select another room and repeat the process.
NOTE: The keypad has standard source selector switch caps installed and a kit of
custom switch caps is also supplied with the CNX-AUDIO-6PAK. Instructions for
installing the custom switch caps or re-arranging the standard switch caps is
provided in the latest revision of the CN-WP12F and CN-WP12N Operations Guide
(Doc. 5788).
NOTE: The lower six buttons on the keypad are fixed.
NOTE: The Net ID of each user interface is room specific and shown beneath the
user interface on the screen.
Add Rooms
12 • Six-Zone Audio Package: CNX-AUDIO-6PAK
Operations & Installation Guide - DOC. 8169
Crestron CNX-AUDIO-6PAK
Six-Zone Audio Package
The switch caps on the lower six buttons on the keypad are fixed and cannot be
altered. These include the On/Off button, Volume Up and Down, and Mute. The left
and right arrow buttons are for the standard Next and Prev commands, as assigned in
the Audio tab of the "Device # Properties" window, as described in "Step 2: Add
Sources" on page 9.
Step 4: Upload the System
The Finish screen provides the final steps to building the logic for the system. This
involves creating and compiling the SIMPL Windows program and uploading it to
the control system. The completed SIMPL Windows program is saved in .smw
format in the system's Program folder and contains all the logic that enables
communication between the control system, button panels, controlled devices and
other CNX-AUDIO-6PAK hardware.
Finish Screen
Before uploading the system, it is probably a good idea to verify the communication
preferences. The PC running the Wizard should be connected to the front
COMPUTER port of the CNMSX-AV via a straight through 9-pin cable. Only then
can all system programs be uploaded. Select the Communication Settings button to
open the "Port Settings" window, as shown below. Notice that TCP/IP connection is
an option. However, a CNXENET+ card (not part of the CNX-AUDIO-6PAK) is
required for Ethernet connections.
Operations & Installation Guide - DOC. 8169
Six-Zone Audio Package: CNX-AUDIO-6PAK • 13
Verify Port Settings
The Documentation button on the final screen of the Wizard displays an HTML
report of the entire system including devices and their respective locations. These
reports are a great troubleshooting tool.
The Edit in Crestron Application Builder button is available for those users that
surpass the basic intent of the CNX-AUDIO-6PAK. The options are numerous, but
possibilities include:
•
Add more zones
•
Add a numeric keypad
•
Add a CT/LC-1000 touchpanel as a user interface
•
Add a wireless touchpanel as a user interface
•
Add a CNXTA to the CNMSX-AV for intercom use.
If the Application Builder is to be used, check the Edit in Crestron Application
Builder button and click Finish, then modify the system as desired. However, note
that once the system is saved in the Application Builder, the Audio Six-Pack Wizard
can no longer be used to open the file.
When communication between the PC and the control system has been established,
click the Upload System button from the final screen of the Wizard. The "System
Creation" window displays its progress as the Wizard creates and compiles the
SIMPL Windows program. Then click Continue to proceed to the next and final
action, uploading the program to the control system. After the transfer, click Yes to
load the program into the permanent memory of the control system. Then click
Finish to exit the Wizard.
14 • Six-Zone Audio Package: CNX-AUDIO-6PAK
Operations & Installation Guide - DOC. 8169
Crestron CNX-AUDIO-6PAK
Six-Zone Audio Package
System Operation
This section describes how to use the function keypad to operate a Crestron audio
distribution system.
NOTE: These keypads are standard Crestron network devices and as such do not
have any functionality built-in. Instead, the program loaded into the CNMSX-AV
governs their operation. If you choose to use these keypads without using the devices
called out in the CNX-AUDIO-6PAK, the programmer must determine how they
operate.
The keypad provides on/off functionality, volume and mute control, source selection
and control, and priority override.
On/Off Button
The On/Off button performs five distinct actions, based on when and how it is
pressed.
ON/OFF
•
Room On: Press/release while room is off.
•
Room Off: Press/release while room is on.
•
All Rooms Off: Press/hold until room shuts off.
•
Sleep Mode On: Press/hold until LEDs flash.
•
Sleep Mode Off: Press/release while in sleep mode.
Volume and Mute Buttons
•
Mute Button: Press to toggle volume mute on and off. LED blinks
when volume is muted.
•
Volume Up/Down Buttons: Control room volume level. LED of
selected source blinks when volume level is adjusted.
MUTE
VOL
VOL
Operations & Installation Guide - DOC. 8169
Six-Zone Audio Package: CNX-AUDIO-6PAK • 15
Source Selection and Control
•
src1
src2
src3
src4
src5
src6
Source Selection Buttons (src1 through src6): These buttons select
the source for listening/control in the given room.
A solid LED indicates that the source is selected and can be controlled.
A blinking LED indicates that a source is in use by another room and
cannot be controlled Refer to "Priority Override" on page 16 for an
exception.
If a source is selected and has a solid LED, pressing the button again
issues the NEXT1 command to that device.
•
Previous/Next Buttons: These buttons control the selected source
(unless the source LED is blinking, refer to "Priority Override" on page
16).
Press and release the Prev/Next buttons to send the PREV1/NEXT1
commands to the selected source. Press and hold the Prev/Next buttons
to send the PREV2/NEXT2 commands to the selected source.
To change the NEXT and PREV commands for a given device, refer to
the "Audio Properties" subsection of "Step 2: Add Sources" on page 9
for details.
Priority Override
The source button LEDs blink if another room has control priority over the selected
source. This means that this room can listen to the source, but cannot control it.
If another room has control over the current source, control can be taken from the
other room by pressing and holding the source button for about two seconds.
Audio Configuration
The function keypads provide additional functionality for configuring both the room
and source settings. Room settings include properties such as bass, treble, and
balance, and only affect the room from which they are adjusted. Source settings are
the input gain on the CNX-PAD8 for each source, allowing the volume level of each
source to be normalized relative to one another. Adjusting the input gain for a source
affects the volume of that source in all rooms.
Under normal operation, the keypads operate as described in "System Operation" on
page 15. In order to adjust the room or source settings, the appropriate mode, as
described in the following subsections, must be entered.
16 • Six-Zone Audio Package: CNX-AUDIO-6PAK
Operations & Installation Guide - DOC. 8169
Crestron CNX-AUDIO-6PAK
Six-Zone Audio Package
Setup Modes
•
Enter Room Setup Mode: Press both Volume Up and Down buttons
simultaneously to enter Room Setup Mode.
•
Enter Source Setup Mode: Press both Next and Prev buttons
simultaneously to enter Source Setup Mode.
NOTE: Once a setup mode is entered, additional settings can influence
operation.
VOL
VOL
Room Setup Mode Operation
•
Source Selection Buttons: These buttons select one of six properties to
adjust. Once selected, use the Volume Up/Down or Prev/Next buttons
to adjust the level.
Min. Volume
Max. Volume
Bass
Treble
Startup Vol
Balance
•
On/Off Button: This button's LED blinks rapidly to indicate Room
Setup Mode activity. Press this button to exit Room Setup Mode.
Exit Setup
Loudness
•
Prev/Next Buttons: Adjust the currently selected property left/right.
•
Mute Button: Toggles loudness on and off. LED illuminates if
loudness is currently on.
•
Volum Up/Down Buttons: Adjust the currently selected property
up/down.
Press and hold a button to set that property back to its default level.
VOL
VOL
Source Setup Mode Operation
ON/OFF
MUTE
VOL
•
Source Selection Buttons: These buttons select the sources assigned to
them in "standard" mode. Use the Volume Up/Down buttons to adjust
the input gain for that source.
•
On/Off Button: This button's LED blinks rapidly along with the Mute
button to indicate Source Setup Mode activity. Press this button to exit
Source Setup Mode.
•
Prev/Next Buttons: These buttons have no functionality in this mode.
•
Mute Button: This button's LED blinks rapidly along with the On/Off
button to indicate Source Setup Mode activity.
•
Volum Up/Down Buttons: Adjust the input compensation of the
currently selected source.
VOL
Operations & Installation Guide - DOC. 8169
Six-Zone Audio Package: CNX-AUDIO-6PAK • 17
Problem Solving
Troubleshooting
Refer to the troubleshooting tables in each of the individual device Operations
Guides to resolve trouble situations. If further assistance is required, please contact a
Crestron customer service representative by calling:
•
In the US and Canada, call Crestron’s corporate headquarters at
1-888-CRESTRON [1-888-273-7876] or 1-201-767-3400.
•
In Europe, call Crestron International at +32-15-50-99-50.
•
In Asia, call Crestron Asia at +852-2341-2016.
•
In Latin America, call Crestron Latin America at +5255-5093-2160.
•
In Australia, call Crestron Pacific at +613-9480-2999.
For local support from exclusive Crestron factory-trained personnel in New Zealand
call Amber Technologies at +649-410-8382.
Future Updates
As Crestron improves functions, adds new features, and extends the capabilities of
the CNX-AUDIO-6PAK, additional information may be made available as manual
updates. These updates are solely electronic and serve as intermediary supplements
prior to the release of a complete technical documentation revision.
The Downloads page of the Crestron website (www.crestron.com) directs the reader
to the location and description of each update. Check the site periodically for update
availability and its subjective value.
18 • Six-Zone Audio Package: CNX-AUDIO-6PAK
Operations & Installation Guide - DOC. 8169
Crestron CNX-AUDIO-6PAK
Six-Zone Audio Package
Software License Agreement
This License Agreement (“Agreement”) is a legal contract between you (either an individual or a single business entity) and
Crestron Electronics, Inc. (“Crestron”) for software referenced in this guide, which includes computer software and, as applicable,
associated media, printed materials, and “online” or electronic documentation (the “Software”).
BY INSTALLING, COPYING, OR OTHERWISE USING THE SOFTWARE, YOU REPRESENT THAT YOU ARE AN
AUTHORIZED DEALER OF CRESTRON PRODUCTS OR A CRESTRON AUTHORIZED INDEPENDENT PROGRAMMER
AND YOU AGREE TO BE BOUND BY THE TERMS OF THIS AGREEMENT. IF YOU DO NOT AGREE TO THE TERMS OF
THIS AGREEMENT, DO NOT INSTALL OR USE THE SOFTWARE.
IF YOU HAVE PAID A FEE FOR THIS LICENSE AND DO NOT ACCEPT THE TERMS OF THIS AGREEMENT,
CRESTRON WILL REFUND THE FEE TO YOU PROVIDED YOU (1) CLICK THE DO NOT ACCEPT BUTTON, (2) DO NOT
INSTALL THE SOFTWARE AND (3) RETURN ALL SOFTWARE, MEDIA AND OTHER DOCUMENTATION AND
MATERIALS PROVIDED WITH THE SOFTWARE TO CRESTRON AT: CRESTRON ELECTRONICS, INC., 15 VOLVO
DRIVE, ROCKLEIGH, NEW JERSEY 07647, WITHIN 30 DAYS OF PAYMENT.
LICENSE TERMS
Crestron hereby grants You and You accept a nonexclusive, nontransferable license to use the Software (a) in machine
readable object code together with the related explanatory written materials provided by Creston (b) on a central processing unit
(“CPU”) owned or leased or otherwise controlled exclusively by You, and (c) only as authorized in this Agreement and the related
explanatory files and written materials provided by Crestron.
If this software requires payment for a license, you may make one backup copy of the Software, provided Your backup copy
is not installed or used on any CPU. You may not transfer the rights of this Agreement to a backup copy unless the installed copy of
the Software is destroyed or otherwise inoperable and You transfer all rights in the Software.
You may not transfer the license granted pursuant to this Agreement or assign this Agreement without the express written
consent of Crestron.
If this software requires payment for a license, the total number of CPU’s on which all versions of the Software are installed
may not exceed one per license fee (1) and no concurrent, server or network use of the Software (including any permitted back-up
copies) is permitted, including but not limited to using the Software (a) either directly or through commands, data or instructions from
or to another computer (b) for local, campus or wide area network, internet or web hosting services; or (c) pursuant to any rental,
sharing or “service bureau” arrangement.
The Software is designed as a software development and customization tool. As such Crestron cannot and does not
guarantee any results of use of the Software or that the Software will operate error free and You acknowledge that any development
that You perform using the Software or Host Application is done entirely at Your own risk.
The Software is licensed and not sold. Crestron retains ownership of the Software and all copies of the Software and
reserves all rights not expressly granted in writing.
OTHER LIMITATIONS
You must be an Authorized Dealer of Crestron products or a Crestron Authorized Independent Programmer to install or use
the Software. If Your status as a Crestron Authorized Dealer or Crestron Authorized Independent Programmer is terminated, Your
license is also terminated.
You may not rent, lease, lend, sublicense, distribute or otherwise transfer or assign any interest in or to the Software.
You may not reverse engineer, decompile, or disassemble the Software.
You agree that the Software will not be shipped, transferred or exported into any country or used in any manner prohibited
by the United States Export Administration Act or any other export laws, restrictions or regulations (“Export Laws”). By downloading
or installing the Software You (a) are certifying that You are not a national of Cuba, Iran, Iraq, Libya, North Korea, Sudan, or Syria or
any country to which the United States embargoes goods (b) are certifying that You are not otherwise prohibited from receiving the
Software and (c) You agree to comply with the Export Laws.
If any part of this Agreement is found void and unenforceable, it will not affect the validity of the balance of the Agreement,
which shall remain valid and enforceable according to its terms. This Agreement may only be modified by a writing signed by an
authorized officer of Crestron. Updates may be licensed to You by Crestron with additional or different terms. This is the entire
agreement between Crestron and You relating to the Software and it supersedes any prior representations, discussions, undertakings,
communications or advertising relating to the Software. The failure of either party to enforce any right or take any action in the event
of a breach hereunder shall constitute a waiver unless expressly acknowledged and set forth in writing by the party alleged to have
provided such waiver.
Operations & Installation Guide - DOC. 8169
Six-Zone Audio Package: CNX-AUDIO-6PAK • 19
If You are a business or organization, You agree that upon request from Crestron or its authorized agent, You will within
thirty (30) days fully document and certify that use of any and all Software at the time of the request is in conformity with Your valid
licenses from Crestron of its authorized agent.
Without prejudice to any other rights, Crestron may terminate this Agreement immediately upon notice if you fail to comply
with the terms and conditions of this Agreement. In such event, you must destroy all copies of the Software and all of its component
parts.
PROPRIETARY RIGHTS
Copyright. All title and copyrights in and to the Software (including, without limitation, any images, photographs,
animations, video, audio, music, text, and “applets” incorporated into the Software), the accompanying media and printed materials,
and any copies of the Software are owned by Crestron or its suppliers. The Software is protected by copyright laws and international
treaty provisions. Therefore, you must treat the Software like any other copyrighted material, subject to the provisions of this
Agreement.
Submissions. Should you decide to transmit to Crestron’s website by any means or by any media any materials or other
information (including, without limitation, ideas, concepts or techniques for new or improved services and products), whether as
information, feedback, data, questions, comments, suggestions or the like, you agree such submissions are unrestricted and shall be
deemed non-confidential and you automatically grant Crestron and its assigns a non-exclusive, royalty-tree, worldwide, perpetual,
irrevocable license, with the right to sublicense, to use, copy, transmit, distribute, create derivative works of, display and perform the
same.
Trademarks. CRESTRON and the Swirl Logo are registered trademarks of Crestron Electronics, Inc. You shall not remove
or conceal any trademark or proprietary notice of Crestron from the Software including any back-up copy.
GOVERNING LAW
This Agreement shall be governed by the laws of the State of New Jersey, without regard to conflicts of laws principles.
Any disputes between the parties to the Agreement shall be brought in the state courts in Bergen County, New Jersey or the federal
courts located in the District of New Jersey. The United Nations Convention on Contracts for the International Sale of Goods, shall
not apply to this Agreement.
CRESTRON LIMITED WARRANTY
CRESTRON warrants that: (a) the Software will perform substantially in accordance with the published specifications for a
period of ninety (90) days from the date of receipt, and (b) that any hardware accompanying the Software will be subject to its own
limited warranty as stated in its accompanying written material. Crestron shall, at its option, repair or replace or refund the license fee
for any Software found defective by Crestron if notified by you within the warranty period. The foregoing remedy shall be your
exclusive remedy for any claim or loss arising from the Software.
CRESTRON shall not be liable to honor warranty terms if the product has been used in any application other than that for
which it was intended, or if it as been subjected to misuse, accidental damage, modification, or improper installation procedures.
Furthermore, this warranty does not cover any product that has had the serial number or license code altered, defaced, improperly
obtained, or removed.
Notwithstanding any agreement to maintain or correct errors or defects Crestron, shall have no obligation to service or
correct any error or defect that is not reproducible by Crestron or is deemed in Crestron’s reasonable discretion to have resulted from
(1) accident; unusual stress; neglect; misuse; failure of electric power, operation of the Software with other media not meeting or not
maintained in accordance with the manufacturer’s specifications; or causes other than ordinary use; (2) improper installation by
anyone other than Crestron or its authorized agents of the Software that deviates from any operating procedures established by
Crestron in the material and files provided to You by Crestron or its authorized agent; (3) use of the Software on unauthorized
hardware; or (4) modification of, alteration of, or additions to the Software undertaken by persons other than Crestron or Crestron’s
authorized agents.
ANY LIABILITY OF CRESTRON FOR A DEFECTIVE COPY OF THE SOFTWARE WILL BE LIMITED
EXCLUSIVELY TO REPAIR OR REPLACEMENT OF YOUR COPY OF THE SOFTWARE WITH ANOTHER COPY OR
REFUND OF THE INITIAL LICENSE FEE CRESTRON RECEIVED FROM YOU FOR THE DEFECTIVE COPY OF THE
PRODUCT. THIS WARRANTY SHALL BE THE SOLE AND EXCLUSIVE REMEDY TO YOU. IN NO EVENT SHALL
CRESTRON BE LIABLE FOR INCIDENTAL, CONSEQUENTIAL, SPECIAL OR PUNITIVE DAMAGES OF ANY KIND
(PROPERTY OR ECONOMIC DAMAGES INCLUSIVE), EVEN IF A CRESTRON REPRESENTATIVE HAS BEEN ADVISED
OF THE POSSIBILITY OF SUCH DAMAGES OR OF ANY CLAIM BY ANY THIRD PARTY. CRESTRON MAKES NO
WARRANTIES, EXPRESS OR IMPLIED, AS TO TITLE OR INFRINGEMENT OF THIRD-PARTY RIGHTS,
MERCHANTABILITY OR FITNESS FOR ANY PARTICULAR PURPOSE, OR ANY OTHER WARRANTIES, NOR
AUTHORIZES ANY OTHER PARTY TO OFFER ANY WARRANTIES, INCLUDING WARRANTIES OF
MERCHANTABILITY FOR THIS PRODUCT. THIS WARRANTY STATEMENT SUPERSEDES ALL PREVIOUS
WARRANTIES.
20 • Six-Zone Audio Package: CNX-AUDIO-6PAK
Operations & Installation Guide - DOC. 8169
Crestron CNX-AUDIO-6PAK
Six-Zone Audio Package
Return and Warranty Policies
Merchandise Returns / Repair Service
1.
No merchandise may be returned for credit, exchange, or service without prior authorization
from CRESTRON. To obtain warranty service for CRESTRON products, contact the factory
and request an RMA (Return Merchandise Authorization) number. Enclose a note specifying
the nature of the problem, name and phone number of contact person, RMA number, and
return address.
2.
Products may be returned for credit, exchange, or service with a CRESTRON Return
Merchandise Authorization (RMA) number. Authorized returns must be shipped freight
prepaid to CRESTRON, Cresskill, N.J., or its authorized subsidiaries, with RMA number
clearly marked on the outside of all cartons. Shipments arriving freight collect or without an
RMA number shall be subject to refusal. CRESTRON reserves the right in its sole and
absolute discretion to charge a 15% restocking fee, plus shipping costs, on any products
returned with an RMA.
3.
Return freight charges following repair of items under warranty shall be paid by CRESTRON,
shipping by standard ground carrier. In the event repairs are found to be non-warranty, return
freight costs shall be paid by the purchaser.
CRESTRON Limited Warranty
CRESTRON ELECTRONICS, Inc. warrants its products to be free from manufacturing defects in
materials and workmanship under normal use for a period of three (3) years from the date of
purchase from CRESTRON, with the following exceptions: disk drives and any other moving or
rotating mechanical parts, pan/tilt heads and power supplies are covered for a period of one (1)
year; touchscreen display and overlay components are covered for 90 days; batteries and
incandescent lamps are not covered.
This warranty extends to products purchased directly from CRESTRON or an authorized
CRESTRON dealer. Purchasers should inquire of the dealer regarding the nature and extent of the
dealer's warranty, if any.
CRESTRON shall not be liable to honor the terms of this warranty if the product has been used in
any application other than that for which it was intended, or if it has been subjected to misuse,
accidental damage, modification, or improper installation procedures. Furthermore, this warranty
does not cover any product that has had the serial number altered, defaced, or removed.
This warranty shall be the sole and exclusive remedy to the original purchaser. In no event shall
CRESTRON be liable for incidental or consequential damages of any kind (property or economic
damages inclusive) arising from the sale or use of this equipment. CRESTRON is not liable for
any claim made by a third party or made by the purchaser for a third party.
CRESTRON shall, at its option, repair or replace any product found defective, without charge for
parts or labor. Repaired or replaced equipment and parts supplied under this warranty shall be
covered only by the unexpired portion of the warranty.
Except as expressly set forth in this warranty, CRESTRON makes no other warranties, expressed
or implied, nor authorizes any other party to offer any other party to offer any warranty, including
any implied warranties of merchantability or fitness for a particular purpose. Any implied
warranties that may be imposed by law are limited to the terms of this limited warranty. This
warranty statement supercedes all previous warranties.
Trademark Information
All brand names, product names, and trademarks are the sole property of their respective owners. Windows is a registered
trademark of Microsoft Corporation. Windows95/98/Me/XP and WindowsNT/2000 are trademarks of Microsoft
Corporation.
Operations & Installation Guide - DOC. 8169
Six-Zone Audio Package: CNX-AUDIO-6PAK • 21
This page intentionally left blank.
22 • Six-Zone Audio Package: CNX-AUDIO-6PAK
Operations & Installation Guide - DOC. 8169
Crestron CNX-AUDIO-6PAK
Six-Zone Audio Package
This page intentionally left blank.
Operations & Installation Guide - DOC. 8169
Six-Zone Audio Package: CNX-AUDIO-6PAK • 23
Crestron Electronics, Inc.
15 Volvo Drive Rockleigh, NJ 07647
Tel: 888.CRESTRON
Fax: 201.767.7576
www.crestron.com
Operations & Installation Guide – DOC. 8169
07.01
Specifications subject to
change without notice.