1
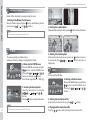
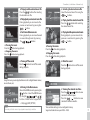
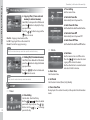
SDP-704C
CONTENTS
CONTENTS
Safety Instructions . . . . . . . . . . . . . . . . . . . . . . . . . . . . . . . . . . . . . . . . . . . . 3
SETUP . . . . . . . . . . . . . . . . . . . . . . . . . . . . . . . . . . . . . . . . . . . . . . . . . . . . . . . . . 8
Product Features . . . . . . . . . . . . . . . . . . . . . . . . . . . . . . . . . . . . . . . . . . . . . . 4
Timer . . . . . . . . . . . . . . . . . . . . . . . . . . . . . . . . . . . . . . . . . . . . . . . . . . . . . . 8
Product and Components . . . . . . . . . . . . . . . . . . . . . . . . . . . . . . . . . . . . 4
Alarm . . . . . . . . . . . . . . . . . . . . . . . . . . . . . . . . . . . . . . . . . . . . . . . . . . . . . . 8
.......................................... 4
Slide Show . . . . . . . . . . . . . . . . . . . . . . . . . . . . . . . . . . . . . . . . . . . . . . . . 8
The back of the product . . . . . . . . . . . . . . . . . . . . . . . . . . . . . . . . . . 4
Language . . . . . . . . . . . . . . . . . . . . . . . . . . . . . . . . . . . . . . . . . . . . . . . . . 9
How to use the button . . . . . . . . . . . . . . . . . . . . . . . . . . . . . . . . . . . . 5
Repeat . . . . . . . . . . . . . . . . . . . . . . . . . . . . . . . . . . . . . . . . . . . . . . . . . . . . 9
How to use the remote control . . . . . . . . . . . . . . . . . . . . . . . . . . 5
Information . . . . . . . . . . . . . . . . . . . . . . . . . . . . . . . . . . . . . . . . . . . . . . . . 9
Installation and Power connection . . . . . . . . . . . . . . . . . . . . . . . . . . 5
Troubleshooting . . . . . . . . . . . . . . . . . . . . . . . . . . . . . . . . . . . . . . . . . . . . . . . 10
Memory Format . . . . . . . . . . . . . . . . . . . . . . . . . . . . . . . . . . . . . . . . . . . . . . . 6
Specifications . . . . . . . . . . . . . . . . . . . . . . . . . . . . . . . . . . . . . . . . . . . . . . . . . 10
PHOTO . . . . . . . . . . . . . . . . . . . . . . . . . . . . . . . . . . . . . . . . . . . . . . . . . . . . . . . . . 6
The warranty . . . . . . . . . . . . . . . . . . . . . . . . . . . . . . . . . . . . . . . . . . . . . . . . . 11
Identify each part
MUSIC . . . . . . . . . . . . . . . . . . . . . . . . . . . . . . . . . . . . . . . . . . . . . . . . . . . . . . . . . . 6
MOVIE . . . . . . . . . . . . . . . . . . . . . . . . . . . . . . . . . . . . . . . . . . . . . . . . . . . . . . . . . 7
CALENDAR . . . . . . . . . . . . . . . . . . . . . . . . . . . . . . . . . . . . . . . . . . . . . . . . . . . . 7
FILE(Copying and Deleting) . . . . . . . . . . . . . . . . . . . . . . . . . . . . . . . . . 8
2
Precautions
Before using this unit please read these operating instructions carefully.
Take special care to follow the warnings indicated on the unit itself
as well as the safety suggestions listed below.
Afterwards keep them handy for future reference.
Safety
1. Power Source – The unit should be connected to a power supply
only of the type described in the operating instructions or as marked
on the unit.
2. Power Cord Protection – AC power supply cords should be routed
so that they are not walked on or pinched by items placed upon or
against them. Never take hold of the plug or cord if your
hands are wet, and always grasp the plug body when connecting
or disconnecting it.
3. Periods of non-use – When the unit is not in use turn of the power.
When left unused for a long period of time, the unit should be
unplugged from the household AC outlet.
Installation
1. Water and Moisture – Do not use this unit near water, for example,
near a bathtub, washbowl, swimming pool or the like.
Damp basements should also be avoided.
2. Heat – The unit should be situated away from heat sources such
as radiators and the like.
It also should not be placed in temperatures less than 5◦C (41◦F)
or greater than 35◦C (95◦F).
Placement
1. Ventilation – The unit should be situated so that its location or
position does not interfere with its proper ventilation.
2. Foreign Material – Care should be taken so that objects do not fall
into and liquids are not spilled into the unit. Do not subject this
unit to excessive smoke, dust, mechanical vibration or shock.
3. Stacking – Do not place heavy objects on top of the unit.
4. Surface – Place the unit on a flat and level surface.
5. Wall or Ceiling mount – The unit should not be mounted on the wall
or ceiling unless specified in the operating instructions.
Safety Instructions
Safety Instructions
Maintenance
Do not use any type of abrasive pad, scouring powder or solvent such
as alcohol or benzene.
Website support : http://www.bpidion.net
1. The user can find the latest version of software upgrade file.
2. Compatibility of memory card should be refered to the list on
the website.
3. Supprts other technical requirements or useful information for
using the products.
Service
1. Damage Requiring Service – The unit should be serviced
by a qualified service person when :
a. The AC power supply cord or the plug has been damaged; or
b. Objects have fallen or liquid has been spilled into the unit; or
c. The unit has been exposed to rain; or
d. The unit does not appear to operate normally or exhibits
a marked change in performance; or
e. The unit has been dropped, or the enclosure is damaged.
2. Servicing – The user should not attempt to service the unit
beyond that described in the operating instructions.
All other servicing should be referred to qualified service personnel.
3
Product Features / Product and Components / Identify each part
Flash memory device
This product is supplied with the following items. Please check the contents.
Input/output of data via flash memory card
High quality LCD panel
LCD panel video device is next generation
(Slim, High resolution)
Body
MP3 Player
Remote
control
Adapter
Manual
Identify each part
High quality stereo sound
Video Player
▷▷ The back of the product
Plays video MJPEG and MPEG4 (SP TYPE) files
It describes the appearance and the name of each part. There may be some
differences in appearance and function depending on the options available.
Remote control
Convenient operation
Convenient function for life
12
9
3
6
Clock, calendar and alarm functions
Role as a messenger
Power
switch
Switch
the power on
or off.
Clock, calendar and alarm functions
Power
connection
High capacity internal memory
Used to connect
the power
adapter to the body.
Store your photos and music files in the internal memory
without the need for an additional memory card.
USB host
4
Product and Components
Product Features
Easy store & change contents through USB memory stick
(According to the manufacturer, type, brand or version of
the USB stick, supporting is restrictive.)
USB Slot
Connection
for USB memory
stick
Speaker
Output of
stereo sound
when playing
the music
file(MP3)
or movie file.
Stand Unit
Stay bar
to stand
the body.
Memory card slot
Used to insert SD
/MMC/xD/CF
memory card.
There is a 7 way button on the back of the product. This describes the name
and function of each of the buttons. There may be some differences in
appearance and function depending on the options available
ESC button
+ button
Stop
Displays the active file’s information.
Card
Copy&Delete function of a file or list.
Zoom
Performs zoom function in slide show menu.
Mute
Switches the sound off. Pressing mute one more time
will recover original volume.
Cancels a selected menu,
or moves to the main menu.
Increases the volume
level or moves
to the upper menu.
button
Moves to the menu
on the right or
selects an item.
button
Moves to
the menu on the left
or moves to
the previous menu.
- button
Decreases the volume
level or moves
to the lower menu.
OK button
Power button
Selects or applies a menu.
The power on or off.
▷▷ How to use the remote control
Response time of remote control can be temporary sluggish sometimes
by the circumstance.
Name
Description
Power
Turns the product on or off.
Setup
Used to run various functions and change
the previous settings.
Home
Stops the previous function(including Slideshow)
and moves to the home menu.
Slide
Starts or stops the slideshow with background
music.
Moves up, down, left, or right on the menu or
file list.
Enter
Volume
Selects a menu or file to run.
Adjusts the volume level.
Back
Return to the previous step. (ESC)
play/pause
Plays back the selected file or pauses the playback.
rotate
Rotates the displayed photo (90°→ 180°→ 270°→ 0°)
Identify each part / Installation and Power connection
▷▷ How to use the button
Installation and Power connection
1. Connect the power adapter to the power
connection on the back for the unit.
Connect the main plug of the adapter
to the wall power outlet.
Note
The adapter can be used in AC 100~240V.
2. Push the power switch. LCD screen will
come on and the BPIDION logo is displayed.
5
※Parenthesis( ) is the button of the main body.
Memory Format / PHOTO / MUSIC
Memory Format
Delete all files stored built-in memory using this menu
◈ Moving to the Memory Format menu
Move to the Menu by pressing the
menu by using
(
) and
(
button. Select Memory Format
) buttons.
◈ Rotating the selected photo
After selecting the photo you want, press the
Note
Do not press any button during memory format
PHOTO
The preview displays available pictures.
Select any of them to display in the digital photo frame.
◈ Moving to the PHOTO menu
Move to the MENU screen by pressing the
( ) button. Select the PHOTO menu
by using the
(
) and
( )
buttons or simply press
button.
Photo format supportable → JPEG (jpg)
◈ Zooming the selected photo
After selecting the photo you want, press the
button to zoom it.
In zoom mode, the
(
) buttons are used as a
direction key.
MUSIC
It plays back the MP3 files.
◈ Moving to the Music menu
Move to the MENU screen by pressing the
( ) button. Select the MUSIC menu
by using the
(
) and
( )
buttons.
◈ Selecting the desired photo
Select the desired photo by using the
(
) and
( )
buttons.
Press the button to start the slide show.
Note
6
button to rotate it clockwise.
Slide show button work only with BGM “ON”mode
◈ Selecting the desired music file
Select the desired music file using the
◈ Playing back the selected music file
Press the
(
(
) buttons.
) button after selecting the desired music file.
※Parenthesis( ) is the button of the main body.
◈ Selecting the desired movie file
Press the
( ) button after selecting
the desired music file.
Select the desired music file using the
(
) buttons.
◈ Playing back previous/next music file
◈ Playing back the selected movie file
During playback, you can move to the
previous or next music by pressing the
(
) button.
Press the
( ) button after selecting
the desired music file.
◈ Playing back the previous/next movie
◈ Fast Forward/Reverse music
◈ Pausing the music
Press the button during playback.
◈ Stopping the music
Press the
During playback, you can move to the
previous or next music by pressing the
(
) button.
During playback, you can move forward
or reverse through music by pressing
the
(
) buttons.
button during playback.
MUSIC / MOVIE / CALENDAR
◈ Playing back the selected music file
◈ Pausing the movie
Press the
button during playback.
◈ Stopping the movie
Press the
button during playback.
◈ Turning off the sound
◈ Mute the sound
Press the
button to turn off the sound
during playback.
Press the
button to turn off the sound
during playback.
MOVIE
Using this menu, you can play back movies such as digital camera movies,
music albums, etc.
◈ Moving to the Movie menu
Note
Move to the MENU screen by pressing the
( ) button. Select the MOVIE menu
by using the
(
) and
( )
buttons. Movie format supportable
→ AVI (mjpg), MP4 (SP TYPE)
According to the file codec or type, playback supporting is restrictive.
CALENDAR
◈ Viewing the calendar and time
Press the
(
) buttons to view
calendar for different years.
Press the
(
) buttons to view
calendar for different months.
Time and date settings can be configured in Setup.
Supported calendars are years 2006 ~ 2030.
7
※Parenthesis( ) is the button of the main body.
FILE (Copying and Deleting) / SETUP
◈ Time Setting
File (Copying and Deleting)
Sets the current time.
◈ Copying file(s) from external
◈ Set Auto Power On
memory to internal memory
Select file(s) to be copied in List Mode and
press the button to display File Copy
popup window.
Press the
( ) button to copy and the
button to cancel.
One file : Copying current selected file.
List All : Copying all files on the current list.
Cancel : Cancel the copy processing.
Note
File(s) from internal memory cannot be copied to external memory.
Automatically turns the power On.
◈ Auto Power On Time
Sets the time for the Auto Power On function.
◈ Set Auto Power Off
Automatically turns the power Off.
◈ Auto Power Off Time
Sets the time for the Auto Power Off function.
▷▷ Alarm
◈ Deleting file(s) from internal memory
Select file(s) to be deleted in List Mode and
press the
button to display File Delete
popup window.
Press the
( ) button to delete and
the button to cancel.
Note
File(s) stored in external memory cannot be deleted.
◈ Alarm Time
◈ Set Alarm
Use this menu to turn on/off the alarm.
Press the
( ) button when the alarm
is going off to dismiss the alarm.
Use the other button to snooze the alarm
and restart it after 5 minutes.
Sets the alarm time.
◈ Set Period
Sets the alarm interval. (Once, Daily, Weekly)
SETUP
◈ Power Save Time
▷▷ Timer
◈ Date Setting
8
Sets the date : Year-Month-Day.
Use the
(
) buttons to decide
year-month-day and press the
(
)
button. Use the
(
) to change
year-month-day.
No key inputs for a certain time will put the product into hibernation
mode.
◈ Slide Show Interval
You can set the interval for slide show.
(1 sec to 30 minute)
◈ Show Type
Full Screen : Displays the image in full screen,
Fit Screen : Displays the image to fit the screen.
◈ Select transition effect
You can select any of various slide effects.
Off : Simple slide show without any effects,
Fade : Fade In/Out effects applied to slide show,
Random : Slide show with various effects in irregular method.
▷▷ Information
◈ Checking the system information
SETUP
▷▷ Slide Show
Display the versions for firmware and
hardware. The memory capacity and free
memory pace are also displayed.
Note
The Firmware Upgrade can be found on
this home page.
http://www.BPIDION.com
◈ BGM (Back Ground Music)
An MP3 file is played back while the slide show is running.
On : MP3 playback active,
Off : MP3 playback not active
▷▷ Language
◈ Language
Sets the language to be displayed on the
screen.
(Supports English,German,Spanish,
and Japanese.)
▷▷ Repeat
◈ Repeat Mode
Use this menu to enable/disable repeat
mode for slide show, mp3, and movie.
Off : Do not repeat,
One : Repeat a single song,
Folder : Repeat all songs in a fold,
All : Repeat all files in the memory.
9
Troubleshooting / Specifications
Troubleshooting
Problem
Solution
Power remains
turned off.
- Check the plug-insertion hole of the adapter,
adapter itself, and connection status between
adapter and outlet.
Power is on but the
initial display still
remains.
- Check the type of memory card.
- This product supports 5 kinds of memory
cards such as SD/MMC/xD/MS/CF/USB.
- Check the file name extension when the
connection between memory card and
power is normal.
(This product supports JPEG(RGB type), MP3,
MJPEG / MP4(SP TYPE) video Files only.)
- First stop the button operations and wait
for over 30 seconds (up to 1 minute).
Suddenly all operations
Delay can occur when the processing speed
are stopped.
is lowered by a high capacity file.
- When this phenomenon continues, disconnect
memory card and then startup and reboot
the product.
It takes a long time to
move to the next photo - Press the menu button then check
the setting of Slide Interval.
in the slide show.
You cannot hear MP3
sound.
- Check the ‘Mute’ function.
- Adjust the volume level
Menu is not shown
even after pressing
the Menu button.
- In order to implement photos on the screen,
it also requires optimization process, so its
speed can be lowered.
- Check the battery status.
The product cannot
read video files or
abnormally plays
them back .
10
- The file encoded with other codec than the
supported one may not normally operate.
Check the file codec.
Menu is not shown
even after pressing
the Menu button.
- In order to implement photos on the screen,
it also requires optimization process, so its
speed can be lowered.
- Check the battery status.
- Check the memory card & try to reconect
the card
Reading memory card
- Depends on manufacture brand, model, version
is failed
there may be the memory card not supported
Specifications
Display
Size / Resolution
Brightness
Contrast
Memory Built-in memory
Storage device slot
Function Photo-View : Image files
MP3 Player : Music files
Movie Player : File Types
Calendar
Clock
Alarm
Certification
USB
Language
OS
Power supply
Speaker
Dimensions(mm)
TFT 7”/480x234 Pixel
350cd/m²
300:1
128MByte
SD / MMC /MS /xD / CF / USB
Stand JPEG
MP3(MPEG-1 Audio Layer-3)
MJPEG, MPEG1/4
○
○
○
FCC,UL,CE
USB 2.0 Host
English/German/Spanish/
French/Portuguese
WINDOWS2000, WINDOWS XP,
WINDOWS VISTA
Input: 100~240v, Output: DC 5V,
2A / Consumption Max. 1.2W
0.8W x 2
211x209.5x32.6mm (WxHxD)
Model
SDP-704C
Serial No.
Purchasing date
Seller
◈ Limited Warranty
The limited warranty set forth below is given by BPIDION with respect
to BPIDION brand electronics products purchased and used in the United
States of America. BPIDION warants this product against defects in mateial
or workmanship as follows :
LABOR : For a period of 6 month from the date of purchase, if this product
is found to be defective, BPIDION will repair or replace the product,
at its option, at no charge. After this 6 month period, labor charges will
be charged on a case by case basis.
PARTS : For a period of 6 month from the date of purchase, if this product
if found to be defective, BPIDION will supply at no cost, new or rebuild
replacement parts, at its option, at no charge.
After this 6 month periodparts will be charged for on a case by case
basis.
This warranty does not cover:
(1) customer instruction, installation or setup;
(2) cosmetic damage or damage due to accident, misuse, abuse or
negligence;
(3) commercial use of this product;
(4) modification of any part of the product;
(5) damage due to improper operation, improper maintanance, or
connection to an improper power supply;
(6) damage due to an attempted repair of the product by anyone other
than a facility authorized by BPIDION to service the product;
(7) consumable (such as fuses and batteries). This warranty is valid
only in the United States.
The product must be accompained by a copy of the original retail purchse
receipt. If no proof of purchase is attached, the warranty will not be
honored and repair costs will be charged.
This warranty is valid with attached written documentation detailing
the complaint to the outside or inside of the carton.
This warranty is invalid if the factory applied serial number has been
altered and or removed from the product. BPIDION reserves
the right to modify and design of the product without prior notice,
written or otherwise.
The warranty
The warranty
To obtain warranty service, you must deliver the product freight prepared
in either its original packaging or packaging affording an equal degree
of protection, plus proof of purchase.
Technical support telephone number : 1-866-939-0610
Repair or replacement as provided under this warranty is the exclusive
remedy of the consumer. BPIDION, its patent company, affilites or
subsidiaries, shall not be liable for any incidental or consequential
damages of breach of any expressd or implied warranty on this product.
Except to the extent prohibited by applicable law, any implied warranty
of merchantability or fitness for a particular purpose on this product is
limited to the duration of this warranty.
Some states do not allow the exclusion or limitation of incidental or
consequential damages, or allow limitation on how long an implied
warranty lasts, so the above limitation or exclusions may not apply.
This warranty gives you specific legal rights, and you may have other
rights, which vary from state to state.
11