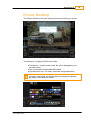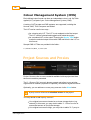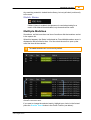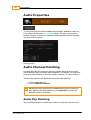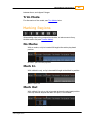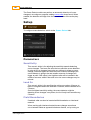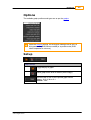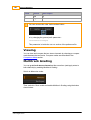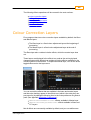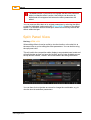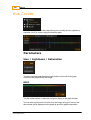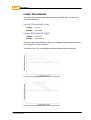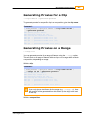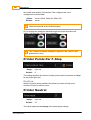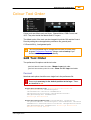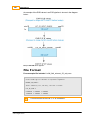
1
UM-2014.1-07
2014
Phoenix User Manual 2014
© 2014 Digital Vision
This publication, or parts thereof, may not be reproduced in any form, by any method, for any
purpose.
The software described in this document is furnished under a license agreement. This license is
available in the docs/licenses folder once the software is installed. See the appendix for license
and legal notification.
DIGITAL VISION MAKES NO WARRANTY, EITHER EXPRESSED OR IMPLIED, INCLUDING BUT
NOT LIMITED TO ANY IMPLIED WARRANTIES, OF MERCHANTABILITY OR FITNESS FOR A
PARTICULAR PURPOSE, REGARDING THESE MATERIALS AND MAKES SUCH MATERIALS
AVAILABLE SOLELY ON AN “AS-IS” BASIS. IN NO EVENT SHALL DIGITAL VISION BE LIABLE
TO ANYONE FOR SPECIAL, COLLATERAL, INCIDENTAL, OR CONSEQUENTIAL DAMAGES IN
CONNECTION WITH OR ARISING OUT OF PURCHASE OR USE OF THESE MATERIALS. THE
SOLE AND EXCLUSIVE LIABILITY TO DIGITAL VISION, REGARDLESS OF THE FORM OF
ACTION, SHALL NOT EXCEED THE PURCHASE PRICE OF THE MATERIALS DESCRIBED
HEREIN.
DIGITAL VISION reserves the right to revise and improve its products as it sees fit. This
publication describes the state of this product at the time of its publication, and may not reflect
the product at all times in the future.
The following are trademarks of DIGITAL VISION :
Nucoda, Nucoda Look, Phoenix Finish, Phoenix Refine, Phoenix Video, Phoenix Touch, Loki, Loki
Control, DVO, Clarity, Twister and Valhall.
All other brand names, product names, or trademarks belong to their respective holders.
Front cover shows Les Enfants du Paradis, directed by Marcel Carné, 1945. Courtesy of Pathé
and Laboratoires Éclair.
Title :
Document Revision :
Software Revision :
Date :
Phoenix User Manual 2014
UM-2014.1-07
2014.1
13/05/2014
Contents
1
Table of Contents
Welcome
.......................................................... 8
Overview
. . . . . . . . . . . . . . . . . . . . . . . . . . . . . . . . . . . . . . . . . . . . . . . . . . . . . . . . . . 11
Documentation
. . . . . . . . . . . . . . . . . . . . . . . . . . . . . . . . . . . . . . . . . . . . . . . . . . . . . . . . 11
New in This Release
. . . . . . . . . . . . . . . . . . . . . . . . . . . . . . . . . . . . . . . . . . . . . . . . . . . . . . . . 12
Product Support
. . . . . . . . . . . . . . . . . . . . . . . . . . . . . . . . . . . . . . . . . . . . . . . . . . . . . . . . 13
Contacts
. . . . . . . . . . . . . . . . . . . . . . . . . . . . . . . . . . . . . . . . . . . . . . . . . . . . . . . . 13
The User Interface. . . . . . . . . . . . . . . . . . . . . . . . . . . . . . . . . . . . . . . . . . . . . . . . . . . . . . . . . .
16
Interface Conventions . . . . . . . . . . . . . . . . . . . . . . . . . . . . . . . . . . . . . . . . . . . . . . . . . . . . . . . . 16
Main Screens
. . . . . . . . . . . . . . . . . . . . . . . . . . . . . . . . . . . . . . . . . . . . . . . . . . . . . . . . 18
Project Screen
Project Desktop
Project Library
File Browser
Netw ork and Drives
Folder Navigation
Folder Bookm arks
Folder Managem ent
File Type Filter
Tables
Projects
. . . . . . . . . . . . . . . . . . . . . . . . . . . . . . . . . . . . . . . . . . . . . . . . . . . . . . . . 18
. . . . . . . . . . . . . . . . . . . . . . . . . . . . . . . . . . . . . . . . . . . . . . . . . . . . . . . . 19
. . . . . . . . . . . . . . . . . . . . . . . . . . . . . . . . . . . . . . . . . . . . . . . . . . . . . . . . 20
. . . . . . . . . . . . . . . . . . . . . . . . . . . . . . . . . . . . . . . . . . . . . . . . . . . . . . . . 20
........................................................
........................................................
........................................................
........................................................
........................................................
21
23
26
28
28
. . . . . . . . . . . . . . . . . . . . . . . . . . . . . . . . . . . . . . . . . . . . . . . . . . . . . . . . 29
. . . . . . . . . . . . . . . . . . . . . . . . . . . . . . . . . . . . . . . . . . . . . . . . . . . . . . . . . . 33
Project List
. . . . . . . . . . . . . . . . . . . . . . . . . . . . . . . . . . . . . . . . . . . . . . . . . . . . . . . . 33
Creating Projects
. . . . . . . . . . . . . . . . . . . . . . . . . . . . . . . . . . . . . . . . . . . . . . . . . . . . . . . . 34
Output Form ats
........................................................
Output Form at Attributes. . . . . . . . . . . . . . . . . . . . . . . . . . . . . . . . . . . . . . . . . . . . . . . . . . . . . . . .
Project Sources and Proxies
........................................................
Project Colour Scaling . . . . . . . . . . . . . . . . . . . . . . . . . . . . . . . . . . . . . . . . . . . . . . . . . . . . . . . .
35
38
42
44
Attach/Detach Project . . . . . . . . . . . . . . . . . . . . . . . . . . . . . . . . . . . . . . . . . . . . . . . . . . . . . . . . 44
Opening Projects
. . . . . . . . . . . . . . . . . . . . . . . . . . . . . . . . . . . . . . . . . . . . . . . . . . . . . . . . 45
Delete Project
. . . . . . . . . . . . . . . . . . . . . . . . . . . . . . . . . . . . . . . . . . . . . . . . . . . . . . . . 47
Recovering a Project
. . . . . . . . . . . . . . . . . . . . . . . . . . . . . . . . . . . . . . . . . . . . . . . . . . . . . . . . 47
Location and Configuration
. . . . . . . . . . . . . . . . . . . . . . . . . . . . . . . . . . . . . . . . . . . . . . . . . . . . . . . . 49
The Project Library
..........................................................
51
Folders
. . . . . . . . . . . . . . . . . . . . . . . . . . . . . . . . . . . . . . . . . . . . . . . . . . . . . . . . 51
Library Contents
. . . . . . . . . . . . . . . . . . . . . . . . . . . . . . . . . . . . . . . . . . . . . . . . . . . . . . . . 53
Properties and Metadata. . . . . . . . . . . . . . . . . . . . . . . . . . . . . . . . . . . . . . . . . . . . . . . . . . . . . . . . 55
Library Filters
. . . . . . . . . . . . . . . . . . . . . . . . . . . . . . . . . . . . . . . . . . . . . . . . . . . . . . . . 59
Cache Management
. . . . . . . . . . . . . . . . . . . . . . . . . . . . . . . . . . . . . . . . . . . . . . . . . . . . . . . . 60
Composition Save and Load
. . . . . . . . . . . . . . . . . . . . . . . . . . . . . . . . . . . . . . . . . . . . . . . . . . . . . . . . 62
UM-2014.1-07
2
Phoenix User Manual
Importing Material. . . . . . . . . . . . . . . . . . . . . . . . . . . . . . . . . . . . . . . . . . . . . . . . . . . . . . . . . .
66
Importing Media
. . . . . . . . . . . . . . . . . . . . . . . . . . . . . . . . . . . . . . . . . . . . . . . . . . . . . . . . 67
Im port Options
Folder Im port
Library Folders
. . . . . . . . . . . . . . . . . . . . . . . . . . . . . . . . . . . . . . . . . . . . . . . . . . . . . . . . 68
. . . . . . . . . . . . . . . . . . . . . . . . . . . . . . . . . . . . . . . . . . . . . . . . . . . . . . . . 70
. . . . . . . . . . . . . . . . . . . . . . . . . . . . . . . . . . . . . . . . . . . . . . . . . . . . . . . . 71
Importing Audio
. . . . . . . . . . . . . . . . . . . . . . . . . . . . . . . . . . . . . . . . . . . . . . . . . . . . . . . . 71
Importing List Files
. . . . . . . . . . . . . . . . . . . . . . . . . . . . . . . . . . . . . . . . . . . . . . . . . . . . . . . . 72
List Capture
Capturing Media
Conform ing the List
Compositions
. . . . . . . . . . . . . . . . . . . . . . . . . . . . . . . . . . . . . . . . . . . . . . . . . . . . . . . . 78
. . . . . . . . . . . . . . . . . . . . . . . . . . . . . . . . . . . . . . . . . . . . . . . . . . . . . . . . 80
. . . . . . . . . . . . . . . . . . . . . . . . . . . . . . . . . . . . . . . . . . . . . . . . . . . . . . . . 84
. . . . . . . . . . . . . . . . . . . . . . . . . . . . . . . . . . . . . . . . . . . . . . . . . . . . . . . . . . 86
Creating Compositions . . . . . . . . . . . . . . . . . . . . . . . . . . . . . . . . . . . . . . . . . . . . . . . . . . . . . . . . 86
Composition Elements . . . . . . . . . . . . . . . . . . . . . . . . . . . . . . . . . . . . . . . . . . . . . . . . . . . . . . . . 88
Video and Audio Tracks . . . . . . . . . . . . . . . . . . . . . . . . . . . . . . . . . . . . . . . . . . . . . . . . . . . . . . . . 88
Media Segm ents
. . . . . . . . . . . . . . . . . . . . . . . . . . . . . . . . . . . . . . . . . . . . . . . . . . . . . . . . 91
Audio Segm ents
. . . . . . . . . . . . . . . . . . . . . . . . . . . . . . . . . . . . . . . . . . . . . . . . . . . . . . . . 92
Positions and Lengths . . . . . . . . . . . . . . . . . . . . . . . . . . . . . . . . . . . . . . . . . . . . . . . . . . . . . . . . 96
Play Heads
. . . . . . . . . . . . . . . . . . . . . . . . . . . . . . . . . . . . . . . . . . . . . . . . . . . . . . . . 97
Tim eline Marks
. . . . . . . . . . . . . . . . . . . . . . . . . . . . . . . . . . . . . . . . . . . . . . . . . . . . . . . . 97
Bookm arks
. . . . . . . . . . . . . . . . . . . . . . . . . . . . . . . . . . . . . . . . . . . . . . . . . . . . . . . . 98
Adjustm ent Segm ents . . . . . . . . . . . . . . . . . . . . . . . . . . . . . . . . . . . . . . . . . . . . . . . . . . . . . . . . 101
Segm ent Status Colours
. . . . . . . . . . . . . . . . . . . . . . . . . . . . . . . . . . . . . . . . . . . . . . . . . . . . . . . . 102
BL and AUX Segm ents . . . . . . . . . . . . . . . . . . . . . . . . . . . . . . . . . . . . . . . . . . . . . . . . . . . . . . . . 104
Grouped Shots
. . . . . . . . . . . . . . . . . . . . . . . . . . . . . . . . . . . . . . . . . . . . . . . . . . . . . . . . 105
Manipulating Compositions
. . . . . . . . . . . . . . . . . . . . . . . . . . . . . . . . . . . . . . . . . . . . . . . . . . . . . . . . 105
Adding Media
Editing and Selection
Marking Regions
Deleting Media
Ripple Mode
Trim Modes
Cuts
........................................................
........................................................
........................................................
........................................................
........................................................
........................................................
........................................................
106
108
111
112
113
114
118
Shots View
. . . . . . . . . . . . . . . . . . . . . . . . . . . . . . . . . . . . . . . . . . . . . . . . . . . . . . . . 120
Handy Hotkeys
. . . . . . . . . . . . . . . . . . . . . . . . . . . . . . . . . . . . . . . . . . . . . . . . . . . . . . . . 123
Versions
. . . . . . . . . . . . . . . . . . . . . . . . . . . . . . . . . . . . . . . . . . . . . . . . . . . . . . . . . . 127
Adding Versions
. . . . . . . . . . . . . . . . . . . . . . . . . . . . . . . . . . . . . . . . . . . . . . . . . . . . . . . . 128
Managing Versions
. . . . . . . . . . . . . . . . . . . . . . . . . . . . . . . . . . . . . . . . . . . . . . . . . . . . . . . . 129
Rendering
. . . . . . . . . . . . . . . . . . . . . . . . . . . . . . . . . . . . . . . . . . . . . . . . . . . . . . . . . . 133
Automatic Render Controls
. . . . . . . . . . . . . . . . . . . . . . . . . . . . . . . . . . . . . . . . . . . . . . . . . . . . . . . . 134
Manual Render Controls
. . . . . . . . . . . . . . . . . . . . . . . . . . . . . . . . . . . . . . . . . . . . . . . . . . . . . . . . 136
Task Queue
Exporting
Export Media
. . . . . . . . . . . . . . . . . . . . . . . . . . . . . . . . . . . . . . . . . . . . . . . . . . . . . . . . 136
. . . . . . . . . . . . . . . . . . . . . . . . . . . . . . . . . . . . . . . . . . . . . . . . . . . . . . . . . . 139
. . . . . . . . . . . . . . . . . . . . . . . . . . . . . . . . . . . . . . . . . . . . . . . . . . . . . . . . 139
The Export Brow ser
. . . . . . . . . . . . . . . . . . . . . . . . . . . . . . . . . . . . . . . . . . . . . . . . . . . . . . . . 140
File Form at and Options. . . . . . . . . . . . . . . . . . . . . . . . . . . . . . . . . . . . . . . . . . . . . . . . . . . . . . . . 141
Filenam e and Num ber . . . . . . . . . . . . . . . . . . . . . . . . . . . . . . . . . . . . . . . . . . . . . . . . . . . . . . . . 141
© 2014 Digital Vision
Contents
Global Options
........................................................
Export Modes
........................................................
Mixdow n Rec TC
........................................................
Visible Multi Rec TC
........................................................
Tracks Multi Rec TC . . . . . . . . . . . . . . . . . . . . . . . . . . . . . . . . . . . . . . . . . . . . . . . . . . . . . . . .
Visible Multi Src TC
........................................................
Tracks Multi Src TC
........................................................
Folder Hierarchy, Presets
. . . and
. . . . Variables
.................................................
Export File Form ats
........................................................
3
143
145
145
145
145
145
145
152
155
Export Composition
. . . . . . . . . . . . . . . . . . . . . . . . . . . . . . . . . . . . . . . . . . . . . . . . . . . . . . . . 155
Scene Detection
. . . . . . . . . . . . . . . . . . . . . . . . . . . . . . . . . . . . . . . . . . . . . . . . . . . . . . . . . . 160
Viewer Tools
. . . . . . . . . . . . . . . . . . . . . . . . . . . . . . . . . . . . . . . . . . . . . . . . . . . . . . . . . . 163
Head-up Display (HUD) . . . . . . . . . . . . . . . . . . . . . . . . . . . . . . . . . . . . . . . . . . . . . . . . . . . . . . . . 164
Grids
. . . . . . . . . . . . . . . . . . . . . . . . . . . . . . . . . . . . . . . . . . . . . . . . . . . . . . . . 166
Masks
. . . . . . . . . . . . . . . . . . . . . . . . . . . . . . . . . . . . . . . . . . . . . . . . . . . . . . . . 168
Graphs
. . . . . . . . . . . . . . . . . . . . . . . . . . . . . . . . . . . . . . . . . . . . . . . . . . . . . . . . 170
Histogram
. . . . . . . . . . . . . . . . . . . . . . . . . . . . . . . . . . . . . . . . . . . . . . . . . . . . . . . . 172
Audio Waveform
. . . . . . . . . . . . . . . . . . . . . . . . . . . . . . . . . . . . . . . . . . . . . . . . . . . . . . . . 175
Handy Hotkeys
. . . . . . . . . . . . . . . . . . . . . . . . . . . . . . . . . . . . . . . . . . . . . . . . . . . . . . . . 176
Comparison Mode
..........................................................
179
Stereo Multitrack . . . . . . . . . . . . . . . . . . . . . . . . . . . . . . . . . . . . . . . . . . . . . . . . . . . . . . . . . .
184
Setting Up Stereo
. . . . . . . . . . . . . . . . . . . . . . . . . . . . . . . . . . . . . . . . . . . . . . . . . . . . . . . . 184
Using Stereo
. . . . . . . . . . . . . . . . . . . . . . . . . . . . . . . . . . . . . . . . . . . . . . . . . . . . . . . . 185
Colour Management
..........................................................
Effects
190
. . . . . . . . . . . . . . . . . . . . . . . . . . . . . . . . . . . . . . . . . . . . . . . . . . . . . . . . . . 192
Colour Correction Layers
. . . . . . . . . . . . . . . . . . . . . . . . . . . . . . . . . . . . . . . . . . . . . . . . . . . . . . . . 193
Managing Layers and Effects
. . . . . . . . . . . . . . . . . . . . . . . . . . . . . . . . . . . . . . . . . . . . . . . . . . . . . . . . 196
Applying and Editing Effects
. . . . . . . . . . . . . . . . . . . . . . . . . . . . . . . . . . . . . . . . . . . . . . . . . . . . . . . . 198
Split Panel View
. . . . . . . . . . . . . . . . . . . . . . . . . . . . . . . . . . . . . . . . . . . . . . . . . . . . . . . . 200
Adding User and Layer. Effects
. . . . . . . . . . . . . . . . . . . . . . . . . . . . . . . . . . . . . . . . . . . . . . . . . . . . . . . 201
Transition Effects
. . . . . . . . . . . . . . . . . . . . . . . . . . . . . . . . . . . . . . . . . . . . . . . . . . . . . . . . 205
Retime
. . . . . . . . . . . . . . . . . . . . . . . . . . . . . . . . . . . . . . . . . . . . . . . . . . . . . . . . 208
Brightness Regions
. . . . . . . . . . . . . . . . . . . . . . . . . . . . . . . . . . . . . . . . . . . . . . . . . . . . . . . . 210
Printer Lights
. . . . . . . . . . . . . . . . . . . . . . . . . . . . . . . . . . . . . . . . . . . . . . . . . . . . . . . . 211
Gamma Matrix
. . . . . . . . . . . . . . . . . . . . . . . . . . . . . . . . . . . . . . . . . . . . . . . . . . . . . . . . 212
Gam m a
Matrix
Presets
Preset Definition
Preset Layout
........................................................
........................................................
........................................................
........................................................
........................................................
212
214
216
216
216
Hue Curves
. . . . . . . . . . . . . . . . . . . . . . . . . . . . . . . . . . . . . . . . . . . . . . . . . . . . . . . . 220
Soft Clip
. . . . . . . . . . . . . . . . . . . . . . . . . . . . . . . . . . . . . . . . . . . . . . . . . . . . . . . . 222
UM-2014.1-07
4
Phoenix User Manual
Effect Notes
. . . . . . . . . . . . . . . . . . . . . . . . . . . . . . . . . . . . . . . . . . . . . . . . . . . . . . . . 223
Lens Distort
. . . . . . . . . . . . . . . . . . . . . . . . . . . . . . . . . . . . . . . . . . . . . . . . . . . . . . . . 225
Warper
. . . . . . . . . . . . . . . . . . . . . . . . . . . . . . . . . . . . . . . . . . . . . . . . . . . . . . . . . . 229
Warper Introduction
. . . . . . . . . . . . . . . . . . . . . . . . . . . . . . . . . . . . . . . . . . . . . . . . . . . . . . . . 229
Warper Basics
. . . . . . . . . . . . . . . . . . . . . . . . . . . . . . . . . . . . . . . . . . . . . . . . . . . . . . . . 230
DVO Effects
. . . . . . . . . . . . . . . . . . . . . . . . . . . . . . . . . . . . . . . . . . . . . . . . . . . . . . . . . . 236
Introduction
. . . . . . . . . . . . . . . . . . . . . . . . . . . . . . . . . . . . . . . . . . . . . . . . . . . . . . . . 236
DVO Stereo Fix
. . . . . . . . . . . . . . . . . . . . . . . . . . . . . . . . . . . . . . . . . . . . . . . . . . . . . . . . 240
DVO Dust
. . . . . . . . . . . . . . . . . . . . . . . . . . . . . . . . . . . . . . . . . . . . . . . . . . . . . . . . 249
DVO Fix
. . . . . . . . . . . . . . . . . . . . . . . . . . . . . . . . . . . . . . . . . . . . . . . . . . . . . . . . 266
DVO Flicker
. . . . . . . . . . . . . . . . . . . . . . . . . . . . . . . . . . . . . . . . . . . . . . . . . . . . . . . . 270
DVO Print Align
. . . . . . . . . . . . . . . . . . . . . . . . . . . . . . . . . . . . . . . . . . . . . . . . . . . . . . . . 273
DVO Scratch
. . . . . . . . . . . . . . . . . . . . . . . . . . . . . . . . . . . . . . . . . . . . . . . . . . . . . . . . 275
DVO Steady
. . . . . . . . . . . . . . . . . . . . . . . . . . . . . . . . . . . . . . . . . . . . . . . . . . . . . . . . 279
DVO Alias
. . . . . . . . . . . . . . . . . . . . . . . . . . . . . . . . . . . . . . . . . . . . . . . . . . . . . . . . 288
DVO Aperture
. . . . . . . . . . . . . . . . . . . . . . . . . . . . . . . . . . . . . . . . . . . . . . . . . . . . . . . . 289
DVO Brickwall
. . . . . . . . . . . . . . . . . . . . . . . . . . . . . . . . . . . . . . . . . . . . . . . . . . . . . . . . 290
DVO Clarity
. . . . . . . . . . . . . . . . . . . . . . . . . . . . . . . . . . . . . . . . . . . . . . . . . . . . . . . . 292
DVO Grain
. . . . . . . . . . . . . . . . . . . . . . . . . . . . . . . . . . . . . . . . . . . . . . . . . . . . . . . . 296
DVO Regrain
. . . . . . . . . . . . . . . . . . . . . . . . . . . . . . . . . . . . . . . . . . . . . . . . . . . . . . . . 311
DVO Sharpen
. . . . . . . . . . . . . . . . . . . . . . . . . . . . . . . . . . . . . . . . . . . . . . . . . . . . . . . . 314
DVO Cross Colour
. . . . . . . . . . . . . . . . . . . . . . . . . . . . . . . . . . . . . . . . . . . . . . . . . . . . . . . . 317
DVO Line Sync
. . . . . . . . . . . . . . . . . . . . . . . . . . . . . . . . . . . . . . . . . . . . . . . . . . . . . . . . 318
DVO Deinterlace
. . . . . . . . . . . . . . . . . . . . . . . . . . . . . . . . . . . . . . . . . . . . . . . . . . . . . . . . 320
DVO Twister
. . . . . . . . . . . . . . . . . . . . . . . . . . . . . . . . . . . . . . . . . . . . . . . . . . . . . . . . 322
DVO Upscale
. . . . . . . . . . . . . . . . . . . . . . . . . . . . . . . . . . . . . . . . . . . . . . . . . . . . . . . . 325
Shapes
Available Shapes
. . . . . . . . . . . . . . . . . . . . . . . . . . . . . . . . . . . . . . . . . . . . . . . . . . . . . . . . . . 332
. . . . . . . . . . . . . . . . . . . . . . . . . . . . . . . . . . . . . . . . . . . . . . . . . . . . . . . . 332
Transforming Shapes . . . . . . . . . . . . . . . . . . . . . . . . . . . . . . . . . . . . . . . . . . . . . . . . . . . . . . . . 333
Manipulating Shapes . . . . . . . . . . . . . . . . . . . . . . . . . . . . . . . . . . . . . . . . . . . . . . . . . . . . . . . . 335
Shape Softness
. . . . . . . . . . . . . . . . . . . . . . . . . . . . . . . . . . . . . . . . . . . . . . . . . . . . . . . . 337
Shape Overlay Colour . . . . . . . . . . . . . . . . . . . . . . . . . . . . . . . . . . . . . . . . . . . . . . . . . . . . . . . . 339
Tracking Shapes
. . . . . . . . . . . . . . . . . . . . . . . . . . . . . . . . . . . . . . . . . . . . . . . . . . . . . . . . 340
DVO Tracker
. . . . . . . . . . . . . . . . . . . . . . . . . . . . . . . . . . . . . . . . . . . . . . . . . . . . . . . . . . 342
Tracking Basics
. . . . . . . . . . . . . . . . . . . . . . . . . . . . . . . . . . . . . . . . . . . . . . . . . . . . . . . . 342
Using Other Tracks
. . . . . . . . . . . . . . . . . . . . . . . . . . . . . . . . . . . . . . . . . . . . . . . . . . . . . . . . 345
Offset Tracking
. . . . . . . . . . . . . . . . . . . . . . . . . . . . . . . . . . . . . . . . . . . . . . . . . . . . . . . . 346
Predictive Tracking
. . . . . . . . . . . . . . . . . . . . . . . . . . . . . . . . . . . . . . . . . . . . . . . . . . . . . . . . 347
Reference
. . . . . . . . . . . . . . . . . . . . . . . . . . . . . . . . . . . . . . . . . . . . . . . . . . . . . . . . 348
© 2014 Digital Vision
Contents
Valhall Keys
Video I/O
5
. . . . . . . . . . . . . . . . . . . . . . . . . . . . . . . . . . . . . . . . . . . . . . . . . . . . . . . . 353
. . . . . . . . . . . . . . . . . . . . . . . . . . . . . . . . . . . . . . . . . . . . . . . . . . . . . . . . . . 356
VTR Settings
. . . . . . . . . . . . . . . . . . . . . . . . . . . . . . . . . . . . . . . . . . . . . . . . . . . . . . . . 357
Video Capture
. . . . . . . . . . . . . . . . . . . . . . . . . . . . . . . . . . . . . . . . . . . . . . . . . . . . . . . . 362
Capture Live
Capture Marked
Capture List
Video Layoff
Output Controls
Output List
Output Single
Command Line
. . . . . . . . . . . . . . . . . . . . . . . . . . . . . . . . . . . . . . . . . . . . . . . . . . . . . . . . 364
. . . . . . . . . . . . . . . . . . . . . . . . . . . . . . . . . . . . . . . . . . . . . . . . . . . . . . . . 365
. . . . . . . . . . . . . . . . . . . . . . . . . . . . . . . . . . . . . . . . . . . . . . . . . . . . . . . . 366
. . . . . . . . . . . . . . . . . . . . . . . . . . . . . . . . . . . . . . . . . . . . . . . . . . . . . . . . 371
. . . . . . . . . . . . . . . . . . . . . . . . . . . . . . . . . . . . . . . . . . . . . . . . . . . . . . . . 374
. . . . . . . . . . . . . . . . . . . . . . . . . . . . . . . . . . . . . . . . . . . . . . . . . . . . . . . . 378
. . . . . . . . . . . . . . . . . . . . . . . . . . . . . . . . . . . . . . . . . . . . . . . . . . . . . . . . 379
. . . . . . . . . . . . . . . . . . . . . . . . . . . . . . . . . . . . . . . . . . . . . . . . . . . . . . . . . . 381
User Login
. . . . . . . . . . . . . . . . . . . . . . . . . . . . . . . . . . . . . . . . . . . . . . . . . . . . . . . . 383
Creating a Project
. . . . . . . . . . . . . . . . . . . . . . . . . . . . . . . . . . . . . . . . . . . . . . . . . . . . . . . . 383
Project Form at Specification
. . . . . . . . . . . . . . . . . . . . . . . . . . . . . . . . . . . . . . . . . . . . . . . . . . . . . . . . 384
Attach and Detach Project
. . . . . . . . . . . . . . . . . . . . . . . . . . . . . . . . . . . . . . . . . . . . . . . . . . . . . . . . 389
Creating a Composition. . . . . . . . . . . . . . . . . . . . . . . . . . . . . . . . . . . . . . . . . . . . . . . . . . . . . . . . 390
Importing Clips
. . . . . . . . . . . . . . . . . . . . . . . . . . . . . . . . . . . . . . . . . . . . . . . . . . . . . . . . 391
Importing Movies
. . . . . . . . . . . . . . . . . . . . . . . . . . . . . . . . . . . . . . . . . . . . . . . . . . . . . . . . 393
Importing Folders
. . . . . . . . . . . . . . . . . . . . . . . . . . . . . . . . . . . . . . . . . . . . . . . . . . . . . . . . 394
Adding a Version
. . . . . . . . . . . . . . . . . . . . . . . . . . . . . . . . . . . . . . . . . . . . . . . . . . . . . . . . 397
Replacing a Source
. . . . . . . . . . . . . . . . . . . . . . . . . . . . . . . . . . . . . . . . . . . . . . . . . . . . . . . . 398
Splice and Overwrite Clips
. . . . . . . . . . . . . . . . . . . . . . . . . . . . . . . . . . . . . . . . . . . . . . . . . . . . . . . . 399
Applying a Note to a Shot
. . . . . . . . . . . . . . . . . . . . . . . . . . . . . . . . . . . . . . . . . . . . . . . . . . . . . . . . 404
EDL Import and Conform
. . . . . . . . . . . . . . . . . . . . . . . . . . . . . . . . . . . . . . . . . . . . . . . . . . . . . . . . 405
Capturing and Conforming
. . . . . . . . . . . . . . . . . . . . . . . . . . . . . . . . . . . . . . . . . . . . . . . . . . . . . . . . 412
Generating Local Proxies
. . . . . . . . . . . . . . . . . . . . . . . . . . . . . . . . . . . . . . . . . . . . . . . . . . . . . . . . 416
Exporting Shots
. . . . . . . . . . . . . . . . . . . . . . . . . . . . . . . . . . . . . . . . . . . . . . . . . . . . . . . . 418
Exporting an EDL
. . . . . . . . . . . . . . . . . . . . . . . . . . . . . . . . . . . . . . . . . . . . . . . . . . . . . . . . 421
Saving and Loading Compositions
. . . . . . . . . . . . . . . . . . . . . . . . . . . . . . . . . . . . . . . . . . . . . . . . . . . . . . . . 422
Rendering a Composition
. . . .Cache
. . . . . . . . . . . . . . . . . . . . . . . . . . . . . . . . . . . . . . . . . . . . . . . . . . . . 423
Running Batch Operations
. . . . . . . . . . . . . . . . . . . . . . . . . . . . . . . . . . . . . . . . . . . . . . . . . . . . . . . . 424
Interactive Mode
. . . . . . . . . . . . . . . . . . . . . . . . . . . . . . . . . . . . . . . . . . . . . . . . . . . . . . . . 426
Listing Information
. . . . . . . . . . . . . . . . . . . . . . . . . . . . . . . . . . . . . . . . . . . . . . . . . . . . . . . . 426
Removing Items
. . . . . . . . . . . . . . . . . . . . . . . . . . . . . . . . . . . . . . . . . . . . . . . . . . . . . . . . 428
Counting and Adding Tracks
. . . . . . . . . . . . . . . . . . . . . . . . . . . . . . . . . . . . . . . . . . . . . . . . . . . . . . . . 430
Testing for a GUI Lock . . . . . . . . . . . . . . . . . . . . . . . . . . . . . . . . . . . . . . . . . . . . . . . . . . . . . . . . 431
Appendices
. . . . . . . . . . . . . . . . . . . . . . . . . . . . . . . . . . . . . . . . . . . . . . . . . . . . . . . . . . 434
Application Preferences
. . . . . . . . . . . . . . . . . . . . . . . . . . . . . . . . . . . . . . . . . . . . . . . . . . . . . . . . 435
General
Capture/Conform
Rendering
Mem ories
........................................................
........................................................
........................................................
........................................................
436
439
444
447
UM-2014.1-07
6
Phoenix User Manual
Control Panel
. . . . . . . . . . . . . . . . . . . . . . . . . . . . . . . . . . . . . . . . . . . . . . . . . . . . . . . . 448
Colour
. . . . . . . . . . . . . . . . . . . . . . . . . . . . . . . . . . . . . . . . . . . . . . . . . . . . . . . . 453
Monitoring / Video IO . . . . . . . . . . . . . . . . . . . . . . . . . . . . . . . . . . . . . . . . . . . . . . . . . . . . . . . . 457
Preferences Assistant . . . . . . . . . . . . . . . . . . . . . . . . . . . . . . . . . . . . . . . . . . . . . . . . . . . . . . . . 464
Keycode
. . . . . . . . . . . . . . . . . . . . . . . . . . . . . . . . . . . . . . . . . . . . . . . . . . . . . . . . 469
Automatic Naming
. . . . . . . . . . . . . . . . . . . . . . . . . . . . . . . . . . . . . . . . . . . . . . . . . . . . . . . . 470
Effect Identifiers
. . . . . . . . . . . . . . . . . . . . . . . . . . . . . . . . . . . . . . . . . . . . . . . . . . . . . . . . 474
Effect Selector Configuration
. . . . . . . . . . . . . . . . . . . . . . . . . . . . . . . . . . . . . . . . . . . . . . . . . . . . . . . . 476
Output Format Confguration
. . . . . . . . . . . . . . . . . . . . . . . . . . . . . . . . . . . . . . . . . . . . . . . . . . . . . . . . 480
Colour Tool Order
. . . . . . . . . . . . . . . . . . . . . . . . . . . . . . . . . . . . . . . . . . . . . . . . . . . . . . . . 485
3D LUT File Format
. . . . . . . . . . . . . . . . . . . . . . . . . . . . . . . . . . . . . . . . . . . . . . . . . . . . . . . . 487
Icon Tools Reference . . . . . . . . . . . . . . . . . . . . . . . . . . . . . . . . . . . . . . . . . . . . . . . . . . . . . . . . 492
Format Support
. . . . . . . . . . . . . . . . . . . . . . . . . . . . . . . . . . . . . . . . . . . . . . . . . . . . . . . . 494
Im age Form ats
........................................................
DPX
........................................................
Cineon
........................................................
TIFF
........................................................
SGI
........................................................
JPEG
........................................................
PIC
........................................................
MPEG
........................................................
MXF
........................................................
EXR
........................................................
Quicktime
........................................................
List Form ats
........................................................
EDL
........................................................
AAF
........................................................
CUT
........................................................
ALE
........................................................
MXF Form ats
........................................................
Cam era Form ats
........................................................
Red
........................................................
ARRI D-21
........................................................
Silicon Imaging SI-2K . . . . . . . . . . . . . . . . . . . . . . . . . . . . . . . . . . . . . . . . . . . . . . . . . . . . . . . .
Vision Research Phantom
........................................................
Audio Form ats
........................................................
WAV Audio
........................................................
Audio Interchange Format
........................................................
OFX Plugins
494
494
494
494
494
494
494
494
494
494
494
499
499
499
499
499
504
506
506
506
506
506
514
514
514
. . . . . . . . . . . . . . . . . . . . . . . . . . . . . . . . . . . . . . . . . . . . . . . . . . . . . . . . 516
Configurable Viewer Tools
. . . . . . . . . . . . . . . . . . . . . . . . . . . . . . . . . . . . . . . . . . . . . . . . . . . . . . . . 517
Grids Specification
HUDs Specification
Masks Specification
Graphs Specification
Legal Notices
Index
© 2014 Digital Vision
........................................................
........................................................
........................................................
........................................................
519
528
528
531
. . . . . . . . . . . . . . . . . . . . . . . . . . . . . . . . . . . . . . . . . . . . . . . . . . . . . . . . 536
0
Welcome
1
8
Welcome
Phoenix User Manual 2014
Phoenix Finish - Phoenix Refine
Phoenix Touch - Phoenix Video
Welcome to the Phoenix Restoration Environment from Digital Vision!
The Phoenix platform is the perfect solution for film/video archives and
content owners who require the best in content restoration, re-mastering and
re-purposing. This manual will help you get the most out of the system.
Product :
Phoenix
Version :
2014
Document Revision : UM-2014.1-07
Date :
© 2014 Digital Vision
13/05/2014
UM-2014.1-07
9
© 2014 Digital Vision
UM-2014.1-07
Overview
2
11
Phoenix Finish
Phoenix Refine
Phoenix Touch
Phoenix Video
Welcome to the Phoenix Restoration Environment from Digital Vision.
The Documentation section lists the documentation included with the
application and where to locate it.
First Time Users
The User Interface chapter gives an overview of the application environment
and GUI, but those who want to jump straight into creating projects may want
to skip ahead to the Projects chapter and return to the User Interface section
at a later date, after having acquired a feel for the product.
Documentation
Several items of documentation are included, all of which can be accessed
via the "Phoenix Docs 2014.1" shortcut that is placed on your desktop by the
installation program. You can also access the index page directly from :
C:\Phoenix\2014_1\docs\index.html
Install and Setup Manual
The Setup Manual describes how to install and configure the application. It
also details installation and configuration of graphics and video hardware and
important considerations for use of the software.
User Manual
This is the user guide that you are currently reading.
Release Notes
The release notes list all the new features, bug fixes and known bugs.
© 2014 Digital Vision
UM-2014.1-07
12
Overview
Precision Control Panel
Documentation
The Precision Panel documentation includes an User Guide and a Hardware
Installation Guide.
Valhall Control Panel Documentation
The Valhall Panel documentation includes an installation guide (giving
information on the Valhall environment variables and setup), a user guide, and
a quick reference labelled diagram of all the Valhall panel controls.
Hotkeys Reference Guide
The Phoenix hotkeys guide is a labelled keyboard diagram and summary page
of all the Hotkeys available in the application. A shortcut to this PDF document
is also placed on your desktop by the installation program.
Note that the application itself includes tool-tip labels on buttons and
user-interface elements. These will pop up when you hover your
mouse over a button and display some explanatory text.
New in This Release
Please see the Features and Benefits document for a description on new
features.
© 2014 Digital Vision
UM-2014.1-07
New in This Release
13
Product Support
Product Support is available to all clients with a valid maintenance contract.
To contact support, see the Contacts section.
User Forum
Digital Vision runs a web-based user forum at the following address :
http://forum.digitalvision.se
Please consider joining the forum and taking part in wide-ranging discussions
with our growing community of users.
Contacts
Stockholm
Linköping
Digital Vision
Telefonv. 30
126 26 Hägersten
Sweden
Digital Vision
Ågatan 40
582 22 Linköping
Sweden
t: +46 (0)8 546 182 00
f: +46 (0)8 546 182 09
t: +46 (0)13 200 100
f: +46 (0)13 200 150
London
Los Angeles
Digital Vision
11 Wardour Mews
London W1F 8AN
United Kingdom
DV Sales and Support
6464 Sunset Blvd
Suite 830
Hollywood
CA 90028
USA
t: +44 (0)207 734 8282
f: +44 (0)207 292 6969
t: +1 818 769 8111
f: +1 818 769 1888
Email Contacts
[email protected]
[email protected]
© 2014 Digital Vision
UM-2014.1-07
14
Overview
© 2014 Digital Vision
UM-2014.1-07
The User Interface
3
16
The User Interface
This chapter will give you an overview of the user interface and some basic
components of the application.
Interface Conventions
The following interface conventions are used for various elements.
Functional
A function button performs a single action only.
Active and available
function button.
Inactive function button.
If a button is not available for selection, it is
greyed out.
Secondary Windows
The two dots preceding the button name indicate that a new window or
dialog will open when pressed.
Drop-down Menus
The three vertical dots preceding the button name indicate that this button is
a drop-down selection list.
Numeric Sliders / Data Entry
Click, hold and drag the mouse left and right in the data field to increment
and decrement the data value. You can also click the mouse once in the
data field to select, then type in a data value.
© 2014 Digital Vision
UM-2014.1-07
Interface Conventions
17
Toggle Buttons
Toggle button off.
Toggle button on.
A group of three toggle buttons, with one enabled.
Radio Buttons
A group of two radio buttons. In a group, only one option can be selected at
one time.
Option Buttons
Option button off.
Option button on.
Information Dialogs
Informational
Informational
messages, no user
interaction required.
© 2014 Digital Vision
Query
Request for user
input.
Warning/Error
Warning or error alert.
Sometimes including a
request for user intervention.
UM-2014.1-07
18
The User Interface
Main Screens
The application environment is composed of a number of components within
which you do the majority of your work. These include the main Project
Screen, the Project Desktop and the Project Library.
Project Screen
The Project Screen is the first screen visible when we launch the application.
This is where we create and manage our projects and access our global
preferences.
Main Project Screen
See the Creating a Project and Project Management sections of this manual.
The active component screen will be high-lighted orange.
To access the component, press the corresponding button on the main
screen :
For the Preferences component, see the appendix Application Preferences.
© 2014 Digital Vision
UM-2014.1-07
Main Screens
19
Project Desktop
The Project Desktop is the main working environment inside your project.
The Project Desktop show ing the view er area and the com position tim eline below .
The desktop is composed of three main views :
The Monitor - in dual monitor mode, this will be displayed on your
second monitor
The Composition Timeline and GUI controls
The Memories view - for notes, memories and grouped shots
In single-screen mode, the Monitor panel can display the Monitor,
the Library or the Memories panel.
Project Desktop show ing M emories view
© 2014 Digital Vision
UM-2014.1-07
20
The User Interface
Project Library
The Project Library is where we import and export media, create
compositions and manage our project assets.
See the Project Library section of this manual.
File Browser
A sophisticated file browser is used throughout the application. It is used to
navigate both local and remote filesystems. You will use the file browser
component in many places, including :
Import and export of media, list files and LUT files.
Attaching and detaching projects.
Capturing material from lists.
This section describes the file browser and its various components.
© 2014 Digital Vision
UM-2014.1-07
File Browser
21
File Brow ser (Im port Media version) show ing m ain functional areas
1. Network and Drives
2. Navigation and Folder hierarchy
3. Folder Bookmarks
4. Folder Management
5. File Type Filter
Network and Drives
To the left of the main file browser panels are the panels that allow :
Network folder and local folder browsing
Local drive selection or
Network share selection
© 2014 Digital Vision
UM-2014.1-07
22
The User Interface
Local Drives
When browsing Local drives, the available drive letters will be shown in the
panel below :
Local drives displaying available drive letters.
You can double-click a drive letter to jump to the root of the drive.
Network
When browsing the Network, the panel will show other systems available on
the local network :
Netw ork displays available netw ork system s
The top-level folder list will display the available Network Shares on the
selected system :
© 2014 Digital Vision
UM-2014.1-07
File Browser
23
System Magners has a shared folder "S on Magners".
If the target system (Magners above) requires authentication, you
will need to do this before starting the application.
Folder Navigation
Once we have selected a local drive or network share, we navigate the
filesystem folders via the central panels.
© 2014 Digital Vision
UM-2014.1-07
24
The User Interface
Full Current Location
The file browser always shows you the full current location to your current
folder in the box at the top :
Full current location
Folder Navigation
The button to the right of the location display lets you quickly go up one folder
level :
Button to m ove up one folder level
You can navigate up and down both local and remote folders using the panels
in the centre of the window. These panels have two modes of display Cascade Mode (multi-pane) and Single Mode (single pane).
These central panels display folders only, never files.
Cascade Mode
In Cascade Mode, the central area will show up to three panels. Each panel
will display the folders that exist :
In folder above us (left pane)
In current folder (middle pane)
In folder below us (right-hand pane)
The current folder is always high-lighted in orange. Click any
folder to make it current.
Enable Cascade Mode via the button :
© 2014 Digital Vision
UM-2014.1-07
File Browser
25
Cascade Mode show ing three folders (above and below current)
In Cascade Mode, you can jump backwards (up) and forwards (down) in
your location history using the arrow buttons below the panels :
Single Pane Mode
In Single Pane Mode, the central area shows a single pane and the folders
inside (below) the current folder only.
Single Pane Mode. Display folders below current folder location only.
Folder File Contents
The files within the current folder are displayed in the bottom pane.
© 2014 Digital Vision
UM-2014.1-07
26
The User Interface
Files that exist within the current folder are displayed in a tabular format (see
the Tables section for a discussion of table use).
The files displayed can be filtered by file type.
Contiguous file sequences (i.e. no gaps) are compressed to display only the
start and end frames i.e.
export097738.dpx, export097739.dpx, ..., export097812.dpx
is displayed as :
export[97738-97812].dpx
Use CTRL+R to refresh the file browser.
Folder Bookmarks
Folder Bookmarks let you store a folder location and jump to it via a dropdown list.
Using Bookmarks
To jump to a previously bookmarked folder, select the bookmark from the
bookmarks drop-down list :
© 2014 Digital Vision
UM-2014.1-07
File Browser
27
Adding Bookmarks
To add a bookmark for the current folder, or manage bookmarks, press the
Bookm arks button. A dialog window will open. To add a bookmark for the
current folder, press the A dd button :
Bookm ark dialog
The bookmark will be added to the list and available for use :
New bookm ark in the list
Delete and rename Bookmarks
To delete or rename a bookmark, select and jump to it and use the
appropriate button.
© 2014 Digital Vision
UM-2014.1-07
28
The User Interface
Folder Management
At the top-right, the file browser displays the name of the current folder.
To the right of the current folder name are the two buttons :
Rename Current folder
Create New folder
Rename Current Folder
Type a new name for the folder and press the Rename Folder button.
Create New Folder
Type a new name for the folder and press the Create New Folder button.
The new folder is created within the current folder.
File Type Filter
The File Type Filter drop-down list lets you limit the display of files in the
current folder to the specified file type only.
© 2014 Digital Vision
UM-2014.1-07
File Browser
29
Use the drop-down list and select the desired filter :
Tables
Many areas of the application display information in a tabular format, including
the library, video I/O screens, capture lists, project list and file browser.
Tabular display of assets in library
Tables behave in a similar manner throughout the application.
Selection
Select items by left-clicking with the mouse. Selected items are shown in
orange.
Multiple non-continuous item s selected
© 2014 Digital Vision
UM-2014.1-07
30
The User Interface
Multiple Selection
To select multiple items :
SHIFT + select to select a continuous range
CTRL + select to select non-continuous items (as shown in image
above)
Deselection
To deselect an item, select it with CTRL + select again.
Column Order
To re-order the columns, click and drag a column title :
Repositioning a colum n.
Column Sort
To sort the table display on a column, click the column title. Clicking again,
reverses the sorting :
Ordering on M aterial Name (title changes to italic).
Column titles change to italics when sorted on the column.
Remove Sort
To remove the sorting, click on another column (or in the library, click on
the the Thumbnail column title).
© 2014 Digital Vision
UM-2014.1-07
Tables
31
Show and Hide Columns
You can show (insert) or hide (remove) a column by using your mouse and a
right-click :
Remove Column
Right-click the mouse over the column you want to remove and choose
Remove Column :
Insert Column
Right-click the mouse in the contents title area where you want to insert
the new column and choose the column you want to insert :
Column Sizing
You can adjust the width of columns by clicking and dragging the column
boundary with your mouse :
Click and drag to stretch Material Nam e colum n w idth out.
© 2014 Digital Vision
UM-2014.1-07
Projects
4
33
Projects are used to store and organise your work. This includes the project
library containing all your compositions and source material, all your edits and
grades specific to each composition, definitions of all the project output
formats and all other project state (such as play heads, cached renders,
window positions, undo stack etc.).
The Project Screen is the first screen displayed when you launch the
application. This is where you create and manage your projects.
Below the project list is an area that displays configuration settings for the
currently selected project. To the right of these settings in a group of buttons
that let us create, open and perform various other actions with projects.
Whenever you select a project from the project list, the project
settings panel will refresh to show you the current settings for the
selected project.
Project List
The top panel lists all available projects:
© 2014 Digital Vision
UM-2014.1-07
34
Projects
Project properties displayed are :
Project Name
Status (e.g. Offline, Available)
Project Location
Creation Date
Modification Date
The Project List is displayed a standard table. For more detail on
tables and their use, see the Tables section.
Project Status
The Status field can have two values :
Available : the project is available for use and exists at the specified
location
Missing : the project folder cannot be located at the specified location
If a needed project is listed as Missing, you will need to locate the
project folder or retrieve from backup. Then you can :
A. Move project folder back to original location or
B. Detach the missing project from the list and then attach it from its
new location.
Creating Projects
Creating a project consists of defining :
One or more output (target) formats. Required.
One or more source definitions (e.g. proxies). Optional.
The project screen has 3 main panels. At the top, a list of all available
projects, along the bottom the project configuration settings, and to the right
the project options:
© 2014 Digital Vision
UM-2014.1-07
Creating Projects
35
To create a new project :
Type the name of the new project in the project name text field.
Press the Ne w Proje ct button.
Usually, a new project will take its initial settings from the last project
selected. To create a completely fresh project (with all settings as
default), see below.
Now configure the project settings (e.g. output formats, sources, colour space
etc.). Once done, press the A pply S e ttings button or just O pe n Proje ct.
If project settings have been changed, O pe n Proje ct will prompt
you to apply them before opening.
Creating a Fresh Project
Currently, a new project is always created using settings defined from
the currently selected project (except for the very first project created).
To create a new fresh project, follow this procedure :
Create a dummy project (e.g. called "delete me")
Open this dummy project
Exit project
Delete the dummy project
Exit application
On application restart, no project will be current and the default settings
will be used for a Untitled Project.
Output Formats
In addition to naming your project, the project configuration settings panel
along the bottom of the project screen allows you to specify your intended
output format(s) and any additional sources you may want to create:
© 2014 Digital Vision
UM-2014.1-07
36
Projects
Defined project output formats are displayed on the left. The project master
format is the first in the list.
The settings for the selected output format is displayed to the right.
Each output format has independent settings.
The output formats defined determine the available display, playback, render
and output formats for the project. You can modify the output formats defined
for the project anytime.
Master Output Format
The master format is always shown at the top of the output format list and
cannot be deleted.
It is recommended that the master format be defined to match the
most common format of the source material you will be using inside
the project.
Some common formats have been provided for use as quick defaults (e.g.
PAL, HD 1080) and these are listed in the Setup drop-down menu. Selecting
one of these formats will automatically update the frame rate, image size and
aspect ratio attributes to the corresponding values for that format.
If you change any of these default values, the setup format will automatically
change to being a Custom Setup.
© 2014 Digital Vision
UM-2014.1-07
Creating Projects
37
Additional Output Formats
All additional output formats are listed below the master format and are
completely independent of it. To create a new output format :
Press the Ne w button located below the Output Formats list box. A
new format will be created.
Then configure the output via the Setup drop-down list or edit the
individual parameters.
To delete an output format, just select it from the output formats list and press
the De le te button.
Editing the Output Formats
To modify an output format :
Highlight it in the output formats list. The settings displayed on the
right switch to the selected format.
Alter any of the output format attributes.
Press the A pply S e ttings button to apply any changes made.
You will be warned if you try and move away from the main project
screen if any settings have been changed.
© 2014 Digital Vision
UM-2014.1-07
38
Projects
Output Format Attributes
Each output format has a set of attributes defined, including :
Format Presets
Frame Rate
Colour Channels
Colour Depth
Render Resolution
Viewing Aspect Ratio
Render Options
Conversion and Filter settings
Colour Management System (CMS)
When setting the attributes for your output formats you are defining
the different ways that you wish to render material. It does not affect
the source material that you will import, which has its own source
format.
Format Presets
There are a variety of predefined formats available in the preset drop-down
list. Selecting a preset will configure the other settings appropriately.
Format Setup
You can configure the format settings independently of the the preset chosen.
Frame Rate
Use the frame rate drop-down list to select the frame rate for the
composition timelines created in the project
If you selected a default setup, it will automatically set its own frame
rate, but you can change this. If you do change it, the default setup will
change to Custom Setup.
You will be able to see the frame rate of each of your compositions and
© 2014 Digital Vision
UM-2014.1-07
Creating Projects
39
media in the project library.
It is possible to create compositions with different frame rates
within a single project. The Library/New Composition button
always creates a timeline at the frame rate set on the currently
selected output format. You can create a composition at a
different frame rate by changing the rate of the output format
(at the project screen), creating the New Composition, then
reverting the output format rate again.
Colour Channels
Default : RGB
Use this drop-down to select the colour channels to use. This defines
the components used in any cache generated.
This is an advanced setting. In general, do not change this.
Component Bit Depth
Default : 10 bit
Use this drop-down to select the bits per component (colour accuracy)
that you want the output format to render.
Component Bit Depth is an advanced setting and usually
should be left at the default.
Render Resolution
The image width and height, in pixels, are set automatically when you
choose one of the preset formats from the setup menu. If you want to
define a different image size for your output format then simply enter
the values into the appropriate text boxes; in doing so, the default format
will automatically change itself to Custom Setup.
Viewing Aspect Ratio
The aspect ratio for viewing images is set automatically when you
choose one of the default formats from the setup menu. If you want to
define a different aspect ratio for your output format then simply enter
the value into the appropriate text box; in doing so, the default format will
automatically change itself to Custom Setup. You will be able to toggle
the aspect ratio correction on/off when viewing images.
Render Options
Cache Output
Default : OFF
Enabling Cache Output will cause output caches to be generated (in the
© 2014 Digital Vision
UM-2014.1-07
40
Projects
output format) if the source format differs from the output. If the source
format matches the output, an output cache is generated if any Master
layer effects are added. Cache Output can be set independently on any
project output format.
Enable this :
To ensure everything is rendered and ready to lay-off to video.
On a 10 bit secondary output format when your master format
(and sources) are half-float or 16 bit. Cache Output will ensure
that the secondary format caches are 10 bit which can improve
realtime performance.
This cache is in addition to the standard (source-format)
cache.
frame / field rendering
Full support for interlaced video formats is included.
Options :
frames
Progressive format, no fields.
fields (f1:f2)
Fields, with field order f1:f2 [PAL]
fields (f2:f1)
Fields with field order f1:f2 [NTSC]
Field settings will enable field edits/cuts in the composition, field viewing,
playback and rendering.
Conversion Settings
If your source images are a different resolution to your defined output, you can
choose if and how they are scaled and/or cropped for output.
None
Displays the source image in its original size. This may result in a
cropped or blanked image, depending on the difference between the
source and output resolution and aspect ratio.
Auto Fit
Scales the source image to the size of the output format.
Auto Crop
Crops the source image and scales it to the size of the output format.
Center
The center of the source image is mapped to the center of the output
© 2014 Digital Vision
UM-2014.1-07
Creating Projects
41
format maintaining the source image aspect ratio. This may result in a
cropped or blanked image, depending on the difference between the
source and output resolution and aspect ratio.
Filtering
The filter type selects the mechanism used to transform the pixels in the
source image to the new output. This mechanism involves calculating the
value of an output pixel as an aggregation of contributing source pixels. How
the various pixel contributions are weighed defines the filter.
In order of worst to best (or increasing accuracy) :
No Filtering
Only the source pixel at the center of the projected boundary is
sampled. This method is very prone to visible artefacts such as jagged
image edges.
Bilinear Filtering
The four pixels in the source image that are closest to the center of the
projected boundary are sampled. Their weighting is based on the
relative proximity to the center of the projected pixel boundary. This
produces an accurate colour result but doesn't cut down aliasing as well
as Gaussian does. Box and bilinear will produce very similar results for
small scale reductions, but due to the nature of the software coding
bilinear is generally the fastest of these two options.
Box Filtering
All pixels falling within the projected pixel boundary are sampled and
their weight is proportional to their area that lies within the projected pixel
boundary. Box and bilinear filtering will produce very similar results for
small scale reductions, but box can produce better results for larger
scale reductions.
Gaussian Filtering
All pixels falling within the projected pixel boundary are sampled and
weighted using a gaussian filter kernel. This produces better results
than the box or bilinear filters in so far as it results in less aliasing, but is
slower.
ZOM Filtering
Uses a sinc filter and is the best general filter for up and down-scaling,
providing a sharp result without artefacts. This is the default setting.
Lanczos Filtering
A windowed form of the sinc filter which may give better results in some
cases.
© 2014 Digital Vision
UM-2014.1-07
42
Projects
Colour Management System (CMS)
Each defined output format can have an independent colour Look Up Table
applied (LUT) as part of your Colour Management System (CMS).
A variety of LUT formats and CMS systems are supported, including the
Nucoda CMS, THX Cinespace and Kodak.
The LUT can be used in two ways :
As a viewing only LUT. The LUT is not rendered on the final output.
The LUT can be selected and toggled on/off inside the project.
As a rendered LUT on the output. Pressing the A pply C M S button
marks the selected output format with CMS and burns in the LUT on
this format.
Sample CMS LUT files are provided in the folder :
C:\Phoenix\2014_1\root\cms
Project Sources and Proxies
Project Sources refer to source material available inside a project and how
the source media is presented.
The "1:1 Source Clip" source is always present and refers to your pristine,
original source material (imported or captured), at whatever original resolution.
Optionally, you can add one or more proxy sources via the Ne w button.
A proxy source will act as a substitute source in the project.
You may decide to add a proxy source if :
Your original sources are located on a slower storage device (e.g.
network). In this case, you may wish to add a "1:1 Clone" source to
ensure fast access to (local) fast storage.
Your original sources are large, you may wish to add a "2:1" proxy to
© 2014 Digital Vision
UM-2014.1-07
Creating Projects
43
improve rendering speeds and realtime performance.
To add a new source, press the Ne w button below the Sources list.
Format
The format and filter type of the selected proxy is shown to the right of the
Sources list.
The format allows you to change the proxy scale and bits per component.
Scale
Set the scale compared to the source media :
1:1
2:1
3.1 etc.
Bits Per Component
Set the colour component depth.
Same Same bit depth as original source media
8 Bit Set proxy to 8 bits per component
10 Bit Set proxy to 10 bits per component
16 Bit Set proxy to 16 bits per component
Half Set proxy to half-float bits per component.
Proxies are created in the DPX file format except Half format, which
are created as EXR files.
This is an advanced setting.
In general, do not change the bits per component but leave as
"Same".
Filter
For non-1:1 proxy sources, you can apply a filter to improve the proxy image
quality.
The Filter options are described in the Filtering section in Output Format
Attributes.
© 2014 Digital Vision
UM-2014.1-07
44
Projects
Project Colour Scaling
The default colour scaling is a per project setting and is defined via a dropdown list below the proxy setup.
These scaling modes (defined below) affect :
Video capture and layoff
Timeline monitoring via SDI – including : Timeline filler, Transitions ,
Pan/Scan blanking, Fade to Colour
Colour tool behaviour (black/white pivot points etc.)
Scene detection
Be very careful with this setting.
If you change the scaling on an existing project, a warning dialog will
request confirmation before application of the change. The change
will affect SDI monitoring, capture and layoff settings and the mode
used in new colour tools. It may also cause a re-render of colour
adaptive tools on your timelines.
See the Colour Scaling section in the Install and Setup Manual.
Attach/Detach Project
Attach Project
We can only open and edit projects once they appear in our main project list.
The A ttach Proje ct button lets you insert an existing project (project
folder) into our project list.
Clicking the A ttach Proje ct button brings up the file browser so that you
can select the location of the project (folder) you want to add to the list. Select
the project folder and click the OK button, or browse inside it and click OK.
The project will then appear in your project list and you can select it to open.
© 2014 Digital Vision
UM-2014.1-07
Attach/Detach Project
45
You should only import projects that were created on the same
version of the application software, e.g. v2013.3 projects should not
be imported into v2014.1
Detach Project
The De tach Proje ct option removes a project from your project list.
It does not delete the project.
If you want to open the project again at a later date you need to re-attach it
using the Attach Project button.
You will not be asked to confirm project detachment.
This is a useful tool for moving a project from one computer to
another, or removing a shared project from your project list without
affecting users elsewhere.
Opening Projects
To open a project, double-click the project on the main project screen, or
select it and press the Open Project button.On opening the project you will be
taken to the project desktop.
When you open a project, if any of the project configuration settings
for that project have been changed but have not been applied with
the A pply S e ttings button you will be asked if you want to apply
the new settings at this point. If the changes were unintentional you
can say no and they will be discarded.
The open project button will be disabled if there is no project selected or if the
selected project has a status of Offline. An Offline project means that the
underlying project data folder is not located in the expected location.
Warnings
You may sometimes see a warning when opening a project. This may relate
© 2014 Digital Vision
UM-2014.1-07
46
Projects
to a version mismatch or to missing cache renders.
Version Mismatch Warning
If you open a project that was created with an earlier application version, you
will receive a warning dialog alerting you to this fact.
It is usually safe to open a project created with the same Major.Minor
version as used currently (i.e. 3.6r1 to 3.6r2). However, projects
created in earlier Major.Minor versions may not be safe (e.g. 3.5r7 to
3.6r1).
Missing Caches
If some (or all) of the rendered cache files cannot be located on disk, you will
receive a warning alerting you to this fact.
This may occur if :
1. The cache (cacheRootDir) volume is unavailable
2. The project has been moved and attached on a different machine
3. After a crash etc.
For case (1), you may wish to press C ance l and investigate. For other
possibilities, pressing Y e s will delete the cache references before opening
the project (your timelines will need rendering).
If you remove cache references your project will require rerendering.
© 2014 Digital Vision
UM-2014.1-07
Delete Project
47
Delete Project
Press the Delete Project Button to delete the selected project. This
permanently deletes the project and all its contents. You will be asked to
confirm the deletion and also asked if you wish to delete the project notes.
To keep the project notes, untick the tickbox before clicking the OK button.
The project notes folder will be left untouched in the notes folder on your
media root directory e.g.
C:\Phoenix\2014_1\root\notes\<project name>\
You can continue to view and use these notes in other projects.
Project deletion cannot be undone.
Recovering a Project
Using the ..R e cov e r Proje ct button, you can revert to a previous version
of a project. Select the project you want to roll back in time and press the ..
Recover Project button.
This can be useful if you want to revert to a previous project state
beyond your undo stack, or if you are unhappy with the past two
hours of work you have done. It can also be used to recover a
previous version of a project if the current one has a problem.
A project snapshot is taken every few minutes (every time the project
is saved) and then these are rolled up and merged as the day goes
on.
On pressing the button, a dialog window will open and allow you to select the
desired version to revert back to :
© 2014 Digital Vision
UM-2014.1-07
48
Projects
Recover Project dialog w indow
Using the From drop-down list, select a previous project revision :
Then press the Recover button to do the recovery. The selected project is
copied to a backup folder (timestamped as per the Backup Folder box, see
below) and then replaced with the chosen project version.
The selected project will now be as it was at the stated date and time chosen
from the drop-down list.
If you are reverting to a previous revision because your current
project has a problem, it is best to revert in stages (one by one,
newest to oldest) until you find a suitable version.
Backup Project
When you press the Recover button, the current project is backed up (copied)
to a folder as named here. The backup is given a timestamp as a suffix. This
backup folder is placed beside the current project :
Each backed up project is the entire state of the project.
In the example illustration above, we have :
© 2014 Digital Vision
UM-2014.1-07
Recovering a Project
49
Grandstand EP 01 - This is the current project - the project that
opens. This project is actually a revision we have recovered.
Grandstand EP 01_2009_04_28_11_46 - This is a backup of the
project created when we pressed Recover at 11:46 on 2009-04-28.
Note that recovery can only go back in time. Once you recover a
previous version of a project, you cannot use this method to revert to
a later version again. To do this, you can rename the appropriate
project backup folder to the project name.
Location and Configuration
Projects are stored in folders located using the projectRootDir setting given
in the main preference file :
C:\Phoenix\2014_1\root\general.prefs
The project folder will default to a subfolder :
C:\Phoenix\2014_1\rootprojects\
Each project consists on a single folder which can be copied,
moved or otherwise archived once a project is complete.
Project folders contain the complete project except for the source
media, renders/caches, any proxies or thumbnails. With the source
material placed in the expected location (as per project library), or reconformed/linked elsewhere, all other media can be regenerated.
© 2014 Digital Vision
UM-2014.1-07
The Project Library
5
51
Keyboard Shortcut : F1
The Project Library is used for a wide variety of tasks, including :
Importing and exporting media
Creating composition timelines
Organising media and timelines
Viewing and modifying metadata
Managing render tasks
Creating proxy sources
In single-screen mode, the Library window replaces the viewer. In
dual-screen mode, the Library (and F1) button toggles display of
the Memories window.
Library Components
The Library is organised around a central tabular display of your media
assets, a list of folders on the left and a row of function and view filter buttons
below.
The main areas are shown below :
Main library com ponents
Folders
To the left of the Library is the folder list. This is a tree view of all folders
existing in the library. Folders are created underneath the project root folder.
© 2014 Digital Vision
UM-2014.1-07
52
The Project Library
The Caches folder contains the renders for all project compositions.
It cannot be deleted.
Create New Folder
This button creates a new folder. New folders are always created as children
of the selected folder. The selected folder is highlighted in orange (e.g. folder
"02" above).
Naming Folders
By default, folders are named new folder. To rename a folder :
Select the folder
Press the F2 hot key
Type the folder name
© 2014 Digital Vision
UM-2014.1-07
Folders
53
Delete Folder
To delete a folder, select it and press the delete folder button.
Recurse
The library only displays the contents of the currently selected folder by
default. To display the contents of the current folder and all sub-folders,
enable the R e curse button.
With the R e curse button off, we only see the contents of the scans folder.
With the R e curse button on, we see the contents of the scans folder and
folders 001, 002, 003 etc.
Library Contents
The main library view is located to the right of the folder list and shows the
contents of the active (orange) folder.
The contents list is tabular, with each row being a single item (shot, timeline,
audio file etc.) and each column being a property of the item.
Library content row s
© 2014 Digital Vision
UM-2014.1-07
54
The Project Library
For more detail on tables and their use, see the Tables section.
Item Types
Each library item has a type.
CLIP
A CLIP is the label for both image and audio media. For image media,
this is source media composed of individual file based frames e.g. DPX
or TIFF sequences.
An audio CLIP will have an icon :
COMP
A composition timeline.
The active composition is shown with a Status property set as Current
Edit and a COMP icon :
Active com position show n as Current Edit.
Editing a Composition
You can set the selected composition active as Current Edit by :
Double-clicking it or
Pressing the Edit button
The active composition displayed in your timeline will update.
Copying the Composition
You can make a copy of the selected (in orange) composition by
pressing the Copy button :
© 2014 Digital Vision
UM-2014.1-07
Library Contents
55
The copy will be named using a prefix "Copy of .." and is completely
independent of the original (but caches will be shared).
MOVIE
This is source media composed of a movie sequence e.g. Quicktime or
Red.
PROXY
A proxy source (or clone).
A proxy source is grouped with its corresponding source media. An
arrow to the left can be expanded to show the proxy or clone.
The proxy scale is shown in the Scale property.
Item Deletion
You can delete on or more selected library items by :
Pressing the delete key on your keyboard or
Pressing the De le te button :
Properties and Metadata
Press the Properties button to bring up a property editor for the selected
library items.
The Properties available depend on the selected item.
Most image sequence types have basic properties, but many movie formats
(such as Red, SI-2K etc.) have extended format properties and extra
miscellaneous metadata associated with them. Audio clips have their own
specific audio properties (including channel routing).
© 2014 Digital Vision
UM-2014.1-07
56
The Project Library
The layout of the Property dialog
Property Editor Layout
As can be seen in the illustration above, the Property Editor is composed of a
number of panels that descrive different aspects of the metadata.
Not all library items will include all metadata and all the panels.
Basic Properties
Basic Properties are those common to all library types, and include item
name, tape name, description, timecode and duration, components and
colour space.
© 2014 Digital Vision
UM-2014.1-07
Properties and Metadata
57
Format Properties
Some items have format specific properties we can edit and these are shown
in the Format Properties panel. The image below shows the extra properties
available for a Red R3D shot.
Form at Properties panel show ing extra properties for a Red Cam era shot.
Miscellaneous Metadata
The Miscellaneous Metadata panel shows the extra metadata available. This
will be the complete display of all item metadata, some of which will overlap
with the Format Properties panel.
A portion of the displayed m iscellaneous m etadata for a Red shot.
This metadata is shown as a more raw form as found in the original
item.
© 2014 Digital Vision
UM-2014.1-07
58
The Project Library
Nucoda Properties
The Nucoda Properties are an extra set of metadata fields that can be set on
library items.
Nucoda properties (part).
Available properties include : SourceId, Take, Scene, Camroll, Slate,
Soundroll, Director, ProjectName, DoP, Cameraman, DailiesColorist,
DateOfShoot
These Nucoda Properties will be included in any ALE List export and
facilitate interoperability in a dailies environment with products from
Avid etc.
Relinking Clips
The Relink Clips dialog allows you to change the source path (location on
disk) for a clip stored in the library. This can be useful if a clip is moved on
disk and needs to be re-linked to the composition.
Open the clip Properties dialog and select the ..Change button to the right of
the clip Source Path property :
The Relink Clips dialog opens and displays the Before path (current location
used) and the After path, the new location we can set. Initially they will be the
same.
© 2014 Digital Vision
UM-2014.1-07
Properties and Metadata
59
Open the File Browser and navigate to the new path required and select the
clip located in the new location. The After path will update.
The Status indicator will display Online if the selected (After) path is
good and the clip is located. If we cannot locate the new path, we
display Offline.
Once complete, press the Apply button :
If you want to undo your change and revert to the original After path, press the
Revert button :
Library Filters
You can filter the main contents display to show only items matching chosen
criteria.
Note that all filters will apply to the contents of the selected library
folder (and sub-folders if Recurse is enabled).
All
Display all items.
© 2014 Digital Vision
UM-2014.1-07
60
The Project Library
Current
Display the library item that corresponds to the segment under the active playhead.
Marked
Display the library items that correspond to the marked segments.
Unused
Display the library items that are not in use in the composition or marked
region.
Comp / Clip / Proxy
Display compositions / clips / proxies.
Cache Management
The C le an U p button lets you selectively purge unused or unwanted caches
and proxies.
Clean Up dialog
You can choose to delete any combination of caches, proxies, thumbnails
and/or paint mattes.
Proxies include any source caches (e.g. from MXF). Paint mattes
are temporary mattes created using the Paint effect or DVO Fix
paint.
© 2014 Digital Vision
UM-2014.1-07
Cache Management
61
Filters
Select a filter via the drop-down menu :
The filter will operate on all library item types selected via the toggle buttons :
Available Filters
unused only
Caches and proxies are deleted if they are not used in any composition.
all in project
All caches and proxies in project are deleted.
all in current composition
Caches and proxies are deleted if they are used in active composition.
all exclusively in current composition
Caches and proxies are deleted if they are only used in active
composition.
all not in current composition
Caches and proxies are deleted if they are not used in active
composition.
Age Filter
To perform a clean up based on selected item age, use the age boxes :
Items older than the set age will be deleted.
© 2014 Digital Vision
UM-2014.1-07
62
The Project Library
Composition Save and Load
You can use the Save and Load buttons (and also Store and Recall, see
below) to easily copy compositions and clips between projects. We can
copy image clips, audio clips and compositions.
The projects can even be on separate computers as long as any selected
sequences have the same file paths on each.
If the paths differ, you can change it by editing the clip Properties and
pressing the ..Change button to open the Relink Clips dialog.
The Save operation (and Store, see below) will save all selected clips and
compositions. If you select a composition, we will also save all clips it
references.
Save w ill stored selected library item s:
Com position "review 10:30" (and everything it references),
plus clips "clip 2" and "clip 3" explicitly.
Any items we Save (or Store) are copied and the original items are
untouched. We Load (or Recall) the copy.
These copies will have the same metadata (properties) as the
original items and, because these are copies, we can safely change
any metadata without affecting the original.
© 2014 Digital Vision
UM-2014.1-07
Composition Save and Load
63
Save / Load
Save
Pressing the Save button will open a File Browser dialog and let you choose a
path and filename for the saved information. This file will have a .content
extension added automatically and stores metadata only.
The .content file is a text file.
Load
Pressing the Load button will open a File Browser dialog and let you select a
previously saved content file for loading.
You can load this saved content into any project (including the current one)
and the result is that a copy of every included clip and composition will be
loaded and made available immediately. No conform or re-linking is
necessary.
Only metadata is written out to the content file, no actual image
sequence data itself. This metadata includes the full path to any
sequences stored and these paths can be checked and (if
necessary) modified before load in any text editor.
© 2014 Digital Vision
UM-2014.1-07
64
The Project Library
If sequences are deleted or moved after the paths are stored, then
we will fail to locate this media when we load the content.
Store / Recall
Store and Recall work exactly like Load and Save except no content file is
used (so no File Browser prompt).
A Store will save the selected compositions and/or clips. A Recall operation
will recall whatever this stored "snapshot" contains.
The stored content persists until the next Store operation, even
between application restarts.
Store and Recall will only work when used with the same version of
the application software.
Also see : Command Line Interface chapter.
© 2014 Digital Vision
UM-2014.1-07
Importing Material
6
66
Importing Material
This chapter describes :
How to get media (both video and audio) into the project library for use
How to recursively import entire folders automatically
How to import and conform from list files (e.g. an EDL)
How to make sure each piece of media we import has the proper
metadata attached
How to manage our media library
We import material into our project via the Library. Switch to the Library
module via :
F1 hotkey or
L ibrary button
Although we talk about importing in this chapter, the application does
not move or copy media around. Unlike some applications that
make you import to a proprietary storage volume, we create library
references to the original media files. Importing large sequences is
almost instant in most cases.
The Library Module will appear over the top part of our desktop :
Project desktop w ith Library View in upper part.
For a complete description of the Library see the Library chapter.
We can get material into the project library in three ways :
© 2014 Digital Vision
UM-2014.1-07
67
Directly importing media (image or audio)
Importing material via a list (and then doing a List Capture)
Capturing media from a tape source - this is covered separately in
the VTR section
In the first two cases, you start off by clicking on the ..Im port button in the
library :
This will launch the file browser and let us browse and load an image
sequence or movie, audio or list file.
For supported file formats, see File Format Support.
Importing Media
To import material into the project library :
Press the Library ..Im port button
Browse to and select the media to import
Check your import options
Press browser ..Im port button to do the import
Pressing ..Im port in the library opens the file brow ser and allows us
to locate and import our source material.
See the File Browser section for detailed instructions on using the
browser component.
The file browser collapses contiguous sequences into single rows and shows
the start and end frames in square brackets :
Select a sequence and press the browser Im port button to import the
selection into the library as a shot.
© 2014 Digital Vision
UM-2014.1-07
68
Importing Material
As shown in the screenshot above, you can import multiple items at
once by selecting more than one item (e.g. SHIFT+Click or
CTRL+Click) and pressing the ..Im port button.
Before doing the import, check your import options (see below).
Once you have finished importing your media, click the C lose button to close
the file browser.
Import Options
For image media, the Import Options dialog lets us select the method used to
extract the Timecode and the Tapename from the media imported.
The browser ..O ptions button will open the import Properties dialog :
Set the default settings in the Application Preferences Capture/
Conform tab.
It is very important that we ensure (where we can) that we have a proper
tapename and timecode associated with our source media.
Timecode
© 2014 Digital Vision
UM-2014.1-07
Importing Media
69
We can extract the timecode from the file header (e.g. a DPX format
sequence) or from the sequence filename (i.e. sequence numbers are the
timecodes).
For header timecode, you will always use 1st tc header unless you
have a Red R3D sequence and wish to use the second R3D
timecode (2nd tc header).
The timecode extracted will be placed in the Library In column, and will also
cause the assignment of the Out and Duration values.
Tape Name
We can extract the tapename from the file :
Header - Some file header metadata contains the tapename (e.g.
DPX)
Filename - A string component of the file path e.g. file name or
containing folder name
Tape Dir Level
The Tape Dir Level sets the folder level from which we take extract the
tapename when extracting the tapename from the filename.
Level 0 is the file name
Level 1 is the containing folder
Level 2 is one folder up etc.
See the appendix chapter Automatic Naming.
© 2014 Digital Vision
UM-2014.1-07
70
Importing Material
Folder Import
If you select a folder and press the ..Im port button, the folder contents and
all sub-folders are imported recursively. We search for image sequences and
movies and import those we find automatically.
The Import Folder Options dialog allows us to set some import options, such
as filters on image format and resolution, material naming convention and
automatic sequence timeline splicing.
Options
Filter file format
Select to import only files of specified file format.
Filter image size
Select to import only files of specified pixel width and height.
Auto create library folders
Select to automatically create library folders for the imported media.
Folders are created as per the auto folder settings.
Import and splice
Select this to splice the imported media to the current composition
timeline automatically. Choose the desired splice order from the dropdown menu :
File order is the order the file sequences are found.
Timecode order is the order as per the extracted shot
timecodes.
© 2014 Digital Vision
UM-2014.1-07
Importing Media
71
Import as background task
Select to import as a background task. After pressing Im port, you can
close the file browser and the importing will continue in the background.
Library Folders
Media you import is placed inside the currently selected library folder (shown
highlighted in orange).
The import process can also create library folders automatically, placing
each piece of media inside a folder named from the filename, file path or
tapename extracted. To configure this, see Automatic Naming in the
appendices.
Importing Audio
Import audio material into the library in the same way as image media. In the
Library module, press the ..Im port button, browse to the audio media
location and select and import.
The audio formats supported are :
Wave Audio (.wav) - either 44.1 KHz or 48 KHz 16bit stereo
Broadcast Wave (.bwf)
Audio Interchange File Format (.aiff, .aif, .aifc)
The default sample rate is 48KHz.
The audio sample rate is configured in the main preference file
general.prefs using the audioSampleRate parameter. It cannot be
configured through the GUI currently.
© 2014 Digital Vision
UM-2014.1-07
72
Importing Material
Importing List Files
Import a list into the library in the same way as image media.
In the Library module, press the ..Im port button, browse to the list file
location, select and import.
In the case of a list file, you are creating a Composition, not
importing shots. Initially, the list created composition will have no
media linked to it. To link media to the composition created, see the
next section List Capture.
A list file is a formatted text file that defines the basic layout of a composition
and relates the source media "events" (defining shots) to the record timeline
locations. The source media is defined by a tapename (or reel) and source
timecode.
The supported list file formats are:
EDL - CMX 3600 format
AAF
Cut Lists (.ctl, .cut)
For Cut Lists, the supported formats are as per the example files in
folder :
C:\Phoenix\2014_1\example_files\
Once the list itself is imported, we will have a new composition. We will then
have to capture any required media and conform. See List Capture.s
Conforming will "attach" media to the empty composition shots.
© 2014 Digital Vision
UM-2014.1-07
Importing List Files
73
List Import Options
When we import a list file, a new dialog opens and lets us set various import
options. We can decide whether to import the list creating a new composition,
merge it into an existing composition, how to merge any existing grades etc.
Always take a backup copy of your composition before modifying it
(e.g. by importing a list "into current composition").
List Im port options dialog. The dialog title is the list filenam e.
Each option is described below.
Import Mode
© 2014 Digital Vision
UM-2014.1-07
74
Importing Material
All events as new composition
A new composition is created from the list file.
If the list has a "TITLE:" field, this will become the name (
Material Name in the Library) of the new composition.
All events into current composition
The list file is added to the active composition on a new video track.
You can also set the imported list events to overwrite a current track by
selecting Overwrite existing track and selecting the track to overwrite
from the drop-down list :
Record events only to mark current
composition
The list record events are used to add cuts only to the currently active
composition.
Use the track selector to the right of Overwrite existing track to choose
which video track to mark :
Note that the cuts will be scene cuts. See the Compositions
chapter.
Import as audio
This imports the EDL (a normal video EDL) but creates audio events on an
audio track, not video.
© 2014 Digital Vision
UM-2014.1-07
Importing List Files
75
Overwrite existing track
With an active composition, this will cause the new list events to overwrite the
selected video track.
The new events from the list will completely replace the selected
track.
Merge existing grades from
If you have a graded composition, you can choose to merge these grades into
the new imported list. You can create a new composition result (All events as
new composition) or merge the grades into the existing composition (All
events into current composition).
The grades are taken from the selected video track.
The Match options let us choose the criteria used to match each graded shot
with the new shot imported with the list.
Match source TC
Use the source timecode when determining the matched shots when
merging grades.
Match record TC
Use the record timecode when determining the matched shots when
merging grades.
You can select both Match source TC and Match record TC to have
both tried consecutively.
Import material from file paths
Select this to automatically import media specified in the EDL list file.
The EDL should contain media paths per event in the following format :
* FROM FILE: <path>
© 2014 Digital Vision
UM-2014.1-07
76
Importing Material
e.g.
001 OE5012E V
C
19:08:57:15 19:08:58:15 01:00:01:00
01:00:02:00
* FROM FILE: S:\media\annotated\4\tc\1723400.dpx
Conform to material
If the media is available in the library (perhaps pulled in via Import material
from file paths), Conform to material will try and conform (i.e. link) the list
events to it.
Create ASC CDL layers
If the EDL list we import includes ASC Color Decision List information,
selecting this option will create effect layers for the shots.
The ASC CDL information includes :
ASC SOP - Slope Offset Power values. Encoded as :
ASC_SOP (SlopeR SlopeG SlopeB) (OffsetR OffsetG OffsetB)
(PowerR PowerG PowerB)
ASC SAT - Saturation value. Encodes as :
ASC_SAT Saturation
e.g.
002 A049_C013_0706DS V
C
11:14:16:22 11:14:24:15
01:00:07:22 01:00:15:15
* FROM CLIP NAME:
* FROM FILE: S:\tests\Day-1\A049_C013_0706DS.
RDC\A049_C013_0706DS_001.R3D
* ASC_SOP (1.1029 1.1223 1.1110) (-0.1162 -0.1061 -0.1046)
(0.6293 0.6277 0.6179)
* ASC_SAT 1.2000
Application version 2010.0r1 and before contains a bug such that the
ASC lines must not contain a space after the "*" i.e. you must use
the syntax *ASC_SOP (no space between '*' and 'ASC'). This issue
has since been fixed.
© 2014 Digital Vision
UM-2014.1-07
Importing List Files
77
Conform to record TC
Selecting Conform to record TC changes the default conforming behaviour
and looks to conform (link) our the available media with the list record
timecodes.
Normally we conform (i.e. link) our media to the event source
timecode. Conforming to the list event record timecode is often
required when our media has already been edited (such that media
timecodes are now those for the record timeline). This media will
usually have a start timecode the same as the first EDL record
timecode event.
TC Offset
Set the offset (if any) between the list record timecodes and media we
are conforming.
Set positive or negative offsets via the "+" and "-" buttons.
Tape name
Technically, only the source events are associated with a tape. You can
associate the record events with a tape by entering it here. It is good
practice to always set a tapename here.
Fill record event gaps
If the record events are not all contiguous (timecode) but contain gaps,
fill the gaps with filler.
Match name
When using Conform to material ,ensure we take account of the
tapename we have entered in the Tape name field.
Keep playhead positions
Make sure we do not reset or change the play-head positions.
© 2014 Digital Vision
UM-2014.1-07
78
Importing Material
List Capture
Once you have imported your list file, we have a composition timeline that has
no media linked to the shots.
A shot without media linked to it will display the offline slate in the
monitor :
To connect the composition shots to media, we need to :
a) capture - find the referenced media and import it to the library.
b) conform - link the matching media to the shots.
We do this via a batch operation called List Capture. With the composition
active (currently edited) click on the ..L ist C apture option in the library:
This will bring up the List Capture window :
© 2014 Digital Vision
UM-2014.1-07
Importing List Files
79
The List Capture window displays an alternative view of the composition
timeline, showing each shot as a separate row in a table. Each shot will have
a Status.
You will only see the events listed on enabled video tracks.
After initial import, the list will not be linked to any media and each list event
will have a Needed status.
Each event has a Needed status after list im port.
Media Event Status
The shot Status field can take the following values :
Status Meaning
Needed The media specific to this event is not in the library,
or has not been matched to media on disk after
searching (Capture).
Found The media specific to this event is in the library and
has been matched exactly (given capture control
criteria).
Found Multiple The media for this event is in the library but multiple
matches have been found (given capture control
criteria). By default, we select the latest for use but
you can choose to change this selection.
Disabled (Needed) As the Needed status, but the event has been
disabled (so no attempt will be made to find or
match it).
Disabled (Found) As the Found status, but the event has been
disabled (so no attempt will be made to conform/link
the event to the media found).
Conformed The media for this event is found, is in the library and
has been linked (conformed) to the event.
© 2014 Digital Vision
UM-2014.1-07
80
Importing Material
Capturing Media
After importing our list, we can proceed to Capture media into our Library via
the ..C apture button.
The capture process will examine on-disk file media and compare it with
events in our list. Those that match will be loaded into our library and have a
status set to Found. Matching can be performed on timecode alone, or on
timecode and tapename.
Because capture list events are always matched (linked) to material
in the project library, if the library contains matching material when
the list is imported, the match will be shown immediately in the
Status field. In this case, the list event Status will say Found for
those events we can match.
Capture opens a file browser and we choose a starting folder from which to
search for media matching our event list. Each piece of media we find has its
timecode and tapename extracted as per the settings we have in the Capture
Controls. For a discussion of this metadata extraction process, see the
Capture/Conform chapter in the appendices.
Capture Controls
The Capture Controls set the mechanisms we use for extracting the timecode
and tapename information from material we find on disk.
As we recursively search from the chosen starting folder, the extracted
timecode and tapename is compared to each list event and if we find a
match, we change the matched event status from Needed to Found.
© 2014 Digital Vision
UM-2014.1-07
Importing List Files
81
Any matching material is loaded into the library, but not yet linked (conformed)
to the event.
Match Name
If Match Name is enabled, the tapename is used when testing for a
match. With Match Name disabled, only timecode will be used.
Multiple Matches
Sometimes, we find more than one item of media on disk that matches a shot
in the capture list.
When this happens, the Status is displayed as Found Multiple and an arrow is
displayed to the left of the list item. You can select the arrow to open up the
rows and view all the matches.
The most recent event is selected by default.
Both shot index 000 and 001 have been m atched to m ultiple m edia item s.
Opening shot 001 to see w hat m edia w e have m atched. Note w e m atched 5 m edia item s
and have selected the latest.
If you want to change the selected match, highlight your choice in the list and
press the Enable Ev e nt button in the Event Controls (see below) :
© 2014 Digital Vision
UM-2014.1-07
82
Importing Material
Event Controls
Use the Event Controls to :
Switch the selected event when multiple matches occur.
Disable events to prevent them being conformed or found.
Disable/Enable Event
When you Disable an event, you prevent it changing status such that :
A Found event will not conform (link) to material when pressing
Conform (it will stay Found)
A Needed event will not be found (it will stay Needed)
The Disabled state of an event is reset if you close and re-enter the
List Capture module.
Enable Event will reverse the disabled state and allow the event to take part in
capture and conform operations once again.
© 2014 Digital Vision
UM-2014.1-07
Importing List Files
83
Detach Event Material
Detach Event Material will unlink the selected events from their conformed
media and change their status from Conformed to Found. The media itself
remains loaded in the library but the affected events (shots) will go offline
because the link to their media has been broken (they become unconformed).
Match Open Folder
If Match open library folder only is selected, we will restrict the media we try
and conform (link) to that inside the currently open library folder.
Consolidation
Default : Consolidate on tape
Consolidation is the grouping together of overlapping events (generally by
timecode) into a single "event" which can be processed (captured) as one.
This can minimise the amount of work required to capture the same amount
of material. Consolidation reduces the total number of events to capture.
Don't consolidate Ignore potential consolidation and show every event in
the list.
Consolidate on
tape
Consolidate overlapping timecodes within the same
tape.
Consolidate on
clip
Consolidate overlapping timecodes within the same clip.
Without consolidation, a composition that uses the same media
more than once, each time using a different set of frames, will
appear in the composition capture list multiple times.
© 2014 Digital Vision
UM-2014.1-07
84
Importing Material
Conforming the List
Conforming will link the Found events in your capture list to specific media
matched and loaded into the project library. Once conformed, the status of the
event changes to Conformed and can be considered locked (to the specified
material).
The event can be considered locked because a re-conform
(pressing the Conform button in the List Capture module) will never
detach or attach different media. To un-lock the event, and break the
link between the event and its media, use the Detach Event Material
button (the event will revert to the Found state).
Once conformed, you can close the List Capture module and return to the
project desktop.
© 2014 Digital Vision
UM-2014.1-07
Compositions
7
86
Compositions
A composition can be considered a container within which you compose your
work. A project can contain an unlimited number of compositions, each of
which can contain any number of video and audio tracks and their media
segments.
Compositions consists of :
Video and audio tracks to arrange your media
Bookmarks
Edits and transitions
Shot versions
Any grading and effects on the shots of tracks
Play-heads and marks
The composition is the basic building block of any creative work you do.
Com position item in library selected and com position tim eline below
Creating Compositions
You can create a composition manually, or by importing a supported list file
(e.g. EDL) or an AAF file.
© 2014 Digital Vision
UM-2014.1-07
Creating Compositions
87
Manual Creation
To manually create a composition, press the New Composition button in the
Library screen :
This will close any open composition, create and open a new one. The new
composition will be named Untitled by default but you can name it via the ..
Properties dialog window or by double-clicking the Material Name field and
typing a new name :
Renam ing a com position m anually by typing in new M aterial Name
The currently viewed (edited) composition has status Current Edit in the
library.
The frame rate of the composition is set on creation to the project
master format rate.
List Import and Capture
Importing an EDL, AAF or other supported list format will create a new
composition with video and audio tracks, media segments and supported
effects (e.g. retimes) as per the imported list.
With an EDL, the composition will be named as per the "TITLE" field. Media
segments will need to be conformed to the timeline.
A composition will also be automatically created when you capture media
from a VTR device.
© 2014 Digital Vision
UM-2014.1-07
88
Compositions
Composition Elements
The main element of a composition is the tim eline.
This view is where you can arrange your m edia segm ents, edit
segments, add effects and control what is displayed in the monitor.
This is the default view for a composition and shows you :
Video and audio tracks
Media segments
Play-heads and position indicators
Timeline marks
Bookmarks
Video and Audio Tracks
Video and audio tracks are laid out in horizontal strips in the classic way. An
empty composition defaults to one video and one audio track. The monitor will
display a mixed-down view of your timeline.
A mixed-down view is the view you see as if viewing the composition
from above, taking track output visibility into account.
A composition is composed of one or more media tracks (image or audio)
stacked on top of each other in rows.
Each track has :
Per track, independent controls on the left and
Global track controls above these
© 2014 Digital Vision
UM-2014.1-07
Composition Elements
89
Per Track Controls
Per track, a set of track indicators on the left :
Enabling a Track
The track enable button allows you to select one or more tracks to
operate on i.e.
Delete
Splice or overwrite media
Push up or down etc.
Disabled tracks are still exported (to file or tape).
Locking a Track
Locking a track will prevent any edit changes i.e.
Edits/cuts
Trimming
Moving segments
Track or segment insertion or deletion etc.
A locked track can still have the grade changed.
© 2014 Digital Vision
UM-2014.1-07
90
Compositions
Track Picture and Sound Output
Toggle the timeline monitor picture and audio output via the toggle
buttons.
Tracks with output turned off are not exported (to tape or file).
Global Track Controls
Globally, you can also set the display of track thumbnails, play-heads, audio
waveform and set the active play-head position to centred during play-back :
Icon
Description
Centre active play head when playing composition.
Toggle display of composition segment thumbnails.
Toggle display of non-active play heads.
Toggle display of audio waveform inside audio segments. See Audio
Segments.
In Shots View mode, the centre active play-head button is removed
and the audio waveform button replaced with a button to toggle
display of effects layers. See the section Shots View.
Creating and Deleting Tracks
Use the toolbar buttons to add or delete video and audio tracks.
© 2014 Digital Vision
UM-2014.1-07
Composition Elements
Icon
91
Description
Create a new video track
Create a new audio track
Push selected tracks up a level
Push selected tracks down a level
Delete selected tracks
You cannot delete a locked track.
Media Segments
Media segments are displayed on the timeline with head and tail thumbnails.
You can toggle the display of thumbnails using the
previous section above.
button. See
Each media segment on a video track displays the tape name, material name
and any source offset (head handles). The source offset is given as a
timecode.
The segment in the diagram above has four seconds and twelve frames of
handles at the front of the segment.
Composition segments are colour-coded.
Normal Segment
Segments are displayed in grey.
© 2014 Digital Vision
UM-2014.1-07
92
Compositions
Active Segment
The active segment lies under the currently active play-head and is
displayed in blue. Grades, effects, versions etc. are applied to the active
segment unless some other segment is selected.
Selected Segment
A selected segment will be displayed in orange. Any selected segments
will take priority over the active segment.
When one or more segments are selected, your composition
timeline scroll-bar will also turn orange to indicate this. This is
visible even if the selected segment is off-screen.
Segment Showing Handles
Head and tail handles are shown as yellow bars, indicating the amount
of handles available.
Audio Segments
Audio segments are displayed on the timeline on audio tracks A1, A2 etc. The
library will display the metadata for each audio segment :
© 2014 Digital Vision
UM-2014.1-07
Composition Elements
93
Components : Number of audio channels in file e.g. 2 chan
Depth : Sample bit depth e.g. 16 bits
Rate : Sample rate in Hz e.g. 48000
If the audio file has extra metadata available, it will be displayed in the
Description column :
Audio Waveforms
The audio display button toggles the display of the audio waveform. The
waveform is overlaid on the audio segments and the output display monitor.
On the timeline segment, the audio channels are shown stacked on top of
each other, as shown below.
Audio track w ith 5 channels as segm ent w aveform
© 2014 Digital Vision
UM-2014.1-07
94
Compositions
Audio Properties
To view and modify the audio metadata and properties, select the audio clip
in the Library and press the Prope rtie s button. The audio clip properties
window will open. This lets you view and modify metadata such as the audio
clip name and description.
Audio clip property dialog, including audio
patching interface
Audio Channel Patching
Patching describes the method of switching (and/or affecting) audio signal
routing between input and output audio channels. For example, you may want
to mute an audio channel, or route the signal in channel 2 to output channel 1.
There are two places in the application that allow audio patching :
1. On an audio clip (file)
2. On a composition timeline
Adjusting the audio patching on an audio clip is specific to this clip
only. Adjusting the audio patching on a composition is global, and
affects the entire composition.
Audio Clip Patching
The properties dialog for an audio clip includes an audio patch panel section.
© 2014 Digital Vision
UM-2014.1-07
Composition Elements
95
Audio clip properties dialog and patch panel.
The audio clip channels (In) are labelled C1, C2, C3 etc., up to a maximum of
eight channels. On import, available audio channels are un-muted by default
and routed (patched) to the corresponding Out channel (i.e. In(C1) to Out(C1)
etc.).
Modify the patching of each channel via the In channel drop-down menus :
Composition Audio Patching
You can view and change the audio patching for the entire timeline via the
composition Prope rtie s button in the Library.
The audio patching interface is similar to the interface used for an audio clip
(detailed above). However, extra selectors are available for choosing channels
from any particular audio track on the composition.
Audio patching in the properties for a com position
© 2014 Digital Vision
UM-2014.1-07
96
Compositions
The available audio channels for the composition are in the In column and
labelled :
Track : Channel
e.g. "A1:C2" is Audio Track A1, Channel 2.
The menu selector drop-down lists allow patching the available input track and
channel to an output channel :
Com position audio patching - input
selection.
Positions and Lengths
Four position position and length indicators are displayed to the right of a
display format specification button :
In point
This will be the location of any Mark In point, or the composition start
if no mark in is set.
Out point
This will be the location of any Mark Out point, or the composition end
if no mark out is set.
Duration In to Out
This will be the composition duration if no marks are set.
Active play-head position
Play-head selector and indicator buttons are shown below the location
of the active play-head. The active play-head is shown in orange, the
secondary in yellow.
© 2014 Digital Vision
UM-2014.1-07
Composition Elements
97
Timecode versus Frames
You can choose to display fields as timecodes or frames via the drop-down
button to the left of the indicator boxes :
Play Heads
Every composition includes four independent play-heads labelled A, B, C and
D. There is an active play-head, a secondary (last-active) play-head and two
auxiliary play-heads. Multiple play-heads can be used for shot comparison
operations.
Icon
Description
The A play-head.
Yellow means it is the secondary head (last active).
The B play-head.
Orange means it is the current active head.
The C play-head.
The D play-head.
You can switch between play-heads using the play-head selectors :
The selected play-head will become active (orange) and the timeline will
centre itself on the active play-head. The colour of the indicator buttons update
to reflect the play-head status.
Timeline Marks
You can add marks to a composition timeline in order to operate on specific
regions only :
Delete only a marked region
© 2014 Digital Vision
UM-2014.1-07
98
Compositions
Limit clip insertion to a marked region
Playback only a marked region etc.
Starting marks are called In marks, ending marks are called Out marks. The
timeline position indicators will reflect any marks set on the timeline.
Mark In and Out set w ith dotted line indicators.
Ico Hotk Description
n ey
i
Set mark in
o
Set mark out
p
Set mark in to out (mark segment)
CTRL
Clear mark in
+i
CTRL
Clear mark out
+o
CTRL
Clear mark in to out (un-mark segment)
+p
Bookmarks
Bookmarks are tags you attach to either an absolute timeline position or to
individual segments. These bookmarks are useful for taking notes for future
reference.
Creating a Bookmark
There are two types of bookmarks - timeline and segment. To create a
bookmark of either type at the active play-head position, open the bookmark
dialog :
Keyboard : CTRL + m
Panel : CTRL + Book M
© 2014 Digital Vision
UM-2014.1-07
Composition Elements
99
Mouse :
You can also use the mouse Right-Click on the timeline timecode
row at the top of the composition :
Right Click to open Add Bookm ark dialog
The bookmark dialog window opens :
Add Bookm ark dialog
The Type drop-down list lets you select a segment or timeline
bookmark (see below).
Add your descriptive text to the Note field.
Choose a colour for t he bookmark.
Then press the Create button to create the bookmark.
Valhall Control Panel
If you are using the panel you can use ENTER to add a bookmark
or use the the QUICKNOTES buttons 1-8 to add bookmarks of
differing colours.
The panel also allows the addition of bookmarks on the fly during
play out. They will update on the timeline once you stop playback.
However, note that you cannot change between Timeline and
Segment bookmarks while playing back.
© 2014 Digital Vision
UM-2014.1-07
100
Compositions
Timeline Bookmark
A timeline bookmark is attached to a specific timecode on the
composition timeline itself and stays in the same place on the timeline.
A timeline bookmark is displayed above the timeline.
Segment Bookmark
A segment bookmark is attached to a specific segment and moves with
the segment. A segment bookmark is displayed within the segment.
Listing and Editing Bookmarks
To list your bookmarks, press :
Keyboard : m
Panel : Book M
A window opens and displays all bookmarks created on the current
composition with their types.
You can select a bookmark and edit it, delete or cue to the bookmark location.
© 2014 Digital Vision
UM-2014.1-07
Composition Elements
101
Valhall Control Panel
Use the UP/DOWN arrows to navigate and ENTER to cue to the
selected bookmark.
Exporting Bookmarks
You can export timeline bookmarks (not segment) using a utility tool called
Bookmarks Assistant supplied with the distribution. This is documented in
the Bookmarks Assistant appendix.
Adjustment Segments
An adjustment segment is a special kind of segment we can create that has
no associated material. This type of segment is "transparent" and any effects
we apply to it will be applied to the material we cover on (visible) tracks below.
An adjustment segment is narrower than a normal segment and by default
drawn in a grey-green colour :
The adjustm ent segm ent (m iddle) is narrow and a different colour. If active, it w ill be
show n in the usual blue colour.
Effects you apply are only applied to covered segments on tracks below.
An adjustm ent track and the m aterial it can affect on the track below . Note that an
adjustm ent segm ent has no thum bnails.
Adjustment segments are useful for adjusting a group of shots the same way.
You can apply any number of effects to the segment in the normal way.
© 2014 Digital Vision
UM-2014.1-07
102
Compositions
Creating an Adjustment Segment
To create an adjustment segment, use marks to select the timeline area for
the segment and then use splice or overwrite with no library material
selected :
Set a Mark In mark
Set a Mark Out mark
Press SHIFT + v (splice) or SHIFT + b (overwrite)
Segment Status Colours
Various colour codes are used to identify the cache and render status of
timeline segments.
The colours shown below are the defaults. They can be changed by
editing the preference file colour.prefs in the folder :
C:\Phoenix\2014_1\root
Cached and Rendered
We mention two types of frames below : cached frames and rendered
frames.
Cached
A cache (also known as source cache) is a source sequence that has
been cached to our internal format (currently DPX except for float/half
float sources). It may be a full size clone (e.g. 1:1 Source Clone, or from
R3D, Quicktime or MXF) or a source proxy at 2:1, 3:1 etc.
These caches have no effects applied.
Rendered
A rendered cache is a sequence that has one or more effects applied
and has to be rendered.
Colour Coding
Normal
N/A
© 2014 Digital Vision
UM-2014.1-07
Composition Elements
103
No processing required.
No timeline colour means the segment requires no rendering e.g. no
applied effects or no source caching/generation needed.
Cached
The first segment above has been cached (and note it has no applied
effects). This segment may be a cached MXF source (or some other
cacheable media) or a generated proxy (2:1, 3:1 etc.) and is shown in
dark green.
Rendered
The second segment has been rendered (i.e. it has an applied effect)
and is shown in lighter-green.
Note also that the second segment has a lighter colour
indicative of an applied effect.
Uncached
The first segment needs caching.
This segment may be an MXF source (or other cacheable media) or an
ungenerated proxy and is shown in dark red. It has no applied effects.
© 2014 Digital Vision
UM-2014.1-07
104
Compositions
Unrendered
The second segment needs rendering.
This segment has an applied effect and requires rendering. It is shown
in a lighter red.
Caches Missing
Segment has missing caches.
Missing caches are shown in yellow. You will be prompted to fix these
(which will render them).
Caches Fragmented
Segment has fragmented caches.
Fragmented caches are shown in bright red. You will be prompted to fix
these (which will re-render them).
BL and AUX Segments
BL and AUX segments will conform automatically via an EDL. You can also
© 2014 Digital Vision
UM-2014.1-07
Composition Elements
105
manually splice BL or AUX segments using the keyboard :
BL
SHIFT + CTRL + b (or v)
AUX
CTRL + ALT + b (or v)
The actual black-level value used by BL will be taken from the project setting.
The AUX colour will be taken from the general.prefs preference file and will be
set once on project creation.
The general.prefs setting for AUX colour is auxColour and defaults
to black. Parameters are given for red, green and blue where values
are 0.0 to 1.0.
BL and AUX segments are never active (blue). As a result of this,
you cannot start a colour dynamic on these segments, only end on
one.
Grouped Shots
You can group segments together and apply your grade to the group rather
than to each shot individually. A shot that is part of a group (and when that
group is current) is shown with a green triangle at the end of the segment.
Segm ent is part of a group
If segment thumbnails are enabled, the thumbnail will cover part of the
triangle.
Manipulating Compositions
Timeline editing tools are found on the tim eline toolbar at the
bottom of the main screen :
© 2014 Digital Vision
UM-2014.1-07
106
Compositions
You may need to change from the effects to the editing toolbar using
the switch button :
The following sections relate to both video and audio material.
Adding Media
You can manually add shots to the composition timeline by using drag and
drop from the library or by using the splice or overwrite tools (from the
keyboard or GUI buttons).
Clip insertion will obey the current ripple mode and will be inserted at either :
a) The active play-head position or
b) Any Mark In location set.
Splice
Hotkey : v
The splice operation is non-destructive, and any clip segments that
already exist on the timeline will be shifted along by the length of the
media you insert.
The overall length of time used on that track will therefore change by the
length of the new media clip that has been added.
© 2014 Digital Vision
UM-2014.1-07
Manipulating Compositions
107
Overwrite
Hotkey : b
This operation will not move existing clip segments out of the way so the
overall length of time used on that track will not change. Any existing clip
segments will be overwritten.
Once a media clip has been added to the timeline we refer to it
as a media segment. The source clip remains the same but a
segment can be edited.
Drag and Drop
You can select one or more library clips and drag them to the
composition timeline.
The shots will be placed onto the video track they are dropped on and
this is indicated by the track enabled light being active.
Drag and Drop : track indicator light m atches cursor position
© 2014 Digital Vision
UM-2014.1-07
108
Compositions
Editing and Selection
An edit mode defines the behaviour of the timeline manipulation tools,
including editing, moving, slipping, sliding and selection. There are four
modes, the default being a direct selection tool.
Icon
Description
Direct Select mode
Region Zoom mode
Move segments mode (segment editing)
Trim mode
Direct Select
This is the default mode. Use the mouse to left-click a segment to select it (it
turns orange).
To select multiple segments :
Drag a selection box with the mouse (see diagram below)
Use the SHIFT key to SHIFT-click multiple segments and all
segments in between
Use the CTRL key to CTRL-click multiple non-contiguous segments.
Using the m ouse to drag a selection region
© 2014 Digital Vision
UM-2014.1-07
Manipulating Compositions
109
Region Zoom
You can use the mouse to drag a selection box around a section of the
timeline. On mouse release, the timeline will zoom to fit the selected
segments.
Drag select a box and tim eline w ill zoom to display segm ents.
Segment Editing
This mode lets you move or copy one or more segments on the timeline.
Select one or more segments as per the direct select mode described above.
To move the selected segment(s), we drag with the mouse and to copy we
use the keyboard short-cut keys.
Moving Segments
To move segments, select them, press with the left mouse button and drag
them to the new location on your timeline. Dragging will obey ripple mode.
If you are not in ripple mode, dragging one or more segments on top
of other segments will replace the segments below. In ripple mode,
the segments below are pushed out of the way.
The default move mode is snap to cut. The start and end of the dragged
segments will snap to any cut points they cross, and allow positioning flush to
any other segment (beside, above or below).
© 2014 Digital Vision
UM-2014.1-07
110
Compositions
Before : tw o segm ents selected
During : segm ents being m oved by dragging. A vertical bar and arrow
show s the dragged segm ents snapping to any cuts they cross.
After : segm ents m oved to new position.
To position segments freely, with no snapping to cuts, hold down
the CTRL key while dragging.
Copying Segments
Use the keyboard to copy the selected segments to a different location on
your timeline.
Copy : c
Splice : v
Overwrite : b
Splice will ripple the timeline and ignore ripple mode.
The segments will be inserted at :
The active play-head location or
The Mark In point if it exists
If a Mark In and a Mark Out point exists, the segments will be inserted to fit
© 2014 Digital Vision
UM-2014.1-07
Manipulating Compositions
111
between them, and clipped if longer.
Trim Mode
For discussion of trim mode, see Trim Modes below.
Marking Regions
When adding clips to the composition timeline, we take account of any
timeline marks set (see Timeline Marks).
No Marks
With no marks, a clip is inserted full length at the active play-head
position.
No m arks - splice to active play-head
Mark In
With a Mark In only, a clip is inserted full length at the Mark In position.
Mark In - splice to it
Mark Out
With a Mark Out only, a clip is inserted at the active play-head position.
If the clip extends beyond the Mark Out point, it is truncated.
Mark Out - splice at play-head to m ark
© 2014 Digital Vision
UM-2014.1-07
112
Compositions
Mark In and Mark Out
With both a Mark In and a Mark Out, the clip is inserted at the Mark In
position. If the clip extends beyond the Mark Out point, it is truncated.
Mark In and Out - splice from in to out
Deleting Media
To delete one or more segments from your timeline, select the segment(s)
then :
Press your keyboard Delete key or
Press the lift/remove toolbar button
The track does not need to be enabled but must be unlocked :
If you have ripple mode on, you may see timeline segments move to
fill the space created. See below.
Removing Marked Regions
To delete a marked region :
a) Set your Mark In and Mark Out points
b) Enable and unlock the track you want to affect :
c) Press the Lift Marked button
.
All media will be removed between the Mark In and Out points on the selected
track.
© 2014 Digital Vision
UM-2014.1-07
Manipulating Compositions
113
Ripple Mode
Ripple mode is a state that affects the behavior of all delete, move and trim
operations, it can be toggled on/off via the button on the timeline toolbar :
Any operations performed while ripple mode is on are rippled throughout the
rest of the timeline so that any gaps created by the operation are closed. If
ripple mode is turned off then a gap/filler will be left on the track in place of
any segments that have been removed or trimmed down. See below.
Ripple mode does not apply to splice and overwrite operations
because these operations are inherently rippled (splice) or not
(overwrite).
The following example shows the effect of deleting the middle of three
segments, with and without ripple mode on.
Select the middle segment and press the delete key on keyboard :
Ripple Mode Off
With ripple mode off, the gap remains.
© 2014 Digital Vision
UM-2014.1-07
114
Compositions
Ripple Off - gap rem ains
Ripple Mode On
With ripple mode on, the segment to the right is shifted left and closes
the gap.
Ripple On - segm ents collapse and fill gap
Trim Modes
A timeline segment can be considered a "window" on the sequence as it
exists on disk and there may be frames both before and after those we can
see in the monitor window.
Using the trim toolset, we can adjust the portion of the shot we see, including
the visible start and end frames.
The start and end portions of a shot we do not see are known as
head and tail handles.
© 2014 Digital Vision
UM-2014.1-07
Manipulating Compositions
115
Trim Mode
You can enable trim mode via a shortcut key or a GUI button :
CTRL + u (this toggles trim mode)
.
To enter Trim Mode, the timeline area of the GUI has to be in focus.
You can focus it by left-clicking once with the mouse.
In trim mode, if a segment has head or tail handles, these will be indicated
visually in yellow. Any available shot handles will be shown inside the shot
itself :
Centre shot has both head (left) and tail (right) handles, show n in yellow .
Trimming
In trim mode, handle drag bars will be visible when you move the mouse
over them :
Hover over shot w ith m ouse and handle
drag bar appears
Click drag bar to select
You should select the drag bar by left-clicking once (drag bar turns
orange) before attempting to trim.
© 2014 Digital Vision
UM-2014.1-07
116
Compositions
With a drag bar selected, you can trim a shot by :
Dragging with the mouse
Using the keyboard shortcut keys (see below)
Typing in a trim value
The keyboard shortcuts are as follows :
Key
Description
<
Trim left one frame
>
Trim right one frame
M
Trim left 10 frames
/
Trim right 10 frames
See the Hotkeys guide distributed with the software. Note that these
keys refer to the Digital Vision application keyboard and the key
names may be different on a normal keyboard.
You can enter a value directly by typing it into a numeric text entry box that
appears above the edit mode buttons. Use a negative value to trim backwards
:
Num ber entry box for trim m ode
If a shot has head handles, the offset (as a timecode) of the first visible frame
of the segment is shown on the segment. This is the Source Offset :
Source offset displays current num ber of fram es to first fram e visible
If you trim the head of a shot, the source offset will update.
You will not be able to trim a shot beyond the available handles and no change
to the shots on the timeline will occur if you type such a value into the trim edit
box.
© 2014 Digital Vision
UM-2014.1-07
Manipulating Compositions
117
Slip Mode
Slipping allows you to change the range of source frames that are used in a
segment, changing the start and end frames, without changing the position of
the segment within the timeline or its overall length. This is useful for
synchronizing video segments to audio.
Slip Mode : Segm ent stays fixed on tim eline but start and end fram es change.
To activate slip mode, select the head and tail trim handles of the same
segment. You can do this via the short-cut key :
CTRL + t
Slip Mode handles inside segm ent
You can slip the shot by typing a value into the trim edit box or using the
keyboard short-cut keys, as described above.
Slide Mode
Sliding allows you to adjust the position of a segment within the timeline by
sliding it left or right. The tail of the previous clip and the head of the
subsequent clip are trimmed automatically to match the repositioned segment
and the overall length of the composition stays the same.
Slide Mode : Segm ent m oves along tim eline, start and end fram es stay fixed.
To activate slide mode, select the trim handles on the segments adjacent to
the segment you want to slide i.e. the tail of the preceding segment and the
head of the next segment. You can do this via the short-cut key :
© 2014 Digital Vision
UM-2014.1-07
118
Compositions
CTRL + y
Slide Mode handles outside segm ent
You can slide the shot by typing a value into the trim edit box or using the
keyboard short-cut keys, as described above.
Cuts
A cut (or edit point) splits a timeline segment up into two parts. There are two
types of timeline cuts defined, a scene cut and a normal cut.
Scene Cut
Short-cut : c
GUI :
A scene cut is a cut inserted manually inside the application via :
The cut button (or keyboard shortcut)
The scene detect module
An EDL used to "cut up" pre-loaded and spliced timeline media.
You cannot trim scene edits.
Normal Cut
Short-cut : N/A
GUI : N/A
A normal cut is an editorial decision and will be created via :
An EDL
An AAF file
© 2014 Digital Vision
UM-2014.1-07
Manipulating Compositions
119
Normal cuts will (normally) have handles and allow head and tail trimming.
Creating a Field Edit
Short-cut : Shift + c
GUI : N/A
In a field based project, you can insert an edit on a field boundary. Field edits
are displayed with a "stitched" line as shown below :
Field Edit is "stitched".
You will need to be in Field Mode to insert a field edit. This is indicated by the
"asterisk" button :
Field toggle button (enabled)
To insert an edit on a field boundary, enable field mode, set the play-head at
the desired timecode and use the keyboard short-cut Shift + c
Note that the timecode indicator displaying your current location on
the timeline has an asterisk (*) appended when you are on a field
boundary :
When play-head on a field boundary, location show s a "*".
© 2014 Digital Vision
UM-2014.1-07
120
Compositions
Toggle Scene Cut to Normal Cut
Short-cut : N/A
GUI :
You can toggle a scene cut to a normal cut (and vice-versa) by pressing the
toggle edit button.
Joining Contiguous Segments
Short-cut : N/A
GUI :
You can join two contiguous segments together by selecting them both and
pressing the Remove Matched Edit button :
The segments you are joining have to be from the same media source,
adjacent to each other in the timeline, and in increasing source time order.
Trimmed out frames from either of the segments is allowed, as the underlying
material will still exist and the join operation can put the segment back
together.
Shots View
The second view we have of the timeline is Shots view. To select Shots view,
click the Shots tab or press the F3 short-cut key.
The Shots view shows a video mix-down of the shots in your composition
such that we only see the segments that are topmost in the timeline view. We
show :
We show a single frame of each timeline segment.
An indication of any applied effect layers are placed on top (optionally).
Gaps in the timeline are shown as black shots.
© 2014 Digital Vision
UM-2014.1-07
Shots View
121
The two illustrations below show the timeline view and its associated Shots
view.
Tim eline view .
Shots view of tim eline above.
The frame displayed is from the middle of the segment. This is not
configurable currently.
Shots View Switches
To the left of the shots themselves are some buttons that affect the display
and ordering of the shots.
Thumbnails
This toggles the size of the displayed thumbnails.
Play-heads
Toggles the display of all play-heads or only the active play-head.
© 2014 Digital Vision
UM-2014.1-07
122
Compositions
Effect Bars
Toggles the display of the effects bars above the shot.
Src / Rec Switch
Toggles the display of the shots in record timecode order (default) or source
timecode order.
This will affect VTR layoff and is linked to Tapename Sort (below).
Set to SRC for a Source Order (C) VTR layoff.
Handles Mode
Toggles handles mode.
Normally, we can only play the visible (non-handle) portion of a segment. In
handles mode, we can step through and play entire shots, including playing
through head and tail handles. The play-head position will update to show us
our position within the shot and accounting for handles.
This requires us to be in SRC order view.
Tapename Sort
This will sort the shots to be in tapename order (then source timecode order).
You must be in SRC timecode order (SRC switch enabled).
This will affect VTR layoff and is linked to Src/Rec Switch (above).
Enabling this results in a Source Order Tape (C) VTR layoff.
© 2014 Digital Vision
UM-2014.1-07
Shots View
123
Effect Indicators
Any applied effects are indicated above the shot using coloured bars : Base
layer, CC/FX layer, Master layer and Pan/Scan. If multiple FX or CC layers
are present, these are indicated by small boxes in the LY bar :
In the illustration on the right, the
shot on the left is the active shot
(blue outline).
All effect layers have an applied
effect (coloured bars) and there
are two CC/FX layers indicated
(two boxes on LY bar).
Active shot on left, w ith effect indicator bars
You can toggle the display of the effect indicator bars using the
Marks
Timeline Mark In and Out points will be shown with dotted lines :
Handy Hotkeys
icon
© 2014 Digital Vision
hotkey
function
TAB
Toggle full-screen mode, i.e. hiding the GUI
ESC
Exit full-screen mode, back to GUI mode
G
Zoom into the active region of the timeline
UM-2014.1-07
124
Compositions
© 2014 Digital Vision
F
Fit the whole timeline into the viewing area
none
+/-
Zoom timeline in/out
none
mouse wheel Zoom timeline in/out
none
Ctrl + drag
mouse left/
right
Pan the timeline left/right
none
Ctrl + Shift +
drag mouse
up/down
Zoom tracks in/out, showing bigger/smaller
thumbnails
none
Ctrl + F2
none
Ctrl + HOME
Switch to the next play-head making it the
active play-head
none
HOME
Jump play-head to the start of the
composition
none
END
Jump play-head to the end of the
composition
none
[ or Down
Arrow
Jump play-head to the start of the previous
edit
none
] or Up Arrow
Jump play-head to the start of the next edit
none
Ctrl+[ or
Ctrl+Down
Jump play-head to end of the previous
segment
none
Ctrl+] or
Ctrl+Up
Jump play-head to the end of the segment
I
Set mark-in point at the play-head position
O
Set mark-out point at the play-head position
P
Set mark in and out points around selection
Ctrl + I
Clear the mark-in point
Ctrl + O
Clear the mark-out point
Ctrl + P
Clear the both mark-in and mark-out points
none
Shift + I
Jump play-head to the mark-in point
none
Shift + O
Jump play-head to the mark-out point
V
Splice a clip onto the active track
B
Insert a clip onto the active track overwriting
segments if necessary
DELETE
Remove selected segments from the
timeline
Toggle between standard timeline view and
large panel view
UM-2014.1-07
Handy Hotkeys
125
Remove marked region from the timeline
C
Insert an edit/cut
Shift + C
Insert a field edit/cut
Ctrl + C
Remove an edit/cut, rejoining two adjacent
segments
Ctrl + U
Toggles between Direct Select Mode and
Trim Mode
none
Ctrl + T
Toggles slip mode on/off, when in Trim
Mode, and activates the segment trim
handles
none
Ctrl + Y
Toggles slide mode on/off, when in Trim
Mode, and activates the segment trim
handles
none
M
Trims the active handle back 10 frames.
none
<
Trims the active handle back one frame.
none
>
Trims the active handle forward one frame.
none
/
Trims the active handle forward 10 frames.
none
F3
Switch to Shot List View
none
Ctrl+F3
Toggle large shots view / standard view
none
© 2014 Digital Vision
UM-2014.1-07
Versions
8
127
When adding a media clip to a composition timeline it is possible to add it as
a version of an existing clip segment instead of as a new segment.
By adding a version you preserve the underlying clip segment in the
composition along with all the changes you have made to it (e.g. trimming or
effects). Versions therefore allow you to experiment with different clips, or to
make gradual changes to a clip segment and save each one as a separate
version until you decide which version you want to keep.
A segment containing a version is denoted on the timeline by a triangle in the
centre:
Grey triangles denote the presence of underlying versions in that segment,
and a green triangle identifies the approved version. Approving a version is
simply a mechanism that allows you to differentiate your preferred version
from all the others. You can change the approved version at any time.
Version Controls
The buttons for adding, approving, and deleting versions are on the timeline
toolbar:
Add a source (duplicate) version (for active shot).
Hotkey : CTRL + N
Add a grade version (for active shot).
Approve current version.
© 2014 Digital Vision
UM-2014.1-07
128
Versions
Delete current version.
Hotkey : SHIFT + N
Adding Versions
To add a version you have to first determine which segment on the timeline
you want to version.
A single selected segment (orange) takes precedence
Otherwise, the active segment is versioned
When you're versioning it is not necessary to activate the track
because we are explicitly selecting a segment to version. However, if
the track that the selected segment is on is locked, then versioning
will not work.
Once you have selected the timeline segment that you want to add a version
to you have two choices, you can either:
add a shot from the library as a new ungraded version (source
version), or
add a duplicate version of the existing timeline segment (grade
version)
Add New Source Version
Hotkey : CTRL + N
A new shot version is a different shot to the one that is already present in the
selected segment of the timeline. It can be the same source media clip, but it
is different from the shot on the timeline in that it will not have any grading
applied.
To add a new shot version :
1. Select the media clip to add from the library
© 2014 Digital Vision
UM-2014.1-07
Adding Versions
129
2. Select the timeline segment to add the version to
3. Press the A dd Ve rsion button :
The media clip that you select to add as a version has to be at least
as long as the timeline segment used. You cannot add a media clip
to a segment if the clip is shorter than the segment.
Once the new version has been added a triangle will appear in the centre of
the segment to denote the presence of underlying versions, and the new
version will be the one that appears on top and visible in the viewer.
Add Duplicate (Grade) Version
To add a new duplicate grade version :
Select the desired timeline segment
Press the A dd G rade Ve rsion button :
This will add another version of the same shot, retaining any grading and
trimming carried out up to that point. Any selected library clips will be ignored.
As with adding a new version, a triangle will appear in the centre of the
segment to denote the presence of underlying versions, and the new version
will be the one that appears on top.
Handy Hotkeys
icon
hotkey
Ctrl + N
none
function
Adds a selected clip from the library as a
new version
Adds a duplicate graded version of the shot
selected on the timeline
Managing Versions
Viewing Versions
To view the different versions underlying a segment simply click on the
triangle in the middle of the segment. This will open up a drop-down list of all
the versions in that segment:
© 2014 Digital Vision
UM-2014.1-07
130
Versions
Tw o versions visible in dropped-dow n view .
You can change the active version by selecting any other version from the
list.
Versions are numbered Version 1 (original), Version 2 etc. To the right of the
version number is the Material Name.
Approving Versions
If you want to mark a version to denote that it is the preferred version, you can
do so by approving it. To do this:
1. Select the version that you want to approve from the versions list so
that it is the active version, visible on the timeline
2. Select the segment on the timeline so that it turns orange
3. Press the A pprov e Ve rsion button on the timeline toolbar
The version indicator will change from grey to green to indicate that you are
now viewing the approved version:
Green triangle signifies the approved version.
If you later select a non-approved version to view, the indicator will turn back
to grey.
You can change the approved version at any time, simply by selecting a
different version as the active version and approving it following the steps
above. This will set the previously approved version back to unapproved and
set the new selection to approved.
© 2014 Digital Vision
UM-2014.1-07
Managing Versions
131
Deleting Versions
Hotkey : SHIFT + N
To delete a version at any time:
1. select the version to be deleted so that it is the active version on the
timeline
2. select the segment on the timeline so that it turns orange
3. press the De le te Ve rsion button on the timeline toolbar :
The active version will be removed from the list and the next version in the list
will become the active version. At this point the version numbers will reshuffle
to close the number gap created by the deleted version.
If on deleting a version there is only one version left, the triangular version
indicator will disappear from the segment and the segment will return to being
a regular segment without versions.
Version operations are always applied to the active or selected
segment on the timeline, so the active/selected segment must be
appropriate for the operation being carried out otherwise no action
will be performed.
© 2014 Digital Vision
UM-2014.1-07
Rendering
9
133
Adding effects to segments, or transforming sources for output, will
require CPU processing: rendering. This rendering normally happens
transparently in the background as you work, and in most
circumstances requires no explicit intervention.
Master layer effects are rendered in realtime on the graphics card
GPU and do not require system CPU processing.
You will have to render your composition if you :
Add effect layers or
Add adjustment segments
Create and use proxy sources (1:1 Clone, 2:1 etc.)
Create source caches (for example, from MXF, Quicktime or Red raw
files)
Proxy Source vs Source Cache
A proxy source and a source cache are technically the same thing
but we differentiate them because :
a) A source cache is always 1:1 (equivalent to 1:1 Clone proxy) and
b) A source cache requires no explicit proxy format created on the
project. The cache proxy is created automatically and
transparently.
Note that (b) is only true if you leave the createClone parameter
true (for the relevant file format) in the preference file :
C:\Phoenix\2014_1\root\Clip.prefs
© 2014 Digital Vision
UM-2014.1-07
134
Rendering
The following buttons control the rendering process in your project:
Render Controls
The automatic render controls toggle between different rendering behaviour,
and the manual render controls let you set off specific rendering tasks.
Automatic Render Controls
These controls are automatic in that they are toggled on or off, and affect the
render processing from then on.
Render BG
Default : On
With The Render BG button enabled, some resources are devoted to
rendering the active composition in the background while you work. This
background rendering will only occur if the application is otherwise idle and will
pause when a more important workload surfaces (e.g. if you play the timeline,
or need interactive response during grading adjustments).
By default, all new projects have the Render BG button enabled.
© 2014 Digital Vision
UM-2014.1-07
Automatic Render Controls
135
Render BG can greatly reduce rendering requirements with little
impact on your interactive work. It is generally a good idea to leave it
enabled.
Render FG
Default : On
This will cause unrendered portions of the timeline to be rendered for display
when playing timeline. If this button is disabled, playback of unrendered
timeline areas will display grey "not generated" frames :
Cache
Default : Off
The Cache button is relevant to composition playback only. During timeline
playback, any unrendered frames are rendered on-the-fly dynamically for
display (if Render FG is enabled) but are not normally saved to disk. Enabling
the Cache button causes any unrendered frames encountered during
playback to be saved to disk.
This rendering is identical to that done with Render BG enabled or
when doing a Render Output operation, except it occurs only during
timeline playback (of unrendered frames).
Enabling the Cache button may affect timeline playback due to the
extra work required to save out rendered frames to disk.
© 2014 Digital Vision
UM-2014.1-07
136
Rendering
Transition
Default : On
The Transition button enables the rendering of transition effects (e.g.
dissolves).
Manual Render Controls
These controls are in the project library and let you set off specific render
tasks, such as rendering a specific portion of the timeline, or rendering and
exporting media.
Render Output
Pressing the Render Output button will start (or queue) a render task for the
currently active composition.
Only visible video tracks are rendered (we render a "mix-down").
If you have marked an in-point, we will render from this position until we reach
an out-point, or the end of the composition. If there is no in-point, we export
the entire composition. If there is a Mark In and Mark Out set, we render any
unrendered material lying between them.
Export Media
For a discussion of the Export Media options, see the Exporting section.
Task Queue
Render tasks and their status will appear in the Task Manager. This is
accessible via the Library/Tasks button. Tasks are displayed in the Task
manager window, with their progress and status :
© 2014 Digital Vision
UM-2014.1-07
Task Queue
137
Task Manager
Render tasks include both Render Output, Render BG and Export Media
tasks.
Suspend Tasks
The Suspend button will suspend all running tasks.
Delete Tasks
You can delete one or more tasks by selecting them and pressing the Delete
button.
© 2014 Digital Vision
UM-2014.1-07
Exporting
10
139
There are two export options available from the Library :
Library / Export buttons
Export Media renders and exports a composition to a chosen file format
(DPX, TIFF, MXF etc.).
Export Composition exports the active composition as a list file e.g. an EDL
Version 2014.1 also lets you export to an AAF composition via ..
Export Media. This requires the composition you export as AAF to
have been created from an AAF.
Export Media
The Export Media button will let you export the active composition to a file (or
sequence of files) in your chosen location and in your chosen format.
If not already rendered, an export will render all applied effects.
If you have marked an in-point, we will export media from this position until we
reach an out-point, or the end of the composition. If there is no in-point, we
export the composition from the start until we reach an out-point or the end of
the composition.
See File Format Support for supported file formats.
From the library, press the ..Export Media button, this will launch the export
browser and let you navigate to the desired export location.
© 2014 Digital Vision
UM-2014.1-07
140
Exporting
The Export Browser
The Export Browser consists of a number of separate elements that let you :
Navigate to the base folder you wish to write the exported frames to
Choose the desired file format and format options
Choose the export mode (default is record timecode order, as a
single clip)
Choose any global options to set (some depend on export mode
chosen)
Choose the filename (if any - default to numeric names only)
The various component parts of the Export Browser are shown below.
Navigate to the desired folder using the standard file browser controls. Set the
desired file format, format options (if any), export mode and global options
using the controls at the bottom of the browser.
© 2014 Digital Vision
UM-2014.1-07
Export Media
141
Export Path Preview
A preview of the path and filename we will create using the current settings is
displayed at the bottom on the browser window.
The following settings :
Current folder : Z:\projects\SH_77TH\exports\van3d\
Filename typed : $c_outputcc..
Folder Hierarchy set : $c_$o\$r
will preview as shown below :
File Format and Options
Use the drop-down list to select a file format for your export. Options available
for the selected format will be displayed in the Format Options panel below :
See File Format Support for supported file formats.
Switching to a different file format will reset the Global Options to
their default settings.
Filename and Number
Name your exported sequence(s) by typing in a name in the text box. This will
© 2014 Digital Vision
UM-2014.1-07
142
Exporting
be the base name for every exported shot (even when multiple shots are
created on export).
If you do not type in a base name, file names will be numeric only e.
g. 007845.dpx
Numbers are added automatically to exported sequences and
correspond to the frame timecodes. The numbers thus depend on the
selected export mode (and may be record or source timecodes)
File extensions are added automatically
Number Handling
Frame numbers will be added automatically on export, zero-padded to the
specified width (Frame Padding). The frame numbers correspond to the
record (Rec) or source (Src) timecode as per the chosen export mode.
Because numbers are added automatically, some care has to be taken if you
choose to type in numbers as part of the base file name.
If you type in numbers as part of the base file name :
Rec TC modes use the numbers as the starting timecode/number
for every shot created. If shots are exported to multiple folders, every
shot in every folder will start at the given number.
Src TC modes ignore any numbers and always use the source
timecode for shots created.
A filename entered as test will usually result in a file called
test090000.dpx (or similar).
To put another "." before the numerics, enter a filename test..
(note the two dots).
This results in a file called test.090000.dpx.
Using Variables in File Names
You can also use variables in the file entry box e.g.
$t_graded_
might expand to a base filename :
newrtt1_graded_
See the Folder Hierarchy and Variables for a list of variables available.
© 2014 Digital Vision
UM-2014.1-07
Export Media
143
Examples
Filename
Pad Sample File Created
Note
(nothing typed)
6
078456.dpx
4883
7
0004883.dpx
A Rec TC export
mode
4883
7
0000096.dpx
A Src TC export
mode
testexport
7
testexport0006734.dpx
Frame Padding = 7
$c_graded..
0
shot677_graded.89345.dpx
Global Options
The Global Options panel displays options available to all file formats.
Export Mode
The export mode determines how a composition is exported. See Export
Modes below.
Frame Padding
Use this slider to choose the width of frame numbers added to exported
sequences. Numbers are zero-padded.
© 2014 Digital Vision
UM-2014.1-07
144
Exporting
Number
Frame
Padding
Result
789
0
789
789
6
000789
456789
4
456789
Target
Export graded material or source (ungraded) only.
Target: Output Output graded material (as per timeline
Play Output view)
Target: Source Output source (ungraded) material (as
per timeline Play Source view).
Handle Size
This sets how many head and tail handles frames are exported with each
shot.
You can only set handles when using a Multi mode export (see
below).
Caching
The Cache option lets us choose whether to save (internally) any cache
renders or proxies created as part of a render export process.
Cache :
Description
None
No internal caches or required proxies are saved in the
application data store.
Proxies
Save any required proxies.
All
Save both caches and proxies created (if any).
© 2014 Digital Vision
UM-2014.1-07
Export Media
145
SMPTE Level Clip
The SMPTE Level Clip toggle button will clip the exported frame colour data
to a SMPTE legal range (64-940 for 10 bit data).
This is only available inside a Linear (SMPTE) colour space project.
See the Colour Scaling section of the Setup Manual for a discussion
on colour space and scaling.
Export Modes
The export mode determines which shots we export, what timecodes we use,
how we order the shots and (usually) whether to create any folder structure.
There are five modes :
Mixdown Rec TC
Visible Multi Rec TC
Tracks Multi Rec TC
Visible Multi Src TC
Tracks Multi Src TC
The default is Mixdown Rec TC i.e. a single mixed down
sequence using record timecodes.
Each mode consists of important keywords that describe how the mode
works :
Mixdown A single clip is created on export.
Multi Multiple clips are created on export
Visible
© 2014 Digital Vision
A shot is only exported if any part of it is visible.
UM-2014.1-07
146
Exporting
Tracks Shots are exported per track. In this mode, clips are exported
even when fully hidden by other clips.
Src / Rec Clips are exported in source or record timecode order. This
also affects the timecodes used (header and filename).
Track Monitoring
Every mode obeys track monitoring.
An un-monitored track
never takes part in any export mode.
Multi-Mode Exporting
Care needs to be taken when using multi-mode export.
Multi-mode exports can cause shots to be overwritten on export.
Due to the fact that some shot metadata can overlap (e.g. timecodes,
tapenames etc.), it is possible to export in such a way that shots get
overwritten.
For this reason, multi-mode exports will warn you if you do not use an event
folder output structure when exporting :
If you know that your output clips do not overlap, you can press the OK button
to continue.
See Folder Hierarchy and Variables.
Mark In/Out Points
Every mode will take account of any in or out points marked.
Begin an export from an In point.
End the export at any Out point (or the end of the composition).
© 2014 Digital Vision
UM-2014.1-07
Export Media
147
Mixdown Rec TC
Exports as :
Single clip - a flattened, mixed-down contiguous sequence into one
folder.
BL, AUX and filler included in export
No handles allowed
Record order and timecodes
Filler will be exported as black frames at the level defined by project
colour space.
Example
No folder hierarchy or variables required.
© 2014 Digital Vision
UM-2014.1-07
148
Exporting
Visible Multi Rec TC
Exports as :
Multiple clips created
No BL, AUX or filler
Handles allowed. Adjust via Handle size slider :
Record order and timecodes
Clips are only exported if they are visible (even partly)
Example
Here, we use event folders (see Folder Hierarchy and Variables) to ensure
exported shots do not overlap.
See Multi-Mode Exporting for a description of why multi-mode might
cause exports shots to be overwritten sometimes.
© 2014 Digital Vision
UM-2014.1-07
Export Media
149
Tracks Multi Rec TC
Exports as :
Multiple clips created
No BL, AUX or filler
Handles allowed. Adjust via Handle size slider :
Record order and timecodes
Clips are exported even if hidden by other clips.
Example
Here, we use event folders (see Folder Hierarchy and Variables) to ensure
exported shots do not overlap.
See Multi-Mode Exporting for a description of why multi-mode might
cause exports shots to be overwritten sometimes.
© 2014 Digital Vision
UM-2014.1-07
150
Exporting
Visible Multi Src TC
Exports as :
Multiple clips created
No BL, AUX or filler
Handles allowed. Adjust via Handle size slider :
Source order and timecodes
Clips are only exported if they are visible (even partly)
Example
Here, we use event folders (see Folder Hierarchy and Variables) to ensure
exported shots do not overlap.
See Multi-Mode Exporting for a description of why multi-mode might
cause exports shots to be overwritten sometimes.
© 2014 Digital Vision
UM-2014.1-07
Export Media
151
Tracks Multi Src TC
Exports as :
Multiple clips created
No BL, AUX or filler
Handles allowed. Adjust via Handle size slider :
Source order and timecodes
Clips are exported even if hidden by other clips.
Example
Here, we use event folders (see Folder Hierarchy and Variables) to ensure
exported shots do not overlap.
See Multi-Mode Exporting for a description of why multi-mode might
cause exports shots to be overwritten sometimes.
© 2014 Digital Vision
UM-2014.1-07
152
Exporting
Folder Hierarchy, Presets and
Variables
The Folder Hierarchy panel lets you create a folder structure as part of an
export process.
The Folder Hierarchy panel does not create filenames, only folders.
See the Filenaming section for naming exported files.
Folders are created automatically below the current file browser folder (the
"base" folder) and can include shot names, tapenames, project name and
many other metadata elements (see the Variables section below).
You can create a folder hierarchy on export by :
Choose a preset from the drop-down list
or
Enter a hierarchy definition in the text box (including variables)
You should consider using a folder hierarchy when doing any multimode export (e.g. Visible Multi or Tracks Multi). A multi-mode export
may cause exported frames to be over-written. See Export Modes.
© 2014 Digital Vision
UM-2014.1-07
Export Media
153
Presets
Presets are pre-defined folder structures available in a drop-down list for ease
of selection and re-use. When selected, the preset will also be written into the
text box and can be edited as required.
A back-slash character ("\") delimits folders.
Manual Entry or Edit
You can create your own folder structure by typing in preset variables and
other text strings in the Folder Hierarchy text box.
You can create a folder structure by separating the elements with
a back-slash character "\".
Saving a Preset
Pressing the Save button will add your folder hierarchy definition to the
drop-down list.
Deleting a Preset
Presets are stored in a plain text file in the application root folder :
C:\Phoenix\2014_1\root\ExportFolder.prefs
ExportFolderPresets
[
Preset "$e"
Preset "$t\$c\$e"
Preset "$o$e"
Preset "$o\$c_$n\$r"
]
To delete a preset, remove it from this file, save the file and restart
the application.
© 2014 Digital Vision
UM-2014.1-07
154
Exporting
Variables
The following variables are available :
Var
Description
Note
$n
Material name
NONAME used if material name
empty.
$e
Event number
See below for the event number
format.
$o
Composition name
NOCOMP used if composition name
empty.
$p
Project name
$r
Resolution.
This will be represented as
WidthxHeight in pixels e.g. 2048x1556
$t
Tape name
NOTAPE used if tape name empty.
$c
Clip name
NOCLIP used if clip name empty.
$O
Original material name
NOORIG used if original material
name is empty.
$f
Frame number
Replaced with a numeric frame
number zero-padded to specified
Frame Padding.
Event Padding
By default, event folders start at 1 and are zero-padded to 4 digits i.e. folders
will be named :
0001/
0002/
..
You can adjust the start number and default event number padding by editing
the export section in the main preference file general.prefs found in the folder
C:\Phoenix\2014_1\root :
C:\Phoenix\2014_1\rootgeneral.prefs
export
{
eventStart 1
eventPadding 4
}
© 2014 Digital Vision
UM-2014.1-07
Export Media
155
Export File Formats
Choose a file format to export to, via the format drop-down list at the bottom of
the window.
Each available format will offer
its own independent set of
options via the Options button.
Drop-dow n form at list
For a full list of supported formats see the appendix Format Support.
Export Composition
This exports the entire composition as a list file (i.e. metadata, not media).
In the Library, press the ..Export C om position button to open the Export
Composition dialog.
Then :
Use the file browser to navigate to the desired location for the list file
Choose the list format
Set list options
Type a list file name
Press the Export button
© 2014 Digital Vision
UM-2014.1-07
156
Exporting
Export Com position dialog
Note that the export ignores :
Marks
Track enable
Track visibility
If you want to export some shots, not the entire composition :
copy the composition (Library/Copy)
delete unwanted shots (with ripple mode off)
export the copy.
You can export a mixdown of all tracks, or a specific track only via the options
dialog.
File extensions are added automatically.
List Format
Choose the export format from the format selector drop-down list :
The supported export list formats are:
EDL (.edl)
Cut List (.ctl)
ALE (.ale)
© 2014 Digital Vision
UM-2014.1-07
Export Composition
157
See the appendix for a description of the list formats.
EDL/CTL Options
The ..O ptions button is available for the EDL and CTL formats.
This will open a new dialog window and let you set various options for the
chosen output list format.
EDL Options
Video Mix Down
Selecting Video Mix Down will export shots from all tracks with "mixed" down
view i.e. shots/cuts as seen from the top track downwards.
Solo Video Track
If you have more than one video track, use this drop-down list to select the
track to export.
Clip Details
Add extra metadata to each exported shot (e.g. clip name, file name) e.g.
* FROM CLIP NAME: A005
* FROM FILE: T:\media\images\tc.00000.dpx
* FROM COMMENT: Check this is OK later
The comment is taken from the shot description column in the
Library.
Cuts Only
This option will only export cuts, no retimes or dissolves.
CMX Legal
The CMX Legal option will disallow the creation of illegal CMX EDL files. The
is particularly important with regards to the tapename.
© 2014 Digital Vision
UM-2014.1-07
158
Exporting
A legal CMX tapename will have :
no spaces
eight characters or less.
If you disable the CMX Legal option, you will be limited to 36
character tapenames. However, the tapename must still contain no
spaces.
When you have adjusted the export properties, close the options dialog and
press the Export button on the bottom right of the file browser window.
The export progress report will be shown in the main Library screen
or via the library T asks window.
Output Timecodes
The source and record event timecodes can be output as a timecode or a
frame count.
CTL Options
The CTL format has a restricted set of options available (Video Mixdown and
Solo Video Track) with the same meanings as for EDL export above.
© 2014 Digital Vision
UM-2014.1-07
Scene Detection
11
160
Scene Detection
The Scene Detect module can perform an automatic detection of scene
changes in a contiguous segment, adding scene edits where found. When
enabled, the detection will begin from the current location of the active playhead.
Setup
To configure scene detection, switch to the S ce ne De te ct tab.
Parameters
Sensitivity
This numeric slider is for adjusting the sensitivity towards detecting
scene changes. The lower the value the less sensitive scene detection
is going to be, so changes have to be very obvious to trigger a scene
change, whilst the higher the value the more sensitive to changes the
scene detector is going to be and smaller amounts of changes will
trigger an edit. If this value is too high then edits will be inserted in the
middle of a scene, whilst if the value is too low scene changes may be
missed.
Lead In
This numeric slider is for specifying the minimum number of frames to
leave in a segment before the next edit is inserted, with the default set to
5 frames.
So at its highest sensitivity setting, the scene detector might be
detecting scene changes every frame, but it will only insert an edit every
5 frames.
Field Boundaries
If enabled, edits can also be inserted at field boundaries on interlaced
material.
When working with interlaced material scene changes sometimes
occur between fields as opposed to between frames, so by turning on
© 2014 Digital Vision
UM-2014.1-07
161
this option you allow the scene detector to insert edits where the scene
change actually occurs. If this options is turned off, then the edits will be
inserted on the frame boundary rather than where the scene change
actually takes place.
Colour
Scene detection is dependent on the material colour format and
especially whether the input is linear or logarithmic. The default setting
will be taken from the project colour scaling setting. Setting the incorrect
value here may result in incorrect scene change detection.
See The Setup Manual for a discussion of colour scaling.
Panel Audio Notify
Enabling this will cause an audible notification when a scene change is
detected. The sound is produced via the control panel.
Usage
Once you have adjusted the settings, switch back to the T im e line tab and
move the active playhead to the start of the segment you want to divide up.
The video track needs to be enabled for scene detection to work.
Turn on the S ce ne De te ct button to start the scene detection process :
You will see the edits appearing on the timeline and a progress report will be
shown in the Library screen :
To stop scene detection at any point just toggle off the scene detect button.
© 2014 Digital Vision
UM-2014.1-07
Viewer Tools
12
163
The viewer tools menu is opened from the project desktop by :
Pressing the F12 hot key or
Clicking the up-arrow button on the bottom-right of the viewer panel as
shown below.
view er toolbox m enu
The viewer tools pop-up menu contains setup for the following functions:
compare mode
head-up display (HUD)
grids
masks
graphs
histogram
colour management system (cms)
These functions can be turned on/off from within the menu pop-up window, or
from the corresponding icons on the desktop once the settings for each
function have been selected via the pop-up menu.
© 2014 Digital Vision
UM-2014.1-07
164
Viewer Tools
Tool Configuration
The available options are user configurable for the following tools :
HUD
Grids
Masks
Graphs
Head-up Display (HUD)
Hot key : F7
The head up display (HUD) overlays information about the frame/shot being
viewed on top of the displayed frame. The information that is displayed is user
configurable (content and position).
The display of the HUD can be toggled on/off using the H U D button in the
viewer options menu or the hot key S.
This is display only and is not rendered into any final output.
© 2014 Digital Vision
UM-2014.1-07
Head-up Display (HUD)
165
Options
This drop-down list defines what HUD information to display over the image.
Sample HUD definitions available are:
location - source and timeline (record) information, in both frames and
timecode
full info all - full information available
full info BI - full information available inside image area (burnt into
image)
full info all
location
logo
Hud Specifications
For the HUD format and specification, see Appendix HUDs Specification.
© 2014 Digital Vision
UM-2014.1-07
166
Viewer Tools
Grids
Hot key : F8
The grids functionality allows you to apply preset grid overlays to your image.
Grids are displayed over the viewed image and are useful for displaying lines,
borders and layout information.
This is display only and is not rendered into any final output.
Options
This drop-down list defines the grids available to display over the image.
© 2014 Digital Vision
UM-2014.1-07
Grids
167
Sample grids included are:
full border
16:9 grid
16:9 blank
1.85 grid
2.35 grid
Grid Specifications
For the Grid format and specification, see Appendix Grids Specification.
© 2014 Digital Vision
UM-2014.1-07
168
Viewer Tools
Masks
Hot key : F9
Masks crop (black out) rectangular areas of the displayed image.
Press the masks button to activate the picture mask function and then select
the mask that you want to apply from the drop-down menu.
This is display only and is not rendered into any final output.
Options
This drop-down list defines which mask to apply to the image.
Sample masks included are:
user
4:3
16:9
1.85
2.35
© 2014 Digital Vision
UM-2014.1-07
Masks
169
2.35 m ask set
User mask
The user mask allows you to interactively draw your own mask over the
image.
In U se r mask mode, press the mask edit button :
A rectangular overlay will appear over the image with handles on each corner.
You can interactively resize the rectangle to create your mask by dragging
each of the corners.
Edit User Mask
Use m ouse to drag rectangle corners to resize m ask.
Move m ask by picking and dragging center point.
© 2014 Digital Vision
UM-2014.1-07
170
Viewer Tools
Disable Edit Mode
Turn off edit m ode to see m ask applied to im age.
Mask Specifications
For the Mask format and specification, see Appendix Masks Specification.
Graphs
Hot key : F10
The graph tool serves three purposes :
It shows the RGB response curves of your shots
It shows the value ranges using dotted lines on the graph (including
important value levels)
It defines how and where the histogram graph will be displayed when
enabled
© 2014 Digital Vision
UM-2014.1-07
Graphs
171
This is display only and is not rendered into any final output.
Options
This drop-down list defines available graphs and histograms.
Note that graphs ignore the "hist" and "parade" settings, using only
the location (e.g. center), size (e.g. PAL) and scaling information
(e.g. cineon).
These options are configured via plain text files (*.graphs) located inside the
folder specified inside the general.prefs file (variable monitorGraphDir).
Named sections inside these files specify the listed options above.
Example graph locations are :
SW - south-west in image
Center - center of image
Scaling refers to the dotted-lines overlaid on the graph to indicate important
graph data points i.e.
Cineon - dotted lines at default cineon black and white points (95/685)
Video - dotted lines at YCrCb SMPTE levels (64/940)
cineon sw
© 2014 Digital Vision
With a grade
UM-2014.1-07
172
Viewer Tools
Graph Specifications
For the Graph format and specification, see Appendix Graphs Specification.
Histogram
Hot key : F11
The histogram tool displays a graph of RGB colour information :
For the entire image or
A selected area of the image
This can be useful in helping identify how much colour correction is needed.
The button on the left activates the histogram, which will be displayed in the
manner and location defined by the current graphs setting.
This is display only and is not rendered into any final output.
© 2014 Digital Vision
UM-2014.1-07
Histogram
173
Options
The available graph positions and types are as per the graphs.
Unlike the Graphs settings, the Histogram settings can be set in a
histogram mode (RGB values overlaid) or a parade mode (RGB
values separated in columns).
Setup
Graph Setup
Toggle display of graph.
Reset graph active area to default (whole image)
Set the scale to use for the reported graph values.
Values : 8,10,16 bit or 0-1.
Default : 10bit
© 2014 Digital Vision
UM-2014.1-07
174
Viewer Tools
Area Selection
By default, the histogram will display RGB values related to the entire image.
You can select a region of interest with the mouse interactively.
You can also click anywhere on the image to display information about a
single pixel.
Display Modes
Histogram
Parade
Note that you can display graphs (colour curves) and histograms (or
parades) simultaneously.
© 2014 Digital Vision
UM-2014.1-07
Histogram
175
Audio Waveform
The Audio Waveform button displays the audio segment waveform overlaid
on your monitor output. The waveform will update dynamically as the
segment plays.
© 2014 Digital Vision
UM-2014.1-07
176
Viewer Tools
Audio segm ent w aveform show n overlaid on m onitor
Handy Hotkeys
icon
hotkey
function
Toggles the viewer options panel on/off.
F12
none
Ctrl + 5
none
5
F6
none
Shift + F6
none
Ctrl + F6
F7
none
Ctrl + F7
F8
none
Ctrl + F8
F9
none
Ctrl + F9
Changes to the next HUD definition
Turns Grids on/off
Changes to the next Grid definition
Turns Masks on/off
F10
F11
Turns Histogram on/off
Ctrl + F12
Ctrl + F12
© 2014 Digital Vision
Changes the compare mode (wipe/dual/
cut)
Changes to the next dynamic compare
source
Turns the Head Up Display (HUD) on/off
Changes to the next Mask definition
Turns Graph Curves on/off
Shift + F11
none
Saves a snapshot of the current image
as a reference image
Toggles the compare source, between
dynamic selection and the reference
image
Turns compare mode on/off
Resets Histogram
Changes to the next Histogram/Graph
definition
Turns CMS on/off
UM-2014.1-07
Handy Hotkeys
© 2014 Digital Vision
177
UM-2014.1-07
Comparison Mode
13
179
Hot key : F6
The compare function allows you to compare the frame you are viewing
against other instances in your timeline, against a reference frame, or against
different versions of the frame itself.
Compare Modes
The Compare options are selected via the drop-down list on the right-hand
menu. Show this menu using the F12 hot key. The options listed inside a
project may be a subset of the total available because you may want to limit
those you can cycle through. The options available in this list is configured in
the Control Panel preference section.
© 2014 Digital Vision
UM-2014.1-07
180
Comparison Mode
Split m ode. You can interactively change the Dual m ode. Com parison side-by-side.
split using the m ouse or panel.
Split
Selecting split mode will allow you to wipe between the currently active frame
in the viewer and your comparison image.
An overlay control will appear in the viewer, separating the two frames. This
control can then be manipulated interactively by dragging it in any arbitrary
direction, to make comparisons between the two images. It is also possible
adjust the overlay during playback.
Dual
Selecting dual mode will display two images in the viewer. The currently
active frame will appear on the left, and next to it on the right will be your
choice of comparison image.
Cut
Selecting the cut mode will allow you to toggle between the current frame and
your comparison image in full size. Only one image will be displayed at a time,
determined by pressing the compare button on/off. When the compare button
is off you will see the current frame, as normal, and when the compare button
is on you will see the comparison image.
A full screen compare can be achieved by taking a snapshot of the
current image and moving to a new frame for comparison. Press
CTRL + 5 to grab the current image. Holding down the 5 key at any
future time will display the snapshot frame in place of the current
image in the monitor.
© 2014 Digital Vision
UM-2014.1-07
181
Difference Modes
There are 3 difference modes:
Diff red
Diff luma
Diff monochrome
Each one will show you the difference between the current frame and the
comparison frame in the specified colour.
Comparison Image
Once you have selected your compare mode, you can close the viewer tools
menu (F12) and bring up the Memories screen to select what we will
compare against.
Select the ..M e m orie s button :
Select the S hot button :
Choose a Comparison Target from the drop-down list below Shot :
© 2014 Digital Vision
UM-2014.1-07
182
Comparison Mode
You can compare against targets :
Track - the track below
Head - the secondary play-head
Event - a selected event
Revert - the previous grade on the shot
Source - the segment source
Groups - a selected group member
© 2014 Digital Vision
UM-2014.1-07
Stereo Multitrack
14
184
Stereo Multitrack
A Stereoscopic mode can be enabled on a per project basis. This allows both
the display and the grading of stereo left and right channels.
Setting Up Stereo
For stereo support, you need to :
1. Enable a project setting and
2. Choose your stereo mode (if using an interlaced DVI device).
DVS Centaurus II Licensing
You will need the DVS Centaurus II license option Multidevice to
use stereo multitrack mode SDI output. See the DVS Centaurus II
Video section of the Setup Manual for more information.
Project Setting
Stereo is enabled independently per project. To enable stereo on a project,
select the project on the main project screen and select the Stereoscopic
Output tick-box :
Application Preferences
Two modes of stereo channel output are supported, SDI video and
interlaced DVI.
SDI
Output of left and right stereo on SDI channels A and B through a DVS
Centaurus II video board.
You will need to enable your SDI I/O card via :
© 2014 Digital Vision
UM-2014.1-07
Setting Up Stereo
185
Preferences / Monitoring/VideoIO : Enable SDI I/O Card
Interlaced DVI
Output of interlaced stereo through DVI to a supported display device.
If your stereo display device uses an interlaced DVI signal, enable this
via :
Preferences / Monitoring/VideoIO : Interlace Stereo DVI Output
Interlaced Stereo mode is incompatible with OpenGL readback and will be hidden if read-back is enabled.
Using Stereo
If Stereoscopic Output is enabled for a project, stereo display output will be
sent to the configured stereo display device (SDI or DVI) automatically.
Composition tracks V1 and V2 will both be sent to the display device as the
left and right stereo channel.
Stereo channel SDI output order :
© 2014 Digital Vision
UM-2014.1-07
186
Stereo Multitrack
Track
Stereo
SDI Output
V1
Left
A
V2
Right
B
You can reverse this order via the toolbar button :
or by changing the general.prefs parameter :
reverseStereoOutput
This parameter is inside the IOCard section of the preference file.
Viewing
You can view and compare the two stereo channels by choosing a compare
mode between the two tracks. Compare modes are described in the
Comparison Mode section.
Multitrack Grading
You can grade both stereo channels at the same time (and apply notes to
both channels) by enabling Multitrack Grading.
Switch to Memories mode :
Then, switch to Shots mode and enable Multitrack Grading using the button
shown below :
© 2014 Digital Vision
UM-2014.1-07
Using Stereo
187
Shots that are grouped into multitrack mode are shown with green triangles
on their right-hand edge :
Multitrack shots show n in group
Note that multitrack mode will only enable (on both tracks) if the two
tracks are the same length.
The render indicator bar also shows the render status of each track
separately :
Each track now has an independent render status bar
Grades will now be applied to both the top and bottom tracks.
A grade will only be applied to a monitored track :
© 2014 Digital Vision
UM-2014.1-07
188
Stereo Multitrack
Stereoscopic Depth Grading
The Stereoscopic Depth Grading button will cause Pan, Tilt and Rotate Pan/
Scan transforms to be applied normally on the top track but in reverse on the
track below.
This can easily be seen in the track thumbnails as shown below :
Track thum bnails show that top track has positive pan. This is reversed on the bottom
track.
© 2014 Digital Vision
UM-2014.1-07
Colour Management
15
190
Colour Management
Hot key : CTRL + F12
The Colour Management System (CMS) lets you apply colour
transformations to your shots. These transformations are user configurable
and defined in a 3D colour cube file which is loaded into the application on
demand, or specified as part of an project output format.
To use a CMS Look Up Table (LUT), you need to define the project LUT type
on the main project setup screen.
Some samples colour cubes have been provided.
If CMS was not selected for the output format that you are viewing then the
CMS option will appear disabled in the viewer tools menu. To activate the
CMS option you can simply exit your project, add CMS to your project
configuration, then re-open your project.
Once you have activated the CMS option, you can apply the CMS by pressing
the CMS toggle button in the viewer tools menu:
Alternatively, you may have chosen to 'burn-in' the CMS to your output format
(via the project configuration options) in which case the CMS will be
permanently applied and you will not be able to toggle it on/off.
If you want to change the colour cube that you are using, you can use the ..
C M S S e tup button to select a different LUT file.
© 2014 Digital Vision
UM-2014.1-07
Effects
16
192
Effects
A variety of colour correction tools and effects are available, each of which
can be applied independently to individual segments on the timeline.
Since each segment can have a different set of effects, the effects tree to the
left of the composition editor will always show all the colour correction layers
and effects that can be applied to the active segment on the timeline:
As the active segment changes, the effects tree will change to show only the
effects corresponding to that segment.
A selected segment is orange, but this does not override the active
segment with regards to the effects tree.
By default, only the basic colour correction layers appear in the effects tree.
These are the Base layer and the Master layer. Additional colour correction
layers and effects can be added using the effects toolbar, which runs along
the bottom of the composition editor.
Segments that have had grading/effects applied are differentiated on the
timeline from those that haven't by having a lighter segment colour; i.e.
segments with effects are whiter than the grey segments without effects.
In addition, if you have thumbnails enabled, the thumbnails in each timeline
segment will show the first and last frames of the segment with the effects
that have been applied.
© 2014 Digital Vision
UM-2014.1-07
193
The following effects operations will be covered in the next sections:
colour correction layers
editing effects
managing effects layers
adding user effects
transition effects
Colour Correction Layers
Every segment has two colour correction layers available by default, the Base
and Master layers.
The Base layer is a fixed colour adjustment layer at the beginning of
processing
The Master layer is a fixed colour adjustment layer at the end of
processing.
The Base layer also contains isolation effects, whilst the master layer does
not.
These layers are displayed in the effects tree, and as the active playhead
changes segment the effects tree updates to list the effects available for the
active segment on the timeline. To expand an effects layer, click on the arrow
toggle button next to the layer name:
You can control the effects that are available in the base and master layers
and the order that they appear in the effects tree (which is the order they are
processed in) by editing the following lines in the main preference file general.
prefs (See Appendix Application Preferences) :
defaultRealTimeEffectIDs - effects available in Master layer
defaultSecondaryCCEffectIDs - effects available in Base and
CC Layers
Not all effects are necessarily available by default, and you can add/remove
© 2014 Digital Vision
UM-2014.1-07
194
Effects
effects from either layer by adding/removing the appropriate IDs from the
preferences file.
See appendix Effect Identifiers for a list of available effect you can
use in these preference settings.
Effects Layer
The Effects layer, at the top of the effects tree, contains no effects by default.
When you add user effects to a segment they will be listed here.
Additional Secondary Colour
Correction Layers
Additional colour correction layers can be added to the active segment by
pressing the A dd L ay e r button on the effects toolbar. This will add the
layers to the effects tree. The layers are numbered from 1 according to their
position within the effects tree:
These additional layers will have the same set of effects available as the base
layer.
You can add an unlimited number of secondary colour correction layers and
each contains shapes, keys and mattes :
© 2014 Digital Vision
UM-2014.1-07
Colour Correction Layers
195
Layers are always added to the active segment only, they are not
added to selected segments or any other segments.
Rename a CC Layer by selecting it and pressing the F2 key.
Layer Router
It is possible to use the layer router (at bottom of every layer) to set various
layer specific parameters, including how layers are composited (blended) on
top of each other.
The Router has an effect tab containing the parameters available.
It is possible to change the layer opacity, or bypass the layer completely.
Blend Mode
The layer router includes a Blend Mode that controls how the layer is
composited over layers below. It has the following settings :
Over
Add
Subtract
Dodge
Burn
© 2014 Digital Vision
UM-2014.1-07
196
Effects
Lighten
Darken
Hardlight
Softlight
Screen
Overlay
These modes will be familiar to Adobe Photoshop users.
Managing Layers and Effects
Re-ordering Layers
You can re-arrange any layers and effects that you have added to the effects
tree, not including the default 'effects', 'base', or 'master' layers.
Effects are processed top-down as they appear in the effects tree,
so by re-ordering effects you are changing the order that they are
processed in.
By default, any user effects that you add are placed above the colour
correction layers in the 'effects' layer. If you want to be able to place user
effects in-between the colour correction layers, you just need to add them as
layer effects instead. These two options are covered in the adding effects
section.
To re-order a layer :
1. Select the layer (it is highlighted)
2. Hold down the mouse left button and drag the layer up/down the
effects tree (an orange guideline appears)
3. Release the mouse button when repositioned correctly.
4. When you've reached the place where you want to place the layer
simply let go of it with the mouse. All the other layers will
© 2014 Digital Vision
UM-2014.1-07
Managing Layers and Effects
197
automatically shuffle down and be renumbered accordingly.
You cannot place any effects after the 'master' layer. The master
layer is always the last layer in the pipeline.
Renaming Layers
To rename a CC layer :
1. Select the layer (it is highlighted)
2. Press the F2 hot key to edit the layer name
3. Rename the layer and press ENTER when done.
You cannot rename the Base or Master layers.
Deleting Layers
To delete a layer :
1. Select the layer (it is highlighted)
2. Press the Remove Layer button or the keyboard DELETE key
The effect/layer selected is removed from the active segment, so make sure
that your active playhead is positioned over the correct segment when
carrying out this operation.
You cannot delete the Effects layer or the Master layer.
You can delete the Base (CC layer) but the first CC layer created
afterwards will become the new Base layer. If you use CC layers, the
first will always be the Base.
© 2014 Digital Vision
UM-2014.1-07
198
Effects
You can use the control panel Undo button, or press CTRL+Z on your
keyboard to revert mistakes.
If you have multiple colour correction layers, numbered 1 - N, and
you remove one of them, the remaining layers will be renumbered to
reflect their position within the effects tree.
Applying and Editing Effects
The colour correction layers in the effects tree are by default inactive and will
not be applied to the corresponding segment until you edit the parameters of
one of the effects within the layer.
User effects and layer effects on the other hand, are often active by default
and are applied to the corresponding segment from the moment that they are
added.
You can adjust the parameters of any effect, whether active or inactive.
To edit an effect, double-click on the effect name in the effects tree to edit it.
The composition editor panel will automatically switch to the Effe cts tab to
show the parameters for the chosen effect
The currently edited Effect will be orange.
View Output
Hot key : w
In addition, the view mode will automatically switch to Play O utput. In this
mode, any changes to the effect parameters are rendered automatically and
the resulting output image is displayed in the viewer. This output image is the
cumulative result of all the effects that have been applied to that segment, i.e.
the full effects tree.
© 2014 Digital Vision
UM-2014.1-07
Applying and Editing Effects
199
View Selected
Hot key : e
You can change the view mode from Play O utput to Play S e le cte d by
Using the drop-down list selecting the option from the view mode drop-down
list or by holding down the CTRL key when you double-click on an effect to
edit it.
In this mode, you will not see the cumulative result of all the effects in the
effects tree but will see only the cumulative result up to the effect that you are
currently editing.
Further to this, if you are editing an isolation effect, i.e. matte, keyer, shapes,
or blur, you will only see the cumulative result of the isolation effects in that
particular layer.
In View Selected mode, the effect that you are editing will appear in
yellow in the effects tree:
Once an effect has been edited, it appears as bold in the effects tree, as
does the layer that it belongs to:
© 2014 Digital Vision
UM-2014.1-07
200
Effects
The bold indicator in the effects tree signals that the effect has been
edited, not that the effect is active. User effects can be active by
default and will not appear bold unless the effect parameters are
edited.
You can reset an effect back to its original parameters by selecting the effect,
so that it's highlighted, and pressing the R e se t Effe ct button on the effects
toolbar. You can also reset an entire layer, which will recursively reset all the
effects within the layer.
Split Panel View
Hot key : CTRL + F4
When editing effects it can be useful to view the timeline, or the shot list, at
the same time as you're editing the effect parameters. You can do this using
the split panel view.
This will switch the composition editor display to an extended panel mode and
will split the tabs so that you have the 'timeline' and 'list' tabs available across
the top and the 'effects', 'tracker' and 'scene detect' tabs along the bottom:
You can then click on the tabs as normal to change the combination, e.g. to
view the shot list and effect parameters:
© 2014 Digital Vision
UM-2014.1-07
Applying and Editing Effects
201
Adding User and Layer Effects
You can add individual effects to any segment in your composition in addition
to the existing colour correction layers. These effects can be added in two
ways, as user effects or as layer effects:
User effects are added to the Effects layer at the top of the effects tree.
Except Composite effects which are added at the bottom of the
effect tree (below the Master layer).
Layer effects are added as new layers in the effects tree. These may be
Colour Correction layers (CC Layer/Base) or Effect Layers (FX Layers).
The benefit of layer effects is that you can change the position of the layer
within the effects tree and therefore the order that it will be processed in, since
effects are processed top-down based on their order in the effects tree. User
effects can only be ordered within the effects layer and the position of the
effects layer cannot be changed.
As when adding colour correction layers, layer effects are only added to the
© 2014 Digital Vision
UM-2014.1-07
202
Effects
active segment. This is because the effects tree of each segment can be
different, i.e. have a different number of layers and effects, and layers are
added at a specific position within the tree, i.e. under the currently selected
layer.
However, User Effects on the other hand are added to all selected
segments, and only when no segments are selected is the effect
added to the active segment.
The effects available are accessed via the effects list drop-down menu button
on the right of the work area panel:
To add an effect you need to select the effect from this list. The selected
effect will be shown as the button label once the list is closed. Valid effect
addition buttons will be enabled on the effects toolbar.
Next, select the segment(s) that you want to add the effect to.
© 2014 Digital Vision
UM-2014.1-07
Adding User and Layer Effects
203
To select multiple effects, hold down the CTRL key on the keyboard
while clicking them (refer to the section on selecting timeline
segments for alternative methods).
By selecting segments you are overriding the active segment, so if you want
to also add the effect to the active segment you have to select it. Selected
segments are in orange.
If any segment is selected on your composition, the scrollbar is also shown
as orange.
Changing the scrollbar colour to orange means that you can see if a
segment is selected even if it is not visible. This can prevent
accidental effect application to the wrong segment.
At the bottom of the main screen are the buttons that control effect addition,
deleting and parameter reset.
Icon
Action
Add CC Layer
Add FX Layer
Add Inverted CC layer
Add Composite Layer
Note that this is active only if a composite effect is chosen
© 2014 Digital Vision
UM-2014.1-07
204
Effects
Add User Effect (to Effect layer at top)
Add Restoration Effect. This is a DVO Dust+Fix Effect layer
Delete Effect or CC/FX Layer
Reset Effect or CC/FX Layer parameters
User Effects
Adding the effect as a user effect will add the effect to all the selected
segments. The effect will appear in the Effects layer of the effects tree:
Layer Effects
Adding the effect as a layer effect will add the effect only to the active
segment, ignoring other selected segments. The effect will appear as a new
layer in the effects tree:
The effect layer will have the applied effect, as well as all the isolation effects
('matte', 'keyer', 'shapes', 'blur') and 'router' which are present in all layers.
© 2014 Digital Vision
UM-2014.1-07
Adding User and Layer Effects
205
Composite Effects
Like an normal Effect, a Composite effect is added to all the selected
segments. It appears at the bottom of the effect tree.
Transition Effects
Transition effects can be added manually between two adjacent segments on
the timeline. An imported EDL may also include transitions between shots.
Enable the T ransition button - transitions will not be rendered and displayed
unless the T ransition button is enabled.
Select two adjacent segments on the timeline (hold down the CTRL key
whilst clicking on the segments) and press the Insert Transition button on the
timeline toolbar:
© 2014 Digital Vision
UM-2014.1-07
206
Effects
Valid Transition
A valid transition will be shown in white, as a diagonal line between the two
segments, with a vertical line on the start and end frames.
Invalid Transition
If there is not enough material for the transition as set (insufficient handles),
then that part of the transition will be displayed as red :
You can fix an invalid transition by going into trim mode and either :
Trimming the shot that requires the extra handles for the transition.
Once valid, the transition changes from red to white.
Adjusting the transition itself
© 2014 Digital Vision
UM-2014.1-07
Transition Effects
207
Selected Transition
A selected transition is displayed as orange.
If the transition is fully valid, i.e. there are sufficient handles in the tail of the
first segment and head of the second segment to carry out the transition, then
the line denoting the transition will be white, as in the image above. If there are
insufficient head or tail overlap frames then the line be red, instead of white,
over those frames which have insufficient underlying material.
To make the transition valid, you can either adjust the transition handles, i.e.
the start/end frames of the transition, or you can trim the underlying segments
to create the necessary handles. For either operation you need to switch to '
Trim Mode', via the button on the shared toolbar, shown in the image above.
Once in trim mode, you can click on the transition handles and drag them with
the mouse to increase or decrease the length/duration of the transition.
For trimming. refer to the Trim Modes section.
Editing the Effect on a Transition
To edit the parameters of the transition effect you first need to make the
transition the active selection.
To do this, place the active playhead in the first segment, positioning it over
any of the frames the make up the transition. This will set the underlying
segment as the active segment.
Then press the keyboard Page Down key to switch the active selection from
the segment to the transition.
Note that the play head flag will change (drop down) to show that you are
© 2014 Digital Vision
UM-2014.1-07
208
Effects
editing the dissolve now :
A blue box will now appear around the transition to show that it is the active
selection, and the effects tree panel will change to display the transition effect:
To edit the parameters of the transition effect you simply have to double-click
on the effect in the effects tree panel, as when editing any effect.
Retime
The retime effect allows you to change the duration of a shot, either adding or
discarding frames as necessary. A retime effect, being time-based, is treated
slightly differently to other effects.
A retime effect should added as a plain Effect node at the top of the
tree.
© 2014 Digital Vision
UM-2014.1-07
Retime
209
Parameters
Mode
The retime Mode determines the accuracy of the retime calculation for the
final output sequence. It can be set as :
Nearest Neighbour
Bilinear Interpolate - more accurate
Scale
The Scale determines a percentage retime speed.
Note that setting a scale to zero (0) lets you adjust a clip duration
manually by stretching it using the cursor.
Frame Pin
The Frame Pin determines which frame in the source stays constant for the
output sequence.
© 2014 Digital Vision
UM-2014.1-07
210
Effects
Brightness Regions
The Brightness Regions effect allows separate adjustness of the shadows,
midtones and highlights.
It is available as a CC Layer, an Effect Layer or a User Effect.
From the Control Panel, the trackballs adjust black, mid and highlight
Brightness Regions when the Color panel is set to Brightness Regions.
The thresholds for black, mid and white can be altered from the top menus by
pressing B.M or W respectively. The RGB values for black, mid and white can
also be adjusted from the top menus by pressing B.M or W a second time.
These buttons are on the right of the top menu when Brightness Regions
mode is selected.
If you need finer control over the areas affected, you can also use
luminance keys.
© 2014 Digital Vision
UM-2014.1-07
Brightness Regions
211
Printer Lights
Printer Lights are named after the laboratory process of filtering light during
the film printing process, to control the colour of the film.
The numeric values displayed in the GUI and on the panels can be calibrated
in the Preferences pages, so that they match a local film lab. The number of
points per f-stop can also be calibrated.
On the panel, the top menu knobs adjust red green and blue Printer Lights
when the Color panel is set to Balance, Color Curves or Brightness Regions
and the right hand menu selection is button 1, labeled All.
Printer Lights affect all pixels and produce a very clean correction.
They are ideal for balancing raw images, log files or flat transfers.
They are also a good way to remove color casts and adjust color
temperature offsets.
Density
Density is Printer Lights ganged together and a density reset makes each of
the RGB Printer Light values neutral. Density works the same as the
Brightness tool in Brightness/ Contrast and is also known as offset in some
other systems.
Although Density and Brightness behave the same, they are in fact
different controls and occur at different stages of the processing path
within a layer. They can be used independently of each other,
although Brightness is used less frequently because it does not
appear on the control panels. See S Gamma to learn more about
Contrast.
This control affects all pixels equally, regardless of luminance, color or
position. Its affect is similar to camera exposure and it is useful for adjusting
the source image dynamic range to a pleasing level. Since it does not
squeeze or stretch the dynamic range it causes no artifacts and is a great
control to start grading raw or flat scanned images.
Some use Density to set black levels and others to use it to assign the mid
range. Both methods are correct.
© 2014 Digital Vision
UM-2014.1-07
212
Effects
Use Density with a dynamic to grade a fade to black.
Gamma Matrix
The Gamma Matrix tool applies a matrix colour transformation to your image
sequence. A gamma correction factor can also be set before and after this
transformation is applied. You can define and apply presets for both the
gamma correction and the colour matrix.
The gamma function applied here is based on a standard power law
mathematical expression.
Compared to a 3D Lookup Table, the Gamma Matrix tool allows for
a more precise and efficient way to convert between various colour
domains e.g. RGB to/from XYZ or RGB Rec709 to/from RGB DCIP3 etc.
This tool is not designed to convert between video and film colour
domains (e.g. film look or negative density).
Enable
The Enable toggle button enables/disables application of the effect. Toggling
this off will cause the effect to take no part in the processing chain.
Gamma
© 2014 Digital Vision
UM-2014.1-07
Gamma Matrix
213
Switch to the Gamma settings using the Gamma button.
Pre/Post Gamma
A gamma correction can be applied to the sequence before (pre) and/or
after (post) any colour matrix is applied.
Pre Gamma
The Pre Gamma slider applies the specified gamma to the image before the
colour matrix is applied.
Post Gamma
The Post Gamma slider applies the specified gamma to the image after the
colour matrix is applied.
Pre/Post Gamma Presets
Below each gamma slider are gamma preset buttons. Press each button to
quickly set the specific gamma.
See the Presets section for details on configuring and positioning
preset buttons.
Negative Mode
The Negative Mode (-ve mode) button lets you choose how to process
negative values.
© 2014 Digital Vision
UM-2014.1-07
214
Effects
preserve
The preserve setting leaves negative values as they are.
The processing chain is :
-val -> process -> result
clamp
The clamp setting clamps negative values to zero (0).
The processing chain is :
-val -> 0 -> process -> result
process
The process setting causes negative values to be processed as if
positive.
The processing chain is :
-val -> +val -> process -> -result
Clamp at 1.0
The Clamp at 1.0 button causes values greater than 1.0 to be clamped to 1.0.
Preserve Denormals
The Preserve Denormals button enables the use of very small floating point
numbers in the processing chain.
This setting is not needed for most reasonable gamma values.
When enabled, the Gamma Matrix tool will take longer to process
the sequence.
Matrix
© 2014 Digital Vision
UM-2014.1-07
Gamma Matrix
215
Switch to the Matrix settings using the Matrix button.
The Matrix page consists of three sections :
Presets on the left
Matrix settings
Matrix configuration on the right
Matrix Presets
Any matrix presets you have defined will be listed in the first column. Pressing
any preset button will load the preset values into the matrix.
See the Presets section for details on configuring and positioning
preset buttons.
Matrix Settings
The Red, Green, Blue and Alpha matrix component values are listed in the
central section. You can enter these values manually using the value sliders,
or activate a preset button to load predefined values.
Pressing a preset button (e.g. Identity Matrix) will set the matrix values to the
preset values.
Matrix Configuration
The Matrix Configuration column contains utility functions that modify the way
the colour matrix is interpreted.
Preserve Luma
Setting Preserve Luma will adjust the resultant matrix such that the scale of
© 2014 Digital Vision
UM-2014.1-07
216
Effects
each component value stays the same relative to the others, thus keeping the
output luminance the same.
Transpose
Setting Transpose causes the matrix to be transposed before being
processed.
Note that the matrix settings will not change when Transpose is
enabled. However, it is transposed internally before use.
Presets
You can define presets for both the gamma settings (pre and post) and the
colour matrix settings. These can be made available inside the Gamma
Matrix tool as preset buttons.
To create and use a preset, you need to do two things :
1. Define the preset and the values it sets.
2. Lay out the preset button in the tool interface.
These operations require the modification of two text files in the application
root folder.
Preset Definition
Location : C:\Phoenix\2014_1\root\ParamPresets.prefs
File Format
All presets are defined in the ParamPresets.prefs text file, wrapped
inside the ParamPresets tag. The Gamma Matrix effect is defined in a
section wrapped with the tag GammaMatrix.
Within the GammaMatrix section, define one or more preset sections as
shown below.
© 2014 Digital Vision
UM-2014.1-07
Gamma Matrix
217
ParamPresets
{
...
GammaMatrix
{
PresetID1
{
...
}
PresetID2
{
...
}
...
}
}
Each preset has a unique identifier, shown above as PresetID1,
PresetID2 etc.
These unique names are used to reference the preset when placing it as a
button in the tool interface (see the Preset Layout section).
By convention, these preset identifiers are named in a style that
identifies their usage i.e.
preGamma16
postGamma20
matrixIdentity
matrixRGBtoXYZ
etc.
Pre/Post Gamma Presets
Set pre-gamma and post-gamma using the preGamma and postGamma
declarations within a section :
preGammaID1
{
preGamma <FLOAT>
}
postGammaID2
{
postGamma <FLOAT>
}
Where <FLOAT> defines a floating point value for the gamma applied e.g.
preGamma188
{
preGamma 1.88
}
The above pre-gamma section would be referenced inside the Layout file
through the identifier "preGamma188".
© 2014 Digital Vision
UM-2014.1-07
218
Effects
Matrix Presets
A matrix preset specifies each red, green, blue and alpha column value as
follows :
matrixID
{
red
{
red <FLOAT>
green <FLOAT>
blue <FLOAT>
alpha <FLOAT>
}
green
{
red <FLOAT>
green <FLOAT>
blue <FLOAT>
alpha <FLOAT>
}
blue
{
red <FLOAT>
green <FLOAT>
blue <FLOAT>
alpha <FLOAT>
}
alpha
{
red <FLOAT>
green <FLOAT>
blue <FLOAT>
alpha <FLOAT>
}
transpose <BOOLEAN>
}
Where <FLOAT> defines a floating point value e.g.
matrixTestSample
{
red
{
red 0.782000
green 0.366000
blue 0.455000
alpha 0.000000
}
...
... etc.
...
transpose true
}
transpose is a <BOOLEAN> and can be set to true or false. If not present,
transpose is assumed true.
The above matrix would be referenced inside the Layout file through the
identifier "matrixTestSample".
© 2014 Digital Vision
UM-2014.1-07
Gamma Matrix
219
Preset Layout
Location : C:\Phoenix\2014_1\root\ParamLayout.configs
The ParamLayout.configs file arranges various tool interface elements parameters, pages, buttons etc.
File Format
All layouts are wrapped inside the paramConfigurations tag. The Gamma
Matrix effect layout is defined in a section wrapped with the tag
GammaMatrix.
Note that each tool (e.g. GammaMatrix, HLS, DvoRegrain etc.) has
parameters delimited by square brackets ([,]).
Within the GammaMatrix layout section, specify preset buttons use the
syntax :
presetButton "<BUTTON NAME>" "<IDENTIFIER>"
Where <BUTTON NAME> will be the button title (text on button) and
<IDENTIFIER> identifies the button action to use from the preset definition
file.
For the GammaMatrix tool, the <IDENTIFIER> key has a format :
GammaMatrix.<PresetIdentifier>
The <PresetIdentifier> is the unique name given to the preset (see the
Preset Definition section).
Examples
paramConfigurations
{
...
...
GammaMatrix
[
...
presetButton "Test Matrix" "GammaMatrix.matrixTestSample"
presetButton "1.88" "GammaMatrix.preGamma188"
...
]
...
}
The above produce the following interface buttons :
© 2014 Digital Vision
UM-2014.1-07
220
Effects
Hue Curves
Hue Curves is a powerful effect that allows you to modify the hue, lightness or
saturation (HLS) of a shot using an interactive graph.
Parameters
Hue / Lightness / Saturation
The Hue, Lightness and Saturation toggle buttons on the left of the graph
select how the graph affects the image.
Hist
The Hist button shows or hides the histogram display in the graph window.
You can select (pick) areas of colour from the image using your mouse, and
these areas will be displayed on the graph as an aid to graph manpulation.
© 2014 Digital Vision
UM-2014.1-07
Hue Curves
221
Add Point / Delete Point
You can Add or Delete points from the graph by toggling these buttons on, and
then clicking on the graph. This allows finer manipulation of the area of the
image affected by the effect.
Scale
The Scale slider adjusts the scale of the graph shown.
Discussion
Hue Curves is the only tool that utilizes the top menu of both the Color and
the Image panels.
The top buttons on the Image panel select one of six preset points on a
spectrum. These presets assign the menu controls of the Color panel to red,
yellow, green, cyan, blue, or magenta. When the Color panel is set to [Menu
2], labeled Positive, the knobs adjust hue, luminance and saturation of the
selected color. This tool can isolate and adjust several colors in the same
layer.
If Color panel [Menu 3], labeled Inverse, is active the selected color
is left unchanged and the other 5 points are adjusted.
[Menu 3] Inverse makes it very easy to create black and white images with
© 2014 Digital Vision
UM-2014.1-07
222
Effects
one color retained.Color panel [Menu 1], labeled All, selects all six points and
configures the Hue Curves to work the same as the HLS tool. This might
seem redundant but the default processing path puts Hue Curves first in a
layer and HLS as last. Hue Curves All is useful for creating duotone and split
tone effects in one layer, whilst HLS modifies the layer correction as well as
the natural color.
Soft Clip
The Soft Clip effect allows full control over black and white point clipping, and
threshold values. Each RGB channel can be independently controlled.
Parameters
The Soft Clip effect has separate white and black modes, chosen via the
toggle buttons to the left.
The white mode includes Threshold White settings.
The black mode includes Threshold Black settings.
Clip
This setting controls the level of clipping done per RGB channel.
Softness
This setting controls the fall-off (softness) in the clipping performed.
Threshold White / Threshold Black
These settings control the cut-off values for white/black clipping.
Discussion
On the control panel, the black and white trackballs adjust soft clips when the
Color panel is set to Clip. The outer rings adjust a neutral clip and the balls
clip the RGB channels separately to cause colour in the peak whites or
blacks.
© 2014 Digital Vision
UM-2014.1-07
Soft Clip
223
The clips are useful for removing colors introduced by clip settings in
a telecine or camera as well as creating color offsets in the
highlights and shadows.
Effect Notes
You can store all, or a chosen subset, of the effects on a segment (including
any keyframes) using effect Notes.
This is available via the ..Memories button (at the bottom right of main
screen).
Storing and Recalling a Note
In Memories/Notes view, store a note for the current shot by pressing the
Store button.
To recall a note, press the Recall button. The effects contained within the note
will be applied to the current shot.
© 2014 Digital Vision
UM-2014.1-07
224
Effects
Notes are placed in the the notes library and display a thumbnail.
Hovering your mouse cursor over a note will display the note contents :
Selecting a note will display the note effects in the note effect tree (top-right).
© 2014 Digital Vision
UM-2014.1-07
Effect Notes
225
Lens Distort
The Lens Distort tool can fix and undo camera lens distortion.
A number of presets are included for various GoPro cameras.
Presets
Presets are predefined settings organised as easy to apply button actions. A
preset exists for some commonly used GoPro camera formats e.g. GoPro
Hero at 1280x960 etc.
Each preset will set up the Distort parameters described below.
Unity
This removes all correction and disables Lens Distort.
The Distort parameter is changed from Remove Distortion to Off.
© 2014 Digital Vision
UM-2014.1-07
226
Effects
GoPro Hero 1920x1080
This preset is the tool default.
This means that when we reset the tool, it resets to the default value
as per the GoPro Hero 1920x1080 preset.
Distort Parameters
Application
Choose to disable tool, add or remove distortion. The default is Remove
Distortion.
The Off setting (tool disabled) is equivalent to the Unity preset.
Amount
The amount of correction to apply (strength).
© 2014 Digital Vision
UM-2014.1-07
Lens Distort
227
Radius
The Radius determines the distance before we see distortion.
Scale
This scales the source image from its center.
Center X/ Center Y
The center point of the distortion. Default to image center point.
A1 A2 A3 / B1 B2
These define the lens distortion coefficents.
A1 deals with the major "fish-eye" style distortion while A2 and A3 are
more distant, edge distortion. B1 and B2 deal with distortion
considered as pans in Z space (or up and down).
Channels
Values :
Default :
RGB , R , G , B
RGB
Correct distortion in a single RGB channel or (by default) all three.
© 2014 Digital Vision
UM-2014.1-07
Warper
17
229
Warp 4 and Warp 9 are sophisticated image warping tools. They can be used
to fix geometric issues and distortion within image sequences.
Both have a broad application but are of particular use when working with
Stereoscopic 3D sequences.
The two Warp tools are :
Warp 4 The Warp 4 warper is a classic four point warper and allows
warping through the manipulation of the four image corner points.
Warp 9 The Warp 9 warper extends the Warp 4 warper with extra control
points on each side mid-point and the center point.
Both warpers allow warping of all three RGB channels simultaneously, or
each channel separately.
Warper Introduction
Both warper tools are designed to be useful in a wide variety of situations.
The Warp 9 tool should be particularly useful in two important areas described
below. Both areas of specifically relevant to stereoscopic work.
For most Stereoscopic work, you would use a warp tool directly after
the DVO Stereo Fix tool.
Geometric Correction
The Warp 9 tool makes geometric correction straightforward. This issue
arises due to distortion between the camera lenses or the mirror from
the stereo rig and creates a non-uniform vertical mismatch between the
left and right eye images.
By correcting to the center of the image, Warp 9 can then adjust each
quadrant of the image, adjusting the points in Y whilst leaving the center
point unchanged. This provides a much more accurate geometric
match as a result.
Frame Violation
© 2014 Digital Vision
UM-2014.1-07
230
Warper
The Warp 9 warper makes it very easy to bend the image forward or
backwards in depth. This is done by moving the control points in X only.
By moving selected areas you can minimise frame violation (where
objects are too far forward in space), thus limiting the effect on the rest
of the image.
Warper Basics
Both Warp 4 and Warp 9 warpers share common features.
A warp is created by selecting and moving one or more control points. These
can be manipulated and controlled interactively using the mouse or the GUI
controls.
Owners of a Precision Panel can also use it to control the warper
tools.
Control Points
Control points are placed around the edges of the source image.
Warp 4 : four warper control points.
© 2014 Digital Vision
Warp 9 : nine warper control points,
including the central control point.
UM-2014.1-07
Warper Basics
231
Control points change their look when used :
An unselected control
point.
A selected control point
A control point with a
mouse cursor proximity
indication.
Mouse Control
A control point is indicated in red when your mouse cursor is within range.
To select points :
Select one control point :
Click it with the left mouse button
Select multiple control points :
Hold down the SHIFT key while click selecting points with the left
mouse button
Hold down left mouse button and drag to warp image
Marquee Select
You can marquee select multiple control points by drag selecting them :
Drag select m ultiple points using the m ouse.
GUI Controls
Once selected, you can manipulate control points via the GUI controls, using
the mouse or keyboard to enter value.
© 2014 Digital Vision
UM-2014.1-07
232
Warper
The Warp 4 GUI controls
The Warp 4 GUI controls are shown above, and include separate sliders for
the X/Y movement of each Warp 4 control point. Four points leading to eight
sliders.
The Warp 9 GUI controls are similar but have eighteen sliders corresponding
to X/Y for all nine control points.
Warp 9-as-4
You can make the Warp 9 tool warp in a similar mode to Warp 4 by selecting
a corner point and dragging whilst holding down the ALT key :
Mouse drag top-right point :
+ ALT :
Norm al Warp 9 single point drag and w arp
behaviour.
Warp 9 w arp behaviour w ith ALT held
dow n.
Note that the warper behaves in a
similar way to Warp 4 and as if the
mid-points do not exist. The central
point stays locked in place however.
© 2014 Digital Vision
UM-2014.1-07
Warper Basics
233
The Precision Panel has a 4 Points toggle to enable this mode. In
effect, the Warp 9 tool changes to a Warp 4 :
Frame Violation
For frame violation issues, the Precision Panel has mode that lets you modify
all left points in X, all right points in X, all top points in X etc.
Use the Left, Top, Right, Bottom buttons to select the row of affected
control points
Then move all the selected points in the X or Y axes using the All Left
X or All Left Y, or All Top X, All Top Y etc.
Using Left / All Left X to select and
move only one side of the image in
the X axis.
Basic Controls
Scale
Values :
Default :
0 - >100000 (slider)
1.000
The Scale slider lets you scale the image from image center.
© 2014 Digital Vision
UM-2014.1-07
234
Warper
You may want to hide warper boundary artifacts in some
circumstances and the Scale control can push these outside the
visible frame.
Channels
Values :
Default :
RGB , R , G , B
RGB
You can choose to warp only a single RGB channel or (by default) all three.
This can be useful for cases (e.g. stereoscopic sequences) that
have distortion that differs in one or more colour channels.
Reset Selected Points
This button will reset any selected control points.
This also removes any keyframes associated with the control points.
Warp 9 Extended Controls
Interpolation
Values :
Default :
Linear , Bicubic
Linear
Linear interpolation is faster but less accurate than Bicubic.
Center Pinning
Pinning the central control point stops it moving when manipulating other
control points and so protects the central part of the image.
Use the Pin Radius to hold a proportion of the central image area steady as
you move other control points around.
© 2014 Digital Vision
UM-2014.1-07
DVO Effects
18
236
DVO Effects
DVO stands for Digital Vision O ptics, a collection of image
processing tools running in software on generic computer
platforms. DVO effects are optimised to make use of the latest
multithreading, CPU and GPU computer technology.
With the DVO toolset, Digital Vision brings twenty years of experience in
developing high performance image processing algorithms to the world of
data-centric restoration, digital intermediate and commercial work.
Many DVO effects are available and will be described in this chapter.
DVO tools are shot based and require the presence of scene
information. Always scene detect pre-conformed media or
adjustment tracks that span more than one shot.
Introduction
Many DVO tools are available and each can be applied independently to
individual timeline segments. A timeline segment can have multiple different
effects applied, stacked in various configurations (layers).
Selecting a DVO Effect
The individual DVO tools are logically grouped into packages :
DVO Restore - repair and renovate media
DVO Enhance - improve detail and add clarity
DVO Video - tools to process and fix video content
DVO Convert - standards conversion, upscaling and de-interlacing
DVO Camera - tools to process digital camera related content
Each package contains a set of DVO tools available. Choose via the Effect
Toolbox to the left of the timeline :
© 2014 Digital Vision
UM-2014.1-07
Introduction
237
The selector displays the groups and effects as a drop-down list :
Applying a DVO Effect
Once you select the DVO effect, you can add it to the active timeline section
as :
Part of the Input FX group or
A new FX Layer
Adding the DVO effect inserts the selected DVO tool at the appropriate place
in the Effects Tree to the left of the timeline.
Input FX
Press the Input Fx button to add the selected effect to the Input FX group :
© 2014 Digital Vision
UM-2014.1-07
238
DVO Effects
In the example below, the selected effect (here DVO Flicker) is added at the
top of the effects stack in the Input FX group.
Action :
Effects Tree Result :
FX Layer
Press the FX Layer button to add the selected effect to the FX Layer group :
In the example below, the selected effect (here DVO Flicker) is added to the
FX Layer group. An FX Layer gives you extra layer tools such as a Keyer and
Shapes.
Action :
Effects Tree Result :
In Phoenix Finish and Phoenix Video, only the basic colour
correction layer (Master Layer) will appear in the Effects Tree by
default.
The Effects Tree will display all effects applied to the current timeline
segment (segment under play-head). The tree will dynamically update if the
current segment changes (such as during play-back).
© 2014 Digital Vision
UM-2014.1-07
Introduction
239
Additionally, a segment with effects applied is displayed in a different colour to
a segment with no effects applied. See the Compositions section.
© 2014 Digital Vision
UM-2014.1-07
240
DVO Effects
DVO Stereo Fix
DVO Stereo Fix is an advanced stereo enhancement tool designed to resolve
colour matching and geometry alignment issues with stereo sequences. The
tool can address problem areas when they appear over the entire image
frame (global correction) or in different areas inside a frame (local
correction).
The tool will be able to correct most problems automatically but where this is
not possible, controls are available that allow straightforward manual
correction.
Enabling Stereo Work
Some basic setup is required to use the DVO Stereo Fix tool.
Project
Your project should be enabled for Stereoscopic Output :
Composition
You should have Multi-track Grading enabled inside the project :
© 2014 Digital Vision
UM-2014.1-07
DVO Stereo Fix
241
A clip with Multi-track enabled will display edge markers as shown
below :
Adding the Tool
DVO Stereo Fix must be added as an Input FX tool :
Overview
The tool has the following basic control layout, with the two primary tool areas
being :
Colour matching controls
Alignment (geometry) controls
© 2014 Digital Vision
UM-2014.1-07
242
DVO Effects
View Controls
Mute
Mutes both the colour match and the align match, as well as any associated
border/blanking modes.
The parameters in this section regarding view and orientation remain active i.
e. SwapEyes/ViewMode/Mirror/Flip.
This can be used to compare before and after while correcting any
necessary mirror/flip.
Swap Eyes
Swaps left and right eye on output.
All parameters referring to either left or right are associated with the source
left and right tracks. As such, the actual processing is not affected by
swapping eyes on the output.
View Mode
Values :
Default :
Normal , Blended , Side-By-Side
Normal
This control allows different view modes to be applied on the output and is
used mainly for visualisation purposes.
Normal Separate left and right outputs.
Blended Blends left and right image, which could be used to verify
alignment processing.
Side-By-Side Displays left and right images side-by-side with halved
horizontal resolution.
If this mode is used to verify colour matching
simultaneously, please note that many monitors might
have colour reproduction which varies spatially or by
viewing angle.
© 2014 Digital Vision
UM-2014.1-07
DVO Stereo Fix
243
Mirror Controls
The Mirror Controls will automatically determine and correct for a mirrored left
or right eye. If required, manual correction can also be set here.
Auto Mirror
Values :
Default :
Disable , Left , Right
Right
Automatically determines mirror and flip between left and right eye. If we
detect a requirement to mirror or flip, it is applied to the specified eye.
This automatic correction will follow any manual mirror or flip
settings applied to the other eye.
Mirror Left
Manually set left eye to be mirrored.
Mirror Right
Manually set right eye to be mirrored.
Flip Left
Manually set left eye to be flipped (vertically).
Flip Right
Manually set right eye to be flipped (vertically).
© 2014 Digital Vision
UM-2014.1-07
244
DVO Effects
Colour Matching
These controls allow us to correct the colour match between the left and right
eyes.
Colour Match
Values :
Default :
to Left , to Right
to Left
Sets colour processing to match the specified eye.
Setting this to "to Left" will process the right eye to match the left.
Scene Mode
Values :
Default :
Disable , Uniform , Non-Uniform
Non-Uniform
Sets the colour matching mode for a scene such that the scene is analysed
and processed equally throughout (all frames). The different modes relate to
how colour matching may vary spatially over the image.
This is unrelated to any spectrum transformation being uniform or
non-uniform.
Disable No colour match processing is performed (on scene basis).
Uniform Colour matching is assumed to be spatially uniform.
Non-Uniform Colour matching is allowed to be spatially non-uniform.
This mode typically works just as well when the colour
differences are spatially uniform.
© 2014 Digital Vision
UM-2014.1-07
DVO Stereo Fix
245
Scene Mode requires proper scene edits as normally one scene will
behave very differently to another.
Frame Mode
Values :
Default :
Disable , Uniform , Non-Uniform
Disable
Sets the colour matching mode which is applied per frame individually.
The processing and modes are the same as described above for Scene
Mode.
This option can be used as an alternative to Scene Mode processing
if it appears that colour differences change on a frame by frame
basis. It is recommended that Scene Mode processing be Disabled
when used.
Local Mode
Values :
Default :
Disable , Normal
Normal
This option allows for more localised colour match processing than found in
Scene or Frame Modes. The Area Size and Sensitivity controls are linked to
Local Mode processing.
Area Size
Values :
Default :
X-Small , Small , Medium , Large , X-Large
Medium
The smaller the Area Size is the more locally aggressive it can be
considered to be.
Sensitivity
Values :
Default :
0 - 1023
64
The Sensitivity parameter is used to control the allowed difference
ranges. The values we set correspond to 10 bit levels. The effect of
Sensitivity is as a safety measure rather than a processing amount.
To speed up the processing of complete scenes/material, Local
Mode processing can be disabled.
© 2014 Digital Vision
UM-2014.1-07
246
DVO Effects
Colour Match Safety
Values :
Default :
0.0 - 1.0
0.5
This parameter sets a general safety level for the Scene and Frame Mode
colour matching.
Colour Match Safety applies to black levels as well as the analysis and
variability of the spectrum transform applied.
This does not include Local Mode, which uses Area Size and
Sensitivity.
Alignment
These controls allow us to correct the alignment (or geometry) between the
left and right eyes.
Align Match
Values :
Default :
to Left , to Right
to Left
Sets alignment processing to match the specified eye.
Setting this to "to Left" will process the right eye to match the left.
Align Mode
Values :
Default :
Disable , Manual , Global , Morph
Morph
The alignment processing is based on scene analysis and frames are
processed equally throughout the scene. The alignment can also be set
manually or adjusted with a global offset (Manual V-Offset).
Disable No alignment processing.
Manual Set manual global vertical offset (using Manual V-Offset).
Global Automatic and global adjustment.
© 2014 Digital Vision
UM-2014.1-07
DVO Stereo Fix
247
Morph Spatially variable adjustment with linear variability over the image.
Like Scene Mode colour matching, Align Mode requires proper
scene edits as normally one scene will behave very differently to
another.
Manual V-Offset
Values :
Default :
0 - 128
0
Manual adjustment of the alignment.
Borders
The Borders controls let us correct any effect alignment has on frame
borders.
Border correction also depends on the Blanking configuration (see
below).
Borders
Values :
Default :
Disable , Blank , Zoom Source , Zoom Fill
Zoom Source
Disable Disable border processing.
Blank Automatically applies necessary blanking to borders.
Zoom Automatically zooms the output to the source frame and
Source original blanking.
As per the Blanking Mode, this mode takes into account
what needs to be excluded regarding the borders and
alignment.
Zoom Fill Automatically zooms the output to fill the full frame
disregarding any original blanking of the source.
Centre
Values :
Default :
On , Off
On
Centre the result in the frame. This may be necessary for some Border
modes.
© 2014 Digital Vision
UM-2014.1-07
248
DVO Effects
Blanking
Blanking is closely linked to the Borders control and allows us to control how
the frame borders are blanked.
Blank Setup
Values :
Default :
Auto , Source , Output
Auto
Blank Setup lets us choose if blanking is setup by automatic analysis or
manually in relation to the source or the output.
Blanking affects the border processing and and its effect will depend
on the Borders mode.
Auto Use automatic analysis to define the blanking amount.
Source Allow manual blanking setup.
Output Manually specify blanking completely based on the output alone.
This requires you to regard frame effects from the alignment
processing manually, as well as the original source frame
blanking.
This is an Advanced Mode.
Blank Top / Left / Right / Bottom
Manual blanking adjustment to the top, left, right and bottom of the frame.
Specified in pixels.
© 2014 Digital Vision
UM-2014.1-07
DVO Stereo Fix
249
DVO Dust
DVO Dust is a fully automatic and highly accurate film dirt, dust and random
scratch concealment and video drop-out removal system. It can remove
around 90% of visible imperfections without introducing unwelcome artifacts.
DVO Dust utilises a pioneering set of processing algorithms and new filters
with the Digital Vision Emmy award-winning PHAME motion compensation
technology. With manual "dust busting" being very time consuming and
expensive, the automation in DVO Dust can typically reduce the amount of
operator time required by an order of magnitude. This saves enormous
amounts of time and money without any compromise in terms of picture
quality.
This effect has three groups of parameters:
The Enable toggle button allows the complete effect
to be turned on or off.
Presets - preset selections for quick dirt
removal
Processing - specific processing options
Setup - additional settings for various
processing selections
Basic Settings and Presets
The DVO Dust effect provides a number of presets, ranging from Extra Light
to Extra Heavy removal. These work as a very good starting point before
moving on to the more advanced controls in the Processing and Setup tabs.
You may not need to use any of the advanced parameters.
© 2014 Digital Vision
UM-2014.1-07
250
DVO Effects
Enable Basic
The Enable Basic toggle button allows you to enable/disable basic mode.
This mode uses presets to automate and hide much of the effect complexity.
When you edit any of the settings in the processing or setup tabs the
basic mode becomes automatically disabled. Similarly, when you
select a mode from the basic modes, all settings will be
automatically adjusted to fit the selected mode and basic mode will
be automatically enabled.
Presets
This is a collection of preset settings (e.g. Extra Light, Heavy etc.) that setup
the effect for a predefined level of dust/dirt.
Values :
Default :
Extra Light, Light, Medium, Heavy, Extra Heavy
Medium
Strength
This slider allows the adjustment of the strength of dust reduction processing
to use. It is only available in basic mode.
Range :
Default :
-5 to +5
0
Enable White / Enable Black
White/black dirt removal is enabled via the corresponding Enable White/
Enable Black toggle buttons.
© 2014 Digital Vision
UM-2014.1-07
DVO Dust
251
Enable Black - for black/dark spots
Enable White - for white/light spots
Both can also be enabled at the same time.
Default :
On
These options also appear in the Processing tab and they are linked
(changing one location affects the other).
Note that if neither button is enabled then DVO Dust will not filter
at all!
Processing Filters
The filters used by the process are very important in determining the final
processed quality. DVO Dust includes a variety of filter algorithms that can
effectively process a wide range of input footage.
Drop-down Filter list
© 2014 Digital Vision
UM-2014.1-07
252
DVO Effects
Spatial / Temporal / Mixed Filters
Values :
Default :
Spatial, Mixed 1, Mixed 2, Mixed 3, Mixed 4, Temporal 1,
Temporal 2, Copy Prev, Copy Next, Bypass
Mixed 3
The following generic filter groups are defined.
Spatial
All filters named Spatial are filters that work only within the current
frame (or field if the material is interlaced), i.e. it has taps only in the
current frame. These filters are intended for very small spots.
Mixed
All filters named Mixed have taps in both the current frame and the
frame previous to and following the current frame. That is, it has both
spatial and temporal taps. All these filters however have more taps in
the current frame than in the previous and following frames together
(more spatial taps than temporal). These filters are intended for
normal spots.
The different Mixed types (Mixed 1,2,3 etc.) change the ratio between
spatial and temporal. The larger the number, the more temporal
filtering.
© 2014 Digital Vision
UM-2014.1-07
DVO Dust
253
Temporal
Filters named Temporal have both spatial and temporal taps but with
more temporal than spatial. This will enable the DVO Dust to remove
any size of spots. These filters may need more careful use, to not
give unwanted artefacts.
The filter called 'Temporal 2' is a special temporal filter that
uses minimum amount of information from the current frame.
This means that the processed signal will not vary as much as
the normal temporal filter in terms of luminance/intensity.
Copy
Copy Next
Copy Prev
The 'Copy Next' and 'Copy Prev' filters should be used for one frame
in combination with a key area and Global mode to replace a big
chunk of dirt, a big hole, or a flash frame with information from the
next or previous frame.
Bypass
Setting the filter to Bypass will leave dirt unprocessed.
Use Adaptive Size
When the U se A daptiv e S ize button is enabled, the filter size
automatically adjusts during processing according to the size of the dirt found.
Default :
© 2014 Digital Vision
On
UM-2014.1-07
254
DVO Effects
Filter Size
This sets the size of the filter on the current frame, so it is only required for
spatial and temporal filters.
Use the numeric slider to define the filter size when adaptive filter sizing is not
enabled. The larger the size of the dirt the larger this value should be.
Range :
Default :
0 to 15
7
Adaptation
The A daptation toggle button allows you to turn the adaptation processing
on/off.
When this button is off, DVO Dust works in global mode, filtering the whole
image with the same fixed filter selected in the Filter menu.
Note that if the A daptation button is off then none of the
adaptation controls above will have an effect.
Motion
This numeric slider configures the degree of motion sensitivity.
Initially you can set it to 0 (most safety), for maximum motion sensitivity, and
then increase it in steps if there isn't enough filtering in moving parts of the
picture.
A value of 256 corresponds to no motion adaptation at all, which means that
temporal filtering can be applied fully to moving parts of the image.
Range :
Default :
0 to 256
30
MDC
The M DC (Motion Detection Current) toggle button determines whether to
look at just the previous and next field/frame, or to look at all of the previous,
© 2014 Digital Vision
UM-2014.1-07
DVO Dust
255
current, and next field/frame.
Default :
On
Having this option on ensures higher sensitivity and reduces artefacts down to
a minimum.
For maximum filtering, the control may be set to off.
MDC filter configuration is done inside the Setup section.
Edge
This controls material edge protection.
Edge protection acts as a safety measure and reduces the possibility of false
scratch detection. Some material may require this protection e.g. houses at a
distance, a forest or material with a slight weave. By turning edge protection
on, the built in edge detector will affect were DVO Dust filters and it will reduce
filtering where it finds edges.
Default :
On
Edge protection should normally be left on.
Further controls for defining thresholds for edges are available in the Setup
tab.
Edge parameter configuration is done inside the Setup section.
Temporal Adaptation
Temporal Adaptation acts to exclude falsely detected dust/dirt from being
processed. It does this by comparing dirt detected on the current frame with
dirt detected on the previous frame (within a sizable window).
This toggle button turns temporal adaptation on/off.
Default :
Off
The temporal adaptation settings can be found in the Setup tab.
Black / White
There are two separate and independent parameter groups controlling the
processing for Black (dark) and White (light) areas of dust/dirt.
© 2014 Digital Vision
UM-2014.1-07
256
DVO Effects
Enable Black / Enable White
White/black dirt removal can be enabled via the corresponding toggle
button.
Enable Black - to remove black/dark spots
Enable White - to remove white/light spots
Both can also be enabled at the same time.
Default :
On
Note that if neither button is enabled then DVO Dust will not
filter at all!
Use Adaptive
If on, sets white/black contrast to be adaptive.
Default :
On
This will result in the algorithm determining which contrast setting is
needed on a pixel-by-pixel basis.
When enabled the contrast controls change to give more, or less, effect
of the adaptive contrast.
Adptv Threshold
Only applicable if U se A daptiv e is on.
Range :
Default :
-32 to 31
0
Fixed Threshold
Only applicable if U se A daptiv e is off.
Range :
Default :
0 to 63
30
You should lower the thresholds if you have very low contrast white
spots on light background, or black spots on dark background, and
increase the thresholds if the luminance difference between the spots
and the background is less:
© 2014 Digital Vision
UM-2014.1-07
DVO Dust
257
or
set the contrast threshold to a low value
or
set the contrast threshold to a high value
Contrast Adaptation Limits
The contrast adaptation low and high limit controls only work in the adaptive
mode and are used to specify the range of contrast settings that the
adaptation is allowed to work in.
The upper limit is normally set to the non-adaptive contrast setting you
normally use. If both limits are set to the same value the result is exactly the
same as when using non-adaptive contrast.
Low
Range :
Default :
0 to 63
5
Range :
Default :
0 to 63
30
High
© 2014 Digital Vision
UM-2014.1-07
258
DVO Effects
Other Settings
Signal
This selects the signal (channel) within which scratches/dirt will be
detected.
Values :
Default :
Y,U,V,R,G,B,Y+U+V
Y
The adaptation works on one channel only, normally 'Y'. By setting the
signal to 'R', for example, when only red scratches are visible, the DVO
Dust will more precisely detect the dirt, minimizing the risk of affecting
actual picture content.
Motion Estimation
This drop-down button allows you to choose the motion estimation.
Values :
Default :
off, normal, best
normal
When enabled, the motion estimation module gives a performance
boost, both in dirt detection and concealment. This means that much
more aggressive settings can be used without introducing smearing.
Scene Change
This drop-down button gives options for how to process the frames
surrounding an edit/cut point:
Inside - processes the frame before a cut using only the current and
previous frame, and processes the frame after a cut using only the
current and next frame. Stays inside the shot.
Across - ignores cuts, use the previous, current, and next frame.
Goes across shots.
Bypass - doesn't process the frames before or after a cut.
© 2014 Digital Vision
UM-2014.1-07
DVO Dust
Values :
Default :
259
Inside, Across, Bypass
inside
Channels
This control is for selecting the channels from which dirt will be
removed.
Normally the processing should be set to all channels, but in some
cases, especially with small dirt, better results can be achieved by
processing only one or two of the channels.
Values :
Default :
Any combination of R,G and B.
R,G,B
Setup
View
Turning on the Vie w toggle button will provide an overlay/preview showing
detected dirt. The type of overlay can be selected via the Vie w M ode dropdown list:
Default :
Off
View Mode
© 2014 Digital Vision
UM-2014.1-07
260
DVO Effects
Values :
Default :
Dirt On Luma, Dirt On Red Input, Dirt On Red Output,
Difference
Dirt On Luma
Where :
Dirt On Luma - The detected scratches/dirt are high-lighted on a
monochrome input picture with lowered luminance.
Dirt On Red Input - The detected scratches/dirt are shown with red
on the unprocessed input signal.
Dirt On Red Output - The detected scratches/dirt are shown with
red on the processed output signal.
Difference - The difference between the unprocessed input and the
processed output is displayed.
Colour
The drop-down list will default to the project setting for the input format. You
need to set this control according to the material that you are working with. If
the footage was shot with a video camera, select a linear format. If this
control is not set correctly the material may not be processed properly.
Default :
From Project
History Required
The DVO Dust effect is recursive.
Recursive means the result for any given frame depends on the
result of the previous frame(s).
For best results a certain amount of frame history needs to be built up, and
this numeric slider is used to specify how many frames of history to use.
Range :
Default :
0 to 15
5 frames
Use Handles
The Use Handles button controls whether the history includes available
© 2014 Digital Vision
UM-2014.1-07
DVO Dust
261
handles of a scene/shot. Normally, the history frames accumulated will
terminate on a shot edit/event (start/end edit). There may be extra frames
available (handles) before or after the start and end edit points of a shot
however and these will be included as history if Use Handles is set.
If handles exist, full and precise processing will be available from the
first frame of a clip.
Default :
On
The remaining controls on the Setup page are used to optimize the
processing further. These controls should only be used by experienced
operators with a good understanding of the dirt and scratch concealment
process.
Max Filter
Enable
In addition to the filter selected in the Processing tab, a separate max filter
can be enabled.
The Max Filter will only be used when U se A daptiv e is enabled in the
Processing tab.
This is very useful when you have material with mostly small dirt and
the occasional bigger stains.
Default :
Off
Filter
Use this drop-down button to select the max filter with which to process large
stains.
© 2014 Digital Vision
UM-2014.1-07
262
DVO Effects
Values :
Default :
Spatial, Mixed 1, Mixed 2, Mixed 3, Mixed 4, Temporal 1,
Temporal 2, Copy Prev, Copy Next, Bypass
Temporal 1
When the Max Filter is enabled, the normal filter used for the adaptive filter
sizing will take care of the small dirt. When the upper size limit is reached it
will automatically switch over to the filter selected here.
The filter used here would typically be a larger temporal filter.
The Max Filter can also be set to Bypass, which will leave big stains
unprocessed. These can be processed later by a de-blotcher or 3rd party
software.
Size
This specifies the size of the spatial part of the filter (for spatial and mixed
filter types).
Use a large value when processing large bits of dirt.
Range :
Default :
0 to 15
3
Motion
Width
Motion W idth is used in combination with the Motion control in the
Processing section and defines the motion adaptation behaviour. When
motion width is set to 0, the motion setting will be used as a threshold
discriminating between moving and non-moving parts. When motion width is
set to a non-zero value, the classification will change gradually from “no
motion” to “full motion”. Motion width then specifies the size of the transition
region.
Range :
Default :
© 2014 Digital Vision
0 to 255
30
UM-2014.1-07
DVO Dust
263
MDC Scale
The M DC (Motion Detection Current) toggle button in the Processing section
determines whether to look at just the previous and next field/frame, or to look
at all of the previous, current, and next field/frame.
Only used if MDC (Motion Detection Current) control enabled in the
Processing section.
The higher the scale setting, the more filtering (less impact of the MDC
algorithm).
Range :
Default :
0 to 15
8
Edge
The Edge settings apply only if Edge protection has been enabled in
the Processing tab.
Offset
The edge offset acts like a threshold, determining how well-defined edges
have to be before the edge control has any effect. The smaller the offset value
the sooner the edge control will have an effect.
Range :
Default :
0 to 255
45
Scale
Edge scale sets the sensitivity of the edge control. The higher the setting the
more pronounced the effect of the edge control.
Range :
Default :
© 2014 Digital Vision
0 to 255
192
UM-2014.1-07
264
DVO Effects
Temporal
The temporal settings apply only if Temporal Adaptation has been
enabled in the Processing tab.
The purpose of temporal adaptation is to exclude falsely detected dirt from
processing by comparing it with the previous frame's detected dirt within a
sizable window.
Strength
The strength level determines the amount of influence that the previous
frame's detected dirt will have on exclusion of dirt detection in the current
frame. A higher value will result in more dirt being excluded and less
processing carried out.
Range :
Default :
0 to 255
80
Trim Size
The trim size corresponds to a "window" in the previous frame which is
searched for dirt to compare against the current frame. The smaller the
window (trim size) the more filtering that will be achieved.
Range :
Default :
0 to 7
5
Hit Growth
The Hit Growth control is useful when the dirt in the image does not have very
well-defined edges.
© 2014 Digital Vision
UM-2014.1-07
DVO Dust
265
By increasing the hit growth the processor is told that the dirt is bigger than it
actually appears. The result is that the soft edges also are processed.
Mode
Absolute
U se R e lativ e button off.
The hit mask for all sizes of scratches are grown by the same amount as
specified with the strength control
Range :
Default :
0 to 4
4
Relative
U se R e lativ e button on (default)
In relative mode large scratches cause a larger growth.
Range :
Default :
0 to 15
10
The Absolute and Relative sliders control the amount of hit mask growth for
each mode. The higher the value, the larger the area around the scratch that
will be processed.
© 2014 Digital Vision
UM-2014.1-07
266
DVO Effects
DVO Fix
DVO Fix facilitates the repair of specific areas and imperfections in a single
frame, such as scratches, hairs and blotches. It also works for repairing
larger damage such as punch holes, film tears and full frame reconstruction.
Using a brush or shape tool to select the damage, DVO Fix automatically
repairs the selected area by comparing it to adjacent frames and applying
motion compensation to recreate missing detail plus grain compensation to
blend-in the recreated information. In addition to Auto Fix and manual Clone,
an Auto Clone mode will automatically reposition and perform a best match
of surrounding frames as an alternative to complete regeneration of content.
DVO Fix is not enabled by default. It is only enabled once an area to fix has
been selected via the Brush or the Rectangle tool.
Brush Menu
The brush tool appears in the viewer as an oval shape. Use this tool to fix an
area by either clicking or clicking and dragging the brush.
Size
The size tool allows you to resize the brush in order to fix smaller/larger
areas.
You can also resize the brush by holding down the SHIFT key (on either the
keyboard or control panel), the left mouse button and dragging. The brush
size will
Range :
Default :
© 2014 Digital Vision
0.1 to 5000
20 pixels
UM-2014.1-07
DVO Fix
267
Rate
The rate tool applies to when you drag the brush, affecting how many brush
'stamps' are performed during the dragging motion.
Range :
Default :
2 to 1000
10
Rect Menu
The rectangle tool displays a cross-hair in the viewer, allowing you to draw a
rectangle around the area that you want to fix. As soon as the rectangle has
been drawn the DVO Fix effect will start processing.
Softness
The softness setting applies to the border outside of the rectangle and allows
you to adjust how the outline blends into the surrounding area. This numeric
slider takes values between 0-1.
Range :
Default :
0 to 1
0.2
Common Menu
The U se H andle s button controls whether the tool uses source handles
when rebuilding the frame. This is important at scene boundaries (edits)
because the tool rebuilds using frames before and after the current frame.
Default :
On
If this button is on, and we are at a scene boundary (start or end of shot), if we
have handles we will use them as part of the rebuilding process.
If there are no handles, or this button is off, no before (or after) frames will (or
can) be used at the scene start (or end), and this impacts the DVO Fix result.
Note that a scene detected timeline can have no shot handles, so
U se H andle s should be turned off.
© 2014 Digital Vision
UM-2014.1-07
268
DVO Effects
Erase
The Erase button becomes enabled as soon as a fix is made to the current
layer.
Default :
Off
Turning on the Erase button will turn the brush into an eraser and applying
this to the fixed area of your image will 'undo' previous fixes.
You cannot erase changes to a mixed-down layer.
Mixdown
The Mix Down button becomes enabled as soon as a fix is made to the
current layer.
Pressing Mix Down will make the changes to the current layer permanent,
"burning" them into the image.
This tool allows you to apply fixes with different settings to the same
area.
Enable Grain
© 2014 Digital Vision
UM-2014.1-07
DVO Fix
269
Enable Grain will turn on the grain compensation. This adds grain to the 'fixed'
area as appropriate, blending the changes into the scene.
Default :
Off
The parameters are the same as for the DVO Regrain effect.
Colour
The drop-down list will default to the project setting for the input format. You
need to set this control according to the material that you are working with. If
the footage was shot with a video camera, select a linear format. If this
control is not set correctly the material may not be processed properly.`
Default :
© 2014 Digital Vision
From Project
UM-2014.1-07
270
DVO Effects
DVO Flicker
DVO Flicker analyses the image sequence to remove brightness and
chrominance fluctuations. These may be caused by varying exposure time,
unsynchronised light sources, telecine tranfer, aging film stock and/or film
chemical related issues.
Chrominance flucuations are often termed chroma breathing.
The effect is enabled and the colour mode of the input set via the basic setup
options :
Setup
The main configuration options are described below.
Mode
This parameter describes the general nature of the flickering. There is one
setting curernt, Location Invariant. This is a flicker that occurs globally on a
frame and is not isolated to portions within a frame.
Future releases will include more Mode options.
Temporal Window
Values :
Default :
5, 7, 9 , 11
11
The Temporal Window specifies how many frames to use for the analysis.
You should usually leave this at the default value.
© 2014 Digital Vision
UM-2014.1-07
DVO Flicker
271
Variation Control
Numeric slider, value range 0-1.
Range :
Default :
0 to 1
0.5
The Variation Control parameter sets how precise and controlled we are
when we make adjustments for flicker. The higher the value we use, the more
care is taken. Lower values allow for larger adjustments (less control).
Lower values (allowing larger adjustments) are best for simple
scenes. Larger settings may be required to take better account of
more complex and dynamic scenes with more real-world intensity
changes (e.g. high-speed pans etc.).
Enhanced Adjust
Values :
Default :
Off, Low, Medium, High
Medium
This will apply further processing enhancements to deal with small scale
variations (both local and global).
The High setting will apply a specialised noise filter and noticeably
affect processing speed.
Max Adjust Limitation
Range :
Default :
0 to 10
4
This sets an adjustment limit to the general processing mode. The setting
corresponds to a percentage (%) of the full signal.
© 2014 Digital Vision
UM-2014.1-07
272
DVO Effects
Black Level Save
Black Level Save lets us enable specific processing to preserve black levels
in the sequence.
If enabled, the Low and High parameters are used to assign the level of
processing performed at the lower (blackest) end of the input sequence. Both
Low and High are 10 bit numbers and limited to values between 0 and 100
(out of the full 10 bit range, 1024).
Low
Range :
Default :
0 to 100
0
If the input level is less than or equal to the setting for Low, no flicker
adjustment is performed and the input signal is untouched.
High
Range :
Default :
0 to 100
1
If the input level is greater than or equal to the setting for High, full flicker
adjustment is performed.
In between these values, there is a soft transition between none and
full processing.
Chroma
The Chroma button enables the removal of chrominance flicker (i.e."colour
breathing").
The Chroma toggle removes luminance flicker as well (if present).
However, for best performance, leave Chroma off unless you have
chrominance flickering to remove.
© 2014 Digital Vision
UM-2014.1-07
DVO Flicker
273
DVO Print Align
DVO Print Align uses a fully automatic process to align RGB separation
prints, even if the offset varies over time.
Basic Setup
Enable
This toggle button allows you to enable/disable the effect. By default, as soon
as the effect is added it is applied/enabled.
Colour
The drop-down list will default to the project setting for the input format. You
need to set this control according to the material that you are working with. If
the footage was shot with a video camera, select a linear format. If this
control is not set correctly the material may not be processed properly.
Default :
From Project
Controls
Reference Colour
Select the component (Red, Green or Blue) that should be used as the
reference.
Values :
Default :
© 2014 Digital Vision
Red, Green, Blue
Green
UM-2014.1-07
274
DVO Effects
This is normally set to Green as more luminance (detail) is available
in the component.
Fixed Colour
Select the component (Red, Green or Blue) to which all other should be
locked.
Values :
Default :
Red, Green, Blue
Green
Normally select the component that is most aligned/stable.
Max Offset
Set the maximum adjustment that can be done in pixels.
Range :
Default :
0 - 1000
100 pixels
Analyze Mode
Determines how extensive an analysis is performed.
Values :
Default :
Normal, Extended
Normal
Normal - Works for most types of material
Extended - For more difficult material and highest safety. Slower.
Picture Noise
Values :
Default :
Low, Normal, High
Normal
Describes the noise level of the image.
ROI Margins
Sets the region for analysis. For best results in some cases, the frame
borders can be included in the analysis. However if picture content is not
locked to frame borders, it might be necessary to exclude frame borders
using the Region Of Interest control. Individual control for Left/Top/Right/
Bottom in pixels (starting from the image edge).
Range :
Default :
© 2014 Digital Vision
0 TO 1000
0
UM-2014.1-07
DVO Print Align
275
DVO Scratch
DVO Scratch processes vertical/continuous scratches.
These are typically those not being detected by dust/dirt removers, which are
looking for random defects in the picture. The process is fully automatic and
has an advanced detection algorithm with a fill-in result far superior to the
normal process of hiding the defect using information from both sides of the
scratch.
Basic Settings
Enable
This toggle button allows you to enable/disable the effect. By default, as soon
as the effect is added it is applied/enabled.
Colour
The drop-down list will default to the project setting for the input format. You
need to set this control according to the material that you are working with. If
the footage was shot with a video camera, select a linear format. If this
control is not set correctly the material may not be processed properly.
Default :
From Project
Scratch Detection Parameters
Colour Mode
This determines the image channels detection is undertaken in.
Values :
Default :
Y, R+G+B, R,G,B
Y
where :
© 2014 Digital Vision
UM-2014.1-07
276
DVO Effects
Y
Luminance detection only (fastest).
R+G+B
Separate detection in R, G and B channels.
Processing of each channel is based on the combined result from the
detection.
R,G,B
Separate detection in R, G and B channels.
Each detection channel affects the corresponding processing channel.
Column Aggressiveness
First stage detector aggressiveness, which determines what columns (and
pixels) are selected as scratch candidates to be processed. The higher the
setting, the more aggressive.
Range :
Default :
0.0 - 1.0
0.5
Pixel Aggressiveness
Second stage detector aggressiveness, which is a modifier for pixel selection
within the selected columns (from the first stage). The higher the setting, the
more aggressive.
Range :
Default :
0.0 - 1.0
0.5
Scratch Type
Used to describe scratch characteristics. For moderate scratches, typically
choose the specific scratch type evident in the material. In case of very heavy
scratches, with emphasised edges, it can be advantageous to select W+B.
Values :
Default :
White, Black, W+ B
White
White - for white (brighter) scratches.
Black - for black (darker) scratches
W+ B - for a mixture of black and white scratches
Do not use W+B as a default setting as it will sometimes process
too much in the picture.
© 2014 Digital Vision
UM-2014.1-07
DVO Scratch
277
Scratch Width
Sets the width-profile for scratches.
Values :
Default :
Thin, Normal, Wide
Normal
If detection/processing is insufficient in areas which have many
scratches close by, a Wide setting is recommended.
Image Noise Level
Characterises the level of noise in the image. Image noise will affect the
accuracy of detection.
Range :
Default :
0.0 - 1.0
0.3
Processing Parameters
Colour Mode
This determines the colour mode of scratches we detect and process.
Values :
Default :
RGB, YUV
RGB
where :
YUV - for monochrome scratches
RGB - for colour scratches
YUV colour mode can not be used in detector mode R,G,B.
© 2014 Digital Vision
UM-2014.1-07
278
DVO Effects
Base Strength
Determines base strength of the processing. This affects properties such as
smoothness (as might be noticed in wide scratches).
Range :
Default :
-3 to +3
0
Residual Strength
Determines the strength of processing the "residuals" e.g. very jagged
scratch may need additional processing.
Range :
Default :
© 2014 Digital Vision
0.0 - 1.0
0.5
UM-2014.1-07
DVO Scratch
279
DVO Steady
DVO Steady is used to reduce unsteadiness due to film weave during
scanning or camera shakes during capture of footage. A two pass solution,
including advanced motion estimation, provides better separation of random
instability and pan/tilt movements.
DVO Steady can be used for both film and progressive video material.
The two passes are :
Analyze - data collection
Processor - actual processing
Analysis
The first pass collects analysis data from the pictures. This is used in the
processing stage.
The default settings work with most types of material, so just enable the
Analyze control and let the shots be analyzed before processing takes over.
A key frame is added for every analyzed frame containing the
analysis data. Complete analysis of the selected clip(s) should be
done before looking at the result and adjusting the processing
parameters.
© 2014 Digital Vision
UM-2014.1-07
280
DVO Effects
Mode, Size and Density
Mode
The analysis looks at the complete frame with selectable focus instead of
locking to a single point. This has several advantages, especially in archiving/
restoration applications with time constraints and problems like camera shake
and film stretching.
The Mode control determines where the analyzer focuses within the frame.
Values :
Default :
Full, Centre Weighted, Border Weighted, Frame Only
Full
Full - Complete frame
Centre Weighted - Complete frame with priority towards centre
Border Weighted - Complete frame with priority towards borders
Frame Only - Only analyzes film frame edge (i.e. requires complete
frame edges).
This is further specified by the "Frame Only Border Enable" controls.
Frame Only mode is fastest.
Size
Sets analyzer size, which should be related to image size and motion.
Values :
Default :
Small, Medium, Large
Medium
Size affects processing time. The larger the size, the more
processing required.
© 2014 Digital Vision
UM-2014.1-07
DVO Steady
Size Setting
Suitable For
Small
SD - low/normal motion
HD/2K - low motion
Frame Only mode (any format)
Medium
SD - normal/high motion
HD/2K - normal motion
Default
Large
HD/2K - high motion
4K - low/normal motion
281
Density
Determines the amount of analysis within the frame.
Values :
Default :
Small, Medium, High
Medium
Low - Lowest safety margin - less accurate
Medium - Normal safety
High - Increased safety margin, more accurate
Processing time increases with the density.
Region of Interest
Set or find active area of picture - the region of interest to be analysed.
Values :
Default :
Disabled, Specific
Specific
Disabled - use complete frame
Specific - set region of interest via additional parameters below
© 2014 Digital Vision
UM-2014.1-07
282
DVO Effects
ROI Size
This is the number of pixels from each edge where the frame (active area)
starts.
Range :
Default :
0 to 2048
0 pixels
Only borders which have visible “non-clipped" film frame edges must
(can) be used and Region of Interest must be set to include those.
Processing
Processing parameters are applied to the pictures in accordance with the
result from the analyze pass.
Basic Setup
Enable
This toggle button allows you to enable/disable the effect. By default, as soon
as the effect is added it is applied/enabled
Colour
The drop-down list will default to the project setting for the input format. You
need to set this control according to the material that you are working with. If
© 2014 Digital Vision
UM-2014.1-07
DVO Steady
283
the footage was shot with a video camera, select a linear format. If this
control is not set correctly the material may not be processed properly.
Default :
From Project
Analyze
This toggle button enables the analysis function.
Currently, once analysis is complete, it should be turned off to enable
rendering.
After analysis, if you change any of the processing parameters you
will need to re-run the analyse step.
Peak / XOffs / YOffs
Once analysis is complete, these display some statistical results.
Aggressiveness
This parameter determines how aggressive the effect should be in attacking
unsteadiness.
Range :
Default :
1 - 10
5
Low values are used for fine errors (small and quick) e.g. introduced by a
scanner/telecine and does not try correct for slower and larger movements.
High values does not only take care of fine errors but also handles coarse
errors (large and slow) like very old material or handheld/shaky cameras.
Reduction
© 2014 Digital Vision
UM-2014.1-07
284
DVO Effects
Used to set how much the unsteadiness should be decreased, with separate
controls for horizontal (X) and vertical (Y) reduction.
Range :
Default :
0 - 100
100 %
Reduction is typically set to 100% to achieve maximum correction.
A bit of residual unsteadiness might be necessary to create a more
natural result sometimes e.g. a camera shaking during frame
capture resulting in motion blur.
Max Adjust
Sets a maximum limit (in pixels) for how much the process is allowed to
adjust the stabilized frames, with separate horizontal (X) and vertical (Y)
controls.
Range :
Default :
0 - 100
20 pixels
Motion Safety
Adaptively reduces the unsteadiness correction based on motion.
Range :
Default :
0 - 10
5
In high motion sequences, errors are more likely to occur. A high Motion
Safety setting limits the allowed unsteadiness correction so that any errors
will become less obvious.
A low setting ignores almost all motion.
© 2014 Digital Vision
UM-2014.1-07
DVO Steady
285
Quality Safety
Adaptively reduces the unsteadiness correction in accordance with an
analyze quality measure recorded during the analyse pass.
Range :
Default :
0 - 10
3
Under certain circumstances, the analysis may be complex and more difficult.
This is signaled by a quality value.
When the analysis quality is low, errors are more likely to occur. In this case a
high setting of the Quality Safety control limits the allowed unsteadiness
correction in such parts of the material, so that any errors will become less
obvious.
A low setting generally ignores the analysis quality.
Mask
Mode
Determines if and how the (shaking) borders should be masked.
Values :
Default :
Disable, Follow Max Adjust, Specific
Follow Max Adjust
where :
Disable - Less safety. Less accurate.
Follow Max Adjust - Use settings as per Max Adjust parameter
© 2014 Digital Vision
UM-2014.1-07
286
DVO Effects
Specific - use settings as per Max Size parameter
Size
Sets the mask size for Specific mode.
Range :
Default :
0 - 100
20
Soft Border
When Enabled (default), creates a soft border where the picture has been
clipped.
A soft border can give a more natural look.
Zoom
Enlarges the picture according to selected mode.
Values :
Default :
Disable, To Blanking, Fill Screen (Letter/Pillar
Boxed), Fill SCreen (Full)
Disable
Disable - No zoom - Default
To Blanking - Enlarges to specified blanking (see below)
Fill Screen (Letter/Pillar Boxed) - Enlarges picture until either full
vertical or full horizontal size is reached.
Fill Screen (Full) - If necessary, makes a cutout to fill the complete
frame (i.e. no black borders/blanking)
All modes keep the correct aspect ratio
Blanking
© 2014 Digital Vision
UM-2014.1-07
DVO Steady
287
The Blanking Mode determines whether to use a masked or a full image.
Set blanking mode to Specific and specify Blanking Size if blanking (mattes)
should be added to the processed pictures.
Disable - Use complete image
Specific - Apply blanking (mattes) according to Blanking Size controls
- Default
Border Size
Range :
Default :
0 - 2048
0 pixels
This specifies the number of pixels from the each edge of the picture.
Scene Cut
Determines if the first/last frame of a scene/shot should be adjusted (Low/
Medium/High Safety) or not (Fixed). Start and End mode are set separately.
Under certain circumstances (typically for very unsteady material), a
Fixed setting might look wrong.
© 2014 Digital Vision
UM-2014.1-07
288
DVO Effects
DVO Alias
DVO Alias takes care of the negative side effects of out-of-band vertical
frequencies that show up on-screen as line flicker or “twitter”.
This is commonly seen in footage containing venetian blinds or car
grills.
Parameters
Enable
This toggle button allows you to enable/disable the DVO Alias effect. By
default, as soon as the effect is added it is applied/enabled.
Cutoff Frequency
This controls the amount of filtering and selects for the maximum vertical
bandwidth to keep
A setting of 100% equals a full bypass.
You should start at a high value and lower until the flickering has been
removed.
Range :
Default :
0 to 100
70%
Colour
The drop-down list will default to the project setting for the input format. You
need to set this control according to the material that you are working with. If
the footage was shot with a video camera, select a linear format. If this
control is not set correctly the material may not be processed properly.
Default :
© 2014 Digital Vision
From Project
UM-2014.1-07
DVO Alias
289
DVO Aperture
The DVO Aperture tool is a high quality frame-based spatial filter that
increases the apparent sharpness of the picture.
This is a critical function when dealing with film scans and compensates for
the loss of high frequency information generated in the film scanner.
Problems requiring aperture correction arise in a scanning system when the
frequency response falls off as the effective wavelength of the detail to be
resolved in the image approaches the dimension of the scanning aperture.
The aperture processor normally increases response to high frequency
content in the signal, thus adding subjective sharpness to the picture.
Aperture correction should therefore be employed as the last
process in the chain.
Parameters
Enable
This toggle button allows you to enable/disable the DVO Aperture effect. By
default, as soon as the effect is added it is applied/enabled.
Horizontal / Vertical
Separate controls for the amount of horizontal and vertical aperture
correction. Allowed values are from 0 to 100% in increements of 10%.
Values :
Default :
0 - 100% (in 10% increments)
0%
Colour
The drop-down list will default to the project setting for the input format. You
need to set this control according to the material that you are working with. If
the footage was shot with a video camera, select a linear format. If this
control is not set correctly the material may not be processed properly.
Default :
© 2014 Digital Vision
From Project
UM-2014.1-07
290
DVO Effects
DVO Brickwall
DVO Brickwall helps reduce signal entropy making compression easier. It
provides an extremely sharp cut-off beyond a user defined frequency,
enabling you to create an accurately defined spectral content of material for
various types of compression pre-processing.
This means that compression artefacts can be reduced and the quality of the
compressed image can usually be greatly improved.
Enable
This toggle button allows you to enable/disable the DVO Brickwall effect. By
default, as soon as the effect is added it is applied/enabled.
Colour
The drop-down list will default to the project setting for the input format. You
need to set this control according to the material that you are working with. If
the footage was shot with a video camera, select a linear format. If this
control is not set correctly the material may not be processed properly.
Default :
From Project
Parameters
Filter
Type
Values :
Default :
© 2014 Digital Vision
Rect Sharp Film, Rectangular, Circular, Diagonal
Rect Sharp Film
UM-2014.1-07
DVO Brickwall
291
Size
Values :
Default :
Small, Normal, Large
Normal
Cutoff
This numeric slider allows you to precisely control the horizontal filtering of the
luminance, as a percentage of the maximum bandwidth. A setting of 100%
equals a full bypass.
Horizontal
Range :
Default :
10 to 100
70
Vertical
Range :
Default :
10 to 100
70
Sharpness
Range :
Default :
© 2014 Digital Vision
0 to 15
0
UM-2014.1-07
292
DVO Effects
DVO Clarity
DVO Clarity is the fifth generation noise and grain reducer from Digital Vision
and is designed to automate as much configuration as possible while still
producing the highest quality output. The new DVO Clarity algorithms are
designed to preserve detail and keep the original image sharpness, while
being artifact free.
DVO Clarity includes :
Automated grain characteristic analysis
An enhanced motion estimation engine
Detail enhancement
A new spatio-temporal filter
Unprocessed
Processed
Enable
The Enable toggle button allows you to enable/disable the effect. By default,
as soon as the effect is added it is applied/enabled.
Colour
The drop-down list will default to the project setting for the input format. You
need to set this control according to the material that you are working with. If
the footage was shot with a video camera, select a linear format. If this
control is not set correctly the material may not be processed properly.
Default :
© 2014 Digital Vision
From Project
UM-2014.1-07
DVO Clarity
293
Process
The Process group sets the basic processing parameters for the DVO Clarity
algorithms.
Amount
Range :
Default :
0 to 100
75
The Amount parameter sets the overall level of noise/grain reduction.
Aggressiveness
Range :
Default :
0 to 100
50
Aggressiveness sets how far and how strongly we attempt to reduce noise/
grain taking motion into account. The higher the value the more motion we
ignore.
Care should be taken because at higher settings there is an
increased risk of introducing motion artifacts.
Details
The Details group controls the level of detail preservation versus noise/grain
reduction performed.
Base Level
Range :
Default :
More, Less, Auto
Auto
The Base Level sets the overall bias used for preserving detail. When set to
Auto (the default), the algorithm will adapt automatically. Setting this to Less
or More will change the overall detail preservation bias such that :
© 2014 Digital Vision
UM-2014.1-07
294
DVO Effects
Less - try and preserve less detail
More - try and preserve more detail
Preservation
Range :
Default :
0 to 100
75
Given the Base Level, the Preservation parameter will fine-tune detail
preservation. Higher settings preserve more detail.
Detail Preservation Workflow
Analyse the shot and note the amount and size of any noise artifacts
(e.g. grain size). Based on this and the level of detail in the shot, we
can choose settings for the Details parameters.
Detail Level
Example Settings
Low detail
No detail below average
noise/grain size
Base Level : Less
Preservation : 0
Higher detail
Base Level : More
Detail observable below
Preservation : 100
average size of noise/grain
Speed and Quality
Range :
Default :
Highest Speed, Highest Quality, Balanced
Balanced
By default, we try to balance the quality of our output with the amount of
processing time we use to produce it. The Speed vs Quality setting lets you
adjust this trade-off between quality and processing time used.
© 2014 Digital Vision
UM-2014.1-07
DVO Clarity
295
Intensity per Channel
The intensity of noise and grain might be very different in the low, mid and
high-lights of the picture. As part of the automatic analysis undertaken for
each shot, DVO Clarity calculates the intensity distribution of noise/grain in
each component (red, green and blue). The calculated distribution is
displayed as a graph.
The graph is calculated per shot.
© 2014 Digital Vision
UM-2014.1-07
296
DVO Effects
DVO Grain
Digital Vision DVO Grain algorithm is specifically designed to manage the look
of film grain and to reduce unwanted electronic noise in film or video
originated material. Uses include restoration, compression pre-processing,
and image processing of new feature film, television and commercial
material.
The Grain algorithm incorporates the Digital Vision Emmy award-winning
PHAME advanced motion estimation technology along with edge-preserving
3-D spatio-temporal filters and temporal (recursive) filters to allow artists to
produce clean, sharp pictures and to match the look of film grain from shot-toshot (including grain matching for underexposed film). The process of
adaptively selecting the best mix of spatial and recursive filtering for each pixel
is unique to the DVO Grain algorithm.
This effect has four groups of parameters:
The Enable toggle button allows the complete effect
to be turned on or off.
Basic mode - basic settings for a quick degrain
Processing - specific processing options
Key - keyed settings for chroma adaptation
Setup - settings for various processing
selections
Basic Settings and Presets
The DVO Grain Basic mode provides simple control of the grain/noise
reduction without sacrificing performance. Basic mode is a good starting
point before using the more advanced settings in the Processing and Setup
tabs (if necessary).
© 2014 Digital Vision
UM-2014.1-07
DVO Grain
297
Enable Basic
The Enable Basic toggle button allows you to enable/disable DVO Grain
basic mode.
When you edit any of the settings in the Processing or Setup tabs
basic mode becomes disabled automatically. Similarly, when you
select a Mode from the basic modes, all settings in the Processing
or Setup tabs will be adjusted automatically to fit the selected mode
and basic mode will be automatically enabled.
Presets
The Mode sets a basic preset level of grain reduction :
Values :
Default :
Default, Film fine (or video), Film medium, Film coarse
Default
Default is roughly equivalent to Film medium
Strength
The amount of grain/noise reduction is automatically set up in the basic mode.
This slider control allows you to tune this, and increase or decrease the
amount of grain reduction done.
Range :
Default :
-2 to 2
0
Out Mix
The Out Mix control determines the mix between the processed image (with
grain removed) and the input image to give the final output image.
© 2014 Digital Vision
UM-2014.1-07
298
DVO Effects
This makes it possible to mix in some of the original grain into the
processed picture for a better film look.
Range :
Default :
0 to 100
100%
The default value of 100% results in an output with full grain removal, whilst a
setting of 0% results in an output equal to the input image.
This control is also available in the Processing section and changes here are
mirrored there.
Processing Filters
Temporal and spatial filters are available on the Processing screen.
DVO Grain utilizes a process that adaptively selects the best mix of spatial
and temporal (recursive) filtering for each pixel.
Start with the basic mode enabled, selecting the most appropriate
setting. If necessary, adjust the processing by disabling basic mode
and continuing to the more advanced settings. In many cases,
advanced mode will not be necessary.
© 2014 Digital Vision
UM-2014.1-07
DVO Grain
299
Temporal Filtering
The temporal or recursive filtering is the most effective filter in terms of
reducing grain/noise.
Temporal Strength
Use the numeric sliders to set the amount/level of temporal recursive filtering
in each channel.
Range :
Default :
0 to 15
7
Do not use higher settings than 11-12 except in extreme situations.
Also note that both Chroma trim and Pos/Neg trim (see below) will
add their values to these set strengths.
Temporal Global
Use this toggle button to turn Temporal Global on/off.
Default :
Off
The DVO Grain is an adaptive grain and noise reducer. This means it
disables the temporal/recursive processing of all moving edges within the
image to assist in the reduction of motion artifacts.
T e m poral G lobal enables filtering of the whole picture regardless of
motion for maximum temporal filtering.
Temporal global should normally be set to Off and only used in
extreme situations, or to create a motion smearing effect.
Enabling Temporal Global might cause excessive smearing in the
picture.
© 2014 Digital Vision
UM-2014.1-07
300
DVO Effects
In addition to the above controls, the motion sensitivity control on the Setup
section adapts the temporal filtering in respect to grain size and intensity
Spatial Filtering
Edge-preserving spatial filtering complements the adaptive temporal filters by
processing grain and noise in portions of the image that are detected as being
in motion, while leaving non-moving areas unaffected. The spatial filtering is
done before application of the temporal filters and works in unison with DVO
Grain’s motion processing.
Spatial Strength
This is the overall level of spatial filtering applied in each channel. Normally,
they should match the temporal strength.
Range :
Default :
0 to 15
7
Spatial Size
The S patial S ize drop-down lists adjust the spatial size of the grain/noise,
in pixels, for each channel.
Values :
Default :
1,3,5,7,9
7
Setting R, G, B spatial size equally will give best performance
Spatial Threshold
The spatial threshold determines when to filter, depending on the intensity of
the surrounding pixels.
Range :
Default :
© 2014 Digital Vision
0 to 100
7
UM-2014.1-07
DVO Grain
301
Use the spatial threshold sliders to adjust the setting for each channel.
If there is a high enough intensity/contrast (e.g. an edge) between the grain/
noise and surrounding pixels, filtering will not occur.
A low setting will only affect low intensity pixels (flat areas). A high
setting will start to affect high intensity pixels (edges)
Spatial Global
This enables filtering of the whole picture by switching off the motion
adaptation.
Use this toggle button to enable/disable global spatial filtering.
Default :
Off
A moderate level of global spatial filtering can be used as a basic level of grain
and noise reduction before using the temporal filtering (also see Global
Balance).
This may cause excessive softening of the picture if the spatial filter
is not set up correctly.
Temporal filtering works in areas with no or little motion.
Spatial filtering works in areas of motion.
Global enable the filters to work on the entire picture.
The R, G, B Strength controls should normally be ganged and
adjusted together. They typically need to be adjusted by the same
amount.
Optimising the Spatial Filter
1. Set Spatial Strength, Size and Threshold to their maximum
2. Turn Spatial Global on
3. Adapt the spatial filter to the grain/noise size by decreasing the spatial size
settings to as low as possible whilst still resulting in grain/noise being
removed
4. Decrease spatial threshold until edges are not affected (a typical setting is
between 8-20%)
5. Decrease spatial strength until the desired level of spatial filtering is
achieved
6. Decide whether Spatial Global should be left on (filtering of the whole
picture), or turned off (filtering only in areas with motion).
© 2014 Digital Vision
UM-2014.1-07
302
DVO Effects
Starting with enabling Basic mode and selecting one of the available
preset modes will automatically set up spatial threshold/size
Chroma Trim
The Chroma Trim controls are used to adjust the grain/noise reduction on
each selected colour. This allows for the boosting or cutting of both the spatial
and temporal filter settings within the selected colour.
Range :
Default :
-8 to 7
0
The colours 1, 2, 3, are selected via the key tab, as described in the Chroma
Adaptation section below.
Having a temporal strength of 7, setting up chroma adaptation for a
red colour and corresponding trim to +2, will set the temporal
strength to 7+2=9 for areas in the picture that contain the selected
red colour.
Other
Pos/Neg Trim
The Pos/Neg Trim control works in conjunction with the Pos/Neg mode
controls in the Setup section. Having selected the mode and luma thresholds
© 2014 Digital Vision
UM-2014.1-07
DVO Grain
303
in the Setup section, use the Pos/Neg Trim control to adjust the noise
reduction levels equally for all RGB channels in highlights (Neg) or lowlights
(Pos).
Range :
Default :
0 to 7
0
Having a temporal strength of 7, setting up neg mode to neg and the
pos/neg trim to +2, will set the temporal strength to 7+2=9 for
highlights.
Processing is slower using trims. Even if Temporal/Spatial strengths
are at 0, Pos/Neg Trim will still add to this and result in processing
within highlights or lowlights.
Out Mix
This control is the same as the Out Mix control available in the basic mode
tab, and changes here are mirrored there.
Range :
Default :
0 to 7
0
Global Balance
Global Balance allows a combination of the basic level of spatial filtering and
motion adaptive spatial filtering.
Maximum filtering according to spatial strength is achieved in areas with
motion.
The Global Balance slider allows you to to set a minimum level of spatial
filtering, rather than having the level set entirely based on motion detection. If
the slider is set to 0, then parts of the image with no motion will receive no
spatial filtering. Increasing the slider increases the spatial filtering of areas
with little or no motion.
Range :
Default :
0 to 100
50
Motion Estimation
DVO Grain is a fully motion compensated noise/grain reducer. This means
that much more aggressive settings can be used without introducing
smearing.
© 2014 Digital Vision
UM-2014.1-07
304
DVO Effects
The motion estimation drop-down button allows you to set the motion
estimation to :
Range :
Default :
Off, Normal, Best
Normal
The Best setting is good for fast motion but is slower than Normal. In
almost all cases, Normal or Best should be used.
Key (Chroma Trim)
The Key (chroma adaptation) function can be used to adjust the levels of
grain/noise reduction in user selectable colour regions.
For example, this feature can be used for greater grain/noise
reduction in sensitive areas such as a blue sky, or less noise
reduction in skin tones.
Three independent channels of chroma adaptation allows adjustment of noise
reduction levels (both spatial and temporal) in the regions of the selected
colour.
These selectable colours are labelled 1, 2 and 3.
Only colours with a saturation higher than approximately 5% will be
detected.
Use the Key screen to adjust the hues and widths to isolate the colours in
each channel:
© 2014 Digital Vision
UM-2014.1-07
DVO Grain
305
Click a colour picker toggle button to enable/disable colour picking from the
displayed monitor image :
Enable picker
Pick area of colour from
image using the mouse
You can also select the selected hue by clicking on the hue bar with the left
mouse button and dragging the hue bar left and right :
Drag on hue bar and/or orange box indicators to alter hue selection.
After selecting the colours using the key tab, the corresponding Chroma Trim
control in the Processing tab may be used to adjust the grain/noise reduction
for each selected colour. Chroma Trim allows for the boosting or cutting of
both the spatial and temporal filter settings within the selected colour.
Even if Temporal/Spatial strengths are at 0, Chroma Trim will still
add to that number and resulting in processing within selected
colour.
© 2014 Digital Vision
UM-2014.1-07
306
DVO Effects
Setup
The Setup screen allows various other effect parameters to be configured.
Colour
The drop-down list will default to the project setting for the input format. You
need to set this control according to the material that you are working with. If
the footage was shot with a video camera, select a linear format. If this
control is not set correctly the material may not be processed properly.
Default :
From Project
History Required
The DVO Grain effect is recursive.
Recursive means the result for any given frame depends on the
result of the previous frame(s).
For best results a certain amount of frame history needs to be built up, and
this numeric slider is used to specify how many frames of history to use.
Range :
Default :
© 2014 Digital Vision
0 to 15
5 frames
UM-2014.1-07
DVO Grain
307
Use Handles
The Use Handles button controls whether the history includes available
handles of a scene/shot. Normally, the history frames accumulated will
terminate on a shot edit/event (start/end edit). There may be extra frames
available (handles) before or after the start and end edit points of a shot
however and these will be included as history if Use Handles is set.
If handles exist, full and precise processing will be available from the
first frame of a clip.
Default :
On
The remaining controls on the Setup page are used to optimise the
processing further. These controls should only be used by experienced
operators with a good understanding of the dirt and scratch concealment
process
Motion Sensitivity
This drop-down allows you to set the level of sensitivity.
Values :
Default :
Low, Medium, High
Medium
Motion sensitivity adapts the temporal filtering with respect to grain size and
intensity.
Motion sensitivity has great impact on processing and the type of
filter (spatial/temporal) being used.
It may be better to set Motion Sensitivity to Low rather than just
increasing filter strengths.
© 2014 Digital Vision
UM-2014.1-07
308
DVO Effects
Spatial Filter
Spatio - Temporal
Enabling this extends the spatial filter to become a 3D spatio-temporal filter,
by including the use of temporal taps. This can enhance the noise reduction
achieved.
Default :
On
Temporal Mix
The temporal mix controls the balance between the spatial and temporal taps
of the spatio-temporal filter.
Values :
Default :
Low, Medium, High,Full
High
This setting affects the noise reduction achieved by the spatio-temporal filter,
with more noise reduction for the higher settings.
For fast motion material and a higher than default spatial filter threshold
setting, a high temporal mix setting may increase the probability of artifacts. In
such cases, this setting may be lowered. For a lower than default spatial filter
threshold setting, the Full setting may be used.
The default setting High should be safe in most circumstances.
Spike
This setting enhances the spatial filter performance by incorporating a spike
adaptation.
Values :
Default :
Off,Narrow,Medium,Wide
Medium
The setting relates to the grain/noise characteristics. A low setting (e.g.
Narrow) is suitable for smaller grain and noise sizes and/or less pronounced
variations in amplitudes.
© 2014 Digital Vision
UM-2014.1-07
DVO Grain
309
A high setting (e.g. Wide) is suitable for larger grain/noise and/or more
pronounced variations in amplitudes.
Setting spike to Narrow in conjunction with setting Motion Sensitivity
to High and Motion Estimation (in the Processing screen) to Best
can help avoid motion estimation errors caused by noisy / grainy
material.
Pos/Neg Profile
The Pos/Neg profile allows the user to select the amount of noise reduction
(both spatial and temporal) applied to the highlights or lowlights within the
image.
This function is important when dealing with grainy images in positive
or negative film stock.Positive film will generally show more grain in
the lowlights whilst Negative film will generally show more noise in
the highlights.
Neg
Values :
Default :
Positive,Negative
Positive
Parameters :
Positive - more grain reduction in lowlights
Negative - more grain reduction in highlights (Film mode)
Having selected the mode, you need to set the Pos/Neg Trim level on the
Processing screen. This will adjust the noise reduction levels equally for all
RGB channels in highlights (Neg) or lowlights (Pos).
© 2014 Digital Vision
UM-2014.1-07
310
DVO Effects
Luma Thresholds
The range of luminance values affected by the Pos/Neg Trim can be set by
two luma thresholds.
Luma Threshold Low
Range :
Default :
0 to 50
0% Luma
Luma Threshold High
Range :
Default :
50 to 100
100% Luma
These two thresholds determine the point in highlights and lowlights where the
Pos or Neg trim is at its maximum.
The effect of the Trim will gradually decrease between these two points.
Trim m ing the Grain/Noise Reduction level for Positive film
Trim m ing the Grain/Noise Reduction level for Positive film
© 2014 Digital Vision
UM-2014.1-07
DVO Grain
311
DVO Regrain
DVO Regrain allows you to quickly set up and generate natural looking film
grain. The intuitive controls enable you to match almost any type of film stock
by setting the grain size and sharpness as well as matching the
characteristics of highlight and lowlight intensity behaviour.
Before
After
Enable
This toggle button allows you to enable/disable the effect. By default, as soon
as the effect is added it is applied/enabled.
Colour
The drop-down list will default to the project setting for the input format. You
need to set this control according to the material that you are working with. If
the footage was shot with a video camera, select a linear format. If this
control is not set correctly the material may not be processed properly.
Default :
© 2014 Digital Vision
From Project
UM-2014.1-07
312
DVO Effects
Parameters
Size
Desired pixel size of the grain.
Range :
Default :
0 to 3
1 pixel
Sharpness
Determines the sharpness of the edges of the grain.
Range :
Default :
0 to 100
50%
Saturation
Determines the colour saturation of the grain.
Range :
Default :
0 to 100
50%
Overall
Overall amount of grain added.
Range :
Default :
0 to 400
100%
Low
Specifies the amount of film grain to be added in low light (dark) areas. The
film grain added is in addition to the overall film grain, as specified in Overall
Amount (above).
Range :
Default :
© 2014 Digital Vision
0 to 400
100%
UM-2014.1-07
DVO Regrain
313
High
Specifies the amount of film grain to be added in high light (light) areas. The
film grain added is in addition to the overall film grain, as specified in Overall
Amount (above).
Range :
Default :
0 to 400
100%
Midpoint
Midpoint Balance controls the amount of the frequency range considered to
be high light and low light, and thus affects how the low light and high light
amounts are applied.
Range :
Default :
0 - 20
10
To treat more of the spectrum as high light, enter a low number. To
treat more of the spectrum as low light, enter a positive number. If
"10" is entered, the gradual change between low and high lights is
completely linear.
© 2014 Digital Vision
UM-2014.1-07
314
DVO Effects
DVO Sharpen
DVO Sharpen is an advanced sharpening tool that greatly enhances out-offocus shots. It uses adaptive picture analysis and processing to yield
excellent results without the common side effects associated with standard
algorithms (such as amplified grain, noise, or halos around areas that were
already sharp).
Before
After
Enable
This toggle button allows you to enable/disable the DVO Sharpen effect. By
default, as soon as the effect is added it is applied/enabled.
Colour
The drop-down list gives two choices of input colour format, log or video. You
need to set this control according to the material that you are working with. If
the footage was shot with a video camera, select video. If this control is not
set correctly the material may not be processed properly.
Default :
© 2014 Digital Vision
From Project
UM-2014.1-07
DVO Sharpen
315
Parameters
Overall Strength
Numeric slider, value range 0-200.
Range :
Default :
0 to 200
100
Spatial Strength
Numeric slider, value range 0-200.
Range :
Default :
0 to 200
100
Crispness
Numeric slider, value range 0-200.
Range :
Default :
0 to 200
150
Low Detail Sharpening
Numeric slider, value range 0-200.
Range :
Default :
0 to 200
100
High Detail Sharpening
Numeric slider, value range 0-200.
Range :
Default :
0 to 200
100
Image Noise Level
Numeric slider, value range 0-2.
© 2014 Digital Vision
UM-2014.1-07
316
DVO Effects
Range :
Default :
0 to 2
1
Low Light Trim
Numeric slider, value range -25 - 0.
Range :
Default :
-25 to 0
0
High Light Trim
Numeric slider, value range -25 - 0.
Range :
Default :
© 2014 Digital Vision
-25 to 0
0
UM-2014.1-07
DVO Sharpen
317
DVO Cross Colour
Cross Colour (also known as Chroma Crawling) is a defect that results from
crosstalk between the chrominance and luminance components of a
composite video signal (PAL or NTSC). Once a video signal has been in the
composite domain, this defect is not easily removed.
Parameters
Enable
When enabled, DVO Cross Colour will process the input as per the settings
described below.
Aggressiveness
Allows the tuning of the degree of removal.
If we increase these parameters too much we increase the
possibility of introducing artifacts.
Spatial
When the Temporal setting is decreased, The Spatial control may be
increased instead to remove cross-colour at the expense of slight spatial
chroma bleeding.
Temporal
Increase for maximum cross-colour removal. Reduce if temporal chroma
bleeding becomes too intrusive.
© 2014 Digital Vision
UM-2014.1-07
318
DVO Effects
DVO Line Sync
Line sync or line jitter is a very common problem with archived analog video
tape.
It is typically caused by the lack of (or disturbances with) line synchronization
pulses which prevents the the video tape recorder from locating the actual
start and end of each line. This causes random line displacement (jitter).
The most visible effect is that vertical edges appear to be jagged. The jitter
can range from +/-1 pixel to more than +/-5 pixels in severe cases. DVO Line
Sync automatically detects and corrects these line displacements as well as
any stretching it causes.
Parameters
Enable
When enabled, DVO Line Sync will process the input as per the settings
described below.
Detection Strength
Detection Strength controls the degree of jitter detection with a higher number
meaning a higher degree of detection.
If the Strength parameter is pushed too high, we may correct lines
unnecessarily and introduce jitter. Analyse the resulting output before
committing to a long render.
Note that the processing time is dependent on detected (and
processed) lines. The more line sync issues we find, the longer it will
take to process.
© 2014 Digital Vision
UM-2014.1-07
DVO Line Sync
319
Processing
Shift
Enables correction of pixel shifting (left/right)
Stretch
Enables correction of stretched/shrunken lines.
Noise Reduction
This is Adaptive Noise Reduction with non-recursive spatio-temporal filtering
so ghosting will not occur.
Note that processing time will be considerably higher when active
since all lines have to be processed.
NR Enable
Enables Noise Reduction, independent of shift/stretch detection and
correction.
NR Strength
Sets the amount of Noise Reduction to perform.
© 2014 Digital Vision
UM-2014.1-07
320
DVO Effects
DVO Deinterlace
DVO Deinterlace accurately creates progressive frames from interlaced video
originated material. The de-interlacer can maintain the fluid motion present in
video (e.g. 50p delivery from a 50i source) or create a film look (e.g. 25p
delivery from a 50i source).
DVO Deinterlace uses advanced motion adaptation techniques to preserve
sharpness while also avoiding jaggedness typically associated with similar
processes.
Parameters
Enable
When enabled, DVO Deinterlace will process the input as per the settings
described below.
Mode
Values :
Default :
align to f1 , align to f2 , double rate f1 + f2 , double rate
f2 + f1
align to f1
The Mode control sets which field(s) the progressive frame is aligned to in
terms of motion and content.
© 2014 Digital Vision
UM-2014.1-07
DVO Deinterlace
321
align to f1 Keep field 1 and align the missing information in the new
frame to the contents of the original field 1
align to f2 Keep field 2 and align the missing information in the new
frame to the contents of the original field 2
double rate f1 Make a complete progressive frame using every single
+ f2 field using the above methods. This doubles the number of
frames.
Top (f1) field first.
double rate f2 Make a complete progressive frame using every single
+ f1 field using the above methods. This doubles the number of
frames.
Bottom (f2) field first.
Half Line Fix
In an analog video signal there may be a visible half lines (unless removed
when captured) i.e. half the line is blanked and the rest of the line contains
image information. Including the half line when de-interlacing is usually
unwanted.
To remove the blanked part, enable Half Line Fix and select the line(s) to
address for top (Top Fix Lines) and bottom (Bottom Fix Lines). This will
ensure that the blanked part of the line is not visible in the final image.
Data
Values :
Default :
Linear , Log
From Project
Process using the selected the data format.
© 2014 Digital Vision
UM-2014.1-07
322
DVO Effects
DVO Twister
DVO Twister is an advanced software standards conversion tool.
To use DVO Twister, you should set up a project and composition configured
for your target format.
Parameters
Enable
This toggle button allows you to enable/disable the DVO Twister effect. By
default, as soon as the effect is added it is applied/enabled.
Mode
The mode option lets you choose the source and target format for the
conversion. Available modes include :
© 2014 Digital Vision
UM-2014.1-07
DVO Twister
50i to 23.98p
50i to 24.00p
50i to 29.97p
50i to 59.94i
50i to 60.00p
59.94i to 23.98p
59.94i to 24.00p
59.94i to 25.00p
59.94i to 50i
59.94i to 50p
50p to 60p
60p to 50p
16.00p to 24.00p
16.00p to 25.00p
23.98p to 29.97p
23.98p to 50.00i
18.00p to 24.00p
18.00p to 25.00p
29.97p to 23.98p
29.97p to 50.00i
20.00p to 24.00p
20.00p to 25.00p
323
Processing Mode
Values :
Default :
Narrow, Medium, Wide, Auto
Narrow
The Processing Mode affects how motion is detected and selects between
three main modes. The Auto mode automatically selects the most appropriate
setting based on the source and target mode chosen.
Only has an effect when Motion Mode is set to Motion Comp.
Motion Mode
Values :
Default :
Motion Comp, Interpolated, Nearest Frame
Motion Comp
This determines how the images are recreated in the target format.
Motion Comp
This uses motion compensation and is the default. This allows the
accurate recreation of fields and frames using the Digital Vision Phame
motion vector algorithms.
Interpolated
This is a simple method that recreates correct target fields and frames
by careful mixing of the input source. This method will often produce a
lower quality result than the motion compensated approach (blurs, jerky
© 2014 Digital Vision
UM-2014.1-07
324
DVO Effects
motion). Try if Motion Comp fails.
Nearest Frame
This uses no processing other than skipping or repeating frames to
output the same clip duration.
Cut Mode
Values :
Default :
Across Scene, Inside Scene, Inside Scene Frame Aligned
Inside Scene
DVO Twister has an internal scene detector and the Cut Mode determines
how images adjacent to a scene cut are aligned.
Across Scene
This ignores the cut and blends the images. This will not provide in a
clean cut but is sometimes preferred as it is the most accurate
representation in terms of alignment in time.
Inside Scene
This aligns the cut to the nearest video field.
Inside Scene Frame Aligned
This aligns the cut to the nearest output video/film frame and so results
in the cleanest cut.
© 2014 Digital Vision
UM-2014.1-07
DVO Twister
325
DVO Upscale
DVO Upscale provides optimised up-scaling of material and is of specific
value when converting from SD to HD.
The algorithm maintains the high quality of edges, including diagonals, and is
especially useful for graphics.
Basic Parameters
Enable
The Enable button must be on to enable processing.
Optimisation
Values :
Default :
Fast , Advanced
Advanced
Optimisation determines the balance between speed and quality. In Advanced
mode a special algorithm is used for the high frequency parts of the image to
reduce scaling artifacts. In Fast mode this algorithm is disabled to gain speed
at the expense of quality.
Mode
Values :
Default :
P -> P , i -> P , i -> i
P -> P
DVO Upscale has an internal de-interlace function in order to deal with
multiple formats.
P is Progressive
i is interlaced
© 2014 Digital Vision
UM-2014.1-07
326
DVO Effects
The setting of progressive or interlaced here is not the same as
video/image format (e.g. HD 1080i 50). It only describes how
pictures were captured and whether to maintain this.
The project must set up to render frames even if the output mode is
interlaced. Internally, the effect needs to use a progressive (frame
based) format for optimal results when both input and output are
interlaced.
Fill
Values :
Default :
Auto , Vertical , Horizontal , Both
Auto
Controls how the input picture is mapped (scaled) to the output picture.
Auto Scales input picture until vertical or horizontal limit of the
output picture is reached, without changing aspect ratio.
Vertical Fills the output picture vertically without changing aspect ratio.
E.g. scaling a SD 4:3 picture to an HD 16:9 output format will
result in a pillar-box format.
Horizontal Fills the output picture horizontally without changing aspect
ratio. E.g. scaling an HD 16:9 picture to a 2k 4:3 picture will
result in a letter-box format.
Both Fills the output picture both vertically and horizontally. Does
not keep the original aspect. Overrides the “Keep Input
Aspect” E.g. scaling an SD 16:9 anamorphic to HD 16:9 will
result in a full 16:9 format.
Keep Input Aspect
Reads clip properties and keeps the input aspect ratio and will also
automatically compensate for non-square pixels.
This should normally be enabled, especially when up-converting from
standard definition sources (525 or 625).
If the clip has an incorrect aspect ratio you will have to change the
clip properties in the library (Library/Properties).
© 2014 Digital Vision
UM-2014.1-07
DVO Upscale
327
Data
Values :
Default :
Linear , Log
From project
Set the clip data format.
Other Parameters
Repos
X and Y repositioning after Fill mode is chosen.
Centre
Values :
Default :
On , Off
On
This centres the scaled image on the output picture. If disabled it maps the
scaled image on the output picture from the lower left corner.
Field Order
Values :
Default :
Follow Clip , f1:f2 , f2:f1
Follow Clip
The Field Order parameter sets the input field order in time for interlaced
input.
Follow Clip Uses the clip properties (assumed correct).
f1:f2 Assumes top field first.
f2:f1 Assumes bottom field first.
This setting is independent of the output field order as set in the
project properties.
© 2014 Digital Vision
UM-2014.1-07
328
DVO Effects
Resize
X and Y scaling after Fill mode is chosen
Sharpen
Adjusts post-scale crispness.
The controls differ between Advanced and Fast modes.
Size
Values :
Default :
0.5 - 2.0
1.5
Adjusts the sharpening radius.
Amount
Values :
Default :
0 - 100
50
In Fast mode, this is the overall sharpness amount. In Advanced mode, the
flat area sharpness amount.
Edge
Values :
Default :
© 2014 Digital Vision
0 - 100
50
UM-2014.1-07
DVO Upscale
329
Advanced mode only
Edge sharpening amount
Texture
Values :
Default :
0 - 100
100
Advanced mode only
Balances flat area texture and sharpening noise.
Recommended settings are 100 for normal images and 0 for graphics. If flat
area noise is intrusive a setting lower than 100 will give less noise at the
expense of texture definition.
Deinterlace Control
In an analogue video signal there may be a visible half lines (unless removed
when captured) i.e. half the line is blanked and the rest of the line contains
image information. The last half line is usually unwanted when de-interlacing.
To remove the blanked part, enable Half Line Fix and select the line(s) to
address for top (Top Fix Lines) and bottom (Bottom Fix Lines). This will
ensure that the blanked part of the line is not visible in the final image.
Blanking
Blanking controls can be used to cover up soft image edges or any other edge
related problem.
© 2014 Digital Vision
UM-2014.1-07
330
DVO Effects
© 2014 Digital Vision
UM-2014.1-07
Shapes
19
332
Shapes
You can use an unlimited number of editable shapes for isolation
(mattes) or as an effect themselves.
Shapes are available as separate (user) effects, as part of an Effect Layer
and as part of any Colour Correction Layer (CC Layer).
Available Shapes
There are four basic shapes available :
Four points define rectangle. User clicks and drags to
set dimensions.
Points are not bezier spline style.
Four points define ellipse. User clicks and drags to
set dimensions.
Points are bezier spline style.
User clicks to add points (minimum three) and define
shape. Straight edges define shape.
Points are not bezier spline style.
© 2014 Digital Vision
UM-2014.1-07
Available Shapes
333
User clicks to add points (minimum three) and define
shape.
Points are bezier spline style.
Valhall Control Panel
You can add a shape using the Control Panel using the Image
Panel {Iso} menu, and pressing the corresponding shape button
e.g. {Ellip} :
You can also use the Image Panel Quick Shape buttons above the
trackball (mouse) :
Im age Panel
The ESC key on the keyboard closes a polygon and bezier shape.
Transforming Shapes
You can move, scale and rotate a shape via the Transform button.
When the Transform button is enabled, the shape is displayed with transform
© 2014 Digital Vision
UM-2014.1-07
334
Shapes
controls :
Transform controls on shape.
You can use your mouse to scale, move or rotate the shape by dragging an
overlay element on-screen interactively.
You can perform the same transformations by using your mouse to modify
the Position, Scale and Rotation parameters directly via their sliders :
Pivot Points
The Pivot X/Y points define the center of the shape for scaling and rotation.
Initially, the pivot points are placed in the exact center of the shape :
You can move the pivot location using the GUI sliders or dragging with the
mouse. The shape will rotate around the pivot :
© 2014 Digital Vision
UM-2014.1-07
Transforming Shapes
335
Valhall Control Panel
On the Valhall Panel, you can manipulate and transform shapes
(move, rotate, scale etc.) using the Image panel {ISO} menu on
button {2} and {3} e.g.
Manipulating Shapes
Shapes are defined by control points. A point is selected when it filled
(white) i.e.
To select multiple points, use CTRL + Click
To de-select a point, CTRL + Click it again
To de-select all points, click outside the shape
You should be in Shape mode (not Transform mode).
© 2014 Digital Vision
UM-2014.1-07
336
Shapes
Adding Points
To add a point to a shape, enable the Add Point button and click on the shape
edge.
Points added behave as bezier points for all base shape types.
Bezier Control
A bezier shape is a spline and is defined by a number of bezier control points.
Each control point has tangent handles on each side of the point that allow
fine control of the curve of the shape at the point.
Shape showing bezier-style control
point and tangent handles.
One tangent handle "broken" (not
mirror of other) using SHIFT+CTRL
drag handle.
The basic ellipse and bezier shapes are defined by bezier style points
whereas the basic rectangle and polygon shapes are defined by standard
non-bezier points. Any points manually added to any shape will be a bezier
type.
You can access and pull out the tangent handles on a sharp
cornered bezier shape by dragging the corner point while holding
down the keyboard z key :
Keyboard : z + drag (mouse)
© 2014 Digital Vision
UM-2014.1-07
Manipulating Shapes
337
Breaking a Shape
You can break a corner of a shape by holding down the keyboard SHIFT +
CTRL keys while dragging the point.
To re-join the two points, hold down SHIFT+CTRL and drag one
point on top of the other. The two points should snap together
when close.
Shape Softness
Shape softness controls are as follows :
Outer Softness sets the amount of softness to create inside the
shape boundary edge.
Inner Softness sets the amount of softness to create outside the
shape boundary edge.
The Variable Softness button lets you vary the amount of softness
created for different parts of the shape.
Basic bezier shape
© 2014 Digital Vision
Increase Inner Softness
UM-2014.1-07
338
Shapes
Increase Inner and Outer Softness
Enable Variable Softness
Vary the softness by m anipulating the
variable softness controls
If view ing shape is difficult - Press the
keyboard "p" key to change the shape
colour
You may get unwanted artifacts if points and/or handles overlap or
cross.
Del Outer / Del Inner
Del Outer will reset any outside/outer softness variation change
Del Inner resets any inside/inner softness variation change
© 2014 Digital Vision
UM-2014.1-07
Shape Softness
339
Valhall Control Panel
On the Valhall Panel, you can manipulate Inner and Outer
Softness using the Image panel {ISO} menu on button {3} e.g.
Shape Overlay Colour
The shape overlay colours are defined in the Shapes section of the file :
C:\Phoenix\2014_1\root\colour.prefs
Two sets of colours are defined : a normal and an alternative set of colours.
The alternative set are tagged with Alt. You can switch between the
normal and alternative colours dynamically by pressing the keyboard
p key.
Example
Shapes
{
Outline
Outer
Inner
VariableLink
OutlineAlt
OuterAlt
InnerAlt
VariableLinkAlt
}
255
155
100
185
0 0
255
255
0 0
255 255 255
155 155 155
100 100 100
185 185 185
0 255
0 0 255
0 255 255
255 255
Be careful editing this file and always create a backup first.
© 2014 Digital Vision
UM-2014.1-07
340
Shapes
Tracking Shapes
You can attach tracking information to shapes via the ..T rack Points
button.
© 2014 Digital Vision
UM-2014.1-07
DVO Tracker
20
342
DVO Tracker
Version 2009 introduces a sophisticated new tracker called the DVO Tracker.
The tracker automates the selection of optimal tracking points within a user
specified area of a shot.
The DVO Tracking controls are available inside every Shapes layer and
become active when a shape is selected.
DVO Tracker controls inside a Shapes control pane.
Tracking Basics
Any Shapes layer inside a CC Layer (including Base) or F X Layer can
be used to create a track for a shot.
Before starting, familiarise yourself with the shot you wish to use. Play the
shot through and identify the area you wish to track and its behaviour. Pay
attention to how the chosen feature moves (including any scaling or rotation),
whether it is ever obscured (or partly obscured), whether it stays inside the
frame and how other parts of the shot move relative to it.
The tracking process is straightforward :
Draw a shape around the area you want to track (and affect)
Press the track control to track forwards or backwards
With the play-head at the required starting frame, we will draw a shape around
the feature we wish to track.
In the Shapes/Shape menu :
© 2014 Digital Vision
UM-2014.1-07
Tracking Basics
343
We draw our shape around the feature we wish to track :
Ellipse shape draw n around our car "feature" w e w ill track
Shape Tips
It is often possible to keep the shape simple (rectangle, ellipse). Any
matte/mask the track creates will usually be softened such that it
properly merges into our shot and does not stand out in an artificial way.
Create the shape to cover the entire feature area of interest with some
head-room. Try and extend the shape a bit beyond the feature area.
Once the shape is drawn, the DVO Tracking controls are enabled.
To track the feature forwards to the end of the shot, press the track forwards
button (as shown above).
If the Feature Points button is enabled, two or more feature points will appear
inside the shape as we start playing the shot, tracking as we go.
© 2014 Digital Vision
UM-2014.1-07
344
DVO Tracker
Tracking forw ards, feature points used appear in green.
While tracking is in progress, the shape is drawn with a
thick border. Once tracking is complete (or stopped),
the shape reverts to its normal outline.
If the shape turns red, feature points can not be
matched in this frame. In the first instance, let the
tracker continue because it will attempt to match new
points.
If this continues to fail :
Turn on Image Enhance and retry.
Redesign or edit your shape to find better feature
patterns
The selected feature tracks until the end of the shot and then stops. The
tracking creates a new key-frame for each frame ,displayed in the key-frame
box at the bottom of the screen.
A key-fram e is created for each fram e of the shot w e track.
We can now use this tracked shape as a mask.
© 2014 Digital Vision
UM-2014.1-07
Using Other Tracks
345
Using Other Tracks
One shot may have any number of effect layers, each including a Shapes
layer.
CC Layers 1-2 all contain tracked shapes. Layer 3 (rear w indow ) is new .
The tracking data from any previously tracked shape can be selected and
applied to any other shape via the Other Tracked Shapes drop-down list :
Having created a new shape, select Other Tracked Shapes and choose the
tracking data you want to apply :
Once chosen, click the Apply button to apply the tracking data to your shape.
The tracking data is applied and track/shape key-frames appear in
the key-frame bar at the bottom of the screen. If the shape had any
previous tracking data, it will be overwritten.
© 2014 Digital Vision
UM-2014.1-07
346
DVO Tracker
Offset Tracking
Offset Tracking lets you use a different area of a shot for generating the track
compared to the position of the shape itself. If a different area of the shot
becomes the best candidate for generating the actual tracking data, we can
use it by creating an offset shape and positioning it over this better area.
Enabling the Offset button will activate a copy of the tracking shape :
Norm al shape tracking
Offset enabled - shape copied (green)
The copy is green. Initially, it is placed on top of the original shape.
We can switch to the Transform menu :
Then move the offset shape to our new preferred position :
© 2014 Digital Vision
UM-2014.1-07
Offset Tracking
347
Once in place, we can switch back to the Shape menu :
and continue our tracking.
The tracking data is calculated from the offset shape and applied to the original.
When the Offset button is enabled, the offset shape is used to generate the
track. You can set the offset shape to any suitable position in the frame. If a
better position becomes apparent, you can re-position it again.
For an offset shape track calculation to work properly, both the
original and the offset shape need to share the same type of motion.
Predictive Tracking
Normally, if the tracking calculation fails at some point in a shot, tracking
stops. In some cases, it is apparent that the track path could simply carry on
as before, the path being extrapolated based on its previous history.
© 2014 Digital Vision
UM-2014.1-07
348
DVO Tracker
If tracking fails because our tracked feature loses definition or goes out of
camera, we can enable Predict Tracking at this point.
When we resume tracking, the track path is calculated such that it smoothly
continues along the same path as calculated previously.
1: Tracking ...
2: Feature reaches edge of fram e. Turn Predict
Tracking ON.
3: Feature off cam era but track path is
extrapolated.
Track path extrapolation continues.
Reference
The DVO Tracker is available to use everywhere we have a Shapes layer
available. As such, we can draw a shape to define the feature we wish to
track and use the result as a Region of Interest matte.
© 2014 Digital Vision
UM-2014.1-07
Reference
349
Every Shapes parameter pane includes the new DVO Tracker control
parameters as shown in the figures below. The DVO Tracker controls
become available once a shape is drawn.
Shape controls and new DVO Tracker controls highlighted
Track Buttons
These buttons start the tracking process. You can track forwards or
backwards in a shot, to the shot end or start (respectively) or a frame at a
time.
From left to right we have :
Track backwards from current frame to
start of shot.
© 2014 Digital Vision
UM-2014.1-07
350
DVO Tracker
Track backwards one frame from current
frame.
Track forwards one frame from current
frame.
Track forwards from current frame to end of
shot.
Feature Points
The Feature Points button toggles display of the feature points used by the
DVO Tracker at each frame.
Feature Points are points inside our shape that are calculated to be good
patterns to use when tracking. They are chosen automatically and appear
inside the shape we have defined.
Feature Points in green, found inside the defined shape.
Feature Points are chosen dynamically on a frame by frame basis.
They are not user selectable or editable.
Transform Buttons
These buttons control what transformations are applied to the shape as we
track. If the button is off (white), the selected transformation is not applied.
If no transform buttons are enabled, the defined shape will not move
or change at all because no transformations will be applied.
From left to right we have :
Pan X/Y
Enable to calculate X/Y (up/down/left/right)
© 2014 Digital Vision
UM-2014.1-07
Reference
351
pans.
Rotation
Enable to calculate feature rotation.
Scale X
Enable to calculate scale changes in the Xaxis.
Scale Y
Enable to calculate scale changes in the Yaxis.
Offset Button
The Offset button creates an offset shape from the currently selected shape.
This offset shape can be moved (offset) to a new position in the shot from
where new feature points are calculated. The feature points calculated using
the offset shape are applied to the original shape. You can re-position an
offset shape any number of times in the same shot if required, with any
tracking data calculated applied to the original shape. See Offset Tracking.
Smooth Button
Normally, the DVO Tracker will position the transformed shape (x/y,rotation,
scale) in single pixel increments. The Smooth button will enable sub-pixel
positioning, and cause the track to be re-computed.
This smoothing effect will be visible by switching to the Keyframe Editor tab
and viewing the resultant animation graph.
If you turn the Smooth button off before completion, the smooth
process will stop and any smoothing done will be reset to its
previous state. Once complete, an undo operation will also reset the
entire track path to its pre-smoothed state.
Reset Track Points
These buttons allow you to reset all or some of the key-frames created by the
tracking process.
© 2014 Digital Vision
UM-2014.1-07
352
DVO Tracker
From left to right we have :
Reset all track key-frames from current
position to start of shot.
Reset all track key-frames.
Reset all track key-frames from current
position to end of shot.
The tracker key-frames are shown below the Shapes panel as green
diamonds :
Key-fram es show n in green, and current key-fram e in blue.
Pressing the reset all left button
will result in all key-frames to to the
left of the play-head being reset (inclusively). This results in the following keyframe status :
Key-fram es after reset all left button pressed.
Image Enhance
Image Enhance will do some image processing on the shot to increase the
contrast such that tracking is optimised and a more accurate track calculated.
This enhancement is transparent and done in the background (with no visible
image changes).
Enabling Image Enhance may be necessary for certain type of media,
particularly those with lower contrast or high contrast changes.
Image Enhance will default to on for Log projects.
Other Shapes
This drop-down list lets you apply the tracking data from a previously tracked
shape in the shot (in another layer) to the current shape. See Using Other
Tracks.
© 2014 Digital Vision
UM-2014.1-07
Reference
353
Predict Tracking
The Predict Tracking toggle button lets you carry on the track even if all
tracked feature points have moved outside the image frame and tracking has
terminated. Turning Predict Tracking on will extrapolate the track to the end
(or start) of the shot such that the track is contiguous and smoothly extended.
See Predictive Tracking.
Valhall Keys
Mod
Key
function
Track forwards to end of shot
Track backwards to start of shot
Track forwards one frame
Track backwards one frame
Scroll up/down "Other Tracked Shapes" menu
Apply tracking from selected "Other" shape to
current shape.
Creates or toggles the Offset Shape
Resets tracking from current frame to end of shot
(inclusive)
Resets tracking from current frame to start of shot
(inclusive)
Resets all tracking on current shot
© 2014 Digital Vision
UM-2014.1-07
354
DVO Tracker
© 2014 Digital Vision
UM-2014.1-07
Video I/O
21
356
Video I/O
You can capture and lay off video via the Library modules :
Capture video
Layoff video
These options will only be enabled when your system has a video I/O board
installed.
Audio I/O
Support for 8 channel audio capture and layoff with the following video cards :
Bluefish Lust - AES/EBU audio
DVS Centaurus2 - AES/EBU and embedded audio
Video I/O
Capture and layoff modules have similar layouts :
The monitor and transport controls are situated on the top left
The settings and control tabs sit below the monitor and transport
controls
The event list and event controls are on the right hand side
Playback/Transport Controls
The playback controls on a VTR deck are more commonly referred to as
transport controls. These controls are the same on both the capture and layoff
screens:
© 2014 Digital Vision
UM-2014.1-07
357
Timecode Box / Cue
This field displays the current tape position.
If you enter a timecode in the box and press the Cue button, the tape will cue
to this location.
VTR Settings
The VT R /Vide o C apture S e ttings tab contains a variety of
configuration settings - including VTR status, video format used, and audio
channels active. The available settings are similar between the capture and
layoff modules.
Always check these settings carefully before proceeding with any
video I/O.
© 2014 Digital Vision
UM-2014.1-07
358
Video I/O
VTR Deck Status Feedback
The four deck status fields are read-only display fields and provide feedback
on :
Model of VTR attached (e.g. HDW-F500)
Status of the VTR (still,stop,play etc.)
Reported VTR frame rate
Record inhibit status (REC Lock).
Note - if the deck and project frame rates do not match you will get a warning
message.
This message can be turned off by setting the general.prefs
frameRateWarning parameter to false.
Refresh Button
The status fields should update automatically but you can perform a manual
update by pressing the Refresh button.
Video Signal Feedback
The three 'SDI' fields are read-only display fields, providing feedback from the
video card.
SDI Input
This shows the video format (resolution and frequency) of the video input
signal.
SDI Sync
This shows the reported sync signal seen by the video card.
© 2014 Digital Vision
UM-2014.1-07
VTR Settings
359
SDI Output
This shows the video format (resolution and frequency) of the video output
signal
Video Format settings
capture
output
Colour Space control
The first drop-down button allows you to set the colour space mode for your
material.
YCrCb 422
RGB 444
RGB Scaling control
The second drop-down allows you to set the video scaling mode that the
application should apply to the material:
Linear (SMPTE) - no scaling
Linear (CGR) - signal is scaled
This setting is very important in order to ensure that what you see on
your monitor is what you will get on output. For a discussion of
Colour Scaling modes, see the Setup Manual.
FPS control
VTR Capture only.
For certain bandwidth intensive formats we need to specify an optimal capture
rate to use.
Default FPS - the default is the composition frame rate
Use 14.98 FPS (2K)
Use 15.00 FPS (2K)
© 2014 Digital Vision
UM-2014.1-07
360
Video I/O
Use 5.00 FPS (4K)
Blanking
VTR Output only
This setting will blank out the top and bottom video lines.
This may be useful to hide any edge artifacts pushed into the video
active area by certain effects (e.g. blurs).
Audio I/O
Note - the audio settings on the right are only available in the Capture m odule.
The audio channel buttons give feedback and also act as controls. They will
automatically default to show how many audio channels are available
(highlighting them in green), after which you can enable/disable them for
capture/layoff.
2014.1 currently supports eight (8) channels of audio. The buttons
for channels 9-16 are visible but disabled (and not used).
Capture Only
Interface
Options : AES-EBU or Embedded SDI
This sets the source of the captured audio data.
We support AES/EBU audio with the Bluefish Lust card (AES audio cables)
We support AES/EBU and embedded audio on the DVS Centaurus2 card.
The audio capture path is set separately in the capture Controls tab.
File Storage
Options : Broadcast WAV
Bit Depth
Options : 16 or 32
Number of bits per sample to capture.
© 2014 Digital Vision
UM-2014.1-07
VTR Settings
361
Roll and Trim controls
Pre-roll
How many seconds the deck should allow the tape to roll before capture/layoff
starts.
When capturing or laying off the deck will cue to the VTR in point minus the
value set in the pre-roll field. No actual capture/layoff takes place during a
post-roll.
Post-roll
How many seconds the deck should allow the tape to roll for after capture/
layoff ends. No actual capture/layoff takes place during a post-roll.
Video Trim
This numeric entry field / slider allows you to correct timecode offset errors
that might occur when capturing or laying off video.
The Video Trim controls which frame of video is recorded at the edit (in) point
and can be used to help fix video routing or system delays.
Edit Trim
VTR Output module only.
Similar to video trim, it allows you to correct any timecode errors causing the
recorded material on tape to be starting at the wrong timecode.
The difference between video trim and edit trim is that the video trim setting
will make adjustments to the time when the frames start being sent from disk
to tape, i.e. when layoff starts, whilst the edit trim setting makes adjustments
to when the deck actually starts recording.
The point at which the deck actually starts recording prior to receiving the
video is what can be adjusted using the edit trim control, should you find that
the layoff is not ending up at the correct timecode.
© 2014 Digital Vision
UM-2014.1-07
362
Video I/O
Project Settings for Video Output
If you intend to lay off video from your project, make sure you enable the Video
Output setting on the project output format. See Cache Output.
Video Capture
The VTR Capture screen is accessible from the library screen via the ..L ist
C apture button.
This brings up the list capture screen, with two options on the bottom left:
Data Capture - this is the mode used for batch capturing digital media
.
VTR Capture - this is the mode for capturing media from tape.
For capturing from a VTR deck, press the VT R C apture button.
The Control tab is where the interactive controls for carrying out a video
capture are located.
© 2014 Digital Vision
UM-2014.1-07
Video Capture
363
Prior to attempting any capture you should always review and adjust
all the values in the settings tab as appropriate for your material and
composition.
Capture Locations
Defaults : As per general.prefs preference file.
Use the tick boxes to choose which data streams to capture - video, audio or
both.
The capture paths are shown and can be edited in place, or set via the file
browser (click the
icon).
If you change a path here, the new location will be saved to the
general.prefs preference file.
For optimal performance, the audio and video capture locations
should be set to separate disk volumes in order to optimise
concurrent disk-writes (and minimise interference). For example,
capture video to the S:\ volume and audio to the W:\ volume.
Deck Status
The deck status is displayed in a summary line at the bottom of the controls
tab.
Information displayed is :
VTR/deck model,
Frame rate
Control status.
If the VTR deck is record inhibited, this will be shown as REC Lock.
© 2014 Digital Vision
UM-2014.1-07
364
Video I/O
Capture Methods
There are three main methods for performing a video capture:
Capture Marked - specify an in and an out point, then capture this
marked region.
Capture Live - start recording as the VTR plays
Capture List - import and then capture from a list (e.g. an EDL).
The Capture Single operation is discussed as part of the Capture List section.
Capture Live
This is the simplest capture method and involves pressing the C apture
L iv e button at an appropriate time as the video tape is playing.
Pre-roll and post-roll settings do not apply during live capture.
When C apture L iv e is pressed, it turns red and the S top C apture button
is highlighted. To stop capturing, press the S top C apture button.
© 2014 Digital Vision
UM-2014.1-07
Video Capture
365
If you do a 'Capture Live' without having pressed play, i.e. with no
footage being displayed in the viewer, you will capture blank (black)
frames for the duration of the capture.
Once capture has stopped, the captured footage will automatically be added
to your project library.
Capture Marked
This capture method will capture the footage defined between the marked in
and marked out timecodes.
Specify the Mark In and Out points by :
Manually typing in the in and out timecode into the appropriate in/out
timecode box or
Cueing the VTR deck to the In timecode and pressing the Mark In
button, then
Cueing the VTR deck to the Out timecode and pressing the Mark Out
button
For accurate marking of the In/Out points you can use the jog frame
buttons to locate the exact frame positions.
Once marked, the duration display field will show the total duration of the
marked region, and pressing C apture M arke d will begin the capture.
© 2014 Digital Vision
UM-2014.1-07
366
Video I/O
During capture, the Capture marked button will turn red and the VTR deck will
cue to the pre-roll point before the marked timecode in-point.
Once the mark-in position is reached the capture will commence and at this
point the S top C apture button will become enabled.
Once complete, the capture will stop automatically. You can interrupt the
capture at any time by pressing the S top C apture button.
Once capture has stopped, the captured footage will automatically be added
to your project library.
Capture List
The C apture L ist method requires an existing event list.
This list is usually created by importing a list file (such as an EDL) and then
capturing and conforming the events. Refer to the section on importing list
files for detailed instructions on creating a composition based on a list file.
Once you have imported the list file, the corresponding composition will
appear in the Library and the events that need to be captured will appear on
the timeline.
No media will exist in the library until it is captured and conformed to
this empty timeline.
Inside the capture module, the list events are shown on the right.
© 2014 Digital Vision
UM-2014.1-07
Video Capture
367
Event List
The event list table is composed of a number of fields per event.
The Event List is displayed a standard table. For more detail on
tables and their use, see the Tables section.
Each event listed has a status assigned to it. This status will update as the
capture proceeds.
Event Status
The status fields are :
Needed - the media for this event has not yet been captured and the
event is enabled for capture.
Disabled (Needed) - the media has not yet been captured but you
have disabled the capture of this event.
Disabled (Found) - the media has already been captured and you
have disabled the event to avoid recapturing it.
Capturing - the media for this event is in the process of being
captured.
Partial Capture - part of the media for this event has been captured
but not in its entirety.
Found - all the media for this event has been found and captured.
© 2014 Digital Vision
UM-2014.1-07
368
Video I/O
Material
Once an event has been captured (Found), the path to the stored media will
be shown in the Material column for that event.
Tape Name
Events in the list may need to be captured from different tapes, as indicated
by the Tape Name column. You will be prompted to insert each tape (or to
skip it).
This will continue until all the media from the different tapes has been
captured.
If you press S kip T ape , no media will be captured for this tape and
capture will proceed to the next tape (prompt for insert), if there is
one. You can capture any skipped tapes later.
Event Controls
The event controls, located beneath the event list, allow you to refine your list
and select specific events prior to capturing:
Enable / Disable Event
To selectively choose to capture events (or not), select single or multiple
events from the list and use the Enable Ev e nt and Disable Ev e nt
buttons prior to pressing C apture L ist.
A disabled event will have a status that displays Disabled e.g. Disabled
(Needed) or Disabled (Found).
You can capture events in "groups", perhaps using a different
number of handles for each.
Reset Event
This option will reset the selected event(s) to the status of Needed, whether or
not the media had already been captured. This allows a re-capture of a
previously captured event.
© 2014 Digital Vision
UM-2014.1-07
Video Capture
369
Event Handles
This numeric slider specifies whether to capture more frames than the events
require i.e. handles. Setting the Event Handles to 5, will capture 5 frames of
head and 5 frames of tail for each enabled event.
The addition of handles might be applied in order to capture as much
of each media clip as might be later needed and to allow later
trimming of the media clip within the composition. Adding handles
can also be used to lengthen events in the composition list so that
their timecodes overlap with others and various events can be
consolidated and captured as a single media clip using the
'Consolidate Events and Tapes' function.
Consolidation
Default : Consolidate on tape
Consolidation is the grouping together of overlapping events (generally by
timecode) into a single "event" which can be processed (captured) as one.
This can minimise the amount of work required to capture the same amount
of material. Consolidation reduces the total number of events to capture.
Don't consolidate Ignore potential consolidation and show every event in
the list.
Consolidate on
tape
Consolidate overlapping timecodes within the same
tape.
Consolidate on
clip
Consolidate overlapping timecodes within the same clip.
You can also use consolidate in conjunction with the handles
function to increase the length of media required by events that are
close in their timecodes but not overlapping. By making them overlap
on purpose, the source material can be captured in one go as a
single clip.
Capturing the List
When ready, press C apture L ist to start the capture.
Once capture starts, the C apture L ist button turns red.
© 2014 Digital Vision
UM-2014.1-07
370
Video I/O
Buttons S kip Ev e nt, S kip T ape and S top C apture are also enabled
now.
In-between capturing each event, whilst the deck scans to find the
correct position, these interactive buttons will become disabled.
Once capture is complete (or stopped), you should look at the status of each
event in your list to check that it was captured correctly and that the Material
location is given.
Press C onform to complete the capture process and link the captured
media in the library to your composition.
Capturing a Single Event
To capture a single event, select it in the event list and press C apture
S ingle.
This button is only enabled when a single event is selected.
As before, the button will turn red once capture is underway, and the 'Stop
Capture' button will become enabled:
The event list will show the individual event being captured:
Exporting the Events List
Press Export L ist to export all, or a subset, of the event list.
© 2014 Digital Vision
UM-2014.1-07
Video Capture
371
You can export as a CMX3600 EDL or a CUT style list.
There are three options for export :
Export all - This will export the full list of events as displayed onscreen. You may want to do this if you've altered the original list in
some way, e.g. by adding handles or using the consolidate events
function.
Export found - This will export a list containing only the events that you
captured.
Export not found - This will export a list of all the events that were not
captured. This could serve as an easy way to identify which events
have yet to be captured.
The list export option is only available in the List Capture screen.
Video Layoff
The VTR Layoff screen is accessible from the library screen via the ..L ist
O utput button. The layoff module is called List Output and will output the
current composition events to video.
There are two tabs - VTR Output Control and VTR/Video Output Settings.
The Settings tab has been detailed in the VTR Settings section.
The monitor will switch between displaying the footage on tape
during tape playback, and displaying your composition footage during
the actual layoff process.
The Control tab is where the interactive controls for carrying out a video layoff
are located.
© 2014 Digital Vision
UM-2014.1-07
372
Video I/O
Event List
The events to be output are shown on the right-hand side and correspond to
the events on your timeline. The number of events in the list matches the
number of events on your timeline. Gaps in the timeline are ignored.
Though gaps in the timeline do not show up in the event list, they will
in fact be laid off to tape as black frames for the duration that they
occur on the timeline.
Status
Before output, each event is checked and rendered if necessary. This is an
automatic process.
Processing - This means the event is still being checked or rendered.
Rendered & Found - This means the event is ready for layoff.
Rec In / Rec Out
The Record In time of the first event matches the start time of the
composition on the timeline, and the Record Out time of the last event
matches the end time of the composition.
These two columns show the Record In and Record Out timecodes of the
event as it appears on the composition timeline. These values are used when
laying events off in Record Order.
Src In / Src Out
These two columns show the Source In and Source Out timecodes of the
source material for that event. These values are used when laying events off
© 2014 Digital Vision
UM-2014.1-07
Video Layoff
373
in Source Order.
Material
This column shows the location of the rendered material on disk. This may or
may not correspond to the location of the source material shown in the library
screen.
Tape Name
This column shows the tape name corresponding to the source material for
that event.
Event Handles
If a source order mode (e.g. Source Order Tape) is selected, the Event
Handles option is enabled.
This numeric slider is located directly below the event list, and allows the
option of laying-off more frames than each event requires (i.e. adding
'handles'). The handles are added on either side of the event on tape.
The addition of handles might be applied in order to layoff as much of
each media clip as might be later needed when re-importing the
media as source material for a composition, and to allow later
trimming of the media clip within the composition.
Laying off Sections
With no marks set, the Output module will select all events for layoff.
To layoff a section of your timeline only, use the timeline Mark In and Mark
Out buttons to mark the desired range before pressing ..L ist O utput.
The output module will only display and output the marked events.
© 2014 Digital Vision
UM-2014.1-07
374
Video I/O
Output Controls
The VTR Output Controls are shown below.
The Actions buttons in the centre perform the specified output operation e.g.
O utput L ist, S top O utput etc.
Status Fields
VTR
VTR Deck status is shown in the VTR row.
If the tape is record inhibited, it will show REC Lock.
List
During processing or output, this row will show the list status and output
progress.
Buffer
The Buffer row will display how many frames are buffered and ready for
output.
Output Channels
Use the tick boxes to choose which data streams to output - video, audio or
both.
© 2014 Digital Vision
UM-2014.1-07
Video Layoff
375
Record Edit Mode
This drop-down list allows you to select the edit mode, which determines how
material is written to tape. The following modes are available.
Insert Edit
Each event is recorded at the record in-point timecode.
This mode requires a tape pre-striped with the right record
timecodes.
Assemble
Edit
This locates the record in-point timecode of the first event
and starts recording. From here, timecodes are generated
(assembled) as the output proceeds. Only the initial inpoint timecode is required (hence only a partially striped
tape is necessary).
Crash Record This method starts recording at the current tape position,
with no pre-roll or post-roll used, and writes out timecodes
as it records. This mode will therefore work on a blank
tape (no pre-striping required) and is only suitable for
laying off contiguous material.
The Pad Events option is available here.
Preview BVB
This mode previews the output. It does not write anything
to tape.
The preview shows : Black - Output Video - Black.
Preview VVV
This mode previews the output. It does not write anything
to tape.
The preview shows : Video - Output Video - Video.
Review
This mode reviews the output on tape. It does not write
anything to the tape.
Pre-striped tapes must be striped at the same frame rate as your
composition.
The Actions buttons will change depending on record mode selected.
© 2014 Digital Vision
UM-2014.1-07
376
Video I/O
Timecode Output Order
This drop-down list allows you to select which timecode order is to be used
when writing the events to the tape:
Source Order TC (C) Record each event to tape at its original location (i.
e. its source timecode), ignoring its location on
the composition timeline (record timecode).
Event handles : enabled.
Source Order Tape
(C)
This is the same as Source Order TC except the
list is sorted by tape first, then source timecode.
Event handles : enabled.
Record Order (A)
Record each event to tape at its composition
(record) timecode location i.e. the same
sequential order as your composition timeline and
at the same timecodes (unless "Use mark as in
point" is set, see below).
Event handles : disabled.
Event Handles are enabled for Source Order mode layoffs :
Note that Source Order layoffs will not render transition effects.
When Source Order is selected, the Mark-In/Out values in the Event
List will change to show the source timecodes matching the start
and end timecodes of the list events. When Record Order is
selected the record timecodes are shown instead.
Pad Events In / Out
Crash Record only.
© 2014 Digital Vision
UM-2014.1-07
Video Layoff
377
Pad Events controls whether padding is to be applied during output. Padding
consists of black frames with contiguous timecode being written before and
after the events being laid off.
How much padding is written is controlled by the In and Out timecode fields.
The timecode given to the padding will always precede the timecode
of the 1st event being laid off, and if a Mark-In Timecode has been
supplied the timecode of the padding will precede the Mark-In TC.
Padding can only be carried out in Crash Record mode.
In / Out Markers
The In, Out and Duration boxes relate to the in, out and duration times of your
event list. Record timecodes or source timecodes are used according to the
Timecode Output Order selected.
You can set the In point timecode by :
Pressing the Set In button (Cue In). This sets the In timecode to the
current deck position.
Erasing and typing in a new timecode via your keyboard.
Use mark as in point
Ticking this box will set your layoff in-point to the In timecode set. Your list
will be recorded starting at this In timecode
Output List
This button is enabled when there are events in the event list. Pressing it will
start off the layoff to tape of all the events in the list.
Unlike the VTR Capture module, you cannot select a group of events
for layoff from the event list. All items in the list will be output. To
select a sub-section for layoff, see Laying Off Sections.
© 2014 Digital Vision
UM-2014.1-07
378
Video I/O
Output Single
This button is enabled whenever a single event is selected/highlighted in the
event list. Pressing it will layoff that specific event only.
Stop Output
This button is only enabled when there a layoff is in progress. Pressing it will
halt the layoff.
Output List
O utput L ist will layoff the entire event list.
Checking the List
Before the list is output to video, the events are first checked to ensure they
are fully rendered and available.
Validate Output
Default : On
If Validate Output is enabled, a final output validity check is performed after
any rendering is complete.
Once layoff starts, the button will turn red and the S top O utput button will
become enabled and turn green.
The tape will be scanned for the correct timecode in-point and recording will
commence. For a crash record, recording will commence at the tape position.
All the events shown in the event list will be written to tape.
The layoff can be halted at any time by pressing the S top O utput button.
© 2014 Digital Vision
UM-2014.1-07
Video Layoff
379
Output Single
Output Single will layoff a single selected event only.
The Output Single button is only enabled when a single event is
selected in the event list.
Before the layoff starts, the event is rendered (if required) and a final output
validation check is performed (if Validate Output is enabled - see Validate
Output).
Once layoff starts, the button will turn red and the S top O utput button will
become enabled and turn green.
The tape will be scanned for the correct timecode in-point and recording will
commence. For a crash record, recording will commence at the tape position.
Only the selected event will be output to tape.
The layoff can be halted at any time by pressing the S top O utput button.
© 2014 Digital Vision
UM-2014.1-07
Command Line
22
381
The Command Line Interface (CLI) lets you run application commands
without starting up the application interface (GUI). The CLI is therefore useful
for automating tasks that do not require an operator to be present.
The CLI supports many of the operations that can be performed interactively
using the GUI interface:
Project Definition and Creation
Composition Definition and Creation
Importing Clips to the Library
Adding a Version
Splicing or Overwriting Clips to a Composition
EDL Import and Conform
Capturing and Conforming Material
Generating Local Proxies
Rendering a Composition via Export
Rendering a Composition Cache
Running Multiple Operations from a File
Listing Project and Composition Information
Counting and Adding Tracks to Existing Compositions
Testing for a GUI Lock
Project Format Specification
Be careful to quote any strings or paths you use on the command
line. In particular, pay attention to any spaces in strings or paths or
you will see syntax errors i.e.
The argument :
--format-spec C:\data files\specs\test.spec
Will give an error due to the space in the "data files" folder. Quote
this to prevent the error :
--format-spec "C:\data files\specs\test.spec"
© 2014 Digital Vision
UM-2014.1-07
382
Command Line
Conventions
Required parameters are given in angled brackets <> i.e.
--format-spec <path>
Optional parameters are given in square brackets [] i.e.
--timecode-header [1|2]
Possible values are separated with a vertical bar (| as above).
Splitting Long Lines
This document sometimes splits long command lines over multiple lines to
make the command easier to read. The split if delimited by a line-continuation
character "\" i.e.
--export S:\exp\$o\$c..dpx \
--export-mode single
In reality, you would type the above command on a single line only without
the continuation character :
--export S:\exp\$o\$c..dpx --export-mode single
© 2014 Digital Vision
UM-2014.1-07
383
User Login
--user <username>
Log in as named user
To use the command line interface as a specific user, use the --user option
and specify the username to login to the application as.
Command :
$ nucoda_film_master --user steven --list
Projects:
1: test1
2: Check Danger 002
3: Check Danger 003
- C:\Nucoda\...
- C:\Nucoda\...
- C:\Nucoda\...
Without the --user option, the last user we logged in as is used. If we have never lo
Creating a Project
--project <name>
Create a new project with the specified name
--format-spec <path>
Use the specified project format specification
template
Create a New Project
--project <name>
--format-spec <path>
To create a new project from the command line, create a project format
specification file that describes the project. This is the equivalent of setting up
the project configuration settings in the GUI.
Specify the name of the project and its format specification file using the
command:
Command :
$ film_master --project PROJ1 --format-spec H:\specs\hd-1.txt
INFO Creating new project "PROJ1".
The above command creates a new project "PROJ1" using the definition
stored in the file "hd-1.txt".
Project Format Specification
--format-spec <path>
This "format spec" is a text file that defines the elements of the project,
© 2014 Digital Vision
UM-2014.1-07
384
Command Line
including both outputs and sources. The output and source sections are
specified using the section tags:
[output]
[source]
The basic format is as follows :
<Global Parameters>
[output]
<output sections>
[source]
<source sections>
Some global parameters are required
There must be one or more output sections.
The first output section will be the master format for the project.
There are zero or more source sections (a "1:1 source" will always
be created).
The '#' symbol starts a comment
See : Format Specification definition section
A minimal format specification file would look like:
# A minimum basic format specification
colourScaling=cgr
[output]
width=1920
height=1080
fps=25
aspectRatio=16/9
A "#" symbol starts a comment.
See the next section for the complete file format definition.
Example format specification files can be found in the folder :
C:\Phoenix\2014_1example_files\format_specs\
Project Format Specification
A project is defined using a project format specification file. This file is of the
following format :
© 2014 Digital Vision
UM-2014.1-07
Creating a Project
385
<Global Parameters>
# one or more output sections
[output]
key=value
...
# zero or more source sections
[source]
key=value
...
© 2014 Digital Vision
UM-2014.1-07
386
Command Line
Data Types
The various data types we can use in the specification are as shown in the
table below.
Data Type
Description
Examples
<bool>
<int>
<float>
A boolean true/false
Integer number
Floating point number
true, false
1556
29.97
Global Parameters
These parameters appear outside an output or source section, at the start of
the file. We underline required options.
colourScaling
Required
Values : SMPTE CGR FilmLog VideoLog
Default :
Project colour scaling mode.
outputClip
Values : <bool>
Default : false
Project output clipping.
Output Section Parameters
These parameters appear inside an output section.
width
Required
Values : <int>
Default :
The width (x resolution)of the output format in pixels.
© 2014 Digital Vision
UM-2014.1-07
Creating a Project
387
height
Required
Values : <int>
Default :
The height (y resolution)of the output format in pixels.
fps
Required
Values : <float>
Default :
The frames per second. If no decimal point set, we add a .0
automatically e.g. 29.97, 25
aspectRatio
Required
Values : <int>/<int>
Default :
The output format image aspect ratio. Specify as M/N e.g. 1316/1000
dropFrame
Values : <bool>
Default : false
Set if output format is drop-frame.
videoOutput
Values : <bool>
Default : false
Specifies if Video Output is enabled on output format.
fields
Values : f2:f1 f1:f2 frames
Default : frames
Specifies if output format is field based and gives field order.
© 2014 Digital Vision
UM-2014.1-07
388
Command Line
channels
Values : RGB RGBA
Default : RGB
Colour channels
bitDepth
Values : 8,10,16,half
Default : 10
Output colour depth per colour channel, in bits per pixel.
convertMode
Values : none fit crop center
Default : none
Output format conversion from source.
convertFilter
Values : none box bilinear gaussian zom lanczos
Default : zom
What conversion filter to use on the source (if convertMode not "none")
applyCms
Values : <bool>
Default : false
Specifies if the Apply CMS toggle is on or off.
Source Section Parameters
These parameters appear inside an input section.
scale
Required
Values : <int>
Default :
Sets the scale of the source/proxy. This integer will divide the width and
height to set the proxy size. A scale N gives an "N:1" proxy.
© 2014 Digital Vision
UM-2014.1-07
Creating a Project
389
bitDepth
As output section above.
convertFilter
As output section above.
Only applicable if scale > 1.
Notes
The key values are case-sensitive.
Values are case-insensitive (e.g. use "rgb" or "RGB").
Attach and Detach Project
--attach-project <path>
Attach project found at specified path
--detach-project <name>
Detach named project
--remove-cache
delete project caches when attaching
Attaching a project makes it available for use by the application and adds it to
the list of available projects on the project screen.
Attaching a Project
--attach-project <path>
This command attaches the specified project. The named project is the full
path to the project folder.
Command :
$ nucoda_film_master \
--attach-project D:\archived\project-x
INFO Imported "D:\archived\project-x" (project name is "project-x").
Attach multiple projects by separating them with a space e.g.
--attach-project D:\project1 "G:\blue sky"
Detaching a Project
--detach-project <name>
This command detaches the named project.
© 2014 Digital Vision
UM-2014.1-07
390
Command Line
Command :
$ nucoda_film_master --detach-project project-x
INFO Detached project "project-x".
Removing Project Caches
--remove-cache
When attaching projects, specify this argument to have their caches removed
after attachment.
Command :
$ nucoda_film_master \
--attach-project D:\archived\project-x \
--remove-cache
INFO Imported "D:\archived\project-x" \
(project name is "project-x") and removed cache.
Creating a Composition
--composition <name>
--num-tracks <N>
Name and create a new composition
Create a composition with N video tracks
Create a New Composition
--composition <name>
The following command creates a new composition named "COMP1" inside
project "PROJ1".
Command :
$ film_master --project PROJ1 --composition COMP1
INFO Opening project "PROJ1".
INFO Creating new composition "COMP1".
If the project does not exist, it will be created. This will require a format
specification option.
Create a New Project and New
Composition
The following command creates a new project "PROJ2" according to the
format specification file "FORMAT". It will then create a new composition
named "COMP2" inside the newly created project.
© 2014 Digital Vision
UM-2014.1-07
Creating a Composition
Command :
$ film_master
--composition
INFO Creating
INFO Creating
391
--project PROJ2 --format-spec FORMAT \
COMP2
new project "PROJ2".
new composition "COMP2".
Create a New Composition with
Multiple Video Tracks
--num-tracks <N>
The following command creates a new composition "COMP3" containing 3
video tracks (V1,V2 and V3) inside project "PROJ1".
Command :
$ film_master --project PROJ1 --composition COMP3 \
--num-tracks 3
INFO Opening project "PROJ1".
INFO Creating new composition "COMP3".
Video tracks can be selected using the --track ID option on the
command line, where ID is "V1", "V2" etc.
Importing Clips
--import-clip <path>
--name <name>
--description <descr>
--clip-description <descr>
Import clip from specified path
Give the clip a library name on import
Give the clip a library description on
import
Importing a Clip
--import-clip <path>
The following command imports a clip from the specified path into the library
of project "PROJ1":
Command :
$ film_master --project PROJ1 --import-clip \
M:\images\train\300001.dpx
INFO Opening project "PROJ1".
INFO Found range (300000, 300164).
The clip imported above will be given a default name in this case because the
filename is numeric only.
© 2014 Digital Vision
UM-2014.1-07
392
Command Line
The default name will be taken from the two containing directories i.e. "images
train". See below.
Command :
$ film_master --project PROJ1 \
--import-clip Z:\shots\056\056_001.001.dpx
INFO Opening project "PROJ1".
INFO Found range (1, 15).
The clip will be given a name taken from the filename, i.e. "056_001". See
below.
This command only imports one clip. To import multiple clips, see
Importing Folders.
If you perform the same import operation twice, the clip will be
imported again. This differs from previous behaviour that expected
the option --force-import to be used (this option has been
removed).
Specifying a Clip Name on Import
--name <name>
To specify a clip name in the library on import, use the --name option.
Command :
$ film_master --project PROJ1 \
--import-clip Z:\shots\002\shot1002.001.dpx \
--name "clip name"
INFO Opening project "PROJ1".
INFO Found range (1, 99).
INFO Set clip name to "clip name".
You can only set the name of an imported clip when you import it, not
afterwards.
Clip Naming Convention
Unless specified with the --name option, the imported clip is named as
per the settings in the application preferences Auto Assign Name.
Specifying a Clip Description on
Import
--description <description>
© 2014 Digital Vision
UM-2014.1-07
Importing Clips
393
To specify a clip description in the library on import, use the --description
option.
Command :
$ film_master --project PROJ1 --import-clip \
Z:\shots\1002\shot1002.001.dpx \
--description "clip desc"
INFO Opening project "PROJ1".
INFO Found range (1, 99).
INFO Set clip description to "clip desc".
The description can only be set on import, not afterwards.
Importing Movies
--import-movie <path>
Import a movie clip from specified path
Importing a Movie
--import-movie <path>
This command imports a movie into the named project from the specified
path.
Any supported movie format can be imported using this command,
including :
Red R3D
Quicktime
MXF wrapped media
ARRI D21
Silicon Imaging SI-2K
Vision Research Phantom
Command :
$ film_master --project PROJ1 --composition comp1 \
--import-movie C:\media\qt\sample.mov
INFO Opening project "PROJ1".
INFO Opening composition "comp1".
© 2014 Digital Vision
UM-2014.1-07
394
Command Line
Importing Folders
--import-folder <path>
Import clips found in named
folder (and all sub-folders)
--filter-format <fmt>
Filter clips we import by file
format
--filter-res <w> <h>
Filter clips we import by image
resolution
--splice-order <file|timecode>
Splice clips found to
composition in specified order
--timecode-header [1|2]
Take timecodes from file
headers
--timecode-filename
Take timecodes from file
names/paths
--tapename-header
Take tapenames from file
headers
--tapename-filename <level>
Take tapenames from file
names/paths
These options control the import of supported image sequences recursively
from a specified folder path.
Importing a Folder
--import-folder <start folder path>
This command imports all supported image files found in the specified
folder and any sub-folders (recursively).
Command :
$ film_master --project code2 \
--import-folder Z:\scans\reel4\
INFO
INFO
INFO
...
INFO
Opening project "code2" from ...
Batch ... importing directory 0 of 1 (0)
Batch ... importing directory 1 of 5 (20)
Batch Import (completed) ... 6 of 6 (100)
The command shown above has imported the given folder into the specified
project "code2". This is a total of six folders searched, the specified folder
itself and five sub-folders :
z:\scans\reel4\
z:\scans\reel4\0008H\
z:\scans\reel4\0006\
z:\scans\reel4\0005\
z:\scans\reel4\0002\
z:\scans\reel4\0002\high\
© 2014 Digital Vision
UM-2014.1-07
Importing Folders
395
Filtering
We can filter the sequences the command selects to import on image
resolution (e.g. choose only HD sequences) and image format (e.g. choose
only TIFF sequences).
Filter on Resolution
--filter-res <width> <height>
This option will select only images that match the given resolution (width x
height) in pixels.
Command :
$ film_master --project code2 \
--import-folder z:\scans\reel4\ \
--filter-res 2048 1556
INFO
INFO
INFO
...
...
INFO
Opening project "code2" from ...
Batch ... importing directory 0 of 1 (0)
Batch ... importing directory 1 of 5 (20)
Batch Import (completed) ... 6 of 6 (100)
Shots that match the resolution specified will be loaded into the project library.
Filter on Image Format
--filter-format <extension>
This option will select only image sequences that match the specified file
format, given as the common format extension.
Command :
$ film_master --project code2 \
--import-folder z:\scans\reel4\ \
--filter-format dpx
For a list of supported formats and recognised extensions, see File
Format Support.
Tapename
--tapename-header
--tapename-filename <level>
These options override the source of the tapename field we extract when
importing each sequence found.
© 2014 Digital Vision
UM-2014.1-07
396
Command Line
If you do not specify these options, the default settings will be used
as set up in your preferences.
Command :
$ film_master --project code2 \
--import-folder z:\scans\reel4\ \
--filter-format tif --tapename-filename 1
INFO
INFO
INFO
...
...
INFO
Opening project "code2" from ...
Batch ... importing directory 0 of 1 (0)
Batch ... importing directory 1 of 5 (20)
Batch Import (completed) ... 6 of 6 (100)
Timecode
--timecode-header [1|2]
--timecode-filename
These options override the source of the timecode we extract when importing
each sequence found.
Using --timecode-header will attempt to extract the sequence timecode
from the file header. If this does not exist (e.g. the format does not support
header timecode), then the filename numerics are used to calculate the
timecode.
If you do not specify these options, the default settings will be used
as set up in your preferences.
First and Second Timecode
This is a Red R3D file specific option argument.
The --timecode-header option takes an optional argument 1 or 2.
This allows us to specify whether to use the first or second timecode
from an R3D file. With no argument, we default to 1.
Command :
$ film_master --project code2 \
--import-folder z:\scans\episode5\ \
--filter-format r3d --timecode-header 2
INFO
INFO
INFO
...
...
INFO
© 2014 Digital Vision
Opening project "code2" from ...
Batch ... importing directory 0 of 1 (0)
Batch ... importing directory 1 of 5 (20)
Batch Import (completed) ... 6 of 6 (100)
UM-2014.1-07
Importing Folders
397
Splicing to a Composition
--splice-order <file|timecode>
This option imports the shots found from the folder import and also splices
them to a named composition.
The composition must be specified via the --composition option.
A splice order (file or timecode) is required
file
This splices the found shots to the timeline in the order they are found.
Note that shots are currently spliced from timecode
00:00:00:00.
timecode
This splices the shots to the timeline in their timecode order.
Command :
$ film_master --project code2 --composition comp1 \
--import-folder z:\scans\episode5\ \
--filter-format dpx --splice-order timecode
INFO Opening project "code2" from ...
INFO Opening composition "comp1".
Adding a Version
--add-version <path>
Add a new version of a clip to the
composition
Adding a Clip Version
--add-version <path>
To add a version to a composition clip, use the --add-version command.
© 2014 Digital Vision
UM-2014.1-07
398
Command Line
Command :
$ film_master --project PROJ1 --composition COMP1 \
--add-version M:\images\shots\009\056_009.001.dpx \
--clip-name VERSION2 --record-in 100
INFO Opening project "PROJ1".
INFO
INFO
INFO
INFO
Opening composition "COMP1".
Found range (1, 54).
Set clip name to "VERSION2".
Clip added to composition.
This will import the clip at the specified path (giving it a name "VERSION2"),
setting it as a version of the clip at the record position 100.
You need to have at least the same amount of source material in the
new version as the old or an error will occur.
Replacing a Source
--replace-source <path>
Replace source of shot (at frame count)
specified by new source
Replacing a Clip Source
--replace-source <path>
To replace the source of the shot (at specified record-in count) with the new
source as specified in the given path.
© 2014 Digital Vision
UM-2014.1-07
Replacing a Source
399
Command :
$ film_master --project PROJ1 --composition COMP1 \
--replace-source M:\images\shots\009\056_009.001.dpx \
--record-in 100
INFO Opening project "PROJ1".
INFO
INFO
INFO
INFO
Opening composition "COMP1".
Found range (1, 54).
Set clip name to "VERSION2".
Clip added to composition.
The source will be replaced.
Grades will be retained on the shot.
You need to have at least the same amount of source material in the
new version as the old or an error will occur.
Splice and Overwrite Clips
--splice [path]
--overwrite [path]
Splice a clip to the composition timeline
If clip path not given, clip name must be.
Overwrite a clip to the composition timeline.
If clip path not given, clip name must be.
--record-in <N>
Composition timeline record position
--source-in <N>
Input clip source position offset
--name <name>
Select name of library clip to operate on
--length <N>
Consider only this number of input frames
--track <Vn>
Select video track to operate on
Splice versus Overwrite
A splice operation will push any existing clip frames up the timeline
from the splice location.
An overwrite operation will overwrite any existing clip frames from
the splice location.
If a clip file path is not supplied, it is required to supply a clip name (
--name). If you only supply a clip name, it must exist in the project
library.
© 2014 Digital Vision
UM-2014.1-07
400
Command Line
Note that the timeline is assumed to start at 00:00:00:00.
Clips will be placed at the end of the timeline (or 00:00:00:00 if
timeline empty) unless a record-in point is set with the --record-in
option.
Original "alex one" clip (splice to empty composition)
Command :
$ nucoda_fuse --project PROJ1 --composition COMP1 \
--name "alex one" \
--splice
Result:
If we now :
Splice Clip
Command :
$ nucoda_fuse --project PROJ1 --composition COMP1 \
--name "train" \
--splice --record-in 0
We end up with :
Overwrite Clip
Command :
$ nucoda_fuse --project PROJ1 --composition COMP1 \
--name "train" \
--overwrite --record-in 0
We end up with :
It is best to always set the explicit in point for an overwrite operation
using the --record-in option.
© 2014 Digital Vision
UM-2014.1-07
Splice and Overwrite Clips
401
Splice/Overwrite By Clip Name
Command :
$ nucoda_fuse --project PROJ1 --composition COMP1 \
--name "train" --splice
INFO Opening project "PROJ1".
INFO Opening composition "COMP1".
INFO Clip added to composition.
Splice/Overwrite By Clip Path
This will do an import to library followed by a splice.
Command :
$ nucoda_fuse --project PROJ1 --composition COMP1 \
--splice M:\shots\004\300000.dpx
INFO Opening project "PROJ1".
INFO Opening composition "COMP1".
INFO Found range (300000, 300164).
INFO Clip added to composition.
You might want to give the imported clip a library name and description
(possible on first import only).
Command :
$ nucoda_fuse --project PROJ1 --composition COMP1 \
--splice Z:\images\300000.dpx --name "train" \
--description "this is a train clip"
INFO Opening project "PROJ1".
INFO Opening composition "COMP1".
INFO Found range (300000, 300164).
INFO Set clip name to "train".
INFO Set clip description to "this is a train clip".
INFO Clip added to composition.
Splice/Overwrite to a Different Video
Track
If the composition has more than one video track, we can select the target
track using the --track option.
Command :
$ nucoda_fuse --project PROJ1 --composition COMP1 \
--splice --name "train" --track V2
INFO Opening project "PROJ1".
INFO Opening composition "COMP1".
INFO Clip added to composition.
© 2014 Digital Vision
UM-2014.1-07
402
Command Line
Splice/Overwrite to a Specific
Record Position
We can splice or overwrite to a specific position on the composition timeline
using the option --record-in.
Original timeline video track with clip "alex one":
Command :
$ nucoda_fuse --project PROJ1 --composition COMP1 \
--overwrite --name "train" --record-in 100
INFO Opening project "PROJ1".
INFO Opening composition "COMP1".
INFO Clip added to composition.
After overwrite to frame 100 of clip "train"
Splice/Overwrite from a Specific
Source Position
There are two methods to splice or overwrite a clip from a specific source
position. Explicitly using the --source-in option or implicitly using the
timecode of the frame of the clip we pass in.
The second implicit method needs the full path of the clip frame to be
used not the clip name.
Source-In
We can splice/overwrite from a specific source position by using the option
--source-in :
© 2014 Digital Vision
UM-2014.1-07
Splice and Overwrite Clips
403
Command :
$ nucoda_fuse --project PROJ1 --composition COMP1 \
--overwrite --name "slate" \
--record-in 100 --source-in 10
INFO Opening project "PROJ1".
INFO Opening composition "COMP1".
INFO Clip added to composition.
Clip Frame
Instead of using the --source-in option to select the first frame of the source
to splice, we splice the source clip from the frame we pass in.
If we have a clip :
008[200-300].dpx
The following command :
Command :
$ nucoda_fuse --project PROJ1 --composition COMP1 \
--splice Z:\images\008220.dpx
--record-in 100
INFO Opening project "PROJ1".
INFO Opening composition "COMP1".
INFO Clip added to composition.
will splice the clip from frame 008220.dpx i.e. splicing frames 008[220300].dpx.
This is equivalent to using the option --source-in 8220.
Splice/Overwrite of Particular
Material Lengths
We can choose to splice or overwrite a particular length of clip using the -length. The following command will splice in the first 10 frames (--length
) of clip "slate" onto the timeline at frame 100 (--record-in).
© 2014 Digital Vision
UM-2014.1-07
404
Command Line
Command :
$ nucoda_fuse --project PROJ1 --composition COMP1 \
--splice --name "slate" \
--record-in 100 --length 10
INFO Opening project "PROJ1".
INFO Opening composition "COMP1".
INFO Clip added to composition.
Applying a Note to a Shot
--set-note <name|path>
Apply note to shot we splice (or overwrite).
Note can be specified by name or path.
Apply Note
Use the --set-note command to apply a note to a shot.
The note can only be applied when the shot is spliced or overwritten
to the composition. See : Splice and Overwrite Clips
By Name
--set-note NAME
Apply the named note to the shot. The note must exist in the project notes
folder :
The named note must exist in the specified project.
Command :
$ film_master --project PROJ1 \
--composition comp --name SHOT \
--splice --record-in 90673 \
--set-note lowerlevels
INFO Opening project "PROJ1".
INFO Opening project "PROJ1" from "D:\Nucoda\2013_1\projects\PROJ
INFO Opening composition "comp".
Successfully applied note lowerlevels.
INFO Clip added to composition.
By Path
--set-note PATH
© 2014 Digital Vision
UM-2014.1-07
Applying a Note to a Shot
405
Apply the note found at the given path to the shot.
Command :
$ film_master --project PROJ1 \
--composition comp --name SHOT \
--overwrite --record-in 90673 \
--set-note S:\Temp\lowerlevels.note
INFO Opening project "PROJ1".
INFO Opening project "PROJ1" from "D:\Nucoda\2013_1\projects\PROJ
INFO Opening composition "comp".
Successfully applied note s:\Temp\lowerlevels.note.
INFO Clip added to composition.
EDL Import and Conform
--import-edl <path> Import EDL or AAF from given path
--new Required (one of)
--add
--mark --new : Create a new composition
--add : Operate on existing composition
--mark : Mark existing composition
Additional Options :
--track-type Specify video, audio, left, right or mono
<v|a|l|r|m> track
Default : v
--merge-from N After import, merge grades from track
number N
Requires : --match
--match When merging grades using --merge<source|record|clip> from, specify what to match when
merging : source timecode, record
timecode or clip name
--track-target N Specify target track number N
--import-material Import EDL or AAF referenced material
--conform-material Conform material to composition
--autoconform Import and conform EDL or AAF
referenced material in one step
--conform-record-tc Conform to record timecode (default is
source timecode)
--no-translate Do not use any EDL tapename translation
table
--strip-extension Strip clip name extensions (e.g. .mov etc.)
--lut-layers Import ASC LUT's and create a CDL base
© 2014 Digital Vision
UM-2014.1-07
406
Command Line
layer
--cdl-layers Create an ASC CDL and CDL base layer
Note : track numbers are indexed from 1.
Use the --help-import option to the application to see some basic
usage for the EDL import functionality.
Importing
--import-edl <path> < --new | --add | --mark >
To import an EDL or AAF list, use the --import-edl option with the path to
the file.
Requirements :
One of the options --new, --add or --mark is required to fully specify
the operation. See below.
You can use --import-edl with AAF files but most other options in
this chapter relate to EDL import only.
Creating a New Composition
--import-edl <path> --new
This imports the file and creates a new composition in the library with tracks
created as required.
No media is imported or linked to a composition automatically. See
the --import-material and conform options below.
Command :
$ nucoda_film_master --project "PROJ1" \
--import-edl S:\edl\ttt.edl --new
INFO Opening project "PROJ1" from "D:\Nucoda\2014_1\projects\PROJ
INFO ttt.edl imported.
Naming the Composition
By default, the composition name (material name) is taken from the EDL
"TITLE:" line.
Use the --name option to name the composition created explicitly.
© 2014 Digital Vision
UM-2014.1-07
EDL Import and Conform
407
Command :
$ nucoda_film_master --project "PROJ1" \
--import-edl S:\edl\ttt.edl --new \
--name compname
INFO Opening project "PROJ1" from "D:\Nucoda\2014_1\projects\PROJ
INFO ttt.edl imported.
Adding to an Existing Composition
--import-edl <path> --add
The --add option will import the named EDL and add it to the named
composition.
Requirements :
Name the composition we are operating on using the --composition
option.
Command :
$ nucoda_film_master --project "PROJ1"
--composition "compname" \
--import-edl S:\edl\ttt-extra.edl --add
INFO Opening project "PROJ1" from "D:\Nucoda\2014_1\projects\PROJ
INFO Opening composition "compname".
INFO ttt-extra.edl imported.
Target Track
--track-target N
Use this option to add the imported EDL to the specified track. If this option is
not given, the EDL is added to the next available track (which will be created).
The imported EDL will overwrite the target track.
Marking an Existing Composition
--import-edl <path> --mark --track-target N
The --mark option imports the named EDL and places "marks" (scene edits)
on the track specified. We place the edits on the target track as per the EDL
In/Out record timecode (for each EDL event).
Requirements :
The --composition option is required
The --track-target option is required to specify the target track we
mark
© 2014 Digital Vision
UM-2014.1-07
408
Command Line
Command :
$ nucoda_film_master --project "PROJ1"
--composition "compname" \
--import-edl S:\edl\ttt-mark.edl \
--mark --track-target 1
INFO Opening project "PROJ1" from "D:\Nucoda\2014_1\projects\PROJ
INFO Opening composition "compname".
INFO ttt-mark.edl marked.
The target track must exist.
Importing Media and Conforming
--import-material
--conform-material
--autoconform
--conform-record-tc
Importing an EDL creates the basic composition but does not import or link
media to the composition. The options described here import actual media to
the project library and conform (link) it to the imported EDL.
These options work on --import-edl only and assume a
command-line that includes :
--import-edl <path> < --new | --add | --mark >
Importing Media
--import-material
Imports any material referenced when importing the EDL.
Command :
$ nucoda_film_master --project "PROJ1" \
--import-edl S:\edl\ttt.edl --new \
--import-material
INFO Opening project "PROJ1" from "D:\Nucoda\2014_1\projects\PROJ
INFO ttt.edl imported.
Material paths are specified per EDL event using a "FROM FILE" syntax as
shown below :
TITLE: comptest
001 tape-1
V
C
05:04:46:13 05:04:56:03 01:03:16:04 01:03:25:19
* FROM FILE: S:\media\images\mazda-2k\OE5012A\438877.dpx
Each referenced clip is imported into the project library from the specified file
path.
© 2014 Digital Vision
UM-2014.1-07
EDL Import and Conform
409
Conforming
--conform-material
Conform (link) any material referenced when importing the EDL. The material
is assumed to be in the project library unless the option --import-material
is also used.
Command :
$ nucoda_film_master --project "PROJ1" \
--import-edl S:\edl\ttt.edl --new \
--import-material --conform-material
INFO Opening project "PROJ1" from "D:\Nucoda\2014_1\projects\PROJ
INFO ttt.edl imported.
Import and Conform in One Step
--autoconform
This will import EDL referenced material into the library and conform (link) it to
the composition at the same time.
Command :
$ nucoda_film_master --project "PROJ1" \
--import-edl S:\edl\ttt.edl --new \
--autoconform
INFO Opening project "PROJ1" from "D:\Nucoda\2014_1\projects\PROJ
INFO ttt.edl imported.
The - - aut oc onf or m option is equivalent to :
--import-material --conform-material
Conforming to Record Timecode
--conform-record-tc
When conforming composition events, use the record timecode when doing
the match.
Merging Grades
--merge-from < N | mixdown >
--match < source | record | clip >
Use these options to import and add a new EDL to an existing composition,
preserving existing grades where shots match. You must specify the track
you take the grades from and also how to match the shots (thus selecting the
correct grades to merge over).
© 2014 Digital Vision
UM-2014.1-07
410
Command Line
To ensure that any EDL referenced material is imported and
conformed, you will also need to use some combination of the
conform options above e.g. - - aut oc onf or m
Requirements :
The --composition option is required to specify the current composition
we merge from.
The --match option is required to specify how to match the shots.
Use a conform option (e.g. - - aut oc onf or m) to link referenced material.
Choosing Source Track
--merge-from < N | mixdown >
This selects the source track containing the grades to merge or "mixdown" to
select the mixed down grades (the "sum" of the grades over all source
tracks).
Match Method
--match < source | record | clip >
Required when using --merge-from.
This selects the method to use when matching shots when merging over the
grades.
Name Method
source Match via source timecode
record Match via record timecode
clip Match using clip name
Command :
$ nucoda_film_master --project "PROJ1" \
--composition compname \
--import-edl S:\edl\ttt-merge.edl --add \
--autoconform \
--merge-from 1 \
--match record
INFO Opening project "PROJ1" from "D:\Nucoda\2014_1\projects\PROJ
INFO Opening composition "compname".
INFO ttt-merge.edl imported.
© 2014 Digital Vision
UM-2014.1-07
EDL Import and Conform
411
Other Options
Tapename Translation
--no-translate
This option disables the automatic tapename translation on import.
Some EDL files contain a tapename translation table. This table can be used
to translate illegal tapenames (e.g. containing spaces) to legal ones (e.g.
spaces replaced with underscores). Normally we use this translation table to
create correct tapenames once imported.
We support two types of translation table : Avid and Final Cut Pro style.
Translation Table
Type
Avid style :
Final Cut pro style :
EDL Line Pattern
>>> SOURCE
FINAL CUT PRO REEL:
Example
TITLE: comptest
001 tape_daily_10
V
C
05:04:46:13 05:04:56:03 01:03:16:04 01:
* FROM FILE: S:\media\images\mazda-2k\OE5012A\438877.dpx
FINAL CUT PRO REEL: tape daily 10 REPLACED BY: tape_daily_10
Stripping Clipname Extensions
--strip-extensions
Remove file extensions on any EDL clipnames (e.g. .mov) before processing
EDL.
LUT Layers
--lut-layers
If the EDL contains any ASC LUT definitions, this option will enable
processing and creation of a CDL base layer.
CDL Layers
--cdl-layers
If the EDL contains any CDL (Color Decision List) definitions, this option will
enable processing and creation of a CDL base layer.
© 2014 Digital Vision
UM-2014.1-07
412
Command Line
Capturing and Conforming
--capture <path>
--capture-list
--match-name <0|1>
--exact-timecode
--conform
--handle-length <N>
Capture material from top-level path specified
Print out the internal capture list created.
Whether to use tapename, clipname or
filmname when conforming.
When capturing, expect source clips to match
the EDL timecode exactly.
Link timeline to "Found" library clips
Capture N handles
Capture versus Conform
Capture
Searches for source material in specified locations (recursively), trying to
match items referenced in the EDL/AAF composition and pulling them into the
library. In general, whole clips are captured if present (not just the event
duration).
Conform
Links library items with the composition timeline (you may wish to use an EDL
merely to load material into the library (capture only)).
A conform will always attempt to link the latest library material to the
timeline. This means if a later version of a clip is imported or
captured, the conform will link to this new version.
Loading the List
--import <path>
When we perform a capture operation on a list file created composition, we
attempt to match the composition timeline (which reflect the list "events") to
actual source material.
Consider the following EDL:
TITLE: Test
001 721A V
002 722A V
003 721A V
004 722A V
EDL
C 01:51:25:07
C 02:37:04:21
C 01:52:27:09
C 02:38:05:16
01:51:25:22
02:37:06:12
01:52:28:13
02:38:06:19
01:05:00:00
01:05:00:15
01:05:02:06
01:05:03:10
01:05:00:15
01:05:02:06
01:05:03:10
01:05:04:13
Load an EDL using the following command :
© 2014 Digital Vision
UM-2014.1-07
Capturing and Conforming
413
Command :
$ film_master --project PROJ1 \
--import C:\edls\test.edl
INFO Opening project "PROJ1".
INFO /edl/test.edl imported.
Results in the composition title "Test EDL" from the EDL "TITLE" parameter.
At this point, we will have a composition called "Test EDL" in the library.
Making it active would show us a timeline consisting of four clips (as per EDL)
on a single video track.
These clips will be Offline if we view them using the application monitor.
Displaying the Capture List
--capture-list
With an EDL loaded, we can view its status using the --capture-list
option :
Command :
$ film_master --project PROJ1 --composition "Test EDL" \
--capture-list
INFO Opening project "PROJ1".
INFO Opening composition "Test EDL".
Clip
| Start
| End
| Tape
| Status
------------------------+-------------+-------------+------------+---721A.[160447-160462] | 01:51:25:07 | 01:51:25:22 |
721A | Ready
722A.[226197-226236] | 02:37:04:21 | 02:37:06:12 |
722A | Ready
721A.[161937-161965] | 01:52:27:09 | 01:52:28:13 |
721A | Ready
722A.[227656-227683] | 02:38:05:16 | 02:38:06:19 |
722A | Ready
This is our internal representation of the EDL and its current status "Ready".
Capturing
--capture <path>
--match-name <0|1>
--handle-length <N>
© 2014 Digital Vision
UM-2014.1-07
414
Command Line
To perform the capture, use the --capture option, with an argument of a file
path to search :
Command :
$ film_master --project PROJ1 --composition "Test EDL" \
--capture Z:\server\shots
INFO Opening project "PROJ1".
INFO Opening composition "Test EDL".
Clip
| Start
| End
| Tape
| Status
------------------------+-------------+-------------+------------+---721A.[160447-160462] | 01:51:25:07 | 01:51:25:22 |
721A | Found
722A.[226197-226236] | 02:37:04:21 | 02:37:06:12 |
722A | Found
721A.[161937-161965] | 01:52:27:09 | 01:52:28:13 |
721A | Found
722A.[227656-227683] | 02:38:05:16 | 02:38:06:19 |
722A | Found
Our status changes to "Found" and we will have clips (four in this case)
loaded into the library. These clips are still offline in the monitor however.
Normally, when searching for source material, we will look at both a clip
timecode and its tapename field when attempting to identify a match to the
EDL/composition.
Matching Names
--match-name <0|1>
The --match-name option lets you specify whether to take a "name" into
account when searching for material to conform.
The "name" we use is as set in the preferences - and might be clip
name, tape name or film name. If we do not specify this option, the
settings are taken from the preferences.
Our capture operation would then look like:
© 2014 Digital Vision
UM-2014.1-07
Capturing and Conforming
415
Command :
$ film_master --project PROJ1 --composition "Test EDL" \
--capture Z:\server\shots \
--match-name 0
INFO Opening project "PROJ1".
INFO Opening composition "Test EDL".
Clip
| Start
| End
| Tape
| Status
------------------------+-------------+-------------+------------+---721A.[160447-160462] | 01:51:25:07 | 01:51:25:22 |
721A | Found
722A.[226197-226236] | 02:37:04:21 | 02:37:06:12 |
722A | Found
721A.[161937-161965] | 01:52:27:09 | 01:52:28:13 |
721A | Found
722A.[227656-227683] | 02:38:05:16 | 02:38:06:19 |
722A | Found
Handles
--handle-length <N>
Use this option to specify how many head and tail handles to capture.
Capturing with Exact Timecode
--exact-timecode
If our EDL looks like the following:
TITLE: Test EDL
001 721A V C T1 T2 ....
where
T1 is the source in timecode
T2 is the source out timecode
And our source clip looks like :
where
TS is the clip first frame timecode
TE is the clip last frame timecode
Then :
Normally, a capture operation would find a match for this source clip
because our EDL source in/out timecode is completely enclosed
within the clip.
Using --exact-timecode will only match during a capture if the
EDL source in/out timecode exactly matches the source clip i.e.
T1 == TS AND T2 == TE
© 2014 Digital Vision
UM-2014.1-07
416
Command Line
Command :
$ film_master --project PROJ1 --composition "Test EDL" \
--capture Z:\server\shots \
--exact-timecode
Conform
--conform
After the capture stage, we can do a conform. This will link captured material
to the composition timeline where the capture status is Found.
Command :
$ film_master --project PROJ1 --composition "Test EDL" \
--conform
INFO Opening project "PROJ1".
INFO Opening composition "Test EDL".
INFO Conforming material...
Generating Local Proxies
--generate-proxies
--range <M> <N>
Generate proxies
Specify a range of proxies to generate
Generating Proxies for a Composition
--generate-proxies
Generate all the proxies for specified composition :
Command :
$ film_master --project PROJ1 --composition COMP1 \
--generate-proxies
INFO
INFO
INFO
INFO
INFO
INFO
...
INFO
© 2014 Digital Vision
Opening project "PROJ1".
Opening composition "COMP1".
Generating proxies for composition...
gen ... 0 frames of 98 (0%)
gen ... 1 frames of 98 (1%)
gen ... 2 frames of 98 (2%)
gen ... 98 frames of 98 (100%)
UM-2014.1-07
Generating Local Proxies
417
Generating Proxies for a Clip
--clip-name N --generate-proxies
To generate proxies for a specific clip in a composition, give the clip name:
Command :
$ film_master --project PROJ1 --clip-name CLIP2 \
--generate-proxies
INFO
INFO
INFO
INFO
INFO
INFO
...
INFO
Opening project "PROJ1".
Generating proxies for clip...
Creating new composition "CLIP2".
gen ... generated 0 frames of 15 (0%)
gen ... generated 1 frames of 15 (6%)
gen ... generated 2 frames of 15 (13%)
gen ... generated 15 frames of 15 (100%)
Generating Proxies on a Range
--range A B
You can generate proxies for a range of frames using the --range option.
This will work on a range of frames within a clip or on a range within a whole
composition, depending on usage.
Within a clip:
Command :
$ film_master --project PROJ1 --clip-name CLIP1 \
--range 10 20 --generate-proxies
INFO
INFO
INFO
INFO
INFO
INFO
...
INFO
Opening project "PROJ1".
Found clip. Origin is 1.
Generating proxies for clip...
Creating new composition "CLIP1".
gen ... generated 0 frames of 10 (0%)
gen ... generated 1 frames of 10 (10%)
gen ... generated 10 frames of 10 (100%)
If you only give a start frame for the range (e.g. --range 30), then
the proxies will be generated from this frame (in the clip) to the end
of the clip.
Within a composition:
© 2014 Digital Vision
UM-2014.1-07
418
Command Line
Command :
$ film_master --project PROJ1 --composition COMP1 \
--range 30 50 --generate-proxies
INFO
INFO
INFO
INFO
INFO
...
INFO
Opening project "PROJ1".
Opening composition "COMP1".
Generating proxies for composition...
gen ... generated 0 frames of 21 (0%)
gen ... generated 1 frames of 21 (4%)
gen ... generated 21 frames of 21 (100%)
If you only give a start frame for the range (e.g. --range 60), then
the proxies will be generated from this frame to the end of the
composition.
Exporting Shots
--export <path> Export/render supplied
composition to specified path
--export-mode <single|multi> Choose mode of export (single
or multi). Required.
--multi-mode Set export mode.
<visible-src|tracks-src| Required when using multi
visible-rec|tracks-rec> mode export.
--frame-padding <N> Set with of numeric padding on
filenames on export. This will be
zero-padded.
--export-handles <N> Export each shot with specified
handles
Required when using multi
mode export.
--smpte-level-clip <true|false> Clip the exported shot
colourspace to SMPTE video
levels
Exporting a Composition
--export <path>
--export-mode <single|multi> REQUIRED
This command will render and export the specified composition (given by the
--composition parameter) to the specified path.
© 2014 Digital Vision
UM-2014.1-07
Exporting Shots
419
The <path> argument should be the full path, including the drive
letter, filename and extension.
The export mode option is required.
Command :
$ film_master --project PROJ1 --composition COMP1 \
--export-mode single \
--export Z:\jobs\001\graded_m.dpx
INFO
INFO
INFO
...
INFO
Opening project "PROJ1".
Opening composition "COMP1".
export ... exported 0 frames of 60 (0%)
export ... exported 60 frames of 60 (100%)
Exporting shots on the command line will not generate caches. This
is different behaviour to the GUI where you have a choice of caching
behaviour when exporting media.
Export Variables
The export path specified with - - ex por t can contain export variables such as
$o, $f etc.
See section Export Variables for a description of available variables.
Example
--export S:\exports\$o\$c_graded..dpx \
--export-mode single
Producing a single file sequence named from the clip name, in a folder
named from composition :
GRADED_MASTER\approved.090000.dpx ... approved.092421.dpx
Exporting Numeric Files
To export files with numeric filenames only, use the $f (frame number)
variable :
--export S:\exports\$e\$f.tiff
Produces numeric files in event folders e.g.
0045\008331.tiff
Export Modes
--export-mode <single|multi> REQUIRED
© 2014 Digital Vision
UM-2014.1-07
420
Command Line
--multi-mode <visible-src|visible-rec|tracks-src|tracks-rec>
--export-handles <N>
You can export your composition as a single contiguous clip (single), in
multiple shot chunks (multi), using source timecode (src) or using record
timecode (rec).
There is one single mode and four types of multi mode, each multi mode
laying out the exported shots slightly differently. The four multi modes are :
--multi-mode
--multi-mode
--multi-mode
--multi-mode
visible-src
visible-rec
tracks-src
tracks-rec
Because shots might be overwritten if they have overlapping
timecodes, you should consider the use of an event folder variable
($e) when exporting.
See the Exporting chapter for a fuller description of Export Modes.
Example
The following examples are split over two lines using a line
continuation character. In reality, the command would be on a
single line only.
--export S:\export\$e\$c..dpx --export-mode multi \
--multi-mode visible-rec --export-handles 20
Producing multiple event folders, each containing one shot with record
order timecodes :
0001/NOCLIP.090000.dpx ...
0002/fixed.0090078.dpx ...
etc.
Frame Number Padding
--frame-padding <N>
This sets the numeric padding on exported filenames.
Numbers are zero padded i.e. 008999.dpx is frame padding of six.
Shot Handles
© 2014 Digital Vision
UM-2014.1-07
Exporting Shots
421
--export-handles <N>
In multi-mode export, set how many handles to export per shot. This is
required in multi-mode.
SMPTE Level Clip
--smpte-level-clip <true|false>
This setting will clip the exported shot to a SMPTE video level (i.e. 64-940 for
10 bit data).
This is only applicable to SMPTE colourspace projects.
Exporting an EDL
--export-edl <edl file> Export supplied composition to specified
EDL file
--use-frame-numbers Use frame numbers in EDL instead of
timecode
Exporting an EDL
--export-edl <edl file>
This command will export the the specified composition (given by the -composition parameter) to the specified EDL file.
The <edl file> argument should be the full path, including the drive
letter, filename and extension.
Command :
$ nucoda_film_master --project project-x --composition comptest \
--export-edl S:\edl1.edl
INFO Opening project "project-x" from "D:\Nucoda\2014_1\projects\project-x".
INFO Opening composition "comptest".
Result
The output EDL will be standard EDL (CMX) format with timecodes e.g.
© 2014 Digital Vision
UM-2014.1-07
422
Command Line
TITLE: comptest
FCM: PAL
001 tape-1
V
C
05:04:46:13 05:04:56:03 01:03:16:04 01:03:25:19
* FROM CLIP NAME:
* FROM FILE: S:\media\images\mazda-2k\OE5012A\438877.dpx
* FROM COMMENT:
Exporting with Frame Numbers
--use-frame-numbers
When exporting an EDL, use --use-frame-numbers to include frame
numbers instead of timecodes in the output EDL.
Command :
$ nucoda_film_master --project project-x --composition comptest \
--export-edl S:\edl1.edl --use-frame-numbers
INFO Opening project "project-x" from "D:\Nucoda\2014_1\projects\project-x".
INFO Opening composition "comptest".
Result
The output EDL will be standard EDL (CMX) format with frame numbers e.g.
TITLE: comptest
FCM: PAL
001 tape-1
V
C
457163 457403 94904 95144
* FROM CLIP NAME:
* FROM FILE: S:\media\images\mazda-2k\OE5012A\438877.dpx
* FROM COMMENT:
Saving and Loading
Compositions
--save-composition <file path> Save given composition and all
referenced source clips to given
file.
--load-composition <file path> Load composition and all
referenced source clips to given
file.
Save Composition
--save-composition <file path>
This command will save the the specified composition (given by the -composition parameter) to the specified file.
© 2014 Digital Vision
UM-2014.1-07
Saving and Loading Compositions
423
The <file path> argument should be the full path, including the
drive letter, filename and extension.
Composition content files saved through the GUI are given an
extension .content.
Command :
$ nucoda_film_master --project project-x --composition comptest \
--save-composition S:\output\comp1.content
INFO Opening project "project-x" from "D:\Nucoda\2014_1\projects\project-x".
INFO Opening composition "comptest".
Load Composition
--load-composition <file path>
Load the composition from given composition file into the specified project.
Command :
$ nucoda_film_master --project project-x \
--load-composition S:\new\day\day011.content
INFO Opening project "project-x" from "D:\Nucoda\2014_1\projects\project-x".
The composition file will be loaded and create a composition with the
same name and contents as the original (saved) composition.
Rendering a Composition Cache
--render-output
Render caches for supplied composition
--render-output
This command will render the caches for the specified composition.
Command :
$ film_master --project PROJ1 --composition COMP1 \
--render-output
INFO
INFO
INFO
INFO
INFO
...
INFO
© 2014 Digital Vision
Opening project "PROJ1".
Opening composition "COMP1".
Rendering output for composition...
render output ... 226 still to render (0)
render output ... 224 still to render (0)
render output ... 0 still to render (100)
UM-2014.1-07
424
Command Line
Running Batch Operations
--batch-mode <file>
--ops-file <file>
Run CLI commands from file
Run some commands from file
Both these options run application commands from the given text file. The
advantage of this is that the commands complete much more quickly than if
run separately on the command line because the application only needs to
startup, initialise and open projects or compositions once.
The "ops-file" command is left for backwards compatibility. The
"batch-mode" option is new and much more flexible and powerful. It
also supports all CLI commands.
Batch Mode
--batch-mode <file>
Run the command-line commands from the given text file. Each command
line should be placed on a separate line of the file and any valid command line
is allowed. The application will load the file and run each line as if you were
typing them interactively.
You do not need to include the application executable on each batch
file line i.e. write batch file lines like :
-p TestProject -c Compname --splice <path>
Example Batch File
--project P --composition C --splice Z:\shots\dpx\056_004.001.dpx
-p P -c Compname --splice Z:\shots\dpx\078_021.001.dpx --record-in 8992
--project ProjectX --import-folder S:\images\testfiles
Ops File
--ops-file <file>
This options allows you to take commands to run from a specified text file but
is more limited in the commands it supports.
© 2014 Digital Vision
UM-2014.1-07
Running Batch Operations
425
Command :
$ nucoda_film_master --project PROJ1 \
--composition COMP1 \
--ops-file ops.txt
INFO
INFO
INFO
INFO
INFO
INFO
INFO
INFO
INFO
INFO
...
Opening project "PROJ1".
Opening composition "COMP1".
Found range (1, 5).
Clip added to composition.
SPLICE : /server/shots/shot1/clip.00001.dpx (0.03 secs)
Found range (1, 5).
Clip added to composition.
SPLICE : /server/shots/shot2/clip.00001.dpx (0.01 secs)
Found range (1, 3).
Clip added to composition.
Commands are read from the file and then run, the project and composition
are opening only once. The
project will be saved every now and then.
Supported Commands
Currently supported commands are:
splice
overwrite
add-version
replace-source
Command Format
Each operation will be on a separate line and have the following format :
<operation> <path> [record in] [source in] [track]
e.g.
splice Z:\shots\dpx\056_004.001.dpx 100
overwrite Z:\shots\test\011_v1.0001.cin 10 1 V2
replace-source Z:\server\ttt\ttt.0001.cin 95662 - V1
splice \images\test\ttt\ttt.0001.cin 1002 - V2
add-version Z:\server\scene4\78818.cin 67711 211 V3
A dash "-" acts as a place-holder.
© 2014 Digital Vision
UM-2014.1-07
426
Command Line
Interactive Mode
--interactive-mode
Interactive Mode lets you type command-line commands to the application
from the Windows CMD prompt interactively. This mode only needs to start
the application once and is therefore faster.
Interactive Mode is useful for testing out the command-line.
Command :
$ nucoda_film_master --interactive-mode
INFO Set current user to "Default".
Interactive mode. Type --quit to exit.
>
>--list
Projects:
1: PROJ1
- D:\Nucoda\2014_1\projects\PROJ1
2: PROJ1.export
- D:\Nucoda\2014_1\projects\PROJ1.export
3: PROJC
- D:\Nucoda\2014_1\projects\PROJC
>-p PROJ1 --import-folder S:\media\images\testsequences\timeline_tests\CLIP-A-DIR
INFO Opening project "PROJ1" from "D:\Nucoda\2014_1\projects\PROJ1".
INFO Batch Import (running) : "Importing" - importing directory 0 of 1 (0)
INFO Batch Import (running) : "Importing" - importing directory 1 of 1 (100)
INFO Batch Import (completed) : "Importing" - importing directory 1 of 1 (100)
>--quit
At the interactive mode prompt (>), you can type any valid command-line
command and see the result immediately.
Use --quit to exit interactive mode.
Listing Information
--list
List projects, or compositions within projects.
--capture-list
List details to list captured material
--clip-list [s]
List details of clips in composition
Any item listed includes an index. You can use this index when
performing remove operations.
Listing Projects
--list
To list projects available, use the command --list :
© 2014 Digital Vision
UM-2014.1-07
Listing Information
427
Command :
$ film_master --list
Projects:
1: test1
- C:\Nucoda\...
2: Check Danger 002
- C:\Nucoda\...
3: Check Danger 003
- C:\Nucoda\...
4: Road Less Travelled Part 1 - C:\Nucoda\...
5: Who Goes Here
- C:\Nucoda\...
6: Mist Snow Fog and Rain 1 - C:\Nucoda\...
7: Mist Snow Fog and Rain 2 - C:\Nucoda\....
8: Road Story 002
- C:\Nucoda\2009_1\....
9: et
- C:\Nucoda\2009_1\....
10: et2
- C:\Nucoda\2009_1\....
Listing Compositions
To list compositions available within a project, use the command:
Command :
$ film_master --project PROJ1 --list
INFO Opening project "et2" from "C:\Phoenix\2014_1\root\projects\et2".
Compositions in project "et2" of "C:\Phoenix\2014_1\root\projects\et2":
1: Comp
- imported from C:\Temp\et.edl ...
2: Graded 001
- Tue 16 Feb 2010 16:22:13
3: Check
- Tue 16 Feb 2010 16:22:14
List Captured Material
--capture-list
This option lists the status of captured material from the specified
composition. It is only relevant if the composition contains list captured
material.
Command :
$ film_master --project et2 --composition Comp \
--capture-list
INFO Opening project "et2" from "C:\Phoenix\2014_1\root\projects\et2".
INFO Opening composition "Comp".
Clip(s) from composition "Comp" in project "et2" of ..
|Clip
| Start
| End
| Tape
| Status
----+------------------------+-------------+-------------+----------+-------1|
blue.[27-127] | 00:00:01:02 | 00:00:05:02 |
blue | Ready
2|
green.[203-272] | 00:00:08:03 | 00:00:10:22 |
green | Ready
3|
purple.[1085-1185] | 00:00:43:10 | 00:00:47:10 |
purple | Ready
4|
yellow.[39-88] | 00:00:01:14 | 00:00:03:13 |
yellow | Ready
INFO Opening composition "Comp".
Once captured the shot Status field will change to Found.
List Clips and Associated Material
--clip-list [s]
© 2014 Digital Vision
UM-2014.1-07
428
Command Line
This option lists details of all clips in specified composition, including :
The clip material name
The clip date and time of import
If you include the argument "s", the clip .Material GUID is also displayed.
Command :
$ film_master --project et2 --composition Comp \
--clip-list
INFO Opening project "et2" from "C:\Phoenix\2014_1\root\projects\et2".
INFO Opening composition "Comp".
Clips in project "et2" of "C:\Phoenix\2014_1\root\projects\et2":
1: blueframe export-tests - Tue 16 Feb 2010 16:07:32
2: cyanframe export-tests - Tue 16 Feb 2010 16:07:32
3: greenframe export-tests - Tue 16 Feb 2010 16:07:33
4: purpleframe export-tests - Tue 16 Feb 2010 16:07:33
5: yellowframe export-tests - Tue 16 Feb 2010 16:07:33
Removing Items
--remove-project <name>
--remove-indexed-project <index>
--remove-composition <name>
--remove-indexed-composition <index>
--remove-clip <name>
--remove-indexed-clip <index>
Remove named
project
Remove project with
index
Remove named
composition
Remove composition
with index
Remove named clip
Remove clip with index
Removal operations cannot be undone. You may wish to backup
(copy) your project folder before using them.
Each removal operation can work on the name of an item, or its index. The
item index is as returned from a list operation e.g.
Command :
$ film_master --project et --list
INFO Opening project "et2" from "C:\Phoenix\2014_1\root\projects\et2".
Compositions in project "et2" of "C:\Phoenix\2014_1\root\projects\et2":
1: Comp
- imported from C:\Temp\et.edl ...
2: Graded 001
- Tue 16 Feb 2010 16:22:13
3: Check
- Tue 16 Feb 2010 16:22:14
To remove the Graded 001 composition, use the command :
© 2014 Digital Vision
UM-2014.1-07
Removing Items
429
Command :
$ film_master.exe --project et --remove-indexed-composition 2
INFO Opening project "et" from "C:\Phoenix\2014_1\root\projects\et".
INFO Deleting composition indexed 2 "Graded 002" from \
project "et" of "C:\Phoenix\2014_1\root\projects\et".
Removing Projects
--remove-project <name>
--remove-indexed-project <index>
To remove a project by :
Name :
Command :
$ film_master.exe --remove-project "Check Danger 003"
INFO Deleting project "Check Danger 003" from \
"C:\Phoenix\2014_1\root\projects\Check Danger 003".
Index :
Command :
$ film_master.exe --project et --remove-indexed-project 2
INFO Deleting project indexed 2 - "Check Danger 002" of \
"C:\Phoenix\2014_1\root\projects\Check Danger 002".
Removing Compositions
--remove-composition <name>
--remove-indexed-composition <index>
You must specify the project name.
Example :
Command :
$ film_master.exe --project et2 --remove-composition Check
INFO Opening project "et2" from "C:\Phoenix\2014_1\root\projects\et2".
INFO Deleting composition "Check" from project "et2" \
of "C:\Phoenix\2014_1\root\projects\et2".
Removing Clips
--remove-clip <name>
--remove-indexed-clip <index>
You must specify the project and the composition.
Example :
© 2014 Digital Vision
UM-2014.1-07
430
Command Line
Command :
$ film_master.exe --project et2 --composition Comp \
--remove-clip "tc first"
INFO Opening project "et2" from "C:\Phoenix\2014_1\root\projects\et2".
INFO Opening composition "Comp".
INFO Deleting clip "tc first" from project "et2" of "C:\Phoenix\2014_1
\root\projects\et2".
Counting and Adding Tracks
--count-tracks <video|audio>
Count how many tracks of
specified type are in composition
--add-track <video|audio>
Add a new track of specified type
to existing composition
Count Tracks
--count-tracks <video|audio>
This command will count how many tracks of the type specified exist in the
named composition.
Command :
$ film_master --project PROJ1 --composition COMP1 \
--count-tracks video
INFO Opening project "ttt".
INFO Opening composition "COMP1".
INFO Total video tracks : 3
Command :
$ film_master --project PROJ1 --composition COMP1 \
--count-tracks audio
INFO Opening project "ttt".
INFO Opening composition "COMP1".
INFO Total audio tracks : 2
Add a Track
--add-track <video|audio>
This command will add a track of the type specified to the named
composition. The number of the new track added is returned.
© 2014 Digital Vision
UM-2014.1-07
Counting and Adding Tracks
431
Command :
$ film_master --project PROJ1 --composition COMP1 \
--add-track video
INFO Opening project "ttt".
INFO Opening composition "COMP1".
INFO New video track added number : 4
We will now have a new track "V4" in the composition "COMP1" above.
Testing for a GUI Lock
--testlock
Test if the GUI has a lock (and therefore GUI is
open)
Testing if the GUI is Running
--testlock
This command will test if the GUI is open (and the application is holding a lock
file).
Command :
$ film_master --testlock
$ echo $?
0
Return :
0 : GUI is not running (no lock)
1 : GUI is running (lock held)
This must be the first argument on the command-line.
© 2014 Digital Vision
UM-2014.1-07
432
Command Line
© 2014 Digital Vision
UM-2014.1-07
Appendices
23
434
Appendices
© 2014 Digital Vision
UM-2014.1-07
435
Application Preferences
To access the application preferences, from the main project screen, click
the Pre fe re nce s button.
Here you can adjust the default system-wide preferences.
Changes will apply to all new and existing projects.
Note that many of these settings can be overridden within a project.
The Preferences screen has a subset of screens, selectable via the tabs
across the top:
General preferences
Capture/Conform preferences
Colour preferences
Video/VTR preferences
Rendering preferences
Control Panel preferences
Preference File
The location of the main preference file is displayed at the bottom of the
General tab section.
Most preferences are stored in a text file called general.prefs, located in the
application ROOT folder.
© 2014 Digital Vision
UM-2014.1-07
436
Appendices
The ROOT folder is set in the environment variable :
PHOENIX_ROOT_V2014_1
Some application preferences can only be changed by editing the general.
prefs file.
General
The general preferences screen specifies global configuration settings.
Location display
Select whether you want the default location display across your project to
show frame numbers or timecodes. Changing the display style will affect the
following:
the timeline timebar
the current position and in/out duration displays on the GUI and control
panel
the in / out values in the library
the render progress report
This setting can also be changed from within your project.
Reference mode
© 2014 Digital Vision
UM-2014.1-07
Application Preferences
Values :
Default :
437
Still store, Live memory
Still store
Select whether comparisons against the reference frame should be carried
out in still store or live memory mode.
Keycode
A keycode allows the unique identification of any frame on a reel of film.
For a film reel, these settings define :
Perfs per frame - how many perforations in one film frame
Perf per count - how many perforations make up one keycode count
increment
See Appendix Keycode.
SAFE mode
Normally, opening a project automatically selects to edit (and display) your
current composition. Selecting Safe Mode will not do this, and open a project
with no composition selected.
This may be useful if a composition causes errors or problems when
opening a project.
This should be left off in normal use.
Other Settings
© 2014 Digital Vision
UM-2014.1-07
438
Appendices
Warn when playback sync is lost
This controls the display of a warning indicator (red arrow) on your monitor
when playback drops below realtime (as defined for currently selected output
format). If off, this warning will not be shown, even if playback is less than
realtime.
Changing this setting requires an application restart.
Ripple Mode on
Whether ripple mode should default to off or on in new projects.
Reset Recall Selection
Whether the source of a Recall action (effects/layers recalled) should
reset afterwards, or persist.
Audio notify default
This enables an audio notification (sound event) on event/shot change.
Control panel only.
Auto Keyframe persist on shot change
This enables the persistence of the Auto Keyframe button on shot
change.
Preference File Location
The location of the main preference file is displayed at the bottom of the
General tab section. Most preferences are stored in a text file called general.
prefs, located in the application ROOT folder.
The ROOT folder is set in the environment variable
PHOENIX_ROOT_V2014_1.
© 2014 Digital Vision
UM-2014.1-07
Application Preferences
439
Capture/Conform
The Capture/Conform preferences screen specifies global configuration
settings and conventions used when naming and conforming imported and
captured material.
See Appendix Extracting Names for more detail on how we extract names
from files and folders.
Auto Assign Name
Defines what library Material Name we give imported files/sequences. This
name is extracted from the file name and/or folder structure according to rules
defined here.
Example folder/file sequence on disk :
three / two / one / clip.0000.dpx
Naming Options
The drop-down choice here modifies the basic name string we calculate via
the Folder Up/Adding parameters (see appendix Extracting Names for details
on calculating the basic name string).
replace with filename
Uses filename only.
This ignores any file/folder calculations (i.e. folder up/additions).
Material Name : clip
prepend filename
Place filename before the concatenated folders we use.
© 2014 Digital Vision
UM-2014.1-07
440
Appendices
Material Name : clip two one
append filename
Place filename after the concatenated folders we use.
Material Name : two one clip
ignore filename
Just use the concatenated folders, no filename.
Material Name : two one
See : Appendix Extracting Names for details on the naming rules for the
concatenated folder.
Folder Up
Which folder we start counting from. The folder containing the imported file/
sequence is index 0.
Adding folders
How many file/folder levels do we "add" as a name string, to create the final
name.
Auto Create Library Folder
Defines if we create named folders in the project library automatically on
material import.
The names created are extracted from the file name and/or folder structure
according to rules defined here.
See : Appendix Extracting Names from File Folders
Example folder/file sequence on disk :
three / two / one / clip.0000.dpx
Naming Options
The drop-down choice here modifies the basic name string we calculate via
the Folder Up/Adding parameters (see Appendix Extracting Names for details
on calculating the basic name string).
© 2014 Digital Vision
UM-2014.1-07
Application Preferences
441
no auto folder
Do not create library folders automatically. Material is imported into current
library folder.
Folder : none created
tape name
Name the folder from the tapename extracted on import.
The tapename is extracted as per the Conform tape name settings below.
This ignores any basic name file/folder calculations (folder up/
additions).
If the tapename cannot be determined, the folder is named "NOTAPE".
Folder : one (if we take tape name from filename, 1 folder up)
filename
Name the folder from the file structure on disk.
Folder : three two
filename hierarchical
Name the folder from the file structure on disk.
Unlike the filename option, this creates folders/subfolders recursively
(whereas filename is flat).
Folder : three / two (folder one is inside two)
See Appendix Extracting Names for an explanation of the rules.
Folder Up
Which folder we start counting from. The folder containing the imported file/
sequence is index 0.
Adding folders
How many file/folder levels do we "add" to create the final name.
© 2014 Digital Vision
UM-2014.1-07
442
Appendices
Start from Selected
This sets whether we create the folders under our currently selected library
folder. If off, the folders are created under the library root folder.
Capture and Conform
Here we are configuring how we assign and set some other important
information when importing/capturing material into our library.
Timecode / Keycode
The C apture tim e code /C apture ke y code drop-down list specifies
where we extract the timecode information from.
The "timecode" can be an actual timecode or a film keycode , and both can
uniquely identify a frame in a sequence.
Timecode
A timecode can be extracted from :
file header (if available)
The DPX file format has a timecode field. The RED R3D file format contains
two timecodes.
filename (numerics) e.g.
clip.090000.dpx is timecode 01:00:00:00 @ 25 fps.
1st and 2nd Timecodes
The 2nd timecode is only used for the RED R3D file format (which
contain two timecode fields). In all other circumstances, use 1st TC
File header.
© 2014 Digital Vision
UM-2014.1-07
Application Preferences
443
Keycode
A keycode can only be extracted from a DPX file header. A keycode will give
us both the keycode field in the project library and the timecode field.
See Appendix Keycode.
Assigning Tapename and Conforming
A tapename can be automatically assigned to a shot :
When importing a shot manually via the Library file browser
As part of an EDL capture/conform process
We can also choose if we use an EDL tape name, film name or clip name in
addition to the timecode for differentiating events during conform.
Tapename
The tape name field in the project library is set via the preference parameters
to the right of the Conform .. drop-down list.
When importing image sequences, it does not matter how the dropdown list to the left is set (whether Conform clip name, Conform film
name or Conform tape name). The high-lighted areas in the
diagram above set the tape name in the library.
The tape name can be extracted from :
file header (if available)
This is supported in the DPX file format.
If the file format does not support this header field, the library tape
name field is blank.
file name
This will be a single folder name at the specified level.
A level of 0 (zero) selects the name of the file (e.g. clip).
See Appendix Extracting Names.
For the DPX format, we use field 38, input device name, as a tape
name/clip name/film name field.
Conforming
A basic conform process will compare events/shots on a timecode basis
only. This method can sometimes result in multiple matches, where we have
more than one candidate shot for the same timeline event.
© 2014 Digital Vision
UM-2014.1-07
444
Appendices
To differentiate these multiple shot matches, we can extend our comparison
to include tape name (or film name, or clip name).
The extra level of conform differentiation is performed if M atch
Nam e is enabled.
A drop-down list assigns the method used to differentiate multiple event/shot
matches in a conform.
Conform tape name
Conform film name
Conform clip name
We take the associated names from the list (EDL,CTL etc.).
Rendering
The Rendering preference tab configures global settings used as defaults for
various render parameters.
DPX Export Style
© 2014 Digital Vision
UM-2014.1-07
Application Preferences
445
The default DPX image format used for DPX exports.
Values :
Default :
Big endian, Little endian
Big endian
Big endian ("cineon" format)
Little endian ("OpenGL" format)
A big endian DPX file has header magic SDPX (ascii). A little endian
DPX file has header magic XPDS (ascii). This specifies the byteorder used in the file and has an impact on DPX compatibility. The
default should be most compatible.
DPX Export Colour Depth
This specifies the default bit depth and colour data format for exported DPX
image files.
Current colour depth RGB - default. This sets the export bit-depth per
channel as per the current output format, and uses RGB colour
space.
12 bit RGB - use 12 bits per channel, RGB.
10 bit YUV - use 10 bits per channel, YUV.
Leave this at the default setting unless you are sure you need to
change it.
Render Tile/Frame Threads
These settings control how many frames we try to render in parallel, and how
each frame may be split for further concurrency in the render process.
Render tile threads - this defines how each individual frame is split
(tiled) for rendering in parallel across multiple CPU cores
Render frame threads - this defines how many whole frames are
rendered in parallel.
© 2014 Digital Vision
UM-2014.1-07
446
Appendices
These settings are dependent on the system type. See the Install
and Configuration Guide for configuration settings for various
supported systems.
Image Memory
This setting defines a "pool" of memory the application will allocate for storing
and rendering image sequences.
Leave this at the default setting unless instructed to change it by a
Digital Vision engineer.
Cache Rendering Setup
These parameters setup some options on how cache renders are generated.
Cache preallocation frames
Values :
Default :
text entry
20
This defines how many frames are preallocated for caches before the caches
themselves are written to disk. This will help prevent caches getting
fragmented.
To disable cache preallocation, set to 0 (zero).
Cache fragmentation test
Default :
on
This test is for Windows NTFS only. Do not enable on SAN
filesystems (e.g. Stornext SNFS).
If turned off, caches will not be tested for fragmentation and no fragmentation
status will be displayed on the timeline.
© 2014 Digital Vision
UM-2014.1-07
Application Preferences
447
Fragmented cache files are displayed in bright-red on the timeline :
Memories
Display Ungraded as Greyscale
Default :
Off
If on, ungraded shots are shown in greyscale in the Memories Window.
Ungraded
Graded
Generate Thumbnails
Default :
Values :
First frame
First frame, Middle frame, Last frame
This option selects the default thumbnail displayed for each event in the
Memories view.
© 2014 Digital Vision
UM-2014.1-07
448
Appendices
Cue Method
Default :
Values :
Timecode
First frame, Middle frame, Last frame, Timecode
This option sets which frame we will cue to in a shot using CTRL+Cue on the
Media Panel.
CTRL + Cue :
First frame : cues to the first frame of the shot
Middle frame : cues to the middle frame of the shot
Last frame : cues to the last frame of the shot
Timecode : cues to the event thumbnail timecode for the shot i.e. the
timecode shown below the Memories/Event itself. This can be set via
the Manual update method described in Update Method below.
Update Method
Default :
Values :
Manual
Auto, Manual
This option chooses how the Memories event thumbnail is updated :
Auto : Memories thumbnail updates automatically when you grade a
shot
Manual : Press Enter on panel to update Memories thumbnail
When your Cue Method is set to Timecode, cueing (CTRL+Cue) will cue to
the timecode
Control Panel
© 2014 Digital Vision
UM-2014.1-07
Application Preferences
449
The Control Panel tab configures global settings used as defaults for various
control panel parameters.
Trackball Orientation
See : Colour Preferences
Modifier Timeout
Default :
3 seconds
This specifies how long a modifier key will stay active ("locked") before timing
out when no other key is pressed.
The modifier keys affected by this setting are :
Ctrl
Shift
Delete
Event
Dyn
All
Clear
Setting this to 0 (zero) will disable locking the modifier key, and
require both the modifier key and the (action) key to be pressed
together.
Shape Scale Control
This controls how shapes are scaled using the control panel, and whether
scaling happens in X and Y independently or together, with separate aspect
ratio control.
© 2014 Digital Vision
UM-2014.1-07
450
Appendices
The choices relate to the control panel menus visible under Shapes on the
Image panel.
Values :
Default :
Aspect - Scale, Scale X - Scale Y
Aspect - Scale
Aspect - Scale
This is the default. On the control panel Shapes menu, we have an Aspect
parameter and a Scale parameter.
Scale X - Scale Y
On the control panel Shapes menu, we have Scale X and Scale Y
parameters.
Layer Focus on Shot Change
Default :
Remember per shot
This option defines the layer focused policy when we jump between shots.
Remember per shot
The focused layer is persisted on a shot by shot basis. Returning to
a shot will focus the same layer as focused previously on this shot. If
navigating to a shot for the first time, focus is put to the Layer Focus
Default (see below).
Match between shots
The focused layer is persisted between shots such that we keep the
same layer focused on our new shot as was focused on the previous
shot.
Layer Focus Default
Values :
Default :
Effect, Base, Master
Base
This option defines which layer we focus after a Master Reset on the control
panel or the first time we visit a shot.
Press-hold Timeout
© 2014 Digital Vision
UM-2014.1-07
Application Preferences
Default :
451
1 second
This refers to the length of time, in seconds, that you need to hold a button
down before it goes into repeat keystroke mode.
Display Timeout
Values :
Default :
User Set
15 minutes
How many minutes of inactivity before the panel displays are turned off.
Display Brightness
Values :
Default :
User Set (0 - 255)
255 (brightest)
The brightness of the LED display screens on the panel.
Key Brightness
Values :
Default :
User Set (0 - 255)
255 (brightest)
The brightness of the lights on the panel keys.
Trackball Timeout
Default :
200
This setting controls how fast the trackball "stops".
This parameter is deprecated and should not be changed.
Trackball Trigger
© 2014 Digital Vision
UM-2014.1-07
452
Appendices
Default :
5
This setting controls how fast the trackball "starts".
This parameter is deprecated and should not be changed.
Ring Timeout
Default :
200
This setting controls how fast the rings "stop".
This parameter is deprecated and should not be changed.
Ring Trigger
Default :
1
This setting controls how fast the rings "start".
This parameter is deprecated and should not be changed.
Speed Settings
These speed settings control the overall sensitivity of the panel controls.
Trackball Speed - the three trackballs on the Colour panel.
Ring Speed - the three rings on the outside of each trackball on the
Colour panel.
Knob Speed - the parameter control knobs on the Colour and Image
panels.
Wheel Speed - the navigation wheel on the Media panel and the
comparison wheel on the Image panel.
© 2014 Digital Vision
UM-2014.1-07
Application Preferences
453
Higher values give more sensitivity.
Fine Sensitivity
Ticking this box will make the rings and trackballs sensitive to very small
changes, without affecting the sensitivity for larger changes. This means tiny
changes can be applied via tiny movements of controls.
Compare Modes
These parameters are on the next page of the Control Panel settings. Go to
the next page by pressing the M ore button.
Enabled (ticked) items are available as compare modes inside the application.
Colour
The Colour preferences screen specifies global configuration settings
controlling colour related controls and display.
Trackball Orientation
This specifies the orientation used for the colour-correction trackballs, both on
© 2014 Digital Vision
UM-2014.1-07
454
Appendices
the control panel and the GUI interface.This configures the colour
arrangement on the trackball.
Values :
Default :
Vector. Offset, Offset 30, Offset 330
Vector
Offset corresponds to the old Rank system
As you change this setting the trackball image next to the drop-down will
update, indicating the current colour orientation :
The Trackball Orientation setting also appears in the Control Panel
preferences screen.
Printer Points Per F-Stop
Range :
Default :
User set
8
This setting specifies the number of printer points used to represent an f-stop
for the printer lights tool.
Positive
With the Positive setting enabled, the number you enter will add colour.
Uncheck Positive to remove colour.
Printer Neutral
Range :
Default :
User set
25
This value represents no change in the printer lights settings.
© 2014 Digital Vision
UM-2014.1-07
Application Preferences
455
Default Layer Show Mode
Values :
Default :
Red,Green,Blue,Cyan,Magenta,Yellow,White,
Black,Grey,Saturated
Grey
Values :
Default :
Inside Area, Outside Area
Outside Area
These settings correspond to :
Show As
Show Area (In/Out)
in the Router settings for each CC/Effect layer.
Default Keyer Input
Values :
Default :
Previous, Base, Start
Start
This configures which layer a Keyer effect will use as input and corresponds
to the layer Router setting Key Input.
Start - use input of Base Layer as input
Base - use output of Base Layer as input
Previous - use previous layer as input
Compare Diff Threshold
This is the threshold below which compare mode differences will not be
registered. A higher value means we are less sensitive to difference.
Range :
Default :
User set
5 units
Default Colour Scaling
© 2014 Digital Vision
UM-2014.1-07
456
Appendices
This parameter controls the default scaling mode used on a new project. See
Project Colour Scaling.
For a discussion of colour scaling modes, see the Colour Scaling
section in the Setup Manual.
© 2014 Digital Vision
UM-2014.1-07
Application Preferences
457
Monitoring / Video IO
The Monitoring/Video IO preference tab configures global settings for display
modes, timeline monitoring and video and audio I/O.
Note that changing many of these settings requires an application
restart.
Enable Dual Display
If Enable Dual Display is on, the application assumes a two display
configuration and configures its screen layout appropriately.
The Enable Dual Display checkbox should be on when using
NVIDIA SDI direct output
© 2014 Digital Vision
UM-2014.1-07
458
Appendices
DVI Order
Values :
Default :
UI(1) - Monitor(2), Monitor(1) - UI(2)
UI(1) - Monitor(2)
Use : All dual-display configurations.
This setting controls the orientation of the displays, where :
UI - the graphical user interface (menus, buttons etc.)
Monitor - the player, image display
If the dual screen mode you configure is invalid and causes
problems, you can always set the general.prefs preference file
parameter dualScreenMode to false before restarting.
Monitor Anchor
Values :
Default :
Centre, Top left
Centre
Use : NVIDIA SDI in extended desktop mode
This setting is only relevant to the extended desktop mode NVIDIA SDI
configuration i.e. SDI configured via the NVIDIA control panel. It is used to
define the positioning of the NVIDIA SDI output in relation to the primary (UI)
output, when the SDI output is a different size to the UI output i.e.
UI output is HD (1920x1080 pixels)
SDI output is PAL (720x576 pixels)
NVIDIA Display Settings
SDI output is ID #2
Use : Top left
SDI output is ID #2
Use : Centre
Enable NVIDIA SDI Direct Output
These settings relate to the NVIDIA direct SDI monitoring output.
Use : Monitoring via NVIDIA direct SDI
© 2014 Digital Vision
UM-2014.1-07
Application Preferences
459
The Enable Dual Display checkbox should be on when using
NVIDIA SDI direct output
NVIDIA direct SDI is our term for the application taking direct control
of the NVIDIA card SDI monitoring signal. This means that no
configuration is needed in the NVIDIA display control panel.
SDI Link
This specifies the default NVIDIA SDI colourspace and format.
Values :
Default :
YCrCb 422, RGB 444, YCrCb 444, Dual YCrCb
422, 12 bit YCrCb 422, 12 bit YCrCb 444
YCrCb 422
Default Format
This specifies the default NVIDIA SDI video format to use.
Values :
Default :
© 2014 Digital Vision
PAL, NTSC, 720p, HD 1080i, HD 1080psf, HD
1080p, 2k p, 2k i
HD 1080i
UM-2014.1-07
460
Appendices
Always use default format for monitoring
When enabled, the monitor is locked to the format set above and will not try
and switch to a new format, even if its input changes.
This is useful if your output monitoring device does not support some
output formats and you wish to lock it to a supported format.
Enable OpenGL readback to Video
This setting enables the OpenGL graphics on your display monitor to be sent
to the video board output for display in realtime. This includes the colour
grading as well as any HUD or graphs displayed.
This setting is only supported for NVIDIA FX4600 graphics cards (or
better) and DVS Centaurus2 video boards.
OpenGL read-back is not compatible with the Interlaced Stereo DVI
setting below. When enabled, the Interlaced Stereo DVI setting will
be hidden.
Interlaced Stereo DVI Output
When enabled, Interlaced Stereo DVI Output will convert the DVI signal to a
left and right stereo channel mode.
This stereo mode is supported on display devices like the Zalman
ZM-M220W 3D LCD monitor.
Interlaced Stereo mode is incompatible with OpenGL read-back
and will be hidden if read-back is enabled.
Enable SDI I/O Card
Use : Video I/O and Monitoring via video I/O card
These settings relate to your SDI video card (e.g. Centaurus2, Bluefish Lust).
© 2014 Digital Vision
UM-2014.1-07
Application Preferences
461
SDI Link
This specifies the default video card SDI colourspace and format.
Values :
Default :
YCrCb 422, RGB 444, YCrCb 444, Dual YCrCb
422, 12 bit YCrCb 422, 12 bit YCrCb 444
YCrCb 422
Default Format
This specifies the default video card SDI video format to use.
Values :
Default :
PAL, NTSC, 720p, HD 1080i, HD 1080psf, HD
1080p, 2k p, 2k i
HD 1080i
Always use default format for monitoring
When enabled, the monitor is locked to the format set above and will not try
and switch to a new format, even if its input changes.
This is useful if your output monitoring device does not support some
output formats and you wish to lock it to something supported.
Priority Format
Use : Frame based project output formats
This setting is only relevant if we are using a progressive (frame) based (noninterlaced) project output format.
If we have a progressive output format (e.g. HD 1080p), this specifies whether
we set our video I/O card to output a progressive signal ("p", Match p format)
or a progressive segmented fields signal ("psf", Match psf format).
© 2014 Digital Vision
UM-2014.1-07
462
Appendices
Values :
Default :
Match p format
Match psf format
RS422 COM Port
Default :
1
This sets the workstation serial (COM) port to use for VTR control.
On a DVW workstation with built-in RS422 ports, this setting is not
used if the environment variable USE_DVS_VTR_IF is set.
Output Sync
This setting specifies the sync signal the video I/O card uses.
Values :
Default :
Internal Sync, External Sync, Bi Level Sync, Tri Level Sync,
Bi Level Sync (SD Source), Tri Level Sync (SD Source)
External Sync
where :
Internal Sync - sync is generated internally and is free-running on
layoff
External Sync - sync on input signal
Bi Level Sync - used for SD (BB -0.3V)
Tri Level Sync - used for HD (-0.3V to +0.3V)
Bi Level Sync (SD Source) - use Bi level sync on HD project
Tri Level Sync (SD Source) - use Tri level sync on SD project
Audio Settings
Default Audio Capture Bitrate
This setting specifies the sample size for VTR audio capture.
© 2014 Digital Vision
UM-2014.1-07
Application Preferences
Values :
Default :
463
16 Bit, 32 Bit
16 Bit
Use Video IO Card as Audio Monitor
This setting will enable the video I/O card as the main audio monitoring device
(rather than the computer workstation audio device).
This is a Centaurus2 video card option only.
This is a DVS Centaurus2 video board option only.
© 2014 Digital Vision
UM-2014.1-07
464
Appendices
Preferences Assistant
The Preference Assistant is a utility tool for display and edit of the general.
prefs file.
Run the main application at least once before using this tool.
Hitting the UPDATE button on any tab will update your general.prefs
file at that time. If you want to create multiple preferences, first go to
the Users section and create a Default general.prefs file and then
additional user files to update. Also note that the in application
preferences will be applied to the current active user preference file.
Welcome Screen
On this tab you have the option to look at some system information such as
operating system version, MAC Address, Cards and Drivers.
© 2014 Digital Vision
UM-2014.1-07
Preferences Assistant
465
Re-order Master Layer Tools
Re-order or remove colour tools available on your Master layer.
The inactive tools can not be changed and have to remain in the
given order.
Re-order CC Layer Tools
As the Master layer tab but operating on the CC Layers.
© 2014 Digital Vision
UM-2014.1-07
466
Appendices
Re-Order Panel Tools
Re-order or remove tools available on your Control Panel.
Using None will leave a gap.
Media Locations
Show and set the various media folder locations.
Avid Mediafiles locations should still be set in general.prefs
© 2014 Digital Vision
UM-2014.1-07
Preferences Assistant
467
Monitoring and Video I/O
Monitor setup with presets for often used configurations. This is a mirror of
what is in the Application Preferences.
License
View and update your license file.
Copy the new license string into the text box and press the Update button.
© 2014 Digital Vision
UM-2014.1-07
468
Appendices
If the string entered starts with "Panel", the rest of the string is taken
as the Control Panel "welcome" string e.g.
Panel Grading System
Sets the Control Panel welcome string to Grading System. This is
the general.prefs option panel.welcomeString.
Users
The Users tab lets you create separate preference files for multiple users and
easily switch between them.
Recommendation :
Once you have set the basic configuration files, use this tool to save
the current preference as Default.
Once you have done this you can change the preferences for a new
user, update and save as as "User-01" "User-02" etc.
A list of user preferences will be displayed in the Available user box.
To switch to a different user, select the user and press the Install button.
These preference files are saved separately from the application, allowing you
to re-install safely without losing preferences.
© 2014 Digital Vision
UM-2014.1-07
Preferences Assistant
469
Keycode
Keycodes sre numbers appearing on the edge of film, incrementing once per
foot, used to uniquely identify frames for negative cutting. Also known as
edgecodes, they are the film equivalent of timecode. The key numbers identify
certain traits of the film, including the manufacturer, the stock type, a prefix
identifying the roll and a footage count.
A keycode has a format : KZ 12 8506 2190 +05
where :
KZ
Manufacturer code - KZ is Kodak
12 8506
Prefix identifies film roll
2190
The count is 4 digits that increment once per foot (35mm film,
4 perf = 16 x 4 perfs per frame)
+05
Offset - how many perforations the frame is from the keycode
mark
Using the count and offset values we can calculate the frame location, as long
as we know how many perforations there are per frame and per count.
The DPX file format includes keycode in the file header.
© 2014 Digital Vision
UM-2014.1-07
470
Appendices
Automatic Naming
Some parts of the application assign names to items such as library material
or folders based on a set of predefined rules. These rules are defined in the
application preferences Capture/Conform tab.
These rules are used for :
Auto assign name
Auto create library folder
Library tape name
Both Auto assign Name and Auto create library folder use the following
interface convention when building a filename/folder structure :
i.e. M folders up, adding N folders
The settings here control the creation of a name string based on the
filename/folder structure on disk. The resulting string can be used as a
name, or part of a name, of an item in a project library.
Basic Name String
Consider the example file and folder structure :
five
/
four
/
three
/
two
/
one
/ clip.0001.dpx
The filename is "clip" inside folder "one".
Note that the application considers the filename as "clip", ignoring the
file numbers (0001) and extension (.dpx).
We start by going :
M folders up :
five
|
5 up
/
four
|
4 up
/
three
|
3 up
/
two /
|
2 up
one / clip.0001.dpx
|
|
1 up
0 up
Where we end up, we then:
add N folders (such that we try and end up with N folders) :
© 2014 Digital Vision
UM-2014.1-07
Automatic Naming
Calculation
Basic Name String
4 up, adding 2
four three
2 up, adding 1
two
2 up, adding 3
two one
no more folders
1 up, adding 2
one
no more folders
0 up, adding 2
471
Note
empty (no folders)
The result here can be used as a name, or as part of a name.
How we use this resulting basic name, and whether we use it at all, depends
on other parameters.
Auto Assign Name
The Auto Assign Name parameter in the Capture/Conform preference tab,
defines what Material Name we give imported files/sequences inside the
project library.This name is extracted from the file name and/or folder
structure according to rules defined here.
Once we have our basic name string described above, we determine its use
via a drop-down selector of :
replace with filename - this setting does not use the basic string we
calculated above
prepend filename
append filename
ignore filename
These settings control whether we combine our basic string with the actual
filename when creating the library material name (apart from the replace with
filename setting).
For our first resultant basic string calculated above :
Calculation
Basic Name String
4 up, adding 2
four three
Note
We end up with :
© 2014 Digital Vision
UM-2014.1-07
472
Appendices
Choice
Material Name
result
Note
replace with filename
clip
Use filename only,
ignore above calculation
prepend filename
clip four three
append filename
four three clip
ignore filename
four three
throw filename away
Auto Assign Library Folder
This setting defines whether we create named library folders automatically on
material import. The folder names are created according to rules defined
here.
Once we have our basic name string described above, we determine its use
via a drop-down selector of :
no auto folder
tape name
filename
filename hierarchical
Note that if we choose no auto folder, the name calculations detailed
below are not used and any imported material is imported into the
current folder.
The folder string constructed is only used for the settings filename and
filename hierarchical .
See the chapter on Capture/Conform preferences for details.
If tape name is selected, a library folder is created and named as per the tape
name extracted from the file or its path.
© 2014 Digital Vision
UM-2014.1-07
Automatic Naming
473
Tape Name
The tape name field in the library can be assigned from both the file header
and the file path.
If we take the tape name from the file path, our choice is a single value
extracted from the filename/filepath :
M folders up e.g.
Example :
five
|
5 up
/
four
|
4 up
/
three
|
3 up
/
two /
|
2 up
one / clip.0001.dpx
|
|
1 up
0 up
Result :
Folders Up
Tape Name Result
Note
0
clip
Use filename at level 0
1
one
2
two
© 2014 Digital Vision
UM-2014.1-07
474
Appendices
Effect Identifiers
Effect Identifiers are unique names for application effects and are used to
uniquely specify an effect in the general.prefs preference file.
Master layer
The following table lists the effects available for the master layer and their
corresponding IDs in the general.prefs file:
Effect Tree Name
Effect ID
saturation
Saturation
printer
PrinterLights
lift gamma gain
LiftGammaGain
balance
Balance
col curves
DifferentialColorCorrect
bright contrast
BrightnessContrast
bright regions
BrightnessRegions
soft clip
SoftClip
saturation
Saturation
pan scan
n/a, always available
Base layer
The following table lists the effects available for the base layer and their
corresponding IDs in the general.prefs file:
Effect Tree Name
Effect ID
matte
n/a, isolation always available
keyer
n/a, isolation always available
shapes
n/a, isolation always available
matte blur
n/a, isolation always available
hue curves
HueCurves
printer
PrinterLights
lift gamma gain
LiftGammaGain
balance
Balance
col curves
DifferentialColorCorrect
bright contrast
BrightnessContrast
bright regions
BrightnessRegions
© 2014 Digital Vision
UM-2014.1-07
Effect Identifiers
soft clip
SoftClip
HLS
HLSColorCorrect
blur
Blur
© 2014 Digital Vision
475
UM-2014.1-07
476
Appendices
Effect Selector Configuration
The Effect Selector is the drop-down list that displays all available effects.
These can be selected and added to a segment on the current composition.
The Effect Selector drop-dow n list.
Interacting w ith the Effect Selector dropdow n list and choosing an effect to add to
the current com position.
Effects are placed within Effect Groups. Above, we see the group Colour
containing the effects Channel Mixer, Saturation, SOP and other tools.
The order of the top-level effect groups, the effects within each group and the
order the effects appear inside a group are controlled by configuration files.
Configuration Files
There are two possible configuration files.
One is the default configuration and exists in the application C:
\Phoenix\2014_1\root. The other user file will override the defaults if you
create it and place it in the same folder. By default, this user configuration file
does not exist.
Default Configuration File
Name : defaultEffectList.prefs
Location : C:\Phoenix\2014_1\root
This is the main configuration file for the drop-down list and defines the effect
groups and the effects that appear in each group by default.
Do not edit or modify this file. It will be over-written every application
install. If you want to modify the effect selector, edit the
userEffectList.prefs file.
© 2014 Digital Vision
UM-2014.1-07
Effect Selector Configuration
477
User Configuration File
Name : userEffectList.prefs
Location : C:\Phoenix\2014_1\root
This file does not exist by default.
If it exists, it will over-ride the default settings in the defaultEffectList.prefs file.
An example userEffectList.prefs file exists in the example_files
folder.
Configuration File Format
A high-level overview of the file format is shown below :
effectList
[
// These effects appear in top-level
effects "effect1" "effect2"
// Multiple "GROUPS" allowed
GROUP
{
// As displayed as menu name
name "NAME"
// As appearing in sub-menu
effects "effect1" "effect2"
}
// Add more effects to top-level here
effects "effect3" "effect4"
// or false. Insert default effects?
insertDefault true
// Do not show these effects
Hidden
{
effects "effectA" "effectB"
}
]
Note that the entire effectList content is wrapped in SQUARE ([,])
brackets.
effects
List effects to use (to display, or to hide).
Each is quoted and separated with spaces.
© 2014 Digital Vision
UM-2014.1-07
478
Appendices
The effect names used are the "effect id". You can list all the "effect
id"'s by running the application with the argument --effect-ids e.g.
cd \Program Files\Nucoda\2014_1\
nucoda_fuse.exe --effect-ids
You can have multiple "effects" lines.
You can use multiple "effects" tags.
An "effects" tag at the top-level is displayed at the top-level of the
Effect Selector. An "effects" tag in a GROUP is displayed within the
named ("name") GROUP.
Example :
effects "Blur" "ChannelExtract" "Saturation"
GROUP
A GROUP groups a set of effects together as a unit with a "name".
The "name" will be displayed in the GUI.
The listed effects are given inside the "effects" tag within the GROUP.
You can have multiple GROUP sections.
Example :
MainEffects
{
effects "Blur" "ChannelExtract" "Saturation"
}
insertDefault
This tag will insert the default effects list (in its entirety) where this tag is
placed.
true - Insert the default effects list. The list inserted is as per the
defaultEffectList.prefs file and inserted where this tag is placed.
false - Do not insert the default list of effects. This may have the effect
of minimising and simplifying the effects list.
If "insertDefault" is omitted, this is equivalent of "insertDefault true" being
added at the end.
Example :
insertDefault true
© 2014 Digital Vision
UM-2014.1-07
Effect Selector Configuration
479
Hidden
Hide the effects set in the "effects" list given.
This means they do not appear anywhere in the Effect Selector, even
if placed in a GROUP or a top-level "effects" list.
This means they cannot be added.
Example :
Hidden
{
effects "FieldSwap" "LiftGammaGain"
}
Example Configuration
The example shown below will result in an Effect Selector drop-down that
looks like :
Channel Extract
Saturation
My Favourites >
DVO Clarity
DVO Grain
DVO Regrain
Balance
Bob's favourites >
DVO Dust+Fix
DVO Fix
DVO Flicker
effectList
[
effects "ChannelExtract" "Saturation"
MyFavorites // This is a comment
{
name "My Favourites"
effects "DvoClarity" "AGR4" "DvoRegrain"
}
effects "Balance" "Saturation"
BobsFavorites
{
name "Bob's Favourites"
effects "Dust+Fix" "Deblotch" "DvoDeflicker"
}
insertDefault false
Hidden
{
effects "FieldDomCorrect" "FieldRemove" "FieldSwap"
}
]
© 2014 Digital Vision
UM-2014.1-07
480
Appendices
Output Format Confguration
Every project a main output format defined and may also have one or more
secondary formats configured. Available formats appear as a drop-down list
on the project screen with a name Setup.
The Output Form at Selector drop-dow n list.
Interacting w ith the Output Form at Selector
drop-dow n list and choosing a form at.
The output formats available can be defined through the use of text
configuration files.
Configuration Files
The default configuration file exists in the application C:\Phoenix\2014_1\root.
If a user configuration file exists in the same folder it will override the defaults.
This user configuration file does not exists unless you create it.
Default Configuration File
Name : defaultOutputFormats.prefs
Location : C:\Phoenix\2014_1\root
This is the main configuration file for the drop-down list and defines the
standard output formats available.
You should not edit or modify this file. It will be over-written by every
application install. If you want to modify the format list, edit the
userOutputFormats.prefs file.
© 2014 Digital Vision
UM-2014.1-07
Output Format Confguration
481
User Configuration File
Name : userOutputFormats.prefs
Location : C:\Phoenix\2014_1\root
This file does not exist by default.
If it exists, it will over-ride the default settings in the defaultOutputFormats.
prefs file.
An example userOutputFormats.prefs file exists in the example_files
folder.
Configuration File Format
A high-level overview of the file format is shown below :
outputFormats
[
// Multiple formats allowed
FORMATNAME // Must be unique
{
name "<Format Name>"
size N N
aspect W H
fps N N
fieldOrder <FIELD ORDER>
dropFrame <Boolean>
initial <Boolean>
}
//
//
//
//
//
// Optional - see below
FORMATNAME2 // Must be unique
{
name "<Format Name>"
//
size N N
//
aspect W H
//
fps N N
//
fieldOrder <FIELD ORDER> //
dropFrame <Boolean>
initial <Boolean>
//
}
insertDefault <Boolean>
as displayed
X Y pixels
Rational aspect
Rational FPS
See below
as displayed
X Y pixels
Rational aspect
Rational FPS
See below
Optional - see below
// insert default list?
]
Note that the entire outputFormats content is wrapped in SQUARE
([,]) brackets.
© 2014 Digital Vision
UM-2014.1-07
482
Appendices
Definitions
Some configuration file parameters are of a specific type :
Rational : A Rational number is a fraction and is composed of
a numerator (top) and a denominator (bottom).
Rather than using a floating point number (and
decimal places), a rational number can more
accurate reflect a parameter such as aspect ratio,
or frames per second.
Boolean : A Boolean value is either true or false.
Sections
FORMATNAME
Type : Identifier
Each output format definition is grouped (using curly braces), and
named. These names :
Must be unique
Must not contain spaces (Only : a-z,A-Z,0-9,_,-)
These names are not related to the user visible name field used
inside the format definition and can be different.
Example :
Main_Feature_2800x1800_Test
{
}
name S
Type : String
This is the user visible display name for the format. It is a string
wrapped in double-quotes ("") and can contain spaces.
Example :
name "2800 x 1800 Test"
© 2014 Digital Vision
UM-2014.1-07
Output Format Confguration
483
size W H
Type : Rational
The size parameter specifies the pixel width and height as a rational
number.
Example :
size 2800 1800
aspect N M
Type : Rational
The aspect parameter specifies the aspect ratio as a rational number
(fraction with a numerator and a denominator).
A 1:1 aspect can always be chosen by setting the aspect
values the same as the size values.
Example :
aspect 37 20
// 1.85
fps N M
Type : Rational
The fps parameter specifies the frames per second as a rational
number.
Example :
fps 2997 100
// i.e. "29.97"
fieldOrder S
Type : String
The fieldOrder parameter specifies how to interpret a frame in the
format. It is a string wrapped in double-quotes ("") and can take values :
InterlacedUpper Format uses interlaced frames (fields) with upper
field dominant.
InterlacedLower Format uses interlaced frames (fields) with lower
field dominant.
Progressive Format is not fielld based.
© 2014 Digital Vision
UM-2014.1-07
484
Appendices
Example :
fieldOrder "Progressive"
dropFrame B
Type : Boolean
The dropFrame parameter specifies if the format uses drop-frame
timecode (true) or not (false).
Example :
dropFrame false
initial B
Type : Boolean
This parameter is optional.
The initial parameter specifies that the format it appears in will be
selected on application start (for a completely fresh installation).
Example :
initial true
insertDefault B
Type : Boolean
The insertDefault parameter can be used in a user configuration file
(userOutputFormats.prefs) to load in the default output formats (a
specified in the defaultOutputFormats.prefs file) at the location the
directive appears.
This parameter must be placed outside any actual format
definition section.
Example :
insertDefault true
© 2014 Digital Vision
UM-2014.1-07
Output Format Confguration
485
Colour Tool Order
Colour tools are effects such as Keyer, Channel Mixer, RGB Curves and
SOP. They exist inside the Master and CC Layers.
The default order of the tools can be changed in both the GUI and the Control
Panel by editing the main application preference file general.prefs :
C:\Phoenix\2014_1\root\general.prefs
The recommended way to change the tool order is via the utility
program Preferences Assistant. Always make a backup if you
choose to edit the general.prefs directly.
GUI Tool Order
Two preference file options set the tool order :
defaultRealTimeEffectIDs - Master Layer tool order
defaultSecondaryCCEffectIDs - Base and CC Layer tool order
Format
Note that each option should be on a single line in the preference file.
Some tools must stay in the default position in the layer. These
are identified in red.
defaultRealTimeEffectIDs "ChannelMixer" "Saturation"
"SlopeOffsetPower" "PrinterLights"
"LiftGammaGain" "Balance" "RGBMLevels"
"DifferentialColorCorrect" "BrightnessContrast"
"BrightnessRegions" "RGBMCurves"
"SoftClip" "Saturation"
defaultSecondaryCCEffectIDs "ChannelMixer" "Saturation"
"SlopeOffsetPower" "PrinterLights" "LiftGammaGain" "Balance"
"RGBMLevels" "DifferentialColorCorrect" "BrightnessContrast"
"BrightnessRegions" "RGBMCurves" "SoftClip" "HueCurves"
"HLSColorCorrect" "Blur"
© 2014 Digital Vision
UM-2014.1-07
486
Appendices
Control Panel Tool Order
Two preference file options are in the "panel" section :
defaultMasterFX - Master Layer tool order
defaultLayerFX - Base and CC Layer tool order
Format
Note that each option should be on a single line in the preference file.
defaultMasterFX "CMix" "Bal" "ColC" "BReg" "Clip"
"SOP" "Lev" "RGB"
defaultLayerFX "CMix" "Bal" "ColC" "BReg" "HCurv"
"Clip" "SOP" "Lev" "RGB" "None" "HCurv" "HLS"
The Valhall Control Panel has space for six options on the display at
once. Use the string "None" to designate a space on the panel
display.
© 2014 Digital Vision
UM-2014.1-07
Colour Tool Order
487
3D LUT File Format
LUT format v3 extends support to High Dynamic Range (HDR) images (e.g.
OpenEXR) and allows the transformation of extended range inputs. This
means LUT data values can exist outside the range 0.0 to 1.0.
Example LUT files are distributed in the folder :
C:\Phoenix\2014_1\root\cms\
In addition, example C programs are included to generate sample
LUT files. These are found in the Example Code folder alongside
some sample program outputs.
v2 format code example :
Example Code\Lut3D.cpp
v3 format code example :
Example Code\Lut3Dv3.cpp
The Nucoda 3D LUT file format is ASCII text with a .cms file extension.
The file is composed of :
1D x 3 floating point LUT and a
3D x 3 floating point LUT
The LUT file can contain a 1D LUT, a 3D LUT or both. If both, the 1D
LUT definition should be before the 3D LUT definition.
Setup
The following parameters are used in the LUT file before the LUT data is
defined :
TITLE
Format : STRING
LUT title. Use quotes if the title contains spaces.
Example :
TITLE "Title of LUT"
© 2014 Digital Vision
UM-2014.1-07
488
Appendices
NUCODA_3D_CUBE
Format : INT
Integer format version of LUT file.
Example :
NUCODA_3D_CUBE 3
LUT_1D_SIZE
Format : INT
Size of 1D LUT.
Example :
LUT_1D_SIZE 1024
LUT_1D_INPUT_RANGE
Format : FLOAT FLOAT
Minimum and maximum 1D input values allowed: min1D max1D
Optional (defaults to 0.0 1.0).
LUT Format v3 Only
Example :
LUT_1D_INPUT_RANGE 0.0 1.0
LUT_3D_SIZE
Format : INT
Size of 3D LUT.
Example :
LUT_3D_SIZE 17
© 2014 Digital Vision
UM-2014.1-07
3D LUT File Format
489
LUT_3D_INPUT_RANGE
Format : FLOAT FLOAT
Minimum and maximum 3D input values allowed: min3D max3D
Optional (defaults to 0.0 1.0).
LUT Format v3 Only
Example :
LUT_3D_INPUT_RANGE -1.000 4.000
Note that min1D and max1D are the minimum and maximum input
values that can be transformed by the 1D LUT. Similarly for the 3D
LUT and min3D and max3D input values.
Input values outside these ranges are clipped to these ranges before
lookup. There is no constraint on the LUT outputs.
The LUT data is specified after the header setup.
1D LUTS
A single 1D array per R,G and B component.
The LUT values will range between min3D and max3D.
Earlier LUT versions use a different range : v1 is between 0 and M,
v2 is normalised between 0 and 1.
In the file this is expanded into a single list of r,g,b triples ....
3D LUTS
The 3D LUT is an MxMxM array.
In the file this is expanded into a single list of r,g,b triples with red the fastest
moving axis, then green, then blue.
© 2014 Digital Vision
UM-2014.1-07
490
Appendices
An example of the RGB values in an EXR pipeline is shown in the diagram
below :
Exam ple EXR RGB values pipeline.
File Format
From a sample file included : lut3d_2xN_noinvert_1D_only.cms
# Lut3D.exe <1D-size> <3D-size> <invert-green> <1d-3d-test>
# see Lut3D.cpp for details on optional arguments
NUCODA_3D_CUBE 2
TITLE "Identity Lut, 1D Only, Version 2 format"
LUT_1D_SIZE 2
0.000000
1.000000
0.000000
1.000000
0.000000
1.000000
Comments start a line with '//' or '#' characters.
© 2014 Digital Vision
UM-2014.1-07
3D LUT File Format
491
Format Description
// version, title and sizes of LUTs:
NUCODA_3D_CUBE version-number:int // version number
TITLE "colour-conversion-title:string" // optional title (in quotes)
LUT_1D_SIZE size-of-1D-LUTs:int // call this N
LUT_1D_INPUT_RANGE min1D:float max1D:float // optional
LUT_3D_SIZE number-of-levels-per-axis-in-3D-LUT:int // call this M
LUT_3D_INPUT_RANGE min3D:float max3D:float // optional
// specify 1D LUT: comes directly after the header specifications
red[0]:float green[0]:float blue[0]:float
red[1]:float green[1]:float blue[1]:float
red[2]:float green[2]:float blue[2]:float
...
...
red[N-1]:float green[N-1]:float blue[N-1]:float
// specify 3D LUT: comes directly after 1D LUT specification
// R lvl 0, G lvl 0, B lvl 0
red[0,0,0]:float green[0,0,0]:float blue[0,0,0]:float
// R lvl 1, G lvl 0, B lvl 0
red[0,0,1]:float green[0,0,1]:float blue[0,0,1]:float
// R lvl 2, G lvl 0, B lvl 0
red[0,0,2]:float green[0,0,2]:float blue[0,0,2]:float
...
...
// red level M-1, green level 0, blue level 0
red[0,0,M-1]:float green[0,0,M-1]:float blue[0,0,M-1]:float
// R lvl 0, G lvl 1, B lvl 0
red[0,1,0]:float green[0,1,0]:float blue[0,1,0]:float
// R lvl 1, G lvl 1, B lvl 0
red[0,1,1]:float green[0,1,1]:float blue[0,1,1]:float
// R lvl 2, G lvl 1, B lvl 0
red[0,1,2]:float green[0,1,2]:float blue[0,1,2]:float
...
...
// red level M-1, green level 1, blue level 0
red[0,1,M-1]:float green[0,1,M-1]:float blue[0,1,M-1]:float
// R lvl 0, g lvl 2, B lvl 0
red[0,2,0]:float green[0,2,0]:float blue[0,2,0]:float
// R lvl 1, G lvl 2, B lvl 0
red[0,2,1]:float green[0,2,1]:float blue[0,2,1]:float
// R lvl 2, G lvl 2, B lvl 0
red[0,2,2]:float green[0,2,2]:float blue[0,2,2]:float
...
...
// red level M-1, green level M-1, blue level 0
red[0,M-1,M-1]:float green[0,M-1,M-1]:float blue[0,M-1,M-1]:float
// R lvl 0, G lvl 0, B lvl 1
red[1,0,0]:float green[1,0,0]:float blue[1,0,0]:float
// R lvl 1, G lvl 0, B lvl 1
red[1,0,1]:float green[1,0,1]:float blue[1,0,1]:float
// R lvl 2, G lvl 0, B lvl 1
red[1,0,2]:float green[1,0,2]:float blue[1,0,2]:float
...
...
// red level M-2, green level M-1, blue level M-1
red[M-1,M-1,M-2]:float green[M-1,M-1,M-2]:float blue[M-1,M-1,M-2]:float
// red level M-2, green level M-1, blue level M-1
red[M-1,M-1,M-2]:float green[M-1,M-1,M-2]:float blue[M-1,M-1,M-2]:float
© 2014 Digital Vision
UM-2014.1-07
492
Appendices
Icon Tools Reference
File Browser Navigation
icon function
User preset directories - Opens the preset directories configuration
panel
Back to previous directory - Navigate backwards by one folder level
Directory rename - Renames the selected folder
Add folder - Adds a new folder as a sub directory of the current one
Open / Close Panels - Opens/closes the multiple panel display
Move panels right - Navigates forwards through multiple panels
Move panels left - Navigates backwards through multiple panels
Library Folders
icon function
Add Folder - Creates a new folder in the Library
Remove Folder - Removes the selected folder from the library
Folder - Depicts a Library folder
Caches Folder - Depicts the Caches folder in the library
Tree Expand - Expands the Tree branch being viewed
Tree Close - Closes the Tree branch being viewed
Playback Tools
icon function
Step Back a frame
Jump to previous edit point
Play backwards - Toggle, plays backwards, then stops
Play forwards - Toggle, plays forwards, then stops
Jump to next edit point
© 2014 Digital Vision
UM-2014.1-07
Icon Tools Reference
493
Step Forward a frame
Scene Detect - Applies scene detection on next playback
Viewer Tools
icon function
Apply monitor Aspect Ratio correction
Show Video Fields - Shows individual video fields of interlaced
footage
Show monitor Overlay tools
View Full Screen
Reference Lock
Compare Mode
Show HUD (Head Up Display)
Show Grid
Show Mask
Edit Mask
Show Graph Curves
Show Histogram
Reset Histogram
Apply CMS
Show monitor output
Show video output
Shape Transform Tools
icon function
Translate
Rotate
Scale
© 2014 Digital Vision
UM-2014.1-07
494
Appendices
Invert
Tracker Tools
icon function
Track Forward - Plays through the shot tracking as it goes
Track Backwards - Plays backwards through the shot tracking as it
goes
Track Step Forward - Tracks forward one frame
Track Step Backwards - Tracks backward one frame
Format Support
The following sections describe media formats supported by the
main application.
Image Formats
DPX
Digital Moving Picture Exchange (SMPTE 268M)
Extensions : dpx
Read / Write
Optimised for realtime playback
Options :
Mode Big-endian (default) / Little-endian
Depth 10 bit RGB / 12 bit RGB / 10 bit YUV
The DPX format is optimised for realtime playback and includes
support for alpha channels. It is the native format for cache renders
and source proxies in 10 bit projects (default).
© 2014 Digital Vision
UM-2014.1-07
Format Support
495
Cineon
Cineon File Format
Extensions : cin
Read / Write
Options : None
© 2014 Digital Vision
UM-2014.1-07
496
Appendices
TIFF
Tagged Image File Format
Extensions : tiff tif
Read / Write
Options :
Bit Depth 8 / 16 bit
SGI
SGI Image Format
Extensions : sgi rgb
Read / Write
Options :
Compression None / RLE
Bit Depth 8 / 16 bit
JPEG
JPEG Image Format
Extensions : jpg jpeg
Read / Write
Options :
Quality 0-100% (default : 75)
© 2014 Digital Vision
UM-2014.1-07
Format Support
497
PIC
Softimage PIC Format
Extensions : pic
Read / Write
Options :
Compression None / RLE
MPEG
MPEG-1 Video
Extensions : mpg mpeg
Read / Write
Options :
Width/Height Slider
I-Frame 0-10 (default : 8)
Interval
Bitrate (Kb/s) Slider (default : 400 Kbps)
Tolerance (% ) Slider
See the MXF Formats section.
MXF
Material Exchange Format
Extensions : mxf
Read / Write
Options :
Codec Availability is output format dependant
Avid Project From MXF File / From DV Project / User Set
Name
See MXF Formats section.
© 2014 Digital Vision
UM-2014.1-07
498
Appendices
EXR
OpenEXR High Dynamic Range Format
Extensions : exr
Read / Write
Options :
Compression None / RLE / ZIPS / ZIP / PIZ / PXR24 / B44 / B44A
The EXR format is based on the industry standard OpenEXR format
[1]. It is the default cache format for half-float projects.
For optimal performance reading and writing EXR files to/from disk
on the Windows NTFS filesystem, EXR frames should be padded to
an NTFS volume sector size. This is usually 512 bytes but may be
different on some systems (e.g. padding to 4096 or 16384 bytes).
[1]
For details on OpenEXR, see the web site at http://www.openexr.com.
OpenEXR is trademarked by Lucasfilm Ltd.
Quicktime
Apple Quicktime Format
Extensions : mov
Read / Write
Supported as per installed and configured codecs.
Support includes Avid DNxHD.
© 2014 Digital Vision
UM-2014.1-07
Format Support
499
List Formats
EDL
This is the Edit Decision List.
CMX3600 Standard Format
Support :
Dissolves
Retimes
Black (BL) and AUX (AX) events
EDL export (Export Composition) supports both standard CMX3600
format and an extended EDL format that includes :
Long tapenames
Clipname detail
File path detail per event.
Comment fields are parsed for clipname and event material (file path)
information.
Clip Names
If an event followed by a clip-name specifier e.g.
* FROM CLIP NAME: test_gh56
Then the event is loaded and the clip is created with a clip-name as
specified.
File Load
If an event is followed with a file path e.g.
* FROM FILE: C:\media\film_cc_scans.007882.dpx
Then the event material will be loaded into the library if we enable the
following on EDL import :
Import material from file paths
© 2014 Digital Vision
UM-2014.1-07
500
Appendices
See the Export Composition chapter for details of EDL export options.
AAF
This is the Advanced Authoring Format.
Extensions : aaf
Read / Write (see note below)
Options :
Format See MXF Formats section.
Export to Off / On (default : off)
Interplay
Exporting an AAF requires the composition to have been created
from an imported AAF.
CUT
This is a film cut list file.
Extension : .cut
Format
We expect a line :
The cut list in construction order
We expect a line after this (skipping empty lines and comments) that starts
with the word :
Shot
We skip :
© 2014 Digital Vision
UM-2014.1-07
Format Support
501
lines that start with a string of asterisks (*).
blank lines.
A Title line becomes the title of the created composition.
This is a fixed format text file with the following fields (index from 0 (zero)) :
Field
Start
Length
Shot
0
5
Footage (Rec Start)
5
7
Length (Rec Length)
14
7
Keycode
24
10
In Frame (Src In)
36
7
Out Frame (Src Out)
46
7
Roll
57
10
Example CUT File
This is taken from the release distribution and the examples folder :
C:\Phoenix\2014_1\example_files\cut\
Title: Cutlist test
**************************************************************
The cut list in construction order:
Shot Footage Length
Keycode
In Frame Out Frame Roll
001 0000+00 0000+08
KM 16 1825 4582+08
4582+12
002
002 0000+08 0000+06
KM 41 2976 3884+00
3884+06
004
003 0000+14 0000+05
KU 25 1490 2105+02
2105+07
007
004 0001+03 0000+10
KM 18 0863 0044+00
0044+10
025
005 0001+13 0000+10
KU 09 8386 2901+07
2902+01
030
006 0002+07 0007+12
KM 46 9745 0513+00
0520+12
050
**************************************************************
ALE
This is the Avid Log Exchange format.
Extensions : ale
The ALE format is export only.
The ALE format is an ascii text format used by Avid editing systems for
metadata interchange.
Generate an ALE file for the current composition via the ..Export
C om position button. Choose ale as your export format.
© 2014 Digital Vision
UM-2014.1-07
502
Appendices
The ALE format is ascii text and usually tab-delimited (delimiters are specified
in the header). It consists of :
A header containing various global settings (e.g. project format, fps
etc.)
A column specification
One or more lines encoding metadata for a shot
Header
Heading
FIELD_DELIM<TAB>TABS
VIDEO_FORMAT<TAB>PAL
FPS<TAB>25
Column Specification
Column
Name<TAB>FPS<TAB>Project<TAB>Tape<TAB>Start<TAB> ... <TAB>
ASC_SOP
Fields :
Name
FPS
Project
Tape
Start
End
Duration
Tracks
SourceId
Take
Scene
Slate
Camroll
Director
SoundRoll
ProjectName
DoP
Cameraman
DailiesColorist
DateOfShoot
ASC_SAT
ASC_SOP
© 2014 Digital Vision
UM-2014.1-07
Format Support
503
Content
Data
<shot1>
<shot2>
...
Each shot includes and encodes the fields as shown above. Each field in
each shot is delimited as per the header specification (e.g. usually a TAB).
© 2014 Digital Vision
UM-2014.1-07
504
Appendices
MXF Formats
Read Support
Codec
On Avid
Format
Bits Notes
DV25
DV 25 MXF
720x576 50i
720x486 59.94i
8
[1]
DV50
DV 50 MXF
720x576 50i
720x486 59.94i
8
[1]
DVCPRO100
DVCPRO HD MXF 720p 59.94
1080i 50
8
[2]
MPEG IMX30
MPEG 30 MXF
720x576 50i
720x486 59.94i
8
[3]
MPEG IMX 40
MPEG 40 MXF
720x576 50i
720x486 59.94i
8
[3]
MPEG IMX 50
MPEG 50 MXF
720x576 50i
720x486 59.94i
8
[3]
DNxHD 40
DNxHD 36 MXF
1080p25
8
[5]
DNxHD 36
DNxHD 36 MXF
1080p 23.98
1080p 24
8
DNxHD 115
DNxHD 115 MXF
1080p 23.98
1080p 24
8
DNxHD 120
DNxHD 120 MXF
1080i 50
8
DNxHD 145
DNxHD 145 MXF
1080i 59.94
720p 59.94
8
DNxHD 175
DNxHD 175 MXF
1080p 23.98
1080p 24
8
DNxHD 175X
DNxHD 175 X MXF 1080p 23.98
1080p 24
10
DNxHD 185
DNxHD 185 MXF
8
DNxHD 185X
DNxHD 185 X MXF 1080i 50
10
DNxHD 220
DNxHD 220 MXF
8
DNxHD 220X
DNxHD 220 X MXF 1080i 59.94
1080p 29.97
720p 59.94
10
2:1 / 3:1
Compressed
2:1i / 3:1i
PAL / NTSC
8
720x486
720x576
HD 1920x1080
8/10
Uncompressed 1:1 1:1 MXF
1:1 10b MXF
© 2014 Digital Vision
1080i 50
1080i 59.94
1080p 29.97
720p 59.94
[4]
UM-2014.1-07
Format Support
505
[1]
DV25/DV50. For NTSC DV, sample height is actually 480.
These formats are DVPRO, not consumer DV (4:2:0).
[2]
DVPRO100. The 1080 i50 format is actually sampled 1440x1080.
[3]
IMX. Samples are actually 16 lines greater (vertical blanking), making
the formats 720x608 and 720x512.
[4]
Actually a YUV 4:2:2 format. Will offer a 10 bit version if using 10 bit
output depth.
[5]
Avid will treat and label DNxHD 40 as DNxHD 36.
Sony XDCAM
Format
Codec
XDCAM SD
DVCAM 4:1:1/4:2:2 25 Mbps
XDCAM SD
MPEG IMX 30/40/50 Mbps 4:2:2
© 2014 Digital Vision
UM-2014.1-07
506
Appendices
Camera Formats
Red
The Red digital camera format.
Read only
Extension : .R3D
See the Red chapter for details.
ARRI D-21
The ARRI D-21 camera is an advanced digital camera from ARRI. The
camera has a 3K sensor and generates ARRIRAW data (an uncompresssed
12 bit RAW format) as well as a variety of HD output formats.
Read only.
Extension : .ari
We support the .ari (ARRIRAW) file format only.
Timecode
The timecode can be retrieved from :
The file header or
The filename.
Tapename
The tapename is from filename only.
Care needs to be taken when using a standard EDL due to
tapename length and character restrictions.
Resolution
Frames are 2880x2160 pixels native.
© 2014 Digital Vision
UM-2014.1-07
Format Support
507
LUT
A LUT is important in an ARRI D-21 workflow.
We include a standard set of ARRI LUT files in our cms folder :
C:\Phoenix\2014_1\root\cms\ArriD21-LUTS\
You can also download LUT files directly from ARRI by going to
the URL :
http://www.arridigital.com/technical/luts/
Properties
The application exposes the following shot properties via the Library/
Properties dialog.
Scale
Set the resolution we decode to.
Options
1/1
1/2
1/4
1/8
Decode Quality
Set the RAW camera data decode mechanism.
Options
Low
Medium
© 2014 Digital Vision
UM-2014.1-07
508
Appendices
High
Brightness
Slider : -100 to 100
Contrast
Slider : -100 to 100
Gamma
Gamma correction used to transform the camera data for display.
Slider : -0.1 to 10
Saturation
Slider : 0 to 2
Extra Metadata
All available metadata is also displayed in a raw format :
Silicon Imaging SI-2K
The Silicon Imaging SI-2K camera is an advanced 2K digital cinema
compliant camera from Silicon Imaging Inc. The camera records directly to
the CineForm RAW™ format.
Read only.
Extension : .mov
We support the SI-2K .mov file format only.
© 2014 Digital Vision
UM-2014.1-07
Format Support
509
Timecode
The timecode can be retrieved from :
The file header or
The filename.
Tapename
The tapename is from filename only.
Properties
The application exposes the following shot properties via the Library/
Properties dialog.
Look File
The Look File option lets you select and enable an SI-2K CineForm RAW™
LUT file.
SI-2K Look Files have a .look extension.
To select a LUT, click on the file browser icon, navigate to your LUT file
location and press OK. To apply the LUT, enable it via the Look File toggle :
© 2014 Digital Vision
UM-2014.1-07
510
Appendices
SI-2K Look File LUTs have to be installed before use. See below.
Decode Resolution
Set the resolution we decode to.
Options
1/1
1/2
1/4
Decode Quality
Set the RAW camera data decode mechanism.
Options
Automatic
Advanced Bilinear
Advanced Matrix5x5
Advanced Smooth
Advanced Detail 1
Advanced Detail 2
Advanced Detail 3
Gamma Curve
Gamma correction used to transform the camera data for display.
Options
Log 90
Gamma 2.2
Cineon 1.7
Cine985 1.7
Cineon 1.0
Linear
Saturation
Slider : 0 to 4
© 2014 Digital Vision
UM-2014.1-07
Format Support
511
Extra Metadata
All available metadata is also displayed in a raw format :
Installing Look File LUTs
SI-2K CineForm RAW™ Look File LUTs have to be compiled and
installed before they can be used by the application.
If you do not install the .look files before trying to use them, you will
get an error "Could not find .cflook file for selected look file."
The Look Files have a .look extension and are installed by a
program called LookI nstaller.exe.
To install :
Open a Windows CMD shell : Start / Run / Cm d
Type :
LookInstaller <file.look>
Where <file.look> is your chosen .look file.
On success, a dialog box opens and displays information e.g.
You can now use the installed LUT by selecting it in the Look File file selector
in the shot Properties.
© 2014 Digital Vision
UM-2014.1-07
512
Appendices
The LookInstaller program compiles the .look file and installs it as a .
cflook file to the folder :
C:\Program Files\Common Files\CineForm\LUTs
To use the LUT, you can select either the original .look file or
the installed .look file (in above folder).
Because the files are installed to the same location, the names
have to be unique.
Vision Research Phantom
The Vision Research Phantom camera is an advanced digital camera
supporting both RAW data and various HD output formats.
Read only
Extension : .cine
Timecode
The timecode is from file header only.
Timecode is calculated based on .cine file Trigger Time and
the frame rate.
Tapename
The tapename is created based on :
<Camera Serial Number> + "CINE" + <6 Digit Date>
This facilitates an easier conform/re-conform in a tape-less work-flow.
Properties
The application exposes the following properties specific to each Phantom
shot via the Library/Properties dialog.
© 2014 Digital Vision
UM-2014.1-07
Format Support
513
CINE Properties
Options
CINE
Custom
Scale
Set the resolution we decode to.
Options
1/1
1/2
1/4
1/8
Decode Quality
Set the RAW camera data decode mechanism.
Options
Low
Medium
High
WB Red Gain
Slider : 0 to 2
WB Blue Gain
Slider : 0 to 2
Brightness
Slider : -100 to 100
© 2014 Digital Vision
UM-2014.1-07
514
Appendices
Contrast
Slider : -100 to 100
Gamma
Gamma correction used to transform the camera data for display.
Slider : -100 to 100
Saturation
Slider : -100 to 100
Extra Metadata
All available metadata is also displayed in a raw format :
Audio Formats
WAV Audio
Uncompressed WAV audio files.
Extension : .wav
Broadcast WAV Audio
An extension to the WAV file format to include extra metadata.
Extension : .wav .bwf
© 2014 Digital Vision
UM-2014.1-07
Format Support
515
Audio Interchange Format
The audio interchange format.
Extension : .aiff .aif .aifc
Compressed and uncompressed variants.
© 2014 Digital Vision
UM-2014.1-07
516
Appendices
OFX Plugins
OFX is an Open Source standard for visual-effect plugins.
We support the full OFX API (Application Programming Interface) and a
variety of plugins. Plugin support includes :
The Foundry - Tinder, Furnace and Keylight
GenArts - Sapphire (New)
IMAGICA Corp. of America - Primatte
The OFX API and documentation can be found online :
http://openfx.sourceforge.net/
© 2014 Digital Vision
UM-2014.1-07
OFX Plugins
517
Configurable Viewer Tools
Viewer tools let you display various pieces of information and guide elements
on top of your monitor image. This includes various metadata items, grids/
shapes, logos, masks and colour information graphs.
The following viewer tools are user configurable :
Grids
Overlay lines, rectangles and layout information.
HUD (head Up Display)
Overlay text or graphics inside monitor area or image.
Masks
Mask/Blank areas of the image.
© 2014 Digital Vision
UM-2014.1-07
518
Appendices
Graphs
Display a graph or histogram of image colour map.
The displayed information and its position can be customised via one or more
specification files. The search path for the specification files is given in the
main preference file general.prefs.
Configuration
Grids, HUDs, Masks and Graphs are configured via plain text files searched
for in folders specified in the main configuration file general.prefs.
Parameter
Default
File Extension
monitorMaskDir
monitorMasks/
.masks
monitorGridDir
monitorGrids/
.grids
monitorGraphDir
monitorGraphs/
.graphs
monitorHeadUpDisplayDir
monitorHUDs/
.grids
Each specific parameter specifies a folder from which corresponding
specification files will be loaded.
Multiple specification files per folder will be loaded and aggregated
Only files with the specified extensions are loaded
Parameters can be repeated, specifying multiple folders to search
Specification files located are global and available to all projects
Example
An example general.prefs line that specifies three folders to be searched :
monitorGrids "monitorGrids\" "\\server\testgrids\" "C:\Grids\"
Global Versus Project Specific
Specification files located inside folders described in the general.prefs file will
be global and available to all projects.
Specification files can be kept private to a project by placing them inside a
corresponding default named folder inside the project folder i.e.
© 2014 Digital Vision
UM-2014.1-07
Configurable Viewer Tools
519
ProjectName/monitorGraphs/private.graphs
Grids Specification
Overlay lines, rectangles and layout information.
The HUD specification also use Grid files (.grids) but with a
location set as per the general.prefs monitorHeadUpDisplayDir
parameter.
File Specification
A grids file must end in the extension '.grids', e.g. test.grids
It should be a plain text file
Each specification file specifies one or more grids, each identified by unique
name (a name parameter).
Format
The grid file format is as follows :
monitorGrids 1.0 -1
{
monitorGrid 1.0 -1
{
<grid specification>
}
monitorGrid 1.0 -1
{
<grid specification>
}
...
}
The grid specification section is described below.
© 2014 Digital Vision
UM-2014.1-07
520
Appendices
NOTE
Grid specification lines must end with a semi-colon ";" character.
A '#' character at line start delimits a comment. Rest of line is
ignored.
Strings should be quoted i.e. "string".
There should be a space between each identifier and before the
terminating semi-colon.
Grid Specification
The following identifiers are used.
name
name "<STRING>" ;
This is the name of the grid as shown in the GUI drop-down list.
Grid names should be unique.
units
units "<UNITS>" ;
where UNITS are :
pixels By default the coordinate system is absolute image pixels,
lower left to top right.
Elements are drawn relative to the lower left corner of a
pixel.
normalised Normalised coordinates map the range 0.0..1.0 to the
monitor source full image pixel size in x and y.
unitsImageAspect
unitsImageAspect <FLOAT> ;
The normalised region may be mapped to an image aspect extraction of the
monitor source full image (pre or post monitor mask).
This is achieved by specifying the target image aspect. Given the monitor
source image and aspect ratio, the normalised region will automatically be
adjusted for 'letterbox' or 'pillarbox' display of the target aspect ratio.
unitsObeyMask
unitsObeyMask <INT> ;
where INT can be 0 or 1.
The normalised region may be mapped to the visible (post monitor mask)
image pixel size in x and y.
© 2014 Digital Vision
UM-2014.1-07
Configurable Viewer Tools
521
line
line <FLOAT x0> <FLOAT y0> <FLOAT x1> <FLOAT y1>;
Draws a line from coordinates x0,y0 to coordinates x1,y1 using the current
coordinate system and draw style.
lineWeight
lineWeight <FLOAT> ;
How wide to draw lines, in pixels.
ellipse
ellipse <INT x0> <INT y0> <INT Rx> <INT Ry> ;
where Rx is X radius and Ry is Y radius.
Draws an ellipse with centre at coordinates (x0,y0) and size 2*Rx by 2*Ry,
using the current coordinate system and draw style.
polygon
polygon <INT x0> <INT y0> .. <INT xN> <INT yN> ;
Draws a multi-point polygon from (x0,y0) to (x1,y1) to .. (xN,yN), using the
current coordinate system and draw style. If the draw style is filled and the
polygon is convex, it will be filled on the inside.
rectExtraction
rectExtraction <INT x0> <INT y0> <INT x1> <INT y1> ;
Draws a rectangle from (x0,y0) to (x1,y1) using the current coordinate system
and draw style.
If the draw style is filled the rectangle will be filled on the outside, up to the
outer limit of the monitor source image. This element is intended for use when
a solid or semi-transparent 'masking' or 'blanking' region is required.
If the draw style is not filled, an open rectangle will be drawn with the current
line style.
text
text <INT x> <INT y> "<STRING>" ;
Draws the specified string at (x,y) using the current coordinate system and
draw style.
Note that you can use text macros, which will be expanded on display. See
below.
© 2014 Digital Vision
UM-2014.1-07
522
Appendices
textSize
textSize <FLOAT> ;
Set the size of text drawn.
color
color <FLOAT R> <FLOAT G> <FLOAT B> <FLOAT A> ;
Set the color (Red Green Blue Alpha) for drawing.
fill
fill "<FILL>" ;
where FILL is solid or open.
Set the fill mode.
anchor
anchor "<VERT>" "<HORIZ>" ;
where :
String
Values
VERT
HORIZ
bottom, middle , top
left, center , right
This defines the horizontal and vertical positioning for :
text elements
image elements
image
image <INT x> <INT y> "<PATH>" ;
where PATH is full path to image file.
Draw specified image at (x,y) using the current coordinate system and draw
style.
Images should be in PNG format. The image path can be relative (to
specification file) or given as an absolute path.
© 2014 Digital Vision
UM-2014.1-07
Configurable Viewer Tools
523
origin
origin "<VERT>" "<HORIZ>" ;
where :
String
Values
VERT
HORIZ
bottom , top
left , right
Define the coordinate origin for all drawing operations.
Macro Expansion
Macros are available for use with the text operator and will be expanded to the
associated information.
Macro Format
To specify a macro, use a text element e.g.
text 20 50 "Name: ##srcName" ;
text 220 80 "Frame: ##recTimeFrames" ;
Available Macros
Macro Text
Meaning
Source Information
##srcTime
Source time (auto-set from project)
##srcTimeFrames
Source time in frames
##srcTimeTimecode
Source time as timecode
##srcKeycode
Source time as keycode (if available)
##srcTape
Tape name
##srcFilm
Film name
##srcClip
Clip name
##srcScene
Scene name
##srcName
Material Name
##srcDescription
Description
##srcLocation
Location (path on disk)
Record Information
##recTime
Record time (auto-set from project)
##recTimeFrames
Record time in frames
##recTimeTimecode
Record time as timecode
© 2014 Digital Vision
UM-2014.1-07
524
Appendices
##segmentVersion
Version number of segment
Audio Information
##audioName
Audio material name
##audioOriginator
Audio originator/creator (e.g. Pro Tools)
##audioTimecode
Audio timecode
##audioTimeFrames
Audio timecode as frames
##audioReference
Audio reference as per originator
##audioChannels
Number of audio channels
##audioSampleRate
Sample rate of audio
Miscellaneous
##headLength
Length of segment head in frames
##tailLength
Length of segment tail in frames
##clipLength
Length of visible segment in frames
Example Grids
For further examples, see the grids file in folder :
C:\Phoenix\2014_1\root\monitorGrids\
and HUD's in folder :
C:\Phoenix\2014_1\root\monitorHUDs\
monitorGrid 1.0 -1
{
name "DV Logo" ;
units "normalised" ;
textSize 64.0 ;
color 1.0 0.0 0.0 0.8 ;
text 0.1 0.05 "Digital Vision" ;
}
© 2014 Digital Vision
UM-2014.1-07
Configurable Viewer Tools
525
monitorGrid 1.0 -1
{
name "Poly" ;
units "normalised" ;
fill "solid" ;
color 1.0 0.0 0.0 0.33 ;
lineWeight 3.0 ;
polygon 0.5 0.0 1.0 0.5 0.5 0.5 ;
}
monitorGrid 1.0 -1
{
name "Poly2" ;
units "normalised" ;
fill "open" ;
color 0.0 0.0 1.0 1.0 ;
lineWeight 3.0 ;
polygon 0.5 0.0 1.0 0.5 0.5 0.5 ;
}
monitorGrid 1.0 -1
{
name "AS Rect" ;
units "normalised" ;
fill "solid" ;
color 1.0 0.0 0.0 0.33 ;
rectExtraction 0.25 0.25 0.75 0.75 ;
}
© 2014 Digital Vision
UM-2014.1-07
526
Appendices
monitorGrid 1.0 -1
{
name "Center Cross" ;
lineWeight 3.0 ;
units "normalised" ;
color 1.0 1.0 1.0 1.0 ;
polygon 0.0 0.0 0.0 1.0 1.0 1.0 1.0 0.0 ;
polygon 0.0 0.0 0.0 0.5 1.0 0.5 1.0 0.0 ;
polygon 0.0 0.0 0.0 1.0 0.5 1.0 0.5 0.0 ;
}
monitorGrid 1.0 -1
{
name "Safe Areas" ;
lineWeight 2.0 ;
units "normalised" ;
color 1.0 1.0 1.0 1.0 ;
polygon 0.05 0.05 0.05 0.95 0.95 0.95 0.95 0.05 ;
polygon 0.1 0.1 0.1 0.9 0.9 0.9 0.9 0.1 ;
polygon 0.0 0.0 0.0 1.0 1.0 1.0 1.0 0.0 ;
lineWeight 3.0 ;
line 0.45 0.5 0.55 0.5 ;
line 0.5 0.45 0.5 0.55 ;
anchor "top" "left" ;
origin "top" "left" ;
textSize 20.0 ;
color 0.9 0.9 0.9 0.9 ;
text 0.056 0.06 "PICTURE SAFE" ;
text 0.106 0.11 "TITLE SAFE" ;
}
© 2014 Digital Vision
UM-2014.1-07
Configurable Viewer Tools
527
monitorGrid 1.0 -1
{
name "Greyscale" ;
units "pixels" ;
color 1.0 1.0 1.0 1.0 ;
anchor "bottom" "left" ;
origin "bottom" "left" ;
image 0 0 "greyscale2.png" ;
}
monitorGrid 1.0 -1
{
name "full info all" ;
units "pixelsFullWindow" ;
anchor "top" "left" ;
origin "top" "left" ;
textSize 14.0 ;
text 20 20 "##segmentVersion" ;
text 20 50 "Name: ##srcName" ;
text 20 80 "Description: ##srcDescription" ;
text 20 110 "Tape Name: ##srcTape" ;
text 20 140 "Keycode: ##srcKeycode" ;
anchor "bottom" "left" ;
origin "bottom" "left" ;
textSize 14.0 ;
...
...
anchor "top" "right" ;
origin "top" "right" ;
textSize 14.0 ;
text 20 20 "audio: ##audioName" ;
text 20 50 "originator: ##audioOriginator" ;
...
}
© 2014 Digital Vision
UM-2014.1-07
528
Appendices
HUDs Specification
The Head Up Display (HUD) configuration is the same as for the Grids.
Masks Specification
Mask/Blank areas of the image. This is a view only mode and is not exported
or rendered.
2.35 extraction.
User defined.
File Specification
A masks file must end in the extension '.masks', e.g. test.masks
It should be a plain text file
Each specification file specifies one or more masks, each identified by
unique name (a name parameter).
Format
The mask file format is as follows :
monitorMasks 1.0 -1
{
monitorMask 1.0 -1
{
<mask specification>
}
monitorMask 1.0 -1
{
<mask specification>
}
...
}
The mask specification section is described below.
© 2014 Digital Vision
UM-2014.1-07
Configurable Viewer Tools
529
NOTE
Mask specification lines must end with a semi-colon ";" character.
A '#' character at line start delimits a comment. Rest of line is
ignored.
Strings should be quoted i.e. "string".
There should be a space between each identifier and before the
terminating semi-colon.
Mask Specification
name
name "<STRING>" ;
This is the name of the mask as shown in the GUI drop-down list.
Mask names should be unique.
units
units "<UNITS>" ;
where UNITS are :
pixels By default the coordinate system is absolute image pixels,
lower left to top right.
Elements are drawn relative to the lower left corner of a pixel.
normalise Normalised coordinates map the range 0.0..1.0 to the monitor
d source full image pixel size in x and y.
unitsImageAspect
unitsImageAspect <FLOAT> ;
The normalised region may be mapped to an image aspect extraction of the
monitor source full image (pre or post monitor mask).
This is achieved by specifying the target image aspect. Given the monitor
source image and aspect ratio, the normalised region will automatically be
adjusted for 'letterbox' or 'pillarbox' display of the target aspect ratio.
rect
rect <INT x0> <INT y0> <INT x1> <INT y1> ;
Where :
(x0,y0) is rectangle bottom-left.
(x1,y1) is rectangle top-right.
Mask rectangle defined from x0,y0 to x1,y1 using the current coordinate
© 2014 Digital Vision
UM-2014.1-07
530
Appendices
system. The area outside this rectangle will be blanked.
User Masks
A special mask named "User" will also appear in the GUI list. This allows us to
set the mask size and position interactively.
Example Mask Specifications
monitorMask 1.0 -1
{
name "1920x1080" ;
units "pixels" ;
rect 0 0 1920 1080 ;
}
monitorMask 1.0 -1
{
name "10% in" ;
units "normalised" ;
rect 0.1 0.1 0.9 0.9 ;
}
monitorMask 1.0 -1
{
name "4:3" ;
units "normalised" ;
unitsImageAspect 1.333 ;
rect 0.0 0.0 1.0 1.0 ;
}
© 2014 Digital Vision
UM-2014.1-07
Configurable Viewer Tools
531
Graphs Specification
Display a graph or histogram of image colour map.
Parade style centred.
Fill style south-w est.
File Specification
A graphs file must end in the extension '.graphs', e.g. test.graphs
It should be a plain text file
The format used for a Graph file is simpler than that used for Grids and
Masks.
Each specification file specifies one or more graphs, each identified by
unique name (a GraphID string) and containing a list of drawing instructions.
Graph File Format
// This is a comment and ignored
<GraphID 1>
{
<Graph Specification>
}
<GraphID 2>
{
<Graph Specification>
}
Graph files :
Do not use semi-colons to terminate lines
Use C++ style comments (two characters "//" at line start)
Overview
The main elements of the graph are shown below :
© 2014 Digital Vision
UM-2014.1-07
532
Appendices
Main Parameters
GraphID
The unique identifier for the graph e.g.
NameOfGraph
{
....
}
This identifier is not displayed.
This identifier must not contain any spaces.
name
name
"<STRING>"
This is the name displayed in the GUI Graph drop-down list e.g.
© 2014 Digital Vision
UM-2014.1-07
Configurable Viewer Tools
533
Graph name in drop-dow n list
intervals
intervals
<INT>
The intervals parameter defines the total number of solid lines drawn to mark
intervals on the graph. See overview diagram above.
black
black
<FLOAT>
The black parameter specifies the position of the dashed line representing
the black point. See overview diagram above.
It is given in normalised coordinates (0.0 to 1.0).
white
white
<FLOAT>
The white parameter specifies the position of the dashed line representing the
white point. See overview diagram above.
It is given in normalised coordinates (0.0 to 1.0).
Current Section
The current section is optional.
current
{
origin "bottom" "left"
offset 0 0
size
800 600
style "parade"
}
origin
origin "<STRING V>" "<STRING H>"
This defines the vertical and horizontal positioning of the graph.
© 2014 Digital Vision
UM-2014.1-07
534
Appendices
Where :
STRING V Vertical alignment.
Values : bottom center (or centre) top
STRING H Horizontal alignment
Values : left center (or centre) right
offset
offset <INT x> <INT y>
This is the (x,y) position of the graph inside the monitor display area.
(0,0) is bottom-left.
size
size <INT w> <INT h>
This is the (width,height) in pixels of the graph.
style
style "<STRING S>"
Where :
STRING S Style chosen
Values : parade fill line
This defines the type of graph to display.
parade
fill
line
Compare Section
The compare section is optional.
compare
{
origin "bottom" "left"
}
If present, this defines the location of the second comparison graph when in
compare mode. The origin parameter is as per the current section but refers
to the location of the second comparison graph.
© 2014 Digital Vision
UM-2014.1-07
Configurable Viewer Tools
535
Example :
current
{
origin "bottom" "left"
....
}
compare
{
origin "top" "right"
}
Dual Com parison Mode w ith Graphs
© 2014 Digital Vision
UM-2014.1-07
536
Appendices
Legal Notices
The software described in this document is furnished under a license
agreement.
This license is available in the docs/licenses folder once the software is
installed.
The software may not be reverse assembled and may be used or copied only
in accordance with the terms of the license agreement. It is against the law to
copy the software on any medium except as specifically allowed in the license
agreement.
This product includes software that is copyright 2009, Avid Technology, Inc.,
its licensors and its licensees. All rights reserved.
This product is manufactured by Digital Vision AB under license to patent
pending applications and issued (U.S. and other) patents :
U.S. Patent Application 10/817,209, published as U.S. patent publication
2004/0196903
U.S. Patent Application 10/817,217, published as U.S. patent publication
2004/0196911
Canadian Patent Application 2521467
European Patent Application 04749684.0, published as European patent
publication 1629675.
This product includes software that is copyright 2008 RED Digital Cinema.
Digital Vision applications incorporate and are based in part on the work of :
Name
URL
Notes
FLTK
http://www.fltk.org
[1] [2]
FFmpeg
http://www.ffmpeg.org
[1]
Freetype
http://www.freetype.org
[17]
FTGL
http://ftgl.wiki.sourceforge.net
[3]
libtiff
http://www.libtiff.org
[4]
libjpeg
http://www.ijg.org/files/README
[5]
winpcap
http://www.winpcap.org/
[6]
GLEW
http://glew.sourceforge.net/
[7] [8] [9]
OpenFX
http://openfx.sourceforge.net/
[10]
mxflib
http://sourceforge.net/projects/mxflib/
[11]
© 2014 Digital Vision
UM-2014.1-07
Legal Notices
AAF
http://aaf.sourceforge.net/
[12]
OpenEXR
http://www.openexr.com/
[13]
libsigc
http://libsigc.sourceforge.net/
[1]
libsndfile
http://www.mega-nerd.com/libsndfile/
[1]
libpng
http://www.libpng.org/pub/png/libpng.
html
[14]
zlib
http://www.zlib.net/
[15]
Boost
http://www.boost.org/
[16]
Protocol
Buffers
http://code.google.com/apis/
protocolbuffers
[18]
ACES
http://github.com/ampas/aces-dev
[19]
537
Notes
[1] http://www.gnu.org/licenses/old-licenses/lgpl-2.1.html.
Included with product distribution in folder docs/licenses/.
[2] http://www.fltk.org/COPYING.php - FLTK exceptions to [1]
[3] The MIT License
Copyright (c) <year> <copyright holders>
Permission is hereby granted, free of charge, to any person obtaining a copy of this software
and associated documentation files (the "Software"), to deal in the Software without
restriction, including without limitation the rights to use, copy, modify, merge, publish,
distribute, sublicense, and/or sell copies of the Software, and to permit persons to whom the
Software is furnished to do so, subject to the following conditions:
The above copyright notice and this permission notice shall be included in
all copies or substantial portions of the Software.
THE SOFTWARE IS PROVIDED "AS IS", WITHOUT WARRANTY OF ANY KIND, EXPRESS OR
IMPLIED, INCLUDING BUT NOT LIMITED TO THE WARRANTIES OF MERCHANTABILITY,
FITNESS FOR A PARTICULAR PURPOSE AND NONINFRINGEMENT. IN NO EVENT SHALL
THE AUTHORS OR COPYRIGHT HOLDERS BE LIABLE FOR ANY CLAIM, DAMAGES OR
OTHER LIABILITY, WHETHER IN AN ACTION OF CONTRACT, TORT OR OTHERWISE,
ARISING FROM, OUT OF OR IN CONNECTION WITH THE SOFTWARE OR THE USE OR
OTHER DEALINGS IN THE SOFTWARE.
[4] Libtiff license
Copyright (c) 1988-1997 Sam Leffler
Copyright (c) 1991-1997 Silicon Graphics, Inc.
Permission to use, copy, modify, distribute, and sell this software and its documentation for
any purpose is hereby granted without fee, provided that (i) the above copyright notices and
this permission notice appear in all copies of the software and related documentation, and
(ii) the names of Sam Leffler and Silicon Graphics may not be used in any advertising or
publicity relating to the software without the specific, prior written permission of Sam Leffler
and Silicon Graphics.
© 2014 Digital Vision
UM-2014.1-07
538
Appendices
THE SOFTWARE IS PROVIDED "AS-IS" AND WITHOUT WARRANTY OF ANY KIND,
EXPRESS, IMPLIED OR OTHERWISE, INCLUDING WITHOUT LIMITATION, ANY WARRANTY
OF MERCHANTABILITY OR FITNESS FOR A PARTICULAR PURPOSE.
IN NO EVENT SHALL SAM LEFFLER OR SILICON GRAPHICS BE LIABLE FOR ANY
SPECIAL, INCIDENTAL, INDIRECT OR CONSEQUENTIAL DAMAGES OF ANY KIND, OR ANY
DAMAGES WHATSOEVER RESULTING FROM LOSS OF USE, DATA OR PROFITS,
WHETHER OR NOT ADVISED OF THE POSSIBILITY OF DAMAGE, AND ON ANY THEORY OF
LIABILITY, ARISING OUT OF OR IN CONNECTION WITH THE USE OR PERFORMANCE OF
THIS SOFTWARE.
[5] libjpeg
See : http://www.ijg.org/files/README
We are releasing this software for both noncommercial and commercial use. Companies
are welcome to use it as the basis for JPEG-related products. We do not ask a royalty,
although we do ask for an acknowledgement in product literature (see the README file in
the distribution for details). We hope to make this software industrial-quality --- although, as
with anything that's free, we offer no warranty and accept no liability.
[6] winpcap
See : http://www.winpcap.org/misc/copyright.htm
Copyright (c) 1999 - 2005 NetGroup, Politecnico di Torino (Italy).
Copyright (c) 2005 - 2009 CACE Technologies, Davis (California).
All rights reserved.
Portions Copyright (c) 1990, 1991, 1992, 1993, 1994, 1995, 1996, 1997 The Regents of the
University of California. All rights reserved.
Portions Copyright (c) 1995, 1996, 1997 Kungliga Tekniska Högskolan (Royal Institute of
Technology, Stockholm, Sweden). All rights reserved.
Portions Copyright (c) 1997 Yen Yen Lim and North Dakota State University. All rights
reserved.
Portions Copyright (c) 1993 by Digital Equipment Corporation.
Portions Copyright (C) 1995, 1996, 1997, 1998, and 1999 WIDE Project. All rights reserved.
Portions Copyright (c) 1996 Juniper Networks, Inc. All rights reserved.
Portions Copyright (c) 2001 Daniel Hartmeier All rights reserved.
Portions Copyright 1989 by Carnegie Mellon.
License included with product distribution in folder docs/licenses/.
[7] GLEW
The OpenGL Extension Wrangler Library
Copyright (C) 2002-2008, Milan Ikits <milan ikits[]ieee org>
Copyright (C) 2002-2008, Marcelo E. Magallon <mmagallo[]debian org>
Copyright (C) 2002, Lev Povalahev
All rights reserved.
Redistribution and use in source and binary forms, with or without
modification, are permitted provided that the following conditions are met:
* Redistributions of source code must retain the above copyright notice, this list of
conditions and the following disclaimer.
* Redistributions in binary form must reproduce the above copyright notice, this list of
conditions and the following disclaimer in the documentation and/or other materials
provided with the distribution.
* The name of the author may be used to endorse or promote products derived from this
software without specific prior written permission.
© 2014 Digital Vision
UM-2014.1-07
Legal Notices
539
THIS SOFTWARE IS PROVIDED BY THE COPYRIGHT HOLDERS AND CONTRIBUTORS "AS
IS" AND ANY EXPRESS OR IMPLIED WARRANTIES, INCLUDING, BUT NOT LIMITED TO,
THE IMPLIED WARRANTIES OF MERCHANTABILITY AND FITNESS FOR A PARTICULAR
PURPOSE ARE DISCLAIMED. IN NO EVENT SHALL THE COPYRIGHT OWNER OR
CONTRIBUTORS BE LIABLE FOR ANY DIRECT, INDIRECT, INCIDENTAL, SPECIAL,
EXEMPLARY, OR CONSEQUENTIAL DAMAGES (INCLUDING, BUT NOT LIMITED TO,
PROCUREMENT OF SUBSTITUTE GOODS OR SERVICES; LOSS OF USE, DATA, OR
PROFITS; OR BUSINESS INTERRUPTION) HOWEVER CAUSED AND ON ANY THEORY OF
LIABILITY, WHETHER IN CONTRACT, STRICT LIABILITY, OR TORT (INCLUDING
NEGLIGENCE OR OTHERWISE) ARISING IN ANY WAY OUT OF THE USE OF THIS
SOFTWARE, EVEN IF ADVISED OF THE POSSIBILITY OF SUCH DAMAGE.
[8] Mesa
Mesa 3-D graphics library
Version: 7.0
Copyright (C) 1999-2007 Brian Paul All Rights Reserved.
Permission is hereby granted, free of charge, to any person obtaining a copy of this software
and associated documentation files (the "Software"), to deal in the Software without
restriction, including without limitation the rights to use, copy, modify, merge, publish,
distribute, sublicense, and/or sell copies of the Software, and to permit persons to whom the
Software is furnished to do so, subject to the following conditions:
The above copyright notice and this permission notice shall be included in all copies or
substantial portions of the Software.
THE SOFTWARE IS PROVIDED "AS IS", WITHOUT WARRANTY OF ANY KIND, EXPRESS OR
IMPLIED, INCLUDING BUT NOT LIMITED TO THE WARRANTIES OF MERCHANTABILITY,
FITNESS FOR A PARTICULAR PURPOSE AND NON INFRINGEMENT. IN NO EVENT SHALL
BRIAN PAUL BE LIABLE FOR ANY CLAIM, DAMAGES OR OTHER LIABILITY, WHETHER IN
AN ACTION OF CONTRACT, TORT OR OTHERWISE, ARISING FROM, OUT OF OR IN
CONNECTION WITH THE SOFTWARE OR THE US
[9] Khronos
Copyright (c) 2007 The Khronos Group Inc.
Permission is hereby granted, free of charge, to any person obtaining a copy of this software
and/or associated documentation files (the "Materials"), to deal in the Materials without
restriction, including without limitation the rights to use, copy, modify, merge, publish,
distribute, sublicense, and/or sell copies of the Materials, and to permit persons to whom
the Materials are furnished to do so, subject to the following conditions:
The above copyright notice and this permission notice shall be included in all copies or
substantial portions of the Materials.
THE MATERIALS ARE PROVIDED "AS IS", WITHOUT WARRANTY OF ANY KIND, EXPRESS
OR IMPLIED, INCLUDING BUT NOT LIMITED TO THE WARRANTIES OF
MERCHANTABILITY, FITNESS FOR A PARTICULAR PURPOSE AND NONINFRINGEMENT.
IN NO EVENT SHALL THE AUTHORS OR COPYRIGHT HOLDERS BE LIABLE FOR ANY
CLAIM, DAMAGES OR OTHER LIABILITY, WHETHER IN AN ACTION OF CONTRACT, TORT
OR OTHERWISE, ARISING FROM, OUT OF OR IN CONNECTION WITH THE MATERIALS OR
THE USE OR OTHER DEALINGS IN THE MATERIALS.
[10] OFX
From : http://openfx.sourceforge.net/Documentation/Doxygen/ofxCore_8h-source.html
© 2014 Digital Vision
UM-2014.1-07
540
Appendices
Copyright (c) 2003-2004, The Foundry Visionmongers Ltd. All rights reserved.
Redistribution and use in source and binary forms, with or without modification, are
permitted provided that the following conditions are met:
* Redistributions of source code must retain the above copyright notice, this list of conditions
and the following disclaimer.
* Redistributions in binary form must reproduce the above copyright notice, this list of
conditions and the following disclaimer in the documentation and/or other materials
provided with the distribution.
* Neither the name The Foundry Visionmongers Ltd, nor the names of its contributors may
be used to endorse or promote products derived from this software without specific prior
written permission.
THIS SOFTWARE IS PROVIDED BY THE COPYRIGHT HOLDERS AND CONTRIBUTORS "AS
IS" AND ANY EXPRESS OR IMPLIED WARRANTIES, INCLUDING, BUT NOT LIMITED TO,
THE IMPLIED WARRANTIES OF MERCHANTABILITY AND FITNESS FOR A PARTICULAR
PURPOSE ARE DISCLAIMED. IN NO EVENT SHALL THE COPYRIGHT OWNER OR
CONTRIBUTORS BE LIABLE FOR ANY DIRECT, INDIRECT, INCIDENTAL, SPECIAL,
EXEMPLARY, OR CONSEQUENTIAL DAMAGES (INCLUDING, BUT NOT LIMITED TO,
PROCUREMENT OF SUBSTITUTE GOODS OR SERVICES; LOSS OF USE, DATA, OR
PROFITS; OR BUSINESS INTERRUPTION) HOWEVER CAUSED AND ON ANY THEORY OF
LIABILITY, WHETHER IN CONTRACT, STRICT LIABILITY, OR TORT (INCLUDING
NEGLIGENCE OR OTHERWISE) ARISING IN ANY WAY OUT OF THE USE OF THIS
SOFTWARE, EVEN IF ADVISED OF THE POSSIBILITY OF SUCH DAMAGE.
[11] mxflib
Copyright (c) 2002-2007, Matt Beard, BBC R&D and Metaglue Corporation
See : http://mxflib.cvs.sourceforge.net/viewvc/mxflib/mxflib/COPYING?
revision=1.5&view=markup
[12] AAF Public Source License
See : http://aaf.cvs.sourceforge.net/aaf/AAF/LEGAL/AAFSDKPSL.TXT?view=markup
Included with product distribution in folder docs/licenses/.
[13] OpenEXR
See : http://www.ilm.com/opensource/ilm-bsd-lic.html
Copyright (c) 2002, Industrial Light & Magic, a division of Lucas Digital Ltd. LLC All rights
reserved.
Redistribution and use in source and binary forms, with or without modification, are
permitted provided that the following conditions are met:
* Redistributions of source code must retain the above copyright notice, this list of conditions
and the following disclaimer.
* Redistributions in binary form must reproduce the above copyright notice, this list of
conditions and the following disclaimer in the documentation and/or other materials
provided with the distribution.
* Neither the name of Industrial Light & Magic nor the names of its contributors may be used
to endorse or promote products derived from this software without specific prior written
permission.
THIS SOFTWARE IS PROVIDED BY THE COPYRIGHT HOLDERS AND CONTRIBUTORS "AS
IS" AND ANY EXPRESS OR IMPLIED WARRANTIES, INCLUDING, BUT NOT LIMITED TO,
THE IMPLIED WARRANTIES OF MERCHANTABILITY AND FITNESS FOR A PARTICULAR
© 2014 Digital Vision
UM-2014.1-07
Legal Notices
541
PURPOSE ARE DISCLAIMED. IN NO EVENT SHALL THE COPYRIGHT OWNER OR
CONTRIBUTORS BE LIABLE FOR ANY DIRECT, INDIRECT, INCIDENTAL, SPECIAL,
EXEMPLARY, OR CONSEQUENTIAL DAMAGES (INCLUDING, BUT NOT LIMITED TO,
PROCUREMENT OF SUBSTITUTE GOODS OR SERVICES; LOSS OF USE, DATA, OR
PROFITS; OR BUSINESS INTERRUPTION) HOWEVER CAUSED AND ON ANY THEORY OF
LIABILITY, WHETHER IN CONTRACT, STRICT LIABILITY, OR TORT (INCLUDING
NEGLIGENCE OR OTHERWISE) ARISING IN ANY WAY OUT OF THE USE OF THIS
SOFTWARE, EVEN IF ADVISED OF THE POSSIBILITY OF SUCH DAMAGE.
[14] libpng
See : http://www.libpng.org/pub/png/src/libpng-LICENSE.txt
[15] zlib
See : http://www.zlib.net/zlib_license.html
[16] Boost Software License
See : http://www.boost.org/LICENSE_1_0.txt
Boost Software License - Version 1.0 - August 17th, 2003
Permission is hereby granted, free of charge, to any person or organization obtaining a copy
of the software and accompanying documentation covered by this license (the "Software") to
use, reproduce, display, distribute, execute, and transmit the Software, and to prepare
derivative works of the Software, and to permit third-parties to whom the Software is
furnished to do so, all subject to the following:
The copyright notices in the Software and this entire statement, including the above license
grant, this restriction and the following disclaimer, must be included in all copies of the
Software, in whole or in part, and all derivative works of the Software, unless such copies or
derivative works are solely in the form of machine-executable object code generated by a
source language processor.
THE SOFTWARE IS PROVIDED "AS IS", WITHOUT WARRANTY OF ANY KIND, EXPRESS OR
IMPLIED, INCLUDING BUT NOT LIMITED TO THE WARRANTIES OF MERCHANTABILITY,
FITNESS FOR A PARTICULAR PURPOSE, TITLE AND NON-INFRINGEMENT. IN NO EVENT
SHALL THE COPYRIGHT HOLDERS OR ANYONE DISTRIBUTING THE SOFTWARE BE
LIABLE FOR ANY DAMAGES OR OTHER LIABILITY, WHETHER IN CONTRACT, TORT OR
OTHERWISE, ARISING FROM, OUT OF OR IN CONNECTION WITH THE SOFTWARE OR
THE USE OR OTHER DEALINGS IN THE SOFTWARE.
[17] Freetype
See : http://www.freetype.org/FTL.TXT
Portions of this software are copyright copyright (c) 2006 The FreeType Project (www.
freetype.org). All rights reserved.
[18] Protocol Buffers (Google)
Copyright 2008, Google Inc.
All rights reserved.
Redistribution and use in source and binary forms, with or without
modification, are permitted provided that the following conditions are
met:
* Redistributions of source code must retain the above copyright
notice, this list of conditions and the following disclaimer.
* Redistributions in binary form must reproduce the above
© 2014 Digital Vision
UM-2014.1-07
542
Appendices
copyright notice, this list of conditions and the following disclaimer
in the documentation and/or other materials provided with the
distribution.
* Neither the name of Google Inc. nor the names of its
contributors may be used to endorse or promote products derived from
this software without specific prior written permission.
THIS SOFTWARE IS PROVIDED BY THE COPYRIGHT HOLDERS AND CONTRIBUTORS
"AS IS" AND ANY EXPRESS OR IMPLIED WARRANTIES, INCLUDING, BUT NOT
LIMITED TO, THE IMPLIED WARRANTIES OF MERCHANTABILITY AND FITNESS FOR
A PARTICULAR PURPOSE ARE DISCLAIMED. IN NO EVENT SHALL THE COPYRIGHT
OWNER OR CONTRIBUTORS BE LIABLE FOR ANY DIRECT, INDIRECT, INCIDENTAL,
SPECIAL, EXEMPLARY, OR CONSEQUENTIAL DAMAGES (INCLUDING, BUT NOT
LIMITED TO, PROCUREMENT OF SUBSTITUTE GOODS OR SERVICES; LOSS OF USE,
DATA, OR PROFITS; OR BUSINESS INTERRUPTION) HOWEVER CAUSED AND ON ANY
THEORY OF LIABILITY, WHETHER IN CONTRACT, STRICT LIABILITY, OR TORT
(INCLUDING NEGLIGENCE OR OTHERWISE) ARISING IN ANY WAY OUT OF THE USE
OF THIS SOFTWARE, EVEN IF ADVISED OF THE POSSIBILITY OF SUCH DAMAGE.
Code generated by the Protocol Buffer compiler is owned by the owner
of the input file used when generating it. This code is not
standalone and requires a support library to be linked with it. This
support library is itself covered by the above license.
[19] ACES
License Terms for Academy Color Encoding System Components
Academy Color Encoding System (ACES) software and tools are provided by the
Academy under the following terms and conditions: A worldwide, royalty-free,
non-exclusive right to copy, modify, create derivatives, and use, in source and
binary forms, is hereby granted, subject to acceptance of this license.
Performance of any of the aforementioned acts indicates acceptance to be bound
by the following terms and conditions:
Copies of source code, in whole or in part, must retain the above copyright
notice, this list of conditions and the Disclaimer of Warranty.
Use in binary form must retain the copyright notice (below), this list of
conditions and the Disclaimer of Warranty in the documentation and/or other
materials provided with the distribution.
* Nothing in this license shall be deemed to grant any rights to trademarks,
copyrights, patents, trade secrets or any other intellectual property of
A.M.P.A.S. or any contributors, except as expressly stated herein.
* Neither the name "A.M.P.A.S." nor the name of any other contributors to this
software may be used to endorse or promote products derivative of or based on
this software without express prior written permission of A.M.P.A.S. or the
contributors, as appropriate.
* This license shall be construed pursuant to the laws of the State of
California, and any disputes related thereto shall be subject to the
jurisdiction of the courts therein.
Copyright © 2012 Academy of Motion Picture Arts and Sciences (A.M.P.A.S.).
Portions contributed by others as indicated. All rights reserved.
Disclaimer of Warranty: THIS SOFTWARE IS PROVIDED BY A.M.P.A.S. AND
CONTRIBUTORS
© 2014 Digital Vision
UM-2014.1-07
Legal Notices
543
"AS IS" AND ANY EXPRESS OR IMPLIED WARRANTIES, INCLUDING, BUT NOT LIMITED TO,
THE IMPLIED WARRANTIES OF MERCHANTABILITY, FITNESS FOR A PARTICULAR
PURPOSE, AND
NON-INFRINGEMENT ARE DISCLAIMED. IN NO EVENT SHALL A.M.P.A.S., OR ANY
CONTRIBUTORS OR DISTRIBUTORS, BE LIABLE FOR ANY DIRECT, INDIRECT,
INCIDENTAL,
SPECIAL, EXEMPLARY, RESITUTIONARY, OR CONSEQUENTIAL DAMAGES (INCLUDING,
BUT NOT
LIMITED TO, PROCUREMENT OF SUBSTITUTE GOODS OR SERVICES; LOSS OF USE,
DATA, OR
PROFITS; OR BUSINESS INTERRUPTION) HOWEVER CAUSED AND ON ANY THEORY OF
LIABILITY, WHETHER IN CONTRACT, STRICT LIABILITY, OR TORT (INCLUDING
NEGLIGENCE
OR OTHERWISE) ARISING IN ANY WAY OUT OF THE USE OF THIS SOFTWARE, EVEN IF
ADVISED OF THE POSSIBILITY OF SUCH DAMAGE.
WITHOUT LIMITING THE GENERALITY OF THE FOREGOING, THE ACADEMY
SPECIFICALLY
DISCLAIMS ANY REPRESENTATIONS OR WARRANTIES WHATSOEVER RELATED TO
PATENT OR
OTHER INTELLECTUAL PROPERTY RIGHTS IN THE ACADEMY COLOR ENCODING
SYSTEM, OR
APPLICATIONS THEREOF, HELD BY PARTIES OTHER THAN A.M.P.A.S.,WHETHER
DISCLOSED OR
UNDISCLOSED.
© 2014 Digital Vision
UM-2014.1-07