1
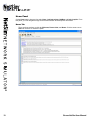
8
User Manual
8K112A
Table of Contents
Boson NetSim Overview.............................................................................................................................1
Using NetSim to Prepare for Your Certification.......................................................................................3
Contact Information.................................................................................................................................4
NetSim Technical Support.......................................................................................................................4
License Solutions....................................................................................................................................4
Getting Started.............................................................................................................................................5
System Requirements.............................................................................................................................5
Product Activation...................................................................................................................................5
Home Panel............................................................................................................................................6
Begin a Lab.............................................................................................................................................6
Menus...........................................................................................................................................................7
Menu Bar................................................................................................................................................7
File Menu..........................................................................................................................................7
Open..........................................................................................................................................7
Recent Files...............................................................................................................................7
Exit.............................................................................................................................................7
View Menu........................................................................................................................................7
Hide Toolbar...............................................................................................................................7
StatusBar Hide...........................................................................................................................7
Size to Fit on Lab Load..............................................................................................................7
Tools Menu.......................................................................................................................................8
Update NetSim...........................................................................................................................8
Console Mode............................................................................................................................8
Telnet Mode...............................................................................................................................8
Proxy Settings............................................................................................................................9
Deactivate Product.....................................................................................................................9
Activate Product.........................................................................................................................9
Lab Menu........................................................................................................................................10
Grade Lab................................................................................................................................10
Load.........................................................................................................................................10
Edit...........................................................................................................................................10
Import Lab ...............................................................................................................................10
Export Lab . .............................................................................................................................10
Import Lab Pack ......................................................................................................................10
Export Lab Pack.......................................................................................................................10
Boson NetSim User Manual
Console Menu................................................................................................................................ 11
Copy......................................................................................................................................... 11
Paste........................................................................................................................................ 11
Load Multi-Device Config......................................................................................................... 11
Save Multi-Device Config......................................................................................................... 11
Zip Multi-Device Config............................................................................................................ 11
Package Multi-Device Configs................................................................................................. 11
Load Single Device Config....................................................................................................... 11
Save Single Device Config...................................................................................................... 11
Paste Real Router Config(s)....................................................................................................12
Launch SDM............................................................................................................................12
Properties.................................................................................................................................12
Lab Text Menu................................................................................................................................13
Highlight...................................................................................................................................13
Add Ink Note............................................................................................................................13
Add Text Note...........................................................................................................................13
Remove Selected Highlight......................................................................................................13
Remove Selected Notes..........................................................................................................13
Remove Selected Highlights and Notes..................................................................................13
Launch External Viewer...........................................................................................................13
NetMap Menu.................................................................................................................................13
Open Topology.........................................................................................................................13
Apply Selected Topology..........................................................................................................14
New Topology...........................................................................................................................14
Save Topology..........................................................................................................................14
Open and Apply Topology........................................................................................................14
Lab Compiler Menu........................................................................................................................14
New Lab Pack..........................................................................................................................14
Edit Lab Pack...........................................................................................................................14
Delete Lab Pack.......................................................................................................................14
New Section.............................................................................................................................14
Edit Section..............................................................................................................................14
Delete Section..........................................................................................................................14
New Lab...................................................................................................................................14
Edit Lab....................................................................................................................................15
Delete Lab................................................................................................................................15
ii
Boson NetSim User Manual
Window Menu.................................................................................................................................15
Size To Fit................................................................................................................................15
Help Menu......................................................................................................................................15
About........................................................................................................................................15
User Manual.............................................................................................................................15
Support....................................................................................................................................15
Submit Feedback.....................................................................................................................15
Quick-Launch Toolbar...........................................................................................................................15
Load and Apply Topology...............................................................................................................15
Load Single Device Configuration (*.rtr).........................................................................................15
Load Multiple Configurations (*.nwc)..............................................................................................16
Save Single Device Configuration (*.rtr).........................................................................................16
Save Multiple Device Configuration (*.nwc)...................................................................................16
Panels.........................................................................................................................................................16
Labs Panel............................................................................................................................................16
Standard Lab Packs Tab................................................................................................................17
Search Labs.............................................................................................................................17
Available Labs..........................................................................................................................17
Lab Details...............................................................................................................................17
Custom Lab Packs Tab...................................................................................................................17
Available Labs..........................................................................................................................18
Lab Details...............................................................................................................................18
Home Panel..........................................................................................................................................19
Home Tab.......................................................................................................................................19
Welcome..................................................................................................................................20
Recent Labs.............................................................................................................................20
News........................................................................................................................................20
Lab Instructions Tab.......................................................................................................................20
NetMap Tab....................................................................................................................................21
Create a New Topology............................................................................................................22
Add Devices......................................................................................................................22
Add Connections...............................................................................................................25
Device Statistics.......................................................................................................................29
iii
Boson NetSim User Manual
Lap Compiler Tab...........................................................................................................................29
Creating the Lab Files..............................................................................................................29
Topology File.....................................................................................................................29
Lab Documentation File.....................................................................................................29
Device Configuration Files.................................................................................................30
Compiling a Lab.......................................................................................................................30
Consoles Panel.....................................................................................................................................32
Console Window.............................................................................................................................32
Settings Button...............................................................................................................................33
SDM Button....................................................................................................................................33
Troubleshooting........................................................................................................................................34
Some of my labs have locks next to them and I can’t work through them............................................ 34
Commands seem to disappear when I press the number pad ENTER key in Telnet mode................. 34
I can’t see everything on the panel I’m looking at.................................................................................34
Telnet is not working on my Windows 7 or Windows Vista computer................................................... 34
The Custom Lab Packs tab is empty....................................................................................................35
Clicking the Labs panel does nothing...................................................................................................35
iv
Boson NetSim User Manual
Boson NetSim Overview
The Boson NetSim® Network Simulator®, which includes the Boson Router Simulator®, is unique
compared to all others on the market because of the functionality it supports and its features. NetSim
utilizes Boson’s proprietary Network Simulator, Router Simulator®, and EROUTER® software
technologies, along with the Boson Virtual Packet Technology® engine, to create individual packets.
These packets are routed and switched through the simulated network, allowing NetSim to build an
appropriate virtual routing table and simulate true networking. Other simulation products on the market do
not support this level of functionality.
NetSim is a Windows®-based product that simulates a wide variety of Cisco® routers, including the 2500
series, 2600 series, 2800 series, and 3600 series routers, as well as the Cisco Catalyst 1900 series, 2900
series, and 3500 series switches. NetSim supports multiple routing protocols, including RIP, IGRP, EIGRP,
BGP, and OSPF. It supports different LAN/WAN protocols, including PPP/CHAP, ISDN, and Frame
Relay. The labs in NetSim require only the devices and functionality included with NetSim—they do not
require access to any external router or switch hardware. NetSim supports many, but not all, of the IOS
commands available on a physical router or switch. All the commands referenced in the available labs are
supported by NetSim.
Achieving Cisco CCENT, CCNA®, or CCNP® certification is the goal of many people who use this
product. The Boson NetSim covers not only the new SWITCH (642-813), TSHOOT (642-832), and
ROUTE (642-902) certifications but also the ICND1 (640-822), ICND2 (640-816), and CCNA (640-802)
certifications, among others. The included labs guide you through the configuration of routers, switches,
and workstations in a variety of scenarios. Installed labs are made available (unlocked) depending on the
activation key used to activate the product. All labs are downloaded and kept up to date after installation
regardless of the activation key used.
Activation keys unlock labs and increase the number of available commands. Beginning with the Demo
version of NetSim 8, the command set is limited to those necessary to perform the steps in the lab. For
example, if you start your studies with a CCENT activation key, you will have the command set and labs
available that are necessary to study for that exam. When you are ready to study for either the CCNA or
CCNP exam, you will need to purchase a new activation key, deactivate NetSim, and then reactivate with
the new CCNA or CCNP activation key; then, more labs and a larger command set become available.
The labs available in the Sequential lab pack when a CCENT activation key has been used to activate
NetSim 8 are shown below. A CCENT activation key also unlocks a selection of labs from the Stand-Alone
and Scenario lab packs. A small lock icon is displayed next to unavailable labs. Higher-level activation
keys allow you to work through all labs unlocked by lower level activation keys. All labs are unlocked
when a CCNP-level activation key is used.
Boson NetSim User Manual
After you load and complete an unlocked lab, you can use the grading function in NetSim to grade the
lab so that you can determine whether you completed it correctly. As you progress through the labs, you
will master the skills needed to pass the simulation questions in the Cisco certification exams. NetSim
has the ability to guide and grade, and using it for practice can actually be more helpful than using real
routers and switches. NetSim allows you to gain experience without requiring you to purchase expensive
equipment.
The Boson NetSim can be used for additional purposes than only working through labs. The included
full version of the NetMap tool allows you to practice designing and planning a network. This tool’s
functionality goes beyond that of most tools because you can actually create the router configurations that
are going to be used, save those configurations, and practice using them on simulated devices.
Routing protocol implementation is one of the more challenging tasks you may encounter.
Troubleshooting a production network can be a frustrating experience. Fortunately, you can create a
virtual copy of your network topology by using the Boson NetMap and troubleshoot the problems without
interfering with your production network. Although you can use NetSim as an aid in troubleshooting, you
should not rely only on NetSim to make decisions about a production network, because NetSim is not
designed to test real networks. Instead, it is a tool that you can use to study for Cisco certification.
In summary, Boson NetSim is a flexible and powerful product that can help you become certified and, in
some cases, can be used to create a simulation of the topology of your corporate network and help you
practice troubleshooting without using devices on the production network.
Boson NetSim User Manual
Using NetSim to Prepare for Your Certification
By incorporating NetSim as part of your process of achieving a Cisco certification, you can learn and
master the skills necessary to help you successfully complete your certification track. The purpose of
NetSim is to help you with the practical, hands-on portion of your education and to ensure that you not
only understand the concepts of routing but can actually configure and implement routing on Cisco
devices.
Mastering Cisco networking involves two fundamental tasks:
1. Learn the theory of routers and switches.
2. Gain the hands-on experience of implementing that theory by configuring the devices in a network
and testing them in a lab.
Self-studying for a Cisco certification can be a daunting task. The amount of information a CCNA
candidate is required to know and the skills that candidate is required to possess are quite extensive.
To begin learning the theory of configuring a network, you can find a good reference book or listen to
an instructor (Boson Training, www.boson.com/training-support-topics, offers a full slate of classes and
bootcamps). But a reference book might not be enough. The book will not give you the practical, handson experience of routing and switching that you can learn from NetSim—experience that will help you
build on the theoretical knowledge you learned from the reference book.
Real equipment gives you the ability to practice on actual routers and switches, but it also is a very
costly way to practice and leaves a lot of room for error. The Boson NetSim, on the other hand, is an
excellent tool to help you prepare for the CCNA (www.boson.com/certification/CCNA) and CCNP (www.
boson.com/certification/CCNP) exams. NetSim simulates the behavior of a network and does not just
return preprogrammed responses to expected command inputs. It allows you to create virtual packets
and virtual frames that will be routed and switched through the simulated network. Aside from physically
plugging in the cables and listening to the fan noise, your experience with the simulated network will be
much the same as your experience with a fully functional lab rack without the expense of the hardware.
NetSim will enable you to practice various configurations and master helpful skills.
Once you feel you have mastered both the theory (www.boson.com/training-support-topics) and the
practical labs (www.boson.com/support/netsim-cisco-network-simulator), you can test your knowledge
by using the Boson ExSim-Max practice exam products available at the ExSim-Max home page (www.
boson.com/exsim-max-practice-exams). Boson ExSim-Max products include complex multiple-choice
questions, drag-and-drop questions, Boson NetSimX simulation questions, and trouble tickets.
The Boson NetSim Network Simulator is the most comprehensive product on the market for learning how
to configure a Cisco router. The Boson NetSim will not only help you become certified, it will actually help
you learn and understand how to configure routers, switches, and networks.
Boson NetSim User Manual
Contact Information
EMAIL:
[email protected]
PHONE:
877-333-EXAM (3926)
615-889-0121
FAX:
615-889-0122
ADDRESS:
25 Century Blvd. Ste. 500
Nashville, TN 37214
Copyright © 1996-2012 Boson Software, LLC. All rights reserved. NetSim software and documentation
are protected by copyright law.
NetSim Technical Support
•
To review NetSim support topics, go to the NetSim Products Support Topics page (www.boson.com/
support/netsim-support-topics).
•
To submit a support ticket, go to Boson’s Web site (www.boson.com) > log in to your account > click
Support Tickets tab > start a new ticket.
License Solutions
•
Single-User License Agreement (SULA) – You can review the SULA here (www.boson.com/SULA).
•
License Server – For our unique license-server solutions and volume discounts, contact us at www.
boson.com, 877.333.EXAM or [email protected].
Boson NetSim User Manual
Getting Started
System Requirements
•
Supported Operating Systems: Windows 7, Windows Vista, Windows XP
•
.NET Framework: Microsoft .NET Framework Version 3.5
•
Processor: 1-GHz Pentium processor or equivalent (Minimum); 3-GHz Pentium processor or
equivalent (Recommended)
•
RAM: 512 MB (Minimum); 2 GB (Recommended)
•
Hard Disk: Up to 100 MB of available space
•
Display: 1024 x 768, 256 colors (Minimum); 1024 x 768 high color, 32-bit (Recommended)
•
Active Internet connection
Product Activation
You must have a Boson account to download the NetSim Demo. To create a free account, visit the Boson
Online Account page (https://www.boson.com/Account/Default.aspx) and enter a valid e-mail address to
begin creating an account.
When you first open NetSim, you will be presented with a Product Activation dialog box. Enter your
e-mail address, password, and registration key; this information should be in the purchase receipt you
received via e-mail, or you can find the receipt online on your Boson Online Account page (https://www.
boson.com/Account/Default.aspx). You must have an active Internet connection in order to activate the
full version of NetSim.
After a successful activation, the lab packs will be updated and NetSim will be ready for you to use.
Installed labs are made available (unlocked) depending on the activation key used to activate the product.
A small lock icon is displayed next to unavailable labs. To make additional labs available, you will need to
purchase a new activation key, deactivate NetSim, and then reactivate with the new activation key; then,
more labs and a larger command set become available.
If you have not purchased an activation key for NetSim, you will not be able to activate the full version of
NetSim. However, you can choose to continue in Demo mode. When you are running the Demo mode,
Boson NetSim User Manual
only the demo lab and a limited set of commands are functional. To purchase the full version of NetSim,
visit the About NetSim page (www.boson.com/netsim-cisco-network-simulator) of our Web site.
You can open NetSim from the shortcut installed during the download or from the Start menu by
clicking Boson Software > Boson NetSim 8.0 > Boson NetSim. If you are a student using NetSim 8
at a learning institution, you should launch NetSim 8 from the Start menu by clicking Boson Software
> Boson NetSim 8.0 > Boson NetSim LS Client. This will enable you to configure NetSim 8 to
authenticate with the Boson NetSim License Server.
Home Panel
The Home panel is displayed when you open NetSim. There are many components of this panel and
various functions and features that you can access from this screen. After NetSim loads, you can access
additional functions by selecting a different tab or an option from the Menu Bar, by expanding the Labs
panel and opening a lab, or by returning to a previously loaded lab quickly by selecting it from the Recent
Labs section of the Home tab.
You can expand or minimize each panel by clicking the arrow on the panel label or by moving the splitter
control between the panels. A splitter control is a divider between panels that you can use to resize a
panel to fit your preferences.
Begin a Lab
1. You can begin a preloaded Boson NetSim lab by performing one of the following tasks:
•
Expand the Labs panel; then, on the Standard Lab Packs tab of the Labs panel, double-click
the lab you want to open.
Boson NetSim User Manual
•
Click to highlight a lab, then click Lab > Load.
•
Select a lab from the list of Recent Labs on the Home tab, and click Yes to open the lab.
2. After you have loaded a lab, click the Lab Instructions tab on the Home panel and read through the
lab instructions.
3. From the Devices drop-down menu on the Consoles panel, select the device(s) that you need to
configure in order to complete the lab and follow the steps in the lab. You can also select the device
you want to configure by clicking the NetMap tab, right-clicking the device, and selecting Configure
in Simulator.
4. When you have completed the lab, click Lab > Grade Lab to ensure that you have completed it
successfully.
5. You can choose to save your single device configuration or multiple device configurations by
selecting the appropriate option in the Console menu. There is more information about saving device
configurations in the Console Menu or the Quick-Launch Toolbar section of this manual.
Menus
The menu options in NetSim 8 enable you to easily navigate through the labs, the NetMap, the Lab
Compiler, the Consoles Panel, and more. These menus include the Menu Bar and the Quick-Launch
Toolbar.
Menu Bar
File Menu
The options in this menu tree enable you to open a topology file, open a single device configuration file,
and open multiple device configuration files, as well as exit the program.
Open
This option enables you to select a configuration file to open. The supported file extensions are *.nwc,
which loads multiple device configurations; *.rtr, which loads a single device configuration in the active
console; and *.top, which opens a NetMap file.
Recent Files
If you previously opened files, including *.top and *.nwc files, they will appear in this list. You can click
a file to open it.
Exit
This option closes the program.
View Menu
The options in this menu tree enable you to alter the way you view the Home screen.
Hide Toolbar
Select this option to hide the Quick-Launch Toolbar. To restore the Quick-Launch Toolbar, clear this
option.
StatusBar Hide
Select this option to hide the status bar, which displays the open file and the status of NetSim, on the
bottom of the screen. To restore the status bar, clear this option.
Size to Fit on Lab Load
Boson NetSim User Manual
When selected, this option will resize the Consoles panel and the NetMap tab to the default size
when a lab is loaded if either had been minimized.
Tools Menu
The options in this menu tree enable you to update NetSim, choose the CLI mode and proxy settings,
activate NetSim, and deactivate NetSim.
Update NetSim
When you click this option, NetSim will check Boson’s update server and determine whether
application updates are available. If updates are available for any of the NetSim application
components, you will have the option to download and install them. As with any software product, you
should routinely check for product updates, feature enhancements, and bug fixes that may not have
been available at the time you received the product.
Note:
NetSim must close before it can check for updates. If you are in the middle of working on
a lab and want to update NetSim, you should save your configurations before updating
NetSim.
Console Mode
Console Mode is NetSim’s CLI default mode. You can issue commands on the active device in
console section of the Consoles panel. Additionally, from the Consoles panel, you can access all the
available devices for the currently loaded lab. The alternative to Console Mode is Telnet Mode.
Telnet Mode
Telnet Mode gives you the option to launch routers, switches, and workstations by using real industrystandard Telnet. A separate Telnet window will be displayed for each device you access. These
windows allow you to view the CLI for multiple devices at the same time, which enables you to see
changes on neighboring devices caused by configurations performed on the active device, such as
when interfaces come up or go down as interface configurations commands are issued. You can keep
all Telnet windows open while you are completing the lab and click among the windows to configure
the different devices. To open a Telnet window, select the device from the drop-down box on the
Consoles panel and click Configure, or right-click a device on the NetMap tab and click Configure
in Simulator.
When you are finished configuring each device, simply close the Telnet window. To exit Telnet Mode
and return to Console Mode, click Tools > Console Mode.
Boson NetSim User Manual
Proxy Settings
If your computer is behind a proxy server, enter your proxy settings into the Proxy Settings dialog
box in order to access the Internet for product registration and to download product features. You
must have an active Internet connection in order to activate and update NetSim.
Deactivate Product
CAUTION: This function is used to remove the license from your computer. You should never use
this special option unless you are instructed to do so by Boson technical support.
This option permanently removes the Unique Serial Number (registration key) from your computer.
Activate Product
The first time you start NetSim or when you select the Activate Product option from the Tools menu,
you will be presented with a Product Activation dialog box. Enter your e-mail address, password,
and registration key; this information should be in the purchase receipt that you received via e-mail, or
you can find the receipt online on your Boson Online Account page (https://www.boson.com/Account/
Default.aspx). You will be notified when the application is successfully activated. You must have an
active Internet connection in order to activate the full version of NetSim.
Boson NetSim User Manual
If the activation was unsuccessful, you will be presented with the Product Activation dialog
box again. If you have forgotten or lost your product registration key, you can retrieve it from the
Purchase History tab of your Boson Online Account page (https://www.boson.com/Account/Default.
aspx); if you do not have a product registration key, you can purchase one from the Boson Web site
(www.boson.com). If you have difficulty logging in to your Boson online account, please contact us at
[email protected].
If you have not purchased an activation key for NetSim, you will not be able to activate the full version
of NetSim. However, you can choose to continue in Demo mode. When you are running the Demo
mode, only the demo lab and a limited set of commands are functional. To purchase the full version
of NetSim, visit the About NetSim page (www.boson.com/netsim-cisco-network-simulator) of our Web
site. If you are having difficulty with NetSim 8 activation, please contact us at [email protected].
After a successful activation, the lab packs will be updated and NetSim will be ready for you to use.
Installed labs are made available (unlocked) depending on the activation key used to activate the
product. A small lock icon is displayed next to unavailable labs. To make additional labs available,
you will need to purchase a new activation key, deactivate NetSim, and then reactivate with the new
activation key; then, more labs and a larger command set become available.
Lab Menu
This menu tree enables you to perform all the functions you need once a lab is loaded.
Grade Lab
After you have completed a lab, click this option to verify that you have completed the lab
successfully.
Load
When you click a lab on the Labs panel, click this option to load the lab instructions and devices.
Edit
After you have opened the Custom Lab Packs tab of the Labs panel, you can click this option to
edit the lab. You can edit the name and files associated with the lab. For more information, see the
Compiling a Lab section of this manual.
Import Lab
After you have selected a lab from the Custom Lab Packs tab, you can click this option to import a
lab from a lab archive. The supported file extension is *.labx. Select or type the file name, and click
Open.
Export Lab
After you have selected an individual lab from the Custom Lab Packs tab, you can click this option
to export a lab. The file extension is *.labx. Select a location, select or type the file name, and click
Save.
Import Lab Pack
After you have opened the Custom Lab Packs tab, you can click this option to import a lab from a
lab pack archive. The supported file extension is *.lpx. Select or type the file name, and click Open.
Export Lab Pack
After you have selected a lab pack from the Custom Lab Packs tab, you can click this option to
export a lab pack. The file extension is *.lpx. Select a location, select or type the file name, and click
Save.
10
Boson NetSim User Manual
Console Menu
This menu tree enables you to modify, load, and save configuration files.
Note: This menu tree is active only after you have loaded a lab.
Copy
Select text in the Consoles panel, then click Copy or press the ENTER key to copy the text.
Paste
Click this option or right-click in the Console window to paste text into the open devices configuration.
Load Multi-Device Config
This option loads a saved “snapshot” of every single device configuration that was previously saved
using the Save Multi-Device Config option. The supported file extension is *.nwc.
Save Multi-Device Config
This option takes a “snapshot” of every single device that is currently loaded in NetSim and
allows you to save all of your device configurations at once. This is comparable to making a TFTP
configuration backup of all devices (routers, switches, and workstations) on your entire network with
one click.
Note:
This will save one *.rtr file for each device currently loaded in NetSim. This will also save
a single network configuration (*.nwc) file, which will be used to link together the *.rtr files.
Zip Multi-Device Config
This option creates a zip file that contains the current running configurations of all loaded devices.
This feature is useful when sending files to an instructor or when requesting assistance from Boson
customer support.
Package Multi-Device Configs
This option creates an encrypted file that contains the current running configurations of all loaded
devices. This feature is useful when sending files to an instructor but should not be used when
requesting assistance from Boson customer support.
Load Single Device Config
This option erases your current device configuration and then loads a device configuration from a
saved file (*.rtr). This option does not allow you to load a new topology (*.top) file into the NetMap. To
do that, click the NetMap tab and select the Open Topology option from the NetMap menu.
Save Single Device Config
This option saves a single device configuration to load into NetSim at a later time.
Note:
11
All device configuration files are saved with the *.rtr extension.
Boson NetSim User Manual
Paste Real Router Config(s)
This option allows you to paste the running configuration from a real router into a device in NetSim.
Selecting this menu option will open a dialog box into which you can paste or type the desired
configuration. The configuration will be loaded into the active device in the NetSim interface.
Launch SDM
This option opens NetSim Router and Security Device Manager. Type the device IP address or host
name in the resulting dialog box, and click Launch.
Note:
This option is available only with certain labs and can only be loaded from a workstation.
Properties
This option enables you to customize the appearance of the console window. Click the appropriate
drop-down menu box to select the font family, size, and weight and to change the foreground and
background colors. Click Ok to apply the settings or Cancel to cancel the changes.
12
Boson NetSim User Manual
Lab Text Menu
This enables you to annotate various parts of the instructions.
Note: This menu tree is available only after you have loaded a lab. You must click the Lab Instructions
tab to see the options available within the menu.
Highlight
Select text in the lab instructions, and click this option to highlight that text. This option is also
available in the right-click options when text is selected.
Add Ink Note
Select text in the lab instructions, and click this option to add a note to that text. You can then use
a tablet and stylus to write a note, or you can click and write as if your mouse were a pen. To close
the note, click the minimize icon in the top right corner. To review the note, move the mouse over the
text and click the small box that appears below the text. This option is also available in the right-click
options when text is selected.
Add Text Note
Select text in the lab instructions, and click this option to add a note to that text. Type your note. To
close the note, click the minimize icon in the top right corner. To review the note, move the mouse
over the text and click the small box that appears below the text. This option is also available in the
right-click options when text is selected.
Remove Selected Highlight
Select the highlighted text in the lab instructions, and click this option to remove the highlight from the
selected text. This option is also available in the right-click options when text is selected.
Remove Selected Notes
Select text in the lab instructions, and click this option to remove any notes from the selected text.
This option is also available in the right-click options when text is selected.
Remove Selected Highlights and Notes
Select text in the lab instructions, and click this option to remove any highlights and notes from the
selected text. This option is also available in the right-click options when text is selected.
Launch External Viewer
Click this option to open the lab instructions in a new window. You can then move the instructions
to a second monitor or place it beside, above, or below the original NetSim window. This feature
provides multi-monitor support so that you can view the lab document on one monitor while entering
commands on a second monitor.
NetMap Menu
This enables you to modify the topology.
Note: This menu tree is available only when the NetMap tab is open.
Open Topology
This option enables you to open a saved topology. In the resulting dialog box, select a *.top file to
open, and click Open. You can then edit the topology in the NetMap. The topology will not be applied
to devices until you select it on the NetMap tab and click Apply Selected Topology.
13
Boson NetSim User Manual
Apply Selected Topology
This option will apply the topology that has been selected on the NetMap tab to the devices and
enable you to configure the devices in the simulator on the Consoles panel. The topology can be
one that you created yourself or one from a previously opened lab. To learn more about configuring
devices, see the Configure in Simulator section of this menu.
Note:
Loading a new topology will close your current console session. This will load the
topology with default device configurations only; it will not load any custom or saved
device configuration files, nor will it load a specific lab’s instructions.
New Topology
This option opens an additional New Topology tab in the NetMap panel. You can then design your
own topology. See the Create a New Topology section of this manual for more information.
Save Topology
This option enables you to save the current topology in the NetMap. The file will be saved as a *.top
file.
Open and Apply Topology
This option enables you to open and apply a previously saved topology. When this option is selected,
you can immediately begin configuring the devices in the simulator on the Consoles panel.
Lab Compiler Menu
From this menu tree, you can perform the functions needed to compile and edit custom labs and lab
packs. For more information about the feature, see the Compiling a Lab section of this manual.
Note: This menu tree is available only when the Lab Compiler tab is open.
New Lab Pack
Click this option to begin creating a new lab pack. Type a name in the Name field under Lab Pack,
and click Save.
Edit Lab Pack
Select a lab pack on the Custom Lab Packs tab, and click this option to edit the lab pack. Click Save
after you have completed your changes.
Delete Lab Pack
Select a lab pack on the Custom Lab Packs tab, and click this option to delete the lab pack.
New Section
Select a lab pack on the Custom Lab Packs tab, and click this option to add a new section to the
custom lab pack. Type a name in the Name field under Section, and click Save.
Edit Section
Select a section on the Custom Lab Packs tab, and click this option to edit the section. Click Save
after you have completed your changes.
Delete Section
Select a section on the Custom Lab Packs tab, and click this option to delete the section.
New Lab
Select a section on the Custom Lab Packs tab, and click this option to add a new lab to that section.
Type a name in the Name field under Lab, type a description, add all the required files (*.top and
*.xps) and optional files (*.nwc), and click Save.
14
Boson NetSim User Manual
Edit Lab
Select a lab on the Custom Lab Packs tab, and click this option to edit the lab name, the description,
and the files within that lab. Click Save to continue.
Delete Lab
Select a lab on the Custom Lab Packs tab, and click this option to delete the lab.
Window Menu
Size To Fit
If you have modified the size of the Labs panel, the Home panel, and the Consoles panels within
NetSim by minimizing the panel or by moving the splitter control, you can select this option and
NetSim will resize the panels to their default settings.
Help Menu
The options in this menu tree enable you to find out more information about the Boson NetSim Network
Simulator and how to find support if you need it.
About
Click this option to display basic information about NetSim, including the version and company
information.
User Manual
Click this option to be directed to the Boson NetSim User Manual, the document you are reading now,
which guides you through the features and functionalities of NetSim.
Support
Click this option to be directed to the Boson NetSim support page (www.boson.com/support/netsimsupport-topics), where you can see frequently asked questions and find the best way to contact
Boson if your questions have not been answered elsewhere. You must have an active Internet
connection in order to view this information.
Submit Feedback
Click this option to be directed to the Boson Web site (www.boson.com). You must have an active
Internet connection in order to be able to submit feedback.
Quick-Launch Toolbar
Load and Apply Topology
Click this icon to load a topology to the NetMap and apply it to devices. Applying this topology will
replace your current console session with the devices from the new topology. The supported file extension
is *.top.
Load Single Device Configuration (*.rtr)
Click this icon to load a single device configuration. The supported file extension is *.rtr. If you have
not previously loaded a lab or a topology, this option will be unavailable.
15
Boson NetSim User Manual
Load Multiple Configurations (*.nwc)
Click this icon to load multiple device configurations. The supported file extension is *.nwc. If you
have not previously loaded a lab or a topology, this option will be unavailable.
Save Single Device Configuration (*.rtr)
Click this icon to save a single device configuration file. The file will be saved as an *.rtr file. If you
have not previously loaded a lab or a topology, this option will be unavailable.
Save Multiple Device Configuration (*.nwc)
Click this icon to save multiple device configuration files. The file will be saved as an *.nwc file. If you
have not previously loaded a lab or a topology, this option will be unavailable.
Panels
Labs Panel
On the Labs panel, there are two tabs: Standard Lab Packs and Custom Lab Packs. The scroll bars on
the right and on the bottom of this panel allow for ease of viewing. As an alternative to scrolling across to
see the entire lab name, you can click and drag the splitter control between the Labs panel on the left and
the Home and Consoles panels on the right to expand the Labs panel. Click the arrow next to Labs to
minimize or restore the panel, or click Window > Size To Fit.
16
Boson NetSim User Manual
Standard Lab Packs Tab
There are three sections on this tab: Search Labs, Available Labs, and Lab Details.
Search Labs
You can use the Search Labs section to search for a specific term within a lab description. You can
search throughout all the available labs, or you can search through the curriculum. For example,
if you want to test your Network Address Translation (NAT) skills, you could type nat in the search
box and press ENTER. If ALL is selected, you will see labs addressing NAT from the Stand-Alone,
Sequential, Scenario, ROUTE, and Supplemental lab packs. If ROUTE were selected, you would see
only the ROUTE Lab 3 - Network Address Translation lab.
Note:
If no lab appears in your search result, select ALL to see all available options. To view all
labs, delete the search term.
Click the arrow next to Search Labs to minimize or restore the section.
Available Labs
There are over 150 labs in NetSim 8, and these labs are categorized in specific categories. The
lab packs are Stand-Alone Labs, Sequential Labs, Scenario Labs, ROUTE Labs, SWITCH Labs,
TSHOOT Labs, Supplemental Labs, and Demo Labs. Each lab pack is expanded by default, but you
can click the negative sign (–) next to the category to minimize it. To open a lab in the NetMap and the
Consoles panel and to view the lab instructions, double-click the lab.
Lab Details
The information in this section contains the curriculum that the lab is associated with and a brief
description of the lab. Click an individual lab to view summary information about the lab. Click the
arrow next to Lab Details to minimize or restore the section.
Custom Lab Packs Tab
There are two sections on this tab: Available Labs and Lab Details. Custom labs are those that you
create or that are provided by an instructor. To learn how to compile your own labs using NetSim, see
the Compiling a Lab section of this manual.
17
Boson NetSim User Manual
Available Labs
If any labs are available on the Custom Lab Packs tab of the Labs panel, double-click the lab you
want to load; custom labs are those you create yourself by using the Lab Compiler or those that have
been provided by an instructor.
You can also right-click a top-level lab pack to see a menu with four options: Edit Lab Pack, Add
New Section, Delete Lab Pack, and Export Lab Pack. The middle-level labs have a right-click
menu with four options: Edit Section, Add New Lab, Delete Section, and Import Lab. The
individual labs have a right-click menu with three options: Edit Lab, Delete Lab, and Export.
To find out more information about creating custom labs and the menu options, see the Compiling a
Lab section of this manual.
Each category is expanded by default, but you can click the negative sign (–) next to the category to
minimize it.
Lab Details
The information in this section contains a brief description of the lab, if one has been assigned. Click
an individual lab to view summary information about the lab. Click the arrow next to Lab Details to
minimize or restore the section.
18
Boson NetSim User Manual
Home Panel
On the Home panel, there are four tabs: Home, Lab Instructions, NetMap, and Lab Compiler. From
this panel, you can navigate through all the relevant NetSim and lab-specific information.
Home Tab
There are three sections on this tab: Welcome, Recent Labs, and News. Click the arrow next to
Home to minimize or restore the panel.
19
Boson NetSim User Manual
Welcome
In this section, you can learn how to get started with NetSim 8, and you can quickly load a lab, open a
new topology, and view the User Manual.
Recent Labs
This displays the five most recent labs you opened. To load a lab from the Recent Labs section, click
the lab and click Yes in the resulting dialog box. If you cannot see this section, click and drag the
splitter control between the Home panel and the Consoles panel to expand it or click the arrow next
to Consoles to minimize the panel.
News
This displays updates and special offers from the Boson Web site (www.boson.com). Scroll through
this section to see the latest news and information, and click more to view the related offer on the
Web site. If you are not connected to the Internet, you might not see any news in this section. To be
sure you can see the latest news from Boson, make sure that you are connected to the Internet. If
you have an active Internet connection but cannot see this section, click and drag the splitter control
between the Home panel and the Consoles panel to expand it or click the arrow next to Consoles to
minimize the panel.
Lab Instructions Tab
After you have loaded a lab, you can view the instructions for the currently loaded lab, choose to print the
lab, highlight a section of the instructions to copy, and change the view by clicking any of the icons at the
top of this tab. Click the arrow next to Lab Instructions to minimize or restore the section.
You can also type text into the search box to find specific terms in the lab. You can click the down arrow
(v) on the far right of the search box to choose to match the whole word only or to match case. Use
the left and right arrows next to the search box to find the terms you are searching for throughout the
document.
Note: If you have selected to match case, for example, and then decide to match the whole word only
and not case, you must click Match case again to remove it as a selected search parameter.
20
Boson NetSim User Manual
NetMap Tab
You can view the currently loaded lab’s topology and any other open topologies on this tab. You can also
select a device to configure in the Consoles panel by right-clicking the device and clicking Configure in
Simulator. Click the arrow next to NetMap to minimize or restore the section. If you cannot see all the
information on this panel, click and drag the splitter control between the NetMap panel and the Consoles
panel to expand it or click the arrow next to Consoles to minimize the panel.
You can expand the Navigation section by clicking the arrow next to Navigation. The Navigation section
enables you to have the best view of each device. You can also add new devices from this section.
Note:
21
If you have a scroll button on your mouse, you can use it to increase or decrease the size of the .
devices in the NetMap window. If multiple topology tabs are open, click the tab that is named in .
accordance with the lab you currently have open. If you have forgotten which lab you are working .
on, you can see the lab name in the status bar. In this example, the lab open is Stand-Alone Lab .
1 – Using NetSim and the appropriate tab is standalone1.top.
Boson NetSim User Manual
Create a New Topology
If you are creating a custom lab or want to gain extra experience with new topologies, you can use
NetSim to create topologies with up to 100 devices. Note, however, that larger topologies might cause
slow performance on computers that do not have sufficient processing power and memory. You can
use this feature to create a topology file (*.top) that can be used in a custom lab. To learn more, see
the Compiling a Lab section of this manual.
To create a new simulated network topology, perform the following steps.
1. Click the NetMap tab on the Home panel, and do one of the following:
•
Select a New Topology tab.
•
Click NetMap > New Topology from the menu bar.
•
On any open Topology tab, expand the Navigation section and click New Topology.
Note: You can rename a New Topology tab by double-clicking the current name on the tab .
and modifying it.
2. Expand the Navigation section, and click the Add Device button.
3. Follow the steps below to add routers, switches, workstations, and IP phones.
Add Devices
Add a Router
1. On the NetMap tab, expand the Navigation section and click the Add Device button.
2. Choose a router from the resulting Add Device dialog box. The menus for the available
devices are minimized by default, but you can expand them by clicking the plus sign (+) next
to each category.
3. Select the number of add-ons and the type of connection for each add-on.
Note: Some routers might note allow you to select the number of add-ons and the type of .
connection.
4. Choose a name for the router; you can use the default name or type a name in the text box.
You can rename a device at any time by clicking the name in the NetMap and modifying it.
5. Click Create Router.
6. Add any additional desired devices to the network.
22
Boson NetSim User Manual
Add a Switch
1. On the NetMap tab, expand the Navigation section and click the Add Device button.
2. Choose a switch from the resulting Add Device dialog box. The available devices menus
are minimized by default, but you can expand them by clicking the plus sign (+) next to each
category.
3. Choose a name for the switch; you can use the default name or type a name in the text box.
You can rename a device at any time by clicking the name in the NetMap and modifying it.
4. Click Create Switch.
5. Add any additional desired devices to the network.
Add a Workstation
1. On the NetMap tab, expand the Navigation section and click the Add Device button.
2. Choose a workstation from the Other Devices category in the resulting Add Device dialog
box. The available devices menus are minimized by default, but you can expand them by
clicking the plus sign (+) next to each category.
23
Boson NetSim User Manual
3. If you have added the WinPC device, select a PC option if desired (you can choose from
Traffic generator, TFTP Server, AAA Server, and VPN Client).
4. Choose a name for the workstation; you can use the default name or type a name in the text
box. You can rename a device at any time by clicking the name in the NetMap and modifying
it.
5. Click Create PC.
Add an IP Phone
1. On the NetMap tab, expand the Navigation section and click the Add Device button.
2. Choose an IP phone from the Other Devices category in the resulting Add Device dialog
box. The available devices menus are minimized by default, but you can expand them by
clicking the plus sign (+) next to each category.
3. Choose a name for the phone; you can use the default name or type a name in the text box.
You can rename a device at any time by clicking the name in the NetMap and modifying it.
4. Click Create 7961.
24
Boson NetSim User Manual
Add Connections
To complete the network, right-click each device on the NetMap. You will see a menu with four
options: Configure in Simulator, New Connection, Existing Connections, and Delete.
Configure in Simulator
When the topology is loaded into the simulator, clicking this option opens on the Consoles panel
a console session to the selected device. To learn how to load and apply a topology, see the Load
and Apply Topology section of this manual. Configurations you make using this option will not
be saved with the topology file. To learn how to your configuration changes, see the Save MultiDevice Config section or the Save Single Device Config section of this manual.
New Connection
Configure a new connection for a device by performing the following steps:
1. After you right-click a device or the NetMap and click New Connection, select an interface
type from the Interface Type drop-down box.
a. If you select All (the default option), Console, or FastEthernet, select .
the local interface, remote device, and remote interface from the drop-.
down list boxes.
b. If you select Ethernet, GigabitEthernet, or BRI, select the local .
interface (if available).
c. If you select Serial, you must also select Point to Point or Frame Relay.
i.
If you select Point to Point, you will not be able to select a .
remote interface.
ii. If you select Frame Relay to create a Frame Relay connection, .
see the Frame Relay Connections section of this manual for .
information on how to complete this connection.
2. After configuring the desired connection, click Connect. The new connection will appear on
the NetMap.
25
Boson NetSim User Manual
Frame Relay Connections
To create a Frame Relay connection, perform the following steps:
1. Add routers to the topology; the routers that will be included in the Frame Relay connection
must have Serial interfaces.
2. Right-click one of the routers to be included in the connection, and select New Connection.
3. Select Serial as the interface type, and select Frame Relay.
4. Click Connect.
5. In the Frame Relay dialog box, type a name for the Frame Relay node in the Name field.
6. Select an option from the Number of Nodes; the number represents the number of routers
that will participate in the Frame Relay connection).
26
Boson NetSim User Manual
7. For each node, select the associated router and interface next to From: 1st Router and
From: interface. Note that the To: DLCI Destination becomes populated with device
names.
Note: You must select a different router for each node.
8. For each node, assign a DLCI value in each To: DLCI Destination field for the remote
routers. For example, for the link from Router1 to Router2, you could use 102.
27
Note: The DLCI value must be a number value.
Boson NetSim User Manual
9. Click Apply Settings. The exhibit below shows a completed Frame Relay connection:
Existing Connections
In the Existing Connections dialog box, you can see the type of device and the currently
connected interfaces.
CAUTION: There is no undo and no confirmation dialog box; be sure that you really want to .
delete a connection before clicking Delete.
To delete a connection, click to highlight the connection. Click Save to save the connection.
Delete
CAUTION: There is no undo and no confirmation dialog box; be sure that you really want to .
delete the selected device and associated connections before clicking Delete.
This deletes the device and associated connection(s) from the topology.
28
Boson NetSim User Manual
Device Statistics
You can use your mouse to hover over a device on the NetMap and then click Device Statistics
to view statistics that are specific for that device. In the exhibit below, you can see the statistics for
Router1:
Lap Compiler Tab
The Lab Compiler can be used to create, edit, and delete custom lab packs that contain personalized
documentation, topologies, and configurations. For example, you can use the Lab Compiler to create a
custom lab pack for a classroom setting and include a custom network topology, documentation, grading
functionality, and beginning configurations for students to practice with. The Lab Compiler is included in
every version of NetSim.
Classroom instructors commonly create custom labs that can be used both in the classroom and
as homework assignments that follow the syllabus used in the course. Students can use homework
assignments to practice the commands and configurations they learned in class and to prepare for the
topics covered in the next day’s lecture. An instructor can add multiple labs to a single lab pack, covering
a variety of concepts, and use custom labs to test the students’ knowledge about specific networking
concepts. To create a functional custom lab pack, you must create the appropriate lab files and then
compile the lab.
Creating the Lab Files
To create a lab for a lab pack, you must first create a topology file and save it from the NetMap
tab. The topology file and lab documentation file are required; however, the initial (loading) device
configuration files and the completed (grading) device configuration files for the lab are optional. The
configuration files can all be configured in NetSim.
Topology File
The topology file (*.top) contains the network design that will be simulated in the lab; this file must be
created in NetSim. To learn how to create a topology file, see the Create a New Topology section of
this manual.
Lab Documentation File
When creating the lab documentation (the supported file extension is *.xps), you should save the file
to a folder named for the lab on your computer. You can then save the rest of the lab files in the same
place.
29
Boson NetSim User Manual
Device Configuration Files
If you want to include loading and/or grading configuration files, you should perform the following
steps:
1. Load the topology into NetSim (NetMap tab > NetMap > Open Topology).
2. Access the console of each device (right-click the device > Configure in Simulator).
3. Create the initial (loading) and/or completed (grading) configurations.
4. Save these configurations as configuration files by clicking Console > Save Multi-Device
Config.
When saving the configuration files, it is a good practice to use “loading” as the file name for loading
configurations and “grading” as the file name for the completed configurations.
When multiple device configurations are saved, a primary configuration file (*.nwc) for the topology
is created. Additionally, one device configuration file (*.rtr) for each device in the topology is created.
Only one *.nwc file will be created; however, the number of *.rtr files will be equal to the number of
devices in the topology.
Loading configurations are used to set the starting parameters desired by the instructor. Grading
configurations can be used to enable students who work through the steps in the lab to easily
determine whether they have completed the lab successfully.
Compiling a Lab
To create a new lab pack, open the Custom Lab Packs tab and perform the following steps:
1. On the Lab Compiler tab, click New Lab Pack.
2. Type a name in the Name field under Lab Pack, and click Save.
3. On the Custom Lab Packs tab, right-click the new lab pack you just created and click Add New
Section.
4. Type a name in the Name field under Section, and click Save.
30
Boson NetSim User Manual
5. Right-click the new section you just created, and click Add New Lab.
6. Type a name in the Name field under Lab, and add a description if desired.
7. Click the Add File button to add files to the lab; supported file extensions are *.top (topology;
required file), *.xps (instructions; required file), and *.nwc (device configuration; optional files).
First add the *.top file, then add the *.xps file. The *.nwc files are optional and can be added next
if desired; after adding *.nwc files, select the file type from the File Type drop-down list box.
Note: A topology file and instruction file are required. Only one document file, one loading .
configuration file, and one grading configuration file can be added to a single lab.
8. Continue adding files until your lab is complete.
9. Click Save to save the lab.
31
Boson NetSim User Manual
10. To add additional labs to the lab pack section, repeat steps 5 through 9 until the lab pack section
is complete.
11. You can edit, add, delete, import, and export lab packs, sections, and labs by right-clicking a lab
pack or section.
Consoles Panel
After you have opened a lab from the Labs panel, you can view the device consoles on this panel and
begin performing the lab steps. You will see the console window, the device tabs, and two available
buttons: Settings and SDM.
Note: If you previously minimized or maximized the Home panel, the Consoles panel might not be .
visible. To ensure that you can see the available device consoles, click the arrow next to Con
soles or click and drag the splitter control between the Home panel and the Consoles panel.
Console Window
From the console window, you can modify the devices and perform the steps in the instructions. The
devices in the lab can be accessed from the drop-down list box at the top of the panel or from the lower
tab menu. Select a specific device to begin performing the lab steps on that device.
32
Boson NetSim User Manual
Settings Button
The Settings button at the top of the console window enables you to customize the appearance of the
console window. Click the appropriate drop-down list box to select the font family, size, and weight and
to change the foreground and background colors. Click Ok to apply the settings or Cancel to cancel the
changes.
SDM Button
The SDM button at the bottom of the console window enables you to access NetSim Router and Security
Device Manager (SDM). SDM is available from only a workstation console and only with certain labs.
33
Boson NetSim User Manual
Troubleshooting
Some of my labs have locks next to them and I can’t work
through them
The activation key you purchased unlocks the labs and the commands that are included with that level of
NetSim 8. If a lab is unavailable with the activation key you purchased, you will see a small lock icon next
to that lab. You can purchase higher-level activation keys, which will allow you to work through additional
labs plus all labs unlocked by lower-level activation keys. All labs are unlocked when a CCNP-level
activation key is used. Only the Demo lab is available without an activation key.
Commands seem to disappear when I press the number pad
ENTER key in Telnet mode
To ensure that the number pad ENTER key works correctly every time you press it, you should
open a command dialog box from the Run box in the Start menu, type telnet, press the CTRL key
and the right bracket ] key, type unset crlf, press ENTER, then press ENTER again. To see more
information about this, see the related support topic on the NetSim Support page (www.boson.
com/support/netsim-support-topics).
I can’t see everything on the panel I’m looking at
In NetSim, you can expand and minimize various panels by clicking the arrow next to the panel name.
If, for example, you cannot see the controls on the NetMap tab on the Home panel, click the arrow next
to Consoles to minimize the Consoles panel and expand the NetMap tab or click Window > Size To
Fit. You can also expand or minimize various panels by moving the splitter control between the panels. A
splitter control is a divider between panels that you can use to resize a panel to fit your preferences.
Telnet is not working on my Windows 7 or Windows Vista
computer
Telnet is disabled by default on Windows 7 and Windows Vista. To enable Telnet for these operating
systems, you should perform the following steps.
1. Click Control Panel on the Start menu.
2. On the Control Panel, click Programs.
3. On the Programs panel, click Turn Windows features on or off.
4. On the Windows Features dialog box, select Telnet Client and then click OK.
5. If you receive a Windows Security Alert, ensure that Private networks, such as my home or work
network is selected and click Allow Access.
To see more information about this, see the related support topic on the NetSim Support page (www.
boson.com/support/netsim-support-topics).
34
Boson NetSim User Manual
The Custom Lab Packs tab is empty
You will see labs on the Custom Lab Packs tab of the Labs panel only if you have uploaded labs from
an instructor or created your own labs. To find out how to extract labs created by your instructor or how to
create your own labs, see the Compiling a Lab section of this manual.
Clicking the Labs panel does nothing
If you try to click anywhere on the Labs panel and nothing happens, check the status bar. If you see that
the Boson NetSim Network Simulator is busy, the controls will be disabled until NetSim finishes loading.
If this problem persists, close NetSim and reopen it. You should then be able to navigate the Labs panel.
However, if it seems to be taking an exceptionally long time to load a lab, you should restart NetSim and
try loading the lab again. If the problem persists, please create a support ticket documenting the problem.
Copyright © 1996-2012 Boson Software, LLC. All rights reserved. NetSim software and documentation are protected by copyright law.
35
Boson NetSim User Manual