1
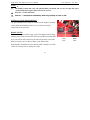
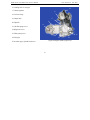
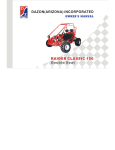
Raider Classic 250 (double-seat): Owner’s Manual EEC Version:2.0 Feb. 2007 Limited Warranty The warranty policy applies to those cases where the new seller vehicle unloaded from its shipping container, set up and delivered by authorized dealer and under normal use and service is found to have defects in parts or workmanship under the following terms and conditions. This warranty covers the engine and engine related components for a period of 90 days from the date of purchase. This warranty does not apply to any parts that in the seller’s opinion were defective because of improper maintenance, improper assembly, alterations, abuse, negligence, usage of non-genuine parts or accidents. Should warranty service be required on your vehicle during the 180-day warranty period, please contact your nearest authorized DAZON dealer for repairs. 2 Raider Classic 250 (double-seat): Owner’s Manual EEC Version:2.0 Feb. 2007 DAZON 90-DAY WARRANTY DAZON warrants the engine and drive train of this vehicle for a period of 90-days. This warranty covers repairs needed to correct defects in materials or workmanship. WHAT YOU MUST DO. Your selling dealership must register your vehicle by sending your warranty registration form upon purchase of the vehicle. You must properly use, maintain and care for the vehicle as outlined in the DAZON owner’s manual. You must maintain a record of the vehicles service history. Periodic service and inspection are considered regular maintenance and are not considered as warranty. WHAT YOUR DEALER MUST DO. All warranty repairs will be made at no cost to you for parts as related to the defect. All parts will be replaced with genuine DAZON parts only. WARRANTY PERIOD The warranty is effective as listed below from the date of purchase by the original owner. train, and factory defects will be covered for a period of 90-days. 3 All engine, drive Raider Classic 250 (double-seat): Owner’s Manual EEC Version:2.0 Feb. 2007 What is not covered under this warranty? This warranty does not cover any seller vehicles that have been subjected to: a. Renting; b. Disassembly, adjusting or repairing of the vehicle in any way so as to adversely affect its safety or reliability; c. Competition or racing. The warranty does not cover any losses of the seller vehicle use, any losses of time, any inconveniences, or any other consequential damages which include, but are not limited to the losses or damages to any persons, property or expenses of returning damaged units to the vehicle distributor or any DAZON authorized dealers. DAZON has the right to make changes without prior notice. 4 Raider Classic 250 (double-seat): Owner’s Manual EEC Version:2.0 Feb. 2007 • Any damage resulting from negligence of periodic maintenance. • Any damage which results from repairs, adjustments, or maintenance operations that do not follow those specified by DAZON. • Any damages caused by collision or improper use. • Any damages caused by overloading or operating outside of design specifications. • Any damages which result from non-genuine parts or accessories, fuel or fluids not specified by DAZON. • Any damages that result from modifications made to the vehicle to increase performance. • Any damages that result from the passage of time such as fading, peeling or other deterioration caused by outside elements. • Sensational phenomena that do not affect performance or function of the product such as engine noise, vibration or seepages. • Consumable replacement parts damaged by normal wear. Such as spark plugs, drive chains, belt drives, air cleaner elements, brake shoes, cables, fuses, oils, coolants and tires. • Any damages caused by improper storage or transport. • Any damages caused by natural disasters such as fires, floods, collision or theft. • Incidental or additional expense incurred for making any claims such as those for towing or transporting the vehicle to a service dealer. 5 Raider Classic 250 (double-seat): Owner’s Manual Contents EEC Version:2.0 Feb. 2007 [Attached wiring diagram] 1. Foreword------------------------------------------------------------------------------------------------------------------7 2. A Few Words about Safety---------------------------------------------------------------------------------------------8 3. Important Safety Information-----------------------------------------------------------------------------------------10 4. Safety Labels------------------------------------------------------------------------------------------------------------15 5. Are You Ready to Drive? ---------------------------------------------------------------------------------------------16 6. Is Your Vehicle Ready to Drive? ------------------------------------------------------------------------------------20 7. Safe Driving Precautions----------------------------------------------------------------------------------------------21 8. Identify Components---------------------------------------------------------------------------------------------------22 9. Add Oil Before Driving -----------------------------------------------------------------------------------------------45 10. Pre-Drive Instruction -------------------------------------------------------------------------------------------------49 11. Operation Instruction -------------------------------------------------------------------------------------------------51 12. Battery ----------------------------------------------------------------------------------------------------------------- 58 13. Maintenance & Service Instruction --------------------------------------------------------------------------------69 14. Storage Instruction ----------------------------------------------------------------------------------------------------90 15. Periodic Check & Service -------------------------------------------------------------------------------------------91 16. Specification -----------------------------------------------------------------------------------------------------------92 17. Buggy identification --------------------------------------------------------------------------------------------------98 6 Raider Classic 250 (double-seat): Owner’s Manual EEC Version:2.0 Feb. 2007 FOREWORD Thanks for choosing our double seat BUGGY. Prior to operating your Buggy, please read through this Owner's Manual carefully as it contains important safety and maintenance information. Failure to follow the warnings contained in this manual could lead to personal injuries or damages to the unit. Be sure to follow the recommended maintenance schedule and service your vehicle accordingly. Preventive maintenance is extremely important to the longevity of your Buggy. Beginners should drive this Buggy in a large open area to practice handling of it, and wear protective gear at all time when driving or riding it We hope you will have a pleasant experience with our products. 7 Raider Classic 250 (double-seat): Owner’s Manual EEC Version:2.0 Feb. 2007 A FEW WORDS ABOUT SAFETY In order to keep everyone safe, you must take responsibility for the safe operation of your Buggy. To help you make informed decisions about safety, we have provided the operating procedures and other information on the labels and in this manual. All these information alerts you to the potential hazards that could hurt you or others. It isn’t practical or possible to warn you against all the hazards associated with operating or maintaining your Buggy, so you must use your own good judgments. You will find important safety information in a variety of forms, including: Safety Labels ------ on the vehicle; Safety Messages ------ preceded by a safety alert symbol “WARNING” or “CAUTION”; 8 and one of the two signal words Raider Classic 250 (double-seat): Owner’s Manual EEC Version:2.0 Feb. 2007 The meaning of these signal words: ------ Physical harm may result from the failure to follow the instructions described within the WARNING labels; ------Damages to your Buggy and possible subsequent personal injuries or death could result from the failure to take proper precautions described within the CAUTION labels; Safety Headings------such as Important Safety Reminders or Important Safety Precautions; Safety Sections ------such as Buggy. Safety; Instructions ------ how to use your Buggy correctly and safely. This entire manual is filled with important safety information—please read it carefully. 9 Raider Classic 250 (double-seat): Owner’s Manual EEC Version:2.0 Feb. 2007 IMPORTANT SAFETY INFORMATION Your Buggy will provide you with many years of service and pleasure providing you take responsibility for your own safety and understand the challenges you’ll meet while driving. There is much that you can do to protect yourself when driving your Buggy. You'll find many helpful recommendations throughout this manual. The following are a few of the most important ones. Follow the Age Recommendation It is strongly recommended that no one under age of 16 be permitted to drive this Buggy. Always Wear a Helmet Facts have proven that helmets can significantly reduce the quantity and severity of head injuries, so when you drive your Buggy, please always wear an E-Mark approved motorcycle helmet. We also recommend that you wear approved goggles, sturdy boots, durable gloves and other protective gear. 10 Raider Classic 250 (double-seat): Owner’s Manual EEC Version:2.0 Feb. 2007 Always Wear Wrist Straps Attach your wrist straps to the steering wheel to insure that you won’t try to reach out to one side during a rollover. This will prevent injuries to your wrists, arms, fingers, etc. Follow the photos below when using the wrist straps: Wrist strap Drive Off-Road Only Your BUGGY is designed and manufactured for off-road use only. The tires are not made for pavements, and your BUGGY doesn’t have the turn signals or any other features required for use on public roads. If You need to cross a pave or public road, please get off and walk your BUGGY across. 11 Raider Classic 250 (double-seat): Owner’s Manual EEC Version:2.0 Feb. 2007 Take Time to Learn & Practice Even if you have driven other buggies, you still should take time to become familiar with how this Buggy works. Practice in a safe area until you have built your skills and gotten accustomed to its size and weight. Because many accidents have involved inexperienced or untrained drivers, we urge all drivers to take a training course approved by the Buggy Safety Institute. Check with your dealer for more information on the training course. Be Alert to Hazards The terrain can present a variety of challenges when you drive. Continually "read" the terrain for unexpected turns, drop-offs, rocks, ruts and any other hazards. Always keep your speed low enough to allow time for seeing and reacting to hazards. Drive within Your Limits Pushing limits is another major cause of Buggy accidents. Never drive beyond your personal abilities or faster than conditions warrant. Remember that alcohol, drugs, fatigue and inattention can significantly reduce your ability to make good judgments and to drive safely. 12 Raider Classic 250 (double-seat): Owner’s Manual EEC Version:2.0 Feb. 2007 Don't Drink and Drive Alcohol and drive never mix. Even one drink can reduce your ability of responding to changing conditions, and every additional drink can lengthen and worsen your reaction time. So don't drink and drive, and don't let your friends drink and drive either. Avoid Operating at Night Nighttime driving conditions can greatly reduce your visibility and judgments. Driving at night is hazardous and can increase the possibility of accidents. Never Run Indoors or in an Enclosed Area The exhaust from the engine contains the carbon monoxide, a poisonous, tasteless and odorless gas that may be lethal. Keep away from Moving Parts You should never place your hands or any other parts of your body near any moving parts of your Buggy. Failure to adhere to this warning will cause physical harm to your body. 13 Raider Classic 250 (double-seat): Owner’s Manual EEC Version:2.0 Feb. 2007 Avoid Skidding or Sliding The terrain surface can be a major factor affecting turns. Skidding or sliding a turn is more likely to occur on slippery surfaces such as snow, ice, mud and loose gravel. If you skid or slide on ice, you may lose all directional controls. To avoid skidding or sliding on slippery terrain surfaces, you should keep your speed low and drive carefully. Age recommendation It is strongly recommended that no one under the age of 18 be permitted to operate this BUGGY. A child driving this BUGGY that is not recommended to his/her age could lose BUGGY control, resulting in severe injuries or even death. 14 Raider Classic 250 (double-seat): Owner’s Manual EEC Version:2.0 Feb. 2007 SAFETY LABELS The labels should be considered permanent parts of your Buggy. If a label comes off or becomes difficult to read, please contact your dealer for warning label replacements. 15 Raider Classic 250 (double-seat): Owner’s Manual EEC Version:2.0 Feb. 2007 ARE YOU READY TO DRIVE? Before each drive, you need to make sure that you and your Buggy are both ready to drive. To help you be prepared, this section discusses how to evaluate your driving readiness, what items you should check on your vehicle, and how to adjust your vehicle for your comfort, conveniences and safety. Before driving your Buggy for the first time, we urge you to: • Carefully read this owner's manual and the labels on your vehicle; • Make sure that you understand all the safety messages; • Learn how to operate all the controls on your vehicle; • Ask for adult supervision if you are under 16 years old. Before each of your drive, we urge you to be sure that: • You feel well and you are in good physical and mental conditions; • You are wearing an E-Mark approved motorcycle helmet (with a chin strap tightened securely), goggles and other protective gear; • You don't have any alcohol or drugs in your body system; • You have a driver’s license. 16 Raider Classic 250 (double-seat): Owner’s Manual EEC Version:2.0 Feb. 2007 Protective Apparel For your safety, we strongly recommend that you always wear an E-Mark approved motorcycle helmet, approved goggles sturdy boots, durable gloves, long pants and long-sleeved shirt or jacket whenever you drive. Although complete protection is not possible, wearing proper protective apparel can reduce the chances of injuries when you drive. The following suggestion will help you choose the proper driving gear. 1. Helmets and Eye Protection Gear Your helmet is your most important driving gear because it offers the best protection against head injuries. Your helmet should fit your head comfortably and securely. An open-face helmet offers some protection, but a full-face helmet offers more. Regardless of the style, look for helmet with DOT/EC Approved. Always wear a face shield or a pair of goggles to protect your eyes and vision. 17 Raider Classic 250 (double-seat): Owner’s Manual EEC Version:2.0 Feb. 2007 2. Additional Driving Gear In addition to a helmet and eye protection gear, we also recommend: • Sturdy motorcycle boots to help protect your feet, ankles and lower legs; • Durable motorcycle gloves to help protect your hands; • Driving pants with knee and hip pads, a driving jersey with padded elbows, and a chest and shoulder protector. z Operating this BUGGY without wearing an approved motorcycle helmet, eye protection gear, or any protective apparel could increase your chances of head and/or eye injuries, and even possibly death in the event of severe accidents. z Always wear an approved motorcycle helmet, an eye protection gear (goggles or a face shield), a long-sleeved shirt or jacket, gloves, boots and long pants. Driver Training Developing your driving skills is an on-going process. Even if you have driven other Buggies, you still need take time to become familiar with how this BUGGY works. Practice driving this Buggy in a safe area to build your skills. Don’t drive on rough terrain surfaces until you’ve gotten accustomed to all the controls on this BUGGY, and felt comfortable with its size and weight. 18 Raider Classic 250 (double-seat): Owner’s Manual z EEC Version:2.0 Feb. 2007 Operating this BUGGY without proper instructions could increase your risks of accidents that could lead to serious injuries, or even death. No Alcohol or Drugs Alcohol, drugs and Buggies never mix. Even a small amount of alcohol can impair your ability to operate your Buggy safely. Likewise, drugs, even prescribed by your doctor, can be dangerous when you’re operating your vehicle. Consult your doctor for the assurance that it is safe to operate your vehicle after taking some kind of medication. z Operating this BUGGY after consuming alcohol or drugs can seriously affect your judgments, cause you to react more slowly, affect your balance and perception, and even could result in serious injuries or death. z Never consume alcohol or drugs before or while operating your BUGGY. 19 Raider Classic 250 (double-seat): Owner’s Manual EEC Version:2.0 Feb. 2007 IS YOUR VEHICLE READY TO RUN ? Before each of your drive, it is important to inspect your Buggy and make sure that any problems you’ve found have been corrected. A pre-drive inspection is a must, not only for safety, but also because a breakdown, or even a flat tire, can be a major inconvenience. If your BUGGY sank into bunker, try to shift the gear for and backward to reverse position and slightly step on the throttle pedal, if the wheels do not get out from the bunker, then stop stepping on the throttle pedal and call the service centre, Excessively stepping on the engine may cause the engine overheat or damage. If your vehicle has overturned or has been involved in a collision, please don’t drive it until your dealer has inspected it. There may be damages or other problems you can’t see. z Improperly maintaining your Buggy or failing to correct a problem before driving can cause a crash in which you can be seriously hurt or even killed. z Always perform a pre-drive inspection before each of your drive, and correct any problems. 20 Raider Classic 250 (double-seat): Owner’s Manual EEC Version:2.0 Feb. 2007 SAFE DRIVING PRECAUTIONS Off-Road Use Only Your BUGGY and its tires are designed and manufactured for off-road use only, not for pavements. Driving on pavements can affect your handling and controlling. Don’t drive your BUGGY on pavements. z Operating your BUGGY on paved surfaces may seriously affect your handling and controlling of your BUGGY, and may even cause your BUGGY to go out of control. z Never operate your BUGGY on any paved surfaces, including sidewalks, driveways, parking lots d When driving off-road, also remember to always obey local off-road driving laws and regulations. Obtain permission to drive on private property. Avoid posted areas and obey "no trespassing" signs. Never drive your BUGGY on public streets, roads or highways, even if they are not paved. Drivers of street vehicles may have difficulty in seeing and avoiding you, which could easily lead to collisions. In many states, it is illegal to operate BUGGIES on public streets, roads and highways. 21 Raider Classic 250 (double-seat): Owner’s Manual EEC Version:2.0 Feb. 2007 While we want to shift the gear from forward to reverse or vice visa, the gear shifter should go back to neutral position first and do not accelerate the engine to high speed ( i.e. Do not change gear when the engine is running at a high speed), otherwise, the gear mechanism will be damaged seriously! Keep Your Hands and Feet on Controls Always keep both of your hands on the steering wheels ,and both of your feet on the foot controls when driving your BUGGY. It is important to maintain your balance and control your BUGGY. Removing your hands or feet away from the controls can reduce your ability of controlling your BUGGY. z Removing your hands from the steering wheels, or your feet from the foot controls during operation, can reduce your ability of controlling your BUGGY, or cause you to lose your balance and fall off your BUGGY. z During operation, always keep your both hands on the steering wheels, and your both feet on the foot controls of your BUGGY. 22 Raider Classic 250 (double-seat): Owner’s Manual EEC Version:2.0 Feb. 2007 Control Speed Driving at excessively high speed increases the chances of accidents. When choosing a proper speed, you need to consider the capability of your BUGGY, terrain, visibility and other operating conditions, plus your own skills and experiences. z z Operating your BUGGY at excessively high speed increases your chances of losing control, which can easily result in an accident. Always drive at a speed that is proper for your BUGGY, terrain, visibility and other operating conditions, plus your own skills and experiences. Be Careful on Unfamiliar or Rough Terrain Before driving in a new area, always check the terrain thoroughly. Don't drive fast on unfamiliar terrain or when the visibility is limited. (Sometimes it’s difficult to gain the reaction time before you see obstructions like hidden rocks, bumps, or holes with enough time to react.) 23 Raider Classic 250 (double-seat): Owner’s Manual z EEC Version:2.0 Feb. 2007 When driving your BUGGY on unfamiliar terrain, failure to be especially careful could cause your BUGGY to go out of control or overturn. When operating your BUGGY on unfamiliar terrain, always drive slowly, always be especially careful, and always be alert to changing terrain conditions. z Never drive past the limit of visibility. Maintain a safe distance between your BUGGY and other off-road vehicles. Always exercise your cautions and use your extra care on rough, slippery and loose terrain. z z z z Failure to use your extra care when operating on excessively rough, slippery or loose terrain could cause loss of traction or vehicle control, which could result in accidents, including an overturn. Don’t operate on excessively rough, slippery or loose terrain until you’ve learned and practiced the skills necessary to control your BUGGY on such terrain. Always be especially cautious on these kinds of terrain. Always keep all wheels on the ground. Attempting wheelies, jumps, and any other stunts increases the chances of accidents, including an overturn. Never attempt stunts, such as wheelies or jumps. Don't try to show off. 24 Raider Classic 250 (double-seat): Owner’s Manual EEC Version:2.0 Feb. 2007 IDENTIFY COMPONENTS Brush Guard Bar Seat Control Panel Steering Wheel Headlight Seat Belt Turning Light Rear Wheel Front Wheel Front Wheel Front Shock Absorber 25 Raider Classic 250 (double-seat): Owner’s Manual EEC Version:2.0 Feb. 2007 Fan Water Tank Sub Water Tank Rear Rack Taillight Rear Shock Absorber Air Cleaner Rear Mudguard Rear Reflector Rear Wheel Engine Trailer Hook Support 26 Raider Classic 250 (double-seat): Owner’s Manual EEC Version:2.0 Feb. 2007 CONTROL PANEL Don’t attempt to start or operate the engine until you’ve been completely familiar with the location and use of each control that is necessary to operate your Buggy. You must know how to stop your vehicle before starting and driving. Tachometer Coolant Head Turning Temperature Lamp Horn Lamp Gauge Switch Switch Switch Key Switch Turning Fog Headlamp Engine Flickering Indicator Lamp H/L beam Stop Lampswitch Switch Switch Switch 27 Raider Classic 250 (double-seat): Owner’s Manual EEC Version:2.0 Feb. 2007 On the control panel, there are altogether three instruments and eight switches. Three Instruments: z Coolant Temperature Indicator------ Indicates the level of engine coolant temperature. z Tachometer------ Indicates the vehicle running speed. z Turning Indicator------ Indicates the directional turning of your Buggy. Eight Switches: z Fog lamp Switch[For On-Road model]------Turn on this switch when driving in foggy condition. z Horn Switch------Turn on this switch, you can sound your horn whenever necessary. z Engine Stop Switch------In case your vehicle comes across some emergency in traveling, and you need to stop the engine immediately, you can use this switch. z Key Switch-------Insert the key into the key switch, turn the key clockwise, and release the key when the engine starts. The engine will warm up within few minutes, and the engine choke will close automatically and operate at normal RPM. z Flickering Lamp Switch------Turn on this switch to indicate the stagnant position of the vehicle. z Headlamp H/L Switch------It can transform the high beam headlamp to the dipped headlamp, or the dipped headlamp to the high beam headlamp. z Turning Lamp Switch [For On-Road model]------ In indicates the turning direction of the vehicle. 28 Raider Classic 250 (double-seat): Owner’s Manual z EEC Version:2.0 Feb. 2007 Master Lamp Switch------It controls all the lamp switches. Warning: Don't crank the starter more than 5 seconds at one time. THROTTLE The right foot pedal is the throttle that controls your vehicle speed. As the engine speed is above idle, the Brake Pedal clutch automatically engages and moves the vehicle forward. To disengage the clutch at any time, allow the throttle to return to the idle position. BRAKE The brake pedal is located on the left side of the vehicle. Applying pressure to the pedal can draw the brake calipers around the brake cylinders (one at the rear wheel, two at the front wheel), and slows or stops your vehicle. 29 Throttle Pedal Raider Classic 250 (double-seat): Owner’s Manual z z z z z EEC Version:2.0 Feb. 2007 Step the left foot on the brake pedal with proper force each time starting the engine and turn the key switch at the same time. Always check the throttle subassembly before starting the engine and make sure that the throttle subassembly can rotate smoothly when stepped on and rebound to the idle speed position when released. Do not drive if the pedal fails to return to the idle speed position as a result of throttle leakage. If problems can not be solved by adding lubricant and by adjusting or replacing worn parts, you can turn to our dealers for help. When the brake is applied, don’t step on the throttle pedal too hard, otherwise the clutch will get burnt and damaged. Nothing should be placed below the pedals, otherwise it will obstruct the driving and cause danger to your life. 30 Raider Classic 250 (double-seat): Owner’s Manual EEC Version:2.0 Feb. 2007 REAR VIEW MIRRORS Adjust both left and right rear view mirrors to the desired angle before start driving the vehicle. If the rear view mirror is defective, it must be replaced immediately. TURNING SIGNAL LAMPS [Available on On-road buggy only] Both left and right turning signals are screwed on the bracket. For safety reason, not to change the lamps to other color. Capacity of turning signal lamp = 5 watts LICENSE PLATE LAMP [Available on On-road buggy only] It is available as an optional item at a surcharge for Off-road model. The license plate lamp can be opened by removing the two nuts. Capacity of license plate lamp = 5 watts 31 Raider Classic 250 (double-seat): Owner’s Manual EEC Version:2.0 Feb. 2007 TAIL LAMP [BRAKE LAMP] Tail lamps are installed at the rear of vehicle. There are two bulbs inside, one is for brake light, the other is normal light. Make sure both lights are in working condition before you drive the vehicle in the night. Capacity of tail lamp = 5 watts Locating screw PASSENGERS SEATS The vehicle allows for two riders only for the double-seat unit; the combined maximum weight of the driver and passenger for the double-seat unit should not exceed 180kg or 400lbs. Seat Adjuster 32 Raider Classic 250 (double-seat): Owner’s Manual EEC Version:2.0 Feb. 2007 SEAT ADJUSTMENT The seat must always be securely adjusted to the positions which affords the best control of the foot, pedals, steering wheel for the operator.. 1) Pull the seat adjustment handle upward to disengage the seat slide; 2) Move the seat forward or backward to the desired position; 3) Be sure that the seat adjustment handle snaps back into place and that the seat is locked into position. The seat upright angle is fixed, it cannot be adjusted NOTE: Before attempting to adjust the seat, ensure that the engine is not running * Never operate your BUGGY when the seat is not securely adjusted. Never adjust the seat when you are driving the BUGGY. Otherwise, it could result in personal injuries or loss of life SAFETY BELT 33 Raider Classic 250 (double-seat): Owner’s Manual EEC Version:2.0 Feb. 2007 Each single bucket seat comes with a safety belt. For safety reason, both driver and passenger MUST put on safety belt provided on each seat. Inspect and test the safety belt before you drive the BUGGY. 1) Check and make sure the terminals of the safety belt are firmly affixed on the frame behind the seat; 2) Put on the vertical [across the chests] safety belt, tighten by pulling the strap downward; 3) Put on the horizontal [across the waist] safety belt, tighten by pulling 34 Raider Classic 250 (double-seat): Owner’s Manual EEC Version:2.0 Feb. 2007 the strap sideward; 4) Release the safety belt by pressing the red button on the buckle with the left hand and pull out the hook from the buckle with the right hand. * Never let safety belt touch the chassis, it might be pulled away by the tree branches during speeding in the forest. * Do not modify the safety belt without the consent of the safety belt maker. * If the safety belt is too long, defective or cannot be tightened, it must be replaced immediately. * Never ride on the BUGGY without good safety belt. Note: After adjusting the seat belt, tie up the excess length 35 Raider Classic 250 (double-seat): Owner’s Manual EEC Version:2.0 Feb. 2007 at the end of the seat belt, otherwise the dangling portion will hit the ground and obstruct the moving of the vehicle. MAINTENANCE OF SAFETY BELT 1) Make sure the buckle is free of dust all the time. 2) Refrain from oil, battery acid and other chemical;. 3) Clean it with soap regularly. AUTOMATIC CARBURETOR The throttle and negative engine pressure adjust the fuel quantity Automatic 36 Raider Classic 250 (double-seat): Owner’s Manual EEC Version:2.0 Feb. 2007 to accelerate /decelerate. The operator can’t completely control the speed of acceleration/ deceleration. The engine performance can also affect the speed. The electric enrichment device controls the starting. At the beginning of starting, the idle speed bore opens automatically, to let in large quantities of fuel for starting. After starting, the pre-heated electric enrichment device automatically closes the idle speed bore. GASOLINE FUEL TANK The gasoline fuel tank is located at the rear carrier [above the engine]. The fuelling mouth is on top the fuel tank. There is a short rubber tube attached to the fuel tank cap for letting out the heat inside the fuel tank. Fuel tank capacity = 9 Litres or 2.5 gallon Following steps must be observed during fuelling : 1) Turn off the engine; 37 Raider Classic 250 (double-seat): Owner’s Manual EEC Version:2.0 Feb. 2007 2) Open the fuel tank cap in anti-clockwise direction. 3) After fuelling, close the fuel tank cap in clockwise direction. Type of petrol Only high quality unleaded petrol is allowed. The quality of petrol will affect the functioning and life of engine. The engine will burn if the petrol octane rating is too low. Recommended grade : Unleaded #95 Do not use leaded petrol, otherwise it will damage the Engine. Fuel tank cap Fuel pipe petcock There is a fuel pipe petcock below the fuel tank. Make sure the fuel valve lever is always at “OFF” position when the vehicle is not in used. Fuel pipe petcock WHEELS 38 Raider Classic 250 (double-seat): Owner’s Manual EEC Version:2.0 Feb. 2007 Use Off-road tires for off-road vehicle [Picture A]. Use On-road tires for on-road vehicle [Picture B]. Tubeless tires are used for both On-road & Off-road tires. Both front and rear wheels are having different sizes: Note : A Special sand tire is to be used if the buggy is to run on desert for long hours. Type of vehicle Wheel position ON-ROAD Front wheel 20.5 x 8-10 or 21x7-10 10-6 Rear wheel 20.5 x 10⁻¹⁰ or 20x11-10 or 22x11-10 10-8 Front wheel 21x7-10 10-6 Rear wheel 22x11-10 10-8 OFF-ROAD Tire B Rim RADIATOR [WATER TANK] a. The radiator is situated behind the seat head rest. It is made of aluminum tubing filled with coolant. 39 Raider Classic 250 (double-seat): Owner’s Manual EEC Version:2.0 Feb. 2007 Radiator Cooling fan b. The engine cooling system is using closed cooling forced circulation system which mainly consists of radiator, sub water tank, water pump, heat-sensor switch, water holes, fan blade and fan motor. c. The double valves inside the radiator cap give the effect of closed cooling box system. 40 Fan motor Raider Classic 250 (double-seat): Owner’s Manual EEC Version:2.0 Feb. 2007 d. Way of adding anticorrosive antifreeze into radiator : i. Remove radiator cap; ii. Pinch the rubber pipe to expel air bubble, meanwhile Cap valve fill in antifreeze up to the top of the rubber pipe; iii. Fasten radiator cap. Radiator cap z Don’t open the radiator cap when the engine temperature is high. Otherwise, the spilling of hot water may cause injuries. 41 Raider Classic 250 (double-seat): Owner’s Manual EEC Version:2.0 Feb. 2007 COOLANT The coolant container must be filled with coolant up to the level of upper marking . The coolant is prepared with fixed ratio of Glycol and water as follow : Upper marking The Thickness of Coolant Glycol content Water content Above 0º C 50% 50% Below 0º C 60% 40% Lower marking Glycol coolant should not be added too much, or diluted with too much water or replaced by methanol or ethanol or other liquid, otherwise its anti-freezing and anti-sepsis function will be affected. However, under extreme cold weather, less water will be used. Replacement of coolant : 1) Open the container cap. 2) Take out the bottle. Pour away old coolant and add in new coolant to the level of upper marking. 3) Close and tighten the container cap. 42 Raider Classic 250 (double-seat): Owner’s Manual EEC Version:2.0 Feb. 2007 NOTE : 1. The boiling coolant and water will spill and hurt your hands and eyes, do not open the cap of coolant bottle if the engine and water tank is very hot. 2. External ---- Flush with water 3. Internal ---- Call physician immediately. Drink large quantity of water or milk. EXTERNAL GEAR TRANSMISSION The gear transmission box which is connected to the engine is installed on the chassis and behind the brake lever. It consists of forward, neutral and reverse gear only. BRAKE LEVER The front & rear wheel of the buggy comes with diagonal intercrossing braking system. Both front and rear wheels are installed with brake disk. If any one of them fails to function, the other will perform as the brake. What you need to do is to depress harder on the brake pedal。 Brake handle is installed next to the throttle pedal. It should be on if the vehicle is not being used or parking on a slope. 43 Gear Brake lever Lever Raider Classic 250 (double-seat): Owner’s Manual EEC Version:2.0 Feb. 2007 BRAKE OIL PUMP The brake oil pump is installed behind the brake pedal. If the brake oil level is below the required minimum level, or the two pistons connecting to the brake oil pump are defective, the brake system will be affected. Brake fluid tank REAR CARRIER RACK It is installed between the engine and radiator for putting traveling bag. Limited loadage = 10kg or 22lbs. NOTE : NEVER EXCEEDS LIMIT, OTHERWISE THE VEHICLE WILL BECOME OVERWEIGHED AT THE REAR AND CAUSE OVER TURN. 44 Rear Rack Raider Classic 250 (double-seat): Owner’s Manual EEC Version:2.0 Feb. 2007 ADD OIL BEFORE DRIVING Before starting to operate the engine, add appropriate amount of specified grade of oil into the brake, engine, transmission box, coolant. BRAKE OIL Brake oil is highly water-absorptive. The brake effect will be affected when too much water goes into the brake oil. Amount of brake oil shall fall between the upper limit marked with “MAX” and lower limit marked with “MIN”. The following regular oil replacement should be observed. Oil replacement interval period Volume Normal condition : Every 1000 km or 3 months Bad condition Every 800 km or 2 months 0.25 L or 0.07 gallon : Grade of oil * Clean up all the dirt on the oil pump cap before adding brake oil. * Avoid contact with skin or eyes. * Antidote : External – flush with water; Internal – call physician immediately; * Brake oil will damage the paint of frame. 45 : DOT-3 Raider Classic 250 (double-seat): Owner’s Manual EEC Version:2.0 Feb. 2007 Transmission/Gearbox gear oil The gear box is situated at the side of the engine. Inspect gear oil only when the gear box is cold down and the vehicle is turned off on a flat ground. Open the oil drive back cap of the oil inlet and check the oil level inside the gear box. The oil level shall reach the bottom neck of the oil inlet. Grade of gear box oil : SAE85W/95 Below regular replacement shall be observed : Oil replacement interval period Every 3 months or 1000 km [ 621 miles] * Volume of oil 0.18 L or 0.05 gal Never make oil replacement before the gearbox is cooled down. * For environment protection purpose, place a container below the oil drain hole. 46 Raider Classic 250 (double-seat): Owner’s Manual ENGINE OIL Grade of engine oil Amount of oil : EEC Version:2.0 Feb. 2007 : SAE15/40SF [Winter] SAE10/30SF [Summer] 1.3 L or 0.34 gallon Steps for checking engine oil level : 1. Place the buggy in a level position.. 2. Stop the engine, let all the oil flow back to the oil basin. [If the engine is cold, the flow of oil will be much slower]. 3. Take out the oil dip stick and dry it with cloth, then put it fully back to the engine for a second and take it out again. Look for the position of oil, if it falls below Marking A, then top up to level B, but never exceed level B, otherwise, the oil consumption rate will increase and cause carbon residue and spark plug fouling. Engine oil dipstick Warning: Before operating your buggy for the first time, please be sure to add engine oil. Your vehicle uses SAE15W/40SF oil in summer, and SAE10W/30SF in winter and cold weather conditions. 47 Raider Classic 250 (double-seat): Owner’s Manual EEC Version:2.0 Feb. 2007 Engine Oil Capacity: The engine's rated capacity of engine oil is 3.5 qts,. Although all the engine oil is supposed to be drained out at the factory before export packaging, small amount of oil may still remain in the engine. For this reason, please first add 3 qts of oil into the engine and check the oil level by using the engine oil dip stick to determine whether more oil is needed. Do not overfill the engine with oil. Do not exceed the maximum oil level indicated on the engine oil dip stick. Filling Method : Unscrew the engine oil cap located on top of the engine camshaft cover. Insert a clean funnel into the oil filling opening and slowly pour fresh engine oil into the camshaft cover. Oil will drain down into the engine. Once the recommended oil volume has been added, remove the funnel and replace and tighten the engine oil cap. Start the engine and let it idle for 30 seconds in order to distribute the engine oil throughout the engine. Turn off the engine and let the warmed oil drain back into the engine oil pan. Now check the oil level with the engine oil dip stick. If the oil level is below the minimum marking, please add more oil into the engine until the proper level is reached. *Note: Use a clean, dry cloth or paper towel to wipe the engine oil dip stick before re-inserting it into the engine. 48 Raider Classic 250 (double-seat): Owner’s Manual EEC Version:2.0 Feb. 2007 PRE-DRIVE INSTRUCTION Overall Inspection z Perform this pre-drive inspection every time before driving your Buggy. z If not, serious damages to your Buggy or personal injuries to yourself may be caused. a. Engine Oil &Transmission Oil: Check for the engine oil level, and add oil if required; check for oil leaks; don’t let any water go into the engine, otherwise the engine can’t start; b. Fuel: Check for the fuel level, and add fuel if necessary (but don’t overfill); check for fuel leaks. c. Brakes: Depress the rear brake pedal several times to see if it works properly, and check for the proper free play of brake pedal; adjust the brake pedal if necessary. Make sure there is no brake fluid leakage. d. Tires: Check the tire conditions and pressures. e. Drive Chain: Check for the chain conditions and tension; lubricate it if necessary. f. Throttle: Check for the smooth operation; assure that the throttle "snaps" back to the idle position. g. Engine Stop Button: Perform the engine stop button test; repair it if necessary. h. Nuts, Bolts & Fasteners: Check all the nuts, bolts and other fasteners to see if they have been tightened to the specified condition; adjust them if necessary. 49 Raider Classic 250 (double-seat): Owner’s Manual EEC Version:2.0 Feb. 2007 i. Roll Cage Bar: Ensure that all the protective roll cage bars are fastened. j. Brake Light: Check for the proper operation of brake light. k. Wheels: Check the wheels to see if all the axle nuts have been tightened properly and been secured by cotter pins. l. Steering: Check for the free operation of the steering and for any unusual looseness in any area. m. Lights: Check the headlights, taillights, rear license lights and turning lights etc. for proper work. n. Horn: Make sure that the horn works properly. o. Cooling System: Make sure that the cooling system works properly after the engine has been started. Preparation before Starting the Engine (1) Check the engine fasteners before starting; (2) Fill in the fuel, lubrication oil and anticorrosive antifreeze as specified; Oil Capacity & Anticorrosive Antifreeze Capacity: Oil Capacity: Crankcase: 1.0 L or 0.26 gallon ; Transmission Box: 0.18 L or 0.05 gallon; Anticorrosive Antifreeze Capacity: Radiator: 1100cc; Reserved Water Tank: 300cc; Total: 1400cc; 50 Raider Classic 250 (double-seat): Owner’s Manual EEC Version:2.0 Feb. 2007 OPERATION INSTRUCTION [A] BEFORE YOU START THE ENGINE Ensure no obstacle in front and behind the vehicle。 Conduct the following routine check: 1、 2、 3、 4、 5、 6、 7、 8、 Check the engine oil level, add oil if required; check for oil leaks。 Turn the key to “ON” position ensure the ignition, all lightings and alarm system are working. Check the tire conditions and pressure. Adjust the seat to the desired position。 Adjust the angle of rear view mirrors。 Put on safety belt。 Check the brake condition. Check the gear shift condition, ensure the shift gear is smooth 51 Raider Classic 250 (double-seat): Owner’s Manual EEC Version:2.0 Feb. 2007 [B] STARTING THE ENGINE Step on the brake pedal fully, insert ignition key and turn the ignition switch clockwise. Once the engine is ignited, step on the throttle pedal slightly to warm up the engine for a few minutes. Brake NOTE : 1) 2) 3) 4) 5) 6) Immediately after starting the engine, release ignition switch to prevent damaging the starter motor. Do not turn on ignition switch while the engine is already running to prevent damaging the starter motor. Do not repeatedly turn on ignition switch if the engine fails to have quick start. Wait for 10 seconds before second try. On the second try, turn ignition switch with the throttle pedal slightly depressed. In cold weather, warm up the engine for several minutes at idle speed before driving the buggy. Then speed up after the operation temperature is reached. In hot weather, avoid excessive running of engine at idle speed otherwise engine will get overheated. Do not leave your buggy alone after the engine is started. 52 Raider Classic 250 (double-seat): Owner’s Manual EEC Version:2.0 Feb. 2007 [C] STARTING TO DRIVE Test the controls to learn how to start, turn and stop. Operate your Buggy slowly until you have been familiar with it. After starting the engine, shift the gearshift lever from neutral to forward position and ready to move the vehicle。If you want to reverse the vehicle, shift the gearshift lever from neutral to reverse position. Forward Reverse Neutral Never move the gear shift lever to reverse gear when the buggy is running, otherwise the engine and transmission will be damaged. Reduce speed before change to reverse gear。 53 Raider Classic 250 (double-seat): Owner’s Manual EEC Version:2.0 Feb. 2007 When you are starting the buggy on a slope, do not release the brake until you have already shifted the gearshift lever to forward position and ready to move the vehicle. The turning radius of your BUGGY is small and agile, so the centrifugal force is very high when turning at high speed. During turning, you should slow down to a more controllable speed to prevent your BUGGY from rolling over. Keep your heel on the floorboard for proper pedal control, any attempt to turn sharply at high speed is dangerous, because the tires can easily catch an edge which can result in a rollover. [D] STOPPING ENGINE 1. Release the throttle. 2. Turn off the engine for about 2-3 minutes at idle speed to cool down. 3. Shift the gearshift lever to neutral position. 4. Turn off the ignition switch. 54 Raider Classic 250 (double-seat): Owner’s Manual EEC Version:2.0 Feb. 2007 [E] RUNNING-IN OF NEW ENGINE The running-in distance is 1000km. During this period, please follow the instructions below: (1) Run the engine according to the requirements specified; Do not overwork the engine. Avoid keeping the throttle full open. (2) Rotate the throttle slowly after starting the engine; don’t speed up or speed down suddenly; (3) Drive on smooth roads; don’t drive uphill or on rough roads for a long time; (4) Keep the oil lines smooth; (5) Avoid speeding up suddenly or running the engine at a high speed without loading; (6) Maintain your vehicle according to the service intervals, and if necessary, repair it as soon as possible; (7) After the running-in period, clean the crankcase and replace the oil; remove the carbon on the top of the piston and in the combustion chamber; adjust the spark plug electrode gap and valve clearance; check if the oil lines are smooth; maintain your whole vehicle according to the requirements specified in this Owner’s Manual. (8) Change engine oil and clean air filter screen every 500 miles of use. 55 Raider Classic 250 (double-seat): Owner’s Manual EEC Version:2.0 Feb. 2007 [F] BRAKE OPERATING SYSTEM When the brake is applied, the rear wheels will be locked。 When the brake lever is pulled upward/ toward direction, the brake is applied and the rear wheels are locked; The brake is released and the rear wheels become unlocked. The brake lever must be depressed downward when you are ready to drive。 Note : 1) Brake effect will decrease when the brake mechanism get over heated. Thus, not to continuously depress the brake pedal. 2) If the brake mechanism gets wet, the brake effect will be affected. Test the brake system after vehicle washing or going through a pool of water by slightly depress on the brake pedal. 3) Maintain certain distance behind the front vehicle so that you have enough time to stop the vehicle. 4) Do not step on brake pedal unnecessarily, otherwise the brake lining and brake lining disc will be damaged. 5) Never drive the vehicle with the brake lever is in use. 56 Raider Classic 250 (double-seat): Owner’s Manual EEC Version:2.0 Feb. 2007 [G] STOP THE BUGGY 1、 Depress brake pedal, pull the brake lever. 2、 When the Buggy is to be parked on a flat ground, shift the gear to neutral position。 3、 When the Buggy is to be parked on a slope with the vehicle facing downhill, shift the gear to reverse position. 4、 When the Buggy is to be parked on a slope with the vehicle facing uphill, shift the gear to forward position。 5、 Turn the ignition key to “OFF” position then pull out the key. 6、 Before you walk away, make sure the vehicle is not in a movable condition。 * Never park the vehicle near the flammable object。 * Brake must be on when the vehicle is not in use。 * Park the vehicle on a solid road surface. * Turn the wheels to left or right when the vehicle is to be parked on a slope。 57 Raider Classic 250 (double-seat): Owner’s Manual EEC Version:2.0 Feb. 2007 BATTERY Free-maintenance battery with 12V 12AH is installed at the rear of the vehicle [behind the seat cushion]. No charging of battery is required if the vehicle is received within 6 weeks after the ex-factory date, what you need to do is to pour electrolyte into the battery. If you feel the battery is weak, you may check its voltage with a multi-meter. If the reading exceeds 9V, it is normal. If the reading falls below 9V, service is required. Read the instructions carefully on all the labels and follow the practice accordingly. 58 Raider Classic 250 (double-seat): Owner’s Manual EEC Version:2.0 Feb. 2007 z The following procedure is very dangerous and should be performed with utmost care and attention. Wear protective eyewear, rubber gloves, and have water available should electrolyte come in contact with skin or eyes. KEEP ALL CHILDREN AWAY FROM THE AREA WHILE THIS PROCEDURE IS BEING PERFORMED. z POISON – CAUSES SEVERE BURNS Contains sulfuric acid. Avoid contact with skin, eyes, or clothing to prevent accidents, rinse empty container with water. z ANTIDOTE: External – flush with water; Internal – call physician immediately. Drink large quantities of water or milk. Follow with milk of magnesia, beaten eggs or vegetable. Eyes – Flush with water for 15 minutes and get prompt medical attention. z KEEP OUT OF THE REACH OF CHILDREN 59 Raider Classic 250 (double-seat): Owner’s Manual EEC Version:2.0 Feb. 2007 2) Battery Installation Note: The following page is for vehicles with battery’s containing separate electrolyte pack. Most battery’s will come with the electrolyte already sealed into the battery. 2.1) Place battery on level surface; Remove sealing tape from top; 2.2) Take the electrolyte container out of the plastic bag; 2.3) Place electrolyte container upside down with the sealed silver mouths of the electrolyte bottles in line with the six filler holes of the battery; 60 Raider Classic 250 (double-seat): Owner’s Manual EEC Version:2.0 Feb. 2007 2.4) Push the container down strongly enough to break the silver seals; 2.5) As electrolyte starts flowing into battery, air bubbles will come up from the mouths of the plastic electrolyte bottles; 2.6) Leave bottles upside down in battery holes until electrolyte is completely drained; Note: Never leave children unattended around battery. 2.7) If air bubbles cease to float to the top of the electrolyte bottles, tap lightly on top; Note: DO NOT remove container from battery while it is draining. Never cut or pierce electrolyte container. 2.8) After all the electrolyte has drained from the bottles into the battery, pull plastic electrolyte bottles gently out of the battery; 2.9) Discard empty electrolyte bottles in a waste area that is inaccessible to children and animals; 61 Raider Classic 250 (double-seat): Owner’s Manual EEC Version:2.0 Feb. 2007 2.10) After filling, let battery stand for at least 30 minutes before charging (This allows the electrolyte to penetrate plates for optimum performance and ensures longer battery life); 2.11) After 30 minutes the battery is ready for its initial charge, place cap strip loosely over the filling holes as shown in the picture. 3) Initial Charge 3.1) Connect the red positive (+) cable to the red positive (+) pole of the battery; 62 Raider Classic 250 (double-seat): Owner’s Manual EEC Version:2.0 Feb. 2007 3.2) Connect the black negative (-) cable to the black negative (-) pole of the battery; Note: The red positive (+) cable has a larger diameter than the black negative y cable. 3.3) Charging rate: Charge battery @ 0.7 Amps for 5 ~ 10 hours; 3.4) After charging is complete, press down firmly with both hands to seat the caps, and the battery is now sealed; Note: Do not pound or hammer. NEVER REMOVE THE STRIP OF CAPS NOR ADD ANY WATER OR ELECTROLYTE. 63 Raider Classic 250 (double-seat): Owner’s Manual EEC Version:2.0 Feb. 2007 . 3.5) Install battery into battery tray making sure that the rubber mat is in place; Note: The warning label on the battery should be facing the warning label on the gray tray. 64 Raider Classic 250 (double-seat): Owner’s Manual EEC Version:2.0 Feb. 2007 3.6) Once battery is firmly seated in gray tray with rubber mat under it, attach the red positive wire to the red positive terminal on the battery. 3.7) Then attach the black negative wire to the black negative terminal on the battery; . 65 Raider Classic 250 (double-seat): Owner’s Manual EEC Version:2.0 Feb. 2007 3.8) Place grey plastic battery cover on top of the battery and thread wires through the cover cuts – outs. Finally, secure the battery with the wide black rubber strap using the hooks on both ends. z DO NOT open sealed caps to add water to battery. z Always wear safety glasses and charge the battery in a ventilated area. z If battery gets hot, discontinue charging and allow battery to cool down. z Do not use fast charging unless it is an emergency. z DO NOT smoke around batteries and keep away from open flame. 66 Raider Classic 250 (double-seat): Owner’s Manual EEC Version:2.0 Feb. 2007 . z Charge the battery in a well ventilated area. z At the beginning or end of charging, turn off the charger first, in order to prevent electric spark and explosion. 4. Battery Replacement Battery failure could be caused by the following possibilities : i) Low voltage --- Test the voltage by using multi-meter, 9V or below means the battery is weak. ii) Self-discharge of electricity ---- Quick loss in power after every re-charge of battery. Observe following steps if replacement is necessary : 4.1) Remove old battery; Mark which cable is connected to the positive terminal (+) and which cable is connected to the negative (-) terminal; 4.2) Clean cable connectors with wire brush or sandpaper to remove oxidation; 4.3) After charging, install new battery; put dielectric grease on the battery terminals to avoid corrosion; 4.4) Connect cables to the proper terminals: positive cable to positive terminal, and negative cable to negative terminal; 67 Raider Classic 250 (double-seat): Owner’s Manual EEC Version:2.0 Feb. 2007 Note: Positive (+) cable is red and larger in diameter; Negative y cable is black and smaller of the two in diameter. CONNECT NEGATIVE CABLE LAST. 4.5) Torque terminal bolts to 40 in. / lbs; 4.6) Place rubber pad in bottom of battery tray, securely fasten battery to the vehicle using cover and strap. z To avoid possibility of explosion, always connect battery cable in the order specified: RED first; BLACK last. An exploding battery can cause serious injury or death. z Batteries contain sulfuric acid. z Always shield eyes with protective eyewear when working around battery acid. z Battery acid is poisonous and can cause severe burns. z z z DO NOT smoke around batteries and keep away from open flame. If the buggy will not be used for long time, disconnect the cable to save electricity. Dispose the old battery to a safe area to protect the environment. 68 Raider Classic 250 (double-seat): Owner’s Manual EEC Version:2.0 Feb. 2007 MAINTENANCE & SERVICE INSTRUCTIONS Following safety precaution must be observed while conducting regular maintenance and services : 1. Make sure the engine and entire vehicle is in OFF position. 2. Make sure the engine and exhaust pipes are cooled down. 3. To avoid possibility of explosion, always connect battery cable in the order specified. 4. Keep children away from the servicing area to avoid touching engine oil, grease and fuel. 5. Park the buggy on a flat ground, shift the gear to neutral position. 6. All flammable items or movement must be away from the engine to avoid accident. The running engine may cause electric shock, pollution, or burn your hands and hurt the body. 69 Raider Classic 250 (double-seat): Owner’s Manual EEC Version:2.0 Feb. 2007 A. AIR CLEANER [FILTER] The air filter is installed above the engine cylinder head. Maintain regular service as follow : Regular maintenance Period Cleaning Every 20 hours or 500 km[311m] Replacement of filter Every 3 months or kilometers [932 miles] 1500 Air Cleaner a. Remove the air cleaner cover; b. Remove the air cleaner element; c. Fill the non-flammable cleaning agent into a basin and dip the element in it; d. Dry it after cleaning, and dip it into the engine oil specified by the manufacture, then dry it again. Note : The performance of engine will decrease if the air cleaner is dirty。 Service more often when running under dusty, sandy and muddy conditions. 70 Raider Classic 250 (double-seat): Owner’s Manual EEC Version:2.0 Feb. 2007 Seam, Dirt, Carbon Verify B. SPARK PLUG a. Remove the spark plug and inspect it with a spark plug 0.6~0.8mm wrench each time you change the oil; Note: The electrodes should be kept clean and free of carbon. The presence of carbon or excess oil will greatly reduce the proper engine performance. Washer If possible, check the spark plug gap (area between the Verify electrodes) with a wire feeler gauge. This specification is 0.6-0.8 mm. b. Before installing the spark plug, coat the threads lightly Seam Verify with the graphite grease if possible, to ensure easy removal next time when the spark plug needs inspection; c. It is advisable to replace the spark plug at least once a year to ensure easy starting and good engine performance. 71 Raider Classic 250 (double-seat): Owner’s Manual EEC Version:2.0 Feb. 2007 C. CARBURETOR ADJUSTMENT Never make unnecessary adjustments. The manufacturer recommended settings are correct for most applications. It's not necessary to disassemble the screw unless the carburetor needs to be replaced. Prepare a 50r/w tachometer before the adjustment. a. Warm up the engine for about 5~10 minutes; b. Tighten the airscrew gently and back out 2-3/8 turns anticlockwise; c. Connect the tachometer, and adjust the throttle to limit the idle speed (the standard value is 1500±100 RPM); d. Slowly turn the airscrew anticlockwise; observe the RPM of the engine, and stop the adjusting as the RPM reaches the top speed; e. Adjust the screw, and adjust the idle speed to an ideal value; f. Repeat the steps d and e until the rotate speed of the engine becomes stable. 72 Raider Classic 250 (double-seat): Owner’s Manual EEC Version:2.0 Feb. 2007 D. CLEANING INSTRUCTION Keep your vehicle clean. Use a clean rag to wipe off the dirt and oil from around the controls, and wipe off any spilled fuel and oil. Keep the engine clean of foreign objects and be sure that the water tank fan is free of debris for proper cooling. E. VEHICLE LUBRICATION Lubricate your vehicle every 90 days of use. Apply several drops of oil in the specific points. F. CHAIN LUBRICATION Fill a spray atomizer with the specified chain lubrication, and lubricate the chain. Chain 73 Raider Classic 250 (double-seat): Owner’s Manual EEC Version:2.0 Feb. 2007 G. CHAIN ADJUSTMENT Check the chain adjustment after the first two hours of use, and readjust the chain if it has over 1/2" flex. a. Loosen Nut # 1; b. Turn Nut # 2 clockwise in 1/2-turn increments, then turn nut # 1 until it is tightened; c. Repeat the two steps [a & b ] until the chain is adjusted to the desired tension. Drive Chain Nut #1 Nut #2 Drive 74 Raider Classic 250 (double-seat): Owner’s Manual EEC Version:2.0 Feb. 2007 H. FRONT SHOCK ABSOBER ADJUSTMENT There are five adjustable positions on each shock. The default position is in the middle set by the manufacturer. Use a round nut wrench as you adjust the shock. The tension of the shock spring will increase as you screw to the left and decrease as you screw to the right. 75 Raider Classic 250 (double-seat): Owner’s Manual EEC Version:2.0 Feb. 2007 L. WHEEL REPLACEMENT 1. Front Wheel Replacement Don’t disassemble the castle nuts when replacing the front wheels. It is only necessary to loosen the nuts so that the wheels turn freely on the axle with minimum endplay. Tighten the nuts after replacing the wheels. 2. Rear Wheel Replacement Don’t disassemble the castle nuts M8 when replacing the rear wheels. It is only necessary to loosen the nuts so that the wheels turn freely on the axle with minimum endplay. Tighten the nuts M5 and put on the cotter pins after replacing the wheels. 76 Raider Classic 250 (double-seat): Owner’s Manual EEC Version:2.0 Feb. 2007 3. Tires inflation Maintaining the following specified tire pressure will be necessary to ensure driving comfort, safety of the driver and durability of tires. Spare Tire Front tire On-road tires Tire size Full load 21 x7-10 175 Kpa/17.5 psi Rear Tire Off-road tires On-road tires 21 x7-10 Off-road tires 21 x 11-10 175 Kpa/17.5 psi 175 Kpa/17.5 psi 22 x 11-11 175 Kpa/17.5 psi The above figures are measured under normal air temperature. If the tires are hot, the pressure reading will slightly go up, but it is within acceptable range and needs no adjustment to the tire pressure. If winter tire is used, each of the above pressure values should be increased by 20 Kpa or 2 psi. Wheel 77 Raider Classic 250 (double-seat): Owner’s Manual EEC Version:2.0 Feb. 2007 ENGINE A. Type of engine CH250CC single cylinder, 4-stroke, water-cooled engine is used in the buggy. Any change in the engine must be approved by the manufacturer because its dimension and technical specification must match the technical specification of carburetor, muffler, air filter and gear transmission, otherwise, engine vibration, oil leaking, engine under-powered, strange noise, disturbance with other portion of the frame body will happen. 4 B. Engine serial number Each engine is embossed with a serial number on the side cover : 3 Serial Number. Serial Number. 78 Raider Classic 250 (double-seat): Owner’s Manual EEC Version:2.0 Feb. 2007 C. Engine components 4 1. Aeration pipe of gear case 2. Cylinder head 3. Spark plug (D8RTC) 4. Cylinder head cover 5. Carburetor 6. Cylinder body 7. Left case cover 8. Special bolt subassembly 3 6 5 1 2 6 7 1 8 7 8 11 Figure I Outline of the engine (Left view) 79 Raider Classic 250 (double-seat): Owner’s Manual 9. EEC Version:2.0 Feb. 2007 12 Secondary wire 11 10. Right case body 12 11. Air-input hole of carburetor 13 12. Temperature sensor 13 14 10 10 9 13. Water-inflow rubber pipe (Water hose B) 14. Starting motor 14 15 9 15. Magneto winding 15 Figure II Outline of the engine (front view) 80 Raider Classic 250 (double-seat): Owner’s Manual EEC Version:2.0 Feb. 2007 16. Linking hole of vent-pipe 25 17. Chain regulator 16 18. Left case body 19. Output axle 17 18 20. Dipstick 21. Oil-filter gauge cover 19 22. Right case cover 24 23. Water pump cover 20 24. Fuel pipe 23 21 22 Figure III Engine outline (right view) 25. Aeration pipe, cylinder head cover 81 Raider Classic 250 (double-seat): Owner’s Manual EEC Version:2.0 Feb. 2007 D. ENGINE OVERHEATING You should stop and check the buggy when the water temperature gauge indicates high temperature. Run the engine at idle speed for a few minutes then check whether the fan blade is running. If it is running and there is no heating gas coming out from the engine, let the engine continue to run at idle speed until the engine is cooled. If the temperature does not drop when the fan blade is running, then stop the engine for cooling. When the engine is cooled, check the level of coolant. If the coolant level is low, check whether there is leakage at the water tank, rubber tube or water pump. If leakage is discovered, do not run the engine anymore and call for repair services. The heating-gas coming out from the engine could burn the skin. NEVER open water tank cap when heating gas is coming out. Stop the engine immediately for cooling and stay away from the buggy. You may open the water tank cap when hot-gas disappears. 82 Raider Classic 250 (double-seat): Owner’s Manual EEC Version:2.0 Feb. 2007 B. ENGINE LUBRICATION After the new engine has operated for the first 5 hours and for every 10 hours thereafter, change the oil in the crankcase to insure the proper lubrication of internal parts and to prevent costly repairs due to the excessive wear. 1) Remove the filler plug located on the rear side of engine; remove the drain plug; tip the vehicle backwards slightly by blocking up the front end ; drain the oil into a suitable container; 2) Place the vehicle in a level position, replace the filler plug and tighten it securely; 3) Refill the crankcase with the same grade of engine oil (approximately 1 1/4 pint) originally used; 4) Check the oil level before each drive; add the oil up to the proper level. NOTE : Grade of engine oil : SAE15W/40SF [During winter] ; SAE10W/30SF [During summer] Don’t mix various grades of oil together. 83 Raider Classic 250 (double-seat): Owner’s Manual EEC Version:2.0 Feb. 2007 C. ENGINE MAINTENANCE (1) Daily Maintenance: a) Remove the dust and dirt on the surface; b) Check all the exterior fasteners at the joints, and fasten or replace them if necessary; c) Check for the oil leakage, and check the compression at the mating surface; d) Check the engine oil, and add some if necessary. Note: The oil level should be between the upper index line and the lower index line of the gauge. Lowe Index Upper Index Line 84 Raider Classic 250 (double-seat): Owner’s Manual EEC Version:2.0 Feb. 2007 (2) 50–Hour Maintenance: a) Finish the daily maintenance; b) Remove the dust in the air cleaner element; replace the element if there is too much dust or any damp; Note: Don’t dip the element in water or oil. Don’t apply any lubrication oil or any other oil on the element. Otherwise it may cause damages to the transmission belt. z Don’t clean the element with gasoline or solvent of low flash point. c) Remove the carbon on the spark plug; d) Clean the crankcase and replace the oil; e) Clean the transmission box and replace the gear oil; z Remove the cap ②; z Remove the filling bolt ①;. z Remove the drain bolt ③; 85 Raider Classic 250 (double-seat): Owner’s Manual Note: EEC Version:2.0 Feb. 2007 Draining of oil should be done at room temperature to achieve quick and complete draining. f) Check the cooling devices. z Check for leakage on the water tank and water pipe; z Check if the water level in the subsidiary water tank is between the upper limit ① and lower limit ③; z If water level is low, open the cap ② and add some water until the water level reaches the upper limit ①. 86 Raider Classic 250 (double-seat): Owner’s Manual EEC Version:2.0 Feb. 2007 (3) 100-Hour Maintenance: a) Finish the 50-hour maintenance; b) Remove the cylinder cover and cylinder body, and clean out the carbon on the cylinder cover, cylinder body, piston top and in/ex valve, etc.; c) Clean the inner part of the crankcase, and rotate the crankshaft during the cleaning to clean the main bearing and connecting rod big end needle bearing; d) Check if the fixed screw of the generator stator is loose; e) Keep the connectors and electric parts dry and clean. (4) 150-Hour Maintenance: a) Finish 100-hour maintenance; b) Clean the crankcase and replace oil; c) Check if there is any leakage on the oil seals; replace the oil seals if necessary. (5) 300-Hour Maintenance: a) Finish 150-hour maintenance; b) Check if the parts of the clutch and the transmission are normal; adjust or replace the parts if necessary. 87 Raider Classic 250 (double-seat): Owner’s Manual EEC Version:2.0 Feb. 2007 (6) 500-Hour Maintenance: a) Finish 300-hour maintenance; b) Disassemble the engine (except the crankshaft connecting rod); check the parts for wear, and repair or replace the parts if necessary; c) Replace the cooling fluid. K. REPLACEMENT OF ENGINE OIL After running the new engine for the first 5 hours and for every 10 hours thereafter, change the oil in the crankcase to insure proper lubrication of internal parts and to prevent costly repairs due to excessive wear. Steps to replace oil : 1) Place the vehicle in a level position. 2) Remove the filler plug located on the rear side of the engine; 3) Remove the drain plug. Engine oil dipstick 4) Drain the oil into a suitable container. 5) Refill the crankcase with specified oil. Use the same grade of oil as used originally. 88 Raider Classic 250 (double-seat): Owner’s Manual EEC Version:2.0 Feb. 2007 Note : NEVER MIX VARIOUS GRADES OF OIL TOGETHER Oil filter must be replaced whenever engine oil is replaced. Check the oil level before driving the vehicle, add oil up to the required level. If the engine is to run under the following tough conditions, the interval of recommended regular engine oil replacement period and oil filter replacement period shall be shorter. 1. Journey is mostly below 2000 km. 2. The engine is to run under cold weather and outside temperature falls below the freezing point, at this point of time, the journey is below 2000 km. 3. The engine is continually running at idle speed or low speed (For example, when engine is always being turned On and Off many times). 4. The vehicle runs in dusty area. CAUTION: The used engine oil is harmful to the human health and will pollute the environment, it needs to be disposed with care according to the environment protection regulation. 89 Raider Classic 250 (double-seat): Owner’s Manual EEC Version:2.0 Feb. 2007 STORAGE INSTRUCTION In the event your vehicle is not to be operated for periods in excess of 30 days or at the end of each driving season, prepare for storage as follows: 1) Drain (or use a fuel stabilizer) all the fuel out of the fuel tank and carburetor; 2) Remove the spark plug; pour one ounce of clean cylinder lubricating oil through the spark plug hole into the cylinder, and crank the engine slowly to spread the oil so as to lubricate the cylinder better; replace the spark plug; 3) Don’t save or store gasoline over winter, because the old gasoline has deteriorated in the winter storage, and will cause hard starting and affect the engine performance. NOTE : In very cold weather, engine oil runs in the wrong direction and stays on one side of engine, not on engine bottom; if you start the buggy immediately after taking it out, engine oil won’t have enough time to flow back to the engine bottom, which may cause starting failure and improper engine lubrication. 90 Raider Classic 250 (double-seat): Owner’s Manual EEC Version:2.0 Feb. 2007 PERIODICAL CHECKS AND SERVICES The maintenance intervals in the following table are based on average riding conditions. Riding in unusually dusty areas requires more frequent services. Items Tire pressure/wear, Brake performance, Tightness of screws Air cleaner Carburetor Spark plug Drive chain Brake fluid Replace gearbox oil Chassis Fuel switch/fuel tank Battery Engine oil Valve clearance of engine Note: First week I Monthly I Quarterly Yearly C I C A I C C, A I I I C, I C, A, L I R L C I I R A A: adjust; C: clean; I: inspect, clean or replace if necessary; L: lubricate; R: replace. 91 Raider Classic 250 (double-seat): Owner’s Manual EEC Version:2.0 Feb. 2007 SPECIFICATIONS DIMENSIONS DOUBLE-SEAT Overall Length 2250 mm/7.38 ft [On-road]; 2270mm/7.45ft [Off-road] Overall Width 1430 mm/4.69 ft [On-road]; 1450 mm/4.76ft [Off-road] Overall Height 1630 mm/5.35 ft [On-road]; 1475mm/4.84ft [Off-road] Wheelbase 1560 mm/5.12 ft Ground Clearance 250 mm/0.82 ft VIN L4VMB1FF Statutory Plate& Safety Labels Accord with GB 7258-1997 ENGINE Model PMI172MM Type Water-cooled, single cylinder, 4-stroke Engine Capacity 244cc Displacement 244.3 ml Bore×Stroke 72 mm×60 mm or Standard Power 11.5kw/7000 rpm or 92 0.24 ft X 0.20 ft 15.6 hp/7000 rpm Raider Classic 250 (double-seat): Owner’s Manual EEC Version:2.0 Feb. 2007 Max. Power 12.5kw/7000 rpm or 17 hp/7000 rom Max. Torque 17.6 N.m /6500 rpm Idle Speed 1500 ±100 rpm CO Emission ≤3.8% HC Emission ≤800 ppm Fuel Type SAE 90# or above (unleaded) Min. Fuel Consumption 354 g/kw.h Fuel consumption rate Approximately 87 ml per second Lubricate Oil Type SAE 15W / 40SF Lubrication Pressure & splash Cooling Fluid SHELL (Antifreeze) Antifreeze Temperature of Cooling Fluid - 450C Mixing Ratio (Cooling Fluid : Water ) 1:1 Cooling Water-cooled, electric fan Ignition C.D.I. Starting Electric Spark Plug D8RTC Spark Plug Gap 0.6-0.8 mm or 0.02 – 0.03 inch 93 [winter], 10W/30SF [Summer] Raider Classic 250 (double-seat): Owner’s Manual EEC Version:2.0 Feb. 2007 Transmission OHC Chain Drive Transmission Ratio F Primary Transmission Ratio 2.2-0.9 Compression Ratio 10 : 1 Reduction Ratio 6.6 Clutch Automatic, centrifugal, dry, shoe -type Generator Outer rotor, flywheel Carburetor Vacuum Film Type Absorber Normal (in 10 6 X10⁴ times of experiments) Air Cleaner Paper element, filtration type Gear-Shifting Automatic, centrifugal Engine Net Weight 31.5 kg or 69.5 lbs Brake Oil Model DOT-3 Noise grade ≤80Db (A) 1:1, B 1:1.758 CAPACITIES Fuel Tank 9.0 ±0.1L, 130 kpa Starting Time ≤15s 94 Raider Classic 250 (double-seat): Owner’s Manual EEC Version:2.0 Feb. 2007 Climbing >18 o Top speed 63kph Tachometer 33-40kph Turning Radius 3 m or 9.85 ft Acceleration < 16 Sec Horn 12V 3A 105dB, 93<db (A) <112 Headlight 12V /35W Headlight High Beam Intensity 10000 cd Taillight 12V 5W /21W Turning Light 12V 10W License Light 12V 5W Battery 12V 8Ah Fuse 12A Anti-theft Lock ≥200N.m Rearview Mirror Accord with EEC standards Cooling fluid capacity 2L 95 Raider Classic 250 (double-seat): Owner’s Manual EEC Version:2.0 Feb. 2007 CHASSIS Front/Rear Brake Hydraulic disc, foot control Front Wheel Brake Force 923N Rear Wheel Brake Force 1288N Braking Distance ≤7 m@30kmph Parking Brake Hydraulic disc, hand control Front Tire 20.5x8-10 [On-road] ; 21 X 7-10 [Off-road] Rear Tire 20.5-10-10 [On-road] ; 22 X11 –10 [Off-road] Max Load of Rear Cargo Rack 20 kg Anti-theft Lock ≥200N.m or 44 lbs TIRE PRESSURE Front 175 kpa Rear 200 kpa WEIGHT Net Weight z 328 kg or 723 lbs The specifications are subject to change without prior notice. 96 Raider Classic 250 (double-seat): Owner’s Manual EEC Version:2.0 Feb. 2007 STANDARD TORQUE OF FASTENING PARTS Below table indicates the standard torque for fixing fastening parts such as bolts onto the BUGGY. Over or under use of torque strength will cause falling off of bolts or easy cracking of components. Bolt Diameter (mm) Conventional Marked bolts 8.8 Marked bolts N.m Kg.m Lb-ft N.m Kg.m Lb-ft 4 1-2 0.1-0.2 0.7-1.5 1.5-3 0.15-0.3 1.0-2.0 5 1-4 0.2-0.4 1.5-3.0 3-6 0.3-0.6 2.0-4.5 6 4-7 0.4-0.7 3.0-5.0 8-12 0.8-1.2 6.0-8.5 8 10-16 1.0-1.6 7.0-11.5 18-28 1.8-2.8 13.0-20.0 10 22-35 2.2-3.5 16.0-25.5 40-60 4.0-6.0 29.0-43.5 12 35-55 3.5-5.5 25.5-40.0 70-100 7.0-10.0 50.5-72.5 14 50-80 5.0-8.0 36.5-58.0 110-160 11.0-16.0 79.5-115.5 16 80-130 8.0-13.0 58.0-94.0 170-250 17.0-25.0 123.0-181.0 18 130-190 13.0-19.0 94.0-137.5 200-280 20.0-28.0 144.5-202.5 97 Raider Classic 250 (double-seat): Owner’s Manual EEC Version:2.0 Feb. 2007 BUGGY IDENTIFICATION 1. VIN -----You may identify your buggy by the Vehicle Identification Number [VIN] which is embossed on the frame behind the passenger seat. This VIN number will be used in communication with the dealer, import custom office , service centre, forwarder or manufacturer. VIN 2. Supplier Label ----- A piece of metal plate showing the date of production, name of supplier is affixed at the front chassis [For On-road model only]. 98