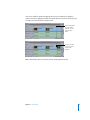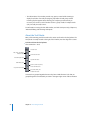
1
42886.FightClubGS Cover 1/17/05 9:29 PM Page 1 Final Cut Express HD Final Cut Express HD Getting Started Getting Started Apple Computer, Inc. © 2005 Apple Computer, Inc. All rights reserved. Under the copyright laws, this manual may not be copied, in whole or in part, without the written consent of Apple. Your rights to the software are governed by the accompanying software license agreement. The Apple logo is a trademark of Apple Computer, Inc., registered in the U.S. and other countries. Use of the “keyboard” Apple logo (Option-Shift-K) for commercial purposes without the prior written consent of Apple may constitute trademark infringement and unfair competition in violation of federal and state laws. Every effort has been made to ensure that the information in this manual is accurate. Apple Computer, Inc., is not responsible for printing or clerical errors. Apple Computer, Inc. 1 Infinite Loop Cupertino, CA 95014-2084 408-996-1010 www.apple.com Apple, the Apple logo, Final Cut, Final Cut Pro, FireWire, iMovie, iTunes, Mac, Macintosh, Mac OS, PowerBook, Power Macintosh, and QuickTime are trademarks of Apple Computer, Inc., registered in the U.S. and other countries. Finder and iDVD are trademarks of Apple Computer, Inc. AppleCare is a service mark of Apple Computer, Inc. Helvetica is a registered trademark of Heidelberger Druckmaschinen AG, available from Linotype Library GmbH. Other company and product names mentioned herein are trademarks of their respective companies. Mention of third-party products is for informational purposes only and constitutes neither an endorsement nor a recommendation. Apple assumes no responsibility with regard to the performance or use of these products. 1 Contents Preface 7 7 8 12 12 An Introduction to Final Cut Express HD What Is Final Cut Express HD? Editing Your Movie With Final Cut Express HD Final Cut Express HD Onscreen Help Apple Websites Chapter 1 13 13 14 16 Setting Up Final Cut Express HD Connecting Your Camera Choosing Your Initial Settings Tip for Optimizing Performance Chapter 2 17 18 21 25 28 32 Getting to Know Your Editing Environment Organizing Your Clips in the Browser Working With Clips in the Viewer Working With Clips in the Canvas Working With Clips in the Timeline Tool Palette Chapter 3 33 33 35 39 40 46 Capturing Your Video Making a New Project and Saving It Working in the Capture Window Determining How Much Disk Space You Need Capturing Capturing Tip Chapter 4 49 50 54 55 57 59 60 62 66 Basic Editing Before You Begin Opening Your Project Adding a Clip to Your Sequence Adding a Storyboard of Clips to a Sequence Locking Tracks Using the Razor Blade Tool Deleting Clips From a Sequence Assigning Destination Tracks 3 4 68 Most Commonly Used Edits Chapter 5 75 75 76 79 82 86 Editing With Audio About Linked Clips Resyncing Clips Adding Music Using the Voice Over Tool Editing With Audio Tips Chapter 6 89 89 90 91 94 96 99 Fine-Tuning Your Edit Where You Can Perform Trim Edits About the Tool Palette Doing a Ripple Edit Doing a Ripple Delete Doing a Roll Edit Tips on Editing Chapter 7 109 109 111 114 115 115 Adding Transitions About Adding Transitions Adding a Transition to the Center of a Cut Adjusting a Transition Deleting a Transition Copying and Pasting a Transition Chapter 8 117 118 119 121 121 122 Adding Effects Applying a Filter to a Clip and a Range of Clips Adjusting a Filter Disabling a Filter Removing a Filter Filter Tips Chapter 9 123 124 128 130 132 Creating Titles and Credits Creating Opening Titles Using Lower-Thirds Creating Rolling Credits Tips for Making Terrific-Looking Titles Chapter 10 133 133 135 136 Sharing Your Movie Exporting for DVD Exporting for the Web Making a Videotape Appendix A 139 Importing an iMovie Project Appendix B 141 Importing Stills Contents Appendix C 143 Preparing for Your Next Project Appendix D 145 145 150 Solutions to Common Problems and Customer Support Solutions to Common Problems AppleCare Support Glossary 151 Index 155 Contents 5 Preface An Introduction to Final Cut Express HD Final Cut Express HD provides a professional-level environment in which to edit video, mix audio, and add effects together to create any kind of video program you can imagine. The last few years have seen a revolution in the use of personal computers for editing video. Until recently, editing video projects would have required an array of professional editing equipment. These projects can now be completed at home using a personal computer and readily available consumer video equipment. A personal computer with a fast processor and enough memory can now serve as a workstation for capturing, organizing, and editing video. The finished movie can be played back on videotape, burned on a DVD, or distributed over the Internet. For hobbyist digital video editors, this development allows unprecedented opportunities for increasing their creative control over their video projects. Now, using Final Cut Express HD, video editors, including those with no professional video editing training or experience, can create high-quality, polished digital video projects on their personal computer. What Is Final Cut Express HD? Final Cut Express HD is a flexible video editing tool; when combined with a Macintosh computer and FireWire, Final Cut Express HD can be used to capture footage from nearly any DV camcorder. Final Cut Express HD is also a standard QuickTime application, so you can import and export a wide variety of video, audio, graphics, and animation file types. This flexibility makes Final Cut Express HD well suited for projects ranging from family videos to feature-length independent films. The only limit is your creativity. 7 Editing Your Movie With Final Cut Express HD If you’re just beginning to learn how to edit video with Final Cut Express HD, the following flow chart illustrates the basic workflow of desktop video editing. There are five main steps to video editing–shooting, capturing, editing, adding effects, and sharing. This book describes how to do the last four. Shoot Connecting Your Camera Capture Making a New Project Capturing Video Organizing Your Clips Edit Editing Your Sequence Fine-Tuning Adding Music Adding Transitions Effects Creating Effects With Filters Creating Titles and Credits Exporting for DVD Share Exporting for the Web Outputting to Videotape The following steps outline a typical Final Cut Express HD work session. You won’t always proceed in a strict linear order, and you may choose to overlap some steps. For example, you may decide to reedit a clip after you’ve added an effect to it, or you may shoot and capture completely new footage to add a different ending to your nearly complete movie. Note: This book is not intended to be a complete guide to editing. Common editorial terms and ideas are discussed in a general way, as appropriate to their use with the application. If you are interested in learning more about the application or more in-depth editing techniques, refer to Final Cut Express HD Help. 8 Preface An Introduction to Final Cut Express HD Step 1: Shoot Making good videos begins with good camera work. Although this book does not teach the finer points of shooting video, you need to be aware of some basic issues while shooting your footage and recording your audio. Final Cut Express HD is a robust and powerful digital video editing tool; however, it is not designed to correct video that was improperly shot or audio that was improperly recorded. The following list is a series of tips on shooting good video: • Use a tripod. Tripods add stability to your shot, allowing your viewers to focus on your subject instead of your camera motion. • Avoid zooming to get closer to your subject, especially when the camera is handheld. • • • • • • • • • • Magnifying the image with a zoom lens also magnifies camera movements, potentially giving your viewer motion sickness. Never use digital zoom. Turn this feature off on your camcorder. Digital zoom makes pixels bigger on the screen, resulting in a blockier, lower resolution image. Avoid auto-focus. Learn to focus your camera lens manually so you control the image instead of the camera. Avoid bright lights behind your subject (called backlighting), since this often results in unwanted silhouetting. Be cautious when shooting reflective surfaces. For example, eyeglasses and car mirrors can cause overly bright highlights and often reveal the camera operator in the shot. Plan your shots in advance. Consider image composition and how your shots may work together during the editing process. Scripting and storyboarding can be useful ways to organize your shooting. Think about image composition and frame your shots. Pay attention to headroom– too little will smash actors’ heads against the top of the frame; too much will lose them at the bottom. Avoid using the on-camera microphone–use an external microphone instead. Built-in microphones tend to capture the sounds of the camera and the camera operator instead of the subject of the scene. Leave at least one minute of black (recorded with no audio or video) at the beginning and end of your tape, where tapes receive the most wear and tear. Pull the record tab to prevent recording over your tape as soon as you’ve finished shooting. Always label your tapes as soon as you remove them from the camcorder. This is the number 1 organizational rule of motion picture editing. Sorting through piles of unlabeled tapes for a particular scene is an editor’s worst nightmare. On feature films, there is one person dedicated to labeling film and tape reels as soon as they leave the camera. Preface An Introduction to Final Cut Express HD 9 Step 2: Set up Thanks to the development of FireWire, setting up Final Cut Express HD is easy. You simply connect your camera (via FireWire) to your computer, turn on your camera, set it to VTR mode, and open Final Cut Express HD. When you open Final Cut Express HD, the application recognizes the type of camera you have and knows how to control it. Unless you upgrade your system or change components, such as the DV camcorder, you should only have to set up your system once. Important: Verify that all of your cables are securely connected between your computer, camera, and speakers, but never force a cable into a connection that doesn’t fit. Step 3: Capture Capturing is the process of digitally copying the video from the DV tape in your camcorder to the hard disk on your computer. After creating a new project, you capture your video using the device control capabilities of Final Cut Express HD and your DV camcorder. (Device control is technology that allows Final Cut Express HD to control a DV camcorder.) Final Cut Express HD makes capturing easy by allowing you the flexibility of capturing individual clips or an entire tape. Step 4: Edit After you’ve captured the clips that will go into your finished program, it’s time to begin editing with Final Cut Express HD. You do most of your editing in the Viewer, Canvas, and Timeline; however, you organize your captured clips in the Browser. The basics of editing involve organizing clips in the Browser; editing clips into your sequence using the Viewer, Canvas, and Timeline; fine-tuning your edits using the Final Cut Express HD editing tools; adding transitions such as cross dissolves to your edits; and adding music tracks to your sequence. Final Cut Express HD provides other tools to perform detailed editorial tasks, manage files, and specify preferences and settings to customize Final Cut Express HD to how you work. Step 5: Effects When you’re satisfied with the arrangement of the clips in your project, it’s time to apply effects and filters such as a blur or a tint to the clips. Once you’re happy with the effects you’ve applied, it’s time to add titles. Now your project is complete. Step 6: Share When your project is complete, you’ll want to show people your movie. Final Cut Express HD provides you with a variety of output options for your completed project. If you want to use your camcorder to view the completed project on your TV, you can transfer your project back to DV tape using the Print to Video command. If you want to make a DVD, you can use the export to iDVD feature. You also have the option of distributing your edited video project on the web. 10 Preface An Introduction to Final Cut Express HD Moving From iMovie to Final Cut Express HD The Apple entry-level DV editing application is iMovie. It allows you to create simple edited digital movies with some of the most popular features found in Hollywoodstyle releases, without having to know any technical details about the process. The interface and feature set are configured to make the process nearly foolproof. Eventually, however, you’ll find yourself requiring features beyond those that iMovie offers. The tools in Final Cut Express HD allow you to expand your digital editing creativity. Final Cut Express HD gives you access to a wide range of professional features such as the following: • Support for multiple projects and sequences, allowing you to edit in multiple projects at once and copy elements from one sequence to another. • Support for multiple video and audio tracks, making it easy to create video composites and audio mixes. • Support for voiceovers. You can record voiceovers directly into the Timeline using the Voice Over tool. Additionally: • Final Cut Express HD is a nondestructive editor, which means making edits and adding transitions does not affect the original video on your computer’s hard disk. This means you can experiment with edits and transitions without having to commit to them permanently. • Final Cut Express HD comes with over 200 transitions, filters, and effects. You can preview many of them without rendering due to the software-based, real-time architecture of Final Cut Express HD. (Rendering involves processing video and audio with any applied effects, such as transitions or filters. Effects that aren’t realtime must be rendered in order to be played back properly. Once rendered, your sequence can be played in real time.) • Final Cut Express HD offers several workflows and work styles for editing digital video projects, including advanced media management and the drag-and-drop method used within iMovie. These capabilities, along with its ability to import iMovie projects, make Final Cut Express HD easy to learn while still providing the advanced features you need. See “Importing an iMovie Project” on page 139. Preface An Introduction to Final Cut Express HD 11 Final Cut Express HD Onscreen Help Final Cut Express HD Help is a comprehensive resource for information about Final Cut Express HD. It allows you to access information directly onscreen while you’re working in Final Cut Express HD. Background information, details, and steps are described at greater length in Final Cut Express HD Help than they are in this book. Throughout this book, you will see references to Final Cut Express HD Help for additional detailed information. m To access onscreen help: Choose Help > Final Cut Express HD Help. Tip: Click the How to Search link on the Final Cut Express HD Help homepage for tips on searching Final Cut Express HD Help. Final Cut Express HD Help also contains information about issues with third-party hardware and software and known bugs. This information is found in the Late-Breaking News section of Final Cut Express HD Help. m To access late-breaking news: Choose Help > Late-Breaking News. Apple Websites There are a variety of discussion boards, forums, and educational resources related to Final Cut Express HD on the web. Final Cut Express HD Websites The following websites provide general information, updates, and support information about Final Cut Express HD, as well as the latest news, resources, and training materials: • http://www.apple.com/finalcutexpress • http://www.info.apple.com/usen/finalcutexpress • http://www.apple.com/finalcutexpress/resources.html • http://www.apple.com/software/pro/training/ts_fcpexpress.html • http://www.apple.com/software/pro/training/dvdcd.html Apple Service and Support Website The Service and Support Website provides software updates and answers to the most frequently asked questions for all Apple products, including Final Cut Express HD. You’ll also have access to product specifications, reference documentation, and Apple and third-party product technical articles: • http://www.apple.com/support 12 Preface An Introduction to Final Cut Express HD 1 Setting Up Final Cut Express HD 1 Setting up Final Cut Express HD is as simple as connecting your DV camcorder to your computer with a FireWire cable. The following sections describe how to connect your camera and the initial settings you need to specify so you can begin working in Final Cut Express HD. Connecting Your Camera The following illustration demonstrates how to connect your DV camcorder to the FireWire port on your computer, so that you can capture video (transfer the video from your camcorder to your computer) and output your program back to DV tape. 6-pin connector to computer Computer DV camcorder in VTR mode FireWire 4-pin connector to camcorder To set up a DV system using FireWire device control (the technology that allows Final Cut Express HD to control your camcorder), you need the following equipment: • Your computer and display • A DV device, such as a DV camcorder or deck • A 4–to–6-pin FireWire cable, available at an electronics store or an Apple-authorized retailer 13 Choosing Your Initial Settings The first time you open Final Cut Express HD after installing the software, you’re prompted to choose an Easy Setup and a scratch disk (where you’ll store your media). Choosing an Easy Setup Final Cut Express HD comes with several predefined Easy Setups based on the most commonly used settings, such as DV-NTSC and DV-PAL. Depending on where you live, you will choose one of these two options. See “The Differences Between NTSC and PAL” on page 15 to find out the setting you need. The Easy Setup you choose applies to all new projects and sequences until you choose another Easy Setup. If you always use the same type of camcorder or video deck, you may never have to change your Easy Setup. If you do change your camcorder or video deck, it’s simple to change your Easy Setup. To change an Easy Setup: 1 Choose Final Cut Express HD > Easy Setup. 2 Choose an Easy Setup from the Setup For pop-up menu. To show all Easy Setups that are currently available, select Show All. Choose an Easy Setup from the Setup For pop-up menu. Select Show All to see a complete list of available Easy Setups. A summary of your selected Easy Setup appears below the pop-up menu. Tip: For best results, choose one of the two main Easy Setups: DV-NTSC or DV-PAL. 3 When you’re ready, click Setup. The selected Easy Setup applies to all new projects and sequences. Settings for existing sequences do not change. For additional information about Easy Setups, see Final Cut Express Help, Chapter 4, “Specifying User Preferences, System Settings, and Easy Setups.” 14 Chapter 1 Setting Up Final Cut Express HD The Differences Between NTSC and PAL NTSC and PAL are standards for video. NTSC, or National Television Systems Committee, is the television and video standard used in most of the Americas, Taiwan, Japan, and Korea. PAL, or Phase Alternating Line, is the television and video standard used in most of Europe, Brazil, Algeria, and China. (SECAM, a video standard based on PAL and used in France, Poland, Haiti, and Vietnam, is not supported by Final Cut Express HD. However, editing work is usually done in PAL and converted to SECAM.) Important: Make sure to choose the Easy Setup that corresponds to your country. The Differences Between Apple FireWire and FireWire Basic Video devices vary greatly in their functionality and adherence to FireWire specifications for device control. For this reason, there are two versions of the FireWire protocol you can use for device control and capture in Final Cut Express HD: • Apple FireWire: This is the default. • Apple FireWire Basic: This is a simplified device control protocol for camcorders and decks that aren’t compatible with the full Apple FireWire set. Using this protocol doesn’t affect the quality of captured video or audio. To switch to the Apple FireWire Basic Easy Setup: 1 Choose Final Cut Express HD > Easy Setup. 2 Select the Show All checkbox, and choose the appropriate FW Basic Easy Setup for your camcorder or deck from the Setup For pop-up menu. For more information about FireWire technology, go to the Apple FireWire website at http://www.apple.com/firewire. Setting Up Scratch Disks A scratch disk is the disk or disk space you allocate in Final Cut Express HD for digital video capture and editing, as well as for the storage of a project’s render files. Final Cut Express HD lets you specify up to 12 scratch disks for storing files. It’s best to set these after you set up your hardware but before you start to work in Final Cut Express HD. When you capture or render clips, media files are saved to the first disk in the list. When that disk is full, Final Cut Express HD goes to the next disk in the list until it’s full, and so on. Chapter 1 Setting Up Final Cut Express HD 15 m To specify one or more scratch disks and associated settings: Choose Final Cut Express HD > System Settings, then click the Scratch Disks tab. For additional information about scratch disks, see Final Cut Express Help, Chapter 4, “Specifying User Preferences, System Settings, and Easy Setups.” Tip for Optimizing Performance In most cases, the default values set in Final Cut Express HD System Preferences will be sufficient for your needs. However, you may choose to change certain settings to accommodate the requirements of your project. • Limit Capture Now To: In the System Settings Scratch Disks tab, change this value from 30 minutes to 62 minutes. This will allow you to capture an entire 60-minute DV tape. 16 Chapter 1 Setting Up Final Cut Express HD 2 Getting to Know Your Editing Environment 2 There are four main windows in Final Cut Express HD: the Browser, Viewer, Canvas, and Timeline. Each window plays an important role in the editing process. If you want to get familiar with the windows and tools in Final Cut Express HD, read through this chapter. If you’d rather jump right in and begin editing, move on to Chapter 4, “Basic Editing,” on page 49, and refer back to this chapter as needed. Use the Viewer to preview your clips before you place them in your sequence in the Timeline. Use the Canvas to play back changes you make to your sequence in the Timeline. Use the Browser to organize the source material in your project. Use the Timeline to edit and arrange your sequence. 17 Organizing Your Clips in the Browser The Browser is the central storage area where you organize all of the source material you’ll use in your project. To organize your media so you can work efficiently, you need to understand the basic organizational elements of Final Cut Express HD—projects, sequences, clips, and bins—and how they relate to the Browser. Project Sequence Clip Bin What Is a Project? A project contains all the clips, sequences, and file references you use while editing your movie. All of these appear in a project’s tab in the Browser. Although the source media files for your project are actually stored on your computer’s hard disk in a location different from the project file, you use the Browser to help organize and manage the clips and sequences used by your project. My Project Audio clip ABC Still image Sequence Video clip There is no limit to the number of items that can be stored in the Browser. You can have multiple projects open in the Browser at one time. Each project appears in its own tab. 18 Chapter 2 Getting to Know Your Editing Environment What Is a Clip? A clip is the basic unit of media that you use to create sequences in Final Cut Express HD. Clips can be movies, still images, generators, and audio files. A clip is not the actual media file, but a reference to the media file stored on your computer’s hard disk. Clips are the building blocks from which all sequences are created. The three kinds of clips you’ll see most often are audio, video, and graphics clips, but there are other kinds of clips that can be created within Final Cut Express HD. You can also subdivide a clip into separate pieces, called subclips, to further organize your footage. What Is a Bin? A bin is a folder inside of the project that can contain clips, transitions, effects, and generators. You use bins to organize these elements, sort them, add comments, rename items, and so on. This creates a logical structure for your projects, making your media easier to manage. Bins exist only in project files. Changes you make to the contents of a bin, such as deleting, moving, and renaming clips or renaming the bin itself, have no effect on the original files or folders on your computer’s hard disk where the source material is stored. If you delete a clip from a bin, it is not deleted from the disk. Likewise, creating a new bin does not create a new folder on your disk. You can create separate bins for different stages of your project or to separate your original and production footage. You can organize bins hierarchically and open them in their own windows. You can even put bins inside other bins. To add a new bin to a project: 1 In the Browser, click the project tab where you want to add a bin. 2 Do one of the following: • Choose File > New > Bin. • Control-click the Name column, then choose New Bin from the shortcut menu. • Press Command-B A new folder appears in the Browser with Bin [number] highlighted. 3 Enter a name for the new bin. What Is a Sequence? A sequence is a container where you edit together a series of clips to create a new movie. Sequences can be a maximum of four hours in length. A sequence can contain your entire movie, or your movie can be composed of several sequences. You can have multiple sequences within a project; sequences can also be used as source clips and edited into other sequences. You cannot save sequences outside a project, but you can export them as movies or clips. Chapter 2 Getting to Know Your Editing Environment 19 Selecting a Browser View There are two ways to view your media in the Browser: icon view and list view. Icon view allows you to view your media as thumbnails. There are three icon views: Small, Medium, and Large. In list view, the Browser’s scrollable columns provide information about your files in an easy-to-access hierarchy. List view also allows you to sort and search for items within the Browser. For more information about list view, see Final Cut Express Help, Chapter 7, “Using the Browser and Managing Projects and Clips.” m To display Browser items as icons or in a list, do one of the following: Choose View > Browser Items, then choose an option from the submenu. m Control-click in the Name column (or any place in the tab other than an icon), then choose a view option from the shortcut menu. m Press Shift-H to toggle through all four views. Tip: To view a thumbnail of each clip while remaining in list view, control-click on a column title, and choose Show Thumbnails from the shortcut menu. Note: In this book, the Browser is shown in icon view. Deleting or Removing Items From the Browser You can remove items from the Browser at any time. m To delete a clip, sequence, or bin from a project, do one of the following: Select the item, then press Delete. m Control-click the item you want to delete, then choose Cut from the shortcut menu. Note: Deleting a clip from a project does not delete that clip’s source media file from your hard disk, nor does it delete any other associated duplicates of that clip appearing in that project, including sequence clips. 20 Chapter 2 Getting to Know Your Editing Environment Working With Clips in the Viewer To view a clip, you select it in the Browser, then open it into the Viewer by doubleclicking. The Video tab of the Viewer acts as your “source” monitor; there, you watch your selected clip and mark the In and Out edit points, which define how much of the clip you want to edit into your sequence. Viewer Controls There are many controls in the Viewer. (Some of these appear in other areas of the interface, as well; for example, the playhead controls also appear in the Canvas.) Tabs Clip name and the project it’s in. Current Timecode field Timecode Duration field Zoom pop-up menu View pop-up menu Preview area Playhead In point Out point Scrubber bar Shuttle control Jog control Generator pop-up menu Marking controls Transport controls Recent Clips pop-up menu Chapter 2 Getting to Know Your Editing Environment 21 The following is a quick summary of the Viewer controls: • Tabs: There are five tabs in the Viewer: Video, Audio, Filters, Motion, and Controls. Each • • • • • • • • • 22 tab in the Viewer provides certain editing functions. The Video and Audio tabs appear only if the clip currently opened in the Viewer contains video or audio media. For example, you only see the Audio tab when you open an audio clip or a video clip that includes audio. The Filters tab appears for all clips, and the Motion tab appears only for video and graphics clips. The Controls tab only appears if you’ve added a generator. For more information on generators, see Chapter 9, “Creating Titles and Credits.” Playhead and scrubber bar: These controls let you locate and move or jump to different parts of a clip quickly and easily. Transport controls: You use these controls to move the playhead within clips and sequences. The position of the playhead corresponds to the currently displayed frame. Jog and shuttle controls: You use the jog and shuttle controls to navigate more precisely within your clip. Marking controls: You use these controls to set a clip’s edit points (In and Out points), markers, and keyframes. Zoom pop-up menu: This pop-up menu lets you enlarge or shrink the image that appears in the Viewer. View pop-up menu: This pop-up menu allows you to change the viewing format and control the display of various overlays that can appear in the Viewer. Generator pop-up menu: You use this pop-up menu to select and open generators in the Viewer for modifying and editing into your sequence. Generators are special clips that can be created by Final Cut Express HD; for example, they can be used to create color mattes and text of different types. Recent Clips pop-up menu: This pop-up menu allows you to open recently used clips in the Viewer for modifying and editing into your sequence. Timecode fields: The Current Timecode field displays the timecode of the frame at the current position of the playhead. The Timecode Duration field lets you view and change the duration of marked clips. Chapter 2 Getting to Know Your Editing Environment Opening Clips Into the Viewer You can open clips into the Viewer from either the Browser or the Timeline. Clips appear in the Viewer with the last selected Viewer tab displayed. If you’re opening an audio-only clip, the Video tab disappears and the Audio tab is displayed. Although the Viewer can display only one clip at a time, you can open multiple selected clips into the Viewer, and they will appear in the Recent Clips pop-up menu. m To open a clip from the Browser, do one of the following: Double-click the clip. m Drag the clip from the Browser to the Preview area of the Viewer. m Select the clip with the Up and Down Arrow keys, then press the Return key. m Control-click the clip, then choose Open in Viewer from the shortcut menu. Clips opened from the Browser have a plain scrubber bar. m To open a clip from the Timeline, do one of the following: Double-click the clip. m Drag the clip from the Timeline to the Preview area of the Viewer. m Select the clip, then press the Return key. m Control-click the clip, then choose Open [Clip Name] from the shortcut menu (where [Clip Name] is the name of the clip). Clips opened from the Timeline have a dotted scrubber bar. Chapter 2 Getting to Know Your Editing Environment 23 Playing Clips in the Viewer You use the transport controls in the Viewer to play clips forward, backward, between In and Out points, one frame at a time, and looped. Previous Edit Next Edit Play In to Out Play Around Current Play To play a clip in the Viewer: 1 Double-click the clip in the Browser to open it into the Viewer. 2 Do one of the following: • • • • Click the Play button. Press the Space bar. Press L. Choose Mark > Play > Forward. m To stop playback, do one of the following: Click the Play button again. m Press the Space bar. m Press K. You can navigate backward in your clip at 1x (normal) speed if you want to search for precise locations to set your In and Out points. To play a clip in reverse: 1 Double-click the clip in the Browser to open it into the Viewer. 2 Do one of the following: • • • • Shift-click the Play button. Press Shift–Space bar. Press J. Choose Mark > Play > Play Reverse. Using In and Out Points See “Setting In and Out Points” on page 51. 24 Chapter 2 Getting to Know Your Editing Environment Working With Clips in the Canvas The Canvas is the Final Cut Express HD record monitor, showing what your edited sequence will look like when it’s played. There are many controls and displays in the Canvas. Before working with the Canvas, make sure it’s the currently selected window. Otherwise, your keyboard shortcuts might trigger the wrong actions. m To select the Canvas window: Click in the Canvas (or press Command-2). Name of the currently selected sequence and the project it’s in Current Timecode field Timecode Duration field Zoom pop-up menu View pop-up menu Image display area Playhead Scrubber bar Shuttle control Jog control Transport controls Sequence marking controls Tip: Press Q to switch between the Viewer and the Canvas. Chapter 2 Getting to Know Your Editing Environment 25 Canvas Controls The following is a list of controls in the Canvas. • Tabs: Each tab in the Canvas represents an open sequence. Each tab in the Canvas has a corresponding tab in the Timeline. • Image display area: This is the area of the Canvas where you can see the video from your sequence play back. • Playhead and scrubber bar: These controls let you locate and jump to different parts of your sequence quickly and easily. • Transport controls: These controls are used to play back your edited sequence. • Jog and shuttle controls: These controls let you more precisely navigate within your sequence. • Sequence marking controls: These controls are used to mark your sequence with edit points: In and Out points, markers, and keyframes. • Editing controls: The edit buttons and the Edit Overlay allow you to perform seven different types of edits. • View and Zoom pop-up menus: These pop-up menus let you enlarge or shrink the image that appears in the Canvas, change the viewing format, and control the display of various overlays. • Timecode fields: Two timecode fields allow you to move the playhead to a specific frame or timecode, as well as to change the sequence Out point based on an entered duration. 26 Chapter 2 Getting to Know Your Editing Environment Edit Overlay The Edit Overlay appears when you drag clips from the Browser or Viewer to the image area of the Canvas. The Overlay appears translucently over the image currently in the Canvas. Drag a clip to the image area of the Canvas. The Edit Overlay appears with its seven sections. There are seven sections in the Edit Overlay, one for each of the seven types of edits that Final Cut Express HD can perform. If you simply drag your clip to the viewing area to the left of the Edit Overlay, you’ll do an overwrite edit. To perform any of the other edits, drag your clip to the overlay area for the edit you want to perform. You’ll know that the clip you’re dragging is over a specific overlay when a colored outline appears around the border of the overlay. Chapter 2 Getting to Know Your Editing Environment 27 Working With Clips in the Timeline The Timeline displays a chronological view of an open sequence. In addition to showing a sequence’s tracks and the clips edited into them, the Timeline contains numerous controls for displaying and manipulating clips. All these controls are specific to the sequence in which they’re used; each sequence open in the Timeline can have its own set of controls. Before working with the Timeline, make sure it’s the currently selected window. Otherwise your keyboard shortcuts might not perform the actions you intend. m To select the Timeline: Click in the Timeline (or press Command-3). Name of the currently selected sequence and the project it’s in Sequence tabs Playhead Current Timecode field Video track Divider Base tracks Audio tracks Audio controls Clip Overlays control Track Height control 28 Zoom slider Zoom control Track Layout menu Chapter 2 Getting to Know Your Editing Environment Track Display and Organization The following is a list of controls that affect the way your sequence and clips are displayed in the Timeline. • Tabs: Each tab represents a sequence. You can have multiple sequences open simultaneously, each with its own tab. Controls in Final Cut Express HD only affect the sequence whose tab is in front. Clicking another sequence’s tab brings it to the front, along with that sequence’s tab in the Canvas. • Tracks: The main portion of the Timeline is divided into audio and video tracks, with a divider between the two regions. You can drag the divider up or down to allocate more room to either the video or audio half of the Timeline. Audio tracks 1 and 2 are just underneath the divider, and all additional audio tracks continue downward. Video track 1 is just above the divider, and all additional video tracks continue upward. This way, linked video and audio clips keep the same relationship to one another even if they’re moved from one track to another. • Zoom control: Use this control to zoom in and out of the contents of your sequence in the Timeline. Zooming in shows more detail in the ruler, and the duration between the numbers in the ruler shrinks. Zooming out shows less detail in the ruler, but allows you to see more of the total duration of your sequence in the Timeline. If the playhead is visible, it stays centered when you use the Zoom control to zoom in on the Timeline. If the playhead is not visible, the Zoom control centers the current contents of the Timeline window instead. • Audio controls: Click these controls to display the mute and solo buttons to the left of each audio track in the Timeline. By default, these controls are hidden. • Clip Overlays: Click this control to display opacity overlays (thin black lines) over your video tracks, and audio level overlays (thin red lines) over any clips in the audio tracks of the Timeline. These lines indicate how transparent or how loud each video and audio clip in your edited sequence will be when you play it back. Any keyframes added to these properties appear as handles, directly on top of the overlay. Overlays and their related keyframe handles also serve as controls themselves, and can be manipulated directly. • Track Height control: Click this control to switch between four track display sizes— Reduced, Small, Medium, and Large. The current setting is highlighted in blue and has a small dot in the center. Choosing a track height using this control resets all tracks to the new size, overriding any custom track heights previously selected. To preserve the relative heights of individually sized tracks while resizing all tracks, hold down the Option key while choosing a new height with this control. Note: When the track size is set to Reduced, neither audio waveforms nor thumbnails are displayed. Chapter 2 Getting to Know Your Editing Environment 29 Timeline Navigation The following is a list of controls that allow you to navigate through your sequence in the Timeline. Playhead Ruler Drag the slider to scroll through your sequence. • Ruler: The ruler along the top of the Timeline represents the total duration of your edited sequence, from the first frame to the last. The ruler can be used for reference, to see the timecode corresponding to the location of clips in the Timeline. It can also be used as a navigation control that works exactly like the scrubber bar in the Canvas. Sequences can be a maximum of four hours, but you don’t need to set a duration for any of your sequences. If you need more time for a particular sequence, editing more clips into it will automatically add to the total duration, until the four-hour limit is reached. • Playhead: The playhead displays the current frame location in a sequence. The Timeline playhead mirrors the Canvas playhead. • Zoom slider: Like the Zoom control, the Zoom slider allows you to zoom in and out of a sequence in the Timeline. Dragging the thumb tabs on either side of the slider adjusts both thumb tabs and leaves the visible area of the Timeline centered. 30 Chapter 2 Getting to Know Your Editing Environment Timeline Editing Controls The following controls determine how your clips are edited into the Timeline tracks. Track Visibility controls Lock Track control Source control Destination control Auto Select control Mute control Solo control Locked tracks are cross-hatched. • Source and Destination controls: Use these controls to designate which video and audio tracks from source clips in the Viewer are edited into which video and audio destination tracks in the Timeline. The number of available Source controls corresponds to the number of tracks in the source clip (or sequence) currently in the Viewer. For example, a typical clip has one video track and two audio tracks. In this case, one video and two audio Source controls will appear in the Timeline. If, instead, you open a clip into the Viewer that has one video track and four audio tracks, then one video and four audio Source controls appear in the Timeline. Every track in your sequence also has a Destination control. By assigning source tracks to destination tracks using these controls, you determine which media items go into which tracks when edits are performed. For more information about Source and Destination controls, see Final Cut Express Help, Chapter 14, “Working in the Timeline.” • Track Visibility control: This control determines whether the contents of a track are displayed and rendered in your sequence. When a track is invisible, it appears darkened in the Timeline, but its contents remain in your sequence and can still be edited. When you play back your sequence, invisible tracks don’t appear in the Canvas, nor will they be rendered or output to tape with that sequence. You can make a track visible or invisible at any time. • Mute and solo controls: Use these controls to enable and disable audio playback on individual tracks for monitoring purposes. These controls do not suspend audio output during the Print to Tape operation, or when exported to a movie or audio file. Chapter 2 Getting to Know Your Editing Environment 31 Tool Palette The Tool palette contains tools for editing, zooming, cropping, and distorting items in the Timeline. m To view the Tool palette: Choose Window > Tools. To select a tool: 1 Select a tool in the Tool palette. 2 Choose the tool you want from the pop-up menu. For detailed information on various tools, see Final Cut Express Help, Chapter 11, “Working With Clips and the Viewer.” 32 Chapter 2 Getting to Know Your Editing Environment 3 Capturing Your Video 3 Capturing is the process of transferring the video images from your camcorder or deck to your computer. Before you begin editing with Final Cut Express HD, you need to transfer the content of your DV tape (the source media) to your computer. This process is called capturing, and you do most of your capturing in the Final Cut Express HD Capture window. Making a New Project and Saving It The media you capture appears in the Browser. For this reason, it’s a good idea to create a new project before you begin capturing, so that you can organize your project elements efficiently. The project is a file that maintains the relationship between your captured video, clips, and sequences. When you create a new project in Final Cut Express HD, a new blank sequence is automatically created and named Sequence 1. You can change the sequence name to better reflect its content or the type of program you’ll be working on. When you quit Final Cut Express HD or close the project, as long as it is saved, Final Cut Express HD remembers your edit decisions and applied effects. 33 m To make a new project: Choose File > New Project (or press Command-E). A new, untitled project appears in the Browser with an empty sequence. You can name the project when you save it. This is your new project. A new sequence is automatically created when you create a new project. As you work on your project, it’s important to get in the habit of saving often. m To save a project: Click the project’s tab in the Browser, then choose File > Save Project (or press Command-S). If you haven’t named the project yet, a dialog appears in which you can enter a name and choose a location for the project. By default, your project is saved in the Documents folder of your home directory. 34 Chapter 3 Capturing Your Video Working in the Capture Window When device control is enabled (proper communication between Final Cut Express HD and your camera), the controls in the Capture window control the playback of your attached camcorder or deck. You use the controls in this window to determine how to capture your media. m To open the Capture window: Choose File > Capture (or press Command-8). Logging tab input area Preview area with marking and transport controls Capture buttons There are three main areas in the Capture window. • Preview area: This area (at the left of the window) is where you view video as you log and capture it, and contains transport and marking controls and timecode fields. • Logging tab: You enter all the descriptive information about the clip you are about to capture in the fields in this tab. • Capture buttons: These buttons, at the bottom-right corner of the window, correspond to three capture methods: Clip, Now, and Project. See “Capturing” on page 40. Chapter 3 Capturing Your Video 35 Transport and Marking Controls The transport and marking controls appear below the Preview area. The Preview area of the Capture window lets you view video as you capture it. If your camcorder or deck is not on or there is no tape inserted, you’ll see color bars or black. The following controls and fields appear if a device-controllable camcorder or deck is connected, and there is communication between the computer and camcorder. Available space and time Current Timecode field Timecode Duration field Preview area Jog control Transport controls Shuttle control Go to In Point Clip In Point timecode Mark Out Mark In Camcorder status Go to Out Point Clip Out Point timecode Transport Controls If you have device control, you can use these buttons to control your camcorder or deck. Rewind Fast Forward Play In to Out Play Around Current Stop 36 Play Chapter 3 Capturing Your Video Marking controls You use these buttons to set the start and end frames (the In and Out points) to select a part of your tape for capture. Go to In Point Clip In Point timecode Mark In • Mark In: Click this button, or press I, to set the starting frame (the In point) of your tape for capture. • Clip In Point timecode: Displays the timecode location of the current In point. • Go to In Point: Click this button, or press Shift-I, to cue the tape to the current In point. Go to Out Mark Out Clip Out Point timecode • Mark Out: Click this button, or press O, to set the end frame (the Out point) of your tape for capture. • Clip Out Point timecode: Displays the timecode location of the current Out point. • Go to Out Point: Click this button, or press Shift-O, to cue the tape to the current Out point. Miscellaneous fields • Available space and time: Displays the amount of available space on the current scratch disk and the amount of capture time available. • Timecode Duration field: Displays the duration of the section of tape you’ve marked for capture, based on the In and Out points you marked. You can enter timecode directly in this field to set a new duration from the In point. See “Setting In and Out Points” on page 51. • Current Timecode field: Displays the timecode number of the currently displayed frame of your source tape. You can enter timecode directly in this field to navigate to that timecode point on your tape. Chapter 3 Capturing Your Video 37 Logging Tab The Logging tab in the Capture window is where you enter all of the descriptive information about clips you are capturing. You can use this information later to help you while you’re editing. • Reel: The reel affects which clips are captured from which source tapes, so it must correspond to the actual tape for the source media the clip is on. The name for each clip becomes the captured clip’s filename on your computer’s hard disk; therefore, all clip names must be unique. • Other fields: The remaining information in the Logging tab is primarily for your use as an editor; it’s up to you and the particular needs of your project to determine how to format this information. Entering descriptive information in the Logging tab helps you manage your clips while you’re editing. For more information about the Logging tab, see Final Cut Express Help, Chapter 8, “Capturing Media.” 38 Chapter 3 Capturing Your Video Determining How Much Disk Space You Need Before you begin capturing, it’s a good idea to make sure you have enough disk space on your computer. The amount of disk space you need depends on the length of your captured video and the length of your finished project. Use the table below to estimate how much space you need. DV data transfer rates 30 sec. 1 min. 5 min. 10 min. 30 min. 60 min. 3.6 MB/sec., DV-format video 108 MB 216 MB 1.08 GB 2.16 GB 6.5 GB 13 GB A good rule of thumb to determine how much space you need is to multiply the amount of space needed for your captured movie by five. For example, if you capture a tape that’s approximately 60-minutes long: • 3.6 MB/sec. video data rate x 60 seconds = 216 MB/min. x 60 minutes = 12960 MB needed for project files. • 12960 MB x 5 = 64800 MB needed for project, render, cache, and other files. Round off 64800 MB to 65 GB to be on the safe side. This is the amount of disk space you’ll need to allow for just this one project. If you plan to work on multiple projects at the same time, estimate the amount for each project and add these numbers together. Once you have figured out how much space you need, you can verify your hard disk space to make sure you have enough room for your finished project. m To verify your hard disk space: Choose File > Capture (or press Command-8). The amount of available hard disk space is displayed at the top of the Capture window. For more information on setting up external drives as extra scratch disks, see Final Cut Express Help, Chapter 4, “Specifying User Preferences, System Settings, and Easy Setups.” Chapter 3 Capturing Your Video 39 Capturing There are three different ways to capture clips in Final Cut Express HD: Capture Now, Capture Clip, and Capture Project. • Capture Now: Using Capture Now, you can capture live video, DV from camcorders or decks that lack device control, or DV from a device-controllable camcorder or deck. If you use Capture Now with a device that’s supplying timecode, that timecode will be accurately captured along with your clip. • Capture Clip: Capture Clip captures video one clip at a time from a camcorder or deck with device control. This command is useful if you’re simply grabbing a few clips and you want to capture them as soon as you identify where they are. • Capture Project: You can also capture all items in your project, from a camcorder or deck with device control. This command is useful if you want to capture or recapture several clips at once. Read through the following sections to learn how to use the Capture Now and Capture Clip options. For more information on the Capture Project option, see Final Cut Express Help, Chapter 8, “Capturing Media.” About Device Control Your capture method depends on whether your video equipment has device control. Device control lets you control your video equipment using the transport controls (including play, fast forward, reverse, and stop) in Final Cut Express HD. If your equipment doesn’t support device control, you must use the controls on the equipment to play your tapes manually. For more information, see the documentation that came with your equipment. 40 Chapter 3 Capturing Your Video Make Sure Your Camera Is Properly Connected and Turned On Before you begin capturing, you need to make sure your camera is properly connected and turned on. To make sure your camera is on and ready for capturing: 1 Verify your FireWire cable is securely connected to your camera and computer. 2 Make sure your camera is on and set to VCR (sometimes labeled VTR) mode. When your camera is properly connected, Final Cut Express HD displays VTR OK at the bottom of the Capture window. Indicates your camcorder is properly connected Capturing One Clip at a Time If you have device control, but you only want to capture one clip at a time (as opposed to an entire group of clips), you can use the Capture Clip button. This method allows you to capture individual clips much more precisely (saving disk space) than if you were to use the Capture Now command. To capture a clip with device control: 1 Make sure your camera is properly connected and set to VCR (sometimes labeled VTR) mode. See “Make Sure Your Camera Is Properly Connected and Turned On” on page 41. 2 If your deck or camcorder has a Local/Remote switch, make sure it’s set to Remote. For more information, see the documentation that came with your video equipment. 3 Insert a tape that includes the clips you want to capture. Chapter 3 Capturing Your Video 41 4 Choose File > Capture (or press Command-8). 5 In the Capture window, enter any appropriate information in the Logging tab. In particular, make sure that the reel number and name is properly set to reflect the reel number and name on the label of your current DV tape. For more information, see “Logging Tab” on page 38. 6 Play your tape and mark the clip you want to capture by doing one of the following: • Click the Mark In and Mark Out buttons to set In and Out points. Mark In Mark Out • Enter a timecode for the In point in the left timecode field and a timecode for the Out point in the right timecode field at the bottom of the Capture window. Clip In Point timecode Clip Out Point timecode • Press I to set an In point and press O to set an Out point. The video between the two points you set will be captured. 42 Chapter 3 Capturing Your Video 7 Click the Capture Clip button. Click here to capture a clip. Tip: Press Esc on your keyboard if you need to abort capturing. Final Cut Express HD captures the clip. The newly captured clip is automatically saved to the scratch disk, and is placed in the log bin of the Browser. The new clip appears in the Browser assigned to your project. 8 Save your project by clicking the project’s tab in the Browser, then choosing File > Save Project (or pressing Command-S). Chapter 3 Capturing Your Video 43 Capturing an Entire Tape or a Group of Clips If you want to capture an entire tape or group of clips, use the Capture Now button. Important: Make sure you have adequate disk space for the length of your DV tape. See “Determining How Much Disk Space You Need” on page 39. To capture your tape: 1 Make sure your video equipment is properly connected and turned on. See “Make Sure Your Camera Is Properly Connected and Turned On” on page 41. 2 Insert a tape that includes the clips you want to capture. 3 Choose File > Capture (or press Command-8). 4 In the Capture window, enter any appropriate information in the Logging tab. In particular, make sure that the reel number is properly set to reflect your current tape. For more information, see “Logging Tab” on page 38. 44 Chapter 3 Capturing Your Video 5 Do one of the following: • Rewind the tape to the beginning using the camcorder or deck’s controls. • Locate the footage you want to capture using the camcorder or deck’s controls. If you’re not rewinding the tape to the beginning, rewind the tape about ten seconds prior to the material you want to capture. This will give the camcorder or deck enough time to remove slack in the tape. 6 When you’re ready to begin recording, press the Play button on your equipment. 7 A few seconds before the first frame of the clip you want to capture, click Capture Now (or press Shift-C). Click here to start capturing your tape. Camcorders and decks don’t begin playing instantaneously. A few seconds of pre-roll will ensure that you capture the entire amount of the desired footage. 8 To stop recording, press Esc, then press the Stop button on your video equipment. Tip: It’s a good idea to capture several seconds beyond the point where you want to end the clip. The newly captured clip is automatically saved to the scratch disk, and is placed in the log bin of the Browser. 9 Save your project by clicking the project’s tab in the Browser, then choosing File > Save Project (or pressing Command-S). Chapter 3 Capturing Your Video 45 Can I Use iMovie to Capture DV Clips Automatically? iMovie and Final Cut Express HD capture DV-format video in different ways. When iMovie captures DV clips, one at a time or by automatically capturing an entire tape and breaking each shot into its own clip, all video and audio is saved on the computer as DV Stream files. When Final Cut Express HD captures DV clips, they are saved as QuickTime video files using the DV-NTSC or DV-PAL codec. Final Cut Express HD can recognize both DV Stream and QuickTime files, but the information in these files is stored differently. DV Stream files encode the audio and video of a clip together as one data stream, the way it’s stored on DV-format tape. In QuickTime files, video and audio are separate tracks inside a single QuickTime movie file. DV Stream files that are edited into a Final Cut Express HD sequence must be rendered before their audio plays back properly. QuickTime files require no rendering. Also, video files captured using iMovie don’t have timecode. This makes it impossible to recapture exactly the same clip twice, which may disrupt your workflow. If you must use a clip captured using iMovie, it’s best to back it up when archiving your project, in case you need it for future revisions. Final Cut Express HD can import projects created with iMovie 3 and later. For more information, see Appendix A, “Importing an iMovie Project.”. Capturing Tip The following tip explains how to rename your clips and sequences once you’ve completed capturing your video. Renaming a Clip or Sequence Whether you let Final Cut Express HD auto-name your clips and sequences or you’ve changed your mind about the name of a clip or sequence you chose, you can rename items within Final Cut Express HD. Renaming clips and sequences only changes the filenames in the project. It does not change the names of source media files on your computer. 46 Chapter 3 Capturing Your Video To rename clips and sequences within Final Cut Express HD: 1 Select the clip or sequence in the Browser. 2 Click the item’s name, then type a new name. Select the item you want to rename. Type the new name. Chapter 3 Capturing Your Video 47 The item’s name changes, but the source media is unaffected. If you rename a file in the Finder that is used by Final Cut Express HD, the clip goes offline because Final Cut Express HD loses the link to that file. To make sure renamed files are online, you need to relink the source media and the files in your project. A red slash indicates the media is offline. For more information, see Final Cut Express Help, Chapter 7, “Using the Browser and Managing Projects and Clips.” 48 Chapter 3 Capturing Your Video 4 4 Basic Editing Now that you’ve seen how the Browser, Viewer, Canvas, and Timeline work together, and you’ve learned how to capture your media, it’s time to begin editing. This chapter explains the basics of editing simple sequences using the different types of Final Cut Express HD edits. There are several steps involved in a typical editing session: Step 1: Select a clip in the Browser to add to your sequence (A) Step 2: Open the clip into the Viewer (B) Step 3: In the Viewer, set In and Out points for the clip to specify what you want to use in your sequence (B) Step 4: Edit the clip into an open sequence in the Canvas (C) or the Timeline (D) A B C D 49 Before You Begin Before you add the first clip to your sequence, there are two important tasks you should know how to do: use the Undo command, and set In and Out points. Once you are comfortable with these procedures, you can begin an efficient editing session. You Can Always Undo When you’re first learning to work in Final Cut Express HD, it can be comforting to know that if you make a change you don’t like or didn’t mean to make, it can usually be undone. Final Cut Express HD lets you undo up to 32 actions, remembering each step you take as you work on your project. The number of levels of undo actually available to you depends on the setting in the General tab of the User Preferences window. When you first install Final Cut Express HD, the default number of undo levels is 10. You can change this at any time, but be aware that the more levels of undo you set, the more memory Final Cut Express HD requires. m To undo the previous action: Choose Edit > Undo (or press Command-Z). You can use the Undo command as many times as you have specified in the General tab of the User Preferences window. m To redo an action that you have undone: Choose Edit > Redo (or press Command-Y). Repeated use of the Redo command will eventually redo all the steps that you’ve undone. 50 Chapter 4 Basic Editing Setting In and Out Points The first step to assembling an edit is deciding which portion of a clip you want to add to your sequence. You do this by viewing your clip over and over again to determine the section of the clip that is usable or the part you like the most. You define the usable region of the clip with editing points called In and Out points. The In point determines the first frame of the clip you want to use; the Out point determines the last frame. To set a clip’s In and Out points: 1 Double-click a clip in the Browser to open it into the Viewer. 2 Click the Viewer or press Command-1 to make it the active window, if it’s not already. 3 Use the Viewer controls to move the playhead to the point in your clip where you want to place the In or Out point. For example, click the Play button or drag the playhead in the scrubber bar. Play through the clip to locate the part of the clip you want to begin with. ...drag the playhead along the scrubber bar. Press the Play button, or... 4 Do one of the following: • • • • Press I to set an In point or press O to set an Out point. Click the Mark In or Mark Out button. Choose Mark > Mark In or Mark Out. Control-click in the scrubber bar, then choose Mark In or Mark Out from the shortcut menu. Chapter 4 Basic Editing 51 You can mark In and Out points while you’re playing a clip or when it’s stopped. Sometimes it’s easier to set edit points while the clip is playing, so you can set the In or Out point immediately when you hear or see the frame you want. Set the In point on the frame you want your clip to start with. Set the Out point on the frame you want your clip to end with. 52 Chapter 4 Basic Editing J,K, and L Keys Use the J, K, and L keys to quickly play through your clip. J cycles through various speeds in reverse, K stops playback, and L cycles through a variety of speeds going forward. When you’ve identified your In and Out points, press I to mark the In point and press O to mark the Out point. m To check the In and Out points of your clip: Click the Play In to Out button. Play In to Out Moving In and Out Points You can change In and Out points in the Viewer as often as you like. After reviewing the In and Out points in your clip, you may decide you want to change the location of the In point, Out point, or both. m To move In and Out points, do one of the following: Play the clip again, following the steps above, and mark new In and Out points. m Drag the In and Out points along the scrubber bar to the preferred locations. Drag the In point or Out point to a new location. Scrubber bar Chapter 4 Basic Editing 53 Removing In and Out Points After setting In and Out points, you may want to use a different part of the clip, or you may just want to start over. m To remove In and Out points, do one of the following: Choose Mark > Clear In and Out. m Control-click the scrubber bar, then choose Clear In and Out. m Select an In or Out point, drag up or down until the edit point disappears, then release the mouse button. Opening Your Project If you closed your project after capturing your video, reopen it. To open your project: 1 Choose File > Open. 2 Locate your project in the Documents folder of your home directory. 3 Click Choose. Note: If you created the project in a previous version of Final Cut Express HD, you’ll be asked if you want to update your project. For more information, see Final Cut Express Help, Chapter 7, “Using the Browser and Managing Projects and Clips.” By default, Final Cut Express HD projects are saved in the Documents folder of your home directory. 54 Chapter 4 Basic Editing Adding a Clip to Your Sequence Now that you know how to set In and Out points, you’re ready to add a clip to your sequence. If you’ve already set In and Out points, jump to step 3; otherwise, start at step 1. To add a clip to your sequence: 1 Double-click a clip in the Browser to open it into the Viewer. This is your source clip. 2 Specify In and Out points for your source clip in the Viewer. See “Setting In and Out Points” on page 51. In point Out point 3 In the Timeline, move the playhead to the beginning of your sequence where you want the clip to start (the sequence In point) by pressing Home on your keyboard or dragging the playhead to the beginning of the Timeline. 4 Drag the clip from the preview area of the Viewer to the Timeline. The clip appears in the Timeline, and the playhead moves to the end of the clip. It’s easy to add additional clips to your sequence. Chapter 4 Basic Editing 55 To add additional clips to your sequence: 1 Double-click a clip in the Browser to open it into the Viewer. This is your source clip. 2 Specify In and Out points for your source clip in the Viewer. See “Setting In and Out Points” on page 51. 3 In the Timeline, move the playhead to the location in your sequence where you want the clip to start (the end of the first clip). 4 Drag the clip from the preview area of the Viewer to the Timeline. Drag the playhead to the location of the sequence where you want the next clip to start. The new clip appears in the Timeline, and the playhead moves to the end of the additional clip. 5 Save your project by clicking the project’s tab in the Browser, then choosing File > Save Project (or pressing Command-S). Tip: Snapping is a setting in the Timeline that affects the movement of the playhead. When snapping is on, the playhead “snaps,” or moves directly, to markers or edit points when it is moved close to them. This can help you quickly line up edits with other items in the sequence. You can turn snapping on and off at any time, even in the middle of dragging edits and clips, by clicking the Snapping control in the Timeline or pressing the N key on your keyboard. Click here to turn snapping on and off. Green indicates snapping is turned on. 56 Chapter 4 Basic Editing Adding a Storyboard of Clips to a Sequence It’s often a good idea to arrange your clips in the Browser to get an idea or preview of what the movie will look like once you’ve finished editing. This “storyboard” can provide a visual representation of your finished movie, and can save you time before you start editing clips into a sequence and meticulously trimming them later only to discover you prefer clips in a different order. For example, storyboarding can be very useful when you’re editing to a music track. Once you create a storyboard, you can then simply drag the clips into a sequence in the Timeline. To create a storyboard: 1 Control-click in the Browser, then choose View as Large Icons from the shortcut menu. 2 Drag your clips within the Browser into the order you want them to appear in your movie sequentially from left to right. When you run out of horizontal space, you can start a new row immediately below the first one. Keep your rows and columns relatively straight, so that Final Cut Express HD can determine their order. Browser Clip 1 Clip 2 Clip 3 Clip 4 Clip 5 Clip 6 Clip 7 Clip 8 Clip 9 Clip 10 Clip 11 Clip 12 Clip 13 Clip 14 Clip 15 Final Cut Express HD reads and displays your clips from left to right. Final Cut Express HD knows the next row of clips is a continuation of the first. 3 Save your project by clicking the project’s tab in the Browser, then choosing File > Save Project (or pressing Command-S). Chapter 4 Basic Editing 57 To add your storyboard to a sequence: 1 Click in the Browser or press Command-4 to make it the active window, if it’s not already. 2 Make sure your clips are organized sequentially. 3 Drag a marquee around all of the storyboard clips to select them. Drag a marquee around your storyboard clips to select them. Note: The Browser is set to View as Small Icons for this example. 4 Drag the selected clips from the Browser to the Timeline. Drag your storyboard clips from the Browser to the Timeline. Your clips are placed in the Timeline in the same order as you had arranged them in the Browser. 5 Save your project. 58 Chapter 4 Basic Editing Locking Tracks Any track in the Timeline can be locked using the Lock Track control. Items on a locked track cannot be modified. Additionally, no new clips can be added to a locked track. This lets you protect the track from any accidental changes. Clips on locked tracks still play back in the sequence, and will still be rendered and output to tape. All new tracks in a sequence are unlocked by default. m To lock a track: Click the Lock Track control of the track you want to lock. Lock Track control Locked tracks are cross-hatched. The locked track is cross-hatched to indicate that it’s locked. • If it’s a video track: You can also press F4 and the number of the track you want to lock for tracks 1 through 9. • If it’s an audio track: You can also press F5 and the number of the track you want to lock for tracks 1 through 9. m To lock all video tracks in a sequence: Press Shift-F4. m To lock all audio tracks in a sequence: Press Shift-F5. m To lock all other audio or video tracks except for the selected track: Press Option while clicking the Lock Track control for the desired track. Chapter 4 Basic Editing 59 Using the Razor Blade Tool The simplest form of an edit is a cut. The simplest tool to perform this edit with is the Razor Blade tool found in the Tool palette. m To activate the Razor Blade tool: Select the Razor Blade tool in the Tool palette (or press B). Razor Blade tool Razor Blade All tool You can use the Razor Blade tool to add an edit point to your sequence by cutting a single clip, along with any items linked to it in the Timeline, into two pieces. This edit point is added at the frame of the clip in the Timeline that you click. 60 Chapter 4 Basic Editing This can be useful for quickly rearranging pieces of your sequence, for deleting a section of a clip, for applying an effect to a specific part of a clip, or for moving a piece of a clip to the same location on another track. Position the playhead where you want to make the cut, then press the mouse button. The clip is separated into two clips at the position of the playhead. Note: Linked audio clips are cut at the position of the playhead as well. Chapter 4 Basic Editing 61 Deleting Clips From a Sequence As you edit, you can delete items from your sequence at any time, provided that the track you want to remove them from is not locked. There are two ways to delete items from a sequence—a lift delete and a ripple delete. Important: Removing clips from a sequence does not delete the original master clips from the Browser, nor does it delete source media from your computer. Doing a Lift Edit A lift edit removes any selected items from the sequence and leaves a gap. This is useful if you have a series of clips already edited into your sequence and you don’t want to move them (for example, if they’re all synchronized to a piece of music). If you want to remove one or more clips from the middle of such a sequence, the lift edit is the best way to do so. Selected clip Before edit A After edit A B C C Gap 62 Chapter 4 Basic Editing To perform a lift edit: 1 Do one of the following: • Select the item or range of items you want to remove using one of the selection tools in the Tool palette. See “About the Tool Palette” on page 90. • Set In and Out points in the Canvas or Timeline, then make sure the Timeline is active. 2 Do one of the following: • Choose Sequence > Lift. • Choose Edit > Cut (or press Command-X) to cut the material, if you want to paste it somewhere else. • Press Delete. Selected clip After a lift edit, a gap is left in the sequence. 3 Save your project. Ripple deletes are discussed in a later section. See “Doing a Ripple Delete” on page 94. Chapter 4 Basic Editing 63 What Are Gaps? How Do I Get Rid of Them? As you edit, cut, paste, and move items around in Final Cut Express HD, empty spaces may be left between clips in your sequence. These are called gaps. Sometimes they are extremely small (one or two frames), which makes them difficult to see in the Timeline. When a sequence with gaps plays back in the Canvas, however, even tiny gaps are apparent as black flashes. There are two types of gaps: • Track gaps: These are empty spaces between two clips in the same track. • Gaps: These are overlapping track gaps that occur in every single track of your sequence. Track gap Gap To find gaps in a sequence: 1 Move the playhead to the beginning of the sequence to start looking from the beginning. (You can do this quickly by pressing the Home key.) Otherwise, you can look for gaps to the left or to the right of the playhead’s current position. 2 Do one of the following: • Choose Mark > Next > Gap (or press Shift-G). • Choose Mark > Previous > Gap (or press Option-G). The playhead moves to the beginning of the first gap found to the left or right of the playhead. To find track gaps in a sequence: 1 Decide which track to search and make it the destination track by dragging the Source control to the Destination control. 2 Do one of the following: • Choose Mark > Next > Track Gap. • Choose Mark > Previous > Track Gap. The playhead moves to the beginning of the first track gap found. 64 Chapter 4 Basic Editing m To close a gap, do one of the following: Position the playhead anywhere within the gap, then choose Sequence > Close Gap. m Control-click anywhere within a gap, then choose Close Gap from the shortcut menu. m Select the gap by clicking it, then press Delete. All clips to the right of the gap move left to close the gap. Because this command shifts all clips to the right of the gap toward the left, the command is not available if another clip on another track overlaps this gap. (This would change the relationship of the overlapping clip to the rest of your sequence, or change the audio/video sync if it’s an audio clip underneath a video clip.) If you don’t care about the sync relationship between the rest of your sequence and the overlapping clip, you can lock tracks containing overlapping clips, and then use any of the above commands to close the gap. To close a track gap without affecting any other tracks in the sequence: 1 Click the Lock Track control of any tracks with clips that overlap the gap you’re trying to close. 2 Close the gap by doing one of the following: • Position the playhead anywhere within the gap, then choose Sequence > Close Gap. • Control-click anywhere within the gap, then choose Close Gap from the shortcut menu. • Select the gap by clicking it, then press Delete. To close a track gap using the Select Track Forward tool: 1 Make sure snapping is turned on. 2 Select the Select Track Forward tool in the Tool palette. 3 Click the first clip to the right of the track gap. All clips to the right are selected. 4 Drag the clips to the left until they close the gap and snap into place beside the earlier clip. Chapter 4 Basic Editing 65 Assigning Destination Tracks Many operations in Final Cut Express HD require you to use the Source controls to assign destination tracks to determine where edited, duplicated, or moved clips appear in the Timeline. Source and Destination controls are located in the Timeline patch panel, at the left of the Timeline window. When you open a clip or sequence into the Viewer, a number of Source controls appear in the Timeline patch panel and correspond to the number of video and audio items that make up that clip, or the number of tracks that appear in that sequence. For example, if you open a clip into the Viewer that contains one video and four audio items, one video and four audio Source controls appear in the Timeline patch panel. Source control Destination control Whenever you open a new clip or sequence into the Viewer, the number of Source controls in the Timeline patch panel updates to reflect the number of video and audio items in the new clip or sequence. Changing Destination Track Assignments You can change destination track assignments five ways in the Timeline. m To change destination track assignments, do one of the following: Click a Destination control. The nearest Source control moves to that track. m Option-click a Destination control. The first Source control appearing underneath that track moves to that track. m Drag one Source control on top of another. For example, if audio track A1 is selected as the channel a1 destination track, and track A2 is selected as the channel a2 destination track, then dragging the a2 Source control onto the a1 Source control makes A1 the channel a2 destination track, and A2 the channel a1 target. 66 m Command-click a Source control in the Timeline, then choose a track from the shortcut menu. m Command-click a Destination control, then choose a Source control from the shortcut menu. Chapter 4 Basic Editing Disconnecting Source and Destination Controls Destination tracks can be disconnected in order to omit the video or audio portion of a clip when it’s edited into a sequence. For example, if you disconnect the video Source control prior to making an edit, only the audio portion of the clip is edited into the Timeline. Disconnected Source controls remain disconnected even when you open a clip into the Viewer consisting of a different number of video and audio items than the previously opened clip contained. m To disconnect a destination track in the Timeline: Click the Source control or the Destination control to break the track assignment. Before disconnecting tracks Disconnected source tracks Important: If a track is locked, that track is also ignored as a destination track. Chapter 4 Basic Editing 67 Resetting Source Controls You can reset Source controls to their default state after you’ve reassigned or disconnected them. When you reset Source controls, all available Source controls are assigned to the base video and audio tracks, and reconnected to the accompanying Destination controls. For example, the a1 Source control is reconnected to the A1 Destination control, the a2 Source control is reconnected to the A2 Destination control, and so on. m To reset the Source controls: Control-click the Timeline patch panel, then choose Reset Panel from the shortcut menu. Most Commonly Used Edits Although you can use Final Cut Express HD to perform many different types of edits, the most commonly used edits are overwrite, insert, and superimpose. For additional information on performing edits, see Final Cut Express Help, Chapter 15, “Basic Editing.” Overwrite Edits Since this is one of the most commonly used edit types, it occupies the biggest overlay area in the Canvas. If you drag a clip into any part of the Canvas to the left of the Edit Overlay, an overwrite edit is performed. You can also drag a clip to the Overwrite section of the Edit Overlay. With this type of edit, the source clip overwrites any items at the insertion point for the duration of the edit you’ve specified. None of your other edited clips in the sequence is moved. If your insertion point is in the middle of a clip, any part of that clip from the insertion point on will be overwritten for the duration of the edit. You can perform an overwrite edit with one or more clips. For more information on overwrite edits, see Final Cut Express Help, Chapter 15, “Basic Editing.” 68 Chapter 4 Basic Editing Overwrite edit Before edit D After edit A B C A D C To do an overwrite edit: 1 Specify the necessary In and Out points and destination tracks. 2 Drag the clip from the Viewer to the Overwrite section of the Edit Overlay (or press F10). Overwrite section of the Edit Overlay in the Canvas Chapter 4 Basic Editing 69 The clip overwrites all items on the destination tracks from the playhead position through the duration of your edit. No items are moved. Before an overwrite edit After an overwrite edit New clip overwrites existing clips 3 Save your project. 70 Chapter 4 Basic Editing Insert Edits An insert edit places the source clip into your sequence so that all items after the insertion point in your sequence are moved forward in the Timeline, to make room for the clip being added. No clips are removed from your sequence. You can perform an insert edit with one or more clips. If you perform an insert edit in the middle of another clip, that clip is cut at the insertion point and the second half pushed, along with the rest of the footage in the Timeline, to the end of the newly inserted clip. For more information on insert edits, see Final Cut Express Help, Chapter 15, “Basic Editing.” Insert edit Before edit D After edit A B A D C B C To do an insert edit: 1 Specify the necessary In and Out points and destination tracks. 2 Drag the clip from the Canvas to the Insert section of the Edit Overlay (or press F9). Insert section of the Edit Overlay in the Canvas Chapter 4 Basic Editing 71 After the edit, all clips on all unlocked tracks (including non-destination tracks) are moved forward in time, from the playhead position to the right, to make room for the clip or clips being inserted. Before an insert edit After an insert edit New clip inserted 3 Save your project. Superimpose Edits Superimpose edits are used to overlay titles and text onto video, as well as to create other compositing effects. You can use a superimpose edit to quickly stack a source clip (the originally captured clip) on top of any clips already edited into your sequence in the Timeline in preparation for further editing. If there isn’t an available track in your sequence, Final Cut Express HD creates a new one for the source clip. You can set the In and Out points in the Canvas or Timeline so that the superimpose edit spans multiple clips, as long as there’s enough media in your source clip to cover the specified area. 72 Chapter 4 Basic Editing If you perform several superimpose edits in the same location, all new source clips are edited into the video track directly above the current destination track, and all other previously superimposed video clips are moved up one track to make room. If your superimposed clip contains audio, the source audio will be similarly placed on new audio tracks immediately below any occupied audio destination tracks already in your sequence. Likewise, if you perform a superimpose edit with several source clips at once, all of those clips will be stacked on top of one another. The first clip in your selected group will be on top, with each successive clip appearing underneath. For more information about superimpose edits, see Final Cut Express Help, Chapter 15, “Basic Editing.” Superimpose edit Before edit D A B C D After edit A B C To do a superimpose edit: 1 Do one of the following: • Position the Timeline playhead over a clip where you want to superimpose your source media. The beginning and end of this clip will be used as edit points for your source clip. • Set sequence In and Out points by setting an In point where you want the clip to begin and setting an Out point where you want it to end. 2 Set In and Out points in the Viewer to define the part of the source clip you want to edit into your sequence. Chapter 4 Basic Editing 73 3 Drag the clip from the Viewer to the Superimpose section of the Edit Overlay in the Canvas (or press F12). Superimpose section of the Edit Overlay in the Canvas The clip in the Viewer is placed on the track above the destination track, starting at the beginning of the clip that intersects the Timeline playhead, or at the sequence In point. If there is no track above the destination track, one is created. Before a superimpose edit After a superimpose edit 4 Save your project. 74 Chapter 4 Basic Editing 5 Editing With Audio 5 Final Cut Express HD lets you mix up to 32 tracks of audio with the flexibility to add music or your own voice. As long as you pay attention to the principles of linked clips and sync relationships, adding music or narration is easy. About Linked Clips When you capture video and audio together, they’re linked by default, appearing in your sequence as linked items. When you turn on linked selection in Final Cut Express HD (by clicking the Linking control), it ensures that if you select one linked item in the Timeline, all other audio and video items linked to it are also selected. Adjustments you make to one item are applied to the others. Click here to turn linked selection on and off. Green indicates linking is turned on. This linking is especially important when working with clips in which the video and audio need to remain in sync. 75 Resyncing Clips Even when linked selection is turned off, Final Cut Express HD keeps track of the relationship between the audio and video items constituting a single clip. If you move the audio or video item of a clip independently of the other items it’s linked to, Final Cut Express HD keeps track of the resulting offset, displaying it as a timecode duration in a small red box at the head of each clip. This box is called an out-of-sync indicator. A linked clip after selection A linked clip with audio only selected A linked clip with audio out of sync with the video Out-of-sync indicator 76 Chapter 5 Editing With Audio A red out-of-sync indicator appears whenever the following conditions occur: • Audio and video items from the same source clip have been moved out of sync but still overlap in the Timeline. • Audio and video items that have been linked together in the Timeline have been moved out of sync but still overlap. Important: Final Cut Express HD always knows the proper sync between audio and video items from the same media file on your computer (unless you’ve changed this with the Mark in Sync command). If it is determined that one or more overlapping items in the Timeline are not in sync, Final Cut Express HD determines how far out of sync they are and displays this value in the red out-of-sync indicator appearing at the head of each item. A pair of audio items with no accompanying video item If an audio or video portion of a clip is isolated in the Timeline and doesn’t overlap any other clips from the same file on disk, this indicator doesn’t appear. Audio moved away from video clip If you do have a clip whose video and audio are out of sync, it’s easy to move them back into sync. Chapter 5 Editing With Audio 77 m To move a linked item into sync: In the Timeline, Control-click the item’s out-of-sync indicator, then choose Move into Sync from the shortcut menu. If the item is an anchor item, it moves into sync with the topmost out-of-sync audio item in the group, starting on track A1 and going down. (When you first link multiple audio items to a video item in the Timeline, that video item is considered the “anchor” item to which the sync of all other linked audio items is compared. If you’re linking a group of audio items without a video item, the topmost audio item that appears in the Timeline acts as the anchor item.) Otherwise, the selected item moves into sync with the anchor item it’s linked to, as shown below. Before syncing After syncing The audio item is moved into sync with the anchor item it’s linked to. There are additional ways to resync your clips. For more information on getting your clips back into sync, see Final Cut Express Help, Chapter 19, “Advanced Editing and Trimming Techniques.” 78 Chapter 5 Editing With Audio Adding Music The quality of audio is crucial to the success of your movie. An easy way to add highquality sound to your movie is to import audio tracks directly from a CD. Note: If you are using a music track with a copyright, make sure you are only using it for personal use. Importing Audio Files There are two kinds of audio files you can import into Final Cut Express HD. You can import an audio file in any supported format from your computer, just like any other media file, or you can import audio tracks from an audio CD directly into your project. Importing Audio CD Tracks Mac OS X recognizes tracks on standard audio CDs as individual .cdda files. Since they come from a CD, .cdda files have a sample rate of 44.1 kHz and sample size of 16 bits. These files can be copied directly from a CD to your hard disk and then imported into Final Cut Express HD without any conversion. Important: You should not import a CD audio track by dragging it directly from a CD to the Browser. If you do, Final Cut Express HD won’t be able to access the file once you eject the CD. To import a track from an audio CD: 1 Hide Final Cut Express HD to reveal the desktop by pressing Command-H. 2 Insert your CD into the CD or DVD-ROM drive. 3 If iTunes opens, quit iTunes. 4 Double-click the CD icon to open it in the Finder. Chapter 5 Editing With Audio 79 5 Drag the audio file or files you want to import to the desktop. Drag the CD audio file to the desktop. 6 In the Dock, click the Final Cut Express HD icon to display the application. 7 Select the Browser to make it active, then choose File > Import > Files (or press Command-I). 8 In the Choose a File dialog, select the audio file or files you dragged to the desktop. The CD audio file appears in the Browser as an AIFF audio file. The audio files are placed in the Browser and can be edited into the Timeline just like a video clip. 80 Chapter 5 Editing With Audio Using iTunes to Convert Audio to the Right Format and Rate Final Cut Express HD does not currently support variable bit rate audio files such as MP3. If you want to use an MP3 audio file, convert it to an AIFF file (which has a constant bit rate) using iTunes, and then import the AIFF file into Final Cut Express HD. To convert an MP3 file to an AIFF file using iTunes: 1 Open iTunes. 2 If you haven’t already done so, add the MP3 file you want to convert to your iTunes Library. 3 Choose iTunes > Preferences (or press Command-,). 4 Click the Importing icon at the top of the dialog. Click the Importing icon. 5 In the Importing dialog, choose AIFF Encoder from the Import Using pop-up menu, then choose Custom from the Setting pop-up menu. Chapter 5 Editing With Audio 81 6 In the AIFF Encoder dialog, choose the following settings, then click OK. • Sample Rate: 48.000 kHz • Sample Size: 16 bit • Channels: Stereo 7 In the Importing dialog, click OK. 8 In the iTunes Library, select the MP3 file you want to convert. 9 Choose Advanced > Convert Selection to AIFF. You now have an AIFF copy of your MP3 file that you can import into Final Cut Express HD. Once you import your imported AIFF audio file, it appears in the Browser as an audio clip that can be edited into your sequence just like a video clip. Using the Voice Over Tool The Voice Over tool allows you to record audio in Final Cut Express HD while simultaneously playing back a specified section of your sequence from the Timeline. Audio can be recorded using a microphone plugged in to the built-in line-in port on the back of your computer. You can monitor your program’s audio using the built-in headphone port on your computer. Once you record an audio clip using the Voice Over tool, it’s automatically placed onto an audio track in the specified section of your sequence. This voiceover feature is particularly useful for recording narration for your program. You can use a microphone to record an audio commentary to match your edited sequence of clips as you watch the sequence play, and listen to any background audio in your program via headphones. Microphone Headphones Microphone input Headphone out PowerBook 82 Chapter 5 Editing With Audio Controls in the Voice Over Tool The Voice Over tool appears as a tab in the Tool Bench window. m To open the Voice Over tool: Choose Tools > Voice Over. The Tool Bench appears with the Voice Over tab. Record/Stop button Status area Preview button Discard button Audio destination track and audio clip name Input area Headphone area Defining the Recording Duration Before using the Voice Over tool, you need to specify the duration you’re recording. m To set the recording duration, do one of the following: Set In and Out points in the Timeline by pressing I on the keyboard for an In point and O for an Out point. Tip: This is the easiest method. Chapter 5 Editing With Audio 83 m If no In point is set, the position of the playhead defines the In point, and recording continues to the Out point. m If no Out point is set, the end of the sequence is used, defined by the end of the last clip in the Timeline. If Final Cut Express HD doesn’t have enough available memory to record the duration specified, a message appears when you click the Record button in the Voice Over tab, prompting you to set a shorter recording duration. 84 Chapter 5 Editing With Audio Recording Your Voiceover After you’ve defined the duration and destination track for your voiceover clip, you’re ready to record. To record a voiceover: 1 Choose Tools > Voice Over. In the Voice Over tab, the status area is green and displays Ready to Record. Note: To prevent the recording microphone from picking up audio from your program, use a pair of headphones to monitor your program’s audio when using the Voice Over tool. Otherwise, set the Volume slider to –60 and deselect the Sound Cues checkbox. Deselect the Sound Cues checkbox. 2 Click the Record button in the Voice Over tab. Once you do this, several things happen before your clip is placed in the Timeline. • Any audio within the defined duration of your sequence that requires rendering is rendered. • The playhead moves back five seconds before the specified In point, and a five-second pre-roll plays to prepare you for recording. The first three seconds of this pre-roll are indicated by beeps to give you a timing cue, and the entire duration of the pre-roll is indicated by a countdown to zero, along with a progressive change in color from yellow to red in the status area. Even though this countdown happens before the duration you’ve specified in the Timeline, audio is recorded during this pre-roll to avoid cutting off the first word you say. Note: During the five seconds of pre-roll, audio that occurs before the beginning of the Timeline cannot be recorded. 3 Once the pre-roll has played, begin your voiceover. • The status area is red and displays Recording to indicate that you’re recording; a bar graph shows you how much of the specified duration still needs to be recorded. • Fifteen seconds before the end of your recording, you are cued with a single warning beep. • During the last five seconds of recording, the status area displays a countdown from five to zero, and you hear five beeps, to let you know your time is nearly up. The last beep is longer and has a lower pitch. • Recording continues two seconds past the end of your specified Out point to prevent your last word from being cut off. During this time, the status area displays Finishing. • The status area displays Saving while the audio clip is saved to the specified scratch disk. • Finally, the recorded clip is automatically edited into your sequence and the status area displays Ready to Record. 4 Save your project. Chapter 5 Editing With Audio 85 Editing With Audio Tips When editing with audio, it is common to create additional tracks that you will want to remove later on. Deleting Tracks You can delete tracks from any sequence at any time. You can delete tracks one at a time, or you can delete multiple video and audio tracks at once. If you delete tracks with video that’s linked to audio, the video is deleted along with the video track, but the associated audio is left alone, and vice versa. Note: If you delete the wrong track, you can use the Undo command to restore it. m To quickly delete a single track in a sequence: Control-click anywhere in the track header (the Timeline column containing each track’s name and its destination track controls), then choose Delete Track from the shortcut menu. Control-click in the track header to access the shortcut menu. If you’ve added more tracks than you intend to use, you can delete several empty tracks from a sequence in the Timeline at once. 86 Chapter 5 Editing With Audio To delete multiple tracks from a sequence: 1 Choose Sequence > Delete Tracks. 2 Choose your options for deleting tracks, then click OK. • Track type: Select the appropriate checkbox to delete audio tracks, video tracks, or both. • Tracks to delete: Specify the type of tracks you want to delete. • All Empty Tracks: Deletes all tracks in your sequence in the Timeline that don’t have any clips edited into them. • All Empty Tracks at End of Sequence: Deletes all empty video tracks above and all empty audio tracks below the outermost tracks with edited clips in them in the Timeline. After tracks are deleted, all remaining tracks in the sequence are renumbered. 3 Save your project. Chapter 5 Editing With Audio 87 6 Fine-Tuning Your Edit 6 Once you are happy with the clips edited into your sequence, you can fine-tune your edits with a process called trimming. Trimming can involve moving an individual clip’s In or Out point, changing the location of an edit point between two clips, or simply moving a clip to a new location. Each trim edit has a name: resize, ripple, ripple delete, lift, roll, slip, slide, extend, and swap. Final Cut Express HD has specialized tools for performing many of these trim edits, while keyboard commands allow you to perform the rest. For the instructional purposes of this book, only ripple edits and roll edits will be discussed. For information on additional trimming techniques, see Final Cut Express Help, Chapter 19, “Advanced Editing and Trimming Techniques.” Where You Can Perform Trim Edits You can do trim edits in the Viewer, the Timeline, and the Trim Edit window, a specialized window for fine-tuning edits. In all of these windows, you can trim using a variety of methods: using tools in the Tool palette, entering timecode, and using keyboard shortcuts. • Viewer: From your sequence in the Timeline, you can open a clip directly into the Viewer to easily and precisely change its In and Out points at any time. The way your edited sequence is affected depends on which tool is selected when the edits are performed. • Timeline: You can also trim clips directly in the Timeline. This method allows you to work on several clips at one time. Trimming is not limited to a single track; you can also trim multiple superimposed clips on multiple tracks. You can adjust the level of precision of your editing by setting the zoom level in the Timeline. By zooming in, you can make changes all the way down to a clip’s individual frames. Conversely, you can also zoom all the way out to see the entire project and work on very large sections at once. 89 • Trim Edit window: This window provides very precise control while trimming. It displays both sides of an edit, the outgoing clip before the edit point, and the incoming clip that appears after, allowing you to adjust your edit as finely as necessary. You can also use this window to trim a group of edits in multiple tracks (only one edit per track) at once. For information on using the Trim Edit window, see Final Cut Express Help, Chapter 19, “Advanced Editing and Trimming Techniques.” About the Tool Palette Many of the trimming tools discussed in this section are found in the Tool palette. The Tool palette is usually located to the right of the Timeline, near the edge of the screen. m To hide and show the Tool palette: Choose Window > Tools. Selection tool Edit, Group, and Range Selection tools Track Selection tools Roll and Ripple tools Slip and Slide tools Razor Blade tools Zoom In, Zoom Out, Hand, and Scrub Video tools Crop and Distort tools Pen, Delete Point, and Smooth Point tools Some tools are grouped together because they have similar functions. Tools that are grouped together are indicated by an arrow in the upper-right corner of the tool button. 90 Chapter 6 Fine-Tuning Your Edit To select a tool from a group: 1 Move the pointer over a tool in the Tool palette, then press and hold down the mouse button. A pop-up menu shows the other tools associated with this function. Tip: Keep the pointer over the tool for a few seconds to see its name; otherwise known as a tooltip. 2 Move the pointer to the tool you want to select, then release the mouse button. Press and hold to choose additional tools. Doing a Ripple Edit A ripple edit moves the location of either the Out point preceding or the In point following an edit point (the point in the Timeline of an edited sequence where the Out point of one clip meets the In point of the next clip). After a ripple edit is performed, the duration of the affected clip is shortened or lengthened. Before edit A After edit A B B C C A ripple edit only affects one clip adjacent to an edit point. All other clips in your sequence are then moved to accommodate the new duration of this clip, changing the overall duration of your sequence. For example, if you want to adjust the Out point of the first of two adjacent clips, you can use the Ripple tool to move the first clip’s Out point to the left or right. The second clip will then be moved to the left or to the right, to match the changed Out point. No clip is overwritten and, as a result, there is no gap. Chapter 6 Fine-Tuning Your Edit 91 To do a ripple edit in the Timeline: 1 Select the Ripple tool in the Tool palette (or press the R key twice). Ripple edits are done using the Ripple tool. 2 Select an edit point by clicking near the edge of the clip. If linked selection is on, the edit points of linked clips are also selected. 3 Do one of the following: • Type + or – followed by the number of frames to add or subtract from the current edit, then press Return. • Drag the edit point to lengthen or shorten the clip in the sequence. • Markers: If you drag a clip’s In point, you see two markers. One is a boundary showing the new duration of the clip you’re trimming. The other shows the position of the current frame you’ve trimmed to. • Boundary: If you drag a clip’s Out point, you see a boundary showing the new duration of the clip you’re trimming. Out point being trimmed in to the first clip 92 Chapter 6 Fine-Tuning Your Edit At the same time, the Canvas shows a two-up display with the Out point of the outgoing clip on the left and the In point of the incoming clip on the right. Indicates the In point of the incoming clip Indicates the Out point of the outgoing clip The clips in your sequence after the edit point you’ve rippled all move either left or right to accommodate the new duration of your rippled clip. For more information on ripple edits, see Final Cut Express Help, Chapter 19, “Advanced Editing and Trimming Techniques.” The Out point moves back to accommodate the ripple edit. 4 Save your project. Chapter 6 Fine-Tuning Your Edit 93 Doing a Ripple Delete You can also delete an item or items so that all items to the right of the deleted item move to the left, filling in the gap. This is called a ripple delete. Ripple deletes can be performed using any of the selection tools in the Tool palette to select one or more clips or using In and Out points in the Timeline or Canvas to specify a range. A ripple delete removes one or more items from the Timeline. All clips in unlocked tracks that follow the deleted item move to the left. This fills in the gap left by the deleted clip. Performing a ripple delete changes the duration of your sequence. To perform a ripple delete: 1 Select an item or range of items to delete using one of the selection tools. This clip is being ripple deleted. 94 Chapter 6 Fine-Tuning Your Edit 2 Do one of the following: • • • • Choose Sequence > Ripple Delete. Press Shift-Delete. Press the Forward Delete key. Control-click the item or region you want to delete, then choose Ripple Delete from the shortcut menu. Note: Control-clicking only works when you’ve selected items with the mouse. It doesn’t work on a region defined by In and Out points. • Press Shift-X to remove the selected clips from your sequence to the Clipboard. This clip moves back to fill the gap. These clips are unaffected. 3 Save your project. For more information about ripple deletes, see Final Cut Express Help, Chapter 19, “Advanced Editing and Trimming Techniques.” Chapter 6 Fine-Tuning Your Edit 95 Doing a Roll Edit A roll edit moves the edit point where two clips in your sequence meet. Both the Out point of the outgoing clip (to the left) and the In point of the incoming clip (to the right) of the selected edit point move simultaneously. Before edit A B After edit A B C C A roll edit changes the duration of the two adjacent clips as the edit point is moved, but the overall duration of your sequence stays the same. Roll edits are useful when you want to match the action of one clip with the action of another and you need to find the right intersecting frames. For example, if one clip shows a woman opening a door and walking into a house, and a second clip from the inside shows the door opening and the woman walking in, you can edit these clips together so that the actions match as closely as possible. You can then do a roll edit to move the edit point between these two shots until you find the perfect frame for this cut. 96 Chapter 6 Fine-Tuning Your Edit To do a roll edit in the Timeline: 1 Select the Roll tool in the Tool palette (or press the R key). Before 2 Select an edit point between two clips. If linked selection is on, the edit points of linked items are also selected. 3 Do one of the following: • Drag the edit point left or right. As you drag, the Canvas shows the two-up display with the Out point of the outgoing clip on the left and the In point of the incoming clip on the right. • Type + (plus) or – (minus) followed by the number of frames to add or subtract from the current edit, then press Return. Indicates the In point of the incoming clip Indicates the Out point of the outgoing clip 4 Save your project. Chapter 6 Fine-Tuning Your Edit 97 To roll multiple tracks simultaneously: 1 Do one of the following: • Press the Command key while clicking to select multiple edit points. • Select the Edit Selection tool in the Tool palette (or press the G key), then drag to select the desired edit points. 2 Use the Roll tool to perform the roll edit across all of the tracks. Edit being rolled After 3 Save your project. For more information about roll edits, see Final Cut Express Help, Chapter 19, “Advanced Editing and Trimming Techniques.” 98 Chapter 6 Fine-Tuning Your Edit Tips on Editing In Final Cut Express HD, there are many methods you can use to perform the same task. Many of these methods have more steps than others, and many functions can be performed with a single keystroke. There are also many features in Final Cut Express HD that are designed to enhance your editing. Moving the Playhead to Edit Points The playhead in the Timeline is locked to the playhead in the Canvas, and both windows mirror each other. The Canvas displays the frame currently at the position of the playhead in the Timeline, whether it’s playing or stopped. While working in Final Cut Express HD, you’ll constantly move the playhead to view frames in your sequence, using its location to set edit points and edit additional clips into your sequence. So it’s important to know how to navigate using the playhead. m To move the playhead to the next edit point, do one of the following: Choose Mark > Next > Edit (or press Shift-E). m Press the Down Arrow key on your keyboard. m In the Canvas, click the Next Edit button. Final Cut Express HD looks for the next edit point, In point, or Out point. If overlays are turned on in the View menu, an L-shaped icon appears in the Canvas, indicating whether you are on an In or Out point. m To move the playhead to the previous edit point, do one of the following: Choose Mark > Previous > Edit (or press Option-E). m Press the Up Arrow key on your keyboard. m In the Canvas, click the Previous Edit button. Final Cut Express HD looks for the previous edit point, In point, or Out point. If overlays are turned on in the View menu, an L-shaped icon appears in the Canvas, indicating whether you are on an In or Out point. Chapter 6 Fine-Tuning Your Edit 99 m To move the playhead to the beginning of your sequence: Press Home on your keyboard. m To move the playhead to the end of your sequence: Press End on your keyboard. For additional tips and information on navigating between edit points, see Final Cut Express Help, Chapter 14, “Working in the Timeline.” Copying and Pasting Clips It’s easy to duplicate clips in a sequence in the Timeline by either dragging, or selecting a clip and using the Copy and Paste commands (or their keyboard equivalents). To copy a clip to another location in the Timeline by dragging: 1 In the Timeline, select the clip. 2 Hold down the Option key and drag the clip to the new location in the Timeline. To copy and paste clips in the Timeline: 1 Use the Selection tool to select the clip or clips you want to copy. 2 Choose Edit > Copy (or press Command-C). 3 Position the playhead where you want to paste your clip. 4 Do one of the following: • To paste your items as an overwrite edit: • Choose Edit > Paste (or press Command-V). • Control-click in the Timeline, then choose Paste from the shortcut menu. • To paste your items as an insert edit: • Choose Edit > Paste Insert (or press Shift-V). • Control-click in the Timeline, then choose Paste from the shortcut menu. 100 Chapter 6 Fine-Tuning Your Edit Changing a Clip’s Speed You can use the Final Cut Express HD speed options to speed up or slow down a clip in your sequence to create fast or slow motion effects. Changes to a clip’s speed that are under 100 percent produce slow motion. Changes to a clip’s speed that are over 100 percent produce fast motion. For example, if you set a 10-second clip to play back at 50 percent, Final Cut Express HD duplicates its frames so that the clip becomes 20 seconds long, playing back more slowly. If you increase the clip’s speed to 200 percent, Final Cut Express HD skips frames and makes the clip 5 seconds long, and it plays back considerably faster. Selected 10-second clip Same clip with speed changed to 50 percent (now 20 seconds long) Speed settings you apply are not applied to that clip’s source media on the computer’s hard disk, and can be changed at any time. Chapter 6 Fine-Tuning Your Edit 101 To change the playback speed of a clip: 1 Select a clip in the Timeline. 2 Do one of the following: • Choose Modify > Speed (or press Command-J). • Control-click a clip, then choose Speed from the shortcut menu. 3 Select speed options for the effect you want to create, then click OK. Changing the clip’s speed or duration automatically changes the other value. • Duration and Speed fields: You can modify the clip’s marked duration or speed percentage. Unmodified clips have a clip speed of 100 percent. Changes to one of these settings are automatically reflected in the other. • Reverse: Select this checkbox to make the clip play in reverse, using any speed specified by the above controls. • Frame Blending: Select this checkbox to smooth the apparent motion of a clip playing back at slow or fast speeds. The clip’s duration in your sequence changes, getting longer or shorter depending on the new speed you selected. 102 Chapter 6 Fine-Tuning Your Edit Making Life Easier With Three-Point Editing When you set up a series of In and Out points to prepare for performing an edit, Final Cut Express HD follows the principles of three-point editing. To set up an edit, you don’t need to specify both In and Out points for your clip in the Viewer, and In and Out points for that clip’s destination in the Canvas or Timeline. All you have to do is to set up any three of the four needed edit points, and Final Cut Express HD calculates the fourth one. The following basic examples show you how three-point editing works. Example: Editing a Specific Clip Into Your Sequence The simplest way to perform a three-point edit is to specify In and Out points for a clip in the Viewer, and then specify the destination In point in your sequence by positioning the playhead in the Canvas: 1 Open a clip into the Viewer. This is your source clip. 2 Specify In and Out points for your source clip in the Viewer. In point Chapter 6 Fine-Tuning Your Edit Out point 103 3 In the Timeline, move the playhead to the location in your sequence where you want the clip to start (the sequence In point). If you don’t define any In and Out points in your sequence, the Canvas or Timeline playhead will serve as the edit point. Move the playhead to the location in the sequence where you want the clip to start. 4 Now, if you do an overwrite edit, you’ll see that the duration of your clip, defined by the In and Out points in the Viewer, has been edited into the sequence. The new clip starts where the playhead was. As you can see, defining only three points—the In and Out points in the Viewer and the sequence In point in the Canvas—gives you total control of the edit that’s performed. 104 Chapter 6 Fine-Tuning Your Edit Example: Editing a Clip Into a Gap in Your Sequence You can also do the reverse of the previous edit. For example, you might have a space in your edited sequence and you want to fill it up entirely with a new clip. You know where you want the source clip to start, and you don’t particularly care where it ends. You can specify an In point only in the Viewer, and specify both In and Out points in the Timeline to cover the gap: 1 Open a clip into the Viewer. This is your source clip. 2 Specify an In point for the source clip in the Viewer. In point 3 In the Timeline, move the playhead to the middle of the gap you want to fill. Move the playhead into the gap. Chapter 6 Fine-Tuning Your Edit 105 4 Choose Mark > Mark Clip (or press X) to set In and Out points around the gap. Note: The gap must be within the destination track. Set In and Out points. 5 If you do an overwrite edit, you’ll see that your clip, defined by the In and Out points in your sequence, has been edited into the sequence. The new clip fills the gap. 106 Chapter 6 Fine-Tuning Your Edit Three-Point Editing Rules in Final Cut Express HD Final Cut Express HD uses the following rules to determine what constitutes an edit point: If no edit points are specified: • If no edit points have been set in the Viewer, the In and Out points used are the beginning and end of the clip. • If no edit points have been set in the Canvas or the Timeline, the playhead location in the Canvas is used as the sequence In point. If only one edit point has been specified: • If only an In point is set for a source clip in the Viewer, Final Cut Express HD uses the end of the clip as the Out point. Likewise, if only an Out point has been specified in the Viewer, Final Cut Express HD uses the beginning of the clip as the In point. • If you’ve only set an Out point in the Canvas or the Timeline, Final Cut Express HD assumes you want to backtime the edit, matching the Out point of the source clip with the Out point specified in your sequence. Exceptions to these rules: There are two exceptions to the Final Cut Express HD three-point editing rule: • Fit to fill edits: This type of edit requires four specified points, because Final Cut Express HD adjusts the speed of the source clip, slowing it down or speeding it up to fill the specified duration in the sequence. • Replace edits: For this type of edit, any In or Out points you set in the Viewer are ignored. If no In or Out points have been set in your sequence, Final Cut Express HD uses the boundaries of the clip currently at the playhead’s location in the Canvas as sequence In and Out points. The replace edit is used to replace all or part of a single clip in your sequence. Also, sequence In and Out points and destination tracks don’t always apply when you drag a clip directly into the Timeline to perform an edit. For more information on fit to fill and replace edits, see Final Cut Express Help, Chapter 19, “Advanced Editing and Trimming Techniques.” Chapter 6 Fine-Tuning Your Edit 107 7 Adding Transitions 7 A transition is a visual effect used to change from one clip in your edited sequence to the next. Most movies and TV shows use two types of transitions. The most common is the dissolve, in which one shot gently fades into the next. The second most common is the wipe, in which the screen splits, moving from one side of the image to the other to gradually reveal the next shot. Final Cut Express HD comes with a variety of transitions you can use in your programs, but you’ll probably use dissolves and wipes more than any others. About Adding Transitions Transitions are applied between two adjacent clips in the same track of a sequence in the Timeline. For a transition to be applied, these two clips must have unused frames that overlap past the edit point. A transition is displayed as an overlay on top of the edit point between the two clips. A transition between two clips Note: By default, transitions have a total duration of one second. To change this, see “Adjusting a Transition” on page 114. 109 Adding a Transition in the Timeline You add transitions to clips in the Timeline after they’ve been edited into a sequence. You can place a transition so that it starts on, centers on, or ends on the edit point. For the instructional purposes of this book, only applying transitions to the center of a cut will be discussed. For more information on applying transitions to the beginning and end of a cut, see Final Cut Express Help, Chapter 18, “Adding and Editing Transition Effects.” Transitions Need Overlapping Frames at an Edit Point To apply a transition between two clips in the Timeline, you must have enough overlapping frames between the clips to cover the duration of your transition. These overlapping frames aren’t visible in the sequence because they occur before and after the In and Out points of the clip, but the clip still contains them. For example, in the illustration below, the outgoing and incoming clips both have more than one second of overlap. Incoming overlap Incoming clip Outgoing clip Outgoing overlap In this case, if you choose to add a one-second transition, there’s enough room to accommodate the transition to start on, center on, or end on an edit point. 110 Chapter 7 Adding Transitions If one clip or both clips have overlapping frames, but not enough for the entire duration of the transition, Final Cut Express HD shortens the transition that’s added. The duration changes to fit that of the available frames. For example, you might have a one-second overlap to the left of the edit point, but only seven frames of overlap to the right, like this: Incoming overlap Incoming clip Outgoing clip Outgoing overlap In this case, your transition will be shortened to a total duration of 14 frames. The length of each half of a transition placed at the edit point is based on the side of the edit point with the least amount of overlap. If there is no overlap at all (for example, if you’ve edited two clips into your sequence in their entirety), you can’t apply the transition. A message appears that says “Insufficient content for edit.” To add a transition, you need to add more overlapping frames or change the duration of the transition to accommodate the available frames. Outgoing clip Incoming clip Adding a Transition to the Center of a Cut You can quickly add the default transition between two clips in your sequence. The default transition in Final Cut Express HD is set to Cross Dissolve. m m To add the default video transition, do one of the following: Select an edit point between two video clips or position the Canvas or Timeline playhead at the edit point, then press Command-T. Control-click an edit point between two video clips in the Timeline, then choose Add Transition from the shortcut menu. If there are enough overlapping frames on both sides of the edit point, the selected transition is added to your edit, centered at the edit point. You can add any type of transition, whether or not it’s the default transition, using the Effects menu in the menu bar or the Effects tab in the Browser. Chapter 7 Adding Transitions 111 To add a transition from the Effects menu: 1 Do one of the following: • Select an edit point between two clips in your sequence. • Position the Canvas or Timeline playhead at the edit point or on a transition that’s already been edited into your sequence. Select an edit point where you want to add a transition. 2 Do one of the following: • To add a video transition: Choose Effects > Video Transitions, choose the type of transition, then choose the desired transition from the submenu. • To add an audio transition: Choose Effects > Audio Transitions, then choose the desired transition from the submenu. If there are enough overlapping frames on both sides of the edit point, the selected transition is added to your edit, centered at the edit point. The added transition, centered on the edit point 3 Save your project. 112 Chapter 7 Adding Transitions m To add a transition from the Effects tab in the Browser: Drag a transition from the Effects tab in the Browser to an edit point in the Timeline. Depending on the number of overlapping frames between the two clips, you can drag the transition to start on, center on, or end on an edit point. A transition starting on the cut A transition centered on the cut A transition ending on the cut Chapter 7 Adding Transitions 113 Adjusting a Transition You can perform some simple trimming operations on transitions in the Timeline to make them longer or shorter. If the transition is centered on the edit point, changes in duration extend in both directions. To graphically change a transition’s duration in the Timeline: 1 Choose the Selection tool, then move the pointer to the beginning or the end of the transition in the Timeline. The pointer changes to the Resize pointer. 2 Drag the transition’s edit point to the new duration. Drag the Resize pointer to the duration you want. 3 Save your project. To numerically change the duration of a transition in a sequence: 1 Control-click the video transition, then choose Duration from the shortcut menu. 2 In the Duration dialog, enter a new duration for the transition, then click OK. Enter the new duration here. If you enter a duration that’s longer than the available amount of overlap between these two clips, you hear an alert sound and the maximum duration possible is displayed in the dialog. You can change the duration or click OK to use the maximum duration. 3 Save your project. 114 Chapter 7 Adding Transitions Deleting a Transition If you’ve applied a transition and don’t like the effect, removing the transition is simple. m To delete a transition from a sequence: Select the transition you want to remove from the Timeline, then do one of the following: • Press Delete. • Choose Edit > Clear. • Control-click the transition, then choose Cut from the shortcut menu. Copying and Pasting a Transition To add the same transition quickly elsewhere within your sequence, you can copy and paste a transition to other edit points. This is helpful if you’ve changed a transition’s default settings and want to use the modified transition again. To copy a transition from one edit point to another: 1 Do one of the following: • In the Timeline, select the transition you want to copy, then press Command-C. • Control-click the transition, then choose Copy from the shortcut menu. 2 Control-click the edit point where you want to add this transition, then choose Paste from the shortcut menu. m To copy a transition by dragging it: Hold down the Option key while dragging an existing transition to another edit point. Chapter 7 Adding Transitions 115 8 8 Adding Effects Effects are ways of enhancing and processing your video and audio media. Most of the effects you’ll create in Final Cut Express HD are done by using filters. Filters can be applied individually or in groups to any video clip. You can add as many filters as you like to a clip; the order in which they’re applied determines the final result. For example, if you apply a blur filter and then a pond ripple filter to a clip, the clip is blurred first, and then the blurred image is rippled. You can also apply the pond ripple first, and then the blur filter. Blurring the clip after rippling makes the ripple harder to distinguish. Blur, then pond ripple filters are applied. Pond ripple, then blur filters are applied. Once multiple filters are applied to a clip, you can change the order in which they take effect by dragging them up and down the list in the Filters tab. For additional information on filters, see Final Cut Express Help, Chapter 29, “Using Video Filters and Generators.” For additional information about filter controls, see “Controls in the Filters Tab of the Viewer” on page 120. 117 Applying a Filter to a Clip and a Range of Clips You can apply filters to clips in a sequence or to clips in the Browser. m To apply a filter to a clip in a sequence, use one of the following methods: Select one or more clips in the Timeline, then drag a filter from the Effects tab of the Browser to one of the selected clips in the Timeline. Drag the filter from the Browser... ... to a clip in the Timeline. m Select one or more clips in the Timeline, choose Effects > Video Filters, then choose a filter from the submenus. m Open a sequence clip into the Viewer, then do one of the following: • Choose Effects > Video Filters, then choose a filter from the submenu. • Drag a filter from the Effects tab of the Browser directly into the Viewer. ... to the sequence clip in the Viewer. Drag the filter from the Browser... For detailed information about the Final Cut Express HD video filters, see Final Cut Express Help, Chapter 29, “Using Video Filters and Generators.” 118 Chapter 8 Adding Effects Rendering a Sequence Depending on the filter you applied to your clips, a red render bar may have appeared at the top of the Timeline above the ruler. This indicates the effects in your sequence need to be rendered before playback. Rendering your sequence processes the video and audio with any applied effects, such as transitions or filters. Once rendered, your sequence can be played in real time. If you try to play back your sequence without rendering, the word Unrendered appears in the image display area of the Canvas. To render a sequence: 1 Select the Timeline to make it active, and make sure nothing inside the Timeline is selected. 2 Choose Sequence > Render (or press Command-R). 3 If your project has not yet been saved, Final Cut Express HD prompts you to save your project. A status window appears showing the rendering progress. Click Cancel to stop rendering. Your sequence now plays in real time. Adjusting a Filter You can adjust the filters applied to a clip by changing the settings in the Filters tab of the Viewer. m To view the filters applied to a clip, do one of the following: Open a clip into the Viewer, then click the Filters tab. m If a sequence clip is already open in the Viewer, click the Filters tab. m To reveal settings for a filter: In the Filters tab, click the disclosure triangle next to the parameter. Chapter 8 Adding Effects 119 Controls in the Filters Tab of the Viewer There are various controls you can use to manipulate filters in Final Cut Express HD. While each filter has its own individual settings and controls, all filters have some controls in common. Filter category bar Reset button Name bar for the pond ripple filter Parameter controls for the pond ripple filter On/off checkbox Disclosure triangle Timecode field • Filter category bar: Video filters are listed first, and then audio filters (if the clip has • • • • • • 120 both video and audio items). Click the Video Filters bar or the Audio Filters bar to select all the filters in that category. Name bar: Each filter has a name bar that contains a disclosure triangle, on/off checkbox, and the filter’s name. Drag the name up or down to change a filter’s position in the list. (It’s easier to do this if the filter’s controls are hidden.) Reset button: This button is located in the name bar, under the Parameters column. Click to reset the parameters to their default value. On/off checkbox: Select this checkbox to turn a filter on or off. If the checkbox is not selected, the filter isn’t applied or rendered. Disclosure triangle: Click this triangle to show and hide all of the controls for a filter. Parameter controls: Each filter has its own set of parameter controls. Timecode navigation field: This field displays the position of the playhead in the Timeline. When you enter a new timecode value, the playhead moves to that time. Chapter 8 Adding Effects Disabling a Filter You can turn a filter on or off without removing it from a clip. This is useful for previewing different combinations of filters without having to repeatedly apply and delete them. To turn individual filters off: 1 Click the Filters tab in the Viewer. 2 Select the checkbox next to the filter’s name to remove the checkmark. Deselect this checkbox to turn the filter off. Select the checkbox again to turn the filter back on. Removing a Filter You can remove one or more filters from a clip at any point in your project. m To remove a filter from a clip, do one of the following: Select the filter in the Filters tab, then press Delete. m Select the filter, then choose Edit > Clear. m Select the filter, then choose Edit > Cut. m Control-click a filter, then choose Cut from the shortcut menu. To remove all of a clip’s filters: 1 Select the Video Filters bar in the Filters tab. 2 Do one of the following: • Choose Edit > Clear. • Press Delete. 3 Save your project. Chapter 8 Adding Effects 121 Filter Tips Final Cut Express HD makes it easy to apply the filter parameters in one clip to other clips in your project. Copying and Pasting a Clip’s Filters When you copy a clip from the Timeline, you also copy all of that clip’s settings, including filters applied to that clip. Instead of pasting duplicates of the clip you’ve copied, you can paste only that clip’s filters into other clips by using the Paste Attributes command in the Edit menu. To use the Paste Attributes command to paste filters into a clip: 1 Select a clip in the Timeline that has a filter (or filters) whose settings you want to copy. 2 Choose Edit > Copy. 3 Select one or more clips in the Timeline to apply the filter or filters to. 4 Do one of the following: • Choose Edit > Paste Attributes. • Control-click the clip or clips you’ve selected in the Timeline, then choose Paste Attributes from the shortcut menu. • Press Option-V. 5 In the Paste Attributes dialog, select the Filters checkbox under Video Attributes. To copy a clip’s filter, make sure the Filters checkbox is selected. 6 Choose any other options, then click OK. The parameter values and keyframes of the filters in the clip you copied from are copied into the selected clip or clips. 7 Save your project. 122 Chapter 8 Adding Effects 9 Creating Titles and Credits 9 You can add the finishing touch to your movie by creating titles and credits. In Final Cut Express HD, you create titles and credits using video generators. Unlike filters, video generators are not effects that you apply to clips in your project. Instead, video generators are synthesized clips created by Final Cut Express HD. You superimpose your created title clips over the existing video clips in the Timeline. To create titles, Final Cut Express HD uses the Text generator. To open the Text generator: 1 Open the Generator pop-up menu at the bottom-right corner of the Viewer. 2 Choose Text, then Text from the submenu. 3 Click the Controls tab in the Viewer to access the generator’s controls. 123 Creating Opening Titles Your opening titles provide viewers with their first impression of your movie. Therefore, it’s important to take your time and try different fonts, colors, and styles, until you’re satisfied with the result. Make Sure Your Titles Fit on a TV Screen Before you begin creating your titles, you want to ensure the titles fit on a television screen. The title safe boundary is 20 percent smaller than the overall size of the frame, whether you’re using NTSC or PAL. Different manufacturers use different amounts of overscan when they build TVs. The title safe boundary is guaranteed to be the minimum displayed area of your image on television. To avoid the possibility of your titles being obscured by the edge of the TV frame, you should restrict any titles or text you add to the title safe area. m m m m To view the title safe boundaries, do one of the following: Choose View > Show Title Safe, so a checkmark appears next to it. Choose Show Title Safe from the View pop-up menu in the Viewer, so a checkmark appears next to it. To remove boundaries, do one of the following: Choose View > Show Title Safe to remove the checkmark. Choose Show Title Safe from the View pop-up menu in the Viewer to remove the checkmark. Text Generator Options When you open the Text generator and click the Controls tab in the Viewer, you see the following fields and controls. You use these to create your titles. Reset button Enter title text in this field. Number field for the font size Font size slider, with arrows on either end Parameter controls for the Text generator Timecode field 124 Chapter 9 Creating Titles and Credits • • • • • • • • • • • Text: Enter your title text in this field. Font: Choose a font from the Font pop-up menu. Size: Change the font size by entering a value or dragging the slider to the left or right. Alignment: Choose the alignment of your title on the screen from this pop-up menu. Your choices are Left, Center, and Right. Font Color: Choose the color of your font by doing one of the following: • Disclosure triangle: Click to display sliders and number fields corresponding to the hue, saturation, and brightness of the range of colors available. • Eyedropper button: Click this button, then click an image in the Viewer or the Canvas to pick up that color. • Color picker: Click to choose a color using the standard color picker. • Hue, Saturation, and Brightness controls (H, S, and B): Hue determines which color is chosen; saturation determines how vivid the color is. If saturation is 0, the resulting color is always white. Brightness determines how bright or dark the color is. If brightness is 0, the resulting color is black; if brightness is 100, the color is the lightest possible value. Origin: You can animate your title by entering new coordinates in the Origin text fields and clicking the Point Select (+) button. Your title will move from the coordinates you specify to its current location. Tracking: Use the slider to adjust the space between letters, or enter a value in the number field. Leading: Use the slider to adjust the space between lines of text, or enter a value in the number field. Aspect: Use the slider to adjust the proportion of height versus width of your selected font, or enter a value in the number field. Auto Kerning: Select the Auto Kerning checkbox to kern your text automatically so that the spacing between the individual letters of your text is correct. Use Subpixel: Use the Use Subpixel control to render your text with subpixel accuracy. Chapter 9 Creating Titles and Credits 125 Creating Title Text You use the Text generator to create the text for the title clips in your movie. To create text: 1 Open the Generator pop-up menu, choose Text, then Text again to open the Text generator. 2 Click the Controls tab in the Viewer to view the Text generator’s controls. 3 Enter the text for your title in the Text field, then specify your settings in the Controls tab. Enter title text in this field. Parameter controls for the Text generator 4 Save your project. You are now ready to add your title to your sequence. 126 Chapter 9 Creating Titles and Credits Adding a Title to a Sequence You add a title to your sequence the same way in which you add a clip. To add your title to a sequence: 1 In the Timeline, set your Destination track to V3 by dragging the V1 Source control to the Destination control on track V3. Drag the Source control to destination track V3. 2 Set the In and Out points where you want your title to begin and end by pressing I where you want the title to start in your sequence and O where you want the title to end. Set the In and Out points for the duration of the title clip. 3 Place the playhead at the In point. 4 Click the Video tab in the Viewer. 5 Control-click the scrubber bar, then choose Clear Out to remove the Out point on the title clip. Removing the Out point ensures the title clip has enough content to fill the space between the In and Out points set in the Timeline. Chapter 9 Creating Titles and Credits 127 6 Perform an Overwrite edit by dragging the title clip from the Viewer to the Overwrite section of the Edit Overlay in the Canvas. The title track appears in track V3. Your new title appears in track V3 over your video. 7 Save your project. Using Lower-Thirds When you’re watching the news and the reporter’s name is displayed at the bottom of the screen, that’s an example of lower-thirds. Lower-thirds provide information about a person or location displayed on the screen. The text is presented at the bottom-third of the screen so as not to cover up the person’s face or draw undue attention from the location on display. An example of lower-thirds 128 Chapter 9 Creating Titles and Credits To open the Lower 3rd text generator: 1 Open the Generator pop-up menu at the bottom-right corner of the Viewer. Generator pop-up menu 2 Choose Text, then Lower 3rd from the submenu. 3 Click the Controls tab in the Viewer to access the generator’s controls. The controls are similar to those of the Text generator except that there are two text fields. Text 1 corresponds to the top line, and Text 2 corresponds to the bottom line. Enter text in this field for the top line. Parameter controls for the top line (Text 1) Enter text in this field for the bottom line. Parameter controls for the bottom line (Text 2) Global lower-thirds parameter controls Auto Kerning on/off checkbox When you are satisfied with the appearance of your lower-thirds text, add it to your sequence using the steps from the previous section. See “Adding a Title to a Sequence” on page 127. 4 Save your project. Chapter 9 Creating Titles and Credits 129 Creating Rolling Credits You can use the Scrolling Text generator to create text that scrolls up the screen, like credits at the end of a movie. The controls in the Scrolling Text generator are similar to those of the Text generator; however, the duration of the clip you set with In and Out points determines how fast the text scrolls up the screen. Press the Return key while entering text in the Text field to break up the text so it flows nicely on the screen. To open the Scrolling Text generator: 1 Open the Generator pop-up menu at the bottom-right corner of the Viewer. Generator pop-up menu 2 Choose Text, then Scrolling Text from the submenu. 130 Chapter 9 Creating Titles and Credits 3 Click the Controls tab in the Viewer to access the generator’s controls. The controls are similar to those of the Text generator except that the Direction pop-up menu allows you to choose whether you want the text to scroll up or down. You can also have your credits fade at the top and bottom of the screen by adjusting the Fade Size slider. Enter scrolling credit text in this field. Press the Return key to add a new line on the screen. Parameter controls for the Scrolling Text generator Note: In the Controls tab, scroll down to reveal the Fade Size slider. When you are satisfied with the appearance of your rolling credits, add them to your sequence using the steps from the section, see “Adding a Title to a Sequence” on page 127. If you want your credits to appear over a black background, add your credit roll clip to the end of your sequence. 4 Save your project. Chapter 9 Creating Titles and Credits 131 Tips for Making Terrific-Looking Titles DV was designed for real-world images that blend together, and it is not optimized for the rigid lines of text. Therefore, apply the tips below to achieve better-looking fonts. • Only use san serif fonts, such as: • Arial • Futura • Gill Sans • Helvetica • Impact • Use the bold font style. • Do not use white or black as a font color. • Do not use a font smaller than 25 point. • Reduce opacity of the text clip to 90%. 132 Chapter 9 Creating Titles and Credits 10 Sharing Your Movie 10 When your video and audio are ready for playback, it’s time to make your movie available to others. There are three easy ways to share a Final Cut Express HD project: export it for use on a DVD, distribute it over the web, or make a videotape. Exporting for DVD Preparing your Final Cut Express HD movie for use in a DVD authoring tool such as iDVD is easy. Final Cut Express HD uses the QuickTime .mov file format and feature set for export. QuickTime is Apple’s cross-platform multimedia technology widely used for editing, CD-ROM, web video, and more. To export a QuickTime movie for use in iDVD: 1 Select a clip or sequence in the Browser or open a sequence in the Timeline. 2 Make sure to clear all In and Out points in the Timeline by Control-clicking in the Timeline, then choosing Clear In and Out. 3 Choose File > Export > QuickTime Movie. 133 4 Choose a location and enter a name for the file. Tip: To easily find your movie when exporting is finished, it’s a good idea to choose the Desktop for the location. It’s also a good idea to verify you have enough disk space before exporting your movie. See “Determining How Much Disk Space You Need” on page 39. 5 Choose Audio and Video from the Include pop-up menu. 6 Choose Chapter Markers from the Markers pop-up menu. Note: For information on how to set DVD chapter markers (targets for DVD chapter separation), see Final Cut Express Help, Chapter 17, “Using Markers and Subclips.” 7 Make sure the Make Movie Self-Contained checkbox is selected. 8 When you’re ready to export, click Save. To cancel your export, press Esc or click Cancel. When Final Cut Express HD has finished exporting your movie, open it in iDVD and begin authoring your DVD. 134 Chapter 10 Sharing Your Movie Exporting for the Web If you want to stream your movie on the web, use QuickTime to create an MPEG-4 movie. MPEG-4 is an open standard video format intended for cross-platform, Internet, and multimedia delivery of video and audio content. For more information about MPEG-4, see Final Cut Express Help, Chapter 37, “QuickTime Export of Video, Images, and Sound.” To export a QuickTime movie for the web: 1 Select a clip or sequence in the Browser or open a sequence in the Timeline. 2 Make sure to clear all In and Out points in the Timeline by Control-clicking in the Timeline, then choosing Clear In and Out from the shortcut menu. 3 Choose File > Export > Using QuickTime Conversion. 4 Choose a location and enter a name for the file. 5 Choose MPEG-4 from the Format pop-up menu. 6 Choose Default Settings from the Use pop-up menu, or click the Options button for additional settings. 7 When you’re ready to export, click Save. To cancel your export, press Esc or click Cancel. Chapter 10 Sharing Your Movie 135 Making a Videotape You can export your Final Cut Express HD movie back to mini-DV and share it with others that way. The Print to Video command allows you to include elements in your program such as color bars and tone, a countdown, a slate, and a black trailer. These elements are then created and recorded to video, along with your sequence or clip, without being included in the Timeline. You can also loop your footage as many times as you want, if you want to output your program multiple times on the same tape. To print to videotape: 1 Make sure your video equipment is properly connected to your computer, turned on, and set to VCR (sometimes labeled VTR) mode. Important: Final Cut Express HD cannot record to your camcorder when it is set to Camera mode. 2 Cue the videotape to the point where you want to start recording. 3 Select the appropriate sequence or clip in the Browser, or open your sequence and make the Canvas or Timeline active. 4 Choose File > Print to Video. 5 Select elements you want to include along with your sequence or clip. All selected elements are sent to tape in the order listed. Make sure elements you don’t need are not selected. For a complete description of the selections in the Print to Video dialog, see Final Cut Express Help, Chapter 36, “Recording to Videotape.” 136 Chapter 10 Sharing Your Movie 6 The duration calculator displays the total duration of the program you are outputting, including all of the selected elements and their durations. Make sure there is sufficient time on your tape before proceeding. 7 When you’re finished setting options, click OK. Transitions and effects that require rendering, along with any added elements, are rendered automatically prior to output. 8 When a message tells you to start recording, press Record on your camcorder or deck. Wait a few seconds for your video device to reach a smooth recording speed, then click OK to begin recording. 9 When playback is finished, press the Stop button on your camcorder or deck. Note: The last frame of your clip or edited sequence is held as a freeze frame until you stop your recording device. Chapter 10 Sharing Your Movie 137 Importing an iMovie Project A Appendix A You can open and edit projects created with iMovie using Final Cut Express HD. To open an iMovie project in the Browser: 1 In Final Cut Express HD, choose File > Open. 2 In the dialog that appears, select the iMovie project you want to open. The iMovie project opens in the Browser and contains the sequence and clips as they appeared in the iMovie Clips pane. 3 Save your project. When the iMovie sequence appears in the Browser, you can open it in the Timeline just like a Final Cut Express HD sequence. To open an iMovie project in the Timeline: 1 Double-click the sequence in the Browser to open the iMovie project in the Timeline. 2 Choose Sequence > Render All to render the sequence. Final Cut Express HD requires you to render the iMovie project in order to view it in the Canvas. 3 Save your project. About iMovie DV Files iMovie clips that are imported into Final Cut Express HD are linked to the original clips captured in iMovie (found in the iMovie project’s Media folder). These clips are iMovie DV files and are encoded differently than the QuickTime files Final Cut Express HD captures. • DV Stream files do not have timecode tracks, so media imported from iMovie project files cannot be recaptured. All imported source media must be backed up for future reediting. • Imported iMovie DV files might not play back or print to tape in real time without being rendered first. Important: Final Cut Express HD does not import iMovie sound effects, audio levels, or transitions. All other applied effects are imported. 139 Importing Stills B Appendix B In addition to capturing video and audio clips from tape, you can import a variety of digital video and audio file types into your Final Cut Express HD projects. Imported files appear as clips in the Browser and, like video and audio clips, are references to the corresponding source files on your computer’s hard disk. Because Final Cut Express HD supports many file formats, you typically won’t have to save media files in a different format before importing them into Final Cut Express HD. Also, you don’t have to make backup copies of your original media files since Final Cut Express HD is a nondestructive editing application. You can import the following file formats into Final Cut Express HD projects and sequences: • • • • • • • • • • • • • BMP FlashPix GIF JPEG/JFIF MacPaint (PNTG) Photoshop (PSD) PICS PICT PNG QuickTime Image File (QTIF) SGI TARGA (TGA) TIFF When you import a still image, it becomes a clip that’s approximately two minutes of identical video frames, with a default duration of ten seconds between the In and Out points. 141 To import a still image: 1 Select the Browser to make it active. 2 Choose File > Import > Files (or press Command-I). 3 Locate the file, then click Choose. The still image appears in the Browser. The still image appears in your project in the Browser. 4 Save your project. 142 Appendix B Importing Stills Preparing for Your Next Project C Appendix C By the time you finish your project, your computer’s hard disk should be full. Preparing your hard disk for your next Final Cut Express HD project is essential. In order to remove your entire project, you need to remove the following files: • • • • • Project files Media files Render files Thumbnail files Waveform files To remove your source media: 1 Choose Final Cut Express HD > System Settings, then click the Scratch Disks tab to locate the directory path to the source media files. By default, Final Cut Express HD places these files in your home directory in the /Documents/Final Cut Express HD Documents folder. 2 In the Finder, navigate to the appropriate folders and delete the files inside. 143 Solutions to Common Problems and Customer Support D Appendix D If you run into problems while working with Final Cut Express HD, there are several resources you can use to find a solution. • This Appendix: This appendix includes information about some of the most frequent issues users encounter. Problems are grouped by category. • Final Cut Express HD Help: Final Cut Express HD Help provides comprehensive information about each topic covered in this book. This is the first place you should go to find answers to issues you encounter. • Late-Breaking News: A late-breaking news page in the Final Cut Express HD Help menu provides last-minute information that didn’t make it into the print documentation or onscreen Help. Be sure to consult this help page as soon as you install or upgrade Final Cut Express HD. • AppleCare Knowledge Base: AppleCare Support maintains a database of common support issues that is updated and expanded to include new issues as they arise. This is an excellent, free resource for Final Cut Express HD users. To access the AppleCare Knowledge Base, go to the Apple Service & Support website at http://www.apple.com/ support. • AppleCare Support: There are a variety of support options available to Final Cut Express HD customers. For more information, see the Apple Software Service & Support Guide that came with your Final Cut Express HD documentation. Solutions to Common Problems This section describes problems that you might encounter while working in Final Cut Express HD and the solutions to these problems. Problems With Video Devices This section deals with device control issues and their resolutions. Your camcorder or deck is not recognized. • Make sure your device control cable or FireWire cable is properly connected and plugged in all the way. • Verify that the camcorder is set to VCR mode. 145 • Quit Final Cut Express HD, shut down your computer, turn your camcorder or deck off and on, and then restart your computer. You can’t control certain functions of your camcorder or deck. • Make sure your device control cable is properly connected. • If your deck has a Local/Remote switch, make sure it’s set to Remote. Problems During Playback This section deals with issues encountered during video playback and their resolutions. Video is not visible on an external NTSC or PAL monitor. • Make sure your cables are properly connected from the DV device to your computer and from the DV device to the NTSC or PAL monitor. • If you’re viewing your video on a camcorder that’s connected to your computer’s FireWire port, make sure the camcorder is set to VCR mode. • Close the Capture window, if it’s open. • Make sure you choose View > Video > FireWire. The audio is not in sync with the video, or you’re experiencing dropped frames in your video. Many audio sync issues stem from dropped frames on capture or output. Nearly all dropped frames are due to either incorrectly configured hardware or incorrect preference settings. The leading causes of dropped frames are the following: • If you’re using external speakers connected to a camcorder or deck, and Final Cut Express HD is set to View > Video > FireWire, the video displayed on your computer’s monitor (from the Viewer or Canvas) will not be in sync with the audio. The audio will instead be in sync with the video that is displayed on the NTSC or PAL monitor that’s connected to the same output device. • If your clip or sequence is zoomed while open in the Viewer or displayed in the Canvas, frames may be dropped. Choose Fit to Window from the View pop-up menu in the Canvas or Viewer. • The computer display is set to a low refresh rate. The refresh rate in the Displays pane of System Preferences should always be set to 75 hertz (Hz) or greater. (This is not applicable to flat-panel displays.) • The Canvas and Viewer windows are overlapped by other windows; they should not be. • Reduce the number of tracks in the Real-time Audio Mixing field in the General tab of the User Preferences window. If more audio tracks are specified to be mixed in real time than your computer can handle, frames may be dropped. Reducing the number of tracks will result in your having to render your sequence, but will result in improved playback. • Incorrect versions of Mac OS X and QuickTime can be another cause of dropped frames. Check the Final Cut Express HD website for the version of system software you should use. 146 Appendix D Solutions to Common Problems and Customer Support • Another reason could be that you’re using Mac OS X version 10.3 and FileVault. Dropped frames can occur if you’re capturing or playing back video to a FileVault encrypted directory. FileVault can be turned off in the Accounts pane of System Preferences. For more information, see Mac Help. • The hard disk drive you’re capturing to is inadequate for capturing video. This could be caused by slow hard disks, incompatible drivers, or configuration issues. For more information, see Final Cut Express Help, Chapter 2, “Setting Up Your System.” • Another source of dropped frames on capture or playback may be fragmented hard disks. In general, it’s preferable to capture to disks that are specifically reserved for video. To avoid fragmentation, you should avoid filling up your disks with numerous files unrelated to the projects you’re working on. If you’re editing a long project where some clips are captured, others are deleted, and then more are captured, and so on, even the cleanest storage volume may become fragmented. You can diagnose this with a hard disk utility. Should your capture disks be seriously fragmented to the point of impeding performance, you have three options: • Quit Final Cut Express HD, back up your project file, and delete all the clips from the affected volumes. (Delete only media that can be recaptured; do not delete graphics, audio, or project files.) Upon reopening your Final Cut Express HD project, you will find that all of your video clips are now offline. Simply recapture them and performance should improve. • Copy all the files from the fragmented volume to a blank volume with enough space. Copying files defragments them on the volume to which they are copied. Then delete the files from the original, fragmented volume; now you’re ready to capture more clips to it. Upon reopening your project, Final Cut Express HD will automatically begin the process of reconnecting your media. • A more time-intensive solution is to back up your project file, and then use diskdefragmenting software to defragment your volume. • Another potential cause of dropped frames during output is having too many sequences open simultaneously in the Timeline. Especially with complex sequences with numerous edits, having more than one sequence open at the same time can affect playback performance. To resolve this issue, close all sequences except the one you want to output to video. • If you are playing sequences with numerous short edits, you may also have dropped frames. Projects with a large number of short edits (for example, an experimental video made up of several hundred ten-frame clips) can sometimes overwhelm a hard disk’s ability to jump from one clip to another. In this case, you can try to split a single long sequence into multiple short sequences, outputting them to tape one at a time. Appendix D Solutions to Common Problems and Customer Support 147 An error message appears during capture reporting a “Break in the Timecode.” • When capturing clips for your program from source tapes that were shot in the field, or from old source tapes that have been played to the point of wearing the media, timecode breaks may appear, disrupting the computer’s ability to read a continuous stream of timecode. A few timecode breaks are normal on any source tape, but these timecode breaks should be avoided during capture whenever possible, as they can cause audio/video sync problems and incorrect timecode in your captured clip. Incorrect timecode can in turn cause incorrect recapture of the clips containing the breaks. • To avoid capturing timecode breaks in any circumstances, make sure that the “Abort capture on dropped frames” checkbox is selected in the General tab of the User Preferences window. For more information, see Final Cut Express Help, Chapter 4, “Specifying User Preferences, System Settings, and Easy Setups.” • If you are experiencing excessive timecode breaks during capture, try cleaning the heads on your camcorder or deck. Dirty heads can cause timecode breaks that don’t actually exist on the tape. An error message says “Servo Can’t Lock.” • Try changing the protocol from Apple FireWire to Apple FireWire Basic in the Easy Setup window. For more information, see Final Cut Express Help, Chapter 4, “Specifying User Preferences, System Settings, and Easy Setups.” DV video clips look fuzzy on the computer’s display. • Older Power Macintosh G4 computers cannot process and properly play back DV in real time when playback quality is set to High. As a result, these computers display DV video at a lower resolution in order to maintain the full frame rate of playback for DV clips. This lower resolution results in a softer image, but no information is lost. You can see this when the picture is stopped. Final Cut Express HD can use a high-quality still frame when it doesn’t have to maintain playback, so the picture snaps back into focus. To view your DV media at full quality while playing at 25 or 29.97 frames per second (fps), you need to connect the FireWire output of your computer to a camcorder or deck. The camcorder or deck will decompress the DV stream using dedicated hardware, resulting in smooth playback of your DV media on an attached NTSC or PAL monitor. Note: You’ll see the same fuzzy effect with DV clips that are exported into other applications as well. As long as the clip is compressed with DV, slower computers will lower the resolution during playback, but the source media on the computer’s hard disk still contains all of the information, at the highest quality. Video does not play through to the computer display. • Make sure cables from the video device are properly connected to your computer. You experience poor playback and stuttering video when trying to edit. • Make sure you are not editing with media that uses keyframe compression, such as Sorenson or Cinepak. 148 Appendix D Solutions to Common Problems and Customer Support Your camcorder or deck doesn’t go to the specified timecode or won’t perform a command. • Try changing the protocol to Apple FireWire Basic in the Easy Setup window. For more information, see Final Cut Express Help, Chapter 4, “Specifying User Preferences, System Settings, and Easy Setups.” General Performance Issues Try the following suggestion to increase the performance of Final Cut Express HD. Final Cut Express HD seems to be working slowly. • The amount of memory available to Final Cut Express HD can make a big difference in performance, especially with long projects. More RAM is also needed for softwarebased real-time effects and long projects. You may not have enough RAM allocated to Final Cut Express HD. This can be changed in the Memory & Cache tab of the System Settings window. Problems With Audio Quality This section deals with poor audio playback issues and suggestions to correct them. You don’t hear audio through your camcorder speakers. • Make sure your cables are properly connected. • If you are scrubbing audio in the Audio tab of the Viewer, increase the volume of the computer’s audio output. You don’t hear audio on your computer’s speakers when playing video from your camcorder or deck. • Make sure the speaker’s cables are properly connected. • Make sure your audio cables are properly connected. • If you’re monitoring your audio from your computer, make sure that Mute is off, and that the computer’s volume is adjusted to a reasonable level. • When Final Cut Express HD is set to View > Video > FireWire in order to monitor video using a camcorder or deck, both the video and audio are played through the external monitor and speakers that are connected to your camcorder or deck. The computer’s speakers don’t receive any audio. Make sure the external monitor and speakers are both on and make sure the speaker’s volume level is turned up. Captured audio sounds distorted and “crackly” during capture. • During capture, make sure that you always set the sample rate in Final Cut Express HD to that of your recorded source material. Mismatched sample rates can result in pops and crackles in the audio, incorrect audio/video sync, and in generally diminished sound quality. These rates are: • 32 kHz if you’re capturing media from a DV camera that was set to 12-bit recording • 44.1 kHz if you’re using your microphone input or other audio interface • 48 kHz if you’re recording from a DV camera set to 16-bit recording, or if you’re recording from an audio interface capable of this rate Appendix D Solutions to Common Problems and Customer Support 149 Problems Playing a Reference Movie This section deals with issues encountered while playing a reference movie and the solution to these issues. You’re having problems playing a reference movie. • If you encounter playback problems with a reference movie, export the media as a selfcontained movie (which includes all its media files), and not as a QuickTime reference movie. To do this, make sure there is a checkmark in the Make Movie Self-Contained checkbox in the Export dialog. For more information, see Final Cut Express Help, Chapter 37, “QuickTime Export of Video, Images, and Sound.” AppleCare Support Included in yourFinal Cut Express HD package is the Apple Software Service & Support Guide that provides information about the support options available from Apple. Several levels of support are available, depending on your needs. In addition, there are numerous online resources within the Apple Service & Support website that provide valuable information and instruction. Find answers to support questions and share and exchange valuable information with a community of experienced users at http://www.apple.com/support. Whatever your issue, it’s a good idea to have the following information immediately available when contacting AppleCare Support. The more of this information you have ready to give to the support agents, the faster they will be able to address your issue. • The registration number that came with Final Cut Express HD. This number is different • • • • • • from the software serial number that is used to activate your copy of Final Cut Express HD. Which version of Mac OS X you have installed. This information is available by choosing Apple menu > About This Mac. The version of Final Cut Express HD you have installed, including updates if applicable. The version number can be viewed by choosing Final Cut Express HD > About Final Cut Express HD. The model of computer you are using How much RAM is installed in your computer, and how much is available to Final Cut Express HD. You can find out how much RAM is installed by choosing Apple menu > About This Mac. The amount of RAM available to Final Cut Express HD can be found in the Memory Usage section in the Memory & Cache tab of the System Settings window. What other third-party hardware is connected to or installed in the computer, and who are the manufacturers. Include hard disks, video cards, and so on. Any third-party plug-ins or other software installed along with Final Cut Express HD AppleCare Support can be reached online at http://www.info.apple.com/usen/ finalcutexpress. 150 Appendix D Solutions to Common Problems and Customer Support Glossary Glossary audio clip A media clip containing audio samples. Auto Render A feature that allows Final Cut Express HD to render open sequences whenever a specified number of idle minutes has passed. batch capture A process in which information stored in clips is used to control the deck or camcorder to automatically capture, or digitize, the video or audio material that corresponds to each clip. bin A folder inside of the Browser that can contain clips, transitions, effects, and generators. You use bins to organize these elements, sort them, add comments, rename items, and so on. capture To move NTSC or PAL video or audio from tape to a digital format for use by Final Cut Express HD. Also called digitizing video. Captured video clips appear on the specified scratch disk as a series of QuickTime movie files. capture rate Used to describe the number of times per second that a picture is taken or captured in an imaging system. In a progressive system, the capture rate is equal to the frame rate. In an interlaced system, the capture rate is double the frame rate because at each capture interval, only one field (a half resolution image) is acquired. It takes two fields to make a complete frame. It is standard practice to refer to the capture rate of an image as well as how it is captured when describing it instead of the frame rate. Examples include: 60i (60 captures, 30 frames per second), 30P (30 captures, 30 frames per second), and 60P (60 captures, 60 frames per second). See also interlaced video. Capture window The window used to enter information about clips from source tapes, and to capture clips so you can edit them. clip A media file containing video, audio, graphics, or any other content imported into Final Cut Express HD. editing The process of combining and arranging audio, video, effects, transitions, and graphics in a sequence to produce a program. 151 edit point (1) Defines what part of a clip you want to use in an edited sequence. Edit points include In points, which specify the beginning of a section of a clip or sequence, and Out points, which specify the end of a section of a clip or sequence. (2) The point in the Timeline of an edited sequence where the Out point of one clip meets the In point of the next clip. This edit point can be selected for various operations. generators Clips that are synthesized by Final Cut Express HD. Generators can be used as different kinds of backgrounds, titles, and elements for visual design. Background, Bars, Text, Gradient, and Titles are all generators. head clip The clip that begins your sequence. In point (1) The edit point that specifies the first frame of a clip to be edited into a sequence. (2) The first marked frame of your edit. incoming clip (1) The clip you are editing into your sequence. (2) The clip a transition segues to. insert edit An edit in which a clip is added to a track in the Timeline at a specified point, moving clips and parts of clips appearing after that point to the right. An insert edit does not replace existing material. interlaced video A video frame format that divides the lines into two fields, each consisting of alternating odd and even lines, which are scanned at different times. Used in standard definition video. linked clip A clip that is connected to one or more other clips, so that when you select it you also select the associated clips. You link clips to keep them in sync with one another. master clip The source clip in the Browser from which affiliate clips (sequence clips, duplicate clips, and subclips) are defined. nonlinear editing A video editing method in which edits within a program can be changed at any time without having to re-create the entire edit. When you use a nonlinear editing application to edit a program, all footage used is stored on a hard disk rather than on tape. This allows random access to all video, audio, and images as you edit. Compare with linear editing. offline Clips that are currently unavailable to your project. They appear in the Browser with a red slash through them. Clips may be offline because they haven’t been captured yet, or because they’ve been moved to another location. To view these clips properly in your project, you must recapture them or reconnect them to their corresponding source files at their new locations on the disk. Out point (1) The edit point that specifies the last frame of a clip for use in a sequence. (2) The last marked frame of a video clip. 152 Glossary outgoing clip The clip a transition segues from. out-of-sync indicator In the Timeline, the symbol that appears at the beginning of a clip when the video moves out of sync with its associated audio. If the selected clip is ahead of its associated video or audio, a + (plus) and a number appear, indicating the number of frames they’re out of sync relative to one another. If behind, a – (minus) and a number appear. output Video and audio that is ready for playback and distribution. Your edited program in Final Cut Express HD can be output to tape as a QuickTime file or any one of a variety of different digital media. overwrite edit An edit in which the clip being edited into a sequence replaces frames that are already in the sequence. patch panel The section of the Timeline containing the Audio, Source and Destination, Track Enabling, Locking, and Edit Select controls. project In Final Cut Express HD, the top-level file that holds all the media associated with a program, including sequences, transitions, and clips of various kinds. real-time effects Changes made to media that can play, record, compress, or decompress on your system as fast as they would when played back in real time, without requiring rendering first. Real-time effects can be played back using any qualified computer. real-time operation What is perceived to be instantaneous to a user (or more technically, processing that completes in a specific time allotment). render To process video and audio with any applied effects, such as transitions or filters. Effects that aren’t real time must be rendered in order to play them back properly. Once rendered, your sequence can be played in real time. render To process video and audio with any applied effects, such as transitions or filters, one frame at time. Effects that aren’t real-time effects must be rendered in order to play them back properly. Once rendered, your sequence can be played in real time. render files Files that Final Cut Express HD generates when you render transitions and effects. Render files are saved to the specified scratch disk. render status bars Two slim horizontal bars, at the top of the Timeline, that indicate which parts of the sequence have been rendered at the current render quality. The top bar is for video and the bottom for audio. Different colored bars indicate the real-time playback status of a given section of the Timeline: gray bars require no rendering, red bars must be rendered prior to playback, green bars indicate real-time effects playback, and yellow bars indicate a real-time approximation of the effect that must be rendered to see the exact effect. Glossary 153 scratch disk The disk or disk space you allocate in Final Cut Express HD for digital video capture and editing, as well as for the storage of a project’s render files. sequence A structured collection of video, audio, and graphics clips, edit information, and effects. sequence clip A clip that has been edited into a sequence. Compare to master clip. snapping A setting in the Timeline that affects the movement of the playhead. When snapping is enabled, the playhead “snaps,” or moves directly, to markers or edit points when it is moved close to them. superimpose edit An edit in which an incoming clip is placed into a track adjacent to a clip that’s already in the Timeline at the position of the playhead. If no In or Out points are set in the Timeline and Canvas, the previously edited clip’s In and Out points are used to define the duration of the incoming clip. Superimposed edits are used to overlay titles and text onto video, as well as to create other compositing effects. tail clip The last clip in a sequence, or the clip on the rightmost side when looking at an edit point between two clips. three-point editing Final Cut Express HD uses three-point editing, so you only need to specify three edit points to define where a new clip should be edited into your sequence. Final Cut Express HD automatically calculates the fourth point. timecode A format for assigning each frame of video a unique, sequential unit of time. The SMPTE format is hours: minutes: seconds: frames. title safe area Part of the video image that is guaranteed to be visible on all televisions. The title safe area is the inner 80 percent of the screen. To prevent text in your video from being hidden by the edge of a TV set, you should restrict any titles or text to the title safe area. track header The Timeline column containing each track’s name and its destination track controls. tracks Layers in the Timeline that contain the audio or video clips in a sequence. Also refers to the separate audio and video tracks on tape. Final Cut Express HD allows up to 99 video and 99 audio tracks to be used in a single sequence. 154 Glossary A AIFF files 81–82 anchor items 78 animation 125 AppleCare Knowledge Base 145 AppleCare Support 12, 145, 150 Apple FireWire. See FireWire Apple websites 12, 145, 150 audio adding music 79–82 capturing with video 75–78 narration 82 out-of-sync 76–78, 146–147 problems with 149 quality of 149 recording 82–85 audio CDs 79–80 audio clips 151 audio controls, Timeline 29 audio editing 75–87 adding music 79–82 deleting tracks 86–87 linked clips and 75 resyncing clips 76–78 audio files 79–80 audio tracks See also tracks importing from audio CDs 79–80 locked 59 audio transitions 112 Auto Render feature 151 B backlighting 9 batch captures 151 bins deleting 20 described 19, 151 bit rates 81 black, recording 9 BMP format 141 “Break in the Timecode” error 148 Index Index brightness 125 Browser 18–20 described 17, 18 icon view 20 list view 20 opening clips from 23 opening iMovie projects in 139 removing items from 20 C camcorder audio problems 149 Camera mode 136 connecting 13, 41 device control 13, 40, 41–43 dirty heads on 148 marking controls 37 not recognized 145 recording to 136–137 transport controls 36 unable to control 146 Camera mode 136 Canvas 25–27 controls in 26 described 17 Edit Overlay 27 capture buttons 35 Capture Clip button 40, 41–43 Capture Now button 40, 44–46 Capture Project button 40 Capture Rate 151 Capture window 35–38 capturing video. See video capture .cdda files 79 chapter markers 134 clip overlays 29 clips audio 151 changing playback speed 101–102 copying 100 deleting from projects 20 deleting from sequences 62–63 described 19, 151 155 duration of 96, 102 editing into sequence gaps 105–106 editing into sequences 103–104 filters for. See filters head 152 incoming 152 linked 75–78, 152 master 152 offline 48, 152 opening from Browser 23 opening from Timeline 23 opening into Viewer 23 organizing in Browser 18–20 outgoing 153 pasting 100 playing. See playback resyncing 76–78 subclips 19 tail 154 transitions. See transitions types of 19 video. See video clips working with in Canvas 25–27 working with in Timeline 28–31 working with in Viewer 21–24 color, fonts 125 color picker 125 composition 9 credits, rolling 130–131 Crop tool 90 Current Timecode field 22, 37 cutting, with Razor Blade tool 60–61 D Delete Point tool 90 deleting items bins 20 from Browser 20 clips 20, 62–63 filters 121 In/Out points 54 ripple deletes 94–95 sequences 20 tracks 86–87 transitions 115 destination controls 31, 67–68 destination tracks 66–68 device control capturing clips with 41–43 described 10, 40 requirements for 13 devices 145–146 See also camcorder; video deck digital zoom 9 disks 156 Index hard. See hard disk scratch 15–16, 154 dissolve transition 109 Distort tool 90 duration calculator 137 DVD authoring 133–134 DV Stream files 46, 139 E Easy Setup 14–15 editing adding clips to sequences 55–56 adding storyboards 57–58 audio. See audio editing backtiming edits 107 basics of 49–74 in Canvas 26 cuts 60–61 described 10, 151 fine-tuning 89–107 fit to fill edits 107 gaps 64–65 In points. See In points insert edits 71–72 lift edits 62–63 locking tracks 59 nondestructive 11 Out points. See Out points overwrite edits 68–70 Razor Blade tool 60–61 replace edits 107 ripple edits 91–95 roll edits 96–98 short edits 147 superimpose edits 72–74 three-point 103–107, 154 in Timeline 31 tips on 99–107 trim edits 89–90 typical steps in 8–11, 49 Undo command 50 workflow 8 Edit Overlay 27 edit points copying transitions 115 determining 107 moving playhead to 99–100 overlapping frames 110–111 ripple edits 91 three-point editing 103–107 Edit tool 90 effects 117–122 described 117 filters. See filters motion 101–102 real-time 153 Effects menu 112 Effects tab 113 errors “Break in the Timecode” 148 “Servo Can’t Lock” 148 exporting items canceling export 134 for DVD 133–134 to videotape 136–137 for web 135 F file formats 133, 141 See also specific formats files AIFF 81–82 audio 79–80 .cdda 79 iMovie 139 MP3 81 render 153 source media 18, 20 filters 117–122 adjusting 119 applying to clips 118 copying 122 described 117 disabling 121 pasting 122 removing 121 settings 119–120 viewing 119 Final Cut Express described 7 Easy Setups 14–15 features 11 help 145 initial settings for 14–16 introduction to 7–12 late-breaking news 12, 145 moving from iMovie to 11 onscreen help 12 setting up 10, 13–16 variable bit rates and 81 website for 12 FireWire 15 FireWire Basic 15 FireWire Basic Easy Setup 15 FireWire port 13 FireWire website 15 fit to fill edits 107 FlashPix format 141 fonts 125, 132 fragmentation 147 Index frames dropped 146–148 freeze 137 overlapping 110–111 freeze frames 137 G gaps 64–65 closing 65 described 64 editing clips into 105–106 finding 64 lift edits 62 ripple edits 91, 94 track 64 Generator pop-up menu 22 generators 152 GIF format 141 glossary 151–154 Group tool 90 H Hand tool 90 hard disk fragmentation 147 preparing for projects 143 problems with 147 removing projects from 143 removing source media from 143 scratch disks 15–16, 154 space required 39 verifying space on 39 head clips 152 headphones 85 help, onscreen 12, 145 hue 125 I icon view 20 iDVD, exporting to 133–134 images composition 9 still 141–142 iMovie importing iMovie projects 139 moving to Final Cut Express from 11 opening projects in Browser 139 opening projects in Timeline 139 timecode and 46 video capture 46 iMovie DV files 139 iMovie files 139 importing items audio CD tracks 79–80 audio files 79–80 157 file formats for 141 iMovie projects 139 still images 141–142 In points checking 53 clearing 133 described 51, 152 moving 53, 91–93 removing 54 roll edits 96–97 setting 51–53 insert edits 71–72 interlaced video 152 iTunes 79, 81 J JFIF format 141 jog control Canvas 26 Viewer 22 JPEG format 141 K kerning 125 L leading 125 lift edits 62–63 lighting 9 linked clips 75–78, 152 list view 20 locking tracks 59 Lock Track control 59, 65 Log and Capture window 151 Logging tab 35, 38 Lower 3rd text generator 129 lower-thirds text 128–129 M MacPaint format 141 marking controls Capture window 36, 37 Viewer 22 master clips 152 memory available 150 recording audio 84 requirements for 149 microphone 9, 82, 85 monitor resolution 146 motion effects 101–102 .mov format 133 movies exporting to iDVD 133–134 exporting to videotape 136–137 158 Index exporting for web 135 location of 134 MPEG-4 135 QuickTime. See QuickTime movies reference 150 sharing 10, 133–137 streaming 135 MP3 files 81 MPEG-4 movies 135 music, adding to movies 79–82 mute control 31 N narration 82 navigation, Timeline 30 nonlinear editing 152 NTSC format 15 NTSC monitor 146 O offline clips 48, 152 onscreen help 12, 145 optimizing performance 16 outgoing clips 153 out-of-sync indicator 76, 77, 153 Out points checking 53 clearing 133 described 51, 152 moving 53, 91–93 removing 54 roll edits 96–97 setting 51–53 output 153 overwrite edits 68–70 P PAL format 15 PAL monitor 146 Paste Attributes command 122 patch panel 153 Pen tool 90 performance optimizing 16 problems with 149 Photoshop format 141 PICS format 141 PICT format 141 playback changing clip speed 101–102 problems with 146–149 reference movies 150 in reverse 24, 102 starting 24 stopping 24 in Viewer 24 playhead moving to edit points 99–100 moving to sequence beginning/end 100 snapping 56 Timeline 30 Viewer 22 PNG format 141 PNTG format 141 pre-roll 45, 85 Preview area 35, 36 Print to Video command 136 projects described 18, 153 iMovie 139 making new 33–34 opening 54 preparing hard disk for 143 removing items from 20 saving 34 sharing 10, 133–137 updating 54 PSD format 141 Q QTIF (QuickTime Image File) format 141 QuickTime files 46 QuickTime format 133 QuickTime Image File (QTIF) 141 QuickTime movies exporting to iDVD 133–134 exporting for web 135 iMovie and 46 tracks in 46 R RAM. See memory Range Selection tool 90 Razor Blade tool 60–61, 90 real-time effects 153 real-time operation 153 Recent Clips pop-up menu 22 recording See also video capture audio 82–85 duration of 83–84 voiceovers 85 Redo command 50 reels 38 reference movies 150 reflective surfaces 9 refresh rate 146 registration number 150 render files 153 rendering 11, 153 Index render status bars 153 replace edits 107 resolution monitor 146 older computers and 148 ripple edits 91–95 Ripple tool 90, 92 roll edits 96–98 rolling credits 130–131 Roll tool 90, 96 ruler 30 S saturation 125 saving projects 34 scratch disks 15–16, 154 Scrolling Text generator 130–131 scrubber bar 22 Scrub Video tool 90 SECAM format 15 Selection tool 90 Select Track Forward tool 65 sequence clips 154 sequence marking controls 26 sequences adding clips to 55–56 adding storyboards to 58 adding titles to 127–128 deleting 20 deleting tracks in 86–87 described 19, 154 duration of 96 editing clips into 103–104 editing clips into gaps 105–106 gaps in 64–65 maximum length 19 moving playhead to beginning/end 100 open 147 organizing in Browser 18, 19 renaming 46–48 short edits and 147 “Servo Can’t Lock” message 148 SGI format 141 sharing movies 10, 133–137 shuttle control Canvas 26 Viewer 22 Slide tool 90 Slip tool 90 Smooth Point tool 90 snapping 56, 154 solo control 31 sound. See audio source controls 31, 66–68 source media 62, 143 159 source media files 18, 20 spacing, text 125 speakers 149 still images 141–142 storyboard adding to sequence 58 creating 57 described 57 streaming movies 135 subclips 19 subpixels 125 superimpose edits 72–74 Support, Apple 12, 145 synchronization 146–147 T tail clips 154 tape. See videotape TARGA format 141 television screen 124 text fonts 125, 132 lower-thirds 128–129 opening titles 124–128 rolling credits 130–131 spacing 125 title safe boundaries 124, 154 tracking 125 Text generator 123, 124–126 TGA format 141 three-point editing 103–107, 154 TIFF format 141 timecode breaks in 148 iMovie and 46 Timecode Duration field 22, 37 timecode fields 22, 26 Timeline 28–31 controls in 28–31 copying clips in 100 described 17 display controls 29 editing controls 31 editing in 89 navigation controls 30 opening clips from 23 opening iMovie projects in 139 pasting clips in 100 removing transitions 115 selecting 28 transition duration 114 transitions to clips in 110 titles adding to sequences 127–128 animating 125 160 Index creating text for 126 lower-thirds text 128–129 opening 124–128 rolling credits 130–131 tips for 132 TV screens and 124 title safe area 154 title safe boundaries 124 Tool Bench 83 Tool palette 32, 90–91 tools See also specific tools selecting 32, 91 in Tool palette 32, 90–91 Track Selection tools 90 Zoom tools 90 tool tips 91 track gaps 64–65 track header 86, 154 Track Height control 29 tracking 125 tracks audio 59, 79–80 deleting 86–87 described 154 destination 66–68 disconnecting 67 displaying 29 locking 59 organizing 29 in Timeline 29 video 59 Track Selection tools 90 Track Visibility control 31 transitions 109–115 adding 109–113 adjusting 114 audio 112 copying 115 default video 111 deleting 115 described 109 dissolve 109 duration 109, 114 from Effects menu 112 from Effects tab 113 overview 109–111 pasting 115 video 112 wipe 109 transport controls Canvas 26 Capture window 36 Viewer 22 trim edits 89–90 Trim Edit window 89, 90 trimming 89–90 tripods 9 troubleshooting 145–150 audio problems 146–149 “Break in the Timecode” error 148 performance problems 149 playback problems 146–149 reference movies 150 “Servo Can’t Lock” error 148 sync problems 146–147 video devices 145–146 U Undo command 50 V variable bit rates 81 VCR mode 41 video capturing. See video capture editing. See editing interlaced 152 out-of-sync 75–78 shooting 9 tips for 9 video capture 33–48 aborting 43 with audio 75–78 camera connections 41 Capture Clip 40, 41–43 Capture Now 40, 44–46 Capture Project 40 Capture window 35–38 described 10, 33, 151 device control 40, 41–43 disk space needed 39 groups of clips 44–46 iMovie 46 Logging tab 38 making new project 33–34 marking controls 36, 37 methods for 40 renaming clips 46–48 saving projects 34 single clip 41–43 stop recording 45 tapes 44–46 transport controls 36 Video Capture window 35–38 video clips adding to sequences 55–56 capturing. See video capture fuzzy 148 Index renaming 46–48 video deck audio problems 149 dirty heads on 148 marking controls 36, 37 not recognized 145 transport controls 36 unable to control 146 video devices 145–146 See also camcorder; video deck video generators 123 videotape capturing 44–46 exporting movies to 136–137 labeling 9 video tracks 59 See also tracks video transitions 112 Viewer 21–24 controls in 21–22 described 17 editing in 89 opening clips into 23 playing clips in 24 View pop-up menu 22, 26 voiceovers 82–85 Voice Over tool controls in 83 described 82 using 82–85 VTR mode 41 W web, exporting movies to 135 websites Apple 12, 145, 150 AppleCare Knowledge Base 145 AppleCare Support 150 Apple Service and Support 12 Final Cut Express 12 FireWire 15 wipe transitions 109 workflows 11 Z zoom, digital 9 Zoom control, Timeline 29 zooming, tips on 9 Zoom In tool 90 Zoom Out tool 90 Zoom pop-up menu 22, 26 Zoom slider, Timeline 30 161