Download DeLonghi PAC W110E Specifications
Transcript
PA C W 1 1 0 E
WATER /A IR A IR C ONDITIONER
Instructions for use
Keep these instructions
C L I M AT I S E U R
EAU-AIR
Mode d'emploi
Conservez cette notice
AR CONDICIONADO ÁGUA/AR
Instrucciones para el uso
Repase y guarde estas instrucciones
Lea cuidadosamente este instructivo
antes de usar su aparato
C ONDIZIONATORE
A CQUA /A RIA
Istruzioni per l’uso
Leggere e conservare queste
istruzioni
Register this product on-line and receive a
free trial issue of Cook's Illustrated.
Visit www.delonghiregistration.com.
Visit www.delonghiusa.com for a list of service centers near you. (U.S. Only)
Enregistrez ce produit en ligne et recevez un
numéro gratuit de Cook's Illustrated.
Visitez www.delonghiregistration.com.
Visitez www.delonghiusa.com pour y voir une
liste des centres de réparation proches de
chez vous. (É.-U. uniquement)
Registre este producto en línea y reciba un
ejemplar gratis de Cook's Illustrated.
Visite www.delonghiregistration.com.
Visite www.delonghiusa.com para ver la lista
de centros de servicios cercanos a usted.
(Solamente en los Estados Unidos)
Registra questo prodotto "on-line" per ricevere una copia omaggio della rivista.
Visita www.delonghiregistration.com.
Visita www.delonghiusa.com per una lista dei
centri di servizio a te piu vicini. (Solo negli Stati
Uniti)
ELECTRICAL SPECIFICATIONS 115V ~ 60Hz
DONNEES ELECTRIQUES 115V~60Hz
CARACTERISTICAS ELECTRICAS 115V ~ 60Hz
CARATTERISTICHE ELETTRICHE 115V~60Hz
IMPORTANT SAFEGUARDS
• Use this appliance only as described in this instruction manual.
As with any electrical appliance, the instructions aim to cover as many eventualities as possible. Caution and common sense should be used when operating and installing this air conditioner.
• This appliance has been manufactured to cool and dehumidify domestic environments and
should not be used for other purposes.
• It is dangerous to alter or modify the unit's characteristics in any way.
• The appliance is not intended for use by persons (including children) with reduced physical,
sensory or mental capabilities, or lack of experience and knowledge, unless they have been
given supervision or instruction concerning use of the appliance by a person responsible for
their safety. Children should be supervised to ensure that they do not play with the appliance.
• Should repairs be necessary, contact the nearest authorized De’Longhi Repair Service
Center. Unauthorized Delonghi servicing can be dangerous.
• This appliance is to be used by adults only; keep away from children.
• In the case that the power cord becomes damaged, this must be substituted only by specialized personnel authorized by the manufacturer, to protect against fire.
• Always ensure the appliance is grounded. If you have any doubts check with a qualified
electrician.
• We strongly discourage the use of an extension cord due to potential safety hazards.
• Before cleaning or maintenance operations, always unplug the unit from the outlet.
• Do not pull on or place strain on the power cord when moving the appliance.
• The appliance should not be installed where the atmosphere may contain combustible
gases, oil or sulphur, or near heat sources.
• Do not rest hot or heavy objects on the appliance.
• Clean the filters at least once a week.
• Avoid using heaters near the unit.
• The unit should be transported in a vertical position. If this is not possible secure the unit at an
angle, do not lie it horizontally.
• Before transporting the unit, drain the unit. After transportation, wait at least 4 hours before
switching the unit on.
• The packaging materials can be recycled. It is recommended to place them in the special
containers for differentiated waste collection.
• This appliance is fitted with a special safety device. When the compressor switches off, this
device prevents it from switching on again for at least 3 minutes.
• Remember to descale the appliance at the end of every season and always after 500 hours
of operation (see page 17).
In areas with particularly hard water, you are recommended to add special water softener
obtainable from authorized service centers to the water.
SAVE THESE INSTRUCTIONS
THIS PRODUCT IS FOR HOUSEHOLD ONLY
ELECTRICAL
CONNECTIONS
Before plugging the appliance into the electrical socket, check that.
• the power supply corresponds to the value indicated on the rating plate on the back of the
appliance.
• the socket and electrical circuit are adequate for the appliance.
• the socket matches the plug. If this is not the case, have the plug replaced.
• the socket is adequately earthed.
Failure to follow these important safety instructions absolves the manufacturer of all liability.
The power cable must be replaced by a qualified professional only
2
WHAT IS THE WATER-AIR PINGUINO
During the summer, you feel comfortable at a temperature of between 75°F and 81°F (24 and
27° C) with a relative humidity of about 50%.
An air conditioner removes excess moisture and heat from the room where it is located.
Compared with installed models, portable air conditioners have the advantage that they can
be moved from one room to another in the home or be transported from one building to
another.
Hot air from the room is passed through a coil
cooled by refrigerant gas. Excess heat and
moisture are removed before the air is reemitted into the room.
In single duct models, a small part of
this air is used to cool the refrigerant
gas and then, when hot and damp,
is discharged outside.
In exclusive De'Longhi water-air
models, the heat is removed from
the room through the cooling effect
of the water which is obviously much
greater than air.
This gives this air conditioner
unbeatable cooling efficiency.
3
DESCRIPTION
A
B
C
D
E
F
G
H
I
J
K
L
M
N
O
P
Q
Air outlet grille
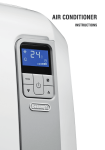
Control panel with advanced LCD display
Handle
Grille
Castors
Air intake grille with dust filter
Air exhaust hose housing
Water drainage hose door
Power cable compartment door
Water fill door
Air exhaust hose
Remote control
Water jug
Window outlet
Castor locks
Wall flange with cap
Single hole window bracket with
locking pins
R Window bracket extension
A
B
C
D
E
K
A
L
M
F
Q
N
J
R
G
H
P
O
I
4
PREPARING FOR USE
1
The instructions below will enable you to prepare your air conditioner for operation as efficiently as possible.
Before use, make sure the air intake and outlet grilles are unobstructed.
AIR-CONDITIONING
1
WITHOUT INSTALLATION
Just a few simple steps and your comfort is ensured with your
appliance:
• Fit the air exhaust hose (K) in the housing (G) at the back of
the appliance (fig. 1).
• Fit the window outlet (N) to the end of the hose.
• Place the air conditioner near a window or French window.
• Adjust the length of the air exhaust hose to reach the window.
2
• Make sure the air exhaust hose is unobstructed.
• Open the window or French window slightly and position the
window outlet (fig. 2).
For optimum results:
• If you have a sash window, place the window bracket (Q) on the
window sill, extend the window bracket fully within the window
frame, fix the window bracket by using the locking pin then lower
the window onto the window bracket. Insert the window outlet
(N) of the exhaust hose (K) into the slot, then connect the hose to
the air conditioner (fig. 3).
• Thanks to the locking pins, it’s possible to use the window bracket also
for sliding windows. Position the hole of the window bracket so to
allow a correct installation of the exhaust hose (see figure 4).
3
• If the windows are large, use the window bracket extension
(R) to cover your window aperture, extending it to the required length, then blocking it with the locking pins supplied (see
figure 5). Make sure you do not cover the hole for the window
outlet.
Keep the air hose as short and free of curves as possible to avoid
bottlenecks.
4
5
3
2
1
5
2
AIR-CONDITIONING
WITH INSTALLATION
6
If required, your appliance can also be installed semi-permanently (Fig. 6).
Proceed as follows:
• Drill a 4.17 inches (106 mm) diameter hole respecting the
11.8 in
30 cm
heights shown in fig. 7 and following the indications in figs. 8,
9 and 10.
11.8 in
30 cm
7
8
4.17 in
106
MAX 39 in
MAX100 cm
MIN 14 in
MIN 35 cm
In the window pane.
• Fit the wall flange (P) into the hole.
• Fit the air exhaust hose (K) in the housing at the back of the
9
appliance (fig. 1).
• Fit the end of the air exhaust hose to the wall flange as shown
in fig. 7. When the air exhaust hose is not fitted, the hole can
be closed with the flange cap.
Keep the air hose as short and free of curves as possible to avoid
bottlenecks.
When
In the wooden kickboard
of a French window.
installing the air conditioner semi-permanently, you
should leave a door slightly open as little as 1/2“ (1cm) to gua10
rantee correct ventilation.
In the wall: it is
recommended that you
insulate the section of
the wall using suitable
insulation.
6
PREPARING
FOR
OPERATION
IN
WATER
MODE
Once the appliance has been installed following the instructions
above, it is ready for use. However, its efficiency can be enhanced by operating it in the exclusive De'Longhi water mode. The
water in the tank increases the cooling power of your Pinguino
and at the same time reduces noise levels and electrical consumption. Compared to air, water reduces the temperature of
the cooling circuit much more efficiently, before being given off
from the air exhaust hose in the form of vapour.
Remember that:
• You must always use salt-free tap water.
• The length of time the water in the tank lasts depends greatly
on environmental conditions such as temperature, humidity,
insulation, the exposure of the room, the number of people
present, etc. Indicatively it lasts about six hours. By using the
WATERSAVE function (see page 13), the length of time can be
extended to 10 hours, with a slightly lower cooling power and
efficiency.
• When the water in the tank runs out, the
light comes on
and operation of the appliance switches automatically to air
to air operation. At the same time, the quantity of air given
out from the rear hose increases.
FILLING
THE TANK
You can fill the tank in one of two ways:
1) By using the water jug provided:
Use the water jug provided or any other plastic/glass bottle or
watering can, providing the neck of the bottle or watering can is
narrow enough to enter the filling hole to avoid spilling water on
the appliance.
• Without using force, open the water fill door (J) completely,
then remove the rubber cap (fig. 11).
• Pour the water into the tank (fig. 12). When the tank is full, the
water level window (fig.13) becomes completely red.
Indicatively, you will need to refill the jug three times to fill the
tank completely.
• After filling, put the rubber cap back in place, then close the
door.
2) Using the extendible hose:
• Without using force, open the water fill door (J) completely,
then remove the rubber cap (fig. 11). Pull out the extendible
hose (fig. 14) and place near a tap.
• Fill the tank to the required level.
• When the tank is full, the water level window (fig. 13) becomes completely red.
• After filling, put the rubber cap back in place, then close the
door.
11
12
13
Level
window
14
The tank does not have to be full to use the water function, but the length of time the
appliance will operate in water mode will be shorter.
When the level window has become completely red, do not add further water or it
could overflow. The tank has no overflow prevention system.
7
DESCRIPTION OF THE CONTROL PANEL WITH LCD DISPLAY
1
Signal receiver
2
Air conditioning symbol
3
Dehumidifying symbol
4
Fan symbol
5
Temperature indicator
6
Timer symbol
7
Alarm symbol
8
WATERSAVE symbol
9
Speed indicator
10 SMART symbol
1
2
3
4
10
5
11
6
11 "No water" symbol
12 BOOST symbol
7
8
12
13 SLEEP symbol
14 AUTOFAN indicator
15 MODE button (selects the modes)
13
14
9
16 FAN button
17 Increase (+) and decrease (-) temperature button
15
16
18 ON/Standby button
17
18
OPERATING FROM THE CONTROL PANEL
15
The control panel enables you to manage all the main functions
of the appliance, but to fully exploit its potential, you must use the
remote control unit.
TURNING
THE APPLIANCE ON
• Plug the appliance into the socket.
Two lines appear on the display indicating that the appliance
is in standby (fig. 15).
• Press the ON/STANDY-BY button (18) until the appliance
comes on. The last function active when it was turned off will
appear.
Never turn the air conditioner off by unplugging from the electrical outlet. Always press
the ON/STAND-BY button, then wait for a few minutes before unplugging. This allows the
appliance to perform a cycle of checks to verify operation.
8
16
AIR CONDITIONING
MODE (FIG.
16)
Ideal for hot muggy weather when you need to cool and dehumidify the room.
Always make sure the water fill door (J) is completely closed
before setting this mode.
To set this mode correctly:
• Press the MODE button (15) a number of times until the airconditioning symbol appears.
• Select the target temperature by pressing the
or
button (17) until the corresponding value is displayed.
• Select the required fan speed by pressing the FAN button (16).
Four speeds are available:
Maximum speed: to achieve the target temperature as rapidly as possible.
Medium speed: reduces noise levels but still
maintains a good level of comfort.
Low speed: for silent operation.
AUTOFAN: the appliance automatically selects
the most suitable fan speed in relation to the
temperature set on the digital display.
The most suitable temperature for the room during the summer
varies from 75°F to 81°F (24 to 27°C). You are recommended,
however, not to set a temperature much below the outdoor temperature.
17
DEHUMIDIFYING
MODE (FIG.
17)
Ideal to reduce room humidity (during Spring and Autumn, in
damp rooms, rainy periods, etc.).
In dehumidifying mode, the appliance should be prepared in the
same way as for air conditioning, with the air exhaust hose attached to enable the moisture to be discharged outside.
To set this mode correctly:
• Press the MODE button (15) a number of times until the dehumidifying symbol appears.
In this mode, fan speed is selected automatically by the appliance and cannot be set manually.
9
18
FAN
MODE (FIG.
18)
When using the appliance in this mode, the air hose does not
need to be attached.
To set this mode correctly:
• Press the MODE button (15) a number of times until the fan
symbol appears.
• Select the required fan speed by pressing the FAN button (16).
Three speeds are available:
Maximum speed: for maximum fan power.
Medium speed: reduces noise levels but still
maintains a good level of comfort.
Low speed: for silent operation.
In this mode, AUTO speed cannot be selected.
19
SMART
MODE (FIG.
19)
The appliance chooses automatically whether to operate in air
conditioning or fan mode.
Fan speed is also set automatically according to the conditions.
To set this mode:
• Press the MODE button (15) a number of times until the SMART
symbol appears.
10
DESCRIPTION OF THE REMOTE CONTROL
1
2
3
4
5
6
Air conditioning symbol
Dehumidifying symbol
Fan symbol
WATERSAVE symbol
Fan speed indicator
SMART symbol
7
8
9
10
11
12
BOOST symbol
SLEEP symbol
AUTOFAN indicator
7
MODE button (selects the modes)
FAN button
Increase (+) and decrease (-) tem- 17
perature button
ON/Standby button
Ionizer symbol
Signal transmission
Selected temperature scale indicator
20
Clock
Timer ON symbol
Timer OFF symbol
Reset button (resets the appliance to
the original settings)
Timer ON button
29
OK button
Timer OFF button
SLEEP button
°C or °F selection button
Swing button (function not available
in this model)
WATERSAVE button
Ionizer button
BOOST button
13
14
15
16
17
18
19
20
21
22
23
24
25
26
27
28
29
3
2
6
1
15
16
14
8
4
5
9
18
19
13
11
10
12
22
23
21
24
25
28
26
27
USING THE REMOTE CONTROL
Point the remote control at the receiver on
the appliance. The remote control must be
no more than 23 ft. (7 metres) away from
the appliance (without obstacles between
the remote control and the receiver).
The remote control must be handled with
extreme care. Do not drop it or expose it to
direct sunlight or sources of heat.
11
MAX 23 ft
MAX 7 metres
INSERTING
OR REPLACING THE BATTERIES
• Remove the back cover of the remote control (fig. 20);
• Insert two R03 “AAA” 1.5V batteries, making sure they are in
the correct position (see the instructions inside the battery
compartment);
• Replace the cover.
20
If the remote control is replaced or discarded, the batteries
must be removed and disposed of in accordance with current legislation as they are harmful to the environment.
Warning: do not mix old and new batteries. Do not mix alkaline, standard (carbon-zinc) or rechargeable (nickel-cadmium) batteries. Do not dispose of batteries in fire. Batteries
may explode or leak.
If the remote control is not be used for a certain length of
time, remove the batteries.
SETTING
THE TIME
After having inserted the batteries, the clock on the display flashes until the time is set.
Proceed as follows.
• Press the
or
button until the correct time is reached. Hold the button down to run
rapidly through first the minutes, then the tens of minutes and then the hours.
• Once the correct time has been reached, release the button and press the OK button (23)
to confirm.
• To cancel the settings programmed
21
on the remote control and restore the
original settings, press the RESET (20)
button lightly with the point of a pencil or pen.
USING THE REMOTE CONTROL
UNIT
The buttons below the remote control display are the same as those on the control
panel of the appliance (fig. 21). You should, therefore, refer to
the instructions in the section "Operating from the control panel"
to turn the appliance on and select the operating mode (AIR
CONDITIONING, DEHUMIDIFYING, FAN, or SMART) and the fan
speed.
The following section describes the additional functions corresponding to the controls on the bottom part of the remote control.
BOOST
FUNCTION (FIG.
22)
Ideal for the summer to cool rooms rapidly. Activate by simply
pressing the
button. The appliance operates in air conditioning mode at maximum fan speed. While this function is selected, it is not possible to set the temperature or change fan speed.
SELECTING
22
THE TEMPERATURE SCALE (FIG.
23)
Press the
button to switch the displayed temperature scale
from Celsius to Fahrenheit and vice-versa.
12
23
24
SLEEP
FUNCTION (FIG.
24)
This function is ideal for the night as it gradually reduces operation of the appliance.
To set this function correctly:
• Press the
button. The appliance operates in the previously
selected mode with low fan speed.
The SLEEP function maintains the room at optimum temperature
without excessive fluctuations in either temperature or humidity
and with silent operation.
Fan speed is always at minimum, while room temperature and
humidity vary gradually to ensure the most comfortable conditions.
During air conditioning, the temperature increases by 2°F (1°C)
after 60 minutes and 4°F (2°C) after 2 hours.
In dehumidifying mode, the dehumidifying power of the appliance is partially reduced every hour for the first two hours.
WATERSAVE
FUNCTION (FIG.
25)
This function is designed to increase the operating time of the
appliance when operating in water mode and can be activated
in air conditioning and SMART mode.
When the button is pressed, the appliance is slightly less efficient,
but consumption of water in the tank is considerably reduced.
With a full tank, the appliance normally operates for six hours.
With this function activated, the operating time increases to 10
hours avoiding the need to refill the water tank frequently.
If the water runs out when this function is active, the quantity of
air given out from the rear hose increases and the
light
comes on. To restore operation in water mode, fill the tank.
SWING
FUNCTION
Not available in these models.
13
25
PROGRAMMING
THE TIMER
The appliance can be programmed to start up and shut down
when required.
Programming start up
• Press the
button.
The start-up time and message
flash on the remote control display (fig. 26).
• Press the or
buttons to set the time you want the appliance to start up.
• When that time is reached, press the OK button to confirm
(fig. 27). The message
appears on the remote control
display and the
symbol is displayed on the appliance to
indicate that the timer is active.
26
27
Programming shutdown
• Press the
OFF button. The shutdown time and message
flash on the remote control display (fig. 28).
• Press the or
buttons to set the time you want the appliance to shut down.
• When that time is reached, press the OK button to confirm
(fig. 29). The message
appears on the remote control
display and the
symbol is displayed on the appliance to
indicate that the timer is active.
29
28
SELF-DIAGNOSIS
The appliance has a self diagnosis system to identify a number of malfunctions.
Error messages are indicated on the control panel display screen.
IF…IS DISPLAYED,
WHAT SHOULD I DO?
LOW TEMPERATURE
The appliance is fitted with
a frost protection device to
avoid excessive formation
of ice. The appliance starts
up again automatically
when the defrosting process is completed.
IF…IS DISPLAYED,
WHAT SHOULD I DO?
HIGH LEVEL
Empty the internal safety
tank, following the instructions in the "End of season
operations" section (pg.
17). If this reoccurs, contact
your local authorized service center.
(safety tank full)
(frost prevention)
If this is displayed, contact
your local authorized service center.
PROBE FAILURE
CLEAN
This message appears after
about 500 hours of operation in water mode and indicates that the appliance
requires descaling as described in the "descaling" section (pg. 17).
(sensor damaged)
After descaling or if the alarm reappears too soon after
the last descaling (carried out before the message is displayed), reset the alarm by holding the
button down
for 10 seconds.
14
TIPS FOR CORRECT USE
30
To get the best from your air conditioner, follow these recommendations:
• Close the windows and doors in the room to be air conditioned (fig. 30).
When installing the air conditioner semi-permanently, you
should leave a door slightly open (as little as 1/2 “) to guarantee correct ventilation.
• Protect the room from direct exposure to the sun by partially
closing curtains and/or blinds to make the appliance much
more economical to run (fig. 31);
• Never rest objects of any kind on the air conditioner;
• Do not obstruct the air intake and outlet (fig. 32). Leave both
grilles free;
• Make sure there are no heat sources in the room.
• Never use the appliance in very damp (laundry rooms for
example).
• Never use the appliance outdoors.
• Make sure the air conditioner is standing on a level surface. If
necessary, place the castor locks (O) under the wheels.
close
doors and
windows
31
close
curtains
32
do not
cover the
appliance
15
CLEANING
33
Before cleaning or maintenance, turn the appliance off by pressing the ON/Standby button on the control panel or remote control, wait for a few minutes then unplug from the socket.
CLEANING
THE CABINET
You should clean the appliance with a slightly damp cloth then
dry with a dry cloth.
wash the air conditioner with water. It could be dan Never
gerous.
use petrol, alcohol or solvents to clean the appliance.
Never
Never spray insecticide liquids or similar.
CLEANING
THE AIR FILTER
To keep your air conditioner working efficiently, you should clean
the dust filters every week of operation.
Dust filter
The filter is housed in the intake grille.
To clean the filters, proceed as follows:
• Remove the intake grille by pulling it outwards (fig. 33).
• Remove the dust filter by detaching it from the grille (Fig. 34).
• Use a vacuum cleaner to remove the dust collected on the
filter. If it is very dirty, immerse in warm water and rinse a number of times. The water should never be hotter than 101°F
(40°C).
• After washing, leave the filter to dry completely.
• To replace, put the filters back in the intake grille then attach
the intake grille to the appliance.
34
RECOMMENDED END OF SEASON OPERATIONS
35
• Descale as described in the following section.
• Empty the water from the tank and internal circuit by extracting and opening the two hoses inside the water drainage
hose door (H) (fig.35).
• Operate the appliance with the water tank empty in fan only
mode for about half an hour. This dries any water remaining
inside the appliance.
• Turn the appliance off and unplug from the electrical socket.
• Remove the air exhaust hose.
• Clean the dust filter.
• Place the power cable in the special rear power cable compartment (I) (fig.36).
• Cover the appliance to avoid dust.
16
36
DESCALING
When using the appliance in water mode, lime scale will inevitably form and must be removed to maintain efficiency. After
about 500 hours of operation, the appliance therefore warns that
descaling is required by displaying the message
CL (CLEAN).
Descale the appliance.
• Turn off the appliance and unplug from the socket. Empty all
water from the inside of the appliance through the drain
hoses (fig. 35).
• Close and replace the drain hoses. Pour 0.5 Liters of descaler
(one bottle) and 1.5 Liters of clean water into the tank.
• Plug in and operate the appliance in air conditioning mode
with the BOOST function selected until the
"no water"
symbol appears on the display.
• Turn off the appliance and unplug from the socket. Empty all
water from the inside of the appliance through the drain
hoses.
• Close and replace the drain hoses. Pour 2 Liters of clean
water into the tank to rinse the internal circuits of dirt and
descaler.
• Plug in and operate the appliance until the
"no water"
symbol appears on the display.
• Turn off the appliance and unplug from the socket. Empty all
rinsing water from the inside of the appliance through the
drain hoses.
• If the water drained off is very dirty or contains large quantities of foam, repeat the rinsing operation.
• Close the drain hoses and replace.
• After descaling, reset the alarm by pressing the
button for
10 seconds.
17
descaler can be
The
bought from your local
De'Longhi service center.
Always
use
original
descaler. Use of other products could damage
internal components and
invalidate the guarantee.
TROUBLESHOOTING
PROBLEM
The air conditioner
does not come on
CAUSE
SOLUTION
• No electricity
• It is not plugged into the socket
• The internal safety device has
tripped
• The safety device of the plug
has tripped
The air conditioner
works for a short time
only
• There are bends or kinks in the
air exhaust hose
• Something is preventing the
air from being discharged
The air conditioner
works, but does not
cool the room
• Restore electricity
• Plug into the socket
•Wait 30 minutes, if the problem
persists, contact your service
center
• Reset the safety plug
• Position the air hose correctly,
keeping it as short and free of
curves as possible to avoid
bottlenecks
• Check and remove any
obstacles obstructing air discharge
• Windows, doors and/or
and/or curtains are open
• Close doors, windows and
curtains, bearing in mind the
"tips for correct use" stated on
pg. 15
• There are heat sources in the
room (oven, hairdryer, etc.)
• Eliminate the heat sources
•The air exhaust hose is detached from the appliance
• Fit the air exhaust hose in the
housing at the back of the
appliance (fig. 1)
• Dust filter clogged
• Clean the filter as described in
the "Cleaning" section (pg. 16)
• The technical specification of
the appliance is not adequate for the room in which it is
located
During operation,
there is an unpleasant smell in the
room
• Dust filter is clogged
• Clean the filter as described in
the "Cleaning" section (pg. 16)
The air conditioner
does not operate for
about three minutes
after restarting it
• The internal compressor safety
device prevents the appliance from being restarted until
three minutes have elapsed
since it was last turned off
• Wait. This delay is part of normal operation
The symbol
and
one of the following
messages appears
on the appliance display: LT / PF / HL / CL
• The appliance has a self diagnosis system to identify a
number of malfunctions
•See the SELF-DIAGNOSIS section (pg.14)
18
TECHNICAL CHARACTERISTICS:
Power supply voltage
see rating plate
Max. power input
“
Refrigerant
“
Cooling capacity
“
LIMIT
CONDITIONS
Room temperature for air conditioning
70÷95°F
35 in
910 mm
21÷35°C
APPLIANCE
•
•
•
•
DIMENSIONS:
width
height
depth
weight
22 in
35 in
18 in
112 lb
570 mm
910 mm
465 mm
51 kg
22 in
570 mm
18 in
475 mm
Transport, filling, cleaning, recovery and disposal of refrigerant should be performed by a
technical service center appointed by the manufacturer only.
The appliance should be disposed of by a specialist center appointed by the manufacturer only.
NEVER TURN THE APPLIANCE UPSIDE DOWN OR ON ITS SIDE. IF THIS
OCCURS, WAIT AT LEAST 4 HOURS BEFORE TURNING THE APPLIANCE ON
(RECOMMENDED TIME IS 24 HOURS).
This appliance is equipped with a 3 prong grounding plug. The plug must be connected into
an outlet that is properly installed and grounded in the accordance with all local codes
and ordinances. Do not modify the plug provided with the appliance. If it will not fit the outlet, have a proper outlet installed by a qualified electrician.
If the household electrical supply does not meet the above specifications, or if you are not
sure your home has an effective ground, have a qualified electrician or your local electrical
utility company check it and correct any problems.
SAFETY PLUG
The appliance is fitted with a safety plug to protect the power cable.
If power is cut off, unplug from the socket and make sure the power cable is undamaged.
If the cable is damaged, call the service center immediately.
If power cuts off frequently and the power cable is undamaged, contact a qualified electrician.
OPERATION OF THE SAFETY PLUG
If the safety device incorporated in the plug trips and cuts off the power supply, check
that the power cable and plug are not damaged.
If the power cable is undamaged, to restore operation press the "RESET" button.
To verify correct operation of the plug, press the "TEST" button periodically and make sure
the appliance disconnects. If this is not the case, contact the service center.
To restore operation, press the "RESET" button.
19
LIMITED WARRANTY:
De’Longhi is the distributor of Kenwood home appliances.
This warranty applies to all home appliances with De’Longhi or Kenwood brand names.
FOR CONTIGUOUS UNITED STATES ONLY
Limited Warranty
We warrant each De’Longhi AIR CONDITIONER to be free from defects in material and workmanship. From the purchase date, our obligation under this warranty is to provide one (1) year
free parts and labor on the entire AIR CONDITIONER, with an additional four (4) years free on
any part of the sealed system consisting of the compressor, evaporator, condenser and factory connected refrigerant tubing. Labor and all other parts during the additional four (4) year
warranty are to be paid by the owner. All AIR CONDITIONERS in need of repair are to be
shipped to an authorized De’Longhi service center at the owner’s expense, and De’Longhi will
then incur the return shipping costs. After the first five (5) years of ownership, all expenses (all
parts, labor and shipping) are to be paid by the owner of the unit. This warranty shall apply
only if the AIR CONDITIONER is used in accordance with the factory directions that accompany it, and on an Alternating Current (AC) circuit. This warranty is in lieu of all other warranties
and representations, expressed or implied, and all other obligations or liabilities on our part. We
do not authorize any other person or company to assume for us any liability in connection with
the sale or use of our AIR CONDITIONER. This warranty shall not apply to any AIR CONDITIONER that has been repaired or altered outside our factory nor shall it apply to any AIR CONDITIONER that has been subjected to misuse, negligence or accidents.
If repairs become necessary, see contact information below:
U.S. Residents:
Please contact our toll free hotline at 1-800-322-3848 or log onto our website at
www.delonghiusa.com.
For all accessories, spare parts or replacement parts, please contact our parts division at
1-800-865-6330.
CANADA Residents:
Please contact our toll free hotline at 1-888-335-6644 or log onto our website at
www.delonghi.com.
Other countries:
Please visit: www.delonghi.com.
20


