1
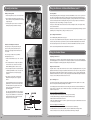
De’Longhi Outdoor Cooking Centre Models DELUX4FS Assembly and Operating Instructions De'Longhi Australia Pty Limited P.O. Box 597 Riverwood, NSW, AUSTRALIA 2210. Phone: 1800 126 659 www.delonghi.com.au De'Longhi New Zealand Limited P.O. Box 56-056 Greenmount, Auckland, NEW ZEALAND. Phone: 0508 200 300 www.delonghi.co.nz For Outdoor Use Only WARNING: Read this Owner's Manual carefully and be sure your Outdoor Cooking Centre has been properly assembled, installed and maintained. Failure to follow these instructions could result in serious bodily injury and/or property damage. Warranty DO NOT use this Outdoor Cooking Centre indoors. This Outdoor Cooking Centre is intended for outdoor use only and is not intended to be installed in or on recreational vehicles or boats. 2 Years Full Warranty IMPORTANT NOTE: READ ALL INSTRUCTIONS PRIOR TO ASSEMBLY AND USE! REMOVE ALL TRANSIT PROTECTION FITTED TO THE OUTDOOR COOKING CENTRE BEFORE USE. Nuts and Bolts may become loose during transit, so for your own safety, thoroughly inspect every nut and bolt and secure as necessary before using your new Outdoor Cooking Centre. The instruction manual should be retained for future reference. Thank you for purchasing this De'Longhi product. Your product is warranted against faults and manufacture when used in normal use for the period of two years. In non domestic use De'Longhi limits the voluntary warranty to 6 months. We undertake to repair or replace your product at no charge if found to be defective due to a manufacturing fault during the warranty period of two years. The warranty excludes damage caused by misuse, neglect, shipping accident, incorrect installation, no fault found with the product or work carried out by anyone other than an Authorised De'Longhi Service Representative. PLEASE KEEP YOUR RECEIPT TO AUTHENTICATE YOUR WARRANTY. Table of Contents For Your Safety …………………………….………………….....…………........ Warnings ……………………………………….……………………………....... Use Outdoors Only …………………………….……………………………...... Exploded Drawing - Model DELUX4FS ........................................................... Parts List - Model DELUX4FS .......................................................................... Assembly Instruction ………………………………………………………........ Checking for LPG Leaks ................................................................................. Basic Grill Lighting Instructions …………………………………………........... Smoker Burner Lighting Instructions ............................................................. Rotisserie Assembly .......................………………………………………......... Using the Rotisserie & Infrared Back Burner ………………………................. Using The Smoker Drawer ………..............………………………………....... Troubleshooting ........................................................................................... Cleaning and Maintenance ...................……………………………………..... Cooking Instructions …………………………….…………………………....... Technical Specifications ................................................................................. Warranty ..................…………………………………………….…………....... Customer Service & Spare Parts ..................................................................... 2 3 4 5 6 8 11 12 14 15 16 17 18 19 21 22 23 23 Customer Service & Spare Parts If your Outdoor Cooking Centre needs part(s) replacement or repair part(s), please contact De'Longhi Customer Service in your region. To ensure prompt and accurate service, please provide the following information when placing a repair part order: model number, serial number, part name, part number, and quantity of parts needed. IMPORTANT: Keep this Owner's Manual for convenient referral and for part(s) replacement. IMPORTANT: Use only factory authorized parts. The use of any part that is not factory authorized can be dangerous. This will also void your warranty. To talk to a De'Longhi representative for further information, please call the number in your region. Australia: 1800 126 659 New Zealand: 0508 200 300 De'Longhi Australia Pty Limited P.O. Box 597 Riverwood, NSW, AUSTRALIA 2210. www.delonghi.com.au De'Longhi New Zealand Limited P.O. Box 56-056 Greenmount, Auckland, NEW ZEALAND. www.delonghi.co.nz For Your Safety 1. Do not store or use gasoline or other flammable vapours and liquids in the vicinity of this or any other appliance. 2. Do not store an LPG cylinder not connected for use in the vicinity of this or any other appliance. If you smell gas: 1. Shut off gas to the appliance. 2. Extinguish any open flame. 3. Open lid. 4. If odour continues, immediately call your gas supplier or your fire department. 2 De’Longhi Outdoor Cooking Centre - Model DELUX4FS De’Longhi Outdoor Cooking Centre - Model DELUX4FS 23 Technical Specifications Model Name: DELUX4FS Burner Type Warnings Gas Type: Universal LPG AGA Approval No.: 6960 Injector (mm) Test Point Pressure (kPa) Turndown Gas Consumption (Mj/h) Nominal Gas Consumption (Mj/h) Main Burner (×4) 0.95 2.75 11.0 Smoker Burner (×1) 0.67 2.75 5.8 - Rotisserie Burner (×1) TOTAL 0.95 2.75 - 11.0 60.7 5.7 Failure to comply with these instructions could result in a fire or explosion that could cause serious bodily injury, death, or property damage. Your Outdoor Cooking Centre will get very hot. Never lean over the cooking area while using your Outdoor Cooking Centre. Do not touch cooking surfaces, grill housing, hood or any other parts while the Outdoor Cooking Centre is in operation, or until the Outdoor Cooking Centre has cooled down after use. Failure to comply with these instructions may result in serious bodily injury. Outdoor Cooking Centre Installation Codes This Outdoor Cooking Centre must be installed in accordance with all local codes. Correct LPG Cylinder Use The Outdoor Cooking Centre is designed for use with up to a 9kg Liquid Propane Gas (LPG) cylinder, not included with the Outdoor Cooking Centre. Never connect your Outdoor Cooking Centre to an LPG cylinder that exceeds this capacity. The LPG cylinder to be used must be constructed and marked in accordance with the Specifications for LP-gas Cylinders of the Australian Standard AS2030. Consult your local gas dealer to obtain the correct gas cylinder. Proper Placement and Clearance of your Outdoor Cooking Centre Never use your Outdoor Cooking Centre in a garage, porch, shed, breezeway or any other enclosed area. Your Outdoor Cooking Centre is to be used outdoors only, allow a minimum clearance around the Outdoor Cooking Centre of 460mm from sides, 600mm from rear and 1000mm overhead to any combustible surface. Your Outdoor Cooking Centre should not be placed under any surface that will burn. Do not obstruct the flow of ventilation air around the Outdoor Cooking Centre. GENERAL WARNINGS · · · · · · · · · · · · · · · · · 22 De’Longhi Outdoor Cooking Centre - Model DELUX4FS The Outdoor Cooking Centre is not intended to be installed in or on recreational vehicles and/or boats. Never connect an unregulated LPG cylinder to your Outdoor Cooking Centre. The gas Regulator assembly supplied with your Outdoor Cooking Centre is adjusted to have an outlet pressure of 2.75kPa for connection to an LPG cylinder. Only use the Regulator and Hose Assembly supplied with your Outdoor Cooking Centre. Replacement Regulators and Hose Assemblies must be those specified by manufacturer. Have your LPG cylinder filled by a reputable propane gas dealer; visually inspected at each filling. Have your propane gas dealer check the release valve after every filling to ensure that it remains free of defects. Always keep LPG cylinders in an upright position. Do not store (or use) gasoline or other flammable vapours and liquids in the vicinity of this Outdoor Cooking Centre. An LPG cylinder that is not connected for use must NOT be stored inside the cabinet or in the vicinity of this or any other gas appliance. Do not subject the LPG cylinder to excessive heat. Never store an LPG cylinder indoors. If you store your Outdoor Cooking Centre in the garage or other indoor location, always disconnect the LPG cylinder first and store it safely outside. When your Outdoor Cooking Centre is not in use the gas must be turned off at the LPG cylinder valve. The Regulator and Hose Assembly must be inspected before each use of the Outdoor Cooking Centre. If there is excess abrasion or wear, or if the hose is cut, it must be replaced prior to the Outdoor Cooking Centre being used again. Keep the gas Regulator Hose away from hot surfaces and dripping grease. Avoid unnecessary twisting of hose. Visually inspect the Regulator and Hose prior to each use for cuts, cracks, excessive wear or other damage. If the Hose appears damaged do not use the Outdoor Cooking Centre. Never light your Outdoor Cooking Centre with the Hood closed or before checking to insure the Burner Tubes are fully seated over the gas valve nozzle. Never allow children to operate your Outdoor Cooking Centre. Do not allow children to play near the Outdoor Cooking Centre. LPG cylinders must be stored outdoors out of the reach of children and must not be stored in a building, garage or any other enclosed area. De’Longhi Outdoor Cooking Centre - Model DELUX4FS 3 Use Outdoors Only Cooking Instructions This appliance shall only be used in an above ground open-air situation with natural ventilation, without stagnant areas, where gas leakage and products of combustion are rapidly dispersed by wind and natural convection. WARNING: Your Outdoor Cooking Centre will get very hot. Never lean over the cooking area during use. Do not touch cooking surfaces, burner housing, hood or any other parts while the Outdoor Cooking Centre is in operation, or until the Outdoor Cooking Centre has cooled down after use. Failure to comply with these instructions may result in serious bodily injury. Any outdoor enclosure in which the appliance is used shall comply with one of the following: An enclosure with walls on all sides, but at least one permanent opening at ground level and no overhead cover. See Figure 1. Within a partial enclosure that includes an overhead cover and no more than two walls. See Figure 2 & 3. Within a partial enclosure that includes an overhead cover and more than two walls, the following shall apply: - At least 25% of the total wall area is completely open; and - At least 30% of the remaining wall area is open and unrestricted. See Figure 4 & 5. In the case of balconies, at least 20% of the total of the side, back and front wall areas shall be and remain open and unrestricted. The following diagrams provide a diagrammatic representation of outdoor areas. Rectangular areas have been used in these figures - the same principles apply to any other shaped area. Burn-off Before cooking on your Outdoor Cooking Centre for the first time, you will want to “burn off” the Outdoor Cooking Centre to eliminate any odour or foreign matter. Just ignite the Burners, lower the hood, and operate on the HIGH setting for three to five minutes. CAUTION: Operating your Outdoor Cooking Centre on the HIGH setting for longer than five minutes may damage certain parts of your Outdoor Cooking Centre. Do not leave your Outdoor Cooking Centre unattended. Preheating To preheat, light your Outdoor Cooking Centre on HIGH, lower the Hood and follow this timetable: ! For high temperature cooking, preheat Burners for 5 to 10 minutes. ! For low temperature cooking, preheat Burners for 3 minutes. ! To slow cook, preheating is not necessary. Cooking Temperatures High setting: Only use this setting for fast warm-up, searing steaks or chops and for burning food residue off the grill after cooking is complete. Never use the HIGH setting for extended cooking. Medium to Low settings: Most recipes specify medium to low settings, including all smoking, rotisserie cooking and for cooking lean cuts such as fish. NOTE: Temperature settings will vary with the amount of wind and temperature outside your home. Direct Cooking Figure 1 - Enclosure with walls on all sides but no overhead cover. Figure 2 - Partial Enclosure with overhead cover and no more than two walls. The direct cooking method can be used with the supplied Solid Plate & Wire Grills and food placed directly over the lit grill Burners. Direct cooking requires the hood to be up. This method is ideal for searing and whenever you want meat, poultry or fish to have an open-flame barbecued taste. Smoking is also best cooked in this manner because it requires direct heat. Indirect Cooking The indirect cooking method can also be used with the supplied Solid Plate & Wire Grills. To cook indirectly, the food should be placed on the left or right side of your Outdoor Cooking Centre with the Burner lit on the opposite side. Or place your food on the Secondary Cooking Rack mounted inside your hood and light the outer grill Burners. Either way, indirect cooking must be done with the Hood down. Figure 3 - Partial Enclosure with overhead cover and no more than two walls. Figure 4 - Open side at least 25% of total wall area. 30 % or more in total of the remaining wall area is open and unrestricted. Warming Rack/ Secondary Cooking Rack Coating your Solid Plate & Wire Grills Before and after each cookout, apply a thin layer of cooking oil, spray or vegetable shortening to each Solid Plate & Wire Grills. Be sure to coat the entire surface including edges. This will help prevent foods from sticking to your Solid Plate & Wire Grills. Flare-ups The fats and juices dripping from grilled food can cause flare-ups. Since flare-ups impart a favourably, distinctive taste and colour to food cooked over an open flame, they should be accepted up to a point. Nevertheless, uncontrolled flaring can result in a ruined meal. Figure 5 - Open side at least 25% of total wall area. 30 percent or more in total of the remaining wall area is open and unrestricted. 4 De’Longhi Outdoor Cooking Centre - Model DELUX4FS WARNING: Do not line the bottom of the Burner housing with aluminum foil, sand or any substance that will restrict the flow of grease into the Grease Spillage Tray. Failure to comply with these instructions could result in a fire or explosion, which could cause serious bodily injury, death, or property damage. De’Longhi Outdoor Cooking Centre - Model DELUX4FS 21 Cleaning and Maintenance cont’d Exploded Drawing - Model DELUX4FS Cleaning the Burner Tubes and Burner Ports To reduce the chance of “FLASH-BACK” the procedure below should be followed at least once a month in late summer or early fall when spiders are most active or when your Outdoor Cooking Centre has not been used for a period of time. 1. Turn all Control Knobs to the full OFF position. 2. Turn the LPG Cylinder Valve to the full OFF position. 3. Detach the Regulator and Hose Assembly from your Outdoor Cooking Centre. 4. Remove the Solid Plate & Wire Grills, Flame Tamers, and Grease Spillage Tray. 5. Remove the Screw of the front and rear of each Burner using a Screwdriver. 6. Carefully lift each Burner up and away from the Gas Valve Nozzle. 7. Perform one of these three cleaning methods: a) Bend a stiff wire, (a lightweight coat hanger works well) into a small hook as shown below. Run the hook through the Burner Tube and inside the Burner several times to remove any debris. b) Use a bottle brush with a flexible handle. Run the brush through the Burner Tube and inside the Burner several times, removing any debris. c) Use an air hose to force air through each Burner Tube. The forced air should pass debris or obstructions through the Burner and out the ports. Regardless of which Burner cleaning procedure you use, we recommend you also complete the following steps to help prolong Burner life. 1. Use a brass wire brush to clean the entire outer surface of each Burner until free of food residue and dirt. 2. Clean any clogged ports with a stiff wire, such as an open paper clip. 3. Inspect each Burner for damage (cracks or holes) and if such damage is found, order and install a new Burner. After installation, check to insure that the Gas Valve Nozzle are correctly placed inside the ends of the Burner Tubes. Also check the position of your Spark Electrode. WARNING: The location of the Burner Tube with respect to the Nozzle is vital for safe operation. Check to ensure the Orifice is inside of the Burner Tube before using your Outdoor Cooking Centre. See below. If the Burner Tube does not fit over the Nozzle, lighting the Burner may cause explosion and/or fire. NOZZLE 20 De’Longhi Outdoor Cooking Centre - Model DELUX4FS De’Longhi Outdoor Cooking Centre - Model DELUX4FS 5 Parts List - Model DELUX4FS REF# 1 2 3 4 5 6 7 8 9 10 11 12 13 14 15 16 17 18 19 20 21 23 24 25 26 27 28 29 30 31 32 33 34 35 36 37 38 39 40 41 42 43 44 45 46 47 48 49 50 51 52 53 54 55 56 6 DESCRIPTION Hood Assembly Temperature Gauge Seat Temperature Gauge Hood Handle Seat - Left Hood Handle Hood Handle Seat - Right Heat-Insulating Insert Warming Rack Rear Panel of Inner Hood Infrared/Back Burner Left Panel of Inner Hood Warming Rack Bracket Right Panel of Inner Hood Shaft for Lid Rotisserie Motor Kit Motor Bracket Solid Plate & Wire Grill Rotisserie Kit Rack for Flame Tamers Ceramic Flame Tamers Main Burner Kit Air Shutter for Main Burner Big Round Head Screw M8 X 10 Ripple Tube for Back Burner Side Shelf Assembly Body Frame Heat Shield for Grease Tray Burner Support Burner Housing Assembly Hole Collar Side Shelf Bracket Kit Side Panel Cart - Right Match Holder Castor with Brake Door Hinge Bracket-Right Top Spice Basket Right Trim Plate Right Door Panel Knob Knob Seat Handle Bolt for LPG Cylinder Drawer LPG Cylinder Drawer Electronic Ignitor Left Trim Plate Left Door Panel Door Hinge Bracket-Left Top Door Hinge Bracket-Left Down Control Panel Grease Tray Support Kit LPG Cylinder Drawer Support LPG Cylinder Drawer Bracket-Left LPG Cylinder Drawer Slider - Left Cart Crossmember Door Magnet Cross Ignition Hoods Cleaning and Maintenance PART# 142805/2000 142501/3008 141601/306 142801/2006 142801/2005 142801/2007 141601/307 142501/2401 142501/2003 142501/2301 142501/2001 142501/2402 142501/2002 142501/2005 143905 142501/2006 142501/1025 142501/2100 142801/1003 142501/1008 142702/1200 142101/116 * 142801/2305 142801/4000 142801/1005 142501/1601 142805/1301 142805/1100 142501/1014 142501/4100 142501/5002 142501/1015 142501/5505 142501/5006 142501/5207 142501/5205 142501/5201 142801/1004 142501/1013 142501/5405 142805/5401 141901/4115 142501/5106 142501/5101 142501/5005 142501/5502 142805/1001 142501/1500 142501/5601 142501/5403 142501/5602 142805/5301 142501/5302 142805/1303 QTY 1 1 1 1 1 1 2 1 1 1 1 2 1 2 1 1 2 1 1 6 4 4 2 1 2 1 1 1 1 2 4 1 1 4 1 1 1 1 5 5 1 1 1 1 1 1 1 1 1 2 1 1 1 1 1 De’Longhi Outdoor Cooking Centre - Model DELUX4FS Keep outdoor cooking gas appliance area clear and free from combustible materials, gasoline and other flammable vapours and liquids. As with all appliances, proper care and maintenance will keep your Outdoor Cooking Centre in top operating condition and prolong its life. By following these cleaning procedures on a timely basis, your Outdoor Cooking Centre will stay clean and work properly with minimum effort. CAUTION: Be sure your Outdoor Cooking Centre is OFF and cool before cleaning. Cleaning The Solid Plate & Wire Grills Before initial use and as needed, wash your Solid plate & wire grills with a mild detergent and rinse with hot water. For stubborn food residue use a degreaser and fibre or brass cleaning brush. Cleaning The Grease Spillage Tray To reduce the chance of fire, the Grease Spillage Tray should be inspected before each use and if required, cleaned before turning the Outdoor Cooking Centre on. Remove grease (a plastic spatula works well) and wash Grease Spillage Tray with a mild soap and warm water solution. Cleaning the Flame Tamers To reduce the chance of flare-ups, Flame Tamers should be cleaned whenever food or grease drippings accumulate. Brush off Flame Tamers with a fibre type brush and turn over to allow the Burner heat to burn off any stubborn food residue. The Ceramic Flame Tamers work equally well on either side. Annual Cleaning of The Outdoor Cooking Centre Interior Use a fibre or brass cleaning brush to clean inside the Burner Housing, Solid Plate & Wire Grills, Flame Tamers and Grease Spillage Tray. Never use a wire brush or metal scraper on porcelain finished parts (Wire Grills) which can scratch or chip the porcelain finish and promote rusting. 1. 2. 3. 4. 5. 6. 7. 8. 9. 10. 11. Turn all Control Knobs to the full OFF position. Turn the LPG Cylinder Valve to the full OFF position. Detach the Regulator & Hose assembly at the LPG Cylinder. Remove and clean the Flame Tamers, Solid Plate, Wire Grills, and Grill Burners. Cover each Gas Valve Nozzle with aluminum foil. Brush the inside and bottom of the Outdoor Cooking Centre with a brass wire brush or fibre cleaning pad, and wash with a mild soap and warm water solution. Rinse thoroughly and let dry. Remove aluminum foil from Nozzles and check each Nozzle for obstruction. Check each Spark Electrode, adjusting as needed. The space between the Spark Electrode Tip and Spark Receiver should be approximately 5mm. Replace the Burners and adjust the Gas Collector Box. The edge of the collector box should be overlapping the Burner Port. Replace Flame Tamers and the Solid Plate & Wire Grills. Reconnect the gas source and observe the Burner flame for correct operation. Exterior Stainless Steel Surfaces: Weathering and high heat can cause the stainless steel hood to turn tan in colour. This is not to be confused with rust and is not a product defect. Machine oils used in the manufacturing process of stainless steel as well as cooking oils and a dirty hood can also encourage discolouration if the hood is not cleaned prior to use. 1. Shut off gas supply at source and disconnect fuel line from LPG cylinder. Protect fuel line fitting. 2. Use a Stainless Steel Cleaner and soft cloth to remove residual adhesive and oils from the inside and outside of the Hood. Never use abrasive cleaners or scrubbers. In addition to the initial cleaning, routine cleaning to remove dirt, grease and oils will help discourage hood discolouration. CAUTION: BEWARE OF FLASH-BACK Spiders and small insects occasionally spin webs or make nests in the grill Burner Tubes during transit and warehousing. These webs can lead to a gas flow obstruction, which could result in a fire in and around the Burner Tubes. This type of fire is known as a “FLASH-BACK” and can cause serious damage to your Outdoor Cooking Centre and create an unsafe operating condition for the user. Although an obstructed Burner Tube is not the only cause of “FLASH-BACK”, you must clean the Burner Tubes before assembling your Outdoor Cooking Centre, and at least once a month in late summer or early fall when spiders are most active. Also perform this Burner Tube cleaning procedure if your Outdoor Cooking Centre has not been used for an extended period of time. De’Longhi Outdoor Cooking Centre - Model DELUX4FS 19 Troubleshooting Parts List - Model DELUX4FS (cont’d) Problem: Misalignment of Burner Tubes over Nozzles Correction: Reposition Burner Tubes over Nozzles. REF# 57 58 59 60 61 62 63 64 65 66 67 68 69 Problem: Obstruction in gas line Correction: Follow procedure on Page 13 to purge the line. If problem persists, please call De'Longhi Customer Service for assistance on 1800 126 659 during business hours. Problem: Blocked Nozzle Correction: Remove Burners by removing screws (the rear and the front of Burner) using a screwdriver. Carefully lift each Burner up and away from Gas Valve Nozzle. Remove the Nozzle from Gas Valve and gently clear any obstruction with a fine wire. Then reinstall all Nozzles, Burners, Screws and cooking components. Perform LPG leak test at all connections as described on page 11. If an obstruction is suspected in Gas Valves or Gas Valve Bracket, please call De'Longhi Customer Service for assistance. Problem: Misalignment of Ignitor on Burner Correction: Check for proper position of the Electrode Tip as shown on Page 8. The gap between the Spark Electrode Tip and Spark Receiver should be approximately 5mm. Adjust if necessary. With the gas supply closed and all Control Knobs set to OFF press the Electric Ignitor Cap and check for the presence of a spark at the Electrode. Problem: Disconnected Ignition Wires Correction: Inspect the Ignition Module found behind the Control Panel. Connect loose Ignitor wires to junction box and try to light the Outdoor Cooking Centre. Problem: Weak ignition - AA battery Correction: Unscrew the Ignitor Cap and replace the battery. DESCRIPTION Infrared/Back Burner Bracket Door Spindle Pin 6 x 12 Split Pin 2 x 15 Grease Tray Support Slider - Right Block Grease Tray Support Slider - Left Smoke Burner kit Electrode Smoker Box Kit Grease Spillage Tray Regulator and Hose Assy Manifold Assy Hardware Kit PART# 142501/2004 142501/5105 * * 142501/1009 142501/1007 142501/1006 142701/1500 142701/1800 142701/1600 142501/1505 142805/6000 142805/1200 QTY 1 4 4 4 1 8 1 1 3 1 1 1 1 1 * Can be purchased at local hardware store. TOOLS REQUIRED (For assembly and adjustments) - Adjustable Spanner. - Phillips head screwdriver. - Small terminal flathead screwdriver (to adjust side shelf grub screw). Record your Outdoor Cooking Centre serial number below for future reference. SERIAL NUMBER ____________________________________ 18 De’Longhi Outdoor Cooking Centre - Model DELUX4FS De’Longhi Outdoor Cooking Centre - Model DELUX4FS 7 Assembly Instructions Battery Powered Ignition Using the Rotisserie & Infrared Back Burner cont’d Food Preparation Figure 3 1. Unscrew the Ignitor Cap located on the Control Panel. When preparing poultry, truss the birds tightly so that wings and drumsticks are close to the body of the bird. The cavity of the bird may be stuffed prior to this. Pull the neck skin down and, using a small skewer, fix it to the back of the bird. Push the rotisserie spit through lengthwise, catching the bird in the fork of the wishbone. Centre the bird and tighten with the holding forks. It may also be necessary to wrap the food with butcher string (never use plastic or nylon string) to secure any loose portions. 2. Place the supplied AA battery into the Ignitor Slot. Be sure to place the positive pole (marked + on the battery) facing toward you. 3. Screw the Ignitor Cap back onto the Control Panel ensuring the Spring fits around the AA battery. A rolled piece of meat requires the rotisserie skewer to be inserted through the centre of the length of meat, then secured and balanced. For meats that contain bones, it is best to secure the rotisserie skewer diagonally through the meaty sections. If protruding bones or wings brown too quickly, cover with pieces of foil. Tips for Using The Back Burner For back burner lighting instructions refer to page 16. The location of the back burner makes it more susceptible to winds that will decrease the performance of your rotisserie cooking. For this reason you should not operate the back burner during windy weather conditions. Electrode Check-Requires an Assistant For best results, always rotisserie cook with the hood down and the Back Burner control knob set to HIGH. Before placing the cooking components into your Outdoor Cooking Centre, ensure that the Spark Electrode Tip is properly positioned within each Gas Collector Box. DO NOT use the main grill burners when the Back Burner is in operation. Using the Smoker Drawer The easiest way to ensure this is to perform the following Electrode Check: Preparing to Smoke Food 1. Be sure all Control Knobs are set to “OFF”. Open the Hood. Smoking gives food a distinctive, delicious flavour. You will find a variety of wood chips or pellets available for use in smoking grilled foods. Pre-soaking of wood chips may be required so read and follow the manufacturers instructions for preparation of smoking chips prior to filling the smoker drawer. 2. Have an assistant stand to the right of the grill and look down at the Gas Collector Box of the Main Burners. NEVER put your face inside hood area. 3. Press centre Ignitor Cap and have assistant watch for a small blue spark within each Gas Collector Box. If a spark is present the Electrode Tips are properly positioned. Using The Smoker Drawer Look for spark 4. If no spark is seen, the Spark Gap shown in the illustration below right needs to be adjusted as follows: Start your Outdoor Cooking Centre and allow it to reach the desired cooking temperature for the food you are grilling. Wear an insulated cooking glove and pull the smoker drawer out of the Outdoor Cooking Centre and fill with your prepared smoking chips. Dried herbs and spices may also be added to produce different flavours. Return the smoker drawer to the Outdoor Cooking Centre, light the Smoker Burner following the instructions on Page 14, the heat will produce smoke and season the food. Tips for Smoking Food Using an adjustable spanner, loosen the inside Nut just until the Gas Collector Box can be manoeuvred and turned upward. The gap between the Spark Electrode Tip and Spark Receiver should be approximately 5mm. You can reduce the strength of the smoke flavour by only smoking for half or three quarters of the cooking time. The heat required for smoking is normally low to medium. Foods naturally high in oils lend themselves well to smoking, while drier foods benefit from a marinade. You can also rub the food with herbs, spices or flavoured oils. Many foods can be smoked to produce stunning results with very little effort. If the gap is wider than 5mm, use a pair of long nose pliers and gently squeeze the Gas Collector Box until the gap is correct. Return the Gas Collector Box to its original horizontal position, secure the inside Nut and try the Electrode Check again. Here are a few suggestions for marinating food: - Tuna steaks, marinated in Asian flavours of sesame oil, soy sauce and sherry. - Pork fillets, rubbed with ginger, orange rind and brushed with maple syrup. - Mussels, brushed with lemon rind and chilli oil. - Lamb cutlets, marinated in virgin olive oil, lemon, oregano and black pepper. The same marinade can be used for a whole leg or rack of lamb. Here are a few suggestions for smoking food: - Boneless chicken, chicken pieces, specially sliced chicken breasts smoked with Hickory. - Fish fillets and assorted seafoods such as prawns, scallops and calamari smoked with Apple Wood. - White & red meats such as beef, lamb, duck, and pork smoked with Hickory or Mesquite. 8 De’Longhi Outdoor Cooking Centre - Model DELUX4FS De’Longhi Outdoor Cooking Centre - Model DELUX4FS 17 Using the Rotisserie & Infrared Back Burner Assembly Instructions BEFORE rotisserie cooking, you will need to remove the Solid Plate & Wire Grills and possibly the Flame Tamers from your Outdoor Cooking Centre. When rotisserie cooking, place a Cooking Pan under the food to be cooked. This will capture the drippings and keep your Outdoor Cooking Centre clean of excess grease, which could cause a fire. Use caution when moving a Cooking Pan containing hot oils. Installing Cooking Components NOTE: The bushing collar must always be used with this Rotisserie. Using your Infrared Back Burner and Rotisserie Your Outdoor Cooking Centre includes an Infrared Back Burner and a Rotisserie designed to slowly cook foods that are moist and flavourful, because the turning food self bastes using infrared heat. The location of the Back Burner allows the placement of a basting pan beneath the food to collect juices and drippings for basting and gravy. To flavour the contents of the basting pan you may add herbs, onions, or other spices of your choice. The Rotisserie Burner is Infrared, which provides intense radiant heat. This intense heat is magnificent for searing in the natural juices and nutrients found in quality cuts of meat. Rotisserie cooking is a slow cooking process and the maximum temperature you can expect to reach with the hood closed is about 163°C to 177°C, depending on weather conditions. 1 Important: Before cooking on your Outdoor Cooking Centre for the first time, wash the Solid Plate, Wire Grills and Warming Rack with warm, soapy water. Rinse and dry thoroughly. After cooking is completed, turn knobs to HIGH setting for about three to five minutes to burn off excess grease or food residue. 1. Place the Rack on the lower ledge of the main body above the Burners. You made need to unscrew the smoker burner shield to fit the Rack. It is held in place by three screws. 2 2. Place the Ceramic Flame Tamers on the Rack. The Ceramic Flame Tamers can be used either side up. 3. Ensure the Smoker Burner shield is screwed in place. 4. Place the Solid Plate & Wire Grills on the ledge above the Flame Tamers in the positions shown. 5. Place the Warming Rack on the Warming Rack Bracket. Using your Lamp 6. Insert the Smoker tray into the slot allocated in the control panel. Your Outdoor Cooking Centre includes a Lamp which is installed on the rotisserie motor. Plug the 3-prong grounded plug into a mating 3-prong grounding type receptacle, then press the button for Lamp, the Lamp will light. You can use the Lamp to observe your food when you are cooking at night. If the Lamp is lit, the vents may be hot. For your safety, do not touch the vents or Rotisserie motor surfaces. 3 4 5 IMPORTANT SAFEGUARDS When using electrical appliances, basic safety precautions should always be used, including the following: 1. Always attach the assembled Rotisserie to your Outdoor Cooking Centre first, then plug the Cord into an outlet. To disconnect, turn the Rotisserie “OFF” then remove the Plug from outlet. 2. Most Outdoor Cooking Centre surfaces and Rotisserie parts are hot during and after cooking, so use reasonable care and wear protective mitts. Only manouevre the Rotisserie by its Handle. 3. To protect against electrical shock, do not immerse Electrical Cord, Plug or Motor in water or expose to rain. Protect electrical cord from burners, hot grill surfaces and grease. Installing Side Shelf 1. Place the side shelf assembly into the slot of the side shelf bracket. 4. Do not operate the Rotisserie if the cord or plug becomes damaged, or if the Rotisserie malfunctions or has been damaged in any manner. 2. Insert the locking pin through the hole in the side shelf bracket and the slot in the side shelf, then add the split pin to lock them into place. Repeat procedure for both sides. 5. Do not let children operate your Outdoor Cooking Centre or Rotisserie, and do not let children play nearby. 3. If the side shelves are not level once installed, you can adjust the grub screw in or out to make the side shelf level. 6. Unplug the Rotisserie from electrical outlet when not in use and before cleaning. Allow to cool before adding or removing parts. When the Rotisserie is not in use, store it indoors in a dry place. 7. The use of accessory attachments is not recommended by the manufacturer and may cause injuries. Do not use this Rotisserie for other than intended use. Figure 5b 1 2 3 8. When rotisserie cooking place a Cooking Pan under the food to be cooked. This will capture the drippings and keep your Outdoor Cooking Centre clean of excess grease which could cause a fire. Use caution when moving a Cooking Pan containing hot oils. 9. Never line the bottom of your burner housing with aluminum foil, sand or any grease absorbent substance. 10. Should a grease fire occur, turn the burners and gas off and leave the hood CLOSED until the fire is out. 2 11. The rotisserie motor is set for 240V 50Hz AC current. A short power cord is provided to reduce the risk resulting from becoming entangled in or tripping over a longer cord. Extension cords may be used if care is exercised in their use. If an extension cord is used the marked electrical Rating should be at least as great as the electrical rating of the appliance and suitable for outdoor use with a 3-wire grounding type cord. The cord must be arranged so that it will be protected from burners, hot surfaces, grease and where it can be pulled on by children or tripped over unintentionally. 12. The Outdoor Cooking Centre and rotisserie is for use outdoors only. 16 De’Longhi Outdoor Cooking Centre - Model DELUX4FS De’Longhi Outdoor Cooking Centre - Model DELUX4FS 9 Assembly Instructions Rotisserie Assembly Choosing A Liquid Propane Gas (LPG) Cylinder 1. Remove all components from the carton. The LPG cylinder to be used must be constructed and marked in accordance with the Specifications for LP-gas Cylinders of the Australian Standard AS2030. Only use up to a 9kg max. cylinder equipped with a Type 21 POL fitting. The LPG cylinder must include a collar to protect the cylinder valve. 2. Slide a Holding Fork onto each end of the Rotisserie Spit. Adjust spacing between Holding Fork to accommodate your food, then tighten the Thumbscrews to keep the Holding Forks in position. Slide the Bushing Collar onto the threaded end of the Spit. Do not tighten the Bushing Collar Thumbscrew until the Rotisserie is placed into your Outdoor Cooking Centre. Slide the balance block onto the threaded end of the Spit. Last, screw the Handle and balance block onto the threaded end of Rotisserie Spit as shown. Consult your local gas dealer to obtain the correct LPG cylinder. If the appliance is not in use, the LPG cylinder must be disconnected. Storage of an appliance indoors is permissible only if the LPG cylinder is disconnected and removed from the appliance. The LPG cylinder must not be stored indoors, it must be stored in a building, garage or any other outdoor enclosure away from dangerous goods. Your LPG cylinder must never be stored where temperatures can reach over 50ºC. Disconnect the LPG cylinder from the regulator valve when the Outdoor Cooking Centre is not in use. DO NOT obstruct the flow of combustion air and ventilation air to the Outdoor Cooking Centre. DO NOT store spare LPG cylinders within, under or near this Outdoor Cooking Centre. A fire causing deaths or serious injury may occur if the above is not followed exactly. LPG cylinder must be stored outdoors, out of the reach of children and must not be stored in a building, garage or any other enclosed area. ALWAYS close LPG cylinder valve after use of your Outdoor Cooking Centre. Connecting A Liquid Propane Gas (LPG) Cylinder To Your Grill 1. Open the left door. Pull out the LPG cylinder Drawer. Place the 9kg cylinder with foot ring into the hole in the Drawer. Make sure the Cylinder Valve is in the OFF position. 3. Install the AC (alternating current) Rotisserie Motor onto the Motor Bracket as shown right. Be sure the Motor attaches to the Bracket with the electrical cord down. This installation ensures that once the Spit is inserted into the Motor it will also rest securely into the slot of your burner housing. Make sure the Gas Cylinder Valve faces to the left and turn the Handle in the cylinder drawer clockwise to secure the gas cylinder in place. 2. Check the Cylinder Valve to ensure it has proper mating threads to fit the Regulator and Hose Assembly provided. PHOTO USE ONLY THE REGULATOR PROVIDED. If a replacement is necessary, please call our customer service centre. The use of unauthorised parts can create an unsafe condition and environment. 4. Insert the assembled Rotisserie into the Motor as shown below. The Motor should be on the right side of your Outdoor Cooking Centre and the Handle on the left side. Place the Bushing collar into the slot opening on the left side of your burner housing, then tighten the Bushing Collar Thumbscrew. The Bushing Collar will stabilize the Rotisserie during the cooking process and the Bushing collar allows the Rotisserie Spit to turn smoothly. Plug the Rotisserie into an outlet and turn on to test. 3. Make sure all Burner Valves are in the OFF position. 4. Inspect the Valve connection port and Regulator Assembly. Look for damage or debris. Remove any debris. Inspect Hose for damage. Never use damaged or plugged equipment. 5. When connecting the Regulator and Hose Assembly to the Cylinder Valve, hand tighten anti-clockwise to a full stop. Do Not use a wrench to tighten because it could damage the fitting and result in a hazardous condition. Tighten Loosen 6. Open the Cylinder Valve fully (counterclockwise). Use a soapy water solution to check all connections for leaks before attempting to light your Outdoor Cooking Centre. See “Checking for LPG Leaks” on page 11. If a leak is found, turn the Cylinder Valve off and do not use your Outdoor Cooking Centre until the leak is repaired. 10 De’Longhi Outdoor Cooking Centre - Model DELUX4FS De’Longhi Outdoor Cooking Centre - Model DELUX4FS 15 Basic Grill Lighting Instructions cont’d Assembly Instructions WARNING Disconnecting A Liquid Propane Gas (LPG) Cylinder From Your Outdoor Cooking Centre. Should a “FLASH-BACK” fire occur in/or around the Burner Tubes, follow the instructions below. Failure to comply with these instructions could result in a fire or explosion that could cause serious bodily injury, death, or property damage. 2. Detach the Regulator and Hose Assembly from the LPG Cylinder Valve by turning the fitting counterclockwise. - Shut off gas supply to the Outdoor Cooking Centre. WARNING: For storage and cylinder exchange, disconnect hose at the LPG cylinder. Do not disconnect hose from the appliance. 1. Turn the Burner Valves and LPG Cylinder Valve to the full OFF position. (Turn clockwise to close.) - Turn the Control Knobs to OFF position. - Put out any flame with a fire extinguisher. - Open hood. - Once the Outdoor Cooking Centre has cooled down, clean the Burner Tubes and Burners according to the cleaning instructions found on page 19 in this manual. Checking for LPG Leaks Your Outdoor Cooking Centre has been checked at all factory connections for leaks. Recheck all connections, as movement in shipping can loosen connections. Check for leaks even if your unit was assembled for you at the store. Never test for leaks with a flame. Prior to first use, and at the beginning of each season, or every time your LPG cylinder is changed, you must check for gas leaks, follow these four steps: Smoker Burner Lighting Instructions 1. Make a soap solution by mixing one part liquid detergent and one part water. 1. Follow steps 1 through 4 of the Basic Lighting Procedures. 2. Turn the Control Knobs to the full OFF position, then turn the gas ON at source. 2. Push and turn the Control Knob for Smoker Burner to ON. 3. Apply the soap solution to all gas connections including Side Burner connections. If bubbles appear in the soap solution the connections are not properly sealed, check each fitting and tighten or repair as necessary. 4. If you have a gas leak that you cannot repair, turn off the gas at the source, disconnect fuel line from your Outdoor Cooking Centre and call the manufacturer or your gas supplier for repair assistance. WARNING A strong gas smell, or the hissing sound of gas indicates a serious problem with your Outdoor Cooking Centre or the LPG cylinder. Failure to immediately follow the steps listed below could result in a fire or explosion that could cause serious bodily injury, death, or property damage. 1. Shut off gas supply to your Outdoor Cooking Centre. 2. Turn the Control Knobs to OFF position. 3. Immediately press the Electric Ignitor for 3-4 seconds to light the Burner. 3. Put out any flame with a Class B fire extinguisher. 4. Open hood. 5. Get away from the LPG cylinder. Do not try to fix the problem yourself. 7. If odour continues or you have a fire you cannot extinguish, call your fire department. Do not operate a telephone near the LPG cylinder because your telephone is an electrical device and could create a spark resulting in fire and/or explosion. NOTE: The normal flow of gas through the Regulator and Hose Assembly can create a humming sound. A low volume of sound is perfectly normal and will not interfere with operation of the Outdoor Cooking Centre. If humming sound is loud and excessive you may need to purge the gas line. This purging procedure should be done every time a new LPG cylinder is connected to your Outdoor Cooking Centre. For help call the De'Longhi Customer Service. To talk to a De'Longhi representative for further information, please call the number in your region. Australia: 1800 126 659 New Zealand: 0508 200 300 4. If the Burner does not light, turn the Control Knob to OFF, wait 5 minutes for gas to clear, then retry. 14 De’Longhi Outdoor Cooking Centre - Model DELUX4FS De’Longhi Outdoor Cooking Centre - Model DELUX4FS 11 Basic Grill Lighting Instructions Basic Grill Lighting Instructions cont’d Basic Lighting Procedures Manually Lighting Your Outdoor Cooking Centre With a Match 1. Familiarise yourself with the safety guidelines at the front of this manual. 2. Make sure all gas connections are securely tightened and you have performed the gas leak test described on page 11. 3. Open the Hood when lighting. Failure to do so during the lighting procedure could result in a fire or explosion that could cause serious bodily injury, death, or property damage. 4. Set Control Knobs to OFF and open the LPG cylinder valve slowly until ¼ to ½ open. Figure 8 To light your Outdoor Cooking Centre with a match, insert a match into the Match Holder and follow steps 1 through 4 of the Basic Lighting Procedures. Then, light the match and place Match Holder through the Lighting Hole on the right side of the Outer Burner Housing. See right. Turn the adjacent Main Burner Control Knob to the HIGH setting to release gas. The Burner should light immediately. WARNING: Never lean over the cooking area while lighting your Outdoor Cooking Centre. Keep your face and body a safe distance (at least 460mm) from the Lighting Hole or Burners when lighting your Outdoor Cooking Centre by match. If the Outdoor Cooking Centre fails to light properly: 1. Turn gas off at source and turn the Control Knob to OFF. Wait at least five minutes for gas to clear, then retry. 2. Check gas supply and connections. 5. Push and turn either of the Control Knobs marked with the ignition symbol “ ” for Main Burner to HIGH. 3. Repeat lighting procedure. If your Outdoor Cooking Centre still fails to operate properly, turn the gas off at source, turn the Control Knobs to OFF, then refer to the Troubleshooting page. 4. If the Outdoor Cooking Centre still does not light you may need to purge air from the gas line. This procedure should be done every time a new LPG cylinder is connected to your Outdoor Cooking Centre. To purge air from your gas line: - Turn the Control Knobs to the OFF position. - Turn off the gas at the Cylinder Valve. - Disconnect Regulator from LPG cylinder. - Let unit stand for 5 minutes. - Reconnect Regulator to the LPG cylinder. 6. Immediately press the Igniter button for 3-4 seconds to light the Burner. - Turn the Cylinder Valve on slowly until 1/4 to 1/2 open. - Open the Hood. - Push and turn the Control Knob for the Main Burner furthest away from the Fuel Source. 5. If all checks have been made and you still have questions about operating your Outdoor Cooking Centre, call De'Longhi Customer Service on the number in your area provided on Page 23. Recognising Abnormal Operation Any of the following are considered to be abnormal operation and may require servicing: - Yellow tipping of the burner flame. - Sooting up of the grill plates. - Burners not igniting properly. - Burners failing to remain alight. - Burners extinguished by trolley door. 7. If the Burner does not light, turn the Control Knob to OFF, wait 5 minutes for gas to clear, then retry. - Gas valves, which are difficult to turn. 8. Once the grill Burner is ignited, the adjacent Burner can be lit by simply turning its Control Knob to HIGH. In case the appliance fails to operate correctly, contact the De’Longhi authorised service representative in your area. 9. Adjust Control Knobs and watch Temperature Gauge to achieve your desired cooking temperature. 10. After use, turn all Control Knobs to the OFF position. Fully close the gas supply at the LPG Cylinder Valve. 12 De’Longhi Outdoor Cooking Centre - Model DELUX4FS De’Longhi Outdoor Cooking Centre - Model DELUX4FS 13