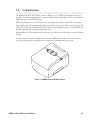
1
USER MANUAL
1016451
JH 2/2/06
IMPORTANT!
Fill in the information below when you receive the REMstar®
Auto M Series system.
Serial No.: _______________________________ (located on the bottom of the device)
System Prescribed for: __________________________________________
Date of Purchase or Rental: ______________________________________
Pressure Setting: _____ cm H2O
Mask Type: __________________________________________________
Mask Size: ___________________________________________________
If you have any questions concerning the system, contact:
•
Home Care Company: _______________________________________
Telephone Number: _________________________________________
•
Health Care Professional: _____________________________________
Telephone Number: _________________________________________
•
Respironics, Inc.
1001 Murry Ridge Lane
Murrysville, Pennsylvania
15668-8550 USA
Customer Service
Telephone Number: 1-724-387-4000
The REMstar® Auto M Series with C-Flex™ system is covered by one or more of the following patents:
5,148,802; 5,313,937; 5,433,193; 5,632,269; 5,803,065; 6,029,664; 6,305,374; 6,539,940, 5,535,738;
5,794,615; 6,105,575; 6,609,517; 6,629,527; 6,622,724; 6,564,797; 6,427,689; 5,645,035; 6,286,508;
6,550,478; 6,752,150, and 6,932,084. Other patents pending. REMstar, Whisper Swivel, Encore Pro, and
Encore Pro SmartCard are trademarks of Respironics, Inc. NOTE: The C-Flex mark is used under license.
© 2006 Respironics, Inc. All rights reserved.
reply_card1.pdf
9/19/05
10:52:10 AM
C
M
Y
CM
MY
CY
CMY
K
FIRST-CLASS MAIL
PERMIT NO. 231 GRAND RAPIDS MN
PO BOX 7014
GRAND RAPIDS MN 55744-8029
reply_card2.pdf
9/19/05
11:22:20 AM
®
C
M
Y
CM
MY
CY
CMY
K
Please complete the following or register online at: www.mseries.respironics.com
Model #:
Product Identification Information
(Numbers located on the bottom
of the device)
Serial #:
Name
Address
City
Phone (
State
Zip
)
E-mail
Where did you first hear about your M Series device?
Homecare Provider
Sleep Lab
Internet/Website
Tradeshow
Other (please specify)
Would you like to receive information regarding new products from Respironics?
Yes
No
If Yes, Preferred Method?
Direct Mail
Phone
Email
Friend/Colleague
An application to join the American Sleep Apnea Association should be attached here.
If it is not, you can contact the American Sleep Apnea Association at 1-202-293-3650.
Name ______________________________________________ Phone No. (
) ___________________________
Address _________________________________ City ____________________ State _________ Zip ___________
Please check: _____$1000
_____$500
_____$250
_____$100
_____$50
_____$25 annual membership*
All memberships include a one year subscription to the newsletter. Membership and contributions are deductible for income tax
purposes within IRS rules. Membership includes a free medical alert necklace or bracelet.
_____I would like to become a member of the ASAA.
Please send me a free medical alert _____bracelet or _____necklace.
_____I am undecided, but please send me a free copy of the newsletter.
_____I would like to know if there is an A.W.A.K.E. group near me.
PLEASE SEND TO:
American Sleep Apnea Association
1424 K Street NW, Suite 302, Washington D.C. 20005
Respironics, Inc. provided a grant to and is recognized as a founding sponsor of the American Sleep Apnea Association. As a
non-profit organization, the American Sleep Apnea Association does not endorse or recommend any company or product.
*For addresses outside the United States, the minimum contribution is U.S. $50.00.
Join the American Sleep Apnea Association
As a member of the American Sleep Apnea Association, you will receive a newsletter, WAKE-UP CALL,
six times each year. This newsletter will inform you about the latest in medical advances, new technology,
human interest stories of individual accomplishment, home care tips, and legislative affairs. Also, you will
receive a medical alert identification bracelet.
You are also invited to participate in the A.W.A.K.E. (Alert, Well And Keeping Energetic) Network, which
is a nationwide system of local mutual help/support groups. A.W.A.K.E. meetings provide the opportunity
to share information and support with others who have been affected by sleep apnea.
G O A L S
To reduce disability and
death from Sleep
Apnea and other
breathing disorders
during sleep.
To improve the clinical
care of Sleep Apnea by
educating the public and
medical profession
about the disorder.
To provide Sleep
Apnea sufferers with
information about new
advances in the treatment
of Sleep Apnea.
To establish and
nurture mutual
help/support groups
for apnea sufferers
and their families.
To raise money for
and to sponsor
research on the
causes and treatment
of Sleep Apnea.
TABLE OF CONTENTS
Chapter 1: Introduction ..................................................................................................................1-1
1.1 System Contents ........................................................................................................1-1
1.2 Intended Use ...............................................................................................................1-2
1.3 Warnings, Cautions, and Contraindications .....................................................1-2
1.3.1 Warnings ...........................................................................................................1-2
1.3.2 Cautions ............................................................................................................1-4
1.3.3 Contraindications ..........................................................................................1-4
1.4 System Overview .......................................................................................................1-5
1.4.1 Breathing Circuit Overview........................................................................1-7
1.5 Glossary .........................................................................................................................1-8
1.6 Symbol Key ..................................................................................................................1-9
1.7 How to Contact Respironics ............................................................................... 1-10
Chapter 2: Device Controls and Displays .................................................................................2-1
2.1 Controls and Displays ..............................................................................................2-1
2.1.1 Control Panel Inactivity ...............................................................................2-3
2.2 Rear Panel .....................................................................................................................2-3
Chapter 3: Setup................................................................................................................................3-1
3.1 Installing the Air Filters ............................................................................................3-1
3.2 Where to Place the Device......................................................................................3-2
3.3 Connecting the Breathing Circuit .......................................................................3-2
3.4 Supplying Power to the Device ............................................................................3-5
3.4.1 Using AC Power .............................................................................................3-5
3.4.2 Using DC Power .............................................................................................3-6
3.5 Complete Assembly Example ...............................................................................3-7
Chapter 4: Device Operation ........................................................................................................4-1
4.1 Available Therapies ...................................................................................................4-1
4.2 Starting the Device ...................................................................................................4-1
4.3 Using the Ramp and C-Flex Features .................................................................4-3
4.3.1 Ramp Feature..................................................................................................4-3
4.3.2 C-Flex Comfort Feature ...............................................................................4-4
4.3.2.1 C-Flex Enabled....................................................................................4-4
4.3.2.2 C-Flex Disabled ..................................................................................4-4
REMSTAR AUTO M SERIES USER MANUAL
i
4.4 Changing the Device Settings .............................................................................. 4-5
4.4.1 Navigating the Display Screens ............................................................... 4-6
4.4.1.1 Viewing Data on the Patient Data Screens............................... 4-6
4.4.1.2 Viewing and Modifying Patient Setup Screens ...................... 4-9
4.5 Completing the FOSQ Questionnaire ..............................................................4-11
4.6 Patient Reminder Screen ......................................................................................4-12
Chapter 5: Device Alerts and Troubleshooting ...................................................................... 5-1
5.1 Device Alerts ............................................................................................................... 5-1
5.2 Troubleshooting......................................................................................................... 5-4
Chapter 6: Accessories .................................................................................................................... 6-1
6.1 Adding a Humidifier ................................................................................................. 6-1
6.2 Using the SmartCard .............................................................................................. 6-2
6.3 Adding Supplemental Oxygen ............................................................................. 6-2
Chapter 7: Cleaning and Maintenance ..................................................................................... 7-1
7.1 Cleaning the Device ................................................................................................. 7-1
7.2 Cleaning or Replacing the Filters ......................................................................... 7-1
7.3 Cleaning the Tubing ................................................................................................. 7-3
7.4 Service ........................................................................................................................... 7-3
7.5 Traveling with the System ...................................................................................... 7-3
7.5.1 International Travel ....................................................................................... 7-4
Chapter 8: Specifications................................................................................................................ 8-1
Appendix A: EMC Information .....................................................................................................A-1
ii
REMSTAR AUTO M SERIES USER MANUAL
CHAPTER 1: INTRODUCTION
This chapter provides information on:
•
REMstar Auto M Series system contents
•
Intended Use
•
Warnings, cautions, and contraindications
•
System overview
•
Glossary and symbol key
•
How to contact Respironics
1.1
SYSTEM CONTENTS
Your REMstar Auto M Series system includes the following items:
Carrying Case
User Manual
Quickstart Guide
Flexible Tubing
Power Supply
Reusable Gray Foam
Filter
C
Disposable Ultra-fine
Filter
-F
le
x
AC Power Cord
REMstar Auto M Series Device
FIGURE 1–1 SYSTEM CONTENTS
Note:
If your system includes a humidifier, you will receive additional items with your
package. See the instructions included with your humidifier for more information.
Note:
If any of the above items are missing, contact your home care provider.
REMSTAR AUTO M SERIES USER MANUAL
1-1
1.2
INTENDED USE
The Respironics REMstar Auto M Series system is a CPAP (Continuous Positive Airway Pressure)
device designed for the treatment of Obstructive Sleep Apnea only in spontaneously breathing
patients weighing >66 lbs (30 kg).
The device is to be used only on the instruction of a licensed physician. The system can deliver
CPAP therapy or Auto-CPAP therapy, both with and without C-Flex. Your home care provider
will make the correct pressure settings according to your health care professional’s prescription.
When set in the Auto-CPAP therapy, the system will monitor your breathing as you sleep and
automatically adjust the pressure to meet your needs. When in CPAP therapy, the system will
deliver a continuous, set pressure during the night.
Several accessories are available to make your OSA treatment with the REMstar Auto M Series
system as convenient and comfortable as possible. To ensure that you receive the safe,
effective therapy prescribed for you, use only Respironics accessories.
1.3
WARNINGS, CAUTIONS, AND CONTRAINDICATIONS
Caution: U.S. federal law restricts this device to sale by or on the order of a physician.
1.3.1 WARNINGS
A warning indicates the possibility of injury to the user or the operator.
1-2
•
This manual serves as a reference. The instructions in this manual are not intended to supersede the health care professional’s instructions regarding the use of the device.
•
The operator should read and understand this entire manual before using the device.
•
This device is not intended for life support.
•
The device should be used only with masks and connectors recommended by Respironics
or with those recommended by the health care professional or respiratory therapist. A mask
should not be used unless the device is turned on and operating properly. The exhalation
port(s) associated with the mask should never be blocked.
Explanation of the Warning: The device is intended to be used with special masks or connectors that have exhalation ports to allow continuous flow of air out of the mask. When the
device is turned on and functioning properly, new air from the device flushes the exhaled air
out through the mask exhalation port. However, when the device is not operating, enough
fresh air will not be provided through the mask, and exhaled air may be rebreathed. Rebreathing of exhaled air for longer than several minutes can in some circumstances lead to
suffocation.
REMSTAR AUTO M SERIES USER MANUAL
•
If oxygen is used with the device, the oxygen flow must be turned off when the device is not
in use.
Explanation of the Warning: When the device is not in operation and the oxygen flow is left
on, oxygen delivered into the tubing may accumulate within the device’s enclosure. Oxygen
accumulated in the device enclosure will create a risk of fire.
•
Oxygen supports combustion. Oxygen should not be used while smoking or in the presence
of an open flame.
•
When using oxygen with this system, a Respironics Pressure Valve (Part Number 302418)
must be placed in-line with the patient circuit. Failure to use the pressure valve could result
in a fire hazard.
•
Do not use the device in the presence of a flammable anaesthetic mixture in combination
with oxygen or air, or in the presence of nitrous oxide.
•
Do not use this device if the room temperature is warmer than 95° F (35° C). If the device is
used at room temperatures warmer than 95° F (35° C), the temperature of the airflow may
exceed 106° F (41° C). This could cause irritation or injury to your airway.
•
Do not operate the device in direct sunlight or near a heating appliance because these conditions can increase the temperature of the air coming out of the device.
•
Contact your health care professional if symptoms of sleep apnea recur.
•
If you notice any unexplained changes in the performance of this device, if it is making unusual or harsh sounds, if the device or the power supply are dropped or mishandled, if water
is spilled into the enclosure, or if the enclosure is broken, discontinue use and contact your
home care provider.
•
Repairs and adjustments must be performed by Respironics-authorized service personnel
only. Unauthorized service could cause injury, invalidate the warranty, or result in costly
damage.
•
Periodically inspect electrical cords, cables, and the power supply for damage or signs of wear.
Discontinue use and replace if damaged.
•
To avoid electric shock, unplug the device before cleaning it. DO NOT immerse the device
in any fluids.
•
Pins of connectors identified with the ESD warning symbol ( )should not be touched.
Connections should not be made to these connectors unless ESD precautionary procedures
are used. Precautionary procedures include methods to prevent build-up of electrostatic
discharge (e.g., air conditioning, humidification, conductive floor coverings, non-synthetic
clothing), discharging one’s body to the frame of the equipment or system or to earth or a
large metal object, and bonding oneself by means of a wrist strap to the equipment or system
or to earth.
REMSTAR AUTO M SERIES USER MANUAL
1-3
1.3.2 CAUTIONS
A Caution indicates the possibility of damage to the device.
•
The device may only be operated at temperatures between 41° F (5° C) and 95° F (35° C).
•
If this device has been exposed to either very hot or very cold temperatures, allow it to adjust
to room temperature before starting therapy. Condensation may damage the device.
•
Do not immerse the device or allow any liquid to enter the enclosure or the inlet filter.
•
A properly installed, undamaged reusable foam inlet filter is required for proper operation.
•
Tobacco smoke may cause tar build-up within the device, which may result in the device
malfunctioning.
Note:
Additional warnings, cautions, and notes are located throughout this manual.
1.3.3 CONTRAINDICATIONS
When assessing the relative risks and benefits of using this equipment, the clinician should
understand that this device can deliver pressures up to 20 cm H2O. In the event of certain fault
conditions, a maximum pressure of 30 cm H2O is possible. Studies have shown that the following
pre-existing conditions may contraindicate the use of CPAP therapy for some patients:
•
Bullous Lung Disease
•
Pathologically Low Blood Pressure
•
Bypassed Upper Airway
•
Pneumothorax
•
Pneumocephalus has been reported in a patient using nasal Continuous Positive Airway Pressure. Caution should be used when prescribing CPAP for susceptible patients such as those
with: cerebral spinal fluid (CSF) leaks, abnormalities of the cribriform plate, prior history of
head trauma, and/or pneumocephalus. (Chest 1989; 96:1425-1426)
The use of positive airway pressure therapy may be temporarily contraindicated if you exhibit
signs of a sinus or middle ear infection. Not for use with patients whose upper airways are bypassed. Contact your physician if you have any questions concerning your therapy.
1-4
REMSTAR AUTO M SERIES USER MANUAL
1.4
SYSTEM OVERVIEW
The REMstar Auto M Series device, shown in Figure 1–2, is a CPAP (Continuous Positive Airway Pressure) device designed for the treatment of Obstructive Sleep Apnea (OSA). It can deliver
CPAP therapy or Auto-CPAP therapy.
When prescribed for you, the device provides several special features to help make your therapy
more comfortable. The ramp function allows you to lower the pressure when you are trying to fall
asleep. The air pressure will gradually increase until your prescription pressure is reached. You also
have the option of not using the ramp feature at all.
Additionally, the C-Flex comfort feature provides you with pressure relief when you exhale during
therapy.
Several accessories are also available for use with your REMstar Auto M Series device. Contact
your home care provider to purchase any accessories not included with your system.
FIGURE 1–2 REMSTAR AUTO M SERIES DEVICE
REMSTAR AUTO M SERIES USER MANUAL
1-5
Figure 1–3 illustrates many of the device features, described in the table below.
Ramp Button
Start/Stop
Button
C-Flex
Button
Power Inlet
Display Screen
(under door)
Air Outlet
le
x
Medical
Equipment Note
(on bottom)
Accessory
Module
Filter Area
FIGURE 1–3 REMSTAR AUTO M SERIES SYSTEM OVERVIEW
1-6
DEVICE FEATURE
Accessory Module
DESCRIPTION
If applicable, insert the optional accessory card here.
Air Outlet
Connect the flexible tubing here.
C-Flex Button
This button allows you to change the C-Flex comfort
setting, if C-Flex is prescribed for you. See Chapter 4
for more information about C-Flex.
Display Screen
Shows therapy settings, patient data, instructions,
and error messages.
Filter Area
A reusable, gray foam filter must be placed in the
filter area to screen out normal household dust and
pollens. An optional, white ultra-fine filter can also
be used for more complete filtration of very fine
particles.
Medical Equipment Note
For ease at airport security stations, there is a note
on the bottom of the device stating that it is medical
equipment. It may help if you also take this manual
with you when you travel.
Power Inlet
Connect the power cord here.
Ramp Button
This button starts or restarts the ramp cycle.
Start/Stop Button
This button starts or stops the airflow.
REMSTAR AUTO M SERIES USER MANUAL
1.4.1 BREATHING CIRCUIT OVERVIEW
The patient breathing circuit, shown in Figure 1–4, consists of the following:
•
Circuit tubing to deliver air from the device to your interface (e.g., mask)
•
A mask or other patient interface device to deliver the prescribed pressure to your nose or
nose and mouth, depending on which interface has been prescribed for you
•
An exhalation device to vent exhaled air from the circuit
Patient Interface
Exhalation
Device
Circuit
Tubing
Circuit with Separate
Exhalation Device
Exhalation
Port
Mask's
Connector
Flexible
Tubing
Connector
Circuit with Mask with
Integrated Exhalation Port
FIGURE 1–4 TYPICAL BREATHING CIRCUITS
Note:
The exhalation port may be part of the interface or may be part of a separate
exhalation device, but is required to minimize the potential for CO2 rebreathing.
REMSTAR AUTO M SERIES USER MANUAL
1-7
1.5
GLOSSARY
The following terms and acronyms appear throughout this manual:
TERM/ACRONYM
1-8
DEFINITION
Active State
The state of the device when power is applied, the airflow is on, and
the device is providing therapy.
Apnea
A condition marked by the cessation of spontaneous breathing.
Auto-CPAP
Adjusts CPAP pressure automatically to improve patient comfort
based on monitoring of apnea and snoring events.
Auto-Off
When this feature is enabled, the device automatically discontinues
therapy whenever the mask is removed.
Auto-On
With this feature, the device automatically initiates therapy when you
begin breathing on the device. This feature is always enabled.
BPM
Breaths Per Minute
C-Flex
A therapy feature that provides pressure relief during exhalation, if
enabled by your home care provider.
CPAP
Continuous Positive Airway Pressure
FOSQ
Functional Outcomes of Sleep Questionnaire – A “quality of life” questionnaire designed specifically for people with sleep disorders. The
results allow health care professionals to assess how CPAP therapy has
improved the quality of their patients’ lives.
LPM
Liters Per Minute
OSA
Obstructive Sleep Apnea
Patient Data Menu
The display mode in which you can view certain stored information,
such as therapy usage hours.
Patient Setup Menu
The display mode in which you can change patient-adjustable device
settings, such as the ramp starting pressure.
Ramp
A feature that may increase patient comfort when therapy is started.
The ramp feature reduces pressure and then gradually increases the
pressure to the prescription setting so you can fall asleep more comfortably.
Safe State
The state in which the device does not provide therapy. The device
enters this state if an error is detected.
Standby State
The state of the device when power is applied but the airflow is
turned off.
REMSTAR AUTO M SERIES USER MANUAL
1.6
SYMBOL KEY
The following symbols appear on the device and power supply:
SYMBOL
DEFINITION
Consult accompanying instructions for use.
DC Power
Type BF Applied Part
Class II (Double Insulated)
IPX1
Drip Proof Equipment
Electrostatic Discharge
European Declaration of Conformity
Canadian/US Certification
Notified Body Approval for Standards Compliance
TUV Safety Standard Compliance
UL Recognized for Canada and the United States
No User Serviceable Parts
REMSTAR AUTO M SERIES USER MANUAL
1-9
1.7
HOW TO CONTACT RESPIRONICS
To have your device serviced, contact your home care provider. If you need to contact Respironics
directly, call the Respironics Customer Service department at 1-800-345-6443 or 1-724-3874000. You can also use the following address:
Visit Respironics web site at: www.respironics.com
1-10
REMSTAR AUTO M SERIES USER MANUAL
CHAPTER 2: DEVICE CONTROLS AND DISPLAYS
This chapter describes the device’s control buttons and displays, patient circuit connections, and
rear panel connections.
2.1
CONTROLS AND DISPLAYS
Figure 2–1 shows the three primary control buttons on the REMstar Auto M Series device.
C-Flex
FIGURE 2–1 PRIMARY CONTROL BUTTONS
These buttons are described below.
BUTTON
DESCRIPTION
Ramp – When the airflow is on, this button allows you to
activate or restart the ramp function. Ramp lowers the
airflow pressure and then gradually increases it, allowing
you to fall asleep more easily.
Start/Stop – This button starts the device’s airflow and
places the device in the Active state, or stops the airflow,
and places the device in Standby. You can also press this
button to exit any setting screen.
C-Flex
C-Flex – This button adjusts the C-Flex comfort setting.
If you do not want to modify the settings that your home care provider has set for you, you only
need these three buttons to start and stop therapy and do not need to use the display buttons located under the device cover door.
Figure 2–2 shows the device display and navigation buttons that are under the cover door.
– FOSQ
Setup +
FIGURE 2–2 DISPLAY BUTTONS
REMSTAR AUTO M SERIES USER MANUAL
2-1
The display buttons are described below:
BUTTON
DESCRIPTION
Allows you to access the Data screens. Also allows you
to navigate to the previous screen when in the Data or
Setup menu.
Allows you to access the Data screens. Also allows you
to navigate to the next screen when in the Data or
Setup menu.
Allows you to enter the FOSQ screens. Also allows you
to decrease the settings on the setup screens.
Allows you to enter the Setup screens. Also allows you
to increase the settings on the setup screens.
The device’s display screen shows the set pressure, patient data, instructions, and error messages.
See Chapter 4 for instructions on navigating the display screens.
Figure 2–3 provides a view of the entire device control panel, with the cover door open.
Placement Area
for Optional Quick
Reference Label
Cover Door
Previous
Screen
Button
Next
Screen
Button
Decrease
Button
Increase
Button
C-Flex
Ramp
Button
Start/Stop
Button
C-Flex
Button
FIGURE 2–3 DEVICE CONTROL PANEL
2-2
REMSTAR AUTO M SERIES USER MANUAL
2.1.1 CONTROL PANEL INACTIVITY
Some screens have time-out periods. The screen’s timer starts when the screen is initially displayed
and is restarted whenever a button is pressed. The screen times out after one minute if there is no
activity and returns to the Standby screen.
2.2
REAR PANEL
Figure 2–4 shows the REMstar Auto M Series device’s rear panel (without a humidifier).
DC Power Inlet
Air Outlet Port
Accessory Slot
Filter Area
FIGURE 2–4 REMSTAR AUTO M SERIES REAR PANEL
The rear panel contains the following:
•
An accessory slot for optional accessories such as the SmartCard or modem (see Chapter 6,
Accessories, for more information).
•
A filter area where the filter(s) supplied with your device should be inserted.
•
A DC power inlet where the power cord is connected (see Chapter 3, Setup, for complete
information on supplying power to the device).
•
The air outlet port where the breathing circuit’s flexible tubing is attached.
REMSTAR AUTO M SERIES USER MANUAL
2-3
2-4
REMSTAR AUTO M SERIES USER MANUAL
CHAPTER 3: SETUP
This chapter provides instructions on how to:
•
Install the air filters
•
Position the device
•
Connect the breathing circuit
•
Supply power to the device
3.1
INSTALLING THE AIR FILTERS
Caution: A properly installed, undamaged foam filter is required for proper operation.
The device uses a gray foam filter that is washable and reusable, and an optional white ultra-fine
filter that is disposable. The reusable filter screens out normal household dust and pollens, while
the optional ultra-fine filter provides more complete filtration of very fine particles. The gray reusable filter must be in place at all times when the device is operating. The white ultra-fine filter is
recommended for people who are sensitive to tobacco smoke or other small particles.
Two reusable gray foam filters and one disposable white ultra-fine filter are supplied with the
device.
If your filters are not already installed when you receive your device, you must at least install the
reusable gray foam filter before using the device.
To install the filter(s):
1.
If you are using the white disposable ultra-fine filter, insert it into the filter area first, meshside facing in, towards the device.
2.
Insert the gray foam filter into the filter area as shown in Figure 3–1.
Note:
If you are not using the white disposable filter, simply insert the gray foam filter
into the filter area.
REMSTAR AUTO M SERIES USER MANUAL
3-1
Filter Area
Disposable Ultra-Fine
Filter (optional)
Reusable Gray
Foam Filter
(required)
FIGURE 3–1 INSTALLING THE AIR FILTER
Note:
3.2
See Chapter 7, Cleaning and Maintenance, for information on how to clean or
replace the air filters.
WHERE TO PLACE THE DEVICE
Place the device on a firm, flat surface somewhere within easy reach of where you will use it. Make
sure the filter area on the back of the device is not blocked by bedding, curtains, or other items.
Air must flow freely around the device for the system to work properly. Make sure the device is
away from any heating or cooling equipment (e.g., forced air vents, radiators, air conditioners).
3.3
CONNECTING THE BREATHING CIRCUIT
To use the system, you will need the following accessories in order to assemble the recommended
circuit:
•
Respironics interface (e.g, nasal mask) with integrated exhalation port (or Respironics interface with a separate exhalation device such as the Whisper Swivel® II)
•
Respironics 6 ft. (1.83 m) flexible tubing (with optional swivel)
•
Respironics headgear (for the patient interface)
Warning:
3-2
If the device is used by multiple persons (e.g., rental devices), a lowresistance, main flow bacteria filter should be installed in-line between
the device and the circuit tubing to prevent contamination.
REMSTAR AUTO M SERIES USER MANUAL
To connect your breathing circuit to the device, complete the following steps:
1.
Connect the flexible tubing to the air outlet on the back of the device, as shown in Figure
3–2. You can use the optional, detachable swivel that is provided with your device and
already attached to the tubing (shown in Figure 3–2), or you can remove the swivel and connect the tubing directly to the air outlet.
Detachable
Swivel
FIGURE 3–2 CONNECTING THE FLEXIBLE TUBING
Note:
2.
If required, connect a bacteria filter to the device air outlet, and then connect
the flexible tubing to the outlet of the bacteria filter.
Connect the tubing to the mask:
a.
If you are using a mask with a built-in exhalation port, connect the mask’s connector to
the flexible tubing, as shown in Figure 3–3.
Exhalation Port
Mask's
Connector
Flexible
Tubing
Connector
FIGURE 3–3 CONNECTING A MASK WITH BUILT-IN EXHALATION PORT
REMSTAR AUTO M SERIES USER MANUAL
3-3
b.
If you are using a mask with a separate exhalation device, connect the open end of the
flexible tubing to the exhalation device as shown in Figure 3–4. Position the exhalation
device so that the vented air is blowing away from your face. Connect the mask’s connector to the exhalation device.
Exhalation
Device
Flexible
Tubing
Connector
FIGURE 3–4 CONNECTING A MASK WITH A SEPARATE EXHALATION DEVICE
Warning:
The exhalation device (e.g., Whisper Swivel II) or exhalation port (on
masks with an integrated exhalation port) is designed to exhaust CO2
from the patient circuit. Do not block or seal the ports on the exhalation device.
Warning:
If you are using a full face mask (i.e., a mask covering both your mouth
and your nose), the mask must be equipped with a safety (entrainment) valve.
3.
3-4
Attach the headgear to the mask. See the instructions that came with your headgear.
REMSTAR AUTO M SERIES USER MANUAL
3.4
SUPPLYING POWER TO THE DEVICE
You can power the device using AC or DC power.
Caution:
If this device has been exposed to either very hot or very cold temperatures, allow it to adjust to room temperature before beginning the
following setup procedures.
Warning:
Route the wires to avoid tripping.
Warning:
This device is activated when the power cord is connected. Pressing
the
button turns the airflow on or off.
Important!
If you are using your device with a humidifier, refer to the Quickstart
Guide included with your device or the instructions included with your
humidifier for details on how to power the device and humidifier.
3.4.1 USING AC POWER
Complete the following steps to operate the device using AC power.
1.
Plug the socket end of the AC power cord into the power supply, as shown in Figure 3–5.
FIGURE 3–5 CONNECTING THE POWER CORD TO THE POWER SUPPLY
2.
Plug the pronged end of the AC power cord into an electrical outlet that is not controlled by
a wall switch.
REMSTAR AUTO M SERIES USER MANUAL
3-5
3.
Plug the power supply cord’s connector into the power inlet on the back of the device, as
shown in Figure 3–6.
FIGURE 3–6 CONNECTING THE POWER SUPPLY CORD TO THE DEVICE
4.
Ensure that all connections are secure.
Important!
To remove AC power, disconnect the power supply cord from the electrical outlet.
Warning:
Inspect the power cord often for any signs of damage. Replace a damaged power cord immediately.
3.4.2 USING DC POWER
The Respironics DC Power Cord (Reorder Number 1001956) can be used to operate this device
in a stationary recreational vehicle, boat, or motor home. The Respironics DC Battery Adapter
Cable (Reorder Number 532209), when used with the DC Power Cord, enables the device to be
operated from a 12 VDC free-standing battery.
Caution: When DC power is obtained from a vehicle battery, the device should not
be used while the vehicle’s engine is running. Damage to the vehicle or the
device may occur.
Caution: Only use a Respironics DC Power Cord and Battery Adapter Cable. Use of
any other system may cause damage to the device or vehicle.
Refer to the instructions supplied with the DC Power Cord and adapter cable for information on
how to operate the device using DC power.
3-6
REMSTAR AUTO M SERIES USER MANUAL
3.5
COMPLETE ASSEMBLY EXAMPLE
Figure 3–7 shows an example of how a complete assembly will look, with breathing circuit connected and power applied to the device.
FIGURE 3–7 FINAL ASSEMBLY EXAMPLE (SHOWN WITH OPTIONAL ACCESSORY MODULE)
Figure 3–8 shows an example of how you should route your tubing and situate your device on
your nightstand for the best setup possible. This will help prevent the device from falling off your
nightstand or table.
FIGURE 3–8 RECOMMENDED DEVICE AND TUBING PLACEMENT
REMSTAR AUTO M SERIES USER MANUAL
3-7
3-8
REMSTAR AUTO M SERIES USER MANUAL
CHAPTER 4: DEVICE OPERATION
This chapter explains the therapies available with the REMstar Auto M Series device, how to start
the device, and how to change the settings.
4.1
AVAILABLE THERAPIES
The REMstar Auto M Series device delivers the following therapies:
•
CPAP – Delivers Continuous Positive Airway Pressure; CPAP maintains a constant level of
pressure throughout the breathing cycle. If your health care professional prescribed ramp for
you, you can press the Ramp button to reduce the pressure and then gradually increase the
pressure to the therapeutic pressure setting so that you can fall asleep more comfortably.
•
CPAP with C-Flex – Delivers CPAP therapy with pressure relief upon exhalation to improve
patient comfort based on patient needs.
•
Auto-CPAP – Delivers CPAP therapy while automatically adjusting the pressure level to
meet the patient’s needs.
•
Auto-CPAP with C-Flex – Auto-CPAP therapy with pressure relief upon exhalation to
improve patient comfort based on patient needs.
4.2
1.
STARTING THE DEVICE
Plug the device in to an AC or DC power source. The three primary buttons light up and the
Software Version screen momentarily appears, shown in Figure 4–1.
V 1.0
FIGURE 4–1 SOFTWARE VERSION SCREEN
Note:
Version 1.0 shown in Figure 4–1 is an example. Your device may have a different
software version installed.
REMSTAR AUTO M SERIES USER MANUAL
4-1
2.
The next screen to appear is the Standby (or Inactive) screen, shown in Figure 4–2. You can
access the FOSQ questionnaire or patient settings and data from this screen. See Section 4.3
for instructions on how to navigate the display screens.
– FOSQ
Setup +
FIGURE 4–2 STANDBY SCREEN
Note:
3.
The FOSQ option will only appear on the Standby screen if a SmartCard is
inserted in the device or if a modem is connected.
Press the
button to turn on the airflow. The Active Display screen appears, shown in
Figure 4–3.
15.0
cmH2O
FIGURE 4–3 ACTIVE DISPLAY (WITH SMARTCARD)
The Active Display screen shows the set pressure.
Some symbols indicating when certain conditions are turned on or detected will also appear
on the Active Display screen or on the Standby screen. These symbols are described below:
SYMBOL
DESCRIPTION
Ramp – You can initiate the ramp feature by pressing the Ramp button. The
ramp symbol displays on the Active Display screen when the ramp function
is active.
Mask
Leak
Mask Leak Alert – This flashing text displays on the Active Display screen if
the Mask Alert setting is enabled and the device detects an excessive mask
leak.
Auto
Off
Auto-Off – This flashing text displays on the Standby screen if the Auto-Off
setting is enabled and the device detects a mask disconnect.
SmartCard – This symbol displays if a SmartCard is inserted in the device. If
the card is inserted incorrectly, the symbol will flash intermittently.
Modem – This symbol displays if a modem is connected to the device. (Note:
This symbol will vary in appearance depending on the type of modem being used.)
4-2
REMSTAR AUTO M SERIES USER MANUAL
4.
Put on your mask assembly when the air starts to flow.
5.
Make sure that no air is leaking from your mask into your eyes. If it is, adjust the mask and
headgear until the air leak stops. See the instructions provided with your mask for more
information.
Note:
6.
A small amount of mask leak is normal and acceptable. Correct large mask
leaks or eye irritation from an air leak as soon as possible.
If you are using the device while sleeping, try placing the tubing from the device over your
headboard. This may reduce tension on the mask.
Note:
4.3
If you are having trouble with your mask, refer to the instructions included with
the mask.
USING THE RAMP AND C-FLEX FEATURES
You can press the
(Ramp) button to activate the Ramp feature, or the C-Flex button to
change the C-Flex setting, if your provider has enabled these features.
4.3.1 RAMP FEATURE
The device is equipped with an optional ramp feature that your home care provider can enable or
disable. This feature reduces the air pressure when you are trying to fall asleep and then gradually
increases (ramps) the pressure until your prescription setting is reached, allowing you to fall asleep
more comfortably.
If ramp is enabled on your device, after you turn on the airflow, press the
button on the top
of the device. You can use the Ramp button as often as you wish during the night.
Note:
If the ramp feature is disabled, nothing will happen when you press the
ton.
REMSTAR AUTO M SERIES USER MANUAL
but-
4-3
4.3.2 C-FLEX COMFORT FEATURE
The C-Flex comfort feature allows you to adjust the level of air pressure relief that you feel when
you exhale during therapy. Your home care provider can enable or disable this feature.
4.3.2.1
C-FLEX ENABLED
When your provider enables C-Flex, a C-Flex level will already be set for you on the device. If this
is not comfortable for you, you can increase or decrease the setting.
To change the C-Flex setting, press the C-Flex button. The screen shown in Figure 4–4 appears,
with an arrow above the current C-Flex setting.
C-Flex Setting
1 2 3
FIGURE 4–4 C-FLEX SETTING SCREEN
The setting of 1 provides a small amount of pressure relief, with higher numbers providing additional relief. To change the pressure relief, press the + or – buttons to increase or decrease the
setting.
Note:
4.3.2.2
You can also view and change the C-Flex setting by navigating to the C-Flex Setting screen from the Patient Setup menu (see Section 4.4).
C-FLEX DISABLED
If C-Flex has not been prescribed for you and your provider has disabled the C-Flex feature, the
following screen appears when you press the C-Flex button, and you cannot enable or adjust the
setting.
C-Flex Setting
FLEX comfort has been
disabled on this unit.
FIGURE 4–5 C-FLEX DISABLED SCREEN
4-4
REMSTAR AUTO M SERIES USER MANUAL
4.4
CHANGING THE DEVICE SETTINGS
You can view the set pressure on the Active Display screen, and you can view the following settings on the Patient Data screens:
•
Therapy usage hours
•
Number of sessions greater than 4 hours
•
90% therapy pressure averages – only appears if in Auto-CPAP therapy
•
System leak (if enabled by your home care provider)
•
Apnea/Hypopnea Index (if enabled by your home care provider)
Additionally, you can view and modify the following settings on the Patient Setup screens:
•
C-Flex (if enabled by your home care provider)
•
Ramp starting pressure (if enabled by your home care provider)
•
Mask alert (enable/disable)
•
Auto off (enable/disable)
•
FOSQ questionnaire
REMSTAR AUTO M SERIES USER MANUAL
4-5
4.4.1 NAVIGATING THE DISPLAY SCREENS
Use the
button to navigate to the next screen and the
button to navigate to the previous
screen. Use the + and — buttons to adjust the settings on the Patient Setup screens.
4.4.1.1
VIEWING DATA ON THE PATIENT DATA SCREENS
Figure 4–6 shows how to navigate the Patient Data screens.
Press
Press
– FOSQ
Setup +
Apn-Hyp Index
7 Day Avg:
30 Day Avg:
Therapy Usage
AHI = 0.0
AHI = 0.0
7 Day Avg:
30 Day Avg:
Sessions > 4
System Leak
7 Day Avg:
30 Day Avg:
Hrs/Night
5:00
8:00
L/min
7 Days:
30 Days:
0.0
0.0
5 Sessions
8 Sessions
90% Pressure
7 Day Avg:
30 Day Avg:
cmH2O
10.0
12.0
Note: Only appears if in
Auto-CPAP therapy.
FIGURE 4–6 NAVIGATING THE PATIENT DATA SCREENS
Press the
button to scroll forward through the data screens, or press the
through the screens in the reverse order.
4-6
button to scroll
REMSTAR AUTO M SERIES USER MANUAL
The Patient Data screens are described below.
1.
– FOSQ
Setup +
Therapy Usage
7 Day Avg:
30 Day Avg:
2.
Hrs/Night
5:00
8:00
Standby Screen
The Standby screen appears when you first apply power to the
device. You can access the Patient Data menu from this screen by
pressing the
or buttons.
Note:
You can access the Patient Setup screens by pressing the +
button, and the FOSQ questionnaire by pressing the — button, as described later in this chapter.
Note:
The FOSQ option only appears if a SmartCard is inserted or
a modem is connected to the device.
Therapy Usage Screen
This screen displays the number of hours that the device provided
therapy, as 7-day and 30-day averages. The maximum value that can
be displayed for both averages is 24 hours.
Note:
Sessions > 4
7 Days:
30 Days:
3.
5 Sessions
8 Sessions
Sessions Greater than 4 Hours Screen
This screen displays the number of device therapy sessions that
exceeded 4 hours in 7-day and 30-day periods. The maximum value
that can be displayed for the 7-day period is 35 sessions, and the
maximum value for the 30-day period is 150 sessions.
Note:
90% Pressure
7 Day Avg:
30 Day Avg:
cmH2O
10.0
12.0
4.
This screen is only for reference. Your home care provider
may periodically ask you for this information.
This screen is only for reference. Your home care provider
may periodically ask you for this information.
90% Therapy Pressure Screen
This screen displays a 7-day and 30-day average of the 90% pressure
that you have used. The 90% pressure is the pressure at which you
spent 90% of the session time at or below. For example, if you have
the device on (with airflow) for 10 hours, and spend 9 hours at or below 11 cm H2O, and 1 hour above 11 cm H2O, then the 90% pressure
is 11 cm H2O. The maximum value for both averages is 20.0 cmH2O.
Note:
This screen is only for reference. Your home care provider
may periodically ask you for this information.
Note:
This screen only displays if you are in Auto-CPAP therapy.
REMSTAR AUTO M SERIES USER MANUAL
4-7
System Leak
7 Day Avg:
30 Day Avg:
5.
L/min
0.0
0.0
System Leak Screen
This screen displays a 7-day and 30-day average of the leak history
for the device in liters per minute (LPM). System leak is a combination of intentional and unintentional air leak. Intentional leak is the
expected leak at the exhalation port. Some leak is required to minimize CO2 rebreathing. Unintentional leak occurs around the patient
interface. If you see a large increase in the amount of leak indicated
here, contact your home care provider for assistance.
Note:
Apn-Hyp Index
7 Day Avg:
30 Day Avg:
AHI = 0.0
AHI = 0.0
6.
Apnea/Hypopnea Index Screen
This screen displays your Apnea/Hypopnea index (AHI) for the last 7
and 30 days.
Note:
4-8
This screen only displays if your home care provider has
enabled it. It is only for reference. Your home care provider
may periodically ask you for this information.
This screen only displays if your home care provider has
enabled it. It is only for reference. Your home care provider
may periodically ask you for this information.
REMSTAR AUTO M SERIES USER MANUAL
4.4.1.2
VIEWING AND MODIFYING PATIENT SETUP SCREENS
Figure 4–7 shows how to navigate the Patient Setup screens.
– FOSQ
Setup +
Press +
Press
C-Flex Setting
Press
1 2 3
Auto Off
Ramp Start Pres
Feature: ON
4.0 cmH2O
Mask Alert
Feature: ON
FIGURE 4–7 NAVIGATING THE PATIENT SETUP SCREENS
The Patient Setup screens are described below.
– FOSQ
1.
Standby Screen
The Standby screen appears when you first apply power to the
device. You can access the Patient Setup menu from this screen by
pressing the + button. Once inside the Setup menu, press the
or buttons to cycle through the screens.
2.
C-Flex Setting Screen
This screen displays the C-Flex level set by your home care
provider. This setting allows you to adjust the level of air pressure
relief that you feel when you exhale during therapy. Your home
care provider will either enable or disable C-Flex.
– If C-Flex is enabled and the setting is not comfortable for you,
you can increase or decrease the setting by pressing the + or
– buttons. The setting of 1 provides a small amount of pressure relief, with higher numbers providing additional relief.
Press the + or – buttons to increase or decrease the setting.
– If your provider has disabled C-Flex, you cannot enable or adjust the setting. The screen shown at left displays to indicate
that C-Flex is disabled.
Setup +
C-Flex Setting
1 2 3
C-Flex Setting
FLEX comfort has been
disabled on this unit.
REMSTAR AUTO M SERIES USER MANUAL
4-9
Ramp Start Pres
3.
4.0 cmH2O
Ramp Starting Pressure Screen
You can increase or decrease the ramp starting pressure in 0.5 cm
H2O increments by pressing the + or – buttons. The default setting
is 4 cm H2O. You can adjust the setting from 4 cm H2O to the CPAP
pressure setting.
Note:
Mask Alert
4.
Feature: ON
Mask Alert Screen
You can enable or disable the mask alert setting by pressing the
+ or – buttons to select OFF or ON. If this feature is enabled, the
words Mask Leak appear on the Active display screen when a
significant mask leak is detected, and an audible alert sounds.
Note:
Auto Off
Feature: ON
5.
This screen will not display if your provider has not enabled Ramp on your device.
If your physician indicates that the Mask Alert is necessary for you, do not disable it.
Auto Off Screen
You can enable this feature if you want the device to automatically turn the airflow off whenever you remove the interface (e.g.,
mask) from your airway.
Press the + or – buttons to select OFF or ON. If this feature is enabled, the words Auto Off appear on the Standby screen if the device detects that you have removed your mask. The airflow shuts
off, and Auto Off continues to appear on the Standby screen until
the condition is corrected.
After you have finished modifying the Patient Setup screens, press the
Standby screen.
Note:
4-10
button to return to the
The Setup menu automatically times out and returns to the Standby screen
after one minute of inactivity.
REMSTAR AUTO M SERIES USER MANUAL
4.5
Note:
COMPLETING THE FOSQ QUESTIONNAIRE
The FOSQ option only appears on the Standby screen if you have a SmartCard
inserted or a modem connected to the device.
From the Standby screen, you can access the FOSQ questionnaire by pressing the – button. The
FOSQ test is a ‘quality of life’ questionnaire designed specifically for people with sleep disorders.
The results allow health care professionals to see how therapy has improved the quality of your
life. By completing the questionnaire periodically, you can provide valuable information about
the effectiveness of your treatment. The device can record your answers on the SmartCard or via a
wired or wireless modem for later review by the health care professional. Contact your home care
provider for further instructions.
Note:
If your health care professional or home care provider instructs you to complete the questionnaire, he or she will provide you with the questions, and you
can enter your answers into the device. Make sure a SmartCard or modem is
installed before answering the questions. The FOSQ screens will not display if a
SmartCard or modem is not present and able to store data.
To answer the FOSQ questionnaire, complete the following steps:
1.
Make sure that the SmartCard or modem is properly installed. Answers to the questionnaire
are saved onto the SmartCard or sent to the health care professional via a wired or wireless
modem (when available). If you are using a SmartCard, a SmartCard symbol (
) appears
in the upper right corner of the Active Display screen. If the SmartCard is inserted incorrectly, this symbol flashes to indicate that the card is incorrectly installed, and the FOSQ
questionnaire will not be available.
2.
From the Standby screen, press the – button to first FOSQ screen, shown in Figure 4–8.
FOSQ 1/30
0 1 2 3 4
FIGURE 4–8 FOSQ SCREEN 1 OF 30
Press the + or – button to select your answer to the first question, and an arrow appears over
your answer:
3.
–
0 indicates that you choose 0 as the answer to the question.
–
1 indicates that you choose 1 as the answer to the question.
–
2 indicates that you choose 2 as the answer.
–
3 indicates that you choose 3 as the answer.
–
4 indicates that you choose 4 as the answer.
After you answer the first question, press the button to access the next FOSQ screen and
continue answering each question. If you need to go back to a previous screen, press the
button.
REMSTAR AUTO M SERIES USER MANUAL
4-11
4.
There are 30 FOSQ questions. Once you have reached the last question, press the
to save your answers and exit the questionnaire.
4.6
button
PATIENT REMINDER SCREEN
Your home care provider may set a patient reminder that will appear periodically to alert you
to take certain actions, such as replacing your mask. A message will appear whenever the device
transitions from the Active Display to the Standby state if the period of time specified by your
provider has expired.
You can acknowledge the message by pressing any of the display buttons (+, –, or ). If you
do not acknowledge the message within six minutes of it appearing on the screen, it will time
out and disappear. The message will continue to display for three consecutive days whenever the
device transitions from Active to Standby until it is acknowledged. If, after three days, you still
have not acknowledged the message, then the reminder period will reset and no more reminders
will display until the next time the patient reminder setting expires.
Figure 4–9 shows an example of a patient reminder message.
Patient Reminder
Check your mask. A
new one may be available.
Call your provider.
FIGURE 4–9 PATIENT REMINDER SCREEN
4-12
REMSTAR AUTO M SERIES USER MANUAL
CHAPTER 5: DEVICE ALERTS AND TROUBLESHOOTING
This chapter describes the device alerts and also provides troubleshooting information for issues
you may run into when using the device.
5.1
DEVICE ALERTS
The device provides two alert levels, high and medium priority.
•
High Priority – These alerts require immediate operator response. The alert signal consists
of a high priority sound, which is a continuous two-beep pattern (indicated in the following
table as: • • • •). Additionally, the backlights on the buttons will provide a high priority
flashing pattern consisting of a continuous, bright-to-off, two-flash pattern (indicated in the
following table as: ◊◊ ◊◊ ◊◊).
•
Medium Priority – These alerts require prompt operator response. The alert signal consists of
a medium priority sound, which is a continuous one-beep pattern (indicated in the following
table as: •
•). Additionally, the backlights on the buttons will provide a medium priority
flashing pattern consisting of a continuous, bright-to-dim, one-flash pattern (indicated in the
following table as: ◊ ◊ ◊).
REMSTAR AUTO M SERIES USER MANUAL
5-1
ALERT SUMMARY TABLE
The following table summarizes the high and medium priority alerts.
ALERT
System Error
AUDIBLE
INDICATOR
••
••
VISUAL
INDICATOR
Backlights:
◊◊ ◊◊ ◊◊
Screen displays the
following message:
DEVICE ACTION
POSSIBLE CAUSE
The device enters the
“Safe state” in which
the device power
remains on, but the
airflow is disabled.
Device failure
Press any of the display
screen buttons to silence
the alert. Remove the
power supply cord from
the device to remove
power. Plug the cord back
into the device’s power
inlet to restore power. If the
alert continues to occur,
contact your home care
provider.
The device continues
to operate and
provide therapy, but
data logging is unavailable and FOSQ
is deactivated.
A problem exists
with the SmartCard inserted in
the accessory
slot. The card may
be improperly inserted or the data
may be corrupt.
Remove the SmartCard
to clear the alert. Confirm
that the card is properly
oriented, with the arrow
pointing towards the device, as shown below, and
reinsert the SmartCard.
Service Required
SmartCard
Error
•
•
Backlights:
◊
◊
◊
Screen displays the
following flashing
error symbol:
PATIENT ACTION
If the alert continues to
occur, remove the SmartCard from the device and
contact your home care
provider. The card may be
corrupt and need to be
replaced.
5-2
REMSTAR AUTO M SERIES USER MANUAL
ALERT
Mask Leak
AUDIBLE
INDICATOR
•
•
VISUAL
INDICATOR
Backlights:
◊
◊
◊
DEVICE ACTION
POSSIBLE CAUSE
PATIENT ACTION
The device continues
to operate.
The breathing
circuit is disconnected or there is
a large air leak.
Check your breathing
circuit connections and reconnect the tubing if it has
come loose. Press any of
the display buttons to clear
the alarm. Make sure your
mask is on properly before
you press the
button to
restart the airflow.
The words Mask
Leak flash on the
Active Display
screen.
If the alert continues to
occur, disable the mask
alert setting following the
instructions in Chapter 4,
and continue your therapy
overnight. Contact your
home care provider the
next morning to have your
mask checked. You may
need a mask refitting.
Auto Off
Patient
Reminder
None
None
The words Auto
Off flash on the
Standby screen,
indicating that a
mask disconnect
has been detected.
Backlights:
◊
◊
◊
Screen displays
a customized
reminder message
whenever the device transitions from
the Active state to
the Standby state.
REMSTAR AUTO M SERIES USER MANUAL
The airflow shuts
off and the device
enters the Standby
state approximately
45-60 seconds after
detection.
The mask has
been removed.
Put your mask back on
The device continues
to operate.
Your home care
provider may
set a patient
reminder scheduled to pop up at
a particular time
to remind you
to replace your
mask, change
your filters, etc.
Press any of the display
buttons to acknowledge
the message and clear it. If
you do not acknowledge
the reminder, it will disappear after 6 minutes, and
then reappear for three
consecutive days whenever
the device transitions from
the Active state to the
Standby state. If you still do
not acknowledge the message, the reminder period
will reset and the message
will not reappear until
the next time the Patient
Reminder setting expires.
button
and press the
to turn the airflow on and
resume therapy.
5-3
5.2
TROUBLESHOOTING
The table below lists some of the problems you may experience with your device or mask and possible solutions to those problems.
PROBLEM
Nothing happens when
you apply power to
the device. The audible
indicator does not sound
and the backlights on
the buttons do not light.
WHY IT HAPPENED
There’s no power
at the outlet or
the device is
unplugged.
WHAT TO DO
If you are using AC power, check the outlet
power and verify that the device is properly
plugged in. Make sure the AC power cord is
connected correctly to the power supply and
the power supply cord is securely connected to
the device’s power inlet. If the problem continues to occur, contact your home care provider.
Return both the device and power supply to
your provider, so they can determine if the
problem is with the device or power supply.
If you are using DC power, make sure your DC
power cord and battery adaptor cable connections are secure. Check your battery. It may
need recharged or replaced. If the problem
persists, check the DC cord’s fuse following the
instructions supplied with your DC cord. The
fuse may need to be replaced. If the problem
still occurs, contact your home care provider.
If you are using a humidifier, make sure you follow the instructions for applying power that are
provided with your humidifier.
The device does not op- There may be a
erate when you press the problem with the
blower.
button. The airflow
does not turn on.
Make sure the device is powered correctly, following the instructions on the previous page.
If the audible indicator sounds and the button
backlights turn on when you apply power, but
the airflow does not turn on, there may be a
problem with your device. Contact your home
care provider for assistance.
Note: When the device is functioning correctly, after you press the
button,
the device beeps and the airflow turns
on after a slight delay. This brief delay
is normal.
5-4
REMSTAR AUTO M SERIES USER MANUAL
PROBLEM
The device’s display is
erratic.
WHY IT HAPPENED
WHAT TO DO
The device or
power supply has
been dropped
or mishandled,
or the device or
power supply is in
an area with high
Electromagnetic
Interference (EMI)
emissions.
Unplug the device and the power supply.
Reapply power to the device. If the problem
continues, relocate the device to an area with
lower EMI emissions (e.g., away from electronic
equipment such as cellular phones, cordless
phones, computers, TVs, electronic games, hair
dryers, etc.).
Device Resets/Reboots:
The device comes
installed with
The device shuts down
troubleshooting
and restarts automatisoftware that
cally during therapy.
automatically
(This is unlikely to occur.) monitors performance.
The Ramp feature does
not work when you
press the Ramp button
( ).
Your home care
provider did not
prescribe Ramp
for you, or your
CPAP pressure is
already set to the
minimum setting.
REMSTAR AUTO M SERIES USER MANUAL
If the problem still occurs, contact your home
care provider for assistance.
Such a reset poses no danger to the patient
and assures that the patient receives prescribed
therapy throughout the night. If there is a possibility of damage to the device, the device will
shut down permanently. The product will then
display the following system error alert to indicate that the device be returned to the home
care provider for service:
Service Required
If Ramp has not been prescribed for you, discuss this feature with your home care provider
to see if they will change your prescription.
If your provider has enabled Ramp, but the
feature still does not work, check the pressure
setting on your Active Display screen. If it is set
to the minimum setting (4.0 cm H2O), the Ramp
feature will not work.
5-5
PROBLEM
WHY IT HAPPENED
The device has fallen off The device may
your table or nightstand. not have been
properly seated
on the nightstand,
or the placement
of the tubing may
have caused the
device to fall.
WHAT TO DO
Always make sure your device is placed on a
hard, flat surface so the feet on the bottom of
the device can adhere to the surface (make sure
there is no fabric under the device). The device
(and humidifier, if using) must be level for
proper operation.
Also, place the device away from the edge of
the nightstand or table, so it doesn’t accidentally get knocked off the table.
If you are using a humidifier with the device,
make sure that the device and humidifier are
placed below your head and mask, so that any
condensation in the tubing drains back into the
water chamber.
If the device and humidifier fall and water gets
into the device, drain all water out of the device
and make sure it is completely dry before reapplying power.
If the placement of the tubing causes the device to fall, make sure that you use proper hose
management when setting up your device.
Route the tubing behind the bed’s headboard,
as shown in Chapter 3, Setup.
If the device falls or water gets into the device
upon falling, let the device dry completely before restarting it. If the device does not operate
correctly after falling, contact your home care
provider.
5-6
REMSTAR AUTO M SERIES USER MANUAL
PROBLEM
WHY IT HAPPENED
WHAT TO DO
You are having problems You have lost the If you are not using a humidifier, you cannot
connecting the tubing to air outlet port or
connect your tubing to the device without the
the device.
are traveling and
detachable air outlet port, shown below.
forgot to bring the
port with you.
You must have the port attached properly
before connecting your tubing.
You are experiencing
excessive air leaks where
the tubing connects to
the device.
The air outlet port Remove the port and reattach it to make sure
is not installed cor- it’s properly installed.
rectly and doesn’t
To remove the port:
seal properly.
a. Put your thumb underneath the port and
insert your index finger into the port opening.
b. Pivoting from the bottom, unsnap the port
and pull it away from the device.
To properly reattach the port:
a. Make sure it is correctly oriented (with the
port opening at the top), and insert the
two latches at the bottom of the port into
the openings on the bottom of the device.
b. Push the top of the port down to snap it
into place.
Reattach your tubing, turn on the airflow, and
check to make sure you do not still feel air coming out of the port area.
REMSTAR AUTO M SERIES USER MANUAL
5-7
PROBLEM
The air out of the mask
is much warmer than
usual.
WHY IT HAPPENED
WHAT TO DO
The air filters may
be dirty.
Clean or replace the air filters as described in
Chapter 7.
The device may be
operating in direct
sunlight or near a
heater.
The temperature of the air may vary somewhat
based on your room temperature. Make sure
that the device is properly ventilated. Keep
the device away from bedding or curtains that
could block the flow of air around the device.
Make sure the device is away from direct sunlight and heating equipment.
If the problem continues, contact your home
care provider.
5-8
The mask feels uncomfortable to wear, there
is significant air leakage
around the mask, or you
experience other maskrelated issues.
This could be due
to improper headgear adjustment
or improper mask
fitting, etc.
If you experience any issues with your mask,
refer to your mask instructions for information
on proper fitting, etc. If the problem continues,
contact your home care provider.
You have a runny nose.
This is caused by
a nasal reaction to
the airflow.
Call your health care professional.
You have throat or nose
dryness.
The air is too dry.
Increase the room humidity. Consult with your
health care professional about using a Respironics humidifier with the device. If you have
a humidifier, refer to the instructions included
with your humidifier to make sure it is working
properly.
You experience nasal,
sinus, or ear pain.
You may have a
sinus or middle
ear infection.
Stop using the device and contact your health
care professional.
REMSTAR AUTO M SERIES USER MANUAL
CHAPTER 6: ACCESSORIES
Contact your home care provider for additional information on the accessories available for your
REMstar Auto M Series system. When using optional accessories, always follow the instructions
enclosed with the accessories.
6.1
ADDING A HUMIDIFIER
You can use the M Series Heated humidifier or the M Series Pass-over humidifier with your
device. They are available from your home care provider. A humidifier may reduce nasal dryness
and irritation by adding moisture (and heat, if applicable) to the airflow. Figure 6–1 shows the
humidifier by itself and attached to the REMstar Auto M Series device.
Caution: For safe operation, the humidifier must always be positioned below the
breathing circuit connection at the mask and the air outlet on the device.
The humidifier must be level for proper operation.
Humidifer without Device
Humidifer Device Attached
FIGURE 6–1 HUMIDIFIER ALONE AND ATTACHED TO THE DEVICE
Refer to the humidifier’s instructions for complete setup information.
REMSTAR AUTO M SERIES USER MANUAL
6-1
6.2
USING THE SMARTCARD
Some REMstar Auto M Series systems come with a SmartCard accessory module installed in the
accessory slot on the back of the device to record information for the home care provider. Your
home care provider may ask you to periodically remove the SmartCard and send it to him/her for
evaluation.
Note:
6.3
The SmartCard does not need to be installed for the device to work properly.
The SmartCard records device usage information for use by your home care
provider. Contact your provider if you have any questions about the SmartCard.
ADDING SUPPLEMENTAL OXYGEN
Oxygen may be added at the mask connection. Please note the warnings listed below when using
oxygen with the device.
WARNINGS
6-2
•
When using oxygen with this system, the oxygen supply must comply with local regulations
for medical oxygen.
•
When using oxygen with this system, a Respironics Pressure Valve (Part number 302418)
must be placed in-line with the patient circuit. Failure to use the pressure valve could result
in a fire hazard.
•
Oxygen accelerates fires. Keep the device and the oxygen container away from heat, open
flames, any oily substance, or other sources of ignition. Do not smoke in the area near the
device or the oxygen.
•
When using oxygen with this system, turn the device on before turning on the oxygen. Turn
the oxygen off before turning the device off. This will prevent oxygen accumulation in the
device.
•
If administering fixed-flow supplemental oxygen, the oxygen concentration may not be constant. The inspired oxygen concentration will vary, depending on the CPAP setting, patient
breathing pattern, and leak rate. Substantial leaks around the mask may reduce the inspired
oxygen concentration to less than the expected concentrations. Appropriate patient monitoring should be implemented.
REMSTAR AUTO M SERIES USER MANUAL
CHAPTER 7: CLEANING AND MAINTENANCE
This chapter describes how to clean the device and its filters and provides tips on traveling with
your REMstar Auto M Series system.
7.1
CLEANING THE DEVICE
Warning:
To avoid electrical shock, always unplug the power cord from the wall
outlet or DC power source before cleaning the device.
Caution:
Do not immerse the device in liquid or allow any liquid to enter the
enclosure, inlet filter, or any opening.
1.
Unplug the device, and wipe the outside of the device with a cloth slightly dampened with
water and a mild detergent. Let the device dry completely before plugging in the power cord.
2.
Inspect the device and all circuit parts for damage after cleaning. Replace any damaged parts.
7.2
CLEANING OR REPLACING THE FILTERS
Caution: Operating the device with a dirty filter may keep the system from working
properly and may damage the device.
Under normal usage, you should clean the gray foam filter at least once every two weeks and
replace it with a new one every six months. The white ultra-fine filter is disposable and should be
replaced after 30 nights of use or sooner if it appears dirty. DO NOT clean the ultra-fine filter.
Caution: Dirty inlet filters may cause high operating temperatures that may affect
device performance. Regularly examine the inlet filters as needed for integrity and cleanliness.
1.
If the device is operating, stop the airflow by pressing the
from the power source.
2.
Remove the filter(s) from the enclosure by gently squeezing the filter in the center and pulling it away from the device, as shown in Figure 7–1.
REMSTAR AUTO M SERIES USER MANUAL
button. Disconnect the device
7-1
FIGURE 7–1 REMOVING THE FILTERS
3.
Examine the filter(s) for cleanliness and integrity.
4.
Wash the gray foam filter in warm water with a mild detergent. Rinse thoroughly to remove
all detergent residue. Allow the filter to air dry completely before reinstalling it. If the foam
filter is torn, replace it. (Only Respironics-supplied filters should be used as replacement
filters.)
5.
If the white ultra-fine filter is dirty or torn, replace it.
6.
Reinstall the filters, inserting the white ultra-fine filter first if applicable, as shown in Figure
7–2.
Filter Area
Disposable Ultra-Fine
Filter (optional)
Reusable Gray
Foam Filter
(required)
FIGURE 7–2 REINSTALLING THE FILTERS
Caution:
7-2
Never install a wet filter into the device. It is recommended that you
clean the filter in the morning and alternate using the two foam
filters provided with the system to ensure sufficient drying time for the
cleaned filter.
REMSTAR AUTO M SERIES USER MANUAL
7.3
CLEANING THE TUBING
Clean the tubing daily. Disconnect the flexible tubing from the device. Gently wash the tubing in
a solution of warm water and a mild detergent. Rinse thoroughly. Air dry.
7.4
SERVICE
The REMstar Auto M Series device does not require routine servicing.
Warning:
If you notice unexplained changes in the performance of this device,
if it is making unusual or harsh sounds, if the device or power supply
have been dropped or mishandled, if the enclosure is broken, or if
water has entered the device, discontinue use, and contact your home
care provider.
REMSTAR AUTO M SERIES USER MANUAL
7-3
7.5
TRAVELING WITH THE SYSTEM
When traveling, the carrying case is for carry-on luggage only. The carrying case will not protect
the system if it is put through checked baggage.
For your convenience at security stations, there is a note on the bottom of the device stating that
it is medical equipment. It may be helpful to bring this manual along with you to help security
personnel understand the REMstar Auto M Series device.
If you typically use a humidifier with your device, but leave the humidifier home when traveling,
make sure you attach the air outlet port to your M Series device when you remove the humidifier from the device. You need the port to connect the tubing directly to your device. Figure 7–3
illustrates how to remove the humidifier from the device and attach the air outlet port.
Remove the Device
From the Humidifier
Attach Air Outlet Port
to the Device
FIGURE 7–3 ATTACHING THE AIR OUTLET PORT TO THE DEVICE
7.5.1 INTERNATIONAL TRAVEL
If you are traveling to a country with a line voltage different than the one you are currently using,
a different power cord or an international plug adaptor may be required to make your power cord
compatible with the power outlets of the country to which you are traveling. Contact your home
care provider for additional information.
7-4
REMSTAR AUTO M SERIES USER MANUAL
CHAPTER 8: SPECIFICATIONS
ENVIRONMENTAL
OPERATING
STORAGE
TEMPERATURE
41° F (5° C) to 95° F (35° C)
-4° F (-20° C) to 140° F (60° C)
RELATIVE HUMIDITY
15 to 95% (non-condensing)
15 to 95% (non-condensing)
ATMOSPHERIC PRESSURE
77 to 101kPa (0 - 7500 ft)
N/A
PHYSICAL
Dimensions:
7.5” L x 5.0” W x 3.125” H (19 x 12.7 x 7.9 cm)
Weight:
Approximately 2.2 lbs. (without a humidifier)
STANDARDS COMPLIANCE
This device is designed to conform to the following standards:
–
IEC 60601-1 General Requirements for Safety of Medical Electrical Equipment
–
EN ISO 17510-1 Sleep Apnea Breathing Therapy Devices
ELECTRICAL
AC Power Consumption:
100 – 240 VAC, 50/60 Hz, 1.0 A max.
DC Power Consumption:
12 VDC, 3.0 A max.
Type of Protection Against Electric Shock:
Class II Equipment
Degree of Protection Against Electric Shock: Type BF Applied Part
Degree of Protection against Ingress of Water: Device: Drip Proof, IPX1
AC Power Supply: (Reorder number 1015642):
Drip Proof, IPX1
Mode of Operation:
Continuous
Electromagnetic Compatibility:
The device meets the requirements of EN 606011-2, 2nd edition.
Fuses:
There are no user-replaceable fuses.
REMSTAR AUTO M SERIES USER MANUAL
8-1
PRESSURE
Pressure Increments:
4.0 to 20.0 cm H2O (in 0.5 cm H2O increments)
Pressure Stability:
<10.0 cm H2O (±0.5 cm H2O)
≥10.0 to 20.0 cm H2O (±1.0 cm H2O)
Measured in accordance with EN ISO 17510-1 @ 1/3, 2/3, and Pmax with BPM set to 10, 15,
and 20 BPM @ 20° C (±5° C), 50% RH (±5%), and an atmospheric pressure of 101.54 kPascals.
Maximum Flow: 35 LPM
Measured in accordance with EN ISO 17510-1 @ 1/3, 2/3, and Pmax with BPM set to 10, 15,
and 20 BPM @ 23° C (±2° C), 50% RH (±5%), and an atmospheric pressure of 101.54 kPascals.
DISPOSAL
Dispose of the device in accordance with local regulations.
8-2
REMSTAR AUTO M SERIES USER MANUAL
APPENDIX A: EMC INFORMATION
GUIDANCE AND MANUFACTURER’S DECLARATION - ELECTROMAGNETIC EMISSIONS
This device is intended for use in the electromagnetic environment specified below. The user of
this device should make sure it is used in such an environment.
EMISSIONS TEST
COMPLIANCE
ELECTROMAGNETIC ENVIRONMENT - GUIDANCE
RF emissions
CISPR 11
Group 1
The device uses RF energy only for
its internal function. Therefore, its RF
emissions are very low and are not
likely to cause any interference in
nearby electronic equipment.
RF emissions
CISPR 11
Class B
Harmonic emissions
IEC 61000-3-2
Class A
Voltage fluctuations/Flicker
emissions
IEC 61000-3-3
Complies
The device is suitable for use in all
establishments, including domestic
establishments and those directly
connected to the public low-voltage
power supply network.
REMSTAR AUTO M SERIES USER MANUAL
A-1
GUIDANCE AND MANUFACTURER’S DECLARATION - ELECTROMAGNETIC IMMUNITY
This device is intended for use in the electromagnetic environment specified below. The user of
this device should make sure it is used in such an environment.
IMMUNITY TEST
IEC 60601 TEST
LEVEL
COMPLIANCE LEVEL
±6 kV contact
±6 kV contact
±8 kV air
±8 kV air
Electrical fast
Transient/burst
±2 kV for power supply lines
±2 kV for supply
mains
IEC 61000-4-4
±1 kV for input-output lines
±1 kV for input/output lines
Surge
IEC 61000-4-5
±1 kV differential
mode
±1 kV differential
mode
Electrostatic
Discharge (ESD)
IEC 61000-4-2
±2 kV common mode ±2 kV for common
mode
Voltage dips, short
interruptions and
voltage variations on
power supply input
lines
IEC 61000-4-11
<5% UT
(>95% dip in UT) for
0.5 cycle
40% UT
(60% dip in UT) for
5 cycles
70% UT (30% dip in
UT) for 25 cycles
<5% UT (>95% dip in
UT) for 5 sec
<5% UT
(>95% dip in UT) for
0.5 cycle
40% UT
(60% dip in UT) for 5
cycles
70% UT (30% dip in
UT) for 25 cycles
<5% UT (>95% dip in
UT) for 5 sec
ELECTROMAGNETIC
ENVIRONMENT GUIDANCE
Floors should be
wood, concrete or
ceramic tile. If floors
are covered with
synthetic material,
the relative humidity should be at least
30%.
Mains power quality
should be that of a
typical home or hospital environment.
Mains power quality
should be that of a
typical home or hospital environment.
Mains power quality should be that
of a typical home
or hospital environment. If the user of
the device requires
continued operation
during power mains
interruptions, it is recommended that the
device be powered
from an uninterruptible power supply or
a battery.
NOTE: UT is the a.c. mains voltage prior to application of the test level.
A-2
REMSTAR AUTO M SERIES USER MANUAL
GUIDANCE AND MANUFACTURER’S DECLARATION - ELECTROMAGNETIC IMMUNITY
This device is intended for use in the electromagnetic environment specified below. The user of
this device should make sure it is used in such an environment.
IMMUNITY TEST
Power frequency (50/60
Hz) magnetic field
IEC 60601
TEST LEVEL
3 A/m
COMPLIANCE
LEVEL
3 A/m
ELECTROMAGNETIC ENVIRONMENT GUIDANCE
Power frequency magnetic fields should be
at levels characteristic of a typical location in a
typical hospital or home environment.
IEC 61000-4-8
Portable and mobile RF communications
equipment should be used no closer to any
part of the device, including cables, than the
recommended separation distance calculated
from the equation applicable to the frequency
of the transmitter.
Conducted RF
IEC 61000-4-6
3 Vrms
150 kHz to 80
MHz
3 Vrms
Radiated RF
IEC 61000-4-3
3 V/m
80 MHz to 2.5 GHz
3 V/m
Recommended separation distance
d = 1.2 P
d = 1.2 P
d = 2.3 P
80 MHz to 800 MHz
800 MHz to 2.5 GHz
where P is the maximum output power rating
of the transmitter in watts (W) according to the
transmitter manufacturer and d is the recommended separation distance in meters (m).
Field strengths from fixed RF transmitters, as
determined by an electromagnetic site surveya,
should be less than the compliance level in
each frequency range.b
Interference may occur in the vicinity of equipment marked with the following
symbol:
NOTE 1 At 80 MHz and 800 MHz, the higher frequency range applies.
NOTE 2 These guidelines may not apply in all situations. Electromagnetic propagation is affected by absorption and
reflection from structures, objects, and people.
a
Field strengths from fixed transmitters, such as base stations for radio (cellular/cordless) telephones and land
mobile radios, amateur radio, AM and FM radio broadcast and TV broadcast cannot be predicted theoretically
with accuracy. To assess the electromagnetic environment due to fixed RF transmitters, an electromagnetic site
survey should be considered. If the measured field strength in the location in which the device is used exceeds
the applicable RF compliance level above, the device should be observed to verify normal operation. If abnormal
performance is observed, additional measures may be necessary, such as re-orienting or relocating the device.
b Over the frequency range 150 kHz to 80 MHz, the field strengths should be less than 3 V/m.
REMSTAR AUTO M SERIES USER MANUAL
A-3
RECOMMENDED SEPARATION DISTANCES BETWEEN PORTABLE AND MOBILE RF
COMMUNICATIONS EQUIPMENT AND THIS DEVICE
The device is intended for use in an electromagnetic environment in which radiated RF disturbances are controlled. The customer or the user of this device can help prevent electromagnetic
interference by maintaining a minimum distance between portable and mobile RF communications equipment (transmitters) and this device as recommended below, according to the maximum output power of the communications equipment.
SEPARATION DISTANCE ACCORDING TO FREQUENCY OF TRANSMITTER
RATED MAXIMUM
POWER OUTPUT OF
TRANSMITTER
W
150 KHZ TO 80 MHZ
d = 1.2 P
80 MHZ TO 800 MHZ
d = 1.2 P
800 MHZ TO 2.5 GHZ
d = 2.3 P
0.01
0.12
0.12
0.23
0.1
0.38
0.38
0.73
1
1.2
1.2
2.3
10
3.8
3.8
7.3
100
12
12
23
M
For transmitters rated at a maximum output power not listed above, the recommended
separation distance d in meters (m) can be estimated using the equation applicable to the
frequency of the transmitter, where P is the maximum output power rating of the transmitter
in watts (W) according to the transmitter manufacturer.
Note 1: At 80 MHz and 800 MHz, the separation distance for the higher frequency range applies.
Note 2: These guidelines may not apply in all situations. Electromagnetic propagation is affected by absorption and reflection from structures, objects, and people.
A-4
REMSTAR AUTO M SERIES USER MANUAL
LIMITED WARRANTY
Respironics, Inc. warrants that the system shall be free from defects of workmanship and materials
and will perform in accordance with the product specifications for a period of two (2) years from
the date of sale by Respironics, Inc. to the dealer. If the product fails to perform in accordance
with the product specifications, Respironics, Inc. will repair or replace – at its option – the defective material or part. Respironics, Inc. will pay customary freight charges from Respironics, Inc. to
the dealer location only. This warranty does not cover damage caused by accident, misuse, abuse,
alteration, and other defects not related to material or workmanship.
Respironics, Inc. disclaims all liability for economic loss, loss of profits, overhead, or consequential damages which may be claimed to arise from any sale or use of this product. Some states do
not allow the exclusion or limitation of incidental or consequential damages, so the above limitation or exclusion may not apply to you.
This warranty is given in lieu of all other express warranties. In addition, any implied warranties
– including any warranty of merchantability or fitness for the particular purpose – are limited
to two years. Some states do not allow limitations on how long an implied warranty lasts, so the
above limitation may not apply to you. This warranty gives you specific legal rights, and you may
also have other rights which vary from state to state.
To exercise your rights under this warranty, contact your local authorized Respironics, Inc. dealer
or contact Respironics, Inc. at:
1001 Murry Ridge Lane
Murrysville, Pennsylvania 15668-8550
1-724-387-4000