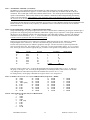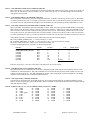
1
Lattis Matrix Switchers
LE-400, LE-800, and LE-1600 Series Owner’s Manual
and Programming Reference
Publication: M-LE-01
January 2006
Firmware Version 7.3.0.0
Protocol Level 7.3
For more information, visit us at: www.vauxelectronics.com
or email us: [email protected]
Vaux Electronics, Inc.
Mesa, Arizona, USA
PHONE: (480) 354-5556
FAX: (480) 354-5558
©1998-2006 Vaux Electronics, Inc.
Portions ©1994-1998 Vaux Electronics, Inc.
Printed in the U.S.A.
All rights reserved.
Aris, Lattis, MediaMation, Vaux, and VauxProtocol are trademarks of Vaux Electronics, Inc.
Other trademarks and registered trademarks are owned by their respective companies.
Model Number: ___________________
Serial Number: ___________________
Date Purchased: ___________________
Place of Purchase: ___________________
Lattis Matrix Switcher
2
Software Version 7.3.0.0
Table of Contents
Introduction..............................................................................................................................................................4
Version 7.3.0.0 Changes.....................................................................................................................................5
Version 7.2.0.0 Changes.....................................................................................................................................5
Version 7.1.0.0 Changes.....................................................................................................................................5
Version 7.0 Changes...........................................................................................................................................7
Matrix Switching and Zone Expansion...............................................................................................................8
IR Remote Control and Keypad Operation.........................................................................................................8
Computer Control Systems.................................................................................................................................8
Installation................................................................................................................................................................9
Lattis Matrix Switcher Front Panel...................................................................................................................10
Lattis Matrix Switcher Rear Panel....................................................................................................................10
Parts Checklist...................................................................................................................................................11
Infrared Control......................................................................................................................................................12
The RC-16 Remote Control..............................................................................................................................12
Setting up the System with the RC-16..............................................................................................................13
Audio/Video Operation with the RC-16...........................................................................................................15
Programming IR-Learning Devices with Vaux IR Commands.........................................................................16
RS-232 Control......................................................................................................................................................17
Zones, Groups, and Clusters.............................................................................................................................17
Send Commands and Receive Messages..........................................................................................................17
An Application Overview.................................................................................................................................19
Command Flexibility.........................................................................................................................................24
Optional Command Checksums........................................................................................................................24
Routing Commands & Messages:.....................................................................................................................25
Volume/Bass/Treble/Mute Commands & Messages:.......................................................................................31
Configuration Programming Commands & Messages:.....................................................................................34
Polling Commands & Messages:......................................................................................................................40
Miscellaneous Status Messages:.......................................................................................................................42
Remote-Control Equivalent Commands & Messages:......................................................................................43
Connectors for System Control..............................................................................................................................44
Control Port (RS-232) Connector (DB-9F).......................................................................................................44
I/O Port Connector (8P8C modular).................................................................................................................45
Ctrl-In/Ctrl-Out Port Connectors (6P6C modular)............................................................................................45
Ribbon-Expansion Connectors (34-cond).........................................................................................................45
Maintenance and Service.......................................................................................................................................46
Limited Warranty...................................................................................................................................................47
Safety Information.................................................................................................................................................48
Lattis Matrix Switcher
3
Software Version 7.3.0.0
Introduction
Thank you for selecting a Vaux Lattis Matrix Switcher. These systems have been designed for the utmost in performance
and reliability. There are currently 21 models in the Lattis Matrix Switcher family. Depending on model, these systems
may be controlled over an ethernet network (IP models), via an RS-232 Serial-Port, and/or infrared remote
controls/keypads.
Stereo-Audio Switchers:
High-fidelity stereo line-level switching, zoned volume/bass/treble/muting, paging and preset-states, programmable
min/max/mute/initial-volumes, and other customizable features. The source inputs are driven from any line-level source,
while the volume-controlled zone outputs connect to power amplifiers for each stereo zone.
LE-400A
LE-800A
LE-800A-RE
LE-800A-IP
LE-800A-RE-IP
LE-1600A
LE-1600A-RE
LE-1600A-IP
LE-1600A-RE-IP
4-source by 4-zone – Serial-Port and IR (infrared) control
8-source by 8-zone – Serial-Port and IR (infrared) control
8-source by 8-zone – Serial-Port and IR (infrared) control (ribbon-expansion)
8-source by 8-zone – IP (ethernet), Serial-Port, and IR control
8-source by 8-zone – IP (ethernet), Serial-Port, and IR control (ribbon-expansion)
16-source by 16-zone – Serial-Port and IR (infrared) control
16-source by 16-zone – Serial-Port and IR (infrared) control (ribbon-expansion)
16-source by 16-zone – IP (ethernet), Serial-Port, and IR control
16-source by 16-zone – IP (ethernet), Serial-Port, and IR control (ribbon-expansion)
Composite-Video/Digital-Audio Switchers:
Video switching is line-level composite-video, for NTSC or PAL systems – these units may also be used to switch
digital-audio. In sets of three, the switchers may also be used to switch high-definition component-video. Each source
input has a buffered output above it, and each video zone has two ports for driving one or two monitors.
LE-800V
LE-800V-IP
LE-1600V
LE-1600V-IP
8-source by 8-zone – Serial-Port and IR (infrared) control
8-source by 8-zone – IP (ethernet), Serial-Port, and IR control
16-source by 16-zone – Serial-Port and IR (infrared) control
16-source by 16-zone – IP (ethernet), Serial-Port, and IR control
Stereo-Audio/Composite-Video Switchers:
These switchers have both stereo-audio and composite-video switching in one chassis.
LE-800AV
LE-800AV-RE
LE-800AV-IP
LE-800AV-RE-IP
8-source by 8-zone – Serial-Port and IR (infrared) control
8-source by 8-zone – Serial-Port and IR (infrared) control (ribbon-expansion)
8-source by 8-zone – IP (ethernet), Serial-Port, and IR control
8-source by 8-zone – IP (ethernet), Serial-Port, and IR control (ribbon-expansion)
Stereo-Audio/Composite-Video Switchers:
These systems switch high-definition component-video as well as digital-audio
LE-400HD
LE-400HD-IP
LE-408HD
LE-408HD-IP
4-source by 4-zone – Serial-Port and IR (infrared) control
4-source by 4-zone – IP (ethernet), Serial-Port, and IR control
4-source by 8-zone – Serial-Port and IR (infrared) control
4-source by 8-zone – IP (ethernet), Serial-Port, and IR control
Lattis Matrix Switcher
4
Software Version 7.3.0.0
Version 7.3.0.0 Changes
Version 7.3.0.0 was released in January 2006. New features:
* Preset and Paging Improvements:
- Added new Preset-State-Recall command (*CW,92,bzn,0,0,pst,msg,tpr)
which returns new message (!S,92,bzn,swt,0,pst).
- Activate-Paging command (*CW,91,bzn,0,0,pst) now returns new message (!S,91,bzn,swt,0,pst).
- Removed Write-State command (*PW,90,1,1,pst,scf) and message (!C,90,...).
(now using Change-State cmd for programming)
- Added new error message (!S,189,bzn,swt,0,4) indicating invalid cmds when paging (routes, volumes...).
Version 7.2.0.0 Changes
Version 7.2.0.0 was released in December 2005. New features:
* Paging Improvements:
- Paging command (*CW,91,bzn,0,0,mst) now allows any state (mst) 1 to 7 to be used for paging.
This allows different page states (eg: state-1 is downstairs, state-2 is upstairs...)
(previously, only allowed state-1 for paging)
- Current-Preset-State message (!S,90,bzn,swt,pag,mst) now has page-status parameter (pag).
When pag=1, we are paging, when pag=0, we are not (was !S,90,bzn,swt,0,mst).
- Added new error messages:
!S,189,bzn,swt,0,2 (Invalid machine/preset-state mst)
!S,189,bzn,swt,0,3 (Can't page -- already paging)
* Improved support for AMX-Serial-Port-Auto-Discovery:
- A Vaux Serial switcher may be quickly set up to use AMX-Serial-Auto-Discovery, by pressing-and-holding
the rear-panel Memory-Erase pushbutton during power-up. This will do three things:
1) sets the Base-Zone to 1
2) sets the baud-rate to 9600
3) enables AMX-Serial-Auto-Discovery (accepts poll cmd and returns beacon mssg)
- If additional switchers are daisy-chained from this first switcher, the additional switchers must NOT be set to
enable AMX-Serial-Auto-Discovery (only one switcher can respond). The additional switchers must,
however, be manually configured to:
1) set the Base-Zone to bzn (*PW,100,0,0,0,bzn command)
2) set the baud-rate to 9600 (*PW,250,0,1,96 command)
* Source-trim modifications:
- Zone volumes were updated to reflect changed source-trim levels, but sometimes incorrectly
(eg: successive calls with same trim level would cause zone vol to change, when is should have not)
- When trimming source levels, for all active zones that are routed with trimmed source, we now send
current-volume (!S,20) message(s), in addition to source-trim message.
Version 7.1.0.0 Changes
Version 7.1.0.0 was released in October 2005. New features:
* Added support for AMX-IP-Auto-Discovery:
- Vaux IP (ethernet) switchers use AMX-IP-Auto-Discovery by default, and the system will be automatically
recognized and configured by the AMX Duet system, by simply connecting the network cable.
- Additional Vaux Serial switchers may be daisy-chained to the Vaux IP switcher, at the standard 38400-baud
setting.
* Added support for AMX-Serial-Port-Auto-Discovery:
- By enabling ONLY ONE of the Vaux Serial switchers on a daisy-chain to use AMX-Serial-Auto-Discovery
(*PW,230,1,4,1 cmd), the system will be automatically recognized and configured by the AMX Duet
system, by simply connecting the serial cable to an unused AMX serial port.
- The current AMX driver requires that all switchers are set to 9600-baud (standard is 38400). This can be done
by issuing the *PW,250,0,1,96 command to the whole switcher chain.
Lattis Matrix Switcher
5
Software Version 7.3.0.0
* Added System-Detail Command and Message:
- System-Detail message, !S,102... provides base-zone, number of zones, number of sources, type of switcher
(audio, composite-video, audio/video, or HD-component-video), and full firmware version.
- Read-System-Detail command *CR,102,rbz may be directed to a single switcher, by setting rbz to a switcher's
base-zone, or by setting rbz to zero to get messages from all switchers on the daisy-chain. The messages f
from daisy-chained switchers are delayed in time so as to not collide. A single *CR,102,0 command will
get information from chained switcher systems up to 255 zones of audio and/or video, at any baudrate from
1200 to 115K – this makes it easy for the host control system to query the entire switcher system at startup,
and configure itself as needed.
* Now sending two messages at system boot (previously, was only System-Info mssg):
!S,100 System-Info message
!S,102 System-Detail message
* Firmware Version is now 4 digits (was 2):
- The first three digits represent protocol level. The third digit will be zero for production releases, so we will
still generally refer to the protocol level by the first two digits, as is displayed in the !S,100 boot message.
- The fourth digit is for non-protocol changes.
- The full four-digit version is displayed in the new !S,102 boot message.
* Permitting Base-Zone of zero in several commands:
- Base-Zone of 0 may now be used to request information from all daisy-chained switchers for Preset-State
(*CR,90,rbz), System-Info (*CR,100,rbz), and Acknowledge (*CR,101,rbz) commands.
* Paging or changing Preset-States on all switchers now returns messages:
- Base-Zone of 0 was previously allowed for Paging (*CW,91) and Preset-State (*CW,90) commands, to act on
all daisy-chained switchers, however, no messages were returned for the base-zone-0 case – Current-PresetState messages are now returned from all switchers in the chain.
- Also added Switcher-Type to the Current-Preset-State message, to distinguish between audio and video
switchers on the same base-zone (both of which will return a message). Number of params did not change.
* Replaced Watchdog-Reset message:
- Added new Watchdog-Reset message (!S,187,bzn,swt,wdt,tb0,tb1,tb2,tb3,tb4,tb5,tb6), which includes BaseZone and Switcher-Type parameters to uniquely identify switcher on the chain. This message is also used
to identify both master (MX) and slave (SX) watchdog resets within the switcher, and provides program
trace information.
- The former (!S,186...) Watchdog-Reset message was removed.
- This message should be logged, and, if it occurs buring operation, should be reported to the factory.
- Note that the only time you should ever see this message is if you use the Force-System-Reset (*PW,255)
command. This command is (almost) equivalent to power-cycling the switcher, and is useful for remote
testing. If the Watchdog-Reset message occurs during normal operation (and note that it has never been
reported to have happened), something hosed-up the system's operation, and the watchdog forced a restart.
This could possibly occur with a lightning-induced transient, large static discharge, or other insideous
electrical event.
* Added new Error message (!S,189...):
- This message is always enabled.
- Now reporting serial-input-buffer-overflows with !S,189,bzn,0,0,1 mssg (formerly done with the normallydisabled !S,199 message)
* Fixed very-rarely-seen bug in 232 serial input buffering:
- This bug only showed up with audio switchers, when a large number of route commands were sent to the unit
at once. Can be corrected by loading new firmware into switcher, or can be avoided in control system
programming by inserting delays (approx 200-ms) between route commands.
- The serial input buffer fills as commands are sent to the unit, and is emptied as commands are processed.
Most commands process quickly, with the notable exception of standard audio route commands (which can
take 200-ms or so for volume tapering).
- Normally, xon/xoff flow control will throttle commands from the control system, should the buffer near its
800-character capacity. Bug occurred when buffer reached 255-characters, well below the xoff threshold.
Lattis Matrix Switcher
6
Software Version 7.3.0.0
- Bug resulted in command execution delays until new commands arrived, and loss of at least one command.
Version 7.0 Changes
Version 7.0 was released in March 2005. Earlier Lattis Matrix Switchers used software version 6.0 to 6.8 (and even earlier units used
versions 4.0 to 5.22); version 7.0 added additional dealer-requested features to the system. Note that, any control system drivers
developed for version 6.0 through 6.8 systems (circa Aug 2002 through April 2005) will function exactly the same with version 7.0
systems. You may easily add support for the following new features:
* Percent-Volume commands:
- Instead of using absolute volume levels (0 to 35), you may now use percent (0 to 100)
- Easier coding and parsing; no additional calculations for updating bargraphs or other volume displays
- Adjustable range for percent commands (you define where the 0% to 100% range spans)
- Volume tapering may be enabled or not
* Fast-Route commands:
- Bypass volume tapering during switching, when you need to quickly route a zone or group of zones
* Preset-State and Paging/Doorchime commands:
- Six general Preset-States, and a Paging/Doorchime state, are programmable for any machine configuration
- Change state with a single command
- Use general presets for applications such as party-mode, boardrooms, courtrooms, etc.
- Paging/Doorchime mode can be activated/deactivated from commands, or external contact-closure input
- You provide the page/chime audio from a telephone system, wav file...
* Adjustable Baud-Rate:
- Our standard is still 38400-baud, but you may select from 1200-baud to 115200-baud, as needed.
Lattis Matrix Switcher
7
Software Version 7.3.0.0
Matrix Switching and Zone Expansion
The Lattis Matrix Switcher is a multi-source/multi-zone audio (or audio/video) distribution and control system. A Lattis system allows
multiple audio (or audio/video) sources to be routed to multiple zones (one or more rooms). Each zone of the system has independent
control over source-selection, volume/bass/treble levels, muting, etc.
Multiple Lattis Matrix Switchers may be combined to expand the number of zones. For example, three 16x16 Lattis LE-1600A
switchers may be use to provide a 16-source by 48-zone system. The units are simply programmed to respond to different “BaseZones,” (1, 17, and 33) allowing contiguous zone numbers from 1 to 48. A Vaux system may expand this way to a total of 255 zones.
The audio sources may be daisy-chained between multiple Lattis Matrix Switchers by ordering the optional ribbon-cable expansion kit.
If your switcher does not have the ribbon-cable option, you may use “Y-cables” to split each channel to multiple Lattis inputs, or a
“Distribution-Amp” (DA) may be used to buffer each source for driving multiple switchers. For video sources (when using a Lattis
LE-800V, LE-1600V, or LE-800AV), a DA is not needed since each source has a buffered output which is used to connect to the
video input of the next switcher. With video signals, a Y-cable cannot be used since it is mandatory to maintain proper 75-ohm video
line impedance. You may also mix and match Lattis switchers to provide different features. For example, an 8x8 audio-only LE-800A
may be combined with an 8x8 audio/video LE-800AV, providing eight sources by sixteen zones (eight of these zones have video).
IR Remote Control and Keypad Operation
Lattis Matrix Switchers may be operated by hand-held Vaux RC-16-IR infrared (IR) remote controls. The remote controls allow
selection of A/V source, adjustment of each zone’s Volume/Bass/Treble levels, as well as system setup and programming functions.
The Vaux RC-16 remote control is easily programmed to control one specific numbered zone – the remote’s zone number may easily
be changed to move the remote to a different room. IR control from multiple rooms will require a wired or wireless IR-Repeater
system, which uses IR sensors in each room. The Vaux RC-16-IR remote may also be used to teach the Vaux control codes to a thirdparty hand-held “learning” remote. Additionally, third-party IR-learning keypads may also be employed, using a Vaux RC-16-IR
remote to teach the Lattis commands to the keypad.
Computer Control Systems
The Lattis Matrix Switcher may be completely controlled by an attached computer, or other control system (such as AMX or Crestron)
which communicates over a serial RS-232 connection. The host computer has complete control over A/V zone switching,
volume/bass/treble levels for each zone, etc. The Lattis system sends messages to the control system confirming actions for not only
RS-232 commands, but also for IR-generated commands, closing the loop on the whole system. The control system may optionally
poll periodically for system status, or may simply ignore messages for a basic command-only interface. Serial communication uses
the VauxProtocol language, presented later in this manual.
Lattis Matrix Switcher
8
Software Version 7.3.0.0
Installation
The Lattis Matrix Switcher is quite flexible, in that it can integrate with a variety of A/V devices and control systems, and may be
configured a variety of ways. Installation of the Lattis System is described below:
1. System Power: Place the Lattis Matrix Switcher near your audio/video components. Turn off the Lattis front panel switch
and plug the AC power adapter’s cable into the rear panel Power connector on the Lattis Matrix Switcher. Plug the
adapter into a standard electrical outlet — select an outlet which is not controlled by a wall switch.
2. Optional IR Input from IR Repeater Systems (modulated IR input source): Connect to the rear-panelIR-In jack, or affix
an IR emitter over the front-panel sensor.
3. Optional IR Input from IR-learning Keypads (modulated IR input source): Connect to the rear-panel IR-In jack, or affix
an IR emitter over the front-panel sensor.
4. Optional RS-232 Computer or Control System Connection: Connect your computer or control system, using a properly
wired RS-232 cable, to the 9-pin Control connector on the rear panel of Lattis Matrix Switcher System. For more
information on the VC-232 interface, refer to a later manual section.
5. Connection of A/V Source components: Plug your Audio/Video source components into the Lattis Source inputs using
appropriate cabling.
Note: Lattis Video Switchers (LE-800V, LE-1600V, and LE-800AV) use a dual-port connector for source inputs. The
video input signal connects to the black phono jack on the Source side – the yellow phono jack above this connector
provides a 75-ohm buffered output for looping the source to other destinations (such as a second switcher).
6. Connection of A/V Zone amplifiers: Connect the Lattis Zone audio outputs to power amplifiers appropriate for each zone.
For video-capable switchers, connect the video outputs to video monitors, or, for longer runs, to composite buffer
amplifiers or video modulators. Run the speaker wiring and video cables to each zone. NOTE: Do not use level-sensing
audio amp powering options — low volumes may turn the amp off.
Note: Lattis Video Switchers (LE-800V, LE-1600V, and LE-800AV) use a dual-port connector zone outputs. Each Zone
output has two independent 75-ohm buffered output ports, allowing connection of two video cables to different
destinations.
7. Power-up the system: Turn on the Lattis Matrix Switcher using the front-panel switch — a string of front-panel lights
indicates that the Switcher is running.
8. Install Two (2) “AA” batteries in the RC-16 remote control(s) (alkaline preferred).
Lattis Matrix Switcher
9
Software Version 7.3.0.0
Lattis Matrix Switcher Front Panel
Power Switch
Infrared Contol Sensor (below switch, left of logo)
Power light
Active light (one or more zones on)
Ack light (acknowledge – command accepted)
Nak light (negative acknowledge – command ignored)
Prog light (power-up testing and program-mode)
Lattis Matrix Switcher Rear Panel
A/V Source Inputs (phono jacks) — 4/8/16 inputs for line-level stereo audio (& composite video on 800AV/1600V).
A/V Zone Outputs (phono jacks) — 4/8/16 outputs for line-level stereo audio (& composite video on 800AV/1600V).
The audio outputs are volume/bass/treble/mute controlled within the Lattis Matrix Switcher and connect to
zone power amplifiers (sized appropriately for each zone).
Optional, one or two 40-conductor ribbon cables for daisy-chaining audio sources.
IR-In jack (3.5mm phone) for connection of IR-Repeater system, or other modulated IR input.
Memory-Erase button. Careful — will restore all programmable parameters to factory settings.
I/O connector (8P8C): System-Active (5V) output. Paging contact-closure input. Other connections for future use.
Ctrl-Out connector (6P6C) Expansion port for RS-232/IR daisy-chaining to Ctrl-In connector on next switcher.
Ctrl-In connector (6P6C) (see Ctrl-Out).
Control connector (9-pin DB-9-F) RS-232 serial control port..
Power connector (2.1mm connector, auto-polarity) For 12 VDC, 1 A adapter.
Lattis Matrix Switcher
10
Software Version 7.3.0.0
Parts Checklist
When unpacking your Lattis system, ensure that you have received the following:
· Lattis Matrix Switcher
· AC Adapter – 12 VDC, 1 A
· Quick Setup Guide
Other components you may need:
·
·
·
·
·
·
·
Vaux RC-16-IR infrared remote control(s)
Infrared repeater system
Keypad control system
Source components, zone power amplifiers, speakers
Audio/Video connecting cables
RS-232 connecting cable
Ribbon-cable kit for daisy-chaining audio sources to multiple switchers. The switchers must be ordered with the ribbon
connectors installed, and ordered with ribbon cable(s) for connecting two to ten switchers. An eight-source switcher uses a
single 40-conductor ribbon cable, and a sixteen-source switcher uses two ribbon cables. The audio sources connect to the
lowest switcher in the rack, and the ribbon cable(s) run vertically to provide all switchers with the input sources.
Lattis Matrix Switcher
11
Software Version 7.3.0.0
Infrared Control
The RC-16 Remote Control
· The RC-16 Remote Control has four lighted "Mode" keys, which select one of four operating modes. Pressing a mode button
will flash the light twice and change the "Current-Mode." When non-mode buttons are pressed on the remote, the appropriate
mode light flashes to confirm the button press, as well as the Current-Mode in use. The remote acts as four totally-different
remotes in each of these modes.
· A/V is the normal mode for turning a zone on or off, selecting sources, and adjusting volume in a zone. The remote's "CurrentA/V-Zone" may be changed to correspond to the room in which the remote is located (up to 90 zones and 8 clusters may be
controlled). You may select 8 or 16 sources for the zone, depending on your system.
· Note that some RC-16 buttons are not used with Vaux Lattis switchers (play, pause, channel, digits...).
· Macro mode is not used with Lattis switchers.
· Lights mode is not used with Lattis switchers.
· Aux mode is for future use.
· Some other buttons will always switch the remote to a/v mode (regardless of the mode it was set to previously): zone, on/off,
volume, mute, shift, prog, and source-select (tuner, cd...).
· During operation or programming, pressing an incorrect button will result in an "Error" flash -- this is a flash of all four of the
lighted mode buttons on the remote (a/v, macro, lights, & aux).
· The RC-16 Remote Control uses two "AA" alkaline batteries. Battery life is typically one year, but will depend on how
frequently the remote is used. When the remote's operating range seems shorter, or operation seems intermittent or erratic, the
batteries likely need to be changed. Batteries contain nasty stuff which gets released in landfills -- to keep our groundwater
clean, please dispose of used batteries at a recycling center.
· When inserting batteries, all four mode lights flash, indicating that the stored parameters have been restored to FactorySettings:
Current-A/V-Source
01 (tuner)
Current-A/V-Zone
01
Current-Lighting-Device
11
Current-Aux-Device
01
Lattis Matrix Switcher
12
Software Version 7.3.0.0
Setting up the System with the RC-16
Setting each Zone’s Initial Volume Level (and maximum level)
When you have the system running, you will likely wish to tailor each room’s initial volume level (the level to which it first turns on).
You can also set the maximum volume of the amplifier at this point.
· Set the RC-16 remote control so you are controlling the desired zone (01 to 90).
Press the Zone button, followed by two-digits corresponding to the desired zone.
eg: Zone-0-1 will select zone 01, and Zone-1-2 will select zone 12.
This zone is saved in the remote until you change it again.
· Turn down power amp’s level control for this zone to about 25%
· Select a nominal-level source such as a CD or Tuner.
· Using the RC-16 remote control, turn the zone’s volume up to maximum.
· Adjust the power amp’s level control to the loudest level you wish the zone to reach.
· Using the RC-16 remote, turn the volume down to the desired initial (turn-on) level.
· Press Shift-FFwd on the RC-16 (Shift followed by the FFwd key).
· Repeat for other zones.
Lattis Matrix Switcher
13
Software Version 7.3.0.0
Remote Control Setup Commands (shift-pause-x):
Note: Zone must be on and unmuted to change these (zone 1-90).
shift-pause-1
shift-pause-2
shift-pause-3
shift-pause-4
shift-pause-5
shift-pause-6
shift-pause-7
shift-pause-8
shift-pause-9
Zone-Initial-Volume-To-Current (L/R levels)
Zone-Mute-Volume-To-Current (left level)
Zone-Min-Volume-To-Current (left level)
Zone-Max-Volume-To-Current (left level)
Zone-Previous-Volume-Flag-Off (zone turns on with programmed Initial Volume – normal)
Zone-Previous-Volume-Flag-On (zone turns on at previous level, saved when zone last turned off)
Zone-Audio-Mode to Mono
Zone-Audio-Mode to Stereo (normal)
Zone-Restore-Factory-Settings (Initial-Vol, etc., this zone only)
Examples (first set RC-16 to desired zone, then select a source):
· to configure a zone's maximum volume level (power amp has gain adjust):
- turn power amplifier's gain down (to perhaps 30 %)
- adjust volume, using remote control, to maximum
- adjust power amplifier's gain to loudest acceptable volume level
· to configure a zone's maximum volume level (power amp has NO gain adjust):
- adjust volume, using remote control, to desired level
- press shift-pause-4 to store this volume as the Maximum-Level
· to configure a zone for a fixed initial (turn-on) volume level:
- press shift-pause-5 to turn Previous-Volume-Flag off
- adjust volume to desired level
- press shift-pause-1 to store this volume as the Initial-Level
· to configure a zone for using Previous-Volume as initial level:
- press shift-pause-6 to turn Previous-Volume-Flag on
· to configure a zone for a desired mute level:
- adjust volume to desired level
- press shift-pause-2 to store this volume as the Mute-Level
· to configure a zone for a desired minimum volume level:
- adjust volume to desired level
- press shift-pause-3 to store this volume as the Minimum-Level
· to restore a zone's programmable parameters to factory settings:
- press shift-pause-9, and reset a zone's initial/mute/min/max/tapers...
Lattis Matrix Switcher
14
Software Version 7.3.0.0
Audio/Video Operation with the RC-16
For all operations below, change the RC-16 remote control to the desired zone, if needed. The remote also needs to be in a/v mode for
the following operations: press the RC-16's a/v mode button to change to a/v mode (the button will flash twice). Note: the remote is
automatically placed in a/v mode when you press certain buttons.
Setting the RC-16’s Current-A/V-Zone:
· For all operations below, set the RC-16 remote so you are controlling the desired zone (01 to 90). Press the Zone button,
followed by two-digits corresponding to the desired zone -- eg: Zone-0-1 will select zone 01, and Zone-1-2 will select zone
12. This zone is saved until you change it again.
· You may also control a Cluster (a group of multiple zones that is programmed into the Lattis system), by selecting zones 91 to
98, for Clusters 1 to 8. Only certain functions are available during Cluster operation.
· You may also choose zone 00, which is a special All-Zones code. Only certain functions are available during All-Zones
operation.
· Note: the remote is automatically placed in a/v mode when you press the zone button.
Selecting a Source:
· Press an RC-16 Source button (Tuner, CD...)
Note: This will automatically place the remote in A/V mode.
· The Lattis Ack light will flash. The source is routed to the zone at the programmed Initial-Volume-Level for the zone (or, the
Previous-Volume, if the zone is so configured). If the zone is currently on, the new source will be at the current volume level.
· The Lattis Active light will be on when any zone is in use.
· If the Lattis s Nak light flashes, the requested zone is not valid for this Lattis unit. (eg: selecting zone 09 when only 01 to 08
are valid in an 8x8 switcher).
· If you have a 16-source LE-1600A or LE-1600V, you access the upper sources by pressing theShift button, followed by a
source button:
button
tuner
cd
dss
vcr1
vcr2
dvd
tape
aux
selects
source 1
source 2
source 3
source 4
source 5
source 6
source 7
source 8
button
shift-tuner
shift-cd
shift-dss
shift-vcr1
shift-vcr2
shift-dvd
shift-tape
shift-aux
selects
source 9
source 10
source 11
source 12
source 13
source 14
source 15
source 16
Turning the Zone Off:
· Press the RC-16’s On/Off button -- the Lattis Ack light flashes, and the zone turns off (note: pressing the On/Off button
again turns the zone on with the previous source).
· If the Lattis Nak light flashes, the requested zone is not valid for this Lattis unit.
Lattis Matrix Switcher
15
Software Version 7.3.0.0
Adjusting Zone Volume and Muting:
· Press the RC-16’s Volume-Up/Down buttons, and release at desired volume level.
Note: This will automatically place the remote in A/V mode.
· Press the RC-16’s Mute button -- the zone volume lowers to the programmed Mute-Volume-Level for the zone. Pressing
Mute again will restore original volume.
· The Lattis Ack light flashes during volume adjust or mute. If the Lattis Nak light flashes, the requested zone is not valid for
this Lattis unit, or the zone is not currently on.
Adjusting Zone Bass/Treble:
· Press the RC-16 Shift button, and then press a Channel-Up/Down button to adjust Bass, or a Volume-Up/Down button to
adjust Treble. Each Shift-button-press adjusts up or down one step (can not press-and-hold for Bass/Treble adjustment)
· The Lattis Ack light flashes as the level is adjusted. If the Lattis Nak light flashes, the requested zone is not valid for this
Lattis unit, or the zone is not currently on.
· You may restore Flat Bass/Treble (both to 0-dB) by pressing Shift-Rew on the RC-16.
Programming IR-Learning Devices with Vaux IR Commands
There are a few things to note when teaching codes from a Vaux RC-16-IR remote, into IR-learning remotes or keypads from other
manufacturers. Each Vaux remote button press results in only a single IR command (never macros of multiple commands). We use a
standard 32-bit, 40-KHz modulated IR command, followed by a button-repeat code as long as the key is held down.
To set the RC-16 remote's zone, you press Zone-x-x, which is the Zone button, followed by two digits (eg: Zone-0-1 for zone 1, or
Zone-1-6 for zone 16). You can verify that the remote is set to the correct zone by aiming it at the switcher, selecting a source, and
then verifying that the correct zone is turning on, or by looking at the messages sent back on the 232 port. You need to learn the same
set of commands for each zone, since the zone number is embedded in the command.
For each zone, you need to learn the commands for selecting (routing) each source. If you have a 16-source LE-1600A or LE-1600V,
you access the upper sources by pressing the Shift button, followed by a source button:
button
tuner
cd
dss
vcr1
vcr2
dvd
tape
aux
selects
source 1
source 2
source 3
source 4
source 5
source 6
source 7
source 8
button
shift-tuner
shift-cd
shift-dss
shift-vcr1
shift-vcr2
shift-dvd
shift-tape
shift-aux
selects
source 9
source 10
source 11
source 12
source 13
source 14
source 15
source 16
The "Zone-Off" command is Shift-On/Off. Normal (unshifted) presses of the On/Off button toggle between two codes: Zone-Off, and
Route-Previous-Source -- so you should not try to learn this unshifted button, just Shift-On/Off. You also need to learn the VolumeUp and Volume-Down buttons. Optional buttons to learn are:
function
mute-toggle
flat eq
bass-up
bass-down
button
mute
shift-rew
shift-chan-up
shift-chan-down
function
mute-on
mute-off
treble-up
treble-down
set-initial-volume-to-current
button
shift-mute
shift-a/b
shift-vol-up
shift-vol-down
shift-ffwd
There are also some other IR setup commands, such as Source-Level-Trim and Zone Min/Max level, but they are not typically used
with a learning device. You can also set the remote to Zone-00 for special route commands -- Zone-0 is all zones, so you can route a
source to all zones (eg: party mode), or use Shift-On/Off for "All-Zones-Off" Also, the remote can be set to Zones 91 to 98 to control
clusters 1 to 8 (resp.).
Lattis Matrix Switcher
16
Software Version 7.3.0.0
RS-232 Control
Connection of a control system or computer to the Vaux switcher’s Control (RS-232) serial port allows you to fully control the system
using a selection of “Commands,” and to obtain immediate or polled feedback on system status by listening to “Messages.” This
Command/Message language is called VauxProtocol.
Using VauxProtocol, and/or infrared remote control commands, you may control Vaux systems to distribute audio/video signals
throughout a house or building. Vaux switchers are available in sizes up to 16-by-16, and switchers may be combined, for up to 255
audio and/or video zones, driven by up to 16 a/v sources -- and controlled via a single serial port. Using an RC-16 remote control
gives access to 90 zones and 16 sources.
Zones, Groups, and Clusters.
Each room that needs a/v, will be driven from a Zone on the Vaux switcher. Each zone can independently select from multiple
sources, each zone can have the same, or different, source for audio and video, and each zone has full volume/bass/treble/mute
capability.
Single-command control of multiple zones at a time is provided with zone Groups. The group commands allow selection of up to eight
consecutive zones, starting at any zone. There is no limit to the number of groups, since the definition is embedded in the command.
Groups can be used with adjoining areas that would normally have the same source selection, such as the Master-Bedroom/MasterBath, or Foyer/Great-Room/Dining-Room/Lavatory. Separate zones drive each room, with zone commands providing individual room
volume control. Group commands allow master control of source-selection, and simultaneous volume adjustment of all zones in the
group.
Groups can also be used within a room, such as when a powered subwoofer augments the main audio system. Both the subwoofer and
the main audio amps are driven from separate zones, and hence have individual volume control with zone commands. Group
commands provide master source-selection, volume-absolute/relative/ramping control, and muting.
A Vaux remote control can access eight Clusters, which are pre-programmed zone group definitions. Clusters have the same
constraints as zone groups (ie: up to eight consecutive zones, starting at any zone). Clusters are part of the switcher configuration -the factory setting provides a few ready-to-use clusters, or they may be changed using programming commands. To access clusters 1
to 8 from an RC-16, the remote control is set to Zone-91 through 98, respectively. Only source-selection, volume, and muting
commands may be used when the remote is set to a cluster, and cluster volume from the remote control does not allow press-and-hold
operation as it does for zones (clusters are 2-dB up/down per press). Note that RS-232 VauxProtocol commands do provide group
ramping operation. Clusters can be accessed via VauxProtocol commands, but this is intended primarily for testing, since the group
commands are more flexible and do not require system programming, as do clusters.
Send Commands and Receive Messages
You will likely only need to implement a handful of Commands/Messages in a typical application. In fact, the simplest application
merely sends basic routing and volume Commands, and ignores any received Messages. The next level of complexity involves
interpreting the Messages that are returned in response to control operations – these Messages are returned for both RS-232
Commands and button-press actions on IR remote-controls. You may watch for an expected message immediately after sending a
Command (single-threaded program), or you may have a separate section of code that parses the messages independently of the
command processing code, and then updates internal variables and displays (multi-threaded program). This allows you to “close-theloop” on the whole system (232 and IR control). You may send commands from the control section of your 232 code, and/or use IR
control from remotes or keypads -- your message-handler will update variables/displays in the background. If you wish to ensure that
your 232 command resulted in an action, you may monitor internal variables after sending your command (instead of waiting for a
specific message), and implement timeout/retry/alert handling as desired for your application.
VauxProtocol Commands begin with an asterisk (*) character, followed by two letters (uppercase or lowercase) defining the type of
command, one or more comma-delimited decimal-number parameters, and finally a carriage-return and/or line-feed character (CR/LF).
The CR/LF characters are the only non-printable ascii characters used in VauxProtocol, and are identified in Vaux documentation as
<cr>.
Lattis Matrix Switcher
17
Software Version 7.3.0.0
The first number parameter is a "command-id" number, defining the specific action for this type of command, and which parameters
follow to complete the command. If a Command (optionally) includes an extra parameter, the last parameter is presumed to be a
checksum. An example command:
*CW,40,3,5,4 <cr>
Similarly, VauxProtocol Messages begin with an exclamation (!) character, followed by one letter defining the type of message, one or
more comma-delimited decimal number parameters, and a terminating CR/LF. Optionally, you can force leading zeroes in Messages,
for fixed three-digit parameters (eg: 003,012). Many Commands return the same status Message – simplifying parsing code. An
example message:
!S,40,3,5,4 <cr>
The serial port requires 38400-baud, 8 data bits, no parity, 1 stop bit, with Xon/Xoff flow control
enabled. 38400 is recommended, but 1200 to 115200 is available via a configuration command.
Lattis Matrix Switcher
18
Software Version 7.3.0.0
An Application Overview
The VauxProtocol commands and messages are detailed in following sections, but a quick application overview will give you an idea
of the various ways that Lattis switchers may be controlled.
Routing (switching source inputs to zone outputs)
There are a variety of Route commands, for various applications. The basic Route command (*CW,13) simply switches the same
audio and video source to a zone. The Route-AV cmd (*CW,10) allows different audio and video sources to be switched to the zone
(or, as a more general cmd, it can be used for selecting only audio or video). There are also discrete commands for Route-Audio only
(*CW,11), or Route-Video only (*CW,12). The Fast-Route-AV cmd (*CW,9) bypasses the normal volume-tapering applied during
switching, for quickly changing sources.
There are also Group commands for routing to a group of up to eight zones – the included zones are defined by cmd parameters, and
do not need to be programmed ahead of time.
The Route-Muted cmds (*CW,14/16) will route the source but leave the zone in a muted state. A typical application is a master suite
with two or more zones, where you may not wish to turn all the zones on at once, but always wish to have the same source routed to all
of the zones in the suite – if someone turns on a source in the master bath zone, you can also route the source to the master bedroom
zone, but leave it muted (to not disturb someone still sleeping) – the bedroom zone can then be unmuted as desired.
Normally, when you set up a zone (after setting the maximum zone volume using the power-amp's gain), you will adjust the volume to
a pleasant level, and program the zone's Initial-Volume-Level to this currently-audible level (*PW,40). You may also set it to an
absolute level (*PW,12), if you know the proper level to use. This Initial-Volume-Level is the volume at which the zone turns on
(from an off state). You may also program a zone to bypass this feature, and always turn on to the prior level at which it was playing
when last turned off (*PW,14), but this is generally discouraged, since most applications benefit from a pre-defined turn-on volume for
each zone. This initial turn-on level feature is also the reason you should explicitly turn the zone off (by routing source 0) when it is no
longer used, as opposed to just muting the zone (if it is muted, it unmutes to whatever volume it was at previously). Note also that if
you are using the SYS_ACTIVE_OUT signal to enable a multi-channel amplifier, you need to turn the zones off (and not just mute)
for this signal to work properly.
The Route-at-Volume cmds (*CW,15/16) will temporarily overide the initial turn-on level feature. This is useful in certain situations,
such as when you wish to simply route at a 0-dB passthrough volume. You could program the zone's Initial-Volume-Level to 0-dB,
but the Route-at-Volume cmds make this easier.
Volume Adjustment
Volume may be adjusted several ways. Absolute-Volume commands (*CW,20/23) allow you to set the left and right volumes to a
specific dB level. Percent-Volume commands (*CW,21/22) let you to use percent (0 to 100) instead of absolute levels (0 to 35), and
also let you define the level range over which the percent command operates. These commands allow you to enable volume tapering
(smooth transition, at programmable rates), or not (immediate change).
To use the Percent (or Absolute) volume commands in your program, you will save left and right zone percentages (or levels),
increment or decrement these values as needed (limiting the upper and lower boundaries), and issue the volume command. If you are
using a loop or oscillator (eg: for volume up/down buttons), you need a minimum 180ms delay between steps.
eg: button-pressed > adjust values and send command > delay 180 ms > repeat if button still pressed...
If your control system program is parsing the volume status messages (!S,20/21), you can update bargraphs and volume displays by
parsing the messages to retreive the left and right levels/percentages. When routing a source to a zone, the resulting route status
messages (!S,1/3) include parameters for absolute volume levels, which can be used to initialize a bargraph or volume display to the
initial levels (or you can calculate percentage). If you wish to use Percent-Volume commands, you can automatically initialize
displays using percentage, by optionally configuring the system (*PW,230) to provide a percentage volume status message upon
routing (!S,21), in addition to the normal route message.
Relative-Volume may also be adjusted in 2-dB up/down increments (*CW,24-29). These commands return a status message at every
volume step. If you are using a loop or oscillator (eg: for volume up/down buttons), you need a minimum 180ms delay between steps.
eg: button-pressed > send up/down command > delay 180 ms > repeat if button still pressed...
Ramping-Volume allows you start/stop ramping in either direction (*CW,35-37). These commands ramp the volume at a fixed 2Lattis Matrix Switcher
19
Software Version 7.3.0.0
dB/100-ms rate, and return a status message only when ramping is stopped. This method is the easiest to implement since commands
are simply sent for button-press/release actions, and RS-232 traffic is minimized. However, if you wish to implement a bargraph
display, you will need to update this with a timer in your program (since there are no per-step messages).
eg: button-pressed > start ramp up/down > delay 100 ms > update bagraph 2-dB if button still pressed... > stop ramping when released
Preset States and Paging/Doorchime features
Vaux Lattis switchers have Preset and Paging modes of operation which allow an entire chain of a/v switchers to quickly re-configure
using single commands. The switchers have seven programmable States which can each be programmed for a specific combination of
a/v routes, volume levels, etc, using any or all of the zones.
For example, a state may be Recalled for use as a Preset, such as a party mode, boardroom mode, etc. Or, a state may define the zones
and volume levels for Paging from telephone-system, doorchime, or other sources.
Normal Operation
The switchers are usually in State-0, which is initialized to all-zones-off when the switchers power-on. If you never use any of the state
features, you simply stay in this Normal mode – in this mode, routes and other changes all occur in State-0.
Preset-Recall Mode
Any of the states 1 through 7 may be programmed as a Preset for a specific use, and then recalled when needed. When a Preset (state
1 to 7) is recalled, it is copied to the Normal state-0. Since state-0 it is cleared at power-up, and changed when a new Preset is
recalled, it is volatile. States 1 to 7 are stored in non-volatile memory and remain when the switcher is powered off – they are not
changed unless you explicitly alter or clear them. Each State stores the a/v route information for each zone, left and right volumes for
each zone, zone a/v status (on/off/muted), and unmute volumes for each zone.
For example, you may have certain sources routed to various zones at specific volume levels (zones can even be muted), for a house
party preset, or a boardroom or courtroom application. Recalling presets will change routes and volumes on all zones, with one simple
command.
recall-cmd
PresetRecall
Mode
State0
State1
State2
State3
recall-cmd
State4
State5
State6
State7
recall-cmd
Each of these Presets store a completely different configuration of the machine, and since they are recalled (copied) into state-0, the
presets are not changed if you subsequently change routes, volumes, etc. However, previous routes on all zones in state-0 are lost
(unlike a page, where the previous state is restored).
The Preset-Recall command (*CW,92,bzn,0,0,pst,msg,tpr) copies the preset-state pst (1 to 7) to state-0. The msg parameter allows
you to enable individual zone-route messages if desired, and tpr selects either normal routing (with volume tapering), or fast routing
(no tapering). Using the bzn parameter, you may direct the command to a switcher at a specific Base-Zone, or to all switchers on the
daisy chain. A Preset-Recalled message (!S,92,bzn,swt,0,pst) is returned, and individual zone route messages (!S,1/2/3) may also be
returned.
Note: If this command is issued when you are NOT currently in state-0 (see dynamic-mode, below), the switcher will be placed in
state-0, and the preset then recalled. This command will also terminate any paging command in progress.
Lattis Matrix Switcher
20
Software Version 7.3.0.0
Dynamic-State Mode
In Preset-Recall mode (described above), you are simply copying the preset information to volatile state-0 memory, and then remaining
in the normal mode. You do not change states 1 to 7 when using preset mode.
In Dynamic-State mode, you can change your Current-State to any of the machine states, 0 to 7. When you in are a state other than 0,
changes you make (routes, volume adjusts...) are immediately saved to the non-volatile state memory.
For example, you may use states for different family members, should they desire the dynamic aspect of the configuration, as opposed
to them loading a fixed preset. Changed routes and volumes will remain when they return to the state next time.
change-cmd
change-cmd
DynamicState
Mode
State0
State1
State2
State3
State4
State5
State6
State7
change-cmd
Caution: in Dynamic-State mode, any changes to the Current-State are immediately saved, so you do not want to allow a user to
change to a state that is storing a preset or paging configuration – you are relying on preset and page states to be static after they are
programmed.
The Change-State command (*CW,90,bzn,0,0,mst,msg,tpr) changes the Current-State to mst (0 to 7). The msg parameter allows you
to enable individual zone-route messages if desired, and tpr selects either normal routing (with volume tapering), or fast routing (no
tapering). Using the bzn parameter, you may direct the command to a switcher at a specific Base-Zone, or to all switchers on the daisy
chain. A State-Change message (!S,90,bzn,swt,0,mst) is returned, and individual zone route messages (!S,1/2/3) may also be returned.
A Change-State command will also terminate any paging command in progress.
Paging/Doorchime/Camera Interrupt Mode
Any of the states 1 through 7 may be programmed for use in Interrupt-mode, for example, to page from a telephone-system (or
microphone), sound a doorchime, or route security cameras and annunciators. Interrupt-mode only uses a state temporarily – it may be
activated when needed, and, when it is deactivated, the previous state is restored. While paging is only one application of Interruptmode, we also refer to this as Paging-mode, since this is the most common use.
In a typical paging/doorchime application, the page state will define, for each zone that is to receive the page, the volume levels as well
as the routes to those zones. The page/chime audio source is typically connected to the highest source on the switcher (eg: 8 or 16),
although any source may be used. The page state is programmed to route this paging source to the desired zones, at the desired paging
volume levels.
Flexibility: You may wish to have different paging states for upstairs, downstairs, outside, etc.
An important distinction: Unlike the Dynamic-State mode, which changes the entire machine's current state and affects all zones,
during paging/doorchime use you do not want to turn off zones that are not getting the page/chime, but instead leave those zones as
they are (on, off, or muted). Therefore, zones that are programmed off in the page state will be unaffected by the page operation.
Zones that are not to receive the page remain as they are, whether off or listening to music, etc. This would not be the case if you
simply changed state in Dynamic-State mode, since the off zones would actually turn off.
Another important distinction: Note also that when the page is terminated, the original state is restored – there is no additional
programming required to implement this powerful function.
Yet another important distinction: To prevent any undesired changes to the page state, when paging, any routes, volume, or other
commands are disabled for the duration of the page. Also, only one page may be active at a time (you may not page from a page).
Lattis Matrix Switcher
21
Software Version 7.3.0.0
The Activate-Page-State command (*CW,91,bzn,0,0,pst) changes the Current-State to paging state pst (1 to 7). Paging always routes
fast (no volume tapering), for immediate activation. Using the bzn parameter, you may direct the command to a switcher at a specific
Base-Zone, or to all switchers on the daisy chain. To terminate the page, you issue the Deactivate-Page-State command
(*CW,91,bzn,0,0,0).
A Page-State message (!S,91,bzn,swt,0,pst) is returned when paging, with state pst (1 to 7) indicating the current paging state. When
paging terminates, a Change-State message (!S,90,bzn,swt,0,mst) is returned, with machine state mst (0 to 7) indicating the restored
state.
A configuration command related to paging, is *PW,230,1,3,1 – this will enable the PAGE_PB_IN contact-closure input to be used to
activate (when closed) and terminate (when open) the paging function FOR STATE-1 ONLY. This is useful for telephone systems that
provide relay contact closure during paging.
page-cmd
page-cmd
Paging
(interrupt)
Mode
State0
State1
State2
State3
State4
State5
State6
done
State7
done
This diagram shows paging from State-0, but note that if you are currently in another state (Dynamic-mode), the paging function works
the same, restoring the original state.
State-Program Mode
Any of the states 1 through 7 may be programmed for use as a preset or page (interrupt) state.
As discussed above, Dynamic-State mode allows you to change your Current-State to any of the machine states, 0 to 7. When you in
are a state other than 0, changes you make (routes, volume adjusts...) are immediately saved to non-volatile state memory.
Therefore, State-Program mode is just a special use of Dynamic-State mode: change to the desired preset or page state, program the
desired configuration of routes and volume adjustments, and then change back to state-0.
The Change-State command (*CW,90,bzn,0,0,mst,msg,tpr) changes the Current-State to mst (0 to 7). The msg parameter allows you
to enable individual zone-route messages if desired, and tpr selects either normal routing (with volume tapering), or fast routing (no
tapering). Using the bzn parameter, you may direct the command to a switcher at a specific Base-Zone, or to all switchers on the daisy
chain. A State-Change message (!S,90,bzn,swt,0,mst) is returned, and individual zone route messages (!S,1/2/3) may also be returned.
change-cmd
change-cmd
StateProgram
Mode
State0
State1
State2
State3
State4
change-cmd
Lattis Matrix Switcher
State5
State6
State7
change-cmd
22
Software Version 7.3.0.0
State Programming Note: You are simply changing to the state to be programmed, entering the commands to configure the state
however you wish, and then exiting program mode by changing back to State-0. This configuration can be done interactively (ie:
manually selecting routes, adjusting volumes, etc), or it may be just a series of commands from the control system. For example we
will program state-2 for all switchers on the daisy-chain, for a paging application using source-16 to page on zones 1, 2, and 4:
*CW,90,0,0,0,2,0,0 <cr>
*CW,9,0,0,0 <cr>
*CW,9,1,16,0 <cr>
*CW,9,2,16,0 <cr>
*CW,9,4,16,0 <cr>
*CW,22,1,40,0 <cr>
*CW,22,2,50,0 <cr>
*CW,22,4,45,0 <cr>
*CW,90,0,0,0,0,0,0 <cr>
Change all switchers quickly to State-2
Fast-Route to turn all zones off (clear the state)
Fast-Route to select audio source-16 on zone-1
Fast-Route to select audio source-16 on zone-2
Fast-Route to select audio source-16 on zone-4
Fast Volume set to 40% on zone-1
Fast Volume set to 50% on zone-2
Fast Volume set to 45% on zone-4
Restore all switchers quickly to State-0
This sequence of commands can be easily issued by the control system to program this state, provided you have an idea what it should
be ahead of time. In a paging application, you will likely need to manually tweak the zone volumes to proper final paging levels for
each zone – but this can easily be fine-tuned during installation by changing to the state, adjusting the volumes in each zone and exiting
to state-0.
To program the state manually, you just need to provide the commands to enter and exit the state-program mode, and leave all other
configuration to the installer, who will manually route and adjust volumes.
*CW,90,0,0,0,2,0,0 <cr>
(manual routes/volumes)
*CW,90,0,0,0,0,0,0 <cr>
Change all switchers quickly to State-2
Restore all switchers quickly to State-0
Lattis Matrix Switcher
23
Software Version 7.3.0.0
Command Flexibility
Letters in the Command header may be upper or lowercase, and spaces can appear in the commands, as desired. The decimal number
parameters in Commands are ascii-encoded-decimal number strings that normally range from 0 to 255. There may be any number of
digits in a parameter (eg: 5, 21, 114), and a parameter may optionally include any number of leading zeroes (ie: 002, 02, and 2 are all
equivalent). Parameter values normally should not exceed 255, although larger numbers are allowed. Numbers greater than 255 are
truncated to 1-byte internally (this is actually handy for the optional checksum parameter, discussed later). A null parameter (nothing
between the commas) will evaluate to 0. An 'X' character may be placed in a parameter position, and will evaluate to 255, which, in
some commands, is used to IGNORE the parameter. A comma ',' is used to delimit parameter fields. An underscore character '_' may
optionally be substituted for the comma delimiter. A Command will be discarded if 1) it is truncated with a premature CR, LF, or *,
2) if the delimit character is anything other than comma or underscore, or 3) if non-digit chars are embedded in the numerical
parameters (except 'X' may be used in place of a parameter, evaluating to 255 -- this is used to ignore the parameter, for commands that
allow it).
Commands are terminated with a carriage-return (CR) and/or line-feed (LF) character (CR = 0x0d = 13;
LF = 0x0a = 10), to work with string terminations found in various programming environments:
- linux/unix systems use LF (\n aka newline)
- macintosh systems use CR (\r aka return)
- windows/dos systems use CR/LF (\r\n)
Vaux documentation uses the symbol <cr> to indicate termination of Commands (CR and/or LF accepted), and termination of
Messages (LF and CR are sent).
Four VauxProtocol Command formats are defined:
Control-Write:
*CW,id,num1(,num2)...<cr>
Control-Read (poll):
*CR,id,num1(,num2)...<cr>
Program-Write:
*PW,id,num1(,num2)...<cr>
Program-Read:
*PR,id,num1(,num2)...<cr>
or
or
or
or
*CW_id_num1(_num2)...<cr>
*CR_id_num1(_num2)...<cr>
*PW_id_num1(_num2)...<cr>
*PR_id_num1(_num2)...<cr>
User applications use the Control-Write (*CW) Commands, and parse the resulting Status-Messages. User
applications may also use the Control-Read (*CR) Commands, if it is desired to handle Message parsing on a
periodically-polled basis. The Program-Write (*PW) and Program-Read (*PR) Commands are for
programming the system configuration, and are not to be employed in a user application, except as part of a
setup function. Do not use *PW commands in power-up boot code, since power-fluctuations at boot time (eg:
power restoring after an outage), could result in corrupted parameters.
Optional Command Checksums
If a Command includes an extra parameter, the last parameter is presumed to be a checksum of all preceding parameters. The
checksum can be truncated to 1-byte before being sent (overflow discarded) or it can simply be the total sum (which, if over 255, gets
truncated to 1-byte internally).
Example command to set Zone-7 volume to 0-dB:
*CW,23,7,32,0
this is normal command with no checksum
*CW,23,7,32,0,62
this is command with checksum (23+7+32+0=62)
Example command to set Zone-241 volume to 0-dB:
*CW,23,241,32,0
this is normal command with no checksum
*CW,23,241,32,0,296 this is command with total checksum (23+241+32+0=296)
*CW,23,241,32,0,40
this is command with truncated (1-byte) checksum (296-256=40)
Lattis Matrix Switcher
24
Software Version 7.3.0.0
Routing Commands & Messages:
·
·
·
·
For zone 0 (all zones), no messages are returned (multiple zones/switchers would be responding together).
A muted zone will be unmuted if route commands are received (except route-muted cmds).
Group commands apply to a group of up to eight consecutive zones, as defined in the command.
Switchers power-up in Preset-State 0, which is initialized to all-zones-off.
Control-Write Cmd Description
Command
Status-Message
Route
Route-Audio
Route-Video
Route-A/V
Fast-Route-A/V
(note
(note
(note
(note
(note
*CW,13,zon,src <cr>
*CW,11,zon,ssa <cr>
*CW,12,zon,ssv <cr>
*CW,10,zon,ssa,ssv <cr>
*CW,9,zon,ssa,ssv <cr>
!S,3,zon,sta,stv,ssa,ssv,vvl,vvr,bas,trb <cr>
!S,1,zon,sta,ssa,vvl,vvr,bas,trb <cr>
!S,2,zon,stv,ssv <cr>
!S,3,zon,sta,stv,ssa,ssv,vvl,vvr,bas,trb <cr>
!S,3,zon,sta,stv,ssa,ssv,vvl,vvr,bas,trb <cr>
Route-Muted
Route-at-Volume
Route-at-Vol-Muted
(note 3, 4, 6)
(note 3, 4, 7)
(note 3, 4, 8)
*CW,14,zon,ssa,ssv <cr>
*CW,15,zon,ssa,ssv,vra <cr>
*CW,16,zon,ssa,ssv,vra <cr>
!S,1/2/3 (as appropriate)
!S,1/2/3 (as appropriate)
!S,1/2/3 (as appropriate)
3, 5)
1, 5)
2)
3, 4, 5)
3, 4, 5, 10)
Group-Route-A/V
(note 3, 4, 9)
*CW,60,gbz,gzd,ssa,ssv <cr>
!S,1/2/3 (for each zone in group)
Fast-Group-Route-A/V (note 3, 4, 9, 10) *CW,59,gbz,gzd,ssa,ssv <cr>
!S,1/2/3 (for each zone in group)
Group-Route-Muted
(note 3, 4, 6, 9) *CW,61,gbz,gzd,ssa,ssv <cr>
!S,1/2/3 (for each zone in group)
_________________________________________________________________________________________________________
Change-State
(note 11)
*CW,90,bzn,0,0,mst,msg,tpr <cr> !S,90,bzn,swt,0,mst <cr> (success)
!S,189,bzn,swt,0,2 <cr> (err: invalid mst)
Activate-Page-State
(note 12)
*CW,91,bzn,0,0,pst<cr>
!S,91,bzn,swt,0,pst <cr> (success)
!S,189,bzn,swt,0,2 <cr> (err: invalid pst)
!S,189,bzn,swt,0,3 <cr> (err: already paging)
Deactivate-Page-State
(note 12)
*CW,91,bzn,0,0,0 <cr>
!S,90,bzn,swt,0,mst <cr>
Preset-State-Recall
(note 13)
*CW,92,bzn,0,0,pst,msg,tpr <cr> !S,92,bzn,swt,0,pst <cr> (success)
!S,189,bzn,swt,0,2 <cr> (err: invalid pst)
zon is zone
0 to 255 (when permitted, 0=all-zones, with no messages returned)
ssa is audio source
ssv is video source
src is audio and video source
0 to 16 (0=off)
0 to 16 (0=off)
0 to 16 (0=off)
vra is route-at volume (left and right)
1 to 35 (2-dB/increment) (see note 14)
vvl is left volume level
vvr is right volume level
0 to 35 (2-dB/increment) (see note 14)
0 to 35 (2-dB/increment) (see note 14)
bas is bass level
trb is treble level
0 to 8 (3-dB/increment) (see note 15)
0 to 8 (3-dB/increment) (see note 15)
sta is audio-state code
stv is video-state code
0=off, 1=on, 2=on/muted-audio
0=off, 1=on
Lattis Matrix Switcher
25
(switcher max = 4, 8, or 16) (see note 4)
(switcher max = 4, 8, or 16) (see note 4)
(switcher max = 4, 8, or 16)
Software Version 7.3.0.0
gbz is group-base-zone
gzd is group-zone-definition
1 to 249; on 8-zone increments (eg: 1, 9, 17... ) (see note 9)
0 to 255 (each bit specifies 1 of 8 zones, starting at gbz) (see note 9)
bzn is base-zone of switcher
1 to 249; on 4/8/16-zone increments (eg: 1, 5, 9, 13, 17, 21, 25, 29, 33,... )
or 0
(0=all-switchers on daisy-chain) (see note 11)
swt is switcher-type
1 = stereo-audio, 2 = composite-video,
3 = stereo-audio/composite-video, 4 = HD-component-video
mst is machine-state
pst is preset/page-state
msg is message-enable
tpr is taper-enable
0 = normal, 1 to 7 for preset, paging, or dynamic use (see note 11, 12, 13)
1 to 7 (see note 11, 12, 13)
0 = no messages, 1 = normal zone-route messages (see note 11, 13)
0 = fast-routing, 1 = normal routes with volume tapering (see note 11, 13)
Routing Notes:
Note 1 -- Audio-only route commands (may use Zone-0) (*CW,11):
- to audio-only switcher:
route audio, update audio state, send audio mssg
- to video-only switcher:
ignore
- to a/v switcher:
route audio, update audio state, send audio mssg
Note 2 -- Video-only route commands (may use Zone-0) (*CW,12):
- to audio-only switcher:
ignore
- to video-only switcher:
route video, update video state, send video mssg
- to a/v switcher:
route video, update video state, send video mssg
Note 3 -- Audio/Video route commands (may use Zone-0, as appropriate) (*CW,9/10/13/14/15/16/59/60/61):
(the audio unit tracks and reports video state, and video unit is silent – eg: LE-1600A and LE-1600V together)
- to audio-only switcher:
route audio, update audio AND VIDEO state, send a/v mssg
- to video-only switcher:
route video, update video state -- NO MSSG
- to a/v switcher:
route a/v, update a/v state, send a/v mssg
Note 4 – Audio and/or Video route commands (may use Zone-0, as appropriate) (*CW,9/10/14/15/16/59/60/61):
- Source parameters ssa and ssv may both be defined, or either may be IGNORE (to only set one source)
For IGNORE, set the parameter to 255, or, optionally, insert the ‘X’ character.
Note 5 -- Routing audio using standard route commands (*CW,9/10/11/13/59/60):
1) Routing a source when zone is currently off:
- Routes and sets zone volume to:
a) Normal (factory setting) route volume uses programmed "Zone-Initial-Volume."
b) Optionally, may configure route volume to be "Previous" volume.
(this was level when zone was last turned off)
(the implementation actually updates Zone-Initial-Volume at every zone turn-off).
2) Routing a source when zone is currently on (skipped if source is the same):
- Routes at current zone volume.
3) Routing a source when zone is currently muted:
- Routes and unmutes to previous volume (level when zone was muted).
Lattis Matrix Switcher
26
Software Version 7.3.0.0
Note 6 -- Routing audio using Route-Muted commands (*CW,14/61):
1) Routing a source when zone is currently off:
- Routes and places zone in muted state, and sets unmute volume to:.
a) Normal (factory setting) unmute level uses programmed "Zone-Initial-Volume."
b) Optionally, may configure unmute level to be "Previous" volume.
(this was level when zone was last turned off)
(the implementation actually updates Zone-Initial-Volume at every zone turn-off,
then this route-muted command loads unmute levels from initial).
2) Routing a source when zone is currently on (skipped if source is the same):
- Routes at current zone volume.
NOTE: DOES NOT MUTE IF ZONE IS ON
3) Routing a source when zone is currently muted:
- Routes and leaves zone in muted state.
- Unmute level will be previous volume (level when zone was muted).
Note 7 -- Routing audio using Route-At-Volume commands (*CW,15):
1) Routing a source when zone is currently off:
- Routes and sets zone volume to specified volume level.
2) Routing a source when zone is currently on:
- Routes at specified volume level (if source is the same, just updates volume).
3) Routing a source when zone is currently muted:
- Routes and unmutes to specified volume level.
Note 8 -- Routing audio using Route-At-Volume-Muted commands (*CW,16/61):
1) Routing a source when zone is currently off:
- Routes and places zone in muted state, and unmute level will be specified volume level.
2) Routing a source when zone is currently on (NOTE: DOES NOT MUTE IF ZONE IS ON):
- Routes at specified volume level (if source is the same, just updates volume).
3) Routing a source when zone is currently muted:
- Routes and leaves zone in muted state, and unmute level will be specified volume level.
Note 9 -- Routing using Group commands (*CW,59/60/61):
Group commands apply to a group of eight consecutive zones, as defined in the command by gbz and gzd. Parameter gbz is
group-base-zone, and gzd is group-zone-definition, which define a group of up to eight zones. If the group is defined such
that the zones are on different switchers, the returned messages will collide and be garbled – therefore, gbz should be
restricted to 8-zone increments (1, 9, 17…). 4-zone switchers can be used if they are installed on 8-zone increments.
Routes are reported for each zone defined in the group.
Each bit in gzd corresponds to one of eight zones, with bit-0 (LSB) being the lowest zone, and the bit-7 (MSB)
being the highest zone. If the bit is 1, the zone is included in the group, and if the bit is 0, it is excluded.
The first zone (selected by bit-0) is defined as group-base-zone gbz. The next seven bits in gzd correspond to the
next seven zones above gbz. For example, if gbz = 9 and gzd = 155, the group includes zones 9, 10, 12, 13, and 16.
First, choose gbz, then to select the appropriate gzd, you need to set the gzd bits corresponding to the desired zones.
Zone
9 = gbz
10
11
12
13
14
15
16
gzd-bit
bit-0
bit-1
bit-2
bit-3
bit-4
bit-5
bit-6
bit-7
bit-value
1
2
4
8
16
32
64
128
1=included
add bit-values
1 (lsb)
1
1
2
0
0
1
8
1
16
0
0
0
0
1 (msb)
128
= 10011011 = 155 = gzd
Therefore, when we choose gbz = 9, and set the appropriate bits in gzd to include zones 9, 10, 12, 13, and 16 in
the group, we need gzd = 155. You can get this gzd either by converting the binary value 10011011 to decimal,
or by adding the bit-values that correspond to the included zones (128+16+8+2+1 = 155).
For testing clusters, use the group commands but set gbz to cluster 1 to 8, and gzd to 0.
Lattis Matrix Switcher
27
Software Version 7.3.0.0
Note 10 -- Fast-Route commands (*CW,9/59):
Routes are performed quickly, by disabling the volume-tapering that is normally applied.
Note 11 – Change-State command (*CW,90):
The switchers are usually in State-0, which is initialized to all-zones-off when the switchers power-on. If you never use any
of the state features, you simply stay in this Normal mode – in this mode, routes and other changes all occur in State-0. Each
State stores the a/v route information for each zone, left and right volumes for each zone, zone a/v status (on/off/muted), and
unmute volumes for each zone.
You can change your Current-State to any of the machine states, 0 to 7. When you in are a state other than 0, changes you
make (routes, volume adjusts...) are immediately saved to the non-volatile state memory. The Change-State command is used
for programming states (for use as preset or page states), or is used for Dynamic-State mode operation (which is only used
in special cases).
Caution: in Dynamic-State mode, any changes to the Current-State are immediately saved, so you do not want to allow a user
to change to a state that is storing a preset or paging configuration – you are relying on preset and page states to be static after
they are programmed.
When this command is used to program page-states or preset-states, you change to the desired page/preset state, apply the
appropriate routes and volume adjustments, and then return back to the previous working state (which is usually state-0). To
make a subsequent adjustment to a page/preset state (eg: change a zone volume), you simply change to the state again, make
the adjustment, and return.
The Change-State command (*CW,90,bzn,0,0,mst,msg,tpr) changes the Current-State to mst (0 to 7). The msg parameter
allows you to enable individual zone-route messages if desired, and tpr selects either normal routing (with volume tapering),
or fast routing (no tapering). Using the bzn parameter, you may direct the command to a switcher at a specific Base-Zone, or
to all switchers on the daisy chain. A State-Change message (!S,90,bzn,swt,0,mst) is returned, and individual zone route
messages (!S,1/2/3) may also be returned. A Change-State command will also terminate any paging command in progress.
If there are multiple switchers daisy-chained together for a large number of zones, you may direct the *CW,90 command to a
specific switcher by providing the Switcher-Base-Zone parameter bzn (and, optionally, enable zone-route messages with the
msg parameter). If there are both audio and video switchers set to this base zone, they both change to the new state. If bzn is
set to 0, all switchers in the daisy chain change state, but no zone-route messages are returned (if you set msg=1). However,
all switchers in the chain will reply with their state-change messages.
Note 12 – Page-State command (*CW,91):
Any of the states 1 through 7 may be programmed for use in Interrupt-mode, for example, to page from a telephone-system
(or microphone), sound a doorchime, or route security cameras and annunciators. Interrupt-mode only uses a state
temporarily – it may be activated when needed, and, when it is deactivated, the previous state is restored. While paging is
only one application of Interrupt-mode, we also refer to this as Paging-mode, since this is the most common use.
Unlike the Dynamic-State mode, which changes the entire machine's current state and affects all zones, during
paging/doorchime use you do not want to turn off zones that are not getting the page/chime, but instead leave those zones as
they are (on, off, or muted). Therefore, zones that are programmed off in the page state will be unaffected by the page
operation. Zones that are not to receive the page remain as they are, whether off or listening to music, etc. This would not be
the case if you simply changed state in Dynamic-State mode, since the off zones would actually turn off.
Note also that when the page is terminated, the original state is restored. To prevent any undesired changes to the page state,
when paging, any routes, volume, or other commands are disabled for the duration of the page. Also, only one page may be
active at a time (you may not page from a page). Error messages are return in these cases.
A page state is programmed by using the Change-State command (*CW,90) to change to the state, apply the desired routes
and volume adjustments for the page state, and then return back to the previous working state (which is usually state-0). To
make a subsequent adjustment to a page state (eg: change a zone volume), you simply change to the state again, make the
adjustment, and return.
Lattis Matrix Switcher
28
Software Version 7.3.0.0
The Activate-Page-State command (*CW,91,bzn,0,0,pst) changes the Current-State to paging state pst (1 to 7). Paging
always routes fast (no volume tapering), for immediate activation. Using the bzn parameter, you may direct the command to a
switcher at a specific Base-Zone, or to all switchers on the daisy chain. To terminate the page, you issue the DeactivatePage-State command (*CW,91,bzn,0,0,0).
A Page-State message (!S,91,bzn,swt,0,pst) is returned when paging, with state pst (1 to 7) indicating the current paging state.
When paging terminates, a Change-State message (!S,90,bzn,swt,0,mst) is returned, with machine state mst (0 to 7) indicating
the restored state.
If there are multiple switchers daisy-chained together for a large number of zones, you may direct the *CW,91 command to a
specific switcher by providing the Switcher-Base-Zone parameter bzn. If there are both audio and video switchers set to this
base zone, they both change to the new state. If bzn is set to 0, all switchers in the daisy chain change state, and all switchers
in the chain will reply with their state-change messages.
A configuration command related to paging, is *PW,230,1,3,1 – this will enable the PAGE_PB_IN contact-closure input to be
used to activate (when closed) and terminate (when open) the paging function FOR STATE-1 ONLY. This is useful for
telephone systems that provide relay contact closure during paging.
Note 13 – Preset-State-Recall command (*CW,92):
Any of the states 1 through 7 may be programmed as a Preset for a specific use, and then recalled when needed. When a
Preset (state 1 to 7) is recalled, it is copied to Normal state-0. Since state-0 it is cleared at power-up, and changed when a
new Preset is recalled, it is volatile. States 1 to 7 are stored in non-volatile memory and remain when the switcher is powered
off – they are not changed unless you explicitly alter or clear them. Each State stores the a/v route information for each zone,
left and right volumes for each zone, zone a/v status (on/off/muted), and unmute volumes for each zone.
Each of these Presets store a completely different configuration of the machine, and since they are recalled (copied) into state0, the presets are not changed if you subsequently change routes, volumes, etc. However, previous routes on all zones in
state-0 are lost (unlike a page, where the previous state is restored).
A preset state is programmed by using the Change-State command (*CW,90) to change to the state, apply the desired routes
and volume adjustments for the page state, and then return back to the previous working state (which is usually state-0). To
make a subsequent adjustment to a preset state (eg: change a zone volume), you simply change to the state again, make the
adjustment, and return.
The Preset-Recall command (*CW,92,bzn,0,0,pst,msg,tpr) copies the preset-state pst (1 to 7) to state-0. The msg parameter
allows you to enable individual zone-route messages if desired, and tpr selects either normal routing (with volume tapering),
or fast routing (no tapering). Using the bzn parameter, you may direct the command to a switcher at a specific Base-Zone, or
to all switchers on the daisy chain. A Preset-Recalled message (!S,92,bzn,swt,0,pst) is returned, and individual zone route
messages (!S,1/2/3) may also be returned.
Note: If this command is issued when you are NOT currently in state-0 (dynamic-mode), the switcher will be placed in
state-0, and the preset then recalled. This command will also terminate any paging command in progress.
If there are multiple switchers daisy-chained together for a large number of zones, you may direct the *CW,92 command to a
specific switcher by providing the Switcher-Base-Zone parameter bzn. If there are both audio and video switchers set to this
base zone, they both change to the new state. If bzn is set to 0, all switchers in the daisy chain change state, and all switchers
in the chain will reply with their state-change messages.
Lattis Matrix Switcher
29
Software Version 7.3.0.0
Note 14 –Volume Levels (vvl, vvr, vra) are 2-dB/increment (except for 0 = -80dB):
35
34
33
32
31
30
29
28
27
+6 dB
+4 dB
+2 dB
0 dB (pass)
-2 dB
-4 dB
-6 dB
-8 dB
-10 dB
26
25
24
23
22
21
20
19
18
-12 dB
-14 dB
-16 dB
-18 dB
-20 dB
-22 dB
-24 dB
-26 dB
-28 dB
17
16
15
14
13
12
11
10
9
-30 dB
-32 dB
-34 dB
-36 dB
-38 dB
-40 dB
-42 dB
-44 dB
-46 dB
8
7
6
5
4
3
2
1
0
-48 dB
-50 dB
-52 dB
-54 dB
-56 dB
-58 dB
-60 dB
-62 dB
-80 dB
Note 15 – Bass/Treble Levels (bas, trb) are 3-dB/increment:
8
7
6
5
4
3
2
1
0
+12 dB
+9 dB
+6 dB
+3 dB
0 dB (flat)
-3 dB
-6 dB
-9 dB
-12 dB
Lattis Matrix Switcher
30
Software Version 7.3.0.0
Volume/Bass/Treble/Mute Commands & Messages:
· Volume/bass/treble/mute commands will only affect zones that are not off (ie: zones that are on or muted).
· A muted zone will be unmuted if volume adjustment commands are received.
· Group commands apply to a group of up to eight consecutive zones, as defined in the command.
Control-Write Cmd Description
Command
Status-Message
Percent-Volume
Percent-L/R-Volume
Absolute-Volume
Absolute-L/R-Volume
(note 2, 4)
(note 2, 4, 6)
(note 2)
(note 1, 2, 6, 9)
*CW,22,zon,vpc,tpr <cr>
*CW,21,zon,vpl,vpr,tpr <cr>
*CW,23,zon,vol,tpr <cr>
*CW,20,zon,vvl,vvr,tpr <cr>
!S,21,zon,sta,vpl,vpr <cr>
!S,21,zon,sta,vpl,vpr <cr>
!S,20,zon,sta,vvl,vvr <cr>
!S,20,zon,sta,vvl,vvr <cr>
Volume-Up (2-dB)
Volume-Down (2-dB)
Left-Volume-Up
Left-Volume-Down
Right-Volume-Up
Right-Volume-Down
(note 5)
(note 5)
(note 5, 6)
(note 5, 6)
(note 5, 6)
(note 5, 6)
*CW,24,zon
*CW,25,zon
*CW,26,zon
*CW,27,zon
*CW,28,zon
*CW,29,zon
<cr>
<cr>
<cr>
<cr>
<cr>
<cr>
!S,20,zon,sta,vvl,vvr <cr>
!S,20,zon,sta,vvl,vvr <cr>
!S,20,zon,sta,vvl,vvr <cr>
!S,20,zon,sta,vvl,vvr <cr>
!S,20,zon,sta,vvl,vvr <cr>
!S,20,zon,sta,vvl,vvr <cr>
Balance-to-Left
Balance-to-Right
(note 7)
(note 7)
*CW,30,zon <cr>
*CW,31,zon <cr>
!S,20,zon,sta,vvl,vvr <cr>
!S,20,zon,sta,vvl,vvr <cr>
Ramp-Volume-Up
*CW,35,zon <cr>
(none)
Ramp-Volume-Down
*CW,36,zon <cr>
(none)
Ramp-Volume-Stop
(note 3)
*CW,37,zon <cr>
!S,20,zon,sta,vvl,vvr <cr>
NOTE: volume ramps at 2-dB/100-msec until stopped, or Min/Max-Vol reached!
_________________________________________________________________________________________________________
Absolute-Bass/Treble (note 1, 10)
Flat-Bass/Treble (0-dB)
Bass-Up (3-dB/step)
Bass-Down (3-dB/step)
Treble-Up (3-dB/step)
Treble-Down (3-dB/step)
*CW,40,zon,bas,trb <cr>
*CW,41,zon <cr>
*CW,42,zon <cr>
*CW,43,zon <cr>
*CW,44,zon <cr>
*CW,45,zon <cr>
!S,40,zon,bas,trb
!S,40,zon,bas,trb
!S,40,zon,bas,trb
!S,40,zon,bas,trb
!S,40,zon,bas,trb
!S,40,zon,bas,trb
<cr>
<cr>
<cr>
<cr>
<cr>
<cr>
Audio-Mute-Toggle
*CW,50,zon <cr>
!S,20,zon,sta,vvl,vvr <cr>
Audio-Mute-On
*CW,51,zon <cr>
!S,20,zon,sta,vvl,vvr <cr>
Audio-Mute-Off
*CW,52,zon <cr>
!S,20,zon,sta,vvl,vvr <cr>
_________________________________________________________________________________________________________
Group-Volume-Up (2-dB)
(note 8)
Group-Volume-Down (2-dB) (note 8)
*CW,62,gbz,gzd <cr>
*CW,63,gbz,gzd <cr>
!S,20,zon,sta,vvl,vvr <cr> (for each zon in group)
!S,20,zon,sta,vvl,vvr <cr> (for each zon in group)
Group-Ramp-Volume-Up
(note 8)
*CW,64,gbz,gzd <cr>
Group-Ramp-Volume-Down (note 8)
*CW,65,gbz,gzd <cr>
Group-Ramp-Volume-Stop (note 3, 8) *CW,66,gbz,gzd <cr>
(none)
(none)
!S,20,zon,sta,vvl,vvr <cr> (for each zon in group)
Group-Mute-Toggle
Group-Mute-On
Group-Mute-Off
!S,20,zon,sta,vvl,vvr <cr> (for each zon in group)
!S,20,zon,sta,vvl,vvr <cr> (for each zon in group)
!S,20,zon,sta,vvl,vvr <cr> (for each zon in group)
(note 8)
(note 8)
(note 8)
Lattis Matrix Switcher
*CW,67,gbz,gzd <cr>
*CW,68,gbz,gzd <cr>
*CW,69,gbz,gzd <cr>
31
Software Version 7.3.0.0
zon is zone
1 to 255 (zone-0 not permitted)
vvl is left volume level
vvr is right volume level
vol is volume (left and right)
0 to 35 (2-dB/increment) (see note 1, 9)
0 to 35 (2-dB/increment) (see note 1, 9)
0 to 35 (2-dB/increment) (see note 9)
vpl is left percent volume
vpr is right percent volume
vpc is percent volume (left and right)
0 to 100 (see note 4)
0 to 100 (see note 4)
0 to 100 (see note 4)
bas is bass level
trb is treble level
0 to 8 (3-dB/increment) (see note 10)
0 to 8 (3-dB/increment) (see note 10)
tpr is taper-enable
0=no-taper, 1=taper-volume
sta is audio-state code
0=off, 1=on, 2=on/muted-audio
gbz is group-base-zone
gzd is group-zone-definition
1 to 249; on 8-zone increments (eg: 1, 9, 17... ) (see note 8)
0 to 255 (each bit specifies 1 of 8 zones, starting at gbz) (see note 8)
Volume/Bass/Treble/Mute Notes:
Note 1 – Absolute Left and/or Right Volume (*CW,20), and Absolute Bass and/or Treble (*CW,40) commands:
Volume level parameters vvl and vvr may both be defined, or either may be IGNORE (to only set the one channel)
For IGNORE, set the parameter to 255, or, optionally, insert the ‘X’ character. Either bas or trb may be set to IGNORE.
Note 2 – Tapering with Absolute-Volume and Percent-Volume commands (*CW,20/21/22/23):
If parameter tpr is set to 0, the absolute volume is set immediately. If tpr is set to 1, the level tapers up or down using
the zone’s tud/tdd taper configuration.
Note 3 –Volume-Ramping commands (*CW,35/36/37/64/65/66):
Volume levels are reported only when ramping is stopped (not at each increment).
Note 4 – Percent-Volume commands (*CW,21,22):
For the Percent-Volume commands, a volume percentage (0 to 100) level is used instead of an absolute (0 to 35) level. The
message returned is also in percent, which is handy for updating a readout or bar-graph display, without the need for
additional calculations. Note that the absolute range is more granular (0 to 35) than the percentage (0 to 100) – for this
reason, there will be several percentage steps that resolve to the same absolute volume.
See the Configuration Command section for the *PW,20 command, which is used to program the Percent-Volume-Range.
The factory setting sets the 0-to-100 percent range to operates on the full absolute volume range of -80 to +6 dB (0 to 35), but
you may define a smaller range. For example, the Percent-Volume-Range can be set to -40 to 0 dB (12 to 32) – this example
prevents the lower part of the percentage adjustment from being barely audible, by setting the 0% point at -40 dB, and sets the
100% point at the passthrough level of 0-dB.
Note 5 – Relative-Volume commands (*CW,24/25/26/27/28/29):
When these commands are used, there must be a 180ms minimum delay between successive commands. Otherwise there will
be an “overshoot” effect, due to commands still in the serial buffer (eg: if a “vol-up” button is programmed with a too-short
loop delay, volume will continue to increase somewhat after the button is released).
Note 6 – Mono zone with Left and/or Right Volume commands (*CW,20/21/26/27/28/29):
If a zone is programmed for mono operation, the same source must be routed to both the L&R channels, but these
volume commands allow you to provide independent volume control for two mono areas. You may also apply
relative-up/down control to both L&R as a “master” control of this 2-channel area, while retaining independent “sub-zone”
control over each channel with the individual (L or R) volume commands. This is handy in patios etc.
Lattis Matrix Switcher
32
Software Version 7.3.0.0
Note 7 – Zone Balance commands (*CW,30/31):
The Balance-to-Left command increases the left channel by 2-dB, and decreases the right channel by 2-dB. The
Balance-to-Right command is the opposite. For finer control you can adjust only one channel with the *CW,24/25
commands. The left and right volumes may remain at different levels -- the volume up/down and ramping commands
operate on both channels, relative to the volume of each. Balance is maintained when muting/unmuting, and running
volume to the rails and back. After balancing a zone, adjust the volume to the desired level for zone turn-on, and save
the current levels as the Initial-Volume-Levels (balance will be maintained, since left and right initial levels are saved).
Note that the absolute and percent volume commands may be used to overide L/R balance that has been programmed via the
Initial-Volume-Levels, but this is only temporary, as L/R balance will be restored the next time the zone is switched
off and then back on.
Note 8 –Group-Volume/Mute commands (*CW,62/63/64/65/66/67/68/69):
Group commands apply to a group of eight consecutive zones, as defined in the command by gbz and gzd. Parameter gbz is
group-base-zone, and gzd is group-zone-definition, which define a group of up to eight zones. If the group is defined such
that the zones are on different switchers, the returned messages will collide and be garbled – therefore, gbz should be
restricted to 8-zone increments (1, 9, 17…). 4-zone switchers can be used if they are installed on 8-zone increments.
Volume levels are reported for each zone defined in the group.
Each bit in gzd corresponds to one of eight zones, with bit-0 (LSB) being the lowest zone, and the bit-7 (MSB)
being the highest zone. If the bit is 1, the zone is included in the group, and if the bit is 0, it is excluded.
The first zone (selected by bit-0) is defined as group-base-zone gbz. The next seven bits in gzd correspond to the
next seven zones above gbz. For example, if gbz = 9 and gzd = 155, the group includes zones 9, 10, 12, 13, and 16.
First, choose gbz, then to select the appropriate gzd, you need to set the gzd bits corresponding to the desired zones.
Zone
9 = gbz
10
11
12
13
14
15
16
gzd-bit
bit-0
bit-1
bit-2
bit-3
bit-4
bit-5
bit-6
bit-7
bit-value
1
2
4
8
16
32
64
128
1=included
add bit-values
1 (lsb)
1
1
2
0
0
1
8
1
16
0
0
0
0
1 (msb)
128
= 10011011 = 155 = gzd
Therefore, when we choose gbz = 9, and set the appropriate bits in gzd to include zones 9, 10, 12, 13, and 16 in
the group, we need gzd = 155. You can get this gzd either by converting the binary value 10011011 to decimal,
or by adding the bit-values that correspond to the included zones (128+16+8+2+1 = 155).
For testing clusters, use the group commands but set gbz to cluster 1 to 8, and gzd to 0.
Note 9 –Volume Levels (vol, vvl, vvr, vra) are 2-dB/increment (except for 0 = -80dB):
35
34
33
32
31
30
29
28
27
+6 dB
+4 dB
+2 dB
0 dB (pass)
-2 dB
-4 dB
-6 dB
-8 dB
-10 dB
26
25
24
23
22
21
20
19
18
-12 dB
-14 dB
-16 dB
-18 dB
-20 dB
-22 dB
-24 dB
-26 dB
-28 dB
17
16
15
14
13
12
11
10
9
-30 dB
-32 dB
-34 dB
-36 dB
-38 dB
-40 dB
-42 dB
-44 dB
-46 dB
8
7
6
5
4
3
2
1
0
-48 dB
-50 dB
-52 dB
-54 dB
-56 dB
-58 dB
-60 dB
-62 dB
-80 dB
Note 10 – Bass/Treble Levels (bas, trb) are 3-dB/increment:
8
7
6
5
4
3
2
1
0
+12 dB
+9 dB
+6 dB
+3 dB
0 dB (flat)
-3 dB
-6 dB
-9 dB
-12 dB
Lattis Matrix Switcher
33
Software Version 7.3.0.0
Configuration Programming Commands & Messages:
In many applications, the factory settings are just right, but you may want to tweak some parameters, such as the Zone-Initial-Volume
(zone-turn-on) levels. You can adjust zone settings using the *PW commands below – some of the zone configuration settings may
also be adjusted using an RC-16 remote control.
The Program-Read (*PR) and Program-Write (*PW) Commands are for programming the system configuration, and are
not to be employed in a user application, except as part of a setup function. Do not use *PW commands in power-up boot
code, since power-fluctuations at boot time (eg: when power restores after an outage), could result in corrupted parameters.
The following are programming commands for general switcher setup:
Program-Write/Read-Cmd Description
Command
Config-Message
Write-Switcher-Base-Zone
Read-Switcher-Base-Zone
(note 1, 3)
(note 1, 3)
*PW,100,0,0,0,bzn <cr>
*PR,100,0,0 <cr>
!C,100,0,0,0,bzn <cr>
!C,100,0,0,0,bzn <cr>
Write-Config-Flags
Read-Config-Flags
(note 2, 5)
(note 2, 5)
*PW,230,1,flg,fst <cr>
*PR,230,1,flg <cr>
!C,230,1,flg,fst <cr>
!C,230,1,flg,fst <cr>
Write-Tmp-Config-Flags
Read-Tmp-Config-Flags
(note 2, 6)
(note 2, 6)
*PW,240,1,flg,fst <cr>
*PR,240,1,flg <cr>
!C,240,1,flg,fst <cr>
!C,240,1,flg,fst <cr>
Write-Cluster-Definition
Read-Cluster-Definition
Read-All-Cluster-Definitions
(note 2, 7)
(note 2, 7)
(note 2, 7)
*PW,70,1,clu,gbz,gzd <cr>
*PR,70,1,clu <cr>
*PR,71,1 <cr>
!C,70,1,clu,gbz,gzd <cr>
!C,70,1,clu,gbz,gzd <cr>
!C,70 for clusters 1 to 8
Set-New-Baud-Rate
(note 2, 18)
*PW,250,0,1,bau <cr>
(no mssg, since rate changed)
Restore-All-Factory-Settings
(note 2)
*PW,254,0,0,1 <cr>
(factory-settings restored, and the front-panel light-bar will flash)
!C,254,0,0 <cr>
Force-System-Reset
*PW,255,0,0,1 <cr>
(reset via watchdog, and the front-panel light-bar will flash)
!S,100... / !S,187...
The following are general program commands for audio switchers:
Program-Write/Read-Cmd Description
Command
Config-Message
Write-Percent-Volume-Range
Read-Percent-Volume-Range
(note 2, 8)
(note 2, 8)
*PW,20,1,vrl,vrh <cr>
*PR,20,1,1 <cr>
!C,20,1,vrl,vrh <cr>
!C,20,1,vrl,vrh <cr>
Write-Source-Trim-Level
(note 1, 9)
*PW,22,1,ssa,ast <cr>
!S,20... mssgs for active zones using ssa
!C,22,1,ssa,ast <cr>
Read-Source-Trim-Level
Read-All-Source-Trim-Levels
(note 1, 9)
(note 1, 9)
*PR,22,1,ssa <cr>
*PR,23,1 <cr>
!C,22,1,ssa,ast <cr>
!C,22 for all sources on switcher
Lattis Matrix Switcher
34
Software Version 7.3.0.0
The following are zone-specific program commands for audio switchers:
Program-Write/Read-Cmd Description
Zone-Setup
(note 10)
Command
*PW,40,zon,sid <cr>
Config-Message
!C,9,zon,vll,vhh,vil,vir,vmm,mod,bas,trb,tud,tdd <cr>
Write-Min/Max-Volume-Levels
Read-Min/Max-Volume-Levels
(note 11, 16)
(note 11, 16)
*PW,10,zon,vll,vhh <cr>
*PR,10,zon <cr>
!C,10,zon,vll,vhh <cr>
!C,10,zon,vll,vhh <cr>
Write-Initial-Volume-Levels
Read-Initial-Volume-Levels
(note 12, 16)
(note 12, 16)
*PW,12,zon,vil,vir <cr>
*PR,12,zon <cr>
!C,12,zon,vil,vir <cr>
!C,12,zon,vil,vir <cr>
Write-Mute-Level/Audio-Mode
Read-Mute-Level/Audio-Mode
(note 13, 16)
(note 13, 16)
*PW,14,zon,vmm,mod <cr>
*PR,14,zon <cr>
!C,14,zon,vmm,mod <cr>
!C,14,zon,vmm,mod <cr>
Write-Bass/Treble-Levels
Read-Bass/Treble-Levels
(note 14, 17)
(note 14, 17)
*PW,16,zon,bas,trb <cr>
*PR,16,zon <cr>
!C,16,zon,bas,trb <cr>
!C,16,zon,bas,trb <cr>
Write-Taper-Delays
Read-Taper-Delays
(note 15)
(note 15)
*PW,18,zon,tud,tdd <cr>
*PR,18,zon <cr>
!C,18,zon,tud,tdd <cr>
!C,18,zon,tud,tdd <cr>
The Zone-Parameter-Config-Table combines all params of the *PW,10/12/14/16/18 commands:
Write-Zone-Parameter-Config-Table
*PW,9,zon,vll,vhh,vil,vir,vmm,mod,bas,trb,tud,tdd <cr>
Read-Zone-Parameter-Config-Table
*PR,9,zon <cr> !C,9,zon,vll,vhh,vil,vir,vmm,mod,bas,trb,tud,tdd <cr>
Read-All-Config-Tables
*PR,8,bzn <cr>
!C,9… for all zones on switcher
bzn is base-zone of switcher
1 to 249; on 4/8/16-zone increments (eg: 1, 5, 9, 13, 17, 21, 25, 29, 33,... )
Factory-Setting = 1 (see note 3)
flg is flag
fst is flag state
1 to 199 (see note 5, 6)
0 (off) or 1 (on) (see note 5, 6) Factory-Setting = 0
clu is cluster number
gbz is group-base-zone
gzd is group-zone-definition
1 to 8 (see note 7)
1 to 249; on 8-zone increments (eg: 1, 9, 17... ) (see note 7)
1 to 255 (each bit specifies 1 of 8 zones, starting at gbz) (see note 7)
zon is zone
1 to 255
sid is Zone-Setup id
1 to 9 (see note 10)
vll is Minimum-Volume-Level
vhh is Maximum-Volume-Level
vil is Initial-Left-Volume-Level
vir is Initial-Right-Volume-Level
vmm is Mute-Volume-Level
0 to 35
0 to 35
0 to 35
0 to 35
0 to 35
mod is Zone-Mode
0 to 3 (see note 13) Factory-Setting = 1 (stereo/use-initial-vol)
bas is bass level
trb is treble level
0 to 8 (3-dB/increment) (see note 14, 17) Factory-Setting = 4 (0 dB)
0 to 8 (3-dB/increment) (see note 14, 17) Factory-Setting = 4 (0 dB)
tud is Taper-Up-Delay
tdd is Taper-Down-Delay
1 to 30 (ms/2-dB-step) (see note 15) Factory-Setting = 20
1 to 30 (ms/2-dB-step) (see note 15) Factory-Setting = 5
ssa is audio source
ast is source-trim-attenuation
1 to 8 (or 1 to 16, for 16-source switchers)
0 to 10 (see note 9) Factory-Setting = 0 (0-dB)
bau is New-Baud-Rate
12,19,24,38,48,57,96,115 (see note 18) Factory-Setting = 38
Lattis Matrix Switcher
(2-dB/increment)
(2-dB/increment)
(2-dB/increment)
(2-dB/increment)
(2-dB/increment)
35
(see note 11, 16)
(see note 11, 16)
(see note 12, 16)
(see note 12, 16)
(see note 13, 16)
Factory-Setting = 0 (-80 dB)
Factory-Setting = 35 (+6 dB)
Factory-Setting = 22 (-20 dB)
Factory-Setting = 22 (-20 dB)
Factory-Setting = 0 (-80 dB)
Software Version 7.3.0.0
Configuration Notes:
Note 1 – Do Not Connect Daisy Chain (*PW,100/22):
These commands are designed for configuring a single switcher – disconnect daisy-chain first (else all switchers get changed).
Note 2 – Commands affects all switchers in daisy chain (*PW,90/230/240/70/250/254/20):
These commands will change all switchers in daisy-chain, but message is returned only from the switcher with bzn=1.
Note 3 – Switcher-Base-Zone command (*PW,100):
The Switcher-Base-Zone parameter specifies where a switcher’s zone range will start. The Factory-Setting is 1: for a 16zone switcher, this means it will listen for commands directed to zones 1 to 16, and ignore other zones. If a second 16-zone
switcher is added to the system, you will need to set its Base-Zone set to 17, so it can handle zones 17 to 32. The main RS232 and/or infrared control cables will connect to the first switcher, and a 6P6C modular cable will connect from the first
switcher’s Ctrl-Out port to the Ctrl-In port on the second switcher. Switcher control can daisy-chain in this fashion to a
maximum of 255 zones in the system. The bzn parameter for a 4-zone switcher will get set to 1, 5, 9, 13, 17…, an 8-zone
switcher will get set to 1, 9, 17, 25…, while 16-zone switchers will use 1, 17, 33, 49…. The Factory-Setting for bzn is 1.
Note 4 – (not used):
Note 5 – Configuration-Flags (*PW,230):
The Configuration-Flags (1 to 99) may be turned on to change aspects of the system – these flags are non-volatile,
so they remain effective after power-cycles. The factory setting of these flags is 0 (off).
flg = 1 = Leading-Zeroes-in-Mssgs
flg = 2 = Enable-Percent-Status-on-Route
flg = 3 = Use-PAGE_PB_IN-to-Page
flg = 4 = Use-AMX-Serial-Discovery
When on, message parameters use fixed 3-char format.
When on, a Percent-Volume message is returned when routing.
(this can be used to initialize volume bargraph displays)
When on, the this contact closure input will activate/deactivate pages.
When on, enables Serial-Port-Auto-Discovery on AMX Duet systems.
Note 6 – Temporary-Configuration-Flags (*PW,240):
The Temporary-Configuration-Flags (100-199) may be turned on to temporarily change aspects of the system – the power-up
state for these flags is always 0 (off).
flg = 100 = Echo-Chars
flg = 101 = Show-Diagnostic-Mssgs
When on, RS-232 characters are echoed (for testing only)
When on, diagnostic messages (!S,190 to !S,199) are enabled
Note 7 – Cluster Definition command (*PW,70):
Clusters are saved groups, accessed only via remote controls – for RS-232 control, use the group commands directly.
A Vaux remote control can access eight Clusters, which are pre-programmed zone group definitions. Clusters have the same
constraints as zone groups (ie: up to eight consecutive zones, starting at any zone). Clusters are part of the switcher
configuration -- the factory setting provides a few ready-to-use clusters, or they may be changed using programming
commands. To access clusters 1 to 8 from an RC-16, the remote control is set to Zone-91 through 98, respectively. Only
source-selection and volume commands may be used when the remote is set to a cluster. The factory-settings are:
- cluster 1 includes zones 1 and 2
(gbz = 1, gzd = 3)
- cluster 2 includes zones 1, 2, and 3
(gbz = 1, gzd = 7)
- cluster 3 includes zones 1, 2, 3, and 4
(gbz = 1, gzd = 15)
- clusters 4 to 8 include no zones
(gbz = 1, gzd = 0)
Cluster commands apply to a group of eight consecutive zones, as defined in the cluster by gbz and gzd. Parameter gbz is
group-base-zone, and gzd is group-zone-definition, which define a group of up to eight zones. If the group is defined such
that the zones are on different switchers, the returned messages will collide and be garbled – therefore, gbz should be
restricted to 8-zone increments (1, 9, 17…). 4-zone switchers can be used if they are installed on 8-zone increments.
Lattis Matrix Switcher
36
Software Version 7.3.0.0
Each bit in gzd corresponds to one of eight zones, with bit-0 (LSB) being the lowest zone, and the bit-7 (MSB)
being the highest zone. If the bit is 1, the zone is included in the group, and if the bit is 0, it is excluded.
The first zone (selected by bit-0) is defined as group-base-zone gbz. The next seven bits in gzd correspond to the
next seven zones above gbz. For example, if gbz = 9 and gzd = 155, the group includes zones 9, 10, 12, 13, and 16.
First, choose gbz, then to select the appropriate gzd, you need to set the gzd bits corresponding to the desired zones.
Zone
9 = gbz
10
11
12
13
14
15
16
gzd-bit
bit-0
bit-1
bit-2
bit-3
bit-4
bit-5
bit-6
bit-7
bit-value
1
2
4
8
16
32
64
128
1=included
add bit-values
1 (lsb)
1
1
2
0
0
1
8
1
16
0
0
0
0
1 (msb)
128
= 10011011 = 155 = gzd
Therefore, when we choose gbz = 9, and set the appropriate bits in gzd to include zones 9, 10, 12, 13, and 16 in
the group, we need gzd = 155. You can get this gzd either by converting the binary value 10011011 to decimal,
or by adding the bit-values that correspond to the included zones (128+16+8+2+1 = 155).
For testing clusters, use the group route/volume commands but set gbz to cluster 1 to 8, and gzd to 0.
Note 8 – Percent-Volume-Range command (*PW,20)
See the Volume/Bass/Treble/Mute Command section for the Percent-Volume (*CW,21/22) commands, which are used to
adjust a zone's volume using a percentage (0 to 100) level instead of an absolute (0 to 35) level. The message returned is also
in percent, which is handy for updating a readout or bar-graph display, without the need for additional calculations.
The *PW,20 command is used to program the Percent-Volume-Range. The factory setting sets the 0-to-100 percent range to
operates on the full absolute volume range of -80 to +6 dB (0 to 35), but you may define a smaller range. For example, the
Percent-Volume-Range can be set to -40 to 0 dB (12 to 32), by issuing an *PW,20,1,12,32 command – this example prevents
the lower part of the percentage adjustment from being barely audible, by setting the 0% point at -40 dB, and sets the 100%
point at the passthrough level of 0-dB. Note that the Percent-Volume-Range is used for all zones on the switcher. Note also,
that each zone has programmable Min/Max-Volume levels (as configured by the *PW,10 cmd) – the zone min/max levels will
overide the Percent-Volume-Range, should they be set to more restrictive levels.
Note 9 – Source Trim Leveling command (*PW,22/23)
A source may be attenuated up to 20-dB, if needed, so all sources sound at a similar volume when switching.
ast
0
1
2
3
4
5
6
attenuation
0 dB
-2 dB
-4 dB
-6 dB
-8 dB
-10 dB
-12 dB
ast
7
8
9
10
attenuation
-14 dB
-16 dB
-18 dB
-20 dB
240
241
vol-down = ast+1
vol-up = ast-1
Note 10 – Zone-Setup command (*PW,40):
These Setup commands are handy for configuring zones, and are identical to the setup commands available using the RC-16
remote control (shift-pause-#, where # is the sid digit). The zone must be on and not muted to use these commands
sid = 1
sid = 2
sid = 3
sid = 4
sid = 5
sid = 6
sid = 7
sid = 8
sid = 9
Set Zone-Initial-Volumes to current left/right levels
Set Zone-Mute-Volume to current (left) level
Set Zone-Min-Volume to current (left) level
Set Zone-Max-Volume to current (left) level
Set Previous-Volume-Flag Off (zone turns on with programmed Initial-Volume level) (normal)
Set Previous-Volume-Flag On (zone turns on at previous level, saved when last turned off)
Set Audio-Mode to Mono
Set Audio-Mode to Stereo (normal)
Restore Zone-Factory-Settings (restored on this one zone only)
Lattis Matrix Switcher
37
Software Version 7.3.0.0
Note 11 – Zone Min/Max-Volume Levels command (*PW,9/10):
Min-vol has priority over mute-vol and initial-vol, and is the absolute min volume zone will reach. If min-vol incorrectly set
above max-vol, then min-vol will be presumed to be zero. Max-vol has priority over all other settings, and is the absolute
max volume zone will reach.
Note 12 – Zone Initial-Volume Levels command (*PW,9/12):
Min-Vol and Max-Vol should be set before setting Initial-Volumes. If initial-vol incorrectly set above max-vol, then initialvol will be presumed to be max-vol. If initial-vol incorrectly set below min-vol, then initial-vol will be presumed to be minvol. Initial-vol levels include both left and right levels, and should be set after performing a balance adjustment on a zone.
Note 13 – Zone Mute-Volume Level and Audio-Mode command (*PW,9/14):
Min-Vol and Max-Vol should be set before setting Mute-Volume. Mute always acts upon both L&R channels, even though
L&R volume levels may differ; balance is preserved when zone is unmuted. Mute-vol is a ceiling, not an absolute level. If
mute-vol set above min-vol, zone volume levels may go below mute-vol level. When muting, volumes above mute-vol will
lower to mute-vol level, but volumes below mute-vol will not change. If mute-vol incorrectly set above max-vol, then mutevol will be presumed to be max-vol. If mute-vol incorrectly set below min-vol, then mute-vol will be presumed to be min-vol.
Audio-Mode byte mod is a collection of bits, of which only bits 0 and 1 are currently defined:
Bit 0 (lsb) is MODE_STEREO_BIT: 1 = stereo (normal) or 0 = mono.
Bit 1 is MODE_PREVIOUS_VOL_BIT: 1 = turn-on-at-prev-vol, 0 = turn-on-at-initial-vol (normal).
The factory setting for mod is 1, which is stereo and turn-on-at-initial-vol.
To choose the appropriate mod, you need to set the bits appropriately:
Definition
MODE_STEREO_BIT
MODE_PREVIOUS_VOL_BIT
(unused)
(unused)
(unused)
(unused)
(unused)
(unused)
mod-bit
bit-0
bit-1
bit-2
bit-3
bit-4
bit-5
bit-6
bit-7
bit-value
1
2
4
8
16
32
64
128
1=on
1 (lsb)
1
0
0
0
0
0
0 (msb)
= 10011011 =
add bit-values
1
2
0
0
0
0
0
0
3 = mod
Therefore, when mod = 3, the zone will be stereo, and will turn on at previous volume.
Note 14 – Zone Bass/Treble Levels command (*PW,9/16):
Bass and Treble levels are technically part of the zone configuration (*PW cmds), but also have analogous control (*CW)
commands, for normal adjustment. The *CW commands are to be used in the user program, and also update an active zone
with the new bass/treble levels. The *PW commands are used for simply changing the switcher configuration, and changes
will not be noticed until the zone is turned off and then back on.
Note 15 – Zone Taper Delays command (*PW,9/18):
Taper delays are inserted between each 2-dB volume step to provide a pleasant transition when muting/unmuting, routing
sources, or when using the taper option with absolute volume commands. It generally sounds better to have a longer taper-up
delay than taper-down delay.
Note 16 –Volume Levels (vvl, vvr, vra) are 2-dB/increment (except for 0 = -80dB):
35
34
33
32
31
30
29
28
27
+6 dB
+4 dB
+2 dB
0 dB (pass)
-2 dB
-4 dB
-6 dB
-8 dB
-10 dB
Lattis Matrix Switcher
26
25
24
23
22
21
20
19
18
-12 dB
-14 dB
-16 dB
-18 dB
-20 dB
-22 dB
-24 dB
-26 dB
-28 dB
17
16
15
14
13
12
11
10
9
38
-30 dB
-32 dB
-34 dB
-36 dB
-38 dB
-40 dB
-42 dB
-44 dB
-46 dB
8
7
6
5
4
3
2
1
0
-48 dB
-50 dB
-52 dB
-54 dB
-56 dB
-58 dB
-60 dB
-62 dB
-80 dB
Software Version 7.3.0.0
Note 17 – Bass/Treble Levels (bas, trb) are 3-dB/increment:
8
7
6
5
4
3
2
1
0
+12 dB
+9 dB
+6 dB
+3 dB
0 dB (flat)
-3 dB
-6 dB
-9 dB
-12 dB
Note 18 – Set New Baud-Rate command (*PW,250):
The *PW,250,0,1,bau command is used to change the baud-rate:
bau
12
24
48
96
baud-rate
1200
2400
4800
9600
bau
19
38
57
115
baud-rate
19200
38400
57600
115200
The factory setting is 38400-baud, and this is the recommended baud-rate -- but this can be changed if your control system
needs a faster or slower rate.
You can also force the system to 9600-baud by holding the rear-panel Memory-Erase button depressed as you apply power.
This provides a quick field change to 9600 for systems that cannot reach 38400-baud (notably some Vantage controllers).
Lattis Matrix Switcher
39
Software Version 7.3.0.0
Polling Commands & Messages:
As defined above, Status-Message are sent automatically in response to Control-Write Commands, but system status may also be
determined at any time by polling, using these optional Control-Read Commands. Applications that parse and process StatusMessages in real-time will not need these Commands, but applications can ignore Messages until periodic polling intervals, and then
issue Polling Commands to update variables and displays.
Control-Read Cmd Description
Command
Status-Message
Read-System-Information (note 1, 2)
Read-System-Detail
(note 1, 3)
Read-Acknowledge
(note 1, 4)
*CR,100,rbz <cr>
*CR,102,rbz <cr>
*CR,101,rbz <cr>
!S,100,bzn,fam,fid,0,0,fvh,fvl <cr>
!S,102,bzn,nzo,nsi,swt,0,0,0,fvh,fvl,fvd,fvt <cr>
!S,101,bzn <cr>
Read-Current-Preset-State
*CR,90,rbz <cr>
!S,90,bzn,swt,pag,mst <cr>
Read-Zone-Audio-Status
Read-Zone-Video-Status
Read-Zone-Audio/Video-Status
Read-Zone-Audio/Video-Sources
Read-Zone-Audio-Source
Read-Zone-Video-Source
Read-Zone-Volumes
Read-Zone-Percent-Volumes
Read-Zone-Bass/Treble
*CR,1,zon <cr>
*CR,2,zon <cr>
*CR,3,zon <cr>
*CR,10,zon <cr>
*CR,11,zon <cr>
*CR,12,zon <cr>
*CR,20,zon <cr>
*CR,21,zon <cr>
*CR,40,zon <cr>
!S,1,zon,sta,ssa,vvl,vvr,bas,trb <cr>
!S,2,zon,stv,ssv <cr>
!S,3,zon,sta,stv,ssa,ssv,vvl,vvr,bas,trb <cr>
!S,10,zon,ssa,ssv <cr>
!S,11,zon,ssa <cr>
!S,12,zon,ssv <cr>
!S,20,zon,sta,vvl,vvr <cr>
!S,21,zon,sta,vpl,vpr <cr>
!S,40,zon,bas,trb <cr>
Read-Group-All-Current
Read-Group-Audio-States
Read-Group-Video-States
Read-Group-Audio-Sources
Read-Group-Video-Sources
Read-Group-Left-Volumes
Read-Group-Right-Volumes
Read-Group-Bass-Levels
Read-Group-Treble-Levels
*CR,80,gbz
*CR,81,gbz
*CR,82,gbz
*CR,83,gbz
*CR,84,gbz
*CR,85,gbz
*CR,86,gbz
*CR,87,gbz
*CR,88,gbz
!S,81… through !S,88…
!S,81,bzn,sta1,sta2…sta8 <cr>
!S,82,bzn,stvl1,stv2…stv8 <cr>
!S,83,bzn,ssa1,ssa2…ssa8 <cr>
!S,84,bzn,ssv1,ssv2…ssv8 <cr>
!S,85,bzn,vvl1,vvl2…vvl8 <cr>
!S,86,bzn,vvr1,vvr2…vvr8 <cr>
!S,87,bzn,bas1,bas2…bas8 <cr>
!S,88,bzn,trb1,trb2…trb8 <cr>
(note 1)
(note 5)
(note 5)
(note 5)
(note 5)
(note 5)
(note 5)
(note 5)
(note 5)
(note 5)
<cr>
<cr>
<cr>
<cr>
<cr>
<cr>
<cr>
<cr>
<cr>
bzn is base-zone of switcher
rbz is requested-base-zone (see note 1)
gbz is group-base-zone (see note 4)
1 to 253; on 4/8/16-zone increments (eg: 1, 5, 9, 13, 17, 21, 25, 29, 33,... )
0 to 253; on 4/8/16-zone increments (eg: 1, 5, 9, 13, 17, 21, 25, 29, 33,... )
1 to 249; on 8-zone increments (eg: 1, 9, 17... )
fam,fid is Family,Family-ID
10,5 = LE800A; 10,6 = LE800AV; 10,7 = LE1600A; 10,8 = LE1600V
10,9 = LE800V; 10,10 = LE400A; 10,12 = LE400HD; 10,13 = LE408HD
fvh,fvl is Firmware-Version-High,Low
fvd is Firmware-Version-Development
fvt is Firmware-Version-Tweak
0 to 99 each. This is the protocol level (eg: 7,1 is level 7.1)
0 to 99. This will be zero for production releases.
0 to 99. This indicates non-protocol changes.
swt is switcher-type
1 = stereo-audio, 2 = composite-video,
3 = stereo-audio/composite-video, 4 = HD-component-video
mst is machine-state
pag is current-page-status
0 = normal, 1 to 7 for preset, paging, or dynamic-state use
0 = not-paging, 1 = currently-paging with state mst
zon is zone
1 to 255 (zone-0 not permitted)
sta is audio-state code
stv is video-state code
0=off, 1=on, 2=on/muted-audio
0=off, 1=on
ssa is audio source
ssv is video source
0 to 16 (0=off)
0 to 16 (0=off)
Lattis Matrix Switcher
40
(switcher max = 4, 8, or 16)
(switcher max = 4, 8, or 16)
Software Version 7.3.0.0
vvl is left volume level
vvr is right volume level
0 to 35 (2-dB/increment)
0 to 35 (2-dB/increment)
vpl is left percent volume
vpr is right percent volume
0 to 100
0 to 100
bas is bass level
trb is treble level
0 to 8 (3-dB/increment)
0 to 8 (3-dB/increment)
Polling Notes:
Note 1 – Base-Zone Commands:
The Base-Zone-related commands will only return a message if the specified rbz parameter is zero, or matches the
programmed Base-Zone in the switcher configuration.
When both video-only and audio-only switchers have the same base-zone (eg: LE-1600A and LE-1600V), the
video switcher sends the message slightly after the audio switcher.
In an installation with multiple daisy-chained switchers, the messages from different switchers are delayed so there
are no collisions – a single command using rbz=0 will yield messages from all switchers on the daisy-chain.
Note 2 – System-Information Message (!S,100):
The SysInfo message is sent in response to a *CR,100,rbz polling Command, and is also sent at system boot. It
provides the switcher's base-zone, family/model, and the protocol level (the first 2 digits of the firmware version).
Note 3 – System-Detail Message (!S,102):
The SysDetail message is sent in response to a *CR,102,rbz polling Command, and is also sent at system boot.
It provides the switcher's base-zone, number of zones, number of sources, switcher-type, and the full firmware
version. This command is very useful for determining the entire switcher configuration -- by sending the
*CR,102,0 command at startup, the control system will receive messages from all switchers on the daisy-chain,
and can determine total zones of audio, video, etc.
Note 4 – Read-Acknowledge Command:
The Read-Acknowledge command may be used to poll for existence of switchers (with less complexity than polling
with the SysInfo or SysDetail commands).
This command is also useful in programs where you issue potentially lengthy commands (eg: multiple routes or
Preset-State changes), and wish to wait for completion – you may issue a Read-Acknowledge command, and
wait for the response before continuing in your control program.
Note 5 – Read-Group Commands (*CR,80-88):
The Read-Group commands will only return a message if the specified gbz parameter matches the programmed Base-Zone
in the switcher configuration. Unlike the other group commands, these include all eight zones starting at gbz.
The Read-Group Commands return 8 parameters starting at Base-Zone (ie: params for bzn, bzn+1…bzn+7).
For a 4-zone switcher, the last four parameters are 255 to indicate that they are not applicable. For a 16-zone
switcher, two messages are returned: the first message starts at Base-Zone (params for bzn, bzn+1…bzn+7),
and the second message starts at Base-Zone+8 (params for bzn+8, bzn+9…bzn+15).
Lattis Matrix Switcher
41
Software Version 7.3.0.0
Miscellaneous Status Messages:
These miscellaneous Status Messages are returned for system activity not related to a control or poll command:
Sensor-State-Change messages
PAGE_PB_IN input on I/O jack (note 1)
!S,180,sen,sst,0,0 <cr>
!S,180,1,sst,0,0 <cr>
Watchdog-Reset Occurred
!S,187,bzn,swt,wdt,tb0,tb1,tb2,tb3,tb4,tb5,tb6 <cr>
(note 2, 4)
sen is sensor-id; sst is new state
sst=0: >low/open, sst=1: >high/closed
Obsolete: Watchdog-Reset (Version 7.0 only)
!S,186,0,0,0,0 <cr>
Error messages:
(note 4)
Serial input buffer (232) overflow
Invalid machine/preset-state mst
Can't page – already paging
Cmd invalid when paging
!S,189,bzn,swt,em1,em2 <cr>
!S,189,bzn,swt,0,1 <cr>
!S,189,bzn,swt,0,2 <cr>
!S,189,bzn,swt,0,3 <cr>
!S,189,bzn,swt,0,4 <cr>
Diagnostic messages (normally disabled – note 3):
Command-Error
!S,190,dgc,opt,0,0 <cr>
Invalid Base-Zone cmd
!S,190,3,0,0,0 <cr>
Invalid Cmd-Type
!S,190,3,1,0,0 <cr>
(not *CW, *CR, *PW, or *PR)
Invalid Cmd-Parameter
!S,190,3,2,0,0 <cr>
(invalid cmd-id/num-params/value/checksum)
IR command request
!S,197,zon,irs,irf,0 <cr>
Unknown RC command
!S,198,rb1,rb2,rb3,rb4 <cr>
Internal diagnostic
!S,199,0,0,0,idc <cr>
Miscellaneous Status Message Notes:
Note 1 – PAGE_PB_IN input on I/O jack:
The PAGE_PB_IN contact-closure input on the I/O connector normally sends !S,180 sensor-state-change messages.
A configuration command related to paging, is *PW,230,1,3,1 (see Configuration section) – this will enable the
PAGE_PB_IN contact-closure input on the I/O connector to be used to activate (when closed) and deactivate (when open) the
paging function. In this mode the PAGE_PB_IN input will act as if the *CW,91 commands are issued. When PAGE_PB_IN
is used for paging, the !S180 messages are not returned, since a !S,90 state-change message is provided.
Note 2 – Watchdog-Reset Occurred:
The watchdog reset mechanism will restart the system (equivalent to a power-cycle) should anything cause the machine to
stop functioning properly. This should normally never happen, but certain unforgiving events (power glitch, static-zap...) can
possibly cause the system to be totally hosed. When the system stops running its normal program, the watchdog system
automatically restarts the machine. While this will result in the system initializing to an all-zones-off state, it a least provides
a return to sanity without human intervention. You can watch for the !S187 message to determine whether a watchdog reset
occurred, and you should contact the factory if you see this occur on your system.
Note 3 – Diagnostic messages:
These messages are normally disabled. You may temporarily (until power-cycle) enable these messages, for testing purposes.
To enable the diagnostic messages, issue the *PW,240,101,1 command.
Note 4 – Messages to Log:
The Watchdog-Reset (!S,187) messages should be logged by the control system, if possible, and reported to the
factory if they occur.
Lattis Matrix Switcher
42
Software Version 7.3.0.0
Remote-Control Equivalent Commands & Messages:
Pressing buttons on Vaux remote controls or keypads initiates actions equivalent to the following VauxProtocol Commands. Since
these actions result in the same Messages being sent (as they would for the equivalent Command), the control system must only parse
one set of Messages. This means that the control system is always up-to-date on zone-routes, volume-levels, and other system
parameters, regardless of whether they were initiated by a VauxProtocol command, or by a remote-control button press.
Remote-Control Button-Press
Equivalent Command
Status-Message
Set-Switcher-Base-Zone (prog/hold-#-#) *PW,100,0,0,0,bzn <cr>
(## = bzn: 01 to 98)
!C,100,0,0,0,bzn <cr>
Source-Select (tuner…) or Zone-Off
Volume-Up/Down/Release (note 1)
Bass-Up/Down (shift-chan-up/dn)
Treble-Up/Down (shift-vol-up/dn)
Flat (shift-rewind)
Mute-Toggle (mute)
Mute-On (shift-mute)
Mute-Off (shift-a/b)
!S,3,zon,sta,stv,ssa,ssv,vvl,vvr,bas,trb <cr>
!S,20,zon,sta,vvl,vvr <cr> (when button released)
!S,40,zon,bas,trb <cr>
!S,40,zon,bas,trb <cr>
!S,40,zon,bas,trb <cr>
!S,20,zon,sta,vvl,vvr <cr>
!S,20,zon,sta,vvl,vvr <cr>
!S,20,zon,sta,vvl,vvr <cr>
*CW,13,zon,src <cr>
*CW,35/36/37,zon <cr>
*CW,42/43,zon <cr>
*CW,44/45,zon <cr>
*CW,41,zon <cr>
*CW,50,zon <cr>
*CW,51,zon <cr>
*CW,52,zon <cr>
Clusters (note 2) – messages are sent for each zone in cluster-group:
Cluster-Source-Select (tuner…) or Off
*CW,60,gbz,gzd,src,src <cr>
Cluster-Vol-Up/Down
*CW,62/63,zon <cr>
Cluster-Mute-Toggle/On/Off
*CW,50/51/52,zon <cr>
Source-Trim-Down (shift-down)
Source-Trim-Up (shift-up)
Zone-Setup (shift-pause-#)
Initial-Vol-to-Current (shift-ffwd)
*PW,22,src,240 <cr>
*PW,22,src,241 <cr>
*PW,40,zon,# <cr>
*PW,40,zon,1 <cr>
Restore-All-Factory-Setttings
(prog/hold-9-9)
*PW,254,0,0,1 <cr>
!S,3,zon,sta,stv,ssa,ssv,vvl,vvr,bas,trb <cr>
!S,20,zon,sta,vvl,vvr <cr>
!S,20,zon,sta,vvl,vvr <cr>
!C,22,src,ast <cr>
!C,22,src,ast <cr>
!C,9,zon,vll,vhh,vil,vir,vmm,mod,bas,trb,tud,tdd <cr>
!C,9,zon,vll,vhh,vil,vir,vmm,mod,bas,trb,tud,tdd <cr>
!C,254,0,0 <cr>
Note 1 – Volume adjustment:
Volume ramps at 2-dB/100-msec until button released, or Min/Max-Vol reached!
Note 2 – Clusters:
Clusters 1 to 8 accessed by setting remote to zones 91 to 98, respectively.
Clusters must be programmed to define gbz and gzd for each cluster.
Note 3 – Zone-Setup Command:
These Setup commands are handy for configuring zones, and are identical to the setup commands described in the previous
section. The zone must be on and not muted to use these commands
sid = 1
sid = 2
sid = 3
sid = 4
sid = 5
sid = 6
sid = 7
sid = 8
sid = 9
Set Zone-Initial-Volumes to current left/right levels
Set Zone-Mute-Volume to current (left) level
Set Zone-Min-Volume to current (left) level
Set Zone-Max-Volume to current (left) level
Set Previous-Volume-Flag Off (zone turns on with programmed Initial-Volume level) (normal)
Set Previous-Volume-Flag On (zone turns on at previous level, saved when last turned off)
Set Audio-Mode to Mono
Set Audio-Mode to Stereo (normal)
Restore Zone-Factory-Settings (restored on this one zone only)
Lattis Matrix Switcher
43
Software Version 7.3.0.0
Connectors for System Control
Control Port (RS-232) Connector (DB-9F)
The Control Port is designed to connect directly to any control system or computer that has a standard RS-232 serial port.
A cable (not supplied) is needed to connect the Control Port to the control system or computer serial port. The Control Port has a DB9-F (female) connector – the connector pinout is defined below. Typically, only three wires are needed: TX, RX, and Ground. If your
serial port expects handshake inputs (on CTS, DSR, and/or DCD), you may be able to either change your port configuration to ignore
these signals, or you may provide either the 5V or 12V signals from the Vaux Control connector to drive them active.
Pin
1
2
3
4
5
6
7
8
9
·
·
·
·
·
·
Vaux Control Port
Signal Direction
5VDC (note 1)
->
DATA_OUT
->
DATA_IN
<PAGE_PB_IN (note 2)
<Signal Ground
—
12VDC (note 1)
->
[do not use]
<[do not use]
->
SYS_ACTIVE_OUT (note 3)
->
Standard Computer Port
DCD (Data Carrier Detect)
RXD (Receive Data)
TXD (Transmit Data)
DTR (Data Terminal Ready)
Signal Ground
DSR (Data Set Ready)
RTS (Request To Send)
CTS (Clear To Send)
RI (Ring Indicator)
Typical Connections: Data-In (TXD), Data-Out (RXD), and Signal Ground.
Minimal Connections: Data-In (TXD), and Signal Ground (for commands only)
The DB-9 shield rim (the “D”) is connected to signal ground.
Note 1: If CTS, DSR, or DCD is needed by your serial port, connect to the 5V or 12V signal (1-mA max load).
Note 2: for IP switchers and LE-400A: PAGE_PB_IN (see I/O Port description, below); for other systems: do not use
Note 3: for IP switchers and LE-400A: SYS_ACTIVE_OUT (see I/O Port desc, below); for other systems: do not use
The serial port requires 38400-baud, 8 data bits, no parity, 1 stop bit, with Xon/Xoff flow control
enabled. 38400 is recommended, but 1200 to 115200 is available via a configuration command.
The baud-rate may field-configured to 9600-baud for control systems that cannot communicate at 38400.
To set 9600-baud:
Turn off switcher, press and HOLD the Memory-Erase pushbutton,
Turn switcher back on, holding button until PROG light goes off, then release button. The PROG light will
flash and then the light-bar will indicate system is running -- serial port is now at 9600-baud.
To return to 38400-baud, you must use the config command (*PW,250), or restore factory settings:
While system is running, press and release the Memory-Erase pushbutton. The PROG light will turn on
for a couple of seconds while settings are restored, and then the light-bar will indicate system is
running -- serial port is now at 38400-baud, and all other factory settings are restored (initial turn-on volumes...).
The baud-rate setting is saved in non-volatile memory.
Lattis Matrix Switcher
44
Software Version 7.3.0.0
I/O Port Connector (8P8C modular)
The I/O Port provides a System-Active signal output (+5V when any zone on) for amplifier triggering, and a Page-Activate input for
activating/deactivating a paging/doorchime mode.
Pin
Vaux I/O Port
1
2
3
4
5
6
7
8
TX-T
TX-R
RX-T
SYS_ACTIVE_OUT
GROUND
RX-R
5V_OUT
PAGE_PB_IN
Signal Direction
Use
—
—
—
->
—
—
->
<-
Std Colors (note 3)
(reserved)
(reserved)
(reserved)
Amplifier Enable (note 1)
Signal Ground
(reserved)
5VDC (20 mA max)
Activate Page Mode (note 2)
Wht/Orn
Orn/Wht
Wht/Grn
Blu/Wht
Wht/Blu
Grn/Wht
Wht/Brn
Brn/Wht
1) SYS_ACTIVE_OUT (with respect to GROUND) is 0VDC when all zones are off, and +5VDC (20 mA max) when any zone
is on or muted. This can be used to enable a multichannel power amp which has a compatible DC activation input.
2) The PAGE_PB_IN connection is for activating the paging feature, when enabled (*PW,230). When this line is open, the
system operates normally. If a pushbutton (or relay contact) connects PAGE_PB_IN to 5V_OUT, system paging mode is
activated. Normal mode resumes when the pushbutton is opened. If this signal is not enabled for page-mode use, change-ofsignal-state messages (!S,180) are sent – this allows the control system to use this signal as a digital input.
3) Standard colors apply when using a CAT-5 UTP cable, crimped to an 8P8C modular plug according to the EIA-568B spec.
(many, but not all, ethernet patch cables use this convention; some use the less-common 568A spec, which is electrically
identical but swaps the colors of 2 pairs, just to make life miserable for installers)
Ctrl-In/Ctrl-Out Port Connectors (6P6C modular)
To daisy-chain multiple switchers, short (1-ft) modular cables interconnect the units using the Ctrl-In and Ctrl-Out ports. These daisychain 6P6C modular cables are wired for straight-through connections, and are available from Vaux under part number CBL-8. You
cannot use two or four conductor telco cords, nor can you use a reverse-wired cable.
The main control system connections are made to the Control port and/or the IR-In port on the first switcher, and a daisy-chain cable
connects from the Ctrl-Out port on this first switcher, to the Ctrl-In port of the next switcher (then from Ctrl-Out of the second unit...).
Any number of switchers may connect in this fashion to provide two-way RS-232 control, and one-way IR control, of all switchers in
the daisy-chain.
Ribbon-Expansion Connectors (34-cond)
Some Vaux audio switchers may be ordered (-RE suffix) with the optional ribbon-expansion connector(s). These are used to parallel
the stereo audio input sources and eliminate the need for Y-cables or distribution amps. The audio sources connect to the phono
connectors on the lowest chassis in the rack, and the ribbon cable(s) run vertically to connect from two to ten switchers together
(additionally, you will want to interconnect these units with modular control daisy-chain cables, as described above).
Each of the 34-conductor ribbon cables supports eight stereo audio sources. Lattis LE-800A-RE and LE-800AV-RE switchers have a
single ribbon connector, while the LE-1600A-RE has two ribbon connectors. You can, of course, mix switchers – eg: connecting an
LE-800AV-RE to and LE-1600A-RE with a single ribbon cable, for the first eight sources.
Lattis Matrix Switcher
45
Software Version 7.3.0.0
Maintenance and Service
Vaux systems are designed to be maintenance-free, but do contain sensitive electronic parts. Avoid rough treatment to assure best
performance. If you must ship the system, use the original packaging (or equivalent) for protection. The enclosures may be cleaned
with a soft, slightly-damp soft cloth. Never use detergents, excess water, treated cloths, harsh cleaning agents, or sprays.
This product is to be serviced only by the manufacturer or its authorized service agents. For instructions on how to obtain service, call
the Vaux Electronics Service Department. Attach your sales receipt to this manual for future reference, should service be required
during the warranty period. Also, record your Serial Number(s) on the cover of this manual. Serial Numbers can be found on rearpanel labels.
For more information on product service, see the Limited Warranty section.
Lattis Matrix Switcher
46
Software Version 7.3.0.0
Limited Warranty
What does your warranty cover?
Any defect in material or workmanship.
For how long after the original purchase?
Five-year limited warranty on Lattis Matrix Switchers. One-year limited warranty on Vaux Remote Controls.
What will we do?
If your Vaux product is defective and returned within 30 days of the date it was purchased, we will replace it at no charge to you. If
your Vaux product is returned after 30 days, but within the warranty repair period, we will repair it, or, at our option, replace it at no
charge to you. If we repair your Vaux product , we may use new or reconditioned replacement parts. If we choose to replace your
Vaux product, we may replace it with a new or reconditioned unit of the same or similar design. The repaired or replacement unit will
be warranted for either (a) 90 days or (b) the remainder of the original warranty period, whichever is longer.
How do you make a warranty claim?
To get warranty service for your Vaux product, you must provide proof of purchase. The “Purchase Date” is the date shown on your
invoice. Within 30 days of the Purchase Date, return your Vaux product to your place of purchase for immediate replacement. After
30 days of the date it was purchased, call the Vaux Service Department to obtain a Return Materials Authorization (RMA) Number
and ship the Vaux product standard UPS or equivalent to the Vaux Electronics Service Dept. Provide necessary additional shipping
insurance. Most shipping companies’ basic insurance coverage is only $100.00. Include in the package a copy of the sales receipt or
other evidence of date of original purchase. Also print your name, shipping address (no PO boxes), phone number and a description of
the defect. Write the RMA number on the shipping label or prominently on the outside of the box. Properly pack your unit, include
any cables, etc., which were originally provided with the product. Please use the original carton and packing materials, or equivalent.
Pay any charges billed to you by the Vaux Service Department for service not covered by the warranty. Your repaired unit will be
shipped to you prepaid freight.
What does your warranty not cover?
This warranty does not cover any upgrades of system hardware or software to revisions later than that which shipped with the system
when originally purchased. If this Vaux product includes infrared learning, this warranty does not cover incompatibility with thirdparty remote controls, such as, but not limited to: wired-remote controls, RF remote controls, ultrasonic remote controls, preprogrammed universal remote controls (third-party codes are sometimes distorted), products that operate over 100kHz, products that
use obscure or multi-frequency infrared signals. This warranty does not cover defects resulting from accidents, damage while in transit
to the Vaux Service Department, alterations, products which have been modified or incorporated into other products, unauthorized
repair, tampering, failure to follow instructions, neglect, misuse, fire, flood, lightning damage, meteorite bombardment, regional or
global warfare, or acts of God. This warranty does not cover customer instruction, installation and set-up, or batteries.
If your product is not covered by our warranty, call the Vaux Service Department for advice as to how we may repair your Vaux
product, and other repair information, including charges. At our option, we may replace, rather than repair, your Vaux product with a
new or reconditioned one of the same or similar design. The repaired or replacement product will be warranted for 90 days. This
warranty gives you specific legal rights and you may also have other rights which vary from state to state.
Limitations
Implied warranties, including those of fitness for a particular purpose and merchantability (an unwritten warranty that the product is fit
for ordinary use), are limited to one year from date of purchase. We will not pay for loss of use (eg: during warranty repair),
inconvenience, loss or theft of your Vaux product, or property damage caused by your Vaux product or its failure to work, or any other
incidental or consequential damages.
Lattis Matrix Switcher
47
Software Version 7.3.0.0
Safety Information
· As with any product, basic safety precautions should be observed during handling and use of this system.
· Before using your system, please follow and adhere to all warnings, safety and operating instructions located on the product
and in this owner’s manual. Retain this manual for future reference.
· All warnings on the system components and in the instruction manual should be adhered to
· Do not expose the system to extreme temperatures, such as found near a hot radiator or stove.
· Do not locate AC-powered equipment near water, for example, near a bathtub, shower or pool. Immersion of the system in
water could cause an electrical shock. Keep hands out of toasters.
· The components should be mounted only as directed in the instruction manual. Provide proper ventilation for any
components which generate heat. Do not situate a component such that its ventilation openings are blocked or impeded.
Components are to be situated away from heat sources such as amplifiers, heat registers, and stoves.
· Components are to be connected to a power supply only of the type described in the instruction manual, or as marked on the
component. Polarities must be observed as necessary. Any grounding or polarization means of the component should not be
defeated. Power cords should be routed such as to provide protection against pinching, abrasion, excess flexing, etc.
· Do not place lighted candles, cigarettes, cigars, etc. on the system.
· Never install or modify wiring during a lightning storm.
· Care should be taken so that objects do not fall onto, or liquids do not spill into, the system.
· Do not attempt to disassemble the enclosures. There are no customer serviceable components inside.
· If this system operates on batteries, adhere to the following precautions:
· Any battery may leak electrolyte if mixed with a different battery type, if inserted incorrectly, or if all batteries are not
replaced at the same time.
· Any battery may leak electrolyte or explode if disposed of in fire or an attempt is made to charge a battery not intended to be
recharged.
· Discard leaky batteries immediately. Leaking batteries can cause skin burns or other personal injury., and can damage
electronic components.
· Always dispose of batteries properly — please recycle when possible. Do not eat.
· Remove batteries from your system if it will not be used for an extended period of time.
This equipment generates and uses radio frequency energy which may interfere with residential radio and television reception if not
properly installed and used in accordance with instructions contained in this manual. Reasonable protection against such interference
is ensured, although there is no guarantee this will not occur in a given installation. If interference is suspected, and verified by
powering this equipment on and off, try to correct the interference by one or more of the following measures: re-orient the
radio/television receiver’s antenna; relocate the television or radio equipment with respect to the Vaux equipment; plug the equipment
into separate electrical outlets.
Lattis Matrix Switcher
48
Software Version 7.3.0.0