1
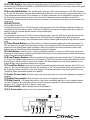
™ Important Safety Information WARNING: TO PREVENT FIRE OR SHOCK HAZARD, DO NOT EXPOSE THIS APPLIANCE TO RAIN OR MOISTURE. CAUTION: 1. Handle the power supply cord carefully Do not damage or deform the power supply cord. If it is damaged or deformed, it may cause electric shock or malfunction when used. When removing from wall outlet, be sure to remove by holding the plug attachment and not by pulling the cord. 2. In order to prevent electric shock, do not open the top cover. If a problem occurs, contact your dealer. 3. Do not place metal objects or spill liquid inside the CD player. Electric shock or malfunction may result. NOTE: This CD player uses the semiconductor laser. To allow you to enjoy music at a stable operation, it is recommended to use this in a room of 5℃ 41℉ 35℃ 95℉. CAUTION: USE OF CONTROLS OR ADJUSTMENTS OR REFORMANCE OF PROCEDURES OTHER THAN THOSE SPECIFIED HEREIN MAY RESULT IN HAZARDOUS RADIATION EXPOSURE. THE COMPACT DISC PLAYER SHOULD NOT BE ADJUSTED OR REPAIRED BY ANYONE EXCEPT PROPERLY QUALIFIED SERVICE PERSONNEL. DOUBLE INSULATED - WHEN SERVICING, USE ONLY IDENTICAL REPLACEMENT PARTS. CAUTION: TO REDUCE THE NOTE: RISK OF ELECTRIC SHOCK, DO NOT REMOVE THE COVER (OR BACK ) . THERE ARE NO SERVICEABLE PARTS INSIDE. REFER SERVICING TO QUALIFIED SERVICE PERSONNEL. The lightning flash with arrowhead symbol, within an equilateral triangle, is intended to alert the user to the presence of un insulated "dangerous voltage" within the product's enclosure that may be of sufficient magnitude to constitute a risk of electric shock to persons. The exclamation point within an equilateral triangle is intended to alert the user to the presence of important operating and maintenance (servicing) instructions in the literature accompanying the appliance. NOTE: This unit may cause interference to radio and television reception ™ Important Safety Instructions 1. Read Instructions – All the safety and operating instructions should be read before this product is operated. 2. Retain Instructions - The safety and operating instructions should be retained for future reference. 3. Heed Warnings - All warnings on the appliance and in the operating instructions should be adhered to. 4. Follow Instructions - All operating and use instructions should be followed. 5. Water and Moisture - The appliance should not be used near water - for example, near a bathtub, washbowl, kitchen sink, laundry tub, in a wet basement, or near a swimming pool, and the like. 6. Carts and Stands - The appliance should be used only with a cart or stand that is recommended by the manufacturer. An appliance and cart combination should be moved with care. Quick stops, excessive force, and uneven surfaces may cause the appliance and cart combination to overturn. 7. Wall or Ceiling Mounting - The product should be mounted to a wall or ceiling only as recommended by the manufacturer. 8. Heat - The appliance should be situated away from heat sources such as radiators, heat registers, stoves, or other appliances (including amplifiers) that produce heat. 9. Power Sources – This product should be operated only from the type of power source indicated on the making label. If you are not sure of the type of power supply to your home, consult your product dealer or local power company. For products intended to operate from battery power, or other sources, refer the operating instructions. 10. Power-Cord Protection-Power-supply cords should be routed so that they are not likely to be walked on or pinched by items placed upon or against them, paying particular attention to the cord in correspondence of plugs, convenience receptacles, and the point where they exit from the appliance. 11. Cleaning - The appliance should be cleaned only as recommended by the manufacturer. Clean by wiping with a cloth slightly damp with water. Avoid getting water inside the appliance. 12. Non-use Periods-The power cord of the appliance should be unplugged from the outlet when left unused for a long period of time. 13. Object and Liquid Entry -Care should be taken so that objects do not fall and liquids are not spilled into the enclosure through openings. 14. Damage Requiring Service-The appliance should be serviced by qualified service personnel when: A. The power-supply cord or the plug has been damaged; or B. Objects have fallen, or liquid has been spilled into the appliance; or C. The appliance has been exposed to rain; or D. The appliance does not appear to operate normally or exhibits a marked change in performance; or E. The appliance has been dropped, or the enclosure damaged. 15. Servicing-The user should not attempt any service to the appliance beyond that described in the operating instructions. All other servicing should be referred to qualified service personnel. 16. Ventilation – Slots and openings in the cabinet are provided for ventilation and to ensure reliable operation of the product and to protect it from overheating, and these openings must not be blocked or covered. The openings should never be blocked by placing the product on a bed, sofa, rug, or other similar surface. This product should not be placed in a built-in installation such as a bookcase or rack unless proper ventilation is the manufacturer’s instructions have been adhered to. 17. Attachments – do not use attachments not recommended by the product manufacturer as they may cause hazards. 18. Accessories – Do not place this product on an unstable cart, stand, tripod, bracket, or table. The product may fall, causing serious injury to a child or adult, and serious damage to the product. Use only with a cart, stand, tripod, bracket, or table recommended by the manufacturer, or sold with the product. Any mounting of the product should follow the manufacturer’s instructions, and should use a mounting accessory recommended by the manufacturer. 19. Lightning – For added protection for this product during a lightning storm, or when it is left unattended and unused for long periods of time, unplug it from the wall outlet and disconnect the antenna or cable system. This will prevent damage to the product due to lightning and power-line surges. 20. Replacement Parts – When replacement parts are required, be sure the service technician has used replacement parts specified by the manufacturer or have the same characteristics as the original part. Unauthorized substitutions may result in fire, electric shock, or other hazards. 21. Safety Check – Upon completion of any service or repairs to this product, ask the service technician to perform safety checks to determine that the product is in proper operating condition. ™ Setting up the MPCD-S6 Ultima 1.Checking the Contents Check that the carton contains the following items: 1. 2. 3. 4. Main unit Operating instructions Auto-start cable. AC power cord. 2. Installing the Unit 1. Place your unit on a flat surface. 2. Be sure the player is mounted in a well-ventilated area where it will not be exposed to direct sunlight, high temperatures, or high humidity. 3. Try to place the unit as far as possible from TVs and tuners, as the unit may cause undesirable interference. CAUTION: y The player will work normally when the unit is mounted with the front panel at within 15 degrees of the vertical plane. If the unit is tilted excessively, discs may not be loaded or unloaded properly. y The unit panel's LCD’s are designed to be clearly visible within the angles shown in Figure 1. Mount the unit panel so that the visual angle is within this range. 10 Sight point 45 3.Connections 1 Turn off the POWER switch. 2 Connect the RCA pin cord to the input on your mixer. CAUTION: • Be sure to use the supplied cables. Using other types of cable may result in unit damage. • To avoid sever damage to the unit, be sure the power is off when connections to the unit. Compact Discs 1. Precautions on handling compact discs • Do not allow fingerprints, oil or dust to get on the surface of the disc. • If the disc is dirty, wipe it off with a soft dry cloth. • Do not use benzene, thinner, water, record spray, Electrostatic-proof chemicals, or silicone-treated cloths to clean discs. • Always handle discs carefully to prevent damaging the Surface; in particular when removing a disc from its Case or returning it. • Do not bend the disc. • Do not apply heat. • Do not enlarge the hole in the center of the disc. • Do not write on the label (printed side) with a hard tipped Implement such as a pencil or ballpoint pen. • Condensation will form if a disc is brought into a warm area from a colder one, such as outdoors in winter. Do not attempt to dry the disc with a hair dryer, etc. 2. Precaution on storage • After playing a disc, always unload it from the player. • Always store the disc in the jewel case to protect from dirt or damage. • Do not place discs in the following areas: Areas exposed to directs sunlight for a considerable time. Areas subject to accumulation of dust or high humidity. Areas are affected by heat from indoor heaters, etc.. ™ Front panel illustration 21 1 13 2 12 11 3 4 5 6 22 23 15 14 9 16 7 17 8 18 19 10 20 Features & Functions top Panel 1. DISPLAY PANEL ─ LCD-display for displaying the different modes and functions. 2. SEARCH WHEEL - This wheel has 4 forward and 4 reverse speed positions allowing you to quickly scan 3. 4. 5. 6. 7. 8. through tracks. The more you turn the wheel in either direction the faster you search. TRACK BUTTON - These buttons are used the select a track. Tapping the button will forward/back skip to the next track, holding down the button will rapidly forward/back skip through the tracks. IN BUTTON - This function allows you to set a cue point without music interrupt. This button also sets the starting point of a seamless loop. OUT BUTTON - This button is used to set the ending point of a loop. A loop is started by pressing the IN button, pressing the OUT button set the loop ending point. The loop will continue to play until the OUT button is pressed once again. RELOOP BUTTON - If a seamless loop has been made, but the CD player is not actively in seamless loop mode (a loop is not playing), pressing the RELOOP button will instantly reactivate the seamless loop mode. To exit loop, press the OUT button. LOOP and RELOOP will appear in the LCD display when the reloop function is available. During play mode, pressing the RELOOP button will instantly return play the last set point without interrupt of music. CUE BUTTON - Pressing the CUE button during playback immediately pauses playback and returns the track to the last set cue point. In pause mode and the CD is at the cue point, press the CUE button to provide cue monitor. The red CUE LED will lit when the CD is at the cue point. PLAY/PAUSE BUTTON - Each press of the button to change from play to pause or from pause to play. In skid mode, press this button to break or slow start. SAMPLER BUTTON - Press this button, then press the desired BANK button to set the sampler mode. When sampler mode is set, then sampler will mix the CD music together. The sampler can play even no disc inside. The sampler will play only once or continuous depends on pressing sampler button once for continuous play and LED is lit; press button again to single play and LED is flash. And press again to cancel sampler function. ™ 9. MEMORY BUTTON - Press this button to set the memory mode, then press the desired BANK button to 10. 11. 12. 13. 14. 15. 16. 17. 18. 19. memorized the music from the cue point. The music length to be memorized is determined by the length of BANK. When the memory mode is set, the MEMORY LED is lit. You can also memorize the BANKs and the last play mode (i.e. time, single/continuous, pitch select) by pressing the memory for 1 sec. To recall the BANKs, just make the memory mode set before put the disc on the tray. EJECT BUTTON - Press this button to eject disc. The disc will not eject unless the player is in cue or pause, this prevent accidentally ejecting the disc when in play mode. KEY LOCK BUTTON - This button is used to choose the key lock mode and the pitch control mode. Key lock mode allows key change while maintaining the original key. When the key lock mode is selected, the LED above the TEMOP LOCK button glows red. PITCH ON/OFF BUTTON – This button is used to turn the PITCH SLIDER function on and off. 4%,8%,16%,100% PITCH SELECT BUTTON - Press the button in order to change pitch percentage of 4%,8%,16%,100%. 4 HOT CUE BUTTONS - Press the desired BANK button when the MEMORY LED is lit will set the memory mode. The music from the cue point will be memorized to the flash. Press the desired BANK button when the SAMPLER LED is lit will set the sampler mode. The sampler length is determined by the smaller one of out point and bank length. Press the desired BANK button will return to the start point instantly. The LED of the BANK button actived will be flashing. PITCH SLIDER - This slider is used to adjust the playback pitch percentage. The slider is a set adjustment and will remain set until the pitch slider is move or the pitch function has been turned off. TIME BUTTON - The TIME button will switch the time value described in the time meter between elapsed play time, track remaining time, and total remaining time. SGL/CTN BUTTON - This function allows you to choose between single track play or continuous track play (all tracks in order). PITCH -/+ BUTTONS - The desired pitch of CD decrease or increase when button is pressing and returns to the original pitch when the button is released. JOG WHEEL - This wheel has three functions: 1. The jog wheel will act as a frame search control when the CD in the pause or cue mode, allowing you to set a point. 2. The wheel also works as a pitch bend during playback. Turning the wheel clockwise will increase the pitch percentage up to 100%, and turning the wheel in the counter-clockwise direction will decrease the pitch percentage down to –100%. The pitch bend will be determined on how long you turn the jog wheel continuously. 3. The jog wheel also controls the bop function and a speed effect when the jog wheel effect function is activated. 20. CD LED - This LED is illuminated when a CD tray empty. 21. PARAMETER/ FORDER BUTTON - Each press of the button to switch parameter and folder. (1) In the parameter mode, turn the Time knob to adjust time and turn the Ratio knob to adjust ratio. (2) Press the button again to switch to the folder mode. a. TRACK KNOB - Pushing the track knob into “normal mode” and turn this knob to choose the desired track on the disc and show the track name is playing in the LCD b. FOLDER KNOB -Turning this knob enter “folder mode” to choose the desired folder then turn the track knob to choose the desired track within the folder; the folder and track name that is playing showed in the LCD. (Pushing the folder knob enter “folder mode” to see the folder name when in normal mode) c. Follow the File Name on the LCD to skip the MP3 track firstly, then the setting of File Name、Title or Artist will be showed when the MP3 track is read. 22. BPM BUTTON - To change the auto/manual BPM mode. 23. TAP BUTTON - 1.The TAP button is used for manual BPM. 2. Press and hold the TAP button then turn the FOLDER or Track knob will enable you to adjust BPM value. 24. REVERSE BUTTON - This button activates reverse play mode. This function will play your track or sampler in reverse. 25 26 27 28 29 30 24 ™ 25. FX SEL. BUTTON - This arrow is used to select the FX to activate and press the button to select the FX between SCRATCH/FILTER/ECHO/ TRANS and SKID/PHASE/FLANGER/PAN to activate. The LED above the FX SEL. Button will indicate which FX are selected. 26. SCRATCH/SKID BUTTON - This button is used to activate and deactivate the SCRATCH effect, when the FX SEL.LED is green. This button is used to activate and deactivate the SKID effect, when the FX SEL. LED is blue. When SCRATCH or SKID effect is activated, you can tune the TIME PARAMETER button to adjust the start time and tune the RATIO PARAMETER to adjust the stop time. If you want to fine adjust the time parameters, you can press TIME PARAMETER or RATIO PARAMETER button then rotate the JOG wheel. Hold the button to active scratch cue function and SCRATCH LED is red. SCRATCH CUE IN PLAYBACK MODE: While in play mode and when the touch sensitivity function is active, the JOG WHEEL can be used to return the unit to last cue point. Simply touch the JOG WHEEL and unit will immediately return to the last set cue point and playback without music interruption. IN CUE MODE: While in cue mode and when the touch sensitivity function is active, tapping on the JOG WHEEL can be used to start playback. The unit will continue to playback until the JOG WHEEL is released. One the JOG WHEEL is released the unit will return to the last point. 27. FILTER/PHASE BUTTON - This button is used to activate and deactivate the FILTER effect, when the FX SEL. LED is green. This button is used to activate and deactivate the PHASE effect, when the FX SEL. LED is blue. The TIME PARAMETER button is used to adjust the FILTER/PHASE effect’s scan time in mini-second. The RATIO PARAMETER button is used adjust the FILTER/PHASE effect’s frequency sweeping range. 28. HOLD BUTTON - This button allows you to set and lock any new parameters you set to the FX. This button will glow red when the hold function is activated. If the hold function is not selected any changes to the effect parameters will be momentary. 29. ECHO/FLANGER BUTTON – This button is used to activate and deactivate the ECHO effect, when the FX SEL. LED is green. This button is used to activate and deactivate the FLANGER effect, when the FX SEL. LED is blue. The TIME PARAMETER button is used to adjust the ECHO/FLANGER effect’s scan time in mini-second. The RATIO PARAMETER button is used adjust the ECHO/FLANGER effect’s frequency sweeping range. 30. TRANS/PAN BUTTON - This button is used to activate and deactivate the TRANS effect, when the FX SEL. LED is green. This button is used to activate and deactivate the PAN effect, when the FX SEL. LED is blue. The TIME PARAMETER button is used to adjust the TRANS/PAN effect’s scan time in mini-second. The RATIO PARAMETER button is used adjust the TRANS/PAN effect’s frequency sweeping range. 31. AUDIO OUT-SOCKETS - The music-signal of these sockets is analogue. Connect the output to the respective input of your mixer. 32. DIGITAL OUT-SOCKET - The music-signal of this socket is digital. Connect the output to the respective input of a digital amplifier for example. 33. RELAY SOCKET - Via the RELAY SOCKET, two CD players can relay play. If you connect with a mixer which supporting fader start, you can also relay play via mixer’s cross-fader. 34. POWER SWITCH - Press this button to start operation. 35. AC CONNECTION - Plug the power supply cable in here. 31 32 33 34 35 ™ 6. LCD Display 19 3 4 9. 15 10. 1 20 2 14 11 11. 12. 13 16 12 17 21 10 5 13. 14. 18 6 7 8 9 15. 16. 17. 1. 2. 3. 4. 5. AUTO CUE - This will indicate if the Auto Cue is on or off. Press and hold the SGL/CTN for 1 sec. to turn the Auto Cue function on and off. SINGLE - Shows when the unit is set to play just one track at a time. When this is not lit the CD will play continuously through all tracks. The function is controlled by the SGL/CTN button. LOOP - shows when the CD is repeating a particular area with the music on the CD. RELOOP - shows when the CD has had a loop set previously and can go back to loop again. ELAPSED, TOTAL REMAIN - These indicate that the time shown on the display is the ELAPSED, TOTAL REMAINING or single song remaining time. 18. 19. 20. 21. ~ 8.MINUTE, SECOND, FRAME - These displays indicate information on the current track and time TIME BAR - shows either time remaining or elapsed depending on the setting of the TIME button. FOLDER / TRACK - Shows the folder / track that unit is playing with. PITCH - Shows the pitch percentage of the song. ANTI SHOCK AND BUFFER INDICATOR - The memory status is represented on the display by a bucket being filled or emptied. The bucket itself represents the instant start function works by buffer memory. If the bucket is flashing, the instant start is not available. Each bar within the bucket represents 2 seconds of anti shock protection. There is up to 10 seconds of anti shock available. CUE - Lit when the unit is at a cue point. PAUSE - The PAUSE indicators light during pause or cue mode. PLAY - lit while the unit is playing a CD. CD INDICATOR - This will indicate that a CD is loaded in the drive. MP3 INDICATOR - This will indicate that a MP3 disc is loaded in the drive. CHARACTER DISPLAY - This will display the name of the track and album when a MP3 disc is loaded. KEY LOCK - This will indicate the key Lock function is active. AUTO BPM - This will indicate that the AUTO BPM counter is active. BPM INDICATOR - This meter will display either the BPM’s of the current track. ™ Operation 1. Eject Function Press this button to eject the disc. The disc will not eject unless the player is in cue or pause, this prevent accidentally ejecting the disc when in play mode. 2. CD Slot In Insert your CD in the CD Slot In. Make sure that you only hold the CD with 2 fingers on the edge. Avoid touching the inside area of the CD. 3. Selecting Tracks Select desired track by pressing the TRACK SEARCH Buttons once to move to one higher or lower track or hold the TRACK buttons down to change tracks continuously at a higher speed. When a new track is selected during playback, playback begins as soon as the search operation is completed. 4. Starting Playback Press the PLAY/PAUSE button during the pause or cue to start playback. The PLAY indicator lights when playback starts. 5. Stopping Playback There are two ways to stop playback. 1) Press the PLAY/PAUSE button during playback to pause at that point 2) Press the CUE button during playback to return to the position at which playback started (Back Cue). 6. Pausing Press the PLAY/PAUSE button to switch between play and pause. The PAUSE indicator lights when the pause mode is set. 7. Cueing "Cueing" is the action of preparing for playback; when the Cue button is pressed, playback return to the cue point and enters pause mode. When the PLAY/PAUSE button is pressed during the cue mode, playback starts. Cue point setting: A. Playback starts from pause (using the jog wheel to set the start point) or skips to a new track during play or pause. The beginning play point will be set to the cue point. Or B. Press the IN button during playback to set the new cue point (“CUE on the fly”). To return to Cue point press Cue Button. This will return to point A or B above. The player has completed the cue or pause operation and is waiting for the play start command. When the PLAY/PAUSE button is pressed, playback starts. C. To memory cues. 8. Auto Cue When disk is loaded, the cue point is set to the first source of music. If track is changed before pressing play, the cue point is changed to the new starting point. If you pause during playback this also sets the new cue point. 9. Frame Search This is done by first pausing then using the jog wheel to set the starting point. (When you use the jog wheel the monitor function allows you to hear what is playing.) Once you reach your desired starting point, you can set a cue (starting) point by pressing PLAY/PAUSE button. 10. Scanning (fast forward/fast reverse) To turn the search wheel forward or reverse will give you a fast search through a disc or track. You will scan forward or reverse at 4 different speeds depending on how much you turn the wheel. 11. Loop Play You can create a seamless loop between two points continuously. a- Press PLAY/PAUSE button so a CD is playing. The PLAY/PAUSE button’s LED lights (figure 1). fig.1 b- Press IN button . This sets the starting point of the SEAMLESS LOOP. The IN button LED will light (figure 2). fig.2 c- Press OUT button to set desired ending point of the SEAMLESS LOOP. You will know you are in SEAMLESS LOOP mode because IN and OUT LED will light and flash. LOOP INDICATOR in LCD DISPLAY will also flash. Sound will continue with no interruption (SEAMLESS LOOP)(figure 3). fig.3 d- To exit SEAMLESS LOOP, press OUT button . LED will stay on but not flash. Music will resume normal play (figure 4). fig.4 e- To replay loop, press the RELOOP button. IN/ R.CUE and OUT LED and LOOP INDICATOR in LCD DISPLAY will all begin flashing again (figure 5). fig.5 12. Seamless Loop Play (Cont.) a- (Must be in SEAMLESS LOOP mode). If a SEAMLESS LOOP has not been created, follow instructions on this page for creating a SEAMLESS LOOP. If a SEAMLESS LOOP has already been created, press RELOOP BUTTON to reenter the SEMALESS LOOP mode. b- Next, press OUT BUTTON to return to normal play (figure 6). This disengages the SEAMLESS LOOP mode. ™ fig.6 c- Press OUT button again for new desired ending point of the loop (figure 7). fig.7 d- To press and hold the RELOOP button until the end time of the loop is disp ayed to edit a loop and the OUT button LED will light and flash, turn the JOG WHEEL to edit loop shooter or longer. 13. Time Display During normal play, each time you press TIME button, the display changes as following information of elapsed, remain and total remaining time. 14. Pitch Bending The speed increases or decreases respectively while the PITCH BEND+ or PITCH BEND- button is pressed. The extent to which the speed change is proportionate to the amount of time the button is pressed. For example, if the PITCH BEND+ button is held in continuously, the speed increases continuously. The pitch changes within the range of +/- pitch select. The jog wheel will temporarily bend the pitch of the music if the song is already playing by rotating the wheel clockwise to speed up or counterclockwise to slowdown. The speed that you rotate the JOG Wheel determines the percent of pitch bend. 15. Memory Cueing (setting a cue point) Press the MEMORY button to make the unit enter cue memory mode (LED on), then press the desired BANK button at the desired cue point to memorize. A new cue point will be set. The numeral on the display will flash twice then lit steadily to indicate the cue memory has been set. 16. Recall Cue Point Press the MEMORY button to make the unit enter cue recall mode (LED off), then press the desired BANK button to recall the desired cue memory point, during playback or pause mode accessing a stored cue point will cue to that point and instantly start without any music interruption. The last cue that was stored or recalled will flash in the LCD screen to let you know it was last cued 17. Memory Backup This will automatically keep your last setting (SGL, CTN) even if you unplug AC current. 18. Fader Start Playback Both player’s CONTROL jack are connected to Mixer’s CROSS FADER signal output CH1 or CH2; when the jack are connected, the operation for both player as following: Left player will return to standby mode at CUE point automatically when move CROSS FADER from left to right to start playback on right player. Right player will return to standby mode at CUE point automatically when move CROSS FADER from right to left to start playback on left player. 19. Relay Play Using Two Players How to set the Relay function: When the both players’ CONTROL jacks are connected to each other, the relay-play FX can be produced. The relay play is explained as below. Set both players to single play mode (the SINGLE indicators will lit in the displays). Begin playback on the first player. When the currently playing track ends, playback will begin automatically on the standby player. The first player will enter standby mode at the beginning of the next track on its disc. By repeating this operation, the two players can be used to perform continuous relay play. By loading new discs on the standby player, you can construct a continuous program of whatever tracks you wish. By setting a cue point on the standby player, you can perform relay to any desired cue point on the selected track. NOTE: Relay play may not work properly if the audio out jacks on the two players are not connected to the same audio amplifier. 20. Stutter Effect It can create a sound similar to a CD skipping. The STUTTER Effect can be created in 2 ways. (1) By rapidly pressing the CUE button a. Press PLAY/PAUSE button so that music is playing. PLAY/PAUSE LED will light (figure 8). fig.8 b. Next, rapidly press the CUE button in sync with the music (figure 9). fig.9 (2) By rapidly pressing the BANK1 or BANK 2 or BANK 3 or BANK 4 buttons 21. Sensitivity Adjustment Press and hold the pitch on/off button, then turn each parameter knob to adjust jog wheel sensitivity, range is -20 ~ +20. To view the setting value, press and hold the pitch on/off button, then press each parameter knob. 22. Sleep Mode The CD player automatically shuts off the transport and laser after 15 minutes (when in pause or cue mode). This will lengthen the life of your motor drive and laser. To restart player, just press cue, PLAY/PAUSE buttons. ™ Technical Specifications Features Anti-shock Playback Instant Start Seamless Loop Pitch Control LCD Display Auto Cue 500*4 sampler can by memoried 4 banks for sampler and Cue memory, <5 sec. Each bank Weight & Dimensions Dimensions: 348(W)*106(H)*246(D)mm Weight: 3.7 Kg Power Requirements Power supply: AC 230/240V, 50Hz Consumption: 17W Note: Specifications and design are subject to change without notice for purpose of improvement. ™ ™ Veiligheidsinformatie WAARSCHUWING : GEBRUIK HET APPARAAT NIET IN EEN VOCHTIGE OMGEVING OM BRAND EN EEN SCHOK TE VOORKOMEN. BELANGRIJK: 1.Controleer bij gebruik of het netsnoer niet beschadigd is om een gevaarlijke situatie te voorkomen ; tevens zal het apparaat dan niet of slecht werken. Trek de steker nooit aan het snoer uit de wandcontactdoos (stopcontact). 2. Nooit de behuizing verwijderen om een schok te voorkomen ; neem contact op met uw leverancier bij calamiteiten. 3. Zorg ervoor dat er geen metalen voorwerpen in het apparaat komen en vermijd dat er vloeistof in/op apparaat lekt. N.B. Deze CD speler maakt gebruik van een laser : Kijk nooit in de laser , dit kan blindheid veroorzaken. HET REPAREREN VAN DE CD SPELER DIENT DOOR EEN ERVAREN EN GEKWALIFICEERD VAKMAN TE GESCHIEDEN : NOOIT ZELF EXPERIMENTEREN. Symbolen in acht nemen !!! Nooit de behuizing verwijderen om een electrische schok te vermijden HOGE SPANNING : Kans op een electrische schok bij aanraking van onderdelen in de cd speler. ATTENTIE : Bedien-en service instructies raadplegen ™ BELANGRIJKE VEILIGHEIDSINSTRUCTIES Voordat u de speler gebruikt dient u eerst alle instructies te lezen. De cd speler nooit in een vochtige omgeving gebruiken zoals zwembad , badkamer , keuken o.i.d. De cd speler horizontaal plaatsen , niet met geweld verplaatsen en voorzichtig neerzetten. Om de veiligheid te waarborgen dienen er geen gaten ingeboord te worden voor oa plafond/muurmontage (tevens vervalt dan de garantie). De speler nooit boven radiatoren – heaters-ovens en zelfs niet boven een versterker plaatsen. In de EU dient de speler op een deugdelijk 220Vac wandcontactdoos te worden aangesloten. Het netsnoer zodanig plaatsen dat deze niet beschadigd kan worden om een levensgevaarlijke of zelfs dodelijke schok te voorkomen. Maak de speler schoon met een ietwat vochtige doek en gebruik géén water of andere vloeistof ivm het maken van kortsluiting gevolgd door eventueel een levensgevaarlijke afloop. Wanneer de speler een lange tijd niet wordt gebruikt dient u de steker uit het stopcontact te verwijderen. De speler mag alleen door gekwalificeerd personeel worden gerepareerd of geopend. Ventilatieopeningen mogen niet worden afgedekt; de cd speler dient zo te worden geplaatst dat ventilatieopeningen vrij zijn om oververhitting te voorkomen. Alleen toebehoren en accessoires gebruiken die door de dealer zijn voorgeschreven. Plaats de cd speler op een deugdelijke en stabiele ondergrond om vallen te voorkomen en geen letsel kan veroorzaken. Bij onweer dient u de steker uit het stopcontact te verwijderen om schade in welke vorm dan ook te voorkomen. Bij het vervangen van onderdelen dient er voor gezorgd te worden dat originele -door de fabrikant aangegeven onderdelen worden gebruikt. Vóór het aanzetten van de cd speler dient u er zich van te vergewissen dat de veiligheid voor mens en materieel is gewaarborgd. ™ De Set Up van de MPCD-S6 Ultima 1 Controleer de inhoud Controleer of de volgende onderdelen aan wezig zijn : 1 CD speler 2 Handleiding 3 Autostart kabel 4 Netsnoer 2 Het installeren van de speler 1 Plaats de speler op een vlakke ondergrond 2 Plaats de speler niet in direct zonlicht en/of in een vochtige ruimte 3 Plaats de speler niet in de omgeving van een TV of radio ivm interferentie Belangrijk : De speler zal normaal functioneren wanneer de voorkant tot max 10 graden wordt opgetild gerekend vanaf de verticale positie. Wanneer de speler hoger wordt opgesteld bestaat de kans dat de speler niet of slecht werkt. De plaats van de LCD is zo geconstrueerd dat deze uitleesbaar is op een manier zoals in onderstaande figuur is weergegeven. 10 Sight point 45 3 Aansluiting 1 Zet de netschakelaar uit 2 Sluit het RCA-snoer aan op de ingang van de mixer Belangrijk : Gebruik het bijgeleverde netsnoer ; bij gebruik van andere soorten kabel is het mogelijk dat de speler onherstelbaar wordt beschadigd. Zorg ervoor dat de spanning van de speler af is als u deze gaat installeren. 1 Er mag geen olie , stof of andere vetiige substanties op het CD-plaatje komen ; is deze toch vuil maak dan schoon met een vochtige doek en gebruik geen gevaarlike stoffen zoals benzine ,thinner , spiritus ,sprays o.i.d.. De Cd altijd met respect behandelen om beschadiging te voorkomen. Buig of verwarm de Cd niet en maak het centergat niet groter. Schrijf alléén op de label en gebruik daarvoor alléén een stift en geen ballpen o.i.d.. Gebruik de Cd niet direct als u vanuit een vochtige ruimte komt, eerst laten drogen maar niet verwarmen. 2 Wanneer u een Cd gedraaid hebt ,deze altijd weer uit de speler halen en stofvrij opbergen. Leg een Cd-plaatje nooit in direct zonlicht , in een vochtige en/of stoffige ruimte of in de buurt van een verwarming. ™ Functionele weergave : 21 1 13 2 12 11 3 4 5 6 22 23 15 14 9 16 7 17 8 18 19 10 20 Kenmerken & Functies : 1 LCD display – Uitlezing van de functies en modes. 2 Search wheel – Mbv deze draaiknop kunt u snel (4posities) vooruit-en achteruit scannen door de tracks. Hoe verder u draait deste sneller u kunt zoeken. 3 Track Button- Hiermee kunt u een track selecteren ;door de toets 1x te drukken gaat u één track verder of terug , door de toets vast te houden scant u door de tracks. 4 In Button-Hiermee kunt u een cue-point selecteren zonder de muziek te onderbreken.Ook wordt hiermee de starting-point geselecteerd van een consistente loop. Out Button- Hiermee selecteert u een ending-point van een loop ; De loop zal zo vaak worden gespeeld totdat u de OUT Button opnieuw toetst. 5 Reloop Button- Als u een loop hebt gemaakt maar de speler staat niet in loop-mode zoals boven beschreven én u toetst de RELOOP-button dan zal loop-mode opnieuw worden geactiveerd. Wilt u de loop beeindigen toets u weer op OUT-Button. LOOP en RELOOP zal in de display verschijnen. Wanneer u in Play-mode de RELOOP-button toetst zal het laatste set-point onmiddellijk worden geactiveerd zonder dat de muziek wordt onderbroken. 6 CUE Button- Op het CUE-point zal de muziek wél worden onderbroken (pauze). Toetst u daarna in PLAY-mode opnieuw op de CUE-Button zal Pauze worden geactiveerd en wordt het laatste CUEpoint opgezocht. Toets opnieuw op Play en de muziek wordt verder afgespeeld.Als de Cd op het CUE-point is aangeland brandt de rode CUE-led. 7 Play/Pause Button – iedere druk op deze toets zal de muziek stoppen(pauze) of afspelen.In Skid-mode zal de muziek in snelheid af-of toenemen. 8 Sampler Button-Om de sampler-mode te activeren toets deze knop en toets de gewenste Bank-Button ( zie 14) .Nu zal de sampler de muziek mixen. De sampler kan zelfs spelen zonder dat er een Cd in zit. De sampler zal één keer of continu afspelen afhankelijk van het drukken van de toets en de led brandt; druk de toets opnieuw voor single-play en de Led flikkert en druk opnieuw om de sampler-mode uit te schakelen. ™ 9 Memory Button- Druk deze toets en nadien de gewenste Bank-toets om de muziek vanaf het CUE-point op te slaan. De opnameduur is afhankelijk van de lengte van de BANK ; de Memory-led zal nu branden. U kunt de BANK’s en de lastplay-mode ook opslaan door de memory-toets 1 sec vast te houden. Om zich te herstellen kunt u de memorymode-set doen voordat u de Cd in de lade legt. 10 Eject Button- Hiermee kunt u de lade openen ; dit werkt niet in Cue-of Pauzemode. 11 Key Lock Button- Deze toets wordt gebruikt om de Keylock en Pitch control te selecteren.De Keylock-mode wordt gebruikt om de snelheid te veranderen zonder dat de toonhoogte af-of toeneemt i.t.t. de pitch control mode. Bij gebruik brandt de led rood boven de TEMOP Lock toets. 12 Pitch Button- Druk deze toets om de slider-functie te gebruiken. 13 Pitch-select Button- Hiermee selecteert u het Pitch percentage van 4-8-16-100%. 14 4 HOT CUE Buttons- Hiermee start u de Memory-mode door gewenste BANK-toets te drukken wanneer de Memory-led brandt.De muziek vanaf het CUE-point wordt opgeslagen. Druk op de gewenste BANK-toets wanneer de Sampler-led brandt; nu zal de Sampler-mode starten.De lengte wordt bepaald door de BANK-lengte Als u op de BANK-toets drukt zal onmiddellijk het start-point worden opgezocht.De led van de geactiveerde BANK-toets zal gaan flikkeren. 15 Pitch Slider- Hiermee kunt u de afspeelsnelheid regelen, de toonhoogte zal veranderen. 16 Time Button- Hiermee kunt u schakelen tussen het weergeven van de verstreken afspeeltijd , de resterende tracktijd en de resterende totaaltijd. 17 SGL/CTN Button- Hiermee kunt u kiezen tussen het afspelen van een enkele track of alle tracks. 18 Pitch+/-Buttons- Hiermee kunt u de snelheid lager of hoger maken door de gewenste toets vast te houden. Indien u deze loslaat gaat de pitch terug naar de originele stand. 19 Jog Wheel- Deze draaitoets heeft 3 functies : 1 Om frames op te zoeken in pauze – of cue-mode om een cue-point te selecteren. 2 Werkt als een pitch-bend gedurende play-mode.Als u de toets rechtsom draait zal de snelheid verhogen tot 100% en linksom draaien verlagen tot –100%.De snelheid is afhankelijk van hoe lang u aan deze toets draait. 3 De toets regelt ook de Bop-functie en een speed-effect wanneer de jogwheel--effectfunctie is geactiveerd. 20 CD Led- Deze Led brandt wanneer de lade leeg is. 21 Parameter/Folder Button- Om te switchen tussen Parameter en Folder. 1 In Parameter-mode aan de Time/Ratio toetsen draaien om deze in te stellen. 2 Druk opnieuw de toets om naar de Folder-mode te switchen. a TRACK KNOB- Kies de gewenste track door deze toets intedrukken in “normal mode” en te draaien. De Trackname komt in de LCD. b FOLDER KNOB- Om de gewenste Folder op te zoeken draait u de toets naar “folder mode”; draai dan aan de Track-knob om de gewenste track in de folder op te zoeken.De Track-en Foldername verschijnt in de LCD. Om de Foldername te zien in “normal mode” toets de Folder Knob. c Skipt van Filename naar Titel/Artiest terwijl de MP3 muziek wordt afgespeeld. 22 BPM Button- Om BPM-mode te selecteren (manual /auto). 23 TAP Button- Wordt gebruikt voor manual BPM. Toets en houdt de TAP-button vast, draai dan aan de Folder-of Tracktoets om de BPM in te stellen. 24 Reverse Button- Deze toets activeert de Reverse Playmode. Deze functie speelt de track of de sampler in Reverse-Mode af. 25 26 27 28 29 30 24 ™ 25 FX SEL Button- Deze Pijltoets wordt gebruikt om FX te activeren en te selecteren tussen SCRATCH/FILTER/ECHO/TRANS en SKID/PHASE/FLANGER/PAN. De Led boven deze toets geeft aan welke FX is geselecteerd. 26 Scratch/Skid Button- Om het Scratch-effect aan/uit te zetten wanneer de FX SELled groen is. Zo ook het Skid-effect wanneer deze led blauw is.Wanneer één van beide is geactiveerd kunt u de Time parametertoets tunen om de starttijd en de Ratio parameter om de stoptijd af te regelen.Als u de Time parameters wilt tunen kunt u één van beide Parametertoetsen indrukken en dan het JOGwheel te draaien.Houd de toets vast om de scratch--cue-functie te activeren en de scratch-Led wordt rood. SCRATCH CUE IN PLAYBACK MODE: In Playmode en wanneer de TOUCH-toets mode aanstaat, kan het JOGwheel gebruikt worden om het laatste CUE-point op te zoeken. Raak het JOGwheel iets aan en de speler gaat direct naar het laatste CUE-point zonder dat de muziek wordt onderbroken. IN CUE MODE : In Cuemode en wanneer de TOUCH-toets mode aanstaat , kan het JOGwheel gebruikt worden om de Playback mode te activeren. Wanneer het JOGwheel wordt vastgehouden gaat de speler in Playback mode tot zolang u het JOGwheel weer loslaat, daarna gaat de speler terug naar het laatste point. 27 Filter/Phase Button- Het Filter-effect kan hiermee worden ge(de)activeerd wanneer de FC SEL led groen is. Zo ook het Phase-effect wanneer de led blauw is.De Time parametertoets wordt gebruikt om de Filter/Phase effect scantijd in msec af te regelen.De Ratio parameter toets wordt gebruikt om de Filter/Phase effect frequentie-sweep af te regelen. 28 Hold Button- Hiermee kunt u nieuwe parameters setten en locken in FX.De toets wordt rood wanneer de Hold-functie is geactiveerd.Als de Holf-functie niet is geselecteerd is iedere verandering in de effect-parameters kortstondig. 29 Echo/Flanger Button- Hiermee wordt de Echo ge(de)activeerd wanneer de FX Sel led groen is. Zo ook het Flanger-effect wanneer de led blauw is.De Time parameter toets wordt gebruikt om de Echo/Flanger effect scantijd in msec af te regelen. De Ratio parameter toets wordt gebruikt om de Echo/Flanger effect frequentie-sweep af te regelen. 30 Trans/Pan Button- Hiermee wordt het Trans-effect ge(de)activeerd wanneer de FX Sel Led groen is. Zo ook het Pan-effect wanneer de led blauw is. De Time parameter toets wordt gebruikt om de Trans/Pan effect scantijd in msec af te regelen. De Ratio parameter toets wordt gebruikt om de Trans/Pan effect frequentie-sweep af te regelen. 31 Audio Out-sockets- Sluit de output aan op de input van een mixer.Het afgenomen signaal is analoog. 32 Digital Out-sockets- Sluit de output aan op b.v.een digitale versterker. 33 Relay Socket – Bij aansluiting op een mixer met crossfader-start kunt u de cd speler starten mbv de crossfader. Bij aansluiting op een andere cd speler gaat de 2e speler automatisch starten wanneer de 1e speler ophoudt te spelen (relay-play). 34 Power Switch- Netschakelaar aan/uit te schakelen. 35 AC Connection- Hierin kunt u het netsnoer plaatsen. 31 32 33 34 35 ™ 19 3 4 15 1 20 2 14 11 13 16 12 17 21 10 5 18 6 7 8 9 LCD DISPLAY 1 Auto Cue- Toets en houd SGL/CTN 1 sec vast om de Auto Cue functie aan/uit te zetten. 2 Single- Laat zien dat de speler een enkele track speelt; wanneer “single” niet is opgelicht speelt de speler alle tracks. Te regelen mbv SGL/CTN toets. 3 Loop- De speler speelt een door u ingestelde loop af. 4 Reloop- De speler gaat terug naar de door u vooraf ingestelde loop. 5 Elapsed,Total Remain- Geeft de verstreken of nog af te spelen tijd weer van één track of totaal te spelen tracks. 6t/m8- Laat het aantal minuten/seconden en frames zien. 9 Time Bar- Laat de verstreken en nog af te spelen tijd zien wanneer de Time-toets wordt gebruikt. 10 Folder/Track- Laat de Folder en Track zien. 11 Pitch- Laat de Pitch(snelheidspercentage) zien. 12 AntiShock and Buffer Indicator- De Memory-status wordt in de display middels een emmer weergegeven die gevuld of geleegd wordt.De emmer geeft de instant-start-functie weer mbv buffermemory.Als de emmer flikkert is de instant-start niet beschikbaar. Elk segment in de emmer geeft 2 seconden (max. 10 seconden) anti shock –protectie weer . 13 Cue- Deze licht op wanneer een Cue-point is bereikt. 14 Pause- licht op tijdens Pauze of Cue-mode. 15 Play- licht op tijdens afspelen. 16 CD Indicator- Deze geeft aan dat er een Cd in de lade aanwezig is. 17 MP3 Indicator- Deze geeft aan dat er een MP3 diskette in de lade aanwezig is. 18 Character Display- Geeft de naam van de track en album weer van een MP3 diskette. 19 Key Lock- Geeft aan dat de Key Lock-functie geactiveerd is. 20 Auto BPM- Geeft aan dat de auto BPM counter is geactiveerd. 21 BPM Indicator- Geeft de BPM’s aan van de track. ™ BEDIENING 1 Eject functie Een druk op deze toets opent de lade als de speler in Stop, Cue of Pauze-mode staat. 2 CD Slot in Plaats de Cd in de CD Slot in. Zorg ervoor dat u de speler met 2 vingers op de hoeken vasthoudt en dat u de binnenkant van de speler niet aanraakt. 3 Selecting Tracks Selecteer de gewenste track door de Track-search toets te drukken ; indien de toets wordt vastgehouden gaat de speler sneller door de tracks. 4 Start Playback Druk op de Play/Pauze toets om het afspelen te beginnen; de Play indicator licht op. 9 Frame Search Druk de Pauze toets en gebruik daarna het jogwheel om het Cuepoint te bepalen. Tijdens het draaien van het jogwheel hoort u de muziek in jogwheeltempo spelen. Wanneer het Cuepoint is bepaald wordt op de Play/Pauze toets gedrukt om dit te bevestigen. 10 Scanning(fast forward/fast reverse) Mbv Searchwheel (2) kunt u in 4 snelheden door de tracks scannen ; de snelheid hangt af van de snelheid waarmee u aan het searchwheel draait. 11 Loop Play Ukunt een loop maken tussen 2 punten : A Druk de Play/Pauze toets en de Cd begint te spelen. De led van deze toetsen begint te branden. 5 Stop Playback Er zijn 2 mannieren op het afspelen te stoppen 1 Druk de Play/Pauze toets tijdens het afspelen om de speler in de Pauzestand te zetten. 2 Druk de Cue toets tijdens het afspelen om terug te keren naar de point waar het afspelen is begonnen ( Back Cue). fig.1 B Druk de IN toets; dit bepaalt het startpoint.De Led van de IN toets begint te branden. 6 Pausing Druk op de Play/Pauze toets om tussen Play en Pauze te switchen; de Pauze indicator licht op. fig.2 7 Cueing Wanneer de Cue toets wordt gedrukt begint de speler op het Cuepoint dat vooraf is ingesteld en gaat vervolgens in de Pauzemode staan. Wanneer dan op Play/Pauze wordt gedrukt begint de speler af te spelen. Cuepoint setting: A Tijdens het spelen de speler in de Pauzestand zetten , gebruik dan het jogwheel om het startpoint op te zoeken. Dit is dan het Cuepoint. Om tijdens het afspelen terug te keren naar het Cuepoint druk op de Cuetoets. OF …… B Druk tijdens het afspelen de IN-toets om het Cuepoint ( wordt “Cue on the fly” genoemd) vast te stellen. Om tijdens het afspelen terug te keren naar het Cuepoint wordt de Cuetoets gedrukt. Druk op de Play/Pauze toets om vanaf het Cuepoint weer met afspelen te beginnen. 8 Auto Cue Wanneer de Cd begint te spelen wordt automatisch het begin van track 1 het Cuepoint. Als bv wordt geskipt naar track5 voordat de Play toets wordt gedrukt wordt het begin hiervan automatisch het Cuepoint. Ook wanneer tijdens afspelen de Pauzetoets wordt gedrukt is dit punt het Cuepoint. C Druk de OUT toets bij het gewenste eindpoint van de loop; de IN en OUT led zullen branden en flikkeren. De LOOP indicator in de display zal ook gaan flikkeren. De muziek wordt afgespeeld in de Seamless Loop. fig.3 D Druk op de OUT toets om de Seamless Loop te verlaten; de Led zal blijven branden maar flikkert niet meer. De muziek wordt dan normaal afgespeeld. fig.4 E Om de LOOP te herhalen wordt de RELOOP toets gedrukt; IN/R.CUE en OUT Led zullen beginnen te flikkeren. Tevens begint LOOP indicator in de display te flikkeren. fig.5 12 Seamless Loop Play (Cont.) A (Moet in Seamless Loop mode). Wanneer een Seamless Loop niet gemaakt is , wordt instructies gevolgd op deze bladzijde ; als deze wél gemaakt is druk dan op de RELOOP toets om opnieuw in de Seamless Loop te komen. B daarna de OUT toets drukken om in NORMAL PLAY te komen. Dit sluit de Seamless Loop buiten. ™ wordt geschoven en de rechter speler begint op het reeds ingestelde Cuepoint te spelen en vice versa. fig.6 C Druk de OUT toets opnieuw om het nieuwe eindpoint van de LOOP te bevestigen. fig.7 D Wanneer een loop niet helemaal juist is gemaakt kan mbv de RELOOP toets en JOGwheel deze worden gewijzigd: Houd de RELOOP toets vast tot het juiste eindpoint is gevonden mbv van het JOGwheel. De Led van de OUT toets zal branden en flikkeren. 13 Time Display Iedere keer als de Time toets wordt gedrukt tijdens afspelen zal de display de verstreken, de nog te spelen en de nog totale te spelen tijd weergeven. 14 Pitch Bending De snelheid wordt hoger/lager als de pitch bend + of de Pitch bend- toets wordt gedrukt.Als de toetsen worden vastgehouden wordt de snelheid steeds hoger/lager. 19 Relay Play 2 Players Als 2 spelers middels aansluiting 33 met elkaar worden verbonden en beide spelers worden in Single mode gezet (Single indicator in de display begint op te lichten) wordt de Relay Play FX als volgt bewerkstelligd: - Druk Playback op d eerste speler. - Wanneer de 1e track van de 1e speler is afgelopen begint automatisch de 2e speler af te spelen. - De 1e speler gaat dan in standby naar de volgende track en zo kan continu worden gerelay played. - Met gebruikmaking van het Cue point op de standby speler kan worden teruggekeerd naar ieder gewenst punt. N.B. Relay Play zal niet naar behoren werken als de audioout aansluitingen niet op dezelfde versterker worden aangesloten. 20 Stutter Effect Dit kan op 2 manieren worden gemaakt : 1 Druk op Play toets zodat de muziek wordt afgespeeld ; de Play/Pauze Led gaat branden. 15 Memory Cueing(set Cuepoint) Druk op Memory toets om in Memorymode te komen (Led gaat aan); druk de gewenste Bank toets op het gewenste Cuepoint om dit punt vast te leggen.De info in de dispaly zal 2 keer flikkeren en dan blijven branden ten teken dat de Cue info is vastgelegd. fig.8 Druk snel op de maat van de muziek op de Cue toets. 16 Recall Cue point Druk de Memory toets om in de Recall mode te komen (Led gaat uit) ; druk de gewenste Bank toets om naar het Cue Memory Point te gaan. De laatste Cue die werd opgeslagen zal in de display worden weergegeven en de muziek wordt afgespeeld. 17 Memory Backup De laatste programmering (SGL,CTN) wordt vastgehouden zelfs als de netspanning wegvalt. 18 Fader Start Playback Verbind 2 spelers (aansluiting 33 achterkant) met CH1 en CH2 van de mixer. De Linker speler gaat naar standby wanneer de crossfader van de mixer naar rechts fig.9 2 Druk snel op de gewenste Bank toets. 21 Sensitivity Adjustment Houd de Pitch on/off toets vast; om de jogwheel gevoeligheid (-20~+20) in te stellen mbv de parameterknoppen. 22 Sleep Mode In Pauze- of in Cue mode zal de speler de laser en de motorsturing na 15 minuten uitschakelen.Dit zal de duurzaamheid van beiden vergroten. -------------------------------------------------------------------------------------------------------------------------------------Weight: 3.7 Kg Features Anti-shock Playback Instant Start Power Requirements Power supply: AC 230/240V, 50Hz Consumption: 17W Seamless Loop Pitch Control LCD Display Auto Cue 500*4 sampler can by memoried 4 banks for sampler and Cue memory, <5 sec. Each bank Dimensions: 348(W)*106(H)*246(D)mm Note: Specifications and design are subject to change without notice for purpose of improvement. ™ ™