1
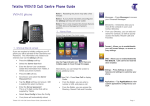
Polycom® VVX® Series
Business Media Phone User Guide
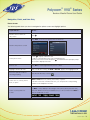
Table of Contents
Important Terms......................................................2
Getting Started.......................................................3
Phone Keys, Hardware and Features...................4
Phone Views........................................................6
Phone Icons and Status Indicators.......................9
Navigation, Fields, and Data Entry.....................10
Cleaning the Touchscreen (VVX500/600)...........14
Basic Features......................................................14
Answering Calls.................................................15
Managing Multiple Calls....................................17
Placing Calls.....................................................18
Ending Calls......................................................20
Headsets—Analog, USB, and Bluetooth.............21
Incoming Calls..................................................25
Holding, Transferring, Parking and Retrieving......26
Conference Calls..............................................28
Call Forward and Do Not Disturb.......................31
Voicemail..........................................................33
Recent Calls......................................................34
Contact Directory..............................................36
Ringtones, Volume, and Mute...........................38
Favorites............................................................40
Shared Lines (Shared Call Appearances)...........42
Advanced Features..............................................42
Call Recording..................................................42
Group Paging....................................................47
Customizing Your Phone.......................................49
Time and Date Display......................................49
Backlight............................................................50
Power-Saving Mode...........................................51
2
1-866-9-TDSBIZ
tdsbusiness.com
157149/4-14/8571
1
Polycom® VVX® Series
Business Media Phone User Guide
Important Terms
•P
ress refers to
– VVX500/600 – touching an item on the screen with your finger and then lifting your finger or depressing
a key on the keypad or pressing a screen item for a second or two.
– VVX310/410 – depressing a key on the keypad, a line key, an arrow key, a hard key—like Hold or
Microphone Mute—or pressing a soft key for a second or two.
•S
elect Submenu > Submenu > Submenu—how to access submenus. Each submenu name is in
boldface and separated by a ‘greater than’ symbol. If the instructions indicate to select Basic >
Preferences > Language, select the Basic submenu, select the Preferences submenu, and select the
Language submenu.
•H
ighlight—selecting an item on the screen so that its appearance brightens. Soft keys apply to
highlighted items.
•S
elect
– VVX500/600 – touching an item on the touch screen with your finger and then lifting your finger or
depressing a key on the keypad or pressing a screen item for a second or two.
– VVX310/410 – navigating using the arrow keys—up, down, left, and right—to highlight an item and
pressing the central Select key so that another screen opens.
•V
iews—Your phone has four main views: Home, Calls, Active Call, and Lines (the default) view. A view is a
specific screen on the phone that provides information to perform specific tasks.
• Dialpad—the area of the keypad to enter numbers and characters. Consisting of all the number keys, the
asterisk (*) and the pound (#) keys.
• Key—any button on the phone console. Phone keys include the dialpad keys,
,
,
,
,
,
,
, and
.
•O
ption—a series of items you can select for a phone setting, (ie: such as Enabled Disabled).
• Held call—any call (including a conference call) that is on hold. Audio for held calls cannot be heard.
• Active call—a call (including a conference call) you’re currently in. An active call has audio associated with it.
•S
etting—a field for which you can define information or choose an option.
• Field—the area of the screen next to a setting to enter information or select an option.
• Icon—A picture on the screen. There are two types of icons:
- An icon that you can select to access a function, feature, setting, or application. For example, when
you’re in Home view, you can select the New Call icon (
) to place a call.
- An icon that provides phone information or status only. Selecting this type of icon doesn’t access
another function. For example, your phone may have an icon to indicate you have a voicemail
message simply to notify you of the current status.
1-866-9-TDSBIZ
tdsbusiness.com
157149/4-14/8571
2
Polycom® VVX® Series
Business Media Phone User Guide
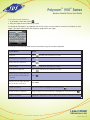
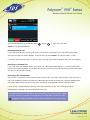
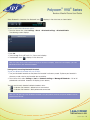
• Soft key—the context-sensitive keys that display along the bottom of the screen that update depending
on the task you’re performing. To see additional options (if available), press More. The More soft key is
always on the far-right of the soft key area, as shown below.
• Soft key area—The area (shown above) along the bottom of the screen that displays context-sensitive
soft keys.
• Status bar—the top-most section of the touchscreen that displays your extension number, the date and
time, and scrolling icons and messages.
• Scroll (VVX500/600)—how to view lists that appear on more than one screen. To scroll through items or
lists, touch the screen, and then drag your finger up, down, left, or right. To stop scrolling, stop the dragging
motion.
• Swipe (VVX500/600)—how to move a list of items up, down, left, or right. When you want to scroll quickly,
swipe your finger across the screen, either up, down, left, or right. To stop your screen from scrolling, press
your finger anywhere on the screen. Touching the screen while it scrolls won’t do anything. Swiping your
finger to the left or right also displays other phone views.
Getting Started
Before you use your phone, it’s important to become familiar with the features and user interface. You will
learn about your phone’s components, the screen layout, and the display (VVX310/410) or touchscreen
display(VVX500/600).
Note: As you read this guide, keep in mind that certain phone features are configurable by your system
administrator or determined by your phone environment. As a result, some features may not be enabled
or may operate differently on your phone. The examples and figures in this guide may not directly reflect
what displays on your phone screen.
1-866-9-TDSBIZ
tdsbusiness.com
157149/4-14/8571
3
Polycom® VVX® Series
Business Media Phone User Guide
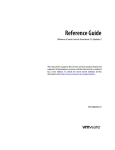
Phone Keys, Hardware, and Features
The following figures show the important phone features, which are described in the table on page 5.
VVX500/600
VVX310/410
* The number of Line Keys, Speed Dials, or Status Connect Keys in total
varies by model (VVX310 has 6, VVX410 has 12, VVX500 has 12 and VVX600 has 16).
1-866-9-TDSBIZ
tdsbusiness.com
157149/4-14/8571
4
Polycom® VVX® Series
Business Media Phone User Guide
VVX Series Phone Features
Feature
Description
Speaker
Provides ringer and hands-free (speakerphone) audio output.
Dialpad
Enables you to enter numbers, letters, and special characters. You can also use
the dialpad keys to select menu items that have index numbers.
Security slot
The connector on the back of your phone that enables you to attach a laptop
cable lock to your phone so you can secure it to a desktop. For more information
on locking your phone to the desktop, see Security Slots on Polycom Phones
(Technical Bulletin 64654).
Message Waiting Indicator
Flashes red to indicate new messages.
Home key
Press
press
Screen
Touchscreen (VVX500/600)
from any screen to display Home view. From Home view,
to display other phone views.
The color screen is touch-sensitive. Press to select and highlight screen items.
To scroll, touch the screen, and swipe your finger up, down, right, or left.
Display (VVX410)
A color diagonal backlit screen
Display (VVX310)
A grayscale diagonal backlit screen
Navigation keys/Select key
Scroll through displayed information or options. Select a field of displayed data.
Headset key
Enables you to place and receive calls through a headset. The key glows green
when an analog headset is activated.
Speakerphone key
Enables you to place and receive calls using the speakerphone. The key glows
green when activated.
Mute key
Mutes local audio during calls and conferences. The key glows red
when activated.
Volume keys
Adjust the volume of the handset, headset, speaker, and phone’s ringer.
Microphone
Transmits sound to other phones.
1-866-9-TDSBIZ
tdsbusiness.com
157149/4-14/8571
5
Polycom® VVX® Series
Business Media Phone User Guide
Phone Views
Your phone has four main views: Home, Calls, Active Call, and Lines view (the default).
To change views:
• For Home view, press .
• From Home view, press to display either Lines or Call view.
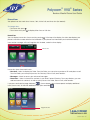
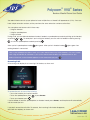
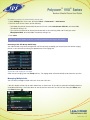
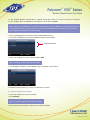
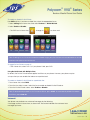
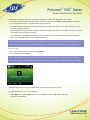
Home View
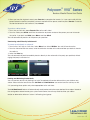
You can display Home view (shown next) by pressing . At the top of the display, the status bar displays your
phone’s extension number and the time and date. If your phone has information you should know about,
icons and/or messages will scroll, together with the date, under the time display.
Phone Line
Home view shows three main icons:
•N
ew Call—Select to display the Dialer. From the Dialer, you can enter a number or URL and place a call.
From the Dialer, you can quickly access the Directory, Recent Calls, and Favorites.
• Messages—Select to access your voicemail messages.
•D
irectories—Select to view all the contacts in your local Contact Directory. From your directory, you can
add and search for contacts, as well as quickly access the Dialer, Recent Calls, and Favorites.
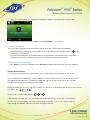
If you press and hold the page indicator,
, (shown above), Home view expands to display additional
icons (shown next). To hide the additional icons, press and hold
.
Page Indicator
1-866-9-TDSBIZ
tdsbusiness.com
157149/4-14/8571
6
Polycom® VVX® Series
Business Media Phone User Guide
Additional icons include:
• Forward—Press to set up forwarding options for incoming calls
• DND—Select to toggle DND (Do Not Disturb) on or off. When DND is enabled, your phone won’t ring and
incoming calls will go to voice mail.
• Settings—Select to access phone features and settings to customize your phone.
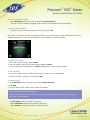
• Applications—Select to access Polycom’s “My Info Portal”. This demonstration application allows you to
access features including News, Weather, Sports, World Clock, International, Business, and a Video Gallery
(containing Polycom product videos). Please note that his application is not supported by TDS, but is for
demonstrating the phone’s capabilities and/or future applications.
From Home view, Select the phone line to display your phone lines and favorites (shown next). From this
screen, Select a phone line to open the Dialer, or Select a favorite to dial the favorite. To go back to the Home
view icons, Select Close.
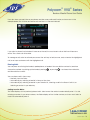
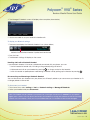
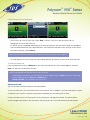
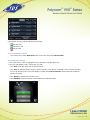
Lines View
Lines view (shown next) is your phone’s default display. Lines view displays your phone line(s), your favorites,
Status Connect monitored users and soft keys in the soft key area.
Phone Line
Favorites
Soft Keys
If your phone is idle, you can:
• Select a phone line or line key to access the Dialer.
If your phone has calls, the phone line indicates the number of calls you have, and if they’re active or held,
as shown next. If the phone line has an active call, a green color status displays. If the phone line has one or
more held calls, a flashing red color status displays.
1-866-9-TDSBIZ
tdsbusiness.com
157149/4-14/8571
7
Polycom® VVX® Series
Business Media Phone User Guide
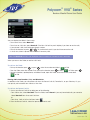
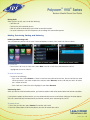
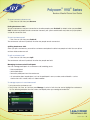
Active Call View
If you have only one call in progress—and it’s active (has audio)—you can access Active Call view (shown next).
This view displays the name and number of the person you’re talking with, and the duration of the call. From Active
Call view, you can manage the call: hold, end, or transfer it, or set up a conference call with the person you’re talking
with and another party.
Calls View
You can access Calls view (shown next) if your phone has multiple calls in progress, or you have one held call. Use
arrow or scroll to see all your calls. If your phone has multiple lines, calls display under the associated line.
Call color indicates status:
VVX310
VVX410
VVX500/600
Medium Gray
Dark Green
Dark Green
Incoming Call
Dark Gray
Bright Blue
Dark Blue
Held Call
Light Gray
Dark Blue
Dark Blue
Active Call
1-866-9-TDSBIZ
tdsbusiness.com
157149/4-14/8571
8
Polycom® VVX® Series
Business Media Phone User Guide
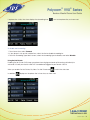
Highlight a call. The soft keys apply to the highlighted call.
Phone Icons and Status Indicators
The following icons and indicators may display on the screen to indicate phone or call status, or to indicate
that a feature is enabled. You can Select certain icons to access information or features.
Icon
Description
Icon
Description
Registered line
Press to view more or fewer icons in Home view. *
Unregistered line
Status indicators in Lines view. A flashing red bar indicates
held calls. A green bar indicates an active call.*
Phone warning
Placing a call
Active call using Polycom HD Voice
Held call
Incoming call (in Home view) *
Incoming call (in Lines view and the
Incoming Call window)
Select to see more information *
Select to edit
Shared line
Shared line with a held call
Call forwarding (Always) enabled
Select to access Recent Calls
Active conference
Select to access your Message Center
USB flash drive attached *
Missed call (in Recent Calls view)
Recording in progress or paused *
Do Not Disturb enabled
Placed call (in Recent Calls view)
Login credentials locked
Received call (in Recent Calls view)
Backspace
Note: Items asterisked are features of the VVX500/600 only.
1-866-9-TDSBIZ
tdsbusiness.com
157149/4-14/8571
9
Polycom® VVX® Series
Business Media Phone User Guide
Navigation, Fields, and Data Entry
Phone Screen
The following table shows you how to navigate the phone screen and highlight options.
If you want to…
Do this…
Return to Home view from
any screen
Press
.
Press Back, as shown next. Or press the left arrow key.
Return to the previous screen
Switch phone views
• Press to display a different view.
• Swipe to switch between two views (VVX500/600 only)
Note: If you’re in Home view and press , the Idle Browser may display. Swipe
the screen to display Lines view.
Place a call
Press Dial or use the right arrow key from a call list.
Highlight calls in Calls view
Select a call. The soft keys, like Hold or Resume, apply to the highlighted call.
Close an option box without
selecting anything
Press the left arrow key or Select
Select an icon, soft key, menu
item, or option
Select or Press the icon, soft key, menu item, or option.
If an item in a list has a number next to it, you can press the corresponding
number on the dialpad to the item.
Select a soft key that’s not
in view
.
If a More soft key displays in the far-right of the soft key area (as shown next),
there are additional soft keys available, but you can’t see them. Press More to
view the additional soft keys.
1-866-9-TDSBIZ
tdsbusiness.com
157149/4-14/8571
10
Polycom® VVX® Series
Business Media Phone User Guide
Data Fields
You can enter information and edit fields using the dialpad keys on the phone console.
Before you use the dialpad keys to enter information in fields, you can select Encoding or Mode to specify
how you want to enter information:
• Mode—enables you to enter just numbers, or text in title case, lowercase, or uppercase characters.
• E ncoding—enables you to enter alphanumeric and special characters—including all the options
available when you select Mode—as well as characters in special languages.
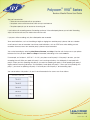
The following tables list the Mode and Encoding options.
Options Available
When You Select Mode
1 Abc
2 ABC
3 abc
4 123
Options Available When You Select Encoding
1 Abc
2 ABC
3 abc
4 123
5 ASCII (for regular text)
6 Latin (to enter accented characters)
7 Katakana (for Japanese characters)
8 Unicode (to store characters as double bytes)
9 Cyrillic (for Russian characters)
Onscreen Keyboard (VVX500/600 only)
Use the onscreen keyboard (shown above) to quickly update field information. If a data entry field only
requires numbers, the onscreen keyboard will just show numbers.
To access the onscreen keyboard, Select
in the phone’s status bar, as shown below. The icon
displays in the status bar whenever you can enter information in a field.
1-866-9-TDSBIZ
tdsbusiness.com
157149/4-14/8571
11
Polycom® VVX® Series
Business Media Phone User Guide
To use the onscreen keyboard:
1. In the phone’s status bar, Select
.
2. Press your finger on the character you want.
The character will display in a magnified view on the screen, as shown below. To enter the character, lift your
finger. If you don’t want to enter the character, drag and lift your finger.
Use the tips in the following table to enter information using the onscreen keyboard.
If you want to…
Do this…
Enter text
Select
Enter uppercase characters
Select
.
Enter lowercase characters
Select
.
Enter numbers
Select
, and Select the numbers you want.
Enter special characters
Select
, and Select the characters you want.
Exit the onscreen keyboard, enter
the information, and update the
next field
Select
Exit the onscreen keyboard, enter
the information, and save it
Select Save.
Delete a character
Select the character to highlight it in yellow and Select
Delete a series of characters
Drag your finger across the characters to highlight them in yellow and Select
Replace characters
Highlight the character(s) you want to delete. Then, enter the character(s) you want.
and Select the characters you want.
.
.
.
1-866-9-TDSBIZ
tdsbusiness.com
157149/4-14/8571
12
Polycom® VVX® Series
Business Media Phone User Guide
Dialpad Keys
You can use the dialpad keys on your phone console to update field information. If a field requires data input,
select Encoding or Mode to specify how you want to enter data.
Use the tips in the following table to enter information using the dialpad.
If you want to…
Do this…
Enter numbers, or characters in
uppercase, lowercase, or
titlecase mode
Select Encoding or Mode, and select one of the alphabetic (ABC, abc, or Abc)
options.
Enter only numbers
Select Encoding or Mode, and select the numeric (123) option.
Enter text in a special language
Select Encoding, and select one of the language options.
Enter a character
Press a dialpad key repeatedly to view the character options and stop to select.
When the character you want to enter displays in the field, wait one second,
and enter the next character.
Enter a number
Press a dialpad key repeatedly (depending what mode you’re in) to enter the
number that displays on that key.
Enter a special character
Select Encoding, and select one of the alphabetic (Abc, ABC, or abc) options.
Then, press the 1, *, 0, or # key one or more times to enter one of the following
special characters:
• 1 key: ! | ‘ ^ \ @ : 1
• * key: . * - & % + ; ( )
• 0 key: / , _ $ ~ = ? 0
• # key: # > < { } [ ] “ ‘
Note: You can’t access special characters when you’re in numerical (123) mode.
Enter a space
Select Encoding, and select one of the alphabetic (Abc, ABC, or abc) options.
Then, press the 0 key.
Note: You can’t enter a space when you’re in numerical (123) mode.
Delete one or more characters
Using the left and right arrow keys until the cursor is positioned to the right of the
character(s) you want to delete. Then, press
.
1-866-9-TDSBIZ
tdsbusiness.com
157149/4-14/8571
13
Polycom® VVX® Series
Business Media Phone User Guide
Cleaning the Touchscreen (VVX500/600)
The touchscreen requires very little maintenance. Periodically, however, you may need to clean it. Use a
clean, dry, microfiber cloth—the kind you would use to clean glass surfaces—to wipe the touchscreen. This
type of cloth is available from many office supply stores.
Before you clean the screen, disable it so you don’t activate phone functions while you wipe the touchscreen.
To enable the touchscreen again, press any key on the phone console.
To answer a call while the touchscreen is disabled, pick up the handset. Or, press
or
and Select Answer.
To clean the touchscreen:
1. Select Settings from Home view, and Select Basic > Screen Clean.
2. Wipe the glass with a clean, dry, microfiber cloth.
3. To enable the touchscreen again, press any key on the phone console.
Basic Features
This chapter introduces you to your phone’s basic features. You’ll learn about:
• Calling, answering, holding, and ending calls
• Ignoring, rejecting, forwarding, and transferring calls
• Setting up conference calls
• Enabling Do Not Disturb
• Listening to voicemail
• Handling Directories, Recent Calls, and Favorites
• Customizing ringtones
• Controlling phone volume
• Setting up Do Not Disturb
• Using headsets
• Managing shared lines
Your phone can handle multiple calls at a time. However, only one active call—the call that has audio
associated with it—can be in progress at any given time. In addition to the active call, your phone may have
multiple other calls that are either held, or in an incoming or ringing state. Your phone can handle a maximum
of 5 calls (VVX310), or 10 calls (VVX410/500/600) per line key.
1-866-9-TDSBIZ
tdsbusiness.com
157149/4-14/8571
14
Polycom® VVX® Series
Business Media Phone User Guide
Your administrator can set up your phone to have multiple lines or Shared Call Appearances (SCAs). Lines can
have unique extension numbers, or they can have the same extension number as other lines.
You can place and answer calls in these ways:
• Using the handset
• Using the speakerphone
• Using a headset
During a call, you can alternate between handset, headset, or speakerphone modes by picking up the handset,
or pressing
or
. For example, if you’re using the handset, you can switch to headset mode by pressing
, or switch to speakerphone mode by pressing
.
When you’re in speakerphone mode,
analog headset is connected.
glows green. When you’re in headset mode,
glows green if an
Note: If your speakerphone doesn’t work, your system administrator may have disabled it. You must handle
calls using the handset or a headset. If your system administrator disables the speakerphone on your
phone, Handsfree mode disabled appears on the screen after you press
.
Answering Calls
All incoming calls display in an Incoming Call window, as shown next.
To answer the call, do one of the following:
• To use the handset, pick up the handset.
• To use the speakerphone, press
or press Answer.
• To use your headset, press
.
If you’re already in handset, speakerphone, or headset mode, press Answer, and the phone will automatically
use the mode you’re in.
If you don’t answer the call within 10 seconds, the Incoming Call window disappears,
and Calls view displays, as shown next.
1-866-9-TDSBIZ
tdsbusiness.com
157149/4-14/8571
15
Polycom® VVX® Series
Business Media Phone User Guide
To answer the call, pick up the handset, press
Answer to use the speakerphone.
, or press
. Or, from Calls view, press
Answering Another Call
If you have a call and an incoming call arrives on the same or a different line, a call waiting tone beeps,
and the Incoming Call window displays. To answer the call, press Answer. The call you were in is held.
If you don’t answer the call within 10 seconds, the Incoming Call window disappears, and Calls view displays.
Answering on a Shared Line
If you share a line with another phone, you can answer calls as described above. Or, someone who shares
the line can choose to answer the call from their phone. If you answer the call and hold it, anyone who shares
your line can answer the held call.
Answering Calls Automatically
You may find it convenient for your phone to auto-answer calls, so you don’t have to press a key to answer a
call. If you enable this feature, your phone will automatically answer incoming calls using the speakerphone.
Your system administrator sets how many times your phone will ring before the call is auto-answered.
If Auto Answer is enabled and a call arrives while you’re already in a call, the incoming call will be
automatically answered if you end or hold the current call.
Your phone mutes the microphone for all auto-answered calls, so that the party calling
you can’t hear you. To unmute the microphone so the other party can hear you, press
To enable or disable microphone mute for auto-answered calls, see step 2, below.
.
1-866-9-TDSBIZ
tdsbusiness.com
157149/4-14/8571
16
Polycom® VVX® Series
Business Media Phone User Guide
To enable your phone to automatically answer calls:
1. Select Settings from Home view, and select Basic > Preferences > Auto Answer.
2. From the Auto Answer screen, do the following:
• To enable your phone to automatically answer SIP calls, select Auto Answer SIP Calls, and select Yes.
The default setting is No.
• To mute the microphone for all auto-answered calls so the incoming caller can’t hear you, select
Microphone Mute, and select Yes. The default setting is Yes.
3. Press Save.
Note: Auto Answer applies to all lines, including shared lines that ring on your phone
Answering Calls with Group Call Pickup
Your Administrator may have configured a Call Pickup Group, enabling you to quickly answer another ringing
phone in your area without having an appearance of the ringing line.
To pickup a call ringing in your area:
While the call is ringing, press the PickUp soft key. The ringing station will automatically be answered on your line.
Managing Multiple Calls
You can easily manage multiple calls from Lines and Calls view.
Calls view displays all the calls for each phone line, as shown next. All the calls for a phone line display under the
associated phone line. Scroll up or down to see all your lines and calls. To switch to Lines view, press More, and
then Lines or press
.
1-866-9-TDSBIZ
tdsbusiness.com
157149/4-14/8571
17
Polycom® VVX® Series
Business Media Phone User Guide
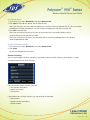
Lines view shows you each line on your phone, and how many calls each line has, as shown next. In the
example below, line 2340 has one active call, and line 2333 has one held call.
If you select a phone line that doesn’t have an active call, the most recent call on that line will become
active. The current call will be held.
To manage a call, select a call and press one of the soft keys to hold, resume, end, or transfer the highlighted
call, or set up a conference with the highlighted call.
Placing Calls
You can place a call using the handset, speakerphone, or headset. You can dial the number first, and then
choose the method—by picking up the handset, pressing
, or pressing
—or choose the method first,
and then dial the number.
You can place calls in these ways:
• Manually, from the Dialer.
• Automatically, by selecting a favorite in Home or Lines view.
• Automatically, by selecting a favorite in your Favorites list, Selecting a call in the Recent Calls list, or
Selecting a contact in your directory.
Calling from the Dialer
The Dialer displays a list of previously-placed calls. Select one of the entries to automatically enter it. Or, start
entering a number. As you enter numbers, the Dialer displays a list of similar numbers, as shown next. Select a
match to automatically enter it.
1-866-9-TDSBIZ
tdsbusiness.com
157149/4-14/8571
18
Polycom® VVX® Series
Business Media Phone User Guide
You can display the dialer in these ways:
• From Home view, select New Call.
• From Lines or Calls view, press New Call. (The New Call soft key won’t display if you have an active call.)
• If your phone is idle, start entering a phone number.
• Pick up the handset, or press
or
. This method only works if you don’t have an active call.
• In Lines view, Select a phone line that doesn’t have any calls.
Note: The New Call soft key is not displayed when the maximum number of calls is reached.
When you access the Dialer, an active call is held.
To call from the Dialer:
• Pick up the handset, press
, or press
, enter the number and Select
or Dial.
• From the Dialer, enter the number. Then, pick up the handset, press
or Select
, or Dial or press
• You are in handset, speakerphone, or headset mode, open the Dialer, enter the number, and Select
or Dial.
.
Placing Calls from Favorites, Lists, and Directories
In addition to the Dialer, you can place calls from the Recent Calls list, Favorites list, or your Directory. Or, you
can quickly call a favorite from Home or Lines view.
To call from the Recent Calls list:
1. Access your Recent Calls list by doing one of the following:
• From Home view, Select New Call. From the Dialer, Select Recent. If you only have held calls, you can also
Select New Call from Lines and Calls view.
or
• From Lines, Calls, or Active Call view, Select
.
2. From the Recent Calls list, Select the person you want to call.
1-866-9-TDSBIZ
tdsbusiness.com
157149/4-14/8571
19
Polycom® VVX® Series
Business Media Phone User Guide
To call from your Favorites list:
1. From Home view, Select New Call.
2. From the Dialer, Select Favorites.
3. From your Favorites list, Select the favorite you want to call.
Automatically Dialing Favorites
• From Home view: Select the phone line, and Select the favorite you want to call.
• From Lines view: Select the favorite you want to call.
To call from your Directory:
1. Access your directory by doing the following:
• From Home view, Select Directories or
• From Home view, Select New Call, and Select Directory.
2. From your Directory, Select the contact you want to call.
3. From the contact’s information screen, Select the contact’s phone number.
Redialing Numbers
To dial the last number you called, open the Dialer. The first number in the list is the last call you placed.
To redial a number:
1. From Home view, Select Redial soft key or
2. From Home view, Select New Call.
3. From the Dialer, Select the first number in the list. Or, instead of selecting the last call you placed, scroll
through the list and another previously-placed call.
4. Place the call.
Ending Calls
To quickly end an active call, replace the handset. Or from Lines or Calls view, press End Call. If you’re in Calls
view, be sure to highlight the call first.
Note: A call must be active to end it. To end a held call: From Calls view, select the held call to highlight it,
press Resume, and then press End Call.
1-866-9-TDSBIZ
tdsbusiness.com
157149/4-14/8571
20
Polycom® VVX® Series
Business Media Phone User Guide
Headsets – Analog, USB & Bluetooth
You can connect an analog and/or USB headset to your phone. If an analog headset is connected,
glows green. If a USB headset is connected,
glows blue. If both an analog and USB headset are
connected, the USB headset will be used. If two USB headsets are connected, the headset you connected first
will be used.
If you use a headset, you can set up your phone so that all calls use your headset. If you use a headset that
supports electronic hookswitch (EHS), you can press the hookswitch button to place, answer, and end calls. In
addition, you may be able to mute calls and control volume from your headset.
If you have a VVX 600, your phone supports Bluetooth headsets. If your system administrator enables
Bluetooth capability for your phone, you can use a Bluetooth device to handle calls. If a Bluetooth headset is
connected and in use, glows blue. If analog, digital, and Bluetooth headsets are connected to your phone
at one time, the Bluetooth headset will be used.
Enabling Headset Memory Mode
This feature is useful for permanent or full-time headset users. You can set up your phone so that all incoming
and outgoing calls use your headset. At any time, you can switch to handset or speakerphone mode.Note:
Headset Memory Mode must be enabled and then and then it can be activated.
To enable Headset Memory Mode:
1. Select Settings from Home view, and press Basic > Preferences > Headset > Headset Memory.
2. From the Headset Memory Mode screen, press Enabled.
3. Press
.
4. To activate Headset Memory Mode, press
twice.
Note: When answering a call, the call will connect to your headset automaticallyIf you switch to the
speakerphone or the handset, you deactivate Headset Memory Mode and calls will no longer
automatically go to your headset. To have calls go to your headset again, activate Headset Memory
Mode by pressing
twice.
Bluetooth Headsets (VVX600 Only)
If you have a VVX600 phone and your system administrator enables Bluetooth capability, you can use a
Bluetooth headset with your phone to handle calls.
Before you can use your Bluetooth headset with your phone, you need to turn on the Bluetooth option on your
phone, and then pair and connect your Bluetooth device with your phone.
1-866-9-TDSBIZ
tdsbusiness.com
157149/4-14/8571
21
Polycom® VVX® Series
Business Media Phone User Guide
When Bluetooth is turned on, the Bluetooth icon (
) displays in the status bar, as shown below.
To turn on the VVX600 Bluetooth option:
1. From the Home view, select Settings > Basic > Bluetooth Settings > Bluetooth Radio.
The following screen displays:
2. Press On.
3. The message Turning BT radio On / Please wait displays.
4. The Bluetooth icon (
) displays in the status bar.
Note: You may have to wait several seconds for the icon to display. When the icon displays, you can
pair and connect your Bluetooth headset.
Pairing and Connecting Bluetooth Headsets
To pair your Bluetooth headset with your VVX600:
1. Turn your Bluetooth headset on and place the headset in discovery mode. To place your headset in
discovery mode, refer to your headset documentation.
2. From Home view, select Settings > Basic > Bluetooth Settings > Manage BT Headsets. A list of all
paired and connected headsets will display (shown below).
The icon next to each headset indicates headset status:
•
—indicates the headset is paired but not connected.
•
—indicates the headset is both paired and connected.
Note: You can pair up to four Bluetooth headsets with your phone; however, only one headset can be
connected at a time.
1-866-9-TDSBIZ
tdsbusiness.com
157149/4-14/8571
22
Polycom® VVX® Series
Business Media Phone User Guide
3. If your headset displays and indicates it is paired, skip to next section To Connect your Bluetooth Headset.
4. If your headset does not appear on the display, find it by pressing Scan.
Note: Make sure your headset is in discovery mode before you press Scan. The message Place device
in discoverable mode will remind you of this. Refer to your headset documentation for information on
how to place your headset in discovery mode.
5. All the nearby devices in discovery mode will be added to the list.
6. A red icon will display next to each unpaired headset (shown below).
Unpaired headsets
7. Select the headset you want to pair and press Add.
Note: An Adding device message will display.
8. The Manage BT Headsets screen displays when complete (shown below).
9. Proceed to next section To connect your Bluetooth Headset.
To connect your Bluetooth headset:
1. Select the headset you want to connect
2. Press Connect.
Note: A Connecting device message will display.
3. Once connected, a Headset attached message will display
1-866-9-TDSBIZ
tdsbusiness.com
157149/4-14/8571
23
Polycom® VVX® Series
Business Media Phone User Guide
4. The Manage BT Headsets screen will display when complete (shown below)
5. You are now able to use your headset to handle calls.
To display your Bluetooth settings:
1. The status bar displays the Bluetooth/Headset icon (shown below)
Indicates that a Bluetooth headset is paired and conntected
2. Press the icon.
3. The Bluetooth Settings will display on the screen.
Handling Calls with a Bluetooth Headset
If your Bluetooth headset is turned on, paired and connected with your phone, you can:
• Use the headset to handle calls, including muting and adjusting call volume.
• Initiate and end calls on your headset by pressing
, or using a control on the headset.
• Switch to handset or speakerphone mode during a headset call by picking up the handset or pressing
.
Disconnecting and Removing a Bluetooth Headset
You can disconnect your headset from your phone, but still keep it paired or you can remove your headset so it’s
no longer paired or connected.
To disconnect your headset:
1. From Home view, select Settings > Basic > Bluetooth Settings > Manage BT Headsets.
2. Select your headset and press Disconnect.
Note: Your headset remains paired to your phone, but is no longer connected. To connect it to your phone
again, press Connect. You can quickly disconnect your headset by turning your headset off and the message
Headset removed displays. When you turn your headset back on, the headset will be connected again.
1-866-9-TDSBIZ
tdsbusiness.com
157149/4-14/8571
24
Polycom® VVX® Series
Business Media Phone User Guide
To remove your headset:
1. From Home view, select Settings > Basic > Bluetooth Settings > Manage BT Headsets.
2. Select your headset and press Remove.
Note: Your headset is removed from the list and is no longer paired or connected with your phone. When
you remove your headset, it won’t display in the Manage BT Headsets screen. To connect it back to your
phone, you’ll need to scan for the device, add it, and connect it again.
Incoming Calls
While your phone rings, you can do the following:
• Temporarily ignore the call before answering it.
• Reject the call so it goes directly to voicemail.
• Forward the call to another person.
Ignoring Incoming Calls
Ignore or silence a call to stop your phone from ringing. Even though the call is ignored, your phone will still
display the incoming call notification so you can still answer the call.
To ignore or silence a call:
• From the Incoming Call window, press Ignore (for private lines) or Silence (for shared lines).
The Incoming Call window disappears, your phone stops ringing, and either Home or Calls view displays.
Rejecting Incoming Calls
Reject a call to stop your phone from ringing and send the call directly to voice mail. Calls you reject display
in your Recent Calls list. Rejecting calls is not available for shared lines.
To reject an incoming call:
• From the Incoming Call window, press Reject. You can also reject an incoming call from Lines and
Calls view.
The call goes directly to voicemail.
Forwarding Incoming Calls to Another Person
While your phone rings, you can forward the call to another person.
To forward an incoming call to another person:
1. While your phone rings, press Forward.
2. From the Call Forwarding screen, enter the forwarding number, and press Forward.
1-866-9-TDSBIZ
tdsbusiness.com
157149/4-14/8571
25
Polycom® VVX® Series
Business Media Phone User Guide
During Calls
When you’re in a call, you can do the following:
• Hold the call.
• Transfer the call to another person.
• Park the call to be retrieved at your station or another location.
• Set up a conference call with the person you’re talking with and another person.
Holding, Transferring, Parking, and Retrieving
Holding and Resuming Calls
You can place any active call on hold. A held call displays in Home, Lines, and Calls view as follows:
To hold a call:
• From Active Call, Lines, or Calls view, Select Hold. If you’re in Calls view, and the active call isn’t
highlighted, be sure to Select it.
To resume a held call:
• Do one of the following:
- From Lines view, Select Resume. If there’s more than one held call on the line, the last call that you held
will be resumed. If you have multiple lines and you Select Resume, the last call that you held—on either
line—will be resumed.
- From Calls view, Select the call to highlight it, and Select Resume.
Transferring Calls
When you transfer a call to another person, you have the option to talk to the person before the transfer completes.
If your phone supports a blind transfer, you can automatically transfer a call without talking to the other person.
The call is automatically transferred after you dial the number you’re transferring the call to.
To transfer a call:
1. From Lines or Calls view, press Transfer. The active call is held.
2. From the Dialer, place a call to the person you want to transfer the call to.
1-866-9-TDSBIZ
tdsbusiness.com
157149/4-14/8571
26
Polycom® VVX® Series
Business Media Phone User Guide
3. W
hen you hear the ring-back sound, press Transfer to complete the transfer. Or, if you want to talk with the
person before the transfer completes, connect and talk with the person, and then press Transfer. To cancel
the transfer before the call connects, Press Cancel.
To perform a blind transfer:
1. From Lines or Calls view, press Transfer. The active call is held.
2. From the Dialer, press Blind, and Enter the extension or phone number of the person you want to transfer
the call to. If you don’t see Blind, press More, and then Blind.
The call automatically transfers to the person you specified.
Transferring a Call Directly to Voicemail
To transfer a call directly to voicemail:
1. From Active Call, Lines, or Calls view, Select More, then Select VM Xfer. Your call will remain active.
2. From the Voicemail Transfer screen, enter the extension number of the voicemail box you desire to transfer
the caller to.
3. Select the Enter key.
The call automatically and immediately transfers directly to the voicemail of the party you specified, without
ringing that party’s extension first.
Parking and Retrieving Parked Calls
You can park any active call, placing it on hold. The parked call can be retrieved from your station or any
station without need to transfer the call. Call Park and Park Retrieve use context-sensitive soft keys on the
VVX, presenting these options only when appropriate to the call state.
The Call Park Recall feature will automatically recall parked calls after a pre-defined timer expires. Based on
the configuration determined by your system Administrator, the call may recall at either your station
and/or an alternative station or Custom Call Routing (hunt) group.
1-866-9-TDSBIZ
tdsbusiness.com
157149/4-14/8571
27
Polycom® VVX® Series
Business Media Phone User Guide
Call Park sequence (including recall):
To park a call:
• From Active Call, Lines, or Calls view, Select Park. If you’re in Calls view, and the active call isn’t
highlighted, be sure to press the call.
• A Call Park screen will appear prompting you to enter the extension that you want to park the call against.
Enter the desired extension (any valid extension in your Enterprise) and press Enter. To return to your active
call without parking it, Select Cancel.
Note: your call will remain active while you enter the extension number to park against.
• An audio prompt will confirm that your call has been parked. Your phone will then return to an idle state.
To retrieve a parked call:
From any idle phone, press the Retrieve soft key, enter the extension the call is parked against, and press
Enter. You are now connected to the call.
Note: Accessing Park and Retrieve soft keys on your phone
• Depending on the services you subscribe to, you may need to press the More soft key on the far right
of your display to access Park and/or Retrieve keys.
• Group Call Park is not supported with this soft key.
Conference Calls
You can set up a conference call with two other people.
Just as with other calls, you can hold and resume conference calls. In addition, you’ll have the option to split a
conference call—end the conference and place the people you were talking with on hold.
During a conference, you will have access to the conference management feature. This feature allows
you to manage each person in the conference call so that you can mute, hold, and remove each person.
1-866-9-TDSBIZ
tdsbusiness.com
157149/4-14/8571
28
Polycom® VVX® Series
Business Media Phone User Guide
Setting up Conference Calls
There are two ways to set up a conference: the conventional way—by calling two people and using the
Confrnc soft key—or joining two existing calls using the Join soft key.
To set up a conference call:
1. Call the first person.
2. From Lines or Calls view, press More and then Confrnc. The active call is held.
3. Using the Dialer, call the second person.
4. When the second person answers, press More and then Confrnc to join everyone in a conference. The
Active: Conference screen displays, as shown next.
Note: If your phone has an active call and one held call—on the same or a different line—press More and
then Join from either Lines or Calls view to automatically create a conference call. The conference call takes
place on the line from which you handled the last active call.
Holding and Resuming Conference Calls
When you place a conference call on hold, you place the other two people in the call on hold. No one in a
held conference call can hear each other. To place a conference call on hold:
• From Lines or Calls view, press Hold. If you’re in Calls view, be sure to highlight the conference first. The other
two people in the conference are held. The following example shows a held conference in Calls view.
1-866-9-TDSBIZ
tdsbusiness.com
157149/4-14/8571
29
Polycom® VVX® Series
Business Media Phone User Guide
To resume a held conference call:
• From Lines or Calls view, press Resume.
Ending Conference Calls
To end a conference, and your connection to the other people, press End Call. By default, when you press End
Call, the other two people remain connected. However, your system administrator may have set up your phone
so that all connections end.
To end a conference call:
• From Lines or Calls view, press End Call.
The conference call ends. By default, the other two people remain connected.
Splitting Conference Calls
When you split a conference, you end the conference and place the other two people on hold. You can split an
active or held conference call.
To split a conference call:
• From Lines or Calls view, press Split.
The conference call ends. By default, the other two people are held.
Managing Conference Call Participants
You can manage participants in a conference call, enabling you to:
• Mute a participant.
• Hold a participant.
• Remove a participant from the conference.
• List information about a participant, such as the participant’s name, number, and call details—such as
whether the call is muted, held, or is video-enabled.
To manage a person in a conference call:
1. Set up an active conference call.
2. From Active Call, Lines, or Calls view, press Manage. If you’re in Calls view, be sure to highlight the conference
first. The following example show the screens that display when you manage a conference.
1-866-9-TDSBIZ
tdsbusiness.com
157149/4-14/8571
30
Polycom® VVX® Series
Business Media Phone User Guide
3. Highlight and Select the person you want to manage.
4. Do one of the following:
• Press Far Mute to mute the person. The muted person can hear everyone, but no one can hear the
muted person.
• Press Hold to hold the person. The held person can’t hear anyone, and no one can hear the held person.
• Press Remove to remove the person from the conference, end the conference call, and create an active
call between you and the person still in the call.
• Press Info to view information about the person and their call status. When you press Info, a popup
displays listing the person’s information, as shown next. You can navigate through the popup to see the
information.
• Press Back to exit the conference management function.
Call Forward and Do Not Disturb (DND)
Change the way calls are answered by doing the following:
• Forwarding all calls to another person.
• Temporarily refusing all calls by enabling Do Not Disturb.
Note: Do Not Disturb & Call Forwarding settings are synchronized between your phone, the managedIP
web portal, and the toolbar which means you can activate/deactivate the feature from the method that
is most convenient at the time you need to make the change. Also, your managedIP Administrator may
configure a Call Forwarding soft key on your phone or you may use the Forward key on the home menu
and activate by simply pressing the forward key.
Forwarding All Calls to Another Person
You can set up your phone to forward all calls to another number, even if the Do Not Disturb feature is
enabled. Call forwarding is not available on shared lines.
To forward all calls to another person:
1. From Home view, select Forward. (You can also select Settings from Home view, and select
Features > Forward, or if your phone is idle, press Forward from Lines view.)
2. If your phone is set up with multiple lines, select the line to apply forwarding to.
3. From the Forwarding Type Select screen, select the forwarding type you want:
• Always—To forward all incoming calls.
• No Answer—To forward all unanswered incoming calls.
• Busy—To forward calls that arrive when you’re already in a call.
4. Enter the forwarding number, and select Enable. If you selected the No Answer option, you can enter the
number of rings before your phone forwards the call. A value of 2 is recommended.
1-866-9-TDSBIZ
tdsbusiness.com
157149/4-14/8571
31
Polycom® VVX® Series
Business Media Phone User Guide
If a phone line is idle, Lines view displays the forwarding icon,
, next to the phone line, as shown next.
To disable call forwarding:
1. From Home view, select Forward.
2. If your phone is set up with multiple lines, select the line to disable forwarding for.
3. From the Forwarding Type Select screen, select the forwarding type to disable, and select Disable.
Using Do Not Disturb
Enabling Do Not Disturb (DND) stops your phone from ringing and sends all incoming calls directly to
voicemail. All calls you receive while DND is enabled are logged to your Recent Calls list.
When you enable Do Not Disturb, My Status: Do Not Disturb and
In addition,
scroll in the status bar.
displays on the phone line in Lines view, as shown next.
1-866-9-TDSBIZ
tdsbusiness.com
157149/4-14/8571
32
Polycom® VVX® Series
Business Media Phone User Guide
To enable or disable Do Not Disturb:
Press DND soft key. If you have multiple lines, select the appropriate line or
1. Select Settings from Home view, and select Features > Do Not Disturb.
2. Select Enable or Disable.
• The DND icon in Home view,
, changes to
, as shown next.
Note: Enabling Do Not Disturb on shared lines disables ringing only. You’ll still see a visual notification of the call
and have the option to answer the call.
To toggle Do Not Disturb on and off:
• From Home view, select DND. Or, if your phone is idle, press DND.
Using Do Not Disturb with Multiple Lines
By default, the Do Not Disturb feature applies to all lines on your phone. However, your phone may be
set up so that you can enable the feature on a per-line basis.
To enable or disable Do Not Disturb for a particular line:
1. From Home view, select DND.
2. From the Line Select screen, Select the line to enable or disable Do Not Disturb on.
3. From the Do Not Disturb screen, select Enable or Disable.
Note: To automatically enable Do Not Disturb for all lines, press Set All. To automatically disable the feature
for all lines, press Clear All.
Voicemail
Your phone may indicate new voicemail messages by the following:
A message counter in Home view, as shown next. The counter indicates the number of new
messages you have.
1-866-9-TDSBIZ
tdsbusiness.com
157149/4-14/8571
33
Polycom® VVX® Series
Business Media Phone User Guide
• A message in the status bar, as shown next. The message indicates the number of new messages you have.
The count is a total of all messages on all lines on the phone.
• A flashing Message Waiting Indicator, located at the top-right of your phone.
• An audible alert (if your phone is on-hook).
• A stuttered dial tone, when your phone is off-hook.
Note: To temporarily remove the message counter, press
, and select Message Center (or select
Messages from Home view, and select Message Center) and press Clear. After a period of time—usually
about an hour or two—the message indicators will display again.
To listen to voicemail messages:
1. Press
, and Select Message Center. Or, from Home view, select Messages, and select
Message Center.
2. If multiple lines are configured on your phone, the Line Select screen displays. Select the line that has
the message.
3. From the Messages screen, press Connect and follow the prompts.
Recent Calls
Your phone maintains a Recent Calls list—a list of missed, received, and placed. Each list can hold up to
100 entries.
From the Recent Calls list (shown next), you can:
• Sort, order, and filter calls (press Type). By default, the list displays all call types (missed, placed, and
received), with the most recent call displaying first, as shown next.
• Remove certain calls from the list.
• Select a call record to view call details and manage the call.
• Select an entry and press Dial to automatically call the person.
1-866-9-TDSBIZ
tdsbusiness.com
157149/4-14/8571
34
Polycom® VVX® Series
Business Media Phone User Guide
Icons display next to a call to indicate the call type:
•
Placed Calls
.
•
Received Calls
.
•
Missed Calls
.
To view your Recent Calls list:
• From Home view, select Directories from Home view, and select Recent Calls.
To manage a call record:
1. From your Recent Calls list, highlight an entry, and press the right arrow key.
2. From the call details screen, shown next, you can:
• Press Dial or the right arrow key to call the person.
•P
ress Save to add the person to your Contact Directory. If the person is already in your Contact Directory,
but isn’t a Favorite, Add to Favorites displays instead. Press Add to Favorites to automatically make the
person a Favorite.
• Press Delete to delete the call from the list.
• Press Edit/Dial to edit the phone number before you dial the person.
1-866-9-TDSBIZ
tdsbusiness.com
157149/4-14/8571
35
Polycom® VVX® Series
Business Media Phone User Guide
To customize the list:
1. From Home view, select Directories, and select Recent Calls.
2. Press Type to filter calls for specific lines or types of calls.
When you filter calls, you can choose to display only missed, received, or placed calls. Or, you can choose
to display all call types (the default). You can choose to display only calls from a certain line.
3. Press Sort to sort the calls.
When you sort calls by the time of the call, you can order calls in ascending (oldest call first)
or descending (most recent call first) order.
When you sort calls by call name, you can order calls in ascending (alphabetical) or descending
(reverse-alphabetical) order.
To remove all calls from the list:
1. From Home view, select Directories, and select Recent Calls.
2. Press Clear.
All calls are deleted from the call list.
Contact Directory
You can store a large number of contacts in your phone’s local Contact Directory (shown below). Contact
your administrator for the exact number.
From your local Contact Directory, you can:
• View contact information.
• Search for contacts.
• Dial contacts.
If you update your Contact Directory, you can also do the following:
• Add contacts.
• Update contact information.
• Delete contacts.
1-866-9-TDSBIZ
tdsbusiness.com
157149/4-14/8571
36
Polycom® VVX® Series
Business Media Phone User Guide
To view your Contact Directory:
• Select Directories from Home view, and select Contact Directory.
From your Contact Directory, navigate to view contacts or enter search criteria to find one.
To view contact information:
• From your Contact Directory, select the contact, and press Info.
The contact’s information screen, including the contact’s name and phone number, displays (as shown next).
Additional information—such as a job title, label, or email address—may also display.
To search for a contact:
1. From your Contact Directory, press Search.
2. From the Search screen, enter search criteria and press Search.
A list of search results is displayed. Press Back to display your Contact Directory again.
To dial a contact:
1. From your Contact Directory, Select the contact you want to call, and press Info.
2. From the contact’s information screen, press Dial.
To add a contact:
1. Select Directories from Home view, and select Contact Directory.
2. Press Add.
3. From the Add Contact screen, enter contact information:
Note: Directory Fields are Administrator-Set.
Therefore your phone may not display all contact fields. The only required field is the Contact field—
the contact’s phone number.
• For First Name, enter the contact’s first name.
• Select Last Name, and enter the contact’s last name.
• Select Contact, and enter the contact’s phone number.
1-866-9-TDSBIZ
tdsbusiness.com
157149/4-14/8571
37
Polycom® VVX® Series
Business Media Phone User Guide
•
•
•
•
•
The phone number must be unique, and can’t already exist in the directory.
If you save an entry with a non-unique phone number, the entry won’t be saved.
Select Job Title, and enter the contact’s job title, such as Manager.
Select Email, and enter the contact’s email address.
Select Favorite Index, and enter a favorite index number.
The number can be any unused value, up to a maximum value of 9999. A contact that has a favorite
index number will automatically display in your Favorites list. For more information about favorites,
see Managing Favorites.
Select Label, and enter a label for the contact such as, Marketing.
If you specify a label, the label will be the first item that displays for the contact on the Directory screen,
and in your Favorites list if the contact is a favorite.
Select Ring Type, and select the ringtone you want to use for the contact.
To update a contact’s information:
1. From the Contact Directory, select the contact you want to update, and press Info.
2. From the contact’s information screen, press Edit.
3. From the Edit Contact screen, update the contact’s information.
4. Press Save.
To delete a contact:
1. From your Contact Directory, select the contact you want to delete, and press Info.
2. From the contact’s information screen, press Delete. A confirmation message displays, confirming that you
want to delete the contact. Press Yes or No.
Ringtones, Volume, and Mute
You can change what you hear by doing the following:
• Updating the incoming call ringtone.
• Updating a contact’s ringtone.
• Changing the speaker volume.
• Changing the ringer volume.
• Muting the microphone.
• Changing where you hear sound effects.
Updating the Incoming Call Ringtone
A simple way to personalize your phone is to change your phone’s ringtone. You can even pick unique
ringtones for the different lines on your phone.
1-866-9-TDSBIZ
tdsbusiness.com
157149/4-14/8571
38
Polycom® VVX® Series
Business Media Phone User Guide
To select an incoming call ringtone for your phone or a line:
1. Select Settings from Home view, and select Basic > Ring Type.
2. If multiple lines are configured on your phone, select the line you want to apply a new ringtone to.
3. From the Ring Type screen, select the ringtone you want. To hear the ringtone before you change it,
press Play. The default ringtone is Low Trill.
Updating a Contact’s Ringtone
You might find it helpful to select unique ringtones for the various contacts in your Contact Directory. In this
way, you can quickly identify callers as your phone rings.
To select a ringtone for a contact:
1. From the Contact Directory, use the up and down arrow keys to select the contact you want to update,
and press Info.
2. From the contact’s information screen, press Edit.
3. From the Edit Contact screen, select Ring Type.
4. Select the ringtone you want, and then press Save.
Changing the Speaker Volume
To change the volume of what you hear during a call, press one of the Volume keys,
to lower or raise the speaker volume.
,
Changing the Ringer and Paging Volume
To change the volume of the incoming call ringtone and Group Pages, press one of the Volume keys,
, while your phone is idle or ringing, or when you are receiving a group page.
Muting the Microphone
Mute the microphone so other parties can’t hear you. Microphone Mute applies to all modes (handset,
headset, and speakerphone). You can still hear all other parties when you mute the microphone.
To mute the microphone:
• During a call (including a conference call), press
.
The Mute key glows red. The other parties can’t hear you. To disable Mute, press
again.
Choosing Where You Hear Sound Effects
You can choose whether you hear sound effects—all phone sounds except call audio—from the handset,
headset, or speaker. For example, you can configure your phone to ring on your headset, instead of the
speaker. By default, you hear all sound effects from the speaker.
1-866-9-TDSBIZ
tdsbusiness.com
157149/4-14/8571
39
Polycom® VVX® Series
Business Media Phone User Guide
To choose where you hear sound effects:
1. Select Settings from Home view, and select Basic > Preferences > Audible Ringer.
2. From the Audible Ringer screen, select where you want to hear sound effects:
• To hear sound effects only from the phone’s loudspeaker, select Speaker.
• To hear sound effects only from the handset, select Handset.
• To hear sound effects only from the headset, select Headset.
• To hear sound effects only from the device you’re currently using to hear call audio, select Active.
The default destination is Speaker.
Favorites
Favorites are the contacts in your Contact Directory that you call most often. To make a contact a favorite,
you need to assign a contact a favorite index number. You do this from the Contact Directory.
Contacts that have a favorite index number display
.
All your Favorites display in your Favorites list. A smaller number of Favorites display in Lines view
and from Home view which depends on the available keys of your VVX phone model and/or VVX expansion
module.
The following figure shows a sample Favorites list.
The following figure shows your favorites in Lines view. Favorites display under the phone line(s).
1-866-9-TDSBIZ
tdsbusiness.com
157149/4-14/8571
40
Polycom® VVX® Series
Business Media Phone User Guide
Favorites also display from the Home view, as shown next.
Favorites display consecutively, according to their index number. The contact with the lowest number displays
first. To reorder your favorites, assign the contact a different index number.
To see your Favorites:
• Press
, select Directories from Home view, and select Favorites.
To make a contact a Favorite:
• From your Contact Directory, select the contact. From the contact’s screen, press More,
and then Add to Favorites.
The contact will now have a star next to their name when you view the contact from the Contact Directory.
After you press Add to Favorites, a dialog displays asking if you want to automatically accept the next
available index number, or manually enter your own. Press Yes to automatically accept an index number,
or press Edit Index to enter a unique index number. You can enter a number up to 9999.
To quickly call a Favorite:
• From your Favorites list or from Lines view, select the favorite you want to call. The call is
automatically placed.
To reorder your Favorites:
1. From your Contact Directory, select the contact.
2. From the contact’s screen, press Edit.
3. From the Edit Contact screen, select Favorite Index,
and enter a new favorite index number.
4. Press Save.
1-866-9-TDSBIZ
tdsbusiness.com
157149/4-14/8571
41
Polycom® VVX® Series
Business Media Phone User Guide
To remove a Favorite from the list:
1. From your Contact Directory, select the contact.
2. From the contact’s screen, press Edit.
3. From the Edit Contact screen, select Favorite Index, and remove the favorite index number.
4. Press Save.
Shared Lines (Shared Call Appearances)
If your phone shares a line with other phones, an incoming call to the shared line will cause all phones to ring.
The call can be answered on any of the phones. You can transfer, hold, or set up a conference with calls on
shared lines.
If you have an incoming call on a shared line, you can stop your phone from ringing by selecting Silence.
Even though the phone doesn’t ring, the call’s visual notification will still display and you’ll still have the option
to answer the call.
In Lines view, the following icons and status indicators display for shared lines, depending if the line is idle, has
an active call, or has a held call:
Shared Line Status
Icon and Status Indicator
Status Indicator
Idle
(No indicator)
Active call
HD voice icon
Held call
Hold icon
Call Forwarding is not available on shared lines.
Advanced Features
Call Recording (VVX500/VVX600 Only)
If the call recording feature is available, and you connect a USB flash drive to the USB port on your phone,
you can record active calls on your phone. Recordings are stored as .wav files on the USB flash drive. You can
record up to four hours in one file.
When you attach a USB flash drive to your phone, a USB icon,
, scrolls in the status bar, together
with a message that tells you how much recording time is available on the USB flash drive.
1-866-9-TDSBIZ
tdsbusiness.com
157149/4-14/8571
42
Polycom® VVX® Series
Business Media Phone User Guide
You can’t record when:
• There are no connected calls on your phone.
• You place a new call to transfer a call or set up a conference.
• The phone prompts you to answer an incoming call.
If you hold a call, recording pauses. Recording continues if the called party places you on hold. Recording
stops if all active calls end, no matter who ends the calls.
If you press while recording, only the called parties are recorded.
Tones and indications, such as the dialing of digits or ringing from another party’s phone, that occur before
a call connects are not recorded. Local tones and indications, such as DTMF tones when dialing, are not
recorded. However, tones from another party’s phone may be recorded.
You control recording by selecting Start, Pause, Resume, and Stop. All active calls that occur on your phone
between the time you press Start and Stop are recorded, alternating in the same .wav file.
For example, on October 4, 2007 at 11:22 A.M., you place a call to party A. After party A answers, you start
recording the call. While you speak with party A, an incoming call arrives. You hold party A and speak with
party B. When you finish speaking with party B, you return to speaking with party A. While speaking with party A
again, another incoming call arrives. You hold party A and speak with party C. When you finish speaking with
party C, you return to speaking with party A. You end your call with party A, and recording stops.
Your conversations with parties A, B, and C are all recorded in the same .wav file as follows:
1-866-9-TDSBIZ
tdsbusiness.com
157149/4-14/8571
43
Polycom® VVX® Series
Business Media Phone User Guide
If you record, or attempt to record, a call, the following messages may appear on your screen:
• If there is insufficient free space on the USB flash drive when you press Start, recording doesn’t start and
the message USB device is full/Recording cancelled displays.
• If the USB flash drive becomes full during recording, recording stops and the message USB device is full/
Recording stopped displays.
• If you remove the USB flash drive during recording, recording stops and the message USB device removed
unsafely/Recording cancelled displays.
• If you attach an unsupported USB flash drive, the message Unsupported USB device attached displays,
along with information about the unsupported product.
Note: You may be required by federal, state, and/or local laws to notify some or all called parties when you
record calls. You can find specific information about US state requirements at http://www.rcfp.org/taping/.
To record a call:
1. From Lines, Calls, or Active Call view, select Record.
2 .To start recording, select Start.
Note: The Recording icon scrolls in the status bar while the phone records, as shown next. The message
Recording in progress also scrolls in the status bar. While you record, you can stop or pause the recording.
To hold, end, transfer, or set up a conference call while you record, press Back
3. To stop recording, do one of the following:
• Select Stop. Then, press Back if you want to manage the call—hold, end, or transfer it,
or set up a conference.
1-866-9-TDSBIZ
tdsbusiness.com
44
Polycom® VVX® Series
Business Media Phone User Guide
When you stop recording, the Stopped Recording icon displays in the status bar, as shown next.
• End the call. To end the call, select Back, and press End Call. Or, just hang up.
To record a conference:
You can record a conference call in the same way as other calls with the following exceptions:
• All conference call participants are recorded. If one of the conference participants presses
, that
participant is not recorded.
• If you hold a conference call, recording pauses. You can place or answer other calls, which will be
recorded in the same file. When you resume the conference call, recording resumes.
To pause and resume a recording:
• Press Pause. To resume the recording, press Resume. Recording continues within the same .wav file.
Playing Recorded Calls
If you connect a USB flash drive to your phone, you can play calls that you recorded on your phone.
You can browse the recorded files, stored as .wav files, on the USB flash drive. You can also open, rename,
and delete the recorded files. If there are no supported .wav files on the USB flash drive, the message
Unsupported .wav file format appears on the screen.
Playing recorded calls occurs in real time. To adjust the volume of the recording while you play it, press one of
the Volume keys,
.
Playing stops if you press Exit, or press
,
or
.
If the handset is off-hook when you press Play, you’ll hear audio through the handset. If the handset is
on-hook when you press Play, you’ll hear audio through the speaker. If you lift the handset while you
listen through the speaker, you’ll hear the audio through the handset.
1-866-9-TDSBIZ
tdsbusiness.com
157149/4-14/8571
45
Polycom® VVX® Series
Business Media Phone User Guide
You can’t open a .wav file if you have an active call or during recording. If you try to, the message Action
aborted displays. If all calls are held, you can start playing a recording. However, if you resume a call,
playback will stop.
You can play recorded files on other devices, such as a Windows® or Apple® based computer using an
application capable of playing .wav files. If an error occurs while a recording plays, playing stops.
If you’re playing a file and an incoming call arrives, playing pauses and the phone rings. If you don’t answer
your phone, playback remains paused, and you have to press Resume to continue playing the recording. If
you decide to reject the incoming call, press Resume, and playing will resume.
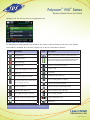
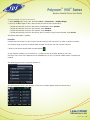
To browse recorded files:
1. Select Settings from Home view, and press Features > Removable Storage Media > Browse Recordings.
A list of recordings displays, as shown next.
2. From the Browse Recordings screen, press the recording you want to rename, delete, or play.
You can rename, delete, or play the selected .wav file by pressing Rename, Delete, or Open (to play it).
To play a recorded call:
1. Select Settings from Home view, and Select Features > Removable Storage Media > Browse
Recordings.
2. From the Browse Recordings screen, press the file you want to play, and press Open.
1-866-9-TDSBIZ
tdsbusiness.com
157149/4-14/8571
46
Polycom® VVX® Series
Business Media Phone User Guide
3. Press Play.
Playing displays on the screen. The position indicator—in hours, minutes, and seconds—above the progress
bar changes as the file plays in real time, as shown next.
While the recording plays, you can pause by pressing Pause. To resume playing, press Resume. To stop
playing and return to the Browse Recordings screen, press Exit.
Group Paging
The Group Paging feature enables a user to make pages—one-way audio announcements—to users that are
subscribed to a page group.
Your phone may be enabled to operate in a broadcast mode called Group Paging mode. In this mode, you
can broadcast one-way announcements to a specified group of phones, called a Paging Group. In Group
Paging mode, users must subscribe to Paging Groups to send and receive pages.
Sending Pages
By default, when you send a group page, it’s automatically sent to Paging Group 1 (All Call). This is your default
paging group.
Your managedIP Administrator can change your default paging group to any other group that you want.
For example, if you always place pages to the “Sales” zone, you may be configured with “Sales” as your
default zone.
You can’t send a group page while you’re in an active call.
To send a page:
1. From Lines view, Select Paging.
2. From the Paging Groups List screen, Select the paging group you wish to page.
1-866-9-TDSBIZ
tdsbusiness.com
157149/4-14/8571
47
Polycom® VVX® Series
Business Media Phone User Guide
3. To begin a page, Select Page.
Note: Before the page begins, you’ll hear an alert tone informing you the page is beginning.
4. Begin speaking.
5. To end the page, Select End Page.
Receiving Pages
To receive a page sent to a particular paging group, you need to be subscribed to that group. Your
managedIP Administrator may subscribe you to any appropriate page groups required.
How you receive a page depends on the priority of the page, whether you’re in an active call, or if your
phone is set to receive a page during an active call.
You’ll receive pages on the paging groups you’re subscribed to as well as Priority pages and Emergency
pages. If you enabled Do Not Disturb, you’ll only receive Emergency pages. Non-emergency pages won’t
display or play on your phone.
Receiving Pages When You’re Not in an Active Call
If you receive a page and you’re not in an active call, the page immediately plays, regardless of the
paging priority.
While a page plays, you can:
• Hold the page.
• End the page. This ends the page at your phone only.
• Place a new call.
Receiving Pages During Active Calls
How you handle a page when you’re in an active call depends on the page priority and if you’re allowed to
receive a page when you’re in an active call.
If the page is a Normal page:
• If your phone is allowed to receive pages during active calls, the page immediately plays. You’ll hear both
the original call and the page. To hear only the page, hold or end the call.
• If your phone isn’t allowed to receive pages during active calls, the page displays as a held page. To
listen to the page, resume it.
If page is a Priority or Emergency page, the page immediately plays. You’ll hear both the original
call and the page. To hear just the page, hold or end the call.
1-866-9-TDSBIZ
tdsbusiness.com
157149/4-14/8571
48
Polycom® VVX® Series
Business Media Phone User Guide
Adjusting the Volume of Pages
You can adjust the volume of pages while they play. During a page, press one of the Volume keys,
, to raise or lower the page volume.
If you adjust the volume of a non-emergency page, your phone will use the adjusted volume for subsequent
non-emergency pages. However, the volume of an Emergency page is preset and cannot be changed.
Changing Where Pages are Played
While you send a page, you can pick up the handset, or press
or
and continue speaking. You
can also press
to mute your audio so that the people receiving your page won’t hear anything. This
behavior is similar to a phone call. When you receive a page, the page is always played through the phone’s
speakerphone—you can’t play it through your handset or headset.
Customizing Your Phone
In the previous chapters, you’ve learned how to customize calls—such as how to change call volume,
forward incoming calls in a special way, or divert calls from a contact. But what if you want to customize the
display? This chapter shows you how you can customize your phone’s screen so that it’s unique to you. Basic
customizations include changing the time and date format and updating the screen brightness.
In this chapter, you’ll learn how to do the following:
• Change the time and date display
• Change the backlight settings
• Set up power saving mode
Time and Date Display
The time and date display in the status bar. If the phone can’t obtain a time and date, the time and date
display will flash. Contact your system administrator if the display flashes, or either the time or date is incorrect.
Note: The time and/or date is not able to be changed locally from your phone as it is updated and
synchronized automatically with a National Time Server. However, you are able to update your time zone
via the managedIP web portal.
You can choose from a variety of time and date display formats, including options to display the day, month,
or year. You can also turn the time and date display off, so it doesn’t display at all. Select and set options that
are right for you.
1-866-9-TDSBIZ
tdsbusiness.com
157149/4-14/8571
49
Polycom® VVX® Series
Business Media Phone User Guide
The following figure shows the default display for the time and date.
To update the time and date display:
1. Select Settings from Home view, and slect Basic > Preferences > Time & Date.
2. From the Time & Date screen, do one of the following:
• To change the date format, press Clock Date.
or
• To change the time format, press Clock Time.
or
• To change the order of the time and date display, press Clock Order.
3. From the Clock Date, Clock Time, or Clock Order screen, select the format you want.
To enable or disable the time and date display:
1. Select Settings from Home view, and select Basic > Preferences > Time & Date.
2. From the Time & Date screen, select Enable or Disable to turn on or off the time and date display.
Backlight
Your phone’s backlight has two components:
•B
acklight Intensity—The brightness of the screen during phone activity and inactivity. Backlight intensity
has three settings:
- Backlight On—The brightness of the screen when there is phone activity.
- Backlight Idle—The brightness of the screen when there is no phone activity.
-M
aximum Intensity—The brightness scale that applies to both Backlight On and Backlight Idle
intensities.
• Backlight Timeout—The number of seconds the phone is inactive before the backlight dims to its
Backlight Idle intensity. The backlight timeout period begins after your last key press or the last phone
event, such as an incoming call.
You can change the Backlight On intensity and the Backlight Idle intensity separately. You can choose a high,
medium, or low intensity, or turn off the backlight entirely.
When you change the Maximum Intensity, you modify the entire backlight intensity scale. For example, if you
decrease the Maximum Intensity, the low, medium, and high levels for both Backlight On and Backlight Idle
intensities decrease.
1-866-9-TDSBIZ
tdsbusiness.com
157149/4-14/8571
50
Polycom® VVX® Series
Business Media Phone User Guide
The backlight automatically turns on with any phone activity. By setting the Backlight Timeout, you can
determine how long the phone should be idle before the backlight dims to its Backlight Idle intensity. By
default, after the phone is idle for 40 seconds, the backlight dims.
To change the backlight intensity:
1. Select Settings from Home view, and select Basic > Backlight Intensity.
2. From the Backlight Intensity screen, select Backlight On Intensity.
3. From the Backlight On Intensity screen, select the intensity you want, and press Back. The default is High.
4. From the Backlight Intensity screen, select Backlight Idle Intensity.
5. From the Backlight Idle Intensity screen, select the intensity you want, and press Back. The default is Low.
6. From the Backlight Intensity screen, select Maximum Intensity.
7. From the Maximum Intensity screen, select Up or Down to increase or decrease the maximum intensity the
screen can display, and press Back.
To change the Backlight Timeout:
1. Select Settings from Home view, and press Basic > Backlight Timeout.
2. From the Backlight Timeout screen, enter the number of seconds the phone will be idle before the
backlight dims. The default is 40 seconds.
Power-Saving Mode
Your phone is set up with a power-saving mode that turns off the touchscreen to conserve energy. Your phone
enters power-saving mode after it has been idle for a certain period of time.
You can configure the period of time that the phone is idle before the touchscreen turns off. You can
configure different idle timeouts for office hours and off hours, such as evenings and weekends.
During off hours, the message Off Hours Mode scrolls on the status bar. Your phone will exit power-saving
mode if a phone event occurs—for example, if the phone has an incoming call or message, or you press
a key or press the screen. If a screen saver is enabled on your phone, power-saving mode will
still occur.
1-866-9-TDSBIZ
tdsbusiness.com
157149/4-14/8571
51
Polycom® VVX® Series
Business Media Phone User Guide
The power-saving settings you can update are:
• Office Hours—When you start work and how long you’re in the office each day. During office hours, your
phone will not enter the power-save mode.
• Timeouts—The period of time the phone should be idle before the touchscreen turns off.
Changing Your Office Hours
Update your office hours so the phone will know when you’re in the office. When you update your office hours,
you specify when you start, and how long you work each day.
To change your office hours:
1. Select Settings from Home view, and press Basic > Power Saving > Office Hours > Start Hour.
2. From the Start Hour screen, press the day of the week you want to update, enter your start time,
and press Save.
3. Enter a start time using the 24-hour clock. You can enter a start time from 0 to 23. The default start time
is 7 a.m.
4. From the Office Hours screen, press Duration.
5. From the Duration screen, press the day of the week you want to update, enter the number of hours you
work, and press Save.
Note: The default duration is 12 hours per day for Monday to Sunday (i.e., by default, office hours are
between 7 a.m. and 7 p.m. every day of the week).
Changing Timeouts
You can update the period of time the phone will be idle before the touchscreen turns off. You can specify
different timeouts for office hours (Office Hours Idle Timeout) and non-office hours (Off Hours Idle Timeout). By
default, the Office Hours Idle Timeout is much longer than the Off Hours Idle Timeout.
You can also specify a separate timeout period that applies after you press a key or press the screen. This
is called the User Input Idle Timeout. You can choose to set a higher User Input Idle Timeout than the Office
Hours and Off Hours Idle Timeouts so that when you’re actively using the phone, power-saving mode won’t
initiate as often.
1-866-9-TDSBIZ
tdsbusiness.com
157149/4-14/8571
52
Polycom® VVX® Series
Business Media Phone User Guide
To change timeouts:
1. Select Settings from Home view, and select Basic > Power Saving > Timeouts.
2. Select Office Hours Idle Timeout, and enter the number of minutes the phone should wait, during office
hours, before starting power-saving mode. Enter a number between 1 minute and 600 minutes. The default
is 10 hours (600 minutes).
3. Select Off Hours Idle Timeout, and enter the number of minutes the phone should wait, during off-hours,
before starting power-saving mode. Enter a number between 1 minute and 10 minutes. The default is 1
minute.
4. Select User Input Idle Timeout, and enter the number of minutes the phone should wait after no activity on
the display screen/touchscreen before starting power-saving mode. Enter a number between 1 minute and
20 minutes. The default is 20 minutes.
5. Press Save.
Note: Default settings are generally appropriate for standard business hours (e.g., 8:00 a.m. to 5:00 p.m.).
If your business has non-standard hours (e.g., 24 x 7 or extended hours into the evening), you may with to
either change the setting above OR disable this feature. The power save feature may be disabled on a per
device (phone) basis. Contact your managedIP Administrator to have this feature disabled via the “Modify
Tags” function in the Administrator web portal.
1-866-9-TDSBIZ
tdsbusiness.com
157149/4-14/8571
53