1
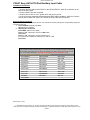
Discountcarstereo.com
Single and Multi-Audio inputs + iPod™ charging
Adapters for Aftermarket Radios
Information Sheet
The following list of connection cables are designed to cover a wide variety of consumer electronics,
including the Apple iPod™ to aftermarket radios such as Alpine, Kenwood, JVC and Pioneer and Sony
and will allow users to route audio from any number of audio devices such as the iPod, mp3 players,
any audio player using headphone outputs or any device using RCA outputs (DVD player, Game
System, etc.). The Connex2car and 3NPUT products includes an iPod connector, 3.5mm headphone
jack and stereo RCA connectors on one end and a radio specific connector on the other depending on
application. They all connect to CD changer port on the radio providing great sound quality and even
provide charging for the iPod. (Only) This innovation offers audio performance that is more enjoyable
than substandard FM-modulated solutions that transmit audio into the FM tuner instead of the preferred
accessory port connection. For the previously named head units, it is necessary to enter the radio's
menu and turn on the Auxiliary input option. This will let the head unit know that an auxiliary device is
connected to the CD changer port. Many customers have purchased our auxiliary input adapter
cables plug them into the CD Changer port and report getting no sound —this situation is
normal because most if not all aftermarket Radios are programmed to automatically recognize a CD
Changer--- connecting an auxiliary input to select aftermarket radios will require changing the
menu option from “CD Changer” to “AUX”.
Note: These input adapters do not display or control iPod products from the aftermarket radio, they will
however charge and play iPod music on the aftermarket stereo.
PXA04 and JVC/J-3NPUT J-LINK iPod/Aux Input Cable.
Installation instructions
1. Connect the J-LINK connector on the PXA04 or JVC/J-3NPUT to the CD Changer port on
the radio.
2. Connect iPod to the dock connector
3. Look up the user manual for the corresponding JVC radio to enable to “AUX” function – Here
is how to enable the “AUX” function on JVC KD-LX111
To select the external component to use–– EXT INPUT
you can connect the external component to the CD changer jack on the rear using the Line Input Adaptor KS-U57, KS-U58 etc.
(not supplied). To use the external component as the playback source through this unit, you need to select which component –
CD changer or external component – to use. When shipped from the factory, CD changer is selected as the external component.
• LINE INPUT: To use the external component other than CD changer.
• CD CHANGER: To use the CD changer.
PXA03 and ALP/M-3NPUT Alpine M-BUS iPod/AUX Input Cable.
Installation instructions
1. Connect the M-bus connector on the PXA03 or ALP/M-3NPUT to the CD Changer port on
the radio
2. Connect iPod to the dock connector
3. Connect the red wire to +12V “ignition wire” and the gray to ground
3. Look up the user manual for the corresponding Alpine radio to enable to “AUX” function –
Here is how to enable the “AUX” function on Versatile Link (V-Link) Alpine CDM-7874
Setting the AUX Mode (i.e. CDM-7874)
You can input TV/video sound by connecting an optional "M-Bus V-Link" (M-Bus/RCA interface cable KCM-122B) to this
component.
1 Press and hold the SETUP button for at least 3seconds.
2 Press the |◄◄ or DN or UP ►►| button to select the AUX mode.
3 Press the BAND button to toggle the mode between AUX ON and AUX OFF.
4 Press the SETUP button to return to normal mode.
5 To adjust the volume, etc., first press the SOURCE button and select the AUX mode, then make the necessary adjustment.
→ TUNER → CD → AUX
NOTE
When AUX ON is selected, a CD Changer cannot be used.
Discountcarstereo.com
PXA06 and ALP/Ai-3NPUT Alpine Ai-Net iPod/Aux input Cable.
Installation instructions
1. Connect the Ai-Net connector on the PXA06 or ALP/AI-3NPUT to the CD Changer port on
the radio
2. Connect the red wire to +12V “ignition wire” and the gray to ground
3. Look up the user manual for the corresponding Alpine radio to enable to “AUX” function
4. Connect iPod to the dock connector –
--- Here is how to enable the “AUX ON” function on Versatile Link (V-Link) Alpine CDA-9815,
9811, 9813
The common operation for SETUP is step 1 to 4 as follows. See down below for further information about each SETUP
menu.
1. Press and hold F/SETUP for at least 3 seconds. SETUP mode is activated.
2. Press ►► or ◄◄ to select the desired SETUP menu. (e.g. Select AUX ON)
Here is the explanation for CDA-9815 display example.
NORMAL/HI-FI/STABLE → DIMMER*2 → SUB-W →SUB-W STEREO/SUB-W MONO*2 → CD-DA / CD-DA/MP3 BEEP →
SCROLL → SCROLL TYPE*1 → MUTE → INTERRUPT→ AUX → (AUX name)*3 → PWR-IC → CONTRAST*1 →FONT*1 →
AREA *4→ DEMO → NORMAL/HI-FI/STABLE
*1 CDA-9815 only.
*2 CDA-9815/CDA-9813 only.
*3 Displayed only when AUX is ON.
*4 “Radio”
3. Press BAND/TEL. to change the setting. (e.g. Select AUX OFF or AUX ON.)
4. Press F/SETUP again.
The display returns to normal mode.
Setting the AUX Mode (V-Link)
AUX ON / AUX OFF (Initial setting) you can input TV/video sound by connecting an optional Ai-NET/ RCA Interface cable (KCA121B) or Versatile Link Terminal (KCA- 410C) to this component. You can change the AUX name display when AUX ON is set.
a. Select the AUX name by pressing ►► or ◄◄
b. Then press BAND/TEL.
If the KCA-410C is connected, it is possible to select two AUX names.
Note: with the KCA-410C, up to 2 external devices with RCA output can be connected. In this case, press SOURCE/POWER to
select AUX mode and then press BAND/TEL. to select your desired device.
PXA02 and PIO/P-3NPUT Pioneer P-BUS iPod/Aux input Cable.
Installation instructions
1. Connect the M-bus connector on the PXA02 or PIO/P-3NPUT to the CD Changer port on the
radio
2. Connect iPod to the dock connector
3. Connect the red wire to +12V “ignition wire” and gray to ground.
3. Look up the user manual for the corresponding Pioneer radio to enable to “AUX” function –
Here is how to enable the “AUX” function on select P-BUS radios
Using the AUX Source
Select AUX as the Source
1 Press Source and hold until the unit powers down
2 Press function button until AUX appears in the display
if the Auxiliary setting is not turned “ON” AUX cannot be selected
Discountcarstereo.com
PXA07 Sony AUX-LITE iPod/Auxiliary input Cable
Installation instructions
1. Connect the RCA inputs of the PXA07 to the “BUS AUDIO IN –AUX IN” connectors on the
back of the Sony radio
2. Connect iPod to the dock connector
3. Connect the red wire to +12V “ignition wire” and gray to ground.
3. Look up the user manual for the corresponding Sony radio to enable to “AUX-Lite” function –
Here is how to enable the “AUX-LITE” function on Sony CDX-630 CD Receiver
Selecting Auxiliary equipment
It is possible to use auxiliary equipment with this unit. Activate the auxiliary setting when using auxiliary equipment
connected to this unit.
1. Press SOURCE repeatedly until AUX
Aux appears in the display.
2. Adjusting the volume level.
Press MENU appears in the display.
Press the ▲▼ repeatedly to select the “AUX Level”
Press Enter
Press the ▲▼ repeatedly to select the desired level
the volume level is adjusted in 1dB steps from -6dB to + 6dB
Press Enter
If you're looking for a way to play a portable audio device, video system, or anything else through your
Sony system, we make it extremely simple. In models with Aux Lite, the BUS audio inputs can be used
as an auxiliary input instead of a CD changer input, allowing any audio signal to play through the head
unit, and the entire audio system. Warning: The Sony Radio must be “AUX-LITE” ready.
The following Sony radio are “AUX-LITE” ready:
CDX-GT805DX
MEX-BT5000
CDX-RA700
CDX-M7815X
CDX-F7710
CDX-M8810
CDX-F7705X
CDX-F7700
CDX-F5700
CDX-M800
CDX-CA900X
CDX-GT705DX
CDX-R505X
CDX-GT500
CDX-M7810
CDX-M8815X
CDX-F5710
CDX-M8805X
CDX-F5705X
CDX-M850MP
CDX-M630
CDX-F605X
CDX-F50M
MEX-1GP
CDX-F7715X
CDX-R5715X
CDX-F7005X
CDX-M8800
CDX-F7000
CDX-M3DI
MEX-5DI
Revised May 11, 2007
© 1995-06 Discount Car Stereo, Inc. All rights reserved. Information in this document is subject to change without notice.
Other products and companies referred to herein are trademarks or registered trademarks of their respective companies or mark
holders.