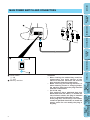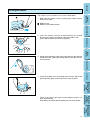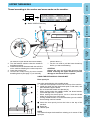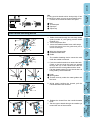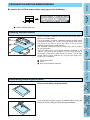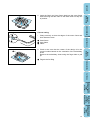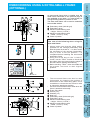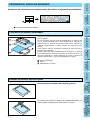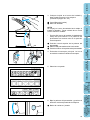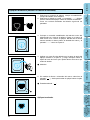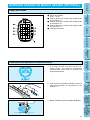
1
Personal Embroidery System
Sistema de Bordado Personal
PE-150
“IMPORTANT
SAFETY INSTRUCTIONS”
When using a embroidery machine, basic safety precautions should always be taken,
including the following:
“Read all instructions before using.”
DANGER –
To reduce the risk of electric shock.
1. The embroidery machine should never be left unattended while plugged in. Always unplug the
embroidery machine from the electrical outlet immediately after using and before cleaning.
2. Always unplug before changing the light bulb. Replace bulb with same type rated 2.4 watts.
WARNING –
To reduce the risk of burns, fire, electric shock, or injury to persons.
1. Do not allow this embroidery machine to be used as a toy. Close attention is necessary when the
embroidery machine is used by or near children.
2. Use this embroidery machine only for its intended use as described in this manual. Use only
accessories recommended by the manufacturer as contained in this manual.
3. Never operate this embroidery machine if it has a damaged cord or plug, if it is not working properly, if it
has been dropped or damaged, or dropped into water. Return the embroidery machine to the nearest
authorized dealer or service center for examination, repair, electrical or mechanical adjustment.
4. Never operate the embroidery machine with any air openings blocked. Keep ventilation openings of the
embroidery machine and foot control free from the accumulation of lint, dust, and loose cloth.
5. Never drop or insert any object into any opening.
6. Do not use outdoors.
7. Do not operate where aerosol (spray) products are being used or where oxygen is being administered.
8. To disconnect, turn the main switch to the symbol “O” position which represents off, then remove plug
from outlet.
9. Do not unplug by pulling on cord. To unplug, grasp the plug, not the cord.
10. Keep fingers away from all moving parts. Special care is required around the embroidery machine
needle.
11. Always use the proper needle plate. The wrong plate can cause the needle to break.
12. Do not use bent needles.
13. Do not pull or push fabric while stitching. It may deflect the needle causing it to break.
14. Switch the embroidery machine to the symbol “O” position when making any adjustments in the needle
area, such as threading needle, changing needle, threading bobbin, or changing presser foot, and the
like.
15. Always unplug the embroidery machine from the electrical outlet when removing covers, lubricating, or
when making any other user servicing adjustments mentioned in the instruction manual.
“SAVE THESE INSTRUCTIONS”
“This embroidery machine is intended for
household use.”
FOR USERS IN THE UK, EIRE, MALTA
AND CYPRUS ONLY.
If your embroidery machine is fitted with a 3 pin non rewireable BS plug then please read the following.
IMPORTANT
If the available socket outlet is not suitable for the plug supplied with this equipment, it should be cut off and
an appropriate three pin plug fitted. With alternative plugs an approved fuse must be fitted in the plug.
NOTE
The plug severed from the main lead must be destroyed as a plug with bare flexible cord is hazardous if
engaged in a live socket outlet. In the event of replacing the plug fuse, use a fuse approved by ASTA to BS
1362, i.e. carrying the
mark, rating as marked on plug.
Always replace the fuse cover, never use plugs with the fuse cover omitted.
WARNING
DO NOT CONNECT EITHER WIRE TO THE EARTH TERMINAL WHICH IS MARKED WITH
THE LETTER ‘E’, BY THE EARTH SYMBOL
OR COLOURED GREEN OR YELLOW.
The wires in this mains lead are coloured in accordance with the following code:
Blue
Neutral
Brown
Live
As the colours of the wiring in the main lead of this appliance may not correspond with the coloured
markings identifying the terminals in your plug, proceed as follows.
The wire which is coloured blue must be connected to the terminal which is marked with the letter ‘N’ or
coloured black or blue.
The wire which is coloured brown must be connected to the terminal which is marked with the letter ‘L’ or
coloured red or brown.
IMPORTANT (In the United Kingdom)
Mains Supply (AC 230/240V ~ , 50 Hz only)
DO NOT cut off the mains plug from this equipment. If the plug fitted is not suitable for the power points
in your home or the cable is too short to reach a power point, then obtain an appropriate safely
approved extension lead or consult your dealer.
BE SURE to replace the fuse only with an identical approved type, as originally fitted, and to replace
the fuse cover.
If nonetheless the mains plug is cut off ensure to remove the fuse and dispose of the plug immediately,
to avoid a possible shock hazard by inadvertent connection to the mains supply.
CONGRATULATIONS ON CHOOSING
OUR COMPUTER EMBROIDERY MACHINE
Your machine is an advanced computerized home embroidery machine.
To fully enjoy all of its features, we suggest that you study this booklet.
PLEASE READ BEFORE USING YOUR EMBROIDERY MACHINE
For safe operation
1. Be sure to keep your eye on the needle while sewing. Do not touch the balance wheel, thread take-up,
needle, or other moving parts.
2. Remember to turn off the power switch and unplug the cord when:
● Operation is complete
● Replacing or removing the needle or any other parts
● A power failure occurs during use
● Maintaining the machine
● Leaving the machine unattended.
3. Plug the machine directly into the wall. Do not use extension cords.
4. Always be sure to turn off the main power switch when inserting and removing the embroidery card. Do
not touch the embroidery card inserted in the card slot while your machine turns on.
For a longer service life
1. When storing your embroidery machine, avoid direct sunlight and high humidity locations. Do not store
your embroidery machine beside a space heater, iron, or other hot objects.
2. Use only neutral soaps or detergents to clean the case. Benzene, thinner, and scouring powders can
damage the case and machine, and should never be used.
3. Do not drop or hit the machine.
4. Always consult the operation manual or use the “BASIC OPERATION” key when replacing or installing
any assemblies; needle, or other parts to assure correct installation.
For repair or adjustment
In the event a malfunction occurs or adjustment is required, first follow the troubleshooting table in the
back of the operation manual to inspect and adjust the machine yourself. If the problem persists, please
consult your nearest authorized service center.
●
Please note that specifications and external appearance are subject to change for improvement without
notice.
1
CHAPTER 1
MACHINE KNOWLEDGE ................
3
39
40
49
50
51
51
52
53
54
55
56
MAINTENANCE ............................... 57
CHANGING THE LIGHT BULB ..............
CLEANING .............................................
57
58
ERROR MESSAGE ...............................
TROUBLESHOOTING...........................
PATTERNS ............................................
EMBROIDERING USING A
SMALL FRAME (OPTIONAL) ...............
EMBROIDERING USING A
EXTRA-SMALL FRAME
(OPTIONAL) ..........................................
EMBROIDERING USING A
LARGE FRAME (OPTIONAL) ...............
59
62
65
Linking two or more embroidered
patterns (using the 90˚
rotation feature) ................................
67
68
69
70
EMBROIDERING
USING A LARGE
FRAME
(OPTIONAL)
39
48
48
48
EMBROIDERING
USING A
EXTRA-SMALL
FRAME (OPTIONAL)
34
35
37
47
EMBROIDERING
USING A SMALL
FRAME
(OPTIONAL)
33
33
34
47
PATTERNS
30
31
32
45
45
46
TROUBLESHOOTING
2
26
28
29
30
43
43
44
44
ERROR
MESSAGE
EMBROIDERY .......................................
Start embroidering ............................
Embroidering advice .........................
HOW TO SELECT PATTERNS..............
Selecting built-in embroidery
patterns .............................................
Selecting alphabetic characters ........
Uppercase & lowercase ....................
Changing the character size to one
of three different sizes ......................
Correcting characters .......................
Checking the characters input ..........
Changing the color of single
characters .........................................
Selecting frame patterns ...................
Selecting one-point patterns .............
Displaying the embroidery time
for one-point patterns........................
Displaying the color names for
one-point patterns .............................
Selecting patterns from a memory
card ...................................................
42
MAINTENANCE
EMBROIDERING ............................. 26
41
EMBROIDERING
CHAPTER 2
41
MACHINE
KNOWLEDGE
PRINCIPAL PARTS AND
THEIR DESCRIPTION ...........................
3
MAIN POWER SWITCH AND
CONNECTORS ......................................
4
SELECTION KEYS.................................
5
“START/STOP” BUTTON.......................
5
ACCESSORIES......................................
6
OPTIONS ...............................................
7
OPERATION (SELECTION KEYS) ........
8
HOW TO USE THE LANGUAGE
SELECTION KEY ................................... 11
How to clear the
language selection ............................ 12
BOBBIN WINDING AND
INSTALLATION ...................................... 13
Setting the bobbin ............................. 15
UPPER THREADING ............................. 16
Auto needle threading device ........... 17
PREPARATION BEFORE
EMBROIDERING ................................... 18
Attaching stabilizer material .............. 18
Embroidering different
types of fabric ................................... 18
Setting the fabric in the
embroidery frame.............................. 20
Fitting the embroidery frame
to the machine .................................. 22
Removing the embroidery frame ...... 22
THREAD TENSION ADJUSTMENT....... 23
ADJUSTING THE LCD
SCREEN CONTRAST............................ 24
If the LCD is hard to see when the power
is turned on ....................................... 24
CHANGING THE NEEDLE..................... 25
MEMORY ...............................................
Saving a pattern combination
in memory .........................................
Retrieving a pattern which has
been saved .......................................
CHANGING THE SETTINGS FOR THE
SELECTED PATTERN...........................
Moving the position (LAYOUT) .........
Changing the embroidery position ....
Checking the embroidery area..........
Embroidering from a specific starting
point ..................................................
Changing the pattern direction..........
Mirror imazing patterns .....................
Changing the size of characters and
frame patterns...................................
Changing thread density of the stitch on
characters and some frame patterns ...
SEWING A BASIC EMBROIDERY
PATTERN...............................................
Embroidering multi-color patterns .....
Embroidering single color patterns ...
Embroidering a single color pattern
when “MULTI COLOR” is displayed...
Embroidering characters that
extend beyond one frame .................
EMBROIDERY APPLICATIONS ............
Combining a frame pattern
with a design .....................................
Embroidering appliques
(using a frame pattern) .....................
Embroidering onto small
pieces of fabric or onto corners ........
IF THREAD BREAKS DURING
EMBROIDERING OR WHEN PARTLY
COMPLETING A PATTERN...................
If thread breaks during
embroidering .....................................
Re-embroidering from
the beginning ....................................
CONTENTS
CONTENTS
CHAPTER 1
CONTENTS
MACHINE KNOWLEDGE
PRINCIPAL PARTS AND THEIR DESCRIPTION
3
1
2 15
12
MACHINE
KNOWLEDGE
4
11
EMBROIDERING
6
13
5
7
14
8
A
10
16
A– MAIN POWER SWITCH AND CONNECTORS
B– SELECTION KEYS
C– “START/STOP” BUTTON
PATTERNS
EMBROIDERING
USING A SMALL
FRAME
(OPTIONAL)
EMBROIDERING
USING A
EXTRA-SMALL
FRAME (OPTIONAL)
1– Handle
2– Spool cap
3– Bobbin winding guide
4– Upper thread tension dial
5– Face plate
6– Presser foot lever
7– Needle threader
8– Presser foot
9– Bobbin cover
10– Needle plate
11– Bobbin winding device
12– Spool felt
13– Balance wheel
14– LCD (Liquid Crystal Display)
15– Hole for extra spool pin
16– Carriage (Embroidery arm)
TROUBLESHOOTING
9
ERROR
MESSAGE
B
MAINTENANCE
C
EMBROIDERING
USING A LARGE
FRAME
(OPTIONAL)
3
CONTENTS
MAIN POWER SWITCH AND CONNECTORS
MACHINE
KNOWLEDGE
EMBROIDERING
2
MAINTENANCE
ERROR
MESSAGE
1
TROUBLESHOOTING
EMBROIDERING
USING A SMALL
FRAME
(OPTIONAL)
EMBROIDERING
USING A
EXTRA-SMALL
FRAME (OPTIONAL)
CAUTION
– When leaving the embroidery machine
unattended, the main switch of the
machine must be switched off and the
plug removed from the socket-outlet.
– When servicing the sewing machine, or
when removing covers or changing lamps,
the machine must have the plug removed
from the socket-outlet.
– For U.S.A. only
This appliance has a polarized plug (one
blade wider than the other). To reduce the
risk of electric shock, this plug is intended
to fit in a polarized outlet only one way.
If the plug does not fit fully in the outlet,
contact a qualified electrician to install the
proper outlet. Do not modify the plug in
any way.
PATTERNS
1 Power switch
1 ON
2 OFF
2 Memory card slot
EMBROIDERING
USING A LARGE
FRAME
(OPTIONAL)
4
CONTENTS
SELECTION KEYS
3
4
5
EMBROIDERING
2
MACHINE
KNOWLEDGE
1
MAINTENANCE
1 “CHARACTERS & DESIGNS” KEY
Use this key for embroidering characters and
patterns.
2 “CARD” KEY
Use this key to select a memory card for
embroidery patterns.
3 “MEMORY” KEY
Use this key for saving or retrieving pattern
combinations in the machine.
4 “BASIC OPERATION” KEY
Use this key for more information on how to
use this embroidery machine.
5 “MODIFY & ADVISE” KEY
Use this key when you have problems with
embroidering. This is a useful key to remember.
ERROR
MESSAGE
TROUBLESHOOTING
PATTERNS
“START/STOP” BUTTON
EMBROIDERING
USING A
EXTRA-SMALL
FRAME (OPTIONAL)
1 “START/STOP” BUTTON
EMBROIDERING
USING A SMALL
FRAME
(OPTIONAL)
1
Press this button to start the machine, and then
press it once more to stop the machine.
* The machine will operate at low speed while
the button is being pressed and then speed
up when the button is released.
* When the machine stops, the needle will stop
at its highest position.
* If “Raise the needle.” appears on the display,
press the “START/STOP” button to stop the
needle at its highest position.
EMBROIDERING
USING A LARGE
FRAME
(OPTIONAL)
5
CONTENTS
ACCESSORIES
6
Parts Code
1
Cleaning brush
XA4527-001
2
Needle set
75/11 3pcs., 90/14 1 pc.
X59535-001
3
Screwdriver
X53666-001
4
Scissors
184783-001
5
Seam ripper
X54243-001
6
Bobbins (4 pcs)
7
Spool cap (Small)
8
Spool cap (Large)
130012-003
9
Embroidery sheet (Regular)
XA3728-001
10
Embroidery frame (Regular)
X58739-003
11
Machine cover (soft type)*
X59351-001
12
Extra spool pin**
130920-051
13
Net***
127610-000
14
Machine cover****
XA0181-051
*****
130013-003
*
12
13
14
EMBROIDERING
USING A
EXTRA-SMALL
FRAME (OPTIONAL)
11
EMBROIDERING
USING A SMALL
FRAME
(OPTIONAL)
10
PATTERNS
9
TROUBLESHOOTING
8
ERROR
MESSAGE
7
When placing the machine cover on the
machine while the embroidery frame is still
attached, touch “CHARACTERS &
DESIGNS” or “CARD” to return the
embroidery arm to it’s storage position. An
alternate method to return the embroidery
arm to it’s storage position would be to turn
the machine off and then turn it on again,
allow the arm to re-set itself and then turn off
the machine.
A cover might not be provieded in some
countries.
** An extra spool pin should be used for
decorative thread such as metallic thread.
*** If using special threads which wind quickly
off the thread spool, attach a net to the spool
before using.
**** In some countries, the No. 14 machine cover
is supplied as an accessory in place of the
No. 11 machine cover (soft type).
***** Distributed in sets of 10 when ordered
separately.
(Parts Code)
USA and Canada: XA3811-051
Other countries: XA3812-051
MAINTENANCE
5
4
Parts Name
EMBROIDERING
3
No.
2
MACHINE
KNOWLEDGE
1
EMBROIDERING
USING A LARGE
FRAME
(OPTIONAL)
6
CONTENTS
OPTIONS
No.
Parts Name
Parts Code
U.S.A.
Others
Embroidery set (Regular)
SA417
XA3727-001
2
Embroidery set (Large)
SA418
XA3733-001
3
Embroidery set (Small)
SA416
XA3730-001
4
Embroidery set (Extra-small)
SA415
XA3713-001
5
Brother poly 40 color thread set
SA740
X80928-100
6
Brother poly #90 bobbin thread
7
Backing material (Stabilizer material)
2
EBT-PE X80919-001
SA517
X80914-001
Memory card
X58321-001
No. 3 Dinosaur
SA300
X58362-001
No. 6 Moskowitz’s World
SA303
X58497-001
No. 7 Country Life
SA304
X59322-001
No. 8 Holiday
SA305
X59357-001
No. 9 Hobby Craft
SA306
X59511-001
No. 10 Monogram emblem
SA307
X59567-001
No. 11 Frame
SA311
XA0257-001
No. 12 Transportation
SA312
XA0275-001
No. 13 Sports Emblem
SA313
XA0517-001
No. 14 Large Floral
SA314
XA1223-001
No. 15 Cute Kids
SA315
XA1325-001
No. 16 Dogs & Cats
SA316
XA1406-001
No. 17 Nintendo
SA317
XA1434-001
No. 19 Marine
SA319
XA2452-001
SA320
XA2869-001
No. 21 Needlework
SA321
XA2873-001
No. 25 Horse
SA325
XA3791-001
WARNING
Embroidery Cards purchased in foreign countries
may not work with your machine.
7
8
EMBROIDERING
USING A
EXTRA-SMALL
FRAME (OPTIONAL)
6
EMBROIDERING
USING A SMALL
FRAME
(OPTIONAL)
5
PATTERNS
No. 20 Petite Designs
TROUBLESHOOTING
4
X58317-001
SA299
ERROR
MESSAGE
8
SA298
No. 2 Flower
MAINTENANCE
3
No. 1 Alphabet
EMBROIDERING
1
MACHINE
KNOWLEDGE
1
EMBROIDERING
USING A LARGE
FRAME
(OPTIONAL)
7
Most of the instructions are in the machine’s memory. Messages on the LCD
screen guide you through each operation.
MACHINE
KNOWLEDGE
A
CONTENTS
OPERATION (SELECTION KEYS)
B
1
EMBROIDERING
Press “BASIC OPERATION”.
Touch “NEXT”.
Touch “SWITCH FUNCTION”.
Touch “SELECTION KEY”.
A
TROUBLESHOOTING
B
ERROR
MESSAGE
1.
2.
3.
4.
MAINTENANCE
1 “BASIC OPERATION” key
PATTERNS
EMBROIDERING
USING A SMALL
FRAME
(OPTIONAL)
EMBROIDERING
USING A
EXTRA-SMALL
FRAME (OPTIONAL)
EMBROIDERING
USING A LARGE
FRAME
(OPTIONAL)
8
CONTENTS
Using the selection keys
Select one of the five keys that explain the
functions of the machine, and press that key.
When you press the key, the LCD at the left will
change to display the information that you
requested.
EMBROIDERING
1
2
3
4
5
MACHINE
KNOWLEDGE
A. Selection keys
“CHARACTERS & DESIGNS” KEY
“CARD” KEY
“MEMORY” KEY
“BASIC OPERATION” KEY
“MODIFY & ADVISE” KEY
MAINTENANCE
ERROR
MESSAGE
B. LCD screen
PATTERNS
A pattern or operation can be selected by gently
touching the box on the screen which
corresponds to the pattern or operation that you
wish to select.
TROUBLESHOOTING
Operation using the screen
EMBROIDERING
USING A SMALL
FRAME
(OPTIONAL)
EMBROIDERING
USING A
EXTRA-SMALL
FRAME (OPTIONAL)
EMBROIDERING
USING A LARGE
FRAME
(OPTIONAL)
9
CONTENTS
1. Press “BASIC OPERATION”.
2. Touch “WINDING BOBBIN”.
1 “BASIC OPERATION” key
EMBROIDERING
The operation procedure for winding a bobbin will
be displayed.
MACHINE
KNOWLEDGE
Example: To find out how to wind a
bobbin
MAINTENANCE
ERROR
MESSAGE
2 “MODIFY & ADVISE” key
PATTERNS
1. Press “MODIFY & ADVISE”.
2. Touch “FABRIC AND THREAD AND
NEEDLE”.
TROUBLESHOOTING
Example: To find out the combination of
fabric, needle and thread
EMBROIDERING
USING A SMALL
FRAME
(OPTIONAL)
EMBROIDERING
USING A
EXTRA-SMALL
FRAME (OPTIONAL)
EMBROIDERING
USING A LARGE
FRAME
(OPTIONAL)
10
You can use the “LANGUAGE SELECTION” key to easily change the display language for all the keys and messages on the LCD screen to the language you need.
CONTENTS
HOW TO USE THE LANGUAGE SELECTION KEY
MACHINE
KNOWLEDGE
1
EMBROIDERING
MAINTENANCE
*
You can move to the next screen by touching “NEXT”.
ERROR
MESSAGE
1. Press “BASIC OPERATION”.
2. Touch “LANGUAGE SELECTION”.
3. The language display screen will then appear. Touch the
key which corresponds to the desired language.
1 “BASIC OPERATION” key
TROUBLESHOOTING
PATTERNS
Example:To change the display language to
Spanish
1. Touch “LANGUAGE SELECTION”.
2. Touch “NEXT”.
3. Touch “ESPAÑOL (SPANISH)”.
This will change the language setting to
Spanish.
4. The display will then return to the screen
which was previously being displayed.
EMBROIDERING
USING A SMALL
FRAME
(OPTIONAL)
EMBROIDERING
USING A LARGE
FRAME
(OPTIONAL)
11
EMBROIDERING
USING A
EXTRA-SMALL
FRAME (OPTIONAL)
NOTE
* When the “LANGUAGE SELECTION” is used
to set the display language, error messages
will also be displayed in the language
selected.
* The display language can be selected from a
list of 13 languages (English, German,
French, Italian, Dutch, Spanish, Danish,
Norwegian, Finnish, Swedish, Portuguese,
Turkish and Chinese).
CONTENTS
How to clear the language selection
EMBROIDERING
1 “BASIC OPERATION” key
MACHINE
KNOWLEDGE
1
Example: To change the display language
from Spanish back to English
1. Press “BASIC OPERATION”.
2. Touch “SELECCION DE LENGUAJE”.
3. Touch “ENGLISH”.
This will cancel the Spanish language setting
and return all screen displays and error
messages to the English language.
MAINTENANCE
ERROR
MESSAGE
TROUBLESHOOTING
PATTERNS
CAUTION
● This function can not be used as a
translation function.
● If the power supply is turned off, the
current language setting will be retained
and will not be cleared.
EMBROIDERING
USING A SMALL
FRAME
(OPTIONAL)
EMBROIDERING
USING A
EXTRA-SMALL
FRAME (OPTIONAL)
EMBROIDERING
USING A LARGE
FRAME
(OPTIONAL)
12
CONTENTS
BOBBIN WINDING AND INSTALLATION
How to wind a bobbin and set the lower thread.
MACHINE
KNOWLEDGE
1
1 “BASIC OPERATION” key
4
EMBROIDERING
3
5
2
MAINTENANCE
6
ERROR
MESSAGE
1
7
PATTERNS
1 ON
2 OFF
2
2
3
1 Spool cap
2 Spool
3 Spool felt
1
2
3
4
Cross wound thread
Spool cap (small)
Separate slightly
No spool felt
13
EMBROIDERING
USING A LARGE
FRAME
(OPTIONAL)
NOTE
* If using a fine thread such as cross wound thread, remove
the spool felt and slightly separate the spool cap from the
thread on the spool before using.
EMBROIDERING
USING A
EXTRA-SMALL
FRAME (OPTIONAL)
1
The spool cap should be pushed on as far as it will go.
EMBROIDERING
USING A SMALL
FRAME
(OPTIONAL)
2. Set the thread spool. The thread end should come from the
bottom front of the spool. The spool cap closest to the
thread spool size should be used to hold the spool securely
on the spool post.
*
TROUBLESHOOTING
1. Connect the machine to the power supply and turn on the
main power.
1
CONTENTS
MACHINE
KNOWLEDGE
3. Guide the thread through the machine and the bobbin
winding guide as marked with the dotted line.
2
1
1 Spring on the shaft
2 Groove in the bobbin
It’s a good idea to have several full bobbins on
hand before start your project.
EMBROIDERING
USING A
EXTRA-SMALL
FRAME (OPTIONAL)
8. Set the bobbin into the shuttle as shown on page 15.
EMBROIDERING
USING A SMALL
FRAME
(OPTIONAL)
7. Push the bobbin shaft to the left. Remove the bobbin and
continue sewing.
PATTERNS
1 “START/STOP” button
TROUBLESHOOTING
6. Press the “START/STOP” button. The machine will stop
automatically when the bobbin is full. Press the
“START/STOP” button to stop at any time or when the
bobbin has stopped moving and the motor is still running.
ERROR
MESSAGE
5. Holding the thread end, press the “START/STOP” button.
Wind the thread a few times around the bobbin and press
the “START/STOP” button again.
Trim the excess thread from the top of the bobbin after the
machine stops.
* It is important to trim the thread close to the spoolend.
MAINTENANCE
4. Guide the thread through the small hole in the side of the
bobbin from the inside. Holding the thread end, push the
bobbin winder shaft to right.
* Match the groove of the bobbin with the spring on the shaft.
EMBROIDERING
3
EMBROIDERING
USING A LARGE
FRAME
(OPTIONAL)
14
CONTENTS
Setting the bobbin
1. Slide open the bobbin cover by pushing the bobbin release
button to the right.
1 Bobbin cover
2 Bobbin cover release button.
ERROR
MESSAGE
3. Guide the thread end around the finger through the channel
toward the back, pulling the thread toward you which will cut
off any excess.
MAINTENANCE
2. Insert the bobbin into the shuttle following the thread
direction as noted in the etching under the bobbin cover.
* (Use a plastic bobbin as shown on page 6)
EMBROIDERING
2
MACHINE
KNOWLEDGE
The bobbin cover is located in front of the needle plate.
1
TROUBLESHOOTING
2
EMBROIDERING
USING A SMALL
FRAME
(OPTIONAL)
1
PATTERNS
4. Close the bobbin cover by placing the left end in place and
pressing down lightly on the right end to snap in place.
There is no need to pull up the lower (bobbin) thread, it is
done automatically.
Embroidery can begin without pulling out the lower thread.
EMBROIDERING
USING A
EXTRA-SMALL
FRAME (OPTIONAL)
*
EMBROIDERING
USING A LARGE
FRAME
(OPTIONAL)
15
CONTENTS
UPPER THREADING
Thread according to the number and arrow marks on the machine.
MACHINE
KNOWLEDGE
1
1 “BASIC OPERATION” key
*
EMBROIDERING
A
3
1
4
MAINTENANCE
2
ERROR
MESSAGE
2.
3.
4.
5.
CAUTION
Always be sure to raise the presser foot
before removing the upper thread to prevent
damage to the thread tension system.
Be sure the spool felt is behind the spool.
(shown above *)
** You do not need to pull the lower thread up
before you start embroidering.
USING THE EXTRA SPOOL PIN AND NET
Extra spool pin
16
EMBROIDERING
USING A LARGE
FRAME
(OPTIONAL)
NOTE
This method keeps the thread from twisting as it comes off the
spool pin.
EMBROIDERING
USING A
EXTRA-SMALL
FRAME (OPTIONAL)
1 Insert the extra spool pin into the hole on the top of the
machine
2 Spool felt
3 Thread spool
EMBROIDERING
USING A SMALL
FRAME
(OPTIONAL)
Use when embroidering with metallic thread.
1. Insert the extra spool pin into the hole on the top of the machine.
2. Install the spool felt and the thread spool in that order, and
then thread the upper thread.
* Do not thread the thread onto bracket (A).
* When sewing using the metallic thread, set thread tension
control dial (B) to the “0” position.
* When setting the thread spool, set it so that the thread
winds off from the front of the spool.
* If using metallic thread, we recommend that you use a 90/14
home sewing machine needle.
PATTERNS
*
not raised, the upper thread cannot be threaded.)
Turn the balance wheel to raise the needle to
its highest position.
Guide the thread as illustrated with the solid line
on the machine following the number sequence.
Lower the presser foot.
Thread the needle using the auto needle
threading device (See page 17) or manually.
TROUBLESHOOTING
1.
5
**
Raise the presser foot lever (If the presser foot is
CONTENTS
4
3
4
Net
Thread spool
Spool pin
Spool cap
EMBROIDERING
2
1
2
3
4
Auto needle threading device
1. Guide the thread through the wire loop thread
guide (number “6”) and gently pull the thread
towards you.
2. Lower the presser foot.
3. Lower the needle threader lever until it stops.
Hook the thread into the guide and pull it
across to the right.
*
ERROR
MESSAGE
1 Wire loop thread guide
2 Needle threader lever
3 Guide
MAINTENANCE
6
MACHINE
KNOWLEDGE
Net
If using special threads which wind quickly off the
thread spool, attach a net to the spool before using.
* Cut the net to match the size of the spool.
1
The needle threading device cannot be used
while the needle is lowered.
EMBROIDERING
USING A
EXTRA-SMALL
FRAME (OPTIONAL)
6. Release the thread from the needle threader
lever.
7. Pull the upper thread through the needle eye
toward the rear of the machine.
EMBROIDERING
USING A SMALL
FRAME
(OPTIONAL)
5. While gently holding the thread, pull the
needle threader lever forward.
PATTERNS
1 Hook
2 Metal guides
3 Thread correctly under the metal guides and
the hook.
TROUBLESHOOTING
4. Push the needle threader lever toward the back.
Check to be sure that the hook has passed
through the eye of the needle and route the
thread under the metal guides and the hook.
* Pull the thread toward you and check that it is
being held by the thread hook.
EMBROIDERING
USING A LARGE
FRAME
(OPTIONAL)
17
Be sure to turn off the power before carrying out the following.
CONTENTS
PREPARATION BEFORE EMBROIDERING
MACHINE
KNOWLEDGE
1
EMBROIDERING
1 “BASIC OPERATION” key
Attaching stabilizer material
EMBROIDERING
USING A SMALL
FRAME
(OPTIONAL)
EMBROIDERING
USING A
EXTRA-SMALL
FRAME (OPTIONAL)
It’s a good idea to place a piece of stabilizer fabric under (not
within) the frame holding the fabric being embroidered.
PATTERNS
From normal fabrics to thick fabrics
TROUBLESHOOTING
Embroidering different types of fabric
ERROR
MESSAGE
1 Embroidery frame
2 Fabric
3 Non-woven stabilizer material
MAINTENANCE
Attach a stabilizer material to the reverse side of the area of
fabric to be embroidered.
It is not necessary to attach a stabilizer material to fabric which
is already sufficiently stiff. For thin, knit and stretch fabric which
may move in the frame, attach the fabric to a non-woven
stabilizer material before embroidering.
The stabilizer material should be framed along with the fabric
for the best results.
There are many types of non-woven stabilizers available on the
market. The goal of the stabilizer is to prevent stretch or
movement of the fabric. Best results for stretch, knit or light
weight fabrics will be obtained by using a light weight nonwoven iron-on stabilizer.
EMBROIDERING
USING A LARGE
FRAME
(OPTIONAL)
18
CONTENTS
MACHINE
KNOWLEDGE
Thin fabrics such as organza or cotton batiste.
EMBROIDERING
MAINTENANCE
After selecting your fabric, place a piece of stabilizer fabric
within the frame beneath the fabric being embroidered.
We also recommend using a spray-on stabilizer first, allow it to
dry or iron to dry then use a non-woven stabilizer with it in the
frame.
Stretchable fabrics such as jerseys
ERROR
MESSAGE
TROUBLESHOOTING
Adhere a piece of iron-on stabilizer material which is slightly
larger than the frame onto the fabric to be embroidered, and
then stretch it over the frame area.
* SA517 (X80914-001)
PATTERNS
EMBROIDERING
USING A
EXTRA-SMALL
FRAME (OPTIONAL)
Use the smallest frame possible that can still accommodate the
pattern being embroidered, as this will give better results.
EMBROIDERING
USING A SMALL
FRAME
(OPTIONAL)
A stabilizer material that can be torn away without affecting the
embroidering is ideal.
EMBROIDERING
USING A LARGE
FRAME
(OPTIONAL)
19
1
2
3
4
5
6
Fabric
Right side surface for embroidering
Adjusting screw
Inner frame
Outer frame
Loosen
TROUBLESHOOTING
3. Firmly tighten the adjusting screw, and then temporarily
remove the fabric and the inner frame from the outer frame.
ERROR
MESSAGE
Make sure that the Ä marks of the outer and inner frames
are aligned.
MAINTENANCE
*
EMBROIDERING
2. Loosen the adjusting screw of the outer frame, place the
fabric on top of the outer frame with the right side of the
fabric up, and then place the inner frame into the outer
frame to clamp the fabric.
MACHINE
KNOWLEDGE
1. Make a mark on the fabric with chalk or marking pencil
indicating the center of the area to be embroidered.
CONTENTS
Setting the fabric in the embroidery frame
1 Tighten
PATTERNS
1 Inner frame
2 Vertical + horizontal crosshair lines
EMBROIDERING
USING A SMALL
FRAME
(OPTIONAL)
1 Area available for embroidering
2 Vertical + horizontal crosshair lines
3 Center of the crosshairs and the pattern
EMBROIDERING
USING A
EXTRA-SMALL
FRAME (OPTIONAL)
4. Place the embroidery sheet on top of the inner frame so that
the center crosshairs on the embroidery sheet and the mark
on the fabric are aligned.
EMBROIDERING
USING A LARGE
FRAME
(OPTIONAL)
20
CONTENTS
*
1 Outer frame
2 Inner frame
3 Fabric
ERROR
MESSAGE
6. Check to be sure that the center of the design is in the
correct location based on the crosshairs of the embroidery
sheet.
Remove the embroidery sheet using the finger hole to pull
up.
MAINTENANCE
Clamp securely so that the edges of the outer frame and
inner frame are even.
EMBROIDERING
Correct setting
MACHINE
KNOWLEDGE
5. Insert the fabric and inner frame back into the outer frame
while ensuring that the mark on the fabric does not slip out
of position.
1 Finger hole for lifting
TROUBLESHOOTING
PATTERNS
EMBROIDERING
USING A SMALL
FRAME
(OPTIONAL)
EMBROIDERING
USING A
EXTRA-SMALL
FRAME (OPTIONAL)
EMBROIDERING
USING A LARGE
FRAME
(OPTIONAL)
21
EMBROIDERING
1 Frame holder
2 Pins
MACHINE
KNOWLEDGE
1. Raise the presser foot to its highest position. Then pass the
embroidery frame under the presser foot with the mounting
pins on the right side and the fabric right side up.
CONTENTS
Fitting the embroidery frame to the machine
MAINTENANCE
1 Release lever
EMBROIDERING
USING A SMALL
FRAME
(OPTIONAL)
Push the release lever to the right and remove the embroidery
frame by pulling up.
PATTERNS
Removing the embroidery frame
TROUBLESHOOTING
1 Frame holder
2 Pins
ERROR
MESSAGE
2. Align the two pins on the embroidery frame with the frame
holder, and then insert the frame into the frame holder until
a click is heard.
* Be sure to insert both pins. If only the forward or the back
pin is inserted, the pattern may not turn out correctly.
EMBROIDERING
USING A
EXTRA-SMALL
FRAME (OPTIONAL)
EMBROIDERING
USING A LARGE
FRAME
(OPTIONAL)
22
CONTENTS
THREAD TENSION ADJUSTMENT
Use this procedure when changing the thread tension.
MACHINE
KNOWLEDGE
Upper thread tension dial
1 Upper thread tension setting
2 Weak (Decrease thread tension)
3 Strong (Increase thread tension)
The standard position is between “4” and “6”. However, a
sewing test should always be done to check for the proper
thread tension.
Thread tension may need to be adjusted with the use of
different thread, fabric or stabilizer fabric.
ERROR
MESSAGE
B
MAINTENANCE
*
EMBROIDERING
A
A– To tighten the upper thread tension, adjust the dial to the
right.
B– To loosen the upper thread tension, adjust the dial to the
left.
1 Top surface of fabric
2 Reverse side of fabric
EMBROIDERING
USING A SMALL
FRAME
(OPTIONAL)
If upper thread tension is too strong
PATTERNS
Adjust so that the lower thread stitch width on the reverse
surface of the fabric is about one-third of the total width.
Correct tension is important because too much or too little tension
will cause poor quality embroidery or your fabric to pucker.
TROUBLESHOOTING
Correct thread tension
The lower thread will be visible on top surface of the fabric.
Decrease the upper thread tension.
1 Top surface of the fabric
2 Reverse side of the fabric
EMBROIDERING
USING A
EXTRA-SMALL
FRAME (OPTIONAL)
If upper thread tension is too weak
The upper thread will be loose.
Increase the upper thread tension.
EMBROIDERING
USING A LARGE
FRAME
(OPTIONAL)
1 Top surface of fabric
2 Reverse side of fabric
23
CONTENTS
ADJUSTING THE LCD SCREEN CONTRAST
To adjust the brightness of the LCD screen
MACHINE
KNOWLEDGE
1
2
1. Press “BASIC OPERATION”.
2. Touch “NEXT”, “BRIGHTNESS
OF LCD” and “NEXT”.
1
EMBROIDERING
1 “BASIC OPERATION” key
MAINTENANCE
2
3
*
If the contrast is adjusted too far, the display
screen becomes invisible. Reset it by turning
the power switch off and then on again.
PATTERNS
If the LCD is hard to see when the power is turned on
TROUBLESHOOTING
1
1 “Dull” Touch this key to make contrast less
(lighter).
2 “Sharp” Touch this key to make contrast
greater (darker).
3 Touch “END” to return to the screen which
was previously being displayed.
ERROR
MESSAGE
To adjust the contrast of the LCD screen
1. While touching the LCD (anywhere is OK),
turn the power off and then back on again.
EMBROIDERING
USING A SMALL
FRAME
(OPTIONAL)
24
EMBROIDERING
USING A LARGE
FRAME
(OPTIONAL)
3. After you have finished adjusting, turn the
power off and back on again once more.
EMBROIDERING
USING A
EXTRA-SMALL
FRAME (OPTIONAL)
2. Touch any one of the lower two selection keys
(BASIC OPERATION, MODIFY & ADVISE).
The LCD will become darker each time one of
these keys is touched. If you would like to
make the LCD lighter, touch the upper
selection key (CHARACTERS & DESIGNS).
CONTENTS
CHANGING THE NEEDLE
Set the needle securely.
MACHINE
KNOWLEDGE
1
ERROR
MESSAGE
2. Loosen the needle screw with a screwdriver.
3. Slide the needle out.
MAINTENANCE
1. Turn the power switch off and lower the
presser foot lever.
Turn the balance wheel to raise the needle to
its highest position.
1
EMBROIDERING
1 “BASIC OPERATION” key
TROUBLESHOOTING
2
3
4
PATTERNS
4. Insert the new needle into the needle shaft as
far up as it will go with the flat side of the
needle facing away from you. Secure it by
firmly tightening the screw with a screwdriver.
5. Turn the power switch on.
EMBROIDERING
USING A SMALL
FRAME
(OPTIONAL)
1
25
EMBROIDERING
USING A LARGE
FRAME
(OPTIONAL)
2
1 Place the needle on a flat surface and check
whether the space is parallel or not.
2 Flat surface
(Needle-plate, glass, ruler etc.)
If the space is not parallel then the needle is
bent and should be thrown away to prevent
damage to your project or the machine.
EMBROIDERING
USING A
EXTRA-SMALL
FRAME (OPTIONAL)
Checking for a bent needle
CHAPTER 2
EMBROIDERY
CONTENTS
EMBROIDERING
MACHINE
KNOWLEDGE
1
1
EMBROIDERING
1 “BASIC OPERATION” key
5
MAINTENANCE
6
ERROR
MESSAGE
3
2
TROUBLESHOOTING
4
PATTERNS
EMBROIDERING
USING A SMALL
FRAME
(OPTIONAL)
1. Thread the upper thread following the
solidline and numerical sequence marked on
your machine.
Be sure to attach the spool felt as shown in
the illustration.
1 Spool felt (See page 16 – 17)
EMBROIDERING
USING A
EXTRA-SMALL
FRAME (OPTIONAL)
2. Thread the lower (bobbin) thread. (See page
15)
EMBROIDERING
USING A LARGE
FRAME
(OPTIONAL)
26
CONTENTS
1 Carriage (embroidery arm)
2 Embroidery frame
*
1 Normal presser foot lever “up” position
2 Presser foot lever pushed up
3 Presser foot lever down position
ERROR
MESSAGE
4. Turn on the power. The light will shine when
the power is turned on.
MAINTENANCE
It is easier to move the embroidery frame
under the presser foot if the presser foot lever
is raised higher than its normal “up” position.
EMBROIDERING
NOTE
Do not push down the carriage too hard as you
attach the hoop. Use caution so as not to move
the carriage sideways.
MACHINE
KNOWLEDGE
3. Place the fabric in the embroidery frame and
then attach the frame to the machine.
(See page 20 – 22)
TROUBLESHOOTING
5. Select a pattern.
PATTERNS
EMBROIDERING
USING A SMALL
FRAME
(OPTIONAL)
EMBROIDERING
USING A
EXTRA-SMALL
FRAME (OPTIONAL)
6. Lower the presser foot lever and press the
“START/STOP” button to start the machine.
1 “START/STOP” button
EMBROIDERING
USING A LARGE
FRAME
(OPTIONAL)
27
CONTENTS
Start embroidering
EMBROIDERING
MAINTENANCE
2. Lower the presser foot and press the
“START/STOP” button to start the machine.
After sewing 5 – 6 stitches, stop the machine
and raise the presser foot again. Trim off any
excess thread at the edge of the design.
After trimming, lower the presser foot and
press the “START/STOP” button again to start
the machine.
3. The machine will stop sewing when it has
completed all the stitching with the current
thread color.
MACHINE
KNOWLEDGE
1. After threading the needle, pass the thread
from the top to the bottom through the hole of
the presser foot, and gently pull the end of the
thread.
ERROR
MESSAGE
TROUBLESHOOTING
PATTERNS
EMBROIDERING
USING A SMALL
FRAME
(OPTIONAL)
EMBROIDERING
USING A
EXTRA-SMALL
FRAME (OPTIONAL)
EMBROIDERING
USING A LARGE
FRAME
(OPTIONAL)
28
CONTENTS
Embroidering advice
Needle
*
Embroidery thread #50
Home sewing machine
needle 75/11
*
*
EMBROIDERING
The recommended lower (bobbin) thread is
#60 – #90 synthetic thread.
For thin and stretch fabrics which are difficult
to embroider, attach the fabric to non-woven
stabilizer fabric before embroidering.
If embroidering on a thick fabric with stabilizer
(see page 18), it is recommended that a
stronger 90/14 home sewing machine needle
be used.
MACHINE
KNOWLEDGE
Thread
MAINTENANCE
ERROR
MESSAGE
TROUBLESHOOTING
PATTERNS
EMBROIDERING
USING A SMALL
FRAME
(OPTIONAL)
EMBROIDERING
USING A
EXTRA-SMALL
FRAME (OPTIONAL)
EMBROIDERING
USING A LARGE
FRAME
(OPTIONAL)
29
CONTENTS
HOW TO SELECT PATTERNS
Selecting built-in embroidery patterns
Select the type of built-in embroidery patterns you
wish to embroider.
* If the power is turned on without a memory
card inserted, the display shown at the left will
appear.
*
1 “CHARACTERS & DESIGNS” key
MAINTENANCE
1
If the power is turned on with a memory card
inserted, the screen corresponding to the
memory card will appear. (Example: No.2 The
Flower card)
To select built-in patterns press the
“CHARACTERS & DESIGNS” key.
EMBROIDERING
B
MACHINE
KNOWLEDGE
A
ERROR
MESSAGE
TROUBLESHOOTING
PATTERNS
EMBROIDERING
USING A SMALL
FRAME
(OPTIONAL)
EMBROIDERING
USING A
EXTRA-SMALL
FRAME (OPTIONAL)
EMBROIDERING
USING A LARGE
FRAME
(OPTIONAL)
30
CONTENTS
Selecting alphabetic characters
Three different fonts are available for alphabetic characters. Touch the
key that corresponds to the typeface you would like to use.
”.
MAINTENANCE
1. Touch “
EMBROIDERING
Example: To select the characters to
form the word “BUS”
MACHINE
KNOWLEDGE
Alphabetic characters
2. Touch “B”.
ERROR
MESSAGE
TROUBLESHOOTING
3. Touch “NEXT”.
PATTERNS
EMBROIDERING
USING A SMALL
FRAME
(OPTIONAL)
4. Touch “U”.
1
31
EMBROIDERING
USING A LARGE
FRAME
(OPTIONAL)
1 Screen A – The operation of each key shown
on this screen is described on the following
page.
EMBROIDERING
USING A
EXTRA-SMALL
FRAME (OPTIONAL)
5. Touch “S”.
1
2
3
CONTENTS
Screen A
4
7
8
PATTERNS
1. Touch “A”.
TROUBLESHOOTING
The characters to be selected can be switched
from uppercase to lowercase and vice versa by
touching “A/a”.
ERROR
MESSAGE
Uppercase & lowercase
MAINTENANCE
1 Touch this key to have the machine sew a reinforcement stitch and stop for the changing of thread
each time a new character is embroidered. (Refer to page 34.)
2 Touch this key to check the character selected. (Refer to page 34.)
3 Touch this key to return to the previous screen character choices.
4 Touch this key to display the next character screen in the sequence.
5 Touch this key to switch between uppercase and lowercase. (Refer to page 32.)
6 Touch this key to change the character size to one of three different sizes. (Refer to page 33.)
7 Touch this key if you would like to change the character position, character size and thread density, or
if you would like to use the Help function.
To change the character position: (Refer to page 43)
To change the character size: (Refer to page 47)
To change the thread density: (Refer to page 47)
To use the Help function: (Refer to page 54)
8 Touch this key to clear the selected characters one by one. (Refer to page 33.)
EMBROIDERING
5
MACHINE
KNOWLEDGE
6
2. Touch “A/a” to switch to lowercase.
EMBROIDERING
USING A SMALL
FRAME
(OPTIONAL)
EMBROIDERING
USING A
EXTRA-SMALL
FRAME (OPTIONAL)
3. Touch “a”.
EMBROIDERING
USING A LARGE
FRAME
(OPTIONAL)
32
CONTENTS
Changing the character size to one of three different sizes
MACHINE
KNOWLEDGE
The size of the characters can be changed by
touching the “L/M/S” key. Each time it is pressed
it changes as shown below. (L → M → S → L ..)
The size of all characters will be changed to the
last character size selected.
EMBROIDERING
ALPHABETIC CHARACTERS
Actual size
MAINTENANCE
1 Large (L)
2 Medium (M)
3 Small (S)
ERROR
MESSAGE
Correcting characters
PATTERNS
Example: If “Giel” has been entered
instead of “Girl”.
TROUBLESHOOTING
One character can be cleared with a backspace each time
“CLEAR” is touched.
EMBROIDERING
USING A SMALL
FRAME
(OPTIONAL)
1. Touch “CLEAR” twice.
EMBROIDERING
USING A
EXTRA-SMALL
FRAME (OPTIONAL)
2. Enter the correct characters.
EMBROIDERING
USING A LARGE
FRAME
(OPTIONAL)
33
CONTENTS
Checking the characters input
EMBROIDERING
Example: If the characters “abcdefghijk”
have been selected in
lowercase characters
MACHINE
KNOWLEDGE
Touch “CHECK” to check the characters which
have been selected.
MAINTENANCE
ERROR
MESSAGE
*
*
If all the characters selected appear on the
display at once, then the display will not
move.
34
EMBROIDERING
USING A LARGE
FRAME
(OPTIONAL)
If “MULTI COLOR” is selected before
embroidering starts, the machine will stop after
each character is sewn so that you can change
the thread.
EMBROIDERING
USING A
EXTRA-SMALL
FRAME (OPTIONAL)
Changing the color of single characters
EMBROIDERING
USING A SMALL
FRAME
(OPTIONAL)
By touching “CHECK”, the display will scroll
through all the characters from the first character
selected.
PATTERNS
ijk
The machine will not accept your next
character if it exceeds the embroidery area.
To continue the word or phrase change to a
smaller size character.
TROUBLESHOOTING
The display appears as shown in the illustration
at left after the “k” is touched.
CONTENTS
Selecting frame patterns
Frame patterns are created by combining the
desired frame and type of stitch.
EMBROIDERING
Example
1. Touch “
”.
If another type of pattern such as characters
or if a memory card has been inserted, press
“CHARACTERS & DESIGNS” first and then
touch “
”.
MAINTENANCE
*
MACHINE
KNOWLEDGE
*
1
2. Select the desired shape for the frame.
3. Select the desired type of stitch to form the
frame.
3 Screen A – The operation of each key shown
on this screen is described on the following
page.
EMBROIDERING
USING A SMALL
FRAME
(OPTIONAL)
4. The combined pattern is then shown on the
LCD screen.
PATTERNS
2 If you touch “NEXT”, additional stitch types
will be displayed. (There are a total of 12
different stitch types available.)
TROUBLESHOOTING
2
ERROR
MESSAGE
1 If you touch “NEXT”, additional frame shapes
will be displayed. (There are a total of 10
different frame shapes available.)
3
EMBROIDERING
USING A
EXTRA-SMALL
FRAME (OPTIONAL)
EMBROIDERING
USING A LARGE
FRAME
(OPTIONAL)
35
CONTENTS
Screen A
1
2
MACHINE
KNOWLEDGE
EMBROIDERING
MAINTENANCE
ERROR
MESSAGE
1 Touch this key if you would like to change the pattern position, pattern size and thread density, or if you
would like to use the Help function.
To change the pattern position: (Refer to page 43)
To change the pattern size: (Refer to page 47)
To change the thread density: (Refer to page 47)
(It may not be possible to change the thread density for some patterns.)
To use the Help function: (Refer to page 54)
2 Touch this key to return to the pattern selection screen.
TROUBLESHOOTING
PATTERNS
EMBROIDERING
USING A SMALL
FRAME
(OPTIONAL)
EMBROIDERING
USING A
EXTRA-SMALL
FRAME (OPTIONAL)
EMBROIDERING
USING A LARGE
FRAME
(OPTIONAL)
36
CONTENTS
Selecting one-point mark patterns
MACHINE
KNOWLEDGE
EMBROIDERING
Example
1. Touch “
”.
MAINTENANCE
3
2. Select the desired pattern to be embroidered.
(Example: Touch the giraffe)
1 Touch this key to display all available patterns
on the screen. You can then select the
desired pattern by touching it.
2 Touch this key to return to the previous
pattern screen.
3 Touch this key to move to the next pattern
screen.
TROUBLESHOOTING
2
ERROR
MESSAGE
1
4 Screen A – The operation of each key shown
on this screen is described on the
following page.
PATTERNS
3. The pattern is now selected.
EMBROIDERING
USING A SMALL
FRAME
(OPTIONAL)
4
EMBROIDERING
USING A
EXTRA-SMALL
FRAME (OPTIONAL)
EMBROIDERING
USING A LARGE
FRAME
(OPTIONAL)
37
CONTENTS
Screen A
2
3
4
5
6
MACHINE
KNOWLEDGE
7
8
MAINTENANCE
ERROR
MESSAGE
TROUBLESHOOTING
1 This indicates the order of color changes.
2 Touch this key to display the total time required for embroidering the pattern and the time remaining
until the pattern is finished. The time taken to change the threads is not included in these times. (The
time is calculated after the key is touched, and is then displayed.) (Refer to page 39.)
3 Touch this key to switch between the multicolor mode and single-color mode. (It is not possible to
change between multi color mode and single color mode if “MULTI COLOR” is not displayed on the
screen).
4 Touch this key if you would like to change the pattern position, or if you would like to use the Help
function.
To change the pattern position: (Refer to page 43)
To use the Help function: (Refer to page 54)
5 Touch this key to change the size of the pattern. (It is not possible to change the size of patterns if
“L/S” is not displayed on the screen.)
6 Touch this key to return to the pattern selection screen.
7 The total number of colors and the number of the color currently being sewn will be displayed.
8 Touch this key to change the display in 1 to the color name (reference). (Refer to page 39.) ( It is not
possible to display the color name if “THREAD COLOR” is not displayed on the screen.)
EMBROIDERING
1
PATTERNS
EMBROIDERING
USING A SMALL
FRAME
(OPTIONAL)
EMBROIDERING
USING A
EXTRA-SMALL
FRAME (OPTIONAL)
EMBROIDERING
USING A LARGE
FRAME
(OPTIONAL)
38
CONTENTS
Displaying the embroidery time for one-point patterns
MACHINE
KNOWLEDGE
1
1 “BASIC OPERATION” key
2
2. The embroidering time will then be calculated.
2 Touch this key to cancel the calculation.
3. The required time and the remaining time will
be shown on the display.
3 Remaining time
4 Total required time
4
PATTERNS
Displaying the color names for one-point patterns
1 “BASIC OPERATION” key
If you touch “THREAD COLOR”, the color names
(reference) of the different threads to be used will
be displayed in order.
39
EMBROIDERING
USING A LARGE
FRAME
(OPTIONAL)
2. The color names will then be displayed.
* If you touch “THREAD COLOR” once more,
the display will return to the previous screen.
* It is not possible to display the color name if
“THREAD COLOR” is not displayed on the
screen.
EMBROIDERING
USING A
EXTRA-SMALL
FRAME (OPTIONAL)
1. After selecting the pattern, touch “THREAD
COLOR”.
1 “THREAD COLOR” key
EMBROIDERING
USING A SMALL
FRAME
(OPTIONAL)
1
1
TROUBLESHOOTING
4. The time remaining will change at the end of
each color embroidery.
ERROR
MESSAGE
3
MAINTENANCE
1. After selecting the pattern, touch “XXXXX”.
1 Time display key
EMBROIDERING
If you would like to know the time it takes to
embroider a pattern, touch the time display key
(“XXXX”). The time required will then be
calculated and displayed. The time taken to
change the threads is not included.
This function can also be used with some of the
patterns on the memory cards, but in such cases
the time displayed may be somewhat different
from the time given on the pattern sheet for that
memory card.
1
1. Turn the power switch off.
*
*
*
If you use a selection key to display another screen, you can
return to the above pattern selection screen by touching
“CARD”.
40
EMBROIDERING
USING A LARGE
FRAME
(OPTIONAL)
2 “CARD” key
EMBROIDERING
USING A
EXTRA-SMALL
FRAME (OPTIONAL)
*
EMBROIDERING
USING A SMALL
FRAME
(OPTIONAL)
4. The pattern selection screen for the inserted memory card
will be displayed.
(The illustration shows the pattern selection screen for the
No. 2 Flower card.)
The selection process from this point is the same as for
selecting built-in patterns.
PATTERNS
*
If the card is inserted in a direction other than that
indicated by the arrow on the card, the connector in the
card slot will become damaged.
Insert so that the card appears as shown in the
illustration at left. If you try to push the card in any
further, the connector will become damaged.
Be sure to turn the power switch off before removing
the card. Pull the card straight out from the slot.
Always keep the memory cards in their proper case
when they are not in use.
TROUBLESHOOTING
IMPORTANT
ERROR
MESSAGE
3. Turn the power switch on.
MAINTENANCE
1 Direction arrow on memory card
EMBROIDERING
2. Insert the memory card into the card slot according to the
direction of the arrow mark on the memory card.
MACHINE
KNOWLEDGE
Be sure to turn off the power switch before inserting or removing the memory cards.
CONTENTS
Selecting patterns from a memory card
Up to 5 different pattern combinations can be saved and retrieved from memory.
CONTENTS
MEMORY
MACHINE
KNOWLEDGE
1
1 “BASIC OPERATION” key
1. Enter the characters to form the word or
monogram.
ERROR
MESSAGE
2. Press “MEMORY”.
1 “MEMORY” key
2
EMBROIDERING
USING A LARGE
FRAME
(OPTIONAL)
41
EMBROIDERING
USING A
EXTRA-SMALL
FRAME (OPTIONAL)
4. The pattern is now saved in memory.
5. For the next example press “CHARACTERS
& DESIGNS”, touch “ABC abc 0” to select
desired font style and enter characters to
create the pattern “Boy”.
Press “MEMORY”, touch “NEXT” and
“MEMORY 2” to save the pattern.
EMBROIDERING
USING A SMALL
FRAME
(OPTIONAL)
*
If the new pattern is saved to a space where
an old pattern has already been saved, the
old pattern will be deleted.
Do not turn off the power while a pattern is
being saved (while “Saving” is displayed).
PATTERNS
2 If any patterns have already been saved, they
will be displayed on the screen. Touch
“NEXT” to look for an empty memory space if
MEMORY 1 has been used.
TROUBLESHOOTING
3. Touch “MEMORY 1”.
*
MAINTENANCE
Example: To save the “Girl” pattern in
memory address 1.
EMBROIDERING
Saving a pattern combination in memory
CONTENTS
Retrieving a pattern which has been saved
1. Touch “MEMORY”.
1 “MEMORY” key
EMBROIDERING
2. Touch “NEXT”.
MACHINE
KNOWLEDGE
Example: To recall the “Boy” pattern
saved in memory space 2
MAINTENANCE
ERROR
MESSAGE
3. Touch “RETRIEVE 2”.
TROUBLESHOOTING
PATTERNS
4. The pattern retrieved will appear on the
screen.
Press “START/STOP” button to embroider the
pattern.
EMBROIDERING
USING A SMALL
FRAME
(OPTIONAL)
Patterns which are saved from an embroidery
card can only be retrieved if the memory card
containing that pattern has been inserted into
the card slot of the machine.
EMBROIDERING
USING A
EXTRA-SMALL
FRAME (OPTIONAL)
*
EMBROIDERING
USING A LARGE
FRAME
(OPTIONAL)
42
CONTENTS
CHANGING THE SETTINGS FOR THE SELECTED PATTERN
Moving the position (LAYOUT)
One point
Frame pattern
Memory card
(No.2 Flower)
EMBROIDERING
Character
MACHINE
KNOWLEDGE
The position for embroidering the pattern can be changed by touching the “LAYOUT” key. This is useful if
you want to embroider a pattern somewhere such as in the corner of the fabric or if you want to align a
pattern away form the center of the embroidery area of frame.
MAINTENANCE
6
ERROR
MESSAGE
34 5
8
TROUBLESHOOTING
1
9
2
7
0 A
EMBROIDERING
USING A SMALL
FRAME
(OPTIONAL)
EMBROIDERING
USING A
EXTRA-SMALL
FRAME (OPTIONAL)
8 This moves the needle position to the middle
of the pattern or to the sewing start position.
Use it when you would like to set the
embroidering position. (Refer to page 45)
9 If you touch this key, the embroidery frame
will move to trace the area required for the
selected design, so that you can check the
embroidering position.(Refer to page 44)
0 Touch this key to return to the previous
selection screen.
A If you touch this key, the display will change
from the layout screen back to the original
screen.
B If you touch this key, the pattern will be
reversed horizontally (mirror imaged).
This function cannot be used with some
patterns. (Refer to page 46)
PATTERNS
Touch “SET” and then “LAYOUT” to display the
above screen.
1 Indicates the current pattern size.
Note:
Characters and patterns may sometimes be
displayed in slightly larger than actual size.
2 Touch this key to rotate the selected pattern
in 90° steps. (Refer to page 45)
3 Indicates the area which can be embroidered.
4 Indicates the current center needle drop
position.
5 Indicates the embroidering position and
embroidering area for the current pattern and
size selected.
6 Touch these keys to move the embroidering
position within the embroidery area. (Refer to
page 44)
7 If you touch this key, the embroidering
position will be returned to the center of the
embroidery area.
B
EMBROIDERING
USING A LARGE
FRAME
(OPTIONAL)
43
EMBROIDERING
Example: To move the embroidery position to the
upper right corner
MACHINE
KNOWLEDGE
Touch the arrow key that corresponds to the direction in which
you would like to move the pattern. The embroidery position will
then move.
* If you touch the “CENTER” key, the embroidery position will
return to the center.
* Use the hole on the embroidery foot as a guide, and never
lower the needle while it is moving.
CONTENTS
Changing the embroidery position
Touch the “????” key.
The embroidery position or area display can be moved by
touching the corresponding arrow key. If the arrow key is
touched once, the frame and display will move one step; if
the key is touched continuously, the frame and display will
move continuously.
MAINTENANCE
*
ERROR
MESSAGE
PATTERNS
If “TRIAL” is touched, the embroidery frame will move and the
presser foot will trace the embroidery area to be used for the
currently selected pattern and size.
* Do not lower the needle. Use the hole of the presser foot as
a guide instead.
TROUBLESHOOTING
Checking the embroidery area
EMBROIDERING
USING A SMALL
FRAME
(OPTIONAL)
EMBROIDERING
USING A
EXTRA-SMALL
FRAME (OPTIONAL)
EMBROIDERING
USING A LARGE
FRAME
(OPTIONAL)
44
CONTENTS
Embroidering from a specific starting point
EMBROIDERING
2. Touch “START/CENTER” to select “START” and then touch
the arrow key to align the hole of the presser foot with the
mark.
MACHINE
KNOWLEDGE
1. Make a mark at the starting position on the fabric in the
frame as shown in the illustration. The mark cannot be too
close to the edge of the frame as the presser foot prevents
the needle from getting very close to the frame.
MAINTENANCE
3. Embroider the pattern.
ERROR
MESSAGE
ABC
TROUBLESHOOTING
PATTERNS
Changing the pattern direction
EMBROIDERING
USING A SMALL
FRAME
(OPTIONAL)
ABC
EMBROIDERING
USING A LARGE
FRAME
(OPTIONAL)
ABC
ABC
ABC
EMBROIDERING
USING A
EXTRA-SMALL
FRAME (OPTIONAL)
The pattern will be rotated clockwise in 90˚ steps as shown in
the illustration at left each time “90˚ clockwise” is touched.
ABC
45
CONTENTS
Mirror imazing patterns
MACHINE
KNOWLEDGE
EMBROIDERING
1. Touch the “??????” key to reverse the pattern
horizontally.
* If the “??????” key appears on the display in
reverse mode, it indicates that the pattern has
been reversed horizontally showing a mirror
image.
* The “??????” key will not be displayed for
some patterns.
MAINTENANCE
ERROR
MESSAGE
TROUBLESHOOTING
PATTERNS
EMBROIDERING
USING A SMALL
FRAME
(OPTIONAL)
EMBROIDERING
USING A
EXTRA-SMALL
FRAME (OPTIONAL)
EMBROIDERING
USING A LARGE
FRAME
(OPTIONAL)
46
CONTENTS
Changing the size of characters and frame patterns
The sizes of characters and frame patterns
can be changed as desired.
1. Touch “SET”.
2. Touch ”ENLARGE/REDUCE”
2
*
*
*
3
Characters can be enlarged and reduced to
sizes ranging from “L” to “S”.
The enlargement sizes for frame patterns will
vary according to the pattern.
Refer to page 43 for instructions on how to
use other keys in this screen.
MAINTENANCE
1
EMBROIDERING
3. Touch “ENLARGE” to make the character or
frame pattern larger, and touch “REDUCE” to
make it smaller. If you touch “RESET”, the
pattern size will return to the original size.
1 “ENLARGE” key
2 “RESET” key
3 “REDUCE” key
MACHINE
KNOWLEDGE
*
ERROR
MESSAGE
The thread density adjustment is not available for
all patterns. Patterns other than the characters and
some frame patterns are not adjustable.
2. Touch “THREAD DENSITY”.
EMBROIDERING
USING A
EXTRA-SMALL
FRAME (OPTIONAL)
1
1 STD (standard)
2 + (stitches closer together)
3 – (stitches farther apart)
EMBROIDERING
USING A LARGE
FRAME
(OPTIONAL)
*
EMBROIDERING
USING A SMALL
FRAME
(OPTIONAL)
3. The thread density of the stitches will become
farther apart (coarser) each time “–” key is
touched. The thread density of the stitches will
become closer together (finer) each time “+” key
is touched.
PATTERNS
1. Touch “SET”.
TROUBLESHOOTING
Changing thread density of the stitch on characters and some frame patterns
The normal setting is “STD” (standard).
47
Embroidering multi-color patterns
(3)
(3)
2. Replace the upper thread with the next color
and press the “START/STOP” button. The
second part of the pattern (2) will be
embroidered and the machine will then stop
automatically.
4. Trim any excess thread.
TROUBLESHOOTING
(3)
ERROR
MESSAGE
3. Replace the upper thread with the next color
and press the “START/STOP” button. The
third part of the pattern (3) will be
embroidered and the machine will then stop
automatically.
MAINTENANCE
(2)
(2)
EMBROIDERING
(1)
1. Thread the first color. (See page 16 – 17)
When the “START/STOP” button is pressed,
the first part of the pattern (1) will be sewn
and then the machine will stop automatically.
* Be sure to raise the presser foot before
changing the thread.
* When embroidering is completed for this
color, the screen display will automatically
move to the left one position.
MACHINE
KNOWLEDGE
When a pattern is selected it is broken down into
color diagrams on the screen. The order of
embroidering is shown left to right. The diagram
on the left is for the first thread color.
CONTENTS
SEWING A BASIC EMBROIDERY PATTERN
PATTERNS
EMBROIDERING
USING A SMALL
FRAME
(OPTIONAL)
Embroidering single color patterns
48
EMBROIDERING
USING A LARGE
FRAME
(OPTIONAL)
Thread the machine. (See page 16 – 17)
Install the embroidery frame. (See page 20 – 22)
Lower the presser foot.
Press the “START/STOP” button to sew the
pattern: the machine will stop automatically
when it is finished.
5. Raise the presser foot.
6. Trim any excess thread.
EMBROIDERING
USING A
EXTRA-SMALL
FRAME (OPTIONAL)
1.
2.
3.
4.
CONTENTS
Embroidering a single color pattern when “MULTI COLOR” is displayed
EMBROIDERING
2. Trim any excess thread.
MACHINE
KNOWLEDGE
1. Touch “MULTI COLOR” to change to the
single color mode. If the “START/STOP”
button is pressed, a single color of the pattern
will be embroidered and then the machine will
stop automatically.
* It is not possible to change between multi
color mode and single color mode if “MULTI
COLOR” is not displayed on the screen.
MAINTENANCE
ERROR
MESSAGE
TROUBLESHOOTING
PATTERNS
EMBROIDERING
USING A SMALL
FRAME
(OPTIONAL)
EMBROIDERING
USING A
EXTRA-SMALL
FRAME (OPTIONAL)
EMBROIDERING
USING A LARGE
FRAME
(OPTIONAL)
49
This function is useful when there are many
characters to embroider and you cannot
embroider them all in the same frame.
Example: ABCDE in large size
MAINTENANCE
ERROR
MESSAGE
TROUBLESHOOTING
2. Press the “START/STOP” button to start
embroidering. When embroidering has
finished, the machine will sew the finishing
position automatically.
You can use the finishing position as the
starting position for the characters to be
embroidered next when the fabric is re-framed
with the finishing point and last character just
inside the left edge of the frame.
EMBROIDERING
1. Input “ABC”, then touch “SET” and then
“LAYOUT”. After this, touch “START/
CENTER” to switch to “START”.
MACHINE
KNOWLEDGE
*
CONTENTS
Embroidering characters that extend beyond than one frame
1 Finishing position
EMBROIDERING
USING A
EXTRA-SMALL
FRAME (OPTIONAL)
Finished pattern
EMBROIDERING
USING A SMALL
FRAME
(OPTIONAL)
1 Finishing position (Use it for the starting
position of “DE”.)
PATTERNS
3. Input the remaining letters “DE”, and then
touch “START/CENTER” to select “START”.
4. Touch the arrow keys to move the start point
of the needle to the finishing position of the
last character and then press the
“START/STOP” button to start the machine.
EMBROIDERING
USING A LARGE
FRAME
(OPTIONAL)
50
CONTENTS
EMBROIDERING APPLICATIONS
Combining a frame pattern with a design
EMBROIDERING
MAINTENANCE
2. Using the “+” mark inside the frame pattern as a guide, align
the needle using the center needle layout function.
Embroider the design.
MACHINE
KNOWLEDGE
1. Select a frame pattern and embroider it.
A “+” mark is sewn after embroidering of the frame pattern in
the center of pattern. This mark can be used as a guide
when embroidering characters or patterns to position them
within the frame pattern.
ERROR
MESSAGE
Making badges or decorative patches
PATTERNS
2. Cut cleanly around the frame pattern, following the line of
the outside pattern.
TROUBLESHOOTING
1. After embroidering a frame pattern and the combined
design, sew an extra frame pattern on the outside using the
“– – –” stitch slightly larger than the original frame pattern.
EMBROIDERING
USING A SMALL
FRAME
(OPTIONAL)
EMBROIDERING
USING A
EXTRA-SMALL
FRAME (OPTIONAL)
The finished badge or decorative patch is now ready
to be attached to a project.
EMBROIDERING
USING A LARGE
FRAME
(OPTIONAL)
51
MAINTENANCE
ERROR
MESSAGE
4. Apply a thin layer of fabric adhesive to the rear of the
applique which is created in step 2, and then attach it to the
base fabric so that it follows the frame shape just stitched.
EMBROIDERING
3. Attach a stabilizer material onto the back of the fabric on the
project where the applique is to be placed. Center the area
where the applique is to be placed in the embroidery hoop.
Embroider it in the same way using the same frame pattern
shape and “– – –” stitch as in step 2.
MACHINE
KNOWLEDGE
1. Select the applique fabric for the project, attach a stabilizer
material, place in the embroidery frame and on the machine.
2. Select the frame shape to be embroidered and the “– – –”
stitch. Embroider it onto the applique fabric. Remove the
fabric from the frame.
Cut neatly around the outside of the shape made by the
stitches.
CONTENTS
Embroidering appliques (using a frame pattern)
TROUBLESHOOTING
1 Adhesive
1
”
1
EMBROIDERING
USING A
EXTRA-SMALL
FRAME (OPTIONAL)
The finished applique on the project
EMBROIDERING
USING A SMALL
FRAME
(OPTIONAL)
1 Satin stitch “
PATTERNS
5. Without changing the frame shape or size, select the “
”
stitch, and use it to embroider the applique material onto the
project.
EMBROIDERING
USING A LARGE
FRAME
(OPTIONAL)
52
CONTENTS
Embroidering onto small pieces of fabric or onto corners
1
2
3
MAINTENANCE
Case B
1 Fabric
2 Secure with double faced tape or a basting
stitch
3 Stabilizer
B
EMBROIDERING
Case A
1 Fabric
2 Secure with double faced tape or a basting
stitch
3 Stabilizer
MACHINE
KNOWLEDGE
Use stabilizer material to provide extra support
while embroidering. After embroidering is
completed, remove the stabilizer material
carefully.
A
ERROR
MESSAGE
TROUBLESHOOTING
Case C
1 Ribbon (Secure with double faced tape)
2 Stabilizer
C
PATTERNS
EMBROIDERING
USING A SMALL
FRAME
(OPTIONAL)
1
2
EMBROIDERING
USING A
EXTRA-SMALL
FRAME (OPTIONAL)
EMBROIDERING
USING A LARGE
FRAME
(OPTIONAL)
53
CONTENTS
IF THREAD BREAKS DURING EMBROIDERING OR WHEN
PARTLY COMPLETING A PATTERN
Before embroidering
MACHINE
KNOWLEDGE
EMBROIDERING
MAINTENANCE
*
When embroidering starts, “SET” will change
to “HELP”.
TROUBLESHOOTING
Touch “HELP”, then the following screen options will appear
1
2
3
4
ERROR
MESSAGE
While embroidering
5
6
PATTERNS
EMBROIDERING
USING A SMALL
FRAME
(OPTIONAL)
EMBROIDERING
USING A LARGE
FRAME
(OPTIONAL)
54
5 Touch this key to move back stitch by stitch
without embroidering.
(If touched continuously, the stitch will be
moved back in 9-stitch jumps starting from the
6th single stitch)
6 Touch this key to return to the previous
screen and allow embroidery to begin.
EMBROIDERING
USING A
EXTRA-SMALL
FRAME (OPTIONAL)
1 Touch this key to move back to the start
position for a pattern.
2 Touch this key to move ahead to the start of
the next color or character without
embroidering
3 Touch this key to move back to the start of the
current color or character without embroidering
4 Touch this key to move forward stitch by stitch
without embroidering.
(If touched continuously, the stitch will be
advanced in 9-stitch jumps starting from the
6th single stitch)
CONTENTS
If thread breaks during embroidering
ERROR
MESSAGE
TROUBLESHOOTING
PATTERNS
3. Lower the presser foot lever and press the
“START/STOP” button to restart embroidering.
* If the machine stopped because the upper
thread ran out, the upper thread may be
tangled on the reverse side of the fabric
(thread nesting). Remove the embroidery
frame to check for this and trim off any excess
build up.
MAINTENANCE
2. Touch “BACK” to move back a few stitches to
slightly before the position where the thread
broke or the bobbin ran out of the thread.
* If it is not possible to move back to the
position where the thread broke, touch
“REVERSE SEARCH” to move back to the
beginning of that color, and then touch
“FORWARD” to move forward to just before
the position where the thread broke or the
bobbin ran out of the thread.
EMBROIDERING
1. If the upper thread breaks.
* Re-thread the upper thread.
If the lower thread breaks or the bobbin runs
out of the thread.
* Cut the upper thread above the fabric in
the frame and then remove the
embroidery frame. Replace the lower
(bobbin) thread and then re-attach the
embroidery frame.
MACHINE
KNOWLEDGE
The machine stops automatically when
the upper thread breaks. When this
happens do the following.
1 “START/STOP” button
1 “START/STOP” button
EMBROIDERING
USING A
EXTRA-SMALL
FRAME (OPTIONAL)
Touch “HELP”.
Follow the same procedure as for “The machine
stops automatically when the thread breaks.”
EMBROIDERING
USING A SMALL
FRAME
(OPTIONAL)
If you stop the machine by pressing the
“START/STOP” button and need to adjust
the stitch location.
EMBROIDERING
USING A LARGE
FRAME
(OPTIONAL)
55
CONTENTS
Re-embroidering from the beginning
MACHINE
KNOWLEDGE
EMBROIDERING
1. Touch “HOME” to move back to the start
position for a pattern.
MAINTENANCE
ERROR
MESSAGE
TROUBLESHOOTING
2. Lower the presser foot lever and press the
“START/STOP” button to start embroidering.
1 “START/STOP” button
PATTERNS
EMBROIDERING
USING A SMALL
FRAME
(OPTIONAL)
EMBROIDERING
USING A
EXTRA-SMALL
FRAME (OPTIONAL)
EMBROIDERING
USING A LARGE
FRAME
(OPTIONAL)
56
CONTENTS
MAINTENANCE
CHANGING THE LIGHT BULB
MACHINE
KNOWLEDGE
When replacing the light bulb
1
1. Turn the main power switch off.
1 ON
2 OFF
The power cord plug must be removed from the socket
outlet prior to changing the bulb.
EMBROIDERING
*
MAINTENANCE
3
2
ERROR
MESSAGE
TROUBLESHOOTING
4
PATTERNS
EMBROIDERING
USING A SMALL
FRAME
(OPTIONAL)
2. Loosen the screw in the end cap at the left side of the
machine.
3. Remove the end cap.
4. Replace the snap-in light bulb with a new one of the same
type.
* Light bulbs are available through your dealer. (8 V, 2.4 W/
Parts code X50228-001 or item #SA105.)
EMBROIDERING
USING A
EXTRA-SMALL
FRAME (OPTIONAL)
EMBROIDERING
USING A LARGE
FRAME
(OPTIONAL)
57
CONTENTS
CLEANING
1. Turn off the power, remove the needle, and then raise the
presser foot lever.
1 Use a screwdriver to loosen the screw to remove.
EMBROIDERING
2. Loosen the screws on the needle plate.
3. Remove the needle plate.
MACHINE
KNOWLEDGE
Always keep the machine clean.
MAINTENANCE
ERROR
MESSAGE
2
3
5
*
Lint and dust accumulated in the race can cause poor
quality stitching.
EMBROIDERING
USING A SMALL
FRAME
(OPTIONAL)
4
6. Put the inner rotary hook back in position by placing the
projection of the hook next to spring of the stopper.
EMBROIDERING
USING A LARGE
FRAME
(OPTIONAL)
1 Projection of the hook
2 Spring of the stopper
EMBROIDERING
USING A
EXTRA-SMALL
FRAME (OPTIONAL)
O
58
PATTERNS
1 Race
2 Inner rotary hook
TROUBLESHOOTING
4. Take out the inner rotary hook.
5. Remove any accumulated lint and threads from the inner
hook and race with a brush or a small vacuum cleaner
attachment.
CONTENTS
ERROR MESSAGE
PATTERNS
This message is displayed when the machine senses that the
upper or lower thread has broken or no upper thread is
threaded or the bobbin runs out of the thread.
TROUBLESHOOTING
This message is displayed when a pattern has not been
selected and the “START/STOP” button is pressed or “SET” is
touched.
ERROR
MESSAGE
This message is displayed when the “START/STOP” button is
pressed while the presser foot lever is raised.
MAINTENANCE
This message is displayed when the bobbin winding shaft is at
the right side and the “START/STOP” button is pressed. This
message may be displayed after the display warns you to raise
the needle to the highest position.
EMBROIDERING
Warning message displays
MACHINE
KNOWLEDGE
When the machine is not properly set and the “START/STOP” button is pressed, or a correction in your
operation is required, machine will not start and will instruct you with an alarm and error number on the
LCD.
EMBROIDERING
USING A SMALL
FRAME
(OPTIONAL)
59
EMBROIDERING
USING A LARGE
FRAME
(OPTIONAL)
This message is displayed when “RETRIEVE” is touched and
there is no pattern stored in that memory space.
EMBROIDERING
USING A
EXTRA-SMALL
FRAME (OPTIONAL)
This message is displayed if the motor locks. This could be
caused by a tangled thread or embroidering with a bent needle.
CONTENTS
EMBROIDERING
USING A
EXTRA-SMALL
FRAME (OPTIONAL)
This message is displayed if “MULTI COLOR” is pressed when
pattern embroidering has already began.
EMBROIDERING
USING A SMALL
FRAME
(OPTIONAL)
This message is displayed if the needle is in the down position
when the power is turned on.
PATTERNS
This message is displayed if the combined size of patterns
exceeds the size of the embroidering area.
TROUBLESHOOTING
This message is displayed if an attempt is made to move the
embroidery frame while the needle is in the down position. Use
the balance wheel to move the needle to the highest position.
Then continue.
ERROR
MESSAGE
This message is displayed when the “START/STOP” button is
pressed but the presser foot has not been raised to change the
thread color.
If you are not changing the thread color, raise the presser foot
lever, lower it again, and then press the “START/STOP” button
to start the machine.
MAINTENANCE
This message is displayed if “CARD” is touched while no
memory card is inserted.
EMBROIDERING
This message is displayed when you are trying to save patterns
that cannot be combined.
MACHINE
KNOWLEDGE
This message is displayed when the RETRIEVE key is touched
and the design in the machine’s memory is from a different
memory card than is currently inserted.
Memory card patterns cannot be saved into the machine’s
memory. However, the characters from memory card #1, the
Alphabet card and #10, Monogram emblem card, can be saved
and retrieved while the card is inserted. The card that the
design was saved from must be inserted in order to retrieve the
design.
EMBROIDERING
USING A LARGE
FRAME
(OPTIONAL)
60
CONTENTS
MAINTENANCE
This message is displayed if you touch the “?????” key while
the machine is embroidering.
EMBROIDERING
This message is displayed when the total number of characters
or patterns combined exceeds a maximum 35.
MACHINE
KNOWLEDGE
This message is displayed if the “START/STOP” button is
pressed when pattern input for a “frame pattern” has not yet
been completed.
Instruction message displays
ERROR
MESSAGE
This message is displayed during bobbin winding.
EMBROIDERING
USING A SMALL
FRAME
(OPTIONAL)
Audio alarms
●
PATTERNS
This message is displayed while the machine is calculating after
you touched the “?????” key. Touch “CANCEL” if you would
like to interrupt the calculation process.
TROUBLESHOOTING
This message is displayed after a “MEMORY” space is touched
to save a pattern to that space. The power should not be turned
off while this is on the display.
Proper operation will sound: One beep
Improper (wrong) operation will sound: Two or four beeps
EMBROIDERING
USING A
EXTRA-SMALL
FRAME (OPTIONAL)
EMBROIDERING
USING A LARGE
FRAME
(OPTIONAL)
61
CONTENTS
TROUBLESHOOTING
Check for the cause of the problem without worrying.
2. The upper thread is tangled.
2. Clean the race or inner rotary hook.
3. The spool of thread is not correctly set.
3. Set the spool of thread correctly.
4. The correct needle is not used.
4. Change to the proper needle.
5. A thread other than the designated upper embroidery thread is being used.
5. Replace with the designated upper
embroidery thread.
1. The upper thread is tangled.
1. Clean the race or inner rotary hook.
2. The bobbin is not threaded properly in
the shuttle.
2. Remove the bobbin, reset the bobbin
properly and pull the bobbin thread
through the channel.
3. A thread other than the designated
lower embroidery thread is being used.
3. Replace with the designated lower
embroidery thread.
1. The needle is not correctly inserted.
1. Set the needle properly.
2. The correct needle is not used.
2. Change to the proper needle.
3. The fabric has been placed in the
embroidery frame incorrectly.
3. Place the fabric in the embroidery
frame correctly.
4. The embroidery frame has been
attached to the machine incorrectly.
4. Attach the embroidery frame to the
machine correctly.
5. Thin or stretch fabric is being used with
no stabilizer fabric attached.
5. Attach stabilizer fabric.
1. The upper thread tension is too strong.
1. Decrease the upper thread tension
using the upper thread tension dial.
2. The upper or lower thread is not
threaded correctly.
2. Thread the upper and lower threads
correctly.
3. Thin or stretch fabric is being used with
no stabilizer fabric attached.
3. Attach stabilizer fabric.
4. The fabric has been placed in the
embroidery frame incorrectly.
4. Place the fabric in the embroidery
frame correctly.
5. The correct needle is not being used.
5. Change to the proper needle.
2. Lower thread breaks
3. Skipped stitches
4. Fabric puckers
EMBROIDERING
USING A
EXTRA-SMALL
FRAME (OPTIONAL)
1. Re-thread the upper thread.
EMBROIDERING
USING A SMALL
FRAME
(OPTIONAL)
1. The upper threading is not correct.
PATTERNS
1. Upper thread breaks
TROUBLESHOOTING
Remedy
ERROR
MESSAGE
Probable cause
MAINTENANCE
Symptom
EMBROIDERING
Trouble with thread and stitches
MACHINE
KNOWLEDGE
Whenever embroidering becomes difficult, review the section of the instruction book which explains the
operation you are performing to make sure that you are using the machine correctly. If you still have
difficulty, the following check list may help you correct it. If you still experience difficulties, contact your
dealer or nearest authorized service center.
EMBROIDERING
USING A LARGE
FRAME
(OPTIONAL)
62
CONTENTS
MACHINE
KNOWLEDGE
EMBROIDERING
Probable cause
Remedy
5. Lower thread is visible on the top
surface of the fabric
1. The upper thread tension is too strong.
1. Decrease the upper thread tension
using the upper thread tension dial.
2. The upper or lower thread is not
threaded correctly.
2. Thread the upper and lower threads
correctly.
3. The thread has been threaded
incorrectly through the inner rotary
hook.
3. Remove the bobbin, reset the bobbin
properly and pull the bobbin thread
through the channel.
4. A thread other than the designated
lower embroidery thread is being used.
4. Replace with the designated lower
embroidery thread.
1. The upper thread tension is too weak.
1. Increase the upper thread tension
using the upper thread tension dial.
2. The upper or lower thread is not
threaded correctly.
2. Thread the upper and lower threads
correctly.
3. Threads other than the designated
upper and lower embroidery thread are
being used.
3. Replace with the designated upper and
lower embroidery threads.
1. The fabric has been placed in the
embroidery frame incorrectly.
1. Place the fabric in the embroidery
frame correctly.
2. The embroidery frame has been
attached to the machine incorrectly.
2. Attach the embroidery frame to the
machine correctly.
3. Thin or stretch fabric is being used with
no stabilizer fabric attached.
3. Attach stabilizer fabric.
4. Threads other than the designated
upper and lower embroidery thread are
being used.
4. Replace with the designated upper and
lower embroidery threads.
5. The thread is tangled.
5. Cut and remove the tangled threads
inside the rotary hook using scissors.
Clean the race or inner rotary hook.
1. The needle is installed incorrectly.
1. Install the needle correctly.
2. The needle threader lever will not turn.
2. Turn the balance wheel to raise the
needle to its highest position.
1. Thread has accumulated around the
thread cutting knife.
1. Remove the needle plate and clean
away the accumulated thread.
EMBROIDERING
USING A SMALL
FRAME
(OPTIONAL)
EMBROIDERING
USING A
EXTRA-SMALL
FRAME (OPTIONAL)
9. Thread is not cut during automatic
thread cutting.
PATTERNS
8. Threading is not possible
TROUBLESHOOTING
7. Embroidered pattern is out of shape
ERROR
MESSAGE
6. Upper thread is loose
MAINTENANCE
Symptom
EMBROIDERING
USING A LARGE
FRAME
(OPTIONAL)
63
CONTENTS
Mechanical problems
1. Machine operation is slow and
noisy
1. Thread scraps and dust have
accumulated under the needle plate.
1. Remove the thread scraps and dust
with a brush.
2. The machine does not start
1. The “START/STOP” button is not
pressed.
1. Press the “START/STOP” button.
2. The main power switch is in the off
position.
2. Turn the power on.
3. The presser foot is not lowered.
3. Lower the presser foot.
4. Check Error messages.
4. See “ERROR MESSAGE” on page 59.
1. The needle is not correctly inserted.
1. Remove the needle and reset a new
needle properly.
2. The correct needle is not used.
2. Change to the proper needle.
3. The needle breaks
ERROR
MESSAGE
TROUBLESHOOTING
Caution
● This machine is equipped with a thread breakage sensor. Accordingly, if the upper thread is
not threaded, the machine will not operate even if the “START/STOP” button is pressed.
In addition, a loud noise which is different from the normal operation noise is generated by the
needle bar holding mechanism during layout changes, layout change tests and also when the
embroidery frame travels a lot during embroidery. This sound is normal and is not the result of
a malfunction.
● If the power goes off during embroidering:
● Turn the power off and unplug the machine. Damage may occur if the machine is on when
the power comes back on.
● To start again, while the main power switch is off, plug the unit in. Then turn the main power
switch on and select an operation. Refer to page 54, using the “HELP” function to get back
to the point where the machine went off.
MAINTENANCE
Remedy
EMBROIDERING
Probable cause
MACHINE
KNOWLEDGE
Symptom
PATTERNS
EMBROIDERING
USING A SMALL
FRAME
(OPTIONAL)
EMBROIDERING
USING A
EXTRA-SMALL
FRAME (OPTIONAL)
EMBROIDERING
USING A LARGE
FRAME
(OPTIONAL)
64
CONTENTS
PATTERNS
Character embroidering chart
Sizes: [L] 30 mm (1-3/16”), [M] 15 mm (9/16”)
[S] 10 mm (0-3/8”)
MACHINE
KNOWLEDGE
Sizes: [L] 30 mm (1-3/16”), [M] 15 mm (9/16”)
[S] 7.5 mm (1/4”)
EMBROIDERING
Sizes: [L] 30 mm (1-3/16”), [M] 15 mm (9/16”)
[S] 9 mm (0-3/8”)
MAINTENANCE
ERROR
MESSAGE
TROUBLESHOOTING
Frame pattern embroidering chart
<Sizes can be enlarged or reduced.>
PATTERNS
Frames
EMBROIDERING
USING A SMALL
FRAME
(OPTIONAL)
Stitches
EMBROIDERING
USING A
EXTRA-SMALL
FRAME (OPTIONAL)
EMBROIDERING
USING A LARGE
FRAME
(OPTIONAL)
65
CONTENTS
One point mark embroidery pattern
<Embroidering times: 2 - 18 min. (It does not include the time needed to change colors.)>
1...307
2...019
3...900
1...307
2...800
3...900
1...001
2...800
3...900
1...001
2...800
3...900
1...001
2...800
3...019
1...001
2...800
3...900
1...800
2...507
3...900
1...800
2...900
1...205
2...800
3...900
1...800
2...900
1...800
2...001
3...900
1...800
2...005
3...900
1...001
2...800
3...019
1...800
2...205
3...900
1...019
2...205
3...900
1...001
2...205
3...900
1...800
2...205
3...900
1...001
2...019
3...900
1...205
2...001
3...339
1...005
2...800
3...900
1...001
2...800
3...900
1...019
2...800
3...900
1...323
2...085
3...001
4...058
1...086
2...058
3...707
1...070
2...085
3...086
4...323
1...513
2...001
3...208
4...058
1...001
2...800
3...515
4...058
5...900
1...800
2...513
3...900
1...001
2...010
3...323
4...513
5...058
1...085
2...323
3...058
1...086
2...205
3...534
4...019
1...513
2...030
3...058
1...900
1...900
2...205
3...800
4...323
5...900
1...339
2...058
3...843
4...900
1...405
2...900
3...005
4...704
1...405
2...507
3...800
4...205
1...843
2...900
3...019
1...205
2...019
3...900
1...001
2...900
1...079
2...800
3...208
4...900
1...405
2...001
3...800
4...900
5...001
6...307
7...405
8...900
9...307
10...800
11...900
1...513
2...030
3...205
4...339
5...900
1...513
2...507
1...005
2...707
1...001
2...900
1...900
1...001
2...515
3...507
1...086
1...614
1...515
2...513
3...001
4...208
5...205
6...513
Patterns which are stored in the machine or memory cards are for home use only. These patterns are not
to be used for any activity other than home use.
66
EMBROIDERING
USING A LARGE
FRAME
(OPTIONAL)
1...513
2...328
3...515
4...085
5...086
6...079
7...515
Embroidery
thread color
EMBROIDERING
USING A
EXTRA-SMALL
FRAME (OPTIONAL)
1...205
2...800
3...900
EMBROIDERING
USING A SMALL
FRAME
(OPTIONAL)
1...001
2...800
3...900
PATTERNS
1...205
2...001
3...900
TROUBLESHOOTING
1...339
2...800
3...900
ERROR
MESSAGE
1...339
2...205
3...900
MAINTENANCE
1...205
2...339
3...900
EMBROIDERING
1...704
2...800
3...900
MACHINE
KNOWLEDGE
Order of
sewing
1...001
2...800
3...900
Embroidering items such as handkerchiefs and collars
ABC
CAUTION
Take note of the following when using the
small frame.
TROUBLESHOOTING
PATTERNS
EMBROIDERING
USING A SMALL
FRAME
(OPTIONAL)
EMBROIDERING
USING A
EXTRA-SMALL
FRAME (OPTIONAL)
Embroidering items which won’t fit into the
frame
For items which won’t fit into the frame, baste or
iron a piece of stabilizer fabric onto the part to be
embroidered, and then place the entire piece into
the frame together with the fabric to be
embroidered.
ERROR
MESSAGE
Embroidering handkerchiefs and cuffs
Set the handkerchief into the small frame. You
can use the rotation function to move the needle
to the desired embroidering location.
MAINTENANCE
1. Always make sure that the initial setting
operation for the carriage (embroidery arm)
after the power is turned on — in other words,
the movement of the carriage (embroidery
arm) in order to set the position — is
completed before installing the small
embroidery frame.
2. If you do not change the position of the
pattern on the “LAYOUT” screen, check that
the embroidering area for the pattern selected
is within 70 mm (2-3/4”) in height and width by
touching the “LAYOUT” key. If it is, the pattern
can be embroidered correctly.
3. If you have changed the position of the
pattern using the arrow keys in the “LAYOUT”
screen, use the “TRIAL” function to check that
the pattern does not extend past the edges of
the frame before starting embroidering.
Before touching “TRIAL”, raise the needle and
the presser foot lever to their highest
positions.
EMBROIDERING
1 Embroidery sheet
2 Embroidering range (Maximum)
Height: 70 mm (2-3/4”)
Width: 70 mm (2-3/4”)
MACHINE
KNOWLEDGE
If the accessory frame is too large to hold the
fabric to be embroidered, you can use the
optional small frame.
CONTENTS
EMBROIDERING USING A SMALL FRAME (OPTIONAL)
EMBROIDERING
USING A LARGE
FRAME
(OPTIONAL)
67
68
EMBROIDERING
USING A LARGE
FRAME
(OPTIONAL)
9
EMBROIDERING
USING A
EXTRA-SMALL
FRAME (OPTIONAL)
8
EMBROIDERING
USING A SMALL
FRAME
(OPTIONAL)
1
2
3
4
5
6
7
PATTERNS
*
The extra-small frame can also be used
horizontally by changing the position of
attachment to the frame fixing plate. Use a
screwdriver to remove the two screws in order
to change the attachment position.
Use the horizontal attachment sheet when the
frame is attached horizontally.
Frame fixing plate
Screws (x 2)
Washers (x 2)
Nuts (x 2)
Embroidery sheet (horizontal type)
Embroidery range
Maximum embroidering area
– Height : 30 mm (1-15/16”)
Maximum embroidering area
– Width : 50 mm (1-3/16”)
Center of pattern
TROUBLESHOOTING
*
ERROR
MESSAGE
1. Always make sure that the initial setting
operation for the carriage (embroidery arm)
after the power is turned on — in other words,
the movement of the carriage (embroidery
arm) in order to set the position — is
completed before installing the extra-small
embroidery frame.
2. Using the arrow keys in the “LAYOUT”
screen, use the “TRIAL” function to check that
the pattern does not extend past the edges of
the frame before starting embroidering.
3. Before touching “TRIAL”, raise the needle and
the presser foot lever to their highest
positions.
MAINTENANCE
CAUTION
Take note of the following when using the
extra-small frame.
EMBROIDERING
1 Embroidery sheet (vertical type)
2 Embroidery range
3 Maximum embroidering area
– Height : 50 mm (1-15/16”)
4 Maximum embroidering area
– Width : 30 mm (1-3/16”)
5 Center of pattern
MACHINE
KNOWLEDGE
An extra-small frame which is smaller than the
small frame mentioned on the previous page is
also available as an option. It is used mostly for
monogramming initials on pockets or cuffs.
The extra-small frame can be used to embroider
even smaller articles.
CONTENTS
EMBROIDERING USING A EXTRA-SMALL FRAME
(OPTIONAL)
Embroidering range
ABC
MACHINE
KNOWLEDGE
1 Embroidering range
18.2 2 11 cm
(7-3/16” 2 4-5/16”)
2 Center when frame is clamped in position “a”.
3 Center when frame is clamped in position “b”.
4 Center when frame is clamped in position “c”.
5 Reference line
CONTENTS
EMBROIDERING USING A LARGE FRAME (OPTIONAL)
EMBROIDERING
a
b
c
MAINTENANCE
ERROR
MESSAGE
1. If the overall height is within 18.2 cm (73/16”), you can embroider the respective
patterns simply by changing the clamping
position of the frame.
TROUBLESHOOTING
Combining patterns in the height direction
PATTERNS
b
c
EMBROIDERING
USING A SMALL
FRAME
(OPTIONAL)
a
2. Once the pattern at the top has been
embroidered, move the clamp from position
“a” to position “b” or position “c”.
EMBROIDERING
USING A
EXTRA-SMALL
FRAME (OPTIONAL)
3. Embroider the pattern at the bottom.
EMBROIDERING
USING A LARGE
FRAME
(OPTIONAL)
69
1 Finished appearance
2 Within 18.2 cm (7-3/16”)
EMBROIDERING
USING A
EXTRA-SMALL
FRAME (OPTIONAL)
4. After touching “LAYOUT”, touch “90˚
clockwise” to change the arrow in the display
so that it points to the right. Then touch
“START/CENTER” to set the current needle
position as the embroidery start position.
EMBROIDERING
USING A SMALL
FRAME
(OPTIONAL)
3. Align the line on the fabric with a line on the
embroidery sheet, and fit the fabric and
embroidery sheet into the frame. Clamp the
frame with the carriage at the place indicated
by “a”. (see next page)
PATTERNS
ABC
TROUBLESHOOTING
1 Embroidery start position
ERROR
MESSAGE
2. Draw a line on the fabric marking the place
where the patterns will be embroidered. Find
the center line, and then draw the line along
the whole length of the pattern, marking it off
into two even lengths. Mark the embroidery
start position with a cross by drawing another
line across this line.
MAINTENANCE
After selecting the pattern, touch “LAYOUT” to
check the size of the pattern.
The size of the pattern is displayed on the left
side on the screen.
EMBROIDERING
1. Check the lengths of the patterns you wish to
embroider continuously by touching
“LAYOUT”. If the length is within 18.2 cm (73/16”), you can proceed with embroidering
just by changing the embroidery location,
without having to re-set the fabric in the
frame.
MACHINE
KNOWLEDGE
Example: Patterns in Flower card
(No. 2)
CONTENTS
Linking two or more embroidered patterns (using the 90˚ rotation feature)
EMBROIDERING
USING A LARGE
FRAME
(OPTIONAL)
70
CONTENTS
c
PATTERNS
EMBROIDERING
USING A SMALL
FRAME
(OPTIONAL)
1 Previous embroidery end
TROUBLESHOOTING
8. Use the arrow keys to move the needle to the
previous embroidery end position, and then
continue embroidering.
ERROR
MESSAGE
7. Embroider the next pattern. If using the same
pattern, go straight ahead and start
embroidering. If using a different pattern,
select the new pattern.
After touching “LAYOUT”, touch “90°
clockwise” to change the arrow in the display
so that it points to the right. Then touch
“START/CENTER” to set the current needle
position as the embroidery start position.
MAINTENANCE
a
EMBROIDERING
6. Move the frame to the place indicated by “c”
and clamp it again with the carriage.
MACHINE
KNOWLEDGE
5. Use the arrow keys to move the needle to the
embroidery start position, and then start
embroidering.
EMBROIDERING
USING A
EXTRA-SMALL
FRAME (OPTIONAL)
EMBROIDERING
USING A LARGE
FRAME
(OPTIONAL)
71
IMPORTANTES INSTRUCCIONES DE
SEGURIDAD
Cuando se usa una máquina de bordar, debe seguirse unas precauciones básicas y
que vienen incluidas a continuación.
“Leer las instrucciones antes de usar”
PELIGRO –
Para reducir el riesgo de una descarga eléctrica.
1. La máquina no debe dejarse nunca desatendida mientras esté conectada. Desconectar la máquina de
la red eléctrica inmediatamente después de su uso y antes de limpiarla.
2. Desconectar la máquina de la red antes de cambiar la bombilla.
Colocar una bombilla del mismo tipo con una potencia de 2,4 Watios.
CUIDADO – Para
reducir el riesgo de quemaduras, fuego, descargas eléctricas o causar
daños a personas.
1. No usar la máquina como un juguete.
Prestar atención si fuese necesario cuando la máquina está siendo usada por niños o cerca de ellos.
2. Usar la máquina de bordar solamente como se describe en este manual.
Usar únicamente los accesorios recomendados por el fabricante y que vienen especificados en este
manual.
3. No trabajar nunca con la máquina en caso de que tenga el cable o el enchufe en malas condiciones, si
no cose correctamente, en caso de que se haya caído, haya sido dañada o se haya mojado.
4. No usar la máquina con los orificios de ventilación bloqueados. Mantener los orificios de ventilación de
la máquina de bordar y el pedal sin acumulación de povo. Suciedad y restos de tejido.
5. No introducir no insertar objetos en los orificios de ventilación.
6. No usar al, aire libre.
7. No usar mientras se estén utilizando productos aerosoles (spray) o en lugares donde se esté
administrando oxígeno.
8. Para desconectar, girar el interruptor hasta la posición del símbolo “O” que representa off, luego
desconectar el enchufe de la red.
9. No desconectar el enchufe tirando del cable. Para desconectar, tirar de la clavija, no del cable.
10. Mantener los dedos alejados de todas las partes movibles de la máquina. Tener un cuidado especial
con la aguja.
11. Usar siempre la placa de agujas apropiada. Una placa de agujas impropia puede producir la rotura de
la aguja.
12. No usar agujas despuntadas.
13. No presionar ni tirar del tejido mientras se está cosiendo. Esto podría doblar la aguja y romperla.
14. Situar el interruptor principal de la máquina en posición “O” cuando se realice algún ajuste en el área
de la aguja como enhebrar la aguja, cambiar la aguja, cambiar la canilla, cambiar la pata prensatelas y
similares.
15. Desconectar siempre la máquina de la red eléctrica cuando se retiren las tapas, para lubricar, o cuando
se realice algún otro tipo de ajuste mecánico mencionado en el manual de instrucciones.
“CONSERVE ESTE MANUAL DE
INSTRUCCIONES”
“Esta máquina de bordar es para uso
doméstico”
FELICITACIONES POR HABER ELEGIDO UNA
MAQUINA DE BORDAR COMPUTARIZADA BROTHER
Esta es la máquina de bordar computarizada para uso doméstico más avanzada.
Para disfrutar de todas sus funciones, le sugerimos que estudie cuidadosamente este manual.
POR FAVOR LEA ESTE MANUAL ANTES DE USAR ESA MAQUINA
DE BORDAR
Para funcionamiento seguro
1. Preste atención a la aguja mientras cose. No toque la polea, el tirahilos, la aguja u otras partes
móviles.
2. Recuerde desconectar el interruptor principal y desenchufar el cable de alimentación cuando:
● Haya terminado de trabajar
● Saque o cambie la aguja u otras partes
● Haya un corte de corriente
● Vaya a realizar el mantenimiento
● No use la máquina o la deje sola.
3. Enchufe la máquina directamente en el tomacorriente de la pared. No use cables de extensión.
4. Nunca se olvide de desconectar el interruptor principal antes de insertar o retirar la tarjeta de bordado.
No toque la tarjeta de bordado insertada en la ranura de la tarjeta cuando la máquina de bordar está
funcionando.
Para mayor duración
1. Guarde la máquina de bordar en un lugar protegido de los rayos solares y donde no haya humedad.
No guarde la máquina cerca de ningún aparato de calefacción, plancha u otros objetos que emitan
calor.
2. Use únicamente jabón o detergente neutro para limpiar la máquina. La bencina, los disolventes y los
polvos abrasivos pueden dañar el exterior de la máquina por lo que no se deben usar para la limpieza.
3. No deje caer ni golpee la máquina de bordar.
4. Para cambiar o instalar algún conjunto, aguja u otra pieza, consulte siempre este manual de
instrucciones o use la tecla de funcionamiento básico.
Para reparar o ajustar
Si ocurre un malfuncionamiento o debe ajustar la máquina, primero siga las instrucciones del cuadro de
localización de averías en la parte de atrás de este manual para inspeccionar y ajustar la máquina. Si el
problema continúa, consulte al centro de servicio autorizado más cercano.
●
Tenga en cuenta que las especificaciones y el diseño están sujetos a cambios por mejoras sin previo
aviso.
73
CAPITULO 1
CONOCIENDO LA MAQUINA ......... 75
75
76
77
77
78
79
83
84
89
90
92
96
96
97
CAPITULO 2
102
103
104
105
105
106
106
107
109
112
112
CAMBIO DE LA BOMBILLA ................... 129
LIMPIEZA ............................................... 130
MENSAJES DE ERROR .......................
LOCALIZACION DE AVERIAS .............
PATRONES ...........................................
BORDADO USANDO UN MARCO
PEQUEÑO (OPCIONAL) .......................
BORDADO USANDO UN BASTIDOR
EXTRA PEQUEÑO (OPCIONAL)..........
BORDADO USANDO UN MARCO
GRANDE (OPCIONAL) .........................
131
134
138
139
140
141
Unión de dos o más diseños de
bordado (uso de la función de giro
de 90˚) .............................................. 142
BORDADO
USANDO UN
MARCO GRANDE
(OPCIONAL)
111
MANTENIMIENTO ........................... 129
BORDADO USANDO
UN BASTIDOR
EXTRA PEQUEÑO
(OPCIONAL)
74
98
100
101
102
BORDADO USANDO
UN MARCO
PEQUEÑO
(OPCIONAL)
BORDADO .............................................
Comienzo del bordado......................
Consejos para el bordado.................
COMO SELECCIONAR PATRONES.....
Selección de patrones de bordado
incorporados .....................................
Selección de caracteres alfabéticos ...
Mayúsculas y minúsculas .................
Cambio del tamaño de los caracteres
a uno de tres tamaños diferentes .....
Corrección de caracteres..................
Verificación de los caracteres
ingresados ........................................
Cambio del color de un solo carácter...
Selección de marcos bordados ........
Selección de patrones de una puntada ..
Exhibición del tiempo de bordado
para patrones de una puntada..........
Exhibición de los nombres de colores
para patrones de una puntada..........
Selección de patrones de una tarjeta
de memoria .......................................
PATRONES
BORDADO ....................................... 98
LOCALIZACION
DE AVERIAS
94
94
95
MENSAJES DE
ERROR
90
90
MANTENIMIENTO
85
87
88
BORDADO
80
CONOCIENDO LA
MAQUINA
PARTES PRINCIPALES Y SUS
DESCRIPCIONES..................................
INTERRUPTOR PRINCIPAL Y
CONECTORES ......................................
TECLAS DE SELECCION......................
BOTON DE COMIENZO/PARADA.........
ACCESORIOS........................................
OPCIONALES ........................................
FUNCIONAMIENTO
(TECLAS DE SELECCION) ...................
COMO USAR LA TECLA DE
SELECCION DE LENGUAJE.................
Como borrar la selección de lenguaje ...
ENROLLADO E INSTALACION
DE LA BOBINA.......................................
Colocación de la bobina ...................
ENHEBRADO DEL HILO SUPERIOR....
Dispositivo de enhebrado
automático de la aguja......................
PREPARATIVO ANTES DE BORDADO ...
Colocación del material
estabilizador......................................
Bordado de diversos tipos de tejidos...
Colocación del tejido en el marco
de bordado........................................
Instalación del marco de bordado
en la máquina ...................................
Desmontaje del marco de bordado...
AJUSTE DE TENSION DEL HILO .........
AJUSTE DE BRILLO DE LA
PANTALLA LCD .....................................
Si la pantalla LCD no se ve bien
cuando la máquina está encendida ..
CAMBIO DE LA AGUJA .........................
MEMORIA .............................................. 113
Almacenando una combinación de
patrón en la memoria ........................ 113
Recuperando un patrón de la
memoria ............................................ 114
CAMBIO DE LOS AJUSTES PARA EL
PATRON SELECCIONADO ................... 115
Como cambiar la posicion
(COMPOSICION) ............................. 115
Cambio de la posición de bordado ... 116
Verificación del área de bordado ...... 116
Bordado desde un punto de comienzo
específico.......................................... 117
Cambio de la dirección del patrón .... 117
Patrones en forma de espejo............ 118
Cambio del tamaño de los
caracteres y marcos bordados ......... 119
Cambio de la densidad de la
puntada en caracteres y algunos
marcos bordados .............................. 119
BORDADO DE UN PATRON DE
BORDADO BASICO............................... 120
Bordado patrones multicolores ........ 120
Patrones de color sencillos para el
bordado............................................. 120
Bordado de un patrón de un sólo color
con la indicación “MULTI COLOR” en
la pantalla ......................................... 121
Bordado de más letras de las que
entran en el área de bordado ........... 122
BORDADO DE APLICACIONES............ 123
Combinación de marcos bordado
con un diseño ................................... 123
Apliques bordado (usando un
marco de bordado) ........................... 124
Bordando sobre piezas pequeñas
de tejido o sobre esquinas ................ 125
SI EL HILO SE ROMPE DURANTE EL
BORDADO O CUANDO HAYA
TERMINADO UN PATRON CASI
TERMINADO .......................................... 126
Si el hilo se rompe durante el
bordado............................................. 127
Volviendo a bordar desde el
principio ............................................ 128
CONTENIDO
CONTENIDO
CAPITULO 1
PARTES PRINCIPALES Y SUS DESCRIPCIONES
3
1
2 15
12
CONOCIENDO LA
MAQUINA
4
11
BORDADO
6
13
5
7
14
8
A
16
PATRONES
A– Interruptor principal y conectores
B– Teclas de selección
C– Botón de comienzo/parada
BORDADO USANDO
UN MARCO
PEQUEÑO
(OPCIONAL)
BORDADO USANDO
UN BASTIDOR
EXTRA PEQUEÑO
(OPCIONAL)
1– Mango
2– Soporte de la bobina
3– Guiahilos para enrollar la bobina
4– Dial de tensión de hilo superior
5– Placa delantera
6– Palanca del prensatelas
7– Enhebrador de aguja
8– Prensatelas
9– Cubierta de la bobina
10– Placa de aguja
11– Dispositivo de bobinado
12– Fieltro de bobina
13– Polea
14– Pantalla de cristal líquido
15– Orificio para pasador de bobina extra
16– Carro (Brazo de bordar)
LOCALIZACION
DE AVERIAS
10
MENSAJES DE
ERROR
B
MANTENIMIENTO
C
9
CONTENIDO
CONOCIENDO LA MAQUINA
BORDADO
USANDO UN
MARCO GRANDE
(OPCIONAL)
75
CONTENIDO
INTERRUPTOR PRINCIPAL Y CONECTORES
CONOCIENDO LA
MAQUINA
2
BORDADO
MANTENIMIENTO
MENSAJES DE
ERROR
1
LOCALIZACION
DE AVERIAS
BORDADO USANDO
UN MARCO
PEQUEÑO
(OPCIONAL)
PRECAUCION
– Cuando no use la máquina de bordar el
interruptor principal debe estar apagado o
la máquina debe estar desenchufada del
tomacorriente.
– Cuando realice el mantenimiento, retire
una de las cubiertas o cambie una
bombilla, la máquina debe estar
desenchufada del tomacorriente.
PATRONES
1 Interruptor principal
1 ON
2 OFF
2 Ranura de tarjeta de memoria
BORDADO USANDO
UN BASTIDOR
EXTRA PEQUEÑO
(OPCIONAL)
BORDADO
USANDO UN
MARCO GRANDE
(OPCIONAL)
76
CONTENIDO
TECLAS DE SELECCION
3
4
5
BORDADO
2
CONOCIENDO LA
MAQUINA
1
MANTENIMIENTO
1 Tecla de caracteres y diseños
Use esta tecla para bordar caracteres y
patrones.
2 Tecla de tarjeta
Use esta tecla para seleccionar una tarjeta de
memoria para los patrones de bordado.
3 Tecla de memoria
Use esta tecla para memorizar o recuperar
patrones de la memoria.
4 Tecla de funcionamiento básico
Use esta tecla para más información a cerca
de como usar la máquina de bordar.
5 Tecla para modificar y consejos
Use esta tecla cuando tenga problemas de
bordado. Es una tecla muy útil.
MENSAJES DE
ERROR
LOCALIZACION
DE AVERIAS
PATRONES
BOTON DE COMIENZO/PARADA
BORDADO USANDO
UN BASTIDOR
EXTRA PEQUEÑO
(OPCIONAL)
1 Botón de comienzo / parada
BORDADO USANDO
UN MARCO
PEQUEÑO
(OPCIONAL)
1
Presione este botón para comenzar a bordar, y
vuelva a presionarlo para parar de bordar.
* La máquina funcionará lentamente mientras
presione el botón y luego acelerará cuando
deje de presionarlo.
* Cuando la máquina para de bordar la aguja
quedará levantada.
* Si la indicación “Subir la aguja posición alta.”
aparece en la pantalla, presione el botón de
comienzo/parada para que la aguja quede
levantada.
BORDADO
USANDO UN
MARCO GRANDE
(OPCIONAL)
77
CONTENIDO
ACCESORIOS
6
11
12
13
14
X59535-001
3
Destornillador
X53666-001
4
Tijeras
184783-001
5
Abrecosturas
X54243-001
6
Bobinas (4 unidades)
7
Tapa de bobina (pequeña)
8
Tapa de bobina (grande)
130012-003
9
Hoja de bordado (normal)
XA3728-001
10
Marco de bordado (normal)
X58739-003
11
Cubierta de máquina (tipo blando)*
X59351-001
12
Pasador de bobina extra**
130920-051
13
Redecilla***
127610-000
14
Cubierta de máquina****
XA0181-051
*****
130013-003
Cuando coloque la cubierta de máquina en
la máquina con el marco de bordado
instalado, presione la tecla de caracteres y
diseños o la tecla de tarjeta para volver el
brazo de bordar a su posición de
almacenamiento. Un método alternativo para
volver el brazo de bordar a su posición de
almacenamiento será desconectar la
máquina y volverla a conectar, dejando que
el brazo se reponga y volver a desconectar
la máquina.
En algunos países no tal vez no se provee
una tapa.
** El pasador de bobina extra se puede usar
con un hilo decorativo como ser un hilo lamé
*** Si usa hilos especiales que se salen
fácilmente de la bobina de hilo, coloque una
redecilla sobre la bobina antes de comenzar
a usar.
**** En algunas áreas, la cubierta de máquina
No. 14 se suministra como un accesorio en
lugar de la cubierta de máquina No. 11 (tipo
blando).
***** Se distribuye en grupos de 10 cuando se
efectúa el pedido por separado.
(Código)
EE.UU y Canadá: XA3811-051
Otros: XA3812-051
BORDADO USANDO
UN BASTIDOR
EXTRA PEQUEÑO
(OPCIONAL)
10
2
BORDADO USANDO
UN MARCO
PEQUEÑO
(OPCIONAL)
9
XA4527-001
Juego de agujas 75/11 3 unidades,
90/14 1 unidad
PATRONES
8
Cepillo
LOCALIZACION
DE AVERIAS
7
1
MENSAJES DE
ERROR
*
Código
MANTENIMIENTO
5
4
Nombre de las partes
BORDADO
3
No.
2
CONOCIENDO LA
MAQUINA
1
BORDADO
USANDO UN
MARCO GRANDE
(OPCIONAL)
78
CONTENIDO
OPCIONALES
Nombre de las partes
1
Juego de bordado extra
(normal)
2
Juego de bordado (grande)
SA418
XA3733-001
3
Juego de bordado (pequeño)
SA416
XA3730-001
4
Juego de bordado (Extra pequeño)
SA415
XA3713-001
5
Juego de hilo de color poli #40 de Brother
SA740
X80928-100
6
Hilo de bobina poli #90 de Brother
7
Entretela (material estabilizador)
U.S.A.
Otros
SA417
XA3727-001
EBT-PE X80919-001
SA517
X80914-001
SA298
X58317-001
BORDADO
2
Código
No.
CONOCIENDO LA
MAQUINA
1
Tarjeta de memoria
8
X58321-001
SA300
X58362-001
No. 6 Moskowitz’s World
SA303
X58497-001
No. 7 Estilo “country”
SA304
X59322-001
No. 8 Fiestas
SA305
X59357-001
No. 9 Artesanías
SA306
X59511-001
No. 10 Monogramas
SA307
X59567-001
No. 11 Marco
SA311
XA0257-001
No. 12 Transportes
SA312
XA0275-001
No. 13 Emblemas deportivos
SA313
XA0517-001
No. 14 Flores grandes
SA314
XA1223-001
No. 15 Niños bonitos
SA315
XA1325-001
No. 16 Perros y gatos
SA316
XA1406-001
No. 17 Nintendo
SA317
XA1434-001
No. 19 Marine
SA319
XA2452-001
No. 20 Diseños pequeños
SA320
XA2869-001
SA321
XA2873-001
No. 25 Caballo
SA325
XA3791-001
ADVERTENCIA
La tarjeta de bordado adquirida en otro país
prodría no funcionar en su máquina.
7
8
BORDADO USANDO
UN BASTIDOR
EXTRA PEQUEÑO
(OPCIONAL)
6
BORDADO USANDO
UN MARCO
PEQUEÑO
(OPCIONAL)
5
PATRONES
No. 21 Bordados
LOCALIZACION
DE AVERIAS
4
SA299
No. 3 Dinosaurios
MENSAJES DE
ERROR
3
No. 2 Flores
MANTENIMIENTO
No. 1 Alfabeto
BORDADO
USANDO UN
MARCO GRANDE
(OPCIONAL)
79
La mayoría de las instrucciones se encuentran en la memoria de la máquina.
Los mensajes en la pantalla LCD lo guiarán en cada procedimiento.
CONOCIENDO LA
MAQUINA
A
CONTENIDO
FUNCIONAMIENTO (TECLAS DE SELECCION)
B
1
BORDADO
Presione la tecla de funcionamiento básico.
Presione “SIGUI”.
Presione “FUNCION DEL INTERRUPTOR”.
Presione “TECLA SELECCION”.
A
LOCALIZACION
DE AVERIAS
B
MENSAJES DE
ERROR
1.
2.
3.
4.
MANTENIMIENTO
1 Tecla de funcionamiento básico
PATRONES
BORDADO USANDO
UN MARCO
PEQUEÑO
(OPCIONAL)
BORDADO USANDO
UN BASTIDOR
EXTRA PEQUEÑO
(OPCIONAL)
BORDADO
USANDO UN
MARCO GRANDE
(OPCIONAL)
80
CONTENIDO
Uso de la teclas de selección
Seleccione una de las seis teclas que explican
las funciones de la máquina y presione esa tecla.
Cuando presione la tecla, la pantalla a la
izquierda cambiará para exhibir la información
que haya solicitado.
TECLA DE CARACTERES Y DISEÑOS
TECLA DE TARJETA
TECLA DE MEMORIA
TECLA DE FUNCIONAMENTO BÁSICO
TECLA PARA MODIFICAR Y CONSEJOS
BORDADO
1
2
3
4
5
CONOCIENDO LA
MAQUINA
A. Teclas de selección
MANTENIMIENTO
MENSAJES DE
ERROR
B. Pantalla LCD
PATRONES
Se puede seleccionar un patrón o funcionamiento
presionando suavemente la sección de la
pantalla que corresponde al patrón o
procedimiento que desea seleccionar.
LOCALIZACION
DE AVERIAS
Funcionamiento usando la pantalla
BORDADO USANDO
UN MARCO
PEQUEÑO
(OPCIONAL)
BORDADO USANDO
UN BASTIDOR
EXTRA PEQUEÑO
(OPCIONAL)
BORDADO
USANDO UN
MARCO GRANDE
(OPCIONAL)
81
CONTENIDO
1. Presione la tecla de funcionamiento básico.
2. Presione “HACER CANILLA”.
CONOCIENDO LA
MAQUINA
Ejemplo: Para consultar cómo enrollar la
bobina
Se exhibirá el procedimiento para enrollar la
bobina.
BORDADO
1 Tecla de funcionamiento básico
MANTENIMIENTO
MENSAJES DE
ERROR
2 Tecla para modificar y consejos
PATRONES
1. Presione la tecla para modificar y consejos.
2. Presione “TEJIDO E HILO Y AGUJA”.
LOCALIZACION
DE AVERIAS
Ejemplo: Para consultar que combinación de
tejido, aguja e hilo usar.
BORDADO USANDO
UN MARCO
PEQUEÑO
(OPCIONAL)
BORDADO USANDO
UN BASTIDOR
EXTRA PEQUEÑO
(OPCIONAL)
BORDADO
USANDO UN
MARCO GRANDE
(OPCIONAL)
82
Puede usar la tecla “SELECCION DE LENGUAJE” para cambiar fácilmente el
lenguaje de los mensajes y las teclas en la pantalla al lenguaje que usted desee.
CONTENIDO
COMO USAR LA TECLA DE SELECCION DE LENGUAJE
CONOCIENDO LA
MAQUINA
1
BORDADO
MANTENIMIENTO
*
Puede cambiar a la siguiente pantalla presionando “SIGUI”.
MENSAJES DE
ERROR
1. Presione la tecla de funcionamiento básico.
2. Presione “SELECCION DE LENGUAJE”.
3. Aparecerá la pantalla de exhibición de lenguaje. Presione el
lenguaje deseado para seleccionarlo.
1 Tecla de funcionamiento básico
LOCALIZACION
DE AVERIAS
PATRONES
Ejemplo: Para cambiar el lenguaje de la
pantalla a Español.
1. Presione “SELECCION DE LENGUAJE”.
2. Presione “SIGUI”.
3. Presione“ESPAÑOL”.
El ajuste de lenguaje cambiará a Español.
4. La exhibición volverá a la pantalla que se
estaba exhibiendo antes.
BORDADO USANDO
UN MARCO
PEQUEÑO
(OPCIONAL)
BORDADO
USANDO UN
MARCO GRANDE
(OPCIONAL)
83
BORDADO USANDO
UN BASTIDOR
EXTRA PEQUEÑO
(OPCIONAL)
NOTA
* Cuando se use“SELECCION DE LENGUAJE”
para ajustar el lenguaje de la pantalla, los
mensajes de error también cambiarán al
lenguaje seleccionado.
* El lenguaje de la pantalla se puede
seleccionar entre una lista de 13 lenguajes.
(Inglés, Alemán, Francés, Italiano, Holandés,
Español, Danés, Noruego, Finlandés, Sueco,
Portugués, Turco y Chino).
CONTENIDO
Como borrar la selección de lenguaje
BORDADO
1 Tecla de funcionamiento básico
CONOCIENDO LA
MAQUINA
1
Ejemplo: Para cambiar el lenguaje de Español
nuevamente a Inglés.
1. Presione la tecla de funcionamiento básico.
2. Presione“SELECCION DE LENGUAJE”.
3. Presione“ENGLISH”.
De esta forma se cancelará el ajuste del
lenguaje Español y la pantalla y los mensajes
de error volverán a aparecer en Inglés.
MANTENIMIENTO
MENSAJES DE
ERROR
LOCALIZACION
DE AVERIAS
PATRONES
PRECAUCION
● Esta función no se debe usar como una
función de traducción.
● Si ocurre un corte de corriente, el ajuste
lenguaje no se borrará y permanecerá en
la memoria.
BORDADO USANDO
UN MARCO
PEQUEÑO
(OPCIONAL)
BORDADO USANDO
UN BASTIDOR
EXTRA PEQUEÑO
(OPCIONAL)
BORDADO
USANDO UN
MARCO GRANDE
(OPCIONAL)
84
CONTENIDO
ENROLLADO E INSTALACION DE LA BOBINA
Cómo enrollar una bobina y enhebrar el hilo inferior
CONOCIENDO LA
MAQUINA
1
1 Tecla de funcionamiento básico
4
BORDADO
3
5
2
MANTENIMIENTO
6
MENSAJES DE
ERROR
1
7
PATRONES
1 Encendido
2 Apagado
2
2
3
1 Tapa de bobina
2 Bobina
3 Fieltro de la bobina
1
2
3
4
Hilo bobinado cruzado
Cubierta de la bobina (pequeña)
Ligeramente separada
Sin fieltro de bobina
85
BORDADO
USANDO UN
MARCO GRANDE
(OPCIONAL)
NOTA
* Cuando usa un hilo bobinado cruzado, retire el fieltro de
bobina y separe ligeramente la tapa de la bobina del hilo en
la bobina antes de comenzar a usar.
BORDADO USANDO
UN BASTIDOR
EXTRA PEQUEÑO
(OPCIONAL)
1
La tapa de la bobina se debe colocar tan apretada como
sea posible.
BORDADO USANDO
UN MARCO
PEQUEÑO
(OPCIONAL)
2. Arme el soporte de la bobina. El extremo del hilo debe salir por
la parte delantera e inferior de la bobina. La tapa de al bobina
debe usarse para mantener bien segura en su lugar la bobina.
*
LOCALIZACION
DE AVERIAS
1. Conecte el cable de alimentación en el tomacorriente y
encienda el interruptor principal.
1
CONTENIDO
1
CONOCIENDO LA
MAQUINA
3. Pase el hilo por la máquina y por los guiahilos para enrollar
la bobina tal como los indica la línea punteada.
2
3
BORDADO
1 Resorte del eje
2 Ranura de la bobina
86
BORDADO
USANDO UN
MARCO GRANDE
(OPCIONAL)
Es una buena idea tener varios bobinas llenas a
mano antes de comenzar con su proyecto de
bordado.
BORDADO USANDO
UN BASTIDOR
EXTRA PEQUEÑO
(OPCIONAL)
8. Coloque la bobina dentro del portabobina tal como se indica
en la página 87.
BORDADO USANDO
UN MARCO
PEQUEÑO
(OPCIONAL)
7. Empuje el eje de la bobina hacia la izquierda. Desmonte la
bobina y continúe cosiendo.
PATRONES
1 Botón de comienzo / parada
LOCALIZACION
DE AVERIAS
6. Presione el botón de comienzo/parada. La máquina parará
automáticamente cuando la bobina esté llena. Presione el
botón de comienzo/parada para parar en cualquier
momento o cuando la bobina haya dejado de moverse y el
motor todavía esté funcionando.
MENSAJES DE
ERROR
5. Sosteniendo el extremo del hilo, presione el botón de
comienzo/parada. Enrolle el hilo unas vueltas alrededor de
la bobina y presione otra vez el botón de comienzo/parada.
Después que haya parado la máquina, corte el sobrante de
hilo por la parte de arriba de la bobina.
* Es importante cortar el hilo cerca del final de la bobina.
MANTENIMIENTO
4. Pase el hilo desde abajo por el orificio pequeño a un
costado de la bobina. Sosteniendo el extremo del hilo,
empuje el eje del bobinador hacia la derecha.
* Haga coincidir la ranura de la bobina con el resorte del eje.
CONTENIDO
Colocación de la bobina
1. Abra la cubierta de bobina empujando el seguro de la
cubierta hacia la derecha.
2
CONOCIENDO LA
MAQUINA
La cubierta de la bobina se encuentra en la parte delantera de
la placa de aguja.
1
1 Cubierta de bobina
2 Seguro de la cubierta de bobina
BORDADO
MENSAJES DE
ERROR
3. Pase el hilo por el gancho y por el canal hacia atrás, tirando
del hilo hacia usted de forma de cortar el sobrante.
MANTENIMIENTO
2. Introduzca la bobina en el portabobina siguiendo la
dirección del hilo indicada debajo de la cubierta de la
bobina.
* (Use una bobina plástica tal como se indica en la página
78.)
LOCALIZACION
DE AVERIAS
2
BORDADO USANDO
UN MARCO
PEQUEÑO
(OPCIONAL)
1
PATRONES
4. Cierre la cubierta de la bobina colocando el extremo
izquierdo en su lugar y presionando ligeramente hacia abajo
del lado derecho para que quede en su lugar.
No hay necesidad de tirar del hilo inferior, esto se realiza
automáticamente.
Se puede comenzar a bordar sin necesidad de tirar del hilo
inferior.
BORDADO USANDO
UN BASTIDOR
EXTRA PEQUEÑO
(OPCIONAL)
*
BORDADO
USANDO UN
MARCO GRANDE
(OPCIONAL)
87
Enhébrelo siguiendo los números y flechas que aparecen marcados en la
máquina.
CONOCIENDO LA
MAQUINA
1
1 Tecla de funcionamiento básico
A
*
BORDADO
3
1
4
3.
4.
5.
88
BORDADO
USANDO UN
MARCO GRANDE
(OPCIONAL)
Nota
Este método impide que el hilo se enrolle al salir de la bobina.
BORDADO USANDO
UN BASTIDOR
EXTRA PEQUEÑO
(OPCIONAL)
1 Inserte el pasador de bobina extra en el orficio en la parte
de arriba de la máquina.
2 Fieltro de bobina
3 Hilo de bobina
BORDADO USANDO
UN MARCO
PEQUEÑO
(OPCIONAL)
Uselo cuando borde usando un hilo metálico.
1. Inserte el pasador de bobina extra en el orficio en la parte
de arriba de la máquina.
2. Instale el fieltro de bobina y la bobina en ese orden, y luego
enhebre el hilo superior.
* No enhebre el hilo en la ménsula (A).
* Cuando cosa usando un hilo metálico, ajuste el dial de
control de tensión (B) a la posición “0”.
* Cuando coloque la bobina de hilo, ajústela de forma que el
hilo salga por la parte de adelante de la bobina.
* Si usa un hilo metálico, le recomendamos que use una
aguja de máquina de coser para el hogar 90/14.
PATRONES
Pasador de bobina extra
LOCALIZACION
DE AVERIAS
2.
* Asegúrese que el fieltro de la bobina está
detrás de la bobina (indicada con *).
levanta, el hilo superior no se podrá enhebrar.)
** No tiene necesidad de tirar del hilo inferior
Gire la polea para levantar la aguja a la
antes de comenzar a coser.
posición más alta.
Enhebre el hilo superior siguiendo la línea continua
PRECAUCION
en la máquina y la secuencia numérica en la figura.
Antes de sacar el hilo superior asegúrese de
Baje el prensatelas.
levantar el prensatelas para evitar dañar el
Enhebre la aguja usando el dispositivo de
sistema de tensión del hilo.
enhebrado automático de la aguja (Consulte
la página 79) o a mano.
USO DEL PASADOR DE BOBINA EXTRA Y DE LA REDECILLA
MENSAJES DE
ERROR
1.
5
MANTENIMIENTO
2
**
Suba el prensatelas (Si el prensatelas no se
CONTENIDO
ENHEBRADO DEL HILO SUPERIOR
CONTENIDO
4
3
1
2
3
4
4
Redecilla
Bobina de hilo
Pasador de bobina
Tapa de bobina
BORDADO
2
Dispositivo de enhebrado automático de la aguja
1. Pase el hilo por el gancho guiahilos (número
“6”) y tire ligeramente del hilo hacia usted.
2. Baje el prensatelas.
3. Baje la palanca del enhebrador de aguja
hasta que haga tope. Enganche el hilo en la
guía y tírelo hacia la derecha.
*
El dispositivo de enhebrado automático no se
puede usar mientras la aguja está abajo.
MENSAJES DE
ERROR
1 Gancho guiahilos
2 Palanca del enhebrador de aguja
3 Guía
MANTENIMIENTO
6
CONOCIENDO LA
MAQUINA
Redecilla
Si usa hilos especiales que se salen fácilmente
de la bobina de hilo, coloque una redecilla sobre
la bobina antes de comenzar a usar.
* Corte la redecilla del tamaño de la bobina.
1
4. Empuje la palanca del enhebrador de aguja
hacia atrás. Verifique que el gancho haya
pasado por el ojo de la aguja y pase el hilo
por debajo de las guías metálicas y del
gancho.
* Tire del hilo hacia usted y verifique el gancho
de hilo lo sostiene.
LOCALIZACION
DE AVERIAS
1 Gancho
2 Guías metálicas
3 Hilo correctamente enhebrado por debajo de
las guías metálicas y del gancho.
PATRONES
BORDADO USANDO
UN BASTIDOR
EXTRA PEQUEÑO
(OPCIONAL)
6. Saque el hilo de la palanca del enhebrador de
aguja.
7. Tire del hilo superior a través del ojo de la
aguja hacia la parte de atrás de la máquina.
BORDADO USANDO
UN MARCO
PEQUEÑO
(OPCIONAL)
5. Sosteniendo suavemente el hilo, tire de la
palanca del enhebrador de aguja hacia
adelante.
BORDADO
USANDO UN
MARCO GRANDE
(OPCIONAL)
89
Asegúrese de desconectar la máquina antes de realizar el siguiente procedimiento.
CONTENIDO
PREPARATIVO ANTES DE BORDADO
CONOCIENDO LA
MAQUINA
1
Colocación del material estabilizador
BORDADO USANDO
UN MARCO
PEQUEÑO
(OPCIONAL)
BORDADO USANDO
UN BASTIDOR
EXTRA PEQUEÑO
(OPCIONAL)
Se recomienda colocar un pedazo de estabilizador debajo, no
entre el tejido a bordar que se encuentra en el marco.
PATRONES
Desde tejidos normales hasta tejidos gruesos
LOCALIZACION
DE AVERIAS
Bordado de diversos tipos de tejidos
MENSAJES DE
ERROR
1 Marco de bordado
2 Tejido
3 Estabilizador no tejido
MANTENIMIENTO
Coloque el material estabilizador del lado del revés del área del
tejido a bordar.
No es necesario colocar material estabilizador en tejidos que
son lo suficientemente duros. Para tejidos finos, de punto o
elásticos que se pueden mover dentro del marco, coloque un
material estabilizador no tejido detrás del tejido antes de
bordar.
Para obtener mejores resultados también se debe colocar la
entretela en el bastidor.
Existen diferentes tipos estabilizadores no tejidos. El objetivo
del estabilizador es evitar que el tejido se estire o mueva. Los
mejores resultados en tejidos elásticos, de punto y livianos se
obtienen planchando un poco el estabilizador no tejido.
BORDADO
1 Tecla de funcionamiento básico
BORDADO
USANDO UN
MARCO GRANDE
(OPCIONAL)
90
CONTENIDO
MANTENIMIENTO
MENSAJES DE
ERROR
Tejidos elásticos como jerseys
BORDADO
Despue’s de seleccionar el tejido, coloque un pedazo de
estabilizador debajo del tejido a bordar que se encuentra en el
marco.
También le recomendamos usar primero apresto, dejarlo secar
o secarlo con la plancha y luego usar un estabilizador no tejido
en el bastidor.
CONOCIENDO LA
MAQUINA
Tejidos delgados como organza o batista de algodón
LOCALIZACION
DE AVERIAS
Adhiera un pedazo de estabilizador un planchar un poco más
grande que el marco donde va a bordar el tejido, y luego
estírelo sobre el marco.
* X80914-001
PATRONES
BORDADO USANDO
UN BASTIDOR
EXTRA PEQUEÑO
(OPCIONAL)
Use el marco más pequeño posible en el que pueda entrar el
diseño a bordar, de esta manera los resultados serán más
bonitos.
BORDADO USANDO
UN MARCO
PEQUEÑO
(OPCIONAL)
Se recomienda usar un estabilizador que se pueda retirar sin
afectar el bordado.
BORDADO
USANDO UN
MARCO GRANDE
(OPCIONAL)
91
1
2
3
4
5
6
Tejido
Lado derecho para bordado
Tornillo de ajuste
Marco interior
Marco exterior
Para aflojar
1 Marco interior
2 Marcas de posicionamiento
BORDADO USANDO
UN MARCO
PEQUEÑO
(OPCIONAL)
1 Area disponible para el bordado
2 Marcas de posicionamiento
3 Centro de la marca de posicionamiento
BORDADO USANDO
UN BASTIDOR
EXTRA PEQUEÑO
(OPCIONAL)
4. Coloque la hoja de bordado sobre el marco interior de forma
que el centro de la marca de posicionamiento de la hoja y la
marca en el tejido estén alineadas.
PATRONES
1 Para apretar
LOCALIZACION
DE AVERIAS
3. Apriete firmemente el tornillo de ajuste, y luego saque
temporariamente el tejido y el marco interior de adentro del
marco exterior.
MENSAJES DE
ERROR
Asegúrese que las marcas Ä en el exterior e interior de los
marcos están alineadas.
MANTENIMIENTO
*
BORDADO
2. Afloje el tornillo de ajuste del marco exterior, coloque el
tejido sobre el marco exterior con el derecho del tejido hacia
arriba y luego coloque el marco interior dentro del marco
exterior para prensar el tejido.
CONOCIENDO LA
MAQUINA
1. Marque el tejido con tiza o un lápiz especial para indicar el
centro de lugar a bordar.
CONTENIDO
Colocación del tejido en el marco de bordado
BORDADO
USANDO UN
MARCO GRANDE
(OPCIONAL)
92
CONTENIDO
BORDADO
Instalación correcta
*
CONOCIENDO LA
MAQUINA
5. Introduzca el tejido y el marco interior dentro del marco
exterior asegurándose que la marca en el tejido no se salga
de posición.
1 Marco exterior
2 Marco interior
3 Tejido
MENSAJES DE
ERROR
6. Verifique que el centro del diseño se encuentra en la
posición correcta de acuerdo con la marca de
posicionamiento de la hoja de bordado. Retire la hoja de
bordado usando el orificio para pasar el dedo y tirar hacia
arriba.
MANTENIMIENTO
Instálelos correctamente de forma que los bordes del marco
exterior e interior queden parejos.
1 Orificio para levantar
LOCALIZACION
DE AVERIAS
PATRONES
BORDADO USANDO
UN MARCO
PEQUEÑO
(OPCIONAL)
BORDADO USANDO
UN BASTIDOR
EXTRA PEQUEÑO
(OPCIONAL)
BORDADO
USANDO UN
MARCO GRANDE
(OPCIONAL)
93
BORDADO
1 Soporte del marco
2 Salientes
CONOCIENDO LA
MAQUINA
1. Levante el prensatelas a la posición más alta. Luego pase
el marco de bordado por debajo del prensatelas con las
Salientes para instalación del lado derecho y con el derecho
del tejido hacia arriba.
CONTENIDO
Instalación del marco de bordado en la máquina
MANTENIMIENTO
1 Palanca de liberación
BORDADO USANDO
UN MARCO
PEQUEÑO
(OPCIONAL)
Empuje la palanca de liberación hacia la derecha y desmonte el
marco de bordado sacándolo hacia arriba.
PATRONES
Desmontaje del marco de bordado
LOCALIZACION
DE AVERIAS
1 Soporte del marco
2 Salientes
MENSAJES DE
ERROR
2. Alinee las dos salientes del marco de bordado con el
soporte del marco, y luego introduzca el marco en el
soporte del marco hasta que escuche un chasquido.
* Asegúrese que las dos salientes han quedado bien. Si
hubiera colocado sólo una de las salientes el diseño no
quedará bien.
BORDADO USANDO
UN BASTIDOR
EXTRA PEQUEÑO
(OPCIONAL)
BORDADO
USANDO UN
MARCO GRANDE
(OPCIONAL)
94
CONTENIDO
AJUSTE DE TENSION DEL HILO
Use este procedimiento para cambiar la tensión del hilo.
CONOCIENDO LA
MAQUINA
Disco de tensión de hilo superior
1 Ajuste de tensión de hilo superior
2 Menos tensión
3 Más tensión
La posición normal es entre “4” y “6”. Sin embargo, siempre
conviene hacer una costura de prueba para probar la
tensión.
Para ajustar la tensión del hilo puede ser necesario usar
hilo, tejido diferente o material estabilizador.
MENSAJES DE
ERROR
B
MANTENIMIENTO
*
BORDADO
A
A– Para aumentar la tensión del hilo superior, gire el disco
hacia la derecha.
B– Para disminuir la tensión del hilo superior, gire el disco
hacia la izquierda.
1 Derecho del tejido
2 Revés del tejido
El hilo superior saldrá para el lado derecho del tejido.
Disminuya la tensión del hilo superior.
1 Derecho del tejido
2 Revés del tejido
BORDADO USANDO
UN MARCO
PEQUEÑO
(OPCIONAL)
Demasiada tensión del hilo superior
PATRONES
Ajústela de forma que el ancho de puntada del hilo inferior del
lado del revés del tejido sea un tercio del ancho total.
Es importante lograr la tensión correcta pues demasiada
tensión o poca tensión hará que el bordado quede mal o que el
tejido se arrolle.
LOCALIZACION
DE AVERIAS
Tensión de hilo correcta
BORDADO USANDO
UN BASTIDOR
EXTRA PEQUEÑO
(OPCIONAL)
Poca tensión del hilo superior
BORDADO
USANDO UN
MARCO GRANDE
(OPCIONAL)
El hilo superior quedará flojo.
Aumente la tensión del hilo superior.
1 Derecho del tejido
2 Revés del tejido
95
CONTENIDO
AJUSTE DE BRILLO DE LA PANTALLA LCD
Para ajustar el brillo de la pantalla LCD
CONOCIENDO LA
MAQUINA
1
1 Tecla de funcionamiento básico
1. Presione
la
tecla
de
funcionamiento básico.
2. Presione “SIGUI”, “BRILLO DE
LCD” y “SIGUI”.
1
2
3
Si ajusta el contraste demasiado no se podrá
ver nada en la pantalla. Reponga la pantalla
apagando y encendiendo nuevamente el
interruptor principal.
96
BORDADO
USANDO UN
MARCO GRANDE
(OPCIONAL)
3. Después que haya terminado de ajustar,
apague y vuelva a encender la máquina otra
vez.
BORDADO USANDO
UN BASTIDOR
EXTRA PEQUEÑO
(OPCIONAL)
2. Presione cualquiera de las dos teclas de
selección inferiores (tecla de funcionamiento
básico, para modificar y consejos). La
pantalla LCD se oscurecerá cada vez que
presione una de estas teclas. Si quiere
aclarar la pantalla LCD, presione una de las
dos teclas de selección superiores (tecla de
caracteres y diseños).
BORDADO USANDO
UN MARCO
PEQUEÑO
(OPCIONAL)
1. A la misma vez que toca la pantalla LCD (en
cualquier lugar está bien), apague y vuelva a
encender la máquina nuevamente.
PATRONES
Si la pantalla LCD no se ve bien cuando la máquina está encendida
LOCALIZACION
DE AVERIAS
*
MENSAJES DE
ERROR
1
1 Presione “CLARO” para menos contraste
(más claro).
2 Presione “OSCURO” para menos contraste
(más oscuro).
3 Presione “FIN” para volver a la pantalla
anterior.
MANTENIMIENTO
Para ajustar el contraste de la pantalla
LCD
BORDADO
2
CONTENIDO
CAMBIO DE LA AGUJA
Coloque la aguja firmemente.
CONOCIENDO LA
MAQUINA
1
LOCALIZACION
DE AVERIAS
2
3
4
BORDADO
USANDO UN
MARCO GRANDE
(OPCIONAL)
97
BORDADO USANDO
UN BASTIDOR
EXTRA PEQUEÑO
(OPCIONAL)
1
1 Coloque la aguja sobre una superficie plana y
verifique si el espacio es paralelo o no.
2 Superficie plana
(Placa de agujas, vidrio, regla, etc.)
Si el espacio no es paralelo entonces el aguja
está doblada y se debe dejar de usar para
evitar que el trabajo quede mal o la máquina
se rompa.
BORDADO USANDO
UN MARCO
PEQUEÑO
(OPCIONAL)
Verificando que el aguja no esté doblada
PATRONES
4. Introduzca la aguja nueva en el portaaguja
con el lado plano hacia atrás y empújela
hacia arriba hasta que haga tope. Atornillela
atorníllela
firmemente
usando
el
destornillador.
5. Apague el interruptor principal.
2
MENSAJES DE
ERROR
2. Afloje el tornillo de la aguja con un
destornillador.
3. Deslice la aguja hacia afuera.
MANTENIMIENTO
1. Apague el interruptor principal y baje la
palanca del prensatelas.
Gire la polea para levantar la aguja a la
posición más alta.
1
BORDADO
1 Tecla de funcionamiento básico
CAPITULO 2
BORDADO
CONTENIDO
BORDADO
CONOCIENDO LA
MAQUINA
1
1 Tecla de funcionamiento básico
BORDADO
1
5
MANTENIMIENTO
6
MENSAJES DE
ERROR
3
2
LOCALIZACION
DE AVERIAS
4
PATRONES
2. Enhebre el hilo inferior (Consulte la página
87).
BORDADO USANDO
UN BASTIDOR
EXTRA PEQUEÑO
(OPCIONAL)
1 Fieltro de bobina (Consulte la página 88 a
89).
BORDADO USANDO
UN MARCO
PEQUEÑO
(OPCIONAL)
1. Enhebre el hilo superior siguiendo la línea
continua y la secuencia numérica en su
máquina.
Asegúrese de colocar el fieltro de bobina tal
como se indica en la figura.
BORDADO
USANDO UN
MARCO GRANDE
(OPCIONAL)
98
CONTENIDO
1 Carro (Brazo de bordar)
2 Marco de bordado
*
1 Posición normal superior de la palanca del
prensatelas
2 Palanca del prensatelas más hacia arriba
3 Posición inferior de la palanca del prensatelas
MENSAJES DE
ERROR
4. Encienda el interruptor principal. La luz se
encenderá cuando encienda el interruptor.
MANTENIMIENTO
Es más fácil mover el bastidor de bordado de
abajo del prensatelas si la palanca del
prensatelas se levanta más de la posición
normal superior.
BORDADO
NOTA
No empuje el carro demasiado hacia abajo al
instalar el bastidor. Tenga cuidado de no mover
el carro hacia un costado.
CONOCIENDO LA
MAQUINA
3. Coloque el tejido en el marco de bordado y
luego instale el marco en la máquina.
(Consulte la página 92 – 94)
LOCALIZACION
DE AVERIAS
5. Seleccione un patrón.
PATRONES
BORDADO USANDO
UN MARCO
PEQUEÑO
(OPCIONAL)
BORDADO
USANDO UN
MARCO GRANDE
(OPCIONAL)
1 Botón de comienzo / parada
BORDADO USANDO
UN BASTIDOR
EXTRA PEQUEÑO
(OPCIONAL)
6. Baje la palanca del prensatelas y presione el
botón de comienzo/parada de la máquina.
99
CONTENIDO
Comienzo de bordado
BORDADO
MANTENIMIENTO
2. Baje el prensatelas y presione el botón de comienzo/parada
para comenzar a coser. Después de coser 5 a 6 puntadas,
pare la máquina y levante de nuevo el prensatelas. Corte el
sobrante de hilo del borde del diseño.
Después de cortar el hilo, baje el prensatelas y presione
otra vez el botón de comienzo/parada para continuar
cosiendo.
3. La máquina parará de coser cuando haya terminado de
coser el color de hilo que está cosiendo.
CONOCIENDO LA
MAQUINA
1. Después de enhebrar la aguja, pase el hilo por el orificio
desde arriba hacia abajo y tire suavemente del extremo del
hilo.
MENSAJES DE
ERROR
LOCALIZACION
DE AVERIAS
PATRONES
BORDADO USANDO
UN MARCO
PEQUEÑO
(OPCIONAL)
BORDADO USANDO
UN BASTIDOR
EXTRA PEQUEÑO
(OPCIONAL)
BORDADO
USANDO UN
MARCO GRANDE
(OPCIONAL)
100
CONTENIDO
Consejos para el bordado
Aguja
*
Hilo de bordar no. 50
Aguja de máquina de coser
para el hogar 75/11
*
*
BORDADO
El hilo inferior recomendado es un hilo
sintético no. 60 a 90.
Para tejidos finos o elásticos difíciles de
bordar, use un estabilizador no tejido debajo
del tejido a bordar.
Si borda un tejido grueso con estabilizador
(consulte la página 90), se recomienda que
use una aguja de máquina de coser para el
hogar fuerte 90/14.
CONOCIENDO LA
MAQUINA
Hilo
MANTENIMIENTO
MENSAJES DE
ERROR
LOCALIZACION
DE AVERIAS
PATRONES
BORDADO USANDO
UN MARCO
PEQUEÑO
(OPCIONAL)
BORDADO USANDO
UN BASTIDOR
EXTRA PEQUEÑO
(OPCIONAL)
BORDADO
USANDO UN
MARCO GRANDE
(OPCIONAL)
101
Selección de patrones de bordado incorporados
Seleccione el tipo de patrones de bordado
incorporados que desea bordar.
* Si enciende el interruptor principal sin haber
colocado una tarjeta de memoria, la
exhibición que se indica a la izquierda
aparecerá en la pantalla.
BORDADO
B
*
Si enciende el interruptor principal habiendo
colocado una tarjeta de memoria, la
exhibición correspondiente a la tarjeta de
memoria aparecerá en la pantalla. (Ejemplo:
No.2 Tarjeta de flores)
Para seleccionar los caracteres, presione la
tecla “CARACTERES Y DISEÑOS”.
MANTENIMIENTO
1
CONOCIENDO LA
MAQUINA
A
CONTENIDO
COMO SELECCIONAR PATRONES
1 Tecla “CARACTERES Y DISEÑOS”
MENSAJES DE
ERROR
LOCALIZACION
DE AVERIAS
PATRONES
BORDADO USANDO
UN MARCO
PEQUEÑO
(OPCIONAL)
BORDADO USANDO
UN BASTIDOR
EXTRA PEQUEÑO
(OPCIONAL)
BORDADO
USANDO UN
MARCO GRANDE
(OPCIONAL)
102
CONTENIDO
Selección de caracteres alfabéticos
Se dispone de tres tipos de letras diferentes para los caracteres
alfabéticos. Presione la tecla que corresponde al tipo de letra que
desea usar.
”.
MANTENIMIENTO
1. Presione “
BORDADO
Ejemplo: Para seleccionar los caracteres
para la palabra “BUS”.
CONOCIENDO LA
MAQUINA
Caracteres alfabéticos
MENSAJES DE
ERROR
2. Presione “B”
LOCALIZACION
DE AVERIAS
3. Presione “SIGUI”.
PATRONES
BORDADO USANDO
UN MARCO
PEQUEÑO
(OPCIONAL)
4. Presione “U”.
1
103
BORDADO
USANDO UN
MARCO GRANDE
(OPCIONAL)
1 Pantalla A – El funcionamiento de cada tecla
indicado en esta pantalla se describe en la
siguiente página.
BORDADO USANDO
UN BASTIDOR
EXTRA PEQUEÑO
(OPCIONAL)
5. Presione “S”.
1
2
3
CONTENIDO
Pantalla A
4
5
7
CONOCIENDO LA
MAQUINA
6
8
LOCALIZACION
DE AVERIAS
PATRONES
1. Presione “A”.
MENSAJES DE
ERROR
Los caracteres a seleccionar se pueden cambiar
entre mayúscula y minúscula y viceversa presionando “A/a”.
MANTENIMIENTO
Mayúscula y minúscula
BORDADO
1 Presione esta tecla para que su máquina cosa una puntada de refuerzo y pare para cambiar el hilo
cada vez que borde un nuevo carácter. (Consulte la página 106.)
2 Presione esta tecla para verificar el carácter seleccionado. (Consulte la página 106.)
3 Presione esta tecla para volver a los caracteres elegidos en la pantalla anterior.
4 Presione esta tecla para exhibir la siguiente pantalla de caracteres en la secuencia.
5 Presione esta tecla para cambiar entre mayúsculas y minúsculas. (Consulte la página 104.)
6 Presione esta tecla para cambiar el tamaño de carácter a uno de los tamaños diferentes. (Consulte la
página 104.)
7 Presione esta tecla si desea cambiar la posición del carácter, el tamaño del carácter y la densidad del
hilo, o si deseara usar la función de ayuda.
Para cambiar la posición del carácter: (Consulte la página 115)
Para cambiar el tamaño del carácter: (Consulte la página 119)
Para cambiar la densidad del hilo: (Consulte la página 119)
Para usar la función de ayuda: (Consulte la página 126)
8 Presione esta tecla para borrar los caracteres seleccionados uno a uno. (Consulte la página 105.)
2. Presione “A/a” para cambiar a minúscula.
BORDADO USANDO
UN MARCO
PEQUEÑO
(OPCIONAL)
BORDADO USANDO
UN BASTIDOR
EXTRA PEQUEÑO
(OPCIONAL)
3. Presione “a”.
BORDADO
USANDO UN
MARCO GRANDE
(OPCIONAL)
104
CONTENIDO
Cambio del tamaño de los caracteres
CONOCIENDO LA
MAQUINA
El tamaño de los caracteres se puede cambiar
presionando “G/M/P”. Cada vez que presiona
cambia de la forma indicada a continuación (G →
M → P → G..)
El tamaño de todos los caracteres cambiará al
último tamaño de carácter seleccionado.
BORDADO
CARACTERES ALFABETICOS
Tamaño normal
MANTENIMIENTO
1 Grande (G)
2 Mediano (M)
3 Pequeño (P)
MENSAJES DE
ERROR
Corrección de caracteres
LOCALIZACION
DE AVERIAS
Puede borrar un carácter a la vez presionando “BORR”.
PATRONES
Ejemplo: Si por equivocación a introducido
“Giel” en vez de “Girl”.
BORDADO USANDO
UN MARCO
PEQUEÑO
(OPCIONAL)
1. Presione dos veces “BORR”.
BORDADO USANDO
UN BASTIDOR
EXTRA PEQUEÑO
(OPCIONAL)
2. Introduzca el carácter correcto.
BORDADO
USANDO UN
MARCO GRANDE
(OPCIONAL)
105
CONTENIDO
Verificación de los caracteres ingresados
BORDADO
Ejemplo: Si ha seleccionado los caracteres
“abcdefghijk” en minúscula.
CONOCIENDO LA
MAQUINA
Presione “COMP” para verificar los caracteres
seleccionados.
MANTENIMIENTO
MENSAJES DE
ERROR
*
*
Si todos los caracteres seleccionados pueden
aparecer, entonces no se desplazarán por la
pantalla.
106
BORDADO
USANDO UN
MARCO GRANDE
(OPCIONAL)
Si se selecciona “MULTICOLOR” antes de
empezar a bordar, la máquina coserá una
puntada de refuerzo y parará después de coser
cada carácter de manera de que pueda cambiar
el hilo.
BORDADO USANDO
UN BASTIDOR
EXTRA PEQUEÑO
(OPCIONAL)
Cambio del color de un solo carácter
BORDADO USANDO
UN MARCO
PEQUEÑO
(OPCIONAL)
Presionando “COMP”, todos los caracteres
desde el primero se desplazarán a lo largo de la
pantalla.
PATRONES
ijk
La máquina no aceptará el carácter siguiente
por que excede el área de bordado. Para
continuar con la palabra o frase cambie a un
tamaño de carácter menor.
LOCALIZACION
DE AVERIAS
La exhibición aparecerá tal como se indica en la
figura a la izquierda después de presionar “k”.
CONTENIDO
Selección de marcos bordados
Los marcos bordados se crean combinando
el marco deseado y el tipo de puntada.
BORDADO
Ejemplo
1. Presione “
”.
Si ha introducido otro tipo de patrón como
caracteres o una tarjeta de memoria, primero
presione “CARACTERES Y DISEÑOS” y
luego “
”.
1
1 Si presiona “SIGUI”, se exhibirán otras
formas. (Existen un total de 10 formas de
marcos disponibles.)
3. Seleccione el tipo de puntada que desea para
el marco.
3 Pantalla A – El funcionamiento de cada tecla
indicado en esta pantalla se describe en la
siguiente página.
BORDADO USANDO
UN MARCO
PEQUEÑO
(OPCIONAL)
4. El patrón combinado se muestra en la
pantalla LCD.
PATRONES
2 Si presiona “SIGUI”, se exhibirán otros tipos
de puntadas. (Existen un total de 12 puntas
diferentes disponibles.)
LOCALIZACION
DE AVERIAS
2
MENSAJES DE
ERROR
2. Seleccione la forma que desea para el marco.
MANTENIMIENTO
*
CONOCIENDO LA
MAQUINA
*
3
BORDADO USANDO
UN BASTIDOR
EXTRA PEQUEÑO
(OPCIONAL)
BORDADO
USANDO UN
MARCO GRANDE
(OPCIONAL)
107
CONTENIDO
Pantalla A
1
2
CONOCIENDO LA
MAQUINA
BORDADO
MANTENIMIENTO
MENSAJES DE
ERROR
1 Presione esta tecla si desea cambiar la posición del patrón, el tamaño del patrón y la densidad del hilo,
o si desea usar la función de ayuda.
Para cambiar la posición del patrón: (Consulte la página 115)
Para cambiar el tamaño del patrón: (Consulte la página 119)
Para cambiar la densidad del hilo: (Consulte la página 119)
(No será posible cambiar la densidad del hilo de algunos patrones.)
Para usar la función de ayuda: (Consulte la página 126)
2 Presione “DIBUJO” para volver a la pantalla de selección de patrón.
LOCALIZACION
DE AVERIAS
PATRONES
BORDADO USANDO
UN MARCO
PEQUEÑO
(OPCIONAL)
BORDADO USANDO
UN BASTIDOR
EXTRA PEQUEÑO
(OPCIONAL)
BORDADO
USANDO UN
MARCO GRANDE
(OPCIONAL)
108
CONTENIDO
Selección de patrones de una puntada
CONOCIENDO LA
MAQUINA
BORDADO
Ejemplo
1. Presione “
”.
MANTENIMIENTO
2
3
MENSAJES DE
ERROR
1
2. Seleccione que desea bordar.
(Por ejemplo, presione la girafa.)
4
BORDADO USANDO
UN MARCO
PEQUEÑO
(OPCIONAL)
4 Pantalla A – El funcionamiento de cada tecla
indicado en esta pantalla se describe en la
siguiente página.
PATRONES
3. El patrón queda seleccionado.
LOCALIZACION
DE AVERIAS
1 Presione “LISTA” para exhibir en la pantalla
todos los patrones disponibles. Puede
seleccionar el patrón deseado presionándolo.
2 Presione “PREV” para volver a la pantalla de
patrones anterior.
3 Presione “SIGUI” para cambiar a la pantalla
de patrones siguiente.
BORDADO USANDO
UN BASTIDOR
EXTRA PEQUEÑO
(OPCIONAL)
BORDADO
USANDO UN
MARCO GRANDE
(OPCIONAL)
109
CONTENIDO
Pantalla A
2
3
4
5
6
CONOCIENDO LA
MAQUINA
7
1
MANTENIMIENTO
MENSAJES DE
ERROR
LOCALIZACION
DE AVERIAS
1 Se indica el orden de los cambios de color
2 Presione esta tecla para exhibir el tiempo total necesario para bordar el patrón y el tiempo restante
hasta terminar el patrón. El tiempo que se demora en cambiar los hilos no se incluye en estos tiempos.
(El tiempo se calcula después de presionar la tecla, y luego es exhibido.) (Consulte la página 111.)
3 Presione esta tecla para cambiar entre el modo multicolor y monocolor. No será posible cambiar entre
el modo multicolor y el modo de un sólo color si “MULTICOLOR” no aparece en la pantalla.
4 Presione esta tecla si desea cambiar la posición del patrón, o si desea usar la función de ayuda.
Para cambiar la posición del patrón: (Consulte la página 115)
Para usar la función de ayuda: (Consulte la página 126)
5 Presione “G/P” para cambiar el tamaño del patrón.
(No se puede cambiar el tamaño de patrones si no se exhibe “G/P” en la pantalla.)
6 Presione esta tecla para volver a la pantalla de selección de patrón.
7 Se exhibe el número total de colores y el número de colores que están siendo cosidos actualmente.
8 Presione esta tecla para cambiar la exhibición en 1 al nombre del color (referencia). (Consulte la
página 111.) (No será posible exhibir el nombre del color si “COLOR DE HILO” no aparece en la
pantalla.)
BORDADO
8
PATRONES
BORDADO USANDO
UN MARCO
PEQUEÑO
(OPCIONAL)
BORDADO USANDO
UN BASTIDOR
EXTRA PEQUEÑO
(OPCIONAL)
BORDADO
USANDO UN
MARCO GRANDE
(OPCIONAL)
110
CONTENIDO
Exhibición del tiempo de bordado para patrones de una puntada
1 Tecla de funcionamiento básico
2
4
2. Entonces será calculado el tiempo de
bordado.
2 Presione esta tecla para cancelar el cálculo.
4. El tiempo restante cambiará al finalizar de
bordar cada color.
PATRONES
Exhibición de los nombres de colores para patrones de una puntada
1 Tecla de funcionamiento básico
Si presiona “COLOR DE HILO”, los nombres de
los colores (referencia) de los hilos a usar
diferentes se exhibirán en orden.
111
BORDADO
USANDO UN
MARCO GRANDE
(OPCIONAL)
2. Se exhibirán los nombres de los colores.
* Si presiona otra vez la tecla “COLOR DE
HILO” la exhibición volverá a la pantalla
anterior.
* No será posible exhibir el nombre del color si
“COLOR DE HILO” no aparece en la pantalla.
BORDADO USANDO
UN BASTIDOR
EXTRA PEQUEÑO
(OPCIONAL)
1. Después de seleccionar el patrón, presione
“COLOR DE HILO”.
1 Tecla “COLOR DE HILO”
BORDADO USANDO
UN MARCO
PEQUEÑO
(OPCIONAL)
1
1
LOCALIZACION
DE AVERIAS
3. El tiempo necesario y el tiempo restante
serán exhibidos en la pantalla.
3 Tiempo restante
4 Tiempo total necesario
MENSAJES DE
ERROR
3
MANTENIMIENTO
1. Después de seleccionar el patrón, presione
“
”.
1 Tecla de exhibición de tiempo
BORDADO
Si desea saber el tiempo que demorará en
bordar un patrón, presione la tecla de exhibición
de tiempo (“
”). El tiempo necesario será
calculado y exhibido. El tiempo necesario para
cambiar los hilos no está incluido.
Esta función también se puede usar con algunos
patrones en las tarjetas de memoria, pero en
esos casos el tiempo exhibido será diferente del
tiempo brindado en la hoja de patrones de la
tarjeta de memoria.
1
CONOCIENDO LA
MAQUINA
1
1. Desconecte el interruptor principal.
CONOCIENDO LA
MAQUINA
Asegúrese de desconectar el interruptor principal antes de insertar o retirar una
tarjeta de memoria.
CONTENIDO
Selección de patrones de una tarjeta de memoria
BORDADO
1 Flecha en la tarjeta de memoria
*
*
*
Si usa una tecla de selección para exhibir otra pantalla,
podrá volver a la pantalla de selección de patrones
presionando la tecla de tarjeta.
112
BORDADO
USANDO UN
MARCO GRANDE
(OPCIONAL)
2 Tecla de tarjeta
BORDADO USANDO
UN BASTIDOR
EXTRA PEQUEÑO
(OPCIONAL)
*
BORDADO USANDO
UN MARCO
PEQUEÑO
(OPCIONAL)
4. Se exhibirá la pantalla de selección de patrones para al
tarjeta de memoria insertada.
(La figura muestra la pantalla de selección de patrones para
la tarjeta de flores No. 2.)
El proceso de selección a partir de este punto es el mismo
que para seleccionar los patrones incorporados.
PATRONES
*
Si inserta la tarjeta en una dirección diferente a la
indicada por la flecha, el conector en la ranura de la
máquina se dañará.
Insértela de forma que la tarjeta aparezca como en la
figura de la izquierda. Si empuja la tarjeta más allá de
lo debido, deñará el conector.
Asegúrese de desconectar el interruptor principal antes
de retirar la tarjeta. Tire la tarjeta derecho hacia afuera.
Cuando no las esté usando mantenga siempre las
tarjetas de memoria en su estuche.
LOCALIZACION
DE AVERIAS
IMPORTANTE
MENSAJES DE
ERROR
3. Conecte el interruptor principal.
MANTENIMIENTO
2. Inserte la tarjeta de memoria en la ranura de acuerdo a la
dirección indicada con la flecha en la tarjeta de memoria.
Se pueden almacenar y recuperar de la memoria hasta 5 combinaciones
diferentes de patrones.
CONTENIDO
MEMORIA
CONOCIENDO LA
MAQUINA
1
1 Tecla de funcionamiento básico
BORDADO
Almacenando una combinación de patrón en la memoria
1. Introduzca los caractéres para formar la
palabra o el monograma.
MENSAJES DE
ERROR
2. Presione “MEMORIA”.
1 Tecla de memoria
2
BORDADO
USANDO UN
MARCO GRANDE
(OPCIONAL)
113
BORDADO USANDO
UN BASTIDOR
EXTRA PEQUEÑO
(OPCIONAL)
4. El patrón quedará almacenado en la
memoria.
5. Para el siguiente ejemplo presione
“CARACTERES Y DISEÑOS”, presione
“
” para seleccionar el tipo de letra
deseado e introduzca caractéres para crear el
patrón “Boy”.
Presione “MEMORIA”, presione “SIGUI” y
luego “MEMORIA 2” para almacenar el
patrón.
BORDADO USANDO
UN MARCO
PEQUEÑO
(OPCIONAL)
*
Si almacena el patrón nuevo en una memoria
que estaba ocupada, se borrará el patrón
viejo.
No corte la corriente mientras almacena un
patrón (mientras “Grabando” aparece en la
pantalla.)
PATRONES
2 Si ya existe un patrón almacenado en la
MEMORIA 1, se exhibirá en la pantalla. Si
estuviera ocupada presione la tecla “SIGUI”
hasta encontrar un vacía.
LOCALIZACION
DE AVERIAS
3. Presione “MEMORIA 1”.
*
MANTENIMIENTO
Ejemplo: Para almacenar el patrón “Girl”
en la memoria 1.
CONTENIDO
Recuperando un patrón de la memoria
1. Presione “MEMORIA”.
1 Tecla de memoria
CONOCIENDO LA
MAQUINA
Ejemplo: Para recuperar el patrón “Boy”
almacenado en la memoria 2.
BORDADO
2. Presione “SIGUI”.
MANTENIMIENTO
MENSAJES DE
ERROR
3. Presione “REVISION 2”.
LOCALIZACION
DE AVERIAS
PATRONES
4. El dibujo recuperado aparecerá en la pantalla.
Presione el botón de comienzo/parada para
bordar el dibujo.
BORDADO USANDO
UN MARCO
PEQUEÑO
(OPCIONAL)
Los patrones almacenados en una tarjeta de
bordado sólo pueden ser recuperados si la
tarjeta de memoria conteniendo ese patrón ha
sido insertada en la ranura de la máquina.
BORDADO USANDO
UN BASTIDOR
EXTRA PEQUEÑO
(OPCIONAL)
*
BORDADO
USANDO UN
MARCO GRANDE
(OPCIONAL)
114
CONTENIDO
CAMBIO DE LOS AJUSTES PARA EL PATRON SELECCIONADO
Como cambiar la posicion (COMPOSICION)
Dibujo de un punto
Maro bordado
Tarjeta de memoria
(No.2 Tarjeta de flores)
BORDADO
Cost. de letras
CONOCIENDO LA
MAQUINA
Puede cambiar la posición del bordado presionando “COMPOSI”. Esto resulta muy útil si desea bordar un
dibujo sobre una esquina del tejido o desea colocar el dibujo fuera del centro del área de bordado del
bastidor.
MANTENIMIENTO
6
MENSAJES DE
ERROR
34 5
8
LOCALIZACION
DE AVERIAS
1
9
2
7
0 A
BORDADO USANDO
UN MARCO
PEQUEÑO
(OPCIONAL)
BORDADO USANDO
UN BASTIDOR
EXTRA PEQUEÑO
(OPCIONAL)
8 Con esta tecla se cambia la posición de la
aguja al centro del dibujo o a la posición de
comienzo de bordado, etc. Usarla cuando se
quiera ajustar la posición de bordado.
(Consulte la página 117)
9 Si se presiona esta tecla, el bastidor de
bordado se moverá para trazar el área
necesaria para el diseño seleccionado, de
manera que se pueda verificar la posición de
bordado. (Consulte la página 116)
0 Presione esta tecla para volver a la pantalla
de selección anterior.
A Si se presiona esta tecla la exhibición
cambiará desde la pantalla de composición a
la pantalla original.
B Si se presiona esta tecla se exhibirá el dibujo
invertido horizontalmente.
Esta función no puede ser usada con algunos
dibujos. (Consulte la página 118)
PATRONES
Presione “AJUSTAR” y luego “COMPOSI” para
exhibir la pantalla anterior.
1 Indica el tamaño del patrón
Nota:
Algunos caracteres y patrones pueden
aparecer un poco más grandes de su tamaño
real.
2 Presione “90˚” para girar el patrón en pasos
de 90˚. (Consulte la página 117)
3 Indica la zona en que se puede bordar
4 Indica la posición de bajada de la aguja
5 Indica la posición de bordado y el área de
bordado para el patrón y el tamaño
seleccionado
6 Presione estas flechas para cambiar la
ubicación del bordado dentro del área de
bordado. (Consulte la página 116)
7 Si se presiona esta tecla, la posición de
bordado volverá al centro del área de
bordado.
B
BORDADO
USANDO UN
MARCO GRANDE
(OPCIONAL)
115
*
La ubicación del bordado se puede cambiar presionando la
flecha correspondiente. Si la flecha se presiona una vez, el
bastidor y la exhibición se moverá un paso; si se presiona
continuamente, el bastidor y la imagen se moverá
continuamente.
MANTENIMIENTO
1. Presione la flecha “????”.
BORDADO
Ejemplo: Para mover la ubicación del bordado hacia
la esquina superior derecha
CONOCIENDO LA
MAQUINA
Presionar la tecla de flecha que corresponde a la dirección que
desea mover el dibujo. La posición de bordado cambiará.
* Si se presiona la tecla “CENTR”, la posición de bordado
volverá al centro.
* Usar el agujero en el prensatelas como una guía, y nunca
bajar la aguja mientras se encuentre en movimiento.
CONTENIDO
Cambio de la posición de bordado
MENSAJES DE
ERROR
PATRONES
Si presiona “PRUEBA”, el marco de bordado se moverá y el
prensatelas se moverá por el área en que se va a bordar el
patrón seleccionado.
* No baje la aguja. En cambio use el orificio en el prensatelas
como guía.
LOCALIZACION
DE AVERIAS
Verificación del área de bordado
BORDADO USANDO
UN MARCO
PEQUEÑO
(OPCIONAL)
BORDADO USANDO
UN BASTIDOR
EXTRA PEQUEÑO
(OPCIONAL)
BORDADO
USANDO UN
MARCO GRANDE
(OPCIONAL)
116
CONTENIDO
Bordado desde un punto de comienzo específico
BORDADO
2. Presione “COMIE/CENTR” para seleccionar “COMIE” y
luego presione la flecha la izquierda” para alinear el orificio
del prensatelas con la marca.
CONOCIENDO LA
MAQUINA
1. Marque el tejido del bastidor en el punto de comienzo tal
como se muestra en la figura. La señal no debe estar muy
cerca del borde del bastidor debido a que el prensatelas
impide que la aguja se aproxime mucho al marco.
MANTENIMIENTO
MENSAJES DE
ERROR
3. Borde el patrón
ABC
LOCALIZACION
DE AVERIAS
PATRONES
Cambio de la dirección del patrón
BORDADO USANDO
UN MARCO
PEQUEÑO
(OPCIONAL)
ABC
BORDADO
USANDO UN
MARCO GRANDE
(OPCIONAL)
ABC
ABC
ABC
BORDADO USANDO
UN BASTIDOR
EXTRA PEQUEÑO
(OPCIONAL)
Cada vez que presione “90˚” el patrón girará hacia la derecha
en pasos de 90˚ tal como se muestra en la figura a la izquierda.
ABC
117
CONTENIDO
Patrones en forma de espejo
CONOCIENDO LA
MAQUINA
BORDADO
1. Presionar la tecla “??????” para invertir el
dibujo horizontalmente y muestra una imagen
en espejo.
* Si la tecla “??????” aparece en la pantalla en
modo invertido, indica que el dibujo ha sido
invertido horizontalmente mostrando una
imagen en espejo.
* En el caso de algunos dibujos no se exhibirá
la tecla “??????”.
MANTENIMIENTO
MENSAJES DE
ERROR
LOCALIZACION
DE AVERIAS
PATRONES
BORDADO USANDO
UN MARCO
PEQUEÑO
(OPCIONAL)
BORDADO USANDO
UN BASTIDOR
EXTRA PEQUEÑO
(OPCIONAL)
BORDADO
USANDO UN
MARCO GRANDE
(OPCIONAL)
118
CONTENIDO
Cambio del tamaño de los caracteres y marcos bordados
Los tamaños de los caracteres y los marcos
se pueden cambiar a gusto.
1. Presione “AJUSTAR”
2. Presione “AMPLIAR REDUCIR”.
2
*
*
3
La función de ajuste de densidad de puntada no
se puede usar con todos los patrones de
bordado. Sólo se puede ajustar la densidad de
los caractéres y de algunos patrones de bordado.
PATRONES
1. Presione “AJUSTAR”
2. Presione “DENSIDAD DEL HILO”.
BORDADO USANDO
UN MARCO
PEQUEÑO
(OPCIONAL)
3. La densidad de hilo para la puntada será
menor (se separará más) al presionar “–”. La
densidad de hilo para la puntada será mayor
(se juntará más) al presionar “+”.
BORDADO USANDO
UN BASTIDOR
EXTRA PEQUEÑO
(OPCIONAL)
1
1 COMUN (normal)
2 + (se juntan más)
3 – (se separan más)
BORDADO
USANDO UN
MARCO GRANDE
(OPCIONAL)
*
LOCALIZACION
DE AVERIAS
Cambio de la densidad de la puntada en caracteres y algunos marcos bordados
MENSAJES DE
ERROR
*
Los caracteres pueden ser reducidos o
agrandados entre “G” o “P”.
Los tamaños para agrandar los marcos varían
de acuerdo al patrón.
Consulte la página 115 por instrucciones
sobre como usar otras teclas de este figura.
MANTENIMIENTO
1
1 Tecla “AMPLIAR”
2 Tecla “REPONER”
3 Tecla “REDUCIR”
BORDADO
3. Presione “AMPLIAR” para agrandar el
carácter o el marco, y presione “REDUCIR”
para achicarlo.
Si presiona “REPONER”, el tamaño del
patrón volverá a su tamaño inicial.
CONOCIENDO LA
MAQUINA
*
El ajuste normal es “COMUN” (normal).
119
Bordado patrones multicolores
2. Cambie el hilo superior por el hilo del
siguiente color y presione el botón de
comienzo/parada. La segunda parte del
patrón (2) se bordará automáticamente y la
máquina parará automáticamente.
3. Cambie el hilo superior por el hilo del
siguiente color y presione el botón de
comienzo/parada. La tercera parte del patrón
(3) se bordará automáticamente y la máquina
parará automáticamente.
LOCALIZACION
DE AVERIAS
4. Corte el sobrante de hilo.
MENSAJES DE
ERROR
(3)
(3)
(3)
MANTENIMIENTO
(2)
(2)
BORDADO
(1)
1. Enhebre el primer color. (Consulte las
páginas 88 a 89)
Al presionar el botón de comienzo/parada, se
coserá el primer patrón (1) y luego la máquina
parará automáticamente.
* Asegúrese de levantar el prensatelas antes
de cambiar de hilo.
* Después de bordar este color, la pantalla
cambiará automáticamente a la posición de la
izquierda.
CONOCIENDO LA
MAQUINA
Cuando se selecciona un patrón se separa en la
pantalla en colores o diagramas. El orden de bordado
se indica de izquierda a derecha. El diagrama de la
izquierda es el del hilo del primer color.
CONTENIDO
BORDADO DE UN PATRON DE BORDADO BASICO
PATRONES
BORDADO
USANDO UN
MARCO GRANDE
(OPCIONAL)
120
BORDADO USANDO
UN BASTIDOR
EXTRA PEQUEÑO
(OPCIONAL)
1. Enhebre la máquina (Consulte la página 88 a
89).
2. Instale la cabeza de bordado (Consulte la
página 92 a 94).
3. Baje el prensatelas.
4. Presione el botón de comienzo/parada para
coser el patrón, la máquina parará
automáticamente al final del patrón.
5. Levante el prensatelas.
6. Corte el sobrante de hilo.
BORDADO USANDO
UN MARCO
PEQUEÑO
(OPCIONAL)
Patrones de color sencillos para el bordado
CONTENIDO
Bordado de un patrón de un sólo color con la indicación “MULTI COLOR” en la pantalla
CONOCIENDO LA
MAQUINA
1. Presione “MULTI COLOR” para cambiar al
modo de un sólo color. Si presiona el botón
de comienzo/parada, se bordará un patrón de
un sólo color y luego la máquina parará
automáticamente.
* No será posible cambiar entre el modo
multicolor y el modo de un sólo color si
“MULTICOLOR” no aparece en la pantalla.
BORDADO
2. Corte el sobrante de hilo.
MANTENIMIENTO
MENSAJES DE
ERROR
LOCALIZACION
DE AVERIAS
PATRONES
BORDADO USANDO
UN MARCO
PEQUEÑO
(OPCIONAL)
BORDADO USANDO
UN BASTIDOR
EXTRA PEQUEÑO
(OPCIONAL)
BORDADO
USANDO UN
MARCO GRANDE
(OPCIONAL)
121
Esta función es útil cuando tiene muchas
letras y no los puede bordar a todos dentro
del bastidor de bordado.
Ejemplo: ABCDE en tamaño grande
CONOCIENDO LA
MAQUINA
*
CONTENIDO
Bordado de más letras de las que entran en el área de bordad
BORDADO
BORDADO USANDO
UN BASTIDOR
EXTRA PEQUEÑO
(OPCIONAL)
Patrón terminado
BORDADO USANDO
UN MARCO
PEQUEÑO
(OPCIONAL)
1 Posición de costura de terminación (use esta
posición para comenzar a coser las letras
“DE”.)
PATRONES
3. Introduzca las letras “DE” y luego presione
“COMIE/CENTR” para seleccionar “COMIE”.
4. Presione la flecha para alinear el punto de
comienzo con el punto de terminación del
último caracter bordado y luego presione el
botón de comienzo/parada para comenzar a
coser.
LOCALIZACION
DE AVERIAS
1 Posición de costura de terminación
MENSAJES DE
ERROR
2. Presione el botón de comienzo/parada para
comenzar a bordar. Cuando haya terminado
de bordar, la máquina hará automáticamente
la costura de terminación.
Puede usar la posición de costura de
terminación como la posición de comienzo
para las letras a bordar a continuación cuando
se vuelve a colocar el tejido en el bastidor con
las puntadas de terminación y la ùltima letra
del lado izquierdo interior del bastidor.
MANTENIMIENTO
1. Ingrese “ABC”, luego presione “AJUSTAR” y
luego “COMPOSI”. Después de esto,
presione “COMIE/CENTR” para cambiar a
“COMIE”.
BORDADO
USANDO UN
MARCO GRANDE
(OPCIONAL)
122
CONTENIDO
BORDADO DE APLICACIONES
Combinación de marcos de bordado con un diseño
CONOCIENDO LA
MAQUINA
1. Seleccione el marco de bordado y bórdelo.
Se coserá una marca “+” en el centro luego de terminar con
el bordado del marco. Esta marca se puede usar como una
guía para bordar caracteres o patrones de manera de
ubicarlos en el centro del marco.
BORDADO
PATRONES
2. Corte el tejido alrededor del marco, siguiendo la línea del
marco exterior.
LOCALIZACION
DE AVERIAS
1. Después de bordar un marco y combinar el diseño, cosa un
marco extra del lado de afuera usando la puntada “– – –” un
poco más grande que la del marco original.
MENSAJES DE
ERROR
Haciendo emblemas o decoraciones
MANTENIMIENTO
2. Usando la marca “+” en el centro del marco de bordado
como guía, alinee la aguja usando la función de centrado de
la aguja. Borde el diseño.
BORDADO USANDO
UN MARCO
PEQUEÑO
(OPCIONAL)
BORDADO USANDO
UN BASTIDOR
EXTRA PEQUEÑO
(OPCIONAL)
El emblema o la decoración quedará pronta para
colocar en una prenda.
BORDADO
USANDO UN
MARCO GRANDE
(OPCIONAL)
123
CONTENIDO
Apliques bordados (usando un marco de bordado)
CONOCIENDO LA
MAQUINA
1. Seleccione el material de aplique, coloque el estabilizador,
coloque el bastidor en la máquina.
2. Seleccione el diseño a bordar y la puntada“– – –”. Bórdelo
sobre el material de aplique. Retire el material del bastidor.
Corte con cuidado alrededor del diseño siguiendo las
puntadas.
BORDADO
LOCALIZACION
DE AVERIAS
1 Adhesivo
MENSAJES DE
ERROR
4. Aplique una capa fina de adhesivo en la parte de atrás del
aplique creado en el paso 2, y luego colóquelo sobre el
tejido de base de forma que quede dentro del marco que
acaba de bordar.
MANTENIMIENTO
3. Coloque un material estabilizador del lado del revés del
tejido donde va a colocar el aplique. Centre en el marco el
área donde va a colocar el aplique. Bórdela de la misma
manera usando el mismo patrón de bordado de marco y la
puntada “– – –” como en el paso 2.
1
1
BORDADO USANDO
UN BASTIDOR
EXTRA PEQUEÑO
(OPCIONAL)
Aplique terminado.
”
BORDADO USANDO
UN MARCO
PEQUEÑO
(OPCIONAL)
1 Puntada satinada “
PATRONES
5. Sin cambiar la forma o el tamaño del marco, seleccione la
puntada “
” y úsela para bordar el aplique sobre el tejido
de base.
BORDADO
USANDO UN
MARCO GRANDE
(OPCIONAL)
124
CONTENIDO
Bordando sobre piezas pequeñas de tejido o sobre esquinas
1
2
BORDADO
Caso A
1 Tejido
2 Asegurado con cinta de doble fase o
hilvanado
3 Estabilizador
CONOCIENDO LA
MAQUINA
Use material estabilizador para tener más apoyo
al bordar. Luego de bordar, retire cuidadosamente
el material estabilizador.
A
3
MANTENIMIENTO
Caso B
1 Tejido
2 Asegurado con cinta de doble fase o
hilvanado
3 Estabilizador
B
MENSAJES DE
ERROR
LOCALIZACION
DE AVERIAS
Caso C
1 Cinta (Asegurada con cinta de doble fase)
2 Estabilizador
C
PATRONES
BORDADO USANDO
UN MARCO
PEQUEÑO
(OPCIONAL)
1
2
BORDADO USANDO
UN BASTIDOR
EXTRA PEQUEÑO
(OPCIONAL)
BORDADO
USANDO UN
MARCO GRANDE
(OPCIONAL)
125
Antes de bordar
CONTENIDO
SI EL HILO SE ROMPE DURANTE EL BORDADO O CUANDO
HAYA TERMINADO UN PATRON CASI TERMINADO
CONOCIENDO LA
MAQUINA
BORDADO
MANTENIMIENTO
*
Cuando comience a bordar, “AJUSTAR”
cambiará a “AYUDA”.
LOCALIZACION
DE AVERIAS
Presione “AYUDA” luego aparecerá la siguiente pantalla.
1
2
3
4
MENSAJES DE
ERROR
Mientras borda
5
6
PATRONES
BORDADO USANDO
UN MARCO
PEQUEÑO
(OPCIONAL)
BORDADO
USANDO UN
MARCO GRANDE
(OPCIONAL)
126
5 Presione aquí para moverse hacia atrás
puntada a puntada sin bordar. (Si presiona
continuamente, la puntada retrocederá a
saltos de 9 puntadas comenzando desde la 6
puntada individual.)
6 Presione aquí para volver a la pantalla
anterior y para permitir que comience a
bordar.
BORDADO USANDO
UN BASTIDOR
EXTRA PEQUEÑO
(OPCIONAL)
1 Presione aquí para moverse hacia atrás a la
posición de comienzo de un patrón.
2 Presione aquí para moverse hacia adelante al
siguiente color o caracter sin bordar.
3 Presione aquí para moverse hacia atrás al
comienzo del color que está bordando o
caracter sin bordar.
4 Presione aquí para moverse hacia adelante
puntada a puntada sin bordar.
(Si presiona continuamente, la puntada
avanzará a saltos de 9 puntadas comenzando
desde la 6 puntada individual.)
CONTENIDO
Si el hilo se rompe durante el bordado
MENSAJES DE
ERROR
LOCALIZACION
DE AVERIAS
PATRONES
3. Baje la palanca del prensatelas y presione el
botón de comienzo/parada para continuar
bordando.
* Si la máquina se paró porque se ha quedado
sin hilo superior, el hilo superior se puede
enredar del lado del revés del tejido (hilo
enredado). Retire el marco de bordado para
verificar esto y corte el hilo enredado.
MANTENIMIENTO
2. Presione “HACIA ATRAS” para moverse
hacia atrás unas puntadas un poco antes de
la posición en que el hilo se rompió o donde
la bobina se haya quedado sin hilo.
* Si no pudiera moverse hacia atrás a la
posición deonde el hilo se rompió, presione
“DIRECCION DE RETROCESO” para
moverse al comienzo del color, y luego
presione “HACIA ADELANTE” para moverse
hacia adelante hasta un poco antes del lugar
donde el hilo se rompió o donde la bobina se
haya quedado sin hilo.
BORDADO
1. Si el hilo superior se rompe.
* Vuelva a enhebrar el hilo superior.
Si el hilo inferior se rompe o se acaba el hilo
de la bobina.
* Corte el hilo superior del lado de arriba del
bastidor y luego retire el bastidor. Cambie
el hilo de la canilla y luego vuelva a
colocar el marco de bastidor.
CONOCIENDO LA
MAQUINA
La máquina se parará automáticamente
cuando el hilo superior se rompa. Al
ocurrir esto realice lo siguiente:
1 Botón de comienzo / parada
1 Botón de comienzo / parada
BORDADO USANDO
UN BASTIDOR
EXTRA PEQUEÑO
(OPCIONAL)
Presione “AYUDA”.
Realice el mismo procedimiento que en la
sección “Si la máquina deja de funcionar
automáticamente cuando el hilo se rompe.”
BORDADO USANDO
UN MARCO
PEQUEÑO
(OPCIONAL)
Si la máquina para la máquina usando el
botón de comienzo/parada y debiéra
ajustar la posición de la puntada.
BORDADO
USANDO UN
MARCO GRANDE
(OPCIONAL)
127
CONTENIDO
Volviendo a bordar desde el principio
CONOCIENDO LA
MAQUINA
BORDADO
1. Presione aquí para moverse hacia atrás a la
posición de comienzo de un patrón.
MANTENIMIENTO
MENSAJES DE
ERROR
PATRONES
1 Botón de comienzo / parada
LOCALIZACION
DE AVERIAS
2. Baje la palanca del prensatelas y presione el
botón de comienzo/parada para comenzar a
bordar.
BORDADO USANDO
UN MARCO
PEQUEÑO
(OPCIONAL)
BORDADO USANDO
UN BASTIDOR
EXTRA PEQUEÑO
(OPCIONAL)
BORDADO
USANDO UN
MARCO GRANDE
(OPCIONAL)
128
CONTENIDO
MANTENIMIENTO
CAMBIO DE LA BOMBILLA
CONOCIENDO LA
MAQUINA
Para cambiar la bombilla
1
1. Apague el interruptor principal.
1 Apagado
2 Encendido
*
BORDADO
Para cambiar la bombilla, debe desenchufar el cable de
alimentación del tomacorriente
MANTENIMIENTO
3
2
MENSAJES DE
ERROR
LOCALIZACION
DE AVERIAS
4
PATRONES
BORDADO USANDO
UN MARCO
PEQUEÑO
(OPCIONAL)
2. Quite los tornillos del lado de atrás de la cabeza de la
máquina.
3. Desmonte el extremo de la cabeza.
4. Cambie la bombilla por una nueva.
* Las bombillas se encuentran a la venta en el distribuidor.
(8 V, 2,4 W/Código X50228-001 ó artículo SA105)
BORDADO USANDO
UN BASTIDOR
EXTRA PEQUEÑO
(OPCIONAL)
BORDADO
USANDO UN
MARCO GRANDE
(OPCIONAL)
129
CONTENIDO
LIMPIEZA
1. Apague la máquina, quite la aguja, y luego levante la
palanca del prensatelas.
1 Use un destornillador para aflojar los tornillos.
BORDADO
2. Afloje los tornillos de la placa de aguja.
3. Desmonte la placa de aguja.
CONOCIENDO LA
MAQUINA
Mantenga siempre limpia la máquina.
MANTENIMIENTO
MENSAJES DE
ERROR
2
3
5
*
La pelusa y el polvo acumulados en la vía pueden
ocasionar costuras defectuosas.
BORDADO USANDO
UN MARCO
PEQUEÑO
(OPCIONAL)
4
6. Coloque la lanzadera calzando la proyección de la
lanzadera en el resorte del tope.
BORDADO
USANDO UN
MARCO GRANDE
(OPCIONAL)
1 Proyección
2 Resorte del tope
BORDADO USANDO
UN BASTIDOR
EXTRA PEQUEÑO
(OPCIONAL)
O
130
PATRONES
1 Vía
2 Lanzadera
LOCALIZACION
DE AVERIAS
4. Retire la lanzadera.
5. Quite la pelusa y los hilos acumulados en el gancho y
lanzadera interior con un cepilla o con el accesorio de una
aspiradora pequeña.
CONTENIDO
MENSAJES DE ERROR
CONOCIENDO LA
MAQUINA
Cuando la máquina no está adecuadamente preparada y presiona el botón de comienzo/parada, o es
necesario hacer alguna corrección, la máquina no comenzará a coser y sonará una alarma y aparecerá un
mensaje en la pantalla indicándole el error.
BORDADO
Significado de los mensajes de advertencia
PATRONES
Este mensaje aparecerá cuando la máquina determine que el
hilo superior o inferior se ha roto o no haya más hilo superior o
la bobina se haya quedado sin hilo.
LOCALIZACION
DE AVERIAS
Este mensaje aparecerá cuando no se haya seleccionado un
dibujo y presione el botón de comienzo/parada o presione
“AJUSTAR”.
MENSAJES DE
ERROR
Este mensaje aparecerá cuando presione el botón de
comienzo/parada y la palanca del prensatelas esté levantada.
MANTENIMIENTO
Este mensaje aparecerá cuando el eje de bobinado se
encuentra a la derecha y presione el botón de comienzo/
parada. Este mensaje aparecerá después de que la pantalla le
advierte que le levante la aguja a la posición más alta.
BORDADO USANDO
UN MARCO
PEQUEÑO
(OPCIONAL)
131
BORDADO
USANDO UN
MARCO GRANDE
(OPCIONAL)
Este mensaje aparecerá cuando presione “REVISION” y no
haya ningún patrón almacenado en la memoria.
BORDADO USANDO
UN BASTIDOR
EXTRA PEQUEÑO
(OPCIONAL)
Este mensaje aparecerá cuando el motor se bloquea. Esto
puede ocurrir cuando un hilo se enreda o esté bordando con
una aguja doblada.
CONTENIDO
BORDADO USANDO
UN BASTIDOR
EXTRA PEQUEÑO
(OPCIONAL)
Este mensaje aparecerá cuando presione “MULTICOLOR”
mientras esté bordando un dibujo.
BORDADO USANDO
UN MARCO
PEQUEÑO
(OPCIONAL)
Este mensaje aparecerá si la aguja se encuentra en la posición
inferior cuando encienda el interruptor principal.
PATRONES
Este mensaje aparecerá cuando el tamaño combinado de los
patrones sea más grande que el área de bordado.
LOCALIZACION
DE AVERIAS
Este mensaje aparecerá cuando haya querido mover el marco
de bordado con la aguja en la posición baja. Use la polea para
mover la aguja a la posición superior. Luego continúe.
MENSAJES DE
ERROR
Este mensaje aparecerá cuando presione el botón de
comienzo/parada pero no haya levantado el prensatelas para
poder cambiar el color del hilo.
Si no quiere cambiar el color del hilo, levante la palanca del
prensatelas, bájela nuevamente y luego presione el botón de
comienzo/parada para comenzar a coser.
MANTENIMIENTO
Este mensaje aparecerá si presiona “Tarjeta” y no ha insertado
una tarjeta.
BORDADO
Este mensaje aparecerá cuando quiera almacenar patrones
que no se pueden combinar.
CONOCIENDO LA
MAQUINA
Este mensaje aparecerá cuando presione “REVISION” y el
diseño el diseño en la memoria de la máquina sea de una
tarjeta de memoria diferente.
Los patrones de la tarjeta de memoria no se pueden almacenar
en la memoria de la máquina. Sin embargo, los caracteres de la
tarjeta de memoria 1, la tarjeta alfabética y la tarjeta de
monogramas se puede almacenar y recuperar mientras la
tarjeta está insertada. Siempre deberá insertar la tarjeta
correspondiente al diseño que quiere recuperar.
BORDADO
USANDO UN
MARCO GRANDE
(OPCIONAL)
132
CONTENIDO
” mientras la
MANTENIMIENTO
Este mensaje aparecerá si presiona la tecla “
máquina está bordando.
BORDADO
Este mensaje aparecerá cuando el número total de caractéres
o patrones combinados exceda el máximo de 35.
CONOCIENDO LA
MAQUINA
Este mensaje aparecerá cuando presione el botón de
comienzo/parada y todavía no haya completado el diseño para
“marco de bordado”.
Mensajes de instrucción
MENSAJES DE
ERROR
Este mensaje aparecerá durante el enrrollado de la bobina.
Este mensaje aparecerá después que presione “MEMORIA”
para almacenar un patrón. No desconecte la alimentación
mientras este mensaje aparezca en la pantalla.
LOCALIZACION
DE AVERIAS
Este mensaje aparecerá si la máquina calcula después de
presionar la tecla “
”. Presione “CANCELAR” si desea
interrumpir el proceso del cálculo.
PATRONES
BORDADO USANDO
UN MARCO
PEQUEÑO
(OPCIONAL)
Alarma
●
En caso de funcionamiento correcto: Se escuchará un bip.
En caso que haya un problema: Se escucharán dos o cuatro bips.
BORDADO USANDO
UN BASTIDOR
EXTRA PEQUEÑO
(OPCIONAL)
BORDADO
USANDO UN
MARCO GRANDE
(OPCIONAL)
133
Verifique la causa del problema sin preocuparse demasiado.
BORDADO
Problemas con el hilo y las puntadas
2. Hilo superior enredado.
2. Quite los extremos de hilo de la guía o
lanzadera.
3. Soporte de bobina mal colocado.
3. Coloque bien el soporte de bobina.
4. Aguja incorrecta
4. Cámbiela por la aguja apropiada.
5. Hilo superior diferente del
recomendado para el bordado
5. Cambie el hilo por el tipo de hilo
superior recomendado.
1. Hilo inferior enredado
1. Quite los extremos de hilo de la guía o
lanzadera.
2. Bobina mal enhebrada en la lanzadera
2. Quite la bobina, vuelva a colocarla
bien y pase el hilo de la bobina a
través del canal.
3. Hilo inferior diferente del recomendado
para el bordado
3. Cambie el hilo por el tipo de hilo
superior recomendado.
1. Aguja mal colocada.
1. Coloque correctamente el aguja.
2. Aguja incorrecta
2. Cámbiela por la aguja correcta.
3. Tejido mal colocado en el marco de
bordado
3. Coloque correctamente el tejido en el
marco de bordado.
4. Marco de bordado mal colocado en la
máquina
4. Coloque correctamente el marco de
bordado en la máquina.
5. Tejido fino o elástico sin usar material
estabilizador
5. Use un material estabilizador
1. Hilo superior demasiado tenso
1. Afloje la tensión del hilo superior
usando el dial de control de tensión del
hilo superior.
2. Hilo superior o inferior mal enhebrado
2. Enhebre el hilo superior e inferior
correctamente.
3. Tejido fino o elástico sin usar material
estabilizador
3. Coloque un material estabilizador.
4. Tejido mal colocado en el marco de
bordado
4. Coloque correctamente el tejido en el
marco de bordado.
5. Aguja incorrecta
5. Cámbiela por la aguja correcta.
3. Puntadas incorrectas
4. Fruncimientos en el tejido
BORDADO USANDO
UN BASTIDOR
EXTRA PEQUEÑO
(OPCIONAL)
1. Enhebre de nuevo el hilo superior.
BORDADO USANDO
UN MARCO
PEQUEÑO
(OPCIONAL)
1. Enhebrado superior incorrecto.
PATRONES
1. Rotura del hilo superior
LOCALIZACION
DE AVERIAS
Solución
MENSAJES DE
ERROR
Causa
MANTENIMIENTO
Síntoma
2. Rotura del hilo inferior
CONOCIENDO LA
MAQUINA
Siempre que encuentre algún problema durante la costura, consulte la sección del manual de
instrucciones donde se explica la función que está usando para asegurarse de que está usando la
máquina correctamente. Si el problema persiste el siguiente listado de problemas le puede ayudar a
corregirlos. Si aún persiste el problema, consulte al centro de servicio técnico autorizado más próximo o al
distribuidor.
CONTENIDO
LOCALIZACION DE AVERIAS
BORDADO
USANDO UN
MARCO GRANDE
(OPCIONAL)
134
CONTENIDO
CONOCIENDO LA
MAQUINA
BORDADO
1. Demasiada tensión del hilo superior.
1. Afloje la tensión del hilo superior
usando el dial de control de tensión del
hilo superior.
2. Hilo superior o inferior mal enhebrado
2. Enhebre el hilo superior e inferior
correctamente.
3. Hilo mal enhebrado en la lanzadera
3. Quite la bobina, vuelva a colocarla
bien y pase el hilo de la bobina a
través del canal.
4. Hilo inferior diferente del recomendado
para el bordado
4. Cambie el hilo por el tipo de hilo
inferior recomendado.
1. Poca tensión del hilo superior
1. Aumente la tensión del hilo superior
usando el dial de control de tensión del
hilo superior.
2. Hilo superior o inferior mal enhebrado
2. Enhebre el hilo superior e inferior
correctamente.
3. Hilo superior o inferior diferente de los
recomendados para el bordado
3. Cambie el hilo por el tipo de hilo
superior o inferior recomendado.
1. Tejido mal colocado en el marco de
bordado
1. Coloque correctamente el tejido en el
marco de bordado.
2. Marco de bordado mal colocado en la
máquina
2. Coloque correctamente el marco de
bordado en la máquina.
3. Tejido fino o elástico sin usar material
estabilizador
3. Coloque un material estabilizador.
4. Hilo superior o inferior diferente de los
recomendados para el bordado
4. Cambie el hilo por el tipo de hilo
superior o inferior recomendado.
5. Hilo enredado
5. Corte y saque el hilo enredado dentro
de la envoltura de la bobina usando
una tijera. Limpie bien la lanzadera.
1. La aguja está mal colocada.
1. Coloque la aguja correctamente.
2. La palanca del enhebrador de aguja no
se mueve.
2. Gire la polea para levantar la aguja a
su posición superior.
1. Se ha acumulado hilo alrededor de la
cuchilla de corte de hilo.
1. Quite la placa de aguja y limpie el hilo
acumulado.
6. Hilo superior demasiado flojo
7. Patrón de bordado deformado
BORDADO USANDO
UN BASTIDOR
EXTRA PEQUEÑO
(OPCIONAL)
9. El hilo no se corta durante el corte
de hilo automático.
BORDADO USANDO
UN MARCO
PEQUEÑO
(OPCIONAL)
8. Imposible enhebrar el hilo
PATRONES
5. Hilo inferior se ve en la parte de
arriba del tejido
LOCALIZACION
DE AVERIAS
Solución
MENSAJES DE
ERROR
Causa
MANTENIMIENTO
Síntoma
BORDADO
USANDO UN
MARCO GRANDE
(OPCIONAL)
135
CONTENIDO
Problemas mecánicos
1. La máquina es muy ruidosa y no
funciona correctamente.
1. Hay suciedad acumulada debajo de la
placa de aguja.
1. Limpie la suciedad con un cepillo.
2. La máquina no funciona
1. No presiona el botón de
comienzo/parada.
1. Presione el botón de comienzo/parada.
2. Interruptor principal apagado
2. Encienda el interruptor principal.
3. Prensatelas levantado
3. Baje el prensatelas.
4. Verifique los mensajes de error.
4. Consulte la sección “Mensajes de
error” en la página 131.
1. La aguja está mal colocada.
1. Coloque correctamente la aguja.
2. La aguja no es la correcta.
2. Cámbiela por la aguja correcta.
3. La aguja se rompe
MENSAJES DE
ERROR
LOCALIZACION
DE AVERIAS
Precaución
● Esta máquina tiene un sensor de ruptura de hilo. Si el hilo no está enhebrado, la máquina no
funcionará aunque presione el botón de encendido/apagado. Además, puede escuchar un
sonido fuerte diferente del sonido normal debido al funcionamiento del mecanismo de la barra
de agujas durante los cambios de composición, a pruebas y otros movimientos del marco
durante el bordado. Estos sonidos no se deben a ningún problema o avería en la máquina.
● En caso de un corte de luz durante el bordado.
● Apague el interruptor principal y desenchufe la máquina. La máquina se podría dañar si
vuelve la corriente.
● Para comenzar a coser, mientras el interruptor principal esté apagado, enchufe la máquina.
Luego encienda el interruptor principal y seleccione la operación deseada. Consulte la
página 126, para usar la función “AYUDA” de forma de continuar donde interrumpio el
trabajo.
MANTENIMIENTO
Solución
BORDADO
Causa
CONOCIENDO LA
MAQUINA
Síntoma
PATRONES
BORDADO USANDO
UN MARCO
PEQUEÑO
(OPCIONAL)
BORDADO USANDO
UN BASTIDOR
EXTRA PEQUEÑO
(OPCIONAL)
BORDADO
USANDO UN
MARCO GRANDE
(OPCIONAL)
136
CONTENIDO
PATRONES
Cuadro de caractéres para bordado
Tamaños: [G] 30 mm, [M] 15 mm
[P] 10 mm
CONOCIENDO LA
MAQUINA
Tamaños: [G] 30 mm, [M] 15 mm
[P] 7.5 mm
BORDADO
Tamaños: [G] 30 mm, [M] 15 mm
[P] 9 mm
MANTENIMIENTO
MENSAJES DE
ERROR
LOCALIZACION
DE AVERIAS
Cuadro de marco de bordado
(El tamaño se puede agrandar o reducir.)
PATRONES
Marcos
BORDADO USANDO
UN MARCO
PEQUEÑO
(OPCIONAL)
Puntadas
BORDADO USANDO
UN BASTIDOR
EXTRA PEQUEÑO
(OPCIONAL)
BORDADO
USANDO UN
MARCO GRANDE
(OPCIONAL)
137
CONTENIDO
Patrones de una puntada
Orden de
bordado
1...205
2...800
3...900
1...307
2...019
3...900
1...307
2...800
3...900
1...001
2...800
3...900
1...001
2...800
3...900
1...001
2...800
3...019
1...001
2...800
3...900
1...800
2...507
3...900
1...800
2...900
1...205
2...800
3...900
1...800
2...900
1...800
2...001
3...900
1...800
2...005
3...900
1...001
2...800
3...019
1...800
2...205
3...900
1...019
2...205
3...900
1...001
2...205
3...900
1...800
2...205
3...900
1...001
2...019
3...900
1...205
2...001
3...339
1...005
2...800
3...900
1...001
2...800
3...900
1...019
2...800
3...900
1...323
2...085
3...001
4...058
1...086
2...058
3...707
1...070
2...085
3...086
4...323
1...513
2...001
3...208
4...058
1...001
2...800
3...515
4...058
5...900
1...800
2...513
3...900
1...001
2...010
3...323
4...513
5...058
1...085
2...323
3...058
1...086
2...205
3...534
4...019
1...513
2...030
3...058
1...900
1...900
2...205
3...800
4...323
5...900
1...339
2...058
3...843
4...900
1...405
2...900
3...005
4...704
1...405
2...507
3...800
4...205
1...843
2...900
3...019
1...205
2...019
3...900
1...001
2...900
1...079
2...800
3...208
4...900
1...405
2...001
3...800
4...900
5...001
6...307
7...405
8...900
9...307
10...800
11...900
1...513
2...030
3...205
4...339
5...900
1...513
2...507
1...005
2...707
1...001
2...900
1...900
1...001
2...515
3...507
1...086
1...614
1...515
2...513
3...001
4...208
5...205
6...513
Los dibujos almacenados en la máquina o en las tarjetas de memoria standard/opcionales son sólo para
uso en el hogar. El uso de estos diseños para otros fines está prohibido.
138
BORDADO
USANDO UN
MARCO GRANDE
(OPCIONAL)
1...513
2...328
3...515
4...085
5...086
6...079
7...515
Color de hilo
para bordado
BORDADO USANDO
UN BASTIDOR
EXTRA PEQUEÑO
(OPCIONAL)
1...001
2...800
3...900
BORDADO USANDO
UN MARCO
PEQUEÑO
(OPCIONAL)
1...205
2...001
3...900
PATRONES
1...339
2...800
3...900
LOCALIZACION
DE AVERIAS
1...339
2...205
3...900
MENSAJES DE
ERROR
1...205
2...339
3...900
MANTENIMIENTO
1...704
2...800
3...900
BORDADO
1...001
2...800
3...900
CONOCIENDO LA
MAQUINA
<Tiempo de bordado: 2 a 18 min. (No se incluye el tiempo necesario para cambiar los colores.)>
Bordado de prendas como pañuelos y cuellos
ABC
1 Hoja de bordado
2 Rango de bordado (máximo)
Alto: 70 mm
Ancho: 70 mm
LOCALIZACION
DE AVERIAS
PATRONES
BORDADO USANDO
UN MARCO
PEQUEÑO
(OPCIONAL)
Bordado de prendas que no entran en el
marco
Para las prendas que no entran en el marco,
hilvane o planche un estabilizador sobre la parte
a bordar y luego coloque el estabilizador en el
marco junto con el tejido a bordar.
MENSAJES DE
ERROR
Bordado de pañuelos y puños
Coloque el pañuelo dentro del marco pequeño.
Puede usar la función de rotación para mover la
aguja al lugar de bordado deseado.
MANTENIMIENTO
1. Siempre asegúrese que la operación de
ajuste inicial del carro (brazo de bordar)
después de encender la máquina, el
movimiento del carro (brazo de bordar)
para ajustar la posición ha finalizado antes
de instalar el bastidor de bordado
pequeño.
2. Si no cambia la posición del diseño en la
pantalla “COMPOSICION”, verifique que el
área a bordar para el diseño seleccionado
se encuentre entre 70 mm de altura y
ancho presionando “COMPOSICION”. Si
es así, podrá bordar correctamente el
diseño.
3. Si ha cambiado de posición del patrón
usando las teclas de flechas en la pantalla
“COMPOSI”, use la función “PRUEBA”
para verificar que el patrón no se extiende
más de los bordes del bastidor antes de
comenzar a bordar.
Antes de presionar “PRUEBA”, levante la
aguja y la palanca del prensatelas a su
posición más alta.
BORDADO
PRECAUCION
Tenga en cuenta lo siguiente al usar el
bastidor pequeño.
CONOCIENDO LA
MAQUINA
Si el marco suministrado es muy grande para
sostener el tejido a bordar, puede usar un marco
pequeño opcional.
CONTENIDO
BORDADO USANDO UN MARCO PEQUEÑO (OPCIONAL)
BORDADO USANDO
UN BASTIDOR
EXTRA PEQUEÑO
(OPCIONAL)
BORDADO
USANDO UN
MARCO GRANDE
(OPCIONAL)
139
140
BORDADO
USANDO UN
MARCO GRANDE
(OPCIONAL)
9
BORDADO USANDO
UN BASTIDOR
EXTRA PEQUEÑO
(OPCIONAL)
8
BORDADO USANDO
UN MARCO
PEQUEÑO
(OPCIONAL)
1
2
3
4
5
6
7
PATRONES
*
El bastidor extra pequeño también puede ser
usado horizontalmente cambiando la posición
del accesorio en la placa de fijación del
bastidor. Use un destornillador para quitar los
dos tornillos de manera de poder cambiar la
posición del accesorio.
Use la hoja accesoria horizontal cuando
coloque el bastidor horizontalmente.
Placa de fijación del bastidor
Tornillos (x 2)
Arandelas (x 2)
Tuercas (x 2)
Hoja de bordado (Tipo horizontal)
Rango de bordado
Area a bordar máxima
– Alto: 30 mm
Area a bordar máxima
– Ancho: 50 mm
Centro del patrón
LOCALIZACION
DE AVERIAS
*
MENSAJES DE
ERROR
1. Siempre asegúrese que la operación de
ajuste inicial del carro (brazo de bordar)
después de encender la máquina, el
movimiento del carro (brazo de bordar)
para ajustar la posición ha finalizado antes
de instalar el bastidor de bordado extra
pequeño.
2. Si ha cambiado de posición del patrón
usando las teclas de flechas en la pantalla
“COMPOSI”, use la función “PRUEBA”
para verificar que el patrón no se extiende
más de los bordes del bastidor antes de
comenzar a bordar.
3. Antes de presionar “PRUEBA”, levante la
aguja y la palanca del prensatelas a su
posición más alta.
MANTENIMIENTO
PRECAUCION
Tenga en cuenta lo siguiente al usar el
bastidor extra pequeño.
BORDADO
1 Hoja de bordado (Tipo vertical)
2 Rango de bordado
3 Area a bordar máxima
– Alto: 50 mm
4 Area a bordar máxima
– Ancho: 30 mm
5 Centro del patrón
CONOCIENDO LA
MAQUINA
Se dispone de un bastidor extra pequeño
opcional que es más pequeño que el bastidor
pequeño mencionado en la página anterior. Se
usa principalmente para hacer monogramas de
iniciales en los bolsillos o los puños.
El bastidor extra pequeño puede ser usado para
bordar artículos aún más pequeños.
CONTENIDO
BORDADO USANDO UN BASTIDOR EXTRA PEQUEÑO
(OPCIONAL)
Rango de bordado
BORDADO
a
b
c
CONOCIENDO LA
MAQUINA
ABC
1 Rango de bordado
18,2 2 11 cm
2 Centro del marco cuando está enganchado
en la posición “a”
3 Centro del marco cuando está enganchado
en la posición “b”
4 Centro del marco cuando está enganchado
en la posición “c”
5 Línea de referencia
CONTENIDO
BORDADO USANDO UN MARCO GRANDE (OPCIONAL)
MANTENIMIENTO
MENSAJES DE
ERROR
1. Si el largo vertical es menor de 18,2 cm,
podrá bordar los diseños respectivos
simplemente cambiando la posición de
enganche del marco.
LOCALIZACION
DE AVERIAS
Combinación de patrones en dirección vertical
PATRONES
b
c
BORDADO USANDO
UN BASTIDOR
EXTRA PEQUEÑO
(OPCIONAL)
3. Borde el diseño la parte de abajo del diseño.
BORDADO USANDO
UN MARCO
PEQUEÑO
(OPCIONAL)
a
2. Una vez que ha bordado el diseño, mueva el
marco de la posición “a” a la posición “b” o la
posición “c”.
BORDADO
USANDO UN
MARCO GRANDE
(OPCIONAL)
141
1 Diseño terminado
2 Menos de 18,2 cm
BORDADO
USANDO UN
MARCO GRANDE
(OPCIONAL)
142
BORDADO USANDO
UN BASTIDOR
EXTRA PEQUEÑO
(OPCIONAL)
4. Después de presionar “COMPOSI”, presione
“90˚” para cambiar la flecha en la pantalla de
manera que apunte hacia la derecha. Luego
presione “COMIE/CENTR” para ajustar la
posición de la aguja a la posición de
comienzo de bordado.
BORDADO USANDO
UN MARCO
PEQUEÑO
(OPCIONAL)
3. Alinee la línea en el tejido con la línea en la
hoja de bordado, y coloque el tejido y la hoja
de bordado en el marco. Enganche el marco
en el carro en el lugar indicado con una “a”.
(consulte la página siguiente)
PATRONES
ABC
LOCALIZACION
DE AVERIAS
1 Posición de comienzo del bordado
MENSAJES DE
ERROR
2. Dibuje una línea en el tejido donde quiera
bordar el diseño. Ubique la línea central, y
luego dibuje una línea a lo largo de todo el
diseño, dividiéndola en dos secciones de
igual medida. Marque la posición de
comienzo del bordado con una cruz dibujando
una línea a través.
MANTENIMIENTO
Después de seleccionar el diseño, presione
“COMPOSI” para verificar el tamaño del diseño.
El tamaño del dibujo se exhibe del lado izquierdo
de la pantalla.
BORDADO
1. Verifique el largo de los diseños que desea
bordar
continuamente
presionando
“COMPOSI”. Si el largo es menos de 18,2
cm, puede continuar con el bordado sólo
cambiando la ubicación del bordado, sin tener
que volver a reubicar el tejido en el marco.
CONOCIENDO LA
MAQUINA
Ejemplo: Diseños en la tarjeta de flores
(no. 2)
CONTENIDO
Unión de dos o más diseños de bordado (uso de la función de giro de 90˚)
CONTENIDO
CONOCIENDO LA
MAQUINA
5. Use las teclas de flecha para mover la aguja
a la posición de comienzo de bordado, y
luego comience a bordar.
BORDADO
a
c
PATRONES
BORDADO USANDO
UN MARCO
PEQUEÑO
(OPCIONAL)
1 Fin del bordado anterior
LOCALIZACION
DE AVERIAS
8. Use las teclasd e flecha para mover la aguja
a la posición final del bordado anterior, y
luego continúe bordando.
MENSAJES DE
ERROR
7. Borde el diseño siguiente. Si usa el mismo
patrón, continúe directamente con el bordado.
Si usa un patrón nuevo, seleccione el patrón
nuevo.
Después de presionar “COMPOSI”, presione
“90˚” para cambiar la flecha en la pantalla
para que apunte hacia la derecha. Luego
presione “COMIE/CENTR” para ajustar la
posición de la aguja a la posición de
comienzo de bordado.
MANTENIMIENTO
6. Mueva el marco a la posición indicada con
una “c” y enganche otra vez el marco en el
carro.
BORDADO USANDO
UN BASTIDOR
EXTRA PEQUEÑO
(OPCIONAL)
BORDADO
USANDO UN
MARCO GRANDE
(OPCIONAL)
143