1
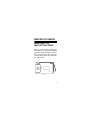
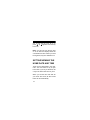
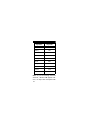
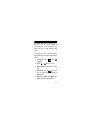
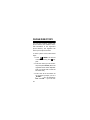
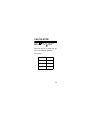
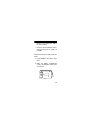
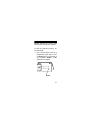
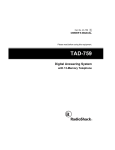
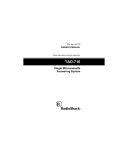
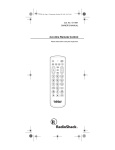
Cat. No. 65-719
OWNER’S MANUAL
Please read before using this equipment.
EC-295
3K Electronic
Organizer
FEATURES
Your RadioShack EC-295 3K Electronic Organizer is a pocket-size data
organizer. It’s great for the person on
the go, combining a telephone directory, alarm clock, schedule alarms, a
calculator, and more in one compact,
easy-to-use package. Its features include:
Three-Row Display — lets you see
up to three lines of data at once.
Phone Directory — puts names,
phone numbers, fax numbers, and email addresses at your fingertips.
Schedule Alarms — remind you of
meetings and other important events.
© 1999 Tandy Corporation.
All Rights Reserved.
RadioShack is a registered trademark
used by Tandy Corporation.
2
Metric Converter — lets you perform
conversions to and from metric measurements.
Currency Converter — makes it easy
to convert between currencies.
Home Time/World Time — shows
you the current time in your local time
zone and in 24 other cities around the
world.
10-Digit Calculator — lets you perform arithmetic and currency conversion calculations.
Daily Alarm — sounds daily at a time
you set.
Password — prevents unauthorized
access to your information.
3
Automatic Power-Off — conserves
battery power by turning off the organizer about 4 minutes after you stop
using it.
3K Memory — gives you ample space
for storing phone numbers, addresses,
and schedules.
Account Manager — lets you keep
track of up to three accounts.
Important: Tandy Corporation assumes no responsibility for any loss or
claims that might arise through use of
this organizer or for damages incurred
as a result of information loss due to
malfunctions, repairs, battery replacement, or misuse. You should maintain
physical records of important information to protect against such loss.
4
CONTENTS
Before You Begin ........................... 7
Removing the Insulation
Strips ........................................... 7
A Quick Look at the Organizer’s
Features ...................................... 8
Operation ...................................... 13
Turning the EC-295 On
and Off ....................................... 13
Turning the Key Tone On
and Off ....................................... 13
Setting/Viewing the Home
Date and Time ........................... 14
Viewing World Times ................. 19
Entering Data/Using Records ..... 20
Recalling a Record .................... 22
Editing a Record ........................ 22
Deleting a Record ...................... 24
Alarms ........................................... 25
Daily Alarm ................................ 25
Schedule Alarms ....................... 27
Entering a Schedule Alarm ........ 29
5
Phone Directory ........................... 32
Account Manager ........................ 34
Locked Records .......................... 36
Calculator ..................................... 39
Conversions ................................. 41
Metric Conversions ................... 41
Currency Conversions .............. 42
Care .............................................. 46
Replacing the Batteries ............. 48
Resetting the Organizer ............ 50
Specifications .............................. 53
6
BEFORE YOU BEGIN
REMOVING THE
INSULATION STRIPS
M
A
D
E
I
R
N
E
S
C
E
H
T
I
N
A
3
A
B
3
K
C
3
3
2
U
2
3
2
R
C
0
2
5
3
V
2
A
M
3
2
1
3
3
x
1
2
2
N
1
3
3
I
1
1
P
Before you can use the organizer, you
must remove the protective insulation
strip from inside the battery compartment. To remove the slip, grasp the
end and gently pull it out in the direction of the arrows.
7
A QUICK LOOK AT THE
ORGANIZER’S
FEATURES
8
Directional Controls , , , and
— search forward or backward
through records, and move the cursor
within records.
Number Keys — enter numbers.
Mode Keys — help you organize your
information into categories.
— keeps track of home time
as well as time in 24 other world
cities.
— organizes phone records
and general information about contacts.
— locks specific records.
— keeps track of up to three
different accounts.
— sets appointment times and
reminders.
9
— performs standard, metric
conversion, and currency conversion calculations.
— keeps track of two different
currency conversion rates.
— converts between common
standard and metric units of measurement.
Special Keys — help you display, edit, rearrange, and organize your information.
EDIT — allows you to update information in various records.
DEL (C/CE) — deletes characters
to the right of the cursor; clears
calculator entries.
— accesses special characters and secondary functions (as
labeled above some keys).
10
F (DST) — enters the letter F and
toggles between standard and daylight-savings time.
D (AM/PM) — enters the letter D
and toggles between AM and PM.
S ( ) — enters the letter S and
turns the key tone on and off.
A (12/24) — enters the letter A and
toggles between the 12- and 24hour time formats.
ENTER (=) — stores information
and totals an arithmetic operation.
SPACE — enters a space.
N (EX1) — enters the letter N and
stores a currency exchange rate.
M (EX2) — enters the letter M and
stores a currency exchange rate.
@ (CM–IN) — enters the @ symbol
and performs centimeters to inches
conversion.
11
Z (KM–MI) — enters the letter Z
and performs miles to kilometers
conversion.
X (G–OZ) — enters the letter X and
performs grams to ounces conversion.
C (KG–LB) — enters the letter C
and performs kilograms to pounds
conversion.
V (L–GAL) — enters the letter V
and performs liters to gallons conversion.
B (°C–°F) — enters the letter B and
performs Celsius to Fahrenheit
conversion.
12
OPERATION
TURNING THE EC-295
ON AND OFF
To turn the organizer on, press ON/
OFF. Press ON/OFF again to turn it off.
To conserve battery power, the organizer automatically turns off about 4
minutes after you stop using it.
TURNING THE KEY
TONE ON AND OFF
Your organizer is preset so a tone
sounds each time you press a key.
You can turn off the key tone.
With the organizer turned on, press
so the home date and time appear and the home city is in parenthe13
ses. To turn the key tone off or on,
press ( S).
appears when the key
tone is on.
Note: You can only turn the key tone
on or off when the display shows the
current date and time. When you reset
the organizer, key tone defaults to on.
SETTING/VIEWING THE
HOME DATE AND TIME
There are 24 cities listed in the organizer. You must select a city as your
home time. If your city is not listed, use
a city in the same time zone as yours.
When you set the time and date for
your home time zone, all other world
times are set automatically.
14
City Name
City Code
London
LON
Paris
PAR
Cairo
CAI
Moscow
MCW
Dubal
DXB
Karachi
KHI
Dhaka
DAC
Bangkok
BKK
Hong Kong
HKG
Tokyo
TYO
Sydney
SYD
Noumea
NOU
15
City Name
City Code
Auckland
AKL
Midway
MID
Honolulu
HNL
Anchorage
ANC
Los Angeles
LAX
Denver
DEN
Chicago
CHI
New York
NYC
Caracas
CCS
Rio De Janeiro
RIO
Note: As you scroll through the world
cities list, –1H and –2H appear; however, no major cities correspond with
16
Greenwich Mean Time –1H (hour) or –
2H. You can still choose either of
these settings if (for example) you
know you are in that specific time
zone.
To choose a city for your home time
and set the time and date, follow these
steps.
1. Repeatedly press
appears.
2. Press or
until
to select your city.
3. Press ENTER (=) to store the setting.
4. Repeatedly press
until the
city you have chosen appears in
parentheses.
5. Hold down EDIT until EDIT appears and the cursor flashes.
17
6. Press or
to
select the digits
you want to change, then use the
number keys to enter the year,
month, day, hour, and minute digits.
7. Press AM/PM (D) to choose AM or
PM. (A or P appears only in the
12-hour format.)
8. Press ENTER to store the setting.
Notes:
• If the information you enter is invalid (for example, you enter 15
for the month), the invalid digit
flashes on the display after you
press ENTER. Enter the correct
digit(s), then press ENTER.
• Press DST(F) to turn daylight saving time on or off. DST appears
when daylight saving time is on.
18
• Press 12/24 any time to choose
the12-hour or 24-hour format.
VIEWING WORLD TIMES
Once you set your home time, you can
follow these steps to view the time in
24 other cities around the world.
1. Repeatedly press
until
and the date and time in the last
selected city appears.
2. Repeatedly press or
lect the desired city.
to se-
3. To turn daylight-saving time on or
off for the currently selected time
zone, press DST.
Note: Not all cities use daylight-saving
time.
19
ENTERING DATA/
USING RECORDS
You enter data in each mode (
,
, and
) in the same way. When
entering data, the display shows 11
characters on a single line and up to
three rows at a time.
• When appears on the right side
of the record, there are more
characters to the right of the last
displayed character. Press to
view the next 12 characters.
When appears on the left side
of the record, you can press to
move back.
• When
appear on the last
line of a record, you can repeatedly press or hold
or
to
move to the first or last field of
that record.
20
When you enter data:
• Press SPACE to enter a space.
• Press
to select a symbol located above certain keys.
• If you make an incorrect entry,
press or to move to the character you want to change, then
type the correct character.
• To skip a field, press ENTER.
Note: If there is not enough memory
available for the record you have entered, FULL appears. Delete phone
records or schedule alarms to free additional space. (See “Deleting a
Record” on Page 24.)
21
RECALLING A RECORD
1. Press the desired mode key
(
, for example) so the desired directory prompt appears.
2. Press or
to view the records
in sequence, starting with the first
or last record.
Or, enter the first few characters
of the record you want to find,
then press or
. The first
matching record appears.
EDITING A RECORD
1. Recall the record you want to edit.
2. Press EDIT. EDIT appears. A
flashing cursor appears on the
first character of the record.
22
3. Press or to move the cursor to
the character you want to edit. To
change a character, simply enter
the correct character.
• Press SPACE to enter a space
in place of a character.
• To delete a character, press
DEL(C/CE).
• If a record has more than one
to view the
field, press or
other fields.
4. When you finish editing a field,
press ENTER. The next field in the
record appears on the first line of
the display.
5. Repeat Steps 3 and 4 to edit other
fields in the record.
6. To store the edited record, press
ENTER. STORE . . appears.
23
7. Repeat Steps 1–6 to edit additional records or press another mode
key to exit.
DELETING A RECORD
1. Recall the record you want to delete.
2. Press DEL. DELETE? Y/N appears.
3. To delete the record, press Y.
(DELETE . . briefly appears.) To
exit, press N.
24
ALARMS
DAILY ALARM
You can set an alarm to remind you of
a daily event, such as a phone call.
When the daily alarm is on,
appears on the display and a tone
sounds for about 20 seconds at the set
time.
To silence the alarm sooner, press any
key.
Note: Because pressing any key turns
off the alarm, the alarm might not
sound if you are entering information
at the precise alarm time.
25
Setting the Daily Alarm
1. Repeatedly press
until
ALARM appears in the display.
2. Press EDIT. EDIT Y/N appears
and the first hour digit flashes.
3. Use the number keys to enter the
alarm hour and minute digits.
4. In the 12-hour format, press AM/
PM to set the alarm time to AM or
PM.
5. To store the alarm time, press Y.
appears. Otherwise, press N.
Turning the Alarm On and Off
1. Repeatedly press
ALARM appears.
26
until
2. Press EDIT. EDIT appears to the
left and Y/N appears at the top.
3. To turn on the alarm, press Y.
appears when the alarm is set
to sound.
To turn off the alarm, press N.
disappears.
Note: Turning the daily alarm on or off
does not affect schedule alarms (see
“Schedule Alarms”).
SCHEDULE ALARMS
Schedule alarms help you stay in control of your busy schedule by reminding you of meetings and other
important events. For each schedule
alarm, you can enter an alarm message of up to 32 characters. The orga27
nizer can store up to 58 schedule
alarms.
At the set alarm time, the alarm
sounds for about 20 seconds and your
stored message appears on the display. If the organizer is off at the alarm
time, the organizer turns on, sounds
the alarm, and displays the alarm message.
To silence the alarm sooner, press any
key.
See “Entering Data/Using Records” on
Page 20 to recall, edit, and delete
schedule alarms.
28
Notes:
• Because pressing any key turns
off the alarm, the alarm might not
sound if you are entering information at the precise alarm time.
• If the alarm sounds and the alarm
message appears while you are
entering information, the information you are entering might not be
stored.
ENTERING A
SCHEDULE ALARM
1. Press
. SCHED?, the amount
of available memory, and
appear.
29
2. Enter the alarm message (up to
32 characters).
3. Press ENTER. The first digit of the
month flashes.
4. Enter the alarm date (month, day,
year).
5. Enter the alarm time.
Note: In the 12-hour format,
press AM/PM to select AM or PM
time.
6. Press ENTER. ALM ON Y/N? appears. To set the schedule alarm
to sound, press Y; otherwise,
press N.
To enter another schedule alarm, repeat Steps 2–6.
30
Turning Schedule Alarms On
and Off
1. Recall
alarm.
the
desired
schedule
2. Hold down EDIT until EDIT appears.
3. Press ENTER twice so ALM ON Y/
N? appears.
4. To set the alarm to sound, press Y;
otherwise, press N.
31
PHONE DIRECTORY
You can store contacts’ names, telephone numbers, fax numbers, and email information in the organizer’s
phone directory. The organizer can
store up to 124 phone records.
To enter a phone record, follow these
steps.
1. Press
. NAME? the amount
of available memory, and
appear.
2. Enter the name (up to 20 characters) and press ENTER. (Since the
organizer stores names alphabetically, you might want to enter the
last name first.)
3. Enter each bit of information as
the organizer prompts you for it
(E-MAIL – up to 36 characters;
TEL and FAX – up to 20 num32
bers) and press ENTER to move to
the next field.
4. Press ENTER to store the record.
STORE... briefly appears.
To enter another phone directory
record, repeat Steps 2–4.
To recall a phone directory record, follow these steps.
1. Press
. NAME? appears.
2. Press . The name, phone number, and fax number of the first
phone record appear.
3. Press ENTER to see the e-mail address, or press to see the other
phone records.
See
“Entering
Data/Using
Records” on Page 20 to edit and
delete phone records.
33
ACCOUNT MANAGER
You can use the organizer to help
manage your money. The organizer is
set up to keep track of up to three different accounts and their balances.
To enter an account record, follow
these steps.
1. Press so
appears.
2. Repeatedly press or
to select the desired account (ACCT1,
ACCT2, or ACCT3).
3. To record a deposit, press + (G),
then use the number keys to enter
the desired amount.
To record a withdrawal, press –
(H), then use the number keys to
enter the desired amount.
34
4. Press ENTER to store the transaction. The adjusted amount appears.
Notes: The balance in each of the
three accounts can be up to
$9,999,999,999. The original balance
will appear if you try to enter a transaction totalling more than this.
35
LOCKED RECORDS
You can block unauthorized access to
confidential phone directory, schedule
alarm, and account records by setting
a password.
Setting the Password
1. Press
. LOCK? appears.
2. Enter a password up to four characters long, then press ENTER.
and the home date and time
appear.
Notes:
• Your password can include any
combination of letters, numbers, or symbols.
36
• Be sure you can remember
your password. If you forget it,
you must reset the organizer,
which clears all of your records.
Storing Records
Once you have set your password,
press
,
, or
then enter
the desired information. See “Entering
Data/Using Records” on Page 20 to
recall, edit, and delete records.
Once you have set the password, all
records are accessible. Once you turn
the organizer off and back on, however, all phone, schedule, and account
records are only accessible after you
enter your password.
37
Cancelling the Password
You can cancel your password so all
records are accessible.
1. Press ON/OFF to turn off the organizer. Then press ON/OFF to turn
on the organizer again.
2. Press
appears.
. UNLOCK? _ _ _ _
3. Enter the current password.
4. LOCK? _ _ _ _ appears.
5. To cancel the password so all
records are accessible, press ENTER. Otherwise, enter the password again so records remain
password protected.
38
CALCULATOR
Press
to use the calculator.
appear.
CALC and 0. and
Press the keys in the order they appear in the arithmetic operation.
For example:
You press
You see
3+4=
7.
8×3–4=
20.
6÷3+2=
4.
39
Press C/CE (DEL) once to clear the last
entry. Press C/CE twice to clear all
pending calculations. Press +/– to
change the displayed number from
positive to negative and vice versa.
Note: If the result of a calculation has
more than 10 digits, or if you try to divide by 0, E (error) appears. To clear
the error, press C/CE.
40
CONVERSIONS
METRIC CONVERSIONS
The organizer can convert between
the following:
• degrees Celsius to degrees Fahrenheit (°C–°F (B))
• miles to kilometers (KM–MI (Z))
• gallons to liters (L–GAL (V))
• ounces to grams (G–OZ (X))
• pounds to kilograms (KG–LB (C))
• inches to centimeters (CM–IN (@))
To convert between standard and metric measurements, follow these steps.
1. Press
appear.
. METRIC 0. and
2. Enter the number you want to
convert.
41
3. Press CM-IN, KM-MI, G-OZ, KG-LB,
L-GAL, or °C-°F to select the desired measurement units to convert.
4. Press to convert from standard to metric units, or
to convert from metric to standard units.
For example, to convert inches to
centimeters, press CM–IN, then
press
. To convert centimeters
to inches, press .
CURRENCY
CONVERSIONS
You can use your organizer to store
two exchange rates and convert between different currencies.
42
Storing Exchange Rates
Follow these steps to store or replace
exchange rates.
1. Press
. CURRENCY,
1 appear.
and
2. Press the desired exchange rate
(EX1 (N) or EX2 (M)).
3. Enter the exchange rate (up to 4
digits).
4. Press ENTER to store the rate.
For example, to enter an exchange
rate between U.S. dollars and French
francs, press
then EX1, enter
6.115, and press ENTER.
43
Converting Currencies
1. Press
.
2. Enter the amount that you want to
convert. (For example, $10 U.S.
dollars into French francs.)
3. Press either EX1 or EX2 (where
the desired exchange rate is
stored).
4. To convert into the exchange
rate, press . The organizer displays the amount.
For example, to convert 10 U.S.
dollars into French francs (as described in storing on “Storing Exchange Rates” on Page 43),
press
, enter 10, press EX1,
then
. Ten U.S. dollars equals
about 61.15 French francs.
44
To convert from the exchange
rate, press .
For example, to convert 10
French francs into U.S. dollars,
press
, enter 10, press EX1,
then press
. Ten French francs
equal about $1.63.
45
CARE
To enjoy your EC-295 3K Electronic
Organizer for a long time:
Keep the organizer dry. If it gets wet,
wipe it dry immediately.
• Use and store the organizer only
in normal temperature environments.
• Handle the organizer gently and
carefully. Don’t drop it.
• Keep the organizer away from
dust and dirt.
• Wipe the organizer with a damp
cloth occasionally to keep it looking new.
Modifying or tampering with the organizer’s internal components can cause
a malfunction and invalidate its warranty. If your organizer is not perform-
46
ing as it should, take it to your local
RadioShack store for assistance.
Notes:
• At very low temperatures, the display’s response time might slow
down or the display might fail
completely. This is only temporary. The organizer works normally again when it returns to normal
temperature.
• If the organizer is exposed to
strong static electrical charges,
the display might become dim or
the organizer might fail to respond. This rarely happens, but if
it does, reset your organizer (see
“Resetting the Organizer” on
Page 50).
47
REPLACING THE
BATTERIES
Your organizer is powered by two 3volt CR2025 lithium batteries. When
the display dims or stops working
properly, replace the batteries one at a
time.
Warnings:
• Always dispose of old batteries
promptly and properly. Never bury
or burn them.
• Do not allow children to play with
a battery. Swallowing a lithium
battery could be fatal.
Caution: To avoid losing stored data:
• Turn off your organizer when replacing the batteries.
48
• Remove and replace the batteries one at a time.
• Remove all old batteries and install the new ones as quickly as
possible.
Follow these steps to replace the batteries.
1. Press ON/OFF to turn off the organizer.
M
A
D
E
I
R
N
E
S
C
E
H
T
I
N
A
3
2
A
B
3
U
K
C
3
C
3
2
2
0
2
3
5
x
R
2
3
A
M
3
V
1
3
3
2
1
2
2
N
1
3
3
I
1
1
P
2. Slide the battery compartment
cover in the direction of the arrow
to remove it.
49
3
2
3
C
A
B
U
K
1
1
2
3
R
C
3
2
0
2
3
5
x
V
2
P
3. Remove the old batteries one at a
time, and install the new ones
with the positive (+) side facing
up.
1
3
2
3
I
A
M
N
1
3
2
3
M
1
A
3
D
E
2
3
I
R
N
E
S
C
E
H
T
I
N
A
4. Replace the cover.
RESETTING THE
ORGANIZER
If the organizer stops operating properly, try resetting the memory.
50
Caution: Resetting the memory clears
all information stored in the organizer.
To clear the organizer’s memory, follow these steps.
M
A
D
E
I
R
N
E
S
C
E
H
T
I
N
A
2
A
B
3
K
C
P
3
2
3
C
3
0
2
5
2
V
3
R
2
3
A
M
3
x
1
3
3
2
1
2
2
N
1
3
3
I
1
RESET
1
U
1. Use a pointed object (such as a
straightened paper clip) to press
the RESET button on the bottom of
Y/N?
your organizer. RESET
appears on the display.
RESET
51
2. Press Y to clear all the information
stored in the organizer. Otherwise, press N.
3. Re-enter any settings, such as
key tone, date and time, daily
alarm, and schedule alarms.
52
SPECIFICATIONS
Power Source .................. 3V Lithium
Batteries (2)
Type: CR2025
Battery Life .................... About 1 Year
Automatic Power-Off: About 4 Minutes
Working Temp. ................ 32 to 104°F
(0 to 40°C)
Dimensions (HWD):
41/2 × 311/16 × 1/2 in
(114.3 × 94 × 13 mm)
Weight (with Batteries) ........... 4.05 oz
(115 g)
Specifications are typical; individual
units might vary. Specifications are
subject to change and improvement
without notice.
53
NOTES
54
55
Limited Ninety-Day Warranty
This product is warranted by RadioShack against manufacturing defects in
material and workmanship under normal use for ninety (90) days from the date
of purchase from RadioShack company-owned stores and authorized RadioShack franchisees and dealers. EXCEPT AS PROVIDED HEREIN, RadioShack MAKES NO EXPRESS WARRANTIES AND ANY IMPLIED
WARRANTIES, INCLUDING THOSE OF MERCHANTABILITY AND FITNESS
FOR A PARTICULAR PURPOSE, ARE LIMITED IN DURATION TO THE DURATION OF THE WRITTEN LIMITED WARRANTIES CONTAINED HEREIN.
EXCEPT AS PROVIDED HEREIN, RadioShack SHALL HAVE NO LIABILITY
OR RESPONSIBILITY TO CUSTOMER OR ANY OTHER PERSON OR ENTITY WITH RESPECT TO ANY LIABILITY, LOSS OR DAMAGE CAUSED DIRECTLY OR INDIRECTLY BY USE OR PERFORMANCE OF THE PRODUCT
OR ARISING OUT OF ANY BREACH OF THIS WARRANTY, INCLUDING,
BUT NOT LIMITED TO, ANY DAMAGES RESULTING FROM INCONVENIENCE, LOSS OF TIME, DATA, PROPERTY, REVENUE, OR PROFIT OR
ANY INDIRECT, SPECIAL, INCIDENTAL, OR CONSEQUENTIAL DAMAGES,
EVEN IF RadioShack HAS BEEN ADVISED OF THE POSSIBILITY OF SUCH
DAMAGES.
Some states do not allow the limitations on how long an implied warranty lasts
or the exclusion of incidental or consequential damages, so the above limitations or exclusions may not apply to you.
In the event of a product defect during the warranty period, take the product
and the RadioShack sales receipt as proof of purchase date to any RadioShack store. RadioShack will, at its option, unless otherwise provided by
law: (a) correct the defect by product repair without charge for parts and labor;
(b) replace the product with one of the same or similar design; or (c) refund the
purchase price. All replaced parts and products, and products on which a refund is made, become the property of RadioShack. New or reconditioned parts
and products may be used in the performance of warranty service. Repaired or
replaced parts and products are warranted for the remainder of the original
warranty period. You will be charged for repair or replacement of the product
made after the expiration of the warranty period.
This warranty does not cover: (a) damage or failure caused by or attributable
to acts of God, abuse, accident, misuse, improper or abnormal usage, failure
to follow instructions, improper installation or maintenance, alteration, lightning
or other incidence of excess voltage or current; (b) any repairs other than
those provided by a RadioShack Authorized Service Facility; (c) consumables
such as fuses or batteries; (d) cosmetic damage; (e) transportation, shipping
or insurance costs; or (f) costs of product removal, installation, set-up service
adjustment or reinstallation.
This warranty gives you specific legal rights, and you may also have other
rights which vary from state to state.
RadioShack Customer Relations,
200 Taylor Street, 6th Floor, Fort Worth, TX 76102
We Service What We Sell
10A99
04/99
Printed in China