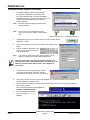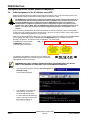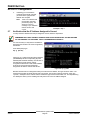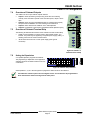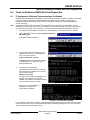
1
D6600 NetCom
System Guide
Network Communications System
D6600 NetCom
Trademarks
Microsoft®, Windows®, Windows NT® are either registered trademarks or trademarks of Microsoft Corporation in
the United States and/or other countries.
46542C
D6600 NetCom System Guide
Page 2
© 2001 Radionics
D6600 NetCom
Contents
1.0
Introduction......................................................................................................... 9
1.1
1.2
1.3
1.3.1
1.3.2
Manual Organization ................................................................................................................................. 9
Other Literature Referenced ...................................................................................................................... 9
Documentation Conventions.................................................................................................................... 10
Type Styles Used in this Manual.............................................................................................................. 10
Tips, Important Notes, Cautions and Warnings......................................................................................... 10
2.0
D6600 NetCom Overview ................................................................................. 11
2.1
2.2
2.3
2.4
2.5
2.6
D6600 NetCom Pre-Installation Requirements ......................................................................................... 13
D6600 Receiver/Gateway NetCom Installation ......................................................................................... 14
Installation of the Optional D6672 Serial COM1 Expansion Kit .................................................................. 17
Setting Up the Host Computer ................................................................................................................. 17
Host Computer D6200 Installation ........................................................................................................... 20
Host Computer D6200 Security Key Protection Overview ......................................................................... 20
3.0
Configuration of the D6680 Network Adapter(s)............................................ 21
3.1
3.2
3.3
3.4
3.5
3.6
3.7
3.8
3.9
Factory Default IP Address...................................................................................................................... 21
Identifying the MAC Hardware Address.................................................................................................... 21
Obtaining an IP Address.......................................................................................................................... 21
Initial Assignment of the IP Address using ARP........................................................................................ 22
Verification that the IP Address Assigned is Correct ................................................................................. 23
Using Telnet to Finish the Configuration................................................................................................... 24
Programming the D6600 Communications Receiver/Gateway Overview ................................................... 28
Configuring for Network Communication via a D6680 Network Adapter..................................................... 28
Editing Program Parameters.................................................................................................................... 29
4.0
D6200 Programming Software Overview........................................................ 31
4.1
4.2
4.2.1
4.2.2
4.3
4.4
4.4.1
4.4.2
4.4.3
4.5
4.6
4.7
4.8
4.9
4.10
4.11
4.11.1
4.11.2
4.11.3
4.11.4
4.11.5
4.11.6
4.12
4.12.1
4.12.2
4.12.3
4.12.4
4.12.5
D6200 Software Password Protection...................................................................................................... 31
Upgrading the Firmware Files in the D6600 via the D6200 Software ......................................................... 32
Finding the Firmware version number ...................................................................................................... 32
Firmware Files Upgrade Procedure.......................................................................................................... 33
D6200 Program Access Rights - Restricting Access for Low Level Users.................................................. 37
D6200 User Management - Adding Authorized Administrator Users.......................................................... 37
Adding a User ......................................................................................................................................... 38
Editing an Existing User .......................................................................................................................... 38
Deleting an Existing User ........................................................................................................................ 38
D6200 Save and Restore User Management Files ................................................................................... 39
Changing User Password........................................................................................................................ 39
Opening/Editing D6600 Configuration Files on Host PC............................................................................ 40
Reading D6600 Configuration Files Using the D6200 ............................................................................... 41
Viewing & Editing D6600 Configuration Files Using the D6200 ................................................................. 42
Sending Configuration Files from the D6200 PC to the D6600 Receiver.................................................... 43
Managing Field Unit Accounts in the D6600 ............................................................................................. 43
Previous Reading of Account Database ................................................................................................... 43
First Time Reading of Account Database ................................................................................................. 43
Adding an Account in the Database ......................................................................................................... 44
Editing the Account Database.................................................................................................................. 48
Copying Account Information................................................................................................................... 49
Deleting an Account from the Database ................................................................................................... 49
Account Status Procedures ..................................................................................................................... 50
Searching the Account Database............................................................................................................. 50
Sorting Database Information .................................................................................................................. 50
Status ..................................................................................................................................................... 50
Status Changed Time.............................................................................................................................. 50
Show Account Status .............................................................................................................................. 50
D6600 NetCom System Guide
© 2001 Radionics
Page 3
46542C
D6600 NetCom
Contents
4.13
4.13.1
4.13.1.1
4.13.1.2
4.13.1.3
4.13.1.4
4.13.1.5
4.13.1.6
4.13.1.7
4.13.1.8
4.13.1.9
C900 Commands.................................................................................................................................... 50
Changing C900 Status Settings............................................................................................................... 51
Switch to Intercept .................................................................................................................................. 51
Switch to Fallback ................................................................................................................................... 51
Disable Intercept..................................................................................................................................... 52
Activate Output ....................................................................................................................................... 52
Deactivate Output ................................................................................................................................... 52
Idle (C900 Polling) .................................................................................................................................. 52
Active (C900 Acknowledgement from Dialer) ........................................................................................... 52
Retry (Elapsed Wait Time) ...................................................................................................................... 52
Hold (Before Transmitting Message)........................................................................................................ 52
5.0
D9133TTL-E Configuration............................................................................... 53
5.1
5.2
5.3
5.4
5.5
5.6
5.7
5.8
5.9
5.10
Network Enabling a Radionics 9000 Series Panel using a D9133TTL-E.................................................... 53
Physical Installation ................................................................................................................................ 53
Factory Programmed Default IP Address ................................................................................................. 54
Identifying the MAC Hardware Address ................................................................................................... 54
Obtaining an IP Address ......................................................................................................................... 54
Initial Assignment of the IP Address using ARP.EXE................................................................................ 55
Verification that the IP Address Assigned is Correct ................................................................................. 56
Using Telnet to Finish the Configuration .................................................................................................. 57
Status LEDs ........................................................................................................................................... 60
9000 Series Panel Programming for Communication................................................................................ 60
6.0
RAM IV NetCom Programming ........................................................................ 61
6.1
6.1.1
RAM IV And D5200 Programmer Handler Requirements.......................................................................... 61
SDI Automation ...................................................................................................................................... 61
Enable SDI Auto .............................................................................................................................. 61
Baud Rate........................................................................................................................................ 61
Parity / Stop ..................................................................................................................................... 61
9133 Supervision ............................................................................................................................. 62
RTS Control ..................................................................................................................................... 62
DTR Control..................................................................................................................................... 62
Status Rate...................................................................................................................................... 62
SDI RAM Parameters.............................................................................................................................. 63
Enable SDI RAM.............................................................................................................................. 63
Call Back Enabled............................................................................................................................ 63
RAM IP Address 1............................................................................................................................ 64
RAM IP Address 2............................................................................................................................ 64
RAM IP Address 3............................................................................................................................ 64
RAM IP Address 4............................................................................................................................ 64
Enable Ext Modem ........................................................................................................................... 64
Answer Armed ................................................................................................................................. 64
Answer Disarmed............................................................................................................................. 65
RAM Line Monitor ............................................................................................................................ 65
Seize Relay ..................................................................................................................................... 65
Modem Init String............................................................................................................................. 65
RAM Dial String ............................................................................................................................... 65
Enhanced Communications..................................................................................................................... 65
Enhanced Comm ............................................................................................................................. 65
Programming Path #'s and IP Addresses ................................................................................................. 66
Path # IP Add1................................................................................................................................. 66
Path # IP Add2................................................................................................................................. 66
Path # IP Add3................................................................................................................................. 66
Path # IP Add4................................................................................................................................. 66
Path # Poll Rate............................................................................................................................... 66
Path # Ack Wait ............................................................................................................................... 68
Path # Retry Count........................................................................................................................... 68
SDI RAM / Enhanced Communications Configuration .............................................................................. 68
6.1.2
6.1.3
6.1.4
6.1.5
46542C
D6600 NetCom System Guide
Page 4
© 2001 Radionics
D6600 NetCom
Contents
6.1.6
Baud Rate........................................................................................................................................ 68
Parity / Stop ..................................................................................................................................... 69
RTS Control ..................................................................................................................................... 69
DTR Control ..................................................................................................................................... 69
9133 Supervision ............................................................................................................................. 69
Route Group Attempts............................................................................................................................. 69
RG# 1 Attempt ................................................................................................................................. 70
7.0
C900TTL-X Configuration ................................................................................ 71
7.1
7.2
7.3
7.4
7.5
7.6
7.7
7.7.1
7.7.2
7.8
7.9
7.10
7.11
7.12
7.13
Network Enabling an Alarm Panel............................................................................................................ 71
Physical Installation................................................................................................................................. 72
Overview of Onboard Inputs .................................................................................................................... 72
Overview of Onboard Outputs ................................................................................................................. 73
Overview of Onboard Terminal Strip ........................................................................................................ 73
Setting the Dipswitches ........................................................................................................................... 73
LEDs ...................................................................................................................................................... 75
Dialer LED .............................................................................................................................................. 75
Status LED ............................................................................................................................................. 75
Factory Programmed Default IP Address ................................................................................................. 75
Identifying the MAC Hardware Address.................................................................................................... 76
Obtaining an IP Address.......................................................................................................................... 76
Initial Assignment of the IP Address using ARP.EXE................................................................................ 76
Verification that the IP Address Assigned is Correct ................................................................................. 77
Using Telnet to Finish the Configuration................................................................................................... 78
8.0
Tools for Radionics D6600 NetCom Diagnostics........................................... 83
8.1
IP Assignment & Network Communications Verification............................................................................ 83
9.0
Special Radionics D6600 NetCom Applications ............................................ 85
9.1
Emulating a Direct Serial Connection Over a LAN Using D6680 Network Adapters ................................... 85
10.0
Index
UL Compliance Installation.............................................................................. 87
........................................................................................................................... 89
© 2001 Radionics
D6600 NetCom System Guide
Page 5
46542C
D6600 NetCom
Contents
Figures
Figure 1: D6600 Communications Receiver/Gateway .................................................................................................. 11
Figure 2: D6600 NetCom System Connection Diagram using C900TTL & any Alarm Panel ........................................... 12
Figure 3: D6600 NetCom System Connection Diagram using D9133TTL and Radionics 9000 Series Panel ................... 12
Figure 4: D6600 Communications Receiver/Gateway Exploded View............................................................................ 14
Figure 5: D6600 Rear Panel ........................................................................................................................................ 14
Figure 6: Null Modem Configuration (Option 1)............................................................................................................. 15
Figure 7: Null Modem Configuration (Option 2)............................................................................................................. 15
Figure 8: Null Modem Pinout Description...................................................................................................................... 15
Figure 9: D6600 Rear View (before installation of D6672) ............................................................................................. 17
Figure 10: D6201 Parallel Port Security Key ................................................................................................................. 20
Figure 11: D6680 Network Adapter Label ..................................................................................................................... 21
Figure 12: arp –g table................................................................................................................................................. 23
Figure 13: Telnet session............................................................................................................................................. 25
Figure 14: Telnet session – Gateway Address.............................................................................................................. 25
Figure 15: D6200 Programming Software main screen ................................................................................................. 31
Figure 16: CPU Configuration Window ........................................................................................................................ 40
Figure 17: D9133TTL-E Serial Interface Network Adapter............................................................................................. 53
Figure 18: D9133TTL-E Diagnostic LEDs and the LED Enable Jumper ......................................................................... 54
Figure 19: MAC Address Label .................................................................................................................................... 54
Figure 20: arp –g table................................................................................................................................................. 56
Figure 21: Telnet Session ............................................................................................................................................ 58
Figure 22: Telnet session – Gateway Address.............................................................................................................. 59
Figure 23: 9000 Series panel ....................................................................................................................................... 60
Figure 24: RAM IP Address Prompts............................................................................................................................ 64
Figure 25: Path # IP Add1 to Add4............................................................................................................................... 66
Figure 26: Poll Rate Timeline....................................................................................................................................... 67
Figure 27: Phone parameters ...................................................................................................................................... 70
Figure 28: Routing parameters..................................................................................................................................... 70
Figure 29: Enhanced Routing parameters .................................................................................................................... 70
Figure 30: Enhanced Communications and Route Group parameters............................................................................ 70
Figure 31: C900TTL-X................................................................................................................................................. 71
Figure 32: C900TTL-X Interconnection Diagram........................................................................................................... 71
Figure 33: C900TTL-X in D2203 Enclosure .................................................................................................................. 72
Figure 34: C900TTL-X Onboard Terminal Strip............................................................................................................. 73
Figure 35: C900TTL-X Dip Switches ............................................................................................................................ 73
Figure 36: MAC Address Label .................................................................................................................................... 76
Figure 42: Direct Serial LAN Connection Configuration ................................................................................................. 85
Tables
Table 1: D6600 NetCom System Guide Organization ..................................................................................................... 9
Table 2: Other Literature Referenced ............................................................................................................................. 9
Table 3: Network Adapters Part Numbers .................................................................................................................... 11
Table 4: C900TTL Part Numbers ................................................................................................................................. 11
Table 5: D9133TTL Part Numbers ............................................................................................................................... 12
Table 6: D6201 Security Key Part Numbers ................................................................................................................. 20
Table 7: D6680 Default IP Addresses........................................................................................................................... 21
Table 8: Netmask Address........................................................................................................................................... 26
Table 9: New D9133TTL-E Parameters........................................................................................................................ 27
Table 10: Firmware Folder Contents ............................................................................................................................ 33
Table 11: Access Level Descriptions ............................................................................................................................ 37
Table 12: Account Database Configuration – Search Options ....................................................................................... 45
Table 13: Account Operation Buttons........................................................................................................................... 45
D6600 NetCom System Guide
46542C
Page 6
© 2001 Radionics
D6600 NetCom
Contents
Table 14: Account Database Column Definitions .......................................................................................................... 46
Table 15: Settings Tab Field Definitions........................................................................................................................ 47
Table 16: D9133TTL-E Wiring Connections.................................................................................................................. 53
Table 17: D9133TTL-E Default IP Addresses ............................................................................................................... 54
Table 18: Netmask Address ......................................................................................................................................... 59
Table 19: D9133TTL-E Status LEDs ............................................................................................................................ 60
Table 20: C900TTL-X Dialer Format Settings – Dipswitches 1 - 4.................................................................................. 74
Table 21: C900TTL-X Dipswitches 5 – 10..................................................................................................................... 74
Table 22: C900TTL-X Dialer LED Status Description .................................................................................................... 75
Table 23: C900TTL-X Status LED Status Description ................................................................................................... 75
Table 24: C900TTL-X Default IP Addresses ................................................................................................................. 75
Table 25: Netmask Address ......................................................................................................................................... 80
© 2001 Radionics
D6600 NetCom System Guide
Page 7
46542C
D6600 NetCom
Contents
Notes:
46542C
D6600 NetCom System Guide
Page 8
© 2001 Radionics
D6600 NetCom
Introduction
1.0
Introduction
This manual covers the installation, operation and programming of a D6600 NetCom Network Communications
System.
References will be made to the Radionics 9000 Series, which include the D9412, D9112, D7412 and D7212
Control/Communicators.
1.1
Manual Organization
This manual is divided into ten sections. A summary of each section is detailed in the table below.
Sections
1
2
3
4
5
6
7
8
9
10
Description
Introduction
D6600 NetCom Overview – provides an overview of the NetCom system, installation
instructions for the D6600 Receiver/Gateway, optional D6672 Serial Com 1 Expansion Kit
and the host computer.
D6680 Network Adapter Configuration – provides configuration, programming and IP
address assignment instructions for the D6680 Network Adapters.
D6200 Programming/Administration Software Overview – provides overview,
programming, editing, communication and administration instructions for the D6200 software.
D9133TTL Configuration – provides configuration, programming and assigning of IP
address assignment instructions for the D9133TTL Serial Interface.
RAM IV NetCom Programming – provides Handler requirements for both RAM IV and the
D5200 plus information on the programming prompts encountered in the RADXAUX1
Handler.
C900TTL-X Configuration – provides configuration, programming and assigning of IP
address assignment instructions for the C900TTL Dialer Capture Modules.
Tools for Radionics D6600 NetCom Diagnostics – provides explanation of utility
commands used to verify IP Addresses.
Special Radionics D6600 NetCom Applications – using a network to emulate a direct
connection between two COM ports.
UL Compliance Installation – lists the documents to reference when installing to comply
with UL.
Table 1: D6600 NetCom System Guide Organization
1.2
Other Literature Referenced
Throughout this manual, references will be made to other documentation. See the following table for a more
complete and detailed description of the D6600 NetCom Network Communications System, which lists the
complete part number for ordering purposes.
Name of document
Part Number
RAM IV Operation Manual
38849
D6600 Operation & Installation Guide
39964
D9133TTL-E Operation and Installation Guide
41124
C900TTL-E Operation and Installation Guide
41123
D6600 Program Entry Guide
39962
D6600 Release Notes
39660
9000 Series Program Entry Guide
74-07695-000
Table 2: Other Literature Referenced
© 2001 Radionics
D6600 NetCom System Guide
Page 9
46542C
D6600 NetCom
Introduction
1.3
Documentation Conventions
These conventions are intended to call out important features, items, notes, cautions, and warnings that the
reader should be aware of in reading this document.
1.3.1
Type Styles Used in this Manual
To help identify important items in the text, the following type styles are used:
Bold text
Usually indicates selections that you may use while programming your panel. It may
also indicate an important fact that should be noted.
Bold Italicized text
Used to denote notes, cautions and/or warnings
Italicized text
Is used to reference the user to another part of this manual or another manual
entirely. It is also used to symbolize names for records that the user will create.
Courier Text
Text that appears like this indicates what may appear on the D5200 Programmer
display, command center/keypad or internal printer.
[F1]
Text like this in brackets is used to indicate to the user that a specific key should be
pressed.
Example: …type [F1] and press…
Italicized Text
1.3.2
Text that appears like this indicates what would be seen in the D5200 Programmer’s
Display. It is used as a section heading and screen example. Shaded boxes indicate
programmer prompts that are only available when Custom or View Events are
selected. (Used only in the Program Entry Guide documents).
Tips, Important Notes, Cautions and Warnings
Throughout this document, helpful tips, important notes, cautions and warnings will be presented for the reader
to keep in mind. These will appear different from the rest of the text as follows:
Important Notes - should be heeded for successful operation and programming. Also tips and
shortcuts may be included here.
Caution - These caution the operator that physical damage to the program and/or equipment may
occur.
Warning - These warn of the possibility of physical damage to the operator, program and/or
equipment.
0101
0101
0101
These cover notes and clarifications specific to programming the unit.
Programming
Note
0101
0101
0101
These are helpful shortcuts or reminders in programming the unit.
Programming
Tip
46542C
D6600 NetCom System Guide
Page 10
© 2001 Radionics
D6600 NetCom
Communication System Overview
2.0
D6600 NetCom Overview
The D6600 NetCom System supports data network
communications. NetCom allows the D6600 Receiver to connect to
various network topologies, specifically Ethernet and Token Ring,
and to process messages both to and from most networks using
TCP/IP protocols. Connection to a data network can be
implemented through the use of the COM4 and/or a COM1
connection from the D6600 Receiver to the D6680 Network
Adapter. Reports from alarm control panels via phone lines OR
Ethernet and Token Ring data networks can be sent to the D6600
Receiver and onto the central station automation software. Alarm
control panels can be monitored on the network for their status.
Figure 1: D6600 Communications
Receiver/Gateway
Connection (line supervision) - The D6600 firmware can be upgraded through any network connection. The
D6600 can be remotely programmed through the D6200 Programming/Administration Software.
The D6600 has two COM ports on the
back available for network communication
connections – COM4 and the optional
COM1. The D6600 requires a separate
Radionics D6680 Network Adapter for
each COM port to be used in order to
interface with either a Token Ring or
Ethernet network. Most applications will
not initially require that both COM ports be
used. The Radionics D6680 Network
Adapters are specific to the type of
network and application to which you will
be connecting.
Radionics part
number
D6680-E120
D6680-E240
D6680-T120
D6680-T240
Application description
D6600 Ethernet Network Adapter, 120VAC
applications
D6600 Ethernet Network Adapter, 240VAC
applications
D6600 Token Ring Network Adapter, 120VAC
applications
D6600 Token Ring Network Adapter, 240VAC
applications
Table 3: Network Adapters Part Numbers
All Alarm Panels to be used with the D6600 NetCom System (from Radionics or other manufacturers) must have
an interface similar in function to the Radionics D6680 Network Adapter to allow for network reporting. One
method of interfacing an Alarm Panel (Radionics or from other manufacturers) to a network is to use the
patented Radionics C900TTL-X Dialer Capture Module/network adapter.*
Radionics model Application description
The C900TTL module will work with almost any Alarm
number
Panel (Radionics or other manufacturer) that uses a
standard digital dialer utilizing one of the following
C900TTL-E
C900 Dialer Intercept Module for
industry standard formats:
Ethernet network applications
BFSK,
C900TTL-TR
C900 Dialer Intercept Module for
•
CONTACT ID,
Token Ring network applications
•
ADEMCO HIGH SPEED,
Table 4: C900TTL Part Numbers
•
4 + 2 EXPRESS,
•
All Radionics MODEM formats,
•
All pulsed formats such as 4+2, 3+1, etc.
The C900TTL accomplishes this through dial tone and handshake simulations. The C900TTL “intercepts” the
Alarm Panel’s signals and transmits them across the network to a network-enabled D6600. The Radionics
C900TTL Dialer Capture Modules are specific to the type of network and application to which you will be
connecting.
* Patent numbers 5,134,644, 5,943,394
© 2001 Radionics
D6600 NetCom System Guide
Page 11
46542C
D6600 NetCom
Communication System Overview
Figure 2 shows a D6600 NetCom System
using any manufacturer’s alarm panel,
C900TTL-E Dialer Capture
Module/network adapters, D6600
Receiver, and D6680 Network Adapters.
The other type of network interface for
Alarm Panels is the D9133TTL-X Serial
Interface. The D9133TTL is designed for
use with Radionics 9000 Series control
panels ONLY. No other Alarm Panel will
function with the D9133TTL. The
D9133TTL and the Radionics 9000
Series panels communicate using the
SDI bus rather than the dialer capture
method used by the C900TTL. The
Radionics D9133TTL Serial Interfaces
are specific to the type of network and
application to which you will be
connecting.
Radionics model
Application description
number
D9133TTL-E
Radionics 9000 series Serial
Interface, Ethernet networks
D9133TTL-TR
Radionics 9000 series Serial
Interface, Token Ring
networks
D6200 Programming
Administrative
Software
CONTROL PANEL
ANY
MANUFACTURER'S
ALARM
PANEL
Ethernet NIC
HOST PC
To Panel
PA NEL
1
2 3
4 5
6 7
8 9
0
1
O
F
F
TELCO Connection
TELC O
C900TTL-E
C
OU T4
OUT 3 O UT2
OUT1
IN 3
I N2
C
IN 1
I -12V+
ETHERNET
Ethernet HUB
D6680
D6680
D6600
COM4
COM1 (optional)
Figure 2: D6600 NetCom System Connection Diagram using
C900TTL & any Alarm Panel
Table 5: D9133TTL Part Numbers
The figure at the right is a diagram of a D6600
NetCom System using Radionics 9000 Series
panels, D9133TTL-E Serial Interface, D6600
Receiver, and D6680 Network Adapters.
CONTROL PANEL
(9000 Series) SDI Bus
D9133TTL-E
(Ethernet)
R
1 2 4 8
The Radionics D6200 Programming/
Administration Software is a D6600
programming utility that is designed to work
over a network connection. Each network
interface device (D6680 Network Adapter,
D9133TTL Serial Interface, or C900TTL Dialer
Capture Module/network adapters) must be
added to the ARP table (see Section 5.6
Initial Assignment of the IP Address
using ARP.EXE) then configured through a
Telnet session (See Section 5.8
Using
Telnet to Finish the Configuration) in order to
configure each device before network
communications will function.
Ethernet
HOST PC
Ethernet HUB
Ethernet NIC
D6680
D6200 Programming
Administrative
Software
D6600
D6680
COM4
COM1 (optional)
See the appropriate configuration information
for the device that you are setting up (D6680,
D9133TTL, or C900TTL) in this manual.
ARP stands for Address Resolution Protocol
and is used to convert an IP address into a
hardware address. It is installed into the
Windows directory during the installation of the
D6200 software.
46542C
Figure 3: D6600 NetCom System Connection Diagram
using D9133TTL and Radionics 9000 Series Panel
D6600 NetCom System Guide
Page 12
© 2001 Radionics
D6600 NetCom
Communication System Overview
2.1
D6600 NetCom Pre-Installation Requirements
The following pre-installation requirements must be considered BEFORE attempting to install a D6600 NetCom
System. These bulleted items are arranged by network type. If you have any questions regarding these items,
please contact the network administrator for the network you are planning to interface with or a Radionics
NetCom Engineer.
To connect the D6600 NetCom over an Ethernet Network:
•
•
•
•
•
•
•
•
The Ethernet network MUST use a Hub.
The Ethernet network MUST use Ethernet cables.
The D6200 host computer MUST have a properly configured Ethernet network interface card (NIC) installed.
The D6600 Receiver/Gateway MUST be connected to the Ethernet network via a Radionics D6680-E
Network Adapter.
If connecting the D6680 Network Adapter’s CHANNEL 1 port to COM4/COM1 on the D6600, use a straight
modem cable, 9-pin female to 25-pin male.
If connecting the D6680 Network Adapter’s CHANNEL 2 port to COM4/COM1 on the D6600, use a NULL
MODEM cable, 9-pin female to 9-pin female.
All non-Radionics Alarm Panels used with the NetCom system MUST use a Radionics C900TTL Dialer
Capture Module.
All Radionics 9000 Series Alarm Panels used with the NetCom system can use either the Radionics
D9133TTL-E Serial Interface OR C900TTL-E Dialer Capture Module.
Remote Programming (RAM) through the network is not possible if using the C900TTL-E with
Radionics 9000 Series panels.
To connect the D6600 NetCom over a Token Ring Network:
•
•
•
•
•
•
•
•
The Token Ring network MUST use a MAU (Multistation Access Unit, equivalent to an Ethernet Hub).
The Token Ring network MUST use Token Ring cables.
The D6200 host computer MUST have a properly configured Token Ring network interface card (NIC)
installed.
The D6600 Receiver/Gateway MUST be connected to the Token Ring network via a Radionics D6680-T
Network Adapter.
If connecting the D6680 Network Adapter’s CHANNEL 1 port to COM4/COM1 on the D6600, use a straight
modem cable, 9-pin female to 25-pin male.
If connecting the D6680 Network Adapter’s CHANNEL 2 port to COM4/COM1 on the D6600, use a NULL
MODEM cable, 9-pin female to 9-pin female.
All non-Radionics Alarm Panels that will be used with the NetCom system MUST use a Radionics C900TTLTR Dialer Capture Module.
All Radionics 9000 Series (D9412, D9112, D7412, and D7212) Alarm Panels that will be used with the
NetCom system can use either the Radionics D9133TTL-T Serial Interface OR C900TTL-TR Dialer Capture
Module.
Remote Programming (RAM) through the network is not possible if using the C900TTL-E with
Radionics 9000 Series panels.
•
RING IN and RING OUT must be connected together on the MAU of the Token Ring network.
The host computer used to setup the D6600 NetCom System:
•
Note:
Will be used to ARP and TELNET (both are DOS utilities that must be run from the DOS prompt) the D6680
Network Adapter, D9133TTL-X Serial Interface, or C900TTL-X Dialer Capture Module.
•
The host computer MUST have a properly configured Ethernet OR Token Ring network interface card (NIC)
installed (card dependent on network type).
•
The host computer MUST have the appropriate cables - Ethernet or Token Ring. Be sure to manually set the
Host Computer's IP address to an address that is acceptable to the particular class of the network.
All devices that will be using this network must have the same first three digits of the four-digit IP address. (For
the example above, all IP addresses would begin with 202.96.168.xxx. 'xxx' will be different for each device.)
© 2001 Radionics
D6600 NetCom System Guide
Page 13
46542C
D6600 NetCom
Communication System Overview
2.2
D6600 Receiver/Gateway NetCom Installation
Follow the steps below to correctly install the D6600 Receiver/Gateway.
BACKPLANE
1. Place the D6600
TELEPHONE LINE CARD TERMINATORS
CPU TERMINATOR CARD
Receiver/
(D6645 or D6645INTL)
(D6615)
Gateway in a
secure location
(Rack mount,
Desktop, etc.)
2. Remove the tie
wrap from the
receiver door
handle. Open the
door and remove
the packaging
foam from the
front of the CPU
Card.
AC/DC POWER SUPPLY
(D6630)
3. Verify CPU Card
and Line Card
connections by
TELEPHONE LINE CARD
(D6640)
CPU CARD
gently pushing the
(D6610)
cards in their slots
CARD GUIDES
until they are
securely
DC/DC POWER SUPPLY
(D6631)
connected to the
CPU Terminator
Figure 4: D6600 Communications Receiver/Gateway Exploded View
Card and the Line
Terminator Card.
4. Plug the AC Power
D6672 COM1
D6615
D6645
Expansion Kit
CPU Terminator Card
Line Terminator Card
Cord into the rear of
the D6600. Plug the
other end into an
unswitched 120 VAC
1
60 Hz or 220 VAC
2
50 Hz line. Keep the
ON
OFF
power off to the
3
receiver.
4
Detection Systems Inc.
Fairport N.Y.
USA
B
A
T
T
E
R
Y
Input:
85-264 AC
47-63 Hz
2.5 Amps
External Parallel
Printer Connection
(25-pin)
Figure 5: D6600 Rear Panel
5.
6.
7.
Plug the telephone lines into the RJ-11 connectors on the Line
Terminator card (See Example 1).
Connect an External Parallel Printer (power off) to the 25-pin
connector, marked ‘PRINTER,’ on the CPU Terminator card.
Connect a D6680 Network Adapter (not included) to COM4, the top 9pin connector on the CPU Terminator card of the D6600 marked ‘COM
4.’ Use a straight modem cable if connecting to Channel 1 (the 25-pin
connector) of the D6680 Network Adapter. Use a NULL modem cable
if connecting to Channel 2 (the 9-pin connector) of the D6680 Network
Adapter.
RJ-11 connector
of Line 1
1
RJ-11 connector
of Line 2
2
3
4
Example 1: Connecting phone
lines to D6600
46542C
D6600 NetCom System Guide
Page 14
© 2001 Radionics
D6600 NetCom
Communication System Overview
8.
When connecting data terminal
equipment together (i.e. D6600
COM port to PC serial port), a
null modem cable must be used.
One possible configuration for a
null modem cable is:
DTE
DB-9 Pin
DTE
DB-9 Pin
1
1
2
2
3
3
4
4
5
5
6
6
7
7
8
8
9
9
Figure 6: Null Modem Configuration
(Option 1)
Note:
DTE
DB-9 Pin
DCE
DB-25 Pin
1
8
2
3
3
2
4
20
5
7
6
6
7
4
8
5
9
22
1
2
6
3
7
4
8
5
9
1 = CD (Carrier Detect)
2 = RX (Receive Data)
3 = TX (Transmit Data)
4 = DTR (Data Terminal Ready
5 = SG (Signal Ground)
6 = DSR (Data Set Ready)
7 = RTS (Request to Send)
8 = CTS (Clear to Send)
9 = RI (Ring Indicator)
Figure 8: Null Modem Pinout
Description
Figure 7: Null Modem Configuration
(Option 2)
9.
Using an appropriate (Ethernet or Token Ring) network cable, connect the 10 Base-T connector of the
D6680 Network Adapter to network drop (This is usually a RJ-45 wall plate).
10.
If a COM1 expansion package is installed in the D6600 Receiver (see next section for installation
instructions), then connect a second D6680 Network Adapter (not included) to COM1. (A D6672 COM1
Expansion Kit must be separately ordered and the D6672 must be installed. See the D6672 Installation
Sheet for details.) COM1 is the 9-pin connector to the left of the CPU Terminator card looking at the rear of
the unit. Use a straight modem cable if connecting to Channel 1 (the 25 pin connector) of the D6680
Network Adapter. Use a NULL modem cable if connecting to Channel 2 (the 9-pin connector) of the D6680
Network Adapter. (See Figure 6 or Figure 7 for pin outs).
11.
If you are utilizing a second D6680 Network Adapter, connect the 10 BASE T connector of the second
D6680 Network Adapter to the network drop (This is usually a RJ-45 wall plate).
12.
Connect a PC with an appropriate (Ethernet or Token Ring) network interface card (NIC) to the network
using a 10 Base-T Ethernet cable.
This PC is connected to the network for D6200 Software applications, for configuring the D6680 Network
Adapters, and setting up any D9133TTL’s or C900TTL’s.
13.
Note:
When connecting data terminal
equipment to data communication
equipment (i.e. D6600 COM port to a
modem), a modem cable should be
used (i.e. straight-through cable):
OPTIONAL: Connect a second PC with an appropriate (Ethernet or Token Ring) network interface card
(NIC) to the network using an appropriate network cable.
This PC is connected to the network for Automation software applications such as the products from MAS, ABM,
BOLD, S.I.S., SIMS, etc.
14.
Using the supplied 16 VAC wall plug-in transformers, apply power to the network adapter(s).
15.
Turn power on to the D6600.
16.
After the System is ready, use the up and down arrow keys to adjust the contrast if needed.
17.
The first prompt will ask for a password. You should see:
ENTER PASSWORD: _
18.
Key in the default programming password,
then press the
M/E
key.
1. EVENT DATABASE
© 2001 Radionics
D6600 NetCom System Guide
Page 15
46542C
D6600 NetCom
Communication System Overview
Use the arrow keys to move through menus, press
19.
M/E
to enter a menu level, and CAN to exit a level.
Use the down arrow key go to Menu 2 CPU CONFIGURATION, then press the
M/E
key.
2. CPU CONFIGURATION
20.
Use the arrow keys to Menu 2.2 GLOBAL, then press the
M/E
key.
2.2 Global
21.
Use the arrow keys to Menu 2.2.1 Time Setup, then press the
M/E
key.
2.2.1 Time Setup
Current setting [00:15:32.]
22.
Key in the current time in 24-hour format (HH:MM:SS). Press the
23.
Use the arrow keys to Menu 2.2.2, Date Setup, then press the
M/E
M/E
key.
key.
2.2.1 Date Setup
Current setting [01/01/1980]
24.
Key in the current date in the following format: MM/DD/YYYY. Press the
25.
Press
CAN
M/E
key.
to exit through the menus. The display will then show:
05/22/2000 00:15:05
26.
The D6600 unit is now close to being ready to accept signals from digital dialers via the phone line.
ALTHOUGH THE D6600 IS CLOSE TO RECEIVING SIGNALS VIA THE TRADITIONAL PHONELINE,
OTHER D6600 PROGRAMMING STEPS MUST BE PERFORMED BEFORE THE D6600 CAN
COMMUNICATE TO THE NETWORK VIA THE NEWLY INSTALLED D6680 Network Adapter! THIS
PROGRAMMING CAN BE PERFORMED IN ONE OF TWO WAYS:
•
PROGRAM THE D6600’s INITIAL NetCom PARAMETERS VIA THE FRONT MOUNTED KEYPAD.
THIS IS THE METHOD RECOMMENDED BY RADIONICS.
Note:
•
46542C
The programming of the initial NetCom parameters via the front mounted keypad is covered
further on in Section 3.8 Configuring for Network Communication via a D6680 Network
Adapter.
PROGRAM THE FUNCTIONS FROM A HOST COMPUTER RUNNING THE D6200 SOFTWARE VIA
A DIRECT NULL MODEM SERIAL CONNECTION TO COM4 ON THE D6600. THIS OPTION IS NOT
PREFERRED BECAUSE THIS WOULD REQUIRE DISCONNECTING THE CABLE BETWEEN THE
D6680 AND THE D6600 THAT WAS JUST INSTALLED.
D6600 NetCom System Guide
Page 16
© 2001 Radionics
D6600 NetCom
Communication System Overview
2.3
Installation of the Optional D6672 Serial COM1 Expansion Kit
The following
instructions will assist
you in installing the
D6672 COM1
Expansion Kit (refer to
Figure 9 for assistance.)
Note:
D6615
CPU Terminator Card
D6645
Line Terminator Card
Detection Systems Inc.
Fairport N.Y.
USA
1
Location of installed
D6672 Serial COM1
Expansion Kit
2
After completion of the
ON
OFF
3
D6672 installation,
4
return to section 2.2
D6600
Receiver/Gateway
NetCom Installation,
“Blank Pate”
STEP #9.
5. Power down the
External Parallel
Printer Connection
D6600. Remove
(25-pin)
battery power.
Remove AC power.
Figure 9: D6600 Rear View (before installation of D6672)
Unplug the AC cord
from the outlet.
2. Remove the four screws from the blank plate on the rear of the receiver. The blank plate is the second plate
from the left when viewing the receiver from the rear.
3. Connect the COM1 connector cable to the 4-pin connector on the inside of the COM1 plate.
B
A
T
T
E
R
Y
Input:
85-264 AC
47-63 Hz
2.5 Amps
4.
5.
6.
7.
8.
2.4
Align the COM1 plate with the screw holes at the rear of the receiver. The COM1 9-pin connector should be
on the outside of the receiver.
Attach the COM1 plate to the receiver by securing the four screws at the corners of the plate.
From the front of the receiver, connect the other end of the COM1 connector cable to the 4-pin connector at
the front bottom corner of the CPU Card. The cable should be connected with the red wire on the top, and
the connector tabs facing toward the inside of the receiver.
Once the installation is complete, the rear of the receiver should resemble Figure 5.
To connect COM1 to the network please refer to the previous Section 2.2
D6600 Receiver/Gateway
NetCom Installation, Step #9.
Setting Up the Host Computer
If the computer you intend to use for programming the D6600, D6680, and the alarm panel network
adapters is already a functioning workstation within the network you are planning on utilizing, then
skip this section!
The host computer is defined as any computer or workstation that is properly configured and connected to the
network you plan on utilizing that will manage/administer the D6600 and other devices. Any existing desktop
computer or laptop on the network could be used. However, for security reasons, it is probably best the computer
be set aside and not used as a regular workstation. This computer will also be the computer on which you will
install the D6200 Software. The D6200 Software is used to program and administer the D6600 Receiver and
other devices.
If the host computer is new to the network the following steps MUST be performed:
®
®
1.
In Microsoft Windows operating system click on the
Start button and then go to Settings and Control Panel.
2.
Once the control panel is open, find and
double-click on the “Network” icon to launch
the Network control panel.
© 2001 Radionics
D6600 NetCom System Guide
Page 17
46542C
D6600 NetCom
Communication System Overview
3.
The network dialog box appears with three tabs:
Configuration, Identification and Access Control.
From the Configuration tab, scroll down the Network
components until you get to the TCP\IP protocol for your
Network Interface Card (NIC) which should look
something like this.
Note:
Most NIC cards will be displayed with the label
“Network Adapter.”
Note:
Be sure that you have selected the TCP/IP
protocol for the network adapter, not the adapter
itself.
Microsoft Protocol Icon
4.
Highlight the protocol icon for TCP/IP bound to your NIC card and click the
"Properties…" button.
5.
Select the IP address tab, then click the "Specify an IP address" radio
button.
6.
Enter an IP address and subnet mask
for the network you will be setting up,
such as 202.96.168.1.
Note:
Microsoft Adapter Icon
If you have any questions regarding the assignment of the IP
address or subnet mask, see the network administrator!
All devices that will be using this network will usually have the
same first three digits of the 4-digit IP address. (For example, all IP
addresses would be 202.96.168.xxx, where 'xxx' is different for
each device).
5.
Some files may have to be copied to the computer.
This may require Microsoft® Windows® operating
system disk for the appropriate version you are using.
6.
After copying the files, the PC may have to be restarted. If so, connect the Host PC's NIC card to the
network (hub/MAU) and restart the PC.
7.
After the reboot is completed, you should perform the following check to see if the previous procedures
were correctly entered.
Open a MS-DOS window by selecting Start à
Programs à MS DOS Prompt:
8.
46542C
Once the DOS Window appears,
type the command winipcfg
[ENTER].
D6600 NetCom System Guide
Page 18
© 2001 Radionics
D6600 NetCom
Communication System Overview
The IP Configuration window should appear:
Note:
Make sure that the Network Adapter is selected in
the first window, not a PPP adapter. Verify the IP
address, subnet mask, and whatever other
information is listed. (This information should
match the IP and subnet mask you assigned to
this computer in the previous steps).
IF YOU HAVE CHOSEN TO PROGRAM THE D6600’s INITIAL NetCom PARAMETERS VIA THE
DIRECT NULL MODEM SERIAL CONNECTION, THEN CONTINUE ON WITH THE FOLLOWING STEPS.
These steps are ONLY necessary if the host computer running the D6200 Software is connected to
the D6600’s COM4 port via a direct NULL modem serial cable!
9.
In Microsoft® Windows® operating system, click on
the Start button and then go to Settings and Control
Panel.
10
.
Once the control panel is open, find and
double-click on the “System” icon to
launch the System control panel.
9.
From the Device Manager tab, select Ports. Highlight
the COM port (usually COM1) used to connect the
D6200 Software to the D6600 COM4 port via a direct
connect NULL Cable.
10.
Highlight the port icon and
then click on the "Properties…"
button.
11.
Under the
Port Settings
tab, select
38400 bits
per second
baud rate
and then
click OK.
© 2001 Radionics
D6600 NetCom System Guide
Page 19
46542C
D6600 NetCom
Communication System Overview
2.5
Host Computer D6200 Installation
Follow these steps to install the Radionics’ D6200 Software on the Host PC.
1.
Insert the D6600
Communications
Receiver/Gatewa
y CD-ROM into
the host
computer’s CDROM drive.
or
Double-click on the
My Computer icon
or start Windows
Explorer then
double-click on the
letter of your CDROM to view the
CD-ROM files.
2.
Open the D6200 Programmer folder on the CD-ROM.
3.
Double click the D6200.exe icon to begin the installation process.
4.
Follow the installation instruction prompts given by the
computer to complete installation of the D6200 NetCom
programming software.
For more information on using the D6200 Programming Software
see Section 4.0 D6200 Programming Software Overview.
2.6
Host Computer D6200 Security Key Protection Overview
Follow these steps to install the Radionics’ D6200 Software on the Host PC. The D6200 Software is available
from Radionics and is ordered under the part number D6600 CD-XXXX (XXXX is the current revision number).
The D6200 Software comes on the installation CD equipped to administer up to 10 client accounts.
To administer more than 10 client accounts an external Security Key
must be installed on the host computer.
A Security Key is a device that attaches to a computer to control access
to a particular application or features of an application. Security Keys
also provide the most effective means of copy protection.
The Radionics D6201 Security Key attaches to a PC's parallel port. The
D6201 Security Key passes through all data coming through the port so
it does not prevent the port from being used for other purposes (such as
a printer).
There are multiple versions of the
D6201 Security Key. The version
necessary for the application you
are using is dependent on the
number of client accounts you
plan to administer.
Radionics Security
Key part number
D6201-0500
D6201-3600
D6201-SUPV
Figure 10: D6201 Parallel Port
Security Key
Application
Allows administration of up to 500 client accounts
Allows administration of up to 3600 client accounts
Allows administration of multiple D6600’s from one
host computer
Table 6: D6201 Security Key Part Numbers
46542C
D6600 NetCom System Guide
Page 20
© 2001 Radionics
D6600 NetCom
Configuration of the D6680 Network Adapter(s)
3.0
Configuration of the D6680 Network Adapter(s)
The Radionics D6680 is a two-channel network adapter. The D6680 includes a cable for connecting to
Channel 1, and for most NetCom installations, only one channel needs to be used and configured. The examples
below illustrate configuration of Channel 1 only.
3.1
Factory Default IP Address
The default IP address is not used for any of the Radionics NetCom functions. This information is
supplied only to assist the technician if a failure of the ARP commands occurs. It could be useful to
know the default IP address should the ARP commands fail. However, this occurrence is highly
unlikely. Contact Radionics Tech Support or a NetCom engineer if you have further questions!
The D6680 Network Adapters
are shipped with the following
default IP addresses:
Radionics
Model Number
Application
D6680E120
D6680E230
Network Adapter for Ethernet networks
(Either USA 120 Volts or International
230 Volts)
194.039.078.254
D6680T120
D6680T230
Network Adapter for Token Ring
networks (Either USA 120 Volts or
International 230 Volts)
194.039.079.254
Default IP
Address
Table 7: D6680 Default IP Addresses
3.2
Identifying the MAC Hardware Address
Once everything is verified for proper setup per the previous steps it is
time to program the IP address of the D6680 Network Adapter. The first
step is finding and writing down the MAC or hardware address of the
D6680 Network Adapter. MAC is short for Media Access Control
address, a hardware address that uniquely identifies each node of a
network. This address is hard-coded into the D6680 Network Adapter
during its manufacture and cannot be changed. This address is 6 bytes
(which is 12 digits) in length and can be found on a label on the D6680
Network Adapter.
The MAC or hardware address for the D6680 Network Adapter is found
on the label under the words ‘Ethernet Address.’
Note:
It is a good idea to record this 12-digit number for future reference.
3.3
Obtaining an IP Address
MAC
Address
Figure 11: D6680 Network Adapter
Label
Go to the network administrator with the MAC address of the D6680 Network Adapter. The network administrator
will assign your D6680 network adapter an IP Address. An IP Address is an identifier for a computer or device on
a TCP/IP network. Networks using the TCP/IP protocol route messages based on the IP address of the
destination. The format of an IP address is a 32-bit numeric address written as four numbers separated by
periods. Each number can be 0 to 255.
For example,
could be an IP address. Within an isolated network, you can assign IP
addresses at random as long as each one is unique. However, connecting a private network to the Internet
requires using registered IP addresses (called Internet addresses) to avoid duplicates.
© 2001 Radionics
D6600 NetCom System Guide
Page 21
46542C
D6600 NetCom
Configuration of the D6680 Network Adapter(s)
3.4
Initial Assignment of the IP Address using ARP
Radionics recommends that you read this entire step before beginning. Also, make sure there is power to the
D6680 Network Adapter and the Ethernet Network RJ45 connection is in place.
The D6680 Network Adapter being configured and the PC being used to configure it must both be on
the same gateway (the device that connects the LAN to the WAN) in order to telnet (the process of
using the TELNET program to communicate with the D6680 Network Adapter and establish its
communications configuration parameters) into the configuration program. The gateway may be
called a router, hub, or MAU. After the D6680 Network Adapter has been configured and it has an IP
address - you will be able to telnet in to change configuration parameters from anywhere on the
network.
Once you have the IP address and the network administrator confirms that it is ready, open up the MS-DOS®
prompt on the host computer tied into the network that is to be used. You will now need to use the ARP program
to assign the D6680 Network Adapter its new IP address.
ARP, short for Address Resolution Protocol, is a program used to convert an IP address into a hardware address
such as a MAC. The ARP program is installed into the C:\WINDOWS directory by default by Microsoft®
Windows® 95, Windows® 98, Windows® 2000, and Windows® NT, during install.
At the MS-DOS® prompt (usually
C:\WINDOWS), the following
command syntax is to be used:
arp –s xxx.xxx.xxx.xxx zz-zz-zz-zz-zz-zz
xxx.xxx.xxx.xxx
is the IP address
assigned to the D6680
Network Adapter by
the Network
Administrator
The following steps detail the assignment of an IP address to a
D6680 Network Adapter, using the ARP program. The following
MAC address is used as an example.
zz-zz-zz-zz-zz-zz
is the MAC hardware
address found on the
label of the D6680
Network Adapter.
Example MAC Address
REMEMBER THAT THE IP AND MAC ADDRESSES USED IN THIS EXAMPLE WILL NOT BE THE
SAME AS THE NUMBERS YOU ARE USING. THIS IS FOR DEMONSTRATION ONLY.
1.
Open a MS-DOS® window by selecting Start à Programs à
MS- DOS Prompt:
A DOS window will appear.
2.
Type the ARP –s command with
the IP Address and the MAC
Hardware address from above.
For this example the IP address to
assign is 190.200.128.220 and the
MAC hardware address is:
00-20-4a-12-04-0e
46542C
D6600 NetCom System Guide
Page 22
© 2001 Radionics
D6600 NetCom
Configuration of the D6680 Network Adapter(s)
3.
If following your command the computer
responds with a prompt of C:\WINDOWS> (see
Example 2), then the address was accepted.
Note:
3.5
There is no indication that the operation
has been performed properly. The
absence of an error message is your
indication that the ARP command was
successful.
Example 2: arp -s
Verification that the IP Address Assigned is Correct
To verify that the IP Address that was just assigned is correct, follow the steps below.
REMEMBER THAT THE IP AND MAC ADDRESS USED IN THIS EXAMPLE WILL NOT BE THE SAME
AS THE NUMBERS YOU ARE USING. THIS IS FOR DEMONSTRATION ONLY!
1.
It is now necessary to verify that the IP address is
assigned to the D6680 Network Adapter and is
recognized by the network.
At the DOS prompt type:
arp -g [ENTER]
2.
Figure 12 shows the Internet address (IP
ADDRESS) and the corresponding Physical
Address (MAC hardware address). The first line
of the arp table above shows that the network
recognizes the D6680 Network Adapter with a
MAC address of 00-20-04a-12-04-0e and has
temporarily assigned the IP address
190.220.128.220 to it.
Figure 12: arp –g table
Because the D6680 Network Adapter is designed to always have the same IP address, the Type should be
“static”, as shown in Figure 12. The network uses the arp table to identify the devices and route signals. The
number of devices and other types like “dynamic” will depend on the network and the number and type of
devices that reside on it. The important thing is to identify the device you are installing and verify that it now has
an IP address assigned.
© 2001 Radionics
D6600 NetCom System Guide
Page 23
46542C
D6600 NetCom
Configuration of the D6680 Network Adapter(s)
3.6
Using Telnet to Finish the Configuration
Once the IP address has been verified to be correct, the TELNET utility must be used to finish the configuration.
1.
Open a DOS window by selecting Start à Programs à MSDOS Prompt:
2.
At the DOS prompt (usually C:\windows), type
telnet [ENTER] .
The TELNET application window will appear.
3.
Click on the Connect pull-down menu and then Remote System.
4.
The Connect window will appear.
5.
Type the IP address of the D6680 Network Adapter into the Host Name
field (this is the IP address that was assigned to the D6680 Network
Adapter in the previous section).
Enter 1 into the Port field and leave the TermType field at "vt100"
REMEMBER THAT THE IP AND MAC ADDRESSES USED IN THIS EXAMPLE WILL NOT BE THE SAME
AS THE NUMBERS YOU ARE USING. THIS IS FOR DEMONSTRATION ONLY.
6.
Click Connect. An error message will appear saying
"’Connect Failed’ Could not open a connection to
190.200.128.220.”
7.
Click [OK] and the TELNET window will appear again.
Click on the Connect menu and choose Remote System again.
Enter 9999 into the Port field, leaving the Host Name and TermType
fields the same. Click the Connect.
46542C
D6600 NetCom System Guide
Page 24
© 2001 Radionics
D6600 NetCom
Configuration of the D6680 Network Adapter(s)
8.
The program will prompt you to press [ENTER] by
displaying "Press Enter to go into setup mode."
Press [ENTER].
If you do not press [ENTER] within 5 seconds of seeing the above message, you
will be disconnected. If this occurs, simply return to Step 1 (in this section).
9.
If you pressed [ENTER] within 5
seconds, then you should see the
following screen (See Figure 13).
Figure 13: Telnet session
10.
Press [0] + [ENTER] to set up the basic Server Configuration. You are now required to enter the desired
IP address.
If the D6680 Network Adapter has been programmed with an IP
address in the past, it will be displayed in parentheses.
For example, if this D6680 Network Adapter were originally programmed to IP address 190.200.128.152,
we would be changing it to address 190.200.128.220.
11.
To properly program the IP address
190.200.128.220, the following keys
would be entered:
190 [ENTER] 200 [ENTER] 128 [ENTER] 220 [ENTER]
Note:
12.
REMEMBER THAT THE IP ADDRESS USED IN THIS EXAMPLE WILL NOT BE THE SAME AS THE
NUMBERS YOU ARE USING. THIS IS FOR DEMONSTRATION ONLY!
When asked to set the Gateway address,
type N [ENTER] or Y
[gateway address]
[ENTER]
13.
Figure 14: Telnet session – Gateway Address
If the Netmask needs to be changed from the default, enter the number of bits that correspond to the
Netmask your network is using (see Table 8).
See your network administrator for more information.
Press [ENTER] after entering the correct number of bits for the Netmask.
© 2001 Radionics
D6600 NetCom System Guide
Page 25
46542C
D6600 NetCom
Configuration of the D6680 Network Adapter(s)
Number of
Host Bits
1
2
3
4
5
6
7
8
9
10
Netmask
255.255.255.254
255.255.255.252
255.255.255.248
255.255.255.240
255.255.255.224
255.255.255.192
255.255.255.128
255.255.255.0
255.255.254.0
255.255.252.0
Number of
Host Bits
11
12
13
14
15
16
17
18
19
20
Netmask
255.255.248.0
255.255.240.0
255.255.224.0
255.255.192.0
255.255.128.0
255.255.0.0
255.254.0.0
255.252.0.0
255.248.0.0
255.240.0.0
Number of
Host Bits
21
22
23
24
25
26
27
28
29
30
31
Netmask
255.224.0.0
255.192.0.0
255.128.0.0
255.0.0.0
254.0.0.0
252.0.0.0
248.0.0.0
240.0.0.0
224.0.0.0
192.0.0.0
128.0.0.0
Table 8: Netmask Address
14.
You will be prompted to change the TELNET password, press [N] for the default of "No". This screen will
now show the Setup Mode screen you saw previously in Figure 13.
Be careful NOT to enter a password into the D6680 Network Adapter by accident or select [Y] to
change the password. If you do, do not lose the password. Otherwise, you will not be able to reenter a TELNET programming session with the D6680. The unit will have to be sent back to the
factory and reconditioned before it will be able to receive another TELNET session.
15.
Now press [1] [ENTER] to go into setup Channel 1
configuration. The following will be displayed:
You must set the baud rate of the D6680 to 38400.
Enter 38400 [ENTER] to change it.
16.
You should then see:
Press [ENTER] to accept the default of (4C). If it doesn't show that, type 4C [ENTER] to change it.
17.
You should then see:
Press [ENTER] to accept the default of (00). If it doesn't show that, type 00 [ENTER] to change it.
18.
You should then see:
For the Port number, type a number that is between 2000 and 10000 followed by [ENTER].
The port number can be compared to a phone extension on a PBX system. For our example we will be
using D9133TTLs and C900TTLs all set up on port 7700.
Be sure to set the port number for Channel 1 different from the port number for Channel 2 (displayed
in the TELNET configuration screen).
19.
You should then see:
Press [ENTER] to accept the default of (CC). If no default is shown, type CC [ENTER] to change it.
20.
You should then see:
Type 00 [ENTER]
46542C
D6600 NetCom System Guide
Page 26
© 2001 Radionics
D6600 NetCom
Configuration of the D6680 Network Adapter(s)
Note:
21.
The rest of these parameters will be
seen only if this is a new D9133TTL
that has never been programmed
before If your unit has been
programmed before you will
automatically arrive at the “save
changes and exit” function (next
step).
Parameter
Remote port (00000)
Pack Cntrl (00)
Send Char 1(00)
Send Char 2 (00)
Action required
Press [ENTER] to leave at:
0000
00
00
00
Table 9: New D9133TTL-E Parameters
Press 9 [ENTER] to save changes and exit the TELNET session. A message
is displayed that the connection was lost. Click OK and close the TELNET
window.
Configuration of the D6680 Network Adapter is complete. Perform this procedure again for any additional
D6680’s you may have.
© 2001 Radionics
D6600 NetCom System Guide
Page 27
46542C
D6600 NetCom
Configuration of the D6680 Network Adapter(s)
3.7
Programming the D6600 Communications Receiver/Gateway Overview
The D6600 Receiver is shipped with factory default program parameters and features already installed.
Descriptions of the program items are found in the D6600 Program Entry Guide (P/N 39962). Many of the
operational features of the D6600 can be altered through programming options. The programming options you
choose will depend on the type(s) of peripheral reporting device(s) used in your central station (i.e. external
printer or automation computer), the supervision characteristics for these devices, the type of communicators
reporting to the receiver, and the number and type of receiving lines in use.
3.8
Configuring for Network Communication via a D6680 Network Adapter
The following steps will allow the D6600 to communicate using a D6680 Network Adapter on a network.
Note:
For this to function, a properly configured D6680 Network Adapter must be installed per the previous sections. If
they are not installed, then further D6200 software programming via the network is not possible.
1.
Enter programming mode from the front panel keypad of the D6600 by pressing M / E
M/E .
Note:
To change any programming parameter, follow this syntax: Press M / E , then enter the desired value, then
press M / E again to store.
key, scroll down to section 6 - NETWORK CONFIGURATION, then press M / E
2.
Using the
3.
Press
4.
Verify that section 6.1.1 COM4 Baud Rate is set to a value of 9 then press M / E
5.
Verify parameters 6.1.2 COM4 Data Bit is set to 8 (default) then press M / E
6.
Verify that section 6.1.3 COM4 Parity is set to 0 (default) then press M / E
7.
Verify that section 6.1.4 COM4 Stop Bit is set to 1 (default). Change if necessary.
8.
Set 6.1.5 COM4 Network Port Adapter Enabled to a value of 1 then press M / E
.
M / E again to enter section 6.1 - COM4 Network Adapter. then press M / E .
.
. Change if necessary.
. Change if necessary.
.
If not set to 1, press M / E , then enter [1], then M / E .
46542C
D6600 NetCom System Guide
Page 28
© 2001 Radionics
D6600 NetCom
Configuration of the D6680 Network Adapter(s)
9.
IF YOU HAVE NOT INSTALLED THE OPTIONAL D6672 SERIAL COM1 EXPANSION KIT SKIP THIS
STEP!!
If you have COM1 installed, press CAN
Network Adapter.
10. Press CAN , then
twice.
then
and repeat steps 4-7 above for section 6.2 COM1
twice to scroll down to section 6.4 D6200 Network Connection. Press M / E
11. Enter the IP address of the Host PC that will be running the D6200 Software.
When entering an IP address through the keypad of the D6600, an alpha character, either
pressed to enter a decimal point in the IP address.
For example, an IP address 202.96.168.127 may be entered as 202
96
168
-
, must be
127, then press
M/E .
12. Press the
twice to go to 6.4.3 Network Programming Enable. Verify it is set to 1.
If not set to 1, press M / E , then enter [1], then
13. Press CAN
3.9
M/E .
multiple times to return to the idle stage (time and date on the LCD).
Editing Program Parameters
The D6600 must have account database information entered into it before it can be ready to manage and receive
signals from alarm panels connected to D9133TTLs or C900TTLs. Radionics recommends programming this
information using the D6200 Programming Software.
The D6200 is a GUI, a Graphical (rather than purely textual) User Interface. The D6200 is a GUI that allows the
user to perform the following functions:
•
Retrieval of data files from the D6600 (CPU/Host/Network, Account Database, or Line Card)
•
Editing of the D6600 data files (CPU/Host/Network, Account Database, or Line Card)
•
Sending the files back to the D6600 (CPU/Host/Network, Account Database, or Line Card)
•
Upgrading the firmware installed in the D6600 (CPU, System, or PSTN line cards)
Section 4.0
D6200 Programming Software Overview provides information and procedures on how to
accomplish these tasks.
© 2001 Radionics
D6600 NetCom System Guide
Page 29
46542C
D6600 NetCom
Configuration of the D6680 Network Adapter(s)
Notes:
46542C
D6600 NetCom System Guide
Page 30
© 2001 Radionics
D6600 NetCom
D6200 Programming Software Overview
4.0
D6200 Programming Software Overview
The D6200 is a PC-based application for Microsoft® Windows® 95, Windows® 98, Windows® 98 Second Edition
and Windows® NT that allows the user to view, change, upload and download all of the D6600’s programming
parameters via a network OR the receiver’s and the host’s serial COM ports.
Figure 15: D6200 Programming Software main screen
The D6600 programming is loaded via three different files:
•
CPU/Host/Network File
•
Account Database File
•
Line Card File
These three files can be modified, uploaded or downloaded separately. Be sure to review the previous
Section 2.2
D6600 Receiver/Gateway NetCom Installation before connecting or using the D6200. See
Section 4.7
Opening/Editing D6600 Configuration Files on Host PC for details on working with these files.
4.1
D6200 Software Password Protection
The D6200 Programming/Administration Software is password protected. To log in, the user must enter the
correct User ID and password upon opening the D6200 Software. Only one user can be logged on at a time. To
log off select File then Log Off.
A window will pop up prompting the user for the correct User ID and
Password necessary to log on again.
Note:
The default User ID is RAD. The default Password is RAD. The D6200
passwords do not correspond with the D6600 passwords.
© 2001 Radionics
D6600 NetCom System Guide
Page 31
46542C
D6600 NetCom
D6200 Programming Software Overview
4.2
Upgrading the Firmware Files in the D6600 via the D6200 Software
Upgrading the Firmware files is recommended only if the version number of the Firmware files in the D6600 is
not the latest revision.
4.2.1
Finding the Firmware version number
There are two ways to check the software versions loaded in the receiver:
•
Use of the 6200 Programming Software.
•
Through the keypad on the receiver.
Through D6200 Programming Software
1.
Click on User Interface menu, and select Software Version.
2.
This will display the CPU and Line Card software versions on
your PC.
Through the D6600 keypad
You will see this screen on the D6600:
46542C
1.
Press M / E and enter the password. The default password is 6600. After the password is entered, the
display will read:
2.
Press
3.
The display will show the CPU card software version.
to scroll down to 5. Software Version and press M / E .
D6600 NetCom System Guide
Page 32
© 2001 Radionics
D6600 NetCom
D6200 Programming Software Overview
4.
Press
to scroll down through the line cards 1 to 8 to display their software versions.
to
5.
Press CAN
to return to the main menu.
Note:
This menu option is very helpful to Radionics Customer Support when trying to troubleshoot problems.
4.2.2
Firmware Files Upgrade Procedure
Refer to Section 7.0 of the D6600 Release Notes (P/N: 39660) for important upgrade information.
If the receiver software files are not of the latest revision(s), they should be upgraded. It is recommended that the
user upgrade the firmware within the D6600 via the D6200 Software when the system is first started up. This
insures that you are using the most recent revision of firmware. After that, the D6600 can be upgraded whenever
upgrades are made available. To upgrade the firmware use the following procedure:
Note:
1.
To browse the contents of the CD, use Microsoft® Windows®
Explorer (or Microsoft® Windows® NT Explorer in an NT
environment). To access Windows Explorer go to Start à
Programs à Windows Explorer.
2.
Insert the D6600 CD into your CD ROM drive. It contains the files
necessary to perform the upgrade. Use Windows Explorer to
navigate over to the CD-ROM drive, then open the D6200
Programmer folder. Open the Firmware subfolder inside the D6200
Programmer folder. You should see three more subfolders inside of
the Firmware folder.
The version number 01.01.01 used in this example is for demonstration only. The version number may be
different depending on the release version of the software CD you have.
The three subfolders as shown in the
example are identified by name,
contents, and function in the following
table:
XX.XX.XX is the version number of the
software.
Folder Name
CPU-D6610
VXX.XX.XX
PSTN-D6640
VXX.XX.XX
System Files
Contains
CPU main operational firmware for the
D6600 Receiver
Line Card Configuration firmware for the
D6600 Receiver
System Files firmware for the D6600
Receiver
Table 10: Firmware Folder Contents
© 2001 Radionics
D6600 NetCom System Guide
Page 33
46542C
D6600 NetCom
D6200 Programming Software Overview
46542C
3.
Double click the CPU-D6610 V01.01.01
subfolder to open it. The folder icon should
change to an open folder. In the right pane of
the Explorer window, you should see the CPU
firmware file, CPU.exe
4.
Double click the CPU firmware file. A window should then open that
tells you that by clicking the OK button, the software will be installed
on your computer. Click OK.
5.
A window will then briefly display identifying that the extraction process is being performed.
6.
Once the extraction of the CPU software file is complete, the window
will disappear. Loading the D6600 CPU software from the CD to your
computer is now complete
7.
You must now launch the D6200 Software. It will be used to load the
newly extracted software into the D6600. After the program initiates,
click on the Programming and select Software Upgrade Wizard.
8.
A window will then be displayed. The program
must then be told which software files you
would like to send to the D6600. Select CPU
files then click ‘Next’.
9.
After selecting the file you wish to upgrade, see
section 7.0 of the D6600 Release Notes (P/N:
39660), click Next. A warning window will be
displayed that instructs you to make sure you
are upgrading the proper files.
D6600 NetCom System Guide
Page 34
© 2001 Radionics
D6600 NetCom
D6200 Programming Software Overview
10.
Click Yes to continue. Next a window will be displayed that will provide real-time updates of the software
loading process.
In order for the Remote Execute Software command to be executed, the Event Buffer in the D6600
Receiver must be cleared (no pending events). If necessary, press [Acknowledge] on the front of the
receiver to clear the events out of the buffer.
11.
Now you must command the D6600 to execute the software upgrade within the
receiver. To do this, click on Programming menu, then Remote Execute
Software.
12.
The D6200 Software will then display a
prompt, advising you of the intended
operation. Click Yes to complete the software
upgrade.
13.
To load the System Files software from Windows Explorer,
navigate to the correct directory and then double click on the
System Files subfolder to open it on the CD-ROM. The folder
icon should change to an open folder.
14.
Look to the right hand side window. You should see a System
Files firmware file.
15.
Double click the System Files software file. A window should
then open that tells you that by clicking the OK button, the
software will be installed on your computer. Click OK.
A window will then briefly display identifying that the extraction
process is being performed.
Once the extraction of the System Files file is complete, the
window will disappear. Loading the D6600 System Files
software from the CD to your computer is now complete.
16.
Click on the Programming menu and select Software Upgrade
Wizard. The Upgrade wizard window will appear.
17.
The program must then be told which software
files you would like to send to the D6600. Select
System Files then click Next.
A window will be displayed that will provide realtime updates of the software loading process.
18.
It is now necessary to turn the D6600 Receiver power OFF and then ON for the System Files to take
effect.
19.
Return to Windows Explorer and double click on the PSTN-D6640
subfolder to open it on the CD-ROM. The folder icon should change
to an open folder.
© 2001 Radionics
D6600 NetCom System Guide
Page 35
46542C
D6600 NetCom
D6200 Programming Software Overview
20.
In the right hand side window you should see a PSTN firmware file
(PSTN.exe).
Double click the PSTN firmware file. A window should then open that
tells you that by clicking the OK button, the software will be installed
on your computer. Click OK.
A window will then briefly (3 seconds) display identifying that the
extraction process is being performed.
Once the extraction of the PSTN software file is complete, the
window will disappear. Loading the D6600 PSTN software from the
CD to your computer is now complete.
21.
Click on the Programming menu and select Software Upgrade
Wizard. The Upgrade wizard window will appear.
22.
The program must then be told which
software files you would like to send to the
D6600. Select Line Card Files then click
Next.
Line Card Files will take effect after all the
lines have been re-initialized. This happens
automatically after the Line Card Files have
been downloaded to the receiver.
46542C
D6600 NetCom System Guide
Page 36
© 2001 Radionics
D6600 NetCom
D6200 Programming Software Overview
4.3
D6200 Program Access Rights - Restricting Access for Low Level Users
Users of the D6200 Programming/
Administration Software may be
granted access rights to varying D6200
menu options. This is for security
reasons, as it may be necessary for a
user to have selective access to
administration of the D6600 database.
However, you may choose to restrict
that access to certain areas. When
adding or editing users from the User
Management window, access rights
are chosen from one of four
categories: All, All except User
Management, Read/Off Line
Modification, & User Defined. If no
access rights are designated, the user
access rights default to Read/Off Line
Modification (see Table 11 for an
explanation of access level rights).
Level
#
Access
Rights Level
Explanation of Available Access
1
All
User can access all D6200 menu options
2
All Except
User
Management
Users can access all D6200 menu options
except user management
3
Read/Off Line
Modification
Users can read configurations from D6600
and modify parameters but cannot
program the D6600
4
User Defined
If the User Defined access category is
selected, the user making the category
can then select or remove any of the
menu options by double clicking on the
menu title listed. A check mark indicates
that the user has been granted access to
the item; no check mark indicates the user
has been denied access to that option
Table 11: Access Level Descriptions
4.4
D6200 User Management - Adding Authorized Administrator Users
In the D6200 Software, User Names, Passwords and Access Rights can be added,
edited or deleted. To do so, click on the Settings menu from the D6200 interface
and select User Management.
A Password Check window will appear. Enter the
correct user ID and password.
The same user ID and password must be used that
was used to log into the D6200. User names and
passwords are not case sensitive. If the correct name
and password is entered, the User Management
window will pop up and display all user names and
passwords.
Master User (RAD) access rights cannot be edited, nor can the master user be deleted. To change the
master password, use the Settings/Change Password menu.
© 2001 Radionics
D6600 NetCom System Guide
Page 37
46542C
D6600 NetCom
D6200 Programming Software Overview
4.4.1
Adding a User
To add a user, follow the steps below.
4.4.2
1.
Click Add.
2.
Enter the user name and password, and select the user’s
access rights.
3.
Click OK.
4.
Click Close and the changes will be automatically saved.
Editing an Existing User
To edit a user name, password or access rights, follow the steps below.
1.
Click on the appropriate cell to edit a user name, password
or access rights.
Click Modify, allowing the user to modify the current value.
4.4.3
2.
Make the appropriate changes, then click OK.
3.
Click Close and the changes will be automatically saved.
Deleting an Existing User
To delete a user,
1.
46542C
Click on the appropriate cell to select a user to be deleted.
D6600 NetCom System Guide
Page 38
© 2001 Radionics
D6600 NetCom
D6200 Programming Software Overview
2.
Click Delete.
A window will pop up to confirm the deletion.
3.
4.5
Click Yes.
D6200 Save and Restore User Management Files
Once the user configurations have been completed, click the Close button. This will save the user Configuration
file to a hidden file in the D6600 Receiver. This file can be advantageous when performing D6200 upgrades, so
that all user configurations can be updated. After a new version of the D6200 has been installed, click the
Restore button in the new D6200 Software, and the previously setup user configurations will now be loaded into
the new D6200.
4.6
Changing User Password
The currently logged in user can change his/her password at anytime. To do so, follow the steps below.
Note:
1.
Click on the Settings menu and select Change Password.
2.
A Password Check window will appear. Enter the User ID and
Password.
If the name and password entered are inconsistent with the currently logged in user, an error message will occur
and the operation will be canceled.
3.
If the correct name and password have been entered, a
Change Password window will pop up. Enter the new
password twice for verification.
4.
Click Change to accept the new password.
© 2001 Radionics
D6600 NetCom System Guide
Page 39
46542C
D6600 NetCom
D6200 Programming Software Overview
4.7
Opening/Editing D6600 Configuration Files on Host PC
Remember that the D6200 Software is nothing more than a tool for programming and administration of the
D6600. This tool allows you to read configuration files from the D6600, modify/edit them, and send them back to
the D6600.
Note:
The currently open
configuration file is displayed
at the bottom of the D6200
window (see Figure 16).
To make a change to the
configuration of the D6600
you can access a
configuration file in one of
two ways:
•
•
46542C
If the D6200 Software
has read the
configuration files from
the D6600 before, then
there will be a saved
version of the file on the
hard drive of the
computer running the
D6200 Software. To
read the files into the
D6200 Software to allow
editing, select File, then
select either Open CPU
Host and Network
Configuration or Open
Figure 16: CPU Configuration Window
Line Card
Configuration.
Then select the appropriate file to view or edit.
If the configuration files have never been read from the D6600 (new installation) then a generic version of
the files are located on the hard drive of the computer running the D6200 Software. (These generic files
were copied to the hard drive at the time of the D6200 installation.) To read the files into the D6200 software
to allow editing, select File, then select either Open CPU Host and Network Configuration or Open Line
Card Configuration. Then select the appropriate file to view or edit. For the CPU Host and Network
configuration file the generic file is named “default.cpu”. For the Line Card configuration file the generic file is
named “default.lnc”
D6600 NetCom System Guide
Page 40
© 2001 Radionics
D6600 NetCom
D6200 Programming Software Overview
4.8
Reading D6600 Configuration Files Using the D6200
To read the CPU Host and Network configuration files from the D6600, follow these steps.
1.
Click on the File menu and select Read Configuration from D6600.
A communication status window appears.
2.
Click OK to close the status window once
file transfer is complete.
The D6600’s CPU Host, Network and Line Card
configuration files are now located in the D6200
Program.
Keep in mind that these files now reside in RAM memory and are available for editing. However, if
any changes are made you must save a copy to the hard drive for archival purposes and you must
send the files to the D6600 to allow it to operate using the new configuration.
© 2001 Radionics
D6600 NetCom System Guide
Page 41
46542C
D6600 NetCom
D6200 Programming Software Overview
4.9
Viewing & Editing D6600 Configuration Files Using the D6200
Once a file is loaded into the D6200 using either one of the methods described above, the user can now view
and edit all of the parameters.
1.
Click on the User Interface menu from the D6200 Menu Bar and
select the CPU Configuration.
2.
Select configuration
file to be viewed or
edited.
Click the tabs of the
program selections
you wish to view or
modify, and enter
values. Value
changes will be
saved temporarily
when the window is
closed.
46542C
D6600 NetCom System Guide
Page 42
© 2001 Radionics
D6600 NetCom
D6200 Programming Software Overview
4.10
Sending Configuration Files from the D6200 PC to the D6600 Receiver
After modifying options from the D6200 interface you must send them over to the D6600.
To do this, click on the Programming menu, select Parameter Programming, and then select the appropriate
(CPU-HOST-Network or line card) parameters to be sent from the D6200 to the D6600 Receiver. Parameter
changes will take effect immediately at the receiver. For example, after modifications have been made to the line
card configuration file, it is necessary to send this file over to the D6600. If you do not send the files over to the
D6600 then no changes are made to the operation of the D6600.
4.11
Managing Field Unit Accounts in the D6600
Before the D6600 can begin to supervise Alarm panels connected to the network via Radionics D9133s or
C900s, the D6600 Account Database must be programmed to include information about each NetCom account.
The programming of field accounts is stored within the D6600 in a file called the Account Database File. This file
holds all of the necessary information the D6600 needs to process signals and manage/supervise field accounts.
The D6200 allows the user to view, change, upload and download all of the D6600’s programming parameters
via the receiver’s and the Host PC’s serial comports, or network connections. Through the D6200 software the
user can view the status of all accounts in the database, add accounts, edit accounts, delete accounts, and
configure network operations.
Note:
Connect D6200 software to the network through the COM4 or COM1 port of the D6600.
All account database configurations will be lost when the D6600 is rebooted. Be sure to save all
database configuration changes to the “ACTXX.DB” file with the D6200. The database must then be
reloaded into the D6600 after the D6600 has been rebooted.
To make a change to the Account Database of the D6600 you must first open the file into the D6200.
4.11.1
Previous Reading of Account Database
If the Account Database file has been read by the D6200 Software from the D6600 before, then there will be a
saved version of the file on the hard drive of the computer running the D6200 Software. To read the files into the
D6200 Software to allow adding, deleting, or editing,
1.
Click on the NetCom menu, then select either Open Account
Database or Read Account Database from the D6600.
2.
Select the appropriate file to view or edit.
Click Open.
4.11.2
First Time Reading of Account Database
If the Account Database file has never been read from the D6600 (new installation), then a generic version of the
Account Database is located on the hard drive of the computer running the D6200 Software. (This generic file
was copied to the hard drive at the time of the D6200 installation.) To read the file into the D6200 Software to
allow editing, follow these steps:
1.
Click on the NetCom menu, then select Open Account
Database.
© 2001 Radionics
D6600 NetCom System Guide
Page 43
46542C
D6600 NetCom
D6200 Programming Software Overview
2.
The select the generic Account Database file ACT00.db.
Click Open.
4.11.3
Adding an Account in the Database
To add an account in the current database in the D6200,
1.
Select NetCom menu, then Account Database Configuration.
An Account Database window will appear.
2.
The Account Database file
shows all of the networked
field accounts programmed
into the D6600. From here
you can add, delete, or edit
any of the accounts.
A. Search functions – see
Table 12 and Section
4.12.1
Searching
the Account Database.
A
B
C
B. Account Operations –
see Table 13
C. See Table 14 for a description of each column in the table.
46542C
D6600 NetCom System Guide
Page 44
© 2001 Radionics
D6600 NetCom
D6200 Programming Software Overview
Section
Search by key field
Field
Search by
Description
Allows searching by the following parameters:
•
•
•
•
•
Search by IP Address
Search by combined values
Find value
IP Address
Virtual account
Virtual line
Enable
Panel poll rate
Account Number
•
Zip
Administrator
•
Phone Number
Virtual Account
•
Fax Number
Panel Type
•
Contact 1 to Contact 5
Panel Communication
•
Contact 1 Phone to
Format
Contact 5 Phone
Allows searching by a specific text string
Allows searching by a specific IP address
Allows searching by a specific Virtual account
Allows searching by a specific Virtual line from 0 to 32
Allows searching by disabled (0) or enabled (1)
Allows searching by specific poll rates (see Poll Rate in
Table 14.
Table 12: Account Database Configuration – Search Options
Buttons
Name
Add Account
List All Accounts
Description
Adds a new account to the database. See Section 4.11.3
Adding an Account in the Database.
Makes a copy of an existing account. See Section 4.11.5
Copying Account Information.
Edits the selected account. See Section 4.11.4
Editing the
Account Database.
Deletes the selected account from the database. See Section
4.11.6 Deleting an Account from the Database.
Lists all the accounts in the database.
Save Account as
Saves the selected account under a new name.
Exit database
Exists the account database configuration and returns to the main
D6200 screen.
Copy Account
Edit Account
Delete Account
Table 13: Account Operation Buttons
© 2001 Radionics
D6600 NetCom System Guide
Page 45
46542C
D6600 NetCom
D6200 Programming Software Overview
Column
IP Address
Virtual Account
Virtual Line
Enable
Poll Rate
Description
The IP address of the panel.
The account number of the panel as it is identified in the automation system.
Enter this line number only if it is part of the alarm panel account number. If the line
number is not used, enter “0”
“0” disables and “1” enables communication between the alarm panel and the receiver.
This is a range of zero to 300 seconds in 30 second
Selection
Seconds
intervals. Enter the value that is closest to the number of
0
0
seconds desired for polling the receivers.
1
2
30
60
3
Status
Status Changed Time
3.
90
4
The current communication status between the panel and D6600.
(0 = panel is OFFLINE, 1 panel is ONLINE).
The time and the date status of the IP address were changed/updated.
120
Table 14: Account Database Column Definitions
Click Add to add an additional account.
Fill in the appropriate information for each
field by typing the information and use the
Tab key to move to the next field.
When finished, click the Settings tab.
46542C
D6600 NetCom System Guide
Page 46
© 2001 Radionics
D6600 NetCom
D6200 Programming Software Overview
4.
Fill in the appropriate information for each
field by typing the information and using
the [TAB] key to move to the next field.
When finished, click OK.
See Table 15 for a description of the
fields in the Settings tab.
Field
IP Address
Virtual Account
Description
Enter the IP Address of the panel.
This is where the account number of the panel can be placed as it is identified in
the automation system.
The number of digits entered for the Virtual Account number
must match the number of digits in the dialer account number.
For example: if a panel account number is 1234, then the virtual
account number must consist of four digits. If the panel account
number is 12345678, then the virtual account number must
consist of eight digits. You cannot use alpha characters in the
virtual account.
A Virtual Account number is used to identify which panel has lost its network
connection when an “Off Normal Status” message appears. If no Virtual Account
number has been entered, the default message “ACT0000 Off Normal Status”
message appears. In this case the only way to identify which panel has lost its
network connection is to read through the D6200 and view the status of the
panels in the account database.
Enable Communication
Virtual Line
Priority Level
Panel Poll
“0” disables and “1” enables communication between the alarm panel and the
receiver.
Enter this line number only if it is part of the alarm panel account number. If the
line number is not used, select 0 (zero).
Reserved Feature.
This is a range of zero to 300 seconds in 30 second intervals. Enter the value
that is closest to the number of seconds desired for polling the receivers. A
selection of “0” will result in no poll being sent. “1” will send a poll every 30
seconds, “2” will send a poll every 60 seconds. “3” = 90 seconds, “4” = 120
seconds, etc.
Receiver Poll
Reserved Feature.
Redirect Automation
Reserved Feature.
Backup Automation
Reserved Feature.
Table 15: Settings Tab Field Definitions
© 2001 Radionics
D6600 NetCom System Guide
Page 47
46542C
D6600 NetCom
D6200 Programming Software Overview
4.11.4
Editing the Account Database
After you have selected the Account Database you wish to edit, the D6200 screen will return to the normal
condition. The file has now been loaded into the D6200 and is ready for editing.
To edit an account in the current database in the D6200:
1.
Click on the NetCom menu and select Account Database
Configuration.
The Account Database Configuration window will appear.
2.
The Account Database file shows
all of the networked field accounts
programmed into the D6600.
See Table 14: Account Database
Column Definitions for a
description of each column in the
table.
The same screens that you used to add an account are used here. The only difference will be that the fields for
each tab will be filled in. You will be able to change any of the information except the IP address in the Settings
tab. The following sections describe the procedures for maintaining accounts.
46542C
D6600 NetCom System Guide
Page 48
© 2001 Radionics
D6600 NetCom
D6200 Programming Software Overview
4.11.5
Copying Account Information
1.
Select NetCom, then select Account Database Configuration.
2.
Highlight the appropriate account and then click
Copy.
This will retain all account information except the
IP address.
The user must enter a new IP address pertaining
to the new account.
3.
The Settings tab will automatically open.
Enter the IP address under the Settings tab. See
Section 4.11.3
Adding an Account in the
Database.
4.
Click OK and the new account should appear in
the database.
This tool is extremely useful when account information
is the same for several different panels.
4.11.6
Deleting an Account from the Database
1.
Click on the NetCom menu, then select Account Database
Configuration.
2.
Highlight the appropriate account and then click Delete.
3.
A window will pop up to confirm the
deletion.
Click Yes or No
4.
Click OK.
After the completion of any changes to the account database, you must first save the file to the D6200
hard drive, then upload the account database file to the D6600. The new account database becomes
active in the receiver after the upload is complete.
To do this, click on NetCom then Load Account
Database Configuration to D6600.
© 2001 Radionics
D6600 NetCom System Guide
Page 49
46542C
D6600 NetCom
D6200 Programming Software Overview
4.12
Account Status Procedures
The procedures for Account Status are searching, sorting, receiver-panel communication status, time of status
change and IP Address status.
4.12.1
Searching the Account Database
To locate a particular account in the current database, click on the NetCom menu, then select Account
Database Configuration. The user can choose to search the database by a key field, by a specific IP address,
or by combined options.
To search the database by a key field, select a particular field from the Search By box. Enter the keyword in the
Find Value box and then click Go. To return to the entire database and to clear any previous queries, click on the
List All button.
To search the database by a specific IP Address, enter an IP address and then click on the adjacent GO button.
To return to the entire database and to clear any previous queries, click on the List All button.
To search the database by combined options, enter information in one or more of the boxes. Once all of the
desired search criteria has been entered, click on the Search button. To return to the entire database and to
clear any previous queries, click on the List All button.
4.12.2
Sorting Database Information
To sort database information, click on the NetCom menu, then select Account Database Configuration. Click
on the desired heading by which the program should sort the database. The user can choose to sort the
database by IP address, Virtual Account, Virtual Line, Enable, Poll Rate, Status, or Status Changed Time.
4.12.3
Status
Under Account Database Configuration, this value will be either be a “1” or a “0”. A “1” will indicate that the
connection is good between the receiver and that particular panel. A “0” will indicate that the receiver is no longer
receiving polls from that particular panel.
For both “Status” and “Status Changed Time” the database must be read into the D6200 for an up to
date reading. After the database has been loaded from the D6200 to the D6600, all the status fields
will be blank until a change on the network occurs.
4.12.4
Status Changed Time
Under Account Database Configuration, this indicates the time at which the status changed for this panel, not
when the database is read into the D6200.
4.12.5
Show Account Status
To view the account status and status changed time for corresponding IP Addresses, click on the NetCom
menu, then select Show Account Status. For up-to-date account status, the database must be read into the
D6200 from the D6600.
4.13
C900 Commands
The D6200 Programming Software will send C900 Commands to the
D6600 Receiver/Gateway. The commands will be held by the D6600
until a poll is received from the appropriate C900 Interface Module.
Once that happens, the command(s) will be sent on to that C900.
To access the C900 Control Commands, click on the NetCom menu,
then select C900 Control Commands.
46542C
D6600 NetCom System Guide
Page 50
© 2001 Radionics
D6600 NetCom
D6200 Programming Software Overview
The C900 Control Commands
Screen appears. A C900 IP
Address must be selected from
the Select C900 drop down menu.
Once a C900 has been selected,
the Dialer Status and Message
Transmission Rate can be
modified. After selections have
been made, the Change button
must be pressed for the
commands to be sent to the C900.
4.13.1
Changing C900 Status Settings
NetCom is capable of sending several Control Commands to the C900 to change its status.
All these commands and related C900 status changes will be recorded on the printer and sent to the automation
software. Other C900 status messages such as Low Battery, Reboot, and Dialer Diagnostic are also sent to the
D6600 where they are processed and sent to the automation computer and the printer. The C900 input #1 status
report (Open, Short and Normal) will be generated by the D6600 and sent to the automation and printer.
To send C900 Control Commands, use D6200 software, click on the NetCom menu, the select C900 Control
Commands. In this window, click the select button to choose a C900 account. All C900 accounts that are online
(Status=1) will appear in this window. The status of a C900 may have changed since the last time the Account
database was read from the D6600. For an accurate C900 Account status, read the Account database from the
D6600 before making any C900 changes. To view all C900 accounts, click the “List All C900” button. This will
show all accounts that have the net device specified as C900 in the account database will be displayed in this
window. (To specify the net device (C900 or 9133) for each account, use the D6200 software, click on the
NetCom menu, the select Account Database Configuration. In this window select an account and click the edit
button. In this window under the Account tab, select the device in the Net Device section, then click OK. NOTE:
If this is left blank - no selection - the account will be displayed in the selection window.) In the C900 Command
window select the C900 account that will receive the commands. Select the command that will be transmitted to
the C900 (See definitions above). Click the change button, this message will be transmitted to the C900 upon the
next poll the D6600 receives from that selected C900. All these status changes are recorded in the D6200
History Log file.
To query the status of an active C900, click the Query button under the D6200 menu item C900 Control
Commands. The real status of the queried C900 will be displayed in the History Log upon the next poll the
D6600 receives from that selected C900. Click the Explain C900 Status button in the History Log window to get a
more detailed explanation.
The following sections describe these Control Commands.
4.13.1.1 Switch to Intercept
This command will force the C900 to work in the Intercept mode. This allows the C900 to receive the dialer
signals and then send them to the D6600 NetCom through LAN/WAN.
Refer to “Command Sent (Switch to Intercept mode)” in the D6600 Computer Interface Manual (P/N 39963F or
later) for the D6600 output format.
4.13.1.2 Switch to Fallback
This command will force the C900 to temporarily work in the fallback mode, so that the dialer can use its PSTN
network to communicate with the central stations. This feature allows the central station to remotely access the
dialer for uploading and downloading. If a C900 is switched to fallback, an optional reminder message can be
created every 30 minutes. This will ensure that the operator is aware the C900 is in the fallback mode and may
return the C900 back to the intercept mode for LAN/WAN communications.
The C900 will automatically switch to Intercept after one hour of being switched to Fallback or turn to Intercept
mode immediately once it has received the command Switch to Intercept.
© 2001 Radionics
D6600 NetCom System Guide
Page 51
46542C
D6600 NetCom
D6200 Programming Software Overview
Refer to “Command Sent (Switch to Intercept mode)” in the D6600 Computer Interface Manual (P/N 39963F or
later) for the D6600 output format.
4.13.1.3 Disable Intercept
This command is provided as a measure to remotely remove a defective C900 from service. The dialer will be
connected to the PSTN until Intercept is enabled or the C900 reboots.
Refer to “Command Sent (Disable Intercept Mode)” in the D6600 Computer Interface Manual (P/N 39963F or
later) for the D6600 output format.
4.13.1.4 Activate Output
Turn on Output #4.
Refer to “Command Sent (Activate Output)” in the D6600 Computer Interface Manual (P/N 39963F or later) for
the D6600 output format.
4.13.1.5 Deactivate Output
Turn off Output #4.
Refer to “Command Sent (Deactivate Output)” in the D6600 Computer Interface Manual (P/N 39963F or later) for
the D6600 output format.
Output #4 is an open collector output that can be used for signaling various conditions by connecting to
annunciating devices or directly to a control panel input.
4.13.1.6 Idle (C900 Polling)
This command specifies the time in seconds that will elapse between polls. During this time, the C900 will not
receive any information from the network. Valid entry is 0-255. If 0 is entered, the default of 30 seconds is used.
This value should be resent to C900 after C900 reboot.
Refer to “Command Sent (Supervision Rate Changed)” in the D6600 Computer Interface Manual (P/N 39963F or
later) for the D6600 output format.
4.13.1.7 Active (C900 Acknowledgement from Dialer)
This command specifies the time in seconds for the C900 to receive the acknowledgment or other information
from the dialer. The C900 will enter the Active mode if it does not receive the dialer acknowledgement from the
receiver. Valid entry is 0-255. If 0 is entered, the default of 1 second is used. This value should be resent to the
C900 after the C900 reboots.
Refer to “Command Sent (Supervision Rate Changed)” in the D6600 Computer Interface Manual (P/N 39963F or
later) for the D6600 output format.
4.13.1.8 Retry (Elapsed Wait Time)
This command specifies the time in seconds that C900 will wait for a response to a message before sending it
again.
Note:
The C900 will retry 9 times before deciding that the host has failed. Valid entry is 0-255. If 0 is entered, the
default of 5 seconds is used. This value should be resent to the C900 after the C900 reboots.
Refer to “Command Sent (Supervision Rate Changed)” in the D6600 Computer Interface Manual (P/N 39963F or
later) for the D6600 output format.
4.13.1.9 Hold (Before Transmitting Message)
This command specifies the time, in 256 millisecond increments, that the C900 must wait after receiving any
message before it can transmit another message. Valid entry is 0-255. If 0 is entered, the default of 256
milliseconds is used. This value should be resent to C900 after C900 reboot.
Refer to “Command Sent (Supervision Rate Changed)” in the Computer Interface Manual (P/N 39963F or later)
for the D6600 output format.
46542C
D6600 NetCom System Guide
Page 52
© 2001 Radionics
D6600 NetCom
D9133TTL Configuration
5.0
D9133TTL-E Configuration
This section details how to correctly install, configure and program a Radionics D9133TTL-E.
5.1
Network Enabling a Radionics 9000 Series Panel using a D9133TTL-E
The D91331TTL-E is a SDI bus
device for use with the Radionics
9000 Series Control/
Communicators. The D9133TTLE is used for bi-directional
communications over Ethernet
networks that are typically used
for event reporting, PC9000
monitoring, and RAM remote
programming.
A Door Bracket (P/N: 40182C) is
included for mounting the
D9133TTL-E on the door of the
enclosure. Mounting instructions
can be found in the D9133TTL-E
Operation and Installation Guide
(P/N: 41124).
Figure 17: D9133TTL-E Serial Interface Network Adapter
5.2
Physical Installation
1.
Remove AC and battery power from the Radionics 9000
Series Control/Communicator.
D9133TTL-E
Control/Communicator
PERIPHERAL DEVICE WIRING
RED
2.
Wire the D9133TTL-E to the Control/ Communicator as
indicated in Table 16: D9133TTL-E Wiring Connections.
POWER +
YELLOW
DATA BUS A
GREEN
DATA BUS B
BLACK
COMMON
32
31
30
29
9000 Series
Control/Communicator
SDI PWR (Terminal 32)
SDI A (Terminal 31)
SDI B (Terminal 30)
SDI COM (Terminal 29)
D9133TTL-E
SDI PWR
SDI A
SDI B
SDI COM
Table 16: D9133TTL-E Wiring Connections
Note:
3.
Connect an Ethernet cable from the network to be utilized by the Modular Jack labeled Ethernet on the
D9133TTL-E.
4.
Set the SDI address for the D9133TTL-E to “88”. This is accomplished by placing a
jumper across position 8 on the D9133TTL-E. SDI Address 88 is reserved for 9000
Series Alternate Communication Functions.
1
2
4
8
88
The D9133TTL-E address configuration is read only at D9133TTL-E power-up. If the address configuration is
changed while the D9133TTL-E is powered, the power must be cycled so that the D9133TTL-E can reconfigure
its address.
5.
Reconnect AC and battery power to the Control/Communicator and power up the system.
© 2001 Radionics
D6600 NetCom System Guide
Page 53
46542C
D6600 NetCom
D9133TTL Configuration
6.
Verify that the connection from the D9133TTL-E to the Ethernet
Network is established by viewing the Ethernet link LED to the right of
the RJ45 connector.
LED Enable Jumper (P2)
This LED should be on solid. Also the LED indicator for the
appropriate port on the network hub should be blinking indicating the
D9133TTL-E is powered and communicating to the network properly.
LEDs
Figure 18: D9133TTL-E Diagnostic
LEDs and the LED Enable Jumper
5.3
Factory Programmed Default IP Address
Radionics has programmed a default IP address into the D9133TTL-E Serial Interface.
The default IP address is not used for any of the Radionics functions. This information is supplied
only to assist the technician if a failure of the ARP commands occurs. It could be useful to know the
default IP address should the ARP commands fail. However, this occurrence is highly unlikely.
Contact Radionics Tech Support at 888-723-9376 or a NetCom engineer if you have further questions!
See Table 17: D9133TTL-E
Default IP Addresses for the
D9133TTL-E Serial
Interface’s default IP
addresses.
Radionics
Part Number
D9133TTL-E
D9133TTL-TR
Application
Network Adapter for Ethernet networks
Network Adapter for Token Ring
networks
Default IP
Address
194.039.078.253
194.039.079.253
Table 17: D9133TTL-E Default IP Addresses
5.4
Identifying the MAC Hardware Address
Note:
If you already know the IP address of the D9133TTL-E and it has already been configured, see Section 5.7
Verification that the IP Address Assigned is Correct.
Once everything is verified and set up properly per the
steps in Section 5.2
Physical Installation, it is time
to program in the IP address of the D9133TTL-E. First,
find and write down the MAC or hardware address of the
D9133TTL-E. This address is hard-coded into the
D9133TTL-E during its manufacture and cannot be
changed. This address is 12 digits in length and can be
found on a label on the large metal box soldered to the
D9133TTL-E.
Figure 19: MAC Address Label
5.5
Obtaining an IP Address
Go to the network administrator with the MAC address. The network administrator will assign your D9133TTL-E
an IP Address.
An IP Address is an identifier for a computer or device on a TCP/IP network. Networks using the TCP/IP protocol
route messages based on the IP address of the destination. The format of an IP address is a 32-bit numeric
address written as four numbers separated by periods. Each number can be zero to 255. For example,
190.200.128.111 could be an IP address. Within an isolated network, you can assign IP addresses at random as
long as each one is unique. However, connecting a private network to the Internet requires using registered IP
addresses (called Internet addresses) to avoid duplicates.
46542C
D6600 NetCom System Guide
Page 54
© 2001 Radionics
D6600 NetCom
D9133TTL Configuration
5.6
Initial Assignment of the IP Address using ARP.EXE
Radionics recommends that you read this entire step before beginning. Also, make sure there is power to the
D9133TTL-E and the Ethernet Network RJ45 connection is in place.
The D9133TTL-E being configured and the PC being used to configure it must both be on the same
gateway (the device that connects the LAN to the WAN) in order to telnet into the configuration
program. It may be called a router, hub, or MAU. After the D9133TTL-E has been configured and it
has an IP address, you will be able to telnet in to change configuration parameters from anywhere
on the network.
Once you have the IP address and the network administrator confirms that it is ready, open up the DOS prompt
(from Windows) on any PC tied into the network that is to be used. You will now need to use the ARP program to
assign the D9133TTL-E its new IP address.
At the DOS prompt (usually
C:\windows), the following
command syntax is to be used.
arp –s xxx.xxx.xxx.xxx zz-zz-zz-zz-zz-zz
xxx.xxx.xxx.xxx
is the IP address assigned
to the D9133TTL-E Serial
Interface by the Network
Administrator
We will now step through the assignment of an IP address to a
D9133TTL-E Network Interface Module, using the ARP program.
We will use the EXAMPLE MAC address found in the step
above:
zz-zz-zz-zz-zz-zz
is the MAC hardware
address found on the
label of the D9133TTL-E
Serial Interface.
Example MAC Address
REMEMBER THAT THE IP AND MAC ADDRESS USED IN THIS EXAMPLE WILL NOT BE THE SAME
AS THE NUMBERS YOU ARE USING. THIS IS FOR DEMONSTRATION ONLY!
1.
Open a DOS window by selecting Start à Programs à MSDOS Prompt
A DOS window will appear.
2.
Type the ARP –s command with
the IP Address and the MAC
Hardware address from above.
For this example the IP address to
assign is 190.200.128.220 and the
MAC hardware address is:
00-20-4a-12-04-0e
© 2001 Radionics
D6600 NetCom System Guide
Page 55
46542C
D6600 NetCom
D9133TTL Configuration
3.
If following your command the
computer responds with a prompt
(as shown to the right) then the
address was accepted.
Note:
5.7
There is no indication that
the operation has been
performed properly. The
absence of an error
message is your indication
that the function was
correct.
Example 3: arp -s
Verification that the IP Address Assigned is Correct
To verify that the IP Address that was just assigned is correct, follow the steps below.
REMEMBER THAT THE IP AND MAC ADDRESS USED IN THIS EXAMPLE WILL NOT BE THE SAME
AS THE NUMBERS YOU ARE USING. THIS IS FOR DEMONSTRATION ONLY!
It is now necessary to verify that the IP address is
assigned to the D9133TTL-E and is recognized by
the network.
At the DOS prompt type:
arp –g [ENTER]
Figure 20: arp –g table shows the Internet address
(IP ADDRESS) and the corresponding Physical
Address (MAC hardware address). The first line of
the table above shows that the network
recognizes the D9133TTL-E with a MAC address
of 00-20-4a-12-04-0e and has temporarily
assigned the IP address 190.220.128.220 to it.
Figure 20: arp –g table
Because the D9133TTL-E is designed to always have the same IP address, the Type should be “static”. The
network uses this table to identify devices and route signals. The number of devices and other “types,” like
“dynamic,” will depend on the network and the number and type of devices that reside on it. The important thing
is to identify the device you are installing and verify that it now has an IP address assigned.
46542C
D6600 NetCom System Guide
Page 56
© 2001 Radionics
D6600 NetCom
D9133TTL Configuration
5.8
Using Telnet to Finish the Configuration
Once the IP address has been verified to be correct, the TELNET utility must be used to finish the configuration.
1.
Open a DOS window by selecting Start à Programs à
MS- DOS Prompt
2.
At the DOS prompt (usually C:\windows),
type
telnet [ENTER] .
The telnet application should now be
running.
3.
Click on the Connect menu and select Remote System.
4.
The Connect window will appear.
5.
Type the IP address of the D9133TTL-X into the Host Name field (this
is the IP address that was assigned to the D9133TTL-X in the previous
section).
Enter 1 into the Port field and leave the TermType field at "vt100".
6.
Click [Connect] and wait a few seconds for a message to display
saying "’Connect Failed’ Could not open a connection to
190.200.128.220.”
REMEMBER THAT THE IP AND MAC ADDRESS USED IN THIS EXAMPLE WILL NOT BE THE SAME
AS THE NUMBERS YOU ARE USING. THIS IS FOR DEMONSTRATION ONLY!
7.
Click OK and the Telnet window will appear again.
© 2001 Radionics
D6600 NetCom System Guide
Page 57
46542C
D6600 NetCom
D9133TTL Configuration
Click on the Connect menu and choose Remote System again.
Enter 9999 into the Port field, leaving the Host Name and TermType
fields the same. Click the Connect.
8.
The program will prompt you to press [ENTER] by
displaying "Press Enter to go into setup mode."
Press [ENTER].
If you do not press [ENTER] within 5 seconds of seeing the above message,
you will be disconnected. If this occurs, simply return to Step 1 (in this
section).
9.
If you pressed [ENTER] within 5
seconds, then you should see the
following screen (See Figure 21:
Telnet Session).
Figure 21: Telnet Session
10.
Press 0 [ENTER] to set up the basic Server Configuration. You
are now required to enter the desired IP address.
If the D9133TTL-E Network Interface module has been programmed with an IP address in the past, it will
be displayed in parentheses (as shown to the right). For example, this D9133TTL-E was originally
programmed to IP address 190.200.128.152. We are now changing it to address 190.200.128.220.
11.
To properly program the IP address
190.200.128.220, the following keys
would be entered:
190 [ENTER] 200 [ENTER] 128 [ENTER] 220 [ENTER]
Note:
REMEMBER THAT THE IP ADDRESS USED IN THIS EXAMPLE WILL NOT BE THE SAME AS THE
NUMBERS YOU ARE USING. THIS IS FOR DEMONSTRATION ONLY!
REMEMBER THAT THE IP AND MAC ADDRESS USED IN THIS EXAMPLE WILL NOT BE THE SAME
AS THE NUMBERS YOU ARE USING. THIS IS FOR DEMONSTRATION ONLY!
46542C
D6600 NetCom System Guide
Page 58
© 2001 Radionics
D6600 NetCom
D9133TTL Configuration
12.
When asked to set the Gateway address
type N [ENTER] or Y
[gateway address]
[ENTER]
13.
Figure 22: Telnet session – Gateway Address
If the Netmask needs to be changed from the default, enter the number of bits that correspond to the
Netmask your network is using (see Table 18).
See your network administrator for more information.
Press [ENTER] after entering the correct number of bits for the Netmask.
Number of
Host Bits
1
2
3
4
5
6
7
8
9
10
Netmask
Number of
Host Bits
11
12
13
14
15
16
17
18
19
20
255.255.255.254
255.255.255.252
255.255.255.248
255.255.255.240
255.255.255.224
255.255.255.192
255.255.255.128
255.255.255.0
255.255.254.0
255.255.252.0
Netmask
255.255.248.0
255.255.240.0
255.255.224.0
255.255.192.0
255.255.128.0
255.255.0.0
255.254.0.0
255.252.0.0
255.248.0.0
255.240.0.0
Number of
Host Bits
21
22
23
24
25
26
27
28
29
30
31
Netmask
255.224.0.0
255.192.0.0
255.128.0.0
255.0.0.0
254.0.0.0
252.0.0.0
248.0.0.0
240.0.0.0
224.0.0.0
192.0.0.0
128.0.0.0
Table 18: Netmask Address
14.
You will be prompted to change the Telnet password, press [N] for the default of "No". This screen will now
show the Setup Mode screen you saw previously.
Be careful NOT to enter a password into the D9133TTL-X by accident or select [Y] to change the
password. If you do, do not lose the password. Otherwise, you will not be able to re-enter a TELNET
programming session with the D9133TTL-X. The unit will have to be sent back to the factory and
reconditioned before it will be able to receive another TELNET session.
15.
Now press 1 [ENTER] to go into setup Channel 1 configuration.
The following will be displayed:
Press Enter to accept the default of (9600).
Enter 9600 [ENTER] to change it.
16.
You should then see:
Press Enter to accept the default of (4C). If it doesn't show that, type 4C [ENTER] to change it.
17.
You should then see:
Press [ENTER] to accept the default of (00). If it doesn't show that, type 00 [ENTER] to change it.
18.
You should then see:
For the Port number, type a number that is between 2000 and 10000 followed by [ENTER].
The port number can be compared to a phone extension on a PBX system. For our example we will be
using D9133TTL-Es and C900TTLs all set up on port 7700.
19.
You should then see:
Press Enter to accept the default of (CC). If it doesn't show that, type CC [ENTER] to change it.
20.
You should then see:
Type 00 [ENTER].
© 2001 Radionics
D6600 NetCom System Guide
Page 59
46542C
D6600 NetCom
D9133TTL Configuration
21.
Press 9 [ENTER] to save changes and exit the Telnet session. A message is
displayed that the connection was lost. Click OK and close the Telnet window.
Configuration of the D9133TTL-E Network Interface module is complete. Perform this procedure for any
additional D9133TTL-E’s you may have.
5.9
Status LEDs
To enable the status LEDs, place the jumper across the LED Enable Jumper (P2). The function of the LEDs are
the table to the below.
LED
ETHERNET LINK
BUS RX
BUS TX
SER RX
SER TX
Function
This LED should be illuminated solid after about 30 seconds of being connected. This
LED indicates proper connection to the Ethernet NETWORK.
Flashes when the 9000 Series panel talks to the D9133TTL-E. (Normally this LED
continually flashes when the Reset Pin is up.)
Flashes when the D9133TTL-E sends data to the 9000 Series panel.
Flashes when data is received by the D9133TTL-E from the Ethernet NETWORK.
Flashes when data is transmitted to the Ethernet NETWORK from the D9133TTL-E.
Table 19: D9133TTL-E Status LEDs
5.10
9000 Series Panel Programming for Communication
The RADXAUX1 Handler is a new
handler for the 9000 Series panels
and is primarily used for
programming Enhanced
Communication capabilities such as
NetCom. As new features (that
require new programmable
prompts) are added to the 9000
Series Control/Communicators,
they will most likely be added to a
new revision of this handler.
The term Enhanced
Communications is used to
represent the ability to provide new
communication functions for the
9000 Series panels via the SDI Bus
including the ability to:
•
Route panel events to a
D9133TTL-X module.
•
•
Communicate with RAM IV using a D9133TTL-X module.
Communicate with a remote or local high-end software package (such as the PC9000).
Figure 23: 9000 Series panel
Only 9000 Series panels with version 6.00 and higher firmware are compatible with NetCom as
outlined in this manual. Previously installed expanded version 9000 Series panels (lower than
version 6.00) can be upgraded to this version at no charge with a chip change.
46542C
D6600 NetCom System Guide
Page 60
© 2001 Radionics
D6600 NetCom
RAM IV NetCom Programming
6.0
RAM IV NetCom Programming
6.1
RAM IV And D5200 Programmer Handler Requirements
In order to program the D6600 NetCom parameters for the 9000 Series panels, you must use RAM IV version
2.9 or higher and a new handler called RADXAUX1. To add the RADXAUX1 handler to your D5200 Programmer,
call the Radionics Handler Update System at (831) 757-1190.
For further information on programming 9000 Series panels, please refer to the 9000 Series Program Entry
Guide (P/N: 74-07695-000) and the RAM IV Operation Manual (P/N: 38849).
This handler currently has six sections: SDI Automation, SDI RAM Parameters, Enhanced Communications,
Route Group Attempts, SDI RAM/Enhanced Communication Configuration, and Miscellaneous. The D5200
handler required for these options is found in the RADXAUX1 handler, version 1.2 and is available on the
Handler Update System at Radionics. Each of the sections within RADXAUX1 are listed in order below:
6.1.1
SDI Automation
This section allows you to define the characteristics of the D9133 Serial Interface Module when used with Home
or Business Automation software. The D9133 Serial Interface Module is a bi-directional SDI to RS232 interface
module that allows the 9000 Series panels, version 6.00 and higher, to send/receive information to/from an
external software program. This Automation protocol will allow external software programs perform functions
such as arming and disarming areas, changing user passcodes and names, and turning relays on and off to
name a few. The following items allow some simple configuration options, however, to receive the D9133
Automation protocol you must contact Radionics’ Marketing Department in Salinas, CA at 800-757-8877.
Enable SDI Auto
Default:
Selections:
No
Yes or No
Turning this item to Yes enables the automation address for use with PC9000 software (SDI Address 80).
Yes
No
Enable PC9000 Automation software.
Disable PC9000 Automation software.
Baud Rate
Default:
Selections:
9600
300, 1200, 2400, 4800, 9600, 14.4K
This item determines the baud rate between the D9133 and the external hardware connected to it. Since the SDI
bus communicates at 9600 baud, Radionics recommends that this prompt also be kept at 9600 baud. Pressing
the [SPACE] bar on the D5200 toggles through the available options.
Parity / Stop
Default:
Selections:
No / 1
No / 1, No / 2, Odd / 1, Even / 1
This prompt addresses two items; Parity and the number of Stop Bits. Pressing the [SPACE] bar on the D5200
toggles through the available options.
No / 1
No / 2
Odd / 1
Even / 1
© 2001 Radionics
♦THIS IS THE SETTING NECESSARY FOR NetCom NETWORK COMMUNICATIONS
No Parity, 2 Stop Bits
Odd Parity, 1 Stop Bit
Even Parity, 1 Stop Bit
D6600 NetCom System Guide
Page 61
46542C
D6600 NetCom
RAM IV NetCom Programming
9133 Supervision
Default:
Selections:
No
Yes or No
This item determines whether the D9133 Serial Interface Module is supervised or not. If the D9133 is supervised,
disconnecting the D9133 from the 9000 series panel will create a TROUBLE SDI 80 event and the command
center will annunciate a trouble tone (if programmed) and display SERVC SDI 80.
Note:
TROUBLE SDI 80 reports are always reported using Area 1’s Account number.
Yes
No
Supervise the D9133 Serial Interface Module.
Do not supervise the D9133 Serial Interface Module.
RTS Control
Default:
Selections:
On
On, AutoX, Off, AutoR
This item determines how the Request To Send Control parameters are defined for the D9133. Pressing the
[SPACE] bar on the D5200 toggles through the available options.
On
♦THIS IS THE SETTING NECESSARY FOR NetCom NETWORK COMMUNICATIONS
AutoX
Automatically enables Xon/Xoff (software control).
Off
Sets RTS off (hardware control).
AutoR
Sets this to Auto RTS.
DTR Control
Default:
Selections:
On
On, AutoD, Off
This item determines how the Data Terminal Ready Control parameters are defined for the D9133. Pressing the
[SPACE] bar on the D5200 toggles through the available options.
On
♦THIS IS THE SETTING NECESSARY FOR NetCom NETWORK COMMUNICATIONS
AutoD
Sets this to Auto DTR.
Off
Sets DTR off (hardware control).
Status Rate
Default:
Selections:
0
0 – 255
This item determines how often the default status information is sent to the D9133 Serial Interface Module. The
Status information includes:
•
•
the current point status (normal or off-normal),
the panel’s area status (Master Armed, Master Instant Armed, Perimeter Delay Armed, Perimeter Instant
Armed, Disarmed, Area Entry Delay, Perimeter Entry Delay, Area Exit Delay, Perimeter Exit Delay),
•
the panel status (AC fail, battery missing, AC restore, battery low, etc.), and
•
relay status (relay on or relay off).
Entries are in 100 millisecond increments. Therefore, if a 5 is entered, the Status information is sent every 500
milliseconds (or ½ second). An entry of 10 would equal 1 second.
0
1 – 255*
Status information never sent unless requested.
Status information is sent at the interval programmed.
* Note: If the Status Rate is set to a value under 10 and there are 1 – 6 SDI devices connected to the system, the fastest
the panel can send the Status information is approximately 1 second. In addition, if there are more than 6 SDI
Devices connected to the panel, the fastest the panel can send the information is approximately 1½ to 2
seconds.
46542C
D6600 NetCom System Guide
Page 62
© 2001 Radionics
D6600 NetCom
RAM IV NetCom Programming
6.1.2
SDI RAM Parameters
This section allows you to configure Remote Account Manager (RAM) parameters when communicating over a
private Local Area or Wide Area Network (LAN/WAN). To allow RAM IV to communicate to a panel over a Local
or Wide Area Network, a D9133TTL-E SDI-Ethernet Bi-directional Interface module or a D9133TTL-TR SDIToken Ring Interface module and RAM IV, version 2.8 or higher, will be required. The computer that RAM IV is
installed on must also have a network card. See your Information Systems’ administrator for network
requirements. In addition this section allows you to
a.
Define the RAM parameters necessary to communicate via an external modem that can be
connected to a D9133 Serial Interface Module or
b.
Allow for local programming via a D9133 Serial Interface Module.
Although it is not listed in this section, RAM IV still checks for the RAM Passcode (see RAM Parameters),
Datalock Code and the panel type to determine if this RAM session should continue.
Enable SDI RAM
Default:
Selections:
Note:
No
Yes or No
This item determines if the panel will allow RAM IV communications over the SDI bus. This item must be set to
Yes if you plan on using the External Modem configuration, a private Local or Wide Area Network, or local RAM
IV programming.
Yes
Enable RAM sessions over the SDI bus. If set to YES, the RAM Line Monitor is always
ready.
No
Do not enable RAM sessions over the SDI bus.
If the reset pin is in the locked position, local RAM IV programming is still allowed even if this prompt is set to No.
Call Back Enabled
Default:
Selections:
No
Yes or No
Using this function allows the panel, after it has verified the RAM passcode, to provide an additional level of
security by ending the SDI RAM session and then reconnecting with RAM using
a) The RAM IP Address (Enable Ext Modem must be set to No) or
b) The RAM Dial String (Enable Ext Modem must be set to Yes)
before allowing any upload or download.
Yes
No
© 2001 Radionics
When the panel hears the proper RAM password (see RAM Passcode in RAM
Parameters it ends the SDI RAM session and then attempts to reconnect to RAM using
the RAM IP Address if Enable Ext Modem is set to No. If Enable Ext Modem is set to
Yes, the panel will attempt to re-establish communication with RAM using the RAM Dial
String. This ensures that the panel only communicates with valid RAM units.
The SDI RAM session is initiated immediately; no ‘call back’ is required. The panel can
engage in SDI RAM sessions regardless of originating location.
D6600 NetCom System Guide
Page 63
46542C
D6600 NetCom
RAM IV NetCom Programming
RAM IP Address 1
Default:
Selections:
0
0 – 255
This prompt and the next 3 prompts will determine the IP
address for RAM IV.
An IP Address consists of four fields. Each field has a range of
0 – 255. As an example, an IP Address is expressed as
110.227.64.190. The D5200 Programmer has split the IP
Address into four programmable fields. Be sure you contact
your network administrator to find out which IP Address your
RAM IV computer is connected to.
Note:
Set this item to 0 if Enable Ext Modem is set to Yes.
0 – 255
110.227.64.190
RAM IP Address 1
RAM IP Address 2
RAM IP Address 3
RAM IP Address 4
Figure 24: RAM IP Address Prompts
Enter the first three digits of the IP Address. Leading zero’s are not required if the field is
one or two digits in length.
RAM IP Address 2
Default:
Selections:
0
0 – 255
See RAM IP Address 1.
RAM IP Address 3
Default:
Selections:
0
0 – 255
See RAM IP Address 1.
RAM IP Address 4
Default:
Selections:
0
0 – 255
See RAM IP Address 1.
Enable Ext Modem
Default:
Selections:
No
Yes or No
Setting this item to Yes instructs the 9000 Series Control/Communicator that SDI Address 88 is enabled for use
with an External Modem. For further information on Local RAM IV programming, please refer to the RAM IV
Operation Manual (P/N: 38849).
Note:
Setting this item to YES disables Enhanced Communication and SDI RAM for use over a Local or Wide Area
Network.
Yes
No
Enable SDI Address 88 for use with an External Modem.
Disable SDI Address 88 for use with an External Modem.
Answer Armed
Default:
Selections:
7
0 – 15
This item determines the number of rings when the External Modem will automatically answer a call if all areas
are in the Master Armed state.
0
1-15
46542C
No answer when all areas are Master Armed.
The panel answers the phone after the specified number of rings when all areas are Master
Armed.
D6600 NetCom System Guide
Page 64
© 2001 Radionics
D6600 NetCom
RAM IV NetCom Programming
Answer Disarmed
Default:
Selections:
7
0 – 15
This item determines the number of rings when the External Modem will automatically answer a call if any area is
Perimeter Armed or Disarmed.
0
No answer when any area is Perimeter Armed or Disarmed.
0-15
The panel answers the phone after the specified number of rings when any area is
Perimeter Armed or Disarmed.
RAM Line Monitor
Default:
Selections:
No
Yes or No
This item is not yet implemented. Keep this item set to No.
Seize Relay
Default:
Selections:
No
Yes or No
This item is not yet implemented. Keep this item set to No.
Modem Init String
Default:
Selections:
ATEO
A – Z (caps only), 0 – 9, (space), ! “ # $ % & ‘ ( ) * + , - . / : ; < = > ? @ [ \ ] ^ _
This item determines what Initialization String the panel will send to the External Modem when the panel is
powered up.
0101
0101
0101
This item can only be programmed successfully from RAM IV. The D5200 Programmer does not
allow certain characters as noted above.
Programming
Note
RAM Dial String
Default:
Selections:
ATDT
Not yet implemented
This item is not yet implemented.
6.1.3
Enhanced Communications
Enhanced Communications is the ability to communicate by some other means than the standard digital dialer.
In this section, programmable parameters allow you to define up to four separate Enhanced Communication
paths to which events can be routed. To route an event (such as an alarm or trouble) to an Enhanced
communication path, additional programming must also be completed in the Routing and Enhanced Routing
sections.
Enhanced Comm
Default:
Selections:
No
Yes or No
This item determines if the panel will allow Enhanced communications over the SDI bus.
Yes
No
© 2001 Radionics
♦THIS IS THE SETTING NECESSARY FOR NetCom NETWORK COMMUNICATIONS
Do not enable Enhanced communications over the SDI bus.
D6600 NetCom System Guide
Page 65
46542C
D6600 NetCom
RAM IV NetCom Programming
0101
0101
0101
Enable Ext Modem must be set to NO if Enhanced Communications are to be used.
Programming
Note
6.1.4
Programming Path #'s and IP Addresses
There are up to four available Paths that events can be routed to. If an event (or group of events) is to be routed
to an SDI Path, the number that is entered in Primary Device will determine which SDI Path will be used (as long
as RG# Prim, Primary SDI has been set to Yes in Routing as well).
If events are going to be routed to an IP Address (in a Private Local or Wide Area Network application), you will
need to determine which Path will be used (Path 1 – Path 4) and then enter the appropriate IP Address for that
Path (see Path # IP Add1 to Path # IP Add4).
If events are going to be routed to an SDI Path but not to an IP Address , leave the Path # IP Add# set to 0.
However, Path # Poll Rate, Path # Ack Wait, and Path # Retry Count must still be programmed.
Path # IP Add1
Default:
Selections:
0
0 – 255
This prompt and the next 3 determine the IP Addresses for each of the
four paths available when using the D5200.
An IP Address consists of four fields. Each field has a range of 0 –
255. As an example, an IP Address is expressed as 110.227.64.190.
The D5200 Programmer has split the IP Address into four
programmable fields. Be sure you contact your network administrator
to find out exactly which IP Address events are to be sent to.
110.227.64.190
Path # IP Add1
Path # IP Add2
Path # IP Add3
Path # IP Add4
Figure 25: Path # IP Add1 to Add4
0 – 255
Enter the first three digits of the IP Address. Leading zero’s are not required if the first field
is one or two digits in length.
Path # IP Add2
Default:
Selections:
0
0 – 255
See Path 1 IP Add1.
Path # IP Add3
Default:
Selections:
0
0 – 255
See Path 1 IP Add1.
Path # IP Add4
Default:
Selections:
0
0 – 255
See Path 1 IP Add1.
Path # Poll Rate
Default:
Selections:
0
0, 5 – 65535 seconds
This prompt and the next two prompts determine how the Signal Path will be supervised between the 9000
Series Control and the central station(s). This is not to be confused with the supervision of the SDI device (the
connection of the SDI device to the 9000 Series control panel). Each Signal Path can be configured to transmit a
‘heartbeat’ event to the central station for supervision purposes. This is used to make sure the integrity of the
connection is established at all times.
46542C
D6600 NetCom System Guide
Page 66
© 2001 Radionics
D6600 NetCom
RAM IV NetCom Programming
If the panel is going to be programmed to send "heartbeat" events to the central station,
consideration must be given to the frequency. The connection with RAM IV over a Local or Wide
Area Network becomes increasingly difficult the lower the poll rate is set.
Each time the 9000 series panel sends this heartbeat event, it will expect an acknowledgement back within the
amount of time programmed in Path # Ack Wait. If the acknowledgement is not received, the panel checks to
see if the Path # Retry Count entry is greater than 0. If so, the panel will retry the number of times programmed
(in Path # Retry Count) to send the heartbeat event before declaring the Path as failed and generating a COMM
FAIL SDI ## event (Path 1 = SDI 88, Path 2 = SDI 89, Path 3 = SDI 90, Path 4 = SDI 91). If the Poll Rate is
programmed with a value and the Central Station does not acknowledge the Poll from the panel, Command
Centers will not currently annunciate a trouble condition. To transmit this event to the central station, see Comm
Fail in the Routing section.
As an example of how the "heartbeat" operates, let’s say the Path # Poll Rate is set to 120 seconds, the Path #
Ack Wait time is set to 10 seconds, and the Path # Retry Count is set to 2. In the example below when the
panel first powers up, the first ‘heartbeat’ event for Path 1 is sent and it gets acknowledged in 1 second. 120
seconds after the first heartbeat event is sent, the second heartbeat event for Path 1 is generated and sent to the
central station. To show how the Retry Count operates, we will assume that the acknowledgement is not
received in 10 seconds. When this occurs, the heartbeat event is re-sent after the first 10 second ack wait period
has expired. If this heartbeat event is not acknowledged, the panel declares this Path as failed (and generates
the Comm Fail SDI ## Event) but continues to re-send the heartbeat events every 10 seconds until it is
acknowledged.
Second 'heartbeat'
event sent
'heartbeat' event
sent
Acknowledgement
received
about 500
milliseconds
difference
No ack, 'heartbeat'
re-sent, retry #1
No ack, 'heartbeat'
re-sent, retry #2
Path declared
as failed
Panel
Powered Up
10
20
30
40
50
60
70
80
90 100 110 120 130 140 150 160 170 180 190 200 210
Additional heartbeats
sent every 10 seconds
until acknowledged.
10 second
interval
Figure 26: Poll Rate Timeline
Once the panel receives acknowledgement from the central station, the panel will then return to the normal Poll
Rate (which, in this example, is 120 seconds). If more than one SDI Path is being used, the 9000 series panel
will handle them on a successive basis. For example, in a “dual SDI Path application”, if SDI Path 1 did not
receive its acknowledgement within 10 seconds (using the previous example), the panel will move on to
SDI Path 2 to send its heartbeat event (and subsequently wait for the ack) before returning to SDI Path 1 to resend its heartbeat.
Entries are made in one second increments.
0
5 – 65535
0101
0101
0101
Disables the ‘heartbeat’ poll.
Enables the poll rate for the amount of time programmed here.
Even though RAM IV and the D5200 allow entries of 1 – 4, the 9000 series panel will interpret this as
an entry of 5.
Programming
Tip
© 2001 Radionics
D6600 NetCom System Guide
Page 67
46542C
D6600 NetCom
RAM IV NetCom Programming
0101
0101
0101
5 minutes = 300 seconds, 1 hour = 3600 seconds, 12 hours = 43,200 seconds, 18 hours = 64,800
seconds.
Programming
Tip
Path # Ack Wait
Default:
Selections:
13
0, 5 – 65535 seconds
This item determines how long the panel will wait for an acknowledgement from the central station after a
heartbeat event (poll) or an actual event has been transmitted. This prompt is only applicable to SDI transmitted
events. Entries are made in one second increments.
0
5 – 65535
0101
0101
0101
The panel will not look for any acknowledgement from the central station.
The panel will wait this amount of time to receive an acknowledgement from the central
station.
Even though RAM IV and the D5200 allow entries of 1 – 4, the 7000/9000 series panel will interpret
this as an entry of 5.
Programming
Tip
The value entered for Path # Ack Wait Tone must not be equal to the “Time Out” entry made in the
RAM IV Account (see RAM IV Operation Manual [P/N: 38849], v2.9 or higher). Instead, offset these
values by 2 or 3. For example, if your Path # Ack Wait time = 15, program your Time Out value as 17
in the RAM IV account.
Path # Retry Count
Default:
Selections:
6.1.5
5
0 – 255
This item determines how many times the panel will re-send the heartbeat event before declaring a Path Failure
and generating a COMM FAIL RG# SDI ### (“RG #” = 1 – 4, “SDI ###” = 88 for Path 1, 89 for Path 2, 90 for
Path 3, 91 for Path 4) event.
0
COMM FAIL RG# SDI ### events are not generated.
1 – 255
COMM FAIL RG# SDI ### events are generated after the number of retries are reached
for a given SDI Path.
SDI RAM / Enhanced Communications Configuration
This section provides the necessary prompts needed for configuring the D9133TTL-E SDI-Ethernet Serial
Module, or D9133TTL-TR SDI-Token Ring Interface Module when using it for SDI RAM and/or SDI Enhanced
Communication applications.
Baud Rate
Default:
Selections:
9600
300, 1200, 2400, 4800, 9600, 14.4K
This item determines the communication baud rate for the D9133TTL-E or D9133TTL-TR. Since the SDI bus
communicates at 9600 baud, Radionics recommends that this prompt also be kept at 9600 baud. Pressing the
[SPACE] bar on the D5200 toggles through the available options.
Do not change this value to any other setting than 9600 baud.
46542C
D6600 NetCom System Guide
Page 68
© 2001 Radionics
D6600 NetCom
RAM IV NetCom Programming
Parity / Stop
Default:
Selections:
No / 1
No / 1, No / 2, Odd / 1, Even / 1
This prompt addresses two items: Parity and the number of Stop Bits for the D9133TTL-E or D9133TTL-TR.
Pressing the [SPACE] bar on the D5200 toggles through the available options.
No / 1
♦THIS IS THE SETTING NECESSARY FOR NetCom NETWORK COMMUNICATIONS
No / 2
No Parity, 2 Stop Bits.
Odd / 1
Odd Parity, 1 Stop Bit.
Even / 1
Even Parity, 1 Stop Bit.
RTS Control
Default:
Selections:
On
On, AutoX, Off, AutoR
This item determines how the Request To Send Control parameters are defined for the D9133TTL-E or
D9133TTL-TR. Pressing the [SPACE] bar on the D5200 toggles through the available options.
On
AutoX
Off
AutoR
♦THIS IS THE SETTING NECESSARY FOR NetCom NETWORK COMMUNICATIONS
Automatically enables Xon/Xoff (software control).
Sets RTS off (hardware control).
Sets this to Auto RTS.
DTR Control
Default:
Selections:
On
On, AutoD, Off
This item determines how the Data Terminal Ready Control parameters are defined for the D9133TTL-E or
D9133TTL-TR. Pressing the [SPACE] bar on the D5200 toggles through the available options.
On
AutoD
Off
♦THIS IS THE SETTING NECESSARY FOR NETWORK COMMUNICATIONS
Sets this to Auto DTR.
Sets DTR off (hardware control).
9133 Supervision
Default:
Selections:
No
Yes or No
This item determines whether the D9133TTL-E or D9133TTL-TR is supervised or not. If the D9133TTL-E or
D9133TTL-TR is supervised, disconnecting it from the 9000 series panel will create a TROUBLE SDI 88 event
and the command center will annunciate a trouble tone and display SERVC SDI 88.
Note:
TROUBLE SDI 88 reports are always reported using Area 1’s Account number.
6.1.6
Yes
Supervise the D9133TTL-E or D9133TTL-TR Interface Module.
No
Do not supervise the D9133TTL-E or D9133TTL-TR Interface Module.
Route Group Attempts
This section determines how many times a Route Group will try the Primary destination before attempting the
Backup destination should the Primary destination fail. This entry applies to both Phone numbers and IP
Addresses.
© 2001 Radionics
D6600 NetCom System Guide
Page 69
46542C
D6600 NetCom
RAM IV NetCom Programming
RG# 1 Attempt
Default:
Selections:
No
Yes or No
Yes
No
Application
Tip
This Route Group will attempt the Primary destination once and, if unsuccessful, will then
attempt the Backup destination. The panel will still make a total of 10 attempts (5 to the
Primary, 5 to the Backup) before generating a Route Group Comm Fail event.
This Route Group will attempt the Primary destination twice and, if unsuccessful, will then
attempt the Backup destination. The panel will still make a total of 10 attempts (6 to the
Primary, 4 to the Backup) before generating a Route Group Comm Fail event.
A common D6600 NetCom System application with the 9000 Series panels may be to use NetCom as
the Primary Path in a given Route Group and then use a standard PSTN phone line as the Backup
Path. In this configuration, if an event is unable to reach the central station after one or two
attempts, the system will then attempt to send the original event using the Backup Path (over the
phone line) as well as a Comm Fail SDI ##* event (which indicates that the system failed to
receive an acknowledgement via the NetCom path).*
Shown below is an example of the sections (from the D7412/D7212 Program Record Sheet) needed
to program events to a Primary IP Path and a Backup Phone Line. However, please refer to the 9000
Series Program Entry Guide (P/N: 74-07695-000) for full instructions and details.
Figure 28: Routing parameters
Figure 27: Phone parameters
Figure 29: Enhanced Routing parameters
Figure 30: Enhanced Communications and Route
Group parameters
46542C
D6600 NetCom System Guide
Page 70
© 2001 Radionics
D6600 NetCom
C900TTL-X Configuration
7.0
C900TTL-X Configuration
This section details how to correctly install, configure and program a Radionics C900TTL-X.
7.1
Network Enabling an Alarm Panel
The patented C900TTL-X is
designed to network enable almost
ANY industry standard alarm panel,
regardless of its manufacturer.
When the dialer has something to
report, the C900TTL-X provides the
signals and voltages necessary to
simulate a connection to the central
station through a phone line. The
C900TTL-X then decodes the
transmitted digital dialer message
and delivers the decoded signals
through an Ethernet NETWORK to
the network enabled D6600
RECEIVER/GATEWAY.
When the network enabled D6600
acknowledges receipt of the
message, the C900TTL-X transmits
an appropriate acknowledge
message to the Alarm Panel.
True end-to-end security is
maintained in this manner. The
C900TTL-X has three modular
jacks. One is labeled "TELCO", and
is intended for connection to an
RJ31X jack. The second is labeled
"PANEL", and is intended for
connection to the Alarm Panel via a
Telco cord. The third, marked
"ETHERNET” is for connection to
the Ethernet NETWORK RG-45
interface. In "Intercept Mode" the
C900TTL-X connects the house
phone directly to the telephone
company, and connects the digital
dialer to its internal Telco simulation
electronics. In "Fallback Mode," the
C900TTL-X connects the house
phone to the Alarm Panel, and the
Alarm Panel to the telephone
company, shunting itself out of the
phone circuit.
Figure 31: C900TTL-X
ETH ERN ET
To LAN/WAN via
Ethernet connection
C900TTL-E
OUTPUTS
Aux. Power
Supply
Battery
INPUTS
12 VDC
Communicator Phone Line
PANEL
TELCO
RJ31X
Battery
House Phones
Control Panel
Input
Phone Line
Monitor
Telco
Figure 32: C900TTL-X Interconnection Diagram
Intercept Mode is maintained only if the C900TTL-X is functioning properly and is receiving
ACKNOWLEDGEMENTS from the network enabled D6600 RECEIVER, via the network.
The C900TTL-X intercepts the phone line between the Telco service and the Alarm Panel, thus rendering the
Alarm panel's phone line monitor inactive. If phone line monitoring is required, an external phone line monitor,
such as the Detection Systems Inc. DS7481, should be used. Alarm Panels with internal phone line monitors
may generate an error when attached to the C900TTL-X. Unless the internal phone line monitor can be disabled,
do not use such a panel with the C900TTL-X.
© 2001 Radionics
D6600 NetCom System Guide
Page 71
46542C
D6600 NetCom
C900TTL-X Configuration
7.2
Physical Installation
The C900TTL-X is static sensitive.
Make sure you touch earth ground
before handling the circuit board.
This will discharge any static
electricity from your body.
Ground Tab
2.
3.
7.3
Circuit board
Enclosure
PA NEL
1
2
3
4
5
6
7
8
9
10
O
F
F
A Door Bracket (P/N: 40182C) is
included for mounting the
C900TTL-X on the door of the
enclosure. Mounting instructions
can be found in the C900TTL-E
Operation and Installation Guide
(P/N: 41123). Figure 33 shows the
C900TTL-X mounted in a separate
enclosure (D2203). It is possible to
mount the C900TTL-X in a D8103
or D8109 enclosure, but additional
mounting hardware is required.
When using either method,
Radionics suggests running the
ground wire to the enclosure
before handling the circuit board.
1.
Retainer
Tabs
Mounting
Holes
TEL CO
C
OUT 4
OU T3
OU T2
O UT1
IN3
IN 2
C
IN1
I-1 2 V+
C900TTL-E
Retainer Holes
Wire
Knockouts
Mounting
Hole
Mounting
Hole
SUPPORT POST ASSEMBLY
Figure 33: C900TTL-X in D2203 Enclosure
While holding the ground wire (or using a ground strap), install the circuit board. Insert the two support posts
into the circuit board retainer holes as shown in the Support Post Assembly diagram.
Slide the top of the circuit board into the two retainer tabs. Once in the retainer tabs, the circuit board will
rest on the two support posts.
Secure the bottom of the enclosure by screwing the bottom two holes through the support posts and through
to the control retainer holes. Once the circuit board is installed, be sure to connect its ground wire to the top
hinge of the panel enclosure.
Overview of Onboard Inputs
The C900TTL-X has 3 inputs monitored by A/D converters. They serve the following functions:
•
•
•
46542C
Input 1: Used as an EOL supervised loop. If the D6200 host computer enables Input status reports, then
any voltage above 3.33 VDC is reported as an open condition to the host. Any voltage below 1.66 volts is
reported as a short. Input 1 must be EOL terminated with a 10 K resistor.
Input 2: Used for Intercept Inhibit. If input 2 goes above 1.66 volts, then the C900TTL-X is immediately
forced into Fallback Mode for a minimum of 2 minutes. Input 2 must go low for at least 5 seconds to be
considered low. Input 2 is intended for connection to a fire bell to force fire reports to be sent digitally. If input
2 is unused, it may be left disconnected.
Input 3: Used for Intercept Override. If input 3 goes above 1.66 volts for 5 seconds, then the C900TTL-X
enters into Fallback Mode. If input 3 goes low, then the C900TTL-X will return to Intercept Mode. If this is
driven by ground start relay output, the C900 will stay in Fallback, except when the dialer wishes to dial.
Input 3 cannot force an intercept if the C900 is in Fallback due to error, command, or input 2 high. If unused,
this may be left disconnected.
D6600 NetCom System Guide
Page 72
© 2001 Radionics
D6600 NetCom
C900TTL-X Configuration
7.4
Overview of Onboard Outputs
The C900TTL-X has 4 open-collector outputs onboard:
•
•
•
•
7.5
Output 1: Active (shorted to ground) as long as the CPU is functioning
normally. If the CPU fails to operate or the CPU loses power, output 1 will be
open.
Output 2: Active as long as the D6600 Receiver is communicating properly,
and open when the D6600 is not communicating to the C900TTL-E.
Output 3: Active whenever the C900TTL-X is in Intercept Mode.
Output 4: Controlled by command from the D6200 software (default is open).
10K EOL
Resistor
Overview of Onboard Terminal Strip
The following list describes the functions of the C900TTL’s Power Terminal Strip:
•
•
+12 V: Connect regulated 12 volt DC power to this terminal and the -12 V
terminal. This power may be supplied by a separate power supply, battery, or
Auxiliary power from the Control/ Communicator.
-12 V: Return terminal for the 12 VDC power supply (earth ground
connection).
Figure 34: C900TTL-X
Onboard Terminal Strip
7.6
Setting the Dipswitches
A 10-position dipswitch programs the C900TTL.
The programming is dependent on the application
and dialer format of the Alarm Panel that it is to be
connected to.
1
2
3
4
5
6
7
8
9
10
O
F
F
ROCKER DOWN
OFF
ON
Figure 35: C900TTL-X Dip Switches
Switch positions 1,2,3, & 4 all work together to program the dialer format into the C900TTL.
The C900 must emulate a phone line and a digital receiver. It must therefore be programmed to
know what format it will be receiving from the alarm panel.
© 2001 Radionics
D6600 NetCom System Guide
Page 73
46542C
D6600 NetCom
C900TTL-X Configuration
DS-1
OFF
OFF
OFF
OFF
OFF
OFF
OFF
OFF
ON
ON
ON
ON
ON
ON
ON
ON
Table 20 identifies the Dialer Format settings possible for switch positions 1 through 4 (the switch positions will
be referred to as DS-1 for Dipswitch 1, etc):
DS-2
DS-3
DS-4
Dialer Format of Host Alarm Panel
OFF
OFF
OFF
Radionics MODEM IIe and MODEM IIIa2 (D7212, D9112 & equivalent)
OFF
OFF
ON
Radionics MODEM II (D4112, D6112, D7112, D8112 and equivalent)
OFF
ON
OFF
Any ADEMCO DTMF format (4+2 EXPRESS, ADEMCO High Speed, Contact
ID)
OFF
ON
ON
Any ADEMCO DTMF where the dialer retransmits quickly
ON
OFF
OFF
2300 Hz ACK Tone, RADIONICS BFSK
ON
OFF
ON
1400 Hz ACK Tone, RADIONICS BFSK
ON
ON
OFF
Reserved
ON
ON
ON
Reserved
OFF
OFF
OFF
2300 Hz ACK Tone, Any digital pulse type format
OFF
OFF
ON
1400 Hz ACK Tone, Any digital pulse type format
OFF
ON
OFF
Long 2300 Hz ACK Tone, Any digital pulse type format
OFF
ON
ON
Long 1400 Hz ACK Tone, Any digital pulse type format
ON
OFF
OFF
Unused
ON
OFF
ON
Unused
ON
ON
OFF
Unused
ON
ON
ON
Unused
Table 20: C900TTL-X Dialer Format Settings – Dipswitches 1 - 4
Dipswitch positions 5 through 10 (Table 21) set up the C900TTL behavior, based upon the application. See the
notes below the table for more information. (The switch positions will be referred to as DS-5 for Dipswitch 5, etc):
Switch and Condition
DS-5 ON
DS-5 OFF
DS-6 ON
DS-6 OFF
DS-7 ON
DS-7 OFF
DS-8 ON
DS-8 OFF
DS-9 ON
DS-9 OFF
DS-10 ON
DS-10 OFF
APPLICATION
Enable AUTO FALLBACK condition after detection of an intercept error
Disable AUTO FALLBACK condition after detection of an intercept error
No number of hang-ups will cause FALLBACK MODE
Third hang-up without D6600 or host computer ACK causes error.
Default 240 second poll of D6600 or host computer during idle state
Default 30 second poll of D6600 or host computer during idle state
C900 will send initial handshake to Alarm Panel after 6 second break in dialing
C900 will send initial handshake to Alarm Panel after 1 second break in dialing
Unused
Unused
9600 BAUD data rate from C900 to onboard Network interface
1200 BAUD data rate from C900 to onboard Network interface
Table 21: C900TTL-X Dipswitches 5 – 10
Note:
46542C
Several errors can occur in the intercept process. Any error will force the C900TTL-X to switch the Alarm Panel
dialer to the Fallback (phone line backup) position for 2 minutes when the Alarm Panel next seizes the line (if
enabled, and if the seize occurs within 2 minutes). Intercept errors are always reported to the D6600 Receiver. If
the D6600 Receiver does not acknowledge a signal sent that was intercepted by the C900TTL-X in the proper
amount of time, the Alarm Panel digital dialer will hang up and retry the message transmission.
D6600 NetCom System Guide
Page 74
© 2001 Radionics
D6600 NetCom
C900TTL-X Configuration
7.7
LEDs
The C900TTL has two dual-colored LEDs that indicate its status: the DIALER LED and the SYSTEM LED. There
are also three red LEDs, which indicate communications to the network.
7.7.1
Dialer LED
The DIALER LED
indicates the status of the
alarm Panel digital dialer
interface.
(Hertz = cycles/flashes
per second).
Dialer LED
Off
Color
(No color)
Solid
Green
Blinking
(5 hertz)
Solid
Green
Red
Blinking
(5 hertz)
Alternating
Red
Red / Green
Condition Indicated
The C900 is in permanent FALLBACK mode
due to command or no power.
The C900 is in INTERCEPT mode and the
Alarm Panel is on-hook.
The C900 is in INTERCEPT mode and the
Alarm Panel is off-hook.
The C900 is in FALLBACK mode due to error,
the INTERCEPT inhibit, Override inputs, or
command from the D6200
The previous Alarm Panel signal send session
caused an INTERCEPT error
The Alarm Panel dialer is off-hook, but the last
signal was rejected by the C900 due to a bad
checksum or other protocol error.
Table 22: C900TTL-X Dialer LED Status Description
7.7.2
Status LED
The STATUS LED
indicates the status of the
host interface and of the
C900 itself.
Dialer LED
Blinking (5
hertz)
Color
Green
(Hertz = cycles/flashes
per second).
Blinking
(repeating code)
Steady
Red
Red
Red
Green
Off
Condition Indicated
The host is responding normally.
The host is not responding.
A Self Test error has occurred. The code is a
series of rapid blinks, repeated every second.
1 blink: ROM checksum error
2 blinks: RAM test error
The C900 has crashed or has no power.
Table 23: C900TTL-X Status LED Status Description
7.8
Factory Programmed Default IP Address
Radionics has programmed in a default IP address into the C900TTL-X Dialer Capture Module.
The default IP address is not used for any of the Radionics functions. This information is supplied
only to assist the technician if a failure of the ARP commands occurs. It could be useful to know the
default IP address should the ARP commands fail. However, this occurrence is highly unlikely.
Contact Radionics Technical Support at (888) 732-9376 or a NetCom engineer if you have further
questions.
The C900TTL-X Dialer
Capture Module Network
Adapters are shipped with the
following default IP
addresses:
Radionics
Model Number
C900TTL-E
C900TTL-TR
Application
Dialer Capture Module, Ethernet
networks
Dialer Capture Module, Token Ring
networks
Default IP
Address
194.039.078.253
194.039.079.253
Table 24: C900TTL-X Default IP Addresses
© 2001 Radionics
D6600 NetCom System Guide
Page 75
46542C
D6600 NetCom
C900TTL-X Configuration
7.9
Identifying the MAC Hardware Address
Note:
If you already know the IP address of the C900TTL-X and it has already been configured, skip down to Section
7.12
Verification that the IP Address Assigned is Correct.
Once everything is verified and set up properly per the
previous steps it is time to program in the IP address of the
C900TTL-X. The first step is finding and writing down the
MAC or hardware address of the C900TTL-X. This address
is hard-coded into the C900TTL-X during its manufacture
and cannot be changed. This address is 6 bytes (12 digits)
in length and can be found on a label on the large metal
box soldered to the C900TTL-X.
The MAC or hardware address for the above labeled
C900TTL-X is found on the label here. It is a good idea to
record this number for future reference.
7.10
Figure 36: MAC Address Label
Obtaining an IP Address
Go to the network administrator with the MAC address. The network administrator will assign your C900TTL-X
an IP Address.
An IP Address is an identifier for a computer or device on a TCP/IP network. Networks using the TCP/IP protocol
route messages based on the IP address of the destination. The format of an IP address is a 32-bit numeric
address written as four numbers separated by periods. Each number can be zero to 255. For example,
190.200.128.111 could be an IP address. Within an isolated network, you can assign IP addresses at random as
long as each one is unique. However, connecting a private network to the Internet requires using registered IP
addresses (called Internet addresses) to avoid duplicates.
7.11
Initial Assignment of the IP Address using ARP.EXE
Radionics recommends that you read this entire step before beginning. Also, make sure there is power to the
C900TTL-X and the Ethernet Network RJ45 connection is in place.
The C900TTL-X being configured and the PC being used to configure it must both be on the same
gateway [the device that connects the LAN to the WAN] In order to Telnet [the process of using the
TELNET program to communicate with the C900TTL-X and establish it’s communications
configuration parameters] into the configuration program. The gateway may be called a router, hub,
or MAU. After the C900TTL-X has been configured and it has an IP address - you will be able to
telnet in to change configuration parameters from anywhere on the network.
Once you have the IP address and the network administrator confirms that it is ready, open up the MS-DOS®
prompt (from Windows) on any PC tied into the network that is to be used. You will now need to use the ARP
program to assign the C900TTL-X its new IP address. ARP, short for Address Resolution Protocol, is a program
used to convert an IP address into a hardware address such as a MAC. The ARP program is installed into the
C:/WINDOWS directory by default in Microsoft® Windows® 95, Windows® 98, Windows® 2000, and Windows®
Millennium Edition during install.
At the MS-DOS® prompt (usually
C:\windows), the following
command syntax is to be used:
arp –s xxx.xxx.xxx.xxx zz-zz-zz-zz-zz-zz
xxx.xxx.xxx.xxx
is the IP address assigned
to the C900TTL-E Dialer
Capture Module by the
Network Administrator
The following steps detail the assignment of an IP address to a
C900TTL-X Dialer Capture Module, using the ARP program. The
EXAMPLE MAC Address is used as an example.
zz-zz-zz-zz-zz-zz
is the MAC hardware address
found on the label of the
C900TTL-E Dialer Capture
Module .
Example MAC Address
REMEMBER THAT THE IP AND MAC ADDRESS USED IN THIS EXAMPLE WILL NOT BE THE SAME
AS THE NUMBERS YOU ARE USING. THIS IS FOR DEMONSTRATION PURPOSES ONLY!
1.
46542C
®
Open a MS-DOS window by selecting Start à Programs à
MS- DOS Prompt:
D6600 NetCom System Guide
Page 76
© 2001 Radionics
D6600 NetCom
C900TTL-X Configuration
A MS-DOS® window will appear.
2.
Type the ARP –s command with the IP
Address and the MAC Hardware address
from above.
For our example the IP address to assign is
190.220.128.219 and the MAC hardware
address is:
00-20-4a-01-65-3d
3.
If following your command the computer
responds with a prompt (as shown in
Example 4) then the address was
accepted.
Note:
There is no indication that the
operation has been performed
properly. The absence of an
error message is your indication
that the function was correct.
Example 4: arp -s
7.12
Verification that the IP Address Assigned is Correct
To verify that the IP Address that was just assigned is correct, follow the steps below.
REMEMBER THAT THE IP AND MAC ADDRESS USED IN THIS EXAMPLE WILL NOT BE THE SAME
AS THE NUMBERS YOU ARE USING. THIS IS FOR DEMONSTRATION ONLY!
It is now necessary to verify that the IP address is assigned
to the C900TTL-X and is recognized by the network.
At the MS-DOS® prompt type:
arp -g [ENTER]
Figure 37 shows the Internet address (IP ADDRESS)
and the corresponding Physical Address (MAC hardware
address). The first line of the table above shows that the
network recognizes the C900TTL-X with a MAC address
of 00-20-4a-01-b5-3d and has temporarily assigned the
IP address 190.200.128.219 to it.
Figure 37: arp-g Table
Because the C900TTL-X is designed to always have the same IP address, the Type should be “static”, as shown
in Figure 37. The network uses this table to identify devices and route signals. The number of devices and other
© 2001 Radionics
D6600 NetCom System Guide
Page 77
46542C
D6600 NetCom
C900TTL-X Configuration
“types,” like “dynamic,” will depend on the network and the number and type of devices that reside on it. The
important thing is to identify the device you are installing and verify that it now has an IP address assigned.
7.13
Using Telnet to Finish the Configuration
Once the IP address has been verified to be correct, the TELNET utility must be used to finish the configuration.
1.
Open a MS-DOS® window by selecting Start
à Programs à MS- DOS Prompt:
2.
At the MS-DOS® prompt (usually
C:\WINDOWS), type
telnet [ENTER] .
The telnet application should now be
running.
3.
Click on the Connect pull-down menu and then Remote System.
The Connect window will appear.
4.
Type the IP address of the C900TTL-X Dialer Capture Module (this
is the IP address that was assigned to the C900TTL-X Dialer
Capture Module in the previous section) into the Host Name field.
Enter 1 into the Port field and leave the TermType field at "vt100"
5.
Click Connect. An error message will appear saying
"’Connect Failed’ Could not open a connection to
190.200.128.219.”
Click OK and the Telnet window appears again.
REMEMBER THAT THE IP AND MAC ADDRESS USED IN THIS EXAMPLE WILL NOT BE THE SAME
AS THE NUMBERS YOU ARE USING. THIS IS FOR DEMONSTRATION ONLY!
46542C
D6600 NetCom System Guide
Page 78
© 2001 Radionics
D6600 NetCom
C900TTL-X Configuration
6.
Click on the Connect menu and then Remote System selection again.
Enter 9999 into the Port field, leaving the Host Name and TermType
fields the same. Click the Connect.
7.
The program will prompt you to press [ENTER] by
displaying "Press Enter to go into setup mode."
Press [ENTER].
If you do not press [ENTER] within 5 seconds of seeing the above message, you
will be disconnected. If this occurs, simply return to Step 1 (in this section).
8.
If you pressed [ENTER] within 5
seconds, then you should see the
following screen (See Figure 38: ).
Figure 38: Telnet Session
9.
Press [0] + [ENTER] to set up the basic Server Configuration.
You are now required to enter the desired IP address.
If the C900TTL-X Dialer Capture Module has been programmed with an IP address in the past, it will be
displayed in parentheses (as shown to the right).
For example, if this D6680 Network Adapter was originally programmed to IP address 190.200.128.152,
we would be changing it to address 190.200.128.219.
10.
To properly program the IP
address 190.200.128.219, the
following keys would be
entered:
190 [ENTER] 200 [ENTER] 128 [ENTER] 219 [ENTER]
Note:
© 2001 Radionics
REMEMBER THAT THE IP ADDRESS USED IN THIS EXAMPLE WILL NOT BE THE SAME AS THE
NUMBERS YOU ARE USING. THIS IS FOR DEMONSTRATION ONLY!
D6600 NetCom System Guide
Page 79
46542C
D6600 NetCom
C900TTL-X Configuration
11.
12.
When asked to set the
Gateway address.
type N [ENTER] or Y
[gateway address]
[ENTER]
Figure 39: Telnet Session – Gateway Address
If the Netmask needs to be changed from the default, enter the number of bits that correspond to the
Netmask your network is using.
See your network administrator for more information.
Press [ENTER] after entering the correct number of bits for the Netmask.
Number of
Host Bits
1
2
3
4
5
6
7
8
9
10
Netmask
255.255.255.254
255.255.255.252
255.255.255.248
255.255.255.240
255.255.255.224
255.255.255.192
255.255.255.128
255.255.255.0
255.255.254.0
255.255.252.0
Number of
Host Bits
11
12
13
14
15
16
17
18
19
20
Netmask
255.255.248.0
255.255.240.0
255.255.224.0
255.255.192.0
255.255.128.0
255.255.0.0
255.254.0.0
255.252.0.0
255.248.0.0
255.240.0.0
Number of
Host Bits
21
22
23
24
25
26
27
28
29
30
31
Netmask
255.224.0.0
255.192.0.0
255.128.0.0
255.0.0.0
254.0.0.0
252.0.0.0
248.0.0.0
240.0.0.0
224.0.0.0
192.0.0.0
128.0.0.0
Table 25: Netmask Address
13.
You will be prompted to change the
Telnet password, press [N] for the
default of "No". This screen will now
show the Setup Mode screen.
Be careful NOT to enter a password into the C900TTL-X by accident or select [Y] to change the
password. If you do, do not lose the password. Otherwise, you will not be able to re-enter a TELNET
programming session with the C900TTL-X. The unit will have to be sent back to the factory and
reconditioned before it will be able to receive another TELNET session.
14.
Now press [1] [ENTER] to go into setup Channel 1
configuration. The following will be displayed:
You must set the baud rate of the C900 to 9600.
Enter 9600 [ENTER] to change it.
15.
46542C
You should then see:
Press Enter to accept the default of (4C). If it doesn't show that,
type 4C [ENTER] to change it.
D6600 NetCom System Guide
Page 80
© 2001 Radionics
D6600 NetCom
C900TTL-X Configuration
16.
You should then see:
Press Enter to accept the default of (00). If it doesn't show that,
type 00 [ENTER] to change it.
17.
You should then see:
Therefore you should type 7700 [ENTER]
18.
You should then see:
Press [ENTER] to accept the default of (CC). If it doesn't show
that, type CC [ENTER] to change it.
19.
You should then see:
Type 01 [ENTER]. C900s are DATAGRAM type 01.
20.
Enter the remote IP address (this will
be the IP address used by the D6680
that the C900 being configured will
report to.
Type the remote IP address in the form of 000.000.000.000 [ENTER] to change it.
21.
You should then see:
Press [ENTER] to accept the default of (07700). If it doesn't
show that, type 07700 [ENTER] to change it.
22.
You should then see:
Press [ENTER] to accept the default of (00). If it doesn't show
that, type 00 [ENTER] to change it.
23.
You should then see:
Press [ENTER] to accept the default of (00). If it doesn't show
that, type 00 [ENTER] to change it.
24.
You should then see:
Press [ENTER] to accept the default of (00). If it doesn't show
that, type 00 [ENTER] to change it.
25.
Press [9] [ENTER] to save changes and exit the Telnet session.
A message is displayed that the connection was lost. Click OK
and close the Telnet window.
Configuration of the C900TTL-X Dialer Capture Module is complete. Perform this procedure for any additional
C900TTL-X’s you may have.
© 2001 Radionics
D6600 NetCom System Guide
Page 81
46542C
D6600 NetCom
C900TTL-X Configuration
Notes:
46542C
D6600 NetCom System Guide
Page 82
© 2001 Radionics
D6600 NetCom
Tools for Radionics D6600 NetCom Diagnostics
8.0
Tools for Radionics D6600 NetCom Diagnostics
8.1
IP Assignment & Network Communications Verification
PING.EXE (short for Packet Internet Groper) is a utility to determine whether a specific IP address is accessible.
It works by sending a packet to the specified address and waiting for a reply. PING is used primarily to
troubleshoot network connections and can be used to verify either a D9133TTL, C900 or D6600 Receiver
network connection.
Note:
Under Microsoft® Windows® 95, Windows® 98, Windows® 2000, and Windows® NT, PING.EXE is normally
installed along with the networking component of Windows, but will not be installed if you have not yet installed
any networking components. If it is not present, it can be extracted from the Windows Installation CAB files.
1.
You must know the IP address of the device you are attempting to verify. Write down the IP address.
2.
Open a MS-DOS® window by selecting Start à Programs à
MS- DOS Prompt:
A MS-DOS® window will appear.
3.
Use the PING command, followed by the IP
address of the device you are attempting to
verify. The correct syntax is:
ping xxx.xxx.xxx.xxx [ENTER]
“xxx.xxx.xxx.xxx” is the IP address assigned
to the D9133TTL-E or C900TTL-E by the
network administrator.
4.
For example, to verify network
communications with a D9133TTL-E that has
been assigned an IP address of: 10.0.0.5 the
correct syntax would be:
PING 10.0.0.5 [ENTER].
See Figure 40: Successful Ping Display for an
example of the display when a device is
installed on the network, is functioning properly
and a successful ping has occurred.
Figure 40: Successful Ping Display
See Figure 41: Unsuccessful Ping
Display for an example of an
unsuccessful ping display.
Figure 41: Unsuccessful Ping Display
If your machine is not properly configured, it may appear to be doing nothing; this is also an indicator of a failure
of the PING command. You can usually terminate the PING command by pressing the Ctrl+C key combination
(press and hold the [Ctrl] and press [C] once).
© 2001 Radionics
D6600 NetCom System Guide
Page 83
46542C
D6600 NetCom
Tools for Radionics D6600 NetCom Diagnostics
Notes:
46542C
D6600 NetCom System Guide
Page 84
© 2001 Radionics
D6600 NetCom
Special Radionics D6600 NetCom Applications
9.0
Special Radionics D6600 NetCom Applications
The following are special applications that have been requested by Radionics dealers. They are included here to
assist you should you have the same requirements. If you have any questions, please feel free to contact Tech
Support at (888) 723-9376, or you can request to speak with a NetCom Engineer.
9.1
Emulating a Direct Serial Connection Over a LAN Using D6680 Network
Adapters
In some applications it may be required that a direct serial connection be emulated over the network. One
application that would require this is where the D6600 Receiver is located on another part of the network from
the Automation System. We can take the COM3 automation output from the D6600 and using 2 D6680’s we can
pipe a direct serial connection between the D6600 and the Automation System. This is true serial cable
emulation over the network (see Figure 42: Direct Serial LAN Connection Configuration).
D6600
Receiver
COM3
Ethernet
D6680
#1
192.158.001.017
D6680
#2
RS232
Automation
System
192.168.001.016
Figure 42: Direct Serial LAN Connection Configuration
The commands necessary for this configuration to automatically establish this connection are as follows. Note
the reference to the D6680’s by their number (#1 or #2). You will also need to insure that the port parameters
such as speed, number of bits, flow control etc. are correct on the D6680 for the serial device that they are
connected to.
D6680 #1:
D6680 #2:
*** basic parameters
Hardware: Ethernet TPI
IP address: 192.168.001.017, no gateway set
*** basic parameters
Hardware: Ethernet TPI
IP address: 192.168.001.016, no gateway set
******* Channel 1 *******
Baudrate 38400, I/F Mode 4C, Flow 00
Port 10001
Remote IP Adr: 192.168.001.016, Port 10001
Connect Mode: CC
******* Channel 1 *******
Baudrate 09600, I/F Mode 4C, Flow 00
Port 10001
Remote IP Adr: 192.168.001.017, Port 10001
Connect Mode: CC
© 2001 Radionics
D6600 NetCom System Guide
Page 85
46542C
D6600 NetCom
Special Radionics D6600 NetCom Applications
Notes:
46542C
D6600 NetCom System Guide
Page 86
© 2001 Radionics
D6600 NetCom
UL Compliance Installation
10.0 UL Compliance Installation
To correctly install the NetCom system according to UL Standards, please refer to the following document:
•
•
D9133TTL-E Installation Guide (P/N: 41124)
C900TTL-E Installation Instructions (P/N: 41123)
© 2001 Radionics
D6600 NetCom System Guide
Page 87
46542C
D6600 NetCom
UL Compliance Installation
Notes:
46542C
D6600 NetCom System Guide
Page 88
© 2001 Radionics
D6600 NetCom
Index
Index
+
+12V
Onboard Terminal Strip
C900TTL-X........................................................ 73
1
Applications
Special
NetCom............................................................. 85
Direct Serial Connection Emulation ................. 85
Assignment using ARP
IP Address
C900TTL-X........................................................ 76
D6680 ............................................................... 22
D9133TTL-E...................................................... 55
-12V
Onboard Terminal Strip
C900TTL-X........................................................ 73
9
9000 Series................................................................ 9
Communication
Programming..................................................... 60
D7212..................................................................... 9
D7412..................................................................... 9
D9112..................................................................... 9
D9412..................................................................... 9
Enhanced Communication..................................... 60
Network Enabling
D9133TTL-E Configuration ................................ 53
Physical Installation
D9133TTL-E Configuration ................................ 53
Program Entry Guide............................................... 9
Programming
for Communication............................................. 60
9133 Supervision
SDI Automation..................................................... 62
SDI RAM/Enhanced Communication ..................... 69
A
Account Status
Procedures ........................................................... 50
Searching Database .......................................... 50
Show................................................................. 50
Sorting Database............................................... 50
Status Changed Time ........................................ 50
Status of Database ............................................ 50
Activate Output
Changing Status ................................................... 52
Active
Changing Status ................................................... 52
Add
Field Unit Accounts
D6600 ............................................................... 44
Add User
User Management
D6200 ............................................................... 38
Alarm Panel
Network Enabling
C900TTL-X Configuration .................................. 71
Answer Armed
SDI RAM Parameters............................................ 64
Answer Disarmed
SDI RAM Parameters............................................ 65
© 2001 Radionics
B
Baud Rate
SDI Automation..................................................... 61
SDI RAM/Enhanced Communication...................... 68
BUS RX
Status LEDs
D9133TTL-E...................................................... 60
BUS TX
Status LEDs
D9133TTL-E...................................................... 60
C
C900
Commands
Changing Status
Activate Output............................................... 52
Active............................................................. 52
D6200
Programming .............................................. 51
Deactivate Output........................................... 52
Disable Intercept ............................................ 52
Idle ................................................................ 52
Retry.............................................................. 52
Status ............................................................ 52
Switch to Fallback .......................................... 51
Switch to Intercept.......................................... 51
D6200
Programming ................................................. 50
C900TTL-E
Operation & Installation Guide ........................... 9, 87
Configuration
Physical Installation ........................................ 72
C900TTL-X
Configuration ........................................................ 71
Default IP Address............................................. 75
Identifying MAC Hardware Address .................... 76
IP Address Assignment using ARP..................... 76
IP Address Verification....................................... 77
Network Enabling
Alarm panel.................................................... 71
Obtaining an IP Address .................................... 76
Physical Installation ........................................... 72
LEDs.............................................................. 75
Dialer.......................................................... 75
Status......................................................... 75
Onboard Inputs .............................................. 72
Onboard Outputs............................................ 73
Onboard Terminal Strip .................................. 73
D6600 NetCom System Guide
Page 89
46542C
D6600 NetCom
Index
Operation & Installation Guide ........................ 72
Setting Dipswitches........................................ 73
Dialer Capture Module
Configuration
IP Address Finishing configuration using TELNET
.................................................................. 78
LEDs .................................................................... 75
Dialer ................................................................ 75
Status ............................................................... 75
Call Back Enabled
SDI RAM Parameters............................................ 63
Caution
Account Database Configurations will be lost when
D6600 is rebooted ............................................. 43
Conventions ......................................................... 10
D6600 Event Buffer must be cleared to Remotely
Execute the software ......................................... 35
Do not change Baud Rate to other than 9600......... 68
Example ............................................................... 10
Failure to press ENTER within 5 seconds will
disconnect.............................................. 25, 58, 79
Path # Ack Wait must not equal RAM IV Time Out
account entry..................................................... 68
Changing
User Password
D6200 ............................................................... 39
Changing Status
Activate Output ..................................................... 52
Active ................................................................... 52
Deactivate Output ................................................. 52
Disable Intercept................................................... 52
Idle....................................................................... 52
Retry .................................................................... 52
Status................................................................... 52
Switch to Fallback ................................................. 51
Switch to Intercept ................................................ 51
Changing User Password
D6200 .................................................................. 39
D6200 Software.................................................... 39
COM1 ...................................................................... 11
COM4 ...................................................................... 11
command center .................................................62, 69
Commands
C900
Changing Status
Activate Output .............................................. 52
Active ............................................................ 52
Deactivate Output .......................................... 52
Disable Intercept ............................................ 52
Idle ................................................................ 52
Programming
D6200 ........................................................ 51
Retry ............................................................. 52
Status ............................................................ 52
Switch to Fallback .......................................... 51
Switch to Intercept.......................................... 51
Programming
D6200............................................................ 50
Configuration
C900TTL-X........................................................... 71
Default IP Address............................................. 75
Identifying MAC Hardware Address.................... 76
IP Address Assignment using ARP..................... 76
46542C
IP Address Finishing configuration using TELNET
...................................................................... 78
IP Address Verification....................................... 77
Network Enabling
Alarm panel ................................................... 71
Obtaining an IP Address .................................... 76
Physical Installation ........................................... 72
LEDs ............................................................. 75
Dialer ......................................................... 75
Status......................................................... 75
Onboard Inputs .............................................. 72
Onboard Outputs ........................................... 73
Onboard Terminal Strip .................................. 73
Setting Dipswitches ........................................ 73
D6680 .................................................................. 21
D6600
Programming ................................................. 28
Default IP Address............................................. 21
Editing Parameters ............................................ 29
Identifying MAC Hardware Address.................... 21
IP Address Assignment using ARP..................... 22
IP Address Finishing configuration using TELNET
...................................................................... 24
IP Address Verification....................................... 23
Network Communication via a D6680................. 28
Obtaining an IP Address .................................... 21
D9133TTL-E......................................................... 53
Default IP Address............................................. 54
Identifying MAC Hardware Address.................... 54
IP Address Assignment using ARP..................... 55
IP Address Finishing configuration using TELNET
...................................................................... 57
IP Address Verification....................................... 56
Network Enabling
9000 Series panel .......................................... 53
Obtaining an IP Address .................................... 54
Physical Installation
9000 Series panel .......................................... 53
Status LEDs ...................................................... 60
Configuration Files
D6600
Editing on Host PC ............................................ 40
Editing using D6200 Software ............................ 42
Opening on Host PC.......................................... 40
Reading on Host PC .......................................... 41
Sending
from D6200 PC .............................................. 43
Viewing using D6200 Software........................... 42
Control/Communicators .............................................. 9
Conventions
Documentation...................................................... 10
Caution ............................................................. 10
Example ........................................................ 10
Important Notes ................................................. 10
Example ........................................................ 10
Programming Note
Example ........................................................ 10
Programming Tip
Example ........................................................ 10
Tips................................................................... 10
Type Styles ....................................................... 10
Warning ............................................................ 10
Example ........................................................ 10
D6600 NetCom System Guide
Page 90
© 2001 Radionics
D6600 NetCom
Index
Copy
Field Unit Accounts
D6600 ............................................................... 49
D
Finding version number through ......................... 32
Software Installation .............................................. 20
D6201
Security Key.......................................................... 20
multiple versions................................................ 20
D6600
Configuration Files
Editing on Host PC ............................................ 40
Editing using D6200 Software ............................ 42
Opening on Host PC .......................................... 40
Reading on Host PC .......................................... 41
Sending to ......................................................... 43
from D6200 PC .............................................. 43
Viewing using D6200 Software........................... 42
D6200 Software
Configuration Files
Editing ........................................................... 42
Viewing .......................................................... 42
Field Unit Accounts
D6200 Programming.......................................... 43
Add Account .................................................. 44
Copy Account................................................. 49
Delete Account............................................... 49
Edit Account................................................... 48
Database
Reading
First Time ................................................... 43
Previous ..................................................... 43
Firmware Files
Changing User Password................................... 39
Program Access Rights...................................... 37
Upgrading through D6200 Software.................... 32
Finding version number .................................. 32
Upgrade Procedure ........................................ 33
User Management ............................................. 37
Add................................................................ 38
Delete ............................................................ 38
Edit ................................................................ 38
Files
Restore....................................................... 39
Save........................................................... 39
Host PC
Configuration Files
Editing ........................................................... 40
Host PC Configuration Files
Opening ............................................................ 40
Reading............................................................. 41
Keypad
Finding version number through ......................... 32
NetCom
Diagnostic Tools ................................................ 83
IP Assignment
Verification.................................................. 83
Network Communications
Verification.................................................. 83
Host PC
D6200 Software Installation ............................ 20
Installation ......................................................... 14
Optional Serial COM1..................................... 17
Overview ........................................................... 11
Requirements – Pre-Installation.......................... 13
Ethernet ......................................................... 13
Host PC ......................................................... 13
D5200 ............................................... 62, 64, 65, 68, 69
NetCom Programming
Handler Requirements ....................................... 61
D6200
Programming
Account Status
Procedures .................................................... 50
Searching Database.................................... 50
Show.......................................................... 50
Sorting Database ........................................ 50
Status Changed Time ................................. 50
Status of Database ..................................... 50
C900 Commands............................................... 50
Changing Status............................................. 51
Changing User Password................................... 39
D6200 Software D6600 Configuration Files
Editing ........................................................... 42
Viewing.......................................................... 42
D6600
Field Unit Accounts ........................................ 43
Add ............................................................ 44
Copy .......................................................... 49
Database
Reading
First Time ............................................ 43
Previous .............................................. 43
Delete......................................................... 49
Edit ............................................................ 48
D6600 Configuration Files
Sending
to D6600..................................................... 43
Host PC D6600 Configuration Files
Editing ........................................................... 40
Opening......................................................... 40
Reading ......................................................... 41
Overview ........................................................... 31
Password Protection.......................................... 31
Program Access Rights...................................... 37
Upgrading D6600 Firmware Files ....................... 32
Finding version number .................................. 32
Upgrade Procedure ........................................ 33
User Management ............................................. 37
Add................................................................ 38
Delete ............................................................ 38
Edit................................................................ 38
Files
Restore....................................................... 39
Save........................................................... 39
Programming/Administration Software ................... 11
Software
D6600
Configuration Files
Viewing ...................................................... 42
D6600 Configuration Files
Editing ........................................................... 42
Sending
to D6600..................................................... 43
D6600 NetCom System Guide
© 2001 Radionics
Page 91
46542C
D6600 NetCom
Index
Token Ring .................................................... 13
Setting Up
Host PC......................................................... 17
Special Applications .......................................... 85
Direct Serial Connection Emulation................. 85
Operation & Installation Guide ................................. 9
Program Entry Guide .............................................. 9
Programming ........................................................ 28
Receiver ............................................................... 11
Release Notes ........................................................ 9
D6672
COM1 Expansion Kit............................................. 17
Installation......................................................... 17
D6680
Network Adapter ................................................... 11
Network Adapters
Configuration..................................................... 21
D6600
Programming.............................................. 28
Default IP Address ......................................... 21
Editing Parameters......................................... 29
Identifying MAC Hardware Address ................ 21
IP Address Assignment using ARP ................. 22
IP Address Finishing configuration using TELNET
.................................................................. 24
IP Address Verification ................................... 23
Network Communication via a D6680 ............. 28
Obtaining an IP Address................................. 21
Direct Serial Connection Emulation .................... 85
D7212........................................................................ 9
D7412........................................................................ 9
D9112........................................................................ 9
D9133TTL-E ................................................. 63, 68, 69
Configuration ........................................................ 53
Default IP Address............................................. 54
Identifying MAC Hardware Address.................... 54
IP Address Assignment using ARP..................... 55
IP Address Verification....................................... 56
Network Enabling
9000 Series panel .......................................... 53
Obtaining an IP Address .................................... 54
Physical Installation
9000 Series panel .......................................... 53
Operation & Installation Guide ........................ 53
Status LEDs ...................................................... 60
Network Adapters
Configuration
IP Address Finishing configuration using TELNET
.................................................................. 57
Operation & Installation Guide ............................9, 87
Configuration
Physical Installation........................................ 53
Status LEDs
BUS RX ............................................................ 60
BUS TX............................................................. 60
ETHERNET LINK .............................................. 60
SER RX ............................................................ 60
SER TX............................................................. 60
D9133TTL-TR ............................................... 63, 68, 69
D9412........................................................................ 9
Database
Reading
First Time.......................................................... 43
46542C
Previous............................................................ 43
Searching
Account Status .................................................. 50
Sorting
Account Status .................................................. 50
Status of
Account Status .................................................. 50
Deactivate Output
Changing Status ................................................... 52
Default
IP Address
C900TTL-X ....................................................... 75
D6680 ............................................................... 21
D9133TTL-E...................................................... 54
Delete
Field Unit Accounts
D6600 ............................................................... 49
Delete User
User Management
D6200 ............................................................... 38
Diagnostic Tools
D6600
NetCom............................................................. 83
IP Assignment
Verification ................................................. 83
Network Communications
Verification ................................................. 83
Dialer
LEDs
C900TTL-X ....................................................... 75
Dialer Capture Module
C900TTL-X
Configuration
IP Address
Finishing configuration using TELNET
C900TTL-X ............................................. 78
Dipswitch
Setting
C900TTL-X ....................................................... 73
Direct Serial Connection Emulation
using D6680 Network Adapters ............................. 85
Disable Intercept
Changing Status ................................................... 52
Documentation Conventions ..................................... 10
Caution................................................................. 10
Example............................................................ 10
Important Notes .................................................... 10
Example............................................................ 10
Programming Note
Example............................................................ 10
Programming Tip
Example............................................................ 10
Tips ...................................................................... 10
Type Styles........................................................... 10
Warning................................................................ 10
Example............................................................ 10
DTR Control
SDI Automation..................................................... 62
SDI RAM/Enhanced Communication ..................... 69
Edit
D6600 NetCom System Guide
Page 92
E
© 2001 Radionics
D6600 NetCom
Index
D6600 Configuration Files
on Host PC........................................................ 40
using D6200 Software........................................ 42
Field Unit Accounts
D6600 ............................................................... 48
Edit User
User Management
D6200 ............................................................... 38
Editing Parameters ................................................... 29
Enable Ext Modem
SDI RAM Parameters............................................ 64
Enable SDI Auto
SDI Automation..................................................... 61
Enable SDI RAM
SDI RAM Parameters............................................ 63
Enhanced Comm
SDI RAM Parameters............................................ 65
Enhanced Communication ........................................ 64
9000 Series programming ..................................... 60
Enhanced Communications ................................ 60, 66
Requirements
Handler
NetCom RAM IV
Programming .............................................. 65
Enhanced Routing.................................................. 65
Ethernet ................................................................... 11
Requirements – Pre-Installation............................. 13
ETHERNET LINK
Status LEDs
D9133TTL-E...................................................... 60
Example of
Caution................................................................. 10
Important Notes .................................................... 10
Programming Note................................................ 10
Programming Tip .................................................. 10
Warning................................................................ 10
Programming ................................................. 61
NetCom RAM IV
Programming ................................................. 61
Enhanced Communications......................... 65
IP Address Programming ............................ 66
Path # Programming ................................... 66
Route Group Attempts................................. 69
SDI Automation........................................... 61
SDI RAM Parameters.................................. 63
SDI RAM/Enhanced Communications
Configuration........................................... 68
Host PC
D6600 Configuration Files
Editing............................................................... 40
Opening ............................................................ 40
Reading............................................................. 41
Requirements – Pre-Installation............................. 13
Setting Up............................................................. 17
I
Identifying
MAC Hardware Address
C900TTL-X........................................................ 76
D6680 ............................................................... 21
D9133TTL-E...................................................... 54
Idle
Changing Status ................................................... 52
Important Note
C900 must emulate a phone and line and a digital
receiver ............................................................. 73
C900TTL-X and PC must both be on same gateway
to telnet ............................................................. 76
D6600 Programming Steps before communication to
network ............................................................. 16
D6680 and PC must both be on same gateway to
telnet ................................................................. 22
D9133TTL-E and PC must both be on same gateway
F
to telnet ............................................................. 55
Field Unit Accounts
Default IP address is not used for NetCom............. 21
D6600................................................................... 43
Files reside in RAM ............................................... 41
Add ................................................................... 44
Frequency must be considered when programming 67
Copy ................................................................. 49
IP and MAC addresses used are for demo only22, 23,
Database
24, 55, 56, 57, 58, 76, 77, 78
Reading
Master User access rights cannot be edited or deleted
First Time ................................................... 43
......................................................................... 37
Previous ..................................................... 43
Number of Virtual Account and Dialer account digits
Delete................................................................ 49
must match........................................................ 47
Edit ................................................................... 48
Refer to D6600 Release Notes for upgrade info ..... 33
Finding version number ............................................ 32
Remote Programming not possible
through D6200 Software........................................ 32
using C900TTL-E with 9000 Series panels ......... 13
through D6600 Keypad.......................................... 32
using C900TTL-E with 9000 Series panels through
Finishing configuration using TELNET
the network .................................................... 13
IP Address
Set Channel 1 and Channel 2 port numbers to
C900TTL-X........................................................ 78
different numbers............................................... 26
D6680 ............................................................... 24
Skip if PC is already functioning workstation for
D9133TTL-E...................................................... 57
D6600, D6680 and panel network adapters
programming ..................................................... 17
Steps necessary only if Host PC is connected via a
H
Null modem serial cable..................................... 19
Important Notes
Handler
Conventions.......................................................... 10
Requirements
Example ............................................................... 10
NetCom D5200
D6600 NetCom System Guide
© 2001 Radionics
Page 93
46542C
D6600 NetCom
Index
Installation
D6200 Software.................................................... 20
D6600 .................................................................. 14
Optional Serial COM1 ........................................... 17
UL Compliance
Referenced Documents ..................................... 87
Introduction ................................................................ 9
Documentation Conventions.................................. 10
Caution ............................................................. 10
Example ........................................................ 10
Important Notes................................................. 10
Example ........................................................ 10
Programming Note
Example ........................................................ 10
Programming Tip
Example ........................................................ 10
Tips................................................................... 10
Type Styles ....................................................... 10
Warning ............................................................ 10
Example ........................................................ 10
Manual Organization............................................... 9
Other Literature Referenced .................................... 9
IP Address
Assignment using ARP
C900TTL-X ....................................................... 76
D6680 ............................................................... 22
D9133TTL-E ..................................................... 55
Default
C900TTL-X ....................................................... 75
D6680 ............................................................... 21
D9133TTL-E ..................................................... 54
Finishing configuration using TELNET
C900TTL-X ....................................................... 78
D6680 ............................................................... 24
D9133TTL-E ..................................................... 57
Obtaining
C900TTL-X ....................................................... 76
D6680 ............................................................... 21
D9133TTL-E ..................................................... 54
Verification
C900TTL-X ....................................................... 77
D6680 ............................................................... 23
D9133TTL-E ..................................................... 56
IP Address Programming
Requirements
Handler
NetCom RAM IV
Programming.............................................. 66
IP Assignment
Verification............................................................ 83
C900TTL-X ....................................................... 76
D6680 ............................................................... 21
D9133TTL-E...................................................... 54
Manual Organization
Introduction............................................................. 9
Modem Init String
SDI RAM Parameters............................................ 65
N
NetCom
Diagnostic Tools ................................................... 83
IP Assignment
Verification..................................................... 83
Network Communications
Verification..................................................... 83
Host PC
D6200 Software Installation ............................... 20
Installation ............................................................ 14
Optional Serial COM1 ........................................ 17
Overview .............................................................. 11
Programming
D5200
Handler Requirements.................................... 61
RAM IV ............................................................. 61
Handler Requirements.................................... 61
Enhanced Communications......................... 65
IP Address Programming ............................ 66
Path # Programming ................................... 66
Route Group Attempts ................................ 69
SDI Automation .......................................... 61
SDI RAM Parameters.................................. 63
SDI RAM/Enhanced Communications
Configuration........................................... 68
Requirements – Pre-Installation............................. 13
Ethernet ............................................................ 13
Host PC ............................................................ 13
Token Ring........................................................ 13
Setting Up
Host PC ............................................................ 17
Special Applications .............................................. 85
Direct Serial Connection Emulation .................... 85
NetCom only compatible with 9000 Series panels (v6.00
or higher) .............................................................. 60
Network Adapters
C900TTL-X
Configuration
Default IP Address ......................................... 75
D6680
Configuration..................................................... 21
D6600
Programming.............................................. 28
L
Default IP Address ......................................... 21
LEDs
Editing Parameters......................................... 29
C900TTL-X........................................................... 75
Identifying MAC Hardware Address ................ 21
Status
IP Address
D9133TTL-E ..................................................... 60
Assignment using ARP ............................... 22
Local Area Network .................................................. 63
Finishing configuration using TELNET ......... 24
Verification ................................................. 23
Network Communication via a D6680 ............. 28
M
Obtaining an IP Address................................. 21
D9133TTL-E
MAC Hardware Address
Configuration
Identifying
D6600 NetCom System Guide
46542C
Page 94
© 2001 Radionics
D6600 NetCom
Index
Default IP Address ......................................... 54
IP Address
Finishing configuration using TELNET
D9133TTL-E ........................................... 57
Network Communication via a D6680........................ 28
Network Communications
Verification............................................................ 83
O
Obtaining an IP Address ........................................... 21
C900TTL-X........................................................... 76
D9133TTL-E ......................................................... 54
Onboard Inputs
C900TTL-X........................................................... 72
Input 1............................................................... 72
Input 2............................................................... 72
Input 3............................................................... 72
Onboard Outputs
C900TTL-X........................................................... 73
Output 1 ............................................................ 73
Output 2 ............................................................ 73
Output 3 ............................................................ 73
Output 4 ............................................................ 73
Onboard Terminal Strip
C900TTL-X........................................................... 73
+12V ................................................................. 73
-12V .................................................................. 73
Open
D6600 Configuration Files
on Host PC........................................................ 40
Operation & Installation Guide
C900TTL-E....................................................... 9, 87
Configuration
Physical Installation........................................ 72
D6600..................................................................... 9
D9133TTL-E ..................................................... 9, 87
Configuration
Physical Installation........................................ 53
Operation Manual
RAM IV................................................................... 9
Overview
D6600 NetCom ..................................................... 11
Host PC
D6200 Software Installation ............................ 20
Installation ......................................................... 14
Optional Serial COM1..................................... 17
Requirements – Pre-Installation ......................... 13
Ethernet ......................................................... 13
Host PC ......................................................... 13
Token Ring .................................................... 13
Setting Up
Host PC ......................................................... 17
P
Path # IP Add1
Programming Path #’s........................................... 66
Path # IP Add2
Programming Path #’s........................................... 66
Path # IP Add3
Programming Path #’s........................................... 66
Path # IP Add4
Programming Path #’s........................................... 66
Path # Poll Rate
Programming Path #’s........................................... 66
Path # Programming
Requirements
Handler
NetCom RAM IV
Programming .............................................. 66
Path # Retry Count
Programming Path #’s........................................... 68
PC9000.................................................................... 60
Physical Installation
C900TTL-X Configuration...................................... 72
PING command........................................................ 83
Pre-Installation
Requirements ....................................................... 13
Ethernet ............................................................ 13
Host PC............................................................. 13
Token Ring........................................................ 13
Procedures
Account Status...................................................... 50
Program Access Rights
D6200................................................................... 37
D6200 Software .................................................... 37
Program Entry Guide
9000 Series ............................................................ 9
D6600..................................................................... 9
Programming
Changing User Password ...................................... 39
D6200
Account Status
Procedures .................................................... 50
Searching Database.................................... 50
Show .......................................................... 50
Sorting Database ........................................ 50
Status Changed Time ................................. 50
Status of Database...................................... 50
C900 Commands............................................... 50
Changing Status............................................. 51
D6600
Field Unit Accounts ........................................ 43
Add ............................................................ 44
Copy........................................................... 49
Database
Reading
First Time ............................................ 43
Previous .............................................. 43
Delete......................................................... 49
Edit............................................................. 48
D6600............................................................. 28, 29
D6600 Configuration Files
Editing on Host PC ............................................ 40
Editing using D6200 Software ............................ 42
Opening on Host PC .......................................... 40
Reading on Host PC .......................................... 41
Sending
Parity/Stop
SDI Automation..................................................... 61
SDI RAM/Enhanced Communication ..................... 69
Password Protection
D6200 Software .................................................... 31
Path # Ack Wait
Programming Path #’s........................................... 68
D6600 NetCom System Guide
© 2001 Radionics
Page 95
46542C
D6600 NetCom
Index
to D6600 from D6200 PC ............................... 43
Viewing using D6200 Software........................... 42
Overview .............................................................. 31
Password Protection ............................................. 31
Program Access Rights......................................... 37
Upgrading D6600 Firmware Files .......................... 32
Finding version number ..................................... 32
Upgrade Procedure ........................................... 33
User Management ................................................ 37
Add ................................................................... 38
Delete ............................................................... 38
Edit ................................................................... 38
Files
Restore.......................................................... 39
Save.............................................................. 39
Programming Note
Example ............................................................... 10
RAM IV programming only allowed ........................ 65
Set ‘Enable Ext Modem’ to NO if using Enhanced
Communications................................................ 66
Programming Path #’s
Prompts
Path # Ack Wait................................................. 68
Path # IP Add1 .................................................. 66
Path # IP Add2 .................................................. 66
Path # IP Add3 .................................................. 66
Path # IP Add4 .................................................. 66
Path # Poll Rate ................................................ 66
Path # Retry Count ............................................ 68
Programming Tip
9000 Series panel interprets.............................67, 68
Common Minutes to Seconds conversions............. 68
Example ............................................................... 10
Prompts
Programming Path #’s
Path # Ack Wait................................................. 68
Path # IP Add1 .................................................. 66
Path # IP Add2 .................................................. 66
Path # IP Add3 .................................................. 66
Path # IP Add4 .................................................. 66
Path # Poll Rate ................................................ 66
Path # Retry Count ............................................ 68
Route Group Attempts
RG# 1 Attempt .................................................. 70
SDI Automation
9133 Supervision............................................... 62
Baud Rate......................................................... 61
DTR Control ...................................................... 62
Enable SDI Auto................................................ 61
Parity/Stop ........................................................ 61
RTS Control ...................................................... 62
Status Rate ....................................................... 62
SDI RAM Parameters
Answer Armed................................................... 64
Answer Disarmed .............................................. 65
Call Back Enabled ............................................. 63
Enable Ext Modem ............................................ 64
Enable SDI RAM ............................................... 63
Enhanced Comm............................................... 65
Modem Init String .............................................. 65
RAM Dial String................................................. 65
RAM IP Address 1 ............................................. 64
RAM IP Address 2 ............................................. 64
46542C
RAM IP Address 3 ............................................. 64
RAM IP Address 4 ............................................. 64
RAM Line Monitor.............................................. 65
Seize Relay ....................................................... 65
SDI RAM/Enhanced Communication
9133 Supervision............................................... 69
Baud Rate ......................................................... 68
DTR Control ...................................................... 69
Parity/Stop ........................................................ 69
RTS Control ...................................................... 69
R
RADAUX1
Sections
Configuration..................................................... 61
Miscellaneous.................................................... 61
Route Group Attempts ....................................... 61
SDI Automation ................................................. 61
SDI RAM Parameters ........................................ 61
RADXAUX1.............................................................. 60
Sections
Enhanced Communications ............................... 61
SDI RAM/Enhanced Communication .................. 61
RAM Dial String
SDI RAM Parameters............................................ 65
RAM IP Address 1
SDI RAM Parameters............................................ 64
RAM IP Address 2
SDI RAM Parameters............................................ 64
RAM IP Address 3
SDI RAM Parameters............................................ 64
RAM IP Address 4
SDI RAM Parameters............................................ 64
RAM IV ................................................... 60, 64, 65, 67
NetCom Programming........................................... 61
Handler Requirements ....................................... 61
Enhanced Communications............................ 65
IP Address Programming................................ 66
Path # Programming ...................................... 66
Route Group Attempts.................................... 69
SDI Automation.............................................. 61
SDI RAM Parameters..................................... 63
SDI RAM/Enhanced Communications
Configuration .............................................. 68
Operation Manual ................................................... 9
RAM Line Monitor
SDI RAM Parameters............................................ 65
Read
D6600 Configuration Files
on Host PC........................................................ 41
Referenced Documents
Installation
UL Compliance.................................................. 87
Referenced Literature
9000 Series Program Entry Guide ........................... 9
C900TTL-E
Operation & Installation Guide........................ 9, 87
D6600
Operation & Installation Guide.............................. 9
Program Entry Guide ........................................... 9
Release Notes..................................................... 9
D9133TTL-E
D6600 NetCom System Guide
Page 96
© 2001 Radionics
D6600 NetCom
Index
Operation & Installation Guide........................ 9, 87
Other ...................................................................... 9
RAM IV Operation Manual....................................... 9
Release Notes
D6600..................................................................... 9
Remote Account Manager ........................................ 63
Requirements
Handler
NetCom D5200
Programming ................................................. 61
NetCom RAM IV
Programming ................................................. 61
Restore
User Management Files
D6200 ............................................................... 39
Retry
Changing Status ................................................... 52
RG# 1 Attempt
Route Group Attempts........................................... 70
Route Group Attempts
Prompts
RG# 1 Attempt................................................... 70
Requirements
Handler
NetCom RAM IV
Programming .............................................. 69
RTS Control
SDI Automation..................................................... 62
SDI RAM/Enhanced Communication ..................... 69
S
RAM IP Address 4 ............................................. 64
RAM Line Monitor .............................................. 65
Seize Relay ....................................................... 65
Requirements
Handler
NetCom RAM IV
Programming .............................................. 63
SDI RAM/Enhanced Communication
Prompts
9133 Supervision............................................... 69
Baud Rate ......................................................... 68
DTR Control ...................................................... 69
Parity/Stop......................................................... 69
RTS Control....................................................... 69
SDI RAM/Enhanced Communications Configuration
Requirements
Handler
NetCom RAM IV
Programming .............................................. 68
Searching Database
Account Status...................................................... 50
Seize Relay
SDI RAM Parameters............................................ 65
Sending to D6600 Receiver
D6600 Configuration Files
from D6200 PC.................................................. 43
SER RX
Status LEDs
D9133TTL-E...................................................... 60
SER TX
Status LEDs
D9133TTL-E...................................................... 60
Setting Dipswitches
C900TTL-X ........................................................... 73
Setting Up
Host PC ................................................................ 17
Show
Account Status...................................................... 50
Sorting Database
Account Status...................................................... 50
Special Applications
NetCom ................................................................ 85
Direct Serial Connection Emulation .................... 85
Status
Changing Status ................................................... 52
LEDs
C900TTL-X........................................................ 75
Status Changed Time
Account Status...................................................... 50
Status LEDs
D9133TTL-E ......................................................... 60
BUS RX............................................................. 60
BUS TX ............................................................. 60
ETHERNET LINK .............................................. 60
SER RX............................................................. 60
SER TX ............................................................. 60
Status of Database
Account Status...................................................... 50
Status Rate
SDI Automation..................................................... 62
Switch to Fallback
Changing Status ................................................... 51
Switch to Intercept
Save
User Management Files
D6200 ............................................................... 39
SDI ...............................................................60, 62, 69
SDI Address 88..................................................... 64
SDI Automation
Prompts
9133 Supervision............................................... 62
Baud Rate ......................................................... 61
DTR Control ...................................................... 62
Enable SDI Auto................................................ 61
Parity/Stop......................................................... 61
RTS Control ...................................................... 62
Status Rate ....................................................... 62
Requirements
Handler
NetCom RAM IV
Programming .............................................. 61
SDI RAM Parameters
Prompts
Answer Armed................................................... 64
Answer Disarmed .............................................. 65
Call Back Enabled ............................................. 63
Enable Ext Modem ............................................ 64
Enable SDI RAM ............................................... 63
Enhanced Comm............................................... 65
Modem Init String .............................................. 65
RAM Dial String................................................. 65
RAM IP Address 1 ............................................. 64
RAM IP Address 2 ............................................. 64
RAM IP Address 3 ............................................. 64
D6600 NetCom System Guide
© 2001 Radionics
Page 97
46542C
D6600 NetCom
Index
Changing Status ................................................... 51
T
TCP/IP..................................................................... 11
Terminal Strip
C900TTL-X (Onboard) .......................................... 73
Tips
Conventions ......................................................... 10
Token Ring .............................................................. 11
Requirements – Pre-Installation............................. 13
Tools
Diagnostic ............................................................ 83
IP Assignment
Verification..................................................... 83
Network Communications
Verification..................................................... 83
Type Styles
Conventions ......................................................... 10
D6200 Software .................................................... 37
Delete
D6200 Software................................................. 38
Delete User
D6200 ............................................................... 38
Edit
D6200 Software................................................. 38
Edit User
D6200 ............................................................... 38
Files
Save
D6200 Software ............................................. 39
User Management Files
Restore
D6200 Software................................................. 39
User Password
Changing
D6200 ............................................................... 39
V
U
UL Compliance
Installation
Referenced Documents ..................................... 87
Upgrade Procedure .................................................. 33
Upgrading D6600 Firmware Files
D6200 Software.................................................... 32
Finding version number ..................................... 32
Upgrade Procedure ........................................... 33
User Management
Add
D6200 Software................................................. 38
Add User
D6200 ............................................................... 38
D6200 .................................................................. 37
46542C
Verification
IP Address
C900TTL-X ....................................................... 77
D6680 ............................................................... 23
D9133TTL-E...................................................... 56
View
D6600 Configuration Files
using D6200 Software........................................ 42
W
Warning
Conventions.......................................................... 10
Example ............................................................... 10
Wide Area Network.................................. 63, 64, 66, 67
D6600 NetCom System Guide
Page 98
© 2001 Radionics
D6600 NetCom
Notes
© 2001 Radionics
D6600 NetCom System Guide
Page 99
46542C
© 2001 Radionics, a division of Detection Systems, Inc.
PO Box 80012, Salinas, CA 93912-0012, USA
Customer Service: (800) 538-5807
46542C
System Guide
5/01
D6600 NetCom
Page 100 of 100