1
Motorola Phone Tools
User’s Manual
Contents
Legal Statement........................................................................1
Screen Shots ............................................................................2
Minimum system requirements ..............................................2
Contacts ....................................................................................2
Sales ..........................................................................................3
Technical support ....................................................................3
Websites....................................................................................3
Copyright and trademarks.......................................................3
CHAPTER 1: MOTOROLA PHONE TOOLS OVERVIEW ............. 4
Introduction ..............................................................................4
Personal Data.............................................................................4
Communicate .............................................................................4
Transfer Files .............................................................................5
Customize ..................................................................................5
Moto Online ................................................................................5
Manage Profiles ........................................................................5
Select a profile............................................................................6
Create a profile ...........................................................................6
Set a default profile ....................................................................6
Enable the Profile selection again ..............................................6
Change the application view ...................................................7
CHAPTER 2: SETUP THE APPLICATION ................................. 8
Access General Setup .............................................................8
Change the general color ........................................................8
Update the application .............................................................9
Configure the Update .................................................................9
Launch the Motorola Live Update ..............................................9
Set up profiles at start time ...................................................10
CHAPTER 3: PERSONAL DATA ........................................... 11
Access Personal Data ..............................................................11
Contacts ........................................................................................... 13
Overview .................................................................................13
Standard View Window layout..................................................13
Synchronization View Window layout.......................................13
Manage Phonebooks .............................................................14
Create a phonebook .................................................................14
Open an existing phonebook....................................................14
Delete a phonebook .................................................................15
Match table window ..................................................................15
Match fields between an external phonebook and the application
Phonebook ...............................................................................16
Manage Contacts ...................................................................17
Create a contact .......................................................................17
Select contacts .........................................................................17
Edit a contact............................................................................18
Delete a contact .......................................................................18
Restore a deleted contact ........................................................18
Copy contacts to a folder..........................................................19
Print contacts............................................................................19
Search .....................................................................................20
Search for contacts ..................................................................20
Perform a fast search ...............................................................21
Use search criteria ...................................................................22
Import/Export ..........................................................................22
Compatible phonebook files .....................................................22
Export .......................................................................................24
Create Group of Contacts......................................................26
Group of contacts .....................................................................26
Create a group .........................................................................26
Rename a group.......................................................................26
Synchronize Contacts............................................................27
Access Contacts Synchronization view ....................................27
Use Contacts Synchronization view .........................................28
Synchronize contacts manually ................................................31
Customize contact details ........................................................31
Calendar ........................................................................................... 33
Overview .................................................................................33
Standard View Window layout..................................................33
Synchronization View Window layout.......................................33
Manage the schedule .............................................................34
Open a calendar .......................................................................34
Start a search ...........................................................................35
Options .....................................................................................36
Choose the display ...................................................................36
Manage events........................................................................38
Schedule an event....................................................................38
View and modify an event ........................................................39
Copy an event or a task ...........................................................39
Delete an event ........................................................................40
Manage tasks ..........................................................................41
Create a task ............................................................................41
Edit a task.................................................................................42
Mark a task as completed ........................................................42
Copy an event or a task ...........................................................43
Delete a task ............................................................................44
Display the Tasks window ........................................................44
Close the Tasks window...........................................................44
Synchronize Calendar............................................................46
Access Calendar Synchronization view ...................................46
Synchronize calendars manually..............................................50
Perform a search in the calendar synchronization view ..........51
Synchronization............................................................................... 53
Two transfer modes..................................................................53
Operation..................................................................................54
Modify the Synchronization Settings ...................................55
Access Synchronization Settings window ................................55
Set up Synchronization ............................................................55
Setup Tabs ...............................................................................56
Synchronize Contacts and Calendar ....................................62
Synchronize now ......................................................................62
Use Protected Data transfer .....................................................63
Backup and Restore your data....................................................... 65
To backup and restore your data .............................................65
To delete data from you phone ................................................66
Phonebook Transfer........................................................................ 67
Manage Phonebook Transfer ...................................................67
CHAPTER 4: COMMUNICATE .............................................. 69
Access Communicate...............................................................69
SMS ................................................................................................... 71
Description of SMS...................................................................71
Configure SMS........................................................................72
Prerequisite ..............................................................................72
Access the Message settings ...................................................72
Configure SMS .........................................................................72
Manage Messages ..................................................................74
Send a message ......................................................................74
Extract mobile phone contact details........................................74
Receive and read a short message..........................................76
Reply to a received message ...................................................76
Forward a message to another recipient ..................................76
Save a message.......................................................................77
Create a mailbox ......................................................................77
Change the status of a message..............................................78
MMS .................................................................................................. 79
Description of MMS ................................................................79
Media Files screen .................................................................80
Composer screen ...................................................................81
Buttons in the Composer toolbar ..............................................81
Composer zones ......................................................................82
Text insertion zone ..................................................................82
Preview screen .......................................................................83
Create an MMS........................................................................83
Insert an image in an MMS ....................................................84
Insert a sound recording in an MMS.....................................84
Insert a text in an MMS ..........................................................85
Modify an MMS .......................................................................85
Move images, texts or sounds inside an MMS ....................86
Modify the display time of an item inside an MMS..............86
Retouch an image ..................................................................86
View an MMS...........................................................................89
Save an MMS .........................................................................90
Send an MMS ..........................................................................90
Internet ............................................................................................. 93
Connect /disconnect ..............................................................93
Connect to the Internet .............................................................93
Start up a connection other than the default connection ..........94
End a connection......................................................................94
Create New Connection .........................................................95
Use Internet Connection Wizard ..............................................95
Manage Connections .............................................................97
Change a connection ...............................................................97
Set a default connection ...........................................................98
Delete a connection..................................................................98
Rename a connection ..............................................................99
Launch Internet Browser automatically ....................................99
Check Connections ..............................................................100
Check Connections Log .........................................................100
View Connection status ..........................................................102
CHAPTER 5: TRANSFER FILES ......................................... 103
Transferring a file from your PC to your mobile phone....104
Transferring a file from your mobile phone to your PC....104
CHAPTER 6: CUSTOMIZE ................................................. 105
Access the Customize editors ............................................105
Description............................................................................105
The explorer screen ...............................................................106
The editor screen ...................................................................106
The preview screen ................................................................106
Image Editor ................................................................................... 107
Description of the Image Editor ..............................................107
Selection screen ...................................................................109
Buttons ..................................................................................110
Tools menu ............................................................................110
Manage Image Editor ...........................................................112
Preview screen .......................................................................112
Edit an image .........................................................................112
Crop an image ........................................................................113
Retouch an image ..................................................................114
Buttons on the retouch toolbar ...............................................115
Perform a screen capture ....................................................116
Melody Editor ................................................................................. 117
Description of the Melody Editor ............................................117
Selection screen ...................................................................118
Melody Files screen .............................................................121
Preview screen .....................................................................121
Open a sound file .................................................................122
Open a .cda file ......................................................................122
Open a polyphonic sound file .................................................123
Open a hi-fi sound file ............................................................124
Select and play an extract ...................................................125
Select a musical extract .........................................................125
Listen to the selected musical extract ....................................125
Start the listening from a selected point .................................126
Make a voice recording........................................................126
Mix two sound files ..............................................................127
Save an extract .....................................................................128
Save a melody on the computer.............................................128
Save a melody on the mobile phone ......................................128
Video Editor ................................................................................... 129
Description of the Video Editor ...............................................129
Preview screen .......................................................................129
Explorer screen ......................................................................129
Composer screen ...................................................................130
Media Files screen ...............................................................130
Composer screen .................................................................130
Buttons in the Composer toolbar ............................................131
Specific buttons in the Tools menu (only in Edit view) ..........132
Composer zones ....................................................................132
Preview screen .....................................................................134
Manage Videos .....................................................................135
Create a video ........................................................................135
Import multimedia files (videos, sounds, images, text)...........135
Insert a title ............................................................................136
Modify a title ...........................................................................138
Add a sound recording ...........................................................138
Adjust the audio balance ........................................................139
Change the display time of an item ........................................140
Reorder items .........................................................................140
Split a video ............................................................................141
Combine videos and/or images ..............................................141
Save a video...........................................................................141
Transfer a video .....................................................................142
User’s Manual
Legal Statement
Music or other audio works, whether originating from CDs, MP-3s or some other sources,
("Music Materials") may be protected under copyright law. Unauthorized copying of
copyrighted works may be contrary to the provisions of the copyright laws of the United States
and other countries. It is your responsibility, not BVRP Software's, to ensure that your use of
Motorola Phone Tools software and/or BVRP Software phones to copy, edit, play or otherwise
use any Music Materials does not violate the copyright laws. You are responsible for obtaining
any necessary permission and paying any necessary licensing fees for the Music Materials
other materials you choose to copy, edit, play or otherwise use. A violation of copyright laws
could result in a civil or criminal claim brought against you, even if you don't receive any
money or other commercial benefit from your copying or other use of the material. This
software should only be used for your personal, noncommercial purposes.
Motorola Phone Tools
1
User’s Manual
Screen Shots
The screen shots in this guide correspond to the use of Motorola Phone ToolsMotorola Phone
Tools in a Windows XP environment. When running the application in other Windows
operating systems, the aspect of the screens may change. This will not impair the software’s
functionality.
The image you see may be different depending on phone model.
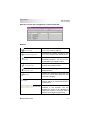
Minimum system requirements
This application runs under Windows® 98, 2000, Millennium, or XP. To obtain information
about other operating systems and upgrades, contact Avanquest Software or your dealer.
For optimal application performance, make sure your system includes the following:
•
Pentium® II 233 MHz computer connected to your mobile phone (via a cable or an
infrared link).
•
Available USB port.
•
Sound card.
•
Hard disk with 120 MB free disk space.
•
High-speed network option (GPRS, CDMA 1X and WCDMA) in your subscription
with your mobile phone operator (for using e-mail and a high-speed Internet connection over the cell phone network).
Contact your access provider if you need more information about your subscription.
•
Minimum RAM requirements: 32 MB under Windows® 98 and Millennium; 64 MB
under Windows® 2000 and XP.
Contacts
Corporate Headquarters
Motorola, Inc.
Consumer Advocacy Office
1307 East Algonquin Road
Schaumburg, IL 60196
2
Motorola Phone Tools
User’s Manual
Sales
To obtain product information, order an upgrade, or obtain a list of dealers and points of sale,
call us at the following number: +1 800-331-6456.
You can also get information at the following address:
http://www.hellomoto.com
Technical support
Technical support information for Motorola Phone Tools is available on the Avanquest
Software Web site:
http://www.bvrp.com/customers/motorola/
To obtain telephone numbers and e-mail addresses, click on Contact us at the top of the Web
page.
Websites
Please visit our Websites to obtain the latest information on our products and available
upgrades: http://www.hellomoto.com and http://www.avanquest.com.
Copyright and trademarks
© Motorola, Inc. 2007
© Avanquest Software 2001-07. All rights reserved.
Motorola Phone Tools is a registered trademark of Avanquest Software.
All product names mentioned in this document are trademarks or registered trademarks of
their respective owners.
Motorola Phone Tools
3
User’s Manual
Chapitre 1 : Motorola Phone Tools
Overview
Introduction
This application enables you to share the information contained in your
mobile phone with your computer.
Once your mobile phone is connected to your computer, different
operations can easily be processed. These operations are organized in
different sections that can be accessed via the left panel: Personal Data,
Communicate, Transfer Files, Customize and Moto Online.
Personal Data
•
Contacts: Manually manage or edit your contacts on your phone
and PC.
•
Calendar: Manually manage or edit your appointments on your
phone and PC.
•
Synchronization: Synchronize your PC contacts and calendar
with your phone. The application works with Outlook, Outlook
Express or Lotus Notes.
•
Backup/Restore: Backup or restore your phone's Contact and
Calendar data at any time.
•
Phonebook Transfer: Transfer mobile phonebook to another
phone.
Communicate
4
•
SMS: Compose, receive and manage your text messages.
•
MMS: Compose multimedia messages with pictures, sounds and
titles and send them to your friends.
•
Internet: Connect to the Internet using your phone as a modem
and manage your internet connections.
Motorola Phone Tools
User’s Manual
Transfer Files
•
Pictures: Transfer your pictures between your phone and your PC.
•
Audio Files: Transfer your music between your phone and your
PC.
•
Video Files: Transfer your videos between your phone and your
PC.
•
All Files: Transfer all types of files between your phone and your
PC.
Customize
You can edit melodies or pictures, create and/or edit movies and transfer
them to your mobile phone:
•
Image Editor: Edit pictures and use them as wallpapers and
screensavers on your mobile phone.
•
Melody Editor: Edit your favorite music files or audio CD tracks
and use them as ringtones on your mobile phone.
•
Video Editor: Compose videos with sound and titles and transfer
them to your mobile device
Moto Online
More online information about Motorola, accessories and Motorola Phone
Tools support.
Note:
You need to have an Internet connection to access it.
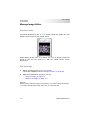
Manage Profiles
Each time you start the application you are prompted to select or create a
new profile, you can also define a default profile. All the user's information
such as contacts' details, calendar events, sent and received SMS etc. are
associated to a profile, thus, the application can be used by different users.
Motorola Phone Tools
5
User’s Manual
Select a profile
1.
Deploy the Profile list box, and select the profile you want to use.
2.
Click OK to launch the application using the selected profile.
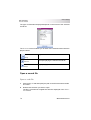
Create a profile
1.
Click the New button.
The New Profile window is displayed
2.
Enter the name of the new profile and click OK.
The window closes and the new profile is selected in the Profile list.
3.
Click OK to launch the application using the new profile.
Set a default profile
1.
Select a profile from the pulldown menu.
2.
Click the Options >> button.
3.
In the Options section, check the Define as default profile box.
The Choose a profile dialog box won’t be displayed any more.
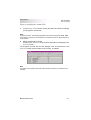
Enable the Profile selection again
1.
From the Tools menu, select Setup > General Setup....
The General Setup window is displayed.
2.
Select the Miscellaneous tab.
3.
In the At start time section, check the Request which profile to use
radio button.
6
Motorola Phone Tools
User’s Manual
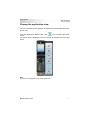
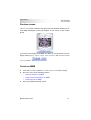
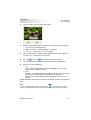
Change the application view
You can customize your application and switch from the default view to the
phone view.
From the application default view, click
at the bottom right-hand
corner.
The phone view is displayed. You can access all functions from the right
panel.
Note:
The phone view depends on the phone connected.
Motorola Phone Tools
7
User’s Manual
Chapter 2: Setup the Application
Access General Setup
From the select Tools menu, select Setup > General Setup....
The General Setup window is displayed.
Various tabs allows you to setup the application:
•
“Change the general color”
•
“Update the application”
•
“Set up profiles at start time”
Change the general color
Important!
The availability of some features described in this help depends on your software
version.
1.
“Access General Setup”
2.
Click the Themes tab.
3.
Select the color you want to be displayed in the application.
4.
Click the OK button to validate.
8
Motorola Phone Tools
User’s Manual
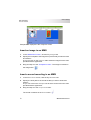
Update the application
Configure the Update
1.
“Access General Setup”
2.
Click the Application update tab.
3.
Click the Settings button.
The Update Configuration windows displays.
4.
Select one of these modes:
-> Automatic:
•
Updating is automatic and takes place with the frequency specified
in the Check updates every dropdown list. Your application is
updated silently.
•
Check the Use the Wizard for downloading updates box to automatically launch the Update Wizard with the frequency you have
decided.
-> Manual:
•
Updating is manual.
Note:
By default the Enable using the product while downloading box is checked. If you
want the product disable while downloading updates, uncheck the box
5.
Click the OK button to validate.
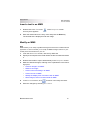
Launch the Motorola Live Update
1.
“Access General Setup”
2.
Click the Application update tab.
3.
Click the Update button. The Motorola Live Update displays.
Then, follow the instructions of the wizard.
4.
Click the OK button to validate.
Motorola Phone Tools
9
User’s Manual
Set up profiles at start time
Important!
The availability of some features described in this help depends on your software
version.
1.
“Access General Setup”
2.
Click the Miscellaneous tab.
3.
In the At start time section, choose if you want the Choose a profile
dialog box to be displayed at start time in order to select a profile from
different profiles you would have defined earlier, or if you want to
always use the current default profile. This means that the Choose a
profile dialog box will not be displayed anymore until further modifications.
4.
Click the OK button to validate.
10
Motorola Phone Tools
User’s Manual
Chapter 3 : Personal Data
Personal Data enables you to simply and efficiently manage your Contacts
and your Calendar. Thus you can edit contacts and appointments, and
transfer them on your mobile phone.
In addition, you can synchronize your PC contacts and calendar with your
phone, backup or restore your phone's Contact and Calendar data at any
time, or transfer phonebook phone to another phone.
Access Personal Data
From the left panel, click Personal Data button then click the section you
want to access:
•
“Contacts”
•
“Calendar”
•
“Synchronization”
•
“Backup and Restore your data”
•
“Phonebook Transfer”
Motorola Phone Tools
11
User’s Manual
12
Motorola Phone Tools
User’s Manual
Contacts
Overview
Contacts is a handy location to store details of your contacts, so you can
use them when preparing a transmission.
The application enables you to display your PC Contacts and your mobile
phone Contacts in the same window in order to make synchronization
easier.
Features described in this help will help you organize contact details in the
way that best suits your needs.
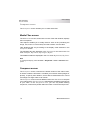
A standard view and a synchronization view are available:
Standard View Window layout
Contacts window is organized in four sections:
•
The menu bar and file management toolbar (which includes the
options of the most frequently used menus).
See below for further details.
•
The left panel displays the tree of the groups for the current Contents.
•
The top right section displays the contact list for the current Contents and its “Perform a fast search”.
•
The bottom right section displays the details for the contact
selected in the contacts list.
Synchronization View Window layout
When you access the Synchronization view, the application reads the
contacts contained in your mobile phone.
The Contacts Synchronization view enables you to display the
application Contacts and your mobile phone Contacts in the same window
in order to make synchronization easier.
Motorola Phone Tools
13
User’s Manual
For further information, refer to the following topics:
“Access Contacts Synchronization view”.
“Use Contacts Synchronization view”.
Manage Phonebooks
Create a phonebook
In order to easily access the contact details, it may be helpful to create
several phonebooks, one for each type of contact. For example, you can
create a phonebook specifically for your business contacts plus a personal
phonebook.
1.
In the menu bar, select File > New. The New Phonebook window is
displayed.
a.
Enter the phonebook name and specify the drive and folder you want
to save it in.
Application phonebook files are automatically given the .MDB extension.
b.
Click Save.
Open an existing phonebook
1.
In the menu bar, select File > Open.... The Open Phonebook window
is displayed.
2.
Select the type of phonebook you want to open in the Phonebook
types zone.
The Filename field displays the name of the phonebook by default.
3.
If you want to change the default phonebook, click the
button.
The Open a Phonebook window is displayed and enables you to
search for a phonebook.
14
Motorola Phone Tools
User’s Manual
4.
Click the Open button.
The selected phonebook becomes the current phonebook: it is opened
as the default phonebook each time you access Contacts.
Note
If the phonebook you are opening has not been created in the application, it is likely
that its structure is different from that of a phonebook created in the application. You
therefore need to “Match fields between an external phonebook and the
application Phonebook” in the file you have opened with those of the application’s phonebook. If some fields in the phonebook are not listed in the structure of
the file you have opened, they will appear grayed out.
Delete a phonebook
1.
“Open an existing phonebook” if you want to delete.
2.
In the menu bar, select File > Open.
The Open Phonebook window is displayed.
3.
In the Current file field, take note of the phonebook path (.mdb format).
4.
Use Windows Explorer to locate and delete the desired phonebook.
Match table window
Microsoft Outlook PST files, Microsoft Exchange PAB files, Microsoft
Outlook Express WAB files and Lotus Notes NSF files have a different
structure to those of the application’s phonebooks (.mdb extension).
Therefore, when you open one of these files in the Phonebook, you need
to match the fields in it with those of the Phonebook itself. This window
enables you to perform this matching.
The Tabs section enables you to select the tab of the contact for which you
wish to perform the matching.
The Phonebook field list displays all fields available in the phonebook for
the selected tab.
The External phonebook fields list displays all fields available in the
external phonebook.
Motorola Phone Tools
15
User’s Manual
The Default button enables you to directly accept the match table
suggested by the application. You can, however, set your own matches
(see “Match fields between an external phonebook and the application
Phonebook”.)
Match fields between an external phonebook and the
application Phonebook
Note
This option is only available for MS Outlook, Outlook Express, Microsoft Exchange
and Lotus Notes phonebooks.
1.
In the menu bar, select Options > Match table.
The Match table window is displayed.
Note
You can also access this window via the Phonebook exchange settings window.
2.
The application suggests a default match table.
The names of fields common to both phonebooks are displayed in red.
If no match has been found, None (the first word in the External
phonebook field list) is displayed in red.
3.
To accept the default match table, click the Default button.
4.
If the match table suggested by the application is not appropriate, you
can match phonebook fields yourself.
To do this, proceed as follows:
a. In the Tabs scrolling list (Business, Full Name, Home, etc.),
select the tab containing the Phonebook fields you wish to match.
The fields for the selected tab are displayed in the Phonebook
field list. All fields contained in the external phonebook are displayed in the External phonebook field list.
b. In the Phonebook field list, click the field you want to match.
c. In the External phonebook field list, click the external phonebook
field name you want to match to the previously selected field.
d. Click Assign.
5.
Repeat steps a. through d. for each field.
6.
Click OK once all matches have been made correctly.
16
Motorola Phone Tools
User’s Manual
Manage Contacts
Create a contact
1.
Click the
New button.
2.
Enter your contact details. Fill out at least one of the following fields:
Title, First name, Middle name or Last name, other fields are
optional.
3.
To enter contact phone numbers:
a. Select the Business or Home tab.
b. Click the
button, select the name that matches type of number
(Fax, for example, if it is a fax number), and enter the number.
c. Do the same for all the numbers you use to contact this contact.
In the list of names for the various number types, a check mark
appears next to each type of number that has been filled out
already.
4.
Click the
Save button.
Select contacts
Select a single contact
•
Click the contact or move up and down the list until you reach the
desired contact using the arrow keys on your keyboard.
The selected contact is highlighted.
Its content is displayed in the Full Name, Business, Home, etc. tabs.
Select multiple contact
•
If the contacts you want to select are not next to one another in the
list, hold down the [CTRL] key and click each contact.
•
If the contacts you want to select are next to each other, hold down
the [SHIFT] key, click the first and last contacts of a block.
Motorola Phone Tools
17
User’s Manual
Select all contacts
•
In the menu bar, select Edit > Select all contacts or use the
Ctrl+A keys.
Selected contacts can then be copied to a group list folder using
drag-and-drop.
Edit a contact
1.
Select the contact you want to change in the phonebook contact list.
The contents of the selected contact are displayed in the lower part of
the window.
2.
Make the modifications directly in the fields you want to change.
3.
Click the
Save button.
Delete a contact
1.
Select the contact you want to delete from the list of phonebook contacts.
2.
Click the
Delete button. The selected contact is placed in the
Recycle Bin.
Warning!
The Recycle bin option is not available if you are using an MS Outlook, Outlook
Express or Microsoft Exchange phonebook. In which case, the deletion of a contact
cannot be undone.
Restore a deleted contact
Deleted contacts are stored in the Recycle bin. You can restore them as
long as you do not have emptied the Recycle bin.
1.
Select the Recycle bin folder in the Group list panel.
2.
Select the contact(s) you want to restore.
3.
Right-click the selected contact(s) and select the Restore option in the
menu that is displayed.
18
Motorola Phone Tools
User’s Manual
Warning!
The Recycle bin is not available if you are using an MS Outlook, Outlook Express
or Microsoft Exchange phonebook. You will not, therefore, be able to restore
deleted contacts.
Copy contacts to a folder
1.
Select the contacts you want to copy.
2.
Drag the selected contacts and drop them into the folder of your
choice.
You can also use the Copy/Paste functions from the Edit menu.
Note
When editing the copy of a contact, the original contact is automatically updated
and vice-versa.
Print contacts
1.
In the menu bar, select File > Print.
The Print Setup window is displayed.
2.
Select the Layout tab.
3.
Check the current printer in the Default printer field.
Click the Printers button if you want to use a different one.
4.
Specify the print range:
•
Current group: all contacts of the selected group (or folder) are
printed.
•
Current contact: only the selected contact is printed.
5.
Enter the size in centimeters of the Top, Bottom, Left and Right margins.
6.
In the Layout section, select the List or Record option.
In List mode:
a. Click the Define List tab.
b. “Specifying the list to print” as you want it printed
Motorola Phone Tools
19
User’s Manual
7.
Click on Preview to check the layout of the document.
In List mode check that all columns appear on the page, within the
margins previously set. If this is not the case, display the Define List
tab again and adapt its layout.
8.
Click Print in the Print preview window once you are satisfied with
your document.
Print Setup window
You can choose between two layout modes to print contacts: Record
mode and List mode.
•
Record Mode: Prints each contact in full, i.e. with all fields, whether
or not they have been filled out.
•
List Mode: Prints only the fields you have specified, in table form.
Each line represents a contact and each column represents a contact field.
The Preview button displays a preview window prior to printing the files.
Specifying the list to print
In the Define list tab, click the arrow next to the DBase Field section to
show the scrolling list of fields you can print.
Select the field that you want to appear in the first column of your table.
In the Width field on the same line, enter the number of characters you
want to assign to the first column (and therefore to the first field).
Repeat steps 1 to 3 for each field you want to include in your document.
Search
Search for contacts
Depending on what you are searching for, you can search for contacts in
Contacts in two different ways:
•
20
If you are searching for a contact and you know his/her last name,
first name, company or telephone number, “Perform a fast search”.
Motorola Phone Tools
User’s Manual
•
If you are looking for all contacts meeting a common criterion, for
example all contacts living in London, use “Use search criteria”.
Perform a fast search
1.
Click the folder (or group) you want to search (if you want to search all
contacts in the current Contacts, click the root folder).
2.
In the list of contacts, click the column title of the field you want to
search: Last Name, First Name, Company, etc.
For example, if you click the heading of the Last name column, the
Fast search field becomes: "Fast search on Last name".
3.
Enter the first characters of the word (or number) being searched for
in the Fast search entry field.
As you enter characters, the cursor moves through the list of contacts
and selects the first contact beginning with the characters you entered.
Motorola Phone Tools
21
User’s Manual
Use search criteria
1.
In the menu bar, select Edit > Search.
The Search window is displayed.
2.
In the Search field, enter the word you are searching for.
3.
In the Fields list, select the field in which you wish to carry out your
search.
4.
Click the OK button.
Records matching the specified search criteria are copied into the
Search results folder.
Import/Export
Compatible phonebook files
When using Phonebook you do not have to give up any phonebooks or
address books you may have created in other applications. The application
enables you to import, update contact details in Phonebook and export the
following types of database:
•
Text file with delimiters*
•
DBASE III or DBASE IV
•
Motorola Phone Tools (DBF, MDB** and PBK)
•
VCard (VCF)
•
Personal Address Book (PAB*)
•
Outlook/Exchange Contacts folder (PST**)
•
Outlook Express Address Book (WAB**)
•
Lotus Notes (NSF**)
•
Vista windows contacts (VCS**)
Lotus Notes, Exchange, Outlook and Outlook Express formats are only
available if the relevant applications are installed on your PC.
22
Motorola Phone Tools
User’s Manual
Note
* Delimited text file (ASCII or ANSI): fields and contacts do not have a fixed size,
but are separated from one another by characters, or specific character sequences,
which need to be specified when importing or exporting contacts. For example,
CSV format is a text file with delimiters.
** The following Phonebook types can directly be accessed by clicking File >
Open....
Import contacts from an external file
In the menu bar, select File > Import.
A wizard will guide you through the import steps.
DBF, MDB, DAN, VCF, PAB, PST and WAB files are automatically
imported. Only for text files with delimiters you need to specify their
structure.
Specify the structure of a text file with delimiters when importing
When importing a text file with delimiters, you must define its structure so
that the application can delimit the various fields and contacts correctly.
This information is requested in the third window (Import wizard - Text file
with delimiters window) of the import wizard.
From this window:
1.
Click the
2.
In the Origin list, select :
3.
Browse button and select the file you wish to import.
•
ASCII/DOS if the file comes from a DOS environment
•
or ANSI/WINDOWS if the file comes from a Windows environment.
Specify the delimiters used to delimit the fields and entries (contacts)
in the file.If you do not know the type of delimiters being used, have a
couple tries and check the results in the Preview zone. If you do not
select the appropriate parameters, the contacts contained in your
phonebook will not be displayed correctly.
Note
A field delimiter is a visual indicator enabling you to specify and view the size of the
fields you want to export.
Motorola Phone Tools
23
User’s Manual
4.
If necessary, specify the Text identifier used.
Note
Text identifiers are characters that come before and after the text contained in the
different fields of the file to be imported. Files containing text identifiers are much
easier to read. For example, if the text file you want to import has the following structure: "Last name";"First name","Smith"; "Igor","Johnson";"Penelope" quotation
marks before and after the fields are Text identifiers.
5.
If the first contact of your file contains field titles, select the File to
Import has Field Names option.
These titles are then recognized as such and will not be imported as a
contact.
6.
Click Next to continue importing.
Note
If you do not wish to import empty fields, select the Hide empty fields option. This
option only applies if fields are not filled out in any contact (entry): if this is so, in the
Preview section the column for this field will be empty.
Export
Export contacts to an external file
The application enables you to export your phonebooks in order to use the
information contained in them in external applications.
In the menu bar, select File > Export.
A wizard guides you through all the export steps.
Exporting in MDB, DAN, PAB, PST and WAB formats is done
automatically. Only text files with delimiters need you to specify their
structure.
Important!
To export to a vCard file, please refer to the following topic: “Export contacts to
an external file”.
24
Motorola Phone Tools
User’s Manual
Specify the structure of a text file with delimiters when exporting
When exporting a phonebook into a text file, you must define how the
application should structure this file.
This information is requested in the third window (Export wizard - Text file
with delimiters window) of the export wizard.
From this window:
1.
In the Export file field, enter the name of the file to which you wish to
export, or use the
2.
Browse button to search for an export file.
In the Origin list, select:
•
ASCII/DOS if the file will be used in a DOS environment
•
or ANSI/WINDOWS if it will be used in a Windows environment.
3.
Indicate the delimiters to be used to delimit the fields and contacts in
the destination file.
4.
Specify a Text identifier : the file will be easier to read.
5.
Select the Display field names on first line option if you wish the first
contact of the file which has been created to contain titles of exported
fields.
6.
Click Next to continue exporting.
Export information from the contact to a vCard file
1.
Select the contact the content of which you wish to export.
2.
In the menu bar, select Edit > Export to vCard file.
The vCard File window is displayed.
3.
Select the location at which you wish to save the vCard file.
4.
Click Save.
Motorola Phone Tools
25
User’s Manual
Create Group of Contacts
Group of contacts
A group is a folder in which you can store contacts. Its main aim is to enable
you to group contacts that do not meet common criteria and that you cannot
therefore search automatically. When the group is created, it becomes a
set selection of contacts which you do not need to recompile each time you
need them.
Groups only contain the copies of contacts that you store in them. When
changing the copy of a contact, the original contact is automatically
updated and vice-versa.
Create a group
You can create groups in any folder, except in the Search results and the
Recycle Bin folders.
1.
Select the folder in which you want to create a group.
2.
In the menu bar, select File > Group > Create New Sub-group.
The Create Subgroup in " [...] " window is displayed.
3.
Enter the name of the group you want to create in the Group name
field.
4.
Click OK.
Rename a group
1.
Right-click the group you want to rename and select the Rename
option in the pop-up menu.
The group label can now be edited.
2.
Enter the new name you want to give to the selected group.
3.
Click Enter on your keyboard.
26
Motorola Phone Tools
User’s Manual
Delete a group
1.
Right-click the group you wish to delete and select the Delete option
in the pop-up menu.
A confirmation window is displayed.
2.
Click OK to confirm.
Synchronize Contacts
Access Contacts Synchronization view
Important!
The availability of some features described in this help depends on your equipment
capabilities and the phone/subscription combination.
Make sure your mobile phone is connected to your PC and switched on.
The Contacts Synchronization view enables you to display the
application phonebook and your mobile phone phonebook in the same
window in order to make synchronization easier.
Open Contacts Synchronization view
1.
In the menu bar, select View > Synchronization View
The Contacts Synchronization view is displayed.
2.
If the Standard view is displayed, click the
to the Contacts Synchronization view.
View button to switch
Note
This view is only accessible if your mobile phone is connected to your PC and
switched on.
Motorola Phone Tools
27
User’s Manual
Use Contacts Synchronization view
Important!
The availability of some features described in this help depends on your equipment
capabilities and the phone/subscription combination.
Make sure your mobile phone is connected to your PC and switched on.
When you access the Synchronization view, the application reads the
contacts contained in your mobile phone Contacts.
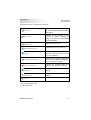
Synchronization View Window layout
The synchronization view is organized in four sections:
•
At the top of the window is the menu bar and file management toolbar (which includes the options of the most frequently used
menus).
See below for further details.
•
On the left, the Phonebook section displays the application Contacts.
•
On the right, the Mobile phone section displays your mobile phone
Contacts.
•
Between these two sections there are a series of buttons which will
enable you to transfer contacts from one Contacts list to the other
(upper buttons), and to save the changes (lower button).
Note
Your mobile phone must be switched on and connected to your PC for initialization
to take place.
Menu bar and file management toolbar
The toolbar and menu bar include part of those of the standard phonebook
view.
For further information, refer to the help of Contacts: “Overview”.
View menu
In this menu, the following options are specific to the synchronization view.
•
28
PC’s contact details: Opens the Customize contact details window.
Motorola Phone Tools
User’s Manual
•
Mobile’s contact details: Opens the Customize contact details
window.
Mobile phone menu
The following option is specific to the synchronization view.
•
Read phone contacts: Updates the display of the current mobile
Contacts.
My computer section
This section works like the standard phonebook view.
The drop-down list located at the top of the section enables you to select
the phonebook folder containing the contacts to be synchronized. Contacts
contained in the selected folder are listed below.
The details of each file selected are displayed in the lower section of the
window.
The New button enables you to create a new file for a contact; the Edit
button enables you to edit the record for the selected contact; the Delete
button enables you to delete the selected contact record. The
button enables you to perform a criteria file search.
Search
Note
When you edit a contact in this view, its details will be displayed in red until you click
Save changes or start a synchronization.
Mobile Phone section
Important!
The information available in this section depends on the capabilities of your phone.
This section displays the list of contact records saved in your mobile
phone’s memory and that of your SIM card.
As with the My computer section, the details of each file selected are
displayed in the lower section of the window.
Motorola Phone Tools
29
User’s Manual
The New button opens the New phone entry dialog box which enables
you to enter a new contact to be saved in your mobile phone Contacts.
Note
For the Edit and Delete buttons, refer to their descriptions under the My computer
heading.
The Refresh button enables the contacts list in your mobile phone Contacts to be
updated.
Note
This command is very useful if you are editing contacts directly in your mobile
phone contacts while it is connected to your PC and the application is running. Simply clicking on this button will display the updated list.
Control buttons
Enables application Contacts to be
transferred to the mobile phone Contacts.
Enables mobile phone Contacts to be
transferred to the application Contacts.
Enables changes made either in the
application Contacts or in the mobile phone
Contacts to be saved.
Note
The last button is only accessible if changes have been made in either list.
30
Motorola Phone Tools
User’s Manual
Synchronize contacts manually
Important:
The availability of some features described in this help depends on your software
version.
Make sure your mobile phone is connected to your PC and switched on.
1.
Open “Open Contacts Synchronization view”.
2.
Select one or more contacts (while holding down the Ctrl key and
clicking on each contact to be synchronized) from the Phonebook
section and / or Mobile Phone section.
3.
Click the
(PC to phone) or
(Phone to PC)
button to transfer the numbers from one list to the other.
Transferred contacts are displayed in red until synchronization is
done.
4.
Click the
button to save the contacts in your mobile phone or in
your PC Contacts.
Synchronization is performed in line with the options selected in
Synchronization Settings.
Customize contact details
1.
From the “Open Contacts Synchronization view”, in the menu bar,
select View > PC’s contact details or Mobile’s contact details.
The Customize contact details window opens.
2.
Select the fields displayed in the Contacts view either on the Contacts
in Phonebook section or on the Contacts in the Mobile Phone section.
a. Use the Add and Hide buttons to move fields from the Available
fields list to the Display fields in this order list.
b. Use the Move Up and Move Down buttons to change the position
of the fields in the Display fields in this order list.
c. Check the Display only filled fields box if you want to display only
fields that have information entered.
Motorola Phone Tools
31
User’s Manual
32
Motorola Phone Tools
User’s Manual
Calendar
Overview
Note
The following calendar interface will only be visible if no other calendar is detected.
The Calendar makes it easy for you to manage your time, wherever you
are. You can synchronize the calendar in your mobile phone with one of the
e-mail software programs you use on your computer (whether that is
Motorola Phone Tools, Outlook, or Lotus Notes). The module synchronizes
your directories and contains a calendar where you can enter tasks and
events and choose a daily, weekly, or monthly view.
The application enables you to display your PC calendar and your mobile
phone calendar in the same window in order to make synchronization
easier. A standard view and a synchronization view are available:
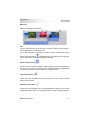
Standard View Window layout
When the Calendar opens, some windows are displayed by default.
•
“You can edit (by clicking the Edit button) or delete (by clicking the
Delete button) a selected event or task from the resulting list.”
•
“Display the Calendar window”
•
“Display the Tasks window”
•
“Display the Time or Week Range window”
You can change and “Choose the display”.
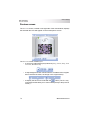
Synchronization View Window layout
When you access the Synchronization view, the application reads tasks
and/or events contained in your mobile phone.
The Calendar Synchronization view enables you to display your PC
Calendar and your mobile phone Calendar in the same window in order to
make synchronization easier.
Motorola Phone Tools
33
User’s Manual
For further information, refer to the help of Calendar Synchronization:
“Access Calendar Synchronization view”.
Use “Calendar Synchronization view”.
Manage the schedule
Note
The following calendar interface will only be visible if no other calendar is detected.
“Open a calendar”
“Manage events”
“Manage tasks”
“Start a search”
“Synchronize Calendar”
Open a calendar
Note
The following calendar interface will only be visible if no other calendar is detected.
1.
In the menu bar, select File > Open. The Open Calendar window is
displayed.
Note
If your are using the e-mail program Outlook and/or Lotus Notes, their contact
icons will also appear in this window. The Calendar File icon represents the calendar of the present application.
2.
Select one of the icons and click Open or double-click directly on one
of the icons to open the corresponding calendar.
Note
If you open the Outlook/Lotus Notes calendar, all changes are automatically synchronized even if they have not been made in the present application.
34
Motorola Phone Tools
User’s Manual
Start a search
Note
The following calendar interface will only be visible if no other calendar is detected.
1.
From the calendar standard view, to start a search, you can:
•
Select Edit > Search in the menu bar.
•
Click the
Search button .
The Search window appears.
2.
In the Search field,
•
Enter the keyword to use for the search (for a new search).
For example: Meeting to reach the past and scheduled meetings.
•
Select in the scrolling list a key word from a previous search.
3.
For an advanced search, check the Advanced search box then indicate a period of time using the From and To fields.
4.
Click the Search button.
The list of scheduled appointments appears in the column of the Subject field.
5.
To view the event selected in the Subject field, click the Go to this
day button.
6.
To delete the event selected in the Subject field, click the Delete button.
7.
To start a new search, click the New Search button.
This erases the results of the previous search.
8.
Click the Close button to close the Search window.
Motorola Phone Tools
35
User’s Manual
Options
Note
The following calendar interface will only be visible if no other calendar is detected.
The Options window allows you to modify the period displayed for the Day
View.
Access the Options window
Note:
If the Time range window is not displayed in the Calendar interface, in the menu
bar, select View > Range > Daily.
•
From the Calendar interface, in the menu bar, select Tools >
Options or click the
Options button.
The Options window appears.
Modify the period displayed
•
In the Time Range section, select a Start time and End time .
For example, Start time: 08 AM and End time: 06 PM. These times
will be displayed in the Time Range window of the calendar.
Choose the display
Note
The following calendar interface will only be visible if no other calendar is detected.
Change the period displayed in the Calendar
Click one of the buttons shown below to modify the “You can edit (by
clicking the Edit button) or delete (by clicking the Delete button) a selected
event or task from the resulting list.”
36
Motorola Phone Tools
User’s Manual
Day View to display a single day.
Week View to display seven days.
Month View to display an entire month.
Show and hide windows
From the View menu, select or deselect the following options to show or
hide the corresponding windows:
•
Calendar
•
Tasks
•
Range > Daily
•
Range > Weekly
Display the Time or Week Range window
Note
The following calendar interface will only be visible if no other calendar is detected.
In the menu bar, select View > Range > Daily or Weekly or click the Range
button to select one of the windows from the scrolling list. The selected
window appears in the bottom part of the screen.
Switch between windows
Right click in the displayed window and select the desired option from the
popup menu.
Motorola Phone Tools
37
User’s Manual
Manage events
Note
The following calendar interface will only be visible if no other calendar is detected.
An event can be an appointment, a meeting, or any other particular or
periodic activity (daily, weekly, monthly, or annual). The Calendar module
enables you to schedule and list events, specify their duration and create
reminders so you do not forget them.
Schedule an event
Note
The following calendar interface will only be visible if no other calendar is detected.
1.
From the Calendar interface, in the menu bar, select Edit > New >
Event.
You can also:
•
Right-click in the Schedule window (central display area), then
select Add an event from the popup menu.
•
Click on the New icon.
The New window opens.
2.
In the Subject field, enter the name of the event you want to create.
For example: Meeting with project managers.
3.
Specify the Location of the event.
For example: Santa Monica.
4.
Indicate the Availability by selecting one of the options from the
scrolling list: Free, In use, or Temporary.
5.
In the Duration section, specify the Start and End date and time for
the event, or check the All day option.
6.
Check the Urgent and/or Private options so that the event appears in
the calendar with the corresponding mark.
7.
Check the Reminder* option if you want an alarm to remind you when
the event is about to occur.
8.
Check the Recurrence option to define the frequency with which the
event takes place.
The Appointment Recurrence window opens.
38
Motorola Phone Tools
User’s Manual
9.
In the Description field you can enter unlimited additional comments
about the event.
10. Click OK to save the event.
The New window closes and the event appears in the schedule. The
day of the event appears in bold in the Calendar window.
Note:
*Reminder: In the Notify scrolling list, choose the number of minutes or hours before
the corresponding event when you want the alarm to trigger. Click the Browse button to choose the sound file to be played and click the Play button to play it now.
When the time comes, the notification window will appear on the screen and the
alarm will trigger automatically.
View and modify an event
Note
The following calendar interface will only be visible if no other calendar is detected.
1.
From the Calendar interface, in the Schedule window (central display
area), double-click the event.
The Edit a calendar event window appears.
2.
View the event and make any changes required, as described in
“Schedule an event”.
3.
After viewing or editing the event, click OK to confirm and close the
window.
Copy an event or a task
Note
The following calendar interface will only be visible if no other calendar is detected.
From the Calendar interface, in the Schedule window (central display
area), select the event or task you want to copy and then use one of the
three following methods.
Motorola Phone Tools
39
User’s Manual
With the keyboard
1.
Press CTRL+C.
2.
Select the day in the Schedule window where you want to copy the
task or the event.
3.
Press CTRL+V. A copy of the event or task is added to the event or
task list.
With the buttons
1.
Click the Copy button.
2.
Select the day in the Schedule window where you want to copy the
task or the event.
3.
Click the Paste button. A copy of the event or task is added to the
event or task list.
Via the Edit menu
1.
In the Edit menu, select Copy.
2.
Select the day in the Schedule window where you want to copy the
task or the event.
3.
In the Edit menu, select Paste. A copy of the event or task is added to
the event or task list.
Delete an event
Note
The following calendar interface will only be visible if no other calendar is detected.
1.
From the Calendar interface, in the Schedule window (central display
area), select the event you want to delete and then do one of the following:
•
40
Right-click and select the Delete event option from the popup
menu, or
Motorola Phone Tools
User’s Manual
•
In the menu bar, select Edit > Delete, or
•
Click the
Delete button.
A confirmation window opens.
2.
Click OK to confirm the deletion.
The selected event no longer appears in the list.
Manage tasks
A task is an action to be performed either once or at regular intervals (daily,
weekly, monthly, or annually). The Calendar module lets you schedule and
list tasks, define their duration, and create reminders so you do not forget
them.
Create a task
Warning!
The availability of some features described in this help depends on your equipment
capacities (mobile phone/modem combination).
1.
From the Calendar interface, in the menu bar, select Edit > New >
Task. You can also right-click in the display area of the Tasks window,
then select Add task from the popup menu. The Add task window
appears.
2.
In the Subject field, enter the name of the task you want to create.
For example: Deliver the monthly report.
3.
Indicate the Status by selecting one of the options from the scrolling
list: Not Started, In progress, Finished, Waiting for Info or
Deferred. The [n] %complete is displayed according to the selected
status.
Duration section
4.
In the Duration section, enter the Start and End date for performing
the task.
5.
The Priority can be set to Low, Normal or High.
6.
To mark your task as private, check the Private option. A flag will
appear next to the task in the Tasks window.
Motorola Phone Tools
41
User’s Manual
Recurrence section
7.
Check the Recurrence option to define the frequency with which the
task takes place. The Appointment Recurrence window opens.
8.
If you wish to be reminded of this task, check the Reminder box and
indicate when you wish to be notified (date and time) using the arrows.
9.
To associate a sound to the reminder, click the Browse button and
specify the sound file (*.wav) to be played at the reminder launch.
The application will launch a reminder window that you can either dismiss or display again every [n] minutes according to your choice in the
corresponding drop-down list.
10. Indicate the Category by selecting one of the options from the scrolling list: None, Private, Holiday, Trip and Work.
11. In the Description field you can enter unlimited additional comments
about the task.
12. Click OK to save the task.
The Add task window closes and the task is added to the Tasks window.
Edit a task
1.
From the Calendar interface, in the Tasks window, double-click on a
task or select it then right-click and choose Edit task from the popup
menu.
The Edit task window appears.
2.
Make the required changes, as described in “Create a task”.
3.
Click OK to confirm and close the window.
Mark a task as completed
From the Calendar interface, in the list in the Tasks window, click in the
check box to the left of the task you want to mark as completed.
A checkmark appears in the check box and the title of the task is crossed
out.
To remove the checkmark, click in the check box again.
42
Motorola Phone Tools
User’s Manual
Copy an event or a task
Note
The following calendar interface will only be visible if no other calendar is detected.
From the Calendar interface, in the Schedule window (central display
area), select the event or task you want to copy and then use one of the
three following methods.
With the keyboard
1.
Press CTRL+C.
2.
Select the day in the Schedule window where you want to copy the
task or the event.
3.
Press CTRL+V. A copy of the event or task is added to the event or
task list.
With the buttons
1.
Click the Copy button.
2.
Select the day in the Schedule window where you want to copy the
task or the event.
3.
Click the Paste button. A copy of the event or task is added to the
event or task list.
Via the Edit menu
1.
In the Edit menu, select Copy.
2.
Select the day in the Schedule window where you want to copy the
task or the event.
3.
In the Edit menu, select Paste. A copy of the event or task is added to
the event or task list.
Motorola Phone Tools
43
User’s Manual
Delete a task
From the Calendar interface, in the Tasks window, select the task you want
to delete then do one of the following:
•
Right-click and select the Delete task option from the popup menu,
or
•
In the menu bar, select Edit > Delete, or
•
Click the
Delete button.
Display the Tasks window
In the menu bar, select View > Tasks or click the
Tasks button.
The Tasks window appears in the lower right part of the screen.
Close the Tasks window
From the View menu, deselect Tasks or click the
upper right corner of the Tasks window.
The window is no longer displayed.
44
button located in the
Motorola Phone Tools
User’s Manual
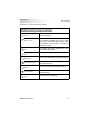
Buttons
Note
The following calendar interface will only be visible if no other calendar is detected.
Opens a calendar
Open
Copies the current selection
Copy
Pastes the previously copied selection
Paste
Print
Change view
Prints the calendar daily, weekly, monthly or
by tasks
Displays the synchronization view of the
calendar, making it easier to synchronize data
between the application’s calendar and that of
your mobile phone
Starts a synchronization
Synchronize
Options
Help
Modify the period displayed for the Time
Range
Starts this on-line help
Adds an event
New
Deletes the selection
Delete
Shows or hides the Calendar window
Calendar
Shows or hides the Tasks window
Tasks
Range
Motorola Phone Tools
Shows or hides the Time range or Week range
window
45
User’s Manual
Day View
Displays the Calendar window using a daily
view
Week View
Displays the Calendar window using a weekly
view
Month View
Displays the Calendar window using a
monthly view
Search
Starts a search for an event or task in the
Calendar
Synchronize Calendar
Access Calendar Synchronization view
Important!
The availability of some features described in this help depends on your equipment
capabilities and the phone/subscription combination.
Make sure your mobile phone is connected to your PC and switched on.
The Calendar Synchronization view enables you to display your PC
calendar and your mobile phone calendar in the same window in order to
make synchronization easier.
Open Calendar Synchronization view
1.
In the menu bar, select View > Change View.
The Calendar Synchronization view is displayed.
2.
If the Standard view is displayed, click the
Change View button
to switch to the Calendar Synchronization view.
Notes
This view is only accessible if your mobile phone is connected to your PC and
switched on.
46
Motorola Phone Tools
User’s Manual
Display the Calendar window
In the menu bar, select View > Calendar or click the Calendar button. The
Calendar window appears in the upper right part of the screen.
Close the Calendar window
From the View menu, deselect Calendar or click the button located in the
upper right corner of the Calendar window.
The window is no longer displayed.
Work with the Calendar window
•
To browse through the calendar month by month, use the following
buttons: and .
•
When you click on a day in the calendar, the corresponding page
is displayed in the Schedule window.
•
The column on the far left shows the week number (in the year) for
each line.
•
Today’s date is circled in red.
•
Days are displayed in bold when you have entered events for them.
Calendar Synchronization view
Important!
The availability of some features described in this help depends on your equipment
capabilities and the phone/subscription combination.
Make sure your mobile phone is connected to your PC and switched on.
When you access the Synchronization view, the application reads the
tasks/events contained in your mobile phone calendar.
Motorola Phone Tools
47
User’s Manual
Synchronization View Window layout
The synchronization view is organized in four sections:
•
At the top of the window is the menu bar and file management toolbar (which includes the options of the most frequently used
menus). See below for further details.
•
On the left, the Calendar section displays the application appointments;
•
On the right, the Mobile Phone section displays your mobile
phone’s appointments;
•
Between these two sections there are a series of buttons which will
enable you to transfer tasks/events from one Calendar list to the
other (upper buttons), and to save the changes (lower button).
Note
Your mobile phone must be switched on and connected to your PC for initialization
to take place.
Appointment on the Calendar section
This section works like the standard calendar view.
The drop-down list located at the top of the section enables you to select
the calendar folder containing the events or the tasks to be synchronized.
Events or tasks contained in the selected folder are listed below.
The details of each file selected are displayed in the lower section of the
window.
The New button enables you to create an event or a task; the Edit button
enables you to edit an event or a task for the selected event/task; the
Delete button enables you to delete an event or a task.
Note
When you edit an event or a task in this view, its details will be displayed in red until
you click Save modifications or start a synchronization.
48
Motorola Phone Tools
User’s Manual
Appointment on the Mobile Phone section
Important!
The information available in this section depends on the capabilities of your phone.
This section displays the list of tasks and events saved in your mobile
phone’s memory and in your SIM card.
As with the Calendar section, the details of each file selected are displayed
in the lower section of the window.
The New button opens the New dialog box which enables you to enter a
new event or task to be saved in your mobile phone calendar.
Note
For the Edit and Delete buttons, refer to their descriptions under the My computer
heading.
The Refresh button enables the events or tasks list in your mobile phone
calendar to be updated.
Note
This command is very useful if you are editing events or tasks directly in your mobile
phone calendar while it is connected to your PC and the application is running. Simply clicking on this button will display the updated list.
Motorola Phone Tools
49
User’s Manual
Control buttons
Enables application tasks and events to be transferred
to the mobile phone calendar.
Enables mobile phone tasks and events to be
transferred to the application tasks Calendar .
Enables changes made either in the application
Calendar or in the mobile phone Calendar to be saved.
Note
The last button is only accessible if changes have been made in either list.
Synchronize calendars manually
Important
The availability of some features described in this help depends on your software
version.
Make sure your mobile phone is connected to your PC and switched on.
1.
Open the “Calendar Synchronization view”.
2.
Select one or more events or tasks (while holding down the Ctrl key
and clicking on each task/event to be synchronized) from the Calendar section and/or Mobile Phone section.
3.
Click the
(Phone to PC) or
(PC to Phone)
button to transfer the events or tasks from one list to the other.
Transferred events or tasks are displayed in red until synchronization
is done.
50
Motorola Phone Tools
User’s Manual
4.
Click the
button to save the tasks/events in your mobile phone
or in your PC calendar.
Synchronization is performed in line with the options selected in
Synchronization Settings.
Perform a search in the calendar synchronization view
1.
From the “Calendar Synchronization view”, in the menu bar, select
Edit > Search or press Ctrl+F on your keyboard.
The Search window appears.
2.
You can perform a search either by date or by subject.
Select the type of search you want to perform in the Fields field: Subject or Date.
3.
For a search by subject, in the Search field, enter the keyword to use
for the search.
For example: Meeting to reach the past and scheduled meetings.
4.
For a search by date, indicate a period of time using the From and To
fields.
5.
Click the OK button.
The result of your search appears in the Find folder of the My Computer section (left side).
6.
You can edit (by clicking the Edit button) or delete (by clicking the
Delete button) a selected event or task from the resulting list.
Motorola Phone Tools
51
User’s Manual
52
Motorola Phone Tools
User’s Manual
Synchronization
Important!
The availability of some features described in this help depends on the capacities
of your equipment and on the mobile phone/subscription combination.
Make sure your mobile phone is connected to your PC and switched on.
Synchronization enables you to update your phonebooks and calendars by
matching:
•
numbers saved in your mobile phone to those saved in the application phonebook,
•
and/or events/tasks saved in your mobile phone calendar to those
saved in the application calendar.
When you install the application, a new toolbar is created in Outlook. It
contains two buttons:
•
Synchronize which launches a synchronization;
•
Sync Help which displays this help.
The first time you click Synchronize, the Synchronization Wizard is
displayed. This wizard will help you choose various synchronization
options before synchronizing. Follow the instructions displayed on screen.
Synchronization is performed with the options selected in “Set up
Synchronization”.
The next time the Synchronize button is pressed, the Synchronization
Wizard is no more displayed. Instead, the Synchronization window is
displayed.
Two transfer modes
“Synchronize now” allows you to transfer data (Contacts, Calendar) from
your PC to your phone, or from your phone to your PC.
The first time this synchronization is launched, a “full” synchronization is
performed:
•
All items of the PC that are not on the phone are transferred to the
phone
•
All items of the phone that are not on the PC are transferred to the
PC
Motorola Phone Tools
53
User’s Manual
•
For items that are on phone and on PC:
-> For contact item, the fields are merged. If a field is filled on both
devices, you will be asked to choose which item to keep*
-> For other items, you will be asked to choose which item to keep*
For the following synchronization:
•
All items that have been created, modified, deleted only on the
phone since the last synchronization are created, modified, deleted
on the PC
•
All items that have been created, modified, deleted only on the PC
since the last synchronization are created, modified, deleted on the
phone
•
If an item has been modifier on both sides since the last synchronization, you will be asked to choose which item to keep*
*: unless you change the conflict rules - see “Priorities tab”
“Use Protected Data transfer” allows you to only transfer data (Contacts,
Calendar) from your PC to your phone.
This synchronization ensures you that your PC contacts will not be
modified or deleted:
•
All items of the PC that are not on the phone are transferred to the
phone
•
For items that are on phone and on PC, the filled PC item fields are
replacing phone item fields
Operation
When your mobile phone is connected to your PC and to your mobile
phone network, the application reads the phonebook records (or calendar
events/tasks) stored in your mobile phone and compares them with the
phonebook file that is open at the time (current phonebook) or with the
current calendar.
When there is a conflict (for example: the same contact with a different
telephone number) between your Phonebook and your mobile phone
during synchronization, the Conflicts option from the Synchronization
Settings window enables you to specify the phonebook which is to prevail
or ask at each conflict.
54
Motorola Phone Tools
User’s Manual
Modify the Synchronization Settings
Access Synchronization Settings window
Important!
The availability of some features described in this help depends on the capacities
of your equipment and on the mobile phone/subscription combination.
Make sure your mobile phone is connected to your PC and switched on.
Click the Modify the synchronization settings button.
The Synchronization Settings window opens.
The first time you access this window, a wizard is displayed to help you
through setting up synchronization options.
Set up Synchronization
Important!
The availability of some features described in this help depends on the capacities
of your equipment and on the mobile phone/subscription combination.
Make sure your mobile phone is connected to your PC and switched on.
1.
Access the Synchronization Settings window.
2.
Make the desired changes in each of the Synchronization Settings
window tabs.
3.
Click OK to confirm and close the window.
The first time you access the Synchronization Settings window, a wizard
is displayed to help you through setting up your synchronization options.
Motorola Phone Tools
55
User’s Manual
Setup Tabs
General tab
Important!
The availability of some features described in this help depends on the capacities
of your equipment and on the mobile phone/subscription combination.
Make sure your mobile phone is connected to your PC and switched on.
1.
In the Specify arrangement for ‘Full Name’ section, select your preferences for the way in which the names of the mobile phone contacts
are displayed by choosing whether to display the Last name first (Last
name, First name option) or First name first (First name, Last name
option).
2.
Check the options you wish to enable:
3.
•
Enable complete synchronization - This option runs a full (and
potentially lengthy) re-read of the entire folder.
•
Display confirmation messages before deleting entries during
synchronization if you wish to confirm the permanent deletion of
records during synchronization.
Move to another tab if necessary or click OK directly to confirm and
close the Synchronization settings window.
Synchronization folder tab
Important!
The availability of some features described in this help depends on the capacities
of your equipment and on the mobile phone/subscription combination.
Make sure your mobile phone is connected to your PC and switched on.
1.
Select the item for which you wish to change the synchronization
folder.
2.
Click Change....
The Synchronization folder window appears.
3.
Select the folder you wish to use for synchronization.
4.
If this folder does not exist, you can create it. Select the folder in which
you wish to create a subfolder, then click New....
A new Create Subgroup window appears.
56
Motorola Phone Tools
User’s Manual
5.
Enter a name for the new subfolder.
6.
Click OK .
This window closes and the new subfolder is displayed in the item tree.
7.
Click OK to confirm changes.
The name of the folder is displayed in the Current folder field.
8.
Move to another tab if necessary or click OK directly to confirm and
close the Synchronization settings window.
Filter tab
Important!
The availability of some features described in this help depends on the capacities
of your equipment and on the mobile phone/subscription combination.
Make sure your mobile phone is connected to your PC and switched on.
1.
Select Contacts , Sim, Calendar or Tasks depending on the type of
data you wish to synchronize.
If you select:
•
Contacts:
a. Select Synchronize all contacts , Synchronize the selected
contacts or Synchronize the category contacts.
b. In the latter cases, click the Select... button.
The Filter or Categories selection windows opens.
c. For the selected contacts, check the box in the Sync column corresponding to the entries you whish to synchronize.
For the category contacts, select the category in the Available categories list.
You can also use the Select all or Unselect all button. Unchecked
entries will be ignored during synchronization.
•
SIM:
a. Check the Synchronize SIM contacts separately box if you want
to synchronize the selected SIM contacts or the category SIM contacts.
b. Select Synchronize all SIM contacts, Synchronize the selected
SIM contacts or Synchronize the category SIM contacts .
c. In the latter cases, click the Select... button.
Motorola Phone Tools
57
User’s Manual
d. Do as for the Contacts option (step c).
•
Calendar:
a. Choose Synchronize all events or Synchronize only .
b. In the latter case, indicate the number of weeks before or after the
current date you wish to synchronize events.
•
Tasks:
a. Choose Synchronize all tasks or Synchronize only.
b. In the latter case, indicate the number of weeks before or after the
current date you wish to synchronize tasks.
c. If you wish to ignore completed tasks during synchronization,
check the Ignore completed tasks option.
2.
Move to another tab if necessary or click OK directly to confirm and
close the Synchronization settings window.
Add entry tab
Important!
The availability of some features described in this help depends on the capacities
of your equipment and on the mobile phone/subscription combination.
Make sure your mobile phone is connected to your PC and switched on.
1.
Use the scrolling list in the Add entry tab to indicate the preferred location for new mobile phone entries.
2.
Move to another tab if necessary or click OK directly to confirm and
close the Synchronization Settings window.
58
Motorola Phone Tools
User’s Manual
Telephone field identification tab
Important!
The availability of some features described in this help depends on the capacities
of your equipment and on the mobile phone/subscription combination.
Make sure your mobile phone is connected to your PC and switched on.
1.
2.
To better identify the phone number type when a phone number
appears in synchronization view, select one of the following three
options:
•
Ask the question - The application will ask, if appropriate, which
identification method to use.
•
By default use the type - Scroll down the list to determine the
default phone number type.
This information appears in the Phone section of the Phonebook,
for example Fax (Business).
•
Use suffixes to identify new numbers - Select the phone field to
which you wish to add a suffix in the scrolling list.
A default letter is assigned in the Suffix field but you can specify it
to suit your own needs. This will make it easy for you to identify different numbers.
Move to another tab if necessary or click OK directly to confirm and
close the Synchronization Settings window.
Note
A suffix is an alphabetic character which has a meaning. Suffixes enable you to recognize various phone and fax numbers belonging to the same person. Several
default suffixes are suggested, but you can specify your own. For example, the letter _H could indicate Home numbers; _S could indicate a company’s Switchboard
number, etc. Suffixes can only contain one letter. Numbers are not accepted.
Priorities tab
Important!
The availability of some features described in this help depends on the capacities
of your equipment and on the mobile phone/subscription combination.
Make sure your mobile phone is connected to your PC and switched on.
Motorola Phone Tools
59
User’s Manual
Where there is a conflict (for example: the same contact with a different
telephone number) between your Phonebook and your mobile phone
during synchronization, this tab enables you to specify the phonebook
which is to prevail or ask at each conflict.
1.
2.
Select one of these three options:
•
Computer - If you enable this option, the application data will be
taken as the basis and will, if applicable, overwrite the mobile
phone data.
•
Mobile phone - If you enable this option, the mobile phone data will
be taken as the basis and will, if applicable, overwrite the application data.
•
Ask the question - If you enable this option, when the application
detects inconsistent data in the application and in the mobile
phone, a window will appear asking you which data to keep (application or mobile phone data).
Move to another tab if necessary or click OK directly to confirm and
close the Synchronization settings window.
Mapping tab
Important!
The availability of some features described in this help depends on the capacities
of your equipment and on the mobile phone/subscription combination.
Make sure your mobile phone is connected to your PC and switched on.
This tab enables you to align your mobile phone entries with those of the
application.
1.
Select the item for which you wish to change the mapping.
2.
Click Modify Mapping....
The mapping table for the selected item is displayed.
3.
Select a mobile phone field and the application phonebook field you
wish to link it to and then click << Link >> . Links created in this way
are displayed in the Established links section.
4.
60
•
If you select a field, you can also click Unlink to delete the link
between the two entries.
•
The Default button restores predefined links between fields in the
program. It clears any changes you have made.
Move to another tab if necessary or click OK directly to confirm and
close the Synchronization settings window.
Motorola Phone Tools
User’s Manual
AutoSync tab
Important!
The availability of some features described in this help depends on the capacities
of your equipment and on the mobile phone/subscription combination.
Make sure your mobile phone is connected to your PC and switched on.
1.
2.
To determine if synchronization between the mobile phone and the
application should occur automatically, select one of the following
options:
•
Never so that synchronization will not run automatically.
•
Every launch if you wish synchronization to run automatically each
time you connect.
•
Every x (day of the week) if you wish synchronization to occur regularly on a specific day of the week.
•
Every month if you wish synchronization to run automatically once
a month.
Move to another tab if necessary or click OK directly to confirm and
close the Synchronization Settings window.
Data source tab
Important!
The availability of some features described in this help depends on the capacities
of your equipment and on the mobile phone/subscription combination.
Make sure your mobile phone is connected to your PC and switched on.
1.
Use the Contacts and Calendar/Task scrolling lists to select the
application where you store Contact and Calendar data.
2.
Move to another tab if necessary or click OK directly to confirm and
close the Synchronization options window.
Motorola Phone Tools
61
User’s Manual
Phonebook selection tab
Important!
The availability of some features described in this help depends on the capacities
of your equipment and on the mobile phone/subscription combination.
Make sure your mobile phone is connected to your PC and switched on.
Use this tab to select the phonebook you want to use.
1.
2.
Check the radio button corresponding to your choice :
•
SIM card
•
Phone's phonebook
Move to another tab if necessary or click OK directly to confirm and
close the Synchronization Settings window.
Synchronize Contacts and Calendar
Synchronize now
Important:
The availability of some features described in this help depends on the capacities
of your equipment and on the mobile phone/subscription combination.
Make sure your mobile phone is connected to your PC and switched on.
The first time you click Synchronize, the Sync Wizard is displayed. This wizard
will guide you step by step for your first synchronization.
The next time the Synchronize button is pressed, the Sync Wizard is no more displayed. Instead, the Synchronization window is displayed.
1.
Click Synchronization now button.
The Synchronization window displays and enables synchronizing to
start immediately.
2.
Check items (Contacts, Calendar) you want to synchronize are
selected then click Synchronize button.
Synchronization is performed with the options selected in “Set up
Synchronization”.
62
Motorola Phone Tools
User’s Manual
Use Protected Data transfer
Important:
The availability of some features described in this help depends on the capacities
of your equipment and on the mobile phone/subscription combination.
Make sure your mobile phone is connected to your PC and switched on.
The Protected data transfer ensures you that your PC data will not be
corrupted: you will only transfer data from PC to phone.
1.
Click the Protected Data button.
The Synchronization window displays and enables synchronizing to
start immediately
2.
Check items (Contacts, Calendar) you want to synchronize are
selected then click Synchronize button.
Synchronization is performed with the options selected in “Set up
Synchronization”.
Motorola Phone Tools
63
User’s Manual
64
Motorola Phone Tools
User’s Manual
Backup and Restore your data
Important:
The availability of some features described in this help depends on the capacities
of your equipment and on the mobile phone/subscription combination.
Make sure your mobile phone is connected to your PC and switched on.
Backing up and restoring records enables you to save records contained in
your mobile phone memory to the hard disk drive in your PC and vice
versa, prior to synchronizing. Backup/Restore wizard is strongly
recommended for those cases where you would like to recover data
overwritten by synchronizing or when you cancel a synchronization.
This wizard also enables you to delete records contained in your mobile
phone memory.
To backup and restore your data
Note
Your mobile phone must be switched on and connected for initialization to take
place.
1.
Click the Backup or Restore button depending on what you wish to
do.
The Backup/Restore Wizard opens.
2.
Follow the instructions displayed on screen.
The Backup/Restore Wizard will then read the contents of your mobile
phone and present you with a summary once the operation has been
completed correctly. Click Finish to close the Backup/Restore Wizard.
The mobile phone contacts, calendar and tasks are saved locally in a .csv
file.
Note:
When restoring contacts to SIM memory, if the original contacts were stored with a
single name and multiple number format they will be restored as single name and
single number format.
Motorola Phone Tools
65
User’s Manual
To delete data from you phone
You can also delete records contained in your mobile phone memory.
1.
Click the Delete data from my phone button depending on what you
wish to do.
The Backup/Restore Wizard opens.
2.
By default all items (calendar, contacts) are selected, uncheck items
you don't want to delete.
Then follow the instruction displayed on screen.
66
Motorola Phone Tools
User’s Manual
Phonebook Transfer
The Phonebook Transfer allows you to transfer mobile phonebook to
another phone.
This feature is useful when you will buy a new phone and want to keep the
phonebook.
A wizard will help you to backup phonebook and immediately restore it to
a new phone.
Manage Phonebook Transfer
Transfer a phonebook to another phone
1.
Make sure your mobile phone is correctly switched on and connected
to the computer.
2.
Click the Transfer my phonebook to another phone button.
The phone swap tool display and the backup of the phonebook immediately starts.
The backup file is saved in the default backup folder.
A progress window displays.
3.
When the backup is finished a window indicates you the backup is
done.
Unplug your phone then click the OK button.
The Phone Setup wizard displays.
Important!
Please do not connect your new mobile phone to your PC until instructed to do so
by the installation wizard.
Motorola Phone Tools
67
User’s Manual
4.
Please ensure your phone is not locked.
Select the connection type you will use to connect your mobile device
to your PC.
5.
Click on Next button.
6.
The following screen prompts to connect your phone.
Your phone will be detected and set up automatically.
7.
Once you phone is detected, the restore progress begins.
Note
If the application detects that some fields do not match between the phones, and
some fields of the first phone can not be swapped to the second phone, a window
will be displayed.
This window lists the fields of the first phone, and in front of each one the field of
the second phone if the match can be done, else “no match” is displayed.
Click the OK button to launch the restore operation.
8.
Click the OK button to launch the restore operation.
A progress window displays and a window prompts you the swap wizard is successfully done.
68
Motorola Phone Tools
User’s Manual
Chapter 4: Communicate
Communicate enables you to easily handle text and MMS messages, edit
and send messages via the keyboard of your computer. It also enables you
to create and manage Internet connections using your mobile phone SIM
card.
Access Communicate
From the left panel, click Communicate button then click the section you
want to access:
•
“SMS”
•
“MMS”
•
“Internet”
Motorola Phone Tools
69
User’s Manual
70
Motorola Phone Tools
User’s Manual
SMS
Important!
The availability of some features described in this help depends on the capacities
of your equipment and on the mobile phone/subscription combination.
SMS enables you to handle text messages easily, allowing you to edit and
send text messages via the keyboard of your computer.
Description of SMS
Folders
All operations relating to outgoing or incoming messages are centralized in
the Folders section presenting the following tree list:
Outbox
The Outbox folder lists all messages,
including those that are underway. Once the
transmission is complete, the message is
transferred to the Sent messages folder.
Sent messages
The Sent messages folder stores complete
transmissions.
Inbox
The Inbox
messages.
folder
lists
all
received
Messages
The Messages section displays the list of messages contained in the folder
selected in the Folders section. Information about the messages is given,
such as: contact number or name, date and time of the message, status
and size.
Details
The Details section displays the content of the selected SMS.
Motorola Phone Tools
71
User’s Manual
Configure SMS
Important!
The availability of some features described in this help depends on the capacities
of your equipment and on the mobile phone/subscription combination.
Prerequisite
Before you can send text messages, you must subscribe to the
corresponding service from your mobile network operator. Before setting
up the SMS function, please check that your mobile phone is connected to
your computer or that your PC card is configured to the correct
communication port of the computer.
Access the Message settings
From the menu bar, select SMS > Configure SMS....
The Message settings window opens.
Configure SMS
The Message settings window enables you to set up Send options and
the rule to delete messages.
Send options
72
•
Delivery report: a delivery report for each sent message is sent to
you (if supported by your contact’s mobile phone network operator).
•
Validity period: specify here the validity period you want to assign
to the messages you send. After this date, the message will be
deleted from the operator server, even if it could not be delivered to
the recipient.
•
Callback number: specify here the phone number where your
contact can reach you.
Motorola Phone Tools
User’s Manual
Delete message on phone
When SMS are received, they are automatically stored in the currently
selected memory of the phone. Messages can be stored either in the SIM
card memory or in the phone memory.
You are advised to clear the messages when they are no longer needed.
As soon as the memory of the SIM card (or the memory of the phone)
becomes full, you do not receive any new incoming messages.
•
Never: SMS are always kept on phone and on computer. You can
still delete them manually from the Inbox or in your mobile phone.
•
When deleting on computer: SMS are automatically deleted from
the mobile phone when they are deleted from the Inbox.
•
When retrieving: SMS are systematically deleted from the mobile
phone after being transferred to the Inbox.
Keep empty text messages
Text messages are made up of a header (reply path, validity, etc.) and a
message body. "Empty" messages are composed essentially of a header
without a message body.
When this option is checked, "empty" messages are processed as any
other message. If you uncheck this option, messages are deleted
automatically without being transferred.
Information
Click this button to display phone features such as the phone model, its
IMEI, the phone number and the application version, if they are available.
Motorola Phone Tools
73
User’s Manual
Manage Messages
Send a message
1.
In the taskbar, click the
New message button, or
From the menu bar, select File > New > SMS.
The Send text message window is displayed.
2.
Enter your contact details in the appropriate field or click the To... button in order to copy the information from the Contacts.
Note:
You can send a message to several recipients; to do so enter recipient's numbers
separated by a semicolon.
3.
Enter your message.
4.
Click the Send button to complete the transmission.
Note:
An SMS (Short Message Service) message has a limit which depends on the service center that will forward your message. If you exceed this limit, the message will
be split into several messages that will be sent separately. An indicator at the bottom right of the window indicates the total number of messages that will be sent.
Extract mobile phone contact details
The Select contacts window enables you to select contacts from your
mobile phone or SIM card contact list and send them an SMS or a MMS.
1.
Access the Select contacts window depending on the type of message you want to send:
•
74
To send an SMS:
From the menu bar, select File > New > SMS. The Send text message window is displayed.
Then, click the To... button. The Select contacts window is displayed.
Motorola Phone Tools
User’s Manual
•
To send an MMS:
From the toolbar, select the
Send To Recipient button. The
Send MMS window is displayed.
Then, click the To... button. The Select contacts window is displayed.
2.
Select the folder, SIM Contacts or Phone Contacts, in which are the
contacts you want to select.
3.
In the zone below the Folders drop-down list, select the contacts to be
extracted:
4.
•
Click the contact directly from the list. Use the Ctrl key to select
several contact.
•
or Enter its name in the Type a name field.
The contact is highlighted.
Click
list.
to add it or them from the list to the Selected contact(s)
The
button deletes the selected items from the Selected contact(s) list.
5.
Once the selected contacts list has been set up, click the OK button to
extract it. You automatically return to the previous window. The contacts you have just extracted now appear in the recipients list.
Important!
The first time you access the Select contact window, and after every modifications
you made to your mobile phone/SIM contacts you must read your mobile phone to
retrieve the contact details. To do so, click the
Read button in the toolbar.
Motorola Phone Tools
75
User’s Manual
Receive and read a short message
1.
In the Folders pane, click Inbox.
If your mobile phone contains messages, they are automatically transferred into the Inbox and appear in the Messages list.
2.
Click the
Send / Receive button.
If you have received new messages, they are transferred into the
Inbox and they appear bold.
3.
Double-click the message you want to view.
The Message Preview windows appears and displays the content of
the message.
4.
Click the Close button to return to the Inbox.
Reply to a received message
1.
In the Folders pane, click Inbox.
2.
Select the message you want to respond to.
3.
Click the
Reply button.
The Send text message window is displayed, and the field corresponding to the recipient’s number is filled in automatically.
Note:
You can send a message to several recipients; to do so enter recipient's numbers
separated by a semicolon or click the To... button in order to copy the information
from the contacts.
4.
Enter your message.
5.
Click the Send button to complete the transmission.
Forward a message to another recipient
1.
In the Folders pane, access the folder where the message you want
to forward is saved (Inbox, Sent Messages...).
2.
Select the message you want to forward.
76
Motorola Phone Tools
User’s Manual
3.
Click the
Forward button.
The Send text message window is displayed. The message content
is filled in automatically, indicating the original sender's detail.
4.
Enter your contact details in the appropriate field or click the To... button in order to copy the information from the contacts.
Note:
You can send a message to several recipients; to do so enter recipient's numbers
separated by a semicolon.
5.
Click the Send button to complete the transmission.
Save a message
1.
In the Folders pane, access the folder where the message you want
to save is saved (Inbox, Sent Messages...).
2.
Select the message you want to save.
3.
In the File menu, select the Save as option.
The Save as window opens.
4.
Rename your document (if you want to) in the File name box.
.txt format is displayed by default.
5.
Select the folder path where you want to save your document if the
selected folder does not suit you.
6.
Click the Save button.
Create a mailbox
1.
From the menu bar, select File > New > Mailbox .
The Create a Mailbox window is displayed.
2.
Enter the name of the new mailbox in the New Mailbox field.
3.
Click OK.
The new mailbox is added to the Inbox.
4.
You can now drag and drop messages from the Inbox into the mailbox
you created.
Motorola Phone Tools
77
User’s Manual
Change the status of a message
1.
In the Folders pane, click Inbox and select a message from the Messages list.
2.
Click on the right mouse button to display the context menu.
3.
Select the Change status option.
The Change Document Status window is displayed.
4.
Choose one or more status: Read, Printed, Forwarded, Replied.
5.
•
An empty box means that the status is not selected.
•
A grayed box indicates that the present document status will not be
modified. This function is useful if you wish to change only one status for multiple documents, without changing the two others.
•
A checked box means that the status is not selected.
Click the
button to apply your modifications.
Note:
Clicking the
button enables you to keep the Change document status window open while using another function of the application.
78
Motorola Phone Tools
User’s Manual
MMS
MMS enables you to create and manage customized multimedia
messages to be sent from your computer or telephone to another
telephone or e-mail address.
These multimedia messages may contain text, retouched pictures or
images, graphics, and sound that you can customize prior to transmission.
The files you can attach to these messages may be of various formats:
jpeg, gif, txt, wav, midi, etc.
The approximate size of an MMS message is 64 Kbytes, depending on the
type of phone used and the mobile phone operator.
Note
The MMS Studio does not enable you to view an MMS received on your mobile
phone and transferred to your PC.
Description of MMS
Buttons
Save to PC
Opens the Save as window to save
the modified multimedia message
in a folder you select.
Send To Recipient
Sends the selected MMS message
to a mobile phone or an e-mail
address.
Help
Displays this help.
Preview screen
The “Preview screen” (located to the right of the window) gives you a
preview of the selected multimedia message as it will appear on the screen
of your mobile phone.
Motorola Phone Tools
79
User’s Manual
Explorer screen
The “Media Files screen” enables you to select files stored on your
computer in order to view, edit, and/or copy them to your mobile phone.
Clicking a file in the explorer allows you to display it in the Preview screen
and in the Selection screen.
Composer screen
The “Composer screen” screen enables you to create multimedia
messages.
Media Files screen
The Media Files screen located in the center part of the application
displays the local explorer and includes the following tabs:
•
Samples: This tab includes a set of MMS supplied by the application (other MMS files cannot be added).
•
My MMS: In this tab you can specify the local path to the folder in
which the selected messages are to be saved.
•
My Images: In this tab you can select and open image files stored
on your PC.
•
My Melodies: In this tab you can select and open music files stored
on your PC.
•
My PC: In this tab you can select and open multimedia files stored
on your PC.
It enables you to locally select the MMS or the files (containing the image,
picture, sound, or melody) you want to open for editing or to attach to an
MMS message.
80
Motorola Phone Tools
User’s Manual
Composer screen
The Composer screen, located in the lower part of the window, is used to
compose your MMS messages. It enables you to obtain images or pictures
to send, adjust the display time of each image, and insert customized text
or a sound recorded for each image.
Buttons in the Composer toolbar
Save to PC
Opens the Save as window to
save the modified MMS message
in a folder you select.
Send to recipient
Sends the selected MMS message
to a mobile phone or an e-mail
address.
Zoom Time Frame In
Increases the size of the MMS
display.
Zoom Time Frame Out
Reduces the size of the MMS
display.
Add Text
Displays an entry zone to enter a
text under an image.
Remove selection
Deletes the selected item (image,
text, or sound).
Displays the image retouch editor.
Retouch an image
Motorola Phone Tools
81
User’s Manual
Composer zones
Video insertion zone
In this zone you can insert pictures you drag and drop from the Media Files
screen. It enables you to change the order of appearance of the items
inserted and define how long each one appears.
Text insertion zone
In this zone you can enter one or more texts per image or all your images.
Sound insertion zone
In this zone you can insert one or more melodies per image or one or more
melodies for all your images. For example, you can apply a different
melody to each image, or assign a different audio comment that you
recorded previously.
Display time bar per image/sound/text
82
Motorola Phone Tools
User’s Manual
Preview screen
The Preview screen located in the right part of the window enables you to
view MMS messages as they will appear on the screen of the mobile
phone.
To preview your images, and MMS, and listen to your melodies, use the
player buttons (Play, Pause, Stop, Fast Forward, and Rewind) of the
Preview screen:
Create an MMS
1.
From the File menu, select New. The Composer screen is empty.
2.
Do one or more of the following actions:
3.
•
“Insert an image in an MMS”
•
“Insert a sound recording in an MMS”
•
“Insert a text in an MMS”
Once your MMS is finished, save it.
Motorola Phone Tools
83
User’s Manual
Sample MMS displayed in the composer screen
Insert an image in an MMS
1.
In the “Media Files screen”, click the My Images tab.
2.
Specify the local path to the image file or picture that you want to insert
and select it.
Or you can click on the Samples tab to select an image from the ones
provided with the application.
3.
Drag and drop it to the “Composer screen”. The image is inserted in
the Image zone:
.
Insert a sound recording in an MMS
1.
In the Media Files screen, click the My Melodies tab.
2.
Specify the local path to the sound file that you want to insert and
select it.
Or you can click on the Samples tab to select a sound from the ones
provided with the application.
3.
Drag and drop it to the Composer screen.
The sound is inserted in the Sound zone:
84
.
Motorola Phone Tools
User’s Manual
Insert a text in an MMS
1.
Double-click in the Text zone
of the Composer screen.
An entry zone appears.
2.
Enter the desired text in the entry zone and press the Enter key.
The entered text is displayed under the image.
Modify an MMS
Note
MMS enables you to modify only MMS messages that have been created within the
application. It does not enable you to modify an MMS message received on your
mobile phone and transferred to your PC.
1.
From the Media Files screen, click the My MMS tab.
2.
Specify the local path to the folder where the file is located and select
it.
3.
Double-click the file to open it automatically in the Composer screen.
4.
Make the desired changes, referring to the explanations in the following topics:
•
“Insert an image in an MMS”
•
“Retouch an image”
•
“Insert a sound recording in an MMS”
•
“Insert a text in an MMS”
•
“Modify the display time of an item inside an MMS”
•
“Move images, texts or sounds inside an MMS”
5.
In the Preview screen, click
6.
Save the changes by selecting File > Save.
Motorola Phone Tools
to launch it and verify the result.
85
User’s Manual
Move images, texts or sounds inside an MMS
1.
In the Composer screen, click and hold down the left mouse button on
the frame around the image, sound, or text to be moved.
2.
Drag the selection to the desired location.
Modify the display time of an item inside an MMS
1.
In the Composer screen, move the cursor to the right edge of the
image, sound, or text, until a double-headed arrow appears.
2.
Click and hold down the mouse while moving the arrow to the right or
to the left to enlarge or reduce the zone.
The display time on the screen of the mobile phone will match the
increased or reduced time that you defined.
Retouch an image
The Image Retouch Editor allows you to make any necessary changes
without modifying the source image via the buttons described below and
via the color palette.
1.
Select an image in the Media Files.
2.
Click the
Retouch an Image button.
The Image retouch editor opens, displaying the image to retouch.
86
Motorola Phone Tools
User’s Manual
3.
Modify the image as you wish using the different buttons and the color
palette.
Changes you make appear in the frame located in the upper right corner, showing the image as it will appear on the screen of your mobile
phone.
Motorola Phone Tools
87
User’s Manual
Buttons
Close and Apply changes
Confirms changes and closes the
image retouch editor.
Close
Closes the image retouch editor
without saving the changes.
Cut
Copies the displayed image to the
clipboard and deletes it from the
screen.
Copy
Copies the displayed image to the
clipboard.
Paste
Pastes the clipboard contents to the
screen.
Undo
Delete image
Mirror
Flip
Cancels the last action prior to save.
Removes the image (and all
changes made) from the selection.
The image is not deleted from your
computer.
Flips the image on its vertical axis.
Flips the image on its horizontal axis.
Rotates the image 90° to the left.
Rotate
Invert colors
Pencil
88
Inverts the colors in the image.
To draw freehand in the color
selected from the palette.
Motorola Phone Tools
User’s Manual
Erase color
Fill
Line
To erase within the drawing.
To define the background color to
erase with, right click on the desired
color. Click the desired color in order
to specify the foreground color.
To replace the color of pixels by the
color selected in the palette.
To draw a straight line.
Rectangle
To create a transparent rectangular
object.
Filled rectangle
To create a rectangular object filled
with the selected color.
Ellipse
To create a transparent elliptical
object.
Filled ellipse
To create an elliptical object filled
with the selected color.
Text
To insert text in an image.
View an MMS
Note
The MMS Studio enables you to view only MMS messages that have been created
within the application.
1.
From the Media Files screen, click the My MMS tab.
2.
Specify the local path to the folder where the file is located.
3.
Select the file and drag and drop it into the Composer screen.
4.
Click once in the Composer screen.
The first image of the MMS is displayed in the Preview screen.
5.
In the Preview screen, click
Motorola Phone Tools
to play it.
89
User’s Manual
Save an MMS
1.
Select the Save to PC option in the File menu.
The Save as screen is displayed.
2.
Specify the path to the folder where you want to save the MMS and
enter the name you want to assign it.
3.
Click Save. The file is saved with the .mpr extension.
Send an MMS
1.
From the Media Files screen, click the My MMS tab.
2.
Select the MMS to be sent (it must have the .mpr extension).
3.
Drag and drop the selected MMS to the Composer screen.
4.
Click
Send To Recipient.
The MMS Setup Wizard may be launched automatically. If so, simply
follow the instructions on the screen.
The Send MMS window is then displayed.
5.
Enter your contact details in the To field or click the To... button in
order to copy the information from the Contacts.
Note:
You can send a message to several recipients; to do so enter recipient's numbers
separated by a semicolon.
6.
90
Enter your contact details that needs to be in copy in the Cc field or
click the Cc... button in order to copy the information from the Contacts.
Motorola Phone Tools
User’s Manual
7.
Enter the Subject of the MMS.
8.
Click the Setup button
if you need to modify the default information regarding the MMS network used.
The MMS Setup Wizard is displayed. Simply follow the instructions on
the screen.
9.
Click the Send button and wait until a window pops up to inform you
that the message is sent.
10. Click OK to close the window.
Your message is placed with the .mms extension in your Inbox/Outbox.
Notes
The MMS size appears in kilobytes in the Message section.
(*)The availability of this function depends on the application version you have.
Motorola Phone Tools
91
User’s Manual
92
Motorola Phone Tools
User’s Manual
Internet
With the Internet option, you can connect to the Internet using your phone.
To perform this feature, your phone has to be connected and turned on.
Within the Internet Connection Manager window, you can also:
•
Manage your connections (create, delete or edit your connections).
•
View in real time the connection information (Operator, Network,
Connection time, Data received or sent).
•
View your connection logs.
Connect /disconnect
Note
When you start up a connection for the first time and/or no connection has been
configured, the program will show the Internet connections wizard so you can set
up your connection.
To do this, refer to the “Use Internet Connection Wizard”.
Connect to the Internet
To connect to the Internet, proceed as follows:
1.
First, make sure that you have subscribed to a service provider and
that you have a good network reception.
2.
Make sure the signal strength is good enough to establish a data connection (if the signal strength is not good enough, it is displayed in red
color).
3.
If you have already set connections, select a connection in the dropdown box, and then click on Connect.
If you have not set a connection, click on Connect.
•
If the Internet Connection finds an Internet data account corresponding to your current operator, the connection is created and
established automatically.
•
If the Internet Connection does not find an Internet data account
corresponding to your current operator, a connection wizard is
launched.
Motorola Phone Tools
93
User’s Manual
•
4.
If there is no more space to write the Internet data on your phone,
you will be prompted to select an existing data account to overwrite.
The Internet connection is established automatically. You are online.
Notes:
If you use a Proxy server, you may need to uncheck the server settings to access
this connection.
When you click on the Connect button, the application creates automatically all
connection types available for your phone (UMTS/GPRS). The best connection will
be used as the default connection.
Start up a connection other than the default connection
1.
Click the Manage connections button.
The Internet Connections window is displayed.
2.
Double-click the connection to be started.
The connection starts up.
or
1.
From the scrolling list, select a connection you want to start up.
2.
Click the Connect button.
The selected connection starts up.
End a connection
To disconnect, click on the Disconnect button in the Internet Connection
Manager window.
A confirmation window opens asking you to confirm the disconnection.
94
Motorola Phone Tools
User’s Manual
Create New Connection
Use Internet Connection Wizard
To configure a connection, proceed as follows:
1.
Click Create new connection button.
The Internet Connection Wizard displays.
2.
Follow the instructions of the wizard. It will guide you in creating and
managing your connections.
The connection created becomes the default connection. The icon for
this connection and, if applicable, that of the fallback connection are
added to the Internet Connections window.
3.
Repeat the same steps for each connection to be created.
Note:
When you access the Connection type screen, check the Use default parameters
box if you would like the wizard to use preset data for the operator you have chosen
(recommended). If you uncheck this box, refer directly to one of the following headings:
- Manual entry of operator settings for a standard network
1.
In the Remote Access open session information screen, enter
User name, Password and Telephone number (supplied by your
operator) in the appropriate entry fields and click Next.
2.
The IP Address Configuration screen is displayed.
3.
Select Dynamic IP Address (assigned automatically when the connection starts) or Fixed IP Address (which you enter yourself) and
click Next .
4.
The Server Name Configuration screen is displayed.
5.
Select Dynamic/Static DNS Addresses and click Next to finish setting
up the connection.
6.
Click Next. The screen End of Internet Connection Wizard displays.
7.
Click Finish and follow the on-screen instructions.
Motorola Phone Tools
95
User’s Manual
- Manual entry of operator settings for a high-speed network
1.
Enter operator settings manually for a GPRS and 1xRTT type highspeed network
2.
Enter User name, Password and APN address (information
requested for a GPRS connection only and provided by your operator)
in the appropriate entry fields and click Next . The Context number
setup screen for the connection is displayed if it is a GPRS connection,
otherwise go directly to step No. 3.
3.
Specify the appropriate Context ID and click Next . The IP Address
Configuration screen is displayed.
4.
Select Dynamic IP Address (assigned automatically when the connection starts) or Fixed IP Address (which you enter yourself) and
click Next. The Server Name screen is displayed.
5.
Select Dynamic DNS Addresses or Fixed DNS Addresses and click
Next. The Quality of Service Requested window is displayed if it is
a GPRS connection.
Warning!
If the Required Service Quality and the Minimum Service Quality windows are
not displayed, go directly to step 7 and ignore steps 5 and 6 below.
6.
After filling out this screen (see GPRS service operation ), click Next.
The Quality of Service Minimum window is displayed.
7.
After filling out this screen (see GPRS service operation ), click Next.
The wizard will ask you if you wish to create a fallback connection to a
standard GSM-Data and CDMA network. This connection will be used
by the program whenever the high-speed network is not available.
8.
Select Yes (recommended) and click Next.
9.
Enter the name you wish to assign to this connection in the Fallback
connection ID screen.
10. Check the Use default parameters box in the Fallback connection
identification screen (recommended) if you would like the wizard to
use preset data for the operator you have chosen.
If you do not check this box, refer directly to the “- Manual entry of operator
settings for a standard network”.
11. Follow the on-screen instructins to finish setting up this connection.
96
Motorola Phone Tools
User’s Manual
Once you have created a connection, the Internet Connection wizard
closes. You can set up your connection in the Internet Connections
window.
For example, you can select another icon for your connection:
1.
Right-click the icon of the connection to which you wish to modify and
select the Select Icon... option in the popup menu that is displayed.
The Select Icon window opens.
2.
Select one of the icons shown in the Icon section or click the
Browse... button to specify the path to the file of an icon saved in your
computer.
3.
Click OK. The icon selected is immediately replaced by the new one.
Manage Connections
Change a connection
1.
Click the Manage connections button.
The Internet connections window is displayed.
2.
Right-click the icon of the connection to be changed and select the
Properties option in the popup menu that is displayed.
The Properties window opens.
3.
Make the desired changes in the various tabs. Certain tabs will be visible and others not, depending on the connection being changed (highspeed or standard connection).
Refer to the “Create New Connection” heading for further details.
4.
Click OK. The window closes.
Motorola Phone Tools
97
User’s Manual
Set a default connection
The first time you click on the Connect button in the Internet Connection
window, the application automatically creates one or two Internet
Connection(s).
The connections are named using the Operator and the network/
subscription (eg.: SFR UMTS ; SFR GPRS).
Note:
If the Fallback Connection parameter is enabled, then two Internet Connections are
created by the application.
When clicking on the Connect button, the default Internet Connection is
always used. The default Internet Connection is always the Internet
Connection using the best network available by the phone. Its icon will
contain the
mark.
Change the default Internet Connection
If you configure more than one connection, you can change the default
connection as follows:
1.
Click the Manage connections button.
The Internet Connections window is displayed.
2.
Right-click the icon of the connection to be specified as the default and
select the Set as default connection option in the popup menu that
is displayed.
The default
mark is added to the connection icon selected.
Delete a connection
1.
Click the Manage connections button.
The Internet connections window is displayed.
2.
Select the icon of the connection to be deleted.
3.
Click the Del key on your keyboard. A confirmation window opens.
98
Motorola Phone Tools
User’s Manual
4.
Click Yes.
The icon for the deleted connection will disappear off Internet Connections window.
Note
If you delete the connection marked as the default, the program will transfer the
default attribute to the next or remaining connection.
Rename a connection
1.
Click the Manage connections button.
The Internet Connections window is displayed.
2.
Right-click the icon of the connection to be renamed and select the
Rename option in the popup menu that is displayed.
3.
Enter the name you want to assign to this connection in the entry field
shown selected.
4.
Click Enter on your keyboard.
Launch Internet Browser automatically
You can request the program to start your Internet browser for each
connection each time you start a connection.
1.
Click the Manage connections button.
The Internet connections window is displayed.
2.
Right-click the icon of the connection for which you wish the program
to start the Internet browser and select the Launch Internet Browser
automatically option in the popup menu that is displayed.
A check mark will appear next to the option.
3.
Repeat these steps for each connection with which you wish the program to launch the Internet browser.
Motorola Phone Tools
99
User’s Manual
Check Connections
Check Connections Log
The connection log enables you to check your call charges. It lists details
of all connections which have taken place.
For each one, it gives you the name of the connection, the service provider,
date and time, duration, the number of bytes sent or received, total, and
status.
Access the Connections log
1.
Click the Manage connections button.
The Internet Connections window is displayed.
2.
In the menu bar select File > Connections log.
The Connections log window is displayed.
Display entries by date
In the Connections log window, select one of the following options from
the Period scrolling list:
•
<No filter>, to display all connections made,
•
Current month,
•
Previous month,
•
From… to…, to display a specific period in the Time Span window.
Display entries by connection
In the Connections log window, select the <No filter> option from the
Connection scrolling list in order to display all entries made for all
connections, otherwise select the connection for which you wish to view the
entries.
100
Motorola Phone Tools
User’s Manual
Save Connections log
You can save either all connections on your computer or those you have
previously selected.
The program saves them in Excel (.CSV) or text (.TXT) format depending
on your choice, which will enable you, for example, to place a value on units
consumed in your subscription(s).
1.
If you do not wish to save all listed connections, select the connections
to be saved from the Connections log window.
2.
Click the
Export button.
The Save as window opens.
3.
Specify the path to the location where you want to store the file and
enter a File name.
4.
Select the format Type (.CSV or .TXT).
5.
Select Selected records or All records in the Selection section.
6.
To export the column headers of the log as well, leave the Column
header box checked.
7.
Click Save.
Delete a listed connection
1.
Select the connection(s) to be deleted from the Connections log window.
2.
Click the
Delete button.
Motorola Phone Tools
101
User’s Manual
View Connection status
To view the status of the current connection, do one of the following
procedure:
1.
Click the Manage connections button.
The Internet connections window is displayed.
2.
Select the current connection
3.
In the menu bar, select File > Status.
The current connection window is displayed. This windows shows in
real time the connection duration and number of bytes sent and
received.
4.
Click Close to exit this window. Or double click the
status icon located in the taskbar.
Connection
The Connection status window is displayed.
102
Motorola Phone Tools
User’s Manual
Chapter 5: Transfer Files
Transfer Files allows you to move your files (images, melodies, and
videos) from your computer to your mobile phone and vice versa. The userfriendly double-pane view, made up of My Computer and Mobile phone,
lets you quickly and easily maneuver your files from one folder to another.
Here are the four applications under Transfer Files:
•
Pictures allows you to transfer image files to and from your mobile
to your PC.
•
Audio files allows you to transfer sound files to and from your
mobile to your PC. With an MTP-enabled mobile phone, you will be
able to select from two different interfaces under My Computer:
•
Manage Playlists (where you can view, manage and transfer playlist stored in Windows Media Player)
•
Manage Songs (where you can view and transfer audio files stored
in Windows Media Player.)
•
Video files allows you to transfer video files to and from your
mobile to your PC.
•
All files allows you to transfer all types of files (picture, sound, and
videos) to and from your mobile to your PC.
Buttons
Copies the selected file to the mobile phone.
Copies the selected file to the computer.
Help: Displays this help file.
Motorola Phone Tools
103
User’s Manual
Transferring a file from your PC to your mobile
phone
1.
Make sure your mobile phone is correctly switched on and connected
to the computer.
2.
Under Mobile phone view, select the directory where you want to
save the file.
3.
From My Computer view, select from the drop-down menu the local
path of the file to be transferred.
Note
You can transfer several files at once by selecting them while pressing the Ctrl key.
4.
Do one of the following :
•
Drag and drop the selected file from the My Computer view to the
Mobile phone view.
•
Click the
button located in between the two zones.
The file is copied to the mobile phone folder.
Transferring a file from your mobile phone to
your PC
1.
Make sure your mobile phone is correctly switched on and connected
to the computer.
2.
Under My Computer view, select from the drop-down menu the directory where you want the file to be saved.
3.
From Mobile phone view, select the file to be transferred.
Note
You can transfer several files at once by clicking them while pressing the Ctrl key.
4.
Do one of the following :
•
Drag and drop the selected file from the Mobile phone view to the
My Computer view.
•
Click the
button located in between the two zones.
The file is copied to the computer folder.
104
Motorola Phone Tools
User’s Manual
Chapter 6: Customize
Warning!
The availability and display of the Editors and the functions depend on the application version you are using. They also depend on the configuration of your PC, the
capabilities of your mobile phone, and your subscription with your telephone operator.
The Customize editors enables you to simply and efficiently manage all
the multimedia functions of your mobile phone on your PC. Thus you can
edit melodies using Melody Editor or pictures using Image Editor, and
transfer them on your mobile phone. You can also compose videos with
sound and titles and transfer them to your mobile device using the Video
Editor.
Access the Customize editors
In the left panel, click the editor you want to display, in the Customize
option list. The Editor is displayed in the main window.
•
“Image Editor” on page 107
•
“Melody Editor” on page 117
•
“Video Editor” on page 129
Description
Each Editor view is divided into 3 parts. The view that is displayed, as well
as the corresponding menus and buttons, vary according to the selected
editor.
Motorola Phone Tools
105
User’s Manual
The explorer screen
This screen located in the central part of the application displays your local
explorer, giving you fast, direct access for locating and selecting the file
(containing the image, picture, sound, video or melody) that you want to
use. This screen is identical in all editors: Melody, Image and Video. It
enables you to locally select the file you want to open for editing.
Note
The explorer screen is called Images files in the Image Editor, Melody files in the
Melody Editor, Media files in the Video Editor.
The editor screen
The editor screen located at the bottom of the application allows you to edit
and customize the currently displayed item.
The editor screen varies according to the selected Editor.
Note
The editor screen is called Selection in the Image and Melody Editors. It is called
Composer in the Video Editor.
The preview screen
Changes made to an item can be displayed, played, and/or viewed in the
preview screen located in the right part of the application main screen.
This screen varies according to the selected Editor.
106
Motorola Phone Tools
User’s Manual
Image Editor
Image Editor enables you to select an image stored on your computer’s
hard disk in order to add a suitable copy of the image to the image library
of your mobile phone, and to use it as a screen background.
Note
According to your mobile phone's capacity, images may be attached to an MMS.
Description of the Image Editor
Buttons
Save to PC
Opens the Save as window to save the
displayed image in a folder you select.
Transfer to phone
Copies the displayed image to the mobile
phone.
Screen capture
Launches the Screen capture tool. (See
“Perform a screen capture” on page 116)
Help
Displays this help.
Specific options in the Edit menu
Crop
Actual Size
Adjust
Motorola Phone Tools
Enables the cropping zone and disables the
Tools > Retouch button.
Displays the image in its original size: the
image is adapted to fit the size of your phone
screen, while keeping its original proportions
(it is centered and adjusted automatically).
Adapts the image to the telephone screen
while maintaining the original image
proportions (proportional scaling).
107
User’s Manual
Centers the image on the telephone screen.
Center
Background
color
Lets you choose from the palette or create a
customized background color used to fill
empty spaces when the selected image does
not fill the entire telephone screen.
Preview screen
The Preview screen (located to the right of the window) gives you a
preview of the selected image as it will appear on the screen of your mobile
phone.
Explorer screen
The Image Files screen enables you to select files stored on your
computer in order to view, edit, and/or copy them to your mobile phone.
Clicking a file in the explorer allows you to display it in the Preview screen
and in the Selection screen.
Selection screen
The Selection screen enables you to edit, crop, and retouch an image.
108
Motorola Phone Tools
User’s Manual
Selection screen
The Selection is located in the lower part of the window. It enables you to
“Edit an image” on page 112, “Crop an image” on page 113, and “Retouch
an image” on page 114.
The selected (and potentially modified) image is displayed in the Preview
screen as it will appear on the screen of your mobile phone.
Motorola Phone Tools
109
User’s Manual
Buttons
Save to PC
Opens the Save as window to save the
modified image in a folder you select.
Transfer to phone
Transfer the modified image to your
mobile phone image folder.
Crop
Enables the cropping zone and disables
the Tools > Retouch button.
Accept the crop
Confirms the cropping zone and enables
the Tools > Retouch button.
Cancel the crop
Cancels the cropping zone and enables
the Tools > Retouch button.
New
Opens a blank new image to be modified
in the Selection screen.
Original Size
Returns to the original size of the image
after a zoom.
Adjust
window
image
Tools
to
Matches the image to the size of the
Selection screen.
Opens the Tools menu for applying
special effects to images.
Tools menu
Displays the retouch toolbar.
Retouch
Reduces the size of an image.
Zoom out
Zoom in
110
Increases the size of the image up to
800%.
Motorola Phone Tools
User’s Manual
Brightness
Contrast
Image
and
Displays the Brightness and contrast
window to adjust the brightness and
contract of the selected image.
Opens a sub-menu for applying rotation
effects to the selected image.
Tools > Image menu
Rotates the image 90° to the left.
Rotate to left
Rotates the image 90° to the right.
Rotate to right
Flip
Mirror
Motorola Phone Tools
Flips the image on its horizontal
axis.
Flips the image on its vertical axis.
111
User’s Manual
Manage Image Editor
Preview screen
The image appearing in the Preview screen shows the image as it will
appear on the screen of your mobile phone.
When clicking on the Save to PC button, the Preview image is saved as
shown in the Preview screen, i.e. with the mobile phone screen
dimensions.
Edit an image
1.
Select an image in the Image Files screen.
The image is displayed in the “Selection screen” on page 109.
2.
Make the modifications you wish, you can :
•
“Crop an image” on page 113
•
“Retouch an image” on page 114
Warning!
Before clicking on another image in the explorer, if you want to keep the changes
you made to the displayed image, make sure you save them first.
112
Motorola Phone Tools
User’s Manual
Crop an image
Display the cropping zone
Click the
Crop button.
The image cropping zone is displayed at the center of the selected image.
It is represented by moving dotted lines that form a frame
move it and modify it as follows.
. You can
Move the cropping zone
Click and hold the mouse button to drag the zone within the image.
Proportional image cropping
1.
Hold the Shift key down and position the cursor on one of the edges
of the frame that makes up the cropping zone to reveal a doubleheaded arrow.
2.
Click and hold this arrow while dragging it to increase or reduce the
size of the frame.
Motorola Phone Tools
113
User’s Manual
Resize the cropping zone with the keyboard
Click once in the zone then press and hold down either the Ctrl or Shift key
while pressing one of the arrow keys.
Resize the cropping zone with the cursor
1.
Move the cursor to the borders of the cropping zone. An arrow
appears.
2.
Click and hold this arrow while dragging it to increase or reduce the
size of the frame.
You can monitor the image in the Preview screen simultaneously as it will
appear on the mobile phone. The image will be matched to the mobile
phone screen while retaining its original proportions.
Retouch an image
The Image Editor allows you to make any necessary changes without
modifying the source image.
1.
Select an image in the Image Files.
2.
Click the
Tools button, then select the
Retouch button.
The retouch toolbar and the color palette are displayed in the Selection screen.
3.
Modify the image as you wish.
114
Motorola Phone Tools
User’s Manual
Buttons on the retouch toolbar
Pencil
Erase color
Fill
To draw freehand in the color selected
from the palette.
To erase within the drawing.
To define the background color to erase
with, right click on the desired color. Click
the desired color in order to specify the
foreground color.
To replace the color of pixels by the color
selected in the palette.
To draw a straight line.
Line
To create a transparent rectangular object.
Rectangle
Filled rectangle
To create a rectangular object filled with
the selected color.
To create a transparent elliptical object.
Ellipse
Filled ellipse
To create an elliptical object filled with the
selected color.
To insert text in an image.
Text
Motorola Phone Tools
115
User’s Manual
Perform a screen capture
The Screen Capture tool allows you to capture the contents of your
computer screen as an image file in the Image Editor.
1.
Display the image you want to capture on the screen then return to the
Image Editor.
2.
In the toolbar, click the
Screen Capture button. The application
closes temporarily and the tool appears on your computer screen.
By default, the size of the tool equals the size of the screen of the connected mobile phone.
3.
Use the up and down arrows
the area you want to capture.
4.
Using the mouse, select the tool and drag it to the part of the screen
you want to capture.
5.
Click
. The tool closes and the screen reappears. The captured
image is inserted in the Selection screen.
6.
Use the Image Editor tools to edit, save, and transfer the image, as
described in this help.
116
to increase or decrease the size of
Motorola Phone Tools
User’s Manual
Melody Editor
Melody Editor enables you to recover your favorite musical extracts in hifi or polyphonic format and use them as ring tones on your mobile phone.
Important!
Some file formats may not be accessible, depending on your phone's capacities.
Description of the Melody Editor
Buttons
Save to PC
Opens the Save as window to save
the selected extract to the PC.
Save selection as ...
Saves the extract selected in the
Selection screen to the PC.
Transfer to phone
Transfers the selected extract to your
mobile phone.
Help
Displays this help.
Preview screen
The Preview screen (on the right side of the window) provides information
about the file selected in the Melody Files explorer and displayed in the
Selection editing screen.
Explorer screen
The Melody Files screen enables you to select sound files stored on your
computer in order to play and copy them to your mobile phone.
Motorola Phone Tools
117
User’s Manual
Clicking a file displays the corresponding information in the Preview
screen and open a corresponding score in the Selection screen. The
contents of that screen vary according to the type of file that is open (hi-fi
or polyphonic).
Selection screen
The Selection screen (located in the lower part of the window) enables you
to select a musical extract, apply effects on it, mix two musical extracts
together and transfer the selected extract to your mobile phone.
Important!
The menus and buttons displayed on the Selection screen vary according to the format of the sound file opened.
Selection screen
The Selection screen is located in the lower part of the window. It enables
you to select a musical extract from a sound file, apply effects on it, mix two
musical sound files together and transfer the selected extract to your
mobile phone.
What is displayed in the Selection screen depends on the format of the
selected extract:
Selection screen with a hi-fi sound file selected
118
Motorola Phone Tools
User’s Manual
Selection screen with a polyphonic sound file selected
Buttons
Save to PC
Saves the extract displayed in the
Selection screen to the PC.
Transfer to phone
Transfers the extract selected in the
Selection screen to the mobile phone.
Crop
Enables the cropping zone with its
associated buttons : OK and Cancel,
and disables the toolbar buttons.
Accept crop
and
Cancels the cropping and enables the
toolbar buttons.
Cancel crop
Deletes the selected extract from the
Selection screen (the sound file has
not been changed).
Delete
Opens the Tools menu for applying
special effects to sounds and make a
voice record.
Tools
Run speed
Motorola Phone Tools
Confirms the cropping zone
enables the toolbar buttons.
Displayed when a file in .mid format is
selected in the browser. The bar
enables the tempo to be adjusted by
sliding the cursor to the left to slow it
down or to the right to speed it up.
119
User’s Manual
Initial Tempo
Displayed when a file in .mid format is
selected in the browser. It enables to
return to the original tempo if it has
been changed previously using the
cursor above.
Buttons in the Tools menu
Fade in/out
Voice record
Mix
Displayed when a hi-fi file is selected
in the explorer.
This button displays the Envelope
window in which a cursor enables you
to specify the fade in and fade out
effects at the beginning and end of
the extract. To do this, place the
cursor on the ruler at the point where
a double-headed arrow appears.
Click and hold this arrow and drag it to
the left or to the right to increase or
decrease the effect.
Displays the Record window to
enable you to make a voice
recording.
Displayed when a hi-fi file is selected
in the explorer.
This button displays the mixing tool
bar and two channels in the
Selection screen. It enables you to
mix two sound files.
Note:
File in Midi format: This is a standard protocol for converting musical data between
instruments and computers.
120
Motorola Phone Tools
User’s Manual
Ruler
The entire strip (the ruler) represents the duration of the selected sound
file. A selected extract is located inbetween the two selection cursors.
Melody Files screen
The Melody Files screen (located in the center of the window) enables you
to select melody files stored on your computer in order to play and/or copy
them to your mobile phone.
It contains the following tabs:
•
Samples: This tab includes a set of sounds supplied by the application (other sound files cannot be added).
•
My Music: In this tab you can specify the local path to the folder in
which the selected extracts are to be saved.
•
My PC: In this tab you can select and open music files stored on
your PC.
•
My CD: In this tab you can select and open music files stored on
the CD in your CD-ROM drive.
•
My Phone: In this tab you can select and open music files stored
on your mobile phone.
When you click a file, information about it is displayed in the Preview
screen, and the corresponding score is displayed in the Selection screen.
Preview screen
The Preview screen, located on the right side of the main window, displays
information concerning the selected sound file.
Motorola Phone Tools
121
User’s Manual
The type of information displayed depends on the format of the selected
sound file.
The Preview screen enables you to listen to the selected extract with the
player buttons:
Plays the selected sound file
Play
Interrupts playing the selected sound file
Pause
Stops playing the selected sound file
Stop
Open a sound file
Open a .cda file
1.
Click the My CD tab and specify the path to the CD drive where the file
is located.
2.
Double-click the track you want to open.
The file is converted in a legible format and is displayed in the Selection screen.
122
Motorola Phone Tools
User’s Manual
Open a polyphonic sound file
1.
In the Melody Files browser, specify the path to the folder containing
your polyphonic sound files .
Note:
Polyphonic format: The following polyphonic formats are supported: .mid, .midi.
A sound file in polyphonic format with the .mid extension may be single-channel or
multi-channel.
2.
Select the desired sound file.
It opens in the Selection screen and its information is displayed in the
Preview screen.
The program converts the file and displays a list of instruments in the
Selection screen (at the bottom of the screen), as follows:
Note
If no extract was selected, then the entire opened sound file is considered to be
selected.
Motorola Phone Tools
123
User’s Manual
Open a hi-fi sound file
1.
In the Melody Files browser, specify the path to the folder containing
your hi-fi* sound files.
Note:
*Hi-fi format: The hi-fi formats supported are .wav, .mp3, .amr, .mp4 and .m4a.
2.
Select the desired sound file.
It opens in the Selection screen and its information is displayed in the
Preview screen.
The program converts the file and displays the signal corresponding to the
musical notes in the Selection screen (at the bottom of the screen), as
follows:
Note
If no extract was selected, then the entire opened sound file is considered to be
selected.
124
Motorola Phone Tools
User’s Manual
Select and play an extract
Select a musical extract
1.
Open a sound file.
2.
Click the
Crop button.
The cropping zone is located between the
the
Selection start and
Selection stop cursors in the ruler.
3.
Place the mouse cursor on the Selection cursor you want to modify
until a double-headed arrow appears.
4.
Click and hold down the mouse button, then drag to the right or to the
left the Selection cursor.
The new selection appears in dark in the Selection screen.
5.
Click the
Accept the crop button to confirm the cropping zone.
The selected extract is entirely displayed in the Selection screen.
Notes
•You can also change the cropping zone by clicking and holding down the mouse
button inside the Selection screen, then drag it to the right or to the left. The selection area appears in dark.
•Simply click inside the Selection screen to cancel the selection. If no part was
selected, then the entire sound file is considered to be selected.
Listen to the selected musical extract
Depending on what you wish to do with the selected extract, use the
Play, Pause and Stop buttons in the Preview screen.
Note
Make sure you have turned on your computer's speakers and adjusted the volume.
Motorola Phone Tools
125
User’s Manual
Start the listening from a selected point
1.
Click wherever you want in the ruler.
The red line indicates where to start the listening
2.
Click the
Play button in the Preview screen to listen to the sound
file from this point.
Make a voice recording
1.
In the toolbar of the Selection screen, click
Record.
The Record dialog box is displayed.
2.
Select the device you wish to use from those detected in the Device
drop-down menu.
3.
Select the type of line on which you wish to make the recording from
the Line drop-down menu.
4.
Set the recording volume using the cursor located in the right hand
section of the dialog box.
5.
Click the Start button.
The recording begins and its lengths is displayed.
6.
Click the Finish button to stop the recording.
The Record dialog box closes and the record appears in the Selection screen.
126
Tools >
Voice
Motorola Phone Tools
User’s Manual
Mix two sound files
You can create a new sound extract by mixing two audio files.
Note:
Only mp3, wav, amr and adp audio files can be mixed.
1.
Select a hi-fi sound file in the Melody Files.
2.
In the toolbar of the Selection screen, click
Tools >
Mix.
The Mix screen is displayed. The selected sound file is displayed with
a second empty track.
3.
Select a second hi-fi sound file in the Melody Files and drag and drop
it in the empty Track 2.
4.
Use the
Move left and
tions of the two tracks.
Move right buttons to adjust the posi-
The
Cancel move button enables you to cancel any previous
move and restore the orignal track positions.
5.
Use the
tracks.
Balance button to adjust the sound level between the two
6.
Use the player buttons in the Preview screen to listen to your mix.
7.
Click one of the following:
8.
Validate to confirm the mix.
The audio mix is displayed in the Selection screen.
9.
Cancel to get back to the Selection screen that displays the first
track selected.
Motorola Phone Tools
127
User’s Manual
Save an extract
You can save the selected extracts to your computer in order to use them
later as mobile phone ring tones or attach them to your MMS messages or
your videos.
Save a melody on the computer
1.
Open a sound file and select the extract to be saved.
2.
From the File menu, select the Save to PC option.
The Save as window is displayed.
3.
Specify the local path and enter a name in the File name field.
4.
Select the desired file format from the Type scrolling list.
5.
Click Save.
Repeat these steps for each musical extract you want to save.
Save a melody on the mobile phone
1.
Open a sound file and select the extract to be saved.
2.
Click the
Transfer to phone button.
The selected extract is transferred to your mobile phone sound folder.
128
Motorola Phone Tools
User’s Manual
Video Editor
Video Editor makes it easy to create and edit videos for mobile phones.
Its ergonomic interface helps you quickly insert pictures, text and/or music
extracts into your videos. You can then combine them into a single video
to be transferred from your PC to your mobile phone and/or saved to your
hard disk.
Description of the Video Editor
Buttons
Save As...
Opens the Save as window to
save the modified video in a folder
you select.
Transfer to your phone:
Transfers the modified video to
your mobile phone.
Help
Displays this help.
Preview screen
The Preview screen (located to the right of the window) gives you a
preview of the selected video as it will appear on the screen of your mobile
phone.
Explorer screen
The Media Files screen enables you to select files stored on your
computer in order to view, edit, and/or copy them to your mobile phone.
Clicking a file in the explorer allows you to display it in the Preview screen
and in the Selection screen.
Motorola Phone Tools
129
User’s Manual
Composer screen
The Composer screen enables you to create video files.
Media Files screen
The Media Files screen, located in the center of the main window, displays
the local explorer.
This explorer enables you to locally select a video or file (containing the
image, text, music or voice extract) and edit or attach it to the video.
Tabs displayed will vary according to the display mode selected in the
Composer screen.
The following tabs are displayed in the Storyboard view and in the Edit
view: Samples, My Videos, My Images, My PC.
Two additional tabs are displayed in the Edit View: My Sounds, My Titles.
Note
To change the display, select the View > Storyboard or View > Edit View menu
option.
Composer screen
The Composer screen, located in the bottom section of the main screen,
is used to create the final video. It enables you to switch videos (images or
photos), to specify their duration, and to attach customized text or sound
recordings to a single video or all of them.
The Composer screen have two different views: the Edit View to compose
your video and the Storyboard View that displays the different sequences
of your video. In the Storyboard View, you can only delete existing
sequences, inverse their position within the video or insert new sequences.
130
Motorola Phone Tools
User’s Manual
Buttons in the Composer toolbar
Save As...
Delete All
Edit View *
Opens the Save as window to
save the modified video in a folder
you select.
Deletes all the content of the
Composer screen (image or
video, as well as associated
sounds and text).
Switches to Edit View.
Switches to Storyboard View.
Storyboard View **
Crop **
Validate Selection **
Enables the cropping zone and the
Validate Selection and Cancel
Selection buttons.
Confirms the cropping zone that is
then the only selection displayed
in the Composer screen.
Cancel Selection **
Cancels the cropping zone and
returns to the previous selection.
Zoom In **
Increases the size of the overall
display
Zoom Out **
Reduces the size of the overall
display
Tools **
Displays the Tools menu.
* only in Storyboard view
** only in Edit view
Motorola Phone Tools
131
User’s Manual
Specific buttons in the Tools menu (only in Edit view)
Add Text
Displays the Title Management
window
Add Voice
Saves a voice extract for the
selected video or for all videos
Audio Balance
Displays
window
the
Audio
Balance
Composer zones
Storyboard View
Videos are displayed as follows:
The Storyboard zone enables you to insert pictures and/or videos you
drag and drop from the Media Files screen. You can change the order of
appearance of the items inserted in order to make up your final video.
132
Motorola Phone Tools
User’s Manual
Edit View
Videos are displayed as follows:
Note
The two images displayed in the selection correspond to the first image (left) and
the last image (right) of the selected video.
A time bar indicates the duration of videos, sound extracts and text by
means of the trim points
that delimit them. The playing time of any item
can be reduced or increased using the trim points.
Video insertion zone
In this zone you can insert pictures and/or videos you drag and drop from
the Media Files screen. It enables you to change the order of appearance
of the items inserted in order to make up your final video.
Text insertion zone
In this zone you can attach one or more texts to a video, or one or more
texts to all the videos.
Sound insertion zone
In this zone you can attach one or more melodies to a video, or one or more
melodies to all the videos. You can also apply your own sound recordings.
Motorola Phone Tools
133
User’s Manual
Preview screen
The Preview screen, located on the right side of the main window, displays
the selected item as it will appear on the mobile phone screen.
The Preview screen enables you:
134
•
to view your video with the player buttons (Play, Pause, Stop, Fast
Forward, and Rewind):
•
to adjust brightness and contrast with the scrollbars at the top (this
does not affect the video, the image or the original video)
•
to display the full screen mode with the
button. (The Esc key
on the keyboard enables you to return subsequently to the previous
screen).
Motorola Phone Tools
User’s Manual
Manage Videos
Create a video
The creation of a video takes place in the “Composer screen” on page 130
of the Video Editor. You combine multimedia items the way you want,
mixing images, sounds, texts and existing videos together to end up with
the final video.
Video Editor enables you to:
•
“Import multimedia files (videos, sounds, images, text)” on
page 135
•
“Insert a title” on page 136 and “Modify a title” on page 138
•
“Add a sound recording” on page 138
•
“Change the display time of an item” on page 140
•
“Reorder items” on page 140
•
“Split a video” on page 141
•
“Combine videos and/or images” on page 141
•
“Save a video” on page 141
•
“Transfer a video” on page 142
At any time of the creation of a video, you can preview it in the “Preview
screen” on page 134.
Import multimedia files (videos, sounds, images, text)
1.
In Edit View mode, click the desired tab in the Media Files screen:
•
the Samples tab to import a video from those installed with the
application.
•
the My Videos or My images tab to import a video, an image, or a
photo.
•
the My Sounds tab to import an audio file.
•
the My Titles tab to import a text file.
•
the My PC tab to browse your PC to import a multimedia file.
Motorola Phone Tools
135
User’s Manual
2.
Specify the local path to the folder containing the video (image, photo,
sound or text) you wish to import and select it.
The item associated with the selected file will be displayed in the Preview screen.
Note:
Supported multimedia files are:
3.
•
sound files must be in .wav, .amr or .mp3 format
•
title files must be in .tit format
•
image files must be in .tif, .png, .pcx, .jpg, .gif or .bmp format
•
video files must be in .3GP, .3G2, .mp4, .wmv,. mpg, .avi, .mov or
.rm format
Drag and drop the selected file to the Composer screen to display it.
Repeat the same steps for each file that contains the video, text or sound
you wish to insert in the Composer screen.
Note
You can modify a sound file or a text file using the trim points:
to the left or to
the right, to shorten or lengthen the duration, and apply it to one or more videos or
images.
Insert a title
1.
In Edit View mode, select the video or the image you want to apply a
text to.
2.
From the toolbar, select
Tools >
Add Text.
The Title Management window is displayed.
136
Motorola Phone Tools
User’s Manual
3.
Type or modify your text in the entry field:
4.
Change the formatting options in the Format zone as you wish using :
•
Font and Size drop-down lists
•
Bold ( B ), Italic ( I ) and Underline ( U ) buttons
•
Text color and Background color tables
5.
You can add a fade-out/fade-in effect between videos using the Fade
out and Fade in bars in the Effect zone.
6.
Use the
7.
You can move and resize the entry field within the image frame.
8.
Click on one of the following:
Play and
Stop buttons to view the result.
•
OK.
The window is closed and the text is displayed in the Preview
screen. It is not saved in the PC.
•
Save.
The Save as windows opens to enable you to save it to your PC as
a text file in .tit format. Enter a file name and click Save.
The window is closed and the text is displayed in the Preview
screen.
Follow the same procedure for each title or written comment you want to
add.
Note
You can modify a text file using the trim points:
to the left or to the right, to
shorten or lengthen the duration, and apply it to one or more videos or images.
Motorola Phone Tools
137
User’s Manual
Modify a title
1.
In Edit View mode, double-click the text you want to modify.
The Title Management window is displayed.
2.
Make the required modifications, as described in Insert text.
3.
Once the modifications done click on one of the following:
•
OK
The window is closed and the modified text is displayed in the Preview screen. It is not saved in the PC.
•
Save
The Save as windows opens to enable you to save it to your PC as
a text file in .tit format. Enter a file name and click Save.
The window is closed and the modified text is displayed in the Preview screen.
•
Cancel
A cancel confirmation window is displayed. Click No to cancel your
modifications.
The window is closed and the text has not been modified.
Add a sound recording
1.
In Edit View mode, click the
Tools button then select
Voice.
The Recorder window is displayed.
Add
2.
Select the device you wish to use from those detected in the Device
drop-down menu.
3.
Select the type of line on which you wish to make the recording from
the Line drop-down menu.
4.
Set the recording volume using the cursor located in the right hand
section of the dialog box.
5.
Click the Record button.
The recording starts and a counter shows the time elapsed.
6.
When you have finished, click Stop. Then click one of the following:
a. OK. The window is closed and the recording is inserted but not
saved to the PC.
138
Motorola Phone Tools
User’s Manual
b. Save. A new window is displayed to save the recording as an audio
file in .wav format on the PC.
Enter a file name for the audio file and click Save.
The recording is inserted at the previously selected located, or
attached to the previously selected video or image.
c. Cancel. The Recorder window closes. The recording has been
deleted.
Follow the same procedure for each record you want to insert.
Note
You can modify a sound file using the trim points:
to the left or to the right, to
shorten or lengthen the duration, and apply it to one or more videos or images.
Adjust the audio balance
When the video displayed in the Composer contains a sound track, you
can define its level and the level of the recording you made or imported.
1.
In Edit View mode, click the
Tools button then select
Balance.
The Audio Balance window is displayed.
Audio
2.
Move the cursor to the left Video (the original video sound) or to the
right Audio (the recording you made) depending on the desired sound
level.
Note
To cut the original sound of the clip, move the Audio track cursor to the right.
3.
Click OK.
The Audio Balance window is closed.
4.
Watch the video in the Preview screen to check your adjustment.
Motorola Phone Tools
139
User’s Manual
Change the display time of an item
Note:
When several items are displayed one after another, if you want to move forward
the display start time of an item, you first need to change the display end time of the
item located before.
Change the display time of a sound or a title
1.
In Edit View mode, select the item you want to modify in the insertion
zone.
2.
Click and hold one of the trim points
appears).
3.
Drag it backwards or forwards to shorten or lengthen the playing time
of the selected item.
(when a double-headed arrow
Change the display time of a video or an image
1.
In Edit View mode, select the item you want to modify in the insertion
zone.
2.
Click and hold one of the trim points
appears).
3.
To lengthen the playing time of the selected item, drag it forwards.
4.
To shorten the playing time of the selected item, drag it backwards,
then click the
(when a double-headed arrow
Validate Selection button.
Reorder items
1.
In Edit View mode, select the item you want to move in its insertion
zone.
2.
Drag and drop it to the desired location.
140
Motorola Phone Tools
User’s Manual
Split a video
1.
In Edit View mode, select the video (or the image) you want to split.
2.
In the ruler, click at the point where you want to split the video.
A white line appears dividing the video into two parts.
3.
From the Clip menu, select the Split option.
The video is splited into two clips.
Combine videos and/or images
1.
In Storyboard View or Edit View mode, make sure that the videos (or
images) you want to combine are displayed in the desired order.
2.
Select the videos and/or images you want to combine by holding down
the Ctrl key on the keyboard while you click on them.
3.
From the Clip menu, select the Combine option.
The selected videos and/or images are combined so as to create only
one video.
Save a video
Once your video finished, you can save it to your computer.
1.
In the Composer toolbar, click the
The Save As... window is displayed.
2.
Select the folder where you want to store your video.
3.
Enter a file name for the video.
4.
Select a file type. The default file type depends on the connected
phone, it corresponds to the best format adapted to your phone.
5.
Click the Save button.
The video is created and saved in the folder you selected previously.
You can access it via the Media Files screen in the My Videos tab.
Motorola Phone Tools
Save As... button.
141
User’s Manual
Transfer a video
You can send your video to your mobile phone at any time.
1.
Ensure your mobile phone is switched on and connected to the PC
using a Bluetooth, infrared or cable link.
2.
From the File menu, select the Transfer to your phone option or click
Transfer to your phone from the toolbar.
The selected video is transferred.
142
Motorola Phone Tools