1
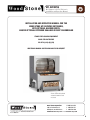
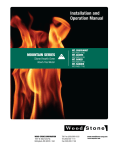
Installation and
Operation Manual
ROTISSERIES
Mt. Olympus
Solid Fuel Rotisserie with Optional Broiler
wood stone corporation
1801 w. bakerview rd.
bellingham, wa 98226 usa
MT. OLYMPUS
WS-SFR
tf.800.988.8103
t.360.650.1111
f.360.650.1166
woodstone-corp.com
Revised November 2014
Doc no: M0057.02
TABLE OF CONTENTS
Mt. Olympus Solid Fuel Rotisserie
Installation and Operation Manual
TABLE OF CONTENTS
MT. OLYMPUS��������������������������������������������� 3
CAUTIONS & WARNINGS ����������������������������� 4
SPECIFICATIONS ����������������������������������������� 6
RECEIVING THE ROTISSERIE������������������������� 7
HEAT SHIELD INSTALLATION������������������������� 8
CLEARANCES ��������������������������������������������� 9
VENTING��������������������������������������������������� 10
CONTROLLER ������������������������������������������� 11
FUELING THE CHARBROILER����������������������� 12
FUEL SAFETY��������������������������������������������� 14
DAILY OPERATION������������������������������������� 15
CLEANING THE ROTISSERIE����������������������� 16
OPTIONAL SPITS��������������������������������������� 17
PREVENTIVE MAINTENANCE����������������������� 18
FUELWOOD FACTS������������������������������������� 19
ELECTRICAL DIAGRAM������������������������������� 20
LIMITED WARRANTY ��������������������������������� 21
An ongoing program of product improvement may require us to change
specifications without notice. SFR, Revised November 2014.
Doc no: M0057.02
2
wood stone corporation
1801 w. bakerview rd.
bellingham, wa 98226 usa
tf.800.988.8103
t.360.650.1111
f.360.650.1166
[email protected] or visit woodstone-corp.com
MT. OLYMPUS
Mt. Olympus Solid Fuel Rotisserie
Installation and Operation Manual
INSTALLATION AND OPERATION MANUAL FOR THE
WOOD STONE MT. OLYMPUS ROTISSERIE,
WITH OPTIONAL NARROW WIDTH,
AND/OR OPTIONAL EXTENDED SHALLOW OR DEEP CHARBROILER
STONE-FIRED COOKING EQUIPMENT
SOLID FUEL ROTISSERIE
WS-SFR-(6,10)-(N)-(SB)
ADDITIONAL MANUAL COPIES AVAILABLE UPON REQUEST
Shown: SFR-6 with optional
extended charbroiler and
wood cart
An ongoing program of product improvement may require us to change
specifications without notice. SFR, Revised November 2014.
Doc no: M0057.02
wood stone corporation
1801 w. bakerview rd.
bellingham, wa 98226 usa
tf.800.988.8103
t.360.650.1111
f.360.650.1166
[email protected] or visit woodstone-corp.com
3
CAUTIONS & WARNINGS
Mt. Olympus Solid Fuel Rotisserie
Installation and Operation Manual
INSTALLATION AND OPERATING INSTRUCTIONS FOR THE WOOD STONE
MODELS WS-SFR-(6,10)-(N)-(SB) MT. OLYMPUS SOLID FUEL ROTISSERIE
RETAIN THIS MANUAL FOR FUTURE REFERENCE
Additional copies of this manual at woodstone-corp.com.
For prompt responses to service/maintenance questions, call us at @ 1-800-988-8103.
READ ALL INSTRUCTIONS BEFORE INSTALLING AND USING THIS APPLIANCE
Please read this entire manual before you install the appliance. Failure to follow instructions may result in property
damage, bodily injury or even death. Contact your local building or fire officials about restrictions and installation
inspection in your area.
WHEN THIS OVEN IS NOT PROPERLY INSTALLED, A FIRE MAY RESULT. TO REDUCE THE RISK OF FIRE, FOLLOW THE
INSTALLATION INSTRUCTIONS. IT IS RECOMMENDED THAT THIS OVEN BE INSTALLED, MAINTAINED AND SERVICED
BY AUTHORIZED PROFESSIONALS.
WARNING: Improper installation, adjustment, alteration, service or maintenance can result in property damage, injury
or death. Read the installation, operation and maintenance instructions thoroughly before installing or servicing this
equipment.
FOR YOUR SAFETY: Do not store or use gasoline or other flammable vapors or liquids in the vicinity of this or any
other appliance. Always keep the area under and around this appliance free and clear of any and all combustible
materials. Wood fuel should be stored in accordance with the Standard for Ventilation Control of Fire Protection of
Commercial Cooking Operations, NFPA 96, and local authorities having jurisdiction.
CAUTION: DISCONNECT POWER TO THE OVEN BEFORE SERVICING OR CLEANING.
A MAJOR CAUSE OF OVEN RELATED FIRES IS A
FAILURE TO MAINTAIN REQUIRED CLEARANCES
TO COMBUSTIBLE MATERIAL. IT IS OF UTMOST
IMPORTANCE THAT THIS OVEN BE INSTALLED ONLY
IN ACCORDANCE WITH THESE INSTRUCTIONS.
An ongoing program of product improvement may require us to change
specifications without notice. SFR, Revised November 2014.
Doc no: M0057.02
4
wood stone corporation
1801 w. bakerview rd.
bellingham, wa 98226 usa
tf.800.988.8103
t.360.650.1111
f.360.650.1166
[email protected] or visit woodstone-corp.com
CAUTIONS & WARNINGS
Mt. Olympus Solid Fuel Rotisserie
Installation and Operation Manual
DO NOT USE PRODUCTS NOT SPECIFIED FOR USE WITH THIS APPLIANCE.
USE SOLID WOOD FUEL ONLY.
CAUTIONS:
(i) DO NOT INSTALL IN A MOBILE HOME.
(ii) DO NOT CONNECT TO USE IN CONJUNCTION WITH ANY AIR DISTRIBUTION DUCTWORK UNLESS SPECIFICALLY
APPROVED FOR SUCH INSTALLATIONS.
(iii)DO NOT USE CHEMICALS OR FLUIDS TO START THE FIRE
(iv)DO NOT BURN GARBAGE OR FLAMMABLE FLUIDS SUCH AS GASOLINE, NAPHTHA OR ENGINE OIL.
(v) HOT WHILE IN OPERATION. KEEP CHILDREN, CLOTHING AND FURNITURE AWAY. CONTACT MAY CAUSE SKIN
BURNS.
CAUTION: TO REDUCE THE RISK OF FIRE, THE APPLIANCE IS TO BE MOUNTED ON FLOORS OF NON-COMBUSTIBLE
CONSTRUCTION WITH NON-COMBUSTIBLE FLOORING AND SURFACE FINISH AND WITH NO COMBUSTIBLE MATERIAL
AGAINST THE UNDERSIDE THEREOF, OR ON NONCOMBUSTIBLE STABS OR ARCHES HAVING NO COMBUSTIBLE
MATERIAL AGAINST THE UNDERSIDE THEREOF, SUCH CONSTRUCTION SHALL IN ALL CASES EXTEND NOT LESS THAN
12 INCHES BEYOND THE EQUIPMENT ON ALL SIDES.
PRUDENCE: POUR RÉDUIRE LE RISQUE DE FEU, L’APPAREIL EST ÊTRE MONTÉ SUR LES PLANCHERS DE CONSTRUCTION
INCOMBUSTIBLE AVEC LE REVÊTEMENT DE SOL INCOMBUSTIBLES ET DE FIN DE SURFACE ET AVEC LE MATÉRIEL
NON COMBUSTIBLE CONTRE LE DESSOUS DE CELA, OU SUR LES DALLES OU LES ARCS INCOMBUSTIBLES AYANT
LE MATÉRIEL NON COMBUSTIBLE CONTRE LE DESSOUS DE CELA, TELLE CONSTRUCTION FAIT DANS TOUS CAS NE
S'ÉTEND PAS MOINS QUE 12 POUCES AU-DELÀ DE L'ÉQUIPEMENT DE TOUS CÔTÉS.
SAVE THE INSTRUCTIONS
Wood Stone’s Mt. Olympus solid fuel rotisserie was tested and approved by
Intertek Testing Services, and is ETL Listed to ANSI/UL 197, CSA C22.2 No. 109,
ANSI/UL 1482, UL Subject 2162, ULC-S627-00 and NSF/ANSI Standard 4.
An ongoing program of product improvement may require us to change
specifications without notice. SFR, Revised November 2014.
Doc no: M0057.02
wood stone corporation
1801 w. bakerview rd.
bellingham, wa 98226 usa
tf.800.988.8103
t.360.650.1111
f.360.650.1166
[email protected] or visit woodstone-corp.com
5
SFR-6N
SFR-6-BROILER
SFR-6N-BROILER
E
50"
62"
50"
35"
47"
35"
35"
47"
35"
17 1/2"
58"
14 3/4"
23 1/2" 69 3/4" 26 3/4"
17 1/2" 69 3/4" 26 3/4"
2,000 lbs.
2,000 lbs.
2,000 lbs.
SPECIFICATIONS
F
Mt. Olympus Solid Fuel Rotisserie
Installation and Operation Manual
The only difference between the SFR-6 and SFR-10 is the number of spits. All other dimensions are the same.
Plan view
11"
280mm
D
69 3/4"
1770mm
43"
1090mm
26 3/4"
680mm
GD GD
Variable Dimensions
C
11"
280mm
D
43" 43"
1090mm
1090mm
22"
560mm
E
E
43"
1090mm
GD
36"
910mm
Rear view
(determines drive side)
D
73 3/4"
1870mm
F
MODEL
A
MODEL
SFR-6SFR-6
62"
SFR-6N
50"
SFR-6N
SFR-6-BROILER
SFR-6-BROILER 62"
MODEL
A
SFR-6N-BROILER
50"
SFR-6N-BROILER
SFR-6
62"
SFR-6N
50"
SFR-6-BROILER
62"
SFR-6N-BROILER
50"
73 3/4"
F 1870mm
E
51 3/4"
1320mm
37 3/4"
960mm
4"
100mm
F
A
B
11" 11"
280mm280mm
4"
4"
100mm100mm
A
11"
280mm
B
4"
100mm
Variable Dimensions
A
SFR-6N
w/
C broiler
C
50"
11" 11" 50"
B
35"
35"
C
35" C
35"
D
11"
17-1/2"
280mm
17-1/2"
58"
69-3/4"
14-3/4"
26-3/4"
SFR-6N
69 3/4"69 3/4"
1770mm
1770mm
43" 43"
26 3/4"26 3/4"
1090mm
680mm680mm
1090mm
26 3/4"
680mm
36" 36"
910mm910mm
69 3/4"
1770mm
43"
1090mm
22" 22"
560mm560mm
SHEET: 1 of 1
PART #: 001-905
DATE: 9/19/2013
DWN BY:
73 3/4"73 3/4"
36" 1870mm
1870mm
910mm
ES
ANGULAR ±2°
SE
WeightWeight
BC
CD
D E
E F
F Shipping
Shipping
A 58" 58"
62"
47" 47"
23 1/2"23 1/2"
14 3/4"14 3/4"62"
2,000 lbs.
47"
2,000 lbs.
35" 35"
17 1/2"17 1/2"
14 3/4"14 3/4"47"
2,000 lbs.
35"
2,000 lbs.
B58" 58"
47"
47" 47"
23 1/2"23 1/2"
69 3/4"69 3/4"
26 3/4"26 3/4" 2,000 lbs.
47"
2,000 lbs.
C
47"
36
C 1/4"17 D1/2"17 1/2"
Shipping
35"
69 E3/4"6947"
26 F3/4"26 3/4"
2,000 Weight
lbs.
35"
3/4"
2,000 lbs.
920mm35"
47"
23 1/2" D 58" 23-1/2"
14 3/4" 23-1/2"
2,000 lbs.
35" 17 1/2"
58"
14 3/4"
2,000 lbs.
47" 23 1/2" E
69 3/4" 58"
26 3/4" 69 3/4"
2,000 lbs.
35" 17 1/2" F
69 3/4"14-3/4"
26 3/4" 26-3/4"
2,000 lbs.
28 1/2"
720mm
Shipping weight:
22 1/4"
570mm
2,900 lbs.
A
B
SFR-6
w/ broiler
AB
47"
62"
35"
50"
47"
62"
B
35"
50"
47"
35"
47"
35"
Side view
Front view
corp.com
SFR-6
E
Mt. Olympus Rotisserie
37 3/4"37 3/4"
960mm960mm
73 3/4"
1870mm
F
bena 22"
73 3/4"73 3/4"
560mm
1870mm
1870mm
General Arrangement
T IMPROVEMENT
37 3/4"
960mm
CIFICATIONS
UTILITIES SPECIFICATIONS
LEGEND:
Electrical
120VAC,Water
15A
DRAWING IS
THE
120
VAC, 2.5 A, 60 Hz
Drain: 1-1/2" outlet tube
CORPORATION
The rotisserie comes with a detachable All utility connections made on
OR AS A WHOLE
power cord. Provide a grounded
1201 1/2" GREASE
bottomDRAIN
of the unit.
GD
F WOOD STONE
ISor 20 A outlet. Cord connector
VAC, 15
Refer to data plate when installing.
underneath rotisserie on control side of
unit. NEMA 5-15 plug.
REV:
1
Shipping weight:
lbs.
51 3/4"51 3/4"
1320mm
1320mm
2,000
73 3/4"
1870mm
51 3/4"
1320mm
4"
4"
100mm100mm
280mm280mm
See page 15 for spit
placement dimensions.
4"
100mm
36 1/4"36 1/4
920mm920mm
36 1/4"
920mm
28
1/2"28 1/2
720mm720mm
22 1/4"22 1/4"
570mm570mm
28 1/2"
720mm
Venting
The Mt. Olympus Rotisserie must be vented using a Listed
Type 1 exhaust hood, or one constructed in accordance
with NFPA 96 and all relevant local and national codes, and
in a manner acceptable to the authority having jurisdiction.
IMPORTANT: This model must be vented as a solid fuel
appliance.
22 1/4"
570mm
_Sizes_Olympus-1.dft
PART
#: 001-905
PART
#: 001-905
wood
stone corporation
DATE:
DATE:
9/19/2013
9/19/2013
gham,
WA 360/650-1111
www.woodstone-corp.com
ellingham,
WA 360/650-1111
www.woodstone-corp.com
An ongoing program of product improvement may require us to change
1801 w. bakerview rd.
001-905 wa 98226 usa
PART #:bellingham,
specifications
withoutARE
notice.ARE
SFR,
November 2014.
DIMENSIONS
IN Revised
INCHES
DIMENSIONS
IN INCHES
Doc no: M0057.02
OLERANCES:
LINEAR
±1/2±1/2
[±10mm],
ANGULAR
±2° ±2°
TOLERANCES:
LINEAR
[±10mm],
ANGULAR
gham, WA 360/650-1111 www.woodstone-corp.com
UNLESS
NOTED
OTHERWISE
UNLESS
NOTED
OTHERWISE
6
ONGOING
PROGRAM
OF
AN ONGOING
PROGRAM
OF
IMPROVEMENT
DIMENSIONS
AREPRODUCT
IN PRODUCT
INCHESIMPROVEMENT
1 of 11 of 1
SHEET:
SHEET:
tf.800.988.8103
benabena
DWNDWN
BY: BY:
t.360.650.1111
SHEET: 1 of 1
f.360.650.1166
Mt.Mt.
Rotisserie
Rotisserie
orOlympus
visit Olympus
woodstone-corp.com
DATE:[email protected]
9/19/2013
DWN BY: bena
General
Arrangement
General
Arrangement
Mt. Olympus Rotisserie
RECEIVING THE ROTISSERIE
Mt. Olympus Solid Fuel Rotisserie
Installation and Operation Manual
UNLOADING THE ROTISSERIE
The crated Mt. Olympus with the optional extended broiler weighs 2,900 lbs. and is roughly 6' x 6'. A 4,000 lb. capacity forklift with
extensions should be used for unloading the unit from the delivery vehicle. Approach the crated rotisserie from the side and insert
the evenly spaced forks under the wooden skid.
MOVING THE ROTISSERIE
The crated rotisserie can be moved using a forklift, if space allows. Alternatively, a 3,000 lb. pallet jack can be used.
UN-CRATING THE ROTISSERIE
Position the forklift at the front or rear of the rotisserie. Adjust the forks so that they are just narrow enough to fit within the stainless
angles on the bottom of the unit. Remove the crating. Do not rest the rotisserie on the stainless angles. If the rotisserie must
be set down before the legs are mounted, support the unit using appropriately arranged blocks which extend beyond the sides.
LEG / CASTER POSITIONING & ASSEMBLY
The legs/casters of the rotisserie must be installed in its proper position prior to setting the unit in place. Each leg is numbered,
corresponding to the number written on the underside corners of the cabinet body.
The rotisserie must be raised more than 23 inches from the floor in order to mount the legs. Each leg is firmly attached using the
four 3/4 inch bolts provided. Once all four legs are securely attached, the rotisserie can be lowered into place. Seal all legs to the
cabinet using the silicone sealant provided.
An ongoing program of product improvement may require us to change
specifications without notice. SFR, Revised November 2014.
Doc no: M0057.02
wood stone corporation
1801 w. bakerview rd.
bellingham, wa 98226 usa
tf.800.988.8103
t.360.650.1111
f.360.650.1166
[email protected] or visit woodstone-corp.com
7
HEAT SHIELD INSTALLATION
Mt. Olympus Solid Fuel Rotisserie
Installation and Operation Manual
PLACEMENT OF THE STAINLESS STEEL SACRIFICIAL HEAT SHIELD
The heavy-gauge stainless steel sacrificial heat shield should be installed in the rear of the firebox. The piece is contoured to fit into
place over the seam between the ceramic firebox and the stainless steel drip zone.
Side panels
Sacrificial Heat
Shield
Ceramic firebox
Sacrificial
Heat Shield
(in place)
Casters
Grease container
An ongoing program of product improvement may require us to change
specifications without notice. SFR, Revised November 2014.
Doc no: M0057.02
8
wood stone corporation
1801 w. bakerview rd.
bellingham, wa 98226 usa
tf.800.988.8103
t.360.650.1111
f.360.650.1166
[email protected] or visit woodstone-corp.com
CLEARANCES
Mt. Olympus Solid Fuel Rotisserie
Installation and Operation Manual
INSTALLATION CLEARANCES
WARNING: DO NOT PACK REQUIRED AIR SPACE WITH INSULATION OR OTHER MATERIALS.
FLOOR: For use on only on noncombustible floors (installér sur un plancher incombustible seulement). Install this unit on a noncombustible floor or provide a non-combustible floor covering. A minimum of clearance of 36 inches under the unit, 30 inches to
each side, and 36 inches in front of the firebox is required (see drawing below).
SIDES: Combustible walls must not come into contact with this unit. Without air circulation between the rotisserie and combustible
construction, a 3-inch clearance is required. With air circulation, clearance to combustible construction is reduced to 1 inch (see
drawing below).
TOP: Combustible ceilings must maintain a minimum clearance of 18 inches from the top of the rotisserie.
Minimum 1" side
clearance with
air circulation
Minimum 3" side
clearance without
air circulation
All obstructions
in shaded area (5'
from drive side
only of unit) must
be removable for
service access.
An ongoing program of product improvement may require us to change
specifications without notice. SFR, Revised November 2014.
Doc no: M0057.02
Minimum 30"
floor clearance to
either side of unit
Minimum 36"
floor clearance in
front of unit
wood stone corporation
1801 w. bakerview rd.
bellingham, wa 98226 usa
tf.800.988.8103
t.360.650.1111
f.360.650.1166
[email protected] or visit woodstone-corp.com
9
VENTING
Mt. Olympus Solid Fuel Rotisserie
Installation and Operation Manual
VENTING
The hood and ductwork used to vent the Mt. Olympus rotisserie must be manufactured and installed in accordance with national and
local code requirements for solid-fuel broilers. This appliance must be vented with a Listed Type 1 exhaust hood or one constructed
and installed in accordance with NFPA 96.
As with all solid fuel cooking equipment and exhaust systems, a regular inspection and cleaning schedule is needed to prevent
the possibility of fire. The frequency of inspection and cleaning will depend on hours of use and type and quality of fuelwood.
Typically solid fuel installations will require cleaning and inspection at least monthly.
CREOSOTE: FORMATION AND NEED FOR REMOVAL
Creosote should be removed to reduce risk of fire. When wood is burned slowly, it produces tar and other organic vapors that
combine with expelled moisture to form creosote. The creosote vapors condense in a relatively cool oven flue and exhaust hood of a
slow burning fire. As a result, creosote residue accumulates on the flue lining and exhaust hood. When ignited, the creosote makes
an extremely hot fire. The oven flue should be inspected twice monthly to determine when creosote build up has occurred. When
creosote has accumulated, it should be removed to reduce risk of fire.
CALL WOOD STONE FOR INFORMATION AND INSTALLATION SPECIFICATIONS
ON GAYLORD HOODS, DESIGNED SPECIFICALLY FOR THE MT. OLYMPUS ROTISSERIE.
An ongoing program of product improvement may require us to change
specifications without notice. SFR, Revised November 2014.
Doc no: M0057.02
10
wood stone corporation
1801 w. bakerview rd.
bellingham, wa 98226 usa
tf.800.988.8103
t.360.650.1111
f.360.650.1166
[email protected] or visit woodstone-corp.com
CONTROLLER
Mt. Olympus Solid Fuel Rotisserie
Installation and Operation Manual
CONTROLLER
BLACK: Rotisserie drum
speed control knob
Circuit breaker
(push to reset)
RED: Stops rotisserie drum
GREEN: Starts rotisserie drum
(when rear doors are open,
depressing the button will
jog the drum).
TROUBLESHOOTING
If drum fails to start after depressing GREEN start rotation button:
1. Check the circuit that oven is connected to at the outlet and/or circuit breaker
2. Press the Push Button Circuit Breaker, located in center of controller
An ongoing program of product improvement may require us to change
specifications without notice. SFR, Revised November 2014.
Doc no: M0057.02
wood stone corporation
1801 w. bakerview rd.
bellingham, wa 98226 usa
tf.800.988.8103
t.360.650.1111
f.360.650.1166
[email protected] or visit woodstone-corp.com
11
FUELING THE CHARBROILER
Mt. Olympus Solid Fuel Rotisserie
Installation and Operation Manual
It is necessary to develop a consistent and simple fuel, fire and temperature management plan for cooking on your wood-fired
charbroiler. This plan should be based on the most appropriate grill temperatures for your products. We have outlined the basic
steps below to begin operating your charbroiler.
TO BEGIN
1.Pull the grate rack forward, and remove the center grill grates by using the Grate Tool. Stack
grates on the remaining side grates until the fire has been established to keep the grates
out of the intense start up fire heat, and to create working space.
1
2
2.Using the Ash Shovel, remove about 2/3rds of the fly ash. Move ash and any live coals along
the back-center of the fire box. The coals and ash will help start the new fire faster.
LUMP CHARCOAL ONLY FIRE
3.Stack recommended quantity of charcoal (see table
above) on top of any live coals and ash toward the
back of the firebox. Ignite a fire starter and place it
under the charcoal. After 1 hour, add charcoal as
necessary to maintain the coal bed depth.
Lump charcoal quantities
to fill charbroiler firebox
Model
Lump Charcoal (lbs)
SFB-6
15–20
SFB-6N
15–20
LUMP CHARCOAL AND WOOD FIRE
4.Stack 3 or 4 small pieces of wood in a conical tepee shape on top of any live coals towards
the back of the fire box. Ignite a fire starter and place it under the wood.
3
4
5.As the wood fire gets going, add lump charcoal in front of the fire—do not extinguish
the flame. The lump charcoal will help to quickly establish a good working coal bed.
Note: Without an optional rotisserie, the wood is primarily for theater, and will not be the
primary source of live coals.
The well maintained firebox (side view)
The coal bed should be about 3" deep in the back and
1-1/2" in the front. A 5–10" open flame (as measured
from the top of coal bed) will maintain this coal depth,
producing the temperature regions shown below.
10" flame
from
coal
bed
5" flame
Coal bed
600 °F
550 °F
3"
12
Cooking
grates
1-1/2"
5
An ongoing program of product improvement may require us to change
specifications without notice. SFR, Revised November 2014.
Doc no: M0057.02
450 °F
wood stone corporation
1801 w. bakerview rd.
bellingham, wa 98226 usa
Ceramic
firebox
tf.800.988.8103
t.360.650.1111
f.360.650.1166
[email protected] or visit woodstone-corp.com
FUELING THE CHARBROILER
Mt. Olympus Solid Fuel Rotisserie
Installation and Operation Manual
6.Once the fire is well established use the Grate Tool to distribute the coals in the firebox, with
about 3" deep in the back, tapering to 1-1/2" deep in the front.
6
7
MAINTAINING THE FIREBOX
7.Place two medium pieces of wood on either side of the center flame every 20–30 minutes.
The height of the open the flame, 5–10 inches as measured from the top of the coal bed,
controls the amount of live coals generated, and by extension, the temperature. As necessary, add charcoal to maintain coal bed level, remembering it takes about 15–30
minutes for charcoal to ignite and significantly contribute to the coal bed. Proper firebox
maintenance requires taking this delay into account to optimize temperature consistancy
and minimize over firing.
8.To optimize heat and energy, pull live coals forward out of the fire. Do not pull wood with
open flame forward. Cooking over an open flame tends to burn fat, making food taste bitter.
See Fuel Tips below, and the FUELWOOD FACTS section at the end of this
manual, for more information about fuel characteristics.
8
FUEL TIPS
LUMP CHARCOAL
Lump charcoal (we recommend Mesquite lump charcoal) is a carefully produced carbonized product that burns at a higher
temperature for a longer period of time than live coals resulting from a natural wood fire. Using lump charcoal as the main source
of heat simplifies grill temperature management and is often the only fuel used when kitchen theater isn't a consideration.
WOOD QUALITY
Wood that is not properly dried and sized is the most common operational problem with solid fuel cooking equipment.
The best woods for cooking are heavy hardwoods (Oak, Apple, Hickory, Pecan and Mesquite), with an average length of 16–18",
and diameter of 3–5" (either full logs or the sides of split wood). Hardwoods are preferred because they produce more BTU/hr
and they coal better, requiring less labor to maintain the same amount of heat.
Ideal moisture levels fall between 15–20%. Accurate moisture readings are taken from the center of a freshly split piece of
wood. Wood should be kept in a covered area, but not totally enclosed (follow the recommendations in NFPA 96 for safe wood
storage and handling practices).
Note: Wood at higher moisture levels produces more creosote residue, which accumulates on the flue lining and exhaust hood,
increasing the risk of fire.
BUYING WOOD
Because most wood is sold for heating, it is often only cured for 4–8 months, rather than the 12–16 months required for
cooking. It is important to make certain the wood you buy has been cured for cooking. Indicators of high moisture content
include hissing (20–25% moisture level), or bubbles forming out the end (moisture higher than 25%). Wood Stone offers an
optional Mini-Ligno E Wood Moisture Meter (see the Tools & Accessories section of woodstone-corp.com).
An ongoing program of product improvement may require us to change
specifications without notice. SFR, Revised November 2014.
Doc no: M0057.02
wood stone corporation
1801 w. bakerview rd.
bellingham, wa 98226 usa
tf.800.988.8103
t.360.650.1111
f.360.650.1166
[email protected] or visit woodstone-corp.com
13
FUEL SAFETY
Mt. Olympus Solid Fuel Rotisserie
Installation and Operation Manual
WOOD
Use only well seasoned hardwood to fuel the charbroiler. The wood should have a moisture content of less than 20%. For best
results, pieces should be split so that the diameter does not exceed 5 inches. See Wood Stone’s FUELWOOD FACTS section at the
end of this manual.
CAUTION: NEVER USE GASOLINE, GASOLINE-TYPE LANTERN FUEL, KEROSENE, CHARCOAL LIGHTER FLUID OR SIMILAR
LIQUIDS TO START OR FRESHEN-UP A FIRE IN THIS OVEN. KEEP ALL SUCH LIQUIDS WELL AWAY FROM THE OVEN WHEN
IN USE.
WOOD STORAGE
Wood should be stored and handled in accordance with the recommendations outlined in NFPA 96.
DISPOSAL OF ASHES
Ashes should be placed in a metal container with a tight-fitting lid. The closed container of ashes should be placed on a noncombustible floor or on the ground, well away from the combustible materials, pending final disposal. When the ashes are disposed
by burial in soil or otherwise locally dispersed, they should be retained in the closed container until all cinders have thoroughly
cooled.
The optional Wood Stone’s Dual Compartment Ash Dolly is available through your dealer. The specification sheet may be viewed on
the Wood Stone website under Tools & Accessories.
Wood Stone’s optional Double
Compartment Ash Dolly. View the
spec sheet at woodstone-corp.com
in the Tools and Accessories section.
An ongoing program of product improvement may require us to change
specifications without notice. SFR, Revised November 2014.
Doc no: M0057.02
14
wood stone corporation
1801 w. bakerview rd.
bellingham, wa 98226 usa
tf.800.988.8103
t.360.650.1111
f.360.650.1166
[email protected] or visit woodstone-corp.com
DAILY OPERATION
Mt. Olympus Solid Fuel Rotisserie
Installation and Operation Manual
BEGINNING OF DAY
FUEL THE BROILER
Make certain the ventilation system is turned on and operating properly. See FUELING THE CHARBROILER section for details.
LOADING THE ROTISSERIE
Open both doors to load the rotisserie. The drum will stop automatically anytime the doors are opened. To advance the rotisserie
drum with the doors open, simply depress the GREEN start rotation button to jog the drum. Release the switch when the rotisserie
drum reaches the desired position and it will stop.
NEVER ATTEMPT TO PLACE OR REMOVE SPITS WHEN THE ROTISSERIE DRUM IS MOVING
LOADING THE SPITS EVENLY
The spits can only be inserted into the rotisserie drive one way. When loading the rotisserie, make sure the load is evenly distributed
by loading equally weighted spits and/or baskets opposite each other. The round end of the spit or basket is always inserted first.
Push the round end of the spit into the hole until there is clearance to insert and seat the square end into its socket. Be sure to fully
seat the spit so that it locks into place and the round end will rotate freely when the drum turns.
SFR-10 CAPACITY
With the 10-spit SFR-10 model,
when using all 10 spits, the
operational maximum product load
will be approximately 6–7 chickens
weighing 2.5 lbs each.
To load larger product, it is
possible to run the rotisserie with
five spits, removing every other
spit for balance.
1. Insert the pointed end of the
spit into the round hole, which
is opposite the motor side of the
rotisserie.
Motor side
2. Then back the other end of the spit
into the square hole on the motor
side.
SPIT DIMENSIONS
3. Make sure that the pointed end of
the spit is backed out of its hole
far enough to allow the spit to turn
freely.
Using
10 spits
SFR-6
Using 5 spits
SFR-10
ROTISSERIE OPERATION
To restart the rotisserie, close the doors and push GREEN start rotation button. The speed
of the rotisserie can be adjusted using the BLACK speed control knob located on the
controller. The rotisserie will stop anytime the doors are opened or when the RED button
is depressed.
NOTE: Except during loading or unloading, the drum should always be moving in the
presence of heat to avoid warping the rotisserie.
An ongoing program of product improvement may require us to change
specifications without notice. SFR, Revised November 2014.
Doc no: M0057.02
wood stone corporation
1801 w. bakerview rd.
bellingham, wa 98226 usa
tf.800.988.8103
t.360.650.1111
f.360.650.1166
[email protected] or visit woodstone-corp.com
15
CLEANING THE ROTISSERIE
Mt. Olympus Solid Fuel Rotisserie
Installation and Operation Manual
ROTISSERIE CABINET
All exposed surfaces of the rotisserie should be wiped clean as necessary (or daily) using an approved mild cleaning solution.
Be careful not to get excess liquid into the controller or the main power switch. Stubborn residues may be removed using a nonmetallic scouring pad. When scouring stainless steel, scrub with the grain to avoid scratching the finish.
ACCESSORIES
All rotisserie attachments (spits, forks, basket pins) should be cleaned between uses using an approved mild detergent, hot water
and an approved sanitizing solution. Alternatively, these items can be cleaned in a dishwasher.
CHARBROILER
If your rotisserie has the extended firebox/charbroiler, scrub the cast iron grill grates (as necessary) with a wire brush to remove
cooked-on build-up. The stainless steel grill support rack can be removed and cleaned using hot water and an approved mild
detergent.
CERAMIC FIREBOX
Remove excess ash from the firebox using the stainless shovel provided with the rotisserie. NEVER POUR WATER INTO THE
CERAMIC FIREBOX. We recommend removing excess ash in the morning, after the fire has died down through the night.
ROTISSERIE CABINET FLOOR
Perform cleaning while the rotisserie is still hot, being careful of the resultant steam. Make certain the drain valve is open. Begin
by rubbing down the rotisserie bar with a soapy towel. Keep the GREEN rotation button depressed so the drum continues to turn.
Then wipe the cabinet floor, directing the soapy water and grease down the grease trough, out the drain and into the grease drip
container. Rinse with clean water.
GREASE CONTAINER
Below the loading doors, you will find the grease drip container on casters (this should be checked frequently). There is a brass
valve that shuts off the flow of grease from the cabinet. The valve must be closed in order to remove the grease drip container. Be
sure to remember to re-open the valve after the container has been cleaned and put back into its place.
EXHAUST HOOD
Refer to the exhaust hood manufacturer’s recommendations for inspection, maintenance and cleaning.
CREOSOTE: FORMATION AND NEED FOR REMOVAL
Creosote should be removed to reduce risk of fire. When wood is burned slowly, it produces tar and other organic vapors that
combine with expelled moisture to form creosote. The creosote vapors condense in a relatively cool oven flue and exhaust hood of a
slow burning fire. As a result, creosote residue accumulates on the flue lining and exhaust hood. When ignited, the creosote makes
an extremely hot fire. The oven flue should be inspected twice monthly to determine when creosote build up has occurred. When
creosote has accumulated, it should be removed to reduce risk of fire.
An ongoing program of product improvement may require us to change
specifications without notice. SFR, Revised November 2014.
Doc no: M0057.02
16
wood stone corporation
1801 w. bakerview rd.
bellingham, wa 98226 usa
tf.800.988.8103
t.360.650.1111
f.360.650.1166
[email protected] or visit woodstone-corp.com
OPTIONAL SPITS
Mt. Olympus Solid Fuel Rotisserie
Installation and Operation Manual
A. STANDARD ANGLE SPIT
This is the standard spit included with all Wood Stone
Rotisseries. 6 to 7 average sized birds can be quickly
loaded. The perforations are convenient for securing the
string or skewers used to bind the legs.
B. SQUARE SPIT WITH ADJUSTABLE FORKS
This spit is made of half inch square stock stainless steel
and comes with 5 double forks and two end forks. The
spit is easy to load and the forks hold the birds in place
so that no binding of the legs is required. This spit holds
from 1 to 6 birds of various sizes.
C. CLAMSHELL BASKET
This versatile basket spit is constructed of heavy gauge
stainless steel and conveniently adjusts to hold a variety
of products, ranging from fresh vegetables to two entire
Prime Ribs. Stainless steel screens are also available to
help secure smaller items.
B.
A.
C.
3-arm version
D. RIB/FISH BASKET SPITS
These are perhaps the most carefully engineered
rotisserie spits ever created. This spit is available in
a 4-arm, 8 compartment version, or in a 3-arm, 6
compartment version. Each compartment is suitable
for a full rack of ribs, a sizeable salmon fillet or several
smaller cuts of meat. On the 3-arm, 6 compartment
spit the size of each compartment is increased making
it ideal for larger items such as Tri-Tip roasts and pork
loins. The laser-cut containment flap is spring-loaded for
easy loading and unloading.
E. PIG SPIT ASSEMBLY
This unit features a spit made from 1/2-inch square type
304 stainless steel stock. The assembly includes the
spit, stainless steel end forks, and an aluminum back
brace. The Pig Spit Assembly is suitable for roasting a
30-40 pound suckling pig or lamb.
D.
4-arm version
F.
E.
F. MULTI-SKEWER DRUM ASSEMBLY
The Multi-Skewer Drum Assembly is for use with the
Okanogan Single-Spit Rotisserie. The MSDA increases
capacity on the rotisserie from 3-4 chickens to 12-16
chickens at a time making your broiler with single-spit
rotisserie a powerful production unit.
An ongoing program of product improvement may require us to change
specifications without notice. SFR, Revised November 2014.
Doc no: M0057.02
wood stone corporation
1801 w. bakerview rd.
bellingham, wa 98226 usa
tf.800.988.8103
t.360.650.1111
f.360.650.1166
[email protected] or visit woodstone-corp.com
17
PREVENTIVE MAINTENANCE
Mt. Olympus Solid Fuel Rotisserie
Installation and Operation Manual
Contact the Wood Stone Service Department or a qualified local service company for any maintenance or repairs.
NOTE: ALWAYS DISCONNECT POWER SUPPLY BEFORE SERVICING THIS APPLIANCE.
MAIN BEARING LUBRICATION (EVERY 12 MONTHS)
The two main shaft bearings should receive one pump of a NLGI Grade 2 lithium-based grease, such as Lubriplate 630-2, every
12 months. These bearings are located inside the cabinet on either end of the main shaft. A Zerk fitting for each bearing is located
directly below the top door hinge on either side of the cabinet on the operator (door) side. Care should be taken not to over lubricate
these bearings. One pump is sufficient.
MOTOR BRUSHES REPLACEMENT (APPROXIMATELY EVERY 3 YEARS)
The three year replacement recommendation is based upon an average daily use of 10 hours. Contact the Wood Stone Service
Department or your local service technician for service.
REDUCTION GEAR LUBRICATION
The gearbox is permanently lubricated and requires no additional maintenance.
SPUR GEAR BUSHING
Check the spur gear bushings for signs of binding or lateral movement where the gear shank passes through the drive end drum.
The gear should rotate in the Rulon inner bushing. If the gear and Rulon bushing are rotating in the drum sleeve instead, remove
the gears and Rulon bushings, clean and refit. Do not lubricate the bushings or gears. To remove the gears, first mark the drum in
relation to the shaft to ensure it is reinstalled in the same position. Remove the six bolts that retain the drum end to the hub and slide
the drum end assembly toward the center of the cabinet. The spur gears can now be removed by loosening the set screw retaining
the locking collar and sliding the gears out of the drum.
INNER DRUM SEALING
The condition of the high-temperature sealant used to seal the inner drums to the cabinet walls and the inside corners of the cabinet
should be checked and renewed if sealant has failed. Use Dow Corning 732 RTV sealant.
DOOR JAMB MICRO SWITCH
Check the jamb switch for proper operation. The switch should move freely in the jamb without sticking or binding and the drums
should stop when the doors are opened.
SPEED CONTROL KNOB
Check the speed control potentiometer for proper operation and the knob for tightness.
DOOR LATCH
Check the door latch mechanism for proper operation. If sticking occurs, remove the wedge pin, clean, refit and adjust.
EXHAUST HOOD
Refer to the exhaust hood manufacturer’s recommendations for inspection, maintenance and cleaning.
An ongoing program of product improvement may require us to change
specifications without notice. SFR, Revised November 2014.
Doc no: M0057.02
18
wood stone corporation
1801 w. bakerview rd.
bellingham, wa 98226 usa
tf.800.988.8103
t.360.650.1111
f.360.650.1166
[email protected] or visit woodstone-corp.com
FUELWOOD FACTS
Mt. Olympus Solid Fuel Rotisserie
Installation and Operation Manual
WHAT TYPE OF WOOD SHOULD YOU USE TO FIRE YOUR SOLID FUEL COOKING EQUIPMENT?
The answer to this question depends on several considerations: geographical location, availability and relative cost of various
fuelwood species and individual preferences regarding the flavor qualities of various wood types. There are a wide variety of good
fuelwood species in all geographic locations. Each species of wood has different characteristics. The table below should help weigh
the pros and cons of various types of wood. Wood from conifers (pine trees) is not recommended due to its poor fuelwood characteristics (low weight, low-med heat, poor coaling, high sparking and high residual creosote).
Wood Type
Heat
Lb/Cord
Lighting
Coaling
Sparks
Fragrance*
Alder
Apple
Ash
Beech
Birch (white)
Cherry
Med-Low
High-Med
High
High
Medium
Medium
2500
4400
3500
3800
3000
2000
Fair
Fair
Fairly Difficult
Difficult
Easy
Fair
Good
Excellent
Good-Excellent
Excellent
Good
Excellent
Moderate
Few
Few
Few
Moderate
Few
Slight
Excellent
Slight
Good
Slight
Excellent
Elm
High
2300
Very Difficult
Good
Very Few
Fair
Hickory
Very High
4200
Fairly Difficult
Excellent
Moderate
Excellent
Maple (red)
High-Med
3200
Fairly Difficult
Excellent
Few
Good
Maple (sugar)
Mesquite
Oak (live)
High
Very High
Very High
3700
4600
Difficult
Very Difficult
Very Difficult
Excellent
Excellent
Excellent
Few
Many
Few
Good
Excellent
Fair
Oak (red)
High
3700
Difficult
Excellent
Few
Fair
Oak (white)
Pecan
Very High
High
4200
Fairly Difficult
Fair
Excellent
Good
Few
Few
Fair
Good
*The desirability of
various fragrances
is largely a matter of
personal preference.
Whichever type of wood you use, MAKE SURE YOU KNOW THE MOISTURE CONTENT. Properly seasoned wood contains 20%
moisture or less. If wood contains more than 20% moisture, it should not be accepted for use. Wood should be stored off the ground
and out of the rain in an environment that allows good air circulation so that the drying process can continue. Wet wood is the most
common operational difficulty associated with wood-fired cooking equipment. Wood Stone’s optional Mini-Ligno E Wood Moisture
Meter can save you from paying for water when you thought you were paying for wood (see the Tools & Accessories section of
woodstone-corp.com, contact your dealer or Wood Stone).
Calculate your approximate monthly, daily and hourly fuel-wood costs using the following formulas:
The cost of well-seasoned hardwood varies greatly with geographical location.
Cost per month = A x C
Cost per day = A x C
Cost per hour = A x C
30
30
12 hr day
A = Cost/cord (from wood supplier)
B = lb/cord (from above table)
C = Cords/mth (from experience, or call Wood Stone for an estimate)
When burned, a pound of any wood releases approximately 6500 BTU/hr, so it is better to compare the price
of wood by the pound rather than by the cord. A full cord of wood measures 4' x 4' x 8' when stacked.
Cost per lb = A
B
( )
An ongoing program of product improvement may require us to change
specifications without notice. SFR, Revised November 2014.
Doc no: M0057.02
wood stone corporation
1801 w. bakerview rd.
bellingham, wa 98226 usa
Do not use
pressed wood
products in
Wood Stone
equipment. They
may damage
the ceramics
and void the
warranty.
tf.800.988.8103
t.360.650.1111
f.360.650.1166
[email protected] or visit woodstone-corp.com
19
ELECTRICAL DIAGRAM
Mt. Olympus Solid Fuel Rotisserie
Installation and Operation Manual
The rotisserie comes with a detachable 7' power cord with NEMA 5-15 plug. Provide a grounded 120 VAC, 15 or 20 A outlet. The
cord connector can be found underneath the rotisserie on the control side of the unit.
An ongoing program of product improvement may require us to change
specifications without notice. SFR, Revised November 2014.
Doc no: M0057.02
20
wood stone corporation
1801 w. bakerview rd.
bellingham, wa 98226 usa
tf.800.988.8103
t.360.650.1111
f.360.650.1166
[email protected] or visit woodstone-corp.com
LIMITED WARRANTY
Mt. Olympus Solid Fuel Rotisserie
Installation and Operation Manual
ALL WARRANTY SERVICE MUST BE PRE-APPROVED BY WOOD STONE
Wood Stone warrants its equipment to the original purchaser against defects in material or manufacture for a period of one
year from the original date of purchase, subject to the following exclusions and limitations.
Please contact the factory first at 1.800.988.8103 or 1.360.650.1111, seven days a week. Our normal business hours are 8am
to 4:30pm PST Monday–Friday. If calling during non-business hours, follow the recorded instructions for emergency service
and a Wood Stone technician will get back to you promptly.
EXCLUSIONS
The warranties provided by Wood Stone do not apply in the following instances:
1. In the event that the equipment is improperly installed. Proper installation is the responsibility of the installer; proper installation
procedures are prescribed by the Wood Stone Installation and Operation Manual.
2. In the event the equipment is improperly or inadequately maintained. Proper maintenance is the responsibility of the user;
proper maintenance procedures are prescribed in the Wood Stone Installation and Operation Manual. Burner problems resulting
from debris or ash in the burner well will not be covered by the warranty. Call with questions regarding maintenance frequency.
3. In the event that the failure or malfunction of the appliance or any part thereof is caused by abnormal or improper use or is otherwise
not attributable to defect in material or manufacture.
4. In the event that the appliance, by whatever cause, has been materially altered from the condition in which it left the factory.
5. In the event that the rating plate has been removed, altered or obliterated.
6. On parts that would be normally worn or replaced under normal conditions.
7. Normal cracking due to expansion and contraction stress relief in the ceramic firebox.
8. In wood-fired equipment configurations, in the event that pressed log products of any type have been burned in the equipment.
9. In coal-fired oven configurations, in the event any type of coal other than anthracite coal fuel has been used.
10.Damage resulting from the use of chemical cleaning products in the oven, as well as any damage from liquids or chemicals, including
water, being poured or sprayed into the oven.
If any oral statements have been made regarding this appliance, such statements do not constitute warranties and are not part of the
contract of sale. This Limited Warranty constitutes the complete, final and exclusive statement with regard to warranties.
THIS LIMITED WARRANTY IS EXCLUSIVE AND IN LIEU OF ALL OTHER WARRANTIES WHETHER WRITTEN, ORAL OR
IMPLIED, INCLUDING, BUT NOT LIMITED TO, ANY WARRANTY OF MERCHANTABILITY OR FITNESS FOR PARTICULAR
PURPOSE OR WARRANTY AGAINST LATENT DEFECTS.
LIMITATIONS OF LIABILITY
In the event of warranty claim or otherwise, the sole obligation of Wood Stone shall be the repair and/or replacement, at the option of
Wood Stone, of the appliance or component or part thereof. Such repair or replacement shall be at the expense of Wood Stone with the
exception of travel over 100 miles or two hours, overtime, and holiday charges which shall be at the expense of the purchaser. Any repair
or replacement under this warranty does not constitute an extension of the original warranty for any period of the appliance or for any
component or part thereof. Parts to be replaced under this warranty will be repaired or replaced at the option of Wood Stone with new
or functionally operative parts. The liability of Wood Stone on any claim of any kind, including claims based on warranty, expressed or
implied, contract, negligence, strict liability or any other theories shall be solely and exclusively the repair or replacement of the product
as stated herein, and such liability shall not include, and purchaser specifically renounces any rights to recover, special, incidental,
consequential or other damages of any kind whatsoever, including, but not limited to, injuries to persons or damage to property, loss of
profits or anticipated profits, or loss of use of the product.
TO SECURE WARRANTY SERVICE
If you claim a defect covered by this Limited Warranty, contact:
Wood Stone Corporation, Attn: Service Department, 1801 W. Bakerview Rd., Bellingham, WA 98226 USA
Phone 1.800.988.8103 or 1.360.650.1111
An ongoing program of product improvement may require us to change
specifications without notice. SFR, Revised November 2014.
Doc no: M0057.02
wood stone corporation
1801 w. bakerview rd.
bellingham, wa 98226 usa
tf.800.988.8103
t.360.650.1111
f.360.650.1166
[email protected] or visit woodstone-corp.com
21