1
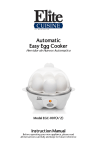
LIMITED WARRANTY* ONE (1) YEAR: Your small kitchen appliance is warranted to the original purchaser to be free from any manufacturing defects under normal use and conditions for one (1) year, cord excluded. During that period, should the appliance fail to operate properly, return the appliance with your sales receipt to the store where purchased. If you use your appliance for household use and according to instructions, it should give you years of satisfactory service. This product warranty covers only the original consumer purchase of the product. WARRANTY IS ONLY VALID WITH A DATED PROOF OF PURCHASE. To guarantee repair or replacement without charge, a dated sales receipt showing purchase within the limited warranty period* must accompany the appliance. Without a sales receipt, warranty will be estimated according to the appliance's manufactured date. A comparable appliance should arrive within 2-3 weeks. However, in case an appliance is not covered by warranty, correspondence offering alternatives will be mailed to you. During the limited one-year warranty period, a product with a defect will be either repaired or replaced with a comparable reconditioned model (at our option) when the product is returned to our Service Center. (See the “Returns” section below). The repaired or replacement product will be in warranty for the remaining balance of the limited one-year warranty period and an additional one-month(30 day) period. 8Qt. Digital Pressure Cooker This limited warranty covers appliances purchased and used within the 48 contiguous states plus Alaska, Hawaii and the District of Columbia and does NOT cover: - Damages caused by unreasonable use, neglect, normal wear and tear, commercial use, improper assembly or installation of product. - Damages caused in shipping. - Damages caused by replacement or resetting of house fuses or circuit breakers. - Defects other than manufacturing defects. - Breakage caused by misuse, abuse, accident, alteration, lack of proper care and maintenance, or incorrect current or voltage. - Lost or missing parts of the product. Parts will need to be purchased separately. - Damages of parts that are not electrical; for example: cracked or broken plastic or glass. - Damage from service or repair by unauthorized personnel. - Extended warranties purchased via a separate company or reseller. - Consumer’s remorse is not an acceptable reason to return a product to our Service Center. *The consumer is responsible for any delivery charges for all replacement units provided for exchange under the warranty. RETURNS: Any return of defective merchandise to the manufacturer must be processed accordingly by contacting customer service first to obtain an RA # (Return Authorization Number). We will not accept any returns of merchandise without an applicable RA #. We cannot assume responsibility for loss or damages to products returned to us during incoming shipment. For your protection, always carefully package the product for shipment and insure with the carrier. Be sure to enclose the following items with your return: any accessories related to the problem, your full address and daytime phone number, a note describing the problem, a copy of the dated sales receipt or other proof of purchase and a valid RA#. C.O.D shipments cannot be accepted. *One Year Limited Warranty valid only in the 48 contiguous states, Alaska, Hawaii and the District of Columbia, excluding Puerto Rico and the Virgin Islands. This warranty is effective only if the product is purchased and operated in the USA; product usage which is in violation of the written instructions provided with the unit will void this warranty. For international warranty, please contact the local distributor. **Any instruction or policy included in this manual may be subject to change at any time. Model EPC-807 Model EPC-807 ® Elite Platinum 8Qt. Digital Pressure Cooker MAXI-MATIC®, USA 18401 E. Arenth Ave. City of Industry, CA 91748 Customer Service Dept: (626) 912-9877 Ext: 120 MON-FRI 9am-5pm PST Email: [email protected] Website: www.maxi-matic.com INSTRUCTION MANUAL Before operating your new appliance, please read all instructions carefully and keep for future reference. IMPORTANT SAFEGUARDS… When using pressure cookers, basic safety precautions should always be followed: 1. Read all instructions before operation. 2. Do not operate while unattended. 3. Do not touch hot surfaces. Use handles or knobs. 4. Close supervision is necessary when the pressure cooker is used near children. 5. DO NOT allow children to operate under any circumstance. 6. Do not place the pressure cooker in a heated oven. 7. Extreme caution must be used when moving a pressure cooker containing hot liquids. 8. Do not use pressure cooker for other than intended use. 9. Never immerse product in water or other liquids. 10. This appliance cooks under pressure. Improper use may result in scalding injury. 11. Make certain unit is properly closed before operating. See Operating Instructions. 12. Do not fill the unit over 2/3 full. When cooking foods that expand during cooking such as rice or dried vegetables, do not fill the unit over 1/2 full. Over filling may cause a risk of clogging the vent pipe and developing excess pressure. Failure to follow this procedure can result in injury to person(s) and/or damage to the unit. 13. Be aware that certain foods, such as applesauce, cranberries, pearl barley, oatmeal or other cereals, split peas, noodles, macaroni, rhubarb, or spaghetti can foam, froth, and sputter, and clog the pressure release device (steam vent). These foods should not be cooked in a pressure cooker. 14. When the normal operating pressure is reached, turn the heat down so all the liquid which creates the steam does not evaporate. 15. Always check the pressure release devices for clogging before use. 16. Do not open the pressure cooker until the unit has cooled and all internal pressure has been released. If the handles are difficult to push apart, this indicates that the cooker is still pressurized – do not force it open. Any pressure in the cooker can be hazardous. See Operating Instructions. 17. Do not use this pressure cooker for pressure frying with oil. 18. DO NOT place the product near flammable materials or use in a humid environment. 19. DO NOT damage the Seal Belt and DO NOT replace it with anything other than the replacement belt designated for this unit. 20. DO NOT tamper with the Steel Ring in the Lid (2) with any tools or external forces. If the Steel Ring is damaged (2), please stop using immediately and replace the Lid. 21. Clean the Filter (20) regularly to keep the cooker clean. 22. NEVER use additional weight on the Pressure Limiting Valve (3) or replace the Pressure Limiting Valve (3) with anything not intended for use with this unit. 23. The surface of contact between the Inner Pot (8) and the Electronic Heater (18) should always be clean. DO NOT use the Inner Pot with other heating sources. DO NOT replace the Inner Pot with a container other than what is recommended by the manufacturer. 24. The Inner Pot consists of a non-stick layer surface. To avoid scratching the non-stick surface, please use wooden or plastic utensils. 25. Food should not be kept warm for more than 24 hours in order to maintain the freshness of the food. The pressure cooker should not be used for more than 6 hours continuously. Serious Injury and/or damage may occur if any safeguards are ignored. 1 26. If steam releases around the Lid (2) during the cooking process, please unplug from the power supply immediately, let cool, remove contents and return the product to the manufacturer for exchange or repair. The Pressure Discharging Device has activated. This is a safeguard to alert the user that the Pressure Limiting Device is malfunctioning. 27. If there is any malfunction of the cooker during the cooking process, please stop using the device and return to the manufacturer for repair or exchange. 28. DO NOT disassemble the product, or replace parts with parts not intended for this unit. SAVE THESE INSTRUCTIONS FOR HOUSEHOLD USE ONLY SAFETY WARNING: There is a potential risk of fire, electric shock or injury to persons if the product is not used as instructed. Protection against electric shock is assured only if the main power cord is connected to a properly grounded 110-120V | 50/60Hz power receptacle. This product is to be used in an indoor environment only and is not intended for commercial use. Dry locations only. All parts and accessories for this appliance must be used properly according to the instructions. All parts and accessories must be the original provided from manufacturer. All other parts or accessories that is not intended for use with this appliance is strictly prohibited. The use of an extension cord, power adapter or other electric devices is highly not recommended. Indicator Code E1 E2 E3 E4 LCD ERROR INDICATOR Problems/Causes Open Circuit of the Sensor Short Circuit of the Sensor Overheating Signal Switch Malfunction ABOUT YOUR PRESSURE COOKER . 2 3 PARTS & FEATURES… This digitally controlled and automatic pressure cooker uses advanced technology so you and your family can enjoy the benefits of better, faster and healthier cooking. Your Elite Pressure Cooker seals in steam to cook hotter and faster while maintaining important nutrients for healthier meals. Cook fast and with less water to save vital natural resources and energy. Features easy touch-button settings, a countdown timer, and a very large cooking pot big enough for family gatherings! Please accept our thanks for purchasing an Elite Pressure Cooker and Enjoy! PRESSURE COOKER WITH MULTIPLE FUNCTIONS: Multiple functions for cooking, stewing, braising, simmering, and roasting. Cooking will be done automatically by selecting the different menu choices on the unit. When the food has completed its cooking cycle, there will be a (3) beep indicator, followed by the unit automatically switching to the Keep Warm mode. This unit allows the user to choose the period of Pressurized Cooking Time (0-99 minutes) according to one’s taste and needs in addition to the Pre-Set menu. A timer allows the user to preset the cooking time up to 9-hours. When the timer is set, the count-down will start. By the end of the countdown, the cooker will start to heat up. The pressure cooker also has its own memory. Interruptions such as a power failure, automatically renew the cooking cycle where the unit left off when the power resumes. RAPID COOKING; TIME & POWER SAVING: By using high pressure (high temperature), food will be cooked much more rapidly. This will reduce the cooking time and consumption of power. For example: when cooking rice, this pressure cooker will save up to 20% of the electricity and up to 15% of the time when compared to a conventional rice cooker. When cooking stew, soups or braising meats, this cooker will save more than 40% of time and more than 45% of power as compared to a conventional slow cooker. Cooking can also be done at high altitudes. PRESERVE NUTRIENTS & PROMOTES HEALTHY EATING: Airtight cooking methods preserve nutrients and original flavor of food. 1. 2. 3. 4. 5. 6. 7. 8. Handle Lid Pressure Limiting Valve Float Valve (external view) Float Valve (internal view) Lid Lock-Slider Sliding Valve Actuator Inner Pot 9. 10. 11. 12. 13. 14. 15. 16. Outer Pot Upper Body & Handle Control Panel Power Cable Steam Condensation Cup Body Cover/Structure Spoon/Ladle Holder Lower Body Base 17. 18. 19. 20. 21. 22. Bottom Handle Electronic Heater Seal Ring for Floater Valve Filter Rubber Seal Ring Sensor 4 BEFORE FIRST USE . Working Pressure 0~70kPa 1. 2. PSI 12 PSI Maximum Pressure 90kPa 5 4. Keep Warm Temperature 140ºF ~ 175 ºF Preset Timer 1~9 Hours How to install the lid: Hold the Lid (2) with both hands at the Closed Lid position and pull it upwards in a slanted position which leads to a height of 10cm between the Lid and the upper edge of the cooker (Figure 11). Align the Lid’s Sliding Valve (7) to the pressure cooker’s Lock-Slider (6) and turn it in a clockwise direction until you reach the Opened Lid position (Figure 12). The lid will be installed when the lid is seated and in the horizontal position (Figure 13). Remove packaging materials such as cardboard, plastics or Styrofoam and discard appropriately. Clean all the parts by wiping with a soft damp cloth or sponge and dry thoroughly. LID ASSEMBLY: 1. 2. 3. How to open the lid: When the lid (2) of the cooker is at the Closed position (Figure 1), hold the Handle (1) and turn it clockwise until you reach the Opened-Lid position (Figure 2). Lift up and the lid will swing open vertically. Note: For new units, the seal of the lid may be slightly stronger than normal and may be slightly difficult to unlock. Once the lid has been opened and closed several times, it will loosen up. How to close the lid: When the Lid (2) of the cooker is in vertical position (Figure 4), hold the Handle (1) and close it downwards at the Opened Lid position (Figure 5). Turn counter-clockwise until you reach the Closed Lid position. (Figure 6). How to dismantle the lid: When the lid (2) of the cooker is in the upright vertical position (Figure 7), hold the lid with both hands, and adjust the height between the Lid and the upper edge of the cooker to approximately 10cm (Figure 8). Then turn it counterclockwise until you reach the Closed Lid position (Figure 9). In order to remove the lid, you will need to move in an upward direction (Figure 10). During the process of installing the lid, please ensure that the height between the Lid and the upper edge of the cooker is approximately 10cm. This is to ensure smooth movement when turning and installing the lid. OPERATING INSTRUCTIONS . 1. To open the lid, hold the Handle (1) and turn it in a clockwise direction until you reach the Opened Lid position. Then pull upwards to vertical position (Figure 14 & 15). 2. Remove the inner pot (8) and place desired food and liquids into the pot. The amount of water and food should not exceed 4/5 of the height of the inner Pot (Figure 16.) For food that will expand in water, the level should not exceed 3/5 of the Inner Pot (Figure 17). The minimum level for cooking would be 1/5 of the Inner Pot (Figure 18). 3. When cooking rice, the maximum amount of rice allowed for this 8 quart pressure cooker is 16 cups of uncooked rice. Normally one cup of rice requires one cup of water. This may vary according to taste. Be certain the inner receptacle, where the Electronic Heater is located, is clean before inserting the inner pot. Place the inner pot into the pressure cooker and adjust the pot left and right to ensure optimal contact between the Inner Pot and the Electronic Heater. (Figure 19) 4. Close the lid. a) Make sure the Rubber Seal Ring (21) is fitted properly onto the inner part of the lid (2). b) Observe the Rubber Seal Ring (21) inside the Lid (2) and ensure that it is evenly fitted into the track. c) Close the lid. d) Hold the Handle (1) and turn it to the “Closed” position or Counter-clockwise. (A clamping sound can be heard) (Figure 20 & 21). 7 MENU SELECTIONS & APPROXIMATE COOK TIMES: SOUP & STEW 20 – 25 minutes RICE & RISOTTO MEAT & CHICKEN 10 – 15 minutes POTATOES & YAMS BEANS & GRAINS 25-30 minutes 5- 10 minutes 15-20 minutes When the unit is heating to achieve the required working pressure, the unit will automatically execute the Pressurizing Sequences/Procedures. If the user selects a pre-set Menu choice on the control panel, the LCD Screen will display “P00”. However, if the user chooses to use the Self-Selected Menu, then the LCD Screen will display “P00” where the “00” is the Self-Selected Pressurizing Cook Time. 5. Adjust the Pressure Limiting Valve (3) to the “Air Tight” position, and ensure that the Float Valve (5) sinks. (Figure 22a & 22b) (EX: If 15-minutes is set, then the LCD screen will display “P15”.) The Pressurized Cook Time will decrease every 1 minute. When the heating and pressurizing process is over, the unit will beep 3 times and the LED light will shut off. This indicates that the selected cooking cycle is complete. The pressure cooker will automatically switch to the Keep Warm setting. NOTE: The pressure in the cooker is still very high when the “Keep Warm” indicator is blinking. When the light has stopped blinking, the pressure has returned to a normal level. NOTE: Always wait for pressure to return to normal before attempting to open the lid. This may be accomplished by allowing the unit to release naturally. The Keep Warm indicator will stop blinking when normal pressure is achieved. You may also manually release pressure by turning the Pressure Limiting Valve to “Exhaust”. During the configuring process, all settings can be cancelled by pressing the “Keep Warm/Cancel” button on the control panel. 7. 6. Connect the power cord to the machine and plug into a wall outlet. The Pressure Cooker’s LCD Screen will automatically display “000”. (The first Red Digit indicates the time in hours of the Preset Timer, while the second and third Green Digits show the Manual Self-selected Pressurized Cooking Time in minutes.) Opening the Lid: When the “Keep Warm” LED is flickering, open the lid after the following: a) Press the “Keep Warm/Cancel” button to stop the warming cycle. b) Move the Pressure Limiting Valve to “Exhaust” position to release the pressure until the Float Valve sinks. (Figure 23a & 23b). CAUTION: Keep hands and face away from Pressure Limiting Valve while in the Exhaust position. Failure to comply may cause serious injury. PRESET COOKING CYCLE AND TIMER (Delayed Cooking Set-Up): Configure the setting and Start the Cooking/Heating process. See options below: Set the Preset Timer: (If the Preset Timer is not required, skip this step). Press the “Timer” button once to increase the timer by 1-hour increments (as indicated by the LCD screen). The maximum Preset period is 9-hours. After 9-hours, the timer will start a new cycle. (The time that displays on the LCD screen shows how long the user wants the unit to wait before the heating process starts). To use the Preset functions, choose one of the Menu Buttons on the control panel (ex: Press “Rice & Risotto” for cooking rice). The Preset function indicator will illuminate. The Timer LED will indicate 0 until the unit reaches optimum pressure. At this point, the indicator will switch to P. NOTE: The LCD screen will not change or indicate a time when using the Menu Buttons. When the cooking cycle has completed, the pressure cooker will automatically set to Keep Warm. If the Preset Timer is activated, the time displays on the LCD Screen will decrease for every 1-hour. When the LCD Screen shows “0”, the timer LED will turn off and the heating cycle will begin. If the Preset Timer is not activated, the heating cycle will start right after one of the buttons on the preset menu is chosen. User is advised to release the pressurized steam when the “Keep Warm” LED stops flickering as the cooker will have lower pressure. This will require a little more time. During the cooking process, when the cooker enters into the Pressurized Sequence, the first digit on the LCD screen will display the letter “P”. At the same time, the power supply to the Heater (18) will be shut off, but the Keep Warm LED light will light up without flickering. For foods with liquid (Stews, soups, porridges, etc.) the Pressure Limiting Valve SHOULD NOT be moved to “Exhaust” position to release the pressure. This is to avoid liquid splatter from spewing out from the vent holes. User should wait for the temperature to drop and the Float Valve to sink on its own prior to opening the lid. 8 BROWNING: To brown meat: 1. Open and/or remove the lid depending on your preference. 2. Press START to manually begin the heating process. 3. Put meat into the Inner Pot (8) and cook to brown the meat to desired consistency. 4. When ready to start the pressurized cooking cycle: Press “Keep Warm/Cancel” button to cancel the browning process. 5. Close the lid and secure properly. 6. Follow the instructions on cooking meat to your preference. CLEANING & MAINTENANCE . 1. 2. 3. 4. 5. 6. Always make sure the Pressure Cooker is unplugged, depressurized and completely cooled down before dismantling. Use a non-abrasive sponge or damp wash cloth to clean the exterior of the outer body (9) and the exterior surface of the pressure cooker. NEVER immerse the pressure cooker in any liquids. Remove the Steam Condensation Cup (13) and rinse it thoroughly and let dry. Clean the Upper Body (10) with a damp sponge or wash cloth. Clean the Lid (2) with warm soapy water, including the Seal Belt (21), Pressure Limiting Valve (3), Filter (20), Vent, Float Valve (4) and let dry thoroughly. Wash the Inner Pot (8) with a non-abrasive sponge and allow to air dry or use a towel. Clean the Pressure Limiting Valve (3) and the holes with a small brush to ensure smooth flow of steam during the cooking cycle. NOTE: Any servicing required shall be performed by an authorized service representative or from the original manufacturer or distributer 9 COOKING TIME CHART . Courtesy of www.healthfoods.com Please note that all the below information is for your reference only and can be adjusted according to the user’s preference. Meat/Poultry Always cook meat or poultry with at least 1/2 cup of liquid. If the cooking time exceeds 15 minutes, use 2 cups of liquid. Preserved or salted meats should be immersed in water. Cooking times for meat and poultry may vary according to the quality and quantity of meat or poultry being cooked. Unless indicated, the cooking times given below are for 3 pounds of meat or poultry unless noted otherwise. Also, the denser the cut, the longer the cooking time should be. Type of Meat Approximate Cooking Minutes Pressure Release Beef/Veal, roast or brisket 38-42 Natural Release Beef Meatloaf, 2 lbs. 13-18 Natural Release Beef, meatballs, 1-2 lbs. 7-12 Natural Release Beef, Corned 55-65 Natural Release Pork, roast 43-47 Natural Release Pork, ribs, 2 lbs. 18 Quick Release Pork, ham shank 25-28 Natural Release Leg of Lamb 42-45 Natural Release Chicken, whole, 2-3 lbs. 15-18 Quick Release Chicken, pieces, 2-3 lbs. 12-15 Quick Release Cornish Hens, two 12-15 Quick Release Meat/Poultry Soup/Stock 15-20 Quick Release Seafood Cooking times may vary according to the kind of seafood being cooked. Cook seafood on a cooking rack (also called steamer basket) with trivet on bottom of pot, and add at least 3/4 cup of liquid. Lightly grease cooking rack with vegetable oil when cooking fish. Approximate Cooking Type of Seafood Pressure Release Minutes Clams 3-5 Quick Release Crabs 3-5 Quick Release Lobster, 1 1/2 - 2 lbs. 3-5 Natural Release Mussels 3-5 Quick Release Shrimp 2-3 Quick Release Fish, whole, gutted 7-8 Quick Release Fish, Soup or Stock 7-8 Quick Release 10 Vegetables Add 1-2 additional minutes to cooking time when using frozen vegetables. Use the quick-release (also called "cold water") release method at the end of cooking time so vegetables will not become soggy. Approximate Cooking Pressure Type of Vegetable Minutes Release 11 Dried Beans and Other Legumes Before cooking, soak beans in four times their volume of lukewarm water, for at least four (4) hours before cooking, or overnight if required. Do not add salt, it will toughen the beans and inhibit hydration. Do not soak lentils or dried split peas. Place beans or legumes in pressure cooker. Add 3 cups of water for each cup of beans or legumes. Add 1 tablespoon of vegetable oil for each cup of water to cut down on foaming. Do not add salt until after cooking. Asparagus, thick whole 2-5 Quick Release Asparagus, thin whole 1-2 Quick Release Beans, fava, shelled 5 Quick Release Beans, green, whole 4-5 Quick Release Beans, lima, shelled 3 Quick Release Let pressure drop naturally after cooking. Beets, small, whole 2-3 Quick Release Beets, large whole 23 Quick Release Cooking times may vary according to the quality of the beans or other legumes. If still hard after recommended cooking times, continue cooking uncovered. Add additional water, if necessary. Beets, 1-inch slices 5 Quick Release Broccoli, flowerets 3 Quick Release Brussel sprouts, whole 5 Quick Release Carrots, 1-inch chunks 5 Quick Release Carrots, 1/4-inch slices 1-2 Cauliflower, flowerets 3-5 Type of Legume Approximate Cooking Minutes Pressure Setting Azuki 7-8 Natural Release Black Beans 10-12 Natural Release Black Eyed Peas 11-12 Natural Release Quick Release Chick Peas (garbanzo) 11-13 Natural Release Quick Release Gandules (pigeon peas) 8-10 Natural Release 10-14 Natural Release Corn on-the-cob 4 Quick Release Great Northern Escarole, coarsely chopped 2-3 Quick Release Kidney Beans, Red 12-14 Natural Release Lentils, green 10-12 Natural Release Lentils, soup 8-10 Natural Release Lentils, red 120-125 Natural Release Kale, coarsely chopped 2-3 Quick Release Okra, small pods 3-5 Quick Release Onions, whole 3 Quick Release Potatoes, 11/2-inch chunks 7 Quick Release Potatoes, new, small whole 6 Quick Release Potatoes, sweet and yams, whole, medium 10-12 Potatoes, sweet and yams, 2" chunks 7-8 Quick Release Spinach, fresh, coarsely chopped 3 Quick Release Quick Release Squash, acorn, halved 8 Quick Release Squash, butternut, 1-inch chunks 5 Quick Release Squash, summer, zucchini or yellow, 1/2-inch slices 6 Turnips, small quartered 4 Quick Release Quick Release Turnips, 1 1/2 inch chunks 4 Quick Release *Split peas and rhubarb can foam, froth, and sputter, and can clog the pressure release device (steam vent). These foods should not be cooked in a pressure cooker. Lima Beans 7-8 Natural Release * Applesauce and cranberries, can foam, froth, and sputter, and can clog the pressure release device (steam vent). These foods should not be cooked in a pressure cooker. 12 Grains Before cooking, soak grains, such as wheat berries and pearl barley in four times their volume of lukewarm water for at least four (4) hours or overnight if required. Do not add salt to water since it will toughen the grains and inhibit hydration. Do not soak rice. Rinse under lukewarm water (this also applies to rice) Cook each cup of grain in the amount of water specified. 13 RECIPES . Courtesy of www.recipezaar.com Visit the website for more delicious recipes. Please note that all the below information is for your reference only and can be adjusted according to the user’s preference. LEEK & ASPARAGUS RISOTTO SERVES 4 -6 Type of Grain Approximate Cooking Minutes Pressure Setting Rice, basmati – 1 1/2 cups 7-8 Natural Release Rice, converted – 1 1/2 cups 7-8 Natural Release Rice, long grain – 1 1/2 cups 7-8 Natural Release Rice, brown – 1 1/2 cups 17-22 Natural Release Rice, wild – 3 cups 25-27 Natural Release Wheat, berries – 3 cups 1 Natural Release * Pearl barley, oatmeal or other cereals can foam, froth, and sputter, and can clog the pressure release device (steam vent). These foods should not be cooked in a pressure cooker. Ingredients 1 1/2 tablespoons olive oil 1 1/2 tablespoons butter 1 1/2 tablespoons water 2 garlic cloves, minced 1 1/2 cups leeks, sliced 1 1/2 cups Arborio rice 4 cups vegetable broth 1/4 lb asparagus, chopped into 1 inch segments 1 1/4 cups parmesan cheese, shredded Directions In the pressure cooker, heat the olive oil and butter. Add the garlic and leeks, sauté until soft. Add the rice, stir thoroughly and then add broth. Close pressure cooker, and press the RICE & RISOTTO function switch. While risotto cooks, steam asparagus in water. When risotto is done cooking, follow instructions to reduce pressure, then add the sautéed asparagus, and Parmesan cheese. Serve immediately. BEEF IN PEPPER SAUCE SERVES 4 Ingredients Pepper Sauce 1 red bell pepper or green bell pepper 1/2 cup baby carrot 1 (8 ounce) can tomato sauce (1 tbsp to be use later) 2 garlic cloves 2 teaspoons ground ginger 1 teaspoon turmeric 1 teaspoon salt 1/2 teaspoon black pepper 1/2-1 teaspoon cayenne pepper (depends on how spicy you like it) 1/2 teaspoon ground cardamom Continue on next page… Remaining Ingredients 2 tablespoons olive oil 2 lbs boneless sirloin steaks, cut into strips salt & pepper 1 cup water 1/2 teaspoon paprika 1/2 teaspoon cumin 1/2-1 onions, sliced 1 green bell pepper, sliced Directions Remove 1 tablespoon of tomato sauce from the can to be used later. Then blend the ingredients for the pepper sauce (green pepper through cardamom) in a food processor until there are no chunks left. Set aside. Pour the oil into the pressure cooker, sprinkle the beef with salt & pepper then brown over heat. Once brown add the water, reserved tomato sauce, paprika & cumin. Close the lid and press the MEAT & CHICKEN function switch. When meat is done, follow instructions to reduce pressure. Add the pepper mixture, sliced onions & green peppers to the meat and sauce, cover with lid and press the MEAT & CHICKEN function again. When cooking is complete, follow instructions to reduce pressure. Vegetables should be tender. Serve immediately. CHICKEN PICCATA SERVES 6 Ingredients 6 chicken breast halves 1/2 cup all-purpose flour 1/4 cup olive oil 4 shallots garlic cloves, crushed 3/4 cup chicken broth 1/3 cup fresh lemon juice 1 tablespoon sherry wine 2 teaspoons salt 1/4 teaspoon white pepper 1 teaspoon dried basil 1 cup pimento stuffed olive, minced 1/4 cup sour cream 1 tablespoon potato starch or flour 1/4 cup fresh parmesan cheese, grated (1 ounce) o 3 fontinella cheese, grated 1 lemon, thinly sliced, to garnish Directions Lightly dust chicken pieces with flour. In pressure cooker, heat oil. Add chicken breasts, two at a time, and sauté in hot oil until brown on all sides. Set aside when finished. Add shallots and garlic to pressure cooker and sauté in oil, scraping bottom of pan to loosen browned particles remaining from chicken. Stir in broth, lemon juice, sherry, salt, pepper, basil, and olives. Mix well. Add chicken pieces skin side down back into the pressure cooker with other ingredients. Close the lid and press the MEAT & CHICKEN function switch. When cooking is complete, follow instructions to reduce pressure. Lift lid. Stir chicken mixture, then transfer just the chicken to serving platter, and cover to retain heat. Whisk sour cream and starch together. Stir into cooking liquid inside the pressure cooker and cook over manual heat 1 minute, stirring constantly. Spoon sauce over chicken. Sprinkle with cheese and garnish with lemon slices. ITALIAN POTATO, RICE, & SPINACH SOUP SERVES 6 Ingredients 1/4 cup olive oil 6 leeks, white part only, sliced 3 garlic cloves, crushed 2 carrots 1/2 cup Arborio rice 3 potatoes, cut in large chunks 5 cups chicken stock 1/2 cup parsley, chopped 1/2 cup celery, chopped 1 bay leaf 1 teaspoon salt 1/4 teaspoon pepper 2 teaspoons dried basil Continue on next page… 2 tablespoons fresh lemon juice 3 tablespoons tomato paste 1 tablespoon light brown sugar 10 ounces fresh spinach, rinsed, cut in large pieces 1/4 cup parmesan cheese, grated 1/4 cup fontinella cheese, grated Directions In the pressure cooker, heat oil. Add leeks, garlic, and carrots and sauté in hot oil 2 minutes. Add rice and potatoes. Stir well and cook 1 minute. Add broth, parsley, celery, bay leaf, salt, pepper, basil, lemon juice, tomato paste, and brown sugar. Stir well. Secure lid. Press the POTATOES & YAMS function switch. Cooking should be approximately 15-20 minutes. When cooking is complete, follow instructions to reduce pressure. Lift lid. Ladle the soup into large serving bowl or individual bowls Combine the cheeses and sprinkle over soup. Serve with hunks of Italian bread. CHICKEN ADOBO SERVES 4 -5 Ingredients 8-9 chicken thighs 2 cups water 2 cups low sodium soy sauce 1 large onion (cut into rings) 8 garlic cloves (chopped up) 3 bay leaves 2 tablespoons cooking sherry 1 teaspoon ground black pepper 3 tablespoons molasses 1 tablespoon olive oil Jasmine rice Continue on next page… 16 Directions In the pressure cooker, heat olive oil over heat. Brown the chicken thighs on both sides. Remove and set aside. In pressure cooker, combine water, soy sauce, onion, garlic, bay leaves, sherry wine, black pepper and molasses. Cook on heat with lid off so the liquid can start to heat up. Add the chicken to the sauce. Stir a bit to get the chicken thighs down into the liquid. Close the lid and press the MEAT & CHICKEN function switch. Use this time to cook some jasmine rice. When cooking is complete, follow instructions to reduce pressure. Lift lid. Remove the bay leaves. Serve chicken and sauce over jasmine rice. TUSCAN LAMB SHANK SERVES 5 Ingredients 3/4 cup dried great northern beans 3 1/4 cups water, divided 3 lbs lamb shanks (about 2 large shanks) 2 tablespoons all-purpose flour 1/2 teaspoon salt 1/2 teaspoon fresh ground black pepper 2 teaspoons olive oil, divided 1/2 cup shallot, sliced 6 garlic cloves, sliced 1 cup dry red wine 1/4 cup sun-dried tomato 1 teaspoon dried rosemary 1 tablespoon Worcestershire sauce 1 (14 1/4 ounce) can low sodium beef broth 2 tablespoons flat leaf parsley, chopped 5 cups egg noodles, hot cooked (about 4 cups uncooked pasta) Directions Sort and wash beans; combine with 3 cups water in a small saucepan. Bring to a boil; cook 1 minute. Remove from heat. Let stand 20 minutes. Drain; set aside. Trim fat from lamb. Place flour, salt, and pepper in a large zip-top plastic bag; add lamb. Seal; shake to coat. Remove lamb from bag; shake off excess flour mixture. Reserve 1 1/2 teaspoons flour mixture, and set aside. Heat 1 teaspoon oil in the pressure cooker over heat. Brown the lamb shanks one by one. Let cook for 8-minutes on each side for Medium doneness. Remove lamb and set aside. Add shallots and garlic to the pressure cooker, and sauté 2 minutes. Add the beans, 1/4 cup water, reserved 1 1/2 teaspoons flour mixture, red wine, and the next 4 ingredients (wine through broth). Close the lid and press the BEANS & GRAINS function switch. During cooking of the sauce, go back to the lamb that was set aside. Remove lamb meat from bones; discard bones, fat, and gristle. When the sauce is finished cooking, follow instructions to reduce pressure. Lift lid. Skim fat from surface. Stir meat into bean mixture. Sprinkle with parsley. Serve over noodles. 17 SPARE RIBS SERVES 6 -8 Ingredients 2 cups brown sugar 1/4 cup soy sauce 1/2 teaspoon paprika 1 tablespoon vinegar 1/4 teaspoon cayenne 1 teaspoon garlic powder 2 lbs pork ribs Directions Place rib meat into the pressure cooker with 1 cup of water. Close the lid and press the MEAT & CHICKEN function switch. When cooking is complete, follow instructions to reduce pressure. Drain the water and add sauce ingredients. Leave on high and simmer for 15-20 minutes.