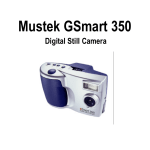
1
n
Copyright Information
All rights reserved. No part of this publication may be reproduced, transmitted, stored in a retrieval
system, or translated into any language in any form by any means, mechanical, optical, electronic.
recording, or otherwise, without the written permission of the Manufacturer.
The Manufacturer reserves the right to revise this manual and to make changes to any or all parts at
any time, without obligation to notify any person or entity of such revisions and changes.
All other brand or product names mentioned in this manual are trademarks or registered trademarks of
their respective owners.
Copyright Mustek Systems Inc. 0 1999
Printed in Taiwan, October, 1999.
FCC Statement
This equipment has been tested and found to comply with the limits for a Class I3 digital device,
pursuant to Part 15 of the FCC Rules. These limits are designed to provide reasonable protection against
harmful interference in a residential installation. This equipment generates, uses, and can radiate radio
frequency energy and if it is not installed and used in accordance with the instructions, may cause harmful
interference to radio communications. However, there is no guarantee that interference will not occur in a
particular installation. If this equipment does cause harmful interference to radio or television reception,
which can be determined by turning the equipment off and on, the user is encouraged to try to correct the
interference by one or more of the following measures:
l Reorient or relocate the receiving antenna.
l Increase the distance between the equipment and the receiver.
l Connect the equipment into an outlet on a circuit different from that to which the receiver is connected.
l Consult the dealer or an experienced radio/TV technician for help.
82-080-00030
GSmart 350 Digital Still Camera
User’s Guide
Are you ready? .................................................................................3
Power On ..........................................................................................3
Using the CompactFlashTM (CF) Memory Card Option ................3
Camera Features ..............................................................................4
Capturing Image(s) and Short Movie(s) ........................................4
Reviewing Image(s) or Movie(s) ,,.~.,,1~~1,*.,~,,~,~,~,1~~~,,1,1,,~~,~,.*,~~*,~~,,~, 5
Summary of Camera’s On-Screen Display (OSD) .....................5-7
Software Installation ....................................................................7-8
Getting Connected ...........................................................................8
Acquiring the TWAIN .......................................................................8
Application for the Mat ..................................................................9
How to transfer your images ..........................................................9
Video Conference and Capture Applications .............................9
Using the Viewer to Manage your images .............................IO-11
Specifications ................................................................................11
Helpful Hints ...................................................................................12
Are you ready?
Please make sure your package has all the following items:
l 2 CDs (1 installation/ 1 application)
l GSmart 350 camera
l Camera strap
l 3 AA batteries
l
USB connection cable
l
User’s Guide
Power On your Camera (Batteries or USB)
Battery Installation:
1. Press the release button at the bottom of the camera
and swing open the front cover.
2. Pull up the battery strip to release the batteries.
3. Insert the batteries as indicated by the (4) marks in the
battery compartment.
l
w The battery 1
l
icon indicates low batteries.
USB:
To save battery power, you can review your images while
your camera is linked with a computer via the USB cable.
:
;
:
w Before linking with computer, install software to avoid “unknown device” message.
Using a CompactFlashTM (CF) Memory Card (optional) e-1 5
1. Turn off the camera and open the CF Card panel.
\
2. Slide the CF card into the slot to activate.
3. To remove: Push the Eject button (located on the bottom of the card slot).
w CF Card acts as primary memory if inserted in the camera. You will be unable to save
images to the camera’s internal memory while card is inserted.
2 Mustek GSmart 350
Mustek GSmart 350 3
Camera Features
Reviewing Image(s) or Movie(s)
Before capturing images, please familiarize yourself with the following features.
1, Lens Adjuster: Rotates to adjust Micro Display to your eyesight.
2. Micro Display Viewfinder: Allows view of subject and review of image.
3. PWR button: Powers the camera on/off.
4. Up/flown Arrow keys: Navigate On-Screen Display (OSD).
5. SEL(Select) button: Confirms the selection.
6. Shutter button: Captures the image/movie.
7. CF Card Panel: Slides back to open CF card slot.
8. Battery button: Pushes in to open front battery cover.
9. LED Indicator: Glows when power is on.
1 O.USB port: Provides connection to computer/power.
11 #Lens: Allows fixed focus.
12.Flash: Provides lighting in low-light environments. ($ indicates flash recharging.)
Reviewing Images on the Camera
1, Power on the camera and press the SEL button for the Main Menu.
2. Press the SEL button on REVIEW.
3. Use the Arrow keys to scroll through the options and press the SEL button to
choose one of 4 functions. Now you may View or Delete images as you like.
Please follow the OSD explanation summary below for more information.
w Press the Shutter button to return to image capture.
Reviewing a Captured Movie on Windows 98 or the Mat
1. First download your movie file with the transfer button on the Viewer application
bundled with your camera’s software.
2. Use Apple’s QuickTimeTM to open and play your movie.
w User is unable to review movies on the camera.
Capturing Image(s) and Short Movie(s)
Summary of Camera’s On-Screen Display (OSD)
Capturing Image(s)
Use Select (SEL) button to access 6 categories of OSD boxes on Micro Display.
1. Position the subject in the viewfinder.
2. Gently press the Shutter button, holding the camera steady to obtain crisp image.
3. After image capture, BUSY g icon flashes while the camera processes image.
Once this message disappears, you may capture another image or Review.
w Press the Arrow keys to change the exposure.
Capturing a Short Movie
1. Press SEI button to Select MOVIE from the OSD; MOVIE ON flashes on screen,
2. Hold down Shutter button (camcorder icon @I appears). Release Shutter to end.
Qj?= Camera must have at least 400 KB available memory to select OSD MOVIE menu item.
4 Mustek GSmart 350
I
MAIN MENU
REVIEW
RECORD
TIMER
MOVIE
INFO
SETUP
ESC
w
1 MAIN MENU: Lists topics of 6 main categories.
REVIEW: Review/Delete images in memory.
RECORD: Change camera settings for image capturing.
TIMER: Select to activate self-timer image capture function.
MOVIE: Select to activate movie capture function.
INFO: Indicates camera status.
SETUP: Allows for advanced camera functions.
1 ESC: Returns user to image capture.
Use Arrow keys and SEL button to navigate the OSD; use Shutter button for a quick exit.
Mustek GSmart 350 5
REVIEW
FULL SCREEN
THUMBNAIL
DIRECTORY
SLIDE SHOW
DELETE ALL
ESC
RECORD
FLASH
OFF
EXP.
AUTO
RES.
640x480
QUALITY STANDARD
Xl
ZOOM
SAVE
ESC
FULL SCREEN: Allows review and deletion of single images.
THUMBNAIL: Allows 4 image review and image deletion.
DIRECTORY: Lists fixed file names of images in memory.
SLIDE SHOW: Review a slide show of images in memory.
DELETE ALL: Allows user to delete all images in memory.
ESG: Exit to MAIN MENU.
FLASH: Select: AUTO or OFF.
w Connection with the USB line disables flash.
EXP.: Select exposure as AUTO or choose: ( -2 to t2 ), +I- .5
RES.: Select from 2 image resolutions: ( 640x480, 320x240 ).
QUALITY:Select either HIGH or STANDARD.
w HIGH utilizes more memory than STANDARD.
ZOOM: Select X2 for closeup capture; Xl is normal capture.
w X2 icon indicates camera is capturing closeup images.
SAVE: Select SAVE to activate changes.
ESG: Exit to MAIN MENU without saving changes,
The TIMER menu item allows you to direct the camera to wait IO seconds before
you capture an image (setting the self-timer).
1. Select TIMER and the TIMER ON message flashes on the screen.
2. Next press the Shutter button to activate 10 second countdown, TIMER ACTIVE appears.
3. After the image is captured, press ?he Shutter button once more to cap?ure more images.
w After the Shulter is pressed, the user has a total of 10 seconds before the image is
captured (7 second slow LED flash plus a final 3 second quick flash).
6 Mustek GSmart 350
The MOVIE menu item allows you to capture video files with your camera.
1 .Once you have selected the MOVIE menu item from the OSD with the SEL button, simply
press and hold Shutter button to capture. Then release the Shutter button to end.
INFO
FULL
BATTERY
VERSION 1 .O
MEMORY
USED ---KB
FREE ---KB
SIZE ---KB
ESC
BATTERY: Indicates either FULL or LOW for power status.
VERSION: Indicates model version (useful for future firmware
upgrades).
MEMORY: Indicates current memory ( CF card OR internal ).
USED: Occupied memory space.
FREE: Available memory space.
SIZE: Total memory capability of the camera.
ESG: Exit to MAIN MENU.
SETUP
TIMEOUT 60 SEC
RESTORE DEFAULTS
ENG
LANG.
SAVE
ESC
TIME OUT: Select auto power off for 30/60/90/None(Seconds)
RESTORE DEFAULTS: Restore factory settings.
LANG.: Change language settings.
SAVE: Select SAVE to activate changes.
ESG: Exit to MAIN MENU without saving changes.
FORMAT CARD
FORMAT CARD: Reformat CF card to delete all CF Card data
and re-initialize the directory structure.
Software Installation for Windows 98
IN1 drwm+ m 1ti.m
j-y 1,**ITR.m.errmM”md
1. Insert the installation CD into your CD-ROM drive.
m.3W.hryrrpn,*mn,in)n.
.___
II
YF, id\rurl exe
2. Click on Start and select Run.
[. n* 1 r-d 1 *‘Ye 1 i
3. In the Run dialog box, type drive:\run.exe where drive is
the location of your CD-ROM drive.
4. Follow on-screen instructions to install driver and included imaging software.
Mustek GSmart 350 7
Application for the Mat
Software Installation for the Mae
1. Insert the installation CD into your CD-ROM drive.
2. Wait for the GSmart 350 CD icon to appear on your desktop.
3. Double-click on the CD icon to open the folder.
4. Double-click on the Installer icon.
5. Continue to follow all on-screen instructions for installation,
44
v
Installer
How to transfer your images for Windows 98 and the Mat
Getting Connected with the PC and the Mat
1. Power off the camera and plug one end of the USB cable into the
appropriate port at the back of your computer and the other end
into the camera’s USB port.
2. Turn on the camera.
The Installer will install the software in the Mustek GSmart 350 folder.
1, Find GSmart 350 Viewer icon in the Mustek GSmart 350 folder and double click.
2. The Viewer’s main window appears and automatically loads your captured images.
3. Follow the instructions for transferring images in the section below.
El
Acquiring the TWAIN driver for Windows 98
@Y TWAIN is the industry standard protocol that allows external image devices to communicate with your imaging software.
For Windows 98 users the user can also acquire the Viewer by clicking the
GSmart 350 Viewer icon from the Windows’ Programs group.
1. Once connected to the computer, follow the steps above to acquire the Viewer.
2.After connecting the camera, open the Viewer and your images load automatically.
3.To transfer images to the computer:
l Click on the thumbnail(s) you want, then click the Transfer icon or double-click
the thumbnail for quick transfer.
OR
l Click the Select All icon, then click the Transfer icon.
1. Launch the TWAIN-compliant program (e.g. Photo Express).
2. Select Digital Camera from the File menu, OR Click the Camera icon.
CEI
3.The Select data source box appears. Choose Mustek GSmart 350
r&Ma&n.. .I < .I
and click the Acquire button.
?9
4. The Viewer’s main window appears and you can select the source J ~?‘~“‘~ y ,A
of your images (camera or CF card reader).
5. Now you may transfer camera images directly into Photo Express for viewing/
editing OR save images directly to disk.
Video Conference and Capture Applications (Windows 98 only)
l
Open your video conference program (e.g. Microsoft’s NetMeetingTM) after
powering on camera to see your conferencing partner.
l
Capture AVI files through the camera’s AmcapO video capture program.
1. Power on camera then click the AmcapO icon in the Windows’ Program group.
2. Select File to set a file in which to save your video and select Capture to Start
capturing video.
8 Mustek GSmart 350
Mustek GSmart 350 9
Using the Viewer to manage your images
The Viewer contains several functions as detailed below. See the on-line help for
more details.
Features and Functions:
1. Download: Selects source of images’imovies download.
2.Total Memory: Represents megabytes (MB) of memory for all images/movies.
3. Select All: Selects all images/movies.
4. Delete: Deletes selected images/movies.
5. Image Count: Represents total number
of imageslmo\vies in ?he Viewer,
6. Delete All: Causes the Viewer
to delete all images/movies.
7. Print: Offers 3 print options:
all, selected, or single
(Windows 98 onlvl.
8.bave to: Allows &e of
images/movies to disk or to
an application (Windows
98 only).
9. Transfer: Transfers
images/movies to a specific
directory (First mark images).
10,File Transfer: Total number of images/movies to be transferred,
11 *Page Down: Takes user to next page of images/movies.
@j- For further explanation of the Viewer functions, please see the tutorial and on-line help.
10 Mustek GSmart 350
12.GoTo: Quick access to specified page of images/movies.
13.Page Up: Takes user to previous page of images/movies.
14.Exit: Allows user to exit Viewer.
15.Help: Lists help version information (Windows 98 only).
16,Product Information: Lists camera version number.
17.Web Link: Links user to the Web page (Windows 98 only).
18.Mark: Flags individual images/movies for selection.
Specifications
CCD
Dual-function
Micro Display LCD
Image resolution
Memory
Computer Interface
Digital Zoom
Flash
Self-timer
White Balance
Exposure
Shutter Speed
Compression
Focus Range
Aperture
Lens Field of view
Battery
Dimensions
Weight
__,_-_._ . __ _ .._...- .--- -_.- .-_,. - .__.11’3 inch 31 OK pixels HP CMOS sensor
Digital cameraAJSB PC camera
320 x 240, 24 bit color
640 x 480; 320 x 240
Internal memory; capacity of up to 12 images (Standard resolution)
CompactFlashTM (CF) card interface, (CF card optional)
USB
x2
Au to/Off
10 second delay
Automatic
Automatic with 9 selectable Exposure Values (EV)
l/5 to i/2000 second
Standard JPG file; YUV (4:l:l)
50cm (approx. 20”) to infinity
Fixed lens F/2.0
55 degrees
3 AA 1.5V alkaline
11.8 x 5.3 x 6.9 cm (4.6” x 2.1” x 2.7”)
170 grams (5.60~) (without batteries)
y--_--_.s_____--
‘1
I. -1I
Mustek GSmart 350 11
GSmart 350 Digitale Kamera
Helpful Hints
.I..
].lssue
1No power.
._
1 Cause-
~~~
_
__.._
.’ f-1 1 Batteries not loaded correctly.
Solution
~_.___.___~
1. Re-Install batteries.
2. Replace batteries.
,
Benutzerhandbuch
2
Vorbereitung . . . . . . . . . . . . . . . . . . . . . . . . . . . . . . . . . . . . . ..I.I...I..II..II.I..~
Kamera einschalten (Batterie- oder USB-Betrieb)
I,III.III.I 2
CompactFlashTM-Speicherkarten (CF) verwenden (optional) . m.. . . . 2-3
..,.I...... 3
Eigenschaften der Kamera II..................................
Bilder und kurze Filme aufnehmen ...............................................3-4
Bilder oder Filme ansehen.. .............................................................4
Ubersicht des OSD-Menus ............................................................5-7
Softwareinstallation .........................................................................7-8
Kamera an PC oder Mat anschlieoen .............................................8
TWAIN-Treiber fur Windows 98 starten .............................................8
Bilder am Mat ansehen ....................................................................9
Bilder unter Windows 98 bzw. am Mat iibertragen ......................... 9
Anwendungen fur Videokonferenz und Bildaufnahme .................... 9
Bilder mit dem Viewer verwalten ............................................... IO-11
Technische Daten ............................................................................ 11
Hilfreiche Tips .............................................................................12-13
m..........
1, Replace batteries.
2. Turn Power On.
1, Camera not In View mode.
shutter is depressed.
? rFlashdoes.not work, 1. Flash IS set to OFF.
z
2. USB is connected to the camera.
T
3. Envtronment is bright enough.
z
z
-TExposure(EXP) setting is
image is too bright
unsurtable.
Or too dark
- .--_ . -
1, Set camera to View mode.
2. Wait for camera to re-adjust.
3. Delete images in camera’s memory.
4. Wait for flash icon to stop blinking on OSD.
1. Set flash to AUTO in RECORD of OSD.
2. Disconnect the USB cable.
3. Continue capturing images.
1. Adjust EXP(exposure) setting while capturing
images with up/down arrows Or change EXP
setting in RECORD category of OSD.
1, Camera is not powered on.
2. USB not connected properly.
,3. USB data transfer,error.
4. Hardware compattbtltty problem.
5. Insufficient USB power
_ __l_._-.-._~__-.~~~.. .~
i
11 Incorrect cable connection.
$ ’ Cannot transfer data. I 2. Camera is not turned on.
1. Power on the camera.
2. Ensure USE cable is connected.
3. Unplug and reconnect the USB cable.
4. Contact your computer vendor for help.
5. Ensure USB connects directly to computer
host port, NOT keyboard or other port.
1, Reconnect the cables.
2. Turn on the camera.
s__ ..--..
^ -+
j CF Card error.
01
2
m
i?
J
1, Format card through the OSD function.
Note: You will delete all data on the CF Card if
you reformat your CF Card.
__~
Device not ready
c nor
ml
ai Connection failure.
12 Mustek GSmart 350
/ 1, CF Card may not be formatted.
*I...a.....II.mm
-I
I