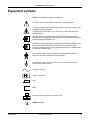
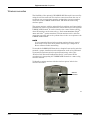
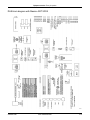
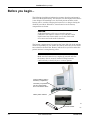
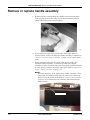
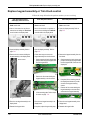
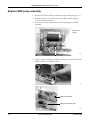
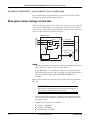
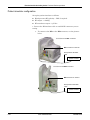
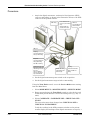
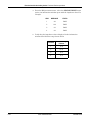
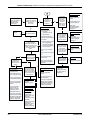
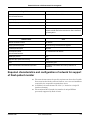
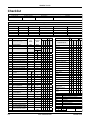
1
GE Healthcare Dash 3000/4000/5000™ Patient Monitor Service Manual Software Version 7 Dash 3000/4000/5000 English 2023909-014 (CD) 2023896-104 (paper) © 2011, 2013 General Electric Company All rights reserved NOTE: The information in this manual only applies to Dash 3000/4000/5000 patient monitors with software version 7. It does not apply to earlier software versions. Due to continuing product innovation, specifications in this manual are subject to change without notice. NOTE: The assembly drawings in this manual only support patient monitors with the SHQ product code. Patient monitors with the SHQ product code are only compatible with software version 6.10 or later. NOTE: Wireless LAN troubleshooting procedures are specific to the wireless LAN technology installed on the patient monitor. For Dash patient monitors with the LA-4137 wireless LAN hardware (identified on the Dash wireless LAN transmitter label), and Dash version 7 or later software, follow the wireless LAN troubleshooting instructions found in the service manual you received with your patient monitor. NOTE: The 802.11 a/b/g wireless feature is only compatible with Dash 3000/4000/5000 patient monitors with software version 7 or later. NOTE: The Dash Port 2 docking station with version 2.1 or later software is only compatible with the Dash 3000/4000/5000 patient monitor with version 7.2 or later software. NOTE: For technical documentation purposes, the abbreviation GE is used for the legal entity name, GE Medical Systems Information Technologies, Inc. Listed below are GE Medical Systems Information Technologies, Inc. trademarks. All other trademarks contained herein are the property of their respective owners. DASH, DINAMAP, EAGLE, MULTI-LINK, MUSE, SAM, SOLAR, TRIM KNOB, and UNITY NETWORK are trademarks of GE Medical Systems Information Technologies, Inc., registered in the United States Patent and Trademark Office. 12SL, CARESCAPE, CENTRALSCOPE, INTELLIRATE, MENTOR, and SUPERSTAT are trademarks of GE Medical Systems Information Technologies, Inc. T-2 Dash 3000/4000/5000 2000966-542D 22 April 2013 Contents 1 Introduction . . . . . . . . . . . . . . . . . . . . . . . . . . . . . . . . . . . . 1-1 Manual information . . . . . . . . . . . . . . . . . . . . . . . . . . . . . . . . . . . . . . . . . . . . . . . . . . 1-2 Revision history . . . . . . . . . . . . . . . . . . . . . . . . . . . . . . . . . . . . . . . . . . . . . . . . . . . 1-2 Manual purpose . . . . . . . . . . . . . . . . . . . . . . . . . . . . . . . . . . . . . . . . . . . . . . . . . . . 1-2 Intended audience . . . . . . . . . . . . . . . . . . . . . . . . . . . . . . . . . . . . . . . . . . . . . . . . . 1-2 Ordering manuals . . . . . . . . . . . . . . . . . . . . . . . . . . . . . . . . . . . . . . . . . . . . . . . . . 1-2 Safety information . . . . . . . . . . . . . . . . . . . . . . . . . . . . . . . . . . . . . . . . . . . . . . . . . . . 1-3 Responsibility of the manufacturer . . . . . . . . . . . . . . . . . . . . . . . . . . . . . . . . . . . . . 1-3 General . . . . . . . . . . . . . . . . . . . . . . . . . . . . . . . . . . . . . . . . . . . . . . . . . . . . . . . . . 1-3 Warnings, cautions, and notes . . . . . . . . . . . . . . . . . . . . . . . . . . . . . . . . . . . . . . . . 1-4 Equipment symbols . . . . . . . . . . . . . . . . . . . . . . . . . . . . . . . . . . . . . . . . . . . . . . . . . . 1-5 Service information . . . . . . . . . . . . . . . . . . . . . . . . . . . . . . . . . . . . . . . . . . . . . . . . . . 1-9 Service requirements . . . . . . . . . . . . . . . . . . . . . . . . . . . . . . . . . . . . . . . . . . . . . . . 1-9 Equipment identification . . . . . . . . . . . . . . . . . . . . . . . . . . . . . . . . . . . . . . . . . . . . . 1-9 2 Equipment overview . . . . . . . . . . . . . . . . . . . . . . . . . . . . . 2-1 Components . . . . . . . . . . . . . . . . . . . . . . . . . . . . . . . . . . . . . . . . . . . . . . . . . . . . . . . . 2-2 Monitoring system . . . . . . . . . . . . . . . . . . . . . . . . . . . . . . . . . . . . . . . . . . . . . . . . . 2-2 Patient monitor . . . . . . . . . . . . . . . . . . . . . . . . . . . . . . . . . . . . . . . . . . . . . . . . . . . . 2-2 Controls and indicators . . . . . . . . . . . . . . . . . . . . . . . . . . . . . . . . . . . . . . . . . . . . . 2-6 Exchangeable or compatible battery packs . . . . . . . . . . . . . . . . . . . . . . . . . . . . . . 2-9 Optional components . . . . . . . . . . . . . . . . . . . . . . . . . . . . . . . . . . . . . . . . . . . . . . 2-10 Optional remote control . . . . . . . . . . . . . . . . . . . . . . . . . . . . . . . . . . . . . . . . . . . . 2-13 Software packages and software options . . . . . . . . . . . . . . . . . . . . . . . . . . . . . . . 2-14 Software packages . . . . . . . . . . . . . . . . . . . . . . . . . . . . . . . . . . . . . . . . . . . . . . . 2-14 Software options . . . . . . . . . . . . . . . . . . . . . . . . . . . . . . . . . . . . . . . . . . . . . . . . . 2-14 Ethernet communication . . . . . . . . . . . . . . . . . . . . . . . . . . . . . . . . . . . . . . . . . . . . . 2-15 About Ethernet . . . . . . . . . . . . . . . . . . . . . . . . . . . . . . . . . . . . . . . . . . . . . . . . . . . 2-15 Twisted pair . . . . . . . . . . . . . . . . . . . . . . . . . . . . . . . . . . . . . . . . . . . . . . . . . . . . . 2-15 Network Terms . . . . . . . . . . . . . . . . . . . . . . . . . . . . . . . . . . . . . . . . . . . . . . . . . . . 2-16 Theory of operation . . . . . . . . . . . . . . . . . . . . . . . . . . . . . . . . . . . . . . . . . . . . . . . . . 2-17 Components . . . . . . . . . . . . . . . . . . . . . . . . . . . . . . . . . . . . . . . . . . . . . . . . . . . . . 2-17 Overall patient monitor block diagram . . . . . . . . . . . . . . . . . . . . . . . . . . . . . . . . . 2-17 Power supply . . . . . . . . . . . . . . . . . . . . . . . . . . . . . . . . . . . . . . . . . . . . . . . . . . . . 2-18 Data Acquisition System (DAS) . . . . . . . . . . . . . . . . . . . . . . . . . . . . . . . . . . . . . . 2-18 2000966-542D Dash 3000/4000/5000 i Processor/power management subsystem . . . . . . . . . . . . . . . . . . . . . . . . . . . . . 2-27 Lithium-Ion battery power . . . . . . . . . . . . . . . . . . . . . . . . . . . . . . . . . . . . . . . . . . 2-35 Speaker . . . . . . . . . . . . . . . . . . . . . . . . . . . . . . . . . . . . . . . . . . . . . . . . . . . . . . . . 2-40 Handle subassembly . . . . . . . . . . . . . . . . . . . . . . . . . . . . . . . . . . . . . . . . . . . . . . 2-40 Interfaces . . . . . . . . . . . . . . . . . . . . . . . . . . . . . . . . . . . . . . . . . . . . . . . . . . . . . . . 2-40 Storage and backup . . . . . . . . . . . . . . . . . . . . . . . . . . . . . . . . . . . . . . . . . . . . . . . 2-42 Optional thermal printer . . . . . . . . . . . . . . . . . . . . . . . . . . . . . . . . . . . . . . . . . . . . 2-43 3 Installation . . . . . . . . . . . . . . . . . . . . . . . . . . . . . . . . . . . . . 3-1 Installation overview . . . . . . . . . . . . . . . . . . . . . . . . . . . . . . . . . . . . . . . . . . . . . . . . . 3-2 Inspection . . . . . . . . . . . . . . . . . . . . . . . . . . . . . . . . . . . . . . . . . . . . . . . . . . . . . . . . . . 3-3 Before you begin... . . . . . . . . . . . . . . . . . . . . . . . . . . . . . . . . . . . . . . . . . . . . . . . . . . 3-4 Connections . . . . . . . . . . . . . . . . . . . . . . . . . . . . . . . . . . . . . . . . . . . . . . . . . . . . . . . . 3-5 Back panel connections . . . . . . . . . . . . . . . . . . . . . . . . . . . . . . . . . . . . . . . . . . . . . 3-5 Power up . . . . . . . . . . . . . . . . . . . . . . . . . . . . . . . . . . . . . . . . . . . . . . . . . . . . . . . . 3-7 Configure . . . . . . . . . . . . . . . . . . . . . . . . . . . . . . . . . . . . . . . . . . . . . . . . . . . . . . . . 3-7 Dash installation checkout procedure . . . . . . . . . . . . . . . . . . . . . . . . . . . . . . . . . . . 3-8 4 Configuration . . . . . . . . . . . . . . . . . . . . . . . . . . . . . . . . . . . 4-1 Before you begin... . . . . . . . . . . . . . . . . . . . . . . . . . . . . . . . . . . . . . . . . . . . . . . . . . . 4-2 Service menus . . . . . . . . . . . . . . . . . . . . . . . . . . . . . . . . . . . . . . . . . . . . . . . . . . . . . . 4-3 Boot Loader Service Menu . . . . . . . . . . . . . . . . . . . . . . . . . . . . . . . . . . . . . . . . . . 4-4 Main menu service mode . . . . . . . . . . . . . . . . . . . . . . . . . . . . . . . . . . . . . . . . . . . . 4-5 Procedures . . . . . . . . . . . . . . . . . . . . . . . . . . . . . . . . . . . . . . . . . . . . . . . . . . . . . . . . . 4-9 Set print locations . . . . . . . . . . . . . . . . . . . . . . . . . . . . . . . . . . . . . . . . . . . . . . . . . . 4-10 Service Mode settings . . . . . . . . . . . . . . . . . . . . . . . . . . . . . . . . . . . . . . . . . . . . . . . 4-11 Set Unit Name . . . . . . . . . . . . . . . . . . . . . . . . . . . . . . . . . . . . . . . . . . . . . . . . . . . 4-11 Set Bed Number . . . . . . . . . . . . . . . . . . . . . . . . . . . . . . . . . . . . . . . . . . . . . . . . . 4-11 Patient-Monitor Type . . . . . . . . . . . . . . . . . . . . . . . . . . . . . . . . . . . . . . . . . . . . . . 4-12 Admit Menu . . . . . . . . . . . . . . . . . . . . . . . . . . . . . . . . . . . . . . . . . . . . . . . . . . . . . 4-13 Confirm or configure wireless LAN . . . . . . . . . . . . . . . . . . . . . . . . . . . . . . . . . . . 4-14 Boot Code settings . . . . . . . . . . . . . . . . . . . . . . . . . . . . . . . . . . . . . . . . . . . . . . . . . 4-18 Set Defib Sync Voltage and pulse width . . . . . . . . . . . . . . . . . . . . . . . . . . . . . . . 4-18 Set Line Frequency . . . . . . . . . . . . . . . . . . . . . . . . . . . . . . . . . . . . . . . . . . . . . . . 4-18 Set CIC and QS protocol . . . . . . . . . . . . . . . . . . . . . . . . . . . . . . . . . . . . . . . . . . . 4-19 Set MUSE system protocol . . . . . . . . . . . . . . . . . . . . . . . . . . . . . . . . . . . . . . . . . 4-19 ii Dash 3000/4000/5000 2000966-542D Transcutaneous Pace Blank Length . . . . . . . . . . . . . . . . . . . . . . . . . . . . . . . . . . 4-19 Set Country Selection . . . . . . . . . . . . . . . . . . . . . . . . . . . . . . . . . . . . . . . . . . . . . 4-20 Set Language . . . . . . . . . . . . . . . . . . . . . . . . . . . . . . . . . . . . . . . . . . . . . . . . . . . . 4-20 Enable or disable AFIB Identification . . . . . . . . . . . . . . . . . . . . . . . . . . . . . . . . . . 4-21 Enable or disable IntelliRate . . . . . . . . . . . . . . . . . . . . . . . . . . . . . . . . . . . . . . . . 4-21 Analog Out Buzz . . . . . . . . . . . . . . . . . . . . . . . . . . . . . . . . . . . . . . . . . . . . . . . . . 4-22 Completion . . . . . . . . . . . . . . . . . . . . . . . . . . . . . . . . . . . . . . . . . . . . . . . . . . . . . . 4-22 Advanced user procedures . . . . . . . . . . . . . . . . . . . . . . . . . . . . . . . . . . . . . . . . . . . 4-23 Procedures . . . . . . . . . . . . . . . . . . . . . . . . . . . . . . . . . . . . . . . . . . . . . . . . . . . . . . 4-23 Set time and date . . . . . . . . . . . . . . . . . . . . . . . . . . . . . . . . . . . . . . . . . . . . . . . . . 4-23 Transfer monitor defaults . . . . . . . . . . . . . . . . . . . . . . . . . . . . . . . . . . . . . . . . . . . 4-24 5 Preventive maintenance . . . . . . . . . . . . . . . . . . . . . . . . . . 5-1 Maintenance schedule . . . . . . . . . . . . . . . . . . . . . . . . . . . . . . . . . . . . . . . . . . . . . . . . 5-2 Visual inspection . . . . . . . . . . . . . . . . . . . . . . . . . . . . . . . . . . . . . . . . . . . . . . . . . . . . 5-3 Cleaning and disinfecting the patient monitor . . . . . . . . . . . . . . . . . . . . . . . . . . . . 5-3 Procedure . . . . . . . . . . . . . . . . . . . . . . . . . . . . . . . . . . . . . . . . . . . . . . . . . . . . . . . 5-3 Cautions . . . . . . . . . . . . . . . . . . . . . . . . . . . . . . . . . . . . . . . . . . . . . . . . . . . . . . . . . 5-4 Impact or results of improper cleaning products and processes . . . . . . . . . . . . . . 5-5 Cleaning products to avoid . . . . . . . . . . . . . . . . . . . . . . . . . . . . . . . . . . . . . . . . . . 5-5 Storage . . . . . . . . . . . . . . . . . . . . . . . . . . . . . . . . . . . . . . . . . . . . . . . . . . . . . . . . . 5-5 Clean the print head . . . . . . . . . . . . . . . . . . . . . . . . . . . . . . . . . . . . . . . . . . . . . . . . 5-6 Cleaning, disinfecting and storing GE ECG cables and leadwires . . . . . . . . . . . . 5-7 Cleaning and disinfecting . . . . . . . . . . . . . . . . . . . . . . . . . . . . . . . . . . . . . . . . . . . . 5-7 Sterilization . . . . . . . . . . . . . . . . . . . . . . . . . . . . . . . . . . . . . . . . . . . . . . . . . . . . . . 5-8 Cautions . . . . . . . . . . . . . . . . . . . . . . . . . . . . . . . . . . . . . . . . . . . . . . . . . . . . . . . . . 5-8 Storage . . . . . . . . . . . . . . . . . . . . . . . . . . . . . . . . . . . . . . . . . . . . . . . . . . . . . . . . . 5-8 Improper cleaning products and processes impact or results . . . . . . . . . . . . . . . . 5-8 Cleaning products to avoid . . . . . . . . . . . . . . . . . . . . . . . . . . . . . . . . . . . . . . . . . . 5-9 Cleaning other applied parts . . . . . . . . . . . . . . . . . . . . . . . . . . . . . . . . . . . . . . . . . . 5-9 Battery maintenance . . . . . . . . . . . . . . . . . . . . . . . . . . . . . . . . . . . . . . . . . . . . . . . . 5-10 How to charge the battery . . . . . . . . . . . . . . . . . . . . . . . . . . . . . . . . . . . . . . . . . . 5-10 How to condition the battery . . . . . . . . . . . . . . . . . . . . . . . . . . . . . . . . . . . . . . . . 5-11 How to store the battery . . . . . . . . . . . . . . . . . . . . . . . . . . . . . . . . . . . . . . . . . . . . 5-12 How to wake up the battery . . . . . . . . . . . . . . . . . . . . . . . . . . . . . . . . . . . . . . . . . 5-12 How to replace the batteries . . . . . . . . . . . . . . . . . . . . . . . . . . . . . . . . . . . . . . . . 5-14 Rechargeable battery recycling . . . . . . . . . . . . . . . . . . . . . . . . . . . . . . . . . . . . . . 5-15 About the Cadex SMart Two+ charger . . . . . . . . . . . . . . . . . . . . . . . . . . . . . . . . . 5-16 Clear the stored patient data memory . . . . . . . . . . . . . . . . . . . . . . . . . . . . . . . . . . 5-17 2000966-542D Dash 3000/4000/5000 iii 6 Troubleshooting . . . . . . . . . . . . . . . . . . . . . . . . . . . . . . . . 6-1 Fault analysis . . . . . . . . . . . . . . . . . . . . . . . . . . . . . . . . . . . . . . . . . . . . . . . . . . . . . . . 6-2 Overview . . . . . . . . . . . . . . . . . . . . . . . . . . . . . . . . . . . . . . . . . . . . . . . . . . . . . . . . 6-2 Required tools or equipment . . . . . . . . . . . . . . . . . . . . . . . . . . . . . . . . . . . . . . . . . 6-2 Problems . . . . . . . . . . . . . . . . . . . . . . . . . . . . . . . . . . . . . . . . . . . . . . . . . . . . . . . . 6-2 Acquisition PCB symptoms . . . . . . . . . . . . . . . . . . . . . . . . . . . . . . . . . . . . . . . . . . 6-4 Processor PCB symptoms . . . . . . . . . . . . . . . . . . . . . . . . . . . . . . . . . . . . . . . . . . . 6-4 Error messages . . . . . . . . . . . . . . . . . . . . . . . . . . . . . . . . . . . . . . . . . . . . . . . . . . . . . 6-5 Battery alarms and messages . . . . . . . . . . . . . . . . . . . . . . . . . . . . . . . . . . . . . . . . . 6-7 Battery messages displayed in the ECG waveform area . . . . . . . . . . . . . . . . . . . . 6-7 Battery messages displayed in the Battery Status information window . . . . . . . . . 6-8 Battery Messages Displayed in the Battery Fuel Gauge Icon . . . . . . . . . . . . . . . . 6-8 Writer or printer . . . . . . . . . . . . . . . . . . . . . . . . . . . . . . . . . . . . . . . . . . . . . . . . . . . . . 6-9 External . . . . . . . . . . . . . . . . . . . . . . . . . . . . . . . . . . . . . . . . . . . . . . . . . . . . . . . . . 6-9 Internal . . . . . . . . . . . . . . . . . . . . . . . . . . . . . . . . . . . . . . . . . . . . . . . . . . . . . . . . . . 6-9 No waveform at central station . . . . . . . . . . . . . . . . . . . . . . . . . . . . . . . . . . . . . . . 6-10 Monitor defaults transfer . . . . . . . . . . . . . . . . . . . . . . . . . . . . . . . . . . . . . . . . . . . . 6-11 Storing monitor defaults . . . . . . . . . . . . . . . . . . . . . . . . . . . . . . . . . . . . . . . . . . . . 6-11 Copying stored monitor defaults . . . . . . . . . . . . . . . . . . . . . . . . . . . . . . . . . . . . . 6-11 Change internet address . . . . . . . . . . . . . . . . . . . . . . . . . . . . . . . . . . . . . . . . . . . . . 6-12 Review errors . . . . . . . . . . . . . . . . . . . . . . . . . . . . . . . . . . . . . . . . . . . . . . . . . . . . . . 6-13 View output or input errors . . . . . . . . . . . . . . . . . . . . . . . . . . . . . . . . . . . . . . . . . . 6-13 Useful error data . . . . . . . . . . . . . . . . . . . . . . . . . . . . . . . . . . . . . . . . . . . . . . . . . 6-14 Get error logs . . . . . . . . . . . . . . . . . . . . . . . . . . . . . . . . . . . . . . . . . . . . . . . . . . . . . . 6-16 Get logs via PC using netUpdate . . . . . . . . . . . . . . . . . . . . . . . . . . . . . . . . . . . . . 6-16 Get logs via CIC . . . . . . . . . . . . . . . . . . . . . . . . . . . . . . . . . . . . . . . . . . . . . . . . . . 6-21 Get logs via Centralscope . . . . . . . . . . . . . . . . . . . . . . . . . . . . . . . . . . . . . . . . . . 6-21 Wireless LAN . . . . . . . . . . . . . . . . . . . . . . . . . . . . . . . . . . . . . . . . . . . . . . . . . . . . . . 6-24 Access Service Mode . . . . . . . . . . . . . . . . . . . . . . . . . . . . . . . . . . . . . . . . . . . . . 6-25 Identify the wireless technology . . . . . . . . . . . . . . . . . . . . . . . . . . . . . . . . . . . . . . 6-25 802.11a/b/g . . . . . . . . . . . . . . . . . . . . . . . . . . . . . . . . . . . . . . . . . . . . . . . . . . . . . 6-26 7 Field replaceable units . . . . . . . . . . . . . . . . . . . . . . . . . . . 7-1 Ordering field replaceable units . . . . . . . . . . . . . . . . . . . . . . . . . . . . . . . . . . . . . . . . 7-2 Field replaceable units . . . . . . . . . . . . . . . . . . . . . . . . . . . . . . . . . . . . . . . . . . . . . . . 7-3 iv Dash 3000/4000/5000 2000966-542D Disassembly guidelines . . . . . . . . . . . . . . . . . . . . . . . . . . . . . . . . . . . . . . . . . . . . . . 7-7 Tools required . . . . . . . . . . . . . . . . . . . . . . . . . . . . . . . . . . . . . . . . . . . . . . . . . . . . 7-7 Before disassembly . . . . . . . . . . . . . . . . . . . . . . . . . . . . . . . . . . . . . . . . . . . . . . . . 7-7 Hardware precautions . . . . . . . . . . . . . . . . . . . . . . . . . . . . . . . . . . . . . . . . . . . . . . 7-8 Electrostatic discharge (ESD) precautions . . . . . . . . . . . . . . . . . . . . . . . . . . . . . . 7-8 Replacement procedures . . . . . . . . . . . . . . . . . . . . . . . . . . . . . . . . . . . . . . . . . . . . . 7-9 Remove or replace handle assembly . . . . . . . . . . . . . . . . . . . . . . . . . . . . . . . . . . . 7-10 Remove or replace display assembly . . . . . . . . . . . . . . . . . . . . . . . . . . . . . . . . . . 7-18 Replace display flex assembly . . . . . . . . . . . . . . . . . . . . . . . . . . . . . . . . . . . . . . . . 7-24 Replace display assembly parts . . . . . . . . . . . . . . . . . . . . . . . . . . . . . . . . . . . . . . . 7-26 Open display assembly . . . . . . . . . . . . . . . . . . . . . . . . . . . . . . . . . . . . . . . . . . . . 7-27 Replace Dash 4000/5000 alarm light . . . . . . . . . . . . . . . . . . . . . . . . . . . . . . . . . . 7-28 Replace display inverter . . . . . . . . . . . . . . . . . . . . . . . . . . . . . . . . . . . . . . . . . . . . 7-28 Replace keypad assembly or Trim Knob control . . . . . . . . . . . . . . . . . . . . . . . . . 7-30 Replace display components without LCD . . . . . . . . . . . . . . . . . . . . . . . . . . . . . 7-31 Replace main unit parts . . . . . . . . . . . . . . . . . . . . . . . . . . . . . . . . . . . . . . . . . . . . . 7-34 Replace wireless card . . . . . . . . . . . . . . . . . . . . . . . . . . . . . . . . . . . . . . . . . . . . . 7-34 Replace DAS assembly . . . . . . . . . . . . . . . . . . . . . . . . . . . . . . . . . . . . . . . . . . . . 7-37 Replace NBP pump assembly . . . . . . . . . . . . . . . . . . . . . . . . . . . . . . . . . . . . . . . 7-40 Replace writer assembly or writer flex . . . . . . . . . . . . . . . . . . . . . . . . . . . . . . . . . 7-41 Replace speaker assembly . . . . . . . . . . . . . . . . . . . . . . . . . . . . . . . . . . . . . . . . . 7-42 Replace CPU/battery housing assembly . . . . . . . . . . . . . . . . . . . . . . . . . . . . . . . 7-44 Replace power supply assembly . . . . . . . . . . . . . . . . . . . . . . . . . . . . . . . . . . . . . 7-48 Replace battery door . . . . . . . . . . . . . . . . . . . . . . . . . . . . . . . . . . . . . . . . . . . . . . . . 7-50 Replace foot . . . . . . . . . . . . . . . . . . . . . . . . . . . . . . . . . . . . . . . . . . . . . . . . . . . . . . . 7-50 Replace writer cover . . . . . . . . . . . . . . . . . . . . . . . . . . . . . . . . . . . . . . . . . . . . . . . . 7-51 Recommended checkout . . . . . . . . . . . . . . . . . . . . . . . . . . . . . . . . . . . . . . . . . . . . 7-52 8 Functional and electrical safety checks . . . . . . . . . . . . . 8-1 Overview . . . . . . . . . . . . . . . . . . . . . . . . . . . . . . . . . . . . . . . . . . . . . . . . . . . . . . . . . . . 8-2 Manufacturer recommendations . . . . . . . . . . . . . . . . . . . . . . . . . . . . . . . . . . . . . . 8-2 Frequency . . . . . . . . . . . . . . . . . . . . . . . . . . . . . . . . . . . . . . . . . . . . . . . . . . . . . . . 8-2 Test equipment . . . . . . . . . . . . . . . . . . . . . . . . . . . . . . . . . . . . . . . . . . . . . . . . . . . 8-2 Functional Checkout procedures . . . . . . . . . . . . . . . . . . . . . . . . . . . . . . . . . . . . . . 8-3 Electrical safety tests . . . . . . . . . . . . . . . . . . . . . . . . . . . . . . . . . . . . . . . . . . . . . . . . 8-4 General . . . . . . . . . . . . . . . . . . . . . . . . . . . . . . . . . . . . . . . . . . . . . . . . . . . . . . . . . 8-4 Recommendations . . . . . . . . . . . . . . . . . . . . . . . . . . . . . . . . . . . . . . . . . . . . . . . . . 8-4 Power outlet test . . . . . . . . . . . . . . . . . . . . . . . . . . . . . . . . . . . . . . . . . . . . . . . . . . 8-5 2000966-542D Dash 3000/4000/5000 v Power cord and plug . . . . . . . . . . . . . . . . . . . . . . . . . . . . . . . . . . . . . . . . . . . . . . . 8-5 Ground (earth) integrity . . . . . . . . . . . . . . . . . . . . . . . . . . . . . . . . . . . . . . . . . . . . . 8-6 Ground (earth) wire leakage current tests . . . . . . . . . . . . . . . . . . . . . . . . . . . . . . . 8-7 Enclosure (Touch) leakage current test . . . . . . . . . . . . . . . . . . . . . . . . . . . . . . . . . 8-9 Patient (source) leakage current test . . . . . . . . . . . . . . . . . . . . . . . . . . . . . . . . . . 8-12 Patient (sink) leakage current test (mains voltage on the applied part) . . . . . . . . 8-14 BISx (option) current leakage tests . . . . . . . . . . . . . . . . . . . . . . . . . . . . . . . . . . . . 8-16 BISx patient (source) leakage current test . . . . . . . . . . . . . . . . . . . . . . . . . . . . . . 8-16 BISx patient (sink) leakage current test . . . . . . . . . . . . . . . . . . . . . . . . . . . . . . . . 8-18 Test completion . . . . . . . . . . . . . . . . . . . . . . . . . . . . . . . . . . . . . . . . . . . . . . . . . . 8-19 Functional Checkout procedures . . . . . . . . . . . . . . . . . . . . . . . . . . . . . . . . . . . . . . 8-20 Frequency . . . . . . . . . . . . . . . . . . . . . . . . . . . . . . . . . . . . . . . . . . . . . . . . . . . . . . 8-20 Identify enabled patient parameters and software options . . . . . . . . . . . . . . . . . 8-20 Patient monitor power-up tests . . . . . . . . . . . . . . . . . . . . . . . . . . . . . . . . . . . . . . 8-21 ECG tests . . . . . . . . . . . . . . . . . . . . . . . . . . . . . . . . . . . . . . . . . . . . . . . . . . . . . . . 8-22 Respiration tests . . . . . . . . . . . . . . . . . . . . . . . . . . . . . . . . . . . . . . . . . . . . . . . . . 8-25 Temperature tests . . . . . . . . . . . . . . . . . . . . . . . . . . . . . . . . . . . . . . . . . . . . . . . . 8-26 Cardiac output tests (option) . . . . . . . . . . . . . . . . . . . . . . . . . . . . . . . . . . . . . . . . 8-27 Invasive blood pressure tests (option) . . . . . . . . . . . . . . . . . . . . . . . . . . . . . . . . . 8-27 Pulse oximetry tests for GE Ohmeda SPO2 oximeter . . . . . . . . . . . . . . . . . . . . . 8-30 Pulse oximetry tests for Masimo SET SPO2 . . . . . . . . . . . . . . . . . . . . . . . . . . . . 8-32 Pulse oximetry tests for Nellcor OxiMax SPO2 . . . . . . . . . . . . . . . . . . . . . . . . . . 8-33 Noninvasive blood pressure tests . . . . . . . . . . . . . . . . . . . . . . . . . . . . . . . . . . . . 8-35 NBP calibration . . . . . . . . . . . . . . . . . . . . . . . . . . . . . . . . . . . . . . . . . . . . . . . . . . 8-37 Analog output and defibrillator synchronization tests . . . . . . . . . . . . . . . . . . . . . . 8-40 End-tidal CO2 test (option) . . . . . . . . . . . . . . . . . . . . . . . . . . . . . . . . . . . . . . . . . . 8-44 Battery tests . . . . . . . . . . . . . . . . . . . . . . . . . . . . . . . . . . . . . . . . . . . . . . . . . . . . . 8-44 Graph or print tests (option) . . . . . . . . . . . . . . . . . . . . . . . . . . . . . . . . . . . . . . . . . 8-44 Display test . . . . . . . . . . . . . . . . . . . . . . . . . . . . . . . . . . . . . . . . . . . . . . . . . . . . . 8-45 Speaker test . . . . . . . . . . . . . . . . . . . . . . . . . . . . . . . . . . . . . . . . . . . . . . . . . . . . . 8-46 Network test (option) . . . . . . . . . . . . . . . . . . . . . . . . . . . . . . . . . . . . . . . . . . . . . . 8-46 Remote control test (option) . . . . . . . . . . . . . . . . . . . . . . . . . . . . . . . . . . . . . . . . . 8-46 BISx test (option) . . . . . . . . . . . . . . . . . . . . . . . . . . . . . . . . . . . . . . . . . . . . . . . . . 8-47 Wireless antenna signal strength test (option) . . . . . . . . . . . . . . . . . . . . . . . . . . . 8-49 Wireless LAN test (option) . . . . . . . . . . . . . . . . . . . . . . . . . . . . . . . . . . . . . . . . . . 8-52 Dash Port 2 docking station test (option) . . . . . . . . . . . . . . . . . . . . . . . . . . . . . . . 8-54 TRAM-rac 2A module housing peripheral device test (option) . . . . . . . . . . . . . . 8-54 ICG Module test (option) . . . . . . . . . . . . . . . . . . . . . . . . . . . . . . . . . . . . . . . . . . . 8-54 Checkout procedures completion . . . . . . . . . . . . . . . . . . . . . . . . . . . . . . . . . . . . . 8-55 vi Dash 3000/4000/5000 2000966-542D A Electromagnetic compatibility (EMC) . . . . . . . . . . . . . . . . .A-1 Electromagnetic compatibility (EMC) . . . . . . . . . . . . . . . . . . . . . . . . . . . . . . . . . . . A-2 Guidance and manufacturer’s declaration – electromagnetic emissions . . . . . . . .A-2 Guidance and manufacturer’s declaration – electromagnetic immunity . . . . . . . .A-3 Guidance and manufacturer’s declaration – electromagnetic immunity . . . . . . . .A-5 Recommended separation distances . . . . . . . . . . . . . . . . . . . . . . . . . . . . . . . . . . .A-6 Compliant cables and accessories . . . . . . . . . . . . . . . . . . . . . . . . . . . . . . . . . . . .A-7 B Network troubleshooting . . . . . . . . . . . . . . . . . . . . . . . . . . .B-1 Network traffic . . . . . . . . . . . . . . . . . . . . . . . . . . . . . . . . . . . . . . . . . . . . . . . . . . . . . . B-2 Traffic types . . . . . . . . . . . . . . . . . . . . . . . . . . . . . . . . . . . . . . . . . . . . . . . . . . . . . .B-2 Flow . . . . . . . . . . . . . . . . . . . . . . . . . . . . . . . . . . . . . . . . . . . . . . . . . . . . . . . . . . . .B-2 Network infrastructure compatibility . . . . . . . . . . . . . . . . . . . . . . . . . . . . . . . . . . . . B-3 Compatible wireless network infrastructures . . . . . . . . . . . . . . . . . . . . . . . . . . . . .B-3 Problem: No waveforms or parameters are displayed at the CIC Pro center . . . B-5 C Network disclosure to facilitate network risk management . . . . . . . . . . . . . . . . . . . . . . . . . . . . . . . . . . . . .C-1 Purpose and scope . . . . . . . . . . . . . . . . . . . . . . . . . . . . . . . . . . . . . . . . . . . . . . . .C-2 Purpose for the Dash patient monitor connection to network . . . . . . . . . . . . . . . .C-2 Dash patient monitor network interface technical specifications . . . . . . . . . . . . . .C-2 Network information flows . . . . . . . . . . . . . . . . . . . . . . . . . . . . . . . . . . . . . . . . . . .C-5 Required characteristics and configuration of network for support of Dash patient monitor . . . . . . . . . . . . . . . . . . . . . . . . . . . . . . . . . . . . . . . . . . . . . . . . . . . . . . . . . .C-6 Potential risks to safety, effectiveness or security resulting from failure of IT network to provide the required characteristics . . . . . . . . . . . . . . . . . . . . . . . . . . . . . . . . . .C-7 D Checklist . . . . . . . . . . . . . . . . . . . . . . . . . . . . . . . . . . . . . . . .D-1 Checklist . . . . . . . . . . . . . . . . . . . . . . . . . . . . . . . . . . . . . . . . . . . . . . . . . . . . . . . . . . . D-2 2000966-542D Dash 3000/4000/5000 vii viii Dash 3000/4000/5000 2000966-542D 1 2000966-542D Introduction Dash 3000/4000/5000 1-1 Introduction: Manual information Manual information Revision history Each page of this manual has the document part number and revision letter at the bottom of the page. The revision letter identifies the document’s update level. The revision history of this document is summarized below. Revision Comment A Initial release of this manual. B Updated WLAN a/b/g instructions. C Added Appendix C - Network disclosure, updated Dash Port 2 software compatibility, updated Windows workflows, and generalized disabling firewall/network services workflows. D Updated FRU kits. Manual purpose This manual supplies technical information for service representatives and technical personnel so they can maintain the equipment to the assembly level. Use it as a guide for maintenance and electrical repairs considered field repairable. Where necessary the manual identifies additional sources of relevant information and technical assistance. See the operator’s manual for the instructions necessary to operate the equipment safely in accordance with its function and intended use. Intended audience This manual is intended for service representatives and technical personnel who maintain, troubleshoot, or repair this equipment. Ordering manuals A paper copy of this manual will be provided upon request. Contact your local GE representative and request the part number on the first page of the manual. 1-2 Dash 3000/4000/5000 2000966-542D Introduction: Safety information Safety information Responsibility of the manufacturer GE is responsible for the effects of safety, reliability, and performance only if: Assembly operations, extensions, readjustments, modifications, or repairs are carried out by persons authorized by GE. The electrical installation of the relevant room complies with the requirements of the appropriate regulations. The equipment is used in accordance with the instructions for use. General This device is intended for use under the direct supervision of a licensed health care practitioner. This device is not intended for home use. Federal law restricts this device to be sold by or on the order of a physician. Contact GE for information before connecting any devices to the equipment that are not recommended in this manual. Parts and accessories used must meet the requirements of the applicable IEC 60601 series safety standards, and/or the system configuration must meet the requirements of the IEC 60601-1-1 medical electrical systems standard. Periodically, and whenever the integrity of the device is in doubt, test all functions. The use of accessory equipment not complying with the equivalent safety requirements of this equipment may lead to a reduced level of safety of the resulting system. Consideration relating to the choice shall include: use of the accessory in the patient vicinity; and evidence that the safety certification of the accessory has been performed in accordance to the appropriate IEC 60601-1 and/or IEC 60601-1-1 harmonized national standard. If the installation of the equipment, in the USA, will use 240V rather than 120V, the source must be a center-tapped, 240V, single-phase circuit. 2000966-542D Dash 3000/4000/5000 1-3 Introduction: Safety information Warnings, cautions, and notes The terms danger, warning, and caution are used throughout this manual to point out hazards and to designate a degree or level or seriousness. Familiarize yourself with their definitions and significance. Hazard is defined as a source of potential injury to a person. DANGER indicates an imminent hazard which, if not avoided, will result in death or serious injury. WARNING indicates a potential hazard or unsafe practice which, if not avoided, could result in death or serious injury. CAUTION indicates a potential hazard or unsafe practice which, if not avoided, could result in minor personal injury or product/property damage. NOTE provides application tips or other useful information to assure that you get the most from your equipment. 1-4 Dash 3000/4000/5000 2000966-542D Introduction: Equipment symbols Equipment symbols NOTE: Some symbols may not appear on all equipment. ATTENTION: Consult accompanying documents before using the equipment. In Europe, this symbol means dangerous or high voltage. In the United States, this symbol represents the caution notice below: To reduce the risk of electric shock, do not remove cover (or back). Refer servicing to qualified personnel. Defibrillator-proof type CF equipment; type CF equipment is specifically designed for applications where a conductive connection directly to the heart is established. The paddles indicate the equipment is defibrillator proof. Defibrillator-proof type BF equipment; type BF equipment is suitable for intentional external and internal application to the patient, excluding direct cardiac application. Type BF equipment is type B equipment with an F-type isolated (floating) part. The paddles indicate the equipment is defibrillator proof. Type B equipment; type B equipment is suitable for intentional external and internal application to the patient, excluding direct cardiac application. Equipotential Stud: A ground wire from another device can be tied here to ensure the devices share a common reference. Alternating current (AC) Power; I = ON; O= OFF Fuse Battery Indicates the Ethernet connection for the patient monitor. POWER (Dash 4000) 2000966-542D Dash 3000/4000/5000 1-5 Introduction: Equipment symbols Power (Dash 5000) Standby (Dash 5000) Main Display (Dash 5000) Trend (Dash 5000) Admit/Discharge (Dash 5000) Print (Graph Go/Stop on older Dash 3000/4000) NBP Go/Stop (on older Dash 3000/4000) NBP Auto (Dash 5000) Zero All Silence Alarm/Admit 4P41 Medical Equipment With respect to electric shock, fire and mechanical hazards only in accordance with UL 60601-1, CAN/CSA C22.2 NO. 601, IEC 60601-1, IEC 60601-2-27, IEC 60601-2-30, IEC 60601-2-34, and IEC 60601-2-49. This symbol indicates that the waste of electrical and electronic equipment must not be disposed as unsorted municipal waste and must be collected separately. Please contact an authorized representative of the manufacturer for information concerning the decommissioning of your equipment. This product consists of devices that may contain mercury, which must be recycled or disposed of in accordance with local, state, or country laws. (Within this system, the backlight lamps in the monitor display contain mercury.) 1-6 Dash 3000/4000/5000 2000966-542D Introduction: Equipment symbols This symbol indicates the date of manufacture of this device. The first four digits identify the year and the last two digits identify the month. 2005-08 Non-ionizing electromagnetic radiation: To indicate elevated, potentially dangerous, levels of non-ionizing radiation. Note - In case of application in a warning sign the rules according to ISO 3864-1 shall be adhered to. IEC 60878 note: See safety sign ISO 7010 - W005 “Warning, non-ionizing radiation”. FCC. USA only. Complies with applicable US government (Federal Communications Commission) radio-frequency interference regulations. Manufacturer name and address. Device serial number. Russia only. GOST-R certification, where XXXX indicates the four-digit certification body number determined by product. Catalog or orderable part number. European authorized representative. Prescriptive device. USA only. For use by or on the order of a physician, or persons licensed by state law. CAUTION — Safety ground precaution. Remove power cord from the mains source by grasping the plug. Do not pull on the cable. 2000966-542D Dash 3000/4000/5000 1-7 Introduction: Equipment symbols NOTE The following symbols (required by China law only) are representative of what you may see on your equipment. The number in the symbol indicates the EFUP period in years, as explained below. Check the symbol on your equipment for its EFUP period. This symbol indicates the product contains hazardous materials in excess of the limits established by the Chinese standard SJ/T11363-2006 Requirements for Concentration Limits for Certain Hazardous Substances in Electronic Information Products. The number in the symbol is the Environment-friendly User Period (EFUP), which indicates the period during which the toxic or hazardous substances or elements contained in electronic information products will not leak or mutate under normal operating conditions so that the use of such electronic information products will not result in any severe environmental pollution, any bodily injury or damage to any assets. The unit of the period is “Year”. In order to maintain the declared EFUP, the product shall be operated normally according to the instructions and environmental conditions as defined in the product manual, and periodic maintenance schedules specified in Product Maintenance Procedures shall be followed strictly. Consumables or certain parts may have their own label with an EFUP value less than the product. Periodic replacement of those consumables or parts to maintain the declared EFUP shall be done in accordance with the Product Maintenance Procedures. This product must not be disposed of as unsorted municipal waste, and must be collected separately and handled properly after decommissioning. This symbol indicates that this electronic information product does not contain any toxic or hazardous substance or elements above the maximum concentration value established by the Chinese standard SJ/T11363-2006, and can be recycled after being discarded, and should not be casually discarded. 1-8 Dash 3000/4000/5000 2000966-542D Introduction: Service information Service information Service requirements Follow the service requirements listed below. Refer equipment servicing to GE-authorized service personnel only. Any unauthorized attempt to repair equipment under warranty voids that warranty. It is the user’s responsibility to report the need for service to GE or to one of their authorized agents. Failure on the part of the responsible individual, hospital, or institution using this equipment to implement a satisfactory maintenance schedule may cause undue equipment failure and possible health hazards. Regular maintenance, irrespective of usage, is essential to ensure that the equipment will always be functional when required. Equipment identification Every GE device has a unique serial number for identification. A sample of the information found on a serial number label is shown below. ### ## ## #### # # A B C D E F Description A product code1 B year manufactured C fiscal week manufactured D production sequence number E manufacturing site F miscellaneous characteristic 1. The current Dash patient monitor product code is SHQ. Dash 3000/4000/5000 patient monitors with the SHQ product code are only compatible with software version 6.10 or later. 2000966-542D Dash 3000/4000/5000 1-9 Introduction: Service information 1-10 Dash 3000/4000/5000 2000966-542D 2 2000966-542D Equipment overview Dash 3000/4000/5000 2-1 Equipment overview: Components Components Monitoring system The Dash patient monitor can function as a portable monitoring device with a built-in writer, or as a flexible care monitoring device connected to the optional CARESCAPE™ Network via Ethernet. If using the wireless card or Ethernet connection, optional components are a Clinical Information Center (CIC Pro™) and a Centralscope™ central station. NOTE The Unity Network™ has been renamed to the CARESCAPE Network. Not all references to the Unity Network will be changed immediately; Unity may appear in some places and CARESCAPE in others. It is important to understand that while the CARESCAPE Network replaces the Unity Network name, they refer to the same GE monitoring network. The CARESCAPE Network MC will be referred to as the MC network throughout this document. The CARESCAPE Network IX will be referred to as the IX network throughout this document. Patient monitor This device is designed to monitor a fixed set of parameters including ECG, noninvasive blood pressure, impedance respiration, SpO2, and temperature. Invasive pressure, BISx, and EtCO2 are optional features. Additional specialized features include cardiac output, cardiac calculations, pulmonary calculations, dose calculations, PA wedge (PA wedge is only available with the invasive pressure option), ICG module interface, and SAM™ module interface. AC Battery Power Charging Status A B Graph NBP Go/Stop Zero All Trim Knob Silence Alarm/ Admit 001C Dash 3000 monitor 051D Dash 4000 monitor 003A Dash 5000 monitor NOTE For compatibility information, contact Technical Support. 2-2 Dash 3000/4000/5000 2000966-542D Equipment overview: Components Right side view All of the patient cable connectors are located on the right side of the patient monitor. A Trim Knob™ control provides single control operation of virtually all patient monitor functions. Patient cable connectors 002A Left side view On the left of the patient monitor, you can find the built-in writer and the battery compartment. A B 925B 2000966-542D Dash 3000/4000/5000 2-3 Equipment overview: Components Name A B Description Built-in writer (optional) The built-in, 4 channel writer is located in the center of the left side of the monitor. Battery compartment The battery packs are located in this compartment. The battery compartment may be a single plastic door or two silicone doors. Back view All ports for equipment and network are on the back of the patient monitor. A K B C D E 004B J Name A B C D 2-4 I H G F Description wireless transmitter label Identifies monitors that contain an internal wireless transmitter for network communication. line voltage selector This selector is factory set to match the line voltage rating for your country. speaker The internal speaker provides sound for audible alarms. For better sound quality do not block speaker. voltage and current requirements Identifies the voltage and electrical current requirements for proper and safe operation of this monitor. Dash 3000/4000/5000 2000966-542D Equipment overview: Components Name Defib Sync port Provides ECG analog output signals to user-supplied equipment. A 5-volt, 2-millisecond artificial pacer spike is added to the analog output when PACE is on and detection occurs. Aux port Provides serial connection to compatible auxiliary devices, including: Remote control TRAM-RAC housing Remote display ® Nellcor 395 pulse oximeter ® Aspect BISx module Ethernet port Used to connect a monitor to the Unity Network for patient monitoring or for software installation. peripheral expansion port Used for connecting to a Dash™ Port docking station or other compatible auxiliary devices. AC power connector Provides connection for AC power cable. The internal power supply converts the AC current to DC power. The monitor is preset at the factory for a specific AC voltage. Refer to the label on the back of the unit for the voltage and current requirements. Before applying power, check that the power requirements match your power supply. equipotential terminal For measurements in or near the heart we recommend connecting the monitor to the potential equalization system. Use the green and yellow potential equalization cable and connect it to this pin. product code label Identifies the product code for this monitor for identification and service needs. E F G H I J K Description Optional alarm light indicator An optional alarm light indicator may be built into the handle of the Dash 3000 patient monitor or into the display bezel of the Dash 4000/ 5000 patient monitor. When activated, the LED indicator flashes red for 2000966-542D Dash 3000/4000/5000 2-5 Equipment overview: Components Crisis patient status alarms and yellow for Warning patient status and system alarms. Alarm light indicator 536A Dash 3000 monitor 052B Dash 4000 and Dash 5000 monitors Controls and indicators The user interface consists of a flat panel display and the keypad assembly that includes a Trim Knob control, function keys, and LED indicators. Flat panel display The active-matrix color liquid crystal display (LCD) is assembled into a shock absorbing isolator that fits within the patient monitor’s front bezel to protect the display from mechanical shock during use. The acrylic optical filter protects the display panel from impact and enhances visibility with its non-glare surface coating on the viewing side of the filter. It also has a scratch-resistance surface coating. Trim Knob control The Trim Knob control is a 24-position rotary control with a push selection switch. Function or power keys Dash 3000/4000 patient monitors Power, Print, NBP Go/Stop, Zero All, Silence Alarm/Admit. Dash 5000 patient monitor Power, Standby, Admit/Discharge, NBP Go/Stop, NBP Auto, Print, Silence Alarm, Zero All, Trend, Main Display. Power key The patient monitor is powered at all times when it is plugged into AC power. When the patient monitor is not plugged in to AC power, press this key to turn on and turn off the patient monitor. When AC power is present, this key toggles the operational mode of the patient monitor between normal operation and stand-by mode. In 2-6 Dash 3000/4000/5000 2000966-542D Equipment overview: Components standby mode patient monitoring discontinues. Only the charging function continues and the charging status indicators operate as described below. Indicators While the patient monitor powers up or changes between normal mode and standby mode, all four front panel indicators illuminate. AC power indicator The indicator lights green when AC mains power is applied to the patient monitor (including when the patient monitor is in the standby mode). The indicator does not illuminate when the patient monitor has no AC mains power. Battery power indicator The indicator lights yellow when the patient monitor is operating on battery power. The indicator does not illuminate when the patient monitor has no battery power. Battery indicators are located on the front panel of the patient monitor. They indicate when battery power is used and the battery charging status. Battery power indicators Dash 3000 Charge status indicators 009A Battery power indicators Dash 4000 Charge status indicators 053A Battery power indicators Dash 5000 Charge status indicators 868A Charging status indicators An icon for each battery indicates its charging status. The battery icon lights yellow when the respective battery is being charged. If both batteries are present and require charging, then both icons illuminate 2000966-542D Dash 3000/4000/5000 2-7 Equipment overview: Components even though they will be charged sequentially. The battery icon lights green when the respective battery is fully charged. When the patient monitor is operating under battery power the battery icons are not illuminated. The icons are also not illuminated when the respective battery is either not being charged, not installed, or has failed. The following table explains what the charging status indicators mean. NOTE No specific indicator distinguishes a failed battery pack condition from a condition where the battery is not installed or is not being charged. Go to the Service Menu for Battery Status. Refer to “Battery alarms and messages” on page 6-7 for further information. LED color Explanation Yellow Two battery icons, labeled Charging Status A and B, illuminate yellow when the respective battery is being charged. If both batteries are present and require charging, then both icons illuminate yellow even though they charge sequentially. Green The icon lights green when the respective battery is fully charged. No light The icon does not illuminate under the following conditions: The respective battery is not installed. The patient monitor is operating on battery power. A failure condition has been detected for the respective battery. Battery status indicators The battery status indicators are located inside the battery compartment. One green LED indicator is located above each of the two battery slots and lights green when the patient monitor is receiving power solely from the respective battery. The indicators do not illuminate when the patient monitor is not battery powered. Neither indicator lights when the patient monitor is operating from both batteries simultaneously (e.g., in a very low battery charge condition when both batteries are joined together in order to sustain operation of the patient monitor). Battery capacity gauge On-screen capacity gauges indicate the battery’s current state of health and charge status. A battery capacity gauge for each battery present displays below the parameter blocks in the lower right corner of the display. The capacity gauge indicates the remaining charge capacity (usable energy left) for each battery. 2-8 Dash 3000/4000/5000 2000966-542D Equipment overview: Components The capacity gauges fill in from left to right proportional to the battery charge level. The solid portion represents the full charge capacity of the battery as a percentage of its design capacity. 60 33 15 20080 23 SPO 105 100 90 *** RATE 70 % PA2 0 S mmHg 2 50 CO2 0 MORE MENUS 10:15:45 CO2 RSP HI 29 NO BREATH 15-DEC-2010 * ALARMS: BED3 - HR LOW ALRM RR 19 A Battery capacity gauges INSP 3 EXP CO2 38 50 -1 B 809C Network connection indicator Network connection indicators When the monitor is connected to the network, a network connection indicator appears in the lower right corner of the display. Icon Description Indicates that the monitor is connected to the Local Area Network (LAN). Indicates that the wireless mode is enabled on the monitor. Wireless signal strength indicator. Indicates that a connection to a Wireless Local Area Network (WLAN) has been established. The number of bars corresponds to the signal strength: four bars indicate a strong signal, one bar indicates a weak signal. Exchangeable or compatible battery packs WARNING EXPLOSION OR FIRE - Using non-recommended batteries could result in injury/burns to patients and users. Only use batteries recommended or manufactured by GE. The warranty can be voided if non-recommended batteries are used. Dash patient monitors running software versions 5.4 or later only recognize and charge GE recommended batteries. Non-recommended batteries will run, but not charge, the Dash patient monitor. If battery is labeled GE Approved, the battery is compatible. NOTE Incompatible batteries display an “ERROR” message in the Battery Capacity Gauge on the bottom right corner of the patient monitor screen. 2000966-542D Dash 3000/4000/5000 2-9 Equipment overview: Components Verify compatibility of an unmarked battery as follows. 1. Install a battery pack in the patient monitor. 2. Using the Trim Knob control, access the Service Mode menu starting from the Main Menu. Select MORE MENUS > MONITOR SETUP > SERVICE MODE. 3. Enter password using the Trim Knob control to select the day and month from patient monitor screen with leading zeros. (e.g. July 4 = 0407). 4. Select BATTERY SERVICE. 5. Verify that the MANUFACTURER NAME does not display INCOMPAT, NME, or UNKNOWN for the battery corresponding to BATTERY A or BATTERY B slot. Optional components TRAM-rac 2A module housing The TRAM-rac 2A module housing currently supports the SAM and ICG modules. 797B An integral power supply is used to run the TRAM-rac 2A and support the needed voltages. Dash Port 2 docking station The docking station is a quick mount/dismount base for a Dash patient monitor. It gives the patient monitor easy connect or disconnect access to AC power, CARESCAPE Network, a remote display, and auxiliary devices. See the Dash Port 2 Docking Station Operating Instructions and the Dash Port 2 Docking Station Service Manual for additional information. NOTE When a Dash patient monitor is connected to the docking station, only the docking station’s Ethernet port is active. The Dash patient monitor’s network port remains inactive until the patient monitor is disconnected from the docking station. 2-10 Dash 3000/4000/5000 2000966-542D Equipment overview: Components 823B An optional remote display can be connected to the system for viewing on a larger monitor, or in a separate room. The remote display requires: Dash Port 2 docking station, Dash 3000/4000 patient monitor software version 5 through version 7.1 with Dash Port 2 software version 2.0, or Dash 3000/4000/5000 patient monitor software version 7.2 or later with Dash Port 2 software version 2.1 or later, and Must be within 150 feet of the Dash patient monitor. ICG module The ICG module (impedance cardiography) measures and processes patient hemodynamic data. 825A BISx Available in software version 6 or later, BISx measures the effect of anesthetics and sedatives on the brain. 935A 2000966-542D Dash 3000/4000/5000 2-11 Equipment overview: Components Wireless connection The flexibility of the optional GE CARESCAPE Network is increased by using the wireless network. The wireless connection allows the user to roam from one access point to another, maintaining a strong seamless connection to the CARESCAPE Network. GE offers the 802.11a/b/g wireless option. The patient monitor, with its optional built-in wireless card, functionally performs the same as a patient monitor connected directly to the optional CARESCAPE Network. It can be viewed at the central station and by other GE monitors on the network (e.g., Dash 3000/4000/5000, Eagle™ 4000, and Solar™ patient monitors). Patient monitors with a wireless connection can send and receive patient data via the access points to the CARESCAPE Network. NOTE It is recommended that wireless patient monitors that are moved from room to room have their patient monitor type configured as Rover or Rover/Combo monitoring. To extend the CARESCAPE Network to a hospital’s 802.11a/b/g wireless network, a proper installation and configuration needs to be performed. To maintain continuous wireless patient monitoring, refer to the “Wireless LAN Network Configuration Guide” and contact GE for consultation in integrating the CARESCAPE Network to a 802.11a/b/g wireless network. To identify a patient monitor with the wireless option, look for the wireless LAN label. Wireless LAN label 004B 2-12 Dash 3000/4000/5000 2000966-542D Equipment overview: Components Optional remote control The optional remote control provides all patient monitor controls on a portable component with a Trim Knob control, and allows the user to operate the patient monitor from across the room. Eighteen hard keys are configured for adult, neonatal, or operating room applications. 821A 2000966-542D Dash 3000/4000/5000 2-13 Equipment overview: Software packages and software options Software packages and software options Software packages The Dash patient monitor comes configured with the Basic software package. This package consists of standard-of-care parameters, lethal arrhythmia detection, dose calculations, and features required by clinicians caring for acutely ill patients. Two additional software packages can be purchased separately or in any combination. These packages provide a variety of features that allow the patient monitor to be configured to best meet the needs of its intended environment. The Cardiac software package focuses on cardiac conductivity. Its features include full arrhythmia analysis and storage, as well as ST segment trending, storage, and templates. The ability to adjust the ST measurement point is also included in this package. The Cardiopulmonary software package centers on cardiac and pulmonary hemodynamics. Features include the PA insert and wedge algorithms, the intra-aortic balloon pump algorithm, and the thermodilution cardiac output algorithm, including predefined computation constants for the catheters of major manufacturers. Also included are cardiac and pulmonary calculations. Software options Three software options can be purchased separately or in any combination with the software packages and software options. The High Resolution CRG Trends option provides storage of up to 100 CRG events, and up to 24 hours of CRG trend data, in addition to the CRG feature set found in the Basic software package. The 12SL™ ECG analysis program with Gender Specific Criteria and the Acute Cardiac Ischemia–Time Insensitive Predictive Instrument (ACITIPI) analysis option uses recorded ECG data to produce a numerical score which is the predicted probability of acute cardiac ischemia. In addition, the gender-specific criteria improves the detection of acute myocardial infarctions (AMI) in women. The CARESCAPE Network option enables you to view other patients on the network, interface with a central station and other network devices, and perform Combo or Rover Combo monitoring. 2-14 Dash 3000/4000/5000 2000966-542D Equipment overview: Ethernet communication Ethernet communication About Ethernet The GE CARESCAPE Network uses Ethernet for device to device communications. This local area network links all patient monitors, clinical information centers, and other GE equipment throughout the hospital. Depending on the construction of the hospital, thick-net, thinnet, or CAT-5 twisted pair cabling is used. The Dash patient monitor is designed to be used with twisted-pair cabling. Consult GE when trying to interface with either thick-net or thin-net cabling. The real-time GE CARESCAPE Network operates at 10 Mbps, half-duplex. Twisted pair Twisted pair is the most popular cabling because it is easy to install and flexible to work with. It uses the star topology with a switch as the hub of the segment. A maximum of 100 meters or 328 feet is the longest length of twisted pair cable allowed. The maximum number of devices on the GE CARESCAPE Network is 1,000. Dash Dash CIC Pro Switches 1 to n CIC Pro Segment 2000966-542D Dash 3000/4000/5000 054B 2-15 Equipment overview: Ethernet communication Network Terms Node Each network device or node is assigned a Media Access Control (MAC) Address number and requires a network connection to interface between the network device and the network. Media Access Control (MAC) address A 48-bit address assigned by the manufacturer to uniquely identify a node of the network. This is also known as the Ethernet address. Switch To implement the star topology, each network device is connected to a network switch. The switch passes all network data between each network device in the star segment. Typically, the switch supports 12 to 48 network devices and may be linked to other switches to form larger networks. Segment A network segment is comprised of all devices connected to one or many switches which are in-turn connected together to form a larger network. The boundaries of the segment are defined by networking equipment that regulate the flow of packets into and out of the segment (e.g. routers and switches). IP address A 32-bit (IPv4) address assigned by the user (either statically or dynamically from a server) to uniquely identify the packets from a device for routing purposes. Subnet A subnet is a logical segment of a larger network that shares a common IP address range as defined by a subnet mask. Proper subnetting can improve the performance and security of a network. 2-16 Dash 3000/4000/5000 2000966-542D Equipment overview: Theory of operation Theory of operation Components The patient monitor is housed in a single package. The main components of the assembly are: Power supply Data Acquisition System Processor and power management subsystem (including battery case and expansion port) Speaker Handle subassembly (including the Alarm Light option) Thermal printer (optional) Battery Overall patient monitor block diagram Ethernet Aux Defib Sync DAS Module NBP Flex AC Mains Power Power Supply Board Patient Connections DAS Board Inverter Writer Speaker Battery Display Battery Backlight Processor Board Writer Flex Alarm Light Display Flex Patient Connector Flex Wireless Card Peripheral Expansion Connector Keypad Display Subassembly 2000966-542D Processor/Power Management Subassembly 516B Dash 3000/4000/5000 2-17 Equipment overview: Theory of operation Power supply The subsystems within the patient monitor operate from a common 9 to 18 V power bus. Due to the wide variety of voltages required by the various subsystems, power is converted locally by each subsystem. This architecture results in an efficient and compact system by reducing the number of conversions required and optimizing the physical size of each converter for the specific application. When operating on AC mains power, the power bus voltage is 18 V, generated by the offline switching power supply. No AC mains power switch is provided. The line voltage range switch must be set to select 115 V or 230 V (90 to 132 VAC or 190 to 264 VAC, respectively). Data Acquisition System (DAS) All interfaces to the patient occur through the DAS. The ECG function uses a direct connection to the patient; therefore it is separately isolated from the other functions (except respiration, which shares the ECG patient interface) to substantially reduce coupling of noise and leakage currents to/from other functions. All remaining DAS functions (e.g., pulse oximetry, NBP, invasive pressure, temperature, cardiac output, and CO2) share a common isolation barrier. NOTE The patient monitor supports three SPO2 configurations, Generic Ohmeda SPO2, Masimo SET SPO2, and Nellcor OxiMax SPO2. 2-18 Dash 3000/4000/5000 2000966-542D 2000966-542D Dash 3000/4000/5000 ETCO2 NBP SpO2 INV BP2 INV BP1 DUAL TEMP/ CARDIAC OUTPUT ISOLATION BARRIER 11 PIN ECG INPUT CONNECTOR MUX & A/D 68HSC05 38.4 KHz (MOUNTED ON 801368-001 HYBRID) CO2 CONTROL LOGIC MUX & A/D VREF CO2 IR SOURCE DRIVE / HEATER CONTROL -- 801370-001 CO2 SIGNAL PROCESSING & BARO PRESS -- 801368-001 BAROMETRIC PRESSURE SENSOR NBP CUFF PRESSURE SENSOR NON-INVASIVE BP -- 2008654-001 22.1184 MHz RESET IC (TO DIGITAL CIRCUITRY) +5V LDO REG DC-DC CONVERTER PRIMARY CIRCUITRY DIGITAL DATA COUPLERS TRANSCUTANEOUS PACE - BLANKING CONTROL 7.5KV SPARK GAP PS FEEDBACK COUPLER 128K x 8 SRAM FLASH 128K x 16 Serial E2PROM 4K x 8 DC-DC CONVERTER SECONDARY CIRCUITRY ISOLATION BARRIER MOTOROLA 68332 -12V +5.5V PULSE-OXIMETRY -- 801368-001 +12V DC-DC CONVERTER SECONDARY CIRCUITRY DUAL INVASIVE BP -- 801466-001 ISOLATION BARRIER 7.3728 MHz -12V +5V +12V TEMP CH2 -- 402100-004 TEMP CH1 -- 401788-004 FINAL AMP (V2-V6) -- 401787-001 FINAL AMP (I,II,III,V/V1) -- 401787-001 PACE REJECT (V2-V6) -- 401786-001 PACE REJECT (I,II,III,V/V1) -- 2007009-001 PACE DETECT (I,II,III,V/V1,V2-V6)-- 800982-001 ECG PREAMP II (V2-V6) -- 401790-001 ECG PREAMP (I,II,III,V/V1) -- 400869-004 RESPIRATION CARRIER -- 400870-001 RESPIRATION DEMODULATOR -- 400871-004 RESPIRATION COUPLING CAP VREF DEFIB PROTECTION MODULE -- 414639-002 DC-DC CONVERTER PRIMARY CIRCUITRY +9-18V NBP INTERFACE ASIC DIGITAL DATA COUPLERS 7.5KV SPARK GAP PS FEEDBACK COUPLER +9-18V TRANSDUCER SIGNAL CONDITIONING H0 H1 H2 H3 H4 H5 H6 H7 NBP_ENABLE RESET* DAS_ID0 DAS_ID1 +3.3V +3.3V +5V +5V +9-18V +9-18V +9-18V +9-18V GND GND GND GND GND GND GND GND PWR_ENABLE* SERIAL _DATA_IN SERIAL_DATA_OUT HA0 HA1 HA2 HRD* HWR* HCS* HOST_DMA_REQ* ACQ_TIMER_IRQ* TC_PACER_BLANK* GENERAL PURPOSE 8-BIT HOST INTERFACE NBP INTERFACE TO PUMP,VALVES & OVERPRESSURE TRANSDUCER +V_PUMP PUMP_DRV +12V_VALVE VALVE1_DRV VALVE0_DRV +5V GND PRESSURE Equipment overview: Theory of operation DAS block diagram with generic Ohmeda SPO2 ISOLATION BARRIER 528B 2-19 Equipment overview: Theory of operation The DAS block diagram with generic Ohmeda SPO2 consists of the following three sections. Section Description ECG/Respiration Separately isolated section includes a 7.3728MHz 68HSC05 microcontroller, A/D conversion, signal processing hybrids and DC-DC isolation converter. Main DAS Separately isolated section includes a 22.1184MHz 68332 microcontroller with FLASH and SRAM memory, A/D conversion, signal processing hybrids and DC isolation converter. Non-Isolated circuits Includes serial and parallel host interfaces and NBP pump, valves, and over-pressure circuitry. ECG The ECG function detects heartbeats and arrhythmias, measures heart rate (HR) and ST segment deviation, and generates a 12SL diagnostic interpretation. Patient alarms with adjustable high and low limits for HR and ST segment deviation are provided. Additional patient alarms are provided for arrhythmias and PVCs. System alarms for individual lead failure and all leads failure are provided. The patient monitor accepts the green 3, 5, and 10-leadwire Multi-link ECG connectors (compatible with Eagle 3000 monitor, Eagle 4000 monitor, and Tram modules). Respiration The respiration function measures respiration rate (RR) and detects apnea through the ECG leadwires using the impedance variation technique. Patient alarms for RR (with adjustable high and low limits) and apnea (with adjustable time limit) are provided. System alarms for lead failure, cardiac artifact, and learning are provided. Generic Ohmeda pulse oximetry (SpO2) The pulse oximetry function measures arterial oxygen saturation (SpO2) and peripheral pulse rate (PPR). Patient alarms with adjustable high and low limits for SpO2 and PPR are provided. System alarms for probe off patient, low-quality signal, and pulse search are provided. The patient monitor accepts the blue color-coded pulse oximetry connector (compatible with Eagle 3000 monitor, Eagle 4000 monitor, and the Tram x50-series modules). The patient monitor with Generic Ohmeda SPO2 supports Nellcor probes. 2-20 Dash 3000/4000/5000 2000966-542D Equipment overview: Theory of operation Non-Invasive blood pressure The NBP function measures systolic pressure, diastolic pressure, mean pressure, and heart rate. Patient alarms with adjustable high and low limits for systolic, diastolic, and mean pressures are provided. System alarms for deflation failure, inflation failure, maximum pressure exceeded, measurement time exceeded, pulse too weak, hardware malfunction, and system pressure leak are provided. The NBP function operates in manual, auto, and stat measurement modes. The patient monitor has backup protections for magnitude and duration of applied cuff pressure (with different settings in adult and neonatal modes). The patient monitor accepts the rectangular NBP connector (compatible with the Eagle 3000 monitor and some versions of the Tram module). Invasive pressure The invasive pressure function measures two blood pressures and calculates systolic pressure, diastolic pressure, mean pressure, and pulsatile pressure rate where applicable. Patient alarms with adjustable high and low limits for systolic pressure, diastolic pressure, mean pressure, and pulse rate are provided for each channel. System alarms for sensor status (failure and disconnected), Smart BP event (artifact), zeroing status (not zeroed, failure, and pressure sensed), and PA Wedge status (wait, inflate, processing, complete, and no pulse) are provided. The user can set an adjustable low-pass filter to 12 or 40 Hz. The 12 Hz filter is implemented in software; the filter is disabled at the 40 Hz setting. The patient monitor accepts the red color-coded invasive pressure connectors (compatible with the Eagle 3000 monitor, Eagle 4000 monitor, and Tram modules). Temperature The temperature function measures two temperatures. Patient alarms with adjustable high and low limits for temperature are provided. System alarms for sensor and calibration failures are provided. The patient monitor accepts the brown color-coded connector (compatible with the Eagle 3000 monitor, Eagle 4000 monitor, and Tram modules). The patient monitor supports EN 12470-4 compliant probes. The probe type is determined by identification signals in the probe adapter cable. The temperature connector and measurement circuits are shared with the cardiac output monitoring function; therefore you cannot use both functions concurrently. A signal in the patient cable indicates the appropriate function. 2000966-542D Dash 3000/4000/5000 2-21 Equipment overview: Theory of operation Cardiac output The cardiac output function measures blood temperature and injectate temperature, and uses the thermal dilution method to calculate cardiac output. Patient alarms with adjustable high and low limits for blood temperature are provided. System alarms for sensor failure and unstable blood temperature are provided. The patient monitor accepts the brown color-coded connector (compatible with the Eagle 4000 monitor and Tram modules). The cardiac output connector and measurement circuits are shared with the temperature monitoring function. You cannot use both functions concurrently. A signal in the patient cable indicates the appropriate function. Carbon dioxide (CO2) The CO2 function measures inspired and expired CO2 and respiration rate using the infrared light absorption technique. The patient monitor connects to an external CapnoFlex Low Flow Sidestream module or Novametrix Capnostat III sensor that clips to an airway adapter in the patient’s ventilation circuit. The circuits to drive the sensor and process its incoming signal are located within the DAS. Patient alarms with adjustable high and low limits for inspired CO2, expired CO2, and respiration rate are provided. An additional patient alarm for no breath detected is provided. System alarms for various sensor conditions are provided. The patient monitor accepts the yellow color-coded connector. 2-22 Dash 3000/4000/5000 2000966-542D Equipment overview: Theory of operation DAS block diagram with Masimo SET SPO2 931B 2000966-542D Dash 3000/4000/5000 2-23 Equipment overview: Theory of operation The DAS system block diagram with Masimo SET SPO2 and four SuperStat BP channels consists of the following three sections. Section Description ECG/Respiration Separately isolated section includes a 7.3728MHz Motorola MC68HSC705C8A microcontroller, A/D conversion, signal processing hybrids and DC-DC isolation converter. Main DAS Separately isolated section includes a 22.1184MHz Motorola MC68332 microcontroller with FLASH and SRAM memory, an Analog Devices ADSP-21062 32-bit floating point digital signal processor running at 12.096MHz, A/D conversion, signal processing hybrids/modules and DC-DC isolation converter. Non-Isolated circuits Includes ECG and Main DAS isolation power conversion circuitry, serial and parallel host interfaces and NBP pump, valves, and over-pressure circuitry. Parameter functions of the DAS with Masimo SET SPO2, four BP channels and Dinamap SuperSTAT NIBP Except for the SPO2 parameter and additional 2 IBPs, the DAS with the Masimo SET SPO2 parameter supports the same parameters as DAS with the GE Ohmeda SPO2 parameter. Refer to “ECG” on page 2-20. Probes and cable The Masimo compatible DAS is intended for use exclusively with pulseoximetry probes from Masimo Corporation. An adapter cable is used to interface the probes to the DAS front panel Nicolay connector. The Nicolay connector utilizes a key pattern unique to Masimo. 2-24 Dash 3000/4000/5000 2000966-542D 2000966-542D Dash 3000/4000/5000 MUX & A/D 68HSC05 (MOUNTED ON 801368-001 HYBRID) MUX & A/D VREF Serial E2PROM 4K x 8 38.4 KHz -12V +5V +12V FLASH 512K x 8 CO2 INTERFAC ASIC CO2 SIGNAL PROCESSING & BARO PRESS -- 801368001 CO2 IR SOURCE DRIVE / HEATER CONTROL -- 801370001 BAROMETRIC PRESSURE SENSOR NBP CUFF PRESSURE SENSOR 4-IBP and SUPER BP -- 2013329001 Empty TEMP CH1 -- 401788004 TEMP CH2 -- 402100004 7.3728 MHz ISOLATION BARRIER RESPIRATION DEMODULATOR-- 400871001 RESPIRATION CARRIER-- 400870001 ECG PREAMP (I,II,III,V/V1) -- 400869004 ECG PREAMP II (V2-V6) -- 401790001 PACE DETECT (I,II,III,V/V1,V2-V6)-- 800982001 PACE REJECT (I, II,III,V/V1) -- 401786001 PACE REJECT (V2 -V6) -- 401786001 FINAL AMP (I,II,III,V/V1) -- 401787001 FINAL AMP (V2 -V6) -- 401787001 RESPIRATION COUPLING CAP DETAILED BLOCK DIAGRAM DASH Nellcor 05 Data ETCO2 NBP SpO2 INV BP2/BP4 INV BP1/BP3 DUAL TEMP/ CARDIAC OUTPUT ISOLATION BARRIER 11 PIN ECG INPUT CONNECTOR VREF DEFIB PROTECTION MODULE 414639- SRAM MOTOROL 68332 22.1184 MHz 128K x 8 +3.3V LDO REG DC-DC CONVERTE RPRIMARY CIRCUITRY DIGITAL DATA COUPLERS UART MP100 PCB Module (TO SPO2 CONNECTOR) DC-DC CONVERTE S RECONDAR YCIRCUITRY I S O L A T I O N TRANSCUTANEOUS PACE - BLANKING CONTROL DC-DC CONVERTE RPRIMARY CIRCUITRY +9-18V ASIC NBP INTERFACE TRANSDUCE R SIGNAL CONDITIONIN G OVERPRESSUR ETRANSDUCE R DIGITAL DATA COUPLERS 7.5KV SPARK GAP PS FEEDBACK COUPLER +9-18V 7.5KV SPARK GAP PS FEEDBACK COUPLER ISOLATION BARRIER (TO CIRCUITRY) DIGITAL +5V LDO REG RESET IC +12V -12V +5.5V DC-DC CONVERTE S RECONDAR YCIRCUITRY HRD* HWR* HCS* HA0 HA1 HA2 H0 H1 H2 H3 H4 H5 H6 H7 SERIAL _DATA_IN SERIAL_DATA_OUT NBP_ENABLE RESET* DAS_ID0 DAS_ID1 +3.3V +3.3V +5V +5V +9-18V +9-18V +9-18V +9-18V GND GND GND GND GND GND GND GND PWR_ENABLE* TC_PACER_BLANK* GENERAL PURPOSE 8-BIT HOST INTERFACE NBP VALVE/MANIFOLD ASSEMBLY NBP PUMP ASSEMBLY Equipment overview: Theory of operation DAS block diagram with Nellcor 05 (OxiMax) SPO2 932A 2-25 Equipment overview: Theory of operation The DAS block diagram with Nellcor 05 DAS PCB assembly consisting of three sections: Section Description ECG/Respiration Separately isolated section includes a 7.3728MHz 68HSC05 microcontroller, A/D conversion, signal processing hybrids and DC-DC isolation converter. Main DAS Separately isolated section includes a 22.1184MHz Motorola MC68332 microcontroller with FLASH and SRAM memory, an Analog Devices ADSP-21062 32-bit floating point digital signal processor running at 12.096MHz, A/D conversion, signal processing hybrids/modules and DC-DC isolation converter. Non-isolated circuits Includes serial and parallel host interfaces and NBP pump, valves, and over-pressure circuitry. The DAS design includes the Nellcor MP100 Module technology. Nellcor SPO2 is classified as motion-resistant. It uses advanced digital signal processing algorithms to extract very low-level SPO2 signals in the presence of artifact induced noise. The DAS contains all circuitry necessary to support the MP100 Module. The Nellcor MP100 Module contains: All SPO2 front end circuitry, such as the digitally programmable photodetector signal conditioning, A/D conversion, digitally programmable back-to-back LED IR/RED emitter drive and on-board diagnostic / sensor identification signal processing circuits. A digital signal processor (DSP), clock circuitry, and program memory. The Nellcor SPO2 algorithms executes on the DSP. No external memory interface is provided. The DSP is "reset-able" by the DAS CPU. A UART for communication of commands and data. Parameter functions of the DAS with Nellcor OxiMax SPO2, four BP channels and Dinamap SuperSTAT NIBP Except for the SPO2 parameter and additional 2 IBPs, the DAS with the Nellcor OxiMax SPO2 parameter supports the same parameters as DAS with the GE Ohmeda SPO2 parameter. Refer to “ECG” on page 2-20. Probes and cable The DAS is intended for use only with Nellcor digital probes. It is not for use with non-Nellcor probes or with Nellcor R-cal (resistor id) probes. An adapter cable is used to interface the probes to the DAS front panel Nicolay connector. 2-26 Dash 3000/4000/5000 2000966-542D Equipment overview: Theory of operation Processor/power management subsystem Overview The main processor/power management PCB contains the electrical hardware to provide data processing and display of patient and monitor configuration data, communication and interface circuitry, and power conversion and battery management functions for the patient monitor. The high level of integration attained in the design of the processor/ power management PCB is attributed to the use of several highly integrated devices. A complex communications controller, ASIC, and battery management hardware significantly improve the performance and reduce the complexity and cost of the assembly. In addition to the CPU, the main microcontroller contains a six-channel communications processor as well as memory, compact flash wireless card, and video controllers. The devices used in the core processing architecture all operate at 3.3 V to minimize power consumption, yet the main processor and ASIC are tolerant of 5 V hardware peripherals. 2000966-542D Dash 3000/4000/5000 2-27 2-28 Dash 3000/4000/5000 ECG OUT BP OUT MARKER IN MARKER OUT 7-PIN MINI DIN AM LCD DISPLAY 2 10-PIN HEADER 3.6864 MHz DEVELOPMENT SUPPORT 50 MHz SYSTEM CLK PCMCIA CONTROLLER SPI CONTROLLER D/A & ANALOG CIRCUITRY LCD CONTROLLER MICROCONTROLLER I C CONTROLLER UART CONTROLLER (SCC2) UART CONTROLLER (SMC2) UART CONTROLLER (SMC1) ETHERNET CONTROLLER (SCC1) ADDRESS DATA AND CONTROL BUS -12V +12V +5V +3.3V RESET DEFIB SYNC INTERFACE DISPLAY BRIGHTNESS CONTROL +V BAT DC-DC CONVERTER BATTERY BACKED REAL-TIME CLOCK POWER ON/OFF CONTROL & BATTERY CHARGER & BATTERY SELECTOR CIRCUITRY +9-18V RESET CIRCUIT 2KB EEPROM-CONFIGURATION DATA 5-TERMINAL SMART BATTERY CONNECTORS POWER ON/OFF KEY AC POWER OFF-LINE CONVERTER BOARD +18V 3V BATTERY FRONT PANEL MANUAL RESET WIRELESS CARD TONE GENERATOR SYSTEM CONTROL LOGIC RJ-45 50-PIN THERMAL RECORDER CONNECTOR AUX INTERFACE WIRELESS CARD CONNECTOR ALARM LIGHT CONNECTOR 3 DIAGNOSTIC LEDS SPEAKER POWER/BATTERY STATUS LEDS WATCHDOG ENABLE SWITCH TRIM KNOB, 5 HARD KEYS 8MB FLASH--CRG TRENDS 4MB SGRAM--VIDEO/VOLATILE DATA 4MB FLASH--MAIN CODE 1MB BATTERY BACKED SRAM--PATIENT DATA THERMAL RECORDER INTERFACE DUART ECG/DAS RESERVED EXPANSION PERIPHERAL INTERFACE ETHERNET INTERFACE RJ-45 Equipment overview: Theory of operation Block diagram of microprocessor and power management subsystem 574B 2000966-542D Equipment overview: Theory of operation Main microcontroller The microcontroller contains two processors: a true internal and external 32-bit CPU core, and a communications processor module (CPM). The CPM contains an 8 kilobyte dual port RAM to communicate with the CPU core, and once configured communicates with external devices with minimum CPU intervention. External logic is reduced by the internal memory controllers and a system interface unit which provides a clock synthesizer and timers used in this design. Writer communications is supported by direct memory access and processing performance is enhanced by 4-kilobyte instruction and data caches. Microcontroller feature 2000966-542D Patient monitor function Serial Communications Controller 1 CARESCAPE Network Serial Communications Controller 2 DAS communication Serial Management Controller 1 Peripheral expansion communication Serial Management Controller 2 Reserved Interprocessor-Integrated Controller Batteries, battery charger, Real-time clock, digital potentiometer for display brightness control Serial Peripheral Interface DAC for ECG and BP analog outputs; ASIC configuration User Programmable Machine A Memory controller for synchronous graphics RAM User Programmable Machine B Memory controller for synchronous flash General-Purpose Chip-Select Machine Memory and peripheral device control LCD Controller Color display Compact Flash Wireless Card Controller Wireless card DMA Writer communication System Phase-Locked Loop (SPLL) Generation of system clock from crystal oscillator Dash 3000/4000/5000 2-29 Equipment overview: Theory of operation Microprocessor supervisory circuit, microcontroller internal Watchdog timer The microprocessor supervisory circuit provides reliable operation of the main processor board. This circuit monitors the +3.3 V power supply and asserts a 140 mS active low reset pulse when the power supply voltage is below +3.0 V during power-up and power-down conditions. A 3 V, 0.5 A hour lithium battery is used to preserve the contents of two SRAM devices and a real-time clock (RTC) when VCC is below the reset threshold. System control logic The system ASIC contains all of the system control logic for the processor/power management PCB. Such functions include address decoding, peripheral read and write control strobes, smart battery control logic, display control, multiple I/O ports, and front panel key switch debouncing. Memory Eight megabytes of non-volatile memory are provided to support the boot code and expansion memory such as high resolution graphic trends data storage. The boot block is write protected. Eight megabytes of non-volatile memory are provided to support the main software application code. Sixty-four megabytes of volatile memory are provided by the synchronous graphics RAM. This memory is used for stack, variable storage, dynamically allocated memory and video data storage. One megabytes of battery-backed SRAM supports storage of 24 hours of 1-minute resolution patient trends, an error log containing 50 input errors, and 50 output errors and storage for the CPM buffers. The patient monitor configuration data such as Internet and Ethernet addresses, unit name and bed number are maintained in memory. 2-30 Dash 3000/4000/5000 2000966-542D Equipment overview: Theory of operation Real-time clock The real-time clock incorporates an on-board quartz crystal. This feature simplifies the design and eliminates adjustments. The time of day on a standalone patient monitor is maintained to an accuracy of 15 seconds in 24 hours to support 24 hour trend data. The RTC device is one of the devices on the I2C bus. Audio subsystem Audio tones are generated using a tone generator, an audio amplifier, and an 8, 2.5-in. speaker. The tone generator has built in D/A converters and a mixer to generate the dual frequency tones. Frequencies ranging from 150 Hz to 2800 Hz are produced. Video subsystem The microprocessor contains a video controller that supports real-time and non-real-time waveform drawing, menu drawing, and parameter display. Display brightness is controlled by a 50 k digital potentiometer. The potentiometer is interfaced to the brightness control input of an inverter. Analog outputs Two analog output channels support ECG and BP. The pace pulse is generated on the main processor board and inserted into the analog out ECG signal. The digital-to-analog conversion for both ECG and blood pressure output signals are performed on the main processing board via a two channel 12-bit serial DAC. Cal data is stored on the processor/ power management PCB. Defib Sync The QRS complex of ECG data acquired from the DAS generates the marker-out signal. A software selectable pulse width and pulse amplitude is provided in the Boot Loader Menu. 2000966-542D Dash 3000/4000/5000 2-31 Equipment overview: Theory of operation Optional thermal printer The thermal printer includes complete control of the print head to print the desired waveforms and text as well as monitor power consumption. The host processor on the main processing board has direct communication via an 8-bit data bus to the processor residing within the thermal recorder. The +9-18 V power supplied to the writer is heavily filtered to provide the storage capability to smooth power surges and transients caused by abnormal thermal printing. Such printing may occur if the patient monitor is subjected to ESU noise. In addition, a writer current limiting circuit restricts the current to the writer to 2.5 A. If this current limit is exceeded, the circuit faults and requires the current limiting circuit to reset through a microprocessor port. Optional alarm light indicator An alarm light indicating two levels of visual alarms resides in the handle of the Dash 3000 patient monitor and in the display bezel of the Dash 4000/5000 patient monitors. Red and yellow alarm lights illuminate by addressing an ASIC output port. The Dash 3000 alarm light interfaces to the processor/power management PCB via the 40-pin writer interface. The Dash 4000/5000 alarm lights interface to the processor/power management PCB via the 100-pin DAS/Display / Keyboard interface. Compact flash wireless card The main processor contains a compact flash (CF) card controller, which complies with the CF standard. One 50-pin fully compliant Type II CF card slot is supported in this design for a wireless card. Peripheral expansion interface A 20-pin peripheral expansion interface is provided to support future use. An active low peripheral present signal may be polled by software to identify when a peripheral is attached to the patient monitor. Asynchronous, AUX, and a switched Ethernet serial communication channels are supported as well as switched +9-18 V and +5 V power. DAS communication The microprocessor communicates with the DAS processor using the second serial communication controller (SCC) of the communication processor module (CPM). This asynchronous communication channel operates at TTL levels and is optically isolated within the DAS. 2-32 Dash 3000/4000/5000 2000966-542D Equipment overview: Theory of operation Optional CARESCAPE Network communication The microprocessor provides an Ethernet controller, which is implemented on SCC1 in order to benefit from the additional buffer descriptors compared to SCC2. Ethernet packets are stored in SRAM buffers and are transmitted and received by the 10BASE-T transceiver. The Ethernet clocks are generated from a 20 MHz crystal oscillator circuit and the transceiver. The transceiver also provides a visual indication in the form of four LEDS to identify packet transmit, receive, collision, and link integrity. The status of received data is indicated by the link integrity signal, which is used by the microprocessor to determine if the patient monitor is connected to the CARESCAPE Network. An isolation transformer provides basic insulation to the twisted pair interface required to meet the ANSI/IEEE 802.3 standard (Ethernet). Isolation is required because during transport the power cord with the ground conductor is not available to provide a path for a fault condition. An 8-pin RJ-45 port containing two isolated, differential pairs is provided to connect the patient monitor to a network hub. NOTE Power is not provided in the twisted pair interface as in the attachment user interface (AUI) of other monitoring products. Ethernet priority Ethernet communications are prioritized in the following order. 1. Top priority is the Peripheral Expansion interface. 2. Next priority is the Hardwired Ethernet connection at the back of the patient monitor. 3. Lowest priority is the optional wireless connection. If none of the above exist, then the patient monitor is a stand-alone monitor. Async communication Asynchronous communication ports comply with the GEMMS AutoPort protocol and are provided through an 8-pin RJ-45 port and the 20-pin peripheral interface described in the next section. 2000966-542D Dash 3000/4000/5000 2-33 Equipment overview: Theory of operation Debug patient monitor and diagnostic LEDs An integrated debugger operating in the debug mode within the main processor provides basic emulator-like features such as modification of register and memory locations and setting of breakpoints. The connector required for this serial communication is a dual row 10-pin header. This connector is located within the patient monitor and is not intended for field service use. Tracing of instructions and logic analysis is provided by an adapter board that connects to a socket installed on the main processor board instead of the microprocessor. Three diagnostic LEDs located along the front edge of the board are provided for general purpose use and are under software control. The LEDs interface directly to port A of the microprocessor. A flashing green LED indicates normal monitoring operation. Main DC-DC converter section The main DC-DC converter consists of two independent synchronous rectifier buck regulators with one common controller. The patient monitor uses a “point of use” power conversion architecture with +9-18 V being the main power distribution bus. Four voltage outputs are developed on the processor/power management PCB: +3.3 V, +5 V, +12 V, and –12 V. Each one of the four outputs are individually current limit protected against overload and short circuit. Battery subsystem Battery charging and control is accomplished on the processor/power management PCB. The battery is a smart battery and features an on-pack fuel gauge. 2-34 Dash 3000/4000/5000 2000966-542D Equipment overview: Theory of operation Lithium-Ion battery power The patient monitor is designed to operate on battery power during transport or whenever AC power is interrupted. A complete battery management system allows you to obtain maximum battery performance. Audible and visual alarms alert you when loss of power is imminent and on-screen capacity gauges indicate battery charge condition and capacity. Depending on usage, you can get up to 2.5 hours of run time per battery for new, fully-charged batteries. Monitoring NBP, CO2 and SpO2 drain battery power faster than other parameters. The display technology and brightness, graphing, and connection to a wireless network can also alter battery run times. NOTE A BATTERY LOW message at the top of the screen warns you prior to complete loss of battery power. Replace the battery or connect the patient monitor to an AC power source when the message displays. The Lithium-Ion battery is a rechargeable battery containing LithiumIon cells. Each battery contains an integrated electronic fuel gauge and a safety protection circuit. Impact of Lithium-Ion Battery technology on the battery The following are key points to know about Lithium-Ion battery technology: The battery self-discharges on its own, even when it is not installed in a patient monitor. This discharge is the result of the Lithium-Ion cells and the bias current required for the integrated electronics. The battery self-discharges. The self-discharge rate doubles for every 10°C (18°F) rise in temperature. The capacity loss of the battery degrades significantly at higher temperatures. As the battery ages, the full-charge capacity of the battery degrades and will permanently be lost. As a result, the amount of charge that is stored and available for use is reduced. How to improve battery performance Installation guideline Position the patient monitor in a location that does not artificially increase the operating temperature of the battery. To optimize battery life and performance, choose a location that does not artificially increase the ambient temperature surrounding the patient monitor. 2000966-542D Do not place the patient monitor near a heat vent or near heatgenerating equipment, such as computer monitors. Avoid placing the patient monitor in corners where the airflow may be restricted. Dash 3000/4000/5000 2-35 Equipment overview: Theory of operation Charging guideline NOTE The Cadex SMart Two+ charger is no longer available for purchase. However, if your site has a Cadex SMart Two+ charger, you should continue to use it to charge and condition the battery. Use the Cadex SMart Two+ charger to charge the battery instead of charging the battery inside the patient monitor. The Cadex SMart Two+ charger maintains a lower battery cell temperature during the charge cycle than the patient monitor. This reduction in temperature will extend the life of the battery. The Cadex SMart Two+ charger charges one battery in less than 4 hours and two batteries in less than 8 hours. When two batteries are used, the charger applies half of the charging current to each battery. Conditioning guideline NOTE The Cadex SMart Two+ charger is no longer available for purchase. However, if your site has a Cadex SMart Two+ charger, you should continue to use it to charge and condition the battery. Remove the battery from the patient monitor every six months and condition it using the Cadex SMart Two+ charger. This condition cycle recalibrates the electronic fuel gauge. Storage guidelines Do not purchase more batteries than you will use in one year. The battery does not have an indefinite shelf-life. See “How to store the battery” on page 5-12. How to identify battery charge capacity Battery capacity definitions The following terms are used to define the capacity of the battery: Design Capacity — The theoretical capacity of the battery cells when the battery is new. Full Charge Capacity — The actual amount of charge the battery can store and deliver to the patient monitor. Remaining Charge Capacity — The amount of Full Charge Capacity currently remaining in the battery. This is a percent of Full Charge Capacity. Identify battery charge capacity using the patient monitor that has 100% Design Capacity and is charged to of this capacity approximately Full Charge Capacity declines, the approximate run time of a fully charged battery will decrease. 2-36 Dash 3000/4000/5000 2000966-542D Equipment overview: Theory of operation Single battery run time: approximately 2.5 hours – An icon fully outlined with solid lines and completely filled indicates a new battery, fully charged to its Design Capacity. Design Capacity and Full Charge Capacity 857A Single battery run time: approximately 2.0 hours – The dotted portion of the icon outline shows that the battery has lost 20% of its Design Capacity. The solid-outline portion is filled in, showing that the battery is charged to 100% Full Charge Capacity. Full Charge Capacity 858A Single Battery Run Time: Approximately 1.0 Hours – The dotted portion of the icon outline shows that the battery has lost 20% of its Design Capacity. The solid-outline portion is half filled in, showing that the battery is charged to only 50% of available capacity. Full Charge Capacity 859A 50% Available Capacity Identify battery capacity using the Cadex SMart Two+ charger NOTE The Cadex SMart Two+ charger is no longer available for purchase. However, if your site has a Cadex SMart Two+ charger, you should continue to use it to charge and condition the battery. When you select the Target Capacity switch on the charger, the charger compares the battery’s performance to a 60%, 70%, or 80% target capacity set on the battery charger. If the battery fails to meet the target performance, the battery charger will prompt you to condition the battery. If after the condition cycle has been completed, the battery does NOT meet the target performance, then the battery charger will illuminate a “fail” light. 2000966-542D Dash 3000/4000/5000 2-37 Equipment overview: Theory of operation Identify battery status using the BATTERY STATUS menu This menu option opens a menu and information window that provides current battery status information. 1. Select MORE MENUS from the Main Menu. 2. Select BATTERY STATUS to display the BATTERY STATUS Menu and information window. 2-38 If a battery is not present, NO BATT displays in the SLOT STATUS column. If communication with the battery has failed, NO COMM displays in the SLOT STATUS row and UNKNOWN displays in all other rows. If a battery is incompatible, INCOMPAT displays in the SLOT STATUS column and UNKNOWN displays in all other fields. Dash 3000/4000/5000 2000966-542D Equipment overview: Theory of operation Battery Help menu ↑ ↓ 835A Each menu option opens an information window that includes the following information: RETURN — Returns to the Battery Status menu. SLOT STATUS — Provides definitions of the battery conditions. NO BATT — No battery is installed in this slot. INIT... — Battery is just installed, establishing communication. NO COMM — Communication with this battery has failed because it is either sleeping, defective, or not a SMart Battery. INCOMPAT — The battery is not compatible with this patient monitor’s battery management system. FAIL — See message displayed in the lower half of the display. IN USE — This battery is currently powering the patient monitor. FULL — Fully charged. CHARGING — Currently being charged. IDLE — Not currently in use or charging. TIMES — Defines “time to empty” and “time to full.” TIME TO EMPTY: — The time to empty represents an estimate of how much longer the patient monitor will be able to run with the current monitored parameters. Changing the setup, running NBPs, printing graphs, etc. will likely change the value of the time remaining. This value is only displayed when the patient monitor is powered by battery. TIME TO FULL: — The time to full represents an estimate of the time remaining before this battery is fully charged. Total recharge time for this unit is the sum of both batteries’ time to full. FUEL GAUGES — Explains the battery capacity gauges. The fuel gauge is filled from the left to right proportional with the battery’s charge level. The full rated capacity of a new battery of this type is represented by a dashed outline. The maximum charge level for the battery currently installed is represented by a solid outline. As a battery ages, its maximum charge level becomes a smaller percentage of its Design Capacity. The solid portion represents the current charge level of the battery as a percentage of its maximum Full Charge Capacity. 2000966-542D Dash 3000/4000/5000 2-39 Equipment overview: Theory of operation ALARMS — Explains low battery and battery fault alarms and messages. FAULT STATUS MESSAGES: — General, charging, and temperature failures indicate that the battery has failed, or the charging of the battery has failed. Replace it with a different battery. CONDITION: — Condition this battery using an external battery charger. LOW BATTERY ALARMS: — The patient monitor will issue a System Warning alarm when there is approximately 10 minutes per battery run time remaining. The patient monitor will issue a System Warning alarm when shutdown is imminent (less than one minute left of remaining run time). Speaker The speaker is used for audible notification of alarms. Handle subassembly The handle serves multiple purposes in the patient monitor. The modular design enables the user to add adapters for specialized applications. The Dash 3000 handle houses the optional alarm light. This light is visible for 360° surrounding the patient monitor. The light is intended for applications when the audible notification is not useful or effective, such as noisy environments (e.g., emergency vehicles) or quiet environments (e.g., neonatal care areas). The alarm light indicates two levels of visual alarms: Crisis alarms (red LED) and Warning alarms (amber LED). The handle also houses the wireless card antennas required for the optional wireless card subsystem. Interfaces Ethernet The Ethernet RJ-45 port provides a hardware connection to the optional CARESCAPE Network. The patient monitor has a built-in transceiver for twisted-pair wire. Basic insulation (1500 VAC) isolates the patient monitor from networked devices. AUX The AUX RJ-45 port provides an asynchronous communication connection to devices within the bedside care area. Basic insulation (1500 VAC) isolates the patient monitor from other devices. 2-40 Dash 3000/4000/5000 2000966-542D Equipment overview: Theory of operation Defib Sync The Defib Sync port provides signals needed to perform synchronized cardioversion with a defibrillator. The Marker Out signal is a pulse with selectable amplitude and width that coincides with the patient’s ECG Rwave. The Marker In signal is returned to the patient monitor by the defibrillator. The Marker In signal causes the patient monitor to insert a defib marker in the displayed ECG waveform. This port also provides two analog signals: ECG and invasive pressure. The patient monitor provides the top displayed ECG signal with reconstructed pace pulses. You can use this signal to trigger a defibrillator or intra-aortic balloon pump. BP1 produces the pressure signal and is intended for triggering an intra-aortic balloon pump. Peripheral expansion Asynchronous communication, Ethernet (shared with the Ethernet RJ45 port), 9-18 V power, 5 V power, and discrete I/O signals are provided in the peripheral expansion interface ports. The expansion port pairs with the AC mains power inlet to supply power to the patient monitor through a peripheral device. Wireless LAN Initialization Initialization begins on a card insertion function call from card services. The card insertion function checks the manufacturer and card ID. Initialization includes: Access Configuration Register - Set through card services to the manufacturer's recommended value. The MAC Address is set to the Dash's MAC address to provide seamless transition from hardwire to wireless and back. SSID - Set to stored value. This ID must be the same between a card and an access point for them to associate. Reception The read task waits on a receive interrupt from the card. When awakened, the packet length is validated and the packet is copied into an ethernet buffer. A transfer function using byte-sized transfers is used to ensure the access time to the card is minimized. The packet length and pointer is returned to the ethernet stream. 2000966-542D Dash 3000/4000/5000 2-41 Equipment overview: Theory of operation Transmission The write task waits on a transmission packet to be queued. When awakened, the card is checked for association to an access point and for an available transmit buffer. Transmits are discarded if both are not true. The packet is copied into the card and a transmit command is issued to the card. The transmit task waits on a transmit complete interrupt from the card. This ensures a transmit buffer will be ready for the write. Error handling The card does not support partial packets or other receive errors. On a transmit error the buffer will not be resent. Other events like buffer and queue overflows are reported through the error log system. Association status Each association change is reported through the error log system. Command queue Commands are queued if the Wait On Command (WOC) bit indicates the card has not completed the previous command. Commands that must complete are issued through a function call that ensures the command is completed before returning. This function delays between each check of the card to allow other tasks to run and must not be called with interrupts off or from within an interrupt. Card enable/disable The patient monitor network task determines which active network media should be used for ethernet communication. The peripheral connector has the highest priority followed by the rear connector then wireless. Interrupts to the wireless card are disabled until an enable wireless call is made by the patient monitor network task. Disabling the card simply turns these interrupts back off. Card events like association changes and receive overflows may be logged when interrupts are enabled, but this provides faster switch over between hardwire and wireless than resetting the card and re-initializing it on an enable. Storage and backup Program code storage Executable program code for the main processor, DAS processor, and thermal printer are stored in non-volatile programmable memory. To display the revision of the currently stored code, access the submenu of the main application’s Monitor Setup menu. Patient monitor settings The processor/power management PCB stores default patient monitor settings in non-volatile memory. The user must restore the original settings if replacing the board. 2-42 Dash 3000/4000/5000 2000966-542D Equipment overview: Theory of operation Patient data storage Static RAM backed up by a lithium battery soldered onto the processor/ power management PCB stores patient data. Time and date A patient monitor on the network maintains time and date for at least five years. Time is accurate to within one second in ten hours. The clock is synchronized with a time master on the optional CARESCAPE Network. Calibration data Calibration factors for NBP and CO2 are stored in non-volatile memory on the DAS board. Calibration factors for the analog output signals are stored in nonvolatile memory on the processor/power management PCB. Error log Input and output errors are retained in static RAM backed up by a lithium battery soldered onto the processor/power management PCB. Contents are retained for at least five years, provided that you exercise caution when you handle the board to prevent inadvertently discharging the battery (e.g. when you ship the board for problem diagnosis). Optional thermal printer The patient monitor uses the same 50-mm thermal printer module that is used in the PRN 50 stand-alone printer. It prints up to four waveforms at chart speeds ranging from 0.1 to 50 mm/s. The printer software is loaded independently from the patient monitor’s software. In the patient monitor, the printer module limits its current consumption to stay within its allocated system power budget. 2000966-542D Dash 3000/4000/5000 2-43 Equipment overview: Theory of operation 2-44 Dash 3000/4000/5000 2000966-542D 3 2000966-542D Installation Dash 3000/4000/5000 3-1 Installation: Installation overview Installation overview The following illustrates the installation steps for patient-ready monitoring. 1. Check received equipment against the sales order. 2. Unpack equipment and inventory contents. 3. Inspect the equipment and its components carefully prior to installation. Refer to “Inspection” on page 3-3. 4. (Optional) Insert two batteries into the battery compartment slots. (Batteries should be charged for 4 hours before using device on patients.) 5. Connect the power cord to the power supply inlet on the Dash patient monitor. Secure the power cord to the back of the Dash using the power cord retention clamp, unless the Dash is used with the Dash Port 2 docking station. Then plug the power cord into the AC power outlet. 599A 6. Connect peripheral equipment and network, if applicable. 7. Power up the Dash monitor. Go to “Configuration” on page 4-1 to configure for stand-alone or networked monitoring. 8. Connect patient cables per the operator’s manual. 9. Qualified personnel must perform the “Dash installation checkout procedure” on page 3-8, and should record the values of each required electrical safety test in the “Checklist” on page D-1. 3-2 Dash 3000/4000/5000 2000966-542D Installation: Inspection Inspection Inspect the equipment and its components carefully prior to installation. Do not use the equipment if damage is determined. Refer damaged equipment to qualified service personnel. 1. Inspect the case for cracks or other physical damage to the case, the display screen, and the keypad. 2. Inspect cables for fraying or other damage. 3. Inspect all plugs and connectors for bent pins or other damage. 4. Inspect the display face for marks, scratches, or other damage. NOTE Physical damage to the flat panel display glass may pose an implosion hazard. 5. Safety labels and inscription on the device are legible. NOTE Damaged cables or equipment should be replaced by service personnel. 2000966-542D Dash 3000/4000/5000 3-3 Installation: Before you begin... Before you begin... The following installation information assumes that the equipment is new from GE manufacturing. The monitor was thoroughly tested before it was shipped. If intending to use the Dash patient monitor under battery power, consider charging the batteries in a charger during the checkout procedures. Otherwise, insert batteries in the battery compartment as shown. CAUTION Leaks from battery cells can occur under extreme conditions. The liquid is caustic to eyes and skin. If the liquid comes into contact with eyes or skin, flush with clean water and seek medical attention. The battery compartment is located on the lower left side of the patient monitor. Depending on your model, the battery doors may be one of the two variations shown below. Battery indicators let you know when the patient monitor is using battery power. WARNING Make sure the batteries are completely inserted and that the battery door is securely latched. Falling batteries could seriously or fatally injure a neonatal patient. Insert the battery packs in the battery compartment. The battery compartment may be a single plastic door or two silicone doors. 634B Battery status indicator 635A Insert this end first 3-4 Dash 3000/4000/5000 928A 2000966-542D Installation: Connections Connections Back panel connections The back of the patient monitor has all ports for equipment and network connections. ETHERNET Aux Port Defib Sync connector 004B AC power connector peripheral expansion port ETHERNET The ETHERNET port provides an ANSI/IEEE 802.3 10BaseT Ethernet standard interface to the CARESCAPE Network. TRAM-rac 2A housing connectors The TRAM-rac 2A module housing connects to the patient monitor via a standard category 5 patch cable (PN 418335-002) that plugs into the Aux port on the patient monitor and to the Auto Port on the back of the TRAM-rac 2A module housing. 2000966-542D Dash 3000/4000/5000 3-5 Installation: Connections The TRAM-rac 2A module housing does not have an Analog Output connector. AC power power switch Auto Port to the patient monitor’s Aux Port Async Comm 006A BISx module The BISx module connects to the patient monitor via a RJ-45 cable that plugs into the Aux port on the patient monitor and a Y-cable. One end of the Y-cable plugs into a power supply and the other end plugs into the BISx module cable. Remote control The remote control connects to the patient monitor via a communications cable which plugs into an Autoport to M-port adapter before it is inserted into the Aux port on the Dash patient monitor or the Dash Port 2 docking station. remote control 822A Aux port adapter The remote control is programmed for specific care areas (adult, neonatal, or operating room). NOTE The error message WARNING: REMOTE MISMATCHED WITH MONITORING MODE displays if a mismatched remote control is connected to the patient monitor. 3-6 Dash 3000/4000/5000 2000966-542D Installation: Connections Defib sync The connector provides ECG analog output signals to user-supplied equipment. CAUTION Equipment damage. Connect all peripheral equipment before plugging the power cord into an AC outlet. Otherwise, connectors may be damaged. AC power Use this connector to apply power to the patient monitor. The patient monitor will be powered at all times when using AC power (there is no AC power switch). The patient monitor is preset at the factory for a specific line voltage. Before applying power, verify the patient monitor’s line voltage setting matches your power supply. If required, use a small bladed screw driver to change the line voltage setting. Refer to the label on the back of the unit for the voltage and current requirements. line voltage selector: 115V for a 100-120V power source 230V for a 220-240V power source 115V 004B, 829A CAUTION Verify the line voltage selector setting before plugging the power cord into an AC outlet. The power supply may be damaged if the power source applied is different from the line voltage setting. Power up After making all connections, plug the power cord into an AC wall outlet. When all cables are properly connected, press the Power button to turn the patient monitor on. All front panel indicators will illuminate until the power-up sequence is complete. After approximately 20 seconds you should see a display on the screen. Configure Go to “Configuration” on page 4-1 to configure and set up the Dash patient monitor for patient use. 2000966-542D Dash 3000/4000/5000 3-7 Installation: Dash installation checkout procedure Dash installation checkout procedure GE recommends that qualified personnel shall perform the following tests, and should record the results on the “Checklist” on page D-1 The Dash unit has been thoroughly tested before leaving manufacturing. There is no need to re-test the parameters or operation of the unit upon installation except for the following: 1. Electrical safety test. Refer to “Electrical safety tests” on page 8-4. 2. Refer to “Patient monitor power-up tests” on page 8-21. 3. Battery check. Ensure the battery indicator displays on the patient monitor without an error. 4. If the Dash is networked: Connect Dash to the MC network (wired or wireless) with any other GE bedside monitor. Select View Other. Select another bed. Verify you can view another bed over the network. 5. If the Dash has TRAM-rac 2A housing connected via the Aux port: Verify communication with a module in the TRAM-rac 2A housing by confirming that the parameter for the ICG or SAM module displays on the Dash. 6. If the Dash has a BISx module connected via the Aux port: 3-8 Verify communication with the BISx module by confirming that the parameter for the module displays on the Dash. Dash 3000/4000/5000 2000966-542D 4 2000966-542D Configuration Dash 3000/4000/5000 4-1 Configuration: Before you begin... Before you begin... To configure a new patient monitor, you must first: know that the new patient monitor’s software revision is compatible with the other patient monitors connected to the CARESCAPE Network. write down the exact care unit name from the central station. write down the bed name for the new patient monitor. know if the patient monitor will be used for either stationary or ambulatory (telemetry) monitoring or both. know if the patient monitor will be connected to a wireless network. know if the patient monitor will be moved from one internet connection to another. This section explains how to configure a patient monitor in both types of patient monitoring system configurations: Stand-alone patient monitor — the monitor is not interconnected to other patient monitoring system devices, and Networked patient monitor — the monitor is interconnected to other patient monitoring system devices over the CARESCAPE Network for the sake of sharing patient data. The patient monitor communicates with central stations, printers, and other related equipment. This network is essentially an internet implementation. NOTE The CARESCAPE Network is a purchased option. 4-2 Dash 3000/4000/5000 2000966-542D Configuration: Service menus Service menus There are two distinct service menus for the patient monitor. The Boot Loader Service Menu is found in the Boot Code and is used for configuring the patient monitor or when downloading the Boot Code and main processor code. The Service Mode menu is located from the Main Menu and is used for various functions like monitor settings, calibration, graph tests, and downloading patient monitor interface software. WARNING The Boot Loader Service Menu and the Service Mode menus are intended for qualified personnel only. Do not ‘experiment’ with any commands found in the service menus. Experimenting with service commands can lead to lost patient data, damaged operating system software for the patient monitor, and even affect the CARESCAPE Network. 2000966-542D Dash 3000/4000/5000 4-3 Configuration: Service menus Boot Loader Service Menu Activate the Boot Loader program as follows: 1. Hold down NBP Go/Stop (or NBP Auto on Dash 5000) and ZERO ALL (FUNCTION) on the front panel. 2. Press and release the Trim Knob control. 3. Keep holding NBP Go/Stop (or NBP Auto) and ZERO ALL (FUNCTION) until the Boot Loader information appears on the display. Following is a list of options in the boot code service menu. Boot Loader Service Menu options Menu Option CHANGE INTERNET ADDRESS Description This option is used when changing the internet protocol (IP) address. WARNING Duplication of an Internet address on a network causes data loss and possible CARESCAPE Network problems. If you change the factory assigned Internet address, you must record all other Internet addresses used on your network to avoid duplication. 4-4 SHOW INSTALL OPTIONS This option lists the options installed on the patient monitor. CLEAR CONFIGURATION MEMORY This option erases all patient histories and programmed defaults in the monitor’s protected memory. Clearing the configuration memory returns the patient monitor defaults to the factory installed defaults. SET CONFIGURATION This menu contains options for configuring the patient monitor. Refer to “Boot Code settings” on page 4-18. VIDEO TEST SCREENS Various color screens for testing the display. BATTERY SIMULATION This option is for engineering use only. WAKE UP BATTERY This option is used when the battery is dead. Refer to “How to wake up the battery” on page 5-12. OPTIONS MENU A unique password is required for each option. Contact your sales/service representative to obtain a password. You must provide your product serial number and internet address. (The internet address is displayed in the Boot Code banner information.) Dash 3000/4000/5000 2000966-542D Configuration: Service menus Main menu service mode The Service Mode menu option items provide the service technician access to general and technical built-in software functions of the patient monitor. Only persons responsible for configuring and maintaining the patient monitor should access the service mode menu option items. The service technician can use the Service Mode menu to: relay software information to design engineers, calibrate and troubleshoot NBP functions of the patient monitor, set admit menu options, operating mode of the patient monitor, and monitor default password, configure the patient monitor unit name, bed number and Internet address for use on the network, and enter or change the time and date on the patient monitor. WARNING The Boot Loader Service Menu and the Service Mode menus are intended for qualified personnel only. Do not ‘experiment’ with any commands found in the service menus. Experimenting with service commands can lead to lost patient data, damaged operating system software for the patient monitor, and even affect the CARESCAPE Network. Access the Service Mode Access the Service Mode menu starting from the Main menu. 1. Select MORE MENUS > MONITOR SETUP > SERVICE MODE > 2. Enter password using the Trim Knob control to select the day and month from patient monitor screen with leading zeros. (e.g. July 4 = 0407). 2000966-542D Dash 3000/4000/5000 4-5 Configuration: Service menus Service Mode options Following is a list of options in the main code service menu. Service Mode menu options Menu option Description REVIEW ERRORS For advanced troubleshooting by GE engineers. Error log data can be transferred over the network to a central station and then loaded onto a diskette for review. Refer to “Error messages” on page 6-5 for details. CALIBRATE For checkout or calibration of the noninvasive blood pressure, ECG analog output, BP analog output, CO2 service, and SAM service menu functions of the patient monitor. BATTERY SERVICE Provides battery data. NOTE If an INCOMPAT message displays in the Manufacturer Name column and UNKNOWN displays in all other columns, the installed battery is incompatible. PATIENT-MONITOR TYPE For selecting the type of patient monitor desired, i.e adult, neonatal or operating room. Refer to “PatientMonitor Type” on page 4-12 for detailed procedures. WARNING Changing the patient-monitor type will default the admit function to Standard configuration. Different alarms and parameters are activated for each selection. NOTE The keypad/remote control is DIDCA programmed for specific patient monitor types. The error message, “WARNING: REMOTE MISMATCHED WITH MONITORING MODE” displays if the patient monitor and keypad/remote control do not match. 4-6 Dash 3000/4000/5000 2000966-542D Configuration: Service menus Service Mode menu options (Continued) Menu option Description MENU SETUP Provides the following sub-menus: (Refer to “Service Mode settings” on page 4-11 for detailed procedures.) ADMIT MENU: STANDARD Allows you to determine the function of the patient monitor. The four variables include stationary or ambulatory (telemetry) patient monitoring with a monitor that always stays in one room (STANDARD) or a monitor that moves from room to room (ROVER). MONITOR DEFAULTS PASSWD Allows you to set the patient monitor so that a password is Required or Not Required for entry into the Monitor Defaults menu section. If selected, the password will be the same as the Service Mode menu password. MONITOR SETTINGS Provides the following sub-menus: (Refer to “Service Mode settings” on page 4-11 for detailed procedures.) SET UNIT NAME Allows changes to the care unit name. After initial setup, this name should not be changed or communication to the central station will be corrupted. Note that the care unit name must be registered exactly the same in the central station and the patient monitor. SET BED NUMBER Allows changes to the bed number. After initial setup, this number should not be changed or communication to the central station will be corrupted. Note that the bed number must be registered exactly the same in the central station and the patient monitor. SET INTERNET ADDRESS Allows changes to the internet (IP) address. An incorrect internet address may also prevent the patient monitor from viewing other monitors on the network even though the unit names match. Whether or not this can occur depends on the network topology at the installed site. WARNING Duplication of an internet (IP) address on a network causes lost data. If you change the factory assigned internet address, you must first record all other internet addresses used on your network to avoid duplication. NOTE An incorrect internet address may also prevent the patient monitor from viewing other monitors on the network even though the unit names match. Whether or not this can occur depends on the network topology at the installed site. 2000966-542D Dash 3000/4000/5000 4-7 Configuration: Service menus Service Mode menu options (Continued) Menu option MONITOR SETTINGS (cont.) Description CONFIGURE WIRELESS LAN Enable and configure the wireless LAN option. (Refer to “Confirm or configure wireless LAN” on page 4-14 for detailed procedures.) WIRELESS LAN STATUS Displays wireless LAN status. STORE DEFAULTS FOR NETWORK TRANSFER Saves the patient monitor defaults for transfer to another patient monitor with the same software version, software package, patient monitor type, and country code. It stores all patient monitor defaults, (including WLAN configuration) custom default names, and 12 SL location and site. SET LOCATION ID Enter the location identification for the MUSE system. SET SITE NUMBER Enter a site number if your institution has multiple buildings. A MUSE system can be used as a site number. COPY UNIT DEFAULTS Use to copy patient monitor defaults from one patient monitor to another patient monitor. Refer to “Configuration” on page 4-1 for detailed procedures. PRINT TEST PATTERN Allows you to run a graph test pattern. The choices are Start and Stop. TIME AND DATE Allows changes to the time and date and may affect the time and date for the entire monitoring network. (Refer to “Set time and date” on page 4-23 for detailed procedures.) WARNING Loss of patient history. This menu should rarely be used because patient histories will be lost. 4-8 Dash 3000/4000/5000 2000966-542D Configuration: Procedures Procedures Listed below are the patient monitor settings that can be configured. Each procedure is described on the next pages. From the Main Menu “Set print locations” on page 4-10 From Service Mode “Set Unit Name” on page 4-11 “Set Bed Number” on page 4-11 “Patient-Monitor Type” on page 4-12 “Admit Menu” on page 4-13 “Confirm or configure wireless LAN” on page 4-14 From Boot Code “Set Defib Sync Voltage and pulse width” on page 4-18 “Set Line Frequency” on page 4-18 “Set CIC and QS protocol” on page 4-19 “Set MUSE system protocol” on page 4-19 “Transcutaneous Pace Blank Length” on page 4-19 “Set Country Selection” on page 4-20 “Set Language” on page 4-20 “Enable or disable AFIB Identification” on page 4-21 “Enable or disable IntelliRate” on page 4-21 “Analog Out Buzz” on page 4-22 Also see “Advanced user procedures” on page 4-23 to “Set time and date” on page 4-23 “Transfer monitor defaults” on page 4-24 After completing all necessary procedures, go to “Functional and electrical safety checks” on page 8-1. 2000966-542D Dash 3000/4000/5000 4-9 Configuration: Set print locations Set print locations NOTE Dash patient monitors and printers must be networked prior to setting locations. Access the Manual Print Location option as follows. 1. Select MORE MENUS > MONITOR SETUP > PRINT SETUP > PRINT LOCATION > MANUAL PRINT LOCATION. 2. Using the Trim Knob control, choose the manual print location from the list. 3. Select PRINT ON ALARM LOCATION. 4. Using the Trim Knob control, choose the alarm print location from the list. 5. Select PRINT WINDOW LOCATION. 6. Using the Trim Knob control, choose the print window location from the list. 7. Select 12 LEAD PRINT LOCATION. 8. Using the Trim Knob control, choose the 12 lead print location from the list. 4-10 Dash 3000/4000/5000 2000966-542D Configuration: Service Mode settings Service Mode settings From the Main Menu, 1. Select MORE MENUS > MONITOR SETUP > SERVICE MODE. 2. Enter password using the control to select the day and month from patient monitor screen with leading zeros. (e.g. July 4 = 0407) Set Unit Name Up to seven characters are used to identify the care unit. These characters display at the top right of the screen immediately preceding the bed number. 1. Enter Service Mode (See “Service Mode settings” on page 4-11) and select MONITOR SETTINGS > UNIT NAME. ↑ ↓ 040A 2. Use the Trim Knob control to select and change each character. Up to seven characters may be entered. 3. Select SET UNIT NAME and press the Trim Knob control to exit. Set Bed Number The bed number identifies a particular patient bed. Up to five characters are used to identify bed number. This number displays at the top right of the screen. 1. Enter service mode (See “Service Mode settings” on page 4-11) and select MONITOR SETTINGS > UNIT NAME > SET BED NUMBER. ↑ ↓ 041A 2. Use the Trim Knob control to select and change each character. Up to five characters may be entered. 3. Select SET BED NUMBER and press the Trim Knob control to exit. 2000966-542D Dash 3000/4000/5000 4-11 Configuration: Service Mode settings Patient-Monitor Type The Patient-Monitor Type selection determines the type of patient monitor desired, e.g., adult, neonatal or operating room. Different alarms and parameters are activated for each selection. CAUTION Each time the patient-monitor type is changed, the ADMIT MENU function defaults to STANDARD configuration. Be aware that some patient alarms and parameters may be changed. NOTE The keypad/remote control is DIDCA programmed for specific patient monitor types. The error message, “WARNING: REMOTE MISMATCHED WITH MONITORING MODE” displays if the patient monitor and keypad/remote control do not match. 1. Enter service mode (See “Service Mode settings” on page 4-11) and select PATIENT-MONITOR TYPE. Be sure to read the information in the Attention box before changing anything. ↑ ↓ 042A 2. Rotate Trim Knob control to select the type of environment the patient monitor will be used in. 3. Press Trim Knob control to exit. Your selection displays at the top left of the screen after the date. 4-12 Dash 3000/4000/5000 2000966-542D Configuration: Service Mode settings Admit Menu The Admit Menu selection determines the function of the patient monitor. Before configuring the Admit Menu, you must know if the patient monitor will be used for standard adult, neonatal, or operating room monitoring, and if the patient monitor will be moved from room to room. All combinations are explained below. STANDARD—configures the patient monitor to stay in one room for stationary monitoring only. Patient monitors not connected to the CARESCAPE Network (Ethernet connection) must use STANDARD configuration only. ROVER—configures the patient monitor to move from room to room for stationary monitoring only. COMBO—configures the patient monitor to stay in one room for both stationary and ambulatory (telemetry) monitoring. This patient monitor displays all Tram module data combined with ECG data for ambulatory patients. NOTE Users should be aware of a possible time discrepancy between the waveforms from the Telemetry device and the waveforms hard-wired to the Dash patient monitor. Users should not consider these waveforms to be synchronous. If absolute synchronicity is desired, Combo mode should be discontinued and the ECG waveforms should be acquired via the hard-wired bedside patient monitor. ROVER COMBO—configures the patient monitor to move from room to room for both stationary and ambulatory (telemetry) monitoring. 1. Enter service mode (See “Service Mode settings” on page 4-11) and select MENU SETUP > ADMIT MENU. ↑ ↓ 513A 2. Use the Trim Knob control to select the function of the patient monitor. 3. Press Trim Knob control to exit. 2000966-542D Dash 3000/4000/5000 4-13 Configuration: Service Mode settings Confirm or configure wireless LAN Confirm or configure the optional wireless LAN as follows. 1. Enter Service Mode (See “Service Mode settings” on page 4-11) and select MONITOR SETTINGS > CONFIGURE WIRELESS LAN. hex key index #1 hex key index #2 hex key index #3 hex key index #4 PMK calculation, if TKIP 943A 2. Select WIRELESS and set to ENABLED. 3. Select SSID (1/2) and enter the SSID. If you change the SSID for TKIP or AES-CCMP, you must enter the PASS KEY (even if it didn’t change) to recalculate the PMK. 4. For all standard installations, the SSID (1/2) should be rtGEHClinical. 5. Select and enter SECURITY. 6. If WEP, enter PASS KEY or hex key and KEY INDEX to match the configuration on the access point. (See the definitions table on the following page.) If TKIP or AES-CCMP, enter PASS KEY. PMK is calculated and displayed below the hex keys. Hex keys display although not used by TKIP or AES-CCMP. NOTE Entering a WEP hex key clears out the pass key. 4-14 The Hospital IT or a group that is responsible for the hospital's wireless network can obtain the SSID and security settings (type, pass key and key index) for the 802.11a/b/g wireless Dash. Dash 3000/4000/5000 2000966-542D Configuration: Service Mode settings Type in the PASS KEY exactly, using no extra spaces. PASS KEY entries must be at least 8 characters for TKIP or AESCCMP. The message TKIP KEY MUST BE AT LEAST 8 CHARACTERS displays. The SSID (1/2) setting is limited to 20 ASCII characters of casesensitive upper/lower case letters and ASCII decimal numbers. The SSID (2/2) setting is limited to 12 ASCII characters of casesensitive upper/lower case letters and ASCII decimal numbers. The PASS KEY entries are limited to 13 ASCII characters, 20 hex characters for WEP, and 8-63 ASCII characters or 64 hex characters for TKIP or AES-CCMP. The SSID and PASS KEY entries are case sensitive. NOTE When using the 802.11 a/b/g wireless option, the PRIORITY configuration setting is not used. If you attempt to change this setting, the WLAN PRIORITY SETTING IS NOT SUPPORTED FOR THIS CARD message displays. 7. Select MORE WLAN SETTINGS from the MONITOR SETTINGS menu. NOTE The MORE WLAN SETTINGS menu option only supports the 802.11 a/b/g wireless card. 956A 8. Select FREQ. BAND and set to ALL BANDS. 9. Select RTS THRESHOLD and set to 2347, unless otherwise specified in the wireless network design. 10. Select FRAG. THRESHOLD and set to 2346, unless otherwise specified in the wireless network design. 11. Select ANTENNA and set to ENABLED. 2000966-542D Dash 3000/4000/5000 4-15 Configuration: Service Mode settings 12. Select QOS CONFIG and set to WMM. 13. Manually reboot the Dash patient monitor. Term 4-16 Definition SSID SSID is an acronym for Service Set Identifier.The SSID is a sequence of numbers and characters that represents the ID, a name, of the wireless network. For the 802.11a/b/g wireless Dash to connect wirelessly, the SSID from the wireless network must match the SSID of the 802.11a/b/g wireless Dash. A 802.11a/b/g wireless Dash has a default SSID of rtGEHClinical. SECURITY A 802.11a/b/g wireless Dash provides four levels of security: NONE, WEP 128 bit, WPA-PSK (TKIP), WPA2-PSK (AES-CCMP). NONE provides no security to the wireless communication WEP 128 bit, Wired Equivalency Privacy, provides some level of security, but it is less secure than WPA-PSK (TKIP). WPA-PSK (TKIP), Temporal Key Integrity Protocol, is more secure than WEP. TKIP has a per-packet key hashing method to secure its data. WPA2-PSK (AES-CCMP), Advanced Encryption Standard Counter Mode Cipher-block Chaining message authentification code, is the most secure method of security supported by the 802.11a/b/g wireless Dash. For the 802.11a/b/g wireless Dash, WPA2-PSK (AES-CCMP) is recommended. PASS KEY Pass Key is equivalent to passphrase. This is a sequence of numbers and characters for the wireless Dash to connect to a security enabled wireless network, WEP 128 bit, WPA-PSK (TKIP), or WPA2-PSK (AESCCMP). When WEP 128 bit security is selected, the wireless Dash generates the 26 hex characters for four different keys, displayed in four different rows (1st row represents a key index of one, 2nd row for a key index of two, 3rd row for a key index of three and 4th row for a key index of four). One of these keys needs to match the WEP 128 security setting in the access point for the wireless Dash to communicate properly. When WPA-PSK (TKIP) or WPA2-PSK (AES-CCMP) is selected, the wireless Dash will not generate the 26 hex characters. Pass Key or passphrase needs to match the WPA-PSK (TKIP) or WPA2-PSK (AES-CCMP) setting in the access point in order for it to communicate properly. KEY INDEX (only required for WEP 128 bit) When WEP 128 bit security is selected, the wireless Dash and the wireless network need to share the same key index. Dash 3000/4000/5000 2000966-542D Configuration: Service Mode settings Term FREQ. BANDS Definition Bandwidth at which the Dash wireless card communicates with wireless network. Dash provides below frequency bands to communicate: • All Bands (2.4GHz and 5.1GHz) • 2.4GHz Band Only • 5.1GHz Band Only • 5.1GHz Band priority over 2.4GHz Band • 2.4GHz Band priority over 5.1GHz Band Default value of the frequency band is “All Bands” (2.4GHz and 5.1GHz). RTS THRESHOLD Request to Send (RTS) and Clear to Send (CTS) is the communication exchange used to reduce collisions introduced by the hidden node problem. RTS/CTS exchanges will occur for unicast data frames that are of a larger size than the RTS threshold value. Using a small threshold value causes RTS frames to be sent more often, consuming more of the available bandwidth, therefore reducing the apparent throughput of the network packet. However, the more RTS packets that are sent, the quicker the system can recover from interference or collisions -- as would be the case in a heavily loaded network, or a wireless network with much electromagnetic interference. If however, it is found that enabling RTS/CTS results in decreased throughput, it is recommended to disable the feature, even if the number of collisions are reduced. A valid range for RTS Threshold is 0 - 2347 bytes. Use the default RTS Threshold value 2347, unless otherwise specified in the wireless network design.” FRAG. THRESHOLD Fragmentation Threshold specifies the maximum frame size a wireless device can transmit without fragmenting the frame. A valid Fragmentation Threshold is a numeric value within the range of 256 to 2346. Use the default Fragmentation Threshold value 2346, unless otherwise specified in the wireless network design. QOS CONFIG Quality of service (QoS) is the ability to prioritize traffic from the Dash above other, less critical, data on the wireless network. Dash supports configuring the QoS settings according to WMM standard guidelines. Options WMM and NONE are available to configure the QoS Settings. Default QoS configuration is WMM. Dash also supports the upstream Quality of Service with the default values for QoS parameters (CWmin, CWmax, AIFS, TXOP and DSCP markings), which are available in BOOT MENU for configuration. 2000966-542D Dash 3000/4000/5000 4-17 Configuration: Boot Code settings Boot Code settings To activate the Boot Code, 1. With power on, hold down NBP Go/Stop (or NBP Auto on Dash 5000) and ZERO ALL. 2. Press and release the Trim Knob control. 3. Keep holding NBP Go/Stop (or NBP Auto) and ZERO ALL until the Boot Code information appears on the display. Set Defib Sync Voltage and pulse width The patient monitor controls the analog out signal used to trigger a defibrillator. Refer to the defibrillator manufacturer’s manual for the required pulse amplitude and duration. Configure or change the Marker Out signal of the DEFIB SYNC connector as follows. 1. Activate Boot Code (“Boot Code settings” on page 4-18) and select SET CONFIGURATION menu option. 2. In the CONFIGURATION MENU, select: 1 Defib Sync Voltage: and choose 5V or 12V amplitude. 2 Defib Sync Pulse Width: and choose 10 ms or 100 ms for pulse duration. 3. Select Exit and wait for the patient monitor to display the message, “Writing settings to Flash config mem...” 4. Manually reboot the patient monitor to implement this change. Set Line Frequency Configure or change the patient monitor line frequency to 50 or 60 Hz as follows. The default is 60 Hz. 1. Activate Boot Code (“Boot Code settings” on page 4-18) and select SET CONFIGURATION menu option. 2. Select Line Frequency then choose 50 Hz or 60 Hz line frequency. 3. Select Exit and wait for the patient monitor to display the message, “Writing settings to Flash config mem...” 4. Manually reboot the patient monitor to implement this change. 4-18 Dash 3000/4000/5000 2000966-542D Configuration: Boot Code settings Set CIC and QS protocol The CIC and QS Protocol default setting is Seg50/51 (Segment 50/51) and should not be changed. However, future products may require Hilltop protocol. Use the Boot Code Service Menu to change the CIC Protocol and QS Protocol. Set MUSE system protocol The patient monitor transmits 12SL and ACI-TIPI data over the optional CARESCAPE Network to the MUSE System and ST Guard. The formats used for this process are Hilltop and Segment 50/51. Since the Segment 50/51 format does not support 500 Hz ECG data or ACI-TIPI, records originally stored on the MUSE System in Hilltop format cannot display at the ST Guard. The default setting is Hilltop. 1. Activate Boot Code (“Boot Code settings” on page 4-18) and select SET CONFIGURATION menu option. 2. Select MUSE System Protocol then choose Hilltop or Seg50/51. Hilltop—Sends 12SL records to the MUSE System in Hilltop format. The 12SL records contain 500 samples per second of ECG data. ST Guard will not be able to retrieve 12SL records stored on the MUSE System in Hilltop format. Seg50/51—Sends 12SL records to the MUSE System in Segment 50/51 format with MAC Rhythm statements. The 12SL records stored on the MUSE System contain 240 samples per second of ECG data. ST Guard can retrieve 12SL records from the MUSE System. ACI-TIPI data can not be retrieved at the MUSE System if this protocol is selected. 3. Select Exit and wait for the patient monitor to display the message, “Writing settings to Flash config mem...” 4. Manually reboot the patient monitor to implement this change. NOTE Before you can transmit data to the MUSE System and ST Guard, you must set up the MUSE system’s Location ID and Site Number. Do not configure MUSE system’s location at Site 0. Site 0 appears invalid to MUSE and any message coming from a device on Site 0 is dumped. 5. Refer to “Service Mode settings” on page 4-11 and select MONITOR SETTINGS > SET LOCATION, then select SET SITE NUMBER. Transcutaneous Pace Blank Length This menu option is reserved for future use and should not be changed. 2000966-542D Dash 3000/4000/5000 4-19 Configuration: Boot Code settings Set Country Selection Select DEFAULT or FRANCE to choose a particular set of GE factory defaults. 1. Activate Boot Code (“Boot Code settings” on page 4-18) and select SET CONFIGURATION menu option. 2. Select Country Selection and choose language. 3. Select Exit and wait for the patient monitor to display the message, “Writing settings to Flash config mem...” 4. Manually reboot the patient monitor to implement this change. Set Language Select Set Language to change the language of the displayed text. 1. Activate Boot Code (“Boot Code settings” on page 4-18) and select SET CONFIGURATION menu option. 2. Select the SET LANGUAGE menu option. 3. Select the appropriate language. 4. Manually reboot the patient monitor to display the new language. French language information When the patient monitor Locale (language) is set to French_France, alarm pause duration is three minutes. Refer to the Alarms chapter in the operator’s manual. Czech, Hungarian, Polish, or Russian language information Special characters within alarm broadcasts, messages, patient name, site name, or location fields that are sent over the optional CARESCAPE Network cannot be displayed by equipment that does not support these languages. Special characters may appear as either blanks, asterisks, a series of square boxes, or no character is displayed at all because the ability to display Cyrillic (Russian alphabet) and special Czech, Hungarian, or Polish characters does not exist on this equipment. Chinese and Japanese language information When the patient monitor Locale (language) is set to Chinese or Japanese, the following conditions apply: 4-20 Text for alarm broadcast over the optional network is in English. All text input is in English only (e.g., text for unit name, bed name, patient information, and custom default name). Dash 3000/4000/5000 2000966-542D Configuration: Boot Code settings Chinese Language NOTE The following two items are only available when the Chinese language is selected. The factory default is disabled. Select 3.2s baseline filter coefficent to enable or disable the 3.2 second baseline filter time constant. Select Minimum Waveform Width Reduction to enable or disable the size reduction of the LCD waveform line width. Enable or disable AFIB Identification NOTE This feature is already enabled if the Cardiac software option is purchased. Select AFIB Identification to enable or disable the atrial fibrillation detection feature. To verify the option has been enabled on the patient monitor, 1. Select the following menu options: MORE MENUS > MONITOR SETUP > SOFTWARE CONFIGURATION. 2. Verify that ATRIAL FIB is listed under “ENABLED SOFTWARE OPTIONS.” To change the status of this feature, 1. Activate Boot Code (“Boot Code settings” on page 4-18) and select SET CONFIGURATION menu option. 2. Select the AFIB Identification menu option. 3. Select enabled to activate this option, or disabled to deactivate this option. 4. Select Exit and wait for the patient monitor to display the message, “Writing settings to Flash config mem...” 5. Manually reboot the patient monitor to implement this change. 6. Refer to the operator’s manual to configure the patient monitor to use this feature. Enable or disable IntelliRate IntelliRate heart rate calculation feature is enabled from the factory. To verify the option has been enabled on the patient monitor, 1. Select the following menu options: MORE MENUS > MONITOR SETUP > SOFTWARE CONFIGURATION. 2. Verify that ECG INTELLIRATE is listed under “ENABLED SOFTWARE OPTIONS.” To change the status of this feature, 2000966-542D Dash 3000/4000/5000 4-21 Configuration: Boot Code settings 1. Activate Boot Code (“Boot Code settings” on page 4-18) and select SET CONFIGURATION menu option. 2. Select the IntelliRate menu option. 3. Select enabled to activate this option, or disabled to deactivate this option. 4. Select Exit and wait for the patient monitor to display the message, “Writing settings to Flash config mem...” 5. Manually reboot the patient monitor to implement this change. 6. Refer to the operator’s manual to configure the patient monitor to use this feature. Analog Out Buzz Select Analog Out Buzz to identify an ECG or an invasive BP “leads off” condition via a supported analog out device. The default is 0 volts. 1. Activate Boot Code (“Boot Code settings” on page 4-18) and select SET CONFIGURATION menu option. 2. Select the Analog Out Buzz menu option. 3. Select 60Hz sine wave to display a 60 Hz sine wave, or select 0 volts to display a flat line. 4. Select Exit and wait for the patient monitor to display the message, “Writing settings to Flash config mem...” 5. Manually reboot the patient monitor to implement this change. Completion The patient monitor is now ready for normal operation. At this time, perform procedures in “Functional and electrical safety checks” on page 8-1. 4-22 Dash 3000/4000/5000 2000966-542D Configuration: Advanced user procedures Advanced user procedures The following procedures are for advanced users only. These procedures should rarely be used, and only experienced technicians should proceed. Procedures The following procedures are discussed in this chapter. Set time and date Transfer monitor defaults Set time and date Change the time only when the system is switched to or from daylight savings time. NOTE When a patient monitor is first connected to the optional CARESCAPE Network, the time and date is automatically updated from the network time. WARNING Loss of patient data history. Changing the time or date settings may result in the loss of patient data history. If one patient monitor’s time or date is changed, all patient monitors on the network “listen” and follow suit within 35 seconds. Changing the time base of one patient monitor may cause some loss of patient data history for all the patient monitors on the network. The following procedure explains how to use the TIME AND DATE option in the patient monitor SERVICE MODE menu. 1. Access the TIME AND DATE menu starting from the Main Menu. Select MORE MENUS > MONITOR SETUP > SERVICE MODE. 2. Enter password using the Trim Knob control to select the day and month from patient monitor screen with leading zeros. (e.g. July 4 = 0407) 3. Select SET TIME and use the Trim Knob control to change the time. The time displays as a 24-hour military clock. 4. Select SET DATE and use the Trim Knob control to change the date. 2000966-542D Dash 3000/4000/5000 4-23 Configuration: Advanced user procedures Transfer monitor defaults NOTE Transfer Monitor Defaults feature is part of the CARESCAPE Network software option and is available in software version 3 or later. You must purchase and enable this software option before you can transfer patient monitor defaults. NOTE To prevent the accidental erasure of the client patient monitor’s wireless LAN defaults, make sure that the server and client patient monitors’ wireless LAN defaults match before transferring patient monitor defaults. The patient monitor defaults set on one patient monitor (server) may be transferred to another patient monitor (client), provided that the client patient monitor shares the following: the same software revision (version), the same patient-monitor type (e.g., ADULT, NEO, or OR), the same wireless LAN configuration, the same software package (e.g., Basic, Cardiac, Cardiopulmonary), and the same country code (e.g., Default or France). The following defaults transfer when using this feature: 4-24 all patient monitor defaults wireless LAN configuration custom default names 12 SL location 12 SL site Dash 3000/4000/5000 2000966-542D Configuration: Advanced user procedures Store monitor defaults for transfer To transfer monitor defaults, they must be set, then stored on the patient monitor that is used as the server. NOTE To prevent the accidental erasure of the client patient monitor’s wireless LAN defaults, make sure that the server and client patient monitors’ wireless LAN defaults match before transferring patient monitor defaults. 1. At the server patient monitor, set up the monitor defaults you want to store. Refer to the following sections of the operator’s manual for reference: Defaults Worksheet located in the preface of the manual. These are blank and allow you to enter your own default settings. Monitor Setup chapter. Adult ICU, Neonatal ICU, Operating Mode Factory Default Appendices. 2. When defaults are set, start from the Main Menu and select MORE MENUS > MONITOR SETUP > SERVICE MODE. 3. Enter password using the Trim Knob control to select the day and month from patient monitor screen with leading zeros. (e.g. July 4 = 0407) 4. Select MONITOR SETTINGS. 5. Select STORE DEFAULTS FOR NETWORK TRANSFER. 6. Select YES to the confirmation popup menu. 2000966-542D Dash 3000/4000/5000 4-25 Configuration: Advanced user procedures Copy stored monitor defaults WARNING Loss of Defaults. Copying patient monitor defaults from the server patient monitor erases all of the patient monitor defaults on the client patient monitor. To copy patient monitor defaults from the server patient monitor, the client patient monitor must be in the Discharged state. If the client patient monitor is set to the OR patient-monitor type, it must not be in Combo or Rover Combo Admit mode. NOTE Make sure that the client patient monitor shares the same configuration as the server patient monitor. Refer to “Transfer monitor defaults” on page 4-24. 1. At the client patient monitor, start from the Main Menu and select MORE MENUS > MONITOR SETUP > SERVICE MODE. 2. Enter password using the Trim Knob control to select the day and month from patient monitor screen with leading zeros. (e.g. July 4 = 0407) 3. Select COPY UNIT DEFAULTS. 4. Select SELECT UNIT TO COPY MONITOR DEFAULTS FROM. 5. From the list of units on the CARESCAPE Network, choose the unit the server patient monitor is in. 6. Select SELECT BED TO COPY MONITOR DEFAULTS FROM. 7. Scroll through the list of beds within the selected unit until the desired server patient monitor is found. Select it, and answer YES to the confirmation popup menu. NOTE After copying patient monitor defaults, the first set of defaults is automatically activated. If another set of defaults is desired, the user must manually select it from the Recall Defaults menu. Wireless LAN configuration settings that are transferred do not take effect until the patient monitor is rebooted. After copying patient monitor defaults from another bed (the server patient monitor), verify that the defaults were transferred and arrhythmia levels are as desired. See “Monitor defaults transfer” on page 6-11 for troubleshooting any errors during this process. 4-26 Dash 3000/4000/5000 2000966-542D 5 2000966-542D Preventive maintenance Dash 3000/4000/5000 5-1 Preventive maintenance: Maintenance schedule Maintenance schedule WARNING Failure on the part of all responsible individuals, hospitals or institutions, employing the use of this device, to implement the recommended maintenance schedule may cause equipment failure and possible health hazards. The manufacturer does not, in any manner, assume the responsibility for performing the recommended maintenance schedule, unless an Equipment Maintenance Agreement exists. The sole responsibility rests with the individuals, hospitals, or institutions utilizing the device. To ensure the patient monitor is always functional when required, qualified service personnel should perform the following regular maintenance every 12 months unless indicated differently. For a detailed checklist of all maintenance items, refer to the “Checklist” on page D-1. NOTE Qualified personnel must perform all functional and safety tests found in Chapter 8, “Functional and electrical safety checks” every 12 months after installation. 5-2 “Visual inspection” on page 5-3. “Cleaning and disinfecting the patient monitor” on page 5-3—Clean the print head every 12 months or as usage demands. “Battery maintenance” on page 5-10—Condition the batteries once every six months or as needed. “Clear the stored patient data memory” on page 5-17—Admit and discharge a test patient every 12 months to clear the patient monitor’s stored patient data memory. “Functional and electrical safety checks” on page 8-1—Perform electrical safety tests, checkout procedures and calibration every 12 months after installation. GE recommends that the qualified personnel performing the tests should record the values of the tests in the “Checklist” on page D-1. Dash 3000/4000/5000 2000966-542D Preventive maintenance: Visual inspection Visual inspection The patient monitor and its components should be carefully inspected once every 12 months. Carefully inspect the equipment for physical damage to the case, the display screen, and the keypad. Do not use the patient monitor if damage is determined. Refer damaged equipment to qualified service personnel. Inspect all external connections for loose connectors or frayed cables. Have any damaged connectors or cables replaced by qualified service personnel. Inspect the display face for marks, scratches, or other damage. Physical damage to a flat panel display glass may pose an implosion hazard. Have the flat panel display replaced by qualified service personnel if necessary. Safety labels and inscription on the device are clearly legible. Cleaning and disinfecting the patient monitor WARNING Disconnect AC-powered equipment from the power line before cleaning or disinfecting its surface. Turn off the power to battery-powered equipment before cleaning or disinfecting its surface. Procedure NOTE Clean the exterior surface on a regular basis in compliance with your institution’s infection control and biomedical engineering department. Complete the following procedure to clean the exterior surfaces of this equipment: 1. For cleaning all displays, including touchscreen and standard displays, do the following: a. Turn off the power to the touchscreen and standard displays before you start cleaning the displays. b. Wipe the exterior with a soft lint-free cloth, lightly moistened with household glass cleaner. 2. For cleaning and disinfecting the equipment, wipe the exterior with a soft lint-free cloth, using the following solution as recommended in the APIC Guidelines for Selection and Use of Disinfectants (1996): 2000966-542D Sodium hypochlorite (5.2% household bleach) minimum 1:500 dilution (minimum 100 ppm free chlorine) and a maximum 1:10 dilution. Dash 3000/4000/5000 5-3 Preventive maintenance: Cleaning and disinfecting the patient monitor Any sodium hypochlorite wipe product that meets the above guidelines can be used. NOTE Wring excess disinfectant from wipe before using. NOTE Any contact of the disinfectant solutions with metal parts may cause corrosion. 3. When disinfecting the equipment, allow disinfectant solution to remain on device for a minimum of one minute per hospital guidelines. 4. Wipe off cleaning solutions with a clean, lightly moistened cloth. 5. Dry thoroughly with a dry lint-free cloth and let air dry for at least 30 minutes. NOTE Drying times may vary based on the environmental conditions. 6. Take care not to let fluid “pool” around connection pins. If this should happen, blot dry with a soft lint-free cloth. Cautions Use the following precautions to prevent damaging the equipment: 5-4 Never immerse the device in any liquid. Do not pour or spray any liquid directly on the device or permit fluid to seep into connections or openings. Never use conductive solutions, solutions that contain chlorides, wax, or wax compounds to clean the device. Never use solutions or products that contain the following: Any type of Ammonium Chloride such as, but not limited to Dimethyl Benzyl Ammonium Chloride and Quaternary Ammonium Chloride solutions. Abrasive cleaners or solvents of any kind. Acetone Ketone Betadine Alcohol-based cleaning agents Sodium salts Never autoclave or steam clean the device. Always use household glass cleaner to clean the touchscreen or standard displays. Dash 3000/4000/5000 2000966-542D Preventive maintenance: Cleaning and disinfecting the patient monitor Impact or results of improper cleaning products and processes The following consequences can occur if you do not follow the cautionary guidelines when cleaning the equipment: Product discoloration. Melting, dulling, or distorting of the device case. Brittle and breaking device case. Blurring the lettering on label text. Equipment malfunction or failure. Void warranty. Cleaning products to avoid Cleaning products known to cause the types of problems listed previously include, but are not limited to: Sani-Cloth® Wipes Ascepti® Wipes HB Quat® Clorox® Wipes (they do not contain bleach) Over-the-counter detergents (e.g., Fantastic®, Tilex®, etc.) Products that contain active ingredients and solutions similar to these products should be avoided. Storage 2000966-542D Always remove batteries when the device is not in use (even for short periods of time). Store in a dry well-ventilated area. Dash 3000/4000/5000 5-5 Preventive maintenance: Cleaning and disinfecting the patient monitor Clean the print head Heavy usage causes debris to build up on the print head. This build can cause the printed images to appear distorted. It is recommended that this procedure be performed when necessary, depending on usage. Materials required A nonabrasive material/cloth and isopropyl alcohol are all that are necessary to perform this procedure. Procedure print head 594A paper drive roller 1. Disconnect the power cord from the mains source. 2. Open the writer door to expose the print head. 3. Remove paper roll. 4. Locate print head shown in the figure above. A flashlight may help illuminate the print head for closer examination. 5. Wipe the print head with alcohol and a nonabrasive material/cotton swab in an side to side motion. Continue wiping until the cloth/swab wipes clean. 6. Wipe paper drive roller clean of any bits of paper and debris with alcohol and a nonabrasive material. 5-6 Dash 3000/4000/5000 2000966-542D Preventive maintenance: Cleaning, disinfecting and storing GE ECG cables and leadwires Cleaning, disinfecting and storing GE ECG cables and leadwires Cleaning and disinfecting 1. Remove cables and leadwires from the handheld device or system before cleaning. 2. Use care in cleaning leadwires to prevent pulling the long wires from the connector ends. Metal connections can be pulled away from the connectors. 3. For general cleaning of cables and leadwires, wipe using a lightly moistened cloth with a mild soap and water solution. Then wipe and air dry. 4. For disinfecting the cables and leadwires, wipe exterior with a soft lint-free cloth, using the following solution as recommended in the APIC Guidelines for Selection and Use of Disinfectants (1996): Sodium hypochlorite (5.2% household bleach) minimum 1:500 dilution (minimum 100 ppm free chlorine) and maximum 1:10 dilution. Any sodium hypochlorite wipe product that meets the above guidelines can be used. NOTE Wring excess disinfectant from wipe before using. NOTE Any contact of disinfectant solutions with metal parts may cause corrosion. 5. Do not immerse either end of a cable or leadwire connector. Immersing or “soaking” the connector ends may corrode metal contact ends and affect signal quality. 6. Wipe off cleaning solutions with a clean, lightly moistened cloth. 7. Dry thoroughly with a dry, lint-free cloth and let air dry for at least 30 minutes. NOTE Drying times may vary based on the environmental conditions. 8. Take care not to let fluid “pool” around connection pins. If this should happen, blot dry with a soft, lint-free cloth. 9. Do not use excessive drying techniques, such as oven, forced heat or sun drying. 2000966-542D Dash 3000/4000/5000 5-7 Preventive maintenance: Cleaning, disinfecting and storing GE ECG cables and leadwires Sterilization NOTE EtO sterilization is not recommended, but may be required for cables and leadwires. Frequent sterilization will reduce the useful life of cables and leadwires. Sterilize with ethylene oxide gas (EtO) at a maximum temperature of 50° C/122° F. After EtO sterilization, follow the recommendations from the sterilizer manufacturer for required aeration. Cautions Never immerse the handheld device, cables, or leadwires in any liquid. Do not pour or spray any liquid directly on cables or leadwires or permit fluid to seep into connections or openings. Never use conductive solutions, solutions that contain chlorides, wax, or wax compounds to clean handheld devices, cables or leadwires. Never use solutions or products that contain the following: Any type of Ammonium Chloride such as, but not limited to: Dimethyl Benzyl Ammonium Chloride or Quaternary Ammonium Chloride solutions Abrasive cleaners or solvents of any kind Acetone Ketone Betadine Alcohol-based cleaning agents Sodium salts Never autoclave or steam clean cables or leadwires. Store in a dry well-ventilated area. Vertically hang cables and leadwires. Do not coil leadwires or cables tightly around any medical device. Storage Improper cleaning products and processes impact or results 5-8 Product discoloration Metal part corrosion Brittle wires Brittle and breaking connectors Reduced cables and leadwires life Unit malfunction Void warranty Dash 3000/4000/5000 2000966-542D Preventive maintenance: Cleaning other applied parts Cleaning products to avoid Cleaning products known to cause the types of problems listed above include, but are not limited to: Sani-Cloth® Wipes Ascepti® Wipes HB Quat Clorox® Wipes (they do not contain bleach) Over-the-counter detergents (e.g., Fantastic®, Tilex®, etc.) Products that contain active ingredients and solutions similar to these products should also be avoided. Cleaning other applied parts For other applied parts such as temperature sensors, catheters, pulse oximetry probes, and NBP cuffs, you must consult the manufacturer for cleaning, sterilization, or disinfecting method 2000966-542D Dash 3000/4000/5000 5-9 Preventive maintenance: Battery maintenance Battery maintenance How to charge the battery The battery can be charged by one of two methods: Outside of a patient monitor by using the Cadex SMart Two+ charger. Inside a patient monitor that is connected to an AC power source. NOTE To extend the life of the battery, GE recommends that you charge the battery using the external Cadex SMart Two+ charger. NOTE The Cadex SMart Two+ charger is no longer available for purchase. However, if your site has a Cadex SMart Two+ charger, you should continue to use it to charge and condition the battery. Charging the battery with a Cadex SMart Two+ charger 1. Insert the battery into the battery charger. The RUN LED lights. 2. Leave the battery in the battery charger until the READY LED lights. NOTE If the FAIL LED lights, remove the battery from the battery charger and reinsert it. This should correct any battery charger time out errors. However, if this does not correct the battery charger time out errors, then the battery is defective and should be replaced. Charging the battery inside a patient monitor NOTE Non-recommended (incompatible) batteries will not charge in the Dash patient monitor. The battery is charged whenever the patient monitor is connected to an AC power source. When you store the battery inside of a patient monitor that is connected to an AC power source (a state known as “floating”), the battery will selfdischarge to less than 90% of its Full Charge Capacity after approximately two weeks (depending upon the temperature of the battery). At this time, the patient monitor will automatically recharge the battery to 100% of its Full Charge Capacity. 5-10 Dash 3000/4000/5000 2000966-542D Preventive maintenance: Battery maintenance How to condition the battery The battery can be conditioned by one of two methods: Outside of a patient monitor by using the Cadex SMart Two+ charger. Inside a patient monitor that is connected to an AC power source. NOTE To extend the life of the battery, GE recommends that you condition the battery using the external Cadex SMart Two+ charger. NOTE The Cadex SMart Two+ charger is no longer available for purchase. However, if your site has a Cadex SMart Two+ charger, you should continue to use it to charge and condition the battery. Conditioning the battery with a Cadex SMart Two+ charger A conditioning cycle using the battery charger requires approximately nine hours to complete. Complete the following steps to automatically condition the battery. 1. Insert the battery into the battery charger. 2. Press the CONDITION button when one of the following conditions occur: While the RUN LED light is still flashing. While the CONDITION LED is flashing. 3. Remove the battery from the battery charger when the RUN LED lights. This completes the conditioning cycle. Conditioning the battery inside a patient monitor NOTE Non-recommended (incompatible) batteries will not condition in the Dash patient monitor. WARNING PATIENT RISK HAZARD — Never condition a battery while the patient monitor is connected to a patient. Serious injury or death could result. Complete the following steps to manually condition the battery using the patient monitor: 1. Remove all batteries from the patient monitor. 2. Insert one battery into Slot A of the patient monitor. 3. Disconnect the patient monitor from the AC power source. 2000966-542D Dash 3000/4000/5000 5-11 Preventive maintenance: Battery maintenance 4. Access the patient monitor’s Battery Status window to monitor the battery’s Charge Level. See “Identify battery status using the BATTERY STATUS menu” on page 2-38. 5. Allow the battery to discharge to less than a 90% Charge Level. 6. Re-connect the patient monitor to the AC power source and fully charge the battery. 7. Disconnect the patient monitor from the AC power source and allow the patient monitor to run until it displays the BATTERY LOW message, or until the patient monitor shuts down. 8. Re-connect the patient monitor to the AC power source. Allow the battery to fully charge to complete the conditioning cycle. How to store the battery Condition the battery before storing it. Conditioning the battery to 100% capacity increases the storage shelf-life of the battery. Store the battery outside of the patient monitor at a temperature between 20°C to 25°C (68°F to 77°F). When the battery is stored inside a patient monitor that is powered by an AC power source, the battery cell temperature increases by 10°C to 15°C (18°F to 27°F) above the room’s ambient temperature. This reduces the life of the battery. When the battery is stored inside a patient monitor that is continuously powered by an AC power source and is not powered by battery on a regular basis, the life of the battery may be less than 12 months. GE recommends that you remove the battery and store it near the patient monitor until it is needed for transport. Re-condition a stored battery every six months to increase the storage shelf-life. How to wake up the battery When the battery is stored for a long period of time without being charged, it will eventually lose all of its charge and “fall asleep.” When the battery is “asleep,” none of the LEDs on the battery will illuminate when the battery’s on/off button is pressed. You must “wake up” the battery before you can use it again. There are two methods to wake up the battery: Outside of a patient monitor by using the Cadex SMart Two+ charger. Inside a patient monitor that is connected to an AC power source. NOTE The Cadex SMart Two+ charger is no longer available for purchase. However, if your site has a Cadex SMart Two+ charger, you should continue to use it to charge and condition the battery. 5-12 Dash 3000/4000/5000 2000966-542D Preventive maintenance: Battery maintenance Waking up the battery with a Cadex SMart Two+ charger NOTE A deep discharged battery will require you to repeat the following steps more than once before the battery will “wake up.” 1. Insert the battery into the battery charger and wait for the RUN LED light to illuminate (approximately three minutes). 2. If the RUN LED light does NOT illuminate, complete the following steps: a. Remove the battery from the battery charger. b. Re-insert the battery into the battery charger and let the battery trickle charge for two to three minutes while the FAIL LED flashes. (If the RUN LED light lights, ignore it.) c. Watch the battery charger LEDs and immediately remove the battery from the battery charger when the FAIL LED stops flashing and remains illuminated, or when both the RUN and CONDITION LEDs flash. d. Wait for one to two seconds, then re-insert the battery into the battery charger. The RUN and CONDITION LEDs will flash for five to ten seconds while the charger initializes the battery. If the FAIL LED lights, remove the battery and re-insert it into the battery charger. e. Watch the battery charger LEDs. The RUN LED should stop flashing and remain illuminated for approximately one minute later the CONDITION LED should stop flashing. At this time, the battery is awake and being charged. Waking up the battery with a patient monitor NOTE Non-recommended (incompatible) batteries will not wake up the Dash patient monitor. 1. Connect the patient monitor to an AC power source. 2. Activate the Boot Loader program. a. Hold down NBP Go/Stop (or NBP Auto on Dash 5000) and ZERO ALL (FUNCTION). b. Press and release the Trim Knob control. c. Keep holding NBP Go/Stop (or NBP Auto) and ZERO ALL (FUNCTION) until the Boot Code information appears on the display. 3. Select Wake Up Battery from the Service Menu. 4. Insert the “sleeping” battery into slot A of the patient monitor. NOTE In some languages, slot A is identified as slot 1 and slot B is identified as slot 2. 2000966-542D Dash 3000/4000/5000 5-13 Preventive maintenance: Battery maintenance 5. Select Wake Up Lithium Ion Battery in SLOT A. Then, the patient monitor applies a “wake-up” shot of current for up to 210 seconds. 6. Watch for the message, Battery awake, run main code to charge. The battery should now be “awake.” If the “Battery awake, run main code to charge” message appears but the battery is NOT awake, the battery may be in a deep discharge state. You should repeat step 5 at least four more times to give the battery additional “wake-up” shots of current. 7. Quickly reboot (or power cycle) the patient monitor to begin charging the batteries. The patient monitor’s illuminated yellow-colored CHARGING STATUS LED indicates that the battery is being charged. NOTE The patient monitor will not charge the battery while it is running the Boot Loader program. How to replace the batteries WARNING EXPLOSION OR FIRE — Using non-recommended batteries could result in injury/burns to the patient or users. Only use batteries recommended or manufactured by GE. The warranty can be voided if non-recommended batteries are used. 1. Open the battery doors on the left side of the patient monitor, along the bottom. 2. Remove the faulty batteries. 5-14 Dash 3000/4000/5000 2000966-542D Preventive maintenance: Battery maintenance NOTE Depending on your model, the battery compartment may be a single plastic door or two silicone doors. 581B 635A 3. Replace with a new battery. The patient monitor supports up to two exchangeable lithium-ion batteries. Install the battery with the connection pins facing down and inserted first. 4. Close the battery covers. 5. Verify that the patient monitor operates correctly. a. Confirm that the Battery IDs with a battery icon displays in the lower right corner of the patient monitor. b. Verify that the Battery LEDS illuminate either green or amber. Rechargeable battery recycling When the battery no longer holds a charge, it should be replaced. The battery is recycleable. Remove the old battery from the patient monitor and follow your local recycling guidelines. WARNING EXPLOSION HAZARD — Do not incinerate the battery or store at high temperatures. Serious injury or death could result. In the United States and Canada, the Rechargeable Battery Recycling Corporation (RBRC) can help you locate your nearest rechargeable battery collection site. You can contact RBRC by telephone or by accessing their internet web site. 2000966-542D telephone: 1-800-8-BATTERY (800-822-88379) internet address: www.rbrc.org Dash 3000/4000/5000 5-15 Preventive maintenance: Battery maintenance About the Cadex SMart Two+ charger NOTE The Cadex SMart Two+ charger is no longer available for purchase. However, if your site has a Cadex SMart Two+ charger, you should continue to use it to charge and condition the battery. Battery charger LED indicators The following is a quick guide which identifies the meaning of the charger LEDs. LED indicators Illuminated Flashing RUN Charging in progress. Initializing the battery. RUN and CONDITION Conditioning in progress. READY Charging is complete. READY and CONDITION Conditioning is complete — pass target. Conditioning is required. FAIL Battery fault. Charger fault. FAIL and CONDITION Conditioning is complete — fail target. Equipment software requirements 5-16 The patient monitor must use Dash 3000/4000 software version 2A or later. The Cadex SMart Two+ charger must use software version 1.31 or later. Dash 3000/4000/5000 2000966-542D Preventive maintenance: Clear the stored patient data memory Clear the stored patient data memory Admit and discharge a test patient every 12 months to clear the patient monitor’s stored patient data memory. 2000966-542D Dash 3000/4000/5000 5-17 Preventive maintenance: Clear the stored patient data memory 5-18 Dash 3000/4000/5000 2000966-542D 6 2000966-542D Troubleshooting Dash 3000/4000/5000 6-1 Troubleshooting: Fault analysis Fault analysis Overview The symptoms and solutions in this chapter represent only a few of the faults that you may encounter and are not intended to cover every possible problem that may occur. A systematic approach to the diagnosis of problems as well as a general understanding of the architecture, both hardware and software, of the patient monitor are essential to ensure successful troubleshooting of a device. GE recommends formal service training before repairs are attempted. These troubleshooting procedures combined with training provide the service technician with skills necessary to service and repair a patient monitor in the event of a malfunction. Required tools or equipment Standard set of hand tools Patient simulator with cables Digital multimeter Problems Before starting any detailed troubleshooting, complete a thorough visual inspection of the following. Problem All cable connections secure? Devices properly powered? Connected to a proper power source? Possible reason Solution General The unit is plugged in, but it does not switch to AC from battery power. The output voltage of the power supply is inadequate for the processor PCB to recognize. Perform “Power outlet test” on page 8-5 to confirm AC power. Replace the power supply. Replace the processor/power management assembly. Alarm audio Audio does not sound. Go to the Alarm Help Menu and select “Crisis.” Listen for the three-beep audio. The speaker cable is loose or disconnected. Restore the cable connections. The speaker failed. Replace the speaker. The audio circuit on the processor PCB failed. Replace the Replace the processor/power management assembly. Patient cables are bad. The acquisition PCB, DAS Assembly or power supply PCB failed. Perform appropriate sections of the “Functional Checkout procedures” on page 8-20 depending on the waveform problem. Waveform display 6-2 Dash 3000/4000/5000 2000966-542D Troubleshooting: Fault analysis Problem Possible reason Solution Optional writer No paper comes out, even though “Graphing” is displayed. Graph locations are set incorrectly. With the Trim Knob control, select MONITOR GRAPH SETUP, and GRAPH LOCATION. Verify that MANUAL, ALARM, and PRINT locations are set properly. Paper comes out, but no graph data is shown. The paper may be loaded incorrectly. Refer to the Operator Manual for correct paper installation. Print head may be dirty or defective. Clean the printhead. Refer to “Clean the print head” on page 5-6 Perform a graph test. If problem persists, replace the writer assembly. Saving Message Missing segments in the graph data. Writer is busy. When the graph is complete, the saved graph prints out. Writer is no longer available. Check the graph locations. Set the correct graph locations if necessary. Print head may be dirty or defective. Clean the printhead. Refer to “Clean the print head” on page 5-6 Perform a graph test. If problem persists, replace the writer assembly. Optional wireless connection Intermittent or no waveform. Network connection bad, wireless not enabled, wireless card not communicating with access point. Outside coverage area. NOTE: There is no alarm or displayed indicator if Dash is outside the wireless coverage area. Perform procedures in “Wireless LAN” on page 6-24. Cable may be loose or disconnected. Restore the connection. LEDs are burned out. Replace the alarm light assembly or PCB. BP is not zeroed. Zero out the BP. BP is not available. Plug in a BP cable. ECG leads fail. Check patient connections. There are bars/strips of pixels missing on the display in rows/columns. Or only one row/column of pixels on the display is missing or never turned on. The remaining portion of the display functions properly. Possible burned-out pixels. Run the display tests in the boot loader. Replace the display assembly. No display Display may be in standby mode. Backlight inverted may be defective. Optional alarm light indicator The red or yellow lights do not light on boot up of the patient monitor. Defib Sync “Buzz” signal comes out for ECG or BP. Video display 2000966-542D Dash 3000/4000/5000 Press the POWER button. If display still does not appear within 20 seconds, replace the display assembly. Replace back light inverter. 6-3 Troubleshooting: Fault analysis Problem Possible reason Solution Network connector No network connection when a network cable is connected to the patient monitor’s Network Connector. The Dash patient monitor is connected to a Dash Port 2 docking station. The patient monitor’s Network Connector is inactive when it is connected to the docking station. Network is disabled in boot code. Connect the network cable to the docking station’s internet connector. Enable network in boot code. The Dash patient monitor does not have the optional CARESCAPE Network option enabled. Purchase and enable the CARESCAPE Network option. Cable or Autoport to Mport adapter connections may be loose. Restore the connection. Remote control needs to be reset. Disconnect and securely reconnect the remote control from the patient monitor. Remote control is defective. Replace the remote control with a known good one. Five or more consecutive hardware failures have occurred. Review the input error log for Masimo or Nellcor failure codes. Remote control The remote control does not activate the display. Masimo SET or Nellcor SPO2 Probe or module malfunction Acquisition PCB symptoms Symptoms relative to patient signal acquisition such as missing parameter text and waveform(s) may be associated with acquisition PCB failure. It is important that you are able to distinguish the difference between the general format of the display, which is generated by the processor PCB, versus the patient signals and data that is associated with these patient signals, a function of data acquisition, which is generated by the acquisition PCB. Processor PCB symptoms Symptoms with battery operation, network communications, asynchronous communications, NBP control, PCMCIA communications, analog output, audio/sound generation, and video signals as well as other display-related problems all may be associated with processor PCB failure. All of these are functions controlled by microcontroller or graphics processing circuitry located on the Processor/Power Management PCB. 6-4 Dash 3000/4000/5000 2000966-542D Troubleshooting: Error messages Error messages The following table describes error messages that may appear on the display and how to resolve the problem. NOTE Refer to the appropriate Dash Patient Monitor operator’s manual for parameter-specific messages. Parameter messages are identified in the troubleshooting section of each parameter chapter. Message Possible Reason/Solution “WARNING: The Flash config mem data was found to be INVALID or uninitialized. Factory defaults will be stored in both the Flash config mem and in the monitor’s configuration memory. You will be required to re-enter the network configuration, re-enable any password protected features and restore all monitor settings and site-specific defaults.” Following the memory dump, restore data: 1. Restore internet address and IP address as requested by the Boot Code. 2. Power cycle. 3. If error message persists, replace processor pcb. If error message no longer occurs, re-enable any password protected features and restore all patient monitor settings and site-specific defaults via SERVICE MENU > Set Configuration, and Options Menu. “WARNING: THIS VERSION OF BOOT CODE IS NOT COMPATIBLE WITH THE VERSION OF MAIN CODE CURRENTLY STORED IN FLASH. PLEASE UPDATE THE BOOT CODE.” 1. Power cycle. 2. Reload Boot Code. 3. If problems persists, replace processor pcb. “Boot Flash test FAILED.” “ERROR: The Boot Code stored in Flash is not valid. Main Code cannot be loaded until valid Boot Code exists.” 1. Power cycle. 2. Reload Boot Code. 3. If problems persists, replace processor pcb. “Main Flash test FAILED.” “ERROR: The Main Code stored in flash is not valid.” 1. Power cycle. 2. Reload Boot Code. 3. If problems persists, replace processor pcb. “Static RAM test FAILED.” “ERROR: The SRAM memory test failed. Main Code will not be loaded unless this test passes. Reboot the monitor to repeat testing.” Replace processor pcb. “Real Time Clock FAILED - will not start.” “WARNING: The real time clock chip is not running. Main Code cannot be loaded until this chip is started. Attempting to start real time clock...” Followed by either: “The real time clock was started. Select Start Patient Monitoring to load and execute Main Code.” Or “ERROR: Unable to start the real time clock.” If problem persists and error message displays, replace processor pcb. PREVENTIVE MAINTENANCE REQUIRED Perform all of the maintenance procedures listed under, “Maintenance schedule” on page 5-2. WLAN PRIORITY SETTING IS NOT SUPPORTED FOR THIS CARD For the 802.11 a/b/g wireless option, the PRIORITY configuration setting is not used. This message displays if you attempt to change this configuration setting. 2000966-542D Dash 3000/4000/5000 6-5 Troubleshooting: Error messages Message Possible Reason/Solution Internal lithium battery is LOW. NOTE These messages are displayed while the patient monitor powers up. Once the “Internal lithium battery is LOW” message appears, the patient monitor will complete all the power-up tests. Then, after the last test is completed, the following message will be displayed on the boot loader screen. ONE OR MORE POWER-UP TESTS HAVE FAILED ** SERVICE MAY BE REQUIRED ** DO YOU WISH TO CONTINUE MONITORING ANYWAY? 1 = no, 2 = yes The processor pcb battery may be depleted. 1. Select NO when the message, “DO YOU WISH TO CONTINUE MONITORING ANYWAY?” appears. 2. Remove this patient monitor from service and use a different patient monitor to monitor the patient. 3. Refer to “Ordering field replaceable units” on page 7-2 and “Replace CPU/battery housing assembly” on page 744 to replace the processor pcb. The battery switch on processor pcb battery may be in the off position. 1. Verify that switch 1 on the mini-dip switch (labeled S1) is in the ON position. 831A ON position 832A 2. To move the battery switch to the ON position, complete the following steps. a. If a plastic film is over the switch, remove and discard the plastic film. b. Use a small, flat-head screw driver to move the switch to the ON position. c. Complete all of the recommended checkout, electrical safety tests, calibration tests listed in “Functional and electrical safety checks” on page 8-1. The processor pcb may be defective. Refer to “Replace CPU/battery housing assembly” on page 7-44 to replace the processor pcb. 6-6 Dash 3000/4000/5000 2000966-542D Troubleshooting: Battery alarms and messages Battery alarms and messages Battery alarms occur when one of the following battery conditions occur: Low battery Empty battery Battery failures Charger failures These Battery messages help identify the cause of a battery alarm. Battery Messages appear in three different locations of the patient monitor: ECG waveform area. Battery Status Information window. Battery Fuel Gauge icon. Battery messages displayed in the ECG waveform area The following battery messages are displayed in the ECG Waveform Area. Battery messages displayed in the ECG waveform area Message Battery alarm Cause BATTERY LOW System WARNING Critical Low BatteryOnly 10 minutes per battery of run time remaining (10 minutes if one battery, 20 minutes if two batteries). POWERING DOWN System WARNING Empty BatteryThere is no battery run time remaining. CHECK BATT STATUS System MESSAGE Battery FailureA minor failure has occurred while using or charging the battery. BATTERY ERROR System WARNING Battery FailureA serious failure has occurred while using or charging the battery. An incompatible battery may be installed. CHECK BATT STATUS System MESSAGE Charger FailureCharger communications have failed. NOTE INTERNAL CHARGER FAILED, CALL SERVICE also appears in the Battery Status information window. 2000966-542D Dash 3000/4000/5000 6-7 Troubleshooting: Battery alarms and messages Battery messages displayed in the Battery Status information window Battery messages displayed in the Battery Status Information window Message Battery alarm Cause INTERNAL CHARGER FAILED, CALL SERVICE System MESSAGE Charger FailureCharger communications have failed. None Condition The battery is requesting a conditioning cycle. NOTE CHECK BATT STATUS also appears in the ECG waveform area. CONDITION INCOMPAT appears in the SLOT STATUS. All other fields in the Battery Status window display UNKNOWN. Incompatible battery installed. Refer to “Exchangeable or compatible battery packs” on page 2-9 for message definitions. Battery Messages Displayed in the Battery Fuel Gauge Icon The following battery message is displayed in the Battery Fuel Gauge icon. Battery Messages Displayed in the Battery Fuel Gauge Icon Message Reason Solution ERROR The battery is asleep, faulty, or unrecognized. The current status of the battery’s health is in question. The Battery Status information window will provide more specific information about the health of the battery. See, “How to identify battery charge capacity” on page 2-36. If the battery is asleep and you need to “wake up” the battery, see “How to wake up the battery” on page 5-12. If the battery will not “wake up” it is probably faulty and should be replaced. Check the battery status screen in the Service Menu. 6-8 Dash 3000/4000/5000 2000966-542D Troubleshooting: Writer or printer Writer or printer External If the printer does not print: Ensure the writer or printer is turned ON. Check all cables for a good connection. Check configured alarms and manual print locations at the patient monitor. Internal If the writer does not print, check that it has paper and that the paper is loaded properly. 2000966-542D Dash 3000/4000/5000 6-9 Troubleshooting: No waveform at central station No waveform at central station If you do not have a waveform at the central station: Ensure the central station software is compatible. Check all cables for a good connection. Check the configured alarms and manual print locations at the patient monitor. Ensure the care unit name is the same in the patient monitor and in the central station. Ensure the internet protocol (IP) addresses are configured correctly. For a troubleshooting tree with more information, refer to “Problem: No waveforms or parameters are displayed at the CIC Pro center” on page B-5. 6-10 Dash 3000/4000/5000 2000966-542D Troubleshooting: Monitor defaults transfer Monitor defaults transfer Below is a list of error messages that may display when performing a patient monitor defaults transfer. Storing monitor defaults Message Description ERROR - UNIT DEFAULTS HAVE NOT BEEN SAVED Patient monitor defaults were not saved on the server patient monitor due to a memory error in the patient monitor. Copying stored monitor defaults Message 2000966-542D Description ERROR COPYING UNIT DEFAULTS NETWORK ERROR Either an error has occurred while the defaults were being transferred, or defaults have not been saved on the server patient monitor. ERROR COPYING UNIT DEFAULTS UNIT TYPE MISMATCH The server and client patient monitors are set to different unit types (e.g., ADULT, NEO, or OR) ERROR COPYING UNIT DEFAULTS SOFTWARE VERSION MISMATCH The server and client patient monitors have different software versions (e.g., V2C, V3A). ERROR COPYING UNIT DEFAULTS DATA CORRUPTION ERROR The patient monitor defaults transferred have become corrupted, possibly due to a memory error. ERROR COPYING UNIT DEFAULTS SOFTWARE FEATURE LEVEL MISMATCH The server and client patient monitors are set to different software levels (e.g., Basic, Cardiac, Cardiopulmonary). ERROR COPYING UNIT DEFAULTS COUNTRY CODE MISMATCH The server and client patient monitors are set to different country codes (e.g., DEFAULT or FRANCE). Dash 3000/4000/5000 6-11 Troubleshooting: Change internet address Change internet address The internet address is an identification number assigned to each device on the optional CARESCAPE Network. If the internet address has been corrupted, changing it must be done in Boot Code using a unique password. Contact your sales/service representative and provide them with the serial number and internet address of the unit to obtain a password. WARNING Lost Data. Duplication of an internet address on a network will cause lost data. If you change the factoryassigned internet address, you must first record all other internet addresses used on your network to avoid duplication. Activate the Boot Loader program as follows: 1. Hold down NBP Go/Stop (or NBP Auto on Dash 5000) and ZERO ALL (FUNCTION) on the front panel. 2. Press and release the Trim Knob control. 3. Keep holding NBP Go/Stop (or NBP Auto) and ZERO ALL (FUNCTION) until the Boot Loader information appears on the display. 4. Select Service Menu > Option Menu > Change Internet Address to acquire information required for password. 6-12 Dash 3000/4000/5000 2000966-542D Troubleshooting: Review errors Review errors This procedure describes how to review the error logs of a patient monitor. If the CARESCAPE Network software option is enabled, the error logs may also be transferred over the network to a central station and copied onto diskette for further review or sent to GE personnel for review. The transferring procedure is in “Get error logs” on page 6-16. WARNING This procedure is intended for use by service personnel with advanced troubleshooting skills. Some of the information recorded in the error logs is useful for field troubleshooting. The details included here serve as an introduction to the error logs and provide basic information about what you can learn from them. 1. Access Review Errors starting from the Main Menu. Select MORE MENUS > MONITOR SETUP > SERVICE MODE. 2. Enter password using the Trim Knob control to select the day and month from patient monitor screen with leading zeros. (e.g. July 4 = 0407) 3. Select REVIEW ERRORS. The menu provides four error log choices, two for viewing error logs and two for clearing the error logs. View output or input errors 1. Select VIEW OUTPUT ERRORS or VIEW INPUT ERRORS to view one error in the log of errors. The error log in a patient monitor holds errors that can be accessed with the NEXT or PREVIOUS command. The errors display one error at a time in the corner of the screen. Watch the error number category to keep track of which error you are viewing. The VIEW OUTPUT ERRORS provides a list of output software errors; the VIEW INPUT ERRORS provides a list of input software errors. 2. If you have the writer option you can print an error. Press Print or Graph Go/Stop. 3. To clear all the errors in the error log, select CLEAR OUTPUT ERRORS or CLEAR INPUT ERRORS menu option. Be aware that once the clear menu option is executed, all selected errors in memory are erased. 2000966-542D Dash 3000/4000/5000 6-13 Troubleshooting: Review errors Useful error data Below is sample error log followed by a description of parameters found in the error log. This information is only useful to the manufacturer. 049A Process Name The name of the software task that was operating when the event/ problem occurred. Error Code The error log contains more than just operating system errors. Many events that have an impact upon the system are also entered into the log. The 700-series of error codes are system-initiated events. Listed below are some of the event/error codes you might find useful. Definition of error codes Error code 400-4FF 6-14 Description Network errors were detected. 703 Diagnostic tests were completed. 70B Internet address was changed. The network address for the patient monitor was changed. This should only be done by qualified service personnel. 70C Video test was completed. This test should only be performed by qualified service personnel. 70E Time was changed from this patient monitor. This helps determine how the system-wide time may have been altered. Dash 3000/4000/5000 2000966-542D Troubleshooting: Review errors Definition of error codes 70F Date was changed from this patient monitor. This helps determine how the system-wide date was altered. 710 Incompatible software was detected. If the main processor software finds that the software operating on the communication software incompatible, it turns off the communication (network) controller and enters this data into the error log. When the patient monitor won’t “talk” to the network, looking for this entry in the error log is one part of the troubleshooting process. NOTE The patient monitor may be referred to as a display or scope in the error code descriptions. Severity Severity is a measure of how the event/error affected the system. There are three levels of severity. Continue—the event/error was logged, the task may have or may not have been finished, but the system was able to go on. Most log entries will have a severity of Continue. Fatal—the event/error was such that the task is not able to go on. Recovery was not possible. This always is followed by a WARM START. Forced Restart—the system was restarted by a known condition (internet address change, video test, etc). Date and time The date and time the event or problem occurred. Error number A sequential number that is used to identify each event/problem. 2000966-542D Dash 3000/4000/5000 6-15 Troubleshooting: Get error logs Get error logs Get logs via PC using netUpdate These instructions describe how to copy log files from a Dash 3000/4000/ 5000 patient monitor to a PC using one of the following configurations: PC or PC laptop connected to a Dash 3000/4000/5000 patient monitor PC or PC laptop connected to the MC network. CAUTION LOSS OF MONITORING — There may be a temporary loss of monitoring functions until the log file retrieval is complete. Do not copy logs while a patient monitor is connected to a patient. Medical staff should be prepared to cover patients in need during these periods of lost monitoring functions. Requirements PC to patient monitor or Dash Port 2 PC to MC network One patient monitor software upgrade CD-ROM V6.5 or later. Microsoft® Windows® XP operating system CD-ROM drive Network card Pentium II processor or higher Minimum 64 MB of RAM Category 5 crossover patch cable (pn 415480-001) Category 5 network patch cable NOTE You must be able to change the IP address on the PC. If you are using a PC laptop with a docking station, remove the laptop from the docking station before you begin the log transfer. If you are using a PC with a wireless network connection, remove or disable the wireless network card before you begin the log transfer. If the patient monitor is using a Dash Port 2, remove the patient monitor from the docking station before you begin the log transfer. 6-16 Dash 3000/4000/5000 2000966-542D Troubleshooting: Get error logs Connect the PC to Dash patient monitor or MC network NOTE Connect the patient monitor and PC to a reliable power source during the transfer process. Do not use battery power. A battery failure during the transfer process may result in a transfer process failure. 1. Connect one end of the category 5 crossover or network patch cable to the PC network card. 2. Connect the other end of the category 5 crossover patch cable as follows: Connect to the ETHERNET port of the docking station if the patient monitor is using a Dash Port 2 docking station. Connect to the ETHERNET port of the patient monitor if no docking station or network is used. Connect to the MC network Ethernet tap if transferring logs from other devises on the network. If you connect directly to the MC network Ethernet tap, verify that the patient monitor or docking station is also connected to the MC network Ethernet tap. 3. Power on the PC. 4. Continue with the instructions, “Change the PC’s IP address” on page 6-18. 2000966-542D Dash 3000/4000/5000 6-17 Troubleshooting: Get error logs Change the PC’s IP address Windows XP 1. From the toolbar, select Start > Run. 2. Type cmd and press Enter. 3. Type ipconfig<space>/all and press Enter. 4. If the IP address and subnet mask are defined, record them: IP address: ______________________________________ Subnet mask: ____________________________________ 6-18 5. From the toolbar, navigate to Network Connections according to you PC configuration: Start > Control Panel > Network Connections. Start > Settings > Control Panel > Network Connections. 6. Right-click Local Area Connection. 7. Select Properties. 8. Select Internet Protocol (TCP/IP). 9. Click Properties. 10. Select Use the following IP address. 11. In the IP Address field, type an IP address. If the patient monitor’s address begins with 126, use 126.003.145.229. If using a PC connected to the Unity Network MC network, the IP address on the PC must match the institution’s Unity Network MC network domain. The network domain is defined by the first numbers used in the IP address and subnet mask. If the patient monitor’s address does not begin with 126, contact the IT department for an IP address. If using a PC connected to a Dash patient monitor or Dash Port 2 docking station with a patient monitor, and the IP address does not begin with 126, change the PC IP address to match the first 3 digits of the patient monitor’s address. The remaining address must be unique. 12. Use the defaulted Subnet mask listed in the Subnet mask field. 13. If prompted to restart the PC, select No. 14. From the toolbar, navigate to the Control Panel according to your PC configuration: Start > Control Panel. Start > Settings > Control Panel. 15. Double-click System and select the Computer Name tab. 16. Record the full computer name: __________________________________________ 17. Close all open windows. 18. Restart the PC. 19. Continue with the instructions, “Disable firewall or networking services” on page 6-19. Dash 3000/4000/5000 2000966-542D Troubleshooting: Get error logs Disable firewall or networking services If your PC is running any firewall protection or networking services (including wireless network cards), perform the following procedure to disable these services on the PC. NOTE Depending on the administrative permissions placed on your computer by your IT department, it may not be possible to disable firewall/networking services using the procedure below. If the procedure does not work, disable the firewall/networking service(s) using the Task Manager to end the process. Simultaneously press Ctrl-Alt-Delete, then select Task Manager. Select the Processes tab. Click on Image Name to alphabetize the list. Locate and highlight the service(s) you wish to disable, then select End Process. Answer Yes to the warning." 1. From the toolbar, navigate to Services according to your PC configuration: Start > Control Panel > Administrative Tools > Services. Start > Settings > Control Panel > Administrative Tools > Services. 2. In the list of available firewall/networking services, double-click the service to be disabled. 3. In the specific service properties window, select Stop. NOTE If you receive an error message, repeat this step. 4. Verify that the Service status reads Stopped. 5. Select OK and close all windows. 6. Repeat these instructions for all VPN, wireless network cards or any firewall protection programs running on your PC. NOTE If you are unsure of the firewall/networking services on your PC, contact your local IT administrator for details. Windows XP PCs allow you to send a list of services to your IT administrator. Set up a log folder and get logs NOTE Use the List or Details view on your PC when starting the netUpdate.exe application. Do not use the Thumbnail view. Always run the netUpdate.exe application from the CD-ROM directory. Do not run the application from any other directory. 1. Make sure the patient monitor is in monitoring mode. 2. Insert the CD-ROM into the CD-ROM drive. 3. Double-click My Computer. 4. Create a folder for the log files in the root directory. (e.g. C:\logs) 2000966-542D Dash 3000/4000/5000 6-19 Troubleshooting: Get error logs 5. Return to My Computer and double-click the CD-ROM drive. 6. Select dl > code > netUpdate.exe. 939A 7. In the netUpdate window, select the patient monitor name or IP address from the device list. Click Refresh until the IP address or patient monitor name displays. 8. Click Get Log or Get All Logs. NOTE If you select Get All Logs and are connected to the CARESCAPE Network, logs from every device type selected will transfer. 9. Select the folder you created for log files, then click OK. 10. The log file displays and a message at the top of the netUpdate window displays a message that the log retrieval was successful. 6-20 Dash 3000/4000/5000 2000966-542D Troubleshooting: Get error logs Get logs via CIC Requirements Clinical Information Center (CIC) networked to the patient monitor(s) Get logs 1. At the CIC, select View Other > Select Unit > Select Bed to verify that the patient monitor(s) can be viewed. 2. From the CIC Main Menu, select SETUP CIC. 3. Select the SERVICE PASSWORD tab. 4. Type the password mms_com and press Enter. 5. At the command prompt, type getlog -n “unit|device” -p “C:\filename” (including quotes) where “unit|device” is the patient monitor name, and “C:\filename” is the CIC location you’re copying to. Type getlog /? to display other options for error code generation. 6. Press Enter. Get logs via Centralscope NOTE The CARESCAPE Network software option must be enabled before the error logs may be transferred over the network to a Centralscope central station. The following procedure describes how to copy the patient monitor and parameter module error logs and then transfer them to a diskette at the Centralscope central station. CAUTION This procedure is intended for use by service personnel with advanced troubleshooting skills. Do not “experiment” with these commands! The consequences of misuse include loss of patient data, corruption of the central station operating software, or disruption of the entire CARESCAPE Network. Access the COPY LOGS menu 1. Beginning with the Centralscope central station Main Menu, select CENTRAL SETUP > SERVICE. 2. Enter password: MEI CS 123 3. Select COPY LOGS. The Copy Logs menu displays. 2000966-542D Dash 3000/4000/5000 6-21 Troubleshooting: Get error logs 4. Select the Care Unit. 048A 5. Select UNIT: 6. Using the Trim Knob control, change the displayed Care Unit name. When the desired Care Unit name displays, press the Trim Knob control. 044A Select the monitoring device 1. Select DEVICE: 2. Using the Trim Knob control, change the displayed device name. Note that only monitoring devices within the previously selected Care Unit show. When the desired monitoring device name displays, press the Trim Knob control. 045A Select the error log date 1. Select DATE: 2. Using the Trim Knob control, change the error log date. Note that one of the selections is ALL, which retrieves all stored error logs from the specified device. When the desired date displays, press the Trim Knob control. 046A 6-22 Dash 3000/4000/5000 2000966-542D Troubleshooting: Get error logs Copy error logs Once the Care Unit, device, and date have been specified the final step is to begin copying the error logs to the floppy diskette. 1. Insert a PC-formatted, high-density floppy diskette into the floppy diskette drive of the central station. 2. Select START COPY. A new display appears that confirms the file source device. Using the Trim Knob control, select the desired function. Press the Trim Knob control to start. Once the copy function begins the Start Copy button changes to show the function: “copying.” 047A Eject floppy Select this option to eject the floppy diskette from the central station’s disk drive. 2000966-542D Dash 3000/4000/5000 6-23 Troubleshooting: Wireless LAN Wireless LAN Many factors could cause the wireless patient monitor to exhibit some form of interruption in communication, such as loss of waveforms or delayed communication response. The solution may be as simple as enabling the wireless communication feature or as complex as analyzing the wireless and wired network. The purpose of this section is to help identify the source of the problem by using the wireless status indicator that is part of the monitor. There are three different locations of wireless status indicators. One is located in the REVISION AND ID Menu, one in the Service Menu., and one in the lower right corner of the display. REVISION AND ID Menu 944A, 945A, 946A Service Menu (page 1) 6-24 Dash 3000/4000/5000 Service Menu (page 2) 2000966-542D Troubleshooting: Wireless LAN 50 CO2 0 Wireless Status Indicators 100 *** RATE 70 MORE MENUS 10:15:45 CO2 RSP HI 29 NO BREATH 15-DEC-2010 * ALARMS: BED3 - HR LOW ALRM A RR 19 INSP 3 SPO2 105 90 % EXP CO2 38 50 -1 B Before troubleshooting, identify the wireless technology used in the patient monitor. Access Service Mode Access the Service Mode menu starting from the Main menu. 1. Select MORE MENUS > MONITOR SETUP > SERVICE MODE. 2. Enter password using the Trim Knob control to select the day and month from patient monitor screen with leading zeros. (e.g. July 4 = 0407). Identify the wireless technology 1. From the Monitor Setup Menu, select REVISION AND ID. 2. Select NEXT until the HARDWARE ID DISPLAY information window displays. 3. If the WIRELESS LAN ID field displays association status, firmware version, signal strength status and transmit rate status (For example: 01 5.0.2.0-005R -44 01), then your wireless card is 802.1 a/b/g technology. Go to “802.11a/b/g” on page 6-26 for further troubleshooting. If the WIRELESS LAN ID field is missing, then the patient monitor either does not have wireless technology (hardware and software) installed or the wireless feature is not enabled. Go to “Confirm or configure wireless LAN” on page 4-14 to enable the feature, then go to “802.11a/b/g” on page 6-26 for further troubleshooting. 802.11a/b/g Wireless technology 944A 2000966-542D Dash 3000/4000/5000 6-25 Troubleshooting: Wireless LAN 802.11a/b/g Identifying the source of a wireless communication problem can be a challenge because of the dependencies between the patient monitor and the wireless/wired network. Below is a simplified troubleshooting process to determine where the problem originates. Following that are detailed steps to display status and analyze information. Take the patient monitor to the location that exhibited the problem. Press Graph or Print to print out WIRELESS LAN STATUS.* Display WIRELESS LAN ID field. Analyze the WIRELESS LAN ID printout. Press Graph or Print to printout WIRELESS LAN ID field.* Analyze the WIRELESS LAN STATUS printout. Display WIRELESS LAN STATUS in the service menu. Determine source of the problem. *If the patient monitor does not have a printer, write down the information. 933A Analyze WIRELESS LAN ID field Display the WIRELESS LAN ID field as follows: 1. From the Monitor Setup menu, select REVISION AND ID. 2. Select NEXT until the HARDWARE ID DISPLAY information window displays. NOTE If the WIRELESS LAN ID field does NOT display a status code as shown below, then wireless technology is not used or not enabled. See “Confirm or configure wireless LAN” on page 4-14 to enable the wireless feature. The WIRELESS LAN ID field does not refresh. You must exit and re-enter the menu. For proper operation of the 802.11a/b/g wireless patient monitor, analyze the association, firmware version, signal strength and transmit rate status. 0X 5.0.2.0-005R XX XX Association status 6-26 Firmware version Dash 3000/4000/5000 Signal strength status Transmit rate status 2000966-542D Troubleshooting: Wireless LAN The following table defines all possible status values. Status Description Association status 00 Dash is not connected to the wireless network or there is no wireless signal 01 Dash is connected to the wireless network Wireless signal strength indicator Signal strength status1 0 No signal < -81 dBm Poor -71 dBm to -80 dBm Fair -51 dBm to -70 dBm Very good >= -50 dBm Excellent Transmit rate status 1 1 Mbps 2 2 Mbps 5 5.5 Mbps 6 6 Mbps 9 9 Mbps 11 11 Mbps 12 12 Mbps 18 18 Mbps 24 24 Mbps 36 36 Mbps 48 48 Mbps 54 54 Mbps 1. Signal strength status is not a calibrated SNR (signal/noise ratio) value. 2000966-542D Dash 3000/4000/5000 6-27 Troubleshooting: Wireless LAN These values should be: Association Status 01 Received Signal Strength Indicator (RSSI) minimum user-defined value Transmit Rate Status 05 or greater If the association status is other than 01, it is likely 0B (SSID or PASS KEY incorrect). Verify that the SSID and PASS KEY matches the access point configuration. Go to “Confirm or configure wireless LAN” on page 4-14 for steps to check the settings. If signal strength and transmit rate statuses are less than the above values, the source of the problem is likely the wireless network (access point). Go to Analyze WIRELESS LAN STATUS screen below and contact your local hospital IT department for further troubleshooting. If association status, signal strength and transmit statuses meet the requirements, then the wireless patient monitor is not the source of the problem. Contact your local hospital IT department for further troubleshooting. 6-28 Dash 3000/4000/5000 2000966-542D Troubleshooting: Wireless LAN Analyze WIRELESS LAN STATUS screen Display the WIRELESS LAN STATUS screen by entering Service Mode (see “Access Service Mode” on page 6-25) and selecting MONITOR SETTINGS > WIRELESS LAN STATUS. The WIRELESS LAN STATUS screen displays the same information as the WIRELESS LAN ID field along with advanced status fields. Personnel with specialized training (hospital IT or network engineer) can interpret this information. Check this value to determine if wireless is enabled Check these values to determine network communication 945A 1. Check that the information updates every 4 seconds indicating communication. 2. Check for the following status information: ASSOCIATION CONNECTED TRANSMIT RATE Greater than 5.5 Mbit PERCENT CRC ERRORS 00 TRANSMIT FAILURES 00000 3. If the ASSOCIATION status in the WIRELESS LAN STATUS window is other than CONNECTED, see “Confirm or configure wireless LAN” on page 4-14 to check if the wireless feature is enabled. Contact GE Technical Support for additional assistance. 2000966-542D Dash 3000/4000/5000 6-29 Troubleshooting: Wireless LAN 6-30 Dash 3000/4000/5000 2000966-542D 7 2000966-542D Field replaceable units Dash 3000/4000/5000 7-1 Field replaceable units: Ordering field replaceable units Ordering field replaceable units The parts lists and drawings in this chapter supply enough detail for you to order parts for the assemblies considered field replaceable. If you require additional information or troubleshooting assistance, contact GE Technical Support. To order parts, contact Service Parts at the address or telephone number listed on the “How to Reach Us...” page found in the front of this manual. 7-2 Dash 3000/4000/5000 2000966-542D Field replaceable units: Field replaceable units Field replaceable units The table below lists field replaceable units that can be ordered. NOTE Due to recent branding changes, the part ordered may vary slightly in appearance from the previous part. Performance is not affected. Part number Description Dash 3000 Dash 4000 Dash 5000 Handle assemblies - See “Remove or replace handle assembly” on page 7-10 for disassembly. 2026653-039 DASH HANDLE WITHOUT ALARM WITH WIRELESS LAN Includes assembled handle, antennas and hardware. X 2026653-040 DASH HANDLE WITH ALARM WITH WIRELESS LAN Includes assembled handle, antennas and hardware. X 2026653-042 DASH HANDLE WITHOUT ALARM WITHOUT WIRELESS LAN Includes assembled handle and hardware. X 2026653-037 DASH HANDLE WITH ALARM WITHOUT WIRELESS LAN Includes assembled handle and hardware. X X X X X Display assemblies - See “Remove or replace display assembly” on page 7-18 for disassembly. 2000966-542D 2026653-002 DASH 5K DISPLAY ASSEMBLY Includes complete display assembly, flex, labels and hardware for Dash 5000 patient monitor. NOTE: V6 software or later required. X 2026653-031 DASH 5K DISPLAY ASSEMBLY WITHOUT LCD Includes display components, flex assembly, labels and hardware for Dash 5000 patient monitor. (no LCD) NOTE: V6 software or later required. X 2026653-004 DASH 4K DISPLAY ASSEMBLY Includes complete display assembly, flex, labels and hardware for Dash 4000 patient monitor. X 2026653-035 DASH 4K DISPLAY ASSY WITHOUT LCD Includes display components, flex assembly, labels and hardware for Dash 4000 patient monitor. (no LCD) X 2026653-006 DASH 3K DISPLAY ASSEMBLY Includes complete display assembly (including flex and inverter) and labels for Dash 3000 patient monitor. Dash 3000/4000/5000 X 7-3 Field replaceable units: Field replaceable units Part number 2026653-007 Description See “Replace display assembly parts” on page 7-26 for disassembly. DASH 3K DISPLAY ASSEMBLY WITHOUT LCD Includes display components and labels for Dash 3000 patient monitor. (no LCD) Dash 3000 Dash 4000 Dash 5000 X Display flex assembly - See “Replace display flex assembly” on page 7-24 for disassembly. 2013114-026 DASH 4K/5K DISPLAY FLEX Includes complete display flex for Dash 4000/5000 patient monitors. X X Alarm light assemblies - See “Replace display assembly parts” on page 7-26 for disassembly. 2026653-025 DASH 4K ALARM LIGHT ASSEMBLY Includes alarm light, cable, lens and lens blank for 10” Dash 4000 patient monitor. 2026653-026 DASH 5K ALARM LIGHT ASSEMBLY Includes alarm light, cable, lens and lens blank for 12” Dash 5000 patient monitor. X X Inverter assemblies - See “Replace display assembly parts” on page 7-26 for disassembly. 2026653-022 DASH 3K DISPLAY INVERTER Includes display inverter and cable for Dash 3000 patient monitor. 2026653-023 DASH 4K DISPLAY INVERTER Includes inverter. Contains a back plate that has a clearance hole to accommodate the height of the capacitors on the inverter. 2026653-034 DASH 5K DISPLAY INVERTER Includes inverter. X X X Keypad or Trim Knob assemblies - See “Replace display assembly parts” on page 7-26 for disassembly. 7-4 2026653-016 DASH 3K KEYPAD ASSEMBLY Includes keypad assembly with encoder and hardware for Dash 3000 patient monitor. 2026653-017 DASH 4K KEYPAD ASSEMBLY Includes keypad assembly with encoder and hardware for Dash 4000 patient monitor. 2026653-018 DASH 5K KEYPAD ASSEMBLY Includes keypad assembly with encoder and hardware for Dash 5000 patient monitor. 2026653-024 DASH3K/4K/5K TRIM KNOB Includes Trim Knobs and clip. Dash 3000/4000/5000 X X X X X X 2000966-542D Field replaceable units: Field replaceable units Part number Description Dash 3000 Dash 4000 Dash 5000 DAS assemblies - See “Replace main unit parts” on page 7-34 for disassembly. 2026653-051 DASH Generic OHMEDA DAS Includes Generic Ohmeda DAS assembly, labels and hardware. NOTE: v2B software or later required with DAS v5. X X X 2026653-052 DASH MASIMO DAS Includes Masimo DAS assembly, labels and hardware. NOTE: v5 software or later required. X X X 2026653-053 DASH NELLCOR-OXIMAX DAS Includes Nellcor OxiMax DAS assembly, labels and hardware. NOTE: v5.4 software or later required. X X X Wireless LAN assemblies 2026653-038 DASH WLAN COMPACT FLASH 802.11a/b/g Includes compact flash wireless card with assembled adapter, connectors, and hardware for 802.11a/b/g. (no antennas and no labels) NOTE: Software version 7 or later is required. NOTE: The compact flash wireless card with adapter assembly is required for use with Dash CPU processor board, PN 801424-006. NOTE: There is no 802.11a/b/g FRU kit available to replace failed 802.11b wireless cards. You must order the appropriate 802.11 a/b/g wireless upgrade and Dash software upgrade kits. X X X 2026653-041 DASH WLAN COMPACT FLASH 802.11a/b/g Includes compact flash wireless card, connectors, hardware and labels for 802.11a/b/g. (no antennas, no labels, and no adapter) NOTE: Software version 7 or later is required. NOTE: There is no 802.11a/b/g FRU kit available to replace failed 802.11b wireless cards. You must order the appropriate 802.11 a/b/g wireless upgrade and Dash software upgrade kits. X X X X X NBP pump assembly - See “Replace main unit parts” on page 7-34 for disassembly. 2013114-020 DASH NBP PUMP ASSEMBLY Includes NBP assembly and hardware. X Writer assembly or flex - See “Replace main unit parts” on page 7-34 for disassembly. 2026653-015 DASH WRITER FLEX Includes writer flex and hardware. X X X 2026653-021 WRITER 50MM CS2 Includes light gray writer with captive hardware. X X X Speaker assembly - See “Replace main unit parts” on page 7-34 for disassembly. 2000966-542D Dash 3000/4000/5000 7-5 Field replaceable units: Field replaceable units Part number 2013114-017 Description DASH SPEAKER ASSEMBLY Includes speaker assembly and hardware. Dash 3000 Dash 4000 Dash 5000 X X X CPU with battery housing assembly - See “Replace main unit parts” on page 7-34 for disassembly. 2026653-045 DASH -007 CPU WITH BATTERY HOUSING WITH WIRELESS LAN Includes CPU/battery housing assembly, PC card holder and hardware. NOTE: v6.10 or later software required. X X X X X X X Power supply assembly - See “Replace main unit parts” on page 7-34 for disassembly. 2013114-018 DASH POWER SUPPLY Includes power supply assembly and hardware. X Battery door assembly - See “Replace battery door” on page 7-50 for disassembly. 2026653-019 DASH BATTERY DOOR Includes frame, fasteners and silicone doors. X Foot and writer cover assemblies - See “Replace battery door” on page 7-50 or “Replace foot” on page 7-50 for disassembly. DASH FOOT AND WRITER COVER Includes dark blue foot, light gray writer cover and hardware. X X X RECHARGEABLE 11.1V BATTERY X X X HARDWARE KIT X X 2026653-027 DASH 3K/4K/5K SIDE LABELS Includes all languages X X 2026653-028 DASH 5K FRONT LABELS Includes all languages 2026653-029 DASH 4K FRONT/DAS LABELS Includes all languages 2026653-030 DASH 3K FRONT/DAS LABELS Includes all languages 2026653-020 Batteries 2017857-002 Hardware and labels 2013114-029 Labels 7-6 Dash 3000/4000/5000 X X X X 2000966-542D Field replaceable units: Disassembly guidelines Disassembly guidelines WARNINGS REPAIR TO THE FRU LEVEL — Field repairs are recommended to the field replaceable unit (FRU) only. Attempting a field repair on a PCB or a factory sealed component or assembly could jeopardize the safe and effective operation of the patient monitor. DAS ASSEMBLY — Do not open the DAS assembly as this breaks the isolation barrier which may result in patient death or serious injury. The DAS assembly is a field replaceable unit only. There are NO field repairs or adjustments for the DAS assembly. BATTERY EXPLOSION HAZARD — When removing the GCX plate and the footpad from the bottom of the patient monitor, clearly identify the screws to ensure the same screws are used to replace both the footpad and the GCX plate. Do not re-assemble the footpad without the GCX plate. Screws that are too long will penetrate into the battery case and cause the battery to leak or to explode. NOTE GE recommends that you assemble the patient monitor using the new fasteners (screws, washers, etc.) provided in the FRU Kits. Some fasteners, like the screws with a thread locking coating, are not intended to be re-used more than three times. Tools required A standard set of hand tools is required for disassembly and assembly. Before disassembly Before you disassemble the patient monitor, you should always do the following tasks. 1. Remove AC power. 2. Remove both batteries. 3. Provide appropriate electrostatic discharge protection to prevent damaging the patient monitor. 4. Be aware that the nonspecific disassembly instructions apply to all patient monitors supported by this service manual. Disassembly for specific models of the patient monitor are identified when required. 2000966-542D Dash 3000/4000/5000 7-7 Field replaceable units: Disassembly guidelines Hardware precautions When disassembling the patient monitor, observe the following guidelines: Remove the handle assembly, then remove the display assembly to access the field replaceable units of the display assembly and the main unit. Note the positions of wires, cables, and different sized screws; marking them if necessary to ensure they are replaced correctly. Do not kink, pinch, stretch, twist, or tightly fold a flex cable. Unless otherwise stated, reassemble the patient monitor in reverse order of disassembly. Electrostatic discharge (ESD) precautions All external connector inputs and outputs of the patient monitor are designed with protection from ESD damage. However, if the patient monitor requires service, exposed components and assemblies contained within are susceptible to ESD damage. This includes human hands, nonESD protected work stations and/or improperly grounded test equipment. The following guidelines help make a service workstation more resistant to the ESD damage: Discharge any static charge you may have built up before handling semiconductors or assemblies containing semiconductors. A grounded, antistatic wristband (3M part number 2046 or equivalent) or heel strap should be worn at all times while handling or repairing assemblies containing semiconductors. Use properly grounded soldering and test equipment. Use a static-free work surface (3M part number 8210 or equivalent) while handling or working on assemblies containing semiconductors. Do not remove semiconductors or assemblies containing semiconductors from antistatic containers (Velo-stat bags) until absolutely necessary. Make sure power to an assembly is turned off before removing or inserting a semiconductor. Do not slide semiconductors or electrical/electronic assemblies across any surface. Do not touch semiconductor leads unless absolutely necessary. Semiconductors and electrical/electronic assemblies should be stored only in antistatic bags or boxes. Handle all PCB assemblies by their edges. Do not flex or twist the circuit board. These guidelines may not guaranty a 100% static-free workstation, but can greatly reduce the potential for failure of any electrical/electronic assemblies being serviced. 7-8 Dash 3000/4000/5000 2000966-542D Field replaceable units: Replacement procedures Replacement procedures Unless otherwise stated, reassemble the patient monitor in reverse order of disassembly. NOTE When reassembling the patient monitor, observe the following guidelines: 2000966-542D To prevent cracking the plastic components, do not overtighten the screws fastening the plastic components together. To prevent cross-threading plastic components, carefully start threading the screws by hand, then finish tightening the screws using an appropriate hand tool. Dash 3000/4000/5000 7-9 Field replaceable units: Remove or replace handle assembly Remove or replace handle assembly 1. Remove the two screws holding the handle to the patient monitor. Take care not to strain the cables if your patient monitor has the alarm light option or the wireless option. 537A 2. If your patient monitor does not have the alarm light option or wireless option, replace the defective handle assembly or continue to “Remove or replace display assembly” on page 7-18 to replace other parts. 3. If your patient monitor has the alarm light option, replace the defective handle assembly, or continue to remove the display assembly to route the alarm light cable through the Dash housing (if it is not already routed) or to replace other parts. Refer to “Remove or replace display assembly” on page 7-18. NOTE For Dash 3000 only: If the replacement handle assembly has an alarm light, the DAS assembly must be removed to connect the cable to J1 on the writer board. Refer to “Replace DAS assembly” on page 7-37 for instructions on removing and reinstalling the DAS assembly. alarm light cable 967A 7-10 Dash 3000/4000/5000 2000966-542D Field replaceable units: Remove or replace handle assembly 4. If your patient monitor has the wireless option, do the following to replace the defective handle assembly: CAUTION Do not pull on the 802.11a/b/g antennas or use force when connecting to the wireless card. Handle the antennas and connectors carefully as they can easily be damaged. NOTE Do not kink or bend the antenna cables tighter than a 5 mm radius. Otherwise, the cable lining will delaminate and reduce antenna performance. a. Apply a piece of adhesive tape to temporarily hold the handle onto the unit. b. Remove the display assembly. Refer to “Remove or replace display assembly” on page 7-18. c. To completely remove the handle from the main unit, do the following: Apply pressure against the antenna cables (to prevent pulling on the cables) and carefully remove the antenna label from the Dash monitor. Discard the used label. 966B 2000966-542D Dash 3000/4000/5000 7-11 Field replaceable units: Remove or replace handle assembly Apply pressure against the antenna cables (to prevent pulling on the cables) and carefully remove the antenna label from the antenna cables. Discard the label. 961B Remove the wireless card from the PC card bracket by pressing the CF card eject button. To press the CF card eject button, carefully insert the flat end of a pen approximately 1inch deep and push the CF flash card eject button as shown. CF card eject button 973A 974A 7-12 Dash 3000/4000/5000 2000966-542D Field replaceable units: Remove or replace handle assembly Carefully disconnect the antennas using a pen tip, small screwdriver, or needle nose pliers. 942A Place the wireless card in a safe place. Remove the handle from the main unit, carefully removing the antenna cables from the housing holes. d. To replace the handle, route the antenna cables through the housing holes as shown. Apply adhesive tape to temporarily hold the handle into position. 954B e. 2000966-542D Gather the antenna cables together in the middle of the unit, then do the following: Make sure that the cables are lying flat and are not twisted around each other. Provide enough slack in the cables to allow the handle to be removed if future repairs are required. Remove the protective backing from the short antenna label and position the label over the untwisted antenna cables as shown. Dash 3000/4000/5000 7-13 Field replaceable units: Remove or replace handle assembly 979A f. Remove the center section of the protective backing from the long antenna label. g. Position the antenna label under the heat shield with the first and second tabs of the antenna label straddling the screw opening in the DAS assembly. Press to secure into place. screw opening Antenna label 955B h. Route the cables under the righthand side of the antenna label as shown. Be sure that the cables are lying flat and are not twisted around each other. 955B i. 7-14 Remove the protective backing from the right side of the antenna label and secure the antenna cables in place. Dash 3000/4000/5000 2000966-542D Field replaceable units: Remove or replace handle assembly j. Continue to wrap the antenna cables around the lefthand side of antenna label. Remove the protective backing from the left side of the antenna label and secure the antenna cables as shown. 958B k. Continue to wrap the antenna cables toward the righthand side of the antenna label and secure as shown. 963B, 964B, 965B 2000966-542D Dash 3000/4000/5000 7-15 Field replaceable units: Remove or replace handle assembly CAUTION Do not pull on the 802.11a/b/g antennas or use force when connecting to the wireless card. Handle the antennas and connectors carefully as they can easily be damaged. l. Connect the antenna cables to the wireless card (black cable to the left and grey cable to the right). Black antenna cable (left) Grey antenna cable (right) Antenna connectors 959C m. Insert the wireless card (with the antenna connectors facing down and the connected antenna cables on the righthand side) into the PC card bracket. Insert wireless card with antenna connectors facing down 975B, 960C 7-16 Dash 3000/4000/5000 2000966-542D Field replaceable units: Remove or replace handle assembly n. Continue to wrap the antenna cables towards the righthand side of the antenna label. Lift up the lefthand side of the secured antenna label and re-secure the additional cable loops under the label. 961B o. Check that there is no excessive slack in the antenna cables that could get pinched between the heat shield and the display assembly or between the display connector. The antenna cable should lie flat underneath the heat shield and the unsecured antenna cables connected to the wireless card should have little slack as shown. NOTE Due to the larger display size of the Dash 5000 monitor, the unsecured portion of the antenna cables between the antenna label and the wireless card has very little slack. 966B p. Reinstall the display assembly. 2000966-542D Dash 3000/4000/5000 7-17 Field replaceable units: Remove or replace display assembly Remove or replace display assembly 1. Remove the handle assembly from the patient monitor. Refer to “Remove or replace handle assembly” on page 7-10. NOTE This step is not necessary for Dash 5000 patient monitors. 2. Place the patient monitor face down on a non-abrasive, static-free surface. Make sure the Trim Knob control hangs off the edge of the surface to avoid damage. 3. Use a Phillips head screw driver to remove the four screws (six screws for Dash 5000 patient monitors) holding the display assembly to the main unit. one screw on the left side of the unit... 579A one screw on the right side of the unit... 580A Note: Use a screwdriver with a long blade or remove the GCX plate first for easy access to the bottom screws. ...and the two shorter screws from the bottom of the unit. 578B 7-18 Dash 3000/4000/5000 2000966-542D Field replaceable units: Remove or replace display assembly The Dash 5000 patient monitor has two additional screws. 893A 4. Partially separate the display assembly from the main unit and look inside the unit to determine how the display flex cable is folded. Depending on the model, the Dash patient monitor may have a display flex cable that folds up from the bottom or from the right side of the display. The location of the fold dictates how to position the display assembly to remove it from the main unit. CAUTION CABLE DAMAGE — Do not kink, pinch, stretch, twist, or tightly fold the display flex cable. If you do not handle the flex cable gently, you will damage the cable. Flex cable folds up from the bottom of the display assembly. Metal display shield plate 869A 2000966-542D Dash 3000/4000/5000 7-19 Field replaceable units: Remove or replace display assembly Flex cable folds over from the right side of the display assembly. Metallic display shield 870A 5. To prevent damaging the display flex cable, position the display assembly for the patient monitor you are servicing. Dash 3000 display assembly with circuit board display shield 1-inch (2.54 cm) 830A 7-20 Dash 3000/4000/5000 2000966-542D Field replaceable units: Remove or replace display assembly Display assembly with metallic display shield 871A 6. Remove the two screws attaching the flex circuit to the main unit’s CPU/battery housing assembly. Remove the flex connector by pulling on the flex connector strain relief. 2 screws 543A 2000966-542D Dash 3000/4000/5000 7-21 Field replaceable units: Remove or replace display assembly 7. Remove the DAS connector by lifting the snap latch and tabs. latch tabs 544A 8. Place the display assembly face down on a non-static, non-abrasive surface. Make sure the Trim Knob control hangs off the edge of the surface to avoid damage. 9. Replace the defective display assembly. 10. To replace the Display Flex assembly, refer to “Replace display flex assembly” on page 7-24. 11. To replace parts in the main unit, refer to “Replace main unit parts” on page 7-34. 12. Refer to the figure below to determine if you need to enable or disable the alarm light on your Dash display assembly. clear lens (enable light) opaque lens (disable light) 877A J2 alarm light jumper 878A 7-22 Dash 3000/4000/5000 2000966-542D Field replaceable units: Remove or replace display assembly a. To enable the alarm light option: Verify the alarm light jumper is connected to both jumper pins on the alarm light PCB of the display you are replacing. Snap in the clear lens. b. To disable the alarm light option: Remove the jumper from the alarm light PCB, or connect the jumper to only one of the jumper pins on the alarm light PCB. Pop in the opaque lens. 13. Connect the display assembly to the main unit. Refer to page 7-18 and re-assemble the patient monitor in reverse order. 14. Apply the Dash front panel label as shown below. Front panel label 894A 15. Complete the procedures in “Recommended checkout” on page 7-52. 2000966-542D Dash 3000/4000/5000 7-23 Field replaceable units: Replace display flex assembly Replace display flex assembly Dash 3000 display flex assembly The Dash 3000 display assembly includes the flex assembly. 1. Remove the handle and display assemblies according to steps starting on page 7-10. 2. Replace the display assembly and reassemble the patient monitor in reverse order of disassembly. Dash 4000 and 5000 display flex assembly CAUTION FLEX CABLE DAMAGE — Do not kink, pinch, stretch, twist, or tightly fold a flex cable. 1. Loosen the handle assembly as required. Refer to “Remove or replace handle assembly” on page 7-10. NOTE This step is not necessary for Dash 5000 patient monitors. 2. Remove the display assembly from the main unit. Refer to page 7-18. NOTE Use a thick book or some heavy object to support the display assembly while you attach the display flex to the main unit. 3. Remove the two screws to disconnect the flex cable from the display. Retain the screws. 4. Insert the new flex cable connector into the display connector as shown in the figure below. 873A 5. Using two screws, secure the flex cable to the display assembly. 7-24 Dash 3000/4000/5000 2000966-542D Field replaceable units: Replace display flex assembly 6. Carefully bend the display flex as shown. 874A 7. Pick up and support the display assembly between the main unit and a thick book. 8. Use two screws to carefully secure the flex processor cable connector to the main processor PCB. 2 screws 875A 9. Carefully align and insert the DAS cable pins into the DAS assembly until the snap latch clicks into place. 876A 10. Reassemble the patient monitor in reverse order of disassembly. 11. Complete the procedures in “Recommended checkout” on page 7-52. 2000966-542D Dash 3000/4000/5000 7-25 Field replaceable units: Replace display assembly parts Replace display assembly parts Use the following procedures to replace the display assembly parts: 1. “Remove or replace handle assembly” on page 7-10. 2. “Remove or replace display assembly” on page 7-18. 3. “Open display assembly” on page 7-27. 4. On the following pages find the steps for the part and Dash model you are servicing: 7-26 “Replace Dash 4000/5000 alarm light” on page 7-28. “Replace display inverter” on page 7-28. “Replace keypad assembly or Trim Knob control” on page 7-30. “Replace display components without LCD” on page 7-31. Dash 3000/4000/5000 2000966-542D Field replaceable units: Replace display assembly parts Open display assembly Follow the steps below for the patient monitor you are servicing. Dash 3000 patient monitor with display shield flex circuit Separate the patient monitor bezel from the LCD display. 1. Remove and retain the four screws holding the display shield to the LCD display and two screws holding the display shield to the patient monitor bezel. 4 larger screws Dash 4000 patient monitor Dash 5000 patient monitor 1. Remove and retain the two screws from the display flex cable. Pull up on the latch tabs to remove the flex cable from the display. 1. Remove and retain the two screws from the display flex cable. Pull up on the latch tabs to remove the flex cable from the display. 2 screws 2 screws 2 smaller screws 879A 860A 2. Remove and retain the 14 screws as shown. 2. Remove and retain the 10 screws as shown. 14 screws 10 screws 500A 2. Remove the display assembly from the patient monitor bezel. 3. Pull the LCD display isolator out of the way. Disconnect the LCD display cable. LCD display cable 899A 501A 4. Disconnect the cable from the backlight inverter PCB. 3. Separate the transition bezel from the front bezel. It is not necessary to remove the metal backplate. 4. Set aside the transition bezel. 900A 3. Separate the transition bezel from the front bezel. It is not necessary to remove the metal backplate. 4. Set aside the transition bezel. cable 910A NOTE The display that is pictured above is a Sharp. 884A 502A 2000966-542D Dash 3000/4000/5000 7-27 Field replaceable units: Replace display assembly parts Replace Dash 4000/5000 alarm light 1. If required, remove the handle assembly. Refer to page 7-10. 2. Remove the display assembly from the main unit. Refer to page 7-18. 3. Open the display assembly. Refer to page 7-27. 4. If required, remove the clear alarm light lens. 5. Disconnect the alarm light cable from the alarm light PCB. 888A 6. Carefully remove the defective alarm light PCB and set aside. 7. Insert the new alarm light PCB and connect the alarm light cable to the alarm light PCB connector. 8. Verify the alarm light jumper is secured to both jumper pins. Refer to step 12 on page 7-22. 9. Re-assemble the patient monitor in reverse order. 10. Complete the procedures in “Recommended checkout” on page 7-52. Replace display inverter Follow the steps below for the patient monitor you are servicing. 7-28 Dash 3000/4000/5000 2000966-542D Field replaceable units: Replace display assembly parts Dash 3000 patient monitor with display shield flex circuit Dash 4000 patient monitor 1. Flip over the display shield flex circuit. Remove the male end of the two snap rivets. plastic snap rivets (male end) Dash 5000 patient monitor 1. Open the display assembly. Refer to page 7-27. NOTE If the display backplate is a PCB with an integrated flex assembly, refer to the section Replacing the Backlight Inverter PCB in the Dash Service Manual shipped with the product for information on how to replace the inverter. Dispose of the backplate and mylar insulator strip included in the new inverter replacement kit. 1. Open the display assembly. Refer to page 7-27. 2. Disconnect the cable connectors from the backlight inverter PCB connectors. 882B 2. Flip over the display shield flex circuit. Disconnect the display shield cable from the backlight inverter PCB. 500A Backplate, PCB with integrated flex assy plastic snap rivets (female end) Backplate, metal 881A 896A, 879A 2. If the backplate is metal, remove and dispose of the backplate. Retain the two screws. 3. Disconnect the cables from the backlight inverter PCB connectors. 3. Remove and retain the two screws that fasten the backlight inverter PCB to the display mounting sub-plate. 881A 4. Install the mylar insulator over the inverter standoffs. 503A display shield cable 898A 3. Use a screw driver to remove the female end of the two snap rivets. Do not re-use these rivets. 4. Replace the backlight inverter PCB. 5. Reassemble the display assembly in reverse order. 6. Complete the procedures in “Recommended checkout” on page 7-52. 4. Remove and retain the two screws that fasten the backlight inverter PCB to the display mounting plate. 5. Install the mylar insulator over the inverter standoffs. 881A 897A 5. Install the new inverter using the two retained screws, and reconnect the inverter cables. 6. Reassemble the display assembly in reverse order. 7. Complete “Recommended checkout” on page 7-52. 897A 6. Install the new inverter using the two retained screws, and reconnect the inverter cables. 7. Install the new metal backplate using the two retained screws. 8. Reassemble the display assembly in reverse order. 9. Complete “Recommended checkout” on page 7-52. 2000966-542D Dash 3000/4000/5000 7-29 Field replaceable units: Replace display assembly parts Replace keypad assembly or Trim Knob control Follow the steps below for the patient monitor you are servicing. Dash 3000 patient monitor with display shield flex circuit Dash 4000 patient monitor Dash 5000 patient monitor 1. Remove the rubber knob from the Trim Knob control shaft. 1. Remove the rubber knob from the Trim Knob control shaft. 1. Remove the rubber knob from the Trim Knob control shaft. 2. Use an 11mm wrench or nut driver to remove the nut holding the Trim Knob control’s shaft to the display bezel. 2. Use an 11mm wrench or nut driver to remove the nut holding the Trim Knob control’s shaft to the display bezel. 2. Open the display assembly. Refer to page 7-27. 589A 589A 3. Open the display assembly. Refer to page 7-27. 3. Open the display assembly. Refer to page 7-27. 4. Remove the three screws holding the keypad assembly to the display bezel. 4. Follow these steps to remove the keypad assembly from the front bezel: 3. Remove the keypad assembly from the front bezel. a. a. three screws Gently squeeze the latch release and pull up to disconnect the keypad cable from the keypad PCB. Gently squeeze the latch release and pull up to disconnect the keypad cable from the keypad PCB. Disconnect the display flex. 883A b. 590A Remove the five screws holding the keypad assembly to the front bezel. 8831A 883A c. Lift the mounting plate. Refer to steps 4b and 4c on page 7-31. b. If required, lift the mounting plate off the display bezel bosses to provide access to the keypad mounting screws. c. Remove the five screws holding the keypad assembly to the front bezel, and remove the keypad assembly. 591A Keypad Assembly 8832A 5. Place the new keypad assembly in the display bezel. 5. Place the new keypad assembly in the display bezel. 4. Place the new keypad assembly in the display bezel. 6. Reattach the keypad cable. 6. If required, replace the grounding strap. 5. Reattach the keypad cable. 7-30 Dash 3000/4000/5000 2000966-542D Field replaceable units: Replace display assembly parts Dash 3000 patient monitor with display shield flex circuit Dash 4000 patient monitor Dash 5000 patient monitor 7. Secure the new keypad with the screws. 7. Reattach the keypad cable. 6. Secure the new keypad with the screws. 8. Make sure the washer tab fits in the retaining slot of the Trim Knob control’s shaft and re-install the 11mm nut. 8. Secure the new keypad with the screws. 7. Secure the Trim Knob and reassemble the display assembly in reverse order. 9. Secure the Trim Knob by reassembling the display assembly in reverse order. 9. Make sure the washer tab fits in the retaining slot of the Trim Knob control’s shaft and re-install the 11mm nut. 8. Complete the procedures in “Recommended checkout” on page 752. 10. Complete the procedures in “Recommended checkout” on page 752. 10. Secure the Trim Knob and reassemble the display assembly in reverse order. 11. Complete the procedures in “Recommended checkout” on page 752. Replace display components without LCD NOTE These instructions are to replace the display components, not the LCD. If the LCD fails, order the Display Assembly field replaceable unit. 2000966-542D Dash 3000/4000/5000 7-31 Field replaceable units: Replace display assembly parts 1. Open the display assembly. Refer to page 7-27. 2. Remove the LCD display. Follow the steps for the patient monitor you are servicing. Dash 3000 patient monitor with display shield flex circuit a. Peel back and remove the rubber display isolator from around the display. Dash 4000 patient monitor a. Dash 5000 patient monitor Disconnect the five cable connectors. a. Disconnect the four or five cable connectors, as required. 885A b. Remove the four screws anchoring the mounting plate to the LCD display. 504A b. Go to next step. 8851A b. Remove the mounting plate and set aside. c. Lift out the LCD display from the rubber display isolator and set aside. 885A c. Remove the mounting plate and set aside. 8871A 7-32 Dash 3000/4000/5000 2000966-542D Field replaceable units: Replace display assembly parts d. Use a 5 mm nut driver to remove the four stand-off screws anchoring the display to the rubber display isolator. NOTE The stand-offs are shimmed at the factory. Save the washers and make sure you put them in the same location when you reassemble the display 886A e. Lift out the LCD display from the rubber display isolator and set aside. 887A 3. Dampen a clean, soft cloth with window cleaner and carefully clean and dry the LCD display and the display filter to remove fingerprints and dust particles. 4. If required, replace the display filter, front bezel, and insert. 5. Install the existing LCD display and reassemble the display assembly in reverse order. 6. Complete the procedures in “Recommended checkout” on page 7-52. 2000966-542D Dash 3000/4000/5000 7-33 Field replaceable units: Replace main unit parts Replace main unit parts Use the following procedures to replace the main unit parts: 1. “Remove or replace handle assembly” on page 7-10. 2. “Remove or replace display assembly” on page 7-18. 3. On the following pages find the steps for the part and Dash model you are servicing: “Replace wireless card” on page 7-34. “Replace DAS assembly” on page 7-37. “Replace NBP pump assembly” on page 7-40. “Replace writer assembly or writer flex” on page 7-41. “Replace speaker assembly” on page 7-42. “Replace CPU/battery housing assembly” on page 7-44. “Replace power supply assembly” on page 7-48. Replace wireless card Complete the following procedures to replace the wireless card. 1. Remove the two screws holding the handle to the patient monitor. Refer to page 7-10. 2. Remove the display assembly from the main unit. Refer to page 7-18. 3. Release the antenna cables from underneath the left side of the antenna label to allow enough slack in the cable to allow the wireless card to be removed from the card slot. 961B 4. Remove the wireless card from the card slot by pressing the CF card eject button. To press the CF card eject button, carefully insert the 7-34 Dash 3000/4000/5000 2000966-542D Field replaceable units: Replace main unit parts flat end of a pen approximately 1- inch deep and push the CF flash card eject button as shown. CF card eject button 973A 974A 5. Carefully disconnect the antennas using a pen tip, small screwdriver, or needle nose pliers. 942A 2000966-542D Dash 3000/4000/5000 7-35 Field replaceable units: Replace main unit parts 6. Reconnect the antennas connectors to the replacement wireless card. The black antenna cable connects to the connector on the left and the grey antenna cable on the right. Black antenna cable (left) Grey antenna cable (right) Antenna connectors 959C 7. Reinsert the wireless card into the PC card bracket. Insert wireless card with antenna connectors facing down 975B 8. Re-secure the antenna cables underneath the antenna label as shown. 962B 7-36 Dash 3000/4000/5000 2000966-542D Field replaceable units: Replace main unit parts Replace DAS assembly WARNING DAS ASSEMBLY — Do not open the DAS assembly as this breaks the isolation barrier which may result in patient death or serious injury. The DAS assembly is a field replaceable unit only. There are NO field repairs or adjustments for the DAS assembly. CAUTION The patient monitor requires software version 5 or later to operate with the Masimo SET SPO2 and 4 BP SuperStat DAS upgrade. If the installation of software version 5 or later is required, GE recommends that you FIRST install the software. Then, install the Masimo SET SPO2 and 4 BP SuperStat hardware upgrade. 1. Remove the two screws holding the handle to the patient monitor. Refer to page 7-10. 2. Remove the display assembly from the main unit. Refer to page 7-18. 3. Remove the four screws anchoring the Data Acquisition System (DAS) assembly in place. CAUTION CAREFULLY remove the DAS assembly so that you do NOT hit the components on the CPU/battery housing assembly. On the Dash 5000 patient monitor the top two screws attach to a bracket, not the rear housing as shown. 545A 2000966-542D Dash 3000/4000/5000 7-37 Field replaceable units: Replace main unit parts 4. Remove the DAS assembly by first pulling the left side out 1/4-inch, then sliding the whole assembly out of the patient monitor. If the Wireless LAN option is installed, use a needle nose pliers to remove the antennae by disconnecting both coax connectors from the compact flash card. 525A 5. Replace the DAS assembly. 6. Reassemble the unit reversing the order of removal steps. 7. If you installed the Generic Ohmeda DAS assembly, place the labels as shown below. BP 1 and BP 2 12SL (if software option was enabled) CO2, NBP, and ECG 861A NOTE The BP 1 and BP 2 label looks similar to the example below. 862A 7-38 Dash 3000/4000/5000 2000966-542D Field replaceable units: Replace main unit parts 8. If you installed the Nellcor OxiMax or Masimo SET SPO2 and 4 BP SuperStat upgrade, place the labels as shown below. BP 1/3 and BP 2/4 DINAMAP SUPERSTAT Masimo SET or Nellcor OxiMax 12SL (if software option was enabled) CO2, NBP, and ECG 827B NOTE The BP 1/3 and BP 2/4 label looks similar to the example below. 860A patent disclosure label 004B 9. Complete the procedures in “Recommended checkout” on page 7-52. 2000966-542D Dash 3000/4000/5000 7-39 Field replaceable units: Replace main unit parts Replace NBP pump assembly 1. Remove the DAS assembly according to steps starting on page 7-37. 2. Remove the four screws and remove the NBP assembly from the cover of the DAS assembly. 3. Disconnect the tube from the inner solenoid going into the NBP assembly. Remove four screws. 570A Disconnect this end of the tube. 4. Using a small, flat-blade screwdriver, remove the connector from the NBP assembly to the DAS assembly. 527A DAS assembly FRU NBP pump assembly FRU 526A 7-40 Dash 3000/4000/5000 2000966-542D Field replaceable units: Replace main unit parts 0 5. Attach the NBP assembly to the DAS assembly. Do not forget: the four mounting screws, the tube connection, and the flex connector. 6. Reassemble the patient monitor in reverse order. Replace writer assembly or writer flex 1. Remove the DAS assembly according to steps starting on page 7-37. 2. Remove the writer by unscrewing the two captive screws inside the writer. CAUTION Approach the screw from below the top bar on the paper roll holder so that you do not damage the unit. 533A 3. Unscrew the thumb screw anchoring the writer cable to the main assembly and disconnect the flex cable from the CPU/battery housing assembly. NOTE When securing the thumb screw for reassembly, first fingertighten the thumb screw. Then, use a flat-head screw driver to tighten the screw an additional 1/4 turn. speaker harness and alarm light cable three writer flex screws thumb screw 562B 2000966-542D Dash 3000/4000/5000 7-41 Field replaceable units: Replace main unit parts 4. Remove the speaker harness and the optional alarm light cable harness from the top of the writer board. 5. Remove three screws holding the writer flex to the writer bracket. 6. Replace writer assembly and/or writer flex and reassemble the patient monitor in reverse order. 7. Complete the procedures in “Recommended checkout” on page 7-52. Replace speaker assembly 1. Remove the DAS assembly according to steps starting on page 7-37. 2. Remove the writer assembly/writer flex according to steps on page 7-41. 3. Remove the writer bracket from the frame by squeezing the sides together. 532A 4. Disconnect the speaker cable connector from the processor board. 586B 7-42 Dash 3000/4000/5000 2000966-542D Field replaceable units: Replace main unit parts 5. Remove the four screws anchoring the speaker to the frame. Remove the speaker from the unit. 586B 6. Install the new speaker in the unit. 7. Fasten the speaker with the four screws. 8. Connect the speaker cable connector to the processor board. 9. Reassemble the patient monitor in reverse order. NOTE When securing the thumb screw on the writer flex, first fingertighten the thumb screw. Then, use a flat-head screw driver to tighten the screw an additional 1/4 turn. 10. Complete the procedures in “Recommended checkout” on page 7-52. 2000966-542D Dash 3000/4000/5000 7-43 Field replaceable units: Replace main unit parts Replace CPU/battery housing assembly 1. For Dash 3000 patient monitors, remove the handle assembly. Refer to page 7-10. For Dash 4000 or 5000 patient monitors, go to the next step. 2. Remove the display assembly from the main unit. Refer to page 7-18. 3. If present, remove the wireless card. CAUTION Do not pull on the 802.11a/b/g antennas or use them to remove the wireless card. They can easily be damaged. a. Release the antenna cables from underneath the left side of the antenna label to allow enough slack in the cable to allow the wireless card to be removed from the PC card bracket. 961B 7-44 Dash 3000/4000/5000 2000966-542D Field replaceable units: Replace main unit parts b. Remove the wireless card from the PC card bracket by pressing the CF card eject button. To press the CF card eject button, carefully insert the flat end of a pen approximately 1- inch deep and push the CF flash card eject button as shown. CF card eject button 973A 974A c. Carefully disconnect the antennas using a pen tip, small screwdriver, or needle nose pliers. 942A d. Place the wireless card in a safe place. 4. Remove the DAS assembly according to steps starting on page 7-37. 2000966-542D Dash 3000/4000/5000 7-45 Field replaceable units: Replace main unit parts 5. Unscrew the thumb screw anchoring the writer cable to the CPU assembly and disconnect the flex cable from the CPU/battery housing assembly. 6. Remove the three screws anchoring the battery door assembly to the rear housing. Remove the battery door assembly. Screws holding battery door. 581B 895A 7. If replacing the battery door only, install the new door and reassemble the patient monitor. Otherwise, continue with the next step. 8. Remove the four panhead screws anchoring the CPU/battery housing assembly to the frame. These screws are attached at the bottom of the unit. 517A 7-46 Dash 3000/4000/5000 2000966-542D Field replaceable units: Replace main unit parts 9. Carefully pull the CPU/battery housing assembly from the unit. 547A 10. Remove the plastic connector panel from the three connectors at the back of the CPU/battery housing assembly. Install this panel on the new CPU/battery housing assembly before you slide the new assembly into the rear housing. plastic connector panel 572A 11. Install the new assembly in the unit. NOTE When securing the thumb screw on the writer flex, first fingertighten the thumb screw. Then, use a flat-head screw driver to tighten the screw an additional 1/4 turn. 12. If present, install the wireless card into the new CPU/battery housing assembly. CAUTION Do not pull on the 802.11a/b/g antennas or use force when connecting to the wireless card. Handle the antennas and connectors carefully as they can easily be damaged. 2000966-542D Dash 3000/4000/5000 7-47 Field replaceable units: Replace main unit parts a. Connect the antenna cables to the wireless card (black cable to the left and grey cable to the right). Black antenna cable (left) Grey antenna cable (right) Antenna connectors 959C b. With the antenna connection facing down, install the card into the card bracket. 13. Reassemble the patient monitor in reverse order. 14. Be sure to complete the following procedures in “Recommended checkout” on page 7-52: electrical safety tests checkout procedures calibration 15. Also configure the patient monitor and enable the software options previously installed. Refer to “Configuration” on page 4-1. Replace power supply assembly 1. Remove the CPU/battery housing assembly according to steps starting on page 7-44. 2. While holding the power supply assembly with one hand, remove the four screws from the back of the unit. 575A 7-48 Dash 3000/4000/5000 2000966-542D Field replaceable units: Replace main unit parts 3. Remove the assembly from the unit. 569A 4. Align the tab on the power supply mounting bracket with the slot in the rear housing and install the new assembly in the unit. Fasten the assembly to the rear housing with the new screws. slot tab 576A NOTE When securing the thumb screw on the writer flex, first fingertighten the thumb screw. Then, use a flat-head screw driver to tighten the screw an additional 1/4 turn. 5. Reassemble the patient monitor in reverse order. 6. Complete the procedures in “Recommended checkout” on page 7-52. 2000966-542D Dash 3000/4000/5000 7-49 Field replaceable units: Replace battery door Replace battery door 1. Remove the three screws anchoring the battery door assembly to the rear housing. Remove the battery door assembly. 581B Screws holding battery door. 895A 2. Install the new door and reassemble the patient monitor. Replace foot 1. Remove four screws holding the foot to the patient monitor. 926A NOTE Your unit may or may not have a mounting plate. The same four screws anchor the mounting plate and foot. 2. Replace the foot and screw to the patient monitor. 7-50 Dash 3000/4000/5000 2000966-542D Field replaceable units: Replace writer cover Replace writer cover Dash patient monitors without a writer have a blank door where the writer assembly would be installed. The door snaps into the writer space above the battery door. 927A 2000966-542D Dash 3000/4000/5000 7-51 Field replaceable units: Recommended checkout Recommended checkout After reassembling the patient monitor, ALWAYS complete the electrical safety tests, checkout procedures, calibration tests, and regular maintenance procedures identified and described in this section. Safety and functional checkout tests should be documented in the checklist provided in “Checklist” on page D-1. Recommended calibration, electrical safety tests, and checkout procedures Replacement procedure Calibration tests Checkout procedures Handle assembly None Display assembly Display assembly components Display inverter assembly Speaker None None Keypad assembly/ Trim Knob 7-52 None “Patient monitor power-up tests” on page 8-21. “Display test” on page 8-45. “Wireless antenna signal strength test (option)” on page 8-49. Use this procedure if the wireless option is installed. “Wireless LAN test (option)” on page 8-52. Use this procedure if the wireless option is installed. Electrical safety tests “Electrical safety tests” on page 8-4. “Patient monitor power-up tests” on page 8-21. “Display test” on page 8-45. “Patient monitor power-up tests” on page 8-21. “Speaker test” on page 8-46. “Wireless antenna signal strength test (option)” on page 8-49. Use this procedure if the wireless option is installed. “Wireless LAN test (option)” on page 8-52. Use this procedure if the wireless option is installed. “Patient monitor power-up tests” on page 8-21. “Display test” on page 8-45. Dash 3000/4000/5000 2000966-542D Field replaceable units: Recommended checkout Recommended calibration, electrical safety tests, and checkout procedures Replacement procedure Calibration tests DAS assembly “NBP calibration” on page 8-37. Checkout procedures 2000966-542D “ECG tests” on page 8-22. “Respiration tests” on page 8-25. “Temperature tests” on page 8-26. “Cardiac output tests (option)” on page 8-27. “Invasive blood pressure tests (option)” on page 8-27. “Pulse oximetry tests for GE Ohmeda SPO2 oximeter” on page 8-30. Use this procedure if you installed a GE Ohmeda DAS assembly. “Pulse oximetry tests for Masimo SET SPO2” on page 8-32. Use this procedure if you installed a Masimo DAS assembly. “Pulse oximetry tests for Nellcor OxiMax SPO2” on page 8-33. Use this procedure if you installed a Nellcor OxiMax DAS assembly. “Noninvasive blood pressure tests” on page 835. “Wireless antenna signal strength test (option)” on page 8-49. Use this procedure if the wireless option is installed. “Wireless LAN test (option)” on page 8-52. Use this procedure if the wireless option is installed. Refer to the CO2 chapter in the patient monitor’s operator manual to checkout the mainstream End-tidal CO2. To check out the sidestream End-tidal CO2, refer to the documentation that came with the module. Dash 3000/4000/5000 Electrical safety tests “Electrical safety tests” on page 8-4. 7-53 Field replaceable units: Recommended checkout Recommended calibration, electrical safety tests, and checkout procedures Replacement procedure Calibration tests NBP assembly “NBP calibration” on page 8-37. “Noninvasive blood pressure tests” on page 835. Wireless LAN None “Patient monitor power-up tests” on page 8-21. “Network test (option)” on page 8-46. “Wireless antenna signal strength test (option)” on page 8-49. “Wireless LAN test (option)” on page 8-52. Checkout procedures Wireless card None Power supply assembly None CPU “End-tidal CO2 test (option)” on page 8-44. “NBP calibration” on page 8-37. Writer, writer flex None 7-54 Electrical safety tests “Electrical safety tests” on page 8-4. “Wireless antenna signal strength test (option)” on page 8-49. “Wireless LAN test (option)” on page 8-52. “Patient monitor power-up tests” on page 8-21. “Wireless antenna signal strength test (option)” on page 8-49. Use this procedure if the wireless option is installed. “Wireless LAN test (option)” on page 8-52. Use this procedure if the wireless option is installed. “Patient monitor power-up tests” on page 8-21. “Analog output and defibrillator synchronization tests” on page 8-40. “Graph or print tests (option)” on page 8-44. “Display test” on page 8-45. “Speaker test” on page 8-46. “Network test (option)” on page 8-46. “Wireless antenna signal strength test (option)” on page 8-49. Use this procedure if the wireless option is installed. “Wireless LAN test (option)” on page 8-52. Use this procedure if the wireless option is installed. “TRAM-rac 2A module housing peripheral device test (option)” on page 8-54. “Patient monitor power-up tests” on page 8-21. “Graph or print tests (option)” on page 8-44. “Wireless antenna signal strength test (option)” on page 8-49. Use this procedure if the wireless option is installed. “Wireless LAN test (option)” on page 8-52. Use this procedure if the wireless option is installed. Dash 3000/4000/5000 2000966-542D 8 2000966-542D Functional and electrical safety checks Dash 3000/4000/5000 8-1 Functional and electrical safety checks: Overview Overview Manufacturer recommendations These safety tests and checkout procedures provide service personnel with a method to verify operational and functional performance of the patient monitor. Safety and functional checkout tests should be documented in the Checklist provided in “Checklist” on page D-1. Failure to attain any of the listed results indicates a potential malfunction of the patient monitor. WARNING The personnel assessing the safety of the patient monitor shall be able to recognize possible consequences and risks arising from non-conforming equipment. The safety tests and checkout procedures are based on the assumption that the tested patient monitor has known good cables and test equipment. It also requires qualified personnel who are familiar with the operation of all test equipment required for the procedures. For more information concerning the operation of these components, refer to the respective operator manual(s). Frequency Qualified personnel must perform the checkout procedures: Every 12 months after receipt of the device (Preventive Maintenance). Refer to “Maintenance schedule” on page 5-2 for more information. Each time the main enclosure is disassembled or a circuit board is removed, tested, or replaced (Corrective Maintenance). Refer to “Recommended checkout” on page 7-52 for more information. Test equipment The safety tests and checkout procedures are written for the GE recommended test equipment listed for each test. If you use test equipment other than those GE recommends, you may need to slightly modify some test steps. 8-2 Dash 3000/4000/5000 2000966-542D Functional and electrical safety checks: Overview Functional Checkout procedures 1. “Patient monitor power-up tests” on page 8-21 2. “ECG tests” on page 8-22 3. “Respiration tests” on page 8-25 4. “Temperature tests” on page 8-26 5. “Cardiac output tests (option)” on page 8-27 6. “Invasive blood pressure tests (option)” on page 8-27 7. “Pulse oximetry tests for GE Ohmeda SPO2 oximeter” on page 8-30 8. “Pulse oximetry tests for Masimo SET SPO2” on page 8-32 9. “Pulse oximetry tests for Nellcor OxiMax SPO2” on page 8-33 10. “Noninvasive blood pressure tests” on page 8-35 11. “NBP calibration” on page 8-37 12. “Analog output and defibrillator synchronization tests” on page 8-40 13. “End-tidal CO2 test (option)” on page 8-44 14. “Battery tests” on page 8-44 15. “Graph or print tests (option)” on page 8-44 16. “Display test” on page 8-45 17. “Speaker test” on page 8-46 18. “Network test (option)” on page 8-46 19. “Remote control test (option)” on page 8-46 20. “BISx test (option)” on page 8-47 21. “Wireless LAN test (option)” on page 8-52 22. “Dash Port 2 docking station test (option)” on page 8-54 23. “TRAM-rac 2A module housing peripheral device test (option)” on page 8-54 2000966-542D Dash 3000/4000/5000 8-3 Functional and electrical safety checks: Electrical safety tests Electrical safety tests General Electrical safety tests provide a method of determining if potential electrical health hazards to the patient or operator of the device exist. Recommendations Qualified personnel must perform all safety tests presented in this chapter: Upon receipt of the device (patient monitor and its associated equipment). Refer to “Dash installation checkout procedure” on page 3-8 for more information. Every 12 months thereafter (Preventive Maintenance). Refer to “Maintenance schedule” on page 5-2 for more information. Each time the main enclosure is disassembled or a circuit board is removed, tested, repaired, or replaced (Corrective Maintenance). Refer to “Recommended checkout” on page 7-52 for more information. GE recommends that the qualified personnel performing the tests should record the values of each required electrical safety test in the “Checklist” on page D-1. These instructions are intended for every component in the system. Test equipment The recommended test equipment required to perform electrical safety tests is listed below. Item Specification Leakage Current Tester Equivalent to the circuits shown Digital Multimeter (DMM) (optional based on leakage tester used and locality) AC volts, ohms Ground Bond Tester 0 – 1 ohm Safety Test Body Kit1 PN M1155870 or equivalent 1 Instead of the test bodies in the safety test body kit, other applicable test bodies with pins connected together may be used. Perform electrical safety tests using an electrical safety analyzer per IEC 60601-1, UL 60601-1, EN 60601-1 or CSA C22.2 No. 601.1. The schematics in the section provide a general understanding of the test equipment. Actual configuration of test equipment may vary. The patient monitor being tested should be placed on an insulating surface. 8-4 Dash 3000/4000/5000 2000966-542D Functional and electrical safety checks: Electrical safety tests Power outlet test Verify that the power outlet is wired correctly per the country’s electrical code standard before starting the following electrical safety tests. The results of the following tests will be inaccurate unless a properly wired power outlet is used. Use only non-isolated power outlets when performing safety tests. Power cord and plug Verify the power cord being used with the patient monitor is good. The following are a couple of things to check for in this regard: Failure of the power cord strain relief is very common. Often times users of the equipment pull on the power cord itself, rather than the power cord plug, to unplug the patient monitor from a wall receptacle. If in doubt, test for continuity through each conductor of the power cord connector and plug. Verify line, neutral, and earth conductors are properly connected to the power cord plug and are not short-circuited. Replace the power cord, as necessary with a regulatory-approved cord for the country of use. WARNING Use only AC power cords recommended or manufactured by GE. 2000966-542D Dash 3000/4000/5000 8-5 Functional and electrical safety checks: Electrical safety tests Ground (earth) integrity Listed below are two methods for checking the ground (earth) integrity, “Ground continuity test” and “Impedance of protective earth connection”. These tests determine whether the device’s exposed metal and power inlet’s earth (ground) connection has a power ground fault condition. Perform the test in accordance with your local regulations. Ground continuity test Refer to the instructions contained with the safety analyzer to perform each test. The measuring device (MD) in the diagram below may be a DMM or part of a safety analyzer. NOTE *The measuring device (MD) represents the network and voltage measuring instrument and its frequency characteristics per IEC 60601-1. 8-6 Dash 3000/4000/5000 2000966-542D Functional and electrical safety checks: Electrical safety tests Impedance of protective earth connection This test, unlike a ground continuity test, will also stress the ground system by using special ground bond testers. This test normally is only required as a manufacturing production test to receive safety agency compliance. Some country agencies do require this test after field equipment repairs (e.g., Germany’s DIN VDE 0751 standards). Consult your country/local safety agency if in question. Compliance is checked by the following steps: 1. A current of 25A from a current source with a frequency of 50 or 60 Hz with a no-load voltage not exceeding 6 V is passed for at least 5 seconds, but no more than 10 seconds, through the protective earth terminal or the protective earth pin in the mains plug and each accessible metal part which could become live in case of failure in basic insulation. 2. The voltage drop between the parts described is measured and the impedance determined from the current and voltage drop. It shall not exceed the values indicated. When taking this measurement, move the unit’s power cord around. There should be no fluctuations in resistance. Acceptance criteria For equipment without a power supply cord, the impedance between the earth terminal of the (IEC 60320-1) AC inlet receptacle and the protective earth (PE) terminal (or any accessible metal part which is protectively earthed) shall not exceed 0.1 ohms. For equipment with a power supply cord, the impedance between the protective earth pin in the mains plug and any accessible metal part which is protectively earthed shall not exceed 0.2 ohms. 3. GE recommends that the qualified personnel performing the tests should record the values in the “Checklist” on page D-1. Ground (earth) wire leakage current tests Perform this test to measure current leakage through the ground (earth) wire of the equipment during normal operation. 1. Refer to the instructions contained with the safety analyzer to perform this test. 2. Configure leakage tester as follows: 2000966-542D Polarity – NORMAL Dash 3000/4000/5000 8-7 Functional and electrical safety checks: Electrical safety tests Neutral – CLOSED 500B NOTE *The measuring device (MD) represents the network and voltage measuring instrument and its frequency characteristics per IEC 60601-1. 3. Read and record the current leakage indicated on the tester. 4. Change leakage tester switches to: Polarity – NORMAL Neutral – OPEN 5. Read and record the current leakage indicated on the tester. 6. Change leakage tester switches to: Polarity – REVERSE Neutral – OPEN 7. Read and record the current leakage indicated on the tester. 8. Change leakage tester switches to: Polarity – REVERSE Neutral – CLOSED 9. Read and record the current leakage indicated on the tester. 8-8 Dash 3000/4000/5000 2000966-542D Functional and electrical safety checks: Electrical safety tests If measured reading is greater than the appropriate specification below, the device under test fails. Contact GE Technical Support. Acceptance criteria NC (Normal condition) (USA only) 300 µA, and the device under test is powered from 100-120 V/50-60 Hz (USA only) 300 µA, and the device under test is powered from a center-tapped 200-240 V/50-60 Hz, single phase circuit (UL Split Phase Exemption) 500 µA, and the device under test is powered from a non-centertapped, 200-240 V/50-60 Hz, single-phase circuit Acceptance criteria SFC (Single fault condition) – ground (earth), line or neutral open (USA only) 300 µA, and the device under test is powered from 100-120 V/ 50-60 Hz (USA only) 300 µA, and the device under test is powered from a center-tapped 200-240 V/50-60 Hz, single phase circuit (UL Split Phase Exemption) 1000 µA, and the device under test is powered from a non-centertapped, 200-240V/50-60 Hz, single-phase circuit. NOTE Center-tapped and non-center-tapped supply circuits produce different leakage currents and the UL and IEC limits are different. Enclosure (Touch) leakage current test Perform this test to measure current leakage through exposed conductive surfaces on the device under test during normal operation. Refer to the instructions contained with the safety analyzer to perform enclosure leakage current test. 501B 2000966-542D Dash 3000/4000/5000 8-9 Functional and electrical safety checks: Electrical safety tests NOTE *The MD represents the network and voltage measuring instrument and its frequency characteristics per IEC 60601-1. 1. Configure leakage tester as follows: Polarity – NORMAL Neutral – CLOSED GND (Earth) – CLOSED 2. Power on device under test. 3. Read and record the current leakage indicated on tester. NOTE Center-tapped and non-center-tapped supply circuits produce different leakage currents and the UL and IEC limits are different. 4. Change leakage tester switches to: Polarity – NORMAL Neutral – OPEN GND (Earth) – CLOSED 5. Read and record the current leakage indicated on the tester. 6. Change leakage tester switches to: Polarity – NORMAL Neutral – CLOSED GND (Earth) – OPEN 7. Read and record the current leakage indicated on the tester. 8. Change leakage tester switches to: Polarity – REVERSED Neutral – CLOSED GND (Earth) – OPEN 9. Read and record the current leakage indicated on the tester. 10. Change leakage tester switches to: Polarity – REVERSED Neutral – OPEN GND (Earth) – CLOSED 11. Read and record the current leakage indicated on the tester. 12. Change leakage tester switches to: 8-10 Polarity – REVERSED Neutral – CLOSED GND (Earth) – CLOSED Dash 3000/4000/5000 2000966-542D Functional and electrical safety checks: Electrical safety tests 13. Read and record the current leakage indicated on the tester. 14. Set the power switch of the device under test to OFF. If measured reading is greater than the appropriate specification below, the device under test fails. Contact GE Technical Support. Acceptance criteria NC 100 microamperes (0.1 volts on the tester), and the device under test is powered from 100-240 V/50-60 Hz Acceptance criteria SFC – ground (earth), line or neutral open (USA only) 300 µA, and the device under test is powered from 100-120 V/50-60 Hz (USA only) 300 µA, and the device under test is powered from a center-tapped 200-240 V/50-60 Hz, single phase circuit (UL Split Phase Exemption) 500 µA, and the device under test is powered from a non-centertapped, 200-240 V/50-60 Hz, single-phase circuit NOTE If the reading is greater than the specification below, and the device under test is powered from 100-240 V/50-60 Hz, the device under test fails. Contact GE Technical Support. 2000966-542D Dash 3000/4000/5000 8-11 Functional and electrical safety checks: Electrical safety tests Patient (source) leakage current test This procedure only applies to Class I (grounded/earthed) equipment, and measures the leakage current from the ECG/RESP connector or the SPO2 connector of the device to ground. 502B NOTE *The MD represents the network and voltage measuring instrument and its frequency characteristics per IEC 60601-1. The patient connector test body shorts all signals in the connector together. Refer to the instructions contained with the safety analyzer to perform this test. 1. Connect the ECG/RESP Test Body to the green connector of the device under test. 2. Configure leakage tester as follows: Polarity – NORMAL Neutral – CLOSED GND (Earth) – CLOSED 3. Power on Device under test. 4. Read and record the current leakage indicated on the tester. 5. Change leakage tester switches to: Polarity – NORMAL Neutral – OPEN GND (Earth) – CLOSED 6. Read and record the current leakage indicated on the tester. 7. Change leakage tester switches to: 8-12 Polarity – NORMAL Dash 3000/4000/5000 2000966-542D Functional and electrical safety checks: Electrical safety tests Neutral – CLOSED GND (Earth) – OPEN 8. Read and record the current leakage indicated on the tester. 9. Change leakage tester switches to: Polarity – REVERSED Neutral – CLOSED GND (Earth) – OPEN 10. Read and record the current leakage indicated on the tester. 11. Change leakage tester switches to: Polarity – REVERSED Neutral – OPEN GND (Earth) – CLOSED 12. Read and record the current leakage indicated on the tester. 13. Change leakage tester switches to: Polarity – REVERSED Neutral – CLOSED GND (Earth) – CLOSED 14. Read and record the current leakage indicated on the tester. 15. Set the power switch of the device to OFF. 16. Repeat the steps in this procedure using the appropriate SPO2 Test Body. Connect the SPO2 Test Body to the blue SPO2 connector of the device under test. Acceptance criteria NC With Ground and Neutral CLOSED – If reading is greater than 10 µA, the device under test fails. Contact GE Technical Support Acceptance criteria SFC – ground (earth), line or neutral open If any reading is greater than 50 µA, the device under test fails. Contact GE Technical Support. 2000966-542D Dash 3000/4000/5000 8-13 Functional and electrical safety checks: Electrical safety tests Patient (sink) leakage current test (mains voltage on the applied part) This procedure only applies to Class I (grounded/earthed) equipment, and measures the leakage current from a mains voltage source into the ECG/RESP connector or the SpO2 connector. The patient connector test body shorts all signals in the connector together. Refer to the instructions contained with the safety analyzer to perform this test. Connect the ECG/RESP Test Body to the green connector of the device under test. Refer to the instructions contained with the safety analyzer to perform each test. AC MAINS Leakage Tester LINE NORM NEUTRAL Power Cord LINE NEUTRAL EARTH EARTH RVS ** Closed Patient connector Test Body MD* Device Under Test (Keep cable length as short as possible.) 503C NOTE *The MD represents the network and voltage measuring instrument and its frequency characteristics per IEC 60601-1. ** Per IEC 60601-1, the impedance to protect the circuitry and the person performing the test, but low enough to accept currents higher than the allowable values of the LEAKAGE CURRENT to be measured. 1. Configure leakage tester as follows: Polarity – NORMAL Neutral – CLOSED GND (Earth) – CLOSED WARNING Shock hazard. The following step causes high voltage at the test body. Do not touch the test body. 8-14 Dash 3000/4000/5000 2000966-542D Functional and electrical safety checks: Electrical safety tests 2. Power on device under test. 3. Read and record leakage current indicated on the tester. 4. Change leakage tester switches to: Polarity – REVERSED Neutral – CLOSED GND (Earth) – CLOSED 5. Read and record the current leakage indicated on the tester. 6. Set the power switch on the device to OFF. 7. Repeat the steps in this procedure using the appropriate SPO2 Test Body. Connect the SPO2 Test Body to the blue SPO2 connector of the device under test. Acceptance criteria If measured reading is greater than the appropriate specification below, the device under test fails. Contact GE Technical Support. 2000966-542D 50 µA at 120-240 VAC using the ECG cable. Dash 3000/4000/5000 8-15 Functional and electrical safety checks: BISx (option) current leakage tests BISx (option) current leakage tests These procedures test the integrity of the BISx isolation only, not the entire system. BISx patient (source) leakage current test This test checks leakage current from the patient cable connector of the BISx to ground. Refer to the instructions contained with the safety analyzer to perform each test. 502B NOTE *The MD represents the network and voltage measuring instrument and its frequency characteristics per IEC 60601-1. Refer to the instructions contained with the safety analyzer to perform this test. 1. Connect the Sensor Plus simulator to the BISx and connect the two circular Sensor Plus simulator connections (test body) to the leakage tester. Sensor Plus simulator circular connections 2. Configure the leakage tester as follows: 8-16 Polarity – NORMAL Neutral – CLOSED GND (Earth) – CLOSED Dash 3000/4000/5000 2000966-542D Functional and electrical safety checks: BISx (option) current leakage tests 3. Connect the BISx power supply cord to the power outlet on the leakage tester. 4. Turn the BISx ON by connecting the AC power adaptor. 5. Read the leakage current indicated on the tester. 6. Change the leakage tester switches to: Polarity – NORMAL Neutral – OPEN GND (Earth) – CLOSED 7. Read and record the leakage current indicated on the tester. 8. Change leakage tester switches to: Polarity – NORMAL Neutral – CLOSED GND (Earth) – OPEN 9. Read and record the current leakage indicated on the tester. 10. Change leakage tester switches to: Polarity – REVERSED Neutral – CLOSED GND (Earth) – OPEN 11. Read and record the current leakage indicated on the tester. 12. Change leakage tester switches to: Polarity – REVERSED Neutral – OPEN GND (Earth) – CLOSED 13. Read and record the current leakage indicated on the tester. 14. Change leakage tester switches to: Polarity – REVERSED Neutral – CLOSED GND (Earth) – CLOSED 15. Read and record the current leakage indicated on the tester. 16. Set the power switch of the device to OFF. 17. Leave the test configuration set up for the sink leakage test. Acceptance criteria NC If any reading with the ground and neutral closed is greater than 100 uA, the BISx fails this test. Contact GE Technical Support. 2000966-542D Dash 3000/4000/5000 8-17 Functional and electrical safety checks: BISx (option) current leakage tests Acceptance criteria SFC – ground (earth), line or neutral open If any reading with the ground open is greater than 500 uA, the BISx fails this test. Contact GE Technical Support. BISx patient (sink) leakage current test This test checks the patient cable leakage current from a 115 or 220VAC source into the BISx. This test checks leakage current from the patient cable connector of the BISx to ground. Refer to the instructions contained with the safety analyzer to perform each test. AC MAINS Leakage Tester LINE NORM Power Cord NEUTRAL LINE NEUTRAL EARTH EARTH RVS ** Closed Patient connector Test Body MD* Device Under Test (Keep cable length as short as possible.) 503C NOTE *The MD represents the network and voltage measuring instrument and its frequency characteristics per IEC 60601-1. ** Per IEC 60601-1, the impedance to protect the circuitry and the person performing the test, but low enough to accept currents higher than the allowable values of the LEAKAGE CURRENT to be measured. Refer to the instructions contained with the safety analyzer to perform this test. WARNING Shock hazard. The following step causes high voltage at the test body. Do NOT touch the test body. 1. With the Sensor Plus simulator connected to the BISx and the two circular Sensor Plus simulator connections (test body) connected to the leakage tester: 2. Configure the leakage tester as follows: 8-18 Polarity – NORMAL Neutral – CLOSED GND (Earth) – CLOSED Dash 3000/4000/5000 2000966-542D Functional and electrical safety checks: BISx (option) current leakage tests 3. Read and record leakage current indicated on the tester. 4. Change leakage tester switches to: Polarity – REVERSED Neutral – CLOSED GND (Earth) – CLOSED 5. Read and record leakage current indicated on the tester. 6. Set the power switch on the leakage tester to OFF. Acceptance criteria If either reading is greater than 5000 µA, the BISx fails this test. Contact GE Technical Support. Test completion 1. Disconnect the leakage tester from the power outlet. 2. Disconnect all test equipment from the device. 3. Disconnect the device power cord from the leakage tester. 2000966-542D Dash 3000/4000/5000 8-19 Functional and electrical safety checks: Functional Checkout procedures Functional Checkout procedures Frequency Qualified personnel must perform the checkout procedures: Every 12 months after receipt of the device (Preventative Maintenance). Refer to “Maintenance schedule” on page 5-2 for more information. Each time the main enclosure is disassembled or a circuit board is removed, tested, or replaced (Corrective Maintenance). Refer to “Recommended checkout” on page 7-52 for more information. Identify enabled patient parameters and software options The check out procedures support all enabled patient parameter and software options. To view the options enabled on the patient monitor, go to the Main Menu and select MORE MENUS > MONITOR SETUP > SOFTWARE CONFIGURATION. The following is a list of all available patient parameter and software options. 8-20 0BP (invasive) 1BP or 2BP (invasive) 3BP or 4BP (invasive) 12SL ACI-TIPI HI-RES TRENDS ETCO2 (CO2) (End-tidal CO2) NETWORK AVOA Plus CARDIO-PULMONARY CARDIAC Dash 3000/4000/5000 2000966-542D Functional and electrical safety checks: Functional Checkout procedures Patient monitor power-up tests NOTE When the patient monitor is connected to a docking station, use the docking station’s power cable instead of the patient monitor’s power cable. 1. Remove the batteries and unplug the patient monitor (or the docking station) from AC power to turn the patient monitor off. 2. Restore the batteries to the patient monitor and plug the patient monitor (or the docking station) into AC power to turn the patient monitor on. 3. Verify all of the front panel indicators illuminate on power up. 4. Verify the AC indicator on the patient monitor stays illuminated. NOTE If the AC indicator stays on, but the screen is blank, the patient monitor is likely in “standby mode” (battery charging). Press the POWER button to enter the normal mode. If the AC indicator is on, continue with the tests. Optional: If either of the CHARGING STATUS indicators is yellow, wait for the battery(ies) to fully charge and the indicators to illuminate green. The batteries may take up to four hours to charge. If the battery “fuel gauge” displays the word “ERROR,” the battery may be asleep. Refer to “Error messages” on page 6-5. 5. Verify the optional alarm indicator lights both red and amber on power up. 6. Verify an audio “beep” sounds at the end of boot up. 7. Test all of the front panel keys and the Trim Knob control. Verify that an audio “beep” sounds after each key press. 8. Optional: Check battery power for both batteries. 2000966-542D Unplug the patient monitor (or the docking station) from AC power and open the battery door. Verify one LED in the battery compartment is on (batteries must have more than 10% charge). Pull that battery out and verify the other LED lights, thus indicating the unit is powered by the other battery. Reinstall battery and plug in patient monitor (or the docking station). Dash 3000/4000/5000 8-21 Functional and electrical safety checks: Functional Checkout procedures ECG tests Equipment Use the following equipment for these tests: A multiparameter patient simulator. ECG patient cable ECG leadwire set 5 leadwire ECG test Perform this test if the patient monitor acquires 5 leadwire ECG data. Connections 1. Attach the ECG patient cable and ECG leadwire set to the ECG/ RESP connector on the patient monitor and connect the leadwires to the patient simulator. Patient Simulator Configuration 2. Set up the patient simulator as follows: Heart rate – 80 bpm. Heart rate amplitude – 1.0 mV. 5-leadwire ECG patient cable properly attached. 3. Admit the patient to the monitor. Normal Sinus Rhythm Procedures 1. Observe the following: ECG lead II is displayed and is noise-free Heart rate of 80 ±1 bpm is displayed With QRS tones enabled, an audible tone sounds with each Rwave (QRS complex) 2. Verify ECG leads I, II, III, aVL, aVF, and aVR are available to view and are noise-free. Pacemaker Detection Procedures 1. Select DETECT PACE and set to PACE 2. 2. Select a pacemaker pulse on the simulator. 3. Observe the following while you view ECG leads I, II, III, aVL, aVF, and aVR: 8-22 a “P” appears above the PVC count indicating pacemaker pulse detection is enabled, and the heart rate still reads 80 ±1 bpm. Dash 3000/4000/5000 2000966-542D Functional and electrical safety checks: Functional Checkout procedures 4. Disable pacemaker pulse detection on the patient monitor and return the simulator to these conditions: Heart rate – 80 bpm, Heart rate amplitude – 1.0 mV, 5-leadwire ECG patient cable properly attached. Leads Off Detection Procedures 1. Select ECG lead II to view in the top trace position on the patient monitor display. 2. Disconnect the RA leadwire from the patient simulator. 3. Observe the following: an RA FAIL message appears on the display, and lead III automatically displays in place of lead II in the top trace position. 4. Reconnect the RA leadwire to the patient simulator and discharge the patient monitor. Calibration Pulse Test Procedures 5. Inject a 1-millivolt calibration signal using the patient simulator and start a manual graph. 6. Observe that the calibration pulse properly displays and graphs. Compare the printed graph with the sample shown below. 016A 7. Measure the cal pulse (Pulse) amplitude. These should be (+/-20%): Lead I:0.5 mV Lead II:1 mV Lead III:0.5 mV Lead V:-0.5 mV 8. This completes the 5 Leadwire ECG test. Leave the ECG patient cable connected to ECG/RESP and continue to the next steps of these checkout procedures. 2000966-542D Dash 3000/4000/5000 8-23 Functional and electrical safety checks: Functional Checkout procedures 12SL and ACI-TIPI ECG test (option) Perform this test if your patient monitor uses the 12SL ACI-TIPI ECG option. 1. Set up the patient simulator as follows: Heart rate – 80 bpm Heart rate amplitude – 1.0 mV 12SL ECG patient cable (5-leadwires with V leadwires) properly attached. 2. Select ECG from the patient monitor menu. Then, select 12 LEAD ECG ANALYSIS. 3. Verify that the patient monitor is displaying 12 noise-free leads. 4. Select 12LD ECG NOW. Wait for the patient monitor to acquire and analyze the data. 5. Select Transmit-Print. 6. Verify the 12SL ECG prints at the print location assigned in the patient monitor’s Print Setup >12SL Print Location. If there is no print location is assigned, an error message appears on the bottom of the patient monitor’s display. 7. Verify the ECG is transmitted to the MUSE Cardiovascular Information System. Verify the ECG prints out correctly as defined by the MUSE system. If no MUSE system is connected, an error message appears on the bottom of the patient monitor’s display. 8. Delete this test 12SL ECG from the MUSE system’s edit list. 8-24 Dash 3000/4000/5000 2000966-542D Functional and electrical safety checks: Functional Checkout procedures Respiration tests Connect the ECG patient cable to the ECG/RESP connector of the patient monitor. 1. Set up the patient simulator as follows: Respiration (RESP) baseline impedance – 750or 1000 RESP R – 0.5 Select appropriate lead for RESP on simulator RESP rate (respirations per minute) – 30 2. Set up the patient monitor as follows: RESP waveform – on RESP waveform lead select – lead II (RESP waveform derived from ECG lead II) 3. Observe the following: RESP parameter window appears on the patient monitor with a reading of 30 ±2 (respirations per minute) RESP waveform appears distortion-free on the patient monitor 4. Change the RESP waveform lead select of the patient monitor to lead I (RESP waveform derived from ECG lead I), LA at the simulator. 5. Observe the following: RESP parameter window appears on the patient monitor with a reading of 30 ±2 (respirations per minute), RESP waveform appears distortion-free on the patient monitor. 6. Disconnect the ECG patient cable from the ECG/RESP connector of the patient monitor. 7. Proceed to the next steps in these checkout procedures. 2000966-542D Dash 3000/4000/5000 8-25 Functional and electrical safety checks: Functional Checkout procedures Temperature tests Equipment 700/400 Series dual temperature adapter (2016998-001) Temperature simulator cable Temperature test procedures 1. Set the patient simulator temperature output to 37° C. 2. Attach the temperature adaptor cable to the TEMP/CO connector of the patient monitor. 3. Set the switch on the temperature adaptor to the 400 or 700 position depending upon customer preference. 4. Attach the temperature simulator cable from the SERIES 400 or 700 TEMPERATURE OUTPUT connector of the patient simulator to the T1 connector of the temperature adaptor. 5. Verify a TEMP parameter window appears on the patient monitor display with a T1 reading of 37.0° ±0.4° C. 6. Move the temperature simulator cable from the T1 connector of the temperature adaptor to the T2 connector of the temperature adaptor. 7. Verify a T2 reading of 37.0° ±0.4° C in the TEMP parameter window on the patient monitor display. 017B 8. Remove the temperature adaptor and temperature simulator cable from the patient monitor and patient simulator. 8-26 Dash 3000/4000/5000 2000966-542D Functional and electrical safety checks: Functional Checkout procedures Cardiac output tests (option) Equipment A multiparameter patient simulator Cardiac output cable adapter Cardiac output simulator Connections 1. Connect the cardiac output cable adaptor to the TEMP/CO connector of the patient monitor. 2. Connect the cardiac output adapter to the cardiac output simulator. 3. Verify a cardiac output parameter window appears on the patient monitor. Cardiac output test procedures 1. On the patient monitor, select CO Parameter Box. 2. Set up the patient monitor: Set AUTO MODE: to ON. Set INJECT TEMP: to BATH. Set SIZE: to 7. Set INJECT VOL: to 10CC. Set COMPUTATIONAL CONSTANT: to 0.540. 3. Set cardiac output cable adapter or simulator to 0°. 4. Turn the simulator on. Select cardiac output menu corresponding to the injectate temperature set in step 3 at 5 liters/minute 5. When the patient monitor screen displays the message, INJECT WHEN READY, press appropriate button on simulator to inject. 6. When computing is complete, the CO reading should be approximately 37°C at 5 liters of blood per minute ± 5%. Invasive blood pressure tests (option) Equipment A multiparameter patient simulator Dual BP cable (2005772-001 or equivalent) The invasive blood pressure (BP) tests provide a method of verification for all BP connectors (BP1, BP2, BP1/3 and BP2/4) of a patient monitor equipped with this optional function. 2000966-542D Dash 3000/4000/5000 8-27 Functional and electrical safety checks: Functional Checkout procedures Patient simulator configuration Set up the patient simulator as follows: Blood pressure (BP) polarity – POS, if required. BP output – 0 mmHg. BP transducer output – 5 µVolts. 1. Connect the BP simulator cable to enabled BP connectors you are testing. a. To connect to the BP1 or the BP2 connector, see the pictures below. To Connect to the BP1 Connector BP1 connector on monitor blood pressure simulator cable patient simulator 863A To Connect to the BP2 Connector BP2 connector on monitor blood pressure simulator cable patient simulator 864A 8-28 Dash 3000/4000/5000 2000966-542D Functional and electrical safety checks: Functional Checkout procedures b. To connect to the BP3 or BP4 connectors, see the pictures below. To connect to the BP3 connector BP1/BP3 connector on monitor dual BP cable, PN 2005772-001 866A blood pressure simulator cable patient simulator BP1 BP3 To connect to the BP4 connector BP2/BP4 connector on monitor dual BP cable, PN 2005772-001 867A BP2 blood pressure simulator cable patient simulator BP4 BP connector test procedures 1. Verify the BP parameter window, waveform label, corresponding graticules, and waveform appear on the patient monitor display, along with a BP waveform requiring zero reference. 2. Press the ZERO ALL (FUNCTION) key on the front panel of the patient monitor to zero-reference the BP waveform. 2000966-542D Dash 3000/4000/5000 8-29 Functional and electrical safety checks: Functional Checkout procedures 3. Change the patient simulator BP output to 240 mmHg. 4. Observe a reading of 240/240 (240) ± 4 mmHg in the BP parameter window on the patient monitor display. 5. Change the patient simulator BP output to WAVE or to a 120/80 wave form (simulated BP waveform). 6. Observe a distortion-free BP waveform and a reading of approximately 120/80 in the BP parameter window on the patient monitor display. 7. Disconnect the BP simulator cable from the BP connector of the patient monitor. 8. Repeat steps for each enabled BP connector. Pulse oximetry tests for GE Ohmeda SPO2 oximeter Equipment Use the following equipment for these tests: GEMS-IT SpO2 simulator (408610-001 or equivalent). NOTE The GEMS-IT SPO2 simulator is only compatible with the GEMS-IT SPO2 parameter. GEMS-IT SpO2 simulator cable (700232-004 or equivalent) Procedure 1. Set the pulse oximetry (SpO2) simulator power switch to the off position. 2. Connect the Nellcor-style SpO2 simulator cable between the SpO2 connector of the patient monitor and the SpO2 simulator. 020A 8-30 Dash 3000/4000/5000 2000966-542D Functional and electrical safety checks: Functional Checkout procedures SpO2 simulator configuration 1. Set the simulator as follows: Set the MODE to NELLCOR. Set the SpO2% to 99. Set the PPR to 100 beats/min. Turn the power ON. Pulse oximetry test procedures 1. Verify that the following are displayed at the patient monitor: A sinusoidal waveform with an SpO2 label. An SpO2% reading between 97 – 100% (97 and 102%). A PPR reading between 97 and 103 beats per minute (it might be necessary to turn the SpO2 ON). 2. Test the accuracy of these SPO2% settings. Accuracy of SpO2 settings Simulator setting Displayed SpO2 value 99% (Both types) 97 – 100% (97 – 102%) 80.3% (84%) 78 – 82% (81 – 87%) 49.7 (63%) 48 – 52% (61 – 65%) 3. Test the accuracy of these PPR settings: Accuracy of PPR settings Simulator setting Displayed PPR value 70 68 – 72 100 97 – 103 160 156 – 164 4. Return the simulator to these conditions: Set the SpO2% to 99. Set the PPR to 100 beats/min. 5. Press the NOISE TEST button on the simulator for 30 seconds. 6. Make sure the patient monitor still displays an SpO2 value between 97 and 100% (97 and 102%), or an interference detection message is displayed. 7. Turn the simulator off. 8. Disconnect the simulator cable from the device under test. 2000966-542D Dash 3000/4000/5000 8-31 Functional and electrical safety checks: Functional Checkout procedures Pulse oximetry tests for Masimo SET SPO2 Equipment Use the following equipment for these tests: Masimo SpO2 Test Kit (2021087-001). Includes Masimo Tester and SPO2 Sensor Adapter Cable. NOTE The Masimo Tester is intended for use only with Masimo instruments or instruments containing Masimo SET oximetry with standard Masimo PC Series patient cable connectors. See the Masimo “Directions for Use” that came with the Tester for more information The PPR and SPO2 values for the Masimo Tester must be within these limits: Peripheral pulse rate: 61 bpm 1 bpm; and SPO2 value: 81% 3%. Procedures 1. Connect the Masimo-style SPO2 simulator cable between the SPO2 connector of the patient monitor and the SPO2 simulator. 824C 2. Turn on the patient monitor. 3. Verify the following are displayed at the patient monitor: (It might be necessary to turn the SPO2 parameter on.) A waveform with an SpO2 label. An SPO2 % reading between 78 - 84%. A PPR reading between 60 and 62 beats per minute. 4. Disconnect the simulator cable from the module. 8-32 Dash 3000/4000/5000 2000966-542D Functional and electrical safety checks: Functional Checkout procedures Pulse oximetry tests for Nellcor OxiMax SPO2 Equipment Use the following equipment for these tests: Nellcor SRC-MAX SpO2 Simulator (2007650-002). NOTE The Nellcor SRC-MAX SPO2 Simulator is only compatible with the Nellcor SPO2 parameter. Procedures 1. Verify that 2 AA alkaline batteries are installed in the SRC-MAX Nellcor Pulse Oximetry functional tester. 2. Connect the SRC-MAX Nellcor Pulse Oximetry functional tester to the 9-pin end of sensor connector from the Dash. Make sure the Dash is powered. SpO2 Port. Nellcor SpO2 cable. Nellcor compatible SpO2 Simulator. 892A 3. Verify that the IR LED and RED LED drive indicators are both lit on the SRC-MAX. 4. Verify the SRC-MAX default indicators are set as follows: HEART RATE = 60 bpm LIGHT = LOW %SpO2 = 75 MODULATION = LOW Allow the Dash a few seconds to obtain a steady reading. 2000966-542D Dash 3000/4000/5000 8-33 Functional and electrical safety checks: Functional Checkout procedures 5. Verify the following SpO2 readings on the Dash for saturation and pulse rate: Saturation (%): 75 ±2 Rate (bpm): 60 ± 2 6. Press and release the HEART RATE switch and verify the SRCMAX default indicators are lit as follows: HEART RATE = 200 bpm LIGHT = LOW %SpO2 = 75 MODULATION = LOW Allow the Dash a few seconds to obtain a steady reading. 7. Verify the following SpO2 readings on the Dash for saturation and pulse rate: Saturation (%): 75 ±2 Rate (bpm): 200 ±3% (194 to 206) 8. Press and release the LIGHT switch and verify the SRC-MAX default indicators are lit as follows: HEART RATE = 200 bpm LIGHT = HIGH %SpO2 = 75 MODULATION = LOW Allow the Dash a few seconds to obtain a steady reading. 9. Verify the following SpO2 readings on the Dash for saturation and pulse rate: Saturation (%): 75 ±2 Rate (bpm): 200 ±3% (194 to 206) 10. Press and release the %SpO2 switch and verify the SRC-MAX default indicators are lit as follows: HEART RATE = 200 bpm LIGHT = HIGH %SpO2 = 90 MODULATION = LOW Allow the Dash a few seconds to obtain a steady reading. 11. Verify the following SpO2 readings on the Dash for saturation and pulse rate: 8-34 Saturation (%): 90 ±2 Rate (bpm): 200 ±3% (194 to 206) Dash 3000/4000/5000 2000966-542D Functional and electrical safety checks: Functional Checkout procedures 12. Press and release the 8h. 13. Switch and verify the SRC-MAX default indicators are lit as follows: HEART RATE = 200 bpm LIGHT = HIGH %SpO2 = 90 MODULATION = HIGH Allow the Dash a few seconds to obtain a steady reading. 14. Verify the following SpO2 readings on the patient monitor for saturation and pulse rate: Saturation (%): 90 ±2 Rate (bpm): 200 ±3% (194 to 206) Noninvasive blood pressure tests Equipment Digital Manometer with a range of at least 0 to 1000 mmHg Accuracy 0.5% FS. 2000966-542D NBP cuff coupling (400787-005 or equivalent) NBP hose coupling (400787-006 or equivalent) NBP tee (4745-101 or equivalent) NBP tubing 2 feet (401582-001 or equivalent) Manometer: mercury, digital (Sensym PDM200M – no longer available for ordering, Meriam Instrument Smart Manometer Model 350 DM2000, or equivalent) NBP tube (2017008-001 or equivalent) NBP cuff (2203 or equivalent) Pipe: PVC Dash 3000/4000/5000 8-35 Functional and electrical safety checks: Functional Checkout procedures Procedures 1. Attach the digital manometer, noninvasive blood pressure (NBP) cuff, tees and tubing, as shown in the illustration below, to the NBP connector of the patient monitor. NBP tubing 6-inch diameter PVC pipe (or 1-pound coffee can): NBP cuff, Any size NBP cuff will be sufficient. Wrap the NBP cuff around this for tests. NBP port Coupling, Connects manometer tubing to NBP tubing. 3-way tee, Connects manometer tubing, NBP tubing and NBP cuff tubing. Digital Manometer with a range of at least 0 to 1000 mmHg Accuracy 0.5% FS. Note: A calibrated mercury manometer may be substituted. Coupling, Manometer tubing, Approximately two feet in length. Connects manometer tubing to NBP cuff tubing. 021B 2. Set the digital manometer power switch to the on position. 3. Set the digital manometer range switch to 1000 mmHg. Using the Trim Knob control, access the Service Mode menu starting from the Main Menu. 1. Select MORE MENUS > MONITOR SETUP > SERVICE MODE. 2. Enter password using the Trim Knob control to select the day and month from patient monitor screen with leading zeros (e.g. July 4 = 0407). 3. Select CALIBRATE > CALIBRATE NBP > CHECK CAL OFF > START. The text on the menu item changes from CHECK CAL OFF to CHECK CAL IN PROGRESS. Verify the readings in the NBP parameter window on the patient monitor display and readings on the digital manometer are equal (± 1 8-36 Dash 3000/4000/5000 2000966-542D Functional and electrical safety checks: Functional Checkout procedures mmHg) for at least one full minute. If the readings are not equal for at least one full minute, the NBP circuit requires calibration. See “NBP calibration” on page 8-37. 4. Select CALIBRATE > CALIBRATE NBP > CHECK CAL OFF > START. 5. Remove the NBP test setup apparatus from the patient monitor. The NBP tests are complete. NBP calibration NOTE Only perform this test if the NBP pressure test fails. The overall accuracy of noninvasive blood pressure (NBP) readings by the patient monitor depend on the following: the zero pressure reading, and the voltage span of the NBP sensor in the patient monitor. This procedure provides a method of verifying these items are accurate and also checks the NBP pneumatic circuit plumbing for leaks. WARNING When the NBP cuff is used in this procedure, it must be tightly wrapped around a rigid cylinder or pipe. Do not put the NBP cuff around a human arm during the calibration procedures due to the potential for injury. Calibration procedure Using the Trim Knob control, access the Service Mode menu starting from the Main Menu. 1. Select MORE MENUS > MONITOR SETUP > SERVICE MODE. 2. Enter password using the Trim Knob control to select the day and month from patient monitor screen with leading zeros (e.g. July 4 = 0407). 3. Select CALIBRATE > CALIBRATE NBP > CAL ZERO OFF > START. 4. The text on the menu item changes from Cal Zero Off to Cal Zero In Progress. When the process is complete, the menu item shows that it is OFF again. 2000966-542D Dash 3000/4000/5000 8-37 Functional and electrical safety checks: Functional Checkout procedures Gain calibration test NOTE To proceed with the Gain Calibration Test, set up the patient monitor and test equipment following the guidelines in the NBP Checkout Procedure,“Functional Checkout procedures” on page 8-20. 1. Connect a cuff and manometer to the patient monitor. 2. Turn the digital manometer on and adjust the range switch to 1000 mmHg. 3. Select CAL GAIN OFF > CAL GAIN OFF > START. The second line of text on the Cal Gain menu item changes from Cal Gain Holding to Cal Gain Inflating. The patient monitor starts pumping up the pressure bulb or cuff—the audible whirring sound of the NBP pump motors occurs and an increase in displayed pressures on both the patient monitor and the manometer can be observed. The pump shuts off at about 250 mmHg, and the pressure drops slowly to about 240 mmHg before stabilizing. The second line of text on the Cal Gain menu item changes from Inflating back to Holding. 4. If the pressure continues to drop at a rate of 1 mmHg or more for every five seconds, there is a leak in the NBP plumbing. If there is a leak in the NBP plumbing, repair it and restart this calibration procedure. 5. Select ENTER CAL PRESSURE and use the Trim Knob control to select a pressure value that is 1 mmHg lower than the current manometer reading. When the manometer falls to exactly the value that you selected in the pop-up window, press the Trim Knob control to enter the value. 6. Select CHECK CAL OFF > START. 7. The text on the menu item changes from Check Cal Off to Check Cal In Progress. Verify the pressure readings (shown as Cuff in the 8-38 Dash 3000/4000/5000 2000966-542D Functional and electrical safety checks: Functional Checkout procedures NBP parameter box) on the patient monitor and manometer are equal (± 1 mmHg) for at least one full minute. 028B 8. Select CHECK CAL IN PROGRESS > STOP. The patient monitor automatically releases pneumatic pressure in the entire plumbing circuit. 0 029B 9. Unplug the patient monitor from AC power source and remove the test apparatus from the patient monitor. 2000966-542D Dash 3000/4000/5000 8-39 Functional and electrical safety checks: Functional Checkout procedures Analog output and defibrillator synchronization tests Equipment Use the following equipment for these tests: Oscilloscope, or equivalent 5.5 digit precision voltmeter (HP34401A or equivalent). Needed for calibration only. Analog output cable (2000633-001 or equivalent) Setup 1. Use the figure below as a reference for connecting test devices to the DEFIB SYNC connector, located on the back panel of the patient monitor, for performing these tests. 039B Analog output cable pinout (2000633-001) PIN number Color 1 Black 2 Green 3 Red 4 Brown 5 Blue 6 White 7 Yellow 8 Gray 2. Test the ECG, Arterial BP, and Marker Out signals from the DEFIB SYNC connector. ECG Input voltage of 1 mV = 1 V analog output +- 8-40 Dash 3000/4000/5000 2000966-542D Functional and electrical safety checks: Functional Checkout procedures 10%. They should closely resemble the waveforms in the figures below. NOTE The Marker Out amplitude and the pulse width are configured in the Boot Code settings. Refer to Boot Code settings, “Set Defib Sync Voltage and pulse width” on page 4-18 for more information. DEFIB Sync connector: Signal Pin:—7 Ground Pin:—3 Probe Type:—x10 Time/Division:—0.2S Volts/Division:—0.5V 023A DEFIB Sync connector: arterial BP Signal Pin:—6 Ground Pin:—5 Probe Type:—x10 Time/Division:—0.2S Volts/Division:—0.2V 024A DEFIB Sync connector: Marker Out (frequency) Signal Pin:—1 Ground Pin:—4 Probe Type:—x10 Time/Division:—0.2S Volts/Division:—1V 025A 2000966-542D Dash 3000/4000/5000 8-41 Functional and electrical safety checks: Functional Checkout procedures DEFIB Sync connector: Marker Out (pulse width) Signal Pin:—1 Ground Pin:—4 Probe Type:—x10 Time/Division:—5mS Volts/Division:—1V 026A 3. Attach a jumper wire between pin-1 (Marker Out) and pin-2 (Marker In) of the DEFIB SYNC connector located on the back of the patient monitor. Verify negative spikes in each of the QRS Complex (ECG waveform) R-Waves on the patient monitor display, similar to those shown in the illustration below . 027A 4. Remove the test cables or wires from the DEFIB SYNC connector. This completes the defibrillator synchronization tests. 8-42 Dash 3000/4000/5000 2000966-542D Functional and electrical safety checks: Functional Checkout procedures ECG or BP calibration NOTE Only perform this test if the ECG or BP out signals from the previous test are out of specifications. To complete the ECG or BP calibration, connect a voltmeter to the patient monitor. 1. Attach the analog output cable (pn 2000633-001) to the patient monitor. 2. Connect a 5.5 digit precision voltmeter (such as HP34401A, or equivalent) to the port pin to be calibrated (If ECG: Pin 7 = ECG signal, Pin 3 = ground. If BP: Pin 6 = BP, Pin 5 = ground.). 022A 3. Access the patient monitor’s Service Mode. 4. Calibrate the ECG or the BP parameters as follows. ECG calibration Using the Trim Knob control, access the Service Mode menu starting from the Main Menu. 1. Select MORE MENUS > MONITOR SETUP > SERVICE MODE. 2. Enter password using the Trim Knob control to select the day and month from patient monitor screen with leading zeros. (e.g. July 4 = 0407). 3. Select CALIBRATE > CAL ECG ANALOG OUT > SET ECG LOW. 4. Adjust the count for –9.0 V ± 5 mV on the meter and press the Trim Knob control. 5. Select SET ECG HIGH. 6. Adjust the count for +9.0 V ± 5 mV on the meter and press the Trim Knob control. 7. Select SET ECG ZERO. Adjust the count for 0.0 V ± 5 mV on the meter and press the Trim Knob control. 8. Select CONFIRM ECG CAL to confirm or abort the calibration. BP calibration Using the Trim Knob control, access the Service Mode menu starting from the Main Menu. 2000966-542D Dash 3000/4000/5000 8-43 Functional and electrical safety checks: Functional Checkout procedures 1. Select MORE MENUS > MONITOR SETUP > SERVICE MODE. 2. Enter password using the Trim Knob control to select the day and month from patient monitor screen with leading zeros. (e.g. July 4 = 0407). 3. Select CALIBRATE > CAL BP ANALOG OUT > SET BP LOW. 4. Adjust the count for –9.0 V ± 5 mV on the meter and press the Trim Knob control. 5. Select SET BP HIGH. 6. Adjust the count for +9.0 V ± 5 mV on the meter and press the Trim Knob control. 7. Select SET BP ZERO. Adjust the count for 0.0 V ± 5 mV on the meter and press the Trim Knob control. 8. Select CONFIRM BP CAL to confirm or abort the calibration. End-tidal CO2 test (option) To verify the mainstream end-tidal CO2, refer to the CO2 chapter in the Dash 3000/4000/5000 Patient Monitor Operator’s Manual. This test requires you perform a zero and reference check by using the sample cells provided on the end-tidal CO2 cable. For instructions on verifying sidestream end-tidal CO2 and setting the sample line to zero, refer to the CO2 module operator instructions. Battery tests 1. Check battery power for both batteries. Unplug the patient monitor (or the docking station) from AC power and open the battery door. Verify one LED in the battery compartment is on (batteries must have more than 10% charge). Pull that battery out and verify the other LED lights, thus indicating the unit is powered by the other battery. Reinstall battery and plug in patient monitor to a wall outlet (or the docking station). Graph or print tests (option) Communication confirmation Confirm communication across the network as follows. 1. Admit and generate a waveform at the patient monitor with a simulator. 2. Press Print and observe graph output at chosen locations. 8-44 Dash 3000/4000/5000 2000966-542D Functional and electrical safety checks: Functional Checkout procedures Test pattern (option based on Dash having a local printer) Using the Trim Knob control, access the Service Mode menu starting from the Main Menu. 1. Select MORE MENUS > MONITOR SETUP > SERVICE MODE. 2. Enter password using the Trim Knob control to select the day and month from patient monitor screen with leading zeros. (e.g. July 4 = 0407). 3. Select PRINT (or GRAPH) TEST PATTERN > START. 4. Verify the following: Fonts Shading Triangle Pattern No missing dots 5. Select PRINT (or GRAPH) TEST PATTERN > STOP. Graph speed Using the Trim Knob control, access the Graph Setup menu starting from the Main Menu. 1. Select MORE MENUS > MONITOR SETUP > PRINT (or GRAPH) SETUP. 2. Select SPEED:25 (default). 3. Verify that all eight speeds work. Display test 1. Hold the NBP Auto and the ZERO ALL keys and press the Trim Knob control at the same time. 2. Release the Trim Knob control immediately. 3. Continue holding the NBP Auto and the ZERO ALL keys. 4. Select “Video Test Screens.” 5. Test all screens: 2000966-542D White Screen Red Screen Blue Screen Green Screen Vertical Bars Dash 3000/4000/5000 8-45 Functional and electrical safety checks: Functional Checkout procedures Speaker test 1. Change the alarm volume of the patient monitor to 100%. 2. Verify the speaker volume of the patient monitor changes accordingly. 3. Return the volume of the patient monitor to the level it was previously set to, before you changed it for this test. Network test (option) 1. Verify that the patient monitor is connected to the CARESCAPE Network MC (Mission Critical). NOTE When the patient monitor is connected to a docking station, verify the docking station is connected to the CARESCAPE Network MC. NOTE When the patient monitor is connected to a docking station, the patient monitor’s network port is disabled. Only the docking station’s network port is enabled at this time. 2. Select VIEW OTHER PATIENTS. 3. Select SELECT ANOTHER CARE UNIT. 4. Verify that you can see at least one care unit. 5. Select a care unit. 6. Select SELECT A BED TO VIEW. 7. Select a bed. 8. Verify that the patient window appears on the patient monitor’s split-screen. Remote control test (option) 1. Verify the remote control is connected into an Autoport to M-Port adapter and is inserted into the Aux connector. 2. Select MORE MENUS > MONITOR SETUP > REVISION AND ID. 3. Select NEXT from the popup menu to display the port connectors. 4. Verify the Remote Control label appears after the appropriate port and the software version for the remote control is shown. 5. Press each remote control key and verify a beep tone sounds at the patient monitor. 8-46 Dash 3000/4000/5000 2000966-542D Functional and electrical safety checks: Functional Checkout procedures BISx test (option) Before performing these procedures, complete the following Electrical Safety tests for the BISx module. “Ground (earth) wire leakage current tests” on page 8-7 “BISx patient (source) leakage current test” on page 8-16 “BISx patient (sink) leakage current test” on page 8-18 Equipment Use the following equipment for this test: BISx with integrated host patient monitor cable and Patient Interface Cable (PIC+) BISx adapter Y-cable assembly 2026830-001 Ethernet patch cable 2011129-001 Power supply with power cord Sensor Plus Simulator (2007695-001 or equivalent) Procedure 1. See the diagram below and connect the BISx as follows:. PIC+ cable Host monitor cable Ethernet patch cable Adapter Y-cable Aux port Dash patient monitor Simulator Power supply a. Connect the BISx host patient monitor cable to the BISx adapter Y-cable assembly. b. Connect one end of the Y to the power supply and the other to the Ethernet patch cable. c. Connect the Ethernet patch cable to the Aux port connector on the Dash patient monitor. d. Connect the power supply to an AC power source. The BIS parameter window appears. The prompt, CONNECT SENSOR displays in the parameter window. 2. Connect the Patient Interface Cable (PIC) to the Sensor Plus Simulator. The message SENSOR CHECK IN PROCESS displays in the parameter window. 3. Select the BIS parameter block to open the BIS parameter menu. 2000966-542D Dash 3000/4000/5000 8-47 Functional and electrical safety checks: Functional Checkout procedures 4. From the BIS parameter menu, select the SENSOR CHECK menu option. An information window opens with the impedance data. For example: LEAD IMPEDANCE STATUS 1 4.8 PASS 2 14.0 PASS 3 2.3 PASS 4 3.3 PASS 5. Verify that the impedance values displayed in the information window fall within the range shown below. 8-48 Electrode # Acceptance range in Kohms 1 4—6 2 8—17 3 2—4 4 3—5 Dash 3000/4000/5000 2000966-542D Functional and electrical safety checks: Functional Checkout procedures Wireless antenna signal strength test (option) Purpose This test checks the individual signal strength of the primary and the secondary wireless antennas. Physical damage to the antenna cables (e.g., pinched, crushed, abraded, or cut) or a poor connection to the wireless card connectors can reduce or stop the wireless antenna signal. The position of the primary and secondary antenna connections on the wireless card are as follows: Primary antenna connection (left) Secondary antenna connection (right) 980A The relationship between the wireless card connectors, wireless antenna cable colors and the primary/secondary antenna signal strength test settings are as follows: Primary and Secondary Wireless Antennas Antenna position Antenna color Antenna configuration test settings MORE WIRELESS LAN SETTINGS > ANTENNA Right Black PRIMARY Left Grey SECONDARY NOTE The default ANTENNA configuration setting is ENABLED. Test environment For this test, place the Dash monitor in a wireless network environment with a known strong wireless signal. 2000966-542D Dash 3000/4000/5000 8-49 Functional and electrical safety checks: Functional Checkout procedures Testing the primary antenna signal strength Complete the following procedures to check the signal strength of the primary and the secondary wireless antennas. 1. On the patient monitor, select MONITOR SETUP > SERVICE MODE. 2. Enter the password. 3. Select MONITOR SETTINGS > MORE WIRELESS LAN SETTINGS. 4. Select ANTENNA and set to PRIMARY. 5. Select RETURN. 6. Reset the Dash monitor and return the monitor to operating mode: a. Simultaneously press the Trim Knob control and the following keys: (Dash 3000) NBP Go/Stop and Function. (Dash 4000) NBP Go/Stop and Zero All. (Dash 5000) NBP Auto and Zero All. b. Release the Trim Knob control and both keys. The patient monitor returns to operating mode and displays the patient monitoring screen. 7. In the lower right corner of the monitor’s display, make note of the number of bars displayed in the wireless signal strength indicator. 90 RATE 70 % 0 MORE MENUS 10:15:45 CO2 RSP HI 29 NO BREATH 15-DEC-2010 * ALARMS: BED3 - HR LOW ALRM A RR 19 INSP 3 EXP CO2 38 50 -1 B 809C Testing the secondary antenna signal strength 1. On the patient monitor, select MONITOR SETUP > SERVICE MODE. 2. Enter the password. 3. Select MONITOR SETTINGS > MORE WIRELESS LAN SETTINGS. 4. Select ANTENNA and set to SECONDARY. 5. Select RETURN. 6. Reset the Dash monitor and return the monitor to operating mode: a. Simultaneously press the Trim Knob control and the following keys: (Dash 3000) NBP Go/Stop and Function. (Dash 4000) NBP Go/Stop and Zero All. (Dash 5000) NBP Auto and Zero All. b. Release the Trim Knob control and both keys. The patient monitor returns to operating mode and displays the patient monitoring screen. 8-50 Dash 3000/4000/5000 2000966-542D Functional and electrical safety checks: Functional Checkout procedures 7. In the lower right corner of the monitor’s display, make note of the number of bars displayed in the signal strength indicator. 90 RATE 70 % 0 MORE MENUS 10:15:45 CO2 RSP HI 29 NO BREATH 15-DEC-2010 * ALARMS: BED3 - HR LOW ALRM RR 19 A INSP 3 EXP CO2 38 50 -1 B 809C Acceptance criteria Three or more bars displayed in the wireless signal strength indicator with no more than +/- 1 bar difference between the primary and the secondary antenna signal strengths. NOTE If the signal strength of the tested antenna is less than 3 bars, the antenna under test fails. If there is greater than +/- 1 bar difference between the primary and the secondary antenna signal strength indicators, then the antennas under test fail. Returning the ANTENNA configuration setting to ENABLED The Dash monitor wireless communication will not function unless the ANTENNA configuration setting is returned to the ENABLED default setting. 1. On the patient monitor, select MONITOR SETUP > SERVICE MODE. 2. Enter the password. 3. Select MONITOR SETTINGS > MORE WIRELESS LAN SETTINGS. 4. Select ANTENNA and set to ENABLED. 5. Select RETURN. 6. Reset the Dash monitor and return the monitor to operating mode: a. Simultaneously press the Trim Knob control and the following keys: (Dash 3000) NBP Go/Stop and Function. (Dash 4000) NBP Go/Stop and Zero All. (Dash 5000) NBP Auto and Zero All. b. Release the Trim Knob control and both keys. The patient monitor returns to operating mode and displays the patient monitoring screen. 2000966-542D Dash 3000/4000/5000 8-51 Functional and electrical safety checks: Functional Checkout procedures Wireless LAN test (option) Purpose These procedures check the patient monitor for wireless communication. While moving a roll-stand with a wireless patient monitor from edge to edge of the predetermined wireless network coverage area, check for the following at the edges of the wireless network: the SIGNAL LEVEL (RSSI) is equal to or greater than the minimum user-defined value, the TRANSMIT RATE is equal to or greater than 5.5, and a constant waveform from a stationary wireless/wired patient monitor displays without any loss of waveform. NOTE This is a verification of the patient monitor and must not substitute a professional site survey, installation and verification of the areas designed for the wireless network. The connectivity and coverage of the wireless network is verified through the SIGNAL LEVEL (RSSI) status and TRANSMIT RATE status in the wireless patient monitor. Equipment Use the following equipment and information for this test: Wireless Dash patient monitor being tested. Roll-stand (optional) Stationary wireless/wired patient monitor Multi-parameter patient simulator or an equivalent ECG patient simulator. Contact the hospital IT department to obtain the following information: access point settings for SSID and SECURITY, and wireless network coverage area. Procedures 1. Connect the patient simulator to the stationary wireless/wired patient monitor and generate a waveform. 2. Admit the stationary wireless/wired patient monitor to the CARESCAPE Network MC. 3. Configure the wireless Dash patient monitor to communicate with the wireless network as follows: a. On the patient monitor, select MORE MENU> MONITOR SETUP > SERVICE MODE. b. Enter the password. c. 8-52 Select MONITOR SETTINGS> CONFIGURE WIRELESS LAN. Dash 3000/4000/5000 2000966-542D Functional and electrical safety checks: Functional Checkout procedures d. Ensure that the SSID and SECURITY match the wireless network and the monitor being checked is within the wireless coverage area. 4. On the patient monitor, select MONITOR SETUP > SERVICE MODE. 5. Enter the password. 6. Select MONITOR SETTINGS > WIRELESS LAN STATUS. 945A 7. Verify that a. the SIGNAL LEVEL (RSSI) status is equal to or greater than the minimum user-defined value, and b. the TRANSMIT RATE status is equal to or greater than 5.5. If the SIGNAL LEVEL (RSSI) is less than the minimum userdefined value and/or the TRANSMIT RATE is less than 5.5, contact the hospital IT department to check for radio interference and verify that the access point’s radio transmission is operating optimally. 8. Close the WIRELESS LAN STATUS window. NOTE The following steps require at least one other patient monitor connected to MC network. 9. Configure the patient monitor to view the stationary patient monitor’s waveform as follows: a. On the patient monitor, select MORE MENU> VIEW OTHER PATIENTS > SELECT ANOTHER CARE UNIT. b. Select the appropriate unit. c. Select SELECT A BED TO VIEW. d. Select the appropriate bed. 10. Verify that the waveform displays without any losses. If a waveform gap or loss was spotted on the display, troubleshoot to determine if the problem is with the wireless network card or network. 2000966-542D Dash 3000/4000/5000 8-53 Functional and electrical safety checks: Functional Checkout procedures Dash Port 2 docking station test (option) Electrical safety tests When the patient monitor is connected to the docking station, perform the electrical safety tests described in the maintenance section of the Dash Port 2 Service Manual. Operation Complete the Checkout procedures located in the Dash Port 2 Docking Station Service Manual. TRAM-rac 2A module housing peripheral device test (option) Electrical safety tests Perform the electrical safety tests on the TRAM-rac 2A separate from the patient monitor. Refer to the “Electrical safety tests” on page 8-4 and complete the following tests. 1. Power outlet test 2. Ground (earth) continuity test, 3. Ground (earth) wire leakage tests, and 4. Enclosure leakage current test. Operation Complete the TRAM-rac 2A Module Housing Test procedures found in the maintenance section of the TRAM-rac 2A Module Housing Service Manual. ICG Module test (option) Refer to the “Electrical safety tests” section of the ICG Module Service Manual. Operation Complete the ICG Test found in the Checkout Procedure section of the ICG Module Service Manual. 8-54 Dash 3000/4000/5000 2000966-542D Functional and electrical safety checks: Checkout procedures completion Checkout procedures completion This completes all tests associated with the checkout procedures. 1. Discharge the test patient admitted during the “ECG tests” on page 8-22. 2. Set all test equipment power switches to the off position. 3. Unplug the patient monitor (or docking station) from AC power. 4. Remove all test equipment from the patient monitor (or docking station). 5. GE recommends that the qualified personnel performing the tests should record functional checkout test values in the “Checklist” on page D-1. 2000966-542D Dash 3000/4000/5000 8-55 Functional and electrical safety checks: Checkout procedures completion 8-56 Dash 3000/4000/5000 2000966-542D A 2000966-542D Electromagnetic compatibility (EMC) Dash 3000/4000/5000 A-1 Electromagnetic compatibility (EMC): Electromagnetic compatibility (EMC) Electromagnetic compatibility (EMC) Changes or modifications to this system not expressly approved by GE can cause EMC issues with this or other equipment. This system is designed and tested to comply with applicable regulation regarding EMC and must be installed and put into service according to the EMC information stated in this supplement. CAUTION Use of portable phones or other radio frequency (RF) emitting equipment near the system may cause unexpected or adverse operation. CAUTION The equipment or system should not be used adjacent to, or stacked with, other equipment. If adjacent or stacked use is necessary, the equipment or system should be tested to verify normal operation in the configuration in which it is being used. Guidance and manufacturer’s declaration – electromagnetic emissions The Dash 3000/4000/5000 is intended for use in the electromagnetic environment specified below. It is the responsibility of the customer or user to assure that the Dash 3000/4000/5000 is used in such an environment. Emissions test Compliance Electromagnetic environment – guidance RF Emissions (radiated) CISPR 11 Group 1 Class A The equipment uses RF energy only for its internal function. Therefore, its RF emissions are very low and are not likely to cause any interference in nearby electronic equipment. RF Emissions (conducted) CISPR 11 Group 1 Class A Harmonic Emissions IEC 61000-3-2 Class A Voltage Fluctuations/ Flicker Emissions IEC 61000-3-3 Complies A-2 CAUTION The equipment is suitable for use in all establishments other than domestic and those directly connected to the public low-voltage power supply network that supplies buildings used for domestic purposes. Dash 3000/4000/5000 2000966-542D Electromagnetic compatibility (EMC): Electromagnetic compatibility (EMC) Guidance and manufacturer’s declaration – electromagnetic immunity The Dash 3000/4000/5000 is intended for use in the electromagnetic environment specified in the following table. It is the responsibility of the customer or user to assure that the Dash 3000/4000/5000 is used in such an environment. CAUTION There are technological limitations in the ability of the monitor to perform as intended when subjected to interference from electrostatic discharges (ESD) at or above ±8kV when tested to EN 60601-1-2. ESD air discharges into the patient cable connectors and the Aux port may cause the monitor to reboot and recover to its normal operating mode without operator intervention. The following guidelines can greatly reduce the potential for ESD interference prior to connecting any cables to the monitor: Discharge any electrostatic charge from your body prior to connecting any cables to the monitor. You can discharge electrostatic charge by touching the exposed metal equipotential terminal on the back of the monitor. Refer to “Back view” on page 2-4 for location of the equipotential terminal. NOTE ESD will not cause any permanent damage to the monitor. 2000966-542D Dash 3000/4000/5000 A-3 Electromagnetic compatibility (EMC): Electromagnetic compatibility (EMC) Immunity test IEC 60601 test level Compliance level Electromagnetic environment – guidance Electrostatic Discharge (ESD) IEC 61000-4-2 ± 6 kV contact ± 6 kV contact ± 8 kV air ± 4 kV air Floors should be wood, concrete or ceramic tile. If floors are covered with synthetic material, the relative humidity should be at least 30%. Electrical Fast Transient/Burst IEC 61000-4-4 ± 2 kV for power supply lines ± 2 kV for power supply lines Mains power should be that of a typical commercial or hospital environment. ±1 kV for input/output lines ±1 kV for input/output lines Surge IEC 61000-4-5 ± 1 kV differential mode ± 1 kV differential mode ± 2 kV common mode ± 2 kV common mode <5% Ut (>95% dip in Ut) for 0.5 cycles <5% Ut (>95% dip in Ut) for 0.5 cycles <40% Ut (>60% dip in Ut) for 5 cycles <40% Ut (>60% dip in Ut) for 5 cycles <70% Ut (>30% dip in Ut) for 25 cycles <70% Ut (>30% dip in Ut) for 25 cycles <5% Ut (>95% dip in Ut) for 5 s <5% Ut (>95% dip in Ut) for 5s 3 A/m 3 A/m Voltage dips, short interruptions and voltage variations on power supply input lines IEC 61000-4-11 Power Frequency (50/60 Hz) Magnetic Field IEC 61000-4-8 Mains power should be that of a typical commercial or hospital environment. Mains power should be that of a typical commercial or hospital environment. If the user of the equipment requires continued operation during power mains interruptions, it is recommended that the equipment be powered from an uninterruptible power supply or a battery. Power frequency magnetic fields should be at levels characteristic of a typical location in a typical commercial or hospital environment. NOTE Ut is the AC mains voltage prior to application of the test level. A-4 Dash 3000/4000/5000 2000966-542D Electromagnetic compatibility (EMC): Electromagnetic compatibility (EMC) Guidance and manufacturer’s declaration – electromagnetic immunity The Dash 3000/4000/5000 is intended for use in the electromagnetic environment specified below. It is the responsibility of the customer or user to assure that the Dash 3000/4000/5000 is used in such an environment. Immunity test IEC 60601 test level Compliance level Electromagnetic environment – guidance Portable and mobile RF communications equipment should not be used closer to any part of the equipment, including cables, than the recommended separation distance calculated from the equation applicable to the frequency of the transmitter. Recommended separation distance Conducted RF IEC 61000-4-6 3 Vrms 150 KHz to 80 MHz 3 V rms Radiated RF IEC 61000-4-3 3 V/m 80 MHz to 2.5 GHz 3 V/m d = 1.2 P d = 1.2 P 80 MHz to 800 MHz d = 2.3 P 800 MHz to 2.5 GHz where P is the maximum output power rating of the transmitter in watts (W) according to the transmitter manufacturer, and d is the recommended separation distance in meters (m). Field strengths from fixed RF transmitters, as determined by an electromagnetic site surveya, should be less than the compliance level in each frequency rangeb. Interference may occur in the vicinity of equipment marked with the following symbol: Note 1: At 80 MHz and 800 MHz, the higher frequency range applies. Note 2: These guidelines may not apply in all situations. Electromagnetic propagation is affected by reflection from structures, objects, and people. a Field strengths from fixed transmitters, such as base stations for radio (cellular/cordless) telephones and land mobile radio, AM and FM radio broadcast, and TV broadcast cannot be predicted theoretically with accuracy. To assess the electromagnetic environment due to fixed RF transmitters, an electromagnetic site survey should be considered. If the measured field strength in the location in which the equipment is used exceeds the applicable RF compliance level above, the equipment should be observed to verify normal operation. If abnormal performance is observed, additional measures may be necessary, such as re-orienting or relocating the equipment. b Over the frequency range 150 KHz to 80 MHz, field strengths should be less than 3 V/m. Note 3: For values above 2.5GHz, IEC 60601-1-2, Subclause 5.2.2.2 states “frequencies above 800MHz can use k= 7. 2000966-542D Dash 3000/4000/5000 A-5 Electromagnetic compatibility (EMC): Electromagnetic compatibility (EMC) Recommended separation distances The table below provides the recommended separation distances (in meters) between portable and mobile RF communications equipment and the Dash 3000/4000/5000. The Dash 3000/4000/5000 is intended for use in the electromagnetic environment on which radiated RF disturbances are controlled. The customer or the user of the Dash 3000/4000/5000 can help prevent electromagnetic interference by maintaining a minimum distance between portable and mobile RF communications equipment (transmitters) and the Dash 3000/4000/5000 as recommended below, according to the maximum output power of the communications equipment. Separation distance estimation (Transmit power of 802.11a/b/g wireless communication device) Power of the Source (Watts) Separation Distance (Feet) Separation Distance (Meter) 0.01 0.75 0.23 0.1 2.39 0.73 1 7.54 2.3 10 23.94 7.3 100 75.44 23 For transmitters rated at a maximum output power not listed above, the recommended separation distance [d] in meters (m) can be estimated using the equitation applicable to the frequency of the transmitter, where P is the maximum output power rating of the transmitter in watts (W) according to the transmitter manufacturer. NOTE: These guidelines may not apply in all instances. Electromagnetic propagation is affected by absorption and reflection from structures, objects and people. A-6 Dash 3000/4000/5000 2000966-542D Electromagnetic compatibility (EMC): Electromagnetic compatibility (EMC) Compliant cables and accessories CAUTION The use of accessories, transducers and cables other than those specified may result in increased emissions or decreased immunity performance of the equipment or system. The table below lists cables, transducers, and other applicable accessories with which GE EMC compliance. NOTE: Any supplied accessories that do not affect EMC compliance are not included. Category Description Maximum length ECG cables Multi-Link 12-Ld ECG Standard Cable 3.6 m / 12 ft Multi-Link 5-Ld ECG Standard Cable 6 m / 20 ft Multi-Link 3-Ld ECG Neonatal Cable 3.6 m / 12 ft Multi-Link 3-Ld ECG Cable w/Grabber 3.6 m / 12 ft Multi-Link 5-Ld ECG ESU 3.6 m / 12 ft Multi-Link, 3/5-Ld ECG Cable 3.6 m / 12 ft Multi-Link 3-Ld Neonatal ECG Cable 3.6 m / 12 ft Multi-Link 3-Ld ECG Cable w/Grabber 3.6 m / 12 ft Multi-Link 6-Ld ECG Cable 3.6 m / 12 ft Multi-Link 12 SL ECG Cable 3.6 m / 12 ft Multi-Link 3/5/6 Adapter N/A Multi-Link to 300-Series 3-Ld Trunk Cable 3 m / 10 ft Multi-Link to 300-Series 5-Ld Trunk Cable 3 m / 10 ft ECG Multi-Link lead wires 2000966-542D Multi-Link lead wire Set-Group, 5-Ld, Grabber 130 cm / 51 in Multi-Link lead wire Set-Group, 3-Ld, Grabber 130 cm / 51 in Multi-Link lead wire set, 5-Ld, Grabber 130 cm / 51 in Multi-Link lead wire set, 5-Ld, Grabber V2-V6 130 cm / 51 in Multi-Link lead wire set, 3-Ld, MiniGrab AHA Ld I 74 cm / 29 in Multi-Link lead wire set, 3-Ld, MiniGrab IEC Ld I 74 cm / 29 in Dash 3000/4000/5000 A-7 Electromagnetic compatibility (EMC): Electromagnetic compatibility (EMC) Category Description Maximum length Multi-Link lead wire set, 3-Ld, Adult Grabber AHA Ld II 74 cm / 29 in Multi-Link lead wire set, 3-Ld, Adult Grabber IEC Ld II 74 cm / 29 in Multi-Link Ldwr Set-Group, 5-Ld, Snap 130 cm / 51 in Multi-Link Ldwr Set-Group, 3-Ld, Snap 130 cm / 51 in Multi-Link Ldwr Set, Mini-Clip/DIN, Neonatal 60 cm / 24 in Multi-Link Ldwr Set, 5-Ld, Snap 130 cm / 51 in Multi-Link Ldwr Set, Radiotranslucent Grabber 1.6 m / 60 in Multi-Link Ldwr Set, 6-Ld, Snap 130 cm / 51 in Multi-Link Ldwr Set, Individual, Grabber 130 cm / 51 in Multi-Link Ldwr Set, Individual, Snap 130 cm / 51 in Multi-Link Ldwr Set, Individual, Grabber, V2-V6 130 cm / 51 in 300-Series 3-Ld Set w/clips 75 cm / 30 in 300-Series 3-Ld Set w/clips 1.5 m / 60 in 300-Series 3-Ld Set w/snaps 75 cm / 30 in 300-Series 5-Ld Set w/clips 125 cm / 49 in 300-Series 5-Ld Set w/clips 1.5 m / 60 in 300-Series 5-Ld Set w/snaps 125 cm / 49 in 300-Series replacement clip lead 125 cm / 49 in 300-Series replacement clip lead 1.5 m / 60 in 300-Series replacement clip lead 75 cm / 30 in 300-Series replacement snap lead 125 cm / 49 in Invasive BP cables and transducers A-8 Utah Transducer Adapter Cable 3.6 m / 12 ft Spectramed Transducer Adapter Cable 3.6 m / 12 ft Dual BP adapter 30 cm / 12 in Utah Transducer Adapter Cable 3.6 m / 12 ft Abbott Transpac-III Adapter Cable 3.6 m / 12 ft Abbott Transpac-IV Adapter Cable 3.6 m / 12 ft Edwards Truwave Adapter Cable 3.6 m / 12 ft Spectramed Transducer Adapter Cable 3.6 m / 12 ft Utah Disposable Transducers (DPT, DP2, DP3) N/A Spectramed Transducers (TC-MQ) N/A Dash 3000/4000/5000 2000966-542D Electromagnetic compatibility (EMC): Electromagnetic compatibility (EMC) Category Description Maximum length Abbott Transpac-III Transducers N/A Abbott Transpac-IV Transducers N/A Edwards Truwave Transducers (PX) N/A Cardiac output cables and probes Cardiac Output Cable 3.6 m / 12 ft Cardiac Output Probe 2.4 m / 8 ft Cardiac Output Cable 3.6 m / 12 ft Temperature cables and probes Dual Temp Cable 20 cm / 8 in Temp Probe Interconnect Cable 3.6 m / 12 ft Dual Temp Cable 20 cm / 8 in Pulse oximetry cables and sensors Nellcor RECAL Interface Cable 3.6 m / 12 ft Masimo SET Interface Cable 3.6 m / 12 ft Nellcor OxiMax Interface Cable 3 m / 10 ft Nellcor OxiMax Interface Cable 1.2 m / 10 ft Masimo Finger Sensor, Pediatric N/A Masimo Finger Sensor, Adult N/A Masimo Sensor Finger Probe N/A Durasensor DS-100A, Adult N/A CO2 cable CO2 Sensor Cable 2.4 m / 8 ft Power Cord 1.8 m / 6 ft Accessories Battery Lithium-Ion N/A RJ45 series Category 5 cable N/A Dash Port 2 N/A CapnoFlex LF CO2 Module N/A UNITY Network ID to Dash Cable 2000966-542D 1.5 m / 5 ft Remote Control N/A UNITY Network ID N/A AUX Adapter N/A Dash 3000/4000/5000 A-9 Electromagnetic compatibility (EMC): Electromagnetic compatibility (EMC) Category Description Maximum length TRAM-rac 2A N/A SAM Module N/A ICG-BIOz Hemodynamics Module N/A ICG Patient Cable 4.8 m / 15 ft Dash Responder N/A 15 inch Medical Grade Flat Panel Display N/A 18 inch Medical Grade Flat Panel Display N/A Digital Video Cable 1.8 m / 6 ft Durasensor Adult DS-100A Individual Probe A-10 Dash 3000/4000/5000 2000966-542D B 2000966-542D Network troubleshooting Dash 3000/4000/5000 B-1 Network troubleshooting: Network traffic Network traffic Traffic types Two main types of communication occurs in the CARESCAPE Network: Broadcast and Unicast. Broadcast traffic is sent from one device to all devices on the network. Examples of CARESCAPE broadcast traffic are device discovery, alarms, and time synchronization. Unicast traffic is sent from one device to another specific device on the network. An example of CARESCAPE unicast traffic is patient waveforms. Upstream broadcast: The Dash patient monitor sends broadcasts to other network devices. Downstream broadcast: The Dash patient monitor receives broadcasts from other network devices. Flow Most of the Dash network problems are broadcast related. If broadcast is not working, it is unlikely that unicast communication can work. Wired Dash patient monitor Access Point Wired Dash patient monitor CIC Pro center Wireless Dash patient monitor Types: Broadcasts (discovery, alarms, time) Unicasts (waveforms, ping) Mediums: Wired Wireless B-2 CIC Pro center Network Dash 3000/4000/5000 Wireless Dash patient monitor Flow: Upstream Broadcast Downstream Broadcast Bi-Directional Unicast Combinations: Wired Broadcast Wired Unicast Wireless Broadcast Wireless Unicast 2000966-542D Network troubleshooting: Network infrastructure compatibility Network infrastructure compatibility The Dash monitor was designed to be compatible with network infrastructures that comply with IEEE 802.11b or IEEE 802.11a/b/g depending on the model. However, due to complexities within the standard and dependencies on client and infrastructure manufacturer's interpretation of that standard, there are cases where the Dash monitor as a wireless network client is incompatible with some wireless network infrastructures WARNING LOSS OF PATIENT MONITORING — Using the Dash monitor in a wireless LAN network environment that is not compatible with the Dash monitor wireless LAN technology may cause loss of patient monitoring. During this time, patient alarms and vital signs data are not available at the Dash monitor or at the central station. NOTE See the “Wireless LAN Network Configuration Guide” for wireless LAN network installation and configuration information. Compatible wireless network infrastructures The following wireless infrastructures have been tested by GE and are compatible with the Dash monitor with the wireless LAN option: Cisco WLAN Controllers and APs version 7.0.116.0. NOTE Pre Go-Live testing of the wireless infrastructure and capacity is strongly recommended. If your hospital is experiencing loss of monitoring due to infrastructure incompatibilities when using the wireless LAN option, GE recommends one of the following actions be performed by a qualified service representative: 1. If available, connect the Dash monitor to the patient monitoring network using a hardwire Ethernet connection, or 2. Disable and stop using the Dash wireless LAN option. To disable the wireless LAN option, complete the following steps: a. From the monitor’s Main Menu, select MORE MENUS > MONITOR SETUP > SERVICE MODE. b. Enter the Service Mode password. c. Select MONITOR SETTINGS > CONFIGURE WIRELESS LAN. d. Select WIRELESS and set to DISABLED. 2000966-542D Dash 3000/4000/5000 B-3 Network troubleshooting: Network infrastructure compatibility e. Select RETURN. f. When the CONFIGURE WIRELESS LAN window is removed from the display, power cycle the Dash monitor to apply the new setting. GE recommends that you do not modify the design of the wireless LAN infrastructure without verifying network infrastructure compatibility, design, and configuration. Examples of design modification include but are not limited to changing access point models, updating firmware of existing access points, or adding new wireless devices to the network. If you choose to modify the design of the wireless network infrastructure, pre Go-Live compatibility and configuration testing is strongly recommended and generally accepted as best practice as reflected in industry white papers, such as the WiFi Alliance WiFi™ in Healthcare paper. This is consistent with recommendations found in IEC80001-1 Application of risk management for IT-networks incorporating medical devices. B-4 Dash 3000/4000/5000 2000966-542D Network troubleshooting: Problem: No waveforms or parameters are displayed at the CIC Pro center Problem: No waveforms or parameters are displayed at the CIC Pro center Before you begin this troubleshooting tree, make sure that the Network connectivity option is enabled on the Dash patient monitor. To check this option, access one of the following menus: Boot Loader > Service Menu > Options Menu (refer to “Boot Loader Service Menu” on page 4-4) or Dash main menu > MORE MENUS > MONITOR SETUP > SOFTWARE CONFIGURATION ([LW \HV &RQILJXUDWLRQLVVXH 6HOHFWWKH DSSURSULDWHXQLWDQG EHGQDPH &DQ\RXQRZVHH ZDYHIRUPV SDUDPHWHUV" QR \HV &DQ\RXVHOHFWWKH 'DVKSDWLHQW PRQLWRUDWWKH&,& 3URFHQWHU" %URDGFDVWWUDIILFLVQRW PDNLQJLWWRWKH&,&3UR FHQWHU QR ([LW \HV &,&3URFHQWHU FRQQHFWLYLW\SUREOHP *RWR$RQ SDJH% &DQ\RXVHOHFWWKH 'DVKSDWLHQW PRQLWRUDWDQRWKHU &,&3URFHQWHU" \HV 3OHDVHYHULI\&,&3UR FHQWHUQHWZRUN FRQILJXUDWLRQVHWWLQJVLQ WKH&,&3UR6HUYLFH 0DQXDO QR &DQ\RXVHOHFW DQRWKHU'DVK SDWLHQWPRQLWRUWR YLHZIURPWKLV'DVK SDWLHQWPRQLWRU" ,VWKH&,&3URFHQWHU LQWKHFRUUHFW &$5(6&$3(1HWZRUN" QR &DQ\RXQRZVHH ZDYHIRUPV SDUDPHWHUV" QR *RWR$RQ SDJH% *RWR$RQ SDJH% \HV ([LW \HV &DQ\RXQRZVHH ZDYHIRUPV SDUDPHWHUV" QR *RWR$RQ SDJH% 2000966-542D 1HWZRUNSUREOHP %URDGFDVWWUDIILFLVJRLQJ EHWZHHQWKH'DVKSDWLHQW PRQLWRUVEXWQRWWRWKH&,& 3URFHQWHUV7KH&,&3UR FHQWHUVPD\QRWEHRQWKH VDPHQHWZRUNDVWKH'DVK SDWLHQWPRQLWRUV 3OHDVHYHULI\FRQILJXUDWLRQ VHWWLQJVXVLQJWKH:LUHOHVV /$11HWZRUN&RQILJXUDWLRQ *XLGHDQGFRQVXOWLQJWKH KRVSLWDO¶V,7GHSDUWPHQW Dash 3000/4000/5000 B-5 Network troubleshooting: Problem: No waveforms or parameters are displayed at the CIC Pro center Broadcast traffic is not making it through. Ensure Dash patient monitor is installed in the appropriate wireless network infrastructure. no Does network infrastructure and Dash wireless card match in technology? 802.11 a/b/g no no 1) Does SSID match? No spaces No spaces at the end Case-sensitive Is wireless enabled? 2) Does wireless network support 802.11d World Mode? Is it turned on? yes Does the Dash patient monitor associate/ authenticate with the AP? Refer to the “Wireless LAN” section of this manual to check the association status. no Can you ping other wireless Dash patient monitors from the CIC Pro center? 5) Does it work under another AP? Can you ping the Dash patient monitor from the CIC Pro center? 6) Do other Dash patient monitors work? Please verify configuration settings with the hospital’s IT department. yes 1) Is the SSID tied to the correct VLAN (AP config)? 2) Is the VLAN bridged to the CARESCAPE Network? 3) Is the CIC Pro center in the correct CARESCAPE Network? 4) Is there a firewall or Access Control List between the hospital infrastructure and the CARESCAPE Network? Please verify configuration settings using the Wireless LAN Network Configuration Guide and consulting the hospital’s IT department. Check IP addresses on the Dash patient monitor. Are the Dash patient monitor and the CIC Pro center on the same network? Broadcasts are not making it through. Network configuration problem. Please verify configuration settings with the hospital’s IT department. no Can you ping other CIC Pro centers or Dash patient monitors from the CIC Pro center? 1) Is the network set up to allow broadcasts? No traffic is making it through. no Please verify configuration settings with the hospital’s IT department. yes Check IP addresses on the Dash patient monitor. Are the Dash patient monitor and the CIC Pro center on the same network? Configuration issue: no Correct IP addressing issues. yes Are they plugged into CARESCAPE Network jacks? User Error: no Plug into correct jacks. yes Please verify configuration settings with the hospital’s IT department. 1) Is the network set up to allow broadcasts? no Configuration issue: Correct IP addressing issues. yes Wired network problem. yes no No traffic is getting through. Potential network configuration issue. 3) Do security settings match? Correct passphrase (remember passphrase does not equal passkey) Correct key index 4) Are you in the coverage area? yes no yes Network configuration problem. Configuration issue: yes Enable wireless. Is Dash connected to the network via hardwire? Leave Dash patient monitor plugged in. Can you ping the Dash patient monitor from the CIC Pro center? yes Please verify configuration settings using the Wireless LAN Network Configuration Guide and consulting the hospital’s IT department. No traffic is getting through to this Dash patient monitor. 1) Are you in the coverage area? 2) Does it work under another AP? 3) Does it work when hard-wired? Contact the hospital IT department for configuration settings and 802.11 a/b/g wireless infrastructure. B-6 Dash 3000/4000/5000 2000966-542D C 2000966-542D Network disclosure to facilitate network risk management Dash 3000/4000/5000 C-1 Network disclosure to facilitate network risk management: Purpose and scope This disclosure is intended to satisfy the requirements of IEC 606011:2005 clause 14.13 and IEC/ISO 80001-1:2010 clause 3.5 for disclosure of network related specifications, requirements and residual risks in order to facilitate the responsible organization’s risk management activities (e.g. pursuant to 80001-1) for their networks incorporating the Dash 3000/4000/5000 Patient Monitor Purpose for the Dash patient monitor connection to network The Dash patient monitor is intended to be connected to a network in order to support the following functionality: Providing real-time patient data (i.e., parameters, waveforms and alarms) to compatible network devices such as central stations or other bedside monitors. Displaying real-time patient data (i.e., parameters, waveforms and alarms) from compatible network devices such as other bedside monitors. Remote configuration (patient admission, alarm settings, etc.) from compatible network devices. Dash patient monitor network interface technical specifications Connection name Mission critical (MC) network port Physical network connection type IEEE 802.3 10Base-T Ethernet Speeds and duplex modes supported 10 Mbps half duplex Default IP address (from factory) IP address - 126.x.x.x (based on last three octets of MAC address) Subnet mask - 255.0.0.0 IP addressing IPV4 Static QoS support IP layer DSCP tagging (packets marked as 26) C-2 Dash 3000/4000/5000 2000966-542D Network disclosure to facilitate network risk management: Connection name General WLAN standards/certifications WLAN (IEEE 802.11a/b/g) IEEE 802.11a/b/g FCC Part 15.247 for USA FCC Part 15.407 for USA FCC Part 15.107 for North America FCC Part 15.109 for North America RSS-210 for Canada ICES 003 Class B for Canada EN 300.328 V1.7.1 for Europe EN 301.893 V1.4.1 for Europe EN 301 489-1 V1.6.1 for Europe EN 301 489-17 V1.2.1 for Europe ARIB-STD T71 V5 for Japan ARIB-STD 33 V5.3 for Japan ARIB-STD 66 V3.3 for Japan AS/NZS 4268:2008 for Australia European Directives 1999/5/EC & 2002/95/EEC IEC 60601-1-2: 2001 +A1: 2004, EN 60601-1-2: 2001 +A1: 2006 Australia AS/NZS CISPRA 22 EU: EN55022:2006 Class B EN55024: 1998 +A1: 2001 +A2: 2003 47CFR15: 1998 (FCC Part 15 Class B) EN 60950-1:2006 IEC 60950-1:2001 UL 60950-1, CSA C22.2 No.60950-1 Antenna gain 2.4 GHz: 1.6dBi Avg., 1.8dBi Maximum 5GHz: -2.5 dBi Avg., -0.7 dBi Maximum Supported channel range 2.4 GHz: 1-14 5 GHZ: 34-165 Transmit power range 2.4GHz DSSS PHYs: up to +16dBm 2.4GHz OFDM PHYs: up to +16dBm 5GHz OFDM PHYs: up to +16dBm May be further restricted on some channels according to regulatory domain Supported Data Rates [Mbps] and Corresponding Receive Sensitivity [dBm, referenced to antenna conducted output Wireless regulatory domains 2000966-542D 2.4 GHz DSSS and HR/DSSS (802.11b) PHYs 1 Mbps / -86, 2 Mbps / -83, 5.5 Mbps / -82, 11 Mbps / -79 (Sensitivity corresponds to 8% max packet error rate with 1024 byte MPDU) 2.4 GHz ERP OFDM (802.11g) PHY 6 Mbps / -82, 9 Mbps / -81, 12 Mbps / -79, 18 Mbps / -77, 24 Mbps / -74, 36 Mbps / -70, 48 Mbps / -66, 54 Mbps / -65 (Sensitivity corresponds to 10% max packet error rate with 1000 byte PSDU) 5 GHz OFDM (802.11a) PHY 6 Mbps / -82, 9 Mbps / -81, 12 Mbps / -79, 18 Mbps / -77, 24 Mbps / -74, 36 Mbps / -70, 48 Mbps / -66, 54 Mbps / -65 (Sensitivity corresponds to 10% max packet error rate with 1000 byte PSDU) IEEE 802.11d compliant Dash 3000/4000/5000 C-3 Network disclosure to facilitate network risk management: Connection name WLAN (IEEE 802.11a/b/g) Dynamic frequency selection IEEE 802.11h DFS MAC-layer QoS and power save support 802.11e HCF-EDCA / EDCF / WMM: Four standard access categories plus legacy DCF and customizable Cwmin, Cwmax, AIFS and TXOP settings Data encryption support 802.11 WEP, Wi-Fi Protected Access with TKIP (“WPA1”), 802.11i / WPA2 AES-CCMP Authentification support None WEP (128-bit) WPA-PSK (TKIP) WPA2-PSK (AES-CCMP) IP addressing IPv4, statically configured IP layer QoS DSCP tagging per dataflow, 802.11e, WMM Network information flows Unity services Value Network connection on device MC Network Usage type/function/purpose Clinical/ Waveforms, parameters, alarms/Transmit clinical data to other devices on the network Licensed/optional/required Required Communication partner Device/IP address/network Unity devices/MC Network Middle layer protocols UDP Application layer protocol and encoding Unity Ports Standard Unity ports Traffic characterization and bandwidth requirements Periodic and on-demand traffic. Incoming unicast traffic is approximately 50 Kbps if viewing a remote bed. Outgoing unicast traffic is approximately 50Kbps per patient view. Maximum of 10 views supported if on wireless network. Maximum of 40 views supported if on wired network. Outgoing broadcast traffic is very small (< 0.7 Kbps). Latency max 250 ms Ping - MC Network Value Network connection on device MC Network Usage type/function/purpose Device Servicing/Network troubleshooting (MC only) Licensed/optional/required Required C-4 Dash 3000/4000/5000 2000966-542D Network disclosure to facilitate network risk management: Ping - MC Network Value Communication partner Device/IP address/network PC, Other Medical Devices/ MC Network Middle layer protocols ICMP Application layer protocol and encoding N/A Ports N/A Traffic characterization and bandwidth requirements On-demand. No ping request can be run from device. Multiple requests could be received from other devices. Size is determined by sending device. Software transfer Value Network connection on device MC Network Usage type/function/purpose Device Servicing / Perform Software Upgrades Licensed/optional/required Required Communication partner Device/IP address/network PC, Central Station/ MC Network Middle layer protocols UDP Application layer protocol and encoding Unity Ports Standard Unity ports Traffic characterization and bandwidth requirements On-demand. User-initiated. Size varies by software to be transferred. Required characteristics and configuration of network for support of Dash patient monitor 2000966-542D The network must meet the specific requirements above for all traffic flows associated with the subset of features, use cases and workflows required by the responsible organization's users. In addition, the network must be “flat” (i.e. limited to a single IP broadcast domain). The maximum MC Network size (number of unique RWhats generated) supported by Dash is 1023. Dash 3000/4000/5000 C-5 Network disclosure to facilitate network risk management: Potential risks to safety, effectiveness or security resulting from failure of IT network to provide the required characteristics WARNING Connection of the Dash patient monitor to a network that includes other equipment could result in other unidentified risks to patients, operators or third parties. The responsible organization should identify, analyze, evaluate and control these risks on an ongoing basis including after changes to the network such as those listed below, which could introduce new risks and require additional analysis. C-6 Changes in network configuration. Connection of additional items to the network. Disconnecting items from the network. Update of equipment connected to the network. Upgrade of equipment connected to the network. Dash 3000/4000/5000 2000966-542D D 2000966-542D Checklist Dash 3000/4000/5000 D-1 Checklist: Checklist Checklist Details of test Configuration, Conditions, and Test Equipment for (DUT) Device Under Test (Complete one sheet per device) Product/Model Customer Asset Tag Serial Number Comments Test Equipment List Prior to testing verify all equipment is calibrated via “Cal” labeling and record Cal Due Dates ID Number Step Manufacturer Description Ground Continuity Test Results Expected Limits Ohms Ohms I N S T C M Serial Number 9 Done DUT Electrical Safety Tests A Model Number P M P A S S Cal Due Date (S) (O) C O N F DUT F A I L Functional Checks <.2 ECG 5 LD µA ECG 12SL (option) Measured Resistance B Earth Leakage Current 1. Pol Norm, Neut Clsd 300 500 2. 3. Pol Norm, Neut Open 300 1000 Pol Rev, Neut Open 300 1000 4. Pol Rev, Neut Clsd 300 500 C Enclosure Leakage Current 1. Pol Norm, Neut Clsd, Gnd Clsd 2. Pol Norm, Neut Open, Gnd Clsd 3. Pol Norm, Neut Clsd, Gnd Open 4. Pol Rev, Neut Clsd, Gnd Open 300 Batteries 5. Pol Rev, Neut Open, Gnd Clsd 300 Battery A (option) 6. Pol Rev, Neut Clsd, Gnd Clsd 100 D Patient Leakage Current to Ground 1. Pol Norm, Neut Clsd, Gnd Clsd 10 Display (S) Pol Norm, Neut Open, Gnd Clsd 50 Speaker (S) 3. Pol Norm, Neut Clsd, Gnd Open 50 Network (option) 4. Pol Rev, Neut Clsd, Gnd Open 50 Remote Control (option) 5. Pol Rev, Neut Open, Gnd Clsd 50 BISx (option) 6. Pol Rev, Neut Clsd, Gnd Clsd 10 Wireless LAN (option) E. Patient Leakage Current Mains on Applied Part µA 1. Pol Norm, Neut Clsd, Gnd Clsd 50 Dash Port 2 Docking Station (option) TRAM-RAC 2A w/ICG 2. Pol Rev, Neut Clsd, Gnd Clsd 50 F. BISx Patient Leakage Current to Ground (option) 1. USA 2. ECG ECG SP O2 SP O2 P M Respiration (S) Temperature 1 and 2 (S) Cardiac Output (option) Invasive BP (option) (S) NBP (S) 300 Analog Out, Defibrillator Synchronization (S) 300 End-Tidal CO2 (option) Battery B (option) µA Printer (option) (option) TRAM-RAC 2A w/SAM µA (option) Pol Norm, Neut Clsd, Gnd Clsd 100 Abbreviations 2. Pol Norm, Neut Open, Gnd Clsd 500 3. Pol Norm, Neut Clsd, Gnd Open 500 4. Pol Rev, Neut Clsd, Gnd Open 500 INST Installation 5. Pol Rev, Neut Open, Gnd Clsd 500 CM Corrective Maintenance 6. Pol Rev, Neut Clsd, Gnd Clsd 100 PM Preventive Maintenance CONF Configuration – Standard (S) or Option (O) G. BISx Patient Leakage Current Mains on Applied Part (option) 1. Pol Norm, Neut Clsd, Gnd Clsd 5000 2. Pol Rev, Neut Clsd, Gnd Clsd 5000 D-2 µA µA F A I L (S) Pulse Oximetry 100 C M P A S S Monitor Power Up - (POST) 1. µA 9 Done I N S T DUT Device Under Test Standard (S) Standard configuration test required Option (O) Test as required if the option is installed µA Dash 3000/4000/5000 Device Test Results Pass (9) Fail (9) Tested By Date 2000966-542D Asia Headquarters GE Medical Systems Information Technologies, Inc. 8200 West Tower Avenue Milwaukee, WI 53223 USA Tel: + 1 414 355 5000 1 800 558 5120 (US only) Fax: + 1 414 355 3790 GE Medical Systems Information Technologies GmbH Munzingerstrasse 5 79111 Freiburg Germany Tel: + 49 761 45 43 - 0 Fax: + 49 761 45 43 - 233 GE Medical Systems Information Technologies Asia; GE (China) Co., Ltd. No1 Huatuo Road, Zhangjiang Hi-tech Park Pudong Shanghai, P.R.China 201203 Tel: + 86 21 5257 4650 Fax: + 86 21 5208 2008 GE Medical Systems Information Technologies, Inc., a General Electric Company, doing business as GE Healthcare. www.gehealthcare.com 0459