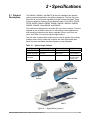
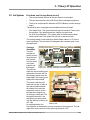
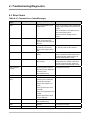
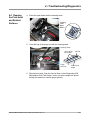
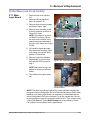
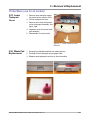
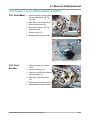
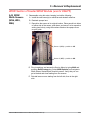
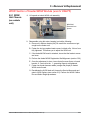
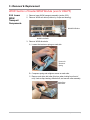
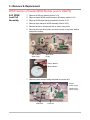
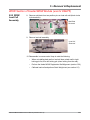
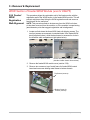
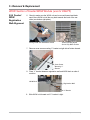
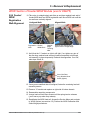
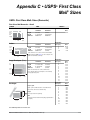
1
DM300c/DM400c/DM450c/DM475
Digital Mailing Systems
DM300c
DM30
DM400c/
DM450c
DM475
Service Manual
US English Edition
NOTICE!
The use of this information by the recipient or others for purposes other than the repair, adjustment or operation of
Pitney Bowes equipment may constitute an infringement of patent and/or other intellectual property rights of Pitney
Bowes or others. Pitney Bowes assumes no responsibility for any such use of the information.
Except as provided in writing, duly signed by an officer of Pitney Bowes, no license, either express or implied,
under any Pitney Bowes or any third party’s patent, copyright, or other intellectual property rights is granted by
providing this information.
April, 2010
©2007, 2010 Pitney Bowes Inc.
Due to publication lead times and continuing product development, this manual may not reflect final product release configurations
and recommended service procedures. Equipment and material specifications as well as performance features are subject to change
without notice. Available product features may vary, depending on machine model, system software level and system setup. Some
product features may be country specific.
Postage By Phone and E-Z Seal are trademarks or registered trademarks of Pitney Bowes Inc. ENERGY STAR is a registered
trademark of the United States Environmental Protection Agency. Other company names, products or services mentioned herein may
be protected by trademarks, registered trademarks or service marks and are the property of their respective owners.
All rights reserved. This book may not be reproduced in whole or in part in any fashion or stored in a retrieval system of any type or
transmitted by any means, electronically or mechanically, without the express written permission of Pitney Bowes.
FCC Part 68 Compliance of the Modem
This equipment complies with Part 68 of the FCC rules and the requirements adopted by the ACTA. On the
bottom of this equipment is a label that contains, among other information, a product identifier in the format
US:AAAEQ##TXXXX. If requested, this number must be provided to the telephone company.
This equipment is designed to be connected to a Facility Interface Code 02LS2 network with RJ11C network
interface.
A plug and jack used to connect this equipment to the premises wiring and telephone network must comply
with the applicable FCC Part 68 rules and requirements adopted by the ACTA. A compliant telephone cord and
modular plug is provided with this product. It is designed to be connected to a compatible modular jack that is
also compliant. See installation instructions for details.
The ringer equivalence number (REN) is used to determine the number of devices that may be connected to a
telephone line. Excessive RENs on a telephone line may result in the devices not ringing in response to an incoming
call. In most but not all areas, the sum of RENs should not exceed five (5.0). To be certain of the number of devices
that may be connected to a line, as determined by the total RENs, contact the local telephone company. The REN
for this product is part of the product identifier that has the format US:AAAEQ##TXXXX. The digits represented by
## are the REN without a decimal point (for example, these models are 10 which is a REN of 1.0).
If this equipment causes harm to the telephone network, the telephone company will notify you in advance that temporary discontinuance of service may be required. But if advance notice isn’t practical, the telephone company will
notify you as soon as possible. Also, you will be advised of your right to file a complaint with the FCC if you believe it
is necessary.
The telephone company may make changes in its facilities, equipment, operations, or procedures that could affect the operation of the equipment. If this happens the telephone company will provide advance notice in order
for you to make necessary modifications to maintain uninterrupted service.
If trouble is experienced with this equipment, please contact Pitney Bowes, 1 Elmcroft Rd., Stamford, CT
06926-0700, for repair or warranty information (also see Servicing section above). If the equipment is causing
harm to the telephone network, the telephone company may request that you disconnect the equipment until
the problem is resolved. This equipment is not intended to be repaired by the customer (user).
Connection to party-line service is subject to state tariffs. Contact the state public utility commission, public
service commission, or corporation commission for information.
If the installation site has specially wired alarm equipment connected to the telephone line, ensure the installation of this mailing machine does not disable the alarm equipment. If you have questions about what will disable alarm equipment, consult your telephone company or a qualified installer.
Declaration of Conformity According to FCC Rules Part 2 , Paragraph 2.1077
This device complies with Part 15 of the FCC Rules. Operation is subject to the following two conditions: (1) this device may not cause harmful interference, and (2) this device must accept any interference received, including interference that may cause undesired operation. Responsible party: Pitney Bowes, 1 Elmcroft Rd., Stamford, CT 069260700.
This equipment has been tested and found to comply with the limits for a Class A digital device, pursuant to part 15 of the
FCC Rules. These limits are designed to provide reasonable protection against interference when the equipment is operated in a commercial environment. This equipment generates, uses, and can radiate radio frequency energy and, if not
installed and used in accordance with the instruction manual, may cause interference to radio communications. Operation
of this equipment in a residential area is likely to cause interference in which case the user will be required to correct the
interference at his own expense.
CAUTION: Changes or modifications to this equipment not expressly approved by the party
responsible for compliance could void the user’s authority to operate the equipment.
Shielded I/O and USB cables must be used with this equipment to ensure compliance with the limits. Use of unshielded
cables is prohibited.
Note for California Customers Only
The battery in this product contains perchlorate material. California requires perchlorate-containing products to be accompanied by the following notice: Percholrate Material - special handling may apply.
See: http://www.dtsc.ca.gov/hazardouswaste/perchlorate/
Table of Contents
Chapter 1 – Introduction
1.1
1.2
1.3
1.4
Purpose ....................................................................................................... 1-1
Related Publications/Information ................................................................. 1-1
Book Organization ....................................................................................... 1-1
Warning Messages ...................................................................................... 1-1
Personal Safety ........................................................................................... 1-2
Electrostatic Discharge (ESD) Procedures ................................................. 1-4
Chapter 2 – Specifications
2.1 Product Description ..................................................................................... 2-1
2.2 Product Features ......................................................................................... 2-2
2.3 Material Specifications................................................................................. 2-3
Material Spectrum ....................................................................................... 2-4
Envelope Size ............................................................................................. 2-5
Envelope Thickness .................................................................................... 2-5
Envelope Weight ......................................................................................... 2-5
Tape Strip Dimensions ................................................................................ 2-5
Tape Strip Thickness ................................................................................... 2-5
Tape Strip Capacity ..................................................................................... 2-5
Stack Height and Weight ............................................................................. 2-5
Envelope Flaps............................................................................................ 2-6
2.4 Ink Capacities, Consumption and Cartridge Life ......................................... 2-7
Capacities and Print Consumption .............................................................. 2-7
Maintenance Consumption.......................................................................... 2-7
2.5 Equipment Specifications ............................................................................ 2-7
Size and Weight .......................................................................................... 2-7
Acoustic Noise Level ................................................................................... 2-7
General Machine Specifications .................................................................. 2-8
User Interface Controller ............................................................................. 2-9
Connectivity ................................................................................................. 2-9
Postage Meter ........................................................................................... 2.10
Environmental Limits ................................................................................. 2-10
2.6 Regulatory ................................................................................................. 2-11
Electromagnetic......................................................................................... 2-11
Safety ........................................................................................................ 2-11
Compliance ............................................................................................... 2-11
DM300c/DM400c/DM475 Service Manual (SV61801 Rev. D)
i
Table of Contents
2.7 Weighing Options ...................................................................................... 2-12
2.8 External Printer Option .............................................................................. 2-12
2.9 Special Services Options........................................................................... 2-12
2.10 Graphics (Slogans, Permits and Inscriptions) ......................................... 2-12
2.11 Internal Ad and Inscription Storage.......................................................... 2-12
2.12 Compatible Pitney Bowes Software ........................................................ 2-13
2.13 Consumables (US) .................................................................................. 2-13
2.14 User-Replaceable Parts .......................................................................... 2-13
2.15 Meter Reports .......................................................................................... 2-14
Chapter 3 – Theory of Operation
3.1 Introduction .................................................................................................. 3-1
3.2 Product Features ......................................................................................... 3-1
3.3 User Interface .............................................................................................. 3-2
LED States .................................................................................................. 3-2
Modes of Operation ..................................................................................... 3-3
3.4 Envelope Tape Transport............................................................................. 3-4
DM400c /DM450c/DM475 Autofeeder Transport ........................................ 3-4
Tape Feeder ................................................................................................ 3-8
Upper Transport .......................................................................................... 3-9
Lower Transport ........................................................................................ 3-10
Sequence of Operation ............................................................................. 3-11
3.5 Ink System ................................................................................................. 3-23
Ink Cartridge .............................................................................................. 3-23
Print Head and Carriage Board ................................................................. 3-24
Carriage Assembly .................................................................................... 3-25
Purge Unit ................................................................................................. 3-26
Waste Tank ................................................................................................ 3-29
User Maintenance ..................................................................................... 3-29
3.6 Electronics ................................................................................................. 3-30
PCBs ......................................................................................................... 3-33
Sensor Summary....................................................................................... 3-41
Motor Summary ......................................................................................... 3-43
3.7 Scale Controller ......................................................................................... 3-44
3.8 USB ........................................................................................................... 3-44
3.9 LEDs .......................................................................................................... 3-44
3.10 DM475 Feeder/WOW Theory .................................................................. 3-45
ii
DM300c/DM400c/DM475 Service Manual (SV61801 Rev. D)
Table of Contents
Chapter 4 – Troubleshooting
4.1 Introduction .................................................................................................. 4-1
4.2 Troubleshooting Tables................................................................................ 4-2
Power ON and Initialization Faults .............................................................. 4-2
Keyboard and Display Faults ...................................................................... 4-3
Automatic Feeder Faults (DM400c/DM450c/DM475) ................................. 4-4
Mailing Machine Transport Faults ............................................................... 4-5
Tape Feeder Faults ..................................................................................... 4-7
Printing Faults ............................................................................................. 4-8
Print Carriage Faults ................................................................................. 4-12
Moistener Faults ........................................................................................ 4-13
Miscellaneous Faults ................................................................................. 4-13
Modem/Connection Faults ........................................................................ 4-14
Integrated Scale Faults ............................................................................. 4-16
4.3 Error Codes ............................................................................................... 4-17
Common Error Codes/Messages .............................................................. 4-18
iButton® PSD Error Codes (20xx) ............................................................ 4-30
iButton® PSD Error Codes (21xx) ............................................................ 4-31
Image Generator Errors (22xx) ................................................................. 4-32
Barcode Generator Errors (22xx) .............................................................. 4-33
Print Head Security Errors (23xx).............................................................. 4-34
Print Manager Errors (24xx) ...................................................................... 4-35
“BOB” Task Errors (25xx) .......................................................................... 4-36
WOW Motion Control Processor (MCP) Error Codes (2Axx) .................... 4-39
Motion Control Processor (MCP) and Feeder Errors (37xx) ..................... 4-39
4.4 Cleaning the Print Head and Related Surfaces ......................................... 4-40
4.5 Meter Withdrawal....................................................................................... 4-42
Scenarios .................................................................................................. 4-42
Removal of iButton PSD............................................................................ 4-43
Running Meter Withdrawal from Menu ...................................................... 4-44
Withdrawal Process................................................................................... 4-45
Preparing the System for Shipment .......................................................... 4-45
Packing the System................................................................................... 4-45
Preparing the Box for Shipping ................................................................. 4-45
Completing the 3601C............................................................................... 4-46
DM300c/DM400c/DM475 Service Manual (SV61801 Rev. D)
iii
Table of Contents
Chapter 5 – Removal and Replacement
5.1 Introduction .................................................................................................. 5-1
Printer/Base (use for all models)
5.2
5.3
5.4
5.5
5.6
Back Cover ................................................................................................. 5-3
Control Panel .............................................................................................. 5-3
Front Sub-Panel .......................................................................................... 5-4
Control Panel Ribbon Cables ..................................................................... 5-4
Bottom Cover (Base Pan) and Side Deck Guide......................................... 5-5
5.6.1 Side Deck Removal ........................................................................... 5-5
5.7 Main Transport Feed Belt ............................................................................ 5-6
5.8 Purge Unit.................................................................................................... 5-7
5.8.1 Purge Unit Sensor Board .................................................................. 5-7
5.8.2 Purge Unit Motor and Gears ............................................................. 5-8
5.9 Transport Drive Motor .................................................................................. 5-8
5.10 Carriage Drive Motor ............................................................................... 5-10
5.11 Rear Drive Belts....................................................................................... 5-11
5.11.1 Main Drive Shaft Belt ..................................................................... 5-11
5.11.2 Intermediate Drive Belt .................................................................. 5-11
5.12 Carriage Drive Belt .................................................................................. 5-12
5.13 Print Head Carriage Assembly ................................................................ 5-13
5.14 Drive Shaft ............................................................................................... 5-16
5.15 Tape Feed Unit ........................................................................................ 5-17
5.15.1 Tape Motor .................................................................................... 5-17
5.15.2 Tape Feed Roller Assembly........................................................... 5-17
5.16 Postal Security Device (PSD) .................................................................. 5-18
5.17 Main Logic Board..................................................................................... 5-19
5.18 Modem Board .......................................................................................... 5-20
5.19 Power Supply .......................................................................................... 5-21
5.20 Encoder Sensor, Encoder Disc and Sensor Board ................................. 5-22
5.21 Segmented Roller .................................................................................... 5-23
5.22 Lower Transport Assembly ...................................................................... 5-24
5.23 Lower Transport Cover ............................................................................ 5-25
5.24 Waste Pad Replacement ......................................................................... 5-25
iv
DM300c/DM400c/DM475 Service Manual (SV61801 Rev. D)
Table of Contents
Auto-Feeder (use for DM400c/DM450c/DM475)
5.25
5.26
5.27
5.28
5.29
5.30
5.31
5.32
5.33
5.34
5.35
5.36
5.37
Feeder Upper Cover ................................................................................ 5-26
Side Guide ............................................................................................... 5-27
Feed Deck ............................................................................................... 5-28
Feeder Unit .............................................................................................. 5-29
Feeder PCB Assembly ............................................................................ 5-31
Retard Roller ........................................................................................... 5-32
Feed Roller Assembly.............................................................................. 5-34
Feed Belt Assembly ................................................................................. 5-36
Feed Motor .............................................................................................. 5-38
Feed Encoder .......................................................................................... 5-39
Feeder Sensor (FS2/WS1) PCB.............................................................. 5-40
Seal/No Seal Lever.................................................................................. 5-40
Sealer Finger ........................................................................................... 5-41
WOW Section of Feeder/WOW Module (use for DM475)
5.38
5.39
5.40
5.41
5.42
5.43
5.44
5.45
5.46
5.47
5.48
5.49
5.50
5.51
5.52
5.53
5.54
5.55
5.56
Separation of Feeder/WOW Module from Printer/Base .......................... 5-42
Feeder/WOW Cover ................................................................................ 5-43
Feeder Unit of Feeder/WOW Module ...................................................... 5-43
Feeder/WOW Control Board (PCB)......................................................... 5-44
WOW Thickness and Feed Encoders ..................................................... 5-46
Feeder/WOW Junction Board ................................................................. 5-47
WOW WS2 (Middle) and WS3 (Exit) Sensors . ....................................... 5-47
WOW Transport Belts (two, behind wall) ................................................. 5-48
WOW Transport Pulleys (three, behind wall)........................................... 5-49
WOW Upper Transport (as a whole unit)................................................. 5-50
WOW Upper Transport Arms Assembly .................................................. 5-51
WOW Width Sensors (WS4, WS5, WS6) ................................................ 5-52
WOW Deck .............................................................................................. 5-54
WOW Unit Chassis (as a whole unit) ...................................................... 5-55
WOW Transport Motor............................................................................. 5-58
Lower WOW Transport Assembly (as a whole unit) ................................ 5-60
Lower WOW Transport Components....................................................... 5-62
WOW Load Cell Assembly ...................................................................... 5-64
Feeder/WOW Registration Wall Alignment .............................................. 5-66
DM300c/DM400c/DM475 Service Manual (SV61801 Rev. D)
v
Table of Contents
Chapter 6 – Service Menus
6.1
6.2
6.3
6.4
Service Menu Overview............................................................................... 6-1
Making SBR Setup Display in Service Menu [DM475] ................................ 6-4
SBR Setup [DM475] .................................................................................... 6-5
Diagnostics .................................................................................................. 6-9
PM Diagnostics ........................................................................................... 6-9
PM Maintenance ....................................................................................... 6-11
Feeder/WOW Diagnostics ......................................................................... 6-12
SBR Diagnostics ....................................................................................... 6-14
6.5 WOW Options [DM475] ............................................................................. 6-16
WOW Calibration....................................................................................... 6-16
Static Weight ............................................................................................. 6-17
Set WOW Mode ........................................................................................ 6-17
Re-zero WOW ........................................................................................... 6-18
Calibration Report ..................................................................................... 6-18
Verify WOW ............................................................................................... 6-18
Last 10 Weights......................................................................................... 6-18
6.6 Platform Options ........................................................................................ 6-18
6.7 Time Functions .......................................................................................... 6-18
6.8 System Information.................................................................................... 6-19
Internal Information ................................................................................... 6-19
USB Device ............................................................................................... 6-19
Flash File Info ............................................................................................ 6-19
6.9 Enable Features ........................................................................................ 6-19
6.10 Meter Withdrawal..................................................................................... 6-19
6.11 Mail Simulation ........................................................................................ 6-19
Appendix A — Glossary of Terms
Appendix B — Operator Checklist
Appendix C –– Appendix C • USPS® First Class Mail® Sizes
vi
DM300c/DM400c/DM475 Service Manual (SV61801 Rev. D)
1 • Introduction
1.1 Purpose
This book contains instructions for troubleshooting and site repair of
DM300c, DM400c, DM450C, and DM475 Digital Mailing Systems. It also
includes complete product specifications and a section on theory for training purposes. For reference, the table below shows a quick comparison of the models.
Marketing Meter Base Features
Model
PCN PCN
Throughput
Connectivity Options
to Data Center
DM300c
G900
3C00 Semi-auto
feed
up to 65 letters
per minute
• PC Meter Connect
• LAN (via USB adapter)
• Analog phone line
DM400c
G900
4C00 Auto feed
up to 95 letters
per minute
• PC Meter Connect
• LAN (via USB adapter)
• Analog phone line
DM450c*
G900
5C00 Auto feed
up to 120 let• PC Meter Connect**
ters per minute • Analog phone line
• LAN (via USB adapter)
DM475
G900
6C00 • Auto feed - up to 120 let- • PC Meter Connect
• WOW
ters per minute • LAN (via its own port)
• Analog phone line
• SBR
- up to 80 letters per minute
in WOW mode
*No longer sold as a new product in US but still serviced (and included in this manual).
**Must choose “DM400c” as the model when installing this software
1.2 Related
Publications/
Information
DM300c/DM400c/DM475 Operator Guide
SV62261 (Rev. C or later)
DM300c Quick Reference Guide
AW19541
DM400c Quick Reference Guide
AW19542
DM475 Quick Reference Guide
AW22340
Customer Install Instructions—DM300c
AW19645
Customer Install Instructions—DM400c
AW19646
Service Install Instructions—DM475
SV62308
DM300c/DM400cDM450c//DM475 Parts List
SV61924
Other sources of information:
•
PC Meter Connect (if installed on the customer’s PC connected to their
mailing machine) - a link to a PDF of their Operator Guide is provided
•
Training - see DM475 Self-Directed Course (MSM-MC-01210) at My Portfolio on the Pitney Bowes intranet.
DM300c/DM400c/DM475 Service Manual (SV61801 Rev. D)
1-1
1 • Introduction
1.3 Book
Organization
1 • Introduction — Presents vital safety information and an overview of manual.
2 • Specifications — Provides a brief product description and lists the equipment, material specifications and PCNs for the models.
3 • Theory of Operation — lists the differences between the DM300c,
DM400c, and DM475 machines; and explains how the machine works.
4 • Troubleshooting — Provides troubleshooting/diagnostic procedures.
5 • Removal and Replacement — Describes procedures for part removal,
replacement and adjustment.
6 • Service Menu — explains on-board diagnostic programs used to troubleshoot.
Appendix A: Glossary of Terms — Defines some terms used in this manual with which you may not be familiar.
Appendix B: Operator Training Checklist — Provides a handy checklist of
1.4 Safety
Warning messages appear throughout this manual to alert you to potentially
hazardous conditions. Two designations indicate their relative seriousness:
WARNING! Calls attention to improper practices that
could result in a potentially serious, even lethal injury to you
or the customer.
CAUTION! Calls attention to practices that could cause
minor injury to you or a customer or that could damage
equipment or material.
Familiarize yourself with proper procedures and methods before you install,
operate or repair the equipment to avoid personal injury or damage to the
equipment. If you train service people or equipment operators, it is important to
explain safety precautions to your students and encourage safety awareness.
Personal Safety
Follow these precautions for your own safety:
1-2
•
Treat every circuit like a gun that may be loaded. It may not be “live,”
but be sure. Check with a neon tester or voltmeter, or simply unplug the
machine.
•
Know how to turn off the power in the work area and get help in an
emergency.
•
Don’t work on equipment under power unless it’s absolutely necessary.
If you must, use extreme caution. Don’t grasp two sides of a live circuit
at the same time—use one hand when reaching into a circuit, touching
a grounded case or chassis with that wrist or elbow if possible. This prevents current from passing through vital organs. Observe this rule when
connecting or disconnecting plugs or leads, or making any adjustments
on a live circuit.
DM300c/DM400c/DM475 Service Manual (SV61801 Rev. D)
Introduction • 1
1.4 Safety
Personal Safety (continued)
•
Don’t underestimate the danger of shock: 1 mA (1/1000 amp) is uncomfortable; 5 mA is dangerous —you may jump back and be injured; 12
mA causes hand muscles to contract, so you cannot free yourself; 24
mA has proven fatal; and 100 mA (1/10 amp) is likely to be fatal.
•
Use the right tools for the job. A tool which slips can cause a short—or a
shock. Don’t reach into a circuit with metal tools, or while wearing rings
or a watch. Even in low voltage circuits, a metal object can short circuit
two terminals. When working on live circuits, use tools with insulated
handles and try to keep your tool hand grounded.
•
Don’t bypass safety devices, particularly fuses. Three-wire outlets (120
VAC) are designed to ground equipment to make it safe. If a hot wire
shorts to a grounded frame, the only result is an open fuse. If a hot wire
shorts to an ungrounded frame, the frame itself becomes hot and potentially dangerous. A fuse is a weak link in a circuit, designed to break
down before anything else does. The maximum safe current in a circuit
is determined by the designers. Too large a fuse can pass excessive
current, damaging expensive equipment.
•
For electrical fires, use Type C, BC or ABC extinguishers only. Don’t use
soda acid or other liquid stream extinguishers. They will damage electrical equipment and present a shock hazard to the user.
•
Digital equipment can be easily damaged or destroyed by static charges. Microprocessors and other integrated circuits contain tiny transistors
not much more than a millionth of an inch across, which operate at 5 to
12 volts.
•
Be extremely careful when lifting heavy equipment. Follow the guidelines below:
a. Squat to lift and lower. DO NOT bend at the waist.
b. Keep your low back bowed in while bending over.
c. Keep the weight as close to you as possible.
d. Bow your back in and raise up with your head first.
e. If you must turn, turn with your feet, not your body.
f.
Never jerk or twist!
g. Put the weight down by keeping your low back bowed in.
h. Keep your feet apart, staggered if possible.
i.
Wear shoes with non-slip soles.
j.
Get help if you need it.
DM300c/DM400c/DM475 Service Manual (SV61801 Rev. D)
1-3
1 • Introduction
1.4 Safety
Electrostatic Discharge (ESD) Procedures
Follow these guidelines to protect sensitive equipment from static damage:
1-4
•
Always use a wrist grounding strap and anti-static mat when working
on equipment sensitive to electrostatic discharge. These items are furnished in the ESD Field Service Kit, L-8351.
•
Ground yourself before reaching into the equipment, or touching any
circuit board or other electrical component. Just touching a doorknob or
metal workbench may be enough, but the best guarantee is to turn the
machine off but leave it plugged in, and ground yourself on the chassis,
which is grounded through the three-wire power cord.
•
Be careful of rugs—even a few steps can recharge you. Re-ground
yourself whenever you’ve walked away and returned to the machine.
Rugs are a major source of static buildup in the body.
•
Take greater precautions as the objects you handle get smaller. A board
in the machine is better protected than one that is not plugged in; a chip
on a board is better protected than one in your hand.
•
Stay away from metal conductors. The plastic and resin that chips and
boards are made of are much better insulators than metal. It’s most
important to keep your hands away from any metal which contacts the
data. In particular, this means the long connector along the bottom of
each board, and the pins coming out of the chips. These signal and
data lines are directly connected to the fragile inner circuits of the chips.
When handling a board, try not to touch the connector; when handling a
chip, try not to touch the pins.
DM300c/DM400c/DM475 Service Manual (SV61801 Rev. D)
2 • Specifications
2.1 Product
Description
The DM300c, DM400c, and DM475 (all service installable) are desktop
mailing systems designed for the global marketplace. They are fully compliant with all current postal standards for digital meters worldwide. These
systems replace the following Pitney Bowes models: E510, E520, DP200,
DP390, DM300, DM400, DM300i, DM400i, DM230L, DM300L, DM330L,
DM350L, DM400L, Mega DM400, and DM450c.
The products are designed for the small office and home markets. They are
targeted at new customers with low- to mid-mailing volume applications,
and at existing customers who wish to upgrade from an entry level machine. See Table 2-1 below for typical usage patterns.
They will also be placed with customers who need to replace their existing
postage meters with a model that complies with new digital postal standards, as posts worldwide mandate migration to new standards.
Table 2-1 Typical Usage Patterns
Feed Type
Average Daily Usage
Maximum Usage
Mail Mix
DM300c Manual
33 Letters
96 Letters
Business letters
DM400c Automatic
88 Letters
295 Letters
Business letters
DM475 Automatic
with WOW
88 Letters
295 Letters
Mixed thickness
mail of the same
envelope size
DM400cDM450c
DM300c
DM475
Figure 2-1 Digital Mailing Systems
DM300c/DM400c/DM475 Service Manual (SV61801 Rev. D)
2-1
2 • Specifications
2.2 Product
Features
2-2
Both the DM300c (manual) and DM400c/DM475 (automatic feeder) versions have the same feature set. This includes:
•
Ease of use — no training necessary for basic user operation.
•
Customer accessible tape track for jam clearance.
•
User-friendly, fully integrated QWERTY keyboard with seven or eightline LCD display
•
Simple, intuitive user interface, which requires minimal training
•
Ink jet printing (300 horizontal x 600 vertical dpi print resolution)
•
Easily replaceable waste ink tank
•
Customer-replaceable ink cartridge and print head
•
Common print engine
•
Provision for an optional, fully integrated scale (2, 5 and 10 pound versions) and interfaced 30 and 70 pound scales
•
Weights and measures compatible (30 and 70 pound scales)
•
Optional differential weighing
•
PB232 communication port for integrated scale platform
•
USB (slave and host functionality) communication ports for printer,
scale, PC connectivity, scanners and USB LAN adaptor
•
RJ-11 jack for telecommunications
•
Standard customer-removable moistening unit
•
Internal socket modem
•
Easily accessible, drop-down envelope transport
•
Optional postal funds accounting (number of accounts is based on the
accounting package purchasd)
•
Remote meter inspection
•
Manual (DM300c) or automatic (DM400c/DM475) envelope feeding,
moistening, and automatic eject
•
Error handling and service diagnostics
•
Multiple language support
•
USPS Services options
•
Data capture
•
Indicia-based Information (IBI) Compliant
•
IntelliLink™ support
•
Features, graphics and rates downloading capability
•
Internal rating feature
•
Custom messaging (based on subscription level)
•
Barcode scanning
DM300c/DM400c/DM475 Service Manual (SV61801 Rev. D)
2 • Specifications
2.2 Product
Features
In addition, the DM475 provides:
•
Weigh on the Way (WOW) capability with a maximum 500 g capacity.
•
Dimensional Rating (also called Shape Based Rating) – accurately categorizes and rates each mail piece based on its dimensions in compliance with global Shape Based Pricing regulations.
•
a combined feeder/WOW module, separate from the printing module.
•
a color graphics display
•
a Internal LAN
NOTE: Features and specifications are subject to change without notice. Some features may not be available in certain markets or immediately at the time of product
launch.
DM300c/DM400c/DM475 Service Manual (SV61801 Rev. D)
2-3
2 • Specifications
2.3 Material
Specifications
Material Spectrum
The table below shows a range of materials suitable for use in DM300c/
DM400c/DM475 mailing machines. This is a partial listing.
Type
Source
Regular white wove, 24 lb.,
low ink absorbing
Dependable, 24 # White Wove, No.10
Regular white wove, 24 lb.,
high ink absorbing
Printmaster, envelopes by Old Colony No. 10 Regular ; Sub.
24 ; White Wove; Diagonal Seam
Bond, 24 lb., smooth finish
Strathmore envelopes by Old Colony No. 10, Sub. 24 ,
Strathmore Bond, White Wove
Bond 24 lb., classic laid
finish
Neenah Paper, Envelopes by Old Colony No. 10, Sub. 24,
Classic Laid Writing, Baronial Ivory
Kraft paper envelopes
Cameo, Quality Park Products, No. 11, Sub. 28, Cameo
4-1/2 x 10-3/8, No.13 Booklet Brown Kraft, Single
Clay-filled paper stock
Mohawk Paper Mills, Inc., Converted by Williamhouse, No.
10, Sub. 80, Innovation Text, Premium White
Calendared paper stock
Neenah Paper, Converted by Williamhouse, No. 10, Sub. 24,
Classic Crest Text, Avon Brilliant White
Air mail envelopes, calendared material, No. 10
Recycled paper stock
P604-10, Recycled envelopes, 25% cotton fiber, Southworth
Company, West Springfield, MA
Tyvek envelope stock, No.
10
Common envelope used in
European Market
DL Autofil, Item No. 1927, A.S. 90 White Wove, 114 x 229
mm, Wiggins Teape, DL White Woven single, C5 White Woven (3.2mm), C4 White Woven (6.4mm)
Xerographic grade paper
sheet
PB Supply order number 451-1
Dark envelope
Eaton Fox River
Recycled
Westvaco
Pitney Bowes Meter Tape
Strips
PB Supply order number 625-0
Postacrds
75# return Single
NOTE: Mention of a manufacturer should not be construed as an endorsement by
Pitney Bowes.
2-4
DM300c/DM400c/DM475 Service Manual (SV61801 Rev. D)
2 • Specifications
2.3 Material
Specifications
Envelope Size
Minimum
89 x 127 mm (3.5 x 5 inches)
Typical
104.8 x 241.3 mm (4 x 9.5 inches)
Maximum
All Models (non-WOW mode): 330 x 381 mm (13 x 15 inches),
DM475 in WOW mode: 330 x 355 mm (13 x 14 inches)
Flap Depth
25 mm (7/8 inch) minimum; 72.2 mm (3 inches) maximum
Envelope Thickness
Minimum
0.20 mm (0.02 inch)
Maximum (DM300c)
9.5 mm (3/8 inch)
Maximum (DM400c/DM475)
8 mm (5/16 inch)
Envelope Weight
Minimum
1 gram (0.035 oz.)
Maximum
450 grams (16 oz.)
Tape Strip Dimensions
Minimum
44.2 x 100 mm (1.75 x 4 inches)
Maximum
44.7 x 200 mm (1.76 x 8 inches)
Tape Strip Thickness
Minimum
0.17 mm (0.007 inch)
Maximum
0.20 mm (0.008 inch)
Tape Strip Capacity
Capacity: 55 Tape Strips (PB branded)
Throughput: 65 tapes/minute. At least 50 consecutive tapes without interruption.
Stack Height and Weight
Stack Height
19 mm (0.75 inch) flat mail, 76.2 mm (3 inches) letter mail
Stack Weight
907.8 grams (2 lbs.)
DM300c/DM400c/DM475 Service Manual (SV61801 Rev. D)
2-5
2 • Specifications
2.3 Material
Specifications
2-6
Envelope Flaps
For a proper seal, the envelope’s minimum flap angle must meet the following criteria:
•
For envelopes with a flap length from 25 to 60mm (1 to 2.36 inches), the
minimum flap angle is 18 degrees.
•
For envelopes with a flap length greater than 60mm to the maximum
flap length for the particular model, the minimum flap angle is 21 degrees.
DM300c/DM400c/DM475 Service Manual (SV61801 Rev. D)
2 • Specifications
2.4 Ink
Capacities,
Consumption
and Cartridge
Life
Capacities and Print Consumption
Ink Cartridge Capacity
45ml (43 grams). See note below.
Consumption, DM300c
5,800 imprints at 33 envelopes per day, average
Consumption, DM400c/DM475
8,800 imprints at 88 envelopes per day, average
Waste Tank
200 grams maximum
NOTE: Ink cartridge capacity is calculated using a US indicium with barcode and is
subject to change. The system displays a low ink warning when the remaining ink is
less than needed for printing 500 indicia plus nominal slogan.
Maintenance Consumption
2.5 Equipment
Specifications
Purge A: Power ON
0.2 to 0.3 grams
Purge B: Ink Cartridge Replacement
0.75 to 0.9 grams
Purge C: Print Head Replacement
0.75 to 0.9 grams
Purge D: Jam and Shutdown Purge
Spits
Purge E: Pre, Post and During Printing
Spits
Size and Weight
System Dimensions
(Length x Depth x
Height)
Includes integrated
scale, but not
stacker
Weight
DM300c
19.5" (495 mm) L x 17.5" (445 mm) D x 12.3" (312 mm) H
DM400c
33" (840 mm) L x 19.5" (495 mm) D x 12.3" (312 mm) H
DM475
51.3" (1296 mm) L x 22.5" (572 mm) D x 12.3" (312 mm) H
DM300c
20 lbs (9.1 kg) without weighing platform (scale)
22.9 lbs (10.4 kg) with weighing platform (scale)
DM400c
35.9 lbs (16.3 kg) without weighing platform (scale)
38.8 lbs. (17.6 kg) with weighing platform (scale)
DM475
64.1 lbs (29 kg ) without weighing platform (scale)
67.0 lbs. (30.4 kg) with weighing platform (scale)
Acoustic Noise Level
Operating
Idle
<=6.5 BEL (A) re 1 pW
5.5 BEL (A) re 1 pW
DM300c/DM400c/DM475 Service Manual (SV61801 Rev. D)
2-7
2 • Specifications
2.5 Equipment
Specifications
General Machine Specifications
Power
Requirements
Printhead
Tape
Strips
Longest
Duty
Cycle
Throughput
DM300c
100-240 VAC, 50/60Hz. 1.0A
DM400c/DM475
100-240 VAC, 50/60Hz. 2.0A
Description
Bubble jet, 616 nozzles (600 used)
Life
500,000 print cycles or 5 calender years
Print resolution
300h x 600v dpi
Barcode
2D variable
Print Image Area
1" (25.4 mm) x 7" (180 mm)
Self-adhesive tape strips for use on mail pieces that are too thick or too
large to run through your machine (order part number 625-0)
5,000 cycles
DM300c
up to 65 letters per minute
DM400c
up to 95 letters per minute
DM475
- up to 120 letters per minute
- up to 80 letters per minute in WOW mode
Average
Usage
per Day
33 pieces (DM300c), 88 pieces (DM400c/DM450c/DM475), 260 days per
year
Average
Usage
per Year
8580 cycles (DM300c), 22,880 cycles (DM400c/DM450c/DM475), 260 days
per year
Motors
Transport Motor (Servo)
Carriage Motor (Stepper)
Purge Motor (Stepper)
Tape Motor
Feeder Motor (Servo, DM400c-DM475 only)
WOW Motor (Servo, DM475 only)
Postal
Security
Device
(PSD)
Performs meter vault functions. It is a secure device complying with FIPS
Pub 140-2, requirements for security of cryptographic modules. The PSD
contains the postal funds and security keys, and it generates the digital signature for indicia-variable components.
Pump
Part of Unit Purge System
PCBs
Main Logic Board with socket Modem (and LAN - DM475 only)
Power Supply Board (DM300c, DM400c/DM450c, and DM475 use different
boards)
Feeder Control (DM400c only)
Feeder/WOW (DM475 only)
Control
Interface
2-8
Supports auto-feeder
DM300c/DM400c/DM475 Service Manual (SV61801 Rev. D)
2 • Specifications
2.5 Equipment
Specifications
User Interface Controller
Keyboard
Full QWERTY plus numeric keypad and function keys
LCD DM300c/DM400c
Display 3.5 x 1.7" (88 x 44 mm) 7 lines, 26 characters (monochrome)
DM475
3.75 x 2.12" (95 x 54 mm) 8 lines x 26 characters (color)
Connectivity
Weighing
Platforms
2-, 5- and 10-pound integrated; 15-, 30-, and 70 pound USB Interfaced.
See note below.
Integrated
Weighing
Platform
Interface
Serial, TTL level. EIA-RS232, 9 Pin, D type, female connector
Printers
Computer
1E05, IE08, 1E20: Full-page USB laser printer for DM Series Mail Finishing Systems
PC connected to available Type B (slave) USB port for Pitney Bowes Data
Exchange software
Ports DM300c/DM400c
2 USB (Type A-Host), 1 USB (Type B-Slave), 1 RJ-11, 1 non-standard Serial
DM475
2 USB (Type A-Host), 1 USB (Type B-Slave), 1 RJ-11, 1 LAN, 1 non-standard Serial
NOTE: USB ports have 500mA maximum power output. Any peripheral
device that may be interfaced shall have its own power source if it requires
more than 500mA.
Phone
Modem
One RJ-11 port
Internal socket modem
NOTE: The mailing system can support only one weighing platform at a time. It will
not support both an integrated weighing platform and an external weighing platform
simultaneously.
DM300c/DM400c/DM475 Service Manual (SV61801 Rev. D)
2-9
2 • Specifications
2.5 Equipment
Specifications
Postage Meter
Maximum
Refill
Amount
$99,999.00
Minimum
Refill
Amount
$1.00
Maximum
Stamp
$99.999
Low Funds
Lockout
Amount
Runs to 0.
Reset Type
Postage By Phone®
Modem
refill
Power cord
On/Off
Switch
Required at install and at inspection due
Supplied
Yes.
Environmental Limits
The printing system is designed to function within the following temperature
and humidity limits:
State
Normal
Printing
Storage
Shipping
(Less than
24 hours)
Parameter
Conditions
Temperature
40°F (4°C) minimum, 109°F (43°C)
maximum
Humidity
8% minimum, 95% maximum RH
Temperature
15°F (-9°C) minimum, 120°F (49°C)
maximum
Humidity
5% minimum, 95% maximum RH
Temperature
-40°F (-40°C) minimum, 109°F (43°C)
maximum
Humidity
5% minimum, 100% maximum
Max. Wet
Bulb Temp.
80°F (27°C)
85°F (29°C)
85°F (29°C)
NOTE: The operating environment is specified as a room ambient condition. The
internal temperature should not exceed this temperature by more than 5°C.
2-10
DM300c/DM400c/DM475 Service Manual (SV61801 Rev. D)
2 • Specifications
2.6 Regulatory
Electromagnetic
US
Canada
European
Union
FCC Part 15, Subpart B, Class B
ICES-003 Interference Causing Equipment Standard,
class B conducted and radiated emissions limits
EMC Directive 89/336/EEC
EN55022, Limits and Methods of Measurement of Radio
Disturbance Characteristics of Information Technology
Equipment, Class B conducted and radiated emissions limits
EN61000-3, Disturbances in Supply Systems Caused by
Household Appliances and Similar Electrical Equipment
Part 2: Specification of harmonics
Part 3: Specification of voltage fluctuations
Australia/
New Zealand
AS/NZS 3548 (Equivalent to European EN55022)
Safety
US
Class A digital equipment
UL 60950, 3rd Edition, Safety of Information Technology
Equipment, Including Electrical Business Equipment.
Canada
CSA Standard C22.2, No. 60950-00, Safety of Information Technology
Equipment, Including Electrical Business Equipment.
Europe
EN 60950:200, Safety of Information Technology Equipment,
Including Electrical Business Equipment
Compliance
United
States
UL Recognized Component (R/C), rated 120Vac, 60Hz.
Japan
UL R/C, rated 100Vac, 50/60Hz. (T mark for external P/S)
Canada
CSA Certified or CUL R/C, rated 120Vac, 60Hz.
Europe
VDE-GS, TUV Rheinland-GS Registered or UL-DE-GS, rated 220240Vac, 50 Hz. CB Scheme Certificate and Test Report with U.K., Germany and Nordic deviations met as a minimum.
DM300c/DM400c/DM475 Service Manual (SV61801 Rev. D)
2-11
2 • Specifications
2.7 Weighing
Options
Weighing
Platform
MP9G
(DM300c-DM450c only)
Integrated Weighing Platform, 5- and 10 pound
MP4D
(DM475 only)
Integrated Weighing Platform, 5- and 10 pound
Software
Features for
Weighing
Capacity
2 Pound Weighing Option
5 Pound Weighing Option
10 Pound Weighing Option
1 Kilogram Weighing Option
2.5 Kilogram Weighing Option
5 Kilogram Weighing Option
Optional
Interfaced
Platforms
MP30
MP49
JB7W
MP3W (USB)
MP4W (USB)
15/30 Pound Weighing Platform
70 Pound Weighing Platform (149 Pound not
Supported)
30/70 Pound Weighing Platform, Weights and
Measures Approved
NOTE: Also see paragraph 2.5.5 for limits on weighing platform connectivity. Two
weighing platforms cannot be used simultaneously.
2.8 External
Printer Option
2.9 Special
Service Options
Laser Printer
1E05/1E08/1E20
USB Laser Printer for DM Mail Finishing Systems
Postal Special Services
DM Series Time and Date Stamping for Incoming Mail
Data Capture
2.10 Graphics
(Slogans,
Permits and
Inscriptions)
Standard Ad Slogan
Custom Ad Slogan
Standard Inscription
Custom Inscription
Four Ad Bundle
Four Inscription Bundle
Town Circle
2.11 Internal Ad
and Inscription
Storage
2-12
Ads
Up to 20 (10 installed at time of manufacture)
Inscriptions
Up to 20 (12 installed at time of manufacture)
DM300c/DM400c/DM475 Service Manual (SV61801 Rev. D)
2 • Specifications
2.12
Compatible
Pitney Bowes
Software
Budget Manager
Business Manager
INVIEW Accounting
Barcode Scanning (for USPS Confirmation Services)
Data Exchange™ for DM Series Mail Finishing Machines
Ascent™ (USB connection only)
SendSuite™
2.13
Consumables
Sealing Solution
601-9
EZ-Seal, 4-ounce Flip-Top Bottles, quantity: 4
601-7
EZ-Seal, 4-ounce Dabber Bottle
601-0
EZ-Seal, 16-ounce Bottles, quantity: 4
Moistener Parts
946-1
Moistener Assembly—DM300c
770-T
Moistener Brush/Wick Assembly (DM400c/DM475)
Ink Cartridges/Print Head
765-9
Ink Cartridge—Red, Fluorescent
625-0
Tape Strips, quantity: 300
612-0
Double Tape Sheets, quantity: 150
Tape Strips
Labels
2.14 UserReplaceable
Parts
639-6
Delivery Confirmation Labels, quantity: 50
639-9
Signature Confirmation Labels, quantity: 50
639-5
E-Certified Confirmation Labels, quantity: 50
•
Print Head
•
Ink Cartridge
•
DM 300c Moistener Assembly
•
DM 400c Moistener Assembly
•
DM 475c Moistener Assembly
•
Water Bottle Assembly (DM400c/DM475)
•
Integrated Weighing Platform
•
Waste Tank
DM300c/DM400c/DM475 Service Manual (SV61801 Rev. D)
2-13
2 • Specifications
2.15 Meter
Reports
The mailing systems can generate and print the following reports. All reports can be printed on an envelope or tape strip (with the exception of the
System Setup report, which requires an optional attached printer, such as a
laser printer).
Last 5 Refills Report
Last 5 Refills
This report lists the last five postage refills. It must be printed on an envelope or tape strip.
Date of Refill:
OCT 04 09
SEP 21 09
SEP 05 09
AUG 11 09
AUG 05 09
Time:
4:32P
3:31P
5:30P
5:05P
5:15P
Refill Amount:
$025.000
$050.000
$025.000
$035.000
$025.000
Acct No.: 12345678
Meter No.: 0011989
Printed: OCT 05 09
Funds Report
Funds
Report
This report lists the postage used, postage available, pieces processed,
and other information about your machine usage. It must be printed on an
envelope or tape strip.
OCT 05 09
4: 13P
Used: $965.390
Available: $10333.610
Total Pieces: 6765
Control Sum: $11299.000
Batch Count: 1
Batch Value: $001.420
PBP Serial Number: 8030397
Refill Receipt Report
Refill
Receipt
This report provides a receipt of the last refill.
Refill: OCT 05 09 4:11P
Refill Amount: $200.00
Funds Available in Meter: $1033.610
Prepaid: $1600.00
Additional Funds Available: $000.000
Account No: 12345678
Meter No.: 8030397
OCT 05 09
4: 13P
Error Report
Error
Report
This report provides a history of error codes that your machine has encountered.
Error Date:
OCT 04 09
SEP 21 09
Time:
4:25P
3:14P
Identifier:
1879
Oaff
Count:
001
000
0011989
OCT 05 09
9:25A
page 1 of 1
Software Version Report
Software
Versions
This report provides system software version information.
2-14
PBP Serial #: 0011969 PCN: 0000
UIC Software Version:
01.02.0042
Print Mgr.:
0118.0004
Low Sector:
01.06.11
Protected Sector:
01.09.14
Rate Mgr. #: 03.10
Platform:
B0.02
PHS: 01.01.0014
Feeder Ver.:
Feeder Profile:
DM300c/DM400c/DM475 Service Manual (SV61801 Rev. D)
2 • Specifications
Last Five Updates Report
This report lists the last five rate downloads to your machine.
System will begin using new rates on the date effective.
Description
Version
Effective
Meter No.:
3231234
Zip/Zone
D .01
DEC 06 08
Page 1 of 1
US Rates
G .02
MAY 11 09
Last Rates
Update
2.15 Meter
Reports
Downloaded:
MAY 11 09 11:59A
Printed: MAY 11 09 12:05P
Single Accounts Report
Account
Report
This report provides the postage amount and number of pieces applied to
all of your accounts (if the Departmental Accounting feature is set up on
your system). It must be printed on an envelope or tape strip.
0011989
OCT 05 09
4: 13P
Account Name: SALES
Acct Number: 1
Pieces:
5
Postage:
001.480
Multi-Account Summary Report
Accounts
Summary
This report provides the postage history for multiple accounts (if the Departmental Accounting feature is set up on your system). It must be printed on
an envelope or tape strip.
Account No.
1
2
Pieces
5
4
Postage
001.480
001.480
0011989
OCT 05 09
4: 13P
page 1 of 1
Configuration Report
This report lists configuration information about your machine and Postage
By Phone® account.
Cfg Report
PBP Serial #:
PBP Account:
0011969
999999999
PCN: 0000
UIC: 510
PSD Ser. #: 4C46000000007E4C
Rate Data:
Print Head #:
Rate Effective:
50000104
Printer Ser. #:
D0 . 07
OCT 05 09
4: 13P
SMR 000
P7US002B01
P7US002B04
2005/08/09
2007/01/08
Account List Report
The Account List Report lists the names and numbers of all accounts that
are set up in your machine (if the Departmental Accounting feature is set up
on your system). It must be printed on an attached printer.
DM300c/DM400c/DM475 Service Manual (SV61801 Rev. D)
2-15
2 • Specifications
2.15 Meter
Reports
Confirmation Services Report
(if optional USPS Confirmation Services feature is purchased)
Confirmation
Services
This report provides a list of the last 20 mail pieces (by barcode number)
that had one of the USPS Confirmation Services applied.
Barcode:
1234567890
2345678901
Postage:
001 . 480
001 . 480
Printed: OCT 05 09 5:41P
ZIP:
06484
06762
Uploaded:
OCT 05 09
OCT 05 09
page 1 of 1
System Setup Report
The System Setup Report is an extensive report that gives you comprehensive information about your total mailing machine. The entire report must be
printed on an attached printer. It provides information on:
2-16
•
Serial Numbers
•
Software Versions
•
Funds and Piece Information
•
Warning Values
•
Time Settings
•
Advertisements
•
Inscriptions
•
Accounting Set Up
•
Modem Set Up
•
Scale Settings
•
Presets
DM300c/DM400c/DM475 Service Manual (SV61801 Rev. D)
3 • Theory
3.1 Introduction
This chapter explains how the DM300c/DM400c/DM475 mailing systems
work. It includes descriptions and explanations of the user interface, tape
and envelope transport mechanisms, motion control system, print engine
and electronics.
3.2 Product
Features
The products are designed for the small office and home markets with
low- to mid-mailing volume applications. See Table 3-1 below for a feature
comparison. Refer to the Operating Guide (SV61800) for detailed user instructions.
DM300c
DM400c Auto Feed
DM475 Auto Feed with WOW
Table 3-1 Product Comparison Matrix
Feature
DM300c
DM400c
Envelope Feed
Speed
Semi-automatic
up to 65 letters per minute
Automatic
up to 95 letters per minute,
Duty Cycle (daily)
Ink Cartridge Life
WOW and SBR
Waste Tank Capacity
Maximum Piece Thickness
Max. No. of Accounts
Weighing/Rates
LCD Display
Keyboard
Labels
Moistener
Text Message Printing
Standard Accounting
Budget Manager
Business Manager
INVIEW Accounting
Barcode Scanning
Differential Weighing
DM475
Automatic
- up to 120 letters per
minute
- up to 80 letters per minute in WOW mode
33 letters
88 letters
88 letters
8,000 imprints @ 33/day 8,000 imprints @ 88/day 8,000 imprints @ 88/day
(no ad)
(no ad)
(no ad)
No
No
Yes
200 grams
3/8 inch
5/16 inch
5/16 inch
50 (Standard Accounting); more for optional accounting packages (see below)
Integrated 2, 5, 10 lb.; external 15, 30 and 70 lb. Weights & measures: 30/70 lb.
7 lines x 26 characters, monochrome
8 lines x 26 characters
color
Integrated full QWERTY
Built-in strip tape feeder
Standard
Standard
Standard
Optional
Optional
Optional
Optional
Optional
DM300c/DM400c/DM475 Service Manual (SV61801 Rev. D)
3-1
3 • Theory Of Operation
All models are equipped with a fixed (non-user removable) Intellilink™
control center. The user interface includes a seven-line monochrome LCD
display (DM300c/DM400c) or an eight-line color LCD display (DM475), an
integrated full QWERTY keyboard, a numeric keypad, dedicated function
keys and software-defined “soft” keys.
3.3 User
Interface
Unlike some previous DM models, the user interface PCB does not include
any controller functions: it is a keyboard and display only. All controller functions, including the PSD, are resident on the system’s main logic board. See
section 3.6, PCBs, Controller (Main Logic) Board, for more information.
QWERTY
Keyboard
Tape LED Meter
Chute
Lock
Soft
Keys
User
Display
Function
Keys
Scroll
Keys
Numeric
Keypad
Figure 3-3 User Interface
The user interface is menu driven and offers a full range of features based
on the common DM Series system architecture. It allows the user to perform meter refills, store information related to indicia printing under a specific key, set postage value, and perform all user entry requirements. See the
Control Panel Unit in section 3.6 for a description of the user interface PCB.
LED States
The LED on the user interface (figure above) has three states:
•
Green: system is nominal (normal operating) mode.
•
Orange: system is in sleep mode.
•
Red: system fault.
The LED flashes green several times during initialization.
3-2
DM300c/DM400c/DM475 Service Manual (SV61801 Rev. D)
3 • Theory Of Operation
3.3 User
Interface
Modes of Operation
Self-Install Mode. In this mode, the user display prompts the user to perform the necessary steps for first-time use of the meter.
1. The self-install mode starts after power up if the system detects that the
self-install was not completed.
2. The system automatically starts the following functions:
a. Install ink.
b. Change language or accept default prompt (if the PCN parameter is
set for multi languages).
c. System receives origin ZIP Code from Postage By Phone.
d. Funds refill (depends on PCN parameters).
3. If there is a power-down in the middle of the self-install process, the system determines which setup function was not completed.
4. The system will not enter sleep mode during the self-install procedure.
Normal Mode. In this mode, postage is dispensed for each mail piece.
Rating can be enabled or disabled. In this mode, the system operates at the
rated throughput.
No Printing (Seal-Only) In this mode, the mail piece is sealed with no printing performed. The operator can select this mode through the user interface.
WOW (Weigh-on-the Way) Mode (DM475). The DM475 has a special
scale built into its deck that can weigh mail pieces as they pass along the
deck so the system can determine the correct postage of each item. You
can feed mail pieces having various weights (1 oz., 2 oz., 3 oz., etc.) into
the machine and the machine will weigh and apply the correct postage to
each piece automatically.
SBR (Shape-Based Rating) Mode (DM475). The DM475 has the ability
to rate mail pieces according to the USPS® requirements for shape-based
rating (SBR). SBR was created by the USPS® to rate mail pieces based on
thickness, length, and width, in addition to weight. To rate your mail according to USPS® shape-based requirements, the system must be in WOW®
mode and you must select an “SBR” class.
Sleep Mode. In this mode, the system reduces system power following a
predetermined period of inactivity. The system wakes when the user presses
any key or a message from an interfaced device changes the software state.
NOTE: The sleep mode does not work during Special Services processing
screens (such as USPS® Confirmations Services).
Service Mode. This is a password-protected mode not available to the
normal user. It allows a customer service representative to perform maintenance, test, and diagnostic functions and adjust certain parameters. See
Chapter 6 for an explanation of the options available under the Service Menu.
DM300c/DM400c/DM475 Service Manual (SV61801 Rev. D)
3-3
3 • Theory Of Operation
3.3 User
Interface
Modes of Operation (cont’d)
Setup. Users view and customize system settings, as explained in the
DM300c/DM400c/DM475 Operating Guide. These system settings include:
1. Date / Ad / Inscriptions Menu
2. Options Menu
3. Reports Menu
4. Presets (Normal and Custom) Menu
5. Accounting Menu
6. Meter Graphics Menu
7. Setup Menu
8. Advanced Functions Menu
9. Funds Menu
10. Account Menu
3.4 Envelope/
Tape Transport
The envelope/tape transport consists of five subsystems:
•
an autofeeder (DM400c/DM475) that separates and feeds a stack of
envelopes onto the feed deck of the mailing machine
✍
•
a tape transport unit that separates and feeds tape strips onto the feed
deck
•
in the printer/base, an upper transport driven by the transport drive motor
•
in the printer/base, a lower, hinged transport which has a series of idler
rollers friction driven by the upper transport
•
a motion control system that monitors the position of the envelope or
tape strip as it traverses the transport.
TIP: The DM475 uses
the existing DM400c
autofeeder hardware,
print engine, modem,
USB and serial ports,
meter PSD, and tape
feeder.
DM400c /DM450c/DM475 Autofeeder Transport
✍
TIP: See section 3.10
for DM475 differences
and specific feeder/
WOW theory.
3-4
As noted above, the automatic feeder is designed to separate and feed a
stack of envelopes into the printer which serves as an indicia printer. The
DM400c/DM450c feeder is fully integrated with the printer; it is not available
as a separate module and therefore cannot be field retrofitted.
The feeder has the following transport components:
•
Drive Motor
•
Drive System
•
Feed Deck
•
Separator
•
Envelope Moistener
•
Feeder Exit Roller and Sensor FS2
DM300c/DM400c/DM475 Service Manual (SV61801 Rev. D)
3 • Theory Of Operation
3.4 Envelope/
Tape Transport
DM400c/DM450c/DM475 Autofeeder Transport (cont’d)
Feeder Motor. This is a DC motor
driven with discrete devices resident on the feeder PCB. The motor is connected to the feeder PCB
through J306 (DM400c/DM450c).
NOTE: The feeder motor has an
added temperature sensor connected to J312 that is not used on the
printer or WOW transport motors.
Drive System. The motor drives
the feeder’s disc encoder through a Figure 3-3A Auto Feeder Drive Motor
timing belt and all other drive components through a system of belts
and pulleys as shown in Figure 3-3B.
Drive is transferred to front-mounted
components via through shafts.
Feed Deck. The feed deck is
equipped with eight feed rollers that
drive the bottom piece of the stack
into the separator unit. All rollers
have tires with a relatively high coefficient of friction (i.e., they’re sticky)
Figure 3-3B Drive System, Rear
to provide positive drive of the mail
piece (the different colors of the tires
correspond to different coefficients of
friction). In addition, the first roller set
is equipped with plastic cams that
jog the stack.
The stack is confined by the rear
wall, the entrance guide, which acts
as a feed fence, and an operator
adjustable side guide which is normally set to within 1/16 inch of the
stack edge.
Figure 3-3C Feed Hopper Components
These components together form
the feed hopper.
NOTE 1: The 1/16 inch is a critical
setting. Failure to set the side guide
can cause binding of the mailpiece if
too tight, or skewing if too loose.
NOTE 2: Stack weight must not
exceed two pounds or three inches
in height (capacity of stacker), other- Figure 3-3D Feed Deck, Underside, Showwise belt skipping and misfeeds will ing Drive Components
occur.
DM300c/DM400c/DM475 Service Manual (SV61801 Rev. D)
3-5
3 • Theory Of Operation
3.4 Envelope/
Tape Transport
✍
TIP: The DM475 uses
the existing DM400c
autofeeder hardware,
print engine, modem,
USB and serial ports,
meter PSD, and tape
feeder.
✍
TIP: See section 3.10
for DM475 differences
and specific theory.
DM400c/DM450c/DM475 Autofeeder Transport (cont’d)
When a stack is loaded, it rests on
the stack sensor arm, blocking FS1,
the Feeder Input (Stack Present)
sensor. As described later in this
chapter, this sensor detects the presence of envelopes in the hopper and
is used by the feeder CPU to start
the mail flow process. This sensor is
connected to the feeder PCB through
J302 (DM400c/DM450c).
Separator. The separator mechanism is an integral part of the upper
auto feeder transport. This consists Figure 3-3E Separation and Feed Parts
of the retard roller assembly (figure,
right), which is driven directly, and a
series of spring- loaded idler rollers
that are friction driven by the lower
transport belts. As the first piece
feeds into the nip formed by the lower
belt drive, the second piece is delayed by the action of the retard rollers and separator pads. The retard
roller keeps the second piece from
advancing by its slow reverse rotational direction until the first piece has
been fed past it by the transport belts.
Figure 3-3F Retard Roller Assembly
When the second piece comes in
contact with the feed belts, the higher
coefficient of friction of the belts overcomes the retard roller force and the
second piece is fed right behind the
trailing edge of the first piece. The
process repeats for any additional
pieces of mail. See Figures 3-15 and
3-16 A and B for timing diagrams.
The gap between envelopes is
produced by the speed difference
between the feed belts and the take
away rollers (TAR) shown in Figure
3-3H. There is no operator thickness Figure 3-3G Feed Belt Assembly
adjustment and field adjustment of
the separator gap is not recommended, as it is fixed at the time of manufacture.
In the event that disassembly of the feed and separation components is required,
the gap adjustment must be returned to its original state as explained in Chapter
5 of this manual. The operator can raise the entire upper transport to clear jams
using the auto feeder’s jam release lever.
3-6
DM300c/DM400c/DM475 Service Manual (SV61801 Rev. D)
3 • Theory Of Operation
3.4 Envelope/
Tape Transport
DM400c/DM450c/DM475 Autofeeder Transport (cont’d)
Envelope Moistener. The mail
piece is driven through the moistener via the two sets of takeaway
rollers. The moistener assembly
is a variant of the design used in
the Pitney Bowes DM500 mailing
systems. Figure 3-3H shows the
DM400c/DM450c moistener. The
moistener used for the DM300c,
DM400c, DM450c and DM475 all
have similar but not interchangeable parts. They are a water tank,
moistener wick and grate and
Figure 3-3H Moistener Assembly
moistener brush. The DM400c and
DM475 also have a separate water
bottle. The DM300c does not.
The operator can enable or disable
the moistener using the seal-no
seal lever. When enabled, the envelope flap passes over the moistener
and is wetted.
The DM300c and DM400c/DM450c
are not equipped with a low water
(sealant) sensor. The operator must
check the sight glass from time to
time to make sure the sealant sup- Figure 3-3I Moistener Tank and Wick
ply is adequate.
The DM475 has a mechanical water level sensor. An arm rests on
the water bottle. As the water bottle
empties, it moves up due to the
spring in the cap. This moves the
arm passed a colored flag across a
window in the cover.
Most components of the sealer assembly are user replaceable.
Feeder Exit. Sensor FS2 (DM400c/
DM450c) or FS2/WS1 (DM475).
Figure 3-3J Sensor FS2
The system uses this sensor to
ensure that adjacent mail pieces are fed with the specified pitch into the transport section of the mailing machine. This sensor also detects jams in the paper path. It connects to the feeder PCB through J307 (DM400c/DM450c).
The motion control system continuously monitors the state of sensors FS2 (auto
feeder) and PS1 (printer) to flag error conditions and report them to the operator.
DM300c/DM400c/DM475 Service Manual (SV61801 Rev. D)
3-7
3 • Theory Of Operation
3.4 Envelope/
Tape Transport
✍
TIP: See section 3.10
for DM475 differences
and specific theory.
Tape Feeder
Gear Train
The tape feed unit has a capacity of 55 tape strips and can
feed up to 65 strips per minute.
Tape Motor
The unit consists of a tape feed
motor and gear train that drives
a feed roller equipped with
a rubber tire. When the user
presses the tape button on the Tape Drive Roller
control panel, the printer transport starts. the tape motor turns
counterclockwise when viewed
as in Figure 3-4A. This drives Figure 3-4A Tape Feed Unit
the tape roller clockwise, feeding the tape strip under sensor
Tape
PS1. The tape is driven into the
Strip
Tape Transnip of the segmented feed rollport Roller
er. Since the tape is not wide
enough to be gripped by the
printer transport belt, it is transported by the tape transport
roller located just downstream
from the segmented roller and
rubber exit roller located on the
main drive shaft as shown in
Figure 3-4B Tape Feed Path
Figure 3-4B.
Exit
Roller
The tape feeder has a pivoting spring-loaded pusher plate containing two
ridges immediately under the roller. The pusher plate presses the first tape
in the stack against the rubber drive roller so that it is fed when the roller
rotates. A single tape is flexible enough to advance through the curved exit
path of the tape feeder and into the printer transport. The two ribs on the
pusher plate keep the remaining tapes in a concave shape perpendicular to
the feed direction. The coefficient of friction between tapes is not sufficient
to drive them around the curved exit path. After the lead edge of a tape is
sensed at PS1, the tape motor is turned off and the tape is taken away by
the printer transport. the tape drive roller contains a one-way clutch that
minimizes the drag on the tape being taken away by the printer transport.
The tape motor is connected to J117 on the main logic board.
3-8
DM300c/DM400c/DM475 Service Manual (SV61801 Rev. D)
3 • Theory Of Operation
3.4 Envelope/
Tape Transport
Upper Transport
The transport drive motor is
mounted on the rear plate of
the machine. It turns clockwise as seen in Figure 3-5,
driving the main shaft that
runs from the rear to the front
of the printer, through a seMain Drive
ries of pulleys and belts (figShaft
ure, right.) A pulley pinned to
the front of the shaft drives a
segmented feed belt which,
Motor Pulley
in turn, drives a segmented
feed (first feed) roller and
Figure 3-5 Transport Drive Train (from Rear)
intermediate feed roller.
To assure reliable belt tracking, the feed belt has a center
ridge that rides in the center
groove of each pulley of the
upper transport. The idlers
of the lower transport are
friction-driven by the feed
components of the upper
transport. See Figure 3-6,
right.
Belt Tensioner
Exit Roller
(not Visible)
Drive Shaft
Drive Pulley
for Segmented
Feed Roller
Figure 3-6 Upper Transport Feed Belt
DM300c/DM400c/DM475 Service Manual (SV61801 Rev. D)
3-9
3 • Theory Of Operation
3.4 Envelope/
Tape Transport
✍
TIP: See section 3.10
for DM475 differences
and specific theory.
Lower Transport
The lower transport assembly is
hinged to the right and left side
plates by means of two pivot
studs. The assembly is equipped
with a lock lever that allows the
user to lower the transport for
jam clearance.
Rotating the lock (jam) clockwise
moves the lock lever slide to the Figure 3-7 Top View of Lower Transport Releft. This motion first releases moved from Machine, Cover Off
the torsion springs that hold the lower transport rollers up. Next, the two white
can rollers arrive at the edge of the cams that hold the lower transport up and the
weight of the lower transport is transferred to the locking cam that rests against
a ramp on the inside of the bottom cover of the printer. As the lock lever slide
completes its movement to the left, it continues to rotate the locking cam which,
in turn, allows the lower transport to drop down by gravity. When the lock lever is
then rotated in the counterclockwise direction, the process is reversed.
The lower transport consists of
six idler rollers, a segmented
idler that opposes the upper
transport’s segmented feed roller,
and an envelope ski. See Figure
3-7 above. The lower transport
is entirely passive; that is, it is
driven by the upper transport and
contains no motors or sensors.
Lock Lever Slide
Locking Cam
Interlock. A jam lever sensor is Figure 3-8 Lower Transport Locking Mechanism
mounted on the sensor board
below transport sensors PS2
and PS3. See Figure 3-42. As
the transport is locked, the lock
lever slide moves a rotating flag
to block the jam lever sensor
(see Figures 3-8 and 3-12). The
mailing machine will not operate when the transport is open
(sensor unblocked). In this case
the machine displays the Jam
Lever Open error message.
The figure at the right (for
DM300c) shows how the jam
lever, lower transport cover and
transport mechanism go together. The sensor board connects Figure 3-9 Lower Transport Jam Lever, Cover
to the main logic board at J119. and Transport
3-10
DM300c/DM400c/DM475 Service Manual (SV61801 Rev. D)
3 • Theory Of Operation
3.4 Envelope/
Tape Transport
Sequence of Operation
The mailing machine is equipped with a sophisticated motion control system
that continuously monitors envelope or tape strip position along the transport and triggers all key operations at the appropriate time in the machine
cycle.
The motion control system is designed to:
•
Detect the presence of a stack (DM400c) or an envelope or tape strip;
•
Move the print carriage assembly from the home to the print position
and initiate a purge (type E—see Table 3-2), if necessary;
•
Start the transport;
•
Measure envelope length;
•
Maintain a consistent gap between pieces;
•
Detect feed failures, jams and skew conditions and set the appropriate
error flag;
•
Trigger the meter debit process;
•
Initiate printing;
•
Repeat the process or return the print carriage to the home position.
DM300c/DM400c/DM475 Service Manual (SV61801 Rev. D)
3-11
3 • Theory Of Operation
3.4 Envelope/
Tape Transport
Sequence of Operation (cont’d)
Sensor Inputs. The transport is equipped with five sensors in the case of
the DM400c, and three in the case of the mailing machine. See Figure 3-10
below for a diagram of the transport layout.
Autofeeder. FS1 (Feeder Sensor 1) is the stack present sensor. FS2
is a lead edge/trail edge sensor, the input of which helps the system determine envelope length. It also serves as a fail-to-feed detector in the
event that a mailpiece fails to reach FS2 within a predetermined time.
See Figure 3-11 for the location of the autofeeder sensors.
#10 Envelope
#10 (241.3[mm]=9.5[inch])
Feeder
Printer
Tape
300[mm/sec]
FS1
609.6[mm/sec]
500[mm/sec]
FS2
Separate Roller
PS2
PS1
Input Roller
Head
500[mm/sec]
PS3
Output Roller
Figure 3-10 DM300c/DM400c Transport Layout
Mailing Machine. Sensor PS1 (Printer Sensor 1) is the lead edge sensor (see Figure 3-12). It detects the lead edge of the mailpiece and
initiates movement of the print carriage assembly from the home to the
print position. (The carriage is home when the carriage home sensor is
blocked).
3-12
DM300c/DM400c/DM475 Service Manual (SV61801 Rev. D)
3 • Theory Of Operation
3.4 Envelope/
Tape Transport
Sequence of Operation (cont’d)
Sensor PS3 is used to report jams or no paper conditions. In the 3C00 only,
sensors PS2 and PS3 are
used for skew detection.
DM400c-DM475 software
does not detect skew and
do not use PS2.
PS3 also triggers the
postage debit request;
if that request is completed successfully within
110/120msec, the printing
process starts.
✍
TIP: See section 3.10
for DM475 differences
and specific theory.
See Figure 3-12, right, for
the location of the mailing
machine sensors. The sensor board to which the sensors are mounted is shown
in Figure 3-42. Note that
the 6C00 does not have a
PS2 sensor mounted on its
sensor board.
FS1
FS2: Mounted on wall
behind roller
assembly
Figure 3-11 AutoFeeder Transport Sensors
PS2
PS1
PS3
Jam Lever
Sensor
Timing Inputs. Timing reference is provided by two
quadrature (two-channel) disFigure 3-12 Mailing Machine Transport Sensors
tance encoders each with a
resolution of 1651 pulses per
revolution or 0.088mm per pulse. The encoder output is used to determine
transport linear speed and adjust it based on envelope or tape position as
reported by the transport sensors.
As shown in Figure 3-13, next page, the autofeeder (AF) encoder is driven
by the AF main drive motor through a timing belt. The mailing machine encoder is mounted on the shaft of the segmented feed roller.
Operating Sequence—DM400c/DM450c. For the discussion that follows,
refer to the Transport Timing Diagram, Figure 3-15, and the DM400c Envelope Print Diagrams, Figures 3-16 A and B.
1. When the user presses the START button and a stack is detected by
FS1, the system commands the purge motor to drive clockwise. This
action drives the print head cap and print head lock down and the print
head wiper up. The carriage drive motor then moves the carriage from
the home position (unblocking the carriage home sensor). The print
head is wiped and a mild purge initiated if necessary.
DM300c/DM400c/DM475 Service Manual (SV61801 Rev. D)
3-13
3 • Theory Of Operation
3.4 Envelope/
Tape Transport
Sequence of Operation (cont’d)
NOTE: If sensor PS1 does
not detect a lead edge
within 15 seconds, the
print carriage returns to the
home position.
2. When the print carriage
is in the print position, the
transport motors start and
one piece is separated
from the stack.
✍
TIP: As noted earlier,
DM400c to DM475C
software does not report skew conditions; it
reports jams or no paper conditions.
The autofeeder transport
operates at a slightly
Figure 3-13 Auto Feeder Distance Encoder
slower maximum speed
than the mailing machine
transport (23.5 ips as opposed to 24 ips) to prevent
collisions at the mailing
machine entrance.
If a mailpiece fails to reach
FS2 within a predetermined
time, the system logic declares a feed error.
3. 3C00 ONLY: Sensors PS2
and PS3 detect skew.
Likewise, if PS1 and PS2
are blocked, and PS3 does
not sense the lead edge of
the piece within a predetermined period of time, a
skew condition is declared
and the system logic prevents the meter debit process.
All Models: If PS1 is
blocked and PS3 does not
see the lead edge of the
piece within a predeterFigure 3-14 Mailing Machine Distance Encoder
mined time, a fault is de- and Sensor Board
clared. If no fault condition
is detected and PS1 and PS3 are blocked, PS3 triggers the meter debit
process. When PS3 triggers, the required postal funds are spent. As
shown in Figure 3-17, the system logic allows a time window of 110/120
msec or roughly three inches of paper travel for the debit process to
complete successfully. If it fails, the meter is not debited, printing is inhibited and a fault declared.
3-14
DM300c/DM400c/DM475 Service Manual (SV61801 Rev. D)
DM300c/DM400c/DM475 Service Manual (SV61801 Rev. D)
89
4.48 [IPS]
(113.8
[mm/sec])
100
63.5
16 [IPS]
(406.4
[mm/sec])
TIP: See section 3.10
for DM475 differences
and specific theory.
89
Stack Sensor
FS1
✍
23 [IPS]
(584.1
[mm/sec])
113
23.5 [IPS]
(596.6
[mm/sec])
Moistener
18
FS2
PS1
33
63
PS1
2
64
PS2
PS3
Start
Debit
PS2
PS3
24 [IPS]
(609.6
[mm/sec]) 105
41
Runs at
Constant
Velocity
120 msec
51
70
51
End
Debit,
Start
Printing
51
25
1651 (Pulse/Revolution)
Encoder Resolution : 0.085 (mm/pulse) = 300dpi
57.5 6.5
Encoder
Tape Feeder
93
4
Two-channel (quadrature) encoders
determine transport motor speed.
Encoder failure can cause motors to run
at wrong speed and affect gapping.
1651 (Pulse/Revolution)
Encoder Resolution : 0.088 (mm/pulse)
3.4 Envelope/
Tape Transport
0.68 [IPS]
(17.2 [mm/sec])
Encoder
3 • Theory Of Operation
Sequence of Operation (cont’d)
Figure 3-15 Transport Timing Diagram — DM400c/DM450c
3-15
3 • Theory Of Operation
䇭
䋨
PS2
PS1
Separate Roller
Input Roller
PS3
Output Roller
Carriage print position change completed -> Transport motor feeder motor start
Separate Roller
䇭䇭
FS2
PS2
PS1
Input Roller
PS3
Output Roller
Detect envelope edge with PS3 -> Envelope skew check
FS1
䇭䇭
Separate Roller
FS2
PS2
PS1
Input Roller
PS3
Envelope arrives at print start position -> Print Start
FS1
Separate Roller
FS2
䇭䇭
Output Roller
Head
㽵
FS1
Head
㽴
䋫
PS2
PS1
Input Roller
PS3
Output Roller
Detect front of envelope by FS2 -> Print Cycle (Envelope Gap)Check (Pause feeder if under 11 inches)
FS2
PS2
PS1
Input Roller
PS3
Output Roller
Envelope arrives at print finish position -> Printing done
FS1
Separate Roller
䇭䇭
FS2
PS2
PS1
Input Roller
PS3
Output Roller
Detect front of envelope by PS3 -> Envelope skew check
FS1
Head
㽸
䇭䇭
Separate Roller
Head
㽷
FS1
Head
㽶
䋯
FS2
FS1
Head
㽳
䋩
Press down start button -> Carriage print position change Purge if necessary
Head
㽲
Sequence of Operation (cont’d)
3.4 Envelope/Tape Transport
FS2
PS2
PS1
Separate Roller
Input Roller
To
㽵
PS3
Output Roller
above
Figure 3-16 DM400c/DM450c Envelope Print Sequence
3-16
DM300c/DM400c/DM475 Service Manual (SV61801 Rev. D)
3 • Theory Of Operation
3.4 Envelope/
Tape Transport
Sequence of Operation (cont’d)
Debit Request
PS3
110/120 msec
(3 inches)
Mailpiece
Debit Complete
Print Head
Generate Data,
Initiate Printing
Figure 3-17 Debit and Print Timing
4. Once the system has confirmed the debit within the allotted time, it issues the print start command and prints the indicium (meter stamp).
FS1 senses the following mailpiece which is approaching FS2.
✍
TIP: See section 3.10
for DM475 differences
and specific theory.
5. FS2 detects the lead edge of the next (following) mailpiece and the system calculates whether the gap between pieces is correct.
The system logic is designed to maintain a consistent gap between
pieces of 11 inches from lead edge to lead edge. The gap between
pieces is defined as envelope length N + gap X = 11”. In other words, if
envelope length is 5 inches, the gap between the trailing edge of piece
one and the lead edge of piece two is 6 inches, for a total of 11 inches.
If a series of #10 envelopes were run, the trail edge to lead edge gap
between pieces would be 1.5 inches (9.5 inches + 1.5 inches = 11 inches).
The system logic monitors the state of FS2 and PS1, the mailing machine’s lead edge detector. If a piece does not arrive at PS1 within a
predetermined time, an error is declared.
6. The first envelope arrives at the print finish position and is driven into
the stacker by the output rollers. The following mailpiece blocks FS2 as
it approaches PS1.
7. As the leading piece exits, the following piece blocks sensors PS1, PS2
and PS3, at which point the system logic assumes there is no transport
fault (misfeed, jam or skew) and initiates the meter debit. The process
repeats (steps 4 through 7) as required.
DM300c/DM400c/DM475 Service Manual (SV61801 Rev. D)
3-17
3 • Theory Of Operation
3.4 Envelope/
Tape Transport
Sequence of Operation (cont’d)
Operating Sequence—DM300c. For the discussion that follows, refer to
the Transport Timing Diagram (Figure 3-18) below and the DM300c Envelope Print Diagram (Figure 3-19) on the following page.
The operating sequence for the DM300c is essentially the same as that for
the DM400c, with the obvious difference that the autofeeder, and therefore
sensors FS1 and FS2 are not present.
1. When PS1 detects the lead edge of an envelope, the print carriage
moves to the print position as described in step 1 for the DM400c sequence.
2. When the print carriage is in the print position, the transport motor
starts and feeds the mailpiece or tape up to the PS2/PS3 skew detect
sensors. From this point on, the process is virtually identical to that described earlier in steps 3 through 7 of the DM400c operating sequence.
Encoder
1651 (Pulse/Revolution)
Encoder Resolution : 0.085 (mm/pulse) = 300dpi
Tape Feeder
57.5 6.5
33
Optional
Moistener
PS1
63
29
70
PS2 and 3
24 [IPS]
(609.6
[mm/sec])
51
105
51
25
Figure 3-18 Transport Timing Diagram — DM300c
3-18
DM300c/DM400c/DM475 Service Manual (SV61801 Rev. D)
3 • Theory Of Operation
䇭
䋨
Detect envelope by PS1 -> Shift carriage print position Purge if necessary
PS2
PS1
Input Roller
PS3
Output Roller
Carriage print position shift complete -> Start transport motor
䇭
Input Roller
䇭
Output Roller
Detect front of envelope by PS3 -> Stop transport motor -> Check envelope skew -> Start data generate
PS2
PS1
䇭䇭
Input Roller
PS3
Output Roller
Data generate complete -> Start transport motor
PS2
PS1
䇭䇭
PS3
Output Roller
Envelope arrives at print start position -> Print Start
䇭䇭
PS2
PS1
Input Roller
PS3
Output Roller
Envelope arrives at print finish position -> Print Finish
Head
㽷
Input Roller
Head
㽶
䇭䇭
䇭
PS2
PS1
Input Roller
PS3
䇭
Output Roller
Detect front of envelope by PS3 -> Stop transport motor -> Envelope skew check -> Start data generate
previous page
PS2
PS1
Input Roller
To
Figure 3-19 DM300c Envelope Print Sequence
PS3
Head
㽸
PS3
Head
㽵
䇭䇭
PS2
PS1
Head
㽴
Head
㽳
䋩
Sequence of Operation (cont’d)
Head
㽲
3.4 Envelope/Tape Transport
Output Roller
㽵
DM300c/DM400c/DM475 Service Manual (SV61801 Rev. D)
3-19
3 • Theory Of Operation
3.4 Envelope/
Tape Transport
✍
TIP: The DM475 uses
the existing DM400c
autofeeder hardware,
print engine, modem,
USB and serial ports,
meter PSD, and tape
feeder.
✍
TIP: See section 3.10
for DM475 differences
and specific theory.
Sequence of Operation (cont’d)
Operating Sequence—Tape. For the discussion that follows, refer to the
Tape Print Sequence diagrams (Figure 3-20) on the following two pages.
This discussion assumes that the user has properly loaded tape strips in the
chute, the postage amount is set and the system is nominal.
1. When the user presses the TAPE button, the print carriage moves into
the print position as described previously and a mild purge is performed
if necessary
2. When the print carriage is in the print position, both the tape and the
feed transport motors start. The tape feeds down, blocking sensor PS1
and enters the nip of the feed rollers.
3. When the tape strip has fed 30mm beyond PS1 as calculated by the
distance encoder, the system logic stops the tape motor.
4. The tape feeds to PS2/PS3 where skew detection is performed (3C00
Only). The meter debit process is initiated by PS3. As noted earlier, all
three transport sensors must be blocked by the tape strip and the debit
process must occur successfully within the 110/120 msec window as
illustrated in Figure 3-17.
5. When the debit (data generation) is complete, the transport drives the
tape strip to the print station.
6. When the tape strip arrives at the print start position, the print head
heats and fires, printing the indicium (meter stamp).
7. PS1 senses the trail edge of the first tape. If a second tape is called for,
this detection starts the tape motor.
8. The first tape reaches the print finish position and is ejected by the output (exit) rollers.
9. The second tape feeds down from the chute, blocks PS1 and feeds into
the nip of the first transport rollers. When the tape lead edge is 30 mm
beyond PS1, the system logic stops the tape motor and the process repeats from step 4 to 9.
3-20
DM300c/DM400c/DM475 Service Manual (SV61801 Rev. D)
3.4 Envelope/
Tape Transport
䇭
䋨
䋩
Press downtape
start button -> Move carriage print position Purge if necessary
Head
Sequence
of Operation
(cont’d)
㽲
3 • Theory Of Operation
㽳
PS2
PS1
䇭
PS3
䋯
Carriage print position shift complete -> Tape motor Feeder motor start
Head
㽴
䇭䇭
PS2
PS1
PS3
PS1+30[mm] -> Stop tape motor
Head
㽵
PS1
䇭䇭
PS2
䇭
PS3
Detect front of envelope by PS3 -> Stop transport motor -> Check envelope
tape skew -> Start data generate
Head
㽶
䇭䇭
PS1
PS2
PS3
Data generate complete -> Start transport motor
Head
㽷
PS1
PS2
䇭䇭
PS3
Envelope arrives at print start position -> Printing start
Head
Figure 3-20 A Tape Print
Sequence
PS1
DM300c/DM400c/DM475 Service Manual (SV61801 Rev. D)
PS2
PS3
3-21
3 • Theory Of Operation
3.4 Envelope/
Tape Transport
Sequence of Operation (cont’d)
㽸
䇭䇭
Detect
PS1 ->
->Start
StartTape
tape motor
Detectend
endofofenvelope
tape byby
PPS1
motor
Head
㽹
PS1
PS2
䇭䇭
PS3
Envelope
arrives
at print
finish
position-> ->
Printing
complete
Tape arrives
at print
finish
position
Printing
complete
Head
㽺
䇭䇭
PS1
PS2
PS3
PS1+30[mm] -> Stop tape motor
Head
PS2
PS1
PS3
To continue sequence, go to 4 on previous page
Figure 3-20 B Tape Print Sequence
3-22
DM300c/DM400c/DM475 Service Manual (SV61801 Rev. D)
3 • Theory Of Operation
3.5 Ink System
The ink system is comprised of
the:
•
Ink tank (cartridge)
•
Print head
•
Carriage Assembly
•
Carriage Board
•
Purge Unit
•
Waste Tank
Ink Cartridge
✍
TIP: The DM475 uses
the existing DM400c
autofeeder hardware,
print engine, modem,
USB and serial ports,
meter PSD, and tape
feeder.
The DM300c/DM400c/DM475
use the same, unique ink car- Figure 3-21 Ink Tank (Cartridge)
tridge (figure, right). It is mounted in the print carriage assembly and is easily replaceable by the user.
The cartridge has a capacity of 45ml. For the DM300c, the cartridge has
a typical life of 5,800 imprints at 33 envelopes per day. For the DM400c/
DM475, cartridge life is typically 8,800 imprints at 88 envelopes per day.
These estimates are based on printing U.S. indicia with 2D barcodes and
assumes the DM400c/DM475 is processing a higher volume of mail than
the DM300c. A higher print volume equates to fewer maintenance (purge)
cycles, therefore, the number of prints from the cartridge increases as the
number of imprints increases. (Most of the ink in a cartridge is used up by
purge cycles, rather than actual printing.)
The tank is equipped with a NVM that holds the following information: ink
tank type; date of manufacture; and ink drop count. The system uses the
drop count to compute ink consumption and display low ink and out-of-ink
messages.
To determine ink tank status, the system counts the number of ink drops
(dots) used. The system knows how many dots are used for each specific
function: indicia print, ad print, inscription print, and purges A through E (see
Table 3-2). The system uses this information to determine how much ink is
left in the ink tank. The system displays a low ink warning when approximately 500 prints are left. For the DM300c, a low ink condition is defined as
5,300 pieces, and for the DM400c/DM475, 8,300 pieces. The following error
messages are associated with the ink tank:
Ink Tank Fault—Power cycle; install new ink tank if problem persists.
Out of Ink—Install new ink cartridge. The system calculates consumption
as explained above. Running out of ink is treated as an error condition
with no adverse effects on the printer system. All non-printing functions
(e.g., accounting, postage refill, USPS services, seal-only mode, data
capture uploads, service menu, etc.) are available when the system is in
the out-of-ink condition.
DM300c/DM400c/DM475 Service Manual (SV61801 Rev. D)
3-23
3 • Theory Of Operation
3.5 Ink System
Ink Cartridge (cont’d)
Ink Tank Expiration Notice—Ink tank will expire in XX days. This is based on
the date of manufacture and the number of days of use.
Low Ink. Remaining ink is less than needed to print 500 indicia.
No Ink Tank Detected—System failed to detect ink tank. System will run in
seal-only mode.
Ink Tank Expired—Install new ink tank (based on the date of manufacture).
Ink Tank Access Cover Open—Close cover or replace ink cartridge/print head.
Print Head and Carriage Board
Print Head. The print head is a bubble jet device with 616 nozzles (600
used) that prints postal indicia. The printed image is 25.4mm high (perpendicular to transport motion) with a maximum print length of 180mm. Resolution is 300h x 600v dpi.
The secure print head and
driver electronics are integrated in the print head assembly. This is mounted on
the print head carriage and,
like the ink cartridge, is easily
replaceable by the user.
The print head, in conjunction with the secure carriage
board, ensures that the
printer in this closed-system
postage meter is dedicated to
printing only postage or other
meter-related information.
Figure 3-22 Print Head —Bottom View
The carriage board receives
encrypted print data from the
PSD. It decrypts the data and
sends it to the print head.
The carriage board is sealed
within the carriage assembly
to provide a high degree of
security. Security is further
enhanced by the following:
•
The print head is unique
to the DM300/400c. It is
not an off-the-shelf item.
•
The print head does not
use a standard connection mechanism.
Figure 3-23 Print Head — Contact View
3-24
DM300c/DM400c/DM475 Service Manual (SV61801 Rev. D)
3 • Theory Of Operation
3.5 Ink System
Print Head and Carriage Board (cont’d)
•
The communication protocol to the print head is not standard.
•
The print head functions only with Pitney Bowes-managed equipment.
•
There is an enciphered link between the PSD (iButton) and the carriage
board.
The following error messages are associated with the print head:
•
Print Head Fault—The system detected a print head fault. Power cycle
the machine. If the problem persists, install a new print head.
•
No Print Head Detected—The system failed to detect the print head.
Install a print head. The system can still run in seal-only mode.
The carriage board is connected by a flexible ribbon cable to J127 on the
main logic board. The print head is held against the connector pins on the
carriage board.
Carriage
Assembly
Carriage Drive Motor
Outer Rail Carriage Drive Belt
Ink Tank
The print
carriage asInner Rail
sembly moves
the print head
and ink tank
Carriage
Print head
from the home
to the print
position and
Figure 3-24 Carriage Assembly in Home Position
back again.
The print carriage also has a cleaning pad
mounted on its back side. As
the carriage passes over the
wiper blade, the cleaning pad
wipes off the wiper blade.
Wiper
Cleaner
The carrier holds the print
head and ink tank. It rides on
two rails mounted between
the chassis’ front and rear
plates and is driven by the
Print head
carriage drive stepper motor through a timing belt. The
timing belt tensioner is not
self-setting (not spring-loaded). Belt tension is factory set
Figure 3-25 Carriage, Removed from Machine,
at 2.2 lbs.
Bottom View
As explained below, the
home position is detected by a sensor mounted on the purge unit. The carriage drive motor connects to the main logic board at J118.
DM300c/DM400c/DM475 Service Manual (SV61801 Rev. D)
3-25
3 • Theory Of Operation
3.5 Ink System
Purge Unit
Carriage Home Sensor
The purge unit is designed to
maintain good print quality. It
is a totally self-contained unit
(no external pumps or other
components) that is cantilevered off the right side plate
and located midway beneath
the print carriage rails.
Wiper
As shown in the figures, right,
the purge unit has a motor,
Motor Gear Cam Gears
pump, capping station, wiper,
print lock and carriage home Figure 3-26 Purge Unit, Right Side
sensor.
Motor. When the purge
motor turns counterclockwise, it drives the pump
cap, wiper and print lock
through cams; when it
turns clockwise, it drives
the purge pump, also
through cams.
Print head Lock
Capping
Station
Carriage
Home
Sensor
Pump. The pump performs the purge cycles
described in Table 3-2.
Purge cycles are performed when the carriage
assembly is in the home
position and also during
printing. Excess ink from Figure 3-27 Purge Unit, Rear View
the purge cycles is deposited in the waste tank
as described in paragraph
3.5.5. The system keeps
a log of the number of
purges and tracks the dot
count to determine the
status of the waste tank.
Purge
Pump
Capping Station. The
print head cap keeps the
print head nozzles from
drying out. The print head
is capped when the carriage assembly is in the
Figure 3-28 Purge Unit PCB
home position.
3-26
DM300c/DM400c/DM475 Service Manual (SV61801 Rev. D)
3 • Theory Of Operation
3.5 Ink System
Purge Unit (cont’d)
Wiper. The wiper removes excess ink and debris from the print head
as the carriage assembly moves to the print position. A wiper cleaner
attached to the back of the print head carriage is designed to keep the
wiper free of excess ink and contaminants.
Print Head Lock. The print head lock is cam driven up to the locking
position as the print head carriage reaches the home. The lock keeps
the carriage in the home position, assuring the print head is capped and
preventing movement during shipping.
Carriage Home Sensor. The sensor is activated by a tab (sensor flag)
mounted on the bottom of the carriage assembly. It tells the system logic
when the carriage is (and is not) in the home position. The home position is defined as that point when the home position sensor is blocked,
the print head is capped and the print head lock is up, engaging the
print carriage and preventing its movement.
After printing is complete and no more envelopes are inserted, the system
logic tells the carriage motor to move the print head back to the capped
position, to prevent the ink nozzles from drying out. This also occurs if PS1
has not detected a lead edge for a period of 15 seconds. As the carriage
moves to the home position, the purge motor turns counterclockwise and
drives the cap up against the print head. Almost simultaneously, the print
head lock rises to lock the carriage in the home position. These actions are
triggered by the carriage home sensor located on the purge unit.
When printing is called for, the purge motor turns counterclockwise and
drives both the print head cap and lock down and the wiper up and the carriage is driven to the print position. When purging is called for, the purge
motor turns clockwise and drives only the cam that powers the purge suction pump.
Purging. This process consists of one or more of the following actions:
pump suction (aspiration); wiping; and spits (firing of nozzles). Purges
are performed:
• At power up;
• When the ink cartridge is replaced;
• When the print head is replaced;
• Following a jam or shut down;
• Before, during and after printing.
The purge cycles are listed on the next page.
The purge unit is connected to the main logic board at J120 (yellow) and
J116 (purple).
DM300c/DM400c/DM475 Service Manual (SV61801 Rev. D)
3-27
3 • Theory Of Operation
3.5 Ink System
Table 3-2 Purge Cycles
Purge A (Power ON Purge)
• Suctioned ink: 0.2 - 0.3g
• Suction time: 1.25 sec.
• Movement: suction, wiping and spits.
• When: 72 hours after the last purge A, B, or C, when printing is initiated.
Purge B (Ink Cartridge Replacement Purge)
✍
TIP: The machine does
not perform purges
when it is in the sleep
mode. The machine
does not perform the
72-hour purge until a
print is requested and
72 hours have passed
since the last type A, B
or C purge.
• Suctioned ink: 0.75 - 0.9g
• Suction time: 1.25 sec. * 3
• Movement: suction, wiping and spits.
• When: After user replaces ink cartridge.
Purge C (Print Head Replacement Purge)
• Suctioned ink :0.75 - 0.9g
• Suction time: 1.25 sec. * 3
• Movement: suction, wiping and spits.
• When: After user installs a new print head.
• Purpose: Prevent ink type mixing.
Purge D (Jam Purge and Shutdown Purge)
• Movement: wiping and spits.
• When: After a jam error or before machine shutdown; after spitting
45,600,000 dots (total) since the last wiping (purge A, B, C, or D).
• Purpose: To remove paper dust from the print head surface.
Purge E (Pre-, Post-, and during Printing Purge)
• Movement: spits
• Purpose: To prevent nozzles from drying out.
Purge E-1 (Pre-Printing Purge)
Spits: 300 dots per nozzle
Purge E-2 (Post-Printing Purge)
Spits: 100 dots per nozzle
Purge E-3 (While Printing Purge)
Spits: 30 dots per nozzle
Interval: every 30 seconds during the print
Spits area: print position
NOTE: This purge sequence does not interrupt printing.
3-28
DM300c/DM400c/DM475 Service Manual (SV61801 Rev. D)
3 • Theory Of Operation
3.5 Ink System
Waste Tank
The waste tank consists of
an absorbent pad that sits
in a drawer located on the
right side of the machine. Its
purpose is to prevent spillage
of ink and ink contamination
with the machine in any orientation and under the shock
and vibration conditions that
normally occur during shipping.
Figure 3-29 Waste Tank Drawer
The tank, located directly
below the purge pump drain,
has a capacity of 200 grams. The system logic uses the purge information
to determine how much ink has been pumped into the waste tank. The system calculates this using a formula that counts the dots purged (from print
manager data) and considers the amount of time the dots have been in the
waste tank to account for evaporation.
Under normal conditions, the waste pad should last the life of the machine
(500,000 cycles). As the tank fills, the system alerts the user with the following messages: Waste Tank Near Full (180 grams or 90%) and Waste Tank
Full (200 grams or 100%). The system will stop when the tank is full and
prompt the user to replace the tank and reset waste tank status to 0% using
the control panel.
The waste tank is easily user replaceable. No machine disassembly is required.
User Maintenance
Should print quality deteriorate, the
user or service representative can
print a test pattern using the Options
Menu (Options > Maintenance > Print
Test Pattern). The pattern should
have no voids as shown in the figure (GOOD), right. The user display
prompts the user to clean (purge) the
print nozzles if the test pattern is not
satisfactory.
GOOD
BAD
Figure 3-30 Test Patterns
Note that printer maintenance options are also available in the Service
Menu as explained in Chapter 6 - Service Menu.
DM300c/DM400c/DM475 Service Manual (SV61801 Rev. D)
3-29
3 • Theory Of Operation
3.6 Electronics
Figure 3-31 below is a block diagram of the system architecture for the
DM300c/DM400c/DM450c.
Figures 3-32 A and B on the subsequent pages provide a simplified block
diagram that shows the printed circuit boards (PCBs) used in the system
and the devices that are connected to them. PCBs and system electronic
components are described on the following pages.
M Transport Motor (Servo)
M Carriage Motor (Stepper)
M Purge Motor (Stepper)
S Paper Sensor PS1
LCD Display
8MB Flash
Keyboard
16MB DRAM
LEDs
128K NVM
Socket Modem
PSD
I-Button
Interface
Serial
Peripheral
USB Slave
USB Host 1
USB Host 2
MOC
Canon
ASIC
S Paper Sensor PS2
S Paper Sensor PS3
S Transport Encoder
S Cap Home Sensor
S Pump Home Sensor
Serial 0
Renesas
SH7720
Microprocessor
Serial 1
Sync
Comm
S Carriage Home Sensor
LSFR
PSOC
S Cover Sensor
S Jam Lever Sensor
M Tape Motor
Paper
Sensor
PS1 Output
Serial TTL
ASIC UART
Carriage Board
USB
HUB
LSFR PSOC
Head EEROM
Tank EEROM
Feeder Control
(DM400c Only)
Motion Control
Processor
H8S/2212
On-Chip Memory
12K RAM 128K Flash
M Feeder Motor (Servo)
M Feeder Sensor FS1
M Feeder Sensor FS2
S Feeder Encoder
Figure 3-31 System Architecture Block Diagram (DM300c/DM400c/DM450c)
3-30
DM300c/DM400c/DM475 Service Manual (SV61801 Rev. D)
3 • Theory Of Operation
3.6 Electronics
USB-H1
USB-H2
USB Function
RJ11
PB232 Scale
MODEM PCB
Tape Motor
PSD1
(iButton)
Transport/LF
Motor
PSD2*
CR Motor
LED 1
Purge Motor
LED 2
Transport/
LF
Encoder
Keyboard/
Display PCB
Main Logic (Controller) PCB
Power
Supply PCB
Feeder PCB
(DM400c Only)
Feeder Sensor 1
(Hopper)
Carriage PCB
PS1 Detect
Cover Sensor
PS2 Skew
Jam Lever
Sensor
PS3 Skew/Debit
Purge PCB
Print Head
CR Sensor
Tank NVM
Pump Sensor
Feeder Sensor 2
Feeder
Encoder
Feeder Motor
Cap Sensor
NOTES:
1. The system is designed to handle different types of PSDs.
2. The DM300c and DM400c/DM450c use the same main logic board but
each PCN (G900, G903, G905) will have a unique part number for their
replacement main logic boards installed by service. The reason is that
the main board must have the correct PCN-specific application code on
it prior to installation.
3. The DM300c, DM400c/DM450c, and DM475 use different power supplies.
Figure 3-32 A Block Diagram (DM300c/DM400c/DM450c)
DM300c/DM400c/DM475 Service Manual (SV61801 Rev. D)
3-31
3 • Theory Of Operation
3.6 Electronics
DM475 PRINTER
Color LCD Display
16MB DRAM
LEDs
256K NVM
Serial Peripheral
S
S
S
S
S
S
S
S
S
Canon
ASIC
Serial 0
i-Button
Interface
PSD
8MB Flash
Keyboard
Socket Modem
M Transport Motor (Servo)
M Carriage Motor (Stepper)
M Purge Motor (Stepper)
Serial 1
Renesas
SH7721
Microprocessor
Serial TTL
ASIC UART
Paper Sensor S1
Paper Sensor S2
Paper Sensor S3
Transport Encoder
Cap Home Sensor
Pump Home Sensor
Carriage Home Sensor
Cover Sensor
Jam Lever Sensor
Sync Comm
LFSR
PSOC
Print Head
LFSR PSOC
USB Slave
Head EEROM
Tank EEROM
SMSC LAN91C111
Ethernet controller
RJ45 LAN Interface
USB
Hub
USB Host1
USB Host2
USB to Page 2
DM475 FEEDER/WOW
JTAG debug conn
USB from Main
PCB
USB Boot control
signal
WOW/Feeder
Control Processor
50MHz H8SX/
1662
M
Feeder Motor (Servo)
S
Feeder Sensor F 1
S
Feeder Sensor F 2
S
Cover Interlock
S
Feeder Motor Encoder
S
Feeder Motor Thermistor
On Chip Memory
Ram 40KB
12C
Flash 384KB
Width Sensor
FFC
A/D
Width Sensor
(Logic)
(Motor )
Width Sensor
EEPROM
BR24L08 2Kx8
62138 256Kx8
or equivalent
SRAM
Power
+5V/+27V
Inst AMP & AD(20bit)
AD620, & AD7703
Junction
PCB
S
Transport Motor Thermistor
M
Transport Motor (Servo)
S
Transport Motor Encoder
S
WOW Mid Sensor
S
WOW Exit Sensor
S
Thickness Encoder
Tedea #1041 Load Cell
DW84009
Figure 3-32 B System Architecture Block Diagram (DM475)
3-32
DM300c/DM400c/DM475 Service Manual (SV61801 Rev. D)
3 • Theory Of Operation
3.6 Electronics
PCBs
Control Panel Unit. The control panel includes a multi-line
character display, main control keyboard and QWERTY
keyboard for data entry. Unlike some previous models
in the DM Series, the feature
memory, control and PSD do
not reside on this board; they
reside instead on the main
logic board.
Figure 3-33 User Interface PCB
The keyboard/display unit is connected to the main logic board at J124 and
J120.
Power Supply PCB. Separate power supplies are used
for the DM300c, DM400c,
and DM475. This is due to
the greater power requirements imposed by the feeder
motor/drives on the higher
model units.
Board Characteristics
Type: Switching
Input: Universal (100-240V)
Output:
27V (to feeder, trans- port
motor, and print head)
Figure 3-34 Power Supply PCB and Shield
5V (to control panel, main logic)
Wattage:
Peak
80W ( DM300c) 140W (DM400c)
Standby 8W
10 W
The power supply is connected to the main logic board through two connectors. Connector J125 has all the voltage lines, whereas connector J126 has
all the control lines used for turning the motor and heater voltage on and
off. Connector J126 is also used for the detection of the power supply type
to ensure that DM400c units are fitted with the higher voltage power supply
units.
DM300c/DM400c/DM475 Service Manual (SV61801 Rev. D)
3-33
3 • Theory Of Operation
3.6 Electronics
PCBs (cont’d)
LEDs 1701, 1702
J127 Print Head
J130B Keyboard
J130 Keyboard
J122 Encoder Sensor
J121 Top Cov Intlk
J119 Sensor Board
J126 PS
J107 Serial Port
J120 Purge Unit
J116 Purge Unit
J117 Tape Motor
J118 Carriage Motor
J103
3C00/4C00/5C00 Controller Main Logic Board. This board contains all the
components that provide the computing resources for the mailing machine,
among them the CPU, flash memory, DRAM, BBRAM and a host of other
components that provide drives to all motors and sensors, and support for
the PSD/iButton hardware.
PSD
J123
J125 PS
J115
Transport
Motor
J101
MODEM
NVRAM
Battery
under
Modem
Card
J128
Figure 3-35 B Controller (Main Logic) Board
3-34
NOTE: Boards may vary; some connectors are not used
DM300c/DM400c/DM475 Service Manual (SV61801 Rev. D)
3 • Theory Of Operation
3.6 Electronics
PCBs (cont’d)
It also provides the interface to the autofeeder for the DM400c system. In
addition, it supports the keypad and display functions through an interface
to the control panel PCB. The board supports all USB communications, the
serial interface to the integrated scale, the analog modem and the feeder
communications channel. Also resident on this board are the circuit elements of the LFSR/PSOC system that encrypt data communication between the iButton/PSD and the Carriage PCB. Finally, the board develops
various local power sources (e.g., 3.3V, 1.5V) derived from the 5V output of
the power supply unit.
As shown in Figure 3-35, the PSD (meter) resides on the main logic board.
The PSD is the vault for postal funds, and debits these prior to issuing postage and credits upon user-selected refills from the Pitney Bowes Data Center. The PSD includes a cryptographic engine that ensures security of the
funds transactions. Physical and environmental security measures reduce
the risk of tampering. PSD1 refers to the iButton meter; PSD2 is reserved
for future non-iButton PSDs.
The board has two status LEDs as shown in Figure 3-35. LED 1701 flashes
fast and indicates the presence of 5V at the Carriage Board which is sealed in
the print carriage assembly. (See figure 3-38 for the location of this board.) LED
1702 is the “heartbeat” lamp and flashes once per second to indicate that 5V
are present on the main logic board and that the microprocessor is running.
The DM300c and DM400c use the same main logic board, but each meter
PCN (G900, G903, G905) will have a unique part number. This is due to
the fact that the main board must have the correct PCN-specific application
code on it prior to installation.
DM300c/DM400c/DM475 Service Manual (SV61801 Rev. D)
3-35
3 • Theory Of Operation
3.6 Electronics
PCBs (cont’d)
6C00 Controller Main Logic Board (DM475). The 6C00 Main Logic Board
includes all the functions of the 3C00/4C00/5C00 Main Logic Board (see
previous section) and adds a USB Feeder/WOW connection. Also added is
an Internal LAN and RJ45 connector. The addition of the integrated LAN requires the external attaching screw to be moved inside, to the bottom of the
board’s mounting frame.
USB Port
Added
LAN Port Added
Figure 3-35 B 6C00 (DM475) Controller Main Logic Board - Front and Side View
Modem Board. An analog modem circuit board (see figure below) is mounted to the main logic board through connectors J114 and J109. This device
is used to establish communications with IntelliLink™ and the Pitney Bowes
Data Center. The board contains all modem-related components. An RJ11
jack is mounted on the main logic board at J108.
Figure 3-36 Modem Board
3-36
DM300c/DM400c/DM475 Service Manual (SV61801 Rev. D)
3 • Theory Of Operation
3.6 Electronics
PCBs (cont’d)
Carriage Board. This PCB contains the decryption elements used in data
communication to the print head as well as connections to the print head.
It is sealed in the print head carriage as shown in Figure 3-38. It connects
to the main logic board through a 50-pin FFC at J127. It also provides the
electrical connections to the NVM in the ink tank (cartridge). See Tank NVM
below.
✍
TIP: The DM475 uses
the existing DM400c
autofeeder hardware,
print engine, modem,
USB and serial ports,
meter PSD, and tape
feeder.
Print Head. The print head contains all the electronics required to transform the data received into appropriate heater elements through driver
devices. The head also provides the mechanical interface to the ink cartridge. Figure 3-37 below shows a block diagram of the print head electronics. Figure 3-38 shows the location of the print head board.
Tank NVM. This is mounted in a pocket in the ink cartridge and stores
a variety of data such as the tank type, date of manufacture, capacity,
consumed ink information (drop count) and other manufacturing information. The NVM is connected through a set of fingers to a connector
which in turn is connected through a 7-pin FFC to the carriage board
PCB.
Ink
PSoC
Tank
LFSR
UART
EEPROM
Carriage Board
Print head
EEPROM
Figure 3-37 Carriage Board, Print Head and Ink Cartridge
Block Diagram
DM300c/DM400c/DM475 Service Manual (SV61801 Rev. D)
3-37
3 • Theory Of Operation
3.6 Electronics
PCBs (cont’d)
Purge Unit. This PCB provides connections from the carriage home sensor,
pump sensor and cap sensor. It serves solely as a junction board and therefore has no active components on it. The purge PCB also routes the 5V
required for the sensors from the main logic board. It connects to the main
logic board through J120.
NOTE: These
contacts
MUST be free
of ink
contamination
Figure 3-38 Location of Print Head
Controller (Carriage) Board
Figure 3-39 Print Head Contacts
Figure 3-40 Purge Unit Junction Board
3-38
DM300c/DM400c/DM475 Service Manual (SV61801 Rev. D)
3 • Theory Of Operation
3.6 Electronics
PCBs (cont’d)
Feeder Logic Board (DM400c/DM450c). The feeder logic board is the
heart of the feeder subsystem used on the DM400c/DM450c. It has a single
chip Hitachi micro controller that provides all the computing and communication power to the feeder subsystem. Also resident on the feeder PCB are the
motor driver for the feeder motor as well as the buffers for the feeder sensors.
The feeder board derives a 27V supply for the motor drive from the power
supply unit described earlier. The 5V required for the board is derived
through the USB interface connected internally to the main logic PCB. An
LED (see figure below) indicates the 5 volt supply is present. The 3.3V power for the feeder controller is generated on board from the 5V supply.
The feeder logic board is connected to the main logic board through a wire
harness at J311 and J301. The feeder logic board is connected to the power supply unit through connector J303. The feeder logic board monitors the
state transitions of transport sensor PS1 in the mailing machine transport.
LED
Figure 3-41A Feeder Logic Board (DM400c/DM450c)
DM300c/DM400c/DM475 Service Manual (SV61801 Rev. D)
3-39
3 • Theory Of Operation
3.6 Electronics
PCBs (cont’d)
Feeder/WOW Logic Board (DM475). The feeder/WOW logic board is located in the feeder/WOW module of the DM475 and adds WOW machine
motion control (MMC) capability to the existing feeder logic board functionality. The new board is attached to the back of the WOW unit. The feeder/WOW
logic board connects directly to the 6C00 main logic board via three cables.
J307 Black Connector to Printer
J301 White Connector to Printer
J315 to Feeder Sensors and Encoder
J320 Flex Cable to
Junction Board
J309 to Feeder Motor
J303 USB
to Printer
Not Used
Not Used
J302 to Load Cell
Figure 3-41B Feeder/WOW Board (DM475)
Feeder/WOW Junction PCB (DM475). The feeder/WOW junction board
is located in the feeder/WOW module of the DM475 and is the connection
point for the WOW width sensors, WOW transport motor and servo, WOW
deck sensors and the thickness encoder. It connects directly to the feeder/
WOW logic board.
J12 to WOW Feed Encoder J13 to Sensors
J16 to WOW Thickness Encoder
J10 to Feeder/
WOW board
J17 (Not Used)
J19 to WOW Motor
J20 3rd Width Sensor
J22 1st Width Sensor J21 2nd Width Sensor
Figure 3-41C Feeder/WOW Junction PCB (DM475)
3-40
DM300c/DM400c/DM475 Service Manual (SV61801 Rev. D)
3 • Theory Of Operation
3.6 Electronics
Sensor Summary
PS1. This is a lead edge sensor that detects the presence
of an envelope at the entry
point of the transport. On the
DM300c, the carriage assembly moves into the print position and the transport starts
when PS1 sees a lead edge.
PS1 is mounted on the sensor PCB, figure right, below
the disc encoder. The sensor board is connected to the
main logic board through connector J119.
✍
TIP: See section 3.10
for specific Feeder/
WOW theory (including sensors) specific to
DM475.
✍
TIP: The DM475 uses
the existing DM400c
autofeeder hardware,
print engine, modem,
USB and serial ports,
meter PSD, and tape
feeder.
PS1
PS3
PS2
Transport Open
Lever Sensor
Figure 3-42 Sensor Board (3C00, 4C00, 5C00)
PS2. This sensor is only used
on the 3C00 and ensures that the envelope or tape strip is squarely in the
printing path and that the system has control of the media. It serves as a
fault detector along with PS3. If PS1 is blocked, but PS2 does not see a
lead edge within a predetermined time, the system declares a fault. This
could be a skew condition or a jam.
As the envelope or tape reaches this point, media movement is controlled
totally by the system. This sensor is mounted to the sensor PCB located
below the disc encoder. The sensor board is connected to the main logic
board through connector J119.
NOTE: PS2 is only used on the 3C00. The 4C00, 5C00 and 6C00 do not
have skew detection enabled. Additionally, the 6C00 has a unique sensor
board that does not have a PS2 sensor mounted on it.
PS3. This sensor is used for skew and jam detection along with PS1 and
PS2. If no skew is detected as the envelope or tape strip reaches PS3, the
system initiates a debit process, i.e., triggers the postage meter. If the debit
process is successful, then the jetting of the ink onto the envelope starts
after a fixed interval following initiation of the debit command by PS3. This
sensor is mounted on the sensor PCB which is below the disc encoder. The
sensor board is connected to the main logic board at connector J119.
Transport Open Sensor. This sensor detects the position of the lower
transport jam releasing mechanism. It is an interlock device that prevents machine operation when the lower transport is open. The sensor is
mounted to the sensor board which is located just below the disc encoder
as shown in Figure 3-14. The sensor board is connected to the main logic
board at connector J119.
Ink Cartridge Cover Sensor. This sensor serves as an interlock device
that detects whether the top cover is open or closed. It is connected to the
main logic board through J121. The system will not operate with the top
cover open.
DM300c/DM400c/DM475 Service Manual (SV61801 Rev. D)
3-41
3 • Theory Of Operation
3.6 Electronics
Sensor Summary (cont’d)
Carriage Return Sensor. This sensor is physically mounted on the purge
PCB that is housed in the purge unit located below the carriage. The system uses this sensor to detect the position of the print carriage in the Y
direction. In this way, the carriage motor drive algorithm has the input necessary to drive the carriage to the printing position and back to the home
position at the appropriate times in the machine cycle.
Pump Sensor. The system uses the output from this sensor to determine
the number of cycles/strokes completed for a defined maintenance/purge
operation. It is connected to the purge PCB which, in turn, is connected to
the main logic board through J120.
Cap Sensor. This sensor detects whether the print head is in the capped or
open position. It is connected to the purge PCB which, in turn, is connected
to the main logic board through J120.
Cover Sensor (DM400c/DM450c/DM475). This sensor detects the top
cover of the feeder as open or closed. It is connected to the feeder PCB
through J304 for DM400c/DM450c or through J315 on the feeder/WOW for
the DM475.
Feeder Input Sensor FS1 — Hopper (DM400c/DM450c/DM475). This
sensor detects the presence of envelopes in the hopper and is used by
the feeder CPU to start the mail flow process. This sensor is connected to
the feeder PCB through J302 for DM400c/DM450c or through J315 on the
feeder/WOW for the DM475.
Feeder Output Sensor FS2 (DM400c/DM450c/DM475). The system uses
this sensor to ensure that adjacent mail pieces are fed with the specified
pitch into the transport section of the mailing machine. This sensor also detects jams in the paper path. It connects to the feeder PCB through J307 for
DM400c/DM450c or through J315 on the feeder/WOW for the DM475.
3-42
DM300c/DM400c/DM475 Service Manual (SV61801 Rev. D)
3 • Theory Of Operation
3.6 Electronics
Motor Summary
Tape Motor. The tape motor is an integral part of the tape feed unit. See
Figure 3-4A. It feeds tape strips from the feed chute into the tape path of the
mail transport. It is a stepper motor driven by discrete switches on the main
logic board to which it is connected through J117. A 1.0A non-replaceable
fuse protects the motor.
✍
TIP: The DM475 uses
the existing DM400c
autofeeder hardware,
print engine, modem,
USB and serial ports,
meter PSD, and tape
feeder.
✍
TIP: See section 3.10
for specific Feeder/
WOW theory (including sensors) specific to
DM475.
Transport/Line Feed Motor. This is a DC motor that drives the tape/envelope transport as described earlier in this chapter. The transport moves the
media from the entry station (at PS1) to the print station, where it serves as
a line feeder, and, at the completion of printing, through the exit rollers out
to the stacker.
This motor is driven from the 27V rail through an integrated motor driver
mounted on the main logic board. It connects to the main logic board
through connector J115 and is protected by a 2.3A non-replaceable fuse.
Feeder Motor (DM400c/DM450c/DM475). This is a DC motor driven with
discrete devices resident on the feeder PCB. It is identical to the Transport/
Line Motor described above, except that it includes a thermistor device
(connected to J312) to protect the motor from over heating. There is also a
current limit protection circuit associated with this motor drive. The motor is
connected to the feeder PCB through J306 for DM400c/DM450c or through
J309 for the DM475. The feeder motor encoder is attached to this motor.
The motor drive is protected by a 3.2A non-replaceable fuse on the feeder
PCB.
Transport/Line Feed Disc Encoder. The encoder provides the quadrature
(two-channel) signals required for the motion control of the line feed motor.
The encoder has a resolution of 1651 lines (pulses). It connects to the main
logic board through J122.
Feeder Encoder (DM400c/DM450c/DM475). The system uses this encoder to provide motion control for the envelope to ensure that mail pieces feed
at the proper velocity. The feeder encoder sensor output is connected to the
feeder PCB through connector J302 for DM400c/DM450c or through J315
for the DM475.
Carriage Drive Motor. This motor moves the carriage that houses the ink
tank and print head back and forth between the print and the parked (home)
positions. During this process, the print head is wiped and cleaned as it
passes over the surface of the wiper blades mounted on the purge unit. The
carriage drive motor is a stepper type driven by an integrated motor driver
on the main logic board. The motor is connects to the main logic board
through J118 and is protected by a 1.8A non-replaceable fuse.
Purge Motor. This is an integral part of the purge unit and drives the cap,
wiper, print head lock and ink suction pump through a series of cams. See
paragraph 3.5.4 for more details. The purge motor is a stepper type driven
by discrete switches from the main logic board to which it is connected
through J116. The motor drive is protected by a 1.0A non-replaceable fuse.
DM300c/DM400c/DM475 Service Manual (SV61801 Rev. D)
3-43
3 • Theory Of Operation
3.7 Scale
Controller
An optional, integrated platform scale connects to the main logic board
through a serial interface using a DB9 connector. This link provides the
weight information broadcast from the scale to the logic board’s processor
using a 19,200 bit serial stream. The DB9 is connected to the main logic
board through connector J107. The DB9 connector provides 5V power to
the scale device.
3.8 USB
The main logic board has three external USB ports:
•
USB Slave — Type B plug: for PC Interface.
•
USB Host 1 — Type A plug: for peripherals such as a printer or barcode
scanner.
•
USB Host 2 — Type A plug: for peripherals such as a printer or barcode
scanner.
The service representative can check the status of USB devices using the
Service Diagnostics menu. See Chapter 6, Service Menus.
3.9 LEDs
Main Logic Board (all models)
The main logic board has two status LEDS as shown in Figure 3-35.
•
LED 1701 - Flashes fast. Indicates 5V present at the PHC board which
is sealed in the print carriage assembly.
•
LED 1702 - “Heartbeat” lamp flashes once per second. It indicates 5V
present on the main logic board and that the microprocessor is running.
Feeder Board (DM400c/DM450c)
The feeder board for the DM400c/DM450c has a single LED as shown in Figure 3-41A. It indicates the board is receiving 5 volts from the power supply.
Feeder/WOW Board (DM475)
For the DM475, the feeder/WOW board (Figure 3-41B) has four LEDs:
4. LED (red) – debug LED used by Engineering,
3. LED (orange) – indicates processor activity.
2. LED (green) - “Heartbeat” flashing once per second. It indicates that 5V is
present on the main logic board and that the microprocessor is running.
1. LED (dim red) – future use.
3-44
DM300c/DM400c/DM475 Service Manual (SV61801 Rev. D)
3 • Theory Of Operation
3.10 DM475
Feeder/WOW
Theory
The DM475 consists of two physical sections which are mated together at
install:
•
✍
TIP: The DM475c
mailing system uses
the existing DM400c
autofeeder hardware,
print engine, modem,
USB and serial ports,
meter PSD, and tape
feeder.
•
Printer/Base
-
Printer
-
Main Board
-
Mail and Strip Tape Transport system
-
Power Supply
-
User Interface
-
Postal Security Device (PSD)
Feeder/WOW
-
The WOW (Weigh on the Way) base assembly and load cell.
-
The Feeder/WOW main board, which contains all of the functionality of the DM400c/DM450c feeder board, and additionally provides
motion control for the WOW unit. The Feeder/WOW main board processes the data from the load cell and SBR Sensors and communicates directly with the main board using USB.
-
Mail transport system.
WOW Operation
•
The WOW (Weigh on the Way) is an internal; in-line mail classifier option that
automatically weighs and rates mail pieces then transports them to the printer.
•
The system evaluates the weight and shape of a mail piece on its tray
for the postal weight breaks of the user-selected class. After determining
the weight and shape of the mail piece, the appropriate postage value is
sent to the meter.
•
The WOW weighs and rates mail pieces from 1/5 ounce to 16 ounces.
The load cell is a small analog device that is fastened between two thick
aluminum base plates. The aluminum casting that connects to the top of the
load cell is similar to the platform of a weigh scale. The load cell is attached
to the upper and lower castings. The load cell, with its upper and lower castings, is the actual assembly that service replaces if a load cell is faulty.
The rest of the WOW unit is attached to the load cell assembly and includes
the drive, motor, sensors and encoders. The complete WOW unit bolts into
the tub of the DM475 to the right of the feeder unit.
When a Shape-Based Rating (SBR) class is selected by the operator, the
system will use the shape of the media in addition to the weight to determining the price. The SBR components include the width sensors, the
thickness encoder, and the three deck sensors used to measure the media
length (FS1/WS1, WS2, WS3).
WOW units used on other mailing machines (DM800i, DM1000, etc.) have
belts that drive the media from above. The DM475, however, has a new WOW
design that uses a drive belt below the media, and the idler rollers above.
DM300c/DM400c/DM475 Service Manual (SV61801 Rev. D)
3-45
3 • Theory Of Operation
3.10 DM475
Feeder/WOW
Theory
Figure 3-43 Block Diagram (DM475)
3-46
DM300c/DM400c/DM475 Service Manual (SV61801 Rev. D)
3 • Theory Of Operation
3.10 DM475
Feeder/WOW
Theory
Sequence of Operation
1. When the Start key is pressed in WOW Mode or Weigh First Piece Mode,
first the feeder/WOW main board’s motion control processor (MCP) downloads the weight breaks from the G900 main board’s Rate Manager. Then
the WOW is re-zeroed and the width sensors are recalibrated. The WOW
will also pause to be re-zeroed every four minutes during a run.
2. The first mail piece is fed onto the WOW deck and is stopped when the
trail edge has passed FS2/WS1. The actual stopping position is dependant on the mail piece length.
•
For most letter sized pieces – mail that is greater than 9.05” (230
mm) but less than 13.18” (335 mm), the trail edge parking position is
consistently 1.97” (50 mm) from FS2/WS1.
•
For long mail pieces – mail that is greater 13.18” (335 mm) must be
stopped before entering the printer, therefore the trail edge of the
envelope will stop 0.275” (7 mm) from FS2/WS1.
•
For short mail (mail that is less than 9.05” (230 mm) – the trail edge
position is variable.
-
For the first mail piece, the trail edge of the envelope will stop
1.97” (50 mm) from FS2/WS1.
-
For subsequent mail pieces, the trail edge position depends on
the position of the previous mail pieces. The mail will stop when
the trail edge of the previous piece has cleared the end of the
WOW deck and the current piece is past 1.97” (50mm).
3. When the mail piece’s trail edge has reached the correct position (see
above description), the envelope stops transporting momentarily. This
hesitation is very brief, but is long enough to allow vibration to subside
and the weighing algorithm to decipher the weight of the mail piece.
4. The feeder/WOW board’s machine motion controller (MMC), which is
holding the rate structure as a set of weight breaks, reports the correct
weight break and shape dimensions back to the G900 main board’s Rate
Manager where the price is selected and provided to the meter (PSD).
5. The meter deducts the proper dollar amount and sends the print data to
the ink jet printer for meter imprint.
6. The first mail piece must have left the WOW transport before the second crosses the WOW middle sensor (WS2) to ensure that one mail
piece at a time will be on the transport when weighing occurs. The separator/takeaway rollers hold back the next mail piece so that only one
piece at a time is on the WOW to be weighed. The three units; feeder,
WOW and printer are run at different speeds in order to control the gap
between media and insure one piece on the WOW at a time. For example:
Feeder:
23.5 ips (inches/sec), at TAR 2
WOW transport:
23.75 ips
Printer transport:
24
DM300c/DM400c/DM475 Service Manual (SV61801 Rev. D)
ips
3-47
3 • Theory Of Operation
3.10 DM475
Feeder/WOW
Theory
Throughput and Estimated Performance
The DM475 is marketed with the following throughputs for #10 or shorter
envelopes:
•
•
In non-WOW mode, there are two throughput modes for the DM 475:
Throughput Mode
LPM
Default
Low
95
Yes
High
120
No
In WOW mode, the throughput will be defaulted to 80 LPM.
Sensors and Actuators
The following diagram illustrates the spacing of key sensors and rollers:
DM475
WS4
WS5
WS6
Figure 3-44 Sensors and Actuators (DM475)
3-48
DM300c/DM400c/DM475 Service Manual (SV61801 Rev. D)
3 • Theory Of Operation
3.10 DM475 Feeder/WOW Theory
Sensors
Qty
Sensor
Name
Type
Function
1
FS1
Deck
Digital with Mechanical
Flag
Detects an empty feeder deck
1
FS2/WS1
Feeder_Exit
Mail piece gap creation. Stage mail
ahead of WOW module. Used as 1 of 3
sensors to measure mail length
1
WS2
WOW_middle
Used to measure envelope length of
material less than 9.88 inches.
1
WS3
WOW_Exit
Used to measure envelope length greater than 9.88 inches. Also used to detect
envelope exit from weighing transport.
1
S1
Printer Module_
Entrance
Digital Through-Beam
Detects mail entering the printer module.
1
S2
Skew
Digital Through-Beam
Used to detect skew in the DM300c.
Skew sensing is turned off in the DM400
through DM475. Even though there is
no S2 on the DM475, it is still displayed
in Diagnostics as “Clear”.
1
S3
Trip
Digital Through-Beam
Used to Debit funds and generate indica
prior to printing.
1
S4
Feeder Top Cover Digital with Mechanical
Flag
Monitors Feeder top cover position
1
S5
Transport
Digital with Mechanical
Flag
Monitors Printer transport position
1
S6
Printer Top Cover
Digital with Mechanical
Flag
Monitors Printer top cover position
1
WS4
Width Sensor 1
Analog
Service adjustable sensor for first width
breakpoint (physical adjustment)
1
WS5
Width Sensor 2
Analog
Service adjustable sensor for second
width breakpoint (physical adjustment)
WS6
Width Sensor 3
Analog
For future use. Service adjustable
sensor for third width breakpoint. Not
populated . (physical adjustment)
T1
Thickness Sensor Digital - Encoder
Measures Mail thickness
WOW load cell
Weight measurement, input to WOW
1
1
Analog - Load Cell
DM300c/DM400c/DM475 Service Manual (SV61801 Rev. D)
3-49
3 • Theory Of Operation
3.10 DM475
Feeder/WOW
Theory
3-50
Actuators
Qty
Actuator
Name
Function
Type
1
M1
Feeder Motor
and encoder
Feed and separate mail
Brush DC
1
M2
WOW Motor
and encoder
Transport mail pieces
and stop for weighing
when necessary
Brush DC
1
M3
Printer Motor
and encoder
Transport mail at constant speed for printing
Brush DC
1
M4
Tape Feed
Feed tape at constant
speed for printing
Stepper
DM300c/DM400c/DM475 Service Manual (SV61801 Rev. D)
4 • Troubleshooting/Diagnostics
4.1
Introduction
This chapter explains how to troubleshoot the DM300c/DM400c/DM450c/
DM475. It includes troubleshooting charts, and a list of error codes and their
meanings. It also includes instructions for withdrawing the mailing machine
from service.
General Troubleshooting
Chapter 3, Theory of Operation, contains valuable information that can help
you analyze a problem and isolate the cause. A good understanding of machine timing is very helpful in this respect.
Before troubleshooting the equipment, check that the customer's material
falls within the specifications published in Chapter 2 of this manual. You can
often trace frequent feed failures to substandard or out-of-spec material or
to improper feeding techniques on the part of the operator.
If the problem involves poor print quality, run a test print (Menu > Scroll
Down > Maintenance > Printer Maintenance > Print Test Pattern) and evaluate the sample. If the test print is not acceptable, select No, Clean Nozzle
when prompted. This action automatically runs the manual maintenance
functions. Repeat the maintenance procedure if necessary.
Service Diagnostics
The mailing system has a resident diagnostic program accessible through
the service menu (see Chapter 6 - Service Menu). Service representatives
can use the program to query the system for certain information and also to
test specific functions.
Troubleshooting Tables
Tables 4-1 through 4-11 present troubleshooting information for:
•
Power On and Initialization Faults
•
Display Faults
•
Automatic Feeder Faults (DM400c/DM450/DM475)
•
Transport Faults (DM300c)
•
Tape Feeder Faults
•
Printing Faults
•
Carriage Movement Faults
•
Moistener Faults
•
Postage By Phone Errors
•
Modem Faults
•
Integrated Scale Faults
Error Messages
The system can display a number of error messages that describe fault
conditions. Table 4-12 is a general summary of these messages arranged
by their most significant digits. Tables 4-13 through 4-21 list all codes, arranged by class. They may help you to isolate a problem further and provide helpful data should engineering analysis be required.
DM300c/DM400c/DM475 Service Manual (SV61801 Rev. D)
4-1
4 • Troubleshooting/Diagnostics
4.2 Troubleshooting Tables
Table 4-1 Power ON and Initialization Faults
Errors
Checkpoints
Possible Causes/Solutions
Mailing machine
is connected
to power, but
control panel
LED is off, no
initialization, no
display, no printer
sounds.
Does the cord show obvious signs of wear?
Does another cord work?
Replace the power cord.
Is the power cord connected to a functioning
wall outlet?
Check wall outlet. Is it switch-controlled? If
machine is connected to a power strip, try connecting it to a known good wall outlet.
Is main logic board getting power? Check
LEDs.
•
LED 1701: Flashes fast. Indicates 5V present at the PHC board which is sealed in
the print carriage assembly. (See figure
3-35 for main logic board.)
•
LED 1702: “Heartbeat” lamp flashes once
per second. Indicates 5V present on the
main logic board and that the microprocessor is running.
Code 010E
displays.
Defective power supply board. System dead.
Check for 27V (to feeder, transport motor, and
print head) and 5V (to control panel, main
logic). Check wiring to an connection at Main
Logic Board, J125.
System starts to initialize, but hangs. LED is
green. No printer noise (no printer initialization). Screen stuck on “Initializing... Please
Wait...”
Verify that all interlocks are closed. Power supply. Check wiring from PS board to Main Logic
Board, J126.
An error occurred during printer initialization
process. This is a CM/PM initialization timeout.
•
If this occurs during install, check that all
shipping tape has been removed from unit.
•
Unplug power cord from unit and then wall
outlet. Wait three minutes. Plug cord into
unit and then into machine. If this problem occurs every time machine is power
cycled, replace it.
•
Check that ink cartridge cover is closed.
“Printer Fault”
error displays.
Error 2447.
Does Error 2447 display?
The system failed to detect the print carriage.
Check ribbon cable from print head to J127 on
Main Logic Board. Problem could be caused by
bad connection, ribbon cable, print head controller board (sealed in carriage assembly) and
print head.
“System Fault”
error displays.
Error 2554.
Does Error 2554 display? 2304?
The system failed to detect the Postal Security Device (PSD). Communications with PSD
failed. Is PSD present? Check that it is properly
seated and making full contact with board.
2304 is a communication timeout error.
1/2 “Jam Lever
Open” and 2/2
“Clear Transport”
errors display.
4-2
If these errors display when the jam lever is
closed and the transport is clear, the sensor
board may be suspect.
Check sensor board and wiring to Main Logic
Board, J119.
DM300c/DM400c/DM475 Service Manual (SV61801 Rev. D)
4 • Troubleshooting/Diagnostics
4.2 Troubleshooting Tables
Table 4-2 Keyboard and Display Faults
Fault
Checkpoints
Possible Causes/Solutions
Keyboard
failure. Does not
respond.
Wiring from keyboard to J130A. Keyboard
PCB.
Poor connection at keyboard, wiring and connection at Main Logic Board, J130A.
No display.
Machine may be in sleep mode. Is front panel
LED orange?
Press any key to wake unit.
Check display contrast.
Adjust display contrast as required.
Machine not getting power.
Power cord not plugged in. Power cord plugged
into a switched or defective outlet. Try another
wall outlet. If unit is plugged into a power strip,
move the power cord to a functioning wall outlet.
No display, front panel LED off, but print head
initializes at start up.
Check connector J130B (next to J130), and
harness to J130B.
See Table 4-1 for power ON an initialization
faults.
Display does not
change.
Meter appears to be “stuck” on the same display for an extended period of time.
DM300c/DM400c/DM475 Service Manual (SV61801 Rev. D)
Power cycle the meter to reboot and start over.
4-3
4 • Troubleshooting/Diagnostics
4.2 Troubleshooting Tables
Table 4-3 Automatic Feeder Faults (DM400c/DM450c/DM475)
Fault
Checkpoints
Possible Causes/Solutions
Fails to feed.
Is material load properly?
Check that operator is loading material correctly.
Does material fall within published specifications?
Check material specifications.
Is hopper overloaded?
Stack should not exceed 2.5 pounds or 3 inches in height.
Is side guide set too tight?
Check for 1/16 inch clearance between side
guide and stack.
Problem with stack sensor FS1.
Check sensor.
Jam or debris in upstream transport.
Check for jammed material and/or debris in entire paper path.
Upper feeder transport not completely closed.
Check transport.
Operator error,
Incorrect loading technique. Materials out of
specification. Hopper overloaded.
Transport obstructed.
Check for paper fragments and other debris on
the transport.
Problems with retard roller assembly, feed belt
assembly.
Check for proper operation. Check belts and
tires for contamination, glazing, etc.
Inconsistent gap
between pieces.
Sensor and/or timing issues.
Check sensors using service diagnostics. Also
check encoders.
Machine fails
to recognize
automatic feeder.
Wrong power supply Installed.
Verify that the correct power supply is installed.
The DM300c, DM400c/DM450c, and DM475 all
use a different power supply.
Loose connection between Base and Feeder.
Check the communication cables between the
meter and the automatic feeder.
Poor separation.
4-4
DM300c/DM400c/DM475 Service Manual (SV61801 Rev. D)
4 • Troubleshooting/Diagnostics
4.2 Troubleshooting Tables
Table 4-4 Mailing Machine Transport Faults
Fault
Checkpoints
Possible Causes/Solutions
Operator Error.
Operator may be feeding piece improperly.
Instruct operator to position envelope top edge
against rear wall and slide it to right.
Interlocks.
Are all covers and transports closed?
An error message should display if a cover is
open.
Fails to feed
when operator
inserts envelope.
PS1.
Dirty or defective sensor. Check sensor using
service diagnostics. If PS1, PS2 and PS3 all
fail service diagnostics tests, there may be a
problem with sensor junction board or harness
to J122. PS2 will always show as Clear on the
6C00 even though it does not have a PS2 sensor on the board.
Segmented (separator) roller.
Check roller for wear or glazing.
Encoder sensor, encoder problem. The system
initializes normally, however an envelope feeds
partially, no print, and system locks.
Encoder disc, encoder sensor, wiring to J122
on Main Logic Board, poor connection at J122.
Transport drive motor and drive components.
See picture below.
Test using service diagnostics. Also check harness and connection at J115.
Drive belts damaged or improperly tensioned.
Check drive belts and tensioners.
Transport fails to
drive, PS1 okay.
Segmented
Roller
Transport Drive
Belt
Transport
Drive Motor
Transport
Drive Belts and
Tensioners
Pulley
Bearing
Drive Shaft
Lower Transport
Idlers
Pulley
Figure 4-1 Transport Drive
DM300c/DM400c/DM475 Service Manual (SV61801 Rev. D)
4-5
4 • Troubleshooting/Diagnostics
4.2 Troubleshooting Tables
Table 4-4 Mailing Machine Transport Faults (cont’d)
Fault
Checkpoints
Possible Causes/Solutions
Transport fails to
drive, PS1 okay
(continued).
Drive shaft fails to turn. Drive shaft is binding.
Check pulleys. Make sure they are securely
mounted on shaft.
Transport drive belt.
Check belt for proper tracking. Check for wear,
glazing, cracks, etc.
Lower transport problems.
Make sure lower transport locks in operating
position and that idlers contact transport drive
belt. Check that all idlers are correctly positioned and turn freely.
Inconsistent gap
between pieces.
Speed variations in transport.
Check distance encoder function.
Frequent jams.
Debris in transport; envelope thickness out of
spec.
Check transport, clean as required. Maximum
envelope thickness is 3/8 inch.
Frequent skews.
Operator error.
Instruct operator to make sure top edge of mail
piece is against registration wall. Customer
should not hold on to mail as he or she feeds it
onto deck. If oversized mail piece, use a tape
strip.
No printing
occurs.
Envelope blank, no errors.
Check ink cartridge. Perform purge. Clean electrical connections; check electrical connections.
4-6
DM300c/DM400c/DM475 Service Manual (SV61801 Rev. D)
4 • Troubleshooting/Diagnostics
4.2 Troubleshooting Tables
Table 4-5 Tape Feeder Faults
Fault
Checkpoints
Possible Causes/Solutions
Failure to Feed
Tape Strips.
Operator may be loading tapes improperly.
Check that operator is loading tapes properly
and in the correct orientation. See Operator
Guide. Also check that operator is not exceeding hopper capacity (50 to 55 tapes).
Operator may be using substandard material.
Check that tape strips meet PB published
specifications. Tape strips from other sources
are not recommended.
Debris in tape path.
Check tape path for debris and paper fragments. Clean as required.
Possible tape motor failure. Tape fails to feed,
but carriage moves to print position. No error
message appears.
Run a zero stamp. Does tape motor turn when
tape switch is pressed? If not, check motor using service diagnostics. If test fails, check tape
motor harness and connection at J117.
Tape drive roller worn or glazed.
Check roller. Clean or replace as necessary.
Tape pressure plate.
This small plate is spring-loaded and is designed to apply force to the tape stack and
assist in separation. Check spring. Make sure
pressure plate is not binding.
Broken drive gears.
Inspect gear train between tape motor and tape
drive roller.
Encoder sensor.
Suspect the encoder sensor if no tape feeds
and the system locks up. Check connection at
Main Logic Board, J122.
Tape pressure plate may be hung up on bezel.
Make sure pressure plate is not binding.
Last few tapes
fail to feed.
Gear Train
Tape Motor
Tape Drive Roller
Figure 4-2 Tape Drive
DM300c/DM400c/DM475 Service Manual (SV61801 Rev. D)
4-7
4 • Troubleshooting/Diagnostics
4.2 Troubleshooting Tables
Table 4-6 Printing Faults
Errors
Checkpoints
Possible Cause/Solution
No print out of
box.
• In some cases, the print head may dry out or
be cold from shipment. This could result in a
no print condition. Allow the system to warm
up to room temperature.
• Check gold contacts on the print carriage for
ink or other deposits and clean if necessary.
• Check for capping station ink “kiss mark” on
the metal plate of the print head. The “kiss
mark” confirms a good print head to print head
cap seal. There should be an oval shape of
ink on the print head where it seals against
the cap.
• Check for large puddle of ink on the print head
nozzles in the center strip of the metal face of
the print head.
1.
Complete install.
2.
After install is complete, remove ink cartridge and print head.
3.
Make sure tape has been removed from
bottom of print head and tab has been
removed from ink cartridge,
4.
Check that ribbon cable from carriage assembly to J127 is intact and properly connected.
5.
Clean the gold connectors on the side of
the print head with a pencil eraser.
6.
Install the print head and ink cartridge.
7.
Check the capping station. Clean if necessary.
8.
Test print quality. Test and purge procedure is available through either the user
(OPTIONS) or service menu. From the
user menu, press OPTIONS > Scroll down
once > Maintenance > Printer maintenance > Print Test Pattern. See illustration below.
9.
If print quality is poor, perform up to three
“C” purges. Then perform a “D” purge.
Follow steps at right.
Poor print quality:
gaps and voids.
Purge may be required. Test and purge procedure is available through either the user
(OPTIONS) or service menu. From the user
menu, press OPTIONS > Scroll down once >
Maintenance > Printer maintenance > Print Test
Pattern.
NOTE: For a poor print issue that will not clear
with a basic purging, perform the printhead
replacement procedure. With the system
running, open the print head/ink access cover.
Select “Replace Print Head.” Physically remove
the printhead and reinstall it following the
prompts.
GOOD
BAD
Figure 4-3 Print Test Patterns
If the test pattern shows gaps or voids, purge
the printer nozzles and retest. If little or no improvement is noted, you may repeat the purge
up to five times total.
“Ink Tank Fault”
error message.
4-8
Wrong ink cartridge installed. Defective cartridge.
The DM100i cartridge will fit into the
DM300c/400c print carriage but will not work.
Check the cartridge. It sometimes happens
that customers are sent the wrong cartridge.
DM300c/DM400c/DM475 Service Manual (SV61801 Rev. D)
4 • Troubleshooting/Diagnostics
4.2 Troubleshooting Tables
Table 4-6 Printing Faults (cont’d)
Errors
Checkpoints
Possible Cause/Solution
Poor print from
used ink cartridge.
Follow steps at right.
Remove the printhead and check for bent pins.
Pins are normally angled downward.
Make sure printhead is correctly installed.
Check printhead harness and connection at J127.
If purges fail to correct the problem, and the ink
cartridge is not empty, replace the printhead.
If this fails to correct the problem, there may be
a problem with the print head carriage board.
This requires replacement of the print head
carriage assembly.
Print is not clean
and crisp; smearing or spotting
evident. Ink supply is okay.
No print, red or
partial print.
Check to see that the edges of the wiper blade
on the front of the maintenance station are clean.
Also check the “wiper wiper” clipped on the rear
of the print carriage. It can be easily unclipped
and removed for inspect and replacement.
Check the wiper blade for excess ink accumulation. Clean as required. Replace wiper wiper
if necessary. Wiper blade cannot be replaced.
Does a purge correct the problem?
If needed, purge and run a test print.
Is the carriage moving normally so that wiping
occurs?
Check carriage movement and correct any
problems. See table 4-7.
Is the printhead harness properly connected at
J127?
Make sure it is locked in position.
Possible print head controller (PHC) failure.
Check for bent pins. These are behind print
head (see figure) and are angled downward.
Check for bent pins
Figure 4-4 Contact Pins
Partial, streaked
or Incomplete
print.
Check the edges of the opening in the registration plate for ink and paper dust deposits.
Clean as required.
Wiper and/or capping station may be contaminated with excess ink. Purge may be required.
Clean wiper and capping station. Perform a “C”
purge, then a “D” purge.
DM300c/DM400c/DM475 Service Manual (SV61801 Rev. D)
4-9
4 • Troubleshooting/Diagnostics
4.2 Troubleshooting Tables
Table 4-6 Printing Faults (cont’d)
Errors
Checkpoints
Possible Cause/Solution
Customer complains that ink
usage is high.
Ink yield is based on usage. Factors affecting
ink usage are:
How many pieces per day does this customer
run?
• The number of pieces run per day.
Do they run one at a time or run them in
batches?
• Whether the pieces are run in a batch or
separately.
• Performing manual maintenance.
Print head cleaning cycles are performed each
time the head is capped [after the stop button
is pressed or if there is no mail run for 15 seconds], after extended periods of idle time [waking from sleep], and after power up.
Do they ever perform manual print head maintenance?
Is the customer printing ads? This increases
ink usage.
Is the customer printing reports? This increases ink usage.
The more pieces you run per day, the higher
your ink yield. This is because there will be
fewer maintenance cycles per ink cartridge.
If you run the mail in batches rather than one at
a time the ink yield will be higher. This is because when you run in batches there are fewer
print head cleaning cycles per mail piece.
See ink consumption specifications in Chapter
2. 5500 prints per ink cartridge is based on
33 pieces per day “exactly”. Any variation will
change that. Most ink is used for maintenance.
Empty cartridge = 40 grams (technically there
is still some left to insure it does not run dry and
allow air into system). 35 grams is really empty.
4-10
DM300c/DM400c/DM475 Service Manual (SV61801 Rev. D)
4 • Troubleshooting/Diagnostics
4.2 Troubleshooting Tables
Table 4-6 Printing Faults (cont’d)
Errors
Checkpoints
Possible Cause/Solution
Poor print with
new ink cartridge.
Ink Cartridge
1.
How to weigh a print cartridge using an integrated platform scale:
Remove cartridge and tap it upside down
on a desk two times.
2.
Remove print head. Check that tape has
been removed from the ink port on the
bottom of the ink cartridge.
3.
Replace printhead and make sure it is
properly seated. When it snaps into place,
push it up against connectors.
1.
Open cover and select REPLACE INK TANK.
2.
Remove ink cartridge, close latch and then
cover.
3.
Select SEAL ONLY mode.
4.
Press WEIGH/RATE.
4.
Install ink cartridge and run test print.
5.
Place ink cartridge on scale.
5.
6.
Select RATE MAIL ON SCALE.
7.
Note weight of cartridge.
8.
Remove ink cartridge from scale platform
and press CLEAR [BACK].
9.
Select EXIT SEAL ONLY MODE to return
to INSTALL INK TANK.
If print is still poor, weigh the ink cartridge.
If 1.5 oz. or less, the cartridge is empty.
If between 1.6 to 1.9 oz., perform two “B”
purges and run a print test. If 1.9 oz. or
more, perform two “B” purges and run a
test print. If necessary, perform up to five
“C” purges, making test prints between
each one. If this fails to correct problem,
printhead is suspect.
1.
Contact PbP to see if the correct ZIP Code
can be flagged.
2.
If PbP is unable to flag the ZIP Code, transfer the customer to Change of Post Office.
3.
The CPO agent will make the correction
and flag the ZIP Code for change at PbP.
4.
Instruct customer to perform a PbP balance inquiry. The correct ZIP Code will be
downloaded once the mailing system has
made a successful connection to view balances.
1.
Reinstall print head and ink cartridge.
Check for bent pins when you do this.
Make sure cap was taken off printhead
and tape removed from cartridge. Check
that print head is snapped into position.
2.
Reboot.
3.
Check PH ribbon cable and connection at
J127.
NOTE: A full cartridge weighs 2.4 ounces;
an empty one weighs 1.4 ounces.
Wrong ZIP Code
prints.
Print head/ink
tank not detected.
The ZIP Code is downloaded when the mailing
system connects to the PB Data Center during
the installation process. It downloads the ZIP
Code that shows on the customer’s PbP account. Follow steps at right.
Bad connections dealing with print head
Print head itself may be bad
DM300c/DM400c/DM475 Service Manual (SV61801 Rev. D)
If, after trying all of the above there is still no
detection, replace print head.
4-11
4 • Troubleshooting/Diagnostics
4.2 Troubleshooting Tables
Table 4-7 Print Carriage Faults
Errors
Checkpoints
Possible Cause/Solution
PS1 fails to sense envelope or tape lead edge.
Check for debris in transport path. Check PS1
using service diagnostics.
Carriage home sensor.
Sensor is blocked when carriage is in the
home position. Use service diagnostics to
check sensor status. Also check harnesses
from Purge Unit to J116 and J120 on Main
Logic (Controller) Board. Any error messages?
Carriage drive stepper motor.
Check motor using service diagnostics. Also
check harness between motor and J118 on
Main Logic (Controller) Board.
Carriage drive belt.
Inspect belt and pulleys. Check that belt is
centered on pulleys and fully engages loop on
carriage.
Carriage drive rails.
Check that carriage assembly is not binding
on rails. Assembly should move freely.
Purge motor.
If the purge motor fails to turn clockwise with
the carriage assembly in the home position,
the printhead lock and cap will remain up,
preventing movement of the carriage. Test the
purge motor using the service diagnostic routine. Also check the harnesses from the purge
motor to connectors J116 and J120 on the
Main Logic Board.
Error 2443.
And grinding noise.
Indicates carriage motor failure or wiring
problem. System locks when error message
is cleared. See Carriage drive stepper motor
above.
Error 2442.
Printer Fault.
Possible problem with cap motor or sensor
located in purge unit. System may lock when
error is cleared. Use service diagnostics to
check. Also check wiring to Main Logic Board,
J116. In addition, check purge motor and wiring to Main Logic Board, J120.
Print carriage
fails to move from
home to print position.
NOTE: It is normal for the print
head to move
back to the home
position if an
envelope or tape
is not sensed by
PS1 for 15 seconds.
4-12
DM300c/DM400c/DM475 Service Manual (SV61801 Rev. D)
4 • Troubleshooting/Diagnostics
4.2 Troubleshooting Tables
Table 4-8 Moistener Faults
Problem
Possible Cause
Solution
Envelopes don’t
seal.
Incorrect feeding.
Check that operator is sliding envelope flap under blue
edge of feed deck. If this is not done, moistener can’t wet
flap.
Low sealant level.
Check sight glass on left side of moistener tank. If level is
low, add E-Z Seal® until it reaches bottom of fill hole.
Dry moistener brush.
Try wetting moistener brush. If brush drys out quickly, replace moistener wick.
Dirty moistener brush.
Remove brush, clean in plain water and rinse thoroughly.
Worn moistener brush.
Replace moistener brush.
Table 4-9 Miscellaneous Faults
Problems
Checkpoints
Possible Cause/Solutions
AM or PM is
wrong.
Drift.
If close to noon or midnight, go to Correct Drift
and attempt to cross over to Am or PM.
Lock Code
Customer forgot
meter lock code.
Go to Enter Lock code screen. Type in
6946-Refill. This will take you to the service
mode. Press Clear. This takes you to the main
menu. Lock Code will override Supervisor
Code.
“Ink Tank Access
Cover Open”.
Access cover.
Close access cover. If this doesn’t correct
problem, check sensor flag. Sensor must be
blocked when cover is closed. If flag is okay,
check wiring and connection at Main Logic
Board, J121.
System is noisy.
Lubrication may be required.
Use Teflon/silicone grease on feeder gear
shafts if there is noise. Also use on white
tension idler rollers if they make a high
squealing noise.
Meter Hangs.
DM300c/DM400c/DM475 Service Manual (SV61801 Rev. D)
Laser printer has lost its enumeration.
4-13
4 • Troubleshooting/Diagnostics
4.2 Troubleshooting Tables
Table 4-10 Modem/Connection Faults
Problem
Possible Cause
Solution
Machine fails
to connect to
Postage By
Phone Data
Center: No dial
tone.
System not connected to working
analog phone line.
1.
Make sure the phone cord is firmly connected to a
single line analog phone jack. The term analog phone
line refers to a RJ11C or RJ11W compatible (single
line) telephone wall plug typically used for a residential
phone, analog dial-up computer modem or facsimile
(fax) machine.
2.
Insure the dialing prefix is set properly if needed.
3.
Verify whether a delay (pause) is required in the dialing
sequence. For example, a pause may be required after
the prefix.
4.
Verify the correct PB Phone # is entered. The toll free
number is 1-866-297-8025. You can also try using a
local number. Most of the time a local number will get a
better connection. See Finding a Local Access Number
below.
5.
There may be a problem with the meter serial number not being recognized by PBP. Are there any error
codes displayed? Check the Error Log before and after
attempting the connection.
6.
There may be telephone line noise or attenuation
causing the line to drop. Trying a different phone number may help. See Finding a Local Access Number
below.
7.
Connect an analog telephone to the line and verify that
you can dial out and hear clearly on the line.
8.
If a T-Jack (line splitter) is used, try removing it and
connect directly to the wall jack.
9.
If the customer is using DSL, try connecting through
the DSL Analog/Digital Filter while no one is on the
internet.
10. Could not connect because of V.42 connect time out.
This can happen with satellite transmissions. Slowing down the modem often resolves this. Please see
Changing the Modem Speed, next page.
Finding a local access number
Go to : http://help.attbusiness.net
On the left side of the screen select the “Access Numbers”
link.
Type the area code in the “Area Code” field and then select
“X2/V.90” under the pull down menu for the “Line Type”.
Click on “Get Numbers”. Choose a local number and program it into the unit.
4-14
DM300c/DM400c/DM475 Service Manual (SV61801 Rev. D)
4 • Troubleshooting/Diagnostics
4.2 Troubleshooting Tables
Table 4-10 Modem/Connection Faults (cont’d)
Problem
Possible Cause
Solution
Machine fails
to connect tp
Postage By
Phone Data
Center: No dial
tone.
Changing the modem speed:
Currently all Meters are built with a default Modem Initialization String setting, as follows:
ATE0&K0M1X4W2S9=50S7=90^M
Using the following Key sequence will take you to the
screen which allows you to edit this string:
Menu > Data Center Options > Phone Settings > Modem
String
Select Modem String
Select Continue
Select Edit Options
Then, using the Move Cursor Left and Move Cursor Right
soft Keys, edit the string so it looks like:
ATE0&K0M1X4W2S9=50S7=90+MS=V34^M
Add the ‘+MS=V34’ to the string; it MUST be placed before
the ‘^M’
NOTE: Special characters like + = ^ can be found on the
QWERTY Keyboard. For + use G, for = use A, for ^ use B.
Once the string looks correct then:
Select OK
Select Accept
Select Done
Modem setup incorrect.
Check that modem setup is correct. Go to OPTIONS and
scroll to CONNECT-DATA CENTER. Is tone/pulse setting
correct? Is a dial prefix required to get an outside line? Is
PbP number correct? Other modem parameters OK?
Faulty modem.
Check that modem is properly seated on main logic board
and that connection between J2 on modem board and J109
on main logic board is sound.
DM300c/DM400c/DM475 Service Manual (SV61801 Rev. D)
4-15
4 • Troubleshooting/Diagnostics
4.2 Troubleshooting Tables
Table 4-11 Integrated Scale Faults
Problem
Possible Cause
Solution
Scale problems at
time of install.
The scale line is not showing or
an error code (e.g., 1103, 11F6)
displays
Put in for a download.
Try steps at right.
1.
Try uploads and downloads.
Scale problems
after install.
If the scale has been working and
the scale line shows but nothing
else, or the scale line shows with
LB and OZ, but no zeroes, try
steps at right.
2.
Push down hard on the scale, then reboot.
3.
Remove the rubber feet on the scale, push down on
scale and reboot.
4.
Check that RS232 connector and pins are okay.
5.
Check harness from DB-9 connector to J107 on Main
Logic (Controller).
6.
If this fails, place in the Print Head Queue.
7.
Check DLA. If the scale feature dowloaded, replace
the scale.
8.
If no scale feature downloaded, place in the print head
queue.
1.
Push down hard on the scale, then reboot.
2.
Remove the rubber feet on the scale, push down on
scale and reboot.
3.
Check that RS232 connector and pins are okay.
4.
Check harness from DB-9 connector to J107 on Main
Logic (Controller).
5.
If this fails, replace the scale but DO NOT put into Print
Head queue.
Weight over capacity.
User attempted to weight an item
that exceeds the maximum capacity of the platform they ordered.
See error 1103 if this is not the case. If these steps don’t
work, follow the local process to have the DLA reset. Advise the customer to perform a download in 24 hours.
Rate manager not
initialized.
Check the order to verify the weight
capacity was ordered.
Follow the local process to have the DLA reset. Advise the
customer to perform a download in 24 hours.
Scale does not
function; unable
to rate mail on
scale.
Is scale seated properly?
Reseat scale. Is serial port set to “Attached Scale?” Check
serial port wiring to Main Logic Board, J107. Is rating feature enabled?
Auto scale function does not
work.
Auto scale may be turned off. Scale
not set up properly.
Enter menu and make sure auto scale function is ON.
4-16
DM300c/DM400c/DM475 Service Manual (SV61801 Rev. D)
4 • Troubleshooting/Diagnostics
4.3 Error
Codes
About the Codes
The mailing systems may display an error code when a fault occurs. These
codes are distinct from operator error messages and prompts that routinely
display during normal operation. Error codes are defined in the tables on
the following pages. Table 4-12 lists and explains some of the more common error codes/messages.
Code Listing
Tables 4-13 through 4-21 list all codes, arranged by class. They may help
you to isolate a problem further and provide helpful data should engineering
analysis be required.
DM300c/DM400c/DM475 Service Manual (SV61801 Rev. D)
4-17
4 • Troubleshooting/Diagnostics
4.3 Error Codes
Table 4-12 Common Error Codes/Messages
Error Code
(Type)
010E
Message
Description/Causes
Resolution
Error occurred while trying to
initialize printer.
If error occurs during install, check that all
shipping tape has been removed from the
system.
Remove the power cord. Wait three minutes and reconnect power.
Make sure the ink cartridge cover is
closed.
0112
Ink carriage motor timing area.
Usually occurs along with
2443 error when the system is
rebooted.
See instructions for error 2443.
0802
The print carriage is not moving correctly or is jammed.
This may also happen during
refills.
Reboot system. If this fails to clear the error, remove power for three minutes.
1103
Weight capacity was not down- Check the order to verify that weight caloaded.
pacity was ordered. Follow local process
to have DLA reset. Advise customer to
perform download after 4 hours.
11F6
The system is not processing
rates correctly.
Check the order to verify that appropriate
rating feature was ordered. Follow local
process to have DLA reset. Advise customer to perform download after 4 hours.
1300 (Software
Lockup)
• Funds key fails to respond
Cycle power to recover
• Resume printing, displayed in
seal only mode
• Recoverable lockup
1400 (Stacker)
Nesting
Cycle power to recover
1500 (Software
Error)
• After printer maintenance,
machine did not restart but
pieces still in transport
Cycle power to recover
• System stop transport runaway
• False jam lever open cover
message
• Screen not refreshing for new
weight
• System stops when low ink
msg is displayed
1600
• Run away transport
Cycle power if necessary
• Recoverable lockup
2000
Unknown
Cycle power to recover
2003 and 2004
Startup error.
Reboot system.
4-18
DM300c/DM400c/DM475 Service Manual (SV61801 Rev. D)
4 • Troubleshooting/Diagnostics
4.3 Error Codes
Table 4-12 Common Error Codes/Messages (cont’d)
Error Code
(Type)
200C
Message
Description/Causes
Resolution
Real time clock error — out of
range.
If this error occurs during out-of-box
setup, reboot the system. If the error
happens again, reboot, press continue
to bypass the current clock time and complete the install process. Change clock
time after installation is complete.
If this occurs after setup, correct the
time via the Menu Key, Setup>Time &
TImeouts>Correct Time Drift.
200D
Bad status message received
from PbP.
Confirm the system is installed on PbP
and try to reconnect. Also confirm with
PbP that funds are available for the customer.
220C
Time out error.
Reboot system.
220C
Invalid meter graphics were
detected.
Try rebooting.
23xx
PSOC error.
Reboot system.
2305
Error displayed when the LAN
network was connected
Cycle power to recover
2400
Printer fault after changing ink
cart
Cycle power to recover
2412
Tape ran out and last tape did
not print.
Refill tape.
2442
Reboot. Leave system off for a minimum
of one minute.
2443
Ink carriage motor or sensor
error. Grinding noise may also
be heard.
Check the capping station area to see if
the capping station is broken or loose. If
loose, try snapping it back into position. If
this fails, replace purge unit.
2482 or 248B
No Paper.
Operator inserted a mail piece then pulled
it back out and then put it in again during
a batch.
2483
Mail too short. Mail skew in
transport
Verify mail piece and rerun through machine if necessary
2484 (Paper error)
1st piece hanging out of printer Verify mail piece and rerun through ma- print OK - 2nd piece following chine if necessary
with small gap at printer
DM300c/DM400c/DM475 Service Manual (SV61801 Rev. D)
4-19
4 • Troubleshooting/Diagnostics
4.3 Error Codes
Table 4-12 Common Error Codes/Messages (cont’d)
Error Code
(Type)
2485 (No paper
error)
Message
Description/Causes
Resolution
• Piece jammed before printer
Verify mail piece and rerun through machine if necessary.
• No print, funds not debited
• Jam at transport sealer roller
• False jam lever open cover
message
2494
Ink tank communication error.
This error usually occurs when
a new ink cartridge is installed.
Remove the ink cartridge and reinstall it.
If this clears the error, install a new ink
cartridge. If not, reboot.
24A3
Print head not at correct temperature.
Is the system located near a heater, hot
air vent or unusually warm area? Move
to cooler area. Try rebooting to clear message. If unable to clear message, print
head is suspect.
24A4 or 24A5
4-20
Reboot. Leave system off for a minimum
of one minute. A replacement print head
will not resolve these errors.
DM300c/DM400c/DM475 Service Manual (SV61801 Rev. D)
4 • Troubleshooting/Diagnostics
4.3 Error Codes
Table 4-12 Common Error Codes/Messages (cont’d)
Error Code
(Type)
Message
Description/Causes
Resolution
248B (Jam)
Mail Jammed
Stall/Jam in printer.
Clear jam in printer area.
Clear Printer Transport.
- If stall/jam is before S3, stops
with piece in printer. No postage will be printed onto the
envelope/tape.
- If stall/jam is after S3, system
may stop with piece in printer
or eject the piece. Postage or
partial postage will be printed
onto the envelope/tape. Funds
will likely be lost. It indicates
that there is a stall/ jam in the
printer transport
The system will not allow user
to start printing until transport
is cleared.
• Piece hanging out of printer
- no print
• Piece jammed before printer
• Transport clear - no observable jam
• Piece hanging out of printer print OK
• Piece stopped before printer
- no jam
• Multiple pieces overlapped
together
• Piece torn - damaged
• Mail piece exit with no print,
no loss of funds
• Fail to feed, no jam
• No apparent jam
• Piece hanging at printer, no
jam, print OK
• No print, funds not debited
• Mail piece stopped, lead
edge at WOW roller 3
• Jam at transport sealer roller
248B (Jam)
Tape Jammed
Jam in tape feeder
Clear jam.
Clear Printer Transport.
DM300c/DM400c/DM475 Service Manual (SV61801 Rev. D)
4-21
4 • Troubleshooting/Diagnostics
4.3 Error Codes
Table 4-12 Common Error Codes/Messages (cont’d)
Error Code
(Type)
Message
Description/Causes
Resolution
Loose connection of the iButton.
Unplug the machine, remove cover, and
remove iButton. Use a small screwdriver
to bend the inner contact out and the outer
contact in so the iButton has full contact on
both sides. Replace iButton.
2509 (System
Fault)
No print, funds not debited
Cycle power to recover
2544, 2443
Errors during bootup - The
PSOC is communicating with
the PSD and it is taking too
long.
Leave error up for two minutes, then reboot.
2544/220C
Communication with the vault
failed.
Reboot the system for 30 seconds. If this
fails, reboot the system for three minutes.
This should clear the error.
25xx OR
“Manufacturing
Mode”
(System Fault)
Withdraw the system from service. You
will not be able to remove funds.
2546
Reboot to clear if softkey does not work.
2552 (System
Fault)
• Meter ran out of funds during
a batch
• Add postage to meter
• Cycle power to recover
• Mail piece exit with no print,
no loss of funds
• No print, funds not debited
• No print, funds debited
3000 (Fail to
Feed)
Fail to feed, no jam tray 1/2 full Clear jam.
3500 (Jam in
sealer)
Jam in sealer in Tar2
372A (Jam feeder error)
Mail Jammed
Clear Feeder Transport.
Clear jam.
Stall/Jam at feeder sensor
Clear jam.
(FS2). Error occurs when FS2
has been blocked too long.
User Interface will not allow error to be cleared until operator
clears sensor.
• Fail to feed, no jam
• Piece jammed at separator
• Piece jammed at stripper
blade
• No apparent jam
• Fail to feed, no jam tray 1/2
full
• Piece hanging at printer, no
jam, print OK
372A
4-22
Feeder error with C4 envelope. Clear jam.
DM300c/DM400c/DM475 Service Manual (SV61801 Rev. D)
4 • Troubleshooting/Diagnostics
4.3 Error Codes
Table 4-12 Common Error Codes/Messages (cont’d)
Error Code
(Type)
Message
Description/Causes
372D (Jam feeder error)
Mail Jammed
Stall/Jam before feeder sensor Clear jam.
FS2. Timeout occurs with material on feeder deck (at FS1)
and material has not made it to
FS2/WS1. Operator can press
soft key to continue or can
press Clear to go the home
screen and press start from
the home screen. System will
allow start up without material
being cleared.
Clear Feeder Transport.
Resolution
• Fail to feed, no jam
• Piece jammed at separator
• Piece jammed at stripper
blade
• No apparent jam
• Fail to feed, no jam, tray 1/2
full
• Piece hanging at printer, no
jam, print OK
372E (Feeder/
WOW error)
Mail Jammed
Stall/Jam at middle wow sensor (WS2 blocked). Error
Clear WOW Transport.
occurs when WS2 has been
blocked too long.
Clear jam.
In non-WOW modes, allows
system to start again if material is not cleared.
In WOW modes, not allows
system to restart if WOW is not
cleared. If WS2 is not blocked,
the WOW will likely throw a rezero error if material is still on
the WOW transport.
DM300c/DM400c/DM475 Service Manual (SV61801 Rev. D)
4-23
4 • Troubleshooting/Diagnostics
4.3 Error Codes
Table 4-12 Common Error Codes/Messages (cont’d)
Error Code
(Type)
Message
372F (Feeder/
WOW error)
Mail Jammed
Description/Causes
Stall/Jam at WOW exit sensor (WS3). Error occurs when
Clear WOW Transport.
WS3 has been blocked too
long.
Resolution
Clear jam.
- In Non-WOW modes, will
allow system to start again if
material is not cleared.
- In WOW mode, error code
37B6 can occur instead of
372F System may stage a
piece at FS2/WS1. System will
not allow system to restart if
WOW is not cleared (WS2 or
WS3 blocked).
When material is cleared, operator can press resume. System will start processing piece
at FS2/WS1.
373E (Stream
feed)
WOW Error
378E (Feeder/
WOW error)
WOW Error
4-24
• Streamfeed
Clear jam.
Clear WOW Transport. • Dimension rating error displayed
Clear jam.
Clear WOW Transport.
DM300c/DM400c/DM475 Service Manual (SV61801 Rev. D)
4 • Troubleshooting/Diagnostics
4.3 Error Codes
Table 4-12 Common Error Codes/Messages (cont’d)
Error Code
(Type)
Message
Description/Causes
Resolution
37A2 (Feeder
Fault)
Feeder-WOW Cover
Open
Piece hanging at printer, no
jam, print OK. Stops immediately when system detects
cover open in the feeder/
WOW.
Clear jam.
If in a Non-WOW mode:
If operator closes the cover:
- If printer is clear of material,
allow system to start.
- Process material in WOW
and feeder modules.
If cover remains open, message remains.
If in WOW-mode:
If operator closes the cover:
- If WOW and printer are
clear of material, it allows
system to start. Process material in feeder module.
- If either the WOW and
printer have material, it
blocks the user from starting
until material is cleared.
If cover remains open, message remains.
37AC (Feeder
Error)
WOW Error
• Mail skew in transport
Clear jam.
Clear WOW Transport. • Fail to feed, no jam
• Cycle power to recover
• Mail piece stopped, lead
edge at WOW roller 3
• Tar2
• UIC error MC correct
• Jam at WOW entrance to
upper frame
37AD (Feeder
error)
WOW Error
37AF (WOW
error)
Mailpiece Too Heavy
37B0 (WOW
error)
WOW Error
Clear jam.
Clear WOW Transport.
Clear jam.
Clear WOW Transport.
Clear jam.
Clear WOW Transport.
DM300c/DM400c/DM475 Service Manual (SV61801 Rev. D)
4-25
4 • Troubleshooting/Diagnostics
4.3 Error Codes
Table 4-12 Common Error Codes/Messages (cont’d)
Error Code
(Type)
Message
37B1 (WOW
error)
WOW Error
37B2 (WOW
error)
WOW Calibration
Error
Description/Causes
Resolution
Clear jam.
Clear WOW Transport.
Recalibrate WOW. See section
Call for Service
37B3 (WOW
error)
WOW Re-zero Error
37B4 (WOW
error)
WOW Re-zero Error
Clear jam.
Clear WOW Transport.
Re-zero error in WOW mode
Clear jam.
37B6
Error on DM400c. Could happen when transport is opened.
Clear envelopes from paper path and
reboot.
37B6 (Feeder
fault)
• Unknown
Clear jam.
Clear WOW Transport.
• Piece jammed before printer
• Jam on printer frame
• Piece hanging at printer, no
jam, print OK
• Nothing in transport
• Cycle power to recover
• Jam at transport sealer roller
• When stop key is pressed
“37B6” is displayed
37B8
Feeder not enumeration in a
timely fashion
3800 (Stream
feed)
• Unknown
4000
• Unknown
Clear jam.
• Streamfeed
Clear jam.
• Jam on printer frame
4500
• Unknown
Clear jam.
• Piece jammed at stripper
blade
4600
• Unknown
• Noise heard in WOW (clicking)
4-26
DM300c/DM400c/DM475 Service Manual (SV61801 Rev. D)
4 • Troubleshooting/Diagnostics
4.3 Error Codes
Table 4-12 Common Error Codes/Messages (cont’d)
Error Code
(Type)
DE00
Message
Description/Causes
Resolution
When trying to connect with
the Data Center, either PbP
is not set up to communicate
with the meter or there is some
other type of network problem.
1. Confirm the meter is installed at PbP,
that the customer has not reached his or
her credit limit, and that there are funds
available to download.
2. If PbP is okay, there may be a network
communication problem.
3. Make sure the meter is installed on the
customer’s account.
4. Make sure the customer is not attempting to use a credit card.
5. Reboot the system for 30 seconds. If
tis fails, reboot the system for three minutes.
6. If the meter was installed at PbP, have
the customer change to the local AT&T
number and attempt to connect again.
7. You must reboot after every DE00 error.
DE06 or DE14
Attempt to connect to Postage
By Phone was unsuccessful.
DE1D
Check PbP for any flags that may be on
the account or any budgets listed for the
customer’s refill amount. Once the flag or
budget is found, proceed accordingly.
Reboot to resolve.
EMD
The meter can’t confirm that its Withdraw the system from service. If
memory is working.
funds are in the meter, flag as QAR
(Question of Accurate Registration).
Invalid User ID/
Password
Usually Occurs during install.
1. Press CLEAR.
2. Reboot for 30 seconds.
3. If the display returns to ENTER
AMOUNT TO ADD TO METER, press
CLEAR.
4. Select RETURN TO START to begin
the install over again.
DM300c/DM400c/DM475 Service Manual (SV61801 Rev. D)
4-27
4 • Troubleshooting/Diagnostics
4.3 Error Codes
Table 4-12 Common Error Codes/Messages (cont’d)
Error Code
(Type)
Message
Description/Causes
Link Negotiation
Failed
Resolution
Check that system is connected to an
analog line. Try using 1-800-590-4857,
1-866-297-8025 or a local access number.
1. Reboot system.
2. Press CLEAR when display prompts:
DO YOU NEED TO ENTER A NUMBER
TO REACH AN OUTSIDE LINE?
3. Select QUIT INSTALL and YES/ENTER
to confirm. Display prompts: NOT AUTHORIZED.
4. Press OPTIONS.
5. Press PAGE DOWN (SCROLL) two
times.
6. Select Connect — Data Center.
7. Select Phone Parameters.
8. Select Change PB Phone Number.
9. Press YES.
10. Enter the alternate phone number an
select OK.
11. Reboot system. Display prompts: DO
YOU NEED TO ENTER A NUMBER TO
REACH AN OUTSIDE LINE?
12. Retry the connection again.
Location Code
Required
Location code not installed
during setup.
Low Sector Error
Reboot.
Meter not Authorized Message
Same as Link Negotiation
Failed error.
No Dial Tone
See Table 4-10.
No Print on Envelope
• Meter ran out of funds during
a batch
• Side guide not set to proper
gap, mail piece skewed and
missed print sensor
• Stream feed, mail piece underneath not printed on
• WOW registration wall not
aligned with feeder wall
Print Head/Ink
Tank not Detected
See Table 4-6.
Rate Manager Not
Initialized
See Table 4-11.
4-28
Access the proper selection under Weigh/
Rate to enter the scale location code (refer to installation document if need be)
See table entry above.
• Add postage to meter
• Adjust side guide per User Guide
• Fan and shingle mail before feeding
• Perform feeder/WOW registration wall
alignment (section 5.56)
DM300c/DM400c/DM475 Service Manual (SV61801 Rev. D)
4 • Troubleshooting/Diagnostics
4.3 Error Codes
Table 4-12 Common Error Codes/Messages (cont’d)
Error Code
(Type)
Message
(SBR Error)
SBR Error Mailpiece
Too
Description/Causes
Resolution
Clear jam. Run proper size material for
WOW modes.
...Wide
...Long
...Short
...Thick
...Thin
...Light
Clear WOW Transport.
(SBR Error)
Mailpiece Too Heavy
Stops with piece in WOW
transport. Reports WOW piece
Clear WOW Transport.
too heavy error. The system
will not allow start until piece
cleared from WOW transport.
Clear jam. Run proper size material for
WOW modes.
When piece from WOW is
cleared, allows user to restart
with material upstream of
WOW.
(SBR Error)
SBR – Piece too big for class
with auto rate turned off. Stops
Clear WOW Transport. with piece in WOW transport.
Reports ‘SBR piece too big
for class’ error. The system
will not allow start until piece
cleared from WOW transport.
SBR piece too big for
class
Clear jam. Run proper size material for
WOW modes.
When piece from WOW is
cleared, allow user to restart
with material upstream of
WOW.
Weight Over Capacity
See Table 4-11.
DM300c/DM400c/DM475 Service Manual (SV61801 Rev. D)
4-29
4 • Troubleshooting/Diagnostics
4.3 Error Codes
Table 4-13 iButton® PSD Error Codes (20xx)
These errors are reported by the iButton® UIC when the PSD returns an error.
Error
Description
2000
IPSD State detected - No problem
2001
IPSD Packet detected - No problem
2002
Unknown Error
2003
Sent invalid message for the IPSD’s state.
2004
Authorization attempted with wrong Public Key Data
2005
PVD mgs received with ascending/descending register values that don’t match the PSD values.
2006
Get Random request out of range (max is 119)
2007
Wrong Lc, msgType, OR offset or length in key, certificate or hash data. Can also be returned by RunAlgorithm
2008
MasterErase, challenge doesn’t match.
2009
Invalid country
200A
From Initialize msg, if Ind.serial num is not the right size for the country. May also check for ASCII chars,
etc.
200B
Provider DESMAC is not valid. Initialize msg.
200C
GMTOffset is not within range. +/- 17 hours.
200D
Invalid Data Center Status
200E
PCN, PBI_SN, or Indicia SN doesn’t match.
200F
Login Hash doesn’t match. A new login challenge will need to be retrieved.
2010
Encrypted challenge doesn’t match. A new challenge will need to be retrieved.
2011
Descending register will exceed $1million, if message processed.
2012
Sum of AR and DR will exceed $1billion.
2013
From createIndicium or precreateIndicium, ascending register will be > Max ascending register
2014
IPSD cannot verify signature of message.
2015
(pre)Create Indicium error: maildate is beyond watchdog time, before backdate limit, or beyond date advance limit.
2016
(pre)Create Indicium error: postage < Min or postage > max
2017
(pre)Create Indicium error: postage > descending register value.
2018
When MasterErase attempted, but there are still funds in the PSD.
2019
Audit status was not 0x03e8
201A
Failed to find USPS Indicia
201B
Failed to find French Indicia
201C
Failed to find Italian Indicia
201D
10-byte ASCII combo failed (uses keypad refill key).
201E
10-byte ASCII combo failed (uses keypad withdrawal key).
201F
Date of Mailing OR current date is later than Watchdog Time, createIndicium or commit msg.
2020
IPSD is in the tampered state and must be returned to Dallas.
2021
Failure in either commitTransaction or CreateIndicium
4-30
DM300c/DM400c/DM475 Service Manual (SV61801 Rev. D)
4 • Troubleshooting/Diagnostics
4.3 Error Codes
Table 4-13 iButton® PSD Error Codes (20xx) (cont’d)
Error
Description
2022
From Get PSD KeyData, (or from Gen PVD or PVR or Precompute R)
2023
French: KMA Key loaded or createIndicium attempted before KFAB_ma Key.
2024
A PVD refill has been attempted on a PSD configured for Keypad Refill only.
2025
The requested function is not permitted for the indiciatype set in the PSD
2026
The key being loaded is not valid for the Indicia Type set in the PSD, or the revision of the encrypting key
does not match the key in the PSD (Germany only)
2027
A Finalizing Frank command must be performed prior to a German Postage Value Download
2028
Germany indicia creation failure
2029
Canada DSA indicia creation failure
202A
The PSD has been explicitly disabled by the Infrastructure
202B
The APDU input value for INS is not supported
202C
The APDU input value for CLA is not supported
202D
More than 5 minutes has elapsed since get challenge retrieved
202E
German specific, a Generate Keys message was received but the key has already been generated.
202F
There is no provider key loaded, cannot verify the signature
2030
German specific, the (provider) key is already loaded, cannot replace
2031
The ECDSA self-tests failed
2032
The current date exceeds the Supplier Key Expiry date
2033
The HMAC Key was not loaded and a Canadian Create Indicium was attempted
2034
The postage value in the flex debit input header does not match the value in the data area
2035
The RandomNumberGenerator watch detected a suspicious repeat.
Table 4-14 iButton® PSD Error Codes (21xx)
These errors are reported by the iButton® UIC when the PSD returns a self test error.
Error
Description
2100
IPSD OK
2101
IPSD self-tests failed.
2102
IPSD CRC self-tests failed.
2103
IPSD Ring self-tests failed.
2104
IPSD Ring self-tests failed.
2105
IPSD Ring self-tests failed.
2106
IPSD Ring self-tests failed.
2107
IPSD Ring self-tests failed.
2108
IPSD Ring self-tests failed.
2109
IPSD SHA1 self-tests failed.
210A
IPSD DES self-tests failed.
210B
IPSD DSA self-tests failed.
210C
IPSD ECDSA self-tests failed.
210D
IPSD SHA1MAC self-tests failed.
DM300c/DM400c/DM475 Service Manual (SV61801 Rev. D)
4-31
4 • Troubleshooting/Diagnostics
4.3 Error Codes
Table 4-15 Image Generator Errors (22xx)
This class of errors is reported by the UIC when there are image generator errors.
Error
Description
2201
Font, graphic, barcode, or text ad component had wrong schema version
2202
Too many “indicia” components in the region map OR too many “town circle” components in the region map(s).
2203
Wrong state to do the requested operation
2204
Someone requested a change in the date duck state when there is no date field
2205
Someone requested a change in the EB duck state when there is no Entgelt Bezahlt
2206
Someone requested a change in the PIN duck state when there is no PIN field
2207
Someone requested a change in the TL/TC duck state when there is no town line field and no town circle
2208
The region maps weren’t numbered consecutively OR the id of the first region map wasn’t 0 (zero) OR the region map didn’t contain an indicia component or a permit component or a tax graphic component or a date/time
component OR the region map had both a normal/low indicia component and a leading/lagging indicia component OR the region map had both a normal indicia component and a low value indicia component OR the region
map had a combinations of indicia and/or permit and/or tax graphic and/or date/time components
2209
Someone tried to set the indicia type to “low” when there is no low value indicia graphic component
220A
IG_Reload was called. Now IG_LoadIndicia, IG_LoadPermit, IG_LoadTaxGraphic, IG_LoadAdInscr or IG_LoadDateTime must be called before calling one of the “duck” functions or IG_LoadStaticVCRs or IG_LoadVariableVCRs. Similarly IG_LoadReport must be called before IG_LoadNextReportPage.
220B
Region map contained an invalid component type
220C
Someone called IG_LoadIndicia or IG_LoadAdInscr when there is no indicia region map
220D
Someone called IG_LoadPermit when there is no permit region map
220E
Someone called IG_LoadTaxGraphic when there is no tax graphic region map
220F
Someone called IG_LoadIndicia when there is no indicia type selected
2210
Someone called IG_LoadPermit when there is no permit selected
2211
The blob was missing data for a set of VCRs OR the name strings was missing from the TC graphic and it’s
needed
2212
The data for a graphic component was missing from the component structure given to IG_Powerup or IG_Reload or IG_SetIndiciaType
2213
Font used by a text ad is missing OR font used by one or more VCRs is missing OR 1D barcode font is missing
2214
A region’s or VCR’s starting point (column or row) and/or ending point (column or row) isn’t within the print area
2215
The width and/or height of a graphic or font is zero OR the max width and/or max height of a region is zero OR
the width/height of a graphic is greater than the max width/height of the region that the graphic goes in
2216
The address of the graphic or font character is zero OR the size of the graphic or font character is zero
2217
The compressed data had a command byte with a byte count of zero
2218
When the image data is decompressed, the graphic is bigger than the given height and width
2219
The number of VCRs defined in the register groups doesn’t match the number of VCR location records OR too
many VCRs have been defined
221A
A register group or text ad line or 1D barcode field has an unknown justification value.
221B
A register group has a field size that is too big OR the number of VCR definitions for a graphic doesn’t match the
sum of all the register field lengths for the graphic OR the total number of VCRs for a region map is more than
the max allowed.
4-32
DM300c/DM400c/DM475 Service Manual (SV61801 Rev. D)
4 • Troubleshooting/Diagnostics
4.3 Error Codes
Table 4-15 Image Generator Errors (22xx) (cont’d)
Error
Description
221C
The text ad works out to be wider than the ad region
221D
The text ad works out to be taller than the ad region
221E
The ad area doesn’t have any space except for the required border around the text ad
221F
One of the text ad lines has a font ID that isn’t allowed to be used for text ads
2220
Something failed previously in the image generator. It won’t work properly until IG_Powerup is called again
2221
Trying to print just an ad and/or an inscription, BUT no ad and no inscription have been selected –OR- there is
no ad area and no inscription area in the indicia region map –OR- combination of the two previous conditions
(e.g., only an ad selected, but no ad area in the region map)
2222
Someone requested a change in the printed batch count duck state when there is no printed batch count field
2223
Someone requested a change in the text entry duck state when there is no text entry region
2224
Someone called IG_LoadDateTime when there is no date/time region map
2225
Someone requested a change in the time duck state when there is no time field
2226
While loading all the desired graphics into the print area, it was found that the total number of columns required
was greater than the maximum number of columns allowed
2227
to
223F
Codes reserved for future image generator errors
Table 4-16 Barcode Generator Errors (22xx)
This class of errors is reported by the UIC when there are errors within the barcode generator.
Error
Description
2240
Can’t match the number of ECC words to a polynomial array. This means there is a mismatch between the barcode information table and the list of polynomial arrays in the DmBcPrivate.c file
2241
An ECC mode other than “Data Matrix” was specified in the barcode definition in flash even though only data
matrix barcodes are supported
2242
Based on the number of symbol rows & columns specified in the barcode definition in flash, can’t find its corresponding data in the barcode information table in the DmBcPrivate.c file
2243
Number of barcode symbols is > the number currently supported by the software
2244
Barcode memory space needs to be increased in the DmBcPrivate.c file
2245
Barcode definition in flash indicates more data bytes in the debit certificate than will fit in the barcode data code
words
2246
Somehow the barcode characteristics were never transferred from the barcode definition in flash to the local
global structure in the barcode generator
2247
Had to do too many switches between ASCII encoding and binary encoding
2250
Somehow the length of the data for the 1D barcode is zero after all the spaces are removed from the data
2251
The width of the generated 1D barcode is greater than the allocated width (if a horizontal barcode) or the allocated height (if a vertical barcode)
2252
The amount of data for the 1D barcode is more bytes than will fit in the work buffer
2253
The 1D barcode data contains characters that aren’t supported by the Code 39 character set.
DM300c/DM400c/DM475 Service Manual (SV61801 Rev. D)
4-33
4 • Troubleshooting/Diagnostics
4.3 Error Codes
Table 4-17 Print Head Security Errors (23xx)
Error
Description
2300
Version mismatch error: version from the PSOC wasn’t the expected version
2301
Programming error: Failed on the first attempt to program a PSOC chip
2302
Communication error: failed to get the proper response to a request on the first attempt
2303
Fatal communication error: failed to get the proper response to a request on the second attempt
2304
Communication timeout error: failed to get an “OK” response after a Reseed or Commit Seed operation
2305
Not used. Reserved for future modifications
2306
Fatal programming error: failed on the 2nd attempt to program a PSOC chip
2307
Problem getting the random number from one of the PSOC chips
2308
A PSOC chip failed to reset as part of the processing of the Reseed request from the Control Mgr
2309
A random number from the PH PSOC was one of the restricted values
230A
A random number from the PH PSOC is the same as the last random number from the PH PSOC
4-34
DM300c/DM400c/DM475 Service Manual (SV61801 Rev. D)
4 • Troubleshooting/Diagnostics
4.3 Error Codes
Table 4-18 Print Manager Errors (24xx)
Error
Description
2400
General printer fatal error
2401
Problem with the PSOC chips - could actually be a 2300, 2301, 2302 error.
2441
Purge pump motor or sensor failure
2442
Cap motor or sensor failure
2443
Carriage motor or sensor failure
2444
Inside temperature out of range
2445
Transport motor or encoder failure
2446
ASIC motor drive time limit exceeded
2447
Print carriage not detected.
2481
E_PAPER_SKEW (Mail skewed)
2482
E_NO_PAPER
2483
E_PIECE_TOO_SHORT
2484
E_PIECE_TOO_FAST (Operator inserted mailpiece too fast)
2485
E_NO_PRINT (Paper error)
248B
E_JAM (Mail jammed)
248C
E_JAM_LEVER_OPEN (Jam lever open)
2491
E_NO_INK
2492
E_NO_INKTANK
2493
E_INKTANK_ID
2494
E_INKTANK_CHECKSUM
2495
E_TANK_LID_OPEN
24A1
No Printhead
24A2
Incorrect printhead type
24A3
Printhead NVM checksum failure
24A4
Printhead temperature out of range
24A5
Printhead heater failure
24B1
E_MSG_SRC
24B2
E_MSG_DEST
24B3
E_MSG_ID
24B4
E_MSG_TYPE
24B5
E_MSG_PARAMETER
24B6
E_MSG_NA (Not appropriate message, like “Perform Printer Maintenance” in Seal Only Mode)
DM300c/DM400c/DM475 Service Manual (SV61801 Rev. D)
4-35
4 • Troubleshooting/Diagnostics
4.3 Error Codes
Table 4-19 “BOB” Task Errors (25xx)
Error
Description
2501
Unknown intertask message or script request
2502
PSD failed to reply to a message
2503
PHC failed to reply to a message
2504
External card failed to reply to a message
2505
General communication failure
2506
PSD USB driver failure
2507
PHC 232 driver failure
2508
External card t=0 driver failure
2509
Internal Error encountered by SCM task
250A
General device driver failure
250B
Unknown intertask message
250C
Access code procedural error
250D
The requested operation is not installed
250E
Required font not installed
250F
Font download error
2510
Error retrieving report hash
2511
Error determining PHC power parameters
2512
Error determining current printing mode
2513
Error while deriving meter status
2514
Error while updating the batch registers
2515
Error while gathering report data
2516
Error gathering ad information
2517
Error gathering inscription information
2518
Error while preparing download to PHC
2519
Error while preparing to download a leading barcode image
251A
Error while preparing to download a lagging barcode image
251B
Error preparing to pre debit
251C
Error preparing the PHC configuration record
251D
Error while preparing the vendor key
251E
Snippet signature is unacceptable to PSD (no longer used but left in for Error spec compatibility)
251F
Indicia not found in flash
2520
Indicia font not found in flash
2521
Report not found in flash
2522
Report font not found in flash
2523
Town circle not found in flash
2524
Town circle font not found in flash
2525
Error reading UIC date or time
2526
Error building a device message
2527
Erroneous message script ID
4-36
DM300c/DM400c/DM475 Service Manual (SV61801 Rev. D)
4 • Troubleshooting/Diagnostics
4.3 Error Codes
Table 4-19 “BOB” Task Errors (25xx) (cont’d)
Error
Description
2528
Device message reply length is unexpected
2529
Unknown component ID in the print zone packed byte parameter
252A
Unknown function ID in the print zone packed byte parameter
252B
Message resent maximum number of times without response
252C
Trouble retrieving a test print from FLASH
252D
Current account has expired during a mail run
252E
Error while preparing the trusted SW key
252F
Unknown device ID found in a tealeaves table
2530
Department account does not have enough funds
2531
Department account has reached allowed mailpieces
2532
Unknown department account Error
2533
Error while getting info from an installed type “Misc” graphic
2534
Error while getting info from an installed Swiss star
2535
Error accessing a required Entgelt Bezahlt in flash
2536
Error while trying to get bar code parameters from FLASH
2537
Error while trying to get NPCG.BIN from external flash
2538
Error while trying to get xxxPCG.BIN from external flash
2539
Error while trying to get PRINTEST.BIN from external flash
253A
Gate keeper model is unknown
253B
Snippet handler was unable to retrieve a snippet from FLASH
253C
iButton® PSD communications driver, success but no expected event
253D
iButton® PSD communications driver, failure miscellaneous
253E
Error while accessing a miscellaneous graphic in the flash
253F
Error creating dynamic blob for image generator
2540
Error creating static blob for image generator
2541
Error creating report blob for image generator
2542
Error logging postage value download message to shadow log
2543
Error logging debit certificate to shadow log
2544
iButton® PSD communications driver, success but timeout error
2545
iButton® PSD communications driver, failure OS no event match error
2546
iButton® PSD communications driver, failure OS timeout error
2547
Currency code mismatch between indicia graphic and psd
2548
CMOS GMToffset found to be out of range, reset to defaults
2549
Error accessing a permit graphic
254A
Error accessing a date time graphic
254B
Error setting permit batch count index
254C
Error finding an auto inscription in flash
254D
Auto inscription ID is not in range
254E
Piece count end of life error
DM300c/DM400c/DM475 Service Manual (SV61801 Rev. D)
4-37
4 • Troubleshooting/Diagnostics
4.3 Error Codes
Table 4-19 “BOB” Task Errors (25xx) (cont’d)
Error
Description
254F
Failure to correct shadow log
2550
Error logging postage value refund message to shadow log
2551
Error in fnValidData, probably a missing table entry
2552
Error in fnWriteData, probably a missing table entry
2553
Glob-to-bob conversion references area beyond glob limit.
2554
Bob-to-glob conversion references area beyond glob limit.
2555
Received glob too big for destination buffer.
2556
Tried to send a boot loader message to an Asteroid.
2557
Tried to send a boot loader command to a Gemini in App or Secure App Mode.
2558
Tried to send an Application command to a Gemini in Boot Loader Mode.
2559
IPSD Boot Loader communications driver OS no event match error.
255A
IPSD Boot Loader communications driver OS timeout error.
255B
IPSD Boot Loader failed to reply to a message.
255C
IPSD Boot Loader communications driver timeout error.
255D
IPSD USB driver failure on Boot Loader Message.
255E
Reply from the boot loader did not start with “JRB”.
255F
Reply from the boot loader had less than 8 bytes.
2560
Unrecognized Family code, or family code = Gemini, but MicroStatus String is not as expeccted.
2561
Attempt to disable the bootloader (or set security lock) before entering and testing the APP mode.
2562
EDM trying to passthrough msg to IPSD BL, bob can’t talk to IPSD.
4-38
DM300c/DM400c/DM475 Service Manual (SV61801 Rev. D)
4 • Troubleshooting/Diagnostics
4.3 Error Codes
Table 4-20 WOW Motion Control Processor (MCP) Error Codes (2Axx)
Error
Description
2A3E
WOW Weighing Error. While weighing a mail piece the WOW MCP reports an error.
2A3F
Width sensor calibration error at start of run.
2A8E
WOW unable to weigh – weight unstable.
2AAC
WOW Error. General-purpose error reported by the WOW MCP.
2AAD
Weight Break Download Sequence error.
2AAE
Negative weight calculated
2AAF
Weight not valid for mail type
2AB0
Weighing error (unstable - maximum number of samples exceeded)
2AB1
Weighing error (no tare achieved - maximum number of samples exceeded)
2AB2
WOW asked to weigh without calibration (calibration required)
2AB3
Compute rezero at power up is outside +/- 50 grams
2AB4
Compute rezero is outside +/- 15 grams (standard) from last rezero
Table 4-21 Motion Control Processor (MCP) and Feeder Errors (37xx)
Error
Description
37xx
Same as MidJet Motion Control Processor (MCP) Related Error Codes (16xx).
372A
FS2 has been covered for too long. Caused by a jam or by a stream feed.
372D
Jam in sealer area. Also caused by mis-feeds or “teasing” FS1. Literal cause of error is FS1 is covered and
timeout waiting for Lead Edge of FS2
37B5
Requested Operation cannot be performed in the current state.
37B6
Feeder Hardware Not Detected. May also occur if UIC times out waiting for a Start or Stop response from the
Feeder MCP.
37B7
The Requested Operation is invalid
37B8
The Feeder has not enumerated in a timely fashion.
37B9
The firmware update has failed.
37BA
No firmware has been installed in the UIC.
37BB
The Feeder Motor Thermister is not operating properly. Indicates an error with the thermister. Check the
thermister and the feeder board.
37BC
The Feeder Motor Temperature has risen too high and the system must not run mail. Stop processing mail
and allow the Feeder Motor to cool down.
DM300c/DM400c/DM475 Service Manual (SV61801 Rev. D)
4-39
4 • Troubleshooting/Diagnostics
4.4 Cleaning
the Print Head
and Related
Surfaces
You can perform this procedure when you suspect, or have seen:
•
bad printing, even after changing the ink cartirdge
1. Remove print head and place the print head on its back side on the absorbent pad.
Print Head Removed and
Placed on its Back Side
2. Locate a bottle of clear ink (PN# 4Y1-9107, it can be ordered as a Service
part). Pour a small amount of clear ink in the ink cap. Lightly moisten the
cleaning swab with clear ink.
Cleaning Swab
Clear Ink in Ink Cap
3. Clean the print head surface (on the print head removed from machine)
with the cleaning swab.
IMPORTANT:
Always use a new cleaning swab to avoid permanent damage on the
print head surface (discard after use). Also, the cleaning swab should
be used to wipe in one direction only.
Print Head
Surface
Cleaning
Swab
4-40
DM300c/DM400c/DM475 Service Manual (SV61801 Rev. D)
4 • Troubleshooting/Diagnostics
4.4 Cleaning
the Print Head
and Related
Surfaces
4. Clean the wiper blades with the cleaning swab.
Cleaning
Swab
Wiper
Blades
5. Clean the cap of the purge unit with the cleaning swab.
Cleaning Swab
Clean ink on
top surface
Purge
Unit Cap
Ink Pad
Clean ink on
edges
6. Reinstall print head. From the Service Menu, select Diagnostics>PM
Maintenance>Print Test Pattern, and/or run some sample mail pieces
through the machine to confirm proper printing.
DM300c/DM400c/DM475 Service Manual (SV61801 Rev. D)
4-41
4 • Troubleshooting/Diagnostics
4.5 Meter
Withdrawal
Scenarios
For a meter withdrawal, the customer or the service representative must
transfer the remaining balance of postage from the machine into the customer’s Postage By Phone® (PbP) Account. Normally this is done if the customer
is no longer going to use the machine or if the machine fails to operate properly and cannot be repaired in the field.
There are two possible scenarios that determine how to return equipment:
1. Customer does not own the mail machine. Entire system needs to
be returned (also for QAR)
There will be at least three SMS Activity’s, one for the Meter (G900/
G905), one for the mail machine base (3C00/ 4C00) and one for the
Subscription (G9SS). There may also be activities for any peripherals
such as the scale (example MP9G).
If this is a one-for-one replacement, return the replaced machine using
the box the new machine came in.
NOTE: For QAR on DM475, return just the printer/base module as
would returning a DM300c.
If this is not a one-for-one replacement, the following Box-It sales kit
should be ordered:
•
DM300c - 3C00104
•
DM400c - 4C00104
2. Customer owns the mail machine but has cancelled their PbP Account. Only the meter needs to be returned.
There will be at least two SMS Activity’s, one for the Meter (G900/
G905) and one for the Subscription (G9SS). There may also be activities for any peripherals such as the scale (example MP9G). There
should be no SMS activity for the mail machine base (3C00/ 4C00).
Order the G900 Meter Return Kit# 3C00105. Perform the following procedure.
IMPORTANT: This kit is to be used only for the small number of customers that own the 3C00/4C00 Base, have cancelled their Postage By
Phone® account, and will be keeping their base. The G900/G905 iButton
PSD is a rented item and must be returned to Pitney Bowes Meter Returns as per USPS Postage Meter requirements.
Follow the procedures on the subsequent pages.
4-42
DM300c/DM400c/DM475 Service Manual (SV61801 Rev. D)
4 • Troubleshooting/Diagnostics
4.5 Meter
Withdrawal
Removal of iButton PSD
1. Transfer funds to Postage By
Phone® account:
Push
Holder
Away from
Board and
Lift Up to
Remove
a. Press Menu and page down
to select Advanced Features.
b. Select Meter Withdrawal.
c. Select Continue.
d. When the transfer is complete select Print Receipt
and follow the prompts.
e. Confirm the funds “Available in Meter” is equal to
$000.000.
Figure 4-7 Removing PSD
2. Remove the iButton PSD from
the Main Logic board:
a. Disconnect the power cord
from the mail machine base.
b. Remove the rear cover.
c. Ground yourself by placing
a hand on the mailing machine’s metal frame.
d. Grasp the iButton PSD handle and carefully push the
holder away from the Main
Logic Board.
Figure 4-8 PSD Secured for Shipping
e. Carefully pull the holder up
at an angle to release it. (See Figure 4-7.)
3. Attach the iButton/PSD to the iButton PSD Security Cover:
a. Remove the iButton PSD Security Cover from the mail machine’s
Rear Cover.
b. Attach the handle of the iButton PSD to the cover using the provided
screw. (See Figure 4-8.)
NOTE: Instructions are not sent with the Return kit because we do not
want the customer to find them and try to remove the iButton!
DM300c/DM400c/DM475 Service Manual (SV61801 Rev. D)
4-43
4 • Troubleshooting/Diagnostics
4.5 Meter
Withdrawal
Running Meter Withdrawal from Menu
NOTES: Contact Pitney Bowes first before withdrawing funds. The machine must
be connected to an analog phone line.
1. Press Options.
2. Press Page Down to the third screen.
3. Select "Advanced Features".
Page
Up
OPTIONS
◄Advanced Features
Page
Down
4. Press Page Down to the second screen.
5. Select "Meter Withdrawal".
Page
Up
ADVANCED FEATURES
◄Meter Withdrawal
Page
Down
6. Select "Transfer all funds from meter to PBP account".
Page
Up
REMOVE FUNDS
◄Transfer all funds
from meter to PBP
account
Page
Down
7. The system dials into the Pitney Bowes Data Center (this may take a
few moments). Various screens displays, letting you know the status of
the process.
8. The Transfer Successful screen displays. Select "Continue".
TRANSFER SUCCESSFUL
Funds moved to PBP
account
$xxx.xx
◄Continue
Page
Up
Page
Down
Funds
Report
9. At the prompt to print a receipt, press Yes/Enter and insert envelope/
tape sheet through machine (see sample, next page) OR simply press
Home to return to Home Screen.
Used:
$000 . 000
Batch Count:
Available:
$000 . 000
Batch Value:
Total Pieces: 0
0000011969
DEC 08 03
5 : 31P
$000 . 000
0
PBP Serial No.: 0011969
Control Sum: $000 . 000
4-44
DM300c/DM400c/DM475 Service Manual (SV61801 Rev. D)
4 • Troubleshooting/Diagnostics
4.5 Meter
Withdrawal
Withdrawal Process
The DM300c/DM400c/DM475 iButton PSD cannot be replaced separately
from the machine. If the iButton fails, the complete machine must be replaced. The iButton PSD must never be separated from its machine.
The only exception is if a lease customer wants to return their meter and
cancel their Postage by Phone® Account, but they want to keep their machine base.
The “Box It” process (used by DM100i/DM200L) will be used for DM300c/
DM400c/DM475. The customer will be shipped a box (Sales Kit 3C00104
or 4C00104) with instructions explaining how to transfer their funds back
to their Postage By Phone® Account and pack and ship the machine via
a SmartLabel. A withdrawal for both the iButton PCN (G90x) and the Base
Machine PCN (3C0x or 4C0x) will be logged in SMS.
For the one situation when the iButton PSD will be removed from the machine, as noted above, a special box kit must be ordered. Attach the iButton
PSD to the iButton Security Cover as shown in Figure 4-7 and ship it back
in the box.
Preparing the System for Shipment
1. Remove the moistener (DM300c) or water bottle and moistener tank
(DM400c - DM475) and drain the liquid. Reinstall the parts to the system.
2. Remove the waste tray from the machine.
A. Remove the waste pad and its holder tray and dispose of them per
local policy.
B. Insert a shop towel into the empty tray and reinstall it into the base.
3. For DM475, lock down the WOW shipping screws.
Packing the System
1. Place foam section with one large cutout into bottom of shipping box.
2. Place mailing machine into foam section in box.
3. Place other foam section over mailing machine in box.
4. Place weighing platform in small cardboard box and place small box in
appropriate cutout in top section of foam.
5. Place power cord in cutout in foam. Do not return moistener, stacker or ink
cartridge.
Preparing the Box for Shipping
1. Close top of box and tape securely.
2. Remove old shipping label from box (if sent a replacement unit box).
3. Apply prepaid shipping label.
DM300c/DM400c/DM475 Service Manual (SV61801 Rev. D)
4-45
4 • Troubleshooting/Diagnostics
4.5 Meter
Withdrawal
Completing the 3601C
1. Do not enter any data into section A, Box 10 until you have completed
the transaction and the outcome.
2. You must include an accurate explanation/description of the action you
have taken in Section A, Box 10.
3. If you cannot perform funds transfer via modem, note the explanation
description for withdrawing the ICC/PSC and complete the transaction
as a QAR.
4. Return form 3601C with the top copy, third and fourth copies intact for
every ICC/PSD being returned. Give the second copy to the customer
as a receipt.
5. Have the customer initial boxes D13, E13, F1 or F2 (depending on the
disposition of funds), F4 and F5 on Form 3601C.
6. You and the customer must sign the 3601C form confirming that the
transaction is completed.
7. If QAR, apply the pink label to ICC case and return ICC/PSD to Newtown2 via registered USPS priority mail along with all required copies of
Form 3601C.
4-46
DM300c/DM400c/DM475 Service Manual (SV61801 Rev. D)
5 • Removal & Replacement
5.1
Introduction
This chapter contains instructions for removing and installing field-replaceable parts. Adjustments are explained when required.
This chapter is divided into three major sections, and each is color-coded:
•
Printer/Base (use for all models* - DM300c/DM400c/DM450c/DM475)
•
Auto-Feeder (use for DM400c/DM450c/DM475*)
•
WOW Section of Feeder/WOW module (use for DM475)
*Differences among models, if any, will be noted in the procedure.
Tools Required
•
#2 Phillips head screwdriver with at least an 8” shank and a magnetic tip
•
Flat blade screwdriver
Printer/Base (use for all models)
(photos show DM300c but procedures apply to all models)
es ,
n3
o2
ee J2T
own
ut
SR
Her
21
543
5.2 Back Cover ............................................................................... 5-3
5.3 Control Panel ............................................................................ 5-3
5.4 Front Sub-Panel ........................................................................ 5-4
5.5 Control Panel Ribbon Cables ................................................... 5-4
5.6 Bottom Cover (Base Pan) and Side Deck Guide....................... 5-5
5.7 Main Transport Feed Belt .......................................................... 5-6
5.8 Purge Unit.................................................................................. 5-7
5.9 Transport Drive Motor ................................................................ 5-8
5.10 Carriage Drive Motor ............................................................. 5-10
5.11 Rear Drive Belts......................................................................5-11
5.12 Carriage Drive Belt ................................................................ 5-12
5.13 Print Head Carriage Assembly .............................................. 5-13
5.14 Drive Shaft ............................................................................. 5-16
5.15 Tape Feed Unit ...................................................................... 5-17
5.16 Postal Security Device (PSD) ................................................ 5-18
5.17 Main Logic Board................................................................... 5-19
5.18 Modem Board ........................................................................ 5-20
5.19 Power Supply ........................................................................ 5-21
5.20 Encoder Sensor, Encoder Disc and Sensor Board ............... 5-22
5.21 Segmented Roller .................................................................. 5-23
5.22 Lower Transport Assembly .................................................... 5-24
5.23 Lower Transport Cover .......................................................... 5-25
5.24 Waste Pad Replacement ....................................................... 5-25
DM300c/DM400c/DM475 Service Manual (SV61801 Rev. D)
5-1
5 • Removal & Replacement
5.1
Introduction
Auto-Feeder (use for DM400c/DM450c/DM475)
(photos show DM400c but procedures apply to all auto-feed models)
5.25 Feeder Upper Cover .............................................................. 5-26
5.26 Side Guide ............................................................................. 5-27
5.27 Feed Deck ............................................................................. 5-28
5.28 Feeder Unit ............................................................................ 5-29
5.29 Feeder PCB Assembly .......................................................... 5-31
5.30 Retard Roller ......................................................................... 5-32
5.31 Feed Roller Assembly............................................................ 5-34
5.32 Feed Belt Assembly ............................................................... 5-36
5.33 Feed Motor ............................................................................ 5-38
5.34 Feed Encoder ........................................................................ 5-39
5.35 Feeder Sensor (FS2/WS1) PCB............................................ 5-40
5.36 Seal/No Seal Lever................................................................ 5-40
5.37 Sealer Finger ......................................................................... 5-41
WOW Section of Feeder/WOW Module (use for DM475)
5.38 Separation of Feeder/WOW Module from Printer/Base ........ 5-42
5.39 Feeder/WOW Cover .............................................................. 5-43
5.40 Feeder Unit of Feeder/WOW Module .................................... 5-43
5.41 Feeder/WOW Control Board (PCB)....................................... 5-44
5.42 WOW Thickness and Feed Encoders ................................... 5-46
5.43 Feeder/WOW Junction Board ............................................... 5-47
5.44 WOW WS2 (Middle) and WS3 (Exit) Sensors . ..................... 5-47
5.45 WOW Transport Belts (two, behind wall) ............................... 5-48
5.46 WOW Transport Pulleys (three, behind wall)......................... 5-49
5.47 WOW Upper Transport (as a whole unit)............................... 5-50
5.48 WOW Upper Transport Arms Assembly ................................ 5-51
5.49 WOW Width Sensors (WS4, WS5, WS6) .............................. 5-52
5.50 WOW Deck ............................................................................ 5-54
5.51 WOW Unit Chassis (as a whole unit) .................................... 5-55
5.52 WOW Transport Motor........................................................... 5-58
5.53 Lower WOW Transport Assembly (as a whole unit) .............. 5-60
5.54 Lower WOW Transport Components..................................... 5-62
5.55 WOW Load Cell Assembly .................................................... 5-64
5.56 Feeder/WOW Registration Wall Alignment ............................ 5-66
5-2
DM300c/DM400c/DM475 Service Manual (SV61801 Rev. D)
5 • Removal & Replacement
Printer/Base (use for all models)
5.2 Back Cover
1. Disconnect power and remove scale if present.
2. DM475 - Separate feeder/WOW module from printer/base (section 5.38).
3. Remove three screws as shown (Figure 5-2).
4. Lift off cover (Figure 5-3).
Figure 5-2 Back Cover Mounting Screws
Figure 5-1 Back Cover
Keyboard
Cover
Tabs Seen from Underside of Control Panel
Figure 5-3 Removing Back Cover
Figure 5-4A Pry Off Control Panel Overlay
5.3 Control
Panel
1. Lift up keyboard cover.
2. Carefully release the tabs (Figure 5-4A) that secure the control panel
overlay to the keyboard. Lift the overlay off the keyboard assembly.
3. Remove four screws as shown in Figure 5-4B.
4. Carefully lift off control panel.
NOTE: Two ribbon cables connect the control panel to the
main logic board. Carefully unplug the cables from the control
panel PCB to free it from the
base. The control panel and
cover are replaceable as a single unit (Figures 5-5, 5-6, 5-7).
DM300c/DM400c/DM475 Service Manual (SV61801 Rev. D)
Figure 5-4B Control Panel Screws
5-3
5 • Removal & Replacement
Printer/Base (use for all models)
5.3 Control
Panel
Figure 5-6 Control Panel Harness
Figure 5-5 Removing Control Panel
5.4 Front
Sub-Cover
1. Remove the back cover and control panel (sections 5.2 and 5.3).
2. Remove 4 screws securing front
sub-cover (Figure 5-9).
3. Lift cover off base.
Figure 5-7 Control Panel Assembly
Control panel
harnesses
Figure 5-8 Control Panel and Display
Assembly (for Reference)
Figure 5-9 Sub-Cover Mounting Screws
5.5 Control
Panel Ribbon
Cables
1. Remove the back cover, control
panel and sub-cover (sections
5.2,5.3, and 5.4).
Ferrite Core
Clamp
2. Disconnect the ribbon cables
from the control panel PCB.
3. Snake the ribbon cables through
the hole in the machine frame.
Connectors
Ground Strap
4. Remove the blue ground strap,
the harness from the clamp and
the ferrite core (figure, right).
5. Remove the two harness connectors from the board.
6. Reassemble in reverse order.
5-4
Figure 5-10 Control Panel Harness
Connections at Main Logic Board
DM300c/DM400c/DM475 Service Manual (SV61801 Rev. D)
5 • Removal & Replacement
Printer/Base (use for all models)
5.6 Bottom
Cover (Base
Pan) and Side
Deck Guide
1. Remove all printer/base covers (sections 5.2, 5.3, and 5.4).
2. Remove five screws located inside base and one screw located on side
(Figures 5-11 through 5-13).
3. Lift machine out of base pan and place on work surface protected by
paper towels. Purge unit drain can leak ink.
Figure 5-11 Base Pan Mounting Screw Figure 5-12 Side Deck Mounting Screw
Locations. Chassis Removed for PurLocation.
pose of Illustration.
Figure 5-13A Chassis Mounting Tabs
5.6.1 Side Deck Removal
1. Remove the base pan as described above (section 5.6).
See Figure 5-12
2. Remove three screws that secure deck to frame. See Figures
5-12 and 5-13B for screw locations.
3. Reassemble in reverse order.
Figure 5-13B Side Deck Mounting Screws
DM300c/DM400c/DM475 Service Manual (SV61801 Rev. D)
5-5
5 • Removal & Replacement
Printer/Base (use for all models)
5.7 Main
Transport Feed
Belt
1. Unlock and lower the lower transport.
2. Slightly loosen the tension idler, press down on it to relieve belt tension,
and tighten in position.
3. Remove old belt.
4. Install new belt so center ridge rides in grooves of pulleys.
5. Loosen belt tensioner slightly and allow spring to normalize belt tension.
DO NOT apply additional tension to belt.
6. Tighten belt tensioner.
7. Make sure belt tracks properly.
8. Close lower transport and test for proper operation.
9. Reassemble in reverse order.
Roller grooves
Figure 5-14 Removing Transport Drive
Belt
5-6
Figure 5-15 Transport Belt Removed.
Note Grooves in Rollers.
DM300c/DM400c/DM475 Service Manual (SV61801 Rev. D)
5 • Removal & Replacement
Printer/Base (use for all models)
5.8 Purge Unit
1. Remove all printer/base covers (sections 5.2, 5.3, 5.4, and 5.6).
2. Disconnect two wire harnesses as shown (Figure 5-16).
3. Hold the purge unit from the bottom using a paper towel or rags to protect yourself from ink leakage from the drain.
4. While holding the purge unit, remove two mounting screws as shown
(Figure 5-16).
5. Remove the purge unit from the bottom of the machine.
6. Reassemble in reverse order.
Disconnect
Harnesses
Mounting Screws
Figure 5-16 Purge Unit Removal
5.8.1 Purge Unit Sensor Board
Figure 5-17A Purge Unit
Mounting Screws
1. Remove purge unit as described
above (section 5.8).
2. Unsnap plastic cover to gain
access to sensor board. Cover
is held in place by three plastic
tabs as shown in figure, right.
3. Remove two board mounting
screws, figure, right.
4. Carefully disconnect harness
Figure 5-17B Sensor Board Cover
connector to free board. See Fig- Removed
ure 5-17C, next page.
5. Reassemble in reverse order.
DM300c/DM400c/DM475 Service Manual (SV61801 Rev. D)
5-7
5 • Removal & Replacement
Printer/Base (use for all models)
5.8 Purge
Unit
Gear Tab
(Opposite Flat)
Figure 5-17C Removing Purge Unit Sensor Board
Figure 5-17D Purge Unit Sensor Board
5.8.2 Purge Unit Motor
and Gears
1. Remove purge unit (section 5.8).
2. Unsnap plastic cover (see
Figure 5-17B).
3. Press down outer gear
tab opposite flat on shaft
(Figure 5-17C) and remove outer and inner
gears.
4. Carefully disconnect harness connector.
Figure 5-17E Purge Motor Removed
5. Remove two screws that
secure motor mounting bracket to purge unit. See figure 5-17E, right.
6. Reassemble in reverse order.
5.9 Transport
Drive Motor
1. Remove all printer/base covers (sections 5.2, 5.3, 5.4, and 5.6).
2. Remove purge unit to provide clearance for motor (section 5.8).
3. Disconnect motor harness at J115 on Main Logic Board (Figure 5-18).
4. Carefully snap open wire clamps as shown to free motor harness (Figure 5-19).
5. Slightly loosen belt tensioner. Press tensioner and tighten screw to relieve tension on timing belt (Figure 5-20). Remove belt as shown (Figure
5-21).
6. Hold motor from underside of machine. While holding motor, remove
two screws as shown to free it (Figure 5-22).
7. Reassemble in reverse order.
5-8
DM300c/DM400c/DM475 Service Manual (SV61801 Rev. D)
5 • Removal & Replacement
Printer/Base (use for all models)
5.9 Transport
Drive Motor
Figure 5-18 Disconnect Motor Harness Figure 5-19 Open Wire Clamps
at Main Logic Board
Figure 5-20 Loosen Belt Tensioner
Slightly; Tighten in UP position.
Figure 5-21 Remove Belt from Drive
Pulley
Figure 5-22 Remove Two Motor Mount- Figure 5-23 Transport Drive Motor
ing Screws
DM300c/DM400c/DM475 Service Manual (SV61801 Rev. D)
5-9
5 • Removal & Replacement
Printer/Base (use for all models)
5.10 Carriage
Drive Motor
1. Remove all printer/base covers (sections 5.2, 5.3, 5.4, and 5.6).
2. Disconnect two harnesses from purge unit as shown (Figure 5-24). This
is necessary to provide clearance.
3. Unscrew plastic wire loom (one screw) and let hang as shown (Figures
5-24 and 5-25).
4. Disconnect motor harness.
5. Unscrew motor mounting bracket (two screws). See Figure 5-25.
6. Remove motor and bracket (Figure 5-26).
7. Remove motor from bracket (four screws). See Figure 5-27.
8. Reassemble in reverse order.
Disconnect
Harnesses
Figure 5-24 Disconnect Harnesses and Figure 5-25 Let Wire Loom Hang;
Unscrew Wire Loom
Unscrew Two Motor Mounting Screws
Figure 5-26 Remove Motor and Bracket
Assembly; Remove Carriage Drive Belt
Figure 5-27 Remove Motor from
Bracket Assembly
5-10
DM300c/DM400c/DM475 Service Manual (SV61801 Rev. D)
5 • Removal & Replacement
Printer/Base (use for all models)
5.11 Rear Drive
Belts
5.11.1 Main Drive Shaft Belt
1. Remove all printer/base covers (sections 5.2, 5.3, 5.4, and 5.6).
2. Loosen belt tensioner slightly. Press on tensioner to relieve tension on
belt and tighten tensioner. See Figure 5-28.
3. Walk belt off pulleys. See Figure 5-29.
4. Replace belt.
5. Loosen belt tensioner. Allow spring to normalize tension on belt. DO
NOT apply additional tension.
6. Tighten belt tensioner.
7. Reassemble in reverse order.
Main Drive
Shaft
Figure 5-28 Loosen Belt Tensioner
Slightly; Press Down and Tighten
Figure 5-29 Remove Main Drive Belt
5.11.2 Intermediate Drive Belt
1. Follow steps 1 through 3 above.
2. Loosen belt tensioner slightly.
Press on tensioner to relieve
tension on intermediate belt and
tighten tensioner.
3. Walk belt off pulleys.
4. Replace belt.
5. Loosen belt tensioner. Allow
spring to normalize tension on
belt. DO NOT apply additional
tension.
6. Tighten belt tensioner.
Figure 5-30 Remove Intermediate Drive
Belt
7. Reassemble in reverse order.
DM300c/DM400c/DM475 Service Manual (SV61801 Rev. D)
5-11
5 • Removal & Replacement
Printer/Base (use for all models)
5.12 Carriage
Drive Belt
1. Remove rear cover (section 5.2), control panel (section 5.3) and subcover (section 5.4).
2. Scribe location of belt tensioner assembly as shown in Figure 5-31.
3. Loosen belt tensioner.
4. Walk belt off pulleys and carefully remove belt from printhead loop.
5. Insert replacement belt in printhead loop as shown in Figure 5-32.
6. Position belt on pulleys.
7. Move tensioner to scribed position and tighten. This is an initial adjustment. DO NOT over-tension belt. See adjustment procedure below.
Connect Spring Gauge Here
Figure 5-31 Scribe Tensioner Location
Carriage Drive Belt Tension
Adjustment
Adjust tension of the carriage drive belt after
replacing it:
1. Loosen the adjustment screw shown in
Figure 5-31.
Figure 5-32 Carriage Belt Loop
2. Connect a spring gauge to the adjustment bracket and set the belt tension for
1 kg (2.2 lbs.) +/- 10%.
3. Tighten adjustment screw.
5-12
DM300c/DM400c/DM475 Service Manual (SV61801 Rev. D)
5 • Removal & Replacement
Printer/Base (use for all models)
5.13 Print Head
Carriage
Assembly
1. Remove rear cover (section 5.2), control panel (section 5.3) and subcover (section 5.4).
2. Remove ink cartridge (Figures 5-33 and 5-34).
3. Remove the print head (Figure 5-35).
4. Make sure carriage is home. In this position the carriage is located
above the purge unit and you should be able to see the printhead cap
as shown in Figure 5-36.
Figure 5-33 Press Ink Cartridge Lock
Figure 5-34 Lift Cartridge out of Well
Wiper
Printhead
Cap
Figure 5-35 Remove Printhead
Figure 5-36 Carriage Home Position
5. Turn purge unit gear clockwise as
shown in Figure 5-37, right, until
printhead lock and wiper are fully
DOWN. See Figure 5-36, above
right.
6. Push carriage toward rear.
Turn
Clockwise
7. Unlock and remove printhead ribbon cable at Main Logic Board.
See Figure 5-38, next page.
8. Remove plastic printhead cable Figure 5-37 Turn Gear Clockwise until
keeper. Pull out slightly on bottom Printhead Lock and Wiper are Fully DOWN
tab. To free keeper, pull it carefully
towards front of machine. See Figure 5-39, next page.
DM300c/DM400c/DM475 Service Manual (SV61801 Rev. D)
5-13
5 • Removal & Replacement
Printer/Base (use for all models)
5.13 Printhead
Carriage
Assembly
Figure 5-38 Removing Print Head Cable at Main Logic Board
Figure 5-39 Removing Cable Keeper
Figure 5-40 Installing Cable Keeper
NOTE: To reinstall keeper, position rear
tabs in cutout first as shown in Figure
5-40, then align the front tab with the corresponding cutout. Pull out the lower rear
locking tab slightly and snap the front of
the keeper into position.
9. Remove main drive belt (section
5.11.1).
10. Remove intermediate drive belt
(section 5.11.2).
11. Remove intermediate drive belt
gear to provide access to screw
securing inner carriage rail. See
figure, right.
Rail
Mounting
Screw
below Gear
Stud
12. Remove rail mounting screw and
slide shaft toward front of machine
Figure 5-41 Removing Intermediate Gear
(Figure 5-42 and 5-43).
13. As the shaft is released from both ends,
push it toward the center of the machine
to free it from the print carriage. (The
shaft will snap out of position.)
5-14
DM300c/DM400c/DM475 Service Manual (SV61801 Rev. D)
5 • Removal & Replacement
Printer/Base (use for all models)
5.13 Printhead
Carriage
Assembly
Figure 5-42 Removing Inner Rail Mount- Figure 5-43 Pushing Rail Forward
ing Screw
14. Remove the mounting screw from
the outer rail as shown in Figure
5-44, right.
15. Lift the shaft up slightly and pull it
toward the front of the machine to
remove the carriage assembly.
16. Reassemble in reverse order.
Figure 5-44 Removing Inner Rail
Mounting Screw
Figure 5-45 Removing Carriage Assembly
Power Supply Shield
Logic Board
Inner Rail Bushing
Snaps in Position
Drive Shaft
Purge Unit Drive Motor
Figure 5-46 Chassis with Carriage Assembly Removed
DM300c/DM400c/DM475 Service Manual (SV61801 Rev. D)
Figure 5-47 Carriage Assembly
5-15
5 • Removal & Replacement
Printer/Base (use for all models)
5.14 Drive
Shaft
1. Remove all printer/base covers (sections 5.2 through 5.5 and 5.7).
2. Remove main drive and intermediate drive belts (sections 5.11.1 and
5.11.2).
3. Remove drive shaft gear as shown in Figure 5-48 and pull bearing off as
shown in Figure 5-49.
4. Unsnap roller from groove in shaft. See Figure 5-51.
CAUTION: Tabs on roller flange break easily.
5. Remove pin from shaft and slide out shaft from front.
6. Reassemble in reverse order.
Figure 5-48 Removing Drive Shaft Gear Figure 5-49 Removing Drive Shaft
Rear Bearing
Tabs
Bearing
Pin
Figure 5-50 Disengaging Roller from
Drive Shaft Groove
5-16
Groove
Figure 5-51 Drive Shaft Components
DM300c/DM400c/DM475 Service Manual (SV61801 Rev. D)
5 • Removal & Replacement
Printer/Base (use for all models)
5.15 Tape Feed
Unit
1. Remove rear cover (section 5.2), control panel (section 5.3) and subcover (section 5.4).
2. Remove two screws as shown in Figure 5-52.
3. Carefully lift the tape feeder unit up. Note that a wiring harness is connected to it. See Figure 5-53 below.
4. Disconnect harness as shown.
5. Remove the tape feed assembly.
6. Reassemble in reverse order.
Figure 5-52 Tape Feeder Mounting Screws Figure 5-53 Tape Feeder Harness
5.15.1 Tape Motor
1. Remove tape feed unit as described above (section 5.15).
2. Remove two screws securing motor. See Figure 5-54 below.
3. Reassemble in reverse order.
Figure 5-54 Tape Feed Motor
Figure 5-55 Tape Feed Roller Assembly
5.15.2 Tape Feed Roller Assembly
1. Remove tape feeder unit as described above (section 5.15).
2. Remove E-Clip and bearing from roller shaft. See Figure 5-55, above right.
3. Free roller assembly from tape feed housing.
4. Reassemble in reverse order.
DM300c/DM400c/DM475 Service Manual (SV61801 Rev. D)
5-17
5 • Removal & Replacement
Printer/Base (use for all models)
5.16 Postal
Security Device
(PSD)
You must remove the Postal Security
Device (PSD) when you swap out
Main Logic (Controller) Boards. Reinstall PSD on the new Main Logic
Board.
Push
Holder
Away from
Board and
Lift Up to
Remove
NOTE: There is a special procedure
for handling removal and disposition
of a PSD in the event a customer
closes their Postage By Phone® account and wishes to retain the mailing machine. Follow the instructions
in Chapter 4, section 4.5.2.
Figure 5-56 Removing PSD
Removal
1. Remove back cover (section 5.2). This provides
access to PSD holder.
2. Remove PSD and holder
as shown in Figure, 5-56,
above right.
a. Carefully push holder away
from Main Logic Board.
b. Carefully pull holder up at an
angle to release it.
Replacement
Carefully install PSD, reversing installation process above. Make sure
it is properly seated and the PSD
makes good contact with the board
as shown in Figure 5-57.
Figure 5-57 PSD Holder and Contact.
The plastic shield has been removed to
provide a better view. The inset shows
the PSD and holder removed from the
machine.
NOTE: If the system displays a 25xx error at initialization, communication
with the iButton PSD failed. Remove power, try reseating the iButton PSD,
then reboot. A loose iButton PSD connection can also cause PSD communication errors. Remove the iButton PSD and tighten both the inner and
outer connector tangs. Pull the inner connector tang to bend it outward.
Push the outer connector tang toward the PC board. Then reinstall the
iButton PSD.
5-18
DM300c/DM400c/DM475 Service Manual (SV61801 Rev. D)
5 • Removal & Replacement
Printer/Base (use for all models)
5.17 Main
Logic Board
1. Remove back cover (section
5.2).
2. Remove PSD as described
above in section 5-16.
3. Remove three mounting screws
as shown in figure, right.
4. Remove lower mounting screw
at rear of machine as shown in
Figure 5-59, right.
NOTE: This screw is not used
Figure 5-58 Main Logic Board Fastenon DM475, but there is an exers
tra screw on the bottom of the
board’s base plate attached to
the floor of the frame (see Figure
5-59B).
5. Lift board up slightly and carefully disconnect all wiring. Open
wire clamps as required. Note
position of connectors.
6. Remove board from machine.
7. Reassemble in reverse order.
Reinstall the PSD removed in
step 2.
Figure 5-59 Lower Rear Mounting Screw
NOTE: Make sure wiring is not
subject to crimping or extreme
bends.
8. Test machine for proper operation.
Figure 5-59B Lower Mounting Screw,
Circled (DM475)
NOTE: The Main Logic Board holds all the system software including the
customers custom configuration file from Download Anywhere (DLA). When
installing a new Main Logic Board, it is necessary to re-download the customers configuration file to the new board. To do this, contact the Call Center and ask them to open the customer’s order on DLA. Then connect using
“Check PBP Balance” via the Refill Postage key or by selecting “Check
For Updates” from the Data Center Options menu.
DM300c/DM400c/DM475 Service Manual (SV61801 Rev. D)
5-19
5 • Removal & Replacement
Printer/Base (use for all models)
5.18 Modem
Board
1. Remove main logic board as described in section 5.17.
2. Remove mounting screws (one
plastic) as shown in figure, right.
3. Carefully lift up modem board to
unplug it from logic board.
NOTE: There is a connector attached to modem board. See
Figures 5-61 and 5-62.
Figure 5-60 Modem Board
4. Disconnect wiring harness from
board to free it.
5. Reassemble in reverse order.
Make sure wiring is not subject
to crimping or extreme bends.
Figure 5-61 Removing Modem Board
Figure 5-62 Modem Board, Component
Side
5-20
DM300c/DM400c/DM475 Service Manual (SV61801 Rev. D)
5 • Removal & Replacement
Printer/Base (use for all models)
5.19 Power
Supply
Figure 5-63 Removing Power Supply
and Shield
Figure 5-64 Removing Power
Supply PCB
1. Remove all printer/base covers (sections 5.2 through 5.5 and 5.7).
2. Remove the printer/base from its base pan. Section 5.6, steps 1 through
3.
3. Unlock cable clamps for harnesses as required.
4. Disconnect cable at back cover interlock switch.
5. Disconnect power supply harnesses at Main Logic Board (J125 and
J126).
6. Remove two screws securing power supply shield.
7. Remove board and shield from machine.
8. To remove board from shield, remove two screws as shown in Figure
5-64 above.
9. Reassemble in reverse order.
DM300c/DM400c/DM475 Service Manual (SV61801 Rev. D)
5-21
5 • Removal & Replacement
Printer/Base (use for all models)
5.20 Encoder
Sensor,
Encoder Disc
and Sensor
Board
1. Remove all printer/base covers
Encoder Sensor Assembly
(sections 5.2 through 5.5 and 5.7).
2. Remove main logic and power
supply PCBs (sections 5.17 and
5.19).
3. Remove sensor assembly (one
screw). See figure, right.
Disc Cover
Mounting
Screw
4. Remove encoder disc cover (one
screw, figure, right).
5. Remove encoder disc. It is secured to shaft by one screw that
passes through disk flange.
NOTE: When replacing disc, install
so arrow faces up at 12 o’clock
position.
6. Remove sensor board (two
screws). Use a stubby driver.
7. Reassemble in reverse order.
5-22
Encoder Disc Cover
Sensor Board
Figure 5-65 Disc Encoder Components
and Sensor Board
Figure 5-66 Removing Encoder Disc
Cover
Figure 5-67 Removing Encoder Disc
Figure 5-68 Encoder Sensor, Encoder
Disc and Cover
Figure 5-69 3C00, 4C00 5C00 Sensor
Board (Front)
DM300c/DM400c/DM475 Service Manual (SV61801 Rev. D)
5 • Removal & Replacement
Printer/Base (use for all models)
5.21
Segmented
Roller
1. Remove all printer/base covers (sections 5.2 through 5.5 and 5.7).
2. Remove main logic and power supply PCBs (sections 5.17 and 5.19).
3. Remove encoder sensor, encoder disc and cover (section 5-20).
4. Remove input feed deck (three screws). See Figure 5-70.
5. Carefully remove the black plastic apron (four screws). See Figure 5-70.
6. Free segmented roller from frame and belt as shown in Figure 5-71.
7. Reassemble in reverse order.
Input Feed Deck
Front Apron
Figure 5-70 Removing Input Feed Deck Figure 5-71 Removing Segmented
and Front Apron
Roller Assembly
Figure 5-72 Segmented Roller Assembly
DM300c/DM400c/DM475 Service Manual (SV61801 Rev. D)
5-23
5 • Removal & Replacement
Printer/Base (use for all models)
5.22 Lower
Transport
Assembly
The lower transport assembly is mounted on two studs that serve as hinges.
1. Remove all printer/base covers (sections 5.2 through 5.5 and 5.7).
2. Remove the printer/base from its base pan. Section 5.6, steps 1 through 3.
3. Remove the right and left stud brackets. Each is held in place by one
screw. See Figures 5-73 and 5-74 below.
4. Maneuver the lower transport out of the machine base. The lower transport is entirely passive. It contains no sensors or drive components.
5. Reassemble in reverse order.
Figure 5-73 Removing Right Pivot Stud Figure 5-74 Removing Left Pivot Stud
Bracket
Bracket
Figure 5-75 Pivot Stud Bracket and
Lower Transport Assembly
Figure 5-76 Side and Top Views of
Lower Transport Assembly
5-24
DM300c/DM400c/DM475 Service Manual (SV61801 Rev. D)
5 • Removal & Replacement
Printer/Base (use for all models)
5.23 Lower
Transport
Cover
1. Remove lower transport assembly from machine (section 5.22).
2. Pull off transport lock lever.
3. Remove two screws that secure
cover to transport assembly. See
figure, right.
4. Separate cover from lower transport assembly.
5. Reassemble in reverse order.
Figure 5-77 Lower Transport Cover
Removal
5.24 Waste Pad
Replacement
1. Squeeze tray handles and slide out waste pad tray.
2. Carefully lift out waste pad using a paper towel.
3. Replace waste pad and insert tray in side of machine.
Figure 5-78 Waste Pad Drawer
Figure 5-79 Removing Waste Pad
DM300c/DM400c/DM475 Service Manual (SV61801 Rev. D)
5-25
5 • Removal & Replacement
Auto-Feeder (use for DM400c/DM450c/DM475)
5.25 Feeder
Upper Cover
1. Open feed access door and
remove water bottle.
Feed Access Door
Water Bottle
Figure 5-80 Feed Access Door and Water
Bottle
2. Remove two mounting
screws as shown and close
feed access door.
Figure 5-81 Mounting Screws
3. Remove four mounting
screws and detach feeder upper cover.
Feeder Upper Cover
4. Reassemble in reverse order.
[DM475 - The left side screw
is the ground for nudger deck
back plate.]
Figure 5-82 Mounting Screws
5-26
DM300c/DM400c/DM475 Service Manual (SV61801 Rev. D)
5 • Removal & Replacement
Auto-Feeder (use for DM400c/DM450c/DM475)
5.26 Side Guide
1. Remove feeder upper cover
(section 5.25).
2. Remove stepped screw that
serves as stop for side guide
slide. See figure, right.
Screw
Figure 5-83 Removing Stepped Screw
3. Slide side guide to front and
remove it as shown in figure,
right.
Side Guide
4. Reassemble in reverse order.
Side Guide Slide
Figure 5-84 Removing Side Guide
DM300c/DM400c/DM475 Service Manual (SV61801 Rev. D)
5-27
5 • Removal & Replacement
Auto-Feeder (use for DM400c/DM450c/DM475)
5.27 Feed Deck
1. Remove feeder upper cover
(section 5.25) and side guide
(section 5.26).
2. Remove screw shown in figure, right, and detach entrance
guide.
Entrance Guide
Screw
3. Remove six screws (located
by arrows in Figure 5-86).
NOTE: The DM475 feed deck
has eight screws. When removing the left rear screw,
Figure 5-85 Removing Entrance Guide
make sure you leave the
ground connection under it
Feed Deck
intact.
4. Before you remove deck assembly, hold down the stacker
sensor flag from its back as
shown in Figure 5-87.
CAUTION: Stacker sensor
flag can break easily.
5. Carefully remove deck. Maneuver the deck tabs out of
Figure 5-86 Removing Feed Deck
their corresponding holes in
the feed unit frame as shown
in Figure 5-88, next page.
Lift up front edge of deck and pull
carefully toward front to free it.
6. Reassemble in reverse order.
NOTE: Make sure you hold
down the stacker sensor flag
when replacing the deck assembly.
5-28
DM300c/DM400c/DM475 Service Manual (SV61801 Rev. D)
5 • Removal & Replacement
Auto-Feeder (use for DM400c/DM450c/DM475)
5.27 Feed Deck
Operating Note:
Maximum stack weight is 4.5
pounds. Weights greater than
this will cause the belts to skip
and consequently erratic or failto-feed conditions.
Service Note:
You can eliminate or reduce
drive component noise by applying a small amount of silicone
lubricant to the offending parts.
Figure 5-87 Moving the Stack Present Sensor Flag to provide Clearance
Figure 5-88 Feed Deck Mounting Tab
5.28 Feeder Unit
1. DM400c/DM450c - Remove
entire printer/base assembly
from its base pan (see section
5.6 and figure, right).
2. DM400c/DM450c - Disconnect
three harnesses from PCB:
J309, J307, and J301
DM475 - Remove two screws
for moistener deck (one is
self-tapping in hole).
3. Remove feed deck (section
5.27).
Figure 5-89 DM400c/DM450c Printer/Base
Removed from Base Pan
DM300c/DM400c/DM475 Service Manual (SV61801 Rev. D)
5-29
5 • Removal & Replacement
Auto-Feeder (use for DM400c/DM450c/DM475)
5.28 Feeder Unit
4. Remove moistener as shown
in figure, right.
Moistener Assembly
Figure 5-90 Removing Moistener
5. Remove moistener tank.
Moistener Tank and Wick
Figure 5-91 Removing Moistener Tank
Figure 5-92 A and B Removing Feed Unit Mounting Screws
5-30
DM300c/DM400c/DM475 Service Manual (SV61801 Rev. D)
5 • Removal & Replacement
Auto-Feeder (use for DM400c/DM450c/DM475)
5.28 Feeder Unit
6. Remove two screws shown in
figures below.
Feeder Unit
7. Remove two screws shown at
right and below, and detach
feeder unit.
8. Reassemble in reverse order.
Figure 5-93 A, B and C Feeder Unit Removal
5.29 Feeder
PCB Assembly
(DM400c/
DM450c)
1. Remove feeder upper
cover (section 5.25).
Mounting Screws
2. Unplug five connectors
(arrows in figure, right) and
remove four screws to detach feeder PCB.
3. Reassemble in reverse
order.
Mounting Screws
Figure 5-94 Removing Feeder PCB
DM300c/DM400c/DM475 Service Manual (SV61801 Rev. D)
5-31
5 • Removal & Replacement
Auto-Feeder (use for DM400c/DM450c/DM475)
5.30 Retard
Roller
1. Remove feeder PCB assembly as described in section
5.29.
2. Remove one screw (figure,
right), and detach the entrance guide.
Entrance Guide
Screw
Figure 5-95 Removing Entrance Guide
3. Remove two springs (4S32380) as shown in figure,
right.
IMPORTANT! The four remaining springs (4S3-2379)
used in this assembly have
a different spring rate. The
springs are not interchangeable. Note the location of and
Springs
mark each spring set so you
can return each to the correct
Figure 5-96 Removing Springs
position when you reassemble the unit.
CAUTION! Failure to do so
will change the tension applied to the pressure rollers
and compromise feeding.
5-32
DM300c/DM400c/DM475 Service Manual (SV61801 Rev. D)
5 • Removal & Replacement
Auto-Feeder (use for DM400c/DM450c/DM475)
5.30 Retard
Roller
4. Remove E-Clip, washer and
bushing.
5. Remove retard roller assembly as shown in figure, right.
E-Clip, Washer and Bushing
Figure 5-97 Removing Shaft Components
Retard Roller Assembly
6. Remove screw and cap.
Figure 5-98 Retard Roller
7. Reassemble in reverse order.
Cap
Screw
Figure 5-99 Removing Screw and Cap
DM300c/DM400c/DM475 Service Manual (SV61801 Rev. D)
5-33
5 • Removal & Replacement
Auto-Feeder (use for DM400c/DM450c/DM475)
5.31 Feed Roller
Assembly
1. Remove printer/base from
base pan (section 5.6).
B
2. Remove two springs (4S32380) at location A in figure,
right.
3. Remove four springs (4S32379) at location B in figure,
right.
See IMPORTANT note on
next page (step 9).
4. Remove release holder.
Push back on seal/no seal
lever to provide clearance.
B
A
Figure 5-100 Spring Locations
Release Holder
Figure 5-101 Release Holder
5. Remove release lever by
sliding it straight out.
Release Lever
Figure 5-102 Release Lever
6. Maneuver retard gap plate to
free it, and slide to right side
to remove it.
Retard Gap Plate
Figure 5-103 Retard Gap Plate
5-34
DM300c/DM400c/DM475 Service Manual (SV61801 Rev. D)
5 • Removal & Replacement
Auto-Feeder (use for DM400c/DM450c/DM475)
5.31 Feed Roller
Assembly
7. Slide feed roller assembly
(right side) to front and remove it. See figure, right.
Feed Roller Assembly
8. Remove screw shown in fig- Figure 5-104 Feed Roller Assembly (1)
ure, right, and slide feed roller
Feed Roller Assembly
unit (left side) to front and remove it.
9. Reassemble in reverse order.
Gap Cam Lock Screw
IMPORTANT! When reinstalling the feed roller assembly, it
is essential that you DO NOT
change the position of the
factory set separator adjustment.
Figure 5-105 Feed Roller Assembly (2)
When removing
the gap cam
lock screw during disassembly, note where
the screw
caused an
indentation in
the plastic. See
Figure 5-106.
Indentation
Figure 5-106 Proper Setting for Gap Cam Lockscrew
When reinstalling, insure that the screw is
tightened in the same indentation.
CAUTION! Changing this setting will cause separation errors.
Gap Cam
Figure 5-107 Gap Cam Shown with Release Holder in Place
DM300c/DM400c/DM475 Service Manual (SV61801 Rev. D)
5-35
5 • Removal & Replacement
Auto-Feeder (use for DM400c/DM450c/DM475)
5.32 Feed Belt
Assembly
1. Remove feeder unit (section
5.28).
Release Lever
2. Release the release lever.
Figure 5-108 Release Lever
3. Remove spring and loosen
the belt tensioner screw as
shown in the figure, right.
E-Clips and Pulleys
Gear
4. Remove timing belt and
gear.
5. Remove two E-Clips, and
pulleys as shown at the
right.
Loosen Screw
Spring
Timing Belt
Figure 5-109 Timing Belt/Gear Removal
6. Remove three bushings as
shown in Figure 5-110.
Figure 5-110 Bushing Removal
5-36
DM300c/DM400c/DM475 Service Manual (SV61801 Rev. D)
5 • Removal & Replacement
Auto-Feeder (use for DM400c/DM450c/DM475)
5.32 Feed Belt
Assembly
7. Remove three screws as
shown in Figures 5-111 and
5-112, right, and detach roller
plate.
NOTE: Roller plate is aligned
to moistener deck by two
studs, one of which is shown
in Figure 5-112. Use care
when separating the roller
plate from moistener deck.
Figure 5-111 Screw Removal, Left
Stud
Figure 5-112 Screw Removal, Right
8. Push out the two bushings
that confine roller shafts; then
remove roller assemblies by
lifting out of cutouts.
Roller Assemblies
E-Clips and
Bushings
Figure 5-113 Roller Plate Removal
DM300c/DM400c/DM475 Service Manual (SV61801 Rev. D)
5-37
5 • Removal & Replacement
Auto-Feeder (use for DM400c/DM450c/DM475)
5.32 Feed Belt
Assembly
9. Remove spring (A).
10. Remove the E-Clip (B), and
detach gear unit (C).
11. Remove screw (D) and detach gear (E) and bushing
(F).
12. Remove screw (G) and feed
belt assembly (H).
F
H
D
E
B
G
C
13. Reassemble in reverse order.
A
Figure 5-114 Feed Belt Assembly Removal
Figure 5-115 Feed Belt Assembly Removed from Roller Plate
5.33 Feed Motor
1. Remove the feeder unit (section 5.28).
2. Disconnect connector (A),
from feeder PCB and dismount the harness (B) from
the three harness guides (C).
A
B
C
C
3. Reassemble in reverse order
Figure 5-116 Disconnecting Harness
5-38
DM300c/DM400c/DM475 Service Manual (SV61801 Rev. D)
5 • Removal & Replacement
Auto-Feeder (use for DM400c/DM450c/DM475)
5.33 Feed Motor
3. Remove spring (A) and loosen
belt tensioner screw (B), Figure right.
A
4. Walk belt (C) off motor pulley.
B
5. Remove two screws (D).
6. Disconnect harness (E), Figure below, right.
D
7. Remove motor (F).
C
8. Reassemble in reverse order.
Figure 5-117 Removing Feed Motor (1)
E
F
Figure 5-118 Removing Feed Motor (2)
5.34 Feed
Encoder
1. Remove feeder unit (section
5.28).
2. Unplug connector (A).
A
B
3. Remove screw (B), and detach
encoder sensor (C).
4. Remove E-Clip and washer
(D).
C
5. Remove feed encoder disc (E).
D
6. Reassemble in reverse order.
E
Figure 5-119 Removing Encoder
DM300c/DM400c/DM475 Service Manual (SV61801 Rev. D)
5-39
5 • Removal & Replacement
Auto-Feeder (use for DM400c/DM450c/DM475)
5.35 Feeder
Sensor (FS2/
WS1) PCB
1. Remove feeder upper cover
(section 5.25)
Connector
2. Unplug connector.
PCB
3. Remove screw and feeder
sensor PCB.
4. Reassemble in reverse order.
Screw
Figure 5-120 Feeder Sensor PCB
5.36 Seal/No
Seal Lever
1. Push cap assembly (figure,
right) in.
2. Turn cap assembly one-quarter turn to remove cap and
spring.
3. Free lever.
4. Reassemble in reverse order.
Cap Assembly
Figure 5-121 Seal/No Seal Lever
5-40
DM300c/DM400c/DM475 Service Manual (SV61801 Rev. D)
5 • Removal & Replacement
Auto-Feeder (use for DM400c/DM450c/DM475)
5.37 Sealer
Finger
1. Remove feed roller assembly
(section 5.32).
2. Release sealer finger pressure spring.
Tab
3. Free lever.
4. Squeeze tabs on back wall.
See figure, right, for location.
Pressure
Spring
5. Remove sealer pressure finger.
Tab
6. Reassemble in reverse order.
Figure 5-122 Sealer Finger
Pressure
Spring
Figure 5-123 Sealer Finger Assembly in
Position
DM300c/DM400c/DM475 Service Manual (SV61801 Rev. D)
5-41
5 • Removal & Replacement
WOW Section of Feeder/WOW Module (use for DM475)
5.38
Separation of
Feeder/WOW
Module from
Printer/Base
1. Disconnect power and remove scale if
present
2. Lift up the feeder/WOW cover and remove water bottle.
3. Locate the interface cable cover. Open
the cable cover by pressing on the plastic
latch away from the edge of the cavity
and lifting up.
Interface
Cavity
4. Disconnect the three cables (two purple harnesses and one black USB
cable) in the interface cable cavity. Keep these from getting pinched in the
next few steps.
5. Open (release) the jam clearance lever on printer/base. Lift up the
printer/base section (put one hand on back and another hand inside the
printer transport) away from the feeder/WOW section. Note the two plastic
pins protruding from the bottom of the printer/base section.
Holes in
Feeder/
WOW
Section
Plastic Pins in Printer/Base Section
6. Reassemble in reverse order.
NOTE: Make sure you route the cables
through the channel into the interface
cable cavity of the feeder/WOW section
and you align the printer/base plastic pins
into the appropriate holes in feeder/WOW
module.
5-42
DM300c/DM400c/DM475 Service Manual (SV61801 Rev. D)
5 • Removal & Replacement
WOW Section of Feeder/WOW Module (use for DM475)
5.39 Feeder/
WOW Cover
1. Separate the feeder/WOW module from the printer/base (section 5.38).
2. Remove water bottle.
3. Remove screws (nine in total) holding cover to chassis - five on back,
one on each side, and two on top (when cover is open).
4. Lift cover straight up.
Cover
5. Reassemble in reverse order.
NOTE: When reassembling,
be careful not to disturb the
left grounding screw on the
bottom chassis, as this screw
connects the grounding tab
between the feeder/WOW
cover and the rear grounding
plate.
5.40 Feeder
Unit of Feeder/
WOW Module
Grounding
Screw
1. Remove water bottle, moistener stripper blade/brush, and moistener
tank.
2. Remove the feeder/WOW module cover (section 5.39).
3. Remove side guide by removing screw at end of shaft behind the rear
wall (section 5.26).
4. Remove feed deck (section 5.27). Note that the DM475 feed deck has
eight screws. The ground screw on left side should be left intact.
5. Continue with step 6 in section 5.28 to remove the feeder unit from the
machine.
Feeder Unit
(in white
rectangle)
6. Reassemble in reverse order.
DM300c/DM400c/DM475 Service Manual (SV61801 Rev. D)
5-43
5 • Removal & Replacement
WOW Section of Feeder/WOW Module (use for DM475)
5.41 Feeder/
WOW Control
Board (PCB)
1. Remove the feeder/WOW module cover (section 5.39).
2. Disconnect the white flex cable at the feeder/WOW junction board end. This
cable is held in just by its placement in the connector - no fastener is used.
White Flex Cable
(partially obscured)
Feeder/WOW
Junction Board
3. Undo two plastic clips and remove feeder harness (purple and orange
wires).
Purple Feeder Harness
Orange Feeder Harness
Plastic Clips
Black Load Hold-Down
Cell Cable Screw
4. Remove load cell cable (black) to board and its accompanying holddown screw.
5. Remove two screws on back of metal frame and one screw holding
metal frame to bottom chassis.
Two Screws on Back
of Metal Frame
Bottom Screw for
Chassis
5-44
DM300c/DM400c/DM475 Service Manual (SV61801 Rev. D)
5 • Removal & Replacement
WOW Section of Feeder/WOW Module (use for DM475)
5.41 Feeder/
WOW Control
Board (PCB)
6. Remove board with metal frame from chassis.
7. Disconnect the two harnesses (interface adapters) with white ferrites
from board.
Harnesses
with Ferrites
8. Undo the top plastic clip for the white flex cable on the back of the metal
frame. This will allow enough slack to pull up the flex cable from the top
and unfasten it from the board. This cable is held in just by its placement in the connector - no fastener is used.
White Flex Cable
Top
Plastic
Clip
9. Remove fours screws at each corner and remove board from frame.
10. Reassemble in reverse order. Keep in mind the following:
A. The white flex cable is properly seated in its connectors at both ends
(feeder/WOW board and junction board).
B. For load cell cable, make sure the wires are coming out on top of
the connector when plugging the cable onto board. Attach grounding
hold-down clamp to frame and plastic clip.
C. If installing WOW Assembly with feeder/WOW Control board attached, leave frame mount screw and load cell cable screws snug
but loose so frame can be adjusted.
D. Ensure all cable hold-downs are properly closed around cables. Vibration in the cable can affect the load cell’s ability to “zero” as well
as its accuracy.
DM300c/DM400c/DM475 Service Manual (SV61801 Rev. D)
5-45
5 • Removal & Replacement
WOW Section of Feeder/WOW Module (use for DM475)
5.42 WOW
Thickness and
Feed Encoders
1. Remove feeder/WOW Control Board (section 5.41). You only need to do
steps 1-6 from that procedure.
2. [Feed encoder only] Unlatch plastic hold-down to allow enough slack
to remove harness in step 6. Do this by squeezing in the tab that compresses the pin that fits in the hole.
Feed Encoder
Thickness Encoder
Plastic
Hold-Down
3. Unplug purple harness from encoder.
Screw
For Metal
Bracket
Screw
Holding
Encoder
to Metal
Bracket
Encoder Wheel
Removed
Thickness Encoder
(Removed)
Purple Harness
Feed Encoder
4. Remove screw holding encoder metal bracket to back wall.
5. Remove screw holding encoder to metal bracket and remove encoder.
6. Remove e-clip and washer from encoder wheel and remove wheel from
shaft.
7. Reassemble in reverse order
NOTE: When reassembling, use alignment nubs on back wall to align
encoder bracket to back wall when mounting. Don’t forget to re-install
plastic hold-down on feed encoder harness.
5-46
DM300c/DM400c/DM475 Service Manual (SV61801 Rev. D)
5 • Removal & Replacement
WOW Section of Feeder/WOW Module (use for DM475)
5.43 Feeder/
WOW Junction
Board
1. Remove Feeder/WOW Control Board (section 5.41).
2. Unplug all connectors (three on top, three ribbon in the middle, and one
on bottom right) and remove two screws.
3. Reassemble in reverse order.
Screws
Top Connectors
Middle Connectors
Bottom Right Connector
5.44 WOW
WS2 (Middle)
and WS3 (Exit)
Sensors
1. Remove Feeder/WOW Control Board (section 5.41).
2. Unplug purple harness (you may need to undo plastic clips).
3. Remove screw holding bracket to frame.
4. Remove screw holding sensor to bracket.
5. Reassemble in reverse order.
NOTE: Both sensors use the same part number.
WS2 Middle Sensor
WS3 Exit Sensor
DM300c/DM400c/DM475 Service Manual (SV61801 Rev. D)
5-47
5 • Removal & Replacement
WOW Section of Feeder/WOW Module (use for DM475)
5.45 WOW
Transport
Belts (two,
behind wall)
1. Remove Feeder/WOW Control Board (section 5.41).
2. Remove WOW thickness encoder (section 5.42).
3. Loosen (but do not remove) belt tensioner screws (one for each belt).
Be careful not to over loosen the screw(s).
Left Belt
Tensioner
Screw
(Left Belt)
Right Belt
Tensioner
Screw
(Right Belt)
4. Release tension from each belt by fully compressing the tensioner, then
while still holding belt and tensioner, tighten screw for each tensionser.
Remove belts, starting with the left belt (looking from behind), then right
belt.
5. Reassemble in reverse order. Keep in mind the following:
5-48
•
When replacing belts, start with the right belt, then left (looking from
behind). Put new belt on and let the spring adjust the tension. Turn
the belt a few times to remove any slack, then tighten screw.
•
Reinstall WOW thickness encoder.
DM300c/DM400c/DM475 Service Manual (SV61801 Rev. D)
5 • Removal & Replacement
WOW Section of Feeder/WOW Module (use for DM475)
5.46 WOW
Transport
Pulleys (three,
behind wall)
1. Remove WOW transport belts (section 5.45).
2. For left clutched pulley – Remove the WOW unit chassis (section 5.51).
For middle and right pulleys – Remove feeder/WOW Control Board
(section 5.41); you only need to do steps 1-6 from that procedure.
3. Remove pulleys (orientation is looking from behind):
A. Right pulley – remove e-clip, white large plastic washer, and brass
washer from shaft.
B. Middle pulley – remove plastic hold-down on encoder bracket. Remove encoder bracket and encoder wheel (one screw). NOTE:
When removing pulley, do not lose pin in shaft. Slot in back of pulley
aligns with pin.
C. Left (clutched) pulley – remove e-clip.
Left Pulley
Middle Pulley
Right Pulley
Encoder and Hardware
Encoder and
Middle Pulley
Removed
Slot in Back
of Pulley
Pin on shaft
(horizontal to
fit in slot in
back of pulley)
4. Reassemble in reverse order. Keep in mind the following:
A. Left (clutched) pulley - install with visible side of the bearing facing in.
Replace WOW unit chassis.
B. Middle pulley - When putting pin back in middle pulley, insert pin
in shaft, turn shaft so pin is horizontal, and hold drive belt so shaft
doesn’t turn. Slide pulley on, capturing the pin.
DM300c/DM400c/DM475 Service Manual (SV61801 Rev. D)
5-49
5 • Removal & Replacement
WOW Section of Feeder/WOW Module (use for DM475)
5.47 WOW
Upper
Transport
(as a whole
unit)
1. Remove the feeder/WOW module cover (section 5.39).
2. Open WOW jam release lever.
3. Remove thickness encoder (section 5.42).
4. Remove the eight screws that hold the upper transport to metal frame.
Eight Screws (Circled), Two Tabs (in dotted boxes)
Thickness Encoder
(Unmounted from wall)
5. Remove upper transport unit (note two tabs) from metal frame.
Upper
Transport
Removed
Two Tabs (in
dotted boxes)
6. Reassemble in reverse order. Keep in mind the following:
5-50
•
open WOW jam lever to release tension
•
ensure two tabs fit into slots
•
reinstall thickness encoder
DM300c/DM400c/DM475 Service Manual (SV61801 Rev. D)
5 • Removal & Replacement
WOW Section of Feeder/WOW Module (use for DM475)
5.48 WOW
Upper
Transport
Arms
Assembly
1. Remove the WOW upper transport (section 5.47).
2. Release spring tension from each roller (eight total).
3. Remove e-clips on each shaft (and bushing on back side of thickness
encoder shaft).
E-Clip and Bushing
4. Note the position of the “tails” of the arms, then remove arms assembly.
5. Reassemble in reverse order. Make sure the ”tails” of the arms are positioned properly (see figures).
“Tails” of the Roller Arms (Circled)
DM300c/DM400c/DM475 Service Manual (SV61801 Rev. D)
5-51
5 • Removal & Replacement
WOW Section of Feeder/WOW Module (use for DM475)
5.49 WOW
Width Sensors
(WS4, WS5,
WS6)
1. Remove width sensor cover on WOW deck (lift gently from the back).
2. Note location of the two sensors (some models sold outside of US have
three sensors) using the scale on opaque cover. Unfasten four screws
and remove opaque cover.
NOTE: For countries using two sensors only (like the US), a spare cable
(for the third sensor) will be left in the cavity.
Sensor 1 (WS4) - preset to 155 (mm)
[Represents 6-1/8" from the back wall]
Four Screws for Opaque Cover (Circled)
Sensor 2 (WS5) - preset to 250 (mm)
[Represents 10-7/32" from the back wall, the
maximum position it can be set to]
3. While holding sensors, unsnap metal shaft from inside slot.
4. Remove the shaft by sliding off the sensors.
Metal Shaft
Sensor 1 and 2
(Circled)
5. Unplug flex cable from sensor. Note the orientation of the flex cable
when removing (one side is blue). The side of the sensor with a screw
is towards the printer/base side
5-52
DM300c/DM400c/DM475 Service Manual (SV61801 Rev. D)
5 • Removal & Replacement
WOW Section of Feeder/WOW Module (use for DM475)
5.49 WOW
Width Sensors
(WS4, WS5,
WS6)
6. Reassemble using this order, keeping in mind the following:
A. Install the new sensor(s) on metal bar and reinstall metal bar.
B. Reattach opaque lens.
C. Reposition the sensor to its original location. Place pencils into holes
on either side of the sensor, push down, and move it to its respective
setting (see below), using the numbers listed on the opaque cover
as your guide.
Sensor 1 (WS4) - position to 155
Sensor 2 (WS5) - position to 250
D. Plug in machine, and access the Service Menu by typing 6946 and
pressing Refill Postage key. Select WOW Options and navigate to
Width Sensor Status/Adjust Sensitivity screen. Verify that you can
get a blocked and clear reading from the sensors.
E. Reinstall sensor cover starting from the left side, then to the right
side.
DM300c/DM400c/DM475 Service Manual (SV61801 Rev. D)
5-53
5 • Removal & Replacement
WOW Section of Feeder/WOW Module (use for DM475)
5.50 WOW
Deck
1. Separate the feeder/WOW module from the printer/base (section 5.38)
2. Remove five screws from deck (one is embedded in a deep slot on the
left, one is in the right back corner under upper transport).
Screws for WOW Deck (Circled)
Screw Under Upper
Transport (Circled)
3. Disconnect width sensor cables from their sensors (section 5.49).
4. Open WOW jam clearance lever.
5. Lift deck plate up and slide the cables out of the opening in the back.
NOTE: Be careful not to damage the WOW width sensors flex cables
under deck.
6. Reassemble in reverse order. Keep in mind the following:
•
5-54
The three width sensor flex cables are not labelled and are attached
together – do not try to separate them. The longest flex cable on the
deck side goes to the outer sensor (WS5).
DM300c/DM400c/DM475 Service Manual (SV61801 Rev. D)
5 • Removal & Replacement
WOW Section of Feeder/WOW Module (use for DM475)
5.51 WOW
Unit Chassis
(as a whole
unit)
1. Locate and lock-down the three WOW load cell shipping screws. The
two front screws are accessed via notched holes in the feeder/WOW
deck (left photo below), while the back screw is accessed through a
hole in the interface cable compartment (right photo below).
Notched Access Holes on Deck
Access Hole Inside Interface Cable Cavity
(interface cables disconnected)
2. Remove the feeder/WOW module cover (section 5.39).
3. Undo two plastic clips and remove feeder harness (purple and orange
wires) from feeder/WOW control board.
Purple Feeder Harness
Orange Feeder Harness
Plastic Clips
Feeder/WOW Control Board
4. Remove the two screws securing the back of the feeder/WOW control
board metal frame and one screw holding metal frame to bottom chassis.
Two Screws on Back
of Metal Frame
Bottom Screw for
Chassis
DM300c/DM400c/DM475 Service Manual (SV61801 Rev. D)
5-55
5 • Removal & Replacement
WOW Section of Feeder/WOW Module (use for DM475)
5.51 WOW
Unit Chassis
(as a whole
unit)
5. Remove three screws that attach the rear of the load cell assembly to
the tub. These are the long, washer head screws in the oval adjustment
holes.
Three Long Screws
in Rear of Load Cell
Assembly (Circled)
6. Remove one screw for brass grounding fingers on right side of bottom
chassis.
Brass Fingers
Screw for
Brass Fingers
7. Remove three screws that attach the front of the load cell assembly to
the tub. These are the long, washer head screws in the oval adjustment
holes accessed through the holes in the front deck that are not keyed.
NOTE: The deck can be loosened if there is difficulty locating the
screws into the hole.
Three Long Screws
in Front of Load Cell
Assembly (Circled)
(this long screw is just to the right of visible screw in photo)
5-56
DM300c/DM400c/DM475 Service Manual (SV61801 Rev. D)
5 • Removal & Replacement
WOW Section of Feeder/WOW Module (use for DM475)
5.51 WOW
Unit Chassis
(as a whole
unit)
8. Lift up and out whole WOW unit assembly.
WOW Unit
Removed from
System
9. Reassemble using this order, keeping in mind the following:
A. Place unit in bottom chassis (tub). Be careful the rear does not get
caught on the feeder unit.
B. Fasten the six long washer-head screws, but back off a 1/4 turn from
fully tightened. This allows you to adjust the WOW unit.
C. If the feeder/WOW board is attached, insure that the bracket screws
are loose.
D. Perform the feeder/WOW Registration Wall Alignment (section 5.56)
E. Once the adjustment is done, insure that all screws (three on board
bracket, 6 - load cell to tub, 1 - grounding fingers) are tightened.
F. Fasten two feeder harness cables (orange and purple) to feeder/
WOW control board.
G. Recalibrate the WOW load cell. Access the Service Menu and navigate to WOW Options (see section 6.5). Perform the WOW Calibration and Static Weight procedures.
DM300c/DM400c/DM475 Service Manual (SV61801 Rev. D)
5-57
5 • Removal & Replacement
WOW Section of Feeder/WOW Module (use for DM475)
5.52 WOW
Transport
Motor
1. Remove WOW unit chassis (section 5.51).
2. Untension the motor drive belt.
Tensioner
Motor Drive Belt
3. Disconnect motor harness cable from junction board. Unclip harness
from two clips in and under the lower WOW transport assembly.
Motor Harness Cable at
Feeder/WOW Junction
Board
Lower WOW
Transport
Assembly
Two Plastic Clips
for Motor Harnesses
(Circled)
WOW Transport
Motor
4. Remove two screws fastening feeder/WOW junction board and move it
up slightly to expose screw for WOW transport motor behind it.
Screws (Circled) for
Feeder/WOW Junction
Board
5-58
DM300c/DM400c/DM475 Service Manual (SV61801 Rev. D)
5 • Removal & Replacement
WOW Section of Feeder/WOW Module (use for DM475)
5.52 WOW
Transport
Motor
5. Remove two screws holding motor to wall plate. Note that the motor
plate is slightly off angle to the wall plate. This is normal.
Screws for Motor (Circled)
6. Slide motor towards printer and remove.
7. Reassemble in reverse order. Keep in mind the following:
•
Ensure all cable hold-downs are properly closed around cables. Vibration in the cable can affect the load cell’s ability to “zero” as well
as its accuracy
•
Perform the feeder/WOW Registration Wall Alignment (section 5.56).
DM300c/DM400c/DM475 Service Manual (SV61801 Rev. D)
5-59
5 • Removal & Replacement
WOW Section of Feeder/WOW Module (use for DM475)
5.53 Lower
WOW
Transport
Assembly (as
a whole unit)
1. Remove the feeder/WOW module cover (section 5.39).
2. [Optional, but recommended] Remove WOW unit chassis (section 5.51).
3. Remove the WOW deck (section 5.50).
4. Release tension on left belt (looking from behind) and remove e-clip
from middle pulley.
Encoder and Hardware Over Middle Pulley
Left Belt
Middle Pulley Tensioner Screw for Left Belt
5. Remove plastic hold-down on encoder bracket over middle pulley. Remove encoder bracket and encoder wheel (one screw). NOTE: When
removing pulley, do not loose pin in shaft. Slot in back of pulley aligns
with pin.
Encoder and
Middle Pulley
Removed
Slot in Back
of Pulley
Pin on shaft
(horizontal to
fit in slot in
back of pulley)
6. Disconnect the width sensor flex cables from the plastic clip under the
lower WOW transport. If you have not removed the WOW unit chassis,
you will need to use your hand to feel for the clip under the lower WOW
transport assembly and unfasten the clip.
Lower WOW
Transport
Assembly
Plastic Clip for Sensor
Harnesses (Circled)
5-60
DM300c/DM400c/DM475 Service Manual (SV61801 Rev. D)
5 • Removal & Replacement
WOW Section of Feeder/WOW Module (use for DM475)
5.53 Lower
WOW
Transport
Assembly (as
a whole unit)
7. Remove five screws (circled below) holding lower WOW transport assembly to the load cell upper casting, and remove assembly.
Lower WOW Transport
Assembly (Removed)
Screws (circled)
8. Reassemble in reverse order. Keep in mind the following:
•
The three width sensor flex cables are not labelled and are attached together – do not try to
separate them. The longest flex cable on the
deck side goes to the outer sensor (WS5). This
longest flex cable is the shortest flex cable at the
Junction board where it connects to J21. At the
deck side, it is on the bottom of the pile with the
contacts facing up. The middle flex cable connects between the second width sensor (WS4)
and the middle plug on the Junction board (J22).
Flex Cable for
Sensor WS5
•
The lower WOW transport assembly sits on two pins coming from
the WOW load cell assembly.
•
Do not overtighten screws; this could cause stripping.
•
When putting pin back in middle pulley, turn shaft so pin is horizontal, and hold drive belt so shaft doesn’t turn. Slide pulley on, capturing the pin.
•
If WOW unit was removed, perform the feeder/WOW Registration
Wall Alignment (section 5.56)
DM300c/DM400c/DM475 Service Manual (SV61801 Rev. D)
5-61
5 • Removal & Replacement
WOW Section of Feeder/WOW Module (use for DM475)
5.54 Lower
WOW
Transport
Components
1. Remove lower WOW transport assembly (section 5.53).
2. Remove WOW exit rollers (held on by e-clips and bearing).
WOW Exit Rollers
WOW Drive Belts
3. Remove WOW drive belts:
A. Loosen the tensioner spring on each side.
Screws for
Tensioner
Spring
B. Compress spring and retighten screws on each side.
C. Remove main drive belt roller (third one when looking from front of
unit). Undo e-clips, bearing, slide belt off, and remove roller assembly.
Main Drive
Belt Roller
5-62
DM300c/DM400c/DM475 Service Manual (SV61801 Rev. D)
5 • Removal & Replacement
WOW Section of Feeder/WOW Module (use for DM475)
5.54 Lower
WOW
Transport
Components
D. Remove right black plastic stiffener (one screw).
E. Remove e-clip and slide off middle belt roller.
F. Remove left black plastic stiffener (one screw).
G. Release tension spring on both sides.
H. Remove tension spring assembly on front (one screw) and only
loosen the tension spring assembly on the back. “Work out” shaft.
I.
Remove belts.
WOW
Drive
Belts
Tension Spring
Assembly (one
removed)
Middle
Roller
Black Stiffener
Cover
E-Clip
4. Reassemble in reverse order. Keep in mind the following:
•
Make sure the shaft is put back in correctly (short end faces the rear
and some are “d” shafts).
“D” Shaft End
•
Put the two belts on first.
•
Belts should go in grooves in rollers.
•
Black plastic stiffeners are keyed to go in one way only
•
Compress springs to allow belts to go over rollers
•
Release tension when belts are installed, spin belts, then retighten
tensioners
•
Perform the feeder/WOW Registration Wall Alignment (section 5.56)
DM300c/DM400c/DM475 Service Manual (SV61801 Rev. D)
5-63
5 • Removal & Replacement
WOW Section of Feeder/WOW Module (use for DM475)
5.55 WOW
Load Cell
Assembly
1. Remove WOW unit chassis (section 5.51).
2. Remove feeder/WOW control board on its bracket (section 5.41)
3. Remove WOW upper transport assembly (section 5.47)
4. Remove lower transport WOW assembly (section 5.53).
5. Release tensioner and remove belt on motor drive pulley.
6. Remove the motor drive pulley (consists of pulley, e-clip brass washer
and plastic washer).
Belt for Motor
Drive Pulley
Motor Drive
Pulley
Plastic Washer
Brass Washer
7. Remove seven screws holding wall plate to load cell unit.
Screws
(white circles)
Position Pins
(black circles)
Wall Plate
5-64
Load Cell
DM300c/DM400c/DM475 Service Manual (SV61801 Rev. D)
5 • Removal & Replacement
WOW Section of Feeder/WOW Module (use for DM475)
5.55 WOW
Load Cell
Assembly
8. Remove wall plate from two position pins on load cell wall (black circles
in photo above).
Wall Plate
Removed
9. Remove load cell assembly.
Load Cell
Removed
10. Reassemble in reverse order. Keep in mind the following:
•
When re-installing back wall on load cell base, attach wall to right
locking pin first, then left locking pin (when looking from the rear).
•
Perform the feeder/WOW Registration Wall Alignment (section 5.56)
•
Calibrate load cell and perform Static Weight test (see section 6.5)
DM300c/DM400c/DM475 Service Manual (SV61801 Rev. D)
5-65
5 • Removal & Replacement
WOW Section of Feeder/WOW Module (use for DM475)
5.56 Feeder/
WOW
Registration
Wall Alignment
This procedure aligns the registration wall of the feeder section with the
registration wall of the WOW section in the feeder/WOW module. This will
prevent mail pieces from hitting the WOW registration wall and ensure a
straight path for the mail piece.
NOTE: This procedure needs to be done any time the WOW unit chassis has been removed from the machine, or if the machine is experiencing
jams/skews/no prints that suggest registration wall misalignment.
1. Locate and lock-down the three WOW load cell shipping screws. The
two front screws are accessed via notched holes in the feeder/WOW
deck (left photo below), while the back screw is accessed in a hole in
the interface cable compartment (right photo below).
Notched Access Holes on Deck
Access Hole Inside Interface Cable Cavity
(interface cables shown disconnected)
2. Remove the feeder/WOW module cover (section 5.39).
3. Remove two screws on top of metal frame for feeder/WOW control
board and one screw holding metal frame to bottom chassis.
Top Screws (remove)
Bottom Screw for
chassis (remove)
5-66
DM300c/DM400c/DM475 Service Manual (SV61801 Rev. D)
5 • Removal & Replacement
WOW Section of Feeder/WOW Module (use for DM475)
5.56 Feeder/
WOW
Registration
Wall Alignment
4. Remove one screw for brass grounding fingers on right side of bottom
chassis.
Brass Fingers
Screw for
Brass Fingers
5. Loosen (do not remove):
•
Two screws on bottom of metal frame for feeder/WOW control board
Two Screws on
Bottom (loosen)
•
Six long, washer-head screws for load cell assembly in oval adjustment holes (three in front, three in back)
Three Long
Screws in Front
(loosen)
(this long screw is just to the right of visible screw in photo)
Three Long
Screws in Back
(loosen)
DM300c/DM400c/DM475 Service Manual (SV61801 Rev. D)
5-67
5 • Removal & Replacement
WOW Section of Feeder/WOW Module (use for DM475)
5.56 Feeder/
WOW
Registration
Wall Alignment
6. Check to make sure the WOW unit can be moved forward and backward. Move WOW unit all the way back towards the back of the machine (see bottom right photo).
Moving WOW Unit Backward/Forward
Screw Indicating WOW
Unit In Fully Back Position
7. Remove cover screw mounting “L” bracket on right side of bottom chassis.
Cover Screw
Mounting “L”
Bracket
8. Place “L” bracket between registration wall and WOW deck on side of
machine.
WOW Deck
Registration Wall
“L” Bracket
9. Slide WOW unit forward until “L” bracket is tight.
5-68
DM300c/DM400c/DM475 Service Manual (SV61801 Rev. D)
5 • Removal & Replacement
WOW Section of Feeder/WOW Module (use for DM475)
5.56 Feeder/
WOW
Registration
Wall Alignment
10. Take ruler (or straight edge) and slide up and down against back wall of
feeder/WOW deck and WOW registration wall. Move WOW unit until the
two walls are vertically aligned.
Unaligned Walls
Registration Feeder/
Wall
WOW Deck
Aligned Walls
Straight
Edge
Touching
Wall
Note the two walls lining up
against side of straight edge
11. Verify that the “L” bracket on right is still tight. If so, tighten any two of
the rear long, washer-head screws in load cell assembly to hold load
cell assembly in place temporarily. Recheck the alignments. If not OK,
redo steps 9 and 10.
One of the Rear,
Long, Washer-Head
Screw (tighten)
12. Once you are satisfied that all is aligned, fasten the remaining load cell
assembly screws.
13. Remove “L” bracket and replace on right side of bottom chassis.
14. Reassemble remaining components.
15. Loosen load cell lock-down screws until the spring tension releases
(you’ll hear a pop when they release).
16. Recalibrate the WOW load cell. Access the Service Menu and navigate
to WOW Options (see section 6.5). Perform the WOW Calibration and
Static Weight procedures.
DM300c/DM400c/DM475 Service Manual (SV61801 Rev. D)
5-69
5 • Removal & Replacement
WOW Section of Feeder/WOW Module (use for DM475)
5-70
DM300c/DM400c/DM475 Service Manual (SV61801 Rev. D)
6 • Service Menus
6.1 Service
Menu
Overview
✍
TIP: Access the Service Menu by typing
6946 and pressing
Refill Postage key.
This chapter discusses the menu programs available to Service that can help
diagnose/troubleshoot problems on the machine.
The table below lists the top level selections in the Service Menu. Use the
scroll buttons as required to see all available options. Press the appropriate
soft key to select a menu option. Press the Back (Clear) key to go to the previous screen.
Service Menu
(Top Level)
Function
Section
SBR Setup*
Allows you to setup and calibrate the ShapeBased Rating (SBR) feature of the DM475
6-3
Diagnostics
Allows you to test motors and sensors for all
modules and perform printer maintenance. Also
includes SBR sensor adjustments for DM475.
6-4
WOW Options
Allows you to calibrate and test the WOW load
cell on the DM475
6-5
Platform Options
Allows you to calibrate an integrated or external
platform scale
6-6
Time Functions
[Engineering Use Only]
6-7
System Information
Allows you to view software/firmware versions,
USB devices status, and flash files installed.
6-8
Enable Features
Allows you to enable/disable a machine feature
manually by entering a code. Because features
are downloaded from the Data Center to the customer’s machine automatically, use this function
only if directed to do so by Engineering.
6-9
Meter Withdrawal
Allows you to move any remaining postage from
6-10
the machine to the customer’s Postage By Phone®
account. Normally this is done if the customer is
no longer going to use the machine.
Mail Simulation**
[Use the Seal-Only mode to test mail feed]
6-11
*Will not display if SBR Setup has already been run on the machine. If you need
to rerun this option, see procedure in section 6.2 to make this option display in the
menu.
**Future enhancement - not implemented at time of publication of this manual.
DM300c/DM400c/DM475 Service Manual (SV61801 Rev. D)
6-1
6 • Service Menus
6.1 Service Menu Overview
Service Menu
Submenu 1
Submenu 2
SBR Setup
[only displays if SBR has not been done out of box or has been reset - see
“Reset SBR Status” below]
Diagnostics
PM Diagnostics
Start Normal test
Motor Diagnostics
Submenu 3
Run Transport Motor
Submenu 4
Stop Test
Run Encoder Full Rev.
Sensor Diagnostics
Run Tape Motor
Start Test
Cap/uncap Print Head
Status is displayed
S1 Transport
[Displays either:
“Clear” or “Blocked
“Open” or “Closed”]
NOTE: S2 will always
show as Clear on 6C00
even thought there is no
S2 mounted on the board.
S2 Transport
S3 Transport
Jam Lever
Top Cover Open
Cap Home Pos.
Pump Home Pos.
Carriage Pos.
Print Head Vol.
PM Maintenance
Feeder
Diagnostics
[DM400c/DM450c]
OR
Feeder/WOW
Diagnostics
[DM475]
Print Test Pattern
Purge A, B, C, D
Clean Printer Nozzle
Purge A, B, C, D
Replace Ink Tank
[Same as opening ink access
cover]
Replace Print Head
[Same as opening ink access
cover]
Motors
Feeder Motor Excerciser
[We recommend the replace print head purge]
[Run at different speeds]
WOW Motor Excerciser [DM475] [Run at different speeds]
Sensors
Read Encoder
Feeder Sensors
[“Clear” or “Blocked”
“Open” or “Closed”]
WOW Sensors
[Includes SBR sensors
and encoder]
Feeder Motor
[Encoder Status]
WOW Motor [DM475]
[Encoder Status]
Download Firmware
[Engineering Use Only]
Reload Profiles
[Engineering Use Only]
Print Logs
[Engineering Use Only]
Save Logs to File
[Engineering Use Only]
Information
PCN Information
[View only feeder/
WOW numeric info]
Counters
Jam Counters
XPT Entry
Length Error
WOW Timeout
Reset Counters
SBR Diagnostics
[DM475]
Length Calibration
Re-zero Thickness
[Check encoder/reset to zero]
Last 256 Dimensions
[Report of dimensions listed]
Reset SBR Status
Reset Status
[makes it display on menu]
Don’t Reset status
Modem Diagnostics Modem Pass-Through [Engineering Use Only]
6-2
DM300c/DM400c/DM475 Service Manual (SV61801 Rev. D)
6 • Service Menus
6.1 Service Menu Overview
Service Menu
Submenu 1
Submenu 2
WOW Options
[DM475]
WOW Calibration
[Calibrates WOW]
Static Weight
[Performs static weight test]
Set WOW Mode
Normal Mode
Precision Mode
Re-zero WOW
[Re-zeros WOW]
Calibration Report
[List dates that WOW was calibrated]
Verify WOW
[Place 16 oz. weight on WOW. System takes
five samples and provides standard deviation
and “Pass/Fail” status.]
Last 10 Weights
[List the weights of the last ten pieces]
Platform
Options
Platform Calibration
[Calibrates attached platform scale]
Time
Functions
Setup DH Time
[Used for Brazil Only]
System
Information
Internal Information
[Lists system versions/PCNs/SN#s]
USB Devices
MCP Device
Submenu 3
[slower but better for unstable
environments]
Hub Device
Flash File Info
View Flash File
Delete Flash File
Enable
Features
Meter
Withdrawal
[See section 4.5]
✍
TIP: Access the Service Menu by typing
6946 and pressing
Refill Postage key.
DM300c/DM400c/DM475 Service Manual (SV61801 Rev. D)
6-3
6 • Service Menus
6.2 Making SBR
Setup Display
in Service Menu
[DM475]
SBR Setup is only displayed if it has not been completed. If SBR Setup
does not display on the Service Menu and you need to rerun this option, follow the procedure below.
1. At the main Service Menu, select Diagnostics.
Service Menu
5. The previous screen displays. Press
Back/C key.
SBR Diagnostics
◄ Diagnostics
◄ Length Calibration
◄ WOW Options
◄ Re-zero Thickness
◄ Platform Options
◄ Last 256 Dimensions
◄ Time Functions
◄ Reset SBR Status
[Back] When Done
2. At the next screen, select SBR Diagnostics.
Diagnostics
6. The previous screen displays.
Press Back/C key.
Diagnostics
◄ PM Diagnostics
◄ PM Maintenance
◄ PM Diagnostics
◄ Feeder/WOW Diagnostics
◄ PM Maintenance
◄ SBR Diagnostics
◄ Feeder/WOW Diagnostics
◄ SBR Diagnostics
3. At the next screen, select Reset SBR Status.
SBR Diagnostics
◄ Length Calibration
7. The main Service Menu screen with SBR
Setup displays.
Service Menu
◄ Re-zero Thickness
◄ SBR Setup
◄ Last 256 Dimensions
◄ Diagnostics
◄ Reset SBR Status
◄ WOW Options
[Back] When Done
◄ Platform Options
4. At the next screen, select Reset Status.
Reset SBR Status
Remove all SBR setting.
Need Setup again for SBR.
◄ Reset Status
◄ Don't reset status
6-4
DM300c/DM400c/DM475 Service Manual (SV61801 Rev. D)
6 • Service Menus
6.3 SBR Setup
[DM475]
SBR Setup is run when you first install a DM475 machine or when you have
replaced the WOW width sensors (WS4, WS5, WS6) or WOW thickness or
feed encoders.
1. At the main Service Menu, select SBR Setup.
NOTE 1: If SBR Setup does not display, see Making SBR Setup Display in Service Menu on previous page.
✍
TIP: Access the Service Menu by typing
6946 and pressing
Refill Postage key.
NOTE 2: If you exit at any time in the process, you will have to begin again
from this point. You will receive a warning screen before you can exit.
2. The Thickness Sensor Status screen appears. Open the feeder/WOW
cover and raise/lower the leading pair of idler rollers on the WOW upper transport (see figure below). This action drives the thickness encoder and the value on this screen should change. You are only looking for
a transition here, not a specific value. This verifies the thickness sensor
is working correctly. Press Enter to continue.
NOTE: When the leading pair of idler rollers on the WOW upper transport are down, the thickness should read 0.000 inches. If any other
reading occurs, select "Re-zero sensor" and then recheck.
Thickness sensor
status
Raise/lower measurement
ski to check sensor:
0.000 in
◄ Re-zero sensor
[Enter] to continue
Leading Pair Raising/Lowering Feeder/WOW
of Idler Rollers
Leading Pair of Upper Idler Rollers
3. The Check Width Sensor Location screen appears. Verify that the values of sensors 1, 2, and 3 match those shown below. This sets the software for the correct values as required by the USPS®. Press Enter to
continue.
NOTE 1: If no values are displayed, there may be no rates loaded in the
system.
NOTE 2: These are the correct settings for machines in the US. Other
countries may use different values based on their postal requirements.
See separate document for instructions.
Check Width Sensor
Location
Sensor 1 :
Sensor 2 :
Sensor 3 :
155 mm
304 mm
0 mm
[Enter] to continue
155 mm represents 6-1/8", the maximum
allowable width for a letter per USPS regulations
304 mm represents 12", the maximum allowable width for a flat (large envelope) per
USPS regulations
Sensor 3 is not installed on the DM475 for
the US, so this value will be "0"
DM300c/DM400c/DM475 Service Manual (SV61801 Rev. D)
6-5
6 • Service Menus
6.3 SBR Setup
[DM475]
4. The Width Sensor Status screen appears. Use a piece of paper and
block/unblock the sensors, one at a time. You are only looking for a transition here from "Clear" to "Blocked", not a specific value. This verifies
the width sensor board is functioning. Press Enter to continue.
NOTE 1: The width sensor positions are adjustable, but they are factory-preset for US machines.
NOTE 2: Sensor 3 is not installed on the DM475 for the US, so the value always shows "Clear".
Width Sensor Status/
Adjust Sensitivity
Sensor 1 :
Sensor 2 :
Sensor 3 :
Clear
Clear
Clear
◄ Edit Sen
[Enter] to continue
Width Sensor Status/
Adjust Sensitivity
Sensor 1 :
Sensor 2 :
Sensor 3 :
Blocked
Blocked
Clear
◄ Edit Sen
[Enter] to continue
Sensor 1 - physically preset to 155 mm (6-1/8")
from the back wall
Sensor 2 - physically preset to 250mm (107/32") from the back wall (this is the maximum
position it can be set to)
NOTE 3: Sensor 2 represents the flat/large envelope width sensor in the
US.
► If you will be feeding flats/large envelopes that are more than 10"
but less than 12", OR
► If the flats/large envelopes will be fed in portrait orientation,
set the Auto Rate Lg Env. option in the Weigh Rate menu to Yes.
Otherwise, an "SBR Error - Mailpiece Too Wide" error occurs when
you feed these type of mail pieces.
6-6
DM300c/DM400c/DM475 Service Manual (SV61801 Rev. D)
6 • Service Menus
6.3 SBR Setup
[DM475]
5. The WOW Calibration screen appears. Ensure the WOW locking screws
are loosened, then press Enter to continue.
WOW Calibration
Make sure that WOW
locking screws (3) are
backed out and Transport
tray is empty
[Enter] to continue
B. When instructed, place a 16 oz. weight onto the center of the WOW
unit (etched circle on top of the feeder/WOW clearance level assembly). Press Enter to continue.
16 oz. Weight
C. When WOW Calibration Complete screen displays, remove weight from
WOW Unit and close feeder/WOW cover. Press Enter to continue.
WOW Calibration
Complete
WOW calibration is
successful.
Remove weight from tray.
[Enter] to continue
DM300c/DM400c/DM475 Service Manual (SV61801 Rev. D)
6-7
6 • Service Menus
6.3 SBR Setup
[DM475]
6. The Length Sensor Calibration screen appears. Place the length calibration gauge on feed deck and adjust the side guide appropriately.
Press Start to continue.
NOTE 1: Make sure you have closed the feeder/WOW cover; otherwise
the transport won't start up when you press the Start key (and no error
message displays).
Length Sensor
Calibration
Please run calibration
gauge 16 times through
system.
[Start] to continue
NOTE 2: Run one calibration gauge through the machine, 16 successive times. You must do each run individually, and it must be with the
same gauge – if you load a stack of 16 calibration gauges, the machine
may give length or width errors during this process.
Length Calibration
Calibration in process
Remaining: 16
Waiting to run gauge
◄ Abort
NOTE 3: If an error occurs or if calibration fails, check the side guide setting to make sure the length calibration gauge is not being skewed when
feeding, then press OK to reattempt the length calibration.
NOTE 4: If you select Abort, you will need to start the SBR setup from
the beginning (see step 1 of this section).
7. When complete, the SBR Setup Completed screen appears. Select OK
to continue.
SBR Setup Completed
Length cal. completed.
Calibration successful.
◄ OK
8. Press Home key to exit Service Mode.
6-8
DM300c/DM400c/DM475 Service Manual (SV61801 Rev. D)
6 • Service Menus
6.4 Diagnostics PM Diagnostics
Submenu 1
Submenu 2
Submenu 3
PM Diagnostics
Motor Diagnostics
Run Transport Motor
Run Tape Motor
Cap/uncap Print Head
✍
Sensor Diagnostics
S1 Transport
S2 Transport
TIP: Access the Service Menu by typing
6946 and pressing
Refill Postage key.
S3 Transport
Jam Lever
Top Cover Open
Cap Home Pos.
Pump Home Pos.
Carriage Pos.
Print Head Vol.
Motor Diagnostics
Run Transport Motor. Select this option to test the transport motor. You
can start and stop the motor using the soft keys. You can also run the distance encoder for one revolution (short burst). NOTE: In actual usage, the
motor frequently starts and stops (not running continuously as is done in
this test).
Run Tape Motor. Select this option to run the tape motor for one feed
cycle.
Cap/Uncap Print Head. Choose this option to test the print head capping
function. Use the appropriate soft keys to open and close the print head
cap. You should be able to hear the cap changing position. The display
shows the status of the cap. NOTE: The system will not allow you to leave
the print head cap in the open position. If you press BACK without first closing the print head cap, the system closes the cap automatically.
DM300c/DM400c/DM475 Service Manual (SV61801 Rev. D)
6-9
6 • Service Menus
6.4 Diagnostics PM Diagnostics (cont’d)
Sensor Diagnostics
The sensor diagnostics option shows you the state of the machine sensors
(see table on the previous page for a list). You can test a sensor by manually changing it’s state and confirming the change on the display screen.
(P)S1, (P)S2 and (P)S3.
These are the mailing machine’s transport sensors as
shown in the accompanying
PS2
figure. When you block the
sensors with an envelope or
PS1
PS3
piece of paper, the display
Jam Lever
should change from Clear to
Sensor
Blocked. If all three sensors
work properly, it is likely that
the sensors, sensor junction
board and cable to J119 on
the Main Logic Board are
okay. If all sensors fail, there Figure 4-5 Transport Sensors (3C00, 4C00,
5C00)
may be a problem with the
sensor junction board, the cable to J119 or the main logic board. If the display shows a blocked sensor that should be clear, try cleaning the sensor.
NOTE: The 6C00 does not have a PS2 on its sensor board, but it is still
listed in Diagnostics and it will always show as “Clear”.
Jam Lever and Top Cover Open. These are the machine safety interlocks.
The system will not operate if the top cover is open or the jam clearance
lever is unlocked. To exercise the sensors, open and close the top cover
and unlock the jam clearance lever. If a sensor fails to change state, the
problem could be a mechanical problem affecting the sensor flag, a misalignment, or a wiring problem. For the top cover interlock, check the wiring
to J121. For the jam clearance lever, check the wiring from the sensor junction board at J119.
Cap Home Position. Cap should be in Cap Spit position.
Pump Home Position. Pump should be in Home Position.
Carriage Position. Indicates location of print carriage. In the capped position, the carriage is home and the carriage position sensor is blocked.
Print Head Vol(tage). Should be ON (except when a cover is open or machine is in sleep mode).
6-10
DM300c/DM400c/DM475 Service Manual (SV61801 Rev. D)
6 • Service Menus
6.4 Diagnostics PM Maintenance
Submenu 1
Submenu 2
PM Maintenance
Print Test Pattern
Clean Printer Nozzle
Replace Ink Tank
Replace Print Head
Example A: Good
Example B: Bad
Print Test Pattern.
This option prints a test pattern like those shown in figures above. Gaps in
the pattern (example B) indicate a purge (cleaning) is required.
Clean Printer Nozzle
This option allows you to select from four purges: A, B, C or D. These are
described in Table 3-2. The Operator Guide advises operators to perform
purge A. Purges B and C are stronger because the suction time is three
times longer than it is for purge A. (Purge B is a cartridge replacement
purge; purge C is a print head replacement purge.) Purge D, which consists
of wiping and spits only (no suction), is a weak purge.
When the purge is complete, the display offers the options of printing another test pattern, selecting another purge or returning to the Printer Maintenance Menu.
Replace Ink Tank (Cartridge)
Replace Print Head
These submenus are identical and self-prompting. When you select this option, the display prompts you to open the top cover, at which point the print
carriage automatically moves to the tank/print head replacement position.
The display then prompts you to install the replacement and close the cover
when done. Closing the cover initiates a purge that’s appropriate for the replacement part. When the purge is complete, the display offers the option of
printing a test pattern.
DM300c/DM400c/DM475 Service Manual (SV61801 Rev. D)
6-11
6 • Service Menus
6.4 Diagnostics Feeder/WOW Diagnostics
Submenu 1
Submenu 2
Feeder/WOW Motors
Diagnostics
Sensors
Read Encoder
Submenu 3
Submenu 4
Feeder Motor Excerciser
[Run at different speeds]
WOW Motor Excerciser
[Run at different speeds]
Feeder Sensors
[“Clear” or “Blocked”
“Open” or “Closed”]
WOW Sensors
[Includes SBR sensors
and encoder]
Feeder Motor
[Encoder Status]
WOW Motor
[Encoder Status]
Download Firmware
[Engineering Only]
Reload Profiles
[Engineering Only]
Print Logs
[Engineering Only]
Save Logs to File
[Engineering Only]
Information
PCN Information
[View only feeder/
WOW numeric info]
Counters
Jam Counters
XPT Entry
Length Error
WOW Timeout
Reset Counters
Motors
Allows you to run either the feeder motor or WOW motor at different speeds
(25%, 50%, 75%, and 100%) to verify if they are functioning. NOTE: In actual
usage, the motor frequently starts and stops (not running continuously as is
done in this test).
Sensors
Displays the current state of the sensor. Depending on the sensor, screen
may show either “Clear” or “Blocked”, or “Open” or “Closed”. For WOW
sensors, it includes the SBR width sensors (WS4, WS5, WS6) and thickness encoder (T1).
Read Encoder
Allows you to rotate the WOW motor feed encoder one full revolution to test
its functionality.
Download Firmware
Reload Profiles
Print Logs
Save Logs to File
These items are for Engineering use only.
6-12
DM300c/DM400c/DM475 Service Manual (SV61801 Rev. D)
6 • Service Menus
6.4 Diagnostics Feeder/WOW Diagnostics (cont’d)
Information
Provides basic information about the system and counters for different
states the machine may undergo.
•
PCN Information – lists model, SN#, PCN, and Software Maintenance
Release (SMR) version on the WOW
•
Counters – lists total pieces, WOW cycles, WOW jams, power cycles,
“watchdog” reboots, and reset counts.
•
Jam Counters – lists the total number of occurrences, and the internal
piece ID# of the last occurrence; for jams due to:
•
Transport Entry
•
Length Error
•
WOW Timeout
You also have the option to reset all of these counters if you want.
DM300c/DM400c/DM475 Service Manual (SV61801 Rev. D)
6-13
6 • Service Menus
6.4 Diagnostics SBR Diagnostics
Submenu 1
Submenu 2
SBR Diagnostics
Length Calibration
Submenu 3
Re-zero Thickness
Last 256 Dimensions
Reset SBR Status
Rest Status
Don’t Reset status
Length Calibration
This program allows you to calibrate the length sensors (FS2/WS1, WS2,
WS3) in the feeder/WOW module. A length calibration gauge is required for
this test (PN# White DJ62084 or Black DW62384).
At the Calibration screen, place the length calibration gauge on feed deck
and adjust the side guide appropriately. Press Start to continue. Run one
calibration gauge through the machine, 16 successive times. You must do
each run individually, and it must be with the same gauge – if you load a
stack of 16 calibration gauges, the machine may give length or width errors
during this process. NOTE: If an error occurs or if calibration fails, check
the side guide setting to make sure the length calibration gauge is not being
skewed when feeding, then press OK to reattempt the length calibration.
Re-zero Thickness
This allows you to re-zero the thickness encoder (T1) in the WOW. You
must make sure nothing is anywhere on the mail deck during this procedure. NOTE: It is normal for the encoder not to return fully to “0.00”.
6-14
DM300c/DM400c/DM475 Service Manual (SV61801 Rev. D)
6 • Service Menus
6.4 Diagnostics SBR Diagnostics (cont’d)
Last 256 Dimensions
Lists the weight (oz.), length (inches), and thickness (inches) of the last 256
mail pieces run through the machine. It also provides what width sensor (if
any) was triggered by the mail piece as it went through, and the mail piece
sequence number.
Last 256 Dimen. Captured
No Weight Length W Thick
Sequence #
(note the order
goes from bottom to top)
004 14.060 12.625 1 0.316
003 14.050 12.250 1 0.309
002 3.150 8.609 0 0.227
001 3.040 8.605 0 0.227
Width Sensor
0= none triggered
1= Sensor 1
2= Sensor 2
3= Sensor 3 (not used in
US models)
( Weight in oz)
[Back] when done
Last 256 Dimen. Captured
No Weight Length W Thick
024
023
022
021
4.060 10.000 2 0.090
4.060 10.039 2 0.090
0.520 5.973 1 0.020
0.580 6.012 1 0.020
( Weight in oz)
[Back] when done
Reset SBR Status
The SBR Status selection is removed from the Service Menu after you run it
(e.g., after you first install a DM475 machine). The Reset SBR Status allows
you to redo the SBR Setup procedure. The SBR Status selection comes in
handy when you have replaced the WOW width sensors (WS4, WS5, WS6) or
WOW thickness or feed encoders because the program walks you through all
of the test procedures necessary for these components (see section 6.3 for the
actual procedure).
Modem Diagnostics
This item is for Engineering use only.
DM300c/DM400c/DM475 Service Manual (SV61801 Rev. D)
6-15
6 • Service Menus
6.5 WOW
Options
[DM475]
Service Menu
Submenu 1
Submenu 2
WOW Options
[DM475]
WOW Calibration
[Calibrates WOW]
Static Weight
[Performs static weight test]
Set WOW Mode
Normal Mode
Precision Mode
✍
TIP: Access the Service Menu by typing
6946 and pressing
Refill Postage key.
Re-zero WOW
[Re-zeros WOW]
Calibration Report
[List dates that WOW was calibrated]
Verify WOW
[Place 16 oz. weight on WOW. System takes
five samples and provides standard deviation
and “Pass/Fail” status.]
Last 10 Weights
[List the weights of the last ten pieces]
WOW Calibration
This procedure should be performed after replacing the load cell assembly
or after the assembly has been locked down (via load cell shipping screws).
1. At the WOW Calibration screen, ensure the WOW locking screws are
loosened, then press Enter to continue.
WOW Calibration
Make sure that WOW
locking screws (3) are
backed out and Transport
tray is empty
[Enter] to continue
2. When instructed, place a 16 oz. weight onto the center of the WOW unit
(etched circle on top of the feeder/WOW clearance level assembly).
Press Enter to continue.
16 oz. Weight
3. When WOW Calibration Complete screen displays, remove weight from
WOW Unit and close feeder/WOW cover. Press Enter to continue.
WOW Calibration
Complete
WOW calibration is
successful.
Remove weight from tray.
[Enter] to continue
6-16
DM300c/DM400c/DM475 Service Manual (SV61801 Rev. D)
6 • Service Menus
6.5 WOW
Options
Static Weight
This procedure should be performed after replacing the load cell assembly
and after the load cell has been calibrated (see WOW Calibration on previous page). It can help confirm whether the load cell is properly seated and
also helps you check if an obstruction is touching the load cell assembly.
1
Select “Re-zero WOW”.
2. When done, select “Static Weight”. Position a 16 oz. test weight at each
of the six points (shown as circles) in the figure below and take a reading.
3. All points should measure 16 oz + or - .010 (15.990 and 16.010). If any
point is far off this range, check to make sure the load cell is properly
seated. Check for an obstruction touching the Load Cell assembly.
4. Recalibrate the WOW until the best 16 oz weight values are obtained.
Set WOW Mode
This setting determines how fast the WOW reacts when it senses mail.
Normal Mode
This is a the regular “fast” mode that works well for most installations.
Precision Mode
Select this mode for unstable environments (it is more resistant to jostles
than the “Normal” setting but slower to react).
DM300c/DM400c/DM475 Service Manual (SV61801 Rev. D)
6-17
6 • Service Menus
6.5 WOW
Options
Re-zero WOW
Allows you to re-zero the WOW manually for those instances where the system cannot re-zero itself (e.g., after certain error conditions) or before running
the Static Weight procedure (see previous page).
Calibration Report
This reports lists dates and times on which the WOW was calibrated.
Verify WOW
This allows you to test the WOW load cell accuracy You place a 16 oz. test
weight on the WOW and the system takes five samples. The system lists
the average, expected, standard deviation, and “Pass/Fail” status results of
the samples.
Last 10 Weights
This provides the weights of the last ten pieces processed by the WOW
module.
6.6 Platform
Options
Platform Calibration
6.7 Time
Functions
Used for Brazil only.
6-18
This allows you to calibrate an attached platform scale by placing a known
test weight (4 lb.) on the scale.
DM300c/DM400c/DM475 Service Manual (SV61801 Rev. D)
6 • Service Menus
6.8 System
Information
Internal Information
Lists information about the system, such as the UIC version, PCN, SN#, rates
level, software levels, etc.
USB Device
✍
TIP: Access the Service Menu by typing
6946 and pressing
Refill Postage key.
This screen shows if a USB device is connected to the system and the type
(“MCP” or “HUB”), basically letting you know USB communications are
working. It does not imply that the USB device itself is fully functional.
Flash File Info
Allows you to maintain flash files that are used to boot up or run the system.
View Flash File
Provides a list of the flash files on the system.
Delete Flash File
Allows you to delete a flash file. IMPORTANT: Do not delete a flash file unless directed to do so by Pitney Bowes Engineering or a call agent.
6.9 Enable
Features
This option allows you to enable or disable features. Enter the code of the
feature you want to enable or disable: Then press Accept. The message
shows whether the feature is enabled or disabled or the code you entered is
invalid.
NOTE: Because features are downloaded from the Data Center to the customer’s machine automatically, use this function only if directed to do so by
Engineering or a Call Agent.
6.10 Meter
Withdrawal
This option allows you to move any remaining postage from your machine to
the Postage By Phone® account. Normally this is done if the machine is to be
taken out of service. See section 4.5 for specific steps.
NOTE 1: Make sure the “return flag” is set on the machine before withdrawing funds. If not sure, call Postage-By-Phone support.
NOTE 2: The system must be connected to the Pitney Bowes Data Center
before you begin.
6.11 Mail
Simulation
Not implemented at time of publication of this manual. Use the Seal-Only
mode to test mail feeding.
DM300c/DM400c/DM475 Service Manual (SV61801 Rev. D)
6-19
6 • Service Menus
This page was put in as a placeholder so you can print this guide in a duplex (double-sided) mode
while keeping the proper page positions.
6-20
DM300c/DM400c/DM475 Service Manual (SV61801 Rev. D)
Appendix A • Glossary
Account. Accumulated information from a set of transactions that have the
same account ID number.
Ad Slogan. An advertisement image printed to the left of the inscription position.
APIN. Alphanumeric Piece Identification Number.
Art Card. Smart Card device used to load custom graphics, such as Ad Slogans, into the meter.
Ascending Register Amount. The cumulative amount of postage spent.
ASIC. Application-Specific Integrated Circuit.
Bank. A term used to define the number of settable digits in the postage
value. A digit includes the printable characters of 0 through 9.
Control Sum. The total of the Ascending (postage amount spent) and Descending (postage amount remaining) Registers.
Descending Register. The Descending Register value is the amount of
unspent postage.
Endorsement. An inscription printed in the Ad slogan area because of the
amount of text. Used only in the US market.
Flap-Stripping Moistener. A type of moistener used to open and seal
closed-flap envelopes. The moistening device opens the flap so the glue
can be moistened. The flap is then closed as it exits the moistening unit.
ICC (IntelliLink™ Control Center). The user interface and main controller
in DM mailing systems. A postage meter. It performs a number of functions
as explained in Chapter 3 of this manual. See also UIC below.
Inscription. Classification information appearing next to the ad slogan
which fulfills postal regulations concerning class of delivery, service or some
other indication used to calculate postage.
IntelliLink Postage-By-Phone™. A special service offered to Pitney Bowes
customers whereby funds may be added to a software vault using a phonebased, interactive system. IntelliLink transactions may be done manually
by the user (i.e., by calling a special telephone number) or automatically
through the use of a modem (also referred to as "Auto-Postage-By Phone"
or "One-Button Refill"). IntelliLink also refers to a suite of services offered by
Pitney Bowes that allow the customer to download product enhancements
and participate in offerings designed to improve mailing efficiency.
IPIN. Incrementing Piece Identification Number.
ISO 7816 International Organization for Standardization. The ISO 7816
is a standard protocol for communicating with smart cards.
DM300c/DM400c/DM475 Service Manual (SV61801 Rev. D)
A-1
Appendix A • Glossary
Meter Printer. A print head assembly driven by a PB print head controller
which prevents the use of the mailing machine printer by other than a Pitney
Bowes meter.
Multi-Slogan. An inscription printed next to the Ad Slogan.
NVM. Non-Volatile Memory
PC. Personal Computer
PCN. Product Code Number. Each system configuration localized for a
particular market and/or equipped with a defined feature set is assigned a
unique PCN for identification. PCN parameters reside in the mailing system’s non-volatile memory. They define the mailing system’s behavior. PCN
parameters are configured during manufacturing.
PHC (Print Head Controller). A device that receives the information to be
sent to the printhead and imprinted on the envelope. Secure transfer of information is provided. This software communicates with the ICC (IntelliLink
Control Center). See also ICC.
Physical Security Device. A paper seal, wire seal, break-off screw or other
device designed to prevent undetected tampering.
PIN. Piece Identification Number.
Platform Scale. A stand-alone weighing device lacking a user interface or
rating capability.
PMC (Print Head Maintenance Controller). Software that handles envelope transport and printhead motion control; it also communicates with the
ICC (IntelliLink Control Center). See also ICC.
Protective Device. Any mechanism or portion of the vault which must be
protected from undetectable tampering, e.g. Privileged Access Switch.
PSD (Postal Security Device). A device that performs the meter vault functions. It is a secure device complying with FIPS Pub 140-1 requirements
for security of cryptographic modules. The PSD contains the postal funds
and security keys, and it generates the digital signature for indicia variable
components.
Rates (Rating). A means of determining mail or parcel piece charges based
on class, weight and method of delivery.
Refill. The process of adding postage funds to a credit locking software
vault.
Seal-Only Mode. This feature allows the mailing system to moisten unsealed envelopes without being printed on by the mailing system.
A-2
DM300c/DM400c/DM475 Service Manual (SV61801 Rev. D)
Appendix A • Glossary
Secure Print Head. An ink jet print head with integrated PUB ASIC to enhance the security of the indicia data sent between the vault and the print
head.
Service Mode. This refers to a mode of operation, available to the CSR, in
which certain non-user accessible parameters may be entered or modified.
This mode corresponds to the Service Mode of previous mailing machine
designs, although some operations which, in the past, required access to
Service Mode are now available in Setup Mode.
Slogan. See Ad Slogan.
Standardized Mail. Mail pieces composed of a #10 commercial envelope
with one insert which is a double folded 8.5 x 11 inch sheet (three-sheet
thickness). Thus, all mail pieces in the category of Standardized Mail are
of the same length, width and thickness. Standardized mail may have flaps
either open, closed or sealed.
Subsystem. A grouping of configuration items satisfying a logical group of
functions within a particular system. See also System.
System. A set of interrelated components working together to accomplish a
common purpose.
UIC (User Interface Controller). The user interface and software vault of
DM Mailing Systems. "ICC" (see entry above) refers to the user interface
and expanded feature set of DM Mailing Systems. The terms "UIC" and
"ICC" are nearly synonymous but not quite interchangeable. They both refer
to what, in a simpler time, was called a "postage meter."
In any event, the UIC (or ICC) software manages the user interface, departmental accounting, logging, reporting, and external interfaces. The software
communicates with the PSD, the PMC, the PHC and external devices.
USB (Universal Serial Bus). A standard that defines the communications
protocol between a host and a device such as a printer, scanner, hard drive,
scale and so on. USB 2.0 supports data transfer rates of 1.5 MB/s (USB
1.0); 12 MB/s (USB 1.1); and 480 MB/s (USB 2.0). USB is faster than a serial or parallel connection, supports up to 127 devices, and generally simplifies the interconnection of devices.
User Mode. This refers to the “normal” mode of operation of the mailing
machine by a user. This is the mode in which postage may be dispensed.
DM300c/DM400c/DM475 Service Manual (SV61801 Rev. D)
A-3
Appendix A • Glossary
A-4
DM300c/DM400c/DM475 Service Manual (SV61801 Rev. D)
Appendix B • Operator Training
Checklist
The following checklist is intended to be used as a training aid. As you review each topic, check it off
and move on to the next until you have completed all sections of the Operator Guide (SV62261 Rev.
C or later).
1 - Introduction
1. ___ Getting Help (on page v of Operator Guide)
2. ___ Other Sources of help (Cardex, CD with Operator Guide, PB websites)
3. ___ Important Safety Notes/Telephone Safety Instructions
4. ___ Special Warning for not Moving DM475 by the Customer
2 - Getting to Know Your System
1. ___ Parts of the Machine
2. ___ Control Panel
3. ___ Connections on Back of Machine
3 - Running Mail
NOTE: Whenever a batch of mail is completed, the operator should quickly flip through the mail to
confirm all were printed.
1. ___ Home Screen
2. ___ Checking Funds (Postage) Availability in Machine
3. ___ Processing Letter Mail
IMPORTANT NOTE ON “SEAL/NO SEAL” USE: Unlike the DM500 through DM1000 models,
the DM400c/DM450c/DM475 models use a manual, mechanical means to switch between “seal”
and “no seal” modes. This means the machine will stay in the last mode the switch was set to by
the operator (it does not use software to switch back to a default “no seal” mode). Consequently,
if an operator uses the machine in a “seal” mode, they must be reminded to switch the seal/no
seal lever back to the “no seal” position. If left in the “seal” mode, it can cause a jam when the
next user runs mail in a no seal mode (this is the most common mode used by our customers).
4. ___ WOW® (Weigh-on-the-Way) and Shape-Based Rating (SBR)
5. ___ Processing Flats, Packages, or Non-Letter Mail
6. ___ Using Differential Weighing
DM300c/DM400c/DM475 Service Manual (SV61801 Rev. D)
B-1
Appendix B • Operator Training Checklist
4 - Printing Options
1. ___ Manually Changing Printed Date for the Meter Stamp
2. ___ Sealing Envelopes without Printing a Meter Stamp
3. ___ Printing the Date and Time, Ad or Text (no Meter Stamp)
4. ___ Omitting/Restoring Day or Date on the Meter Stamp
5. ___ Adjusting Horizontal Print Position of Indicia
6. ___ Adding/Removing a Postal Inscription to Meter Stamp
7. ___ Adding/Removing an Envelope Ad to the Meter Stamp
5 - Normal and Custom Presets
1. ___ What is a Preset and Why Should I Use One?
2. ___ Why Should I Use a USPS® “Class” in my Preset?
3. ___ Normal Preset
4. ___ Custom Presets
6 - Adding Postage/Connecting to the Data Center
1. ___ Postage and Your Machine
2. ___ Establishing Communications Between Your Machine and the Pitney Bowes Data Center
•
Using LAN Network (Constant Connection)
•
Using PC Meter Connect™
•
Using an Analog Phone Line
3. ___ Checking Funds (Postage) Availability in Machine
4. ___ Checking Your Postage By Phone® Account Balance
5. ___ Adding Postage
7 – System Options
1. ___ Setting the Time, Date, and Timeouts
2. ___ Adjusting the Contrast of the Display
3. ___ Setting Postage Limits (Funds Warnings)
4. ___ Enabling, Changing or Disabling Lock Codes and Passwords
5. ___ Configuring the Tape Button
B-2
DM300c/DM400c/DM475 Service Manual (SV61801 Rev. D)
Appendix B • Operator Training Checklist
8 - Standard Accounting
1. ___ Overview of Accounting Option
2. ___ Activating/Setting Up Standard Accounting
3. ___ Turning On/ Off Accounting
4. ___ Turning On/Off Account Passwords
5. ___ Creating New Accounts
6. ___ Editing Account Names and Passwords
7. ___ Selecting An Account to Track Postage
8. ___ Displaying Account Totals
9. ___ Printing Account Reports
10. ___ Clearing All Account Totals
11. ___ Deleting Accounts
9 - Reports
1. ___ Last 5 Refills Report
2. ___ Funds Report
3. ___ Accounting Reports
4. ___ Printing a Report
10 - Text Messages
1. ___ Postal Rules and Guidance
2. ___ Creating a Text Message
3. ___ Viewing/Editing a Text Message
4. ___ Deleting a Text Message
11 - Scale Options
1. ___ Zeroing the Scale
2. ___ Turning Auto Scale On or Off
3. ___ Setting Weight Change Options
4. ___ Setting Destination Change Options
5. ___ WOW® (Weigh-on-the-Way) and Shape-Based Rating
DM300c/DM400c/DM475 Service Manual (SV61801 Rev. D)
B-3
Appendix B • Operator Training Checklist
12 - Maintenance
1. ___ Replacing the Ink Tank Cartridge
2. ___ Filling/ Maintaining the Moistener
3. ___ Cleaning the Feeder Exit/WOW Entrance Sensor
13 - Troubleshooting
1. ___ Printing Problems
2. ___ Feeding Problems (stalled envelopes)
3. ___ Moistening Problems (envelopes don’t seal)
4. ___ Accidentally Printing the Wrong Postage
14 - Supplies and Options
1. ___ Supplies and Accessories
Appendix A - Equipment/Material Specifications
Appendix B - USPS® First Class Mail® Sizes (to help explain Shaped-Based Rating from USPS)
B-4
DM300c/DM400c/DM475 Service Manual (SV61801 Rev. D)
Appendix C • USPS® First Class
Mail® Sizes
USPS® First Class Mail® Sizes (Domestic)
First-Class Mail Domestic—Retail
SHAPE
SIZE
PRICE
Postcards
4-1/4"
max.
3-1/2"
min.
length
height
thickness
Height
Length 5"
min.
minimum
maximum
5 inches
3-1/2 inches
0.007 inch
6 inches
4-1/4 inches
0.016 inch
minimum
maximum
5 inches
3-1/2 inches
0.007 inch
11-1/2 inches
6-1/8 inches
1/4 inch
Price
$0.28
$x.xx
6"
max.
Letters
6-1/8"
max.
length
height
thickness
3-1/2"
min.
Heigth
Length 5"
min.
11-1/2"
max
12"
max.
length
height
thickness
6-1/8"
min.
minimum*
maximum
11-1/2 inches
6-1/8 inches
1/4 inch
15 inches
12 inches
3/4 inch
* Flats exceed at least one of these dimensions.
Pieces that are rigid, nonrectangular, or not uniformly
thick pay package prices.
Height
11-1/2"
min
Weight Not
Over (oz.)
1
2
3
3.5
Price
$x.xx
$0.44
x.xx
0.61
0.78
x.xx
0.95
x.xx
Letters that meet one or more of the nonmachinable
characteristics in DMM 101.1.2 are also subject to the
$0.20 nonmachinable surcharge.
Large Envelopes (Flats)
Length
*
15"
max.
Packages
length + girth
length + girth combined cannot exceed 108 inches
(Parcel Post cannot exceed 130 inches)
length
the longest side of the package
girth
measurement around the thickest part (perpendicular to
the length)
Weight Not
Over (oz.)
1
2
3
4
5
6
7
8
9
10
11
12
13
Weight Not
Over (oz.)
1
2
3
4
5
6
7
8
9
10
11
12
13
Price
$x.xx
$0.88
x.xx
1.05
x.xx
1.22
x.xx
1.39
1.56
x.xx
1.73
x.xx
1.90
x.xx
2.07
x.xx
2.24
x.xx
2.41
x.xx
2.58
x.xx
2.75
x.xx
2.92
x.xx
Price
$x.xx
$1.22
x.xx
1.39
x.xx
1.56
1.73
x.xx
1.90
x.xx
2.07
x.xx
2.24
x.xx
2.41
x.xx
2.58
x.xx
2.75
x.xx
2.92
x.xx
3.09
x.xx
3.26
x.xx
*See www.usps.com for the latest rates.
DM300c/DM400c/DM475 Service Manual (SV61801 Rev. D)
C-1
Appendix C • USPS® First Class Mail® Sizes
USPS® First Class Mail® Sizes (International)
First-Class Mail International—Retail
SHAPE
PRICE
SIZE
*
Postcards
minimum
maximum
length
5-1/2 inches 6 inches
height
3-1/2 inches 4-1/4 inches
thickness 0.007 inch
0.016 inch
4-1/4"
max.
3-1/2"
min.
Prices
Canada
Mexico
All other countries
$x.xx
$0.75
x.xx
0.79
x.xx
0.98
Height
Length 5-1/2"
min.
6"
max.
Letters
6-1/8"
max.
minimum
maximum
length
5-1/2 inches 11-1/2 inches
height
3-1/2 inches 6-1/8 inches
thickness 0.007 inch
1/4 inch
3-1/2"
min.
Heigth
Length 5-1/2"
min.
11-1/2"
max
Letters that meet one or more of the
nonmachinable characteristics in IMM
243.23 are also subject to the $0.20
nonmachinable surcharge.
Large Envelopes (Flats)
12"
max.
length
minimum* maximum
11-1/2 inches 15 inches
height
6-1/8 inches 12 inches
thickness 1/4 inch
3/4 inch
6-1/8"
min.
* Flats exceed at least one of these
dimensions.
Pieces that are rigid, nonrectangular, or not
uniformly thick pay package prices.
Height
Length
11-1/2"
min
15"
max.
Packages
Size
Height
Maximum length = 24 inches
Maximum length + height + thickness
combined = 36 inches.
Thickness
Length
Weight
Not
Price Groups
Over
1
2
3-5 6-9
(oz.)
1
$0.75
$0.98
$x.xx $0.79
$x.xx $0.98
$x.xx $x.xx
x.xx 1.34
x.xx 1.82
x.xx x.xx
2
1.00
1.76
x.xx 1.89
x.xx 2.66
x.xx x.xx
3
1.25
2.54
x.xx 2.44
x.xx 3.50
x.xx x.xx
3.5
1.50
3.32
Weight
Not
Price Groups1
Over
1
2
3-5 6-9
(oz.)
$x.xx $x.xx
1
$1.03
$1.03 $x.xx
$1.24$x.xx
$1.24
x.xx x.xx
2
1.29
1.59 x.xx
2.08 x.xx
2.03
x.xx x.xx x.xx x.xx
3
1.55 2.15 2.92 2.82
x.xx x.xx x.xx x.xx
4
1.81
2.71 x.xx
3.76 x.xx
3.61
x.xx x.xx
5
2.07
3.27 x.xx
4.60 x.xx
4.40
x.xx x.xx
6
2.33
3.83 x.xx
5.44 x.xx
5.19
x.xx x.xx
x.xx x.xx
7
2.59
4.39 x.xx
6.28 x.xx
5.98
x.xx x.xx
8
2.85
4.95 x.xx
7.12 x.xx
6.77
x.xx x.xx
12
3.83
6.50 x.xx
8.84 x.xx
8.44
x.xx x.xx
x.xx 10.11
x.xx
16
4.81
8.05 10.56
Weight
Not
Over
(oz.)
1
2
3
4
5
6
7
8
12
16
Price Groups1
1
$1.23
$x.xx
x.xx
1.49
x.xx
1.75
x.xx
2.01
x.xx
2.27
x.xx
2.53
x.xx
2.79
x.xx
3.05
x.xx
4.03
x.xx
5.01
x.xx
2
$1.23
$x.xx
x.xx
1.79
x.xx
2.35
x.xx
2.91
x.xx
3.47
x.xx
4.03
x.xx
4.59
x.xx
5.15
x.xx
6.70
x.xx
8.25
x.xx
3-5 6-9
$1.44
$1.44
$x.xx $x.xx
x.xx x.xx
2.28
2.23
x.xx x.xx
3.12
3.02
x.xx x.xx
3.96
3.81
x.xx x.xx
4.80 4.60
x.xx x.xx
5.64 5.39
x.xx x.xx
6.48
6.18
x.xx x.xx
7.32
6.97
x.xx x.xx
9.04
8.64
x.xx x.xx
10.76
x.xx 10.31
x.xx
1. For prices up to 64 ounces, see
28. edition of USPS Price List Notice 123 at www.usps.com
see page
the latest
Price Group 1: Canada
Price Group 2: Mexico
Price Groups 3-5: China, Eastern Europe, Hong Kong, Japan, Russia, South Korea, Turkey, Western Europe
Price Groups 6-9: Africa, Asia (see exceptions in Price Groups 3-5), Central America, Middle East, South America
*See www.usps.com for the latest rates.
C-2
DM300c/DM400c/DM475 Service Manual (SV61801 Rev. D)
1 Elmcroft Road
Stamford, Connecticut 06926-0700
www.pitneybowes.com
PB Form SV617801 Rev. D 4/10
© 2009 Pitney Bowes Inc.
All Rights Reserved
Printed in the USA
*sv61801revD*