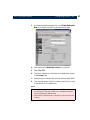
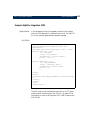
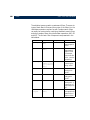
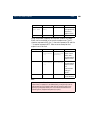
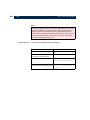
1
AXIS 7100 User’s Manual
AXIS 7100
Network Document Server
User’s Manual
2
AXIS 7100 User’s Manual
Notices
Safety Notices
Take some time to read through the safety notices before
installing the AXIS 7100. Please observe all safety markings and
instructions when using this product.
Caution! -
must be observed to avoid loss of data or damage
to your equipment.
Important! -
must be observed to avoid operational
impairment.
Do not proceed beyond any of the above notices, until you have
fully understood the implications.
Copyright Information
The unauthorized copying of materials that are covered by
copyright and other international proprietary or intellectual
property rights is prohibited in most countries. Axis
Communications AB recommends that the users of this
equipment seek the necessary authorizations for copying
material. The instructions for use in the manual shall not be
considered as an inducement to make illicit duplications of
material. Any duplication will be made at the user’s own risk.
Electromagnetic Compatibility (EMC)
USA - This equipment generates, uses, and can radiate radio
frequency energy and if not installed and used in accordance with
the instruction manual, may cause interference to radio
communications. It has been tested and found to comply with
the limits for a Class A computing device pursuant to Subpart B
of Part 15 of FCC rules, which are designed to provide
reasonable protection against such interference when operated in
a commercial environment. Operation of this equipment in a
residential area is likely to cause interference in which case the
user at his/her own expense will be required to take whatever
measures may be required to correct the interference. Shielded
cables should be used with this unit to ensure compliance with
the Class A limits.
Technology Equipment (VCCI). If this is used near a radio or
television receiver in a domestic environment, it may cause radio
interference. Install and use the equipment according to the
instruction manual
Australia - This electronic device meets the requirements of the
Radio communications (Electromagnetic Compatibility) Standard
1998 AS/NZS 3548
Liability
Every care has been taken in the preparation of this manual; if you
detect any inaccuracies or omissions, please inform your local Axis
office. Axis Communications AB cannot be held responsible for any
technical or typographical errors and reserves the right to make
changes to the product and manuals without prior notice. Axis
Communications AB makes no warranty of any kind with regard to
the material contained within this document, including, but not
limited to, the implied warranties of merchantability and fitness for a
particular purpose. Axis Communications AB shall not be liable nor
responsible for incidental or consequential damages in connection
with the furnishing, performance or use of this material.
Trademark Acknowledgments
Acrobat, Adobe, AIX, DOS, Ethernet, IBM, Internet Explorer,
Macintosh, Microsoft, Netscape Navigator, OS/2, UNIX, Windows
and WORKiO are registered trademarks of the respective holders.
Software Trademark Acknowledgments
JPEG code (libjpeg) used courtesy of the Independent JPEG Group.
LDAP code (libldap and libber) used courtesy of the University of
Michigan at Ann Arbor. Copyright © 1991 Regents of the University
of Michigan. All rights reserved. TIFF code (libtiff) used courtesy of
Sam Leffler and Silicon Graphics, Inc. Copyright © 1988-1996 Sam
Leffler. Copyright © 1991-1996 Silicon Graphics, Inc.
Maintenance
It is recommended that you use a moist cloth to clean the unit. Do
not use petroleum based substances as this may cause damage.
Europe - This digital equipment fulfils the requirements for
radiated emission according to limit B of EN55022, and the
requirements for immunity according to EN55024 residential,
commercial, and light industry (Compliance is not valid for
unshielded network cables).
AXIS 7100 for WORKiO
Network Document Server
Japan - This is a class B product based on the standard of the
Voluntary Control Council for Interference from Information
Copyright © Axis Communications AB, 2001
User’s Manual rev 1.0
Part No: 18961
Date: December 2001
AXIS 7100 User’s Manual
Preface
Thank you for purchasing the AXIS 7100 for WORKiO Network Document Server. This
product allows WORKiO digital imaging systems copiers to be connected anywhere in
Ethernet and Fast Ethernet networks. Based on AXIS ThinServer™ Technology, the
optimized product hardware and Web-based management software simplifies the
distribution and archiving of paper-based information across workgroups, organizations
and the Internet.
About This Manual - This manual applies to the AXIS 7100 for WORKiO with software
release 1.00 and above. It provides introductory information as well as detailed
instructions on how to install and manage the AXIS 7100 in your networking
environment. Some knowledge of networking environments would be beneficial to the
reader, but is not considered prerequisite.
About Axis - Axis Communications is dedicated to providing innovative solutions for
network-connected computer peripherals. Since the start in 1984, it has been one of the
fastest growing companies in the market and is now a leader in its field.
3
4
AXIS 7100 User’s Manual
ThinServer™ Technology - A ThinServer device is a network server which includes
“thin” embedded server software capable of simultaneous multiprotocol communication,
scalable RISC hardware and a built-in Web server which allows easy access and
management via any standard Web browser. The ThinServer technology makes it
possible to connect any electronic device to the network, thus providing “Access to
everything”. Axis Communications offers the following ThinServer product lines:
Mobile Access by Axis - A family of network access solutions that create local "hot spots"
of high-speed wireless connectivity areas. These areas provide a wireless communications link
to local networks and the Internet for mobile devices equipped with Bluetooth wireless
technology, an industry supported technology that provides a low-cost means for supporting
short-range wireless communications between portable devices. Axis provides solutions that
scale from network access devices to larger, more advanced systems to meet the range of needs
for creating new mobile networks and services.
Network Print Servers - offer a powerful and cost-efficient method for sharing printer
resources in your network. They connect to any standard printer, featuring high
performance, simple management and easy upgrading across the network. The print
servers are available in Ethernet, Fast Ethernet and Token Ring versions.
IBM Mainframe and S/3x - AS/400 Print Servers and Protocol Converters include a wide range of LAN, coax and twinax attached print servers for the IBM host
environment. By emulating IBM devices, these servers provide conversion of the IPDS,
SCS and 3270DS data streams to the major ASCII printer languages.
Network Attached CD/DVD Servers - provide a flexible and cost-efficient solution for
sharing CD-ROMs, DVD-ROMs and other optical media across the network. They are
available in Ethernet, Fast Ethernet and Token Ring versions.
Network Attached Storage Servers - offer network connectivity for re-writable media
such as hard disks and Iomega Jaz cartridges, which, via the storage server, can be
backed up on DAT tapes. They are only available in Ethernet versions.
Network Camera Servers - provide live images using standard Internet technology,
thus enabling access to live cameras via any standard Web browser. They offer a perfect
solution for remote surveillance over the Internet; their sharp images can bring life into
any web site. These servers support Ethernet as well as PSTN and GSM phone lines.
5
AXIS 7100 User’s Manual
Network Document Servers - enable easy distribution of paper-based information
across workgroups and the enterprise. By sending scanned documents to your destination
via the Internet/intranet, you will reduce your faxing/mailing costs, as well as save time,
thus improving your organization’s efficiency.
Support Services - Should you require any technical assistance, please contact your
local dealer or local Panasonic office. If your questions cannot be answered immediately,
your local dealer will forward your queries through the appropriate channels to ensure
you a rapid response.
6
AXIS 7100 User’s Manual
Introduction. . . . . . . . . . . . . . . . . . . . . . . . . . . . . . . . . . . . . . . . . . . . . . . . . . . . . . . . . . . . . . . . . . 8
AXIS 7100 for WORKiO Network Document Server . . . . . . . . . . . . . . . . . . . . . 8
Features and Benefits . . . . . . . . . . . . . . . . . . . . . . . . . . . . . . . . . . . . . . . . . . . . . . 9
Physical Description . . . . . . . . . . . . . . . . . . . . . . . . . . . . . . . . . . . . . . . . . . . . . . . . . . . . . . . . . . 12
Control Panel . . . . . . . . . . . . . . . . . . . . . . . . . . . . . . . . . . . . . . . . . . . . . . . . . . . . 14
External Keyboard . . . . . . . . . . . . . . . . . . . . . . . . . . . . . . . . . . . . . . . . . . . . . . . . 16
Basic Installation . . . . . . . . . . . . . . . . . . . . . . . . . . . . . . . . . . . . . . . . . . . . . . . . . . . . . . . . . . . . 18
Checking the Hardware Inventory . . . . . . . . . . . . . . . . . . . . . . . . . . . . . . . . . . 18
Connecting the WORKiO Copier . . . . . . . . . . . . . . . . . . . . . . . . . . . . . . . . . . . . 20
Connecting the AXIS 7100 to the Network . . . . . . . . . . . . . . . . . . . . . . . . . . . 20
Assigning an IP Address . . . . . . . . . . . . . . . . . . . . . . . . . . . . . . . . . . . . . . . . . . . 22
Mapping a Host Name to the IP Address . . . . . . . . . . . . . . . . . . . . . . . . . . . . . 32
Verifying your Installation . . . . . . . . . . . . . . . . . . . . . . . . . . . . . . . . . . . . . . . . . 33
Configuring the AXIS 7100 . . . . . . . . . . . . . . . . . . . . . . . . . . . . . . . . . . . . . . . . . . . . . . . . . . . . 35
Overview of the Administration Tools . . . . . . . . . . . . . . . . . . . . . . . . . . . . . . . 36
Specifying the System Settings . . . . . . . . . . . . . . . . . . . . . . . . . . . . . . . . . . . . . 39
Specifying Network Settings . . . . . . . . . . . . . . . . . . . . . . . . . . . . . . . . . . . . . . . 43
Specifying Authentication Settings . . . . . . . . . . . . . . . . . . . . . . . . . . . . . . . . . 56
Specifying Destinations . . . . . . . . . . . . . . . . . . . . . . . . . . . . . . . . . . . . . . . . . . . 59
Specifying Profiles . . . . . . . . . . . . . . . . . . . . . . . . . . . . . . . . . . . . . . . . . . . . . . . 73
Specifying Paper Sizes . . . . . . . . . . . . . . . . . . . . . . . . . . . . . . . . . . . . . . . . . . . . 78
Configuring Using a Text Editor and FTP . . . . . . . . . . . . . . . . . . . . . . . . . . . . . 80
Scan Counter . . . . . . . . . . . . . . . . . . . . . . . . . . . . . . . . . . . . . . . . . . . . . . . . . . . . 82
Using the AXIS 7100. . . . . . . . . . . . . . . . . . . . . . . . . . . . . . . . . . . . . . . . . . . . . . . . . . . . . . . . . . 85
Sending Methods . . . . . . . . . . . . . . . . . . . . . . . . . . . . . . . . . . . . . . . . . . . . . . . . 86
Authentication . . . . . . . . . . . . . . . . . . . . . . . . . . . . . . . . . . . . . . . . . . . . . . . . . . 89
Sending to Destinations . . . . . . . . . . . . . . . . . . . . . . . . . . . . . . . . . . . . . . . . . . . 91
Adding Temporary Destinations . . . . . . . . . . . . . . . . . . . . . . . . . . . . . . . . . . . . 94
Adding Temporary Profiles . . . . . . . . . . . . . . . . . . . . . . . . . . . . . . . . . . . . . . . . . 98
Adding a Temporary E-mail Subject . . . . . . . . . . . . . . . . . . . . . . . . . . . . . . . . . 99
Changing the Name of the Scanned Image Files. . . . . . . . . . . . . . . . . . . . . . 100
Scanning Parameters . . . . . . . . . . . . . . . . . . . . . . . . . . . . . . . . . . . . . . . . . . . . 101
Sending to your Web Browser . . . . . . . . . . . . . . . . . . . . . . . . . . . . . . . . . . . . . 103
Viewing Image Files . . . . . . . . . . . . . . . . . . . . . . . . . . . . . . . . . . . . . . . . . . . . . 105
Meta Information . . . . . . . . . . . . . . . . . . . . . . . . . . . . . . . . . . . . . . . . . . . . . . . . . . . . . . . . . . . 108
Meta Information . . . . . . . . . . . . . . . . . . . . . . . . . . . . . . . . . . . . . . . . . . . . . . . 108
Example: Archiving . . . . . . . . . . . . . . . . . . . . . . . . . . . . . . . . . . . . . . . . . . . . . . 111
Example: Invoice Handling . . . . . . . . . . . . . . . . . . . . . . . . . . . . . . . . . . . . . . . . 119
AXIS 7100 User’s Manual
Example: Job Applications . . . . . . . . . . . . . . . . . . . . . . . . . . . . . . . . . . . . . . . . 122
Example: RightFax Integration (SMTP) . . . . . . . . . . . . . . . . . . . . . . . . . . . . . . 129
Example: RightFax Integration (LPD) . . . . . . . . . . . . . . . . . . . . . . . . . . . . . . . 131
Retrieving the XML DD file . . . . . . . . . . . . . . . . . . . . . . . . . . . . . . . . . . . . . . . 133
Troubleshooting . . . . . . . . . . . . . . . . . . . . . . . . . . . . . . . . . . . . . . . . . . . . . . . . . . . . . . . . . . . . 139
Restoring Factory Default Settings . . . . . . . . . . . . . . . . . . . . . . . . . . . . . . . . . 139
Front Panel Indicator Conditions . . . . . . . . . . . . . . . . . . . . . . . . . . . . . . . . . . 141
Error and Warning Messages . . . . . . . . . . . . . . . . . . . . . . . . . . . . . . . . . . . . . . 143
Displaying the Log File . . . . . . . . . . . . . . . . . . . . . . . . . . . . . . . . . . . . . . . . . . . 145
LDAP. . . . . . . . . . . . . . . . . . . . . . . . . . . . . . . . . . . . . . . . . . . . . . . . . . . . . . . . . . . . . . . . . . . . . . 146
Usual Attribute Types . . . . . . . . . . . . . . . . . . . . . . . . . . . . . . . . . . . . . . . . . . . . 146
Meta Information DTD . . . . . . . . . . . . . . . . . . . . . . . . . . . . . . . . . . . . . . . . . . . . . . . . . . . . . . . 151
The Parameter List . . . . . . . . . . . . . . . . . . . . . . . . . . . . . . . . . . . . . . . . . . . . . . . . . . . . . . . . . . 158
Updating the Software . . . . . . . . . . . . . . . . . . . . . . . . . . . . . . . . . . . . . . . . . . . . . . . . . . . . . . . 169
Obtaining the Updated System Software . . . . . . . . . . . . . . . . . . . . . . . . . . . . 169
Technical Specifications . . . . . . . . . . . . . . . . . . . . . . . . . . . . . . . . . . . . . . . . . . . . . . . . . . . . . . 171
Glossary . . . . . . . . . . . . . . . . . . . . . . . . . . . . . . . . . . . . . . . . . . . . . . . . . . . . . . . . . . . . . . . . . . . 175
7
8
Introduction
Section 1
AXIS 7100 User’s Manual
Introduction
AXIS 7100 for WORKiO Network Document Server
AXIS 7100 for WORKiO Network Document server (referred to as
the AXIS 7100 in this document) distributes paper-based
information to any e-mail address, file server, fax server, PC or
printer. Simply connect the AXIS 7100 to a WORKiO digital
imaging systems copier (referred to as ‘WORKiO copier’ in this
document) and plug it into your Ethernet network to effortlessly
send documents, photographs, reports and other paper-based
information to corporate distribution lists or around the world.
The AXIS 7100 can be integrated with many different kinds of
applications using the Meta Information functionality.
AXIS 7100 User’s Manual
Introduction
Supplied as a standalone unit and connected to the WORKiO
copier, the AXIS 7100 is used for convenient electronic
distribution of copied materials to e-mail addresses and
application servers.
Features and Benefits
File Server
Independence
The AXIS 7100 is connected as a node in Ethernet or Fast
Ethernet networks, enabling the WORKiO copier to be accessed
via standard Internet protocols. Communicating directly with
the network client, the AXIS 7100 can be used independently of
file servers, which means reduced network licensing fees. The
product offers high performance, reliability and operational
independence from other equipment.
Simplicity
The file-server-independent approach makes installation quick
and convenient. In most environments, the physical connection
to the network is the only installation required prior to using the
AXIS 7100. No additional software is required on clients or file
servers, except for viewing applications for displaying images in
TIFF and PDF format.
Web-based
Management
The built-in Web server provides cross platform management
from any standard Web browser, such as Netscape Navigator or
Internet Explorer. The dynamically generated Web pages provide
menu-based configuration and management capabilities as well
as context sensitive help and links or user documentation and
on-line support.
Flexibility
From the AXIS 7100 control panel, you can send or copy
directly to e-mail addresses, FTP servers or desktop directories,
and even to network printers. You can also use a standard Web
browser to trigger and save scanned documents.
9
10
Introduction
AXIS 7100 User’s Manual
The diverse range of transfer methods and image formats
available means that the AXIS 7100 can easily be integrated into
existing workflows and adapted to satisfy your specific
requirements.
Meta Information
Information sent together with the scanned image in the
Information file or as a separate document. This information can
be used in applications such as workflow systems, archiving
systems etc. or for storing in a database server.
Ease of Use
The AXIS 7100 is designed for quick and easy installation on
both your network and your digital copier or scanner. It has a
number of interesting features that will help you to simplify the
distribution of your paper-based information, including:
•
•
•
•
•
•
•
•
•
•
•
•
Speed
Send-to-e-mail
Send-to-Web browser
Send-to-File
Send-to-Print over Raw TCP or LPD
Send-to-RightFax
Web-based (HTTP) management and configuration
Plug-and-play functionality for supported WORKiO copiers
No additional or special software required
Integrated scanner drivers, image-file creation and network
transfer methods
Destinations and profiles saved for regular use
External e-mail addresses supported
Supports industry standards
This product is equipped with auto-sense functionality enabling
it to automatically detect the speed of the local network segment
and vary the rate of data communication accordingly, between
10Mbps and 100Mbps. Transparent operation for Ethernet and
Fast Ethernet networks.
AXIS 7100 User’s Manual
Reliability
Security
Upgrading
Introduction
ETRAX 100LX hardware, comprising an integrated 32 bit RISC
processor and associated network controllers, provides high
performance and reliability combined with low power
consumption.
Password protection of Administration tools.
User authentication supported.
Firmware downloadable to Flash memory using FTP.
11
12
Physical Description
Section 2
AXIS 7100 User’s Manual
Physical Description
This section provides a physical description of the AXIS 7100
and explains the purpose and function of the unit connectors,
indicators and user interface.
The Back Panel
Keyboard Network
Connector Connector
Push button
Push Button
Parallel Port Connector
Parallel Port
Power supply
The Push button can be used for restoring the AXIS 7100
parameters to the factory default settings. See “Restoring Factory
Default Settings” on page 139.
A 25-pin parallel port connector (IEEE 1284 DSUB) for
connection to a WORKiO copier.
Network Connector
The AXIS 7100 is designed for 10 Mbps Ethernet and 100 Mbps
Fast Ethernet networks (10baseT and 100baseTX) and connects
to the network via an RJ-45 connector, via twisted pair category
5 cable. Auto-sensing allows the AXIS 7100 to vary the speed of
data communication from 10 Mbps to 100 Mbps according to
the local network segment.
Keyboard Connector
A Mini-DIN connector for connection of a standard PC
compatible keyboard.
Power Supply
AXIS PS-E power supply
AXIS 7100 User’s Manual
Physical Description
The Front Panel
Status
Indicator
Busy
Indicator
Network
Indicator
Power
Indicator
The front panel indicators show the status of the AXIS 7100. The
function of each indicator is described below.
Status Indicator
The Status indicator flashes during startup and remains lit when
the AXIS 7100 is ready for use. If the status indicator turns off,
this may indicate an error.
Busy Indicator
The Busy indicator turns on when the AXIS 7100 is allocated for
use and remains on during the scanning process.
Network Indicator
Power Indicator
The tri-colored Network indicator flashes:
yellow - indicating network activity on a 10MB Ethernet
network.
green - indicating network activity on a 100MB Fast Ethernet
network.
red - indicating that the unit is not correctly connected to the
network.
The Power indicator is normally lit while power is applied. If the
indicator remains off or flashes, this indicates a problem with
the AXIS 7100 or its power supply.
13
14
Physical Description
AXIS 7100 User’s Manual
Note:
When the AXIS 7100 is idle: the Power indicator should be on, the
Network indicator should flash randomly, the Busy indicator should be
off and the Status indicator should be permanently lit.
Control Panel
The AXIS 7100 Control panel has user keys (described below)
and a message display that describes the selected menu options
and current status of the unit.
The message display consists of 2 lines of 16 characters
indicating status and menu options.
User Keys
Add
The function of each user key is described below:
The Add key
scans the material in the scanning device. Use
this key to scan each page of bound materials, for example,
books and magazines.
AXIS 7100 User’s Manual
Cancel
Physical Description
The Cancel key
cancels the sending process at any stage
and clears any selections made from the menu. It also resets
error messages on the display.
Menu
The Menu key
scrolls the menu.
Select
The Select key
selects multiple destinations.
Send
Up/Down
The Send key
sends the scanned material to the selected
destination(s) and releases the AXIS 7100 for other users. For a
single page/stack of sheets, use this key to scan the material and
send the image in one step.
The Up
and Down
keys scroll and select menu options.
User Key
Combinations
Advanced Settings
Menu
Up/Down
Pressing and holding the Menu key
while simultaneously
pressing the Select key
displays the Advanced menu.
Use the Up
•
•
•
Select
and Down
scroll keys to select:
Event Log
Firmware version number
Network settings
Use the Select key
to enter the sub menu.
15
16
Physical Description
AXIS 7100 User’s Manual
External Keyboard
It is possible to connect a standard PC compatible keyboard to
the AXIS 7100. This allows you to easily search long e-mail
listings and add any non-listed addresses as temporary additions
to the resident address list.
The Instruction label supplied with the AXIS 7100 can be
attached to your keyboard for quick reference to the function of
the main keys.
Note:
Be sure to power off the AXIS 7100 before connecting the keyboard.
Keys
The function of each key is described below:
F1
The F1 key scans the material in the WORKiO copier. Use this
key to scan each page of bound materials, for example, books
and magazines.
F1 corresponds to the Add key on the control panel.
F2
The F2 key sends the scanned material to the selected
destination and releases the AXIS 7100 for other users. For a
single page or stack of sheets, use this key to scan the material
and send the image in one step.
F2 corresponds to the Send key on the control panel.
Esc
The Esc key cancels the sending process at any stage and clears
any selections made from the menu. It also resets error
messages.
Esc corresponds to the Cancel key on the control panel.
Tab
The Tab key scrolls the menu.
Tab corresponds to the Menu key on the control panel.
AXIS 7100 User’s Manual
Enter
Up/Down
Physical Description
The Enter key selects multiple destinations.
Enter corresponds to the Select key on the control panel.
The Up and Down arrow keys scroll and select menu options.
The Up and Down arrow keys correspond to the Up/Down keys
on the Control Panel.
Note:
When sending your document, the product always uses the destination
and scanning options most recently displayed, whether explicitly selected
or not.
Insert
Press the Insert key to add an address or subject.
Enter
Press Enter to finish a new address or subject.
Delete
Backspace
Left
Page Up
Press Delete to remove a temporary address, a temporary subject
or to delete characters when editing a subject.
Press Backspace to delete characters.
Press the Left arrow key to go backwards in the menu.
Press Page Up to go to the next entry with a different first
character in the “Send to:” or “Sent by:” list.
Page Down
Press Page Down to go to the previous entry with a different
first character in the “Send to:” or “Sent by:” list.
Home
Press Home to go to the first entry in the “Send to:” or “Sent
by:” list.
End
Press End to go to the last entry in a list.
17
18
Basic Installation
Section 3
AXIS 7100 User’s Manual
Basic Installation
This section describes the various aspects of product installation
and includes:
•
•
•
•
•
A detailed hardware inventory
Instructions for installing the AXIS 7100 onto your networking
environment
Instructions for setting the IP address using the AXIS 7100
control panel, DHCP, RARP, BOOTP and AXIS IP Installer
Instructions for setting a host name
Instructions on how to verify your installation
Checking the Hardware Inventory
Unpack and check all the items using the following list. Contact
your dealer if anything is missing or damaged. All packing
materials are recyclable.
Hardware
Model
Part Number
AXIS 7100 for WORKiO
Network Document Server
AXIS 7100
0147-051-01
Power Supply
Europe
15507
UK
15509
Australia
15510
USA
15508
AXIS PS-E
Japan
15511
Media
Title
Part Numbers
CD-ROM
AXIS Product CD
rev 2.2 or higher
Printed Materials
AXIS 7100 User’s Guide
18907
AXIS 7100 Instruction La- 16567
bel
AXIS 7100 Keyboard Instruction Label
18908
AXIS 7100 User’s Manual
AXIS Product CD
Basic Installation
The AXIS Product CD provides an easy-to-use electronic
catalog, that includes all AXIS product software, utilities
software, white papers, user documents, technical notes and
references etc. It can be used within all of the supported Axis
computing environments. AXIS 7100 does not require any
additional software installation from the AXIS Product CD.
You can view the contents of the AXIS Product CD via the
Adobe Reader interface or HTML interface. All documents
presented on the CD are in PDF format.
Notes:
• You can download the Acrobat Reader from the AXIS Product CD or
from the Adobe Web site at www.adobe.com
• All of the software and information provided on the AXIS Product CD
is also available from the Axis Website at http://www.axis.com.
19
20
Basic Installation
AXIS 7100 User’s Manual
Connecting the WORKiO Copier
Important!
Check that the power supply provided with your AXIS 7100 is marked with the correct
mains voltage.
Connecting the AXIS 7100 to your WORKiO copier:
1. Switch off the WORKiO copier and disconnect the AXIS
7100 external power supply.
2. Connect the AXIS 7100 to the WORKiO copier using a fully
connected parallel cable.
Connecting the AXIS 7100 to the Network
Important!
Always consult your Network Administrator before making changes to the network
configuration.
Follow the instructions below to connect the AXIS 7100 to your
network:
1. Disconnect the external power supply from the AXIS 7100.
2. Connect the AXIS 7100 to the WORKiO copier using a bidirectional parallel cable.
Note:
The AXIS 7100 is designed for 10 Mbps Ethernet and 100 Mbps Fast
Ethernet networks and connects to the network via a twisted pair
category 5 cable (10baseT and 100baseTX).
3. Switch on the WORKiO copier.
AXIS 7100 User’s Manual
Basic Installation
4. Connect the external power supply to the AXIS 7100. The
network indicator will flash during power up and self test. The
following message will appear on the display during self test:
AXIS 7100
Version: x.xx
where x.xx is the software version number, e.g. 1.00
Notes:
The tri-colored Network indicator flashes:
•
yellow - indicating network activity on a 10MB Ethernet network.
•
green - indicating network activity on a 100MB Fast Ethernet network.
•
red -if there is no network connection
•
Not lit - indicates that there is no network activity.
21
22
Basic Installation
AXIS 7100 User’s Manual
Assigning an IP Address
To establish communication with the TCP/IP environment, you
must assign an IP address and optionally choose a unique host
name for your AXIS 7100.
Available Methods
Method
Control Panel
Choose your preferred method for setting the IP address from the
list below then proceed to the appropriate instructions defined
later in this section:
Environment
Description
Suitable for all support- Provides a convenient method for setting the IP address in all supported environments.
ed networking environments.
Note: the administrator can disallow this function from the Web-based
Administration pages.
PC Keyboard
(Not supplied)
Suitable for all support- Connecting a PC compatible keyboard directly to the Mini-DIN conneced environments.
tor of the AXIS 7100 provides a quick and convenient method for managing the unit, and setting the IP address during system startup.
Note: the administrator can disallow this function from the Web-based
Administration pages.
AXIS IP Installer
Suitable for all support- Supplied on the AXIS Product CD and available via the Axis Website,
ed networking environ- this Axis tool simplifies the setting of IP addresses for all Axis ThinServments.
erTM devices, including print servers, camera servers, storage servers
and document servers.
Note: you should not use AXIS IP Installer to set the IP address of the
AXIS 7100, if you have an active DHCP server on your network.
AXIS 7100 User’s Manual
Basic Installation
DHCP
Available in Windows
NT and UNIX. Recommended method on
Windows NT networks
ARP
Available in Windows
Requires the IP address for each new device to be downloaded individ95/98,
ually.
Windows NT, UNIX and
OS/2,
Does NOT work over
routers.
Available in UNIX only. Downloads the IP address to each device automatically. It requires a
RARP daemon on your system and operates within a single network
segment only.
Available in UNIX only. Similar to RARP, but operates on the entire network. It requires a
BOOTP daemon on your system.
RARP
BOOTP
Control Panel
Operates on the entire network and allows for automatic but temporary assignment of IP addresses from a central pool. DHCP will, when
enabled, cause the selected host to automatically allocate and download a free IP address, default router address and subnet mask to the
requesting AXIS 7100. It also provides validation data that defines how
long the IP addresses will remain valid.
This is the recommended method on networks, since it allows a number
of parameters to be set automatically, provided the DHCP server has
been configured to do so.
Follow the instructions below to set the IP address from the
control panel:
Note:
The Administrator can disallow this function from the web-based
administration pages. For details refer to “User Options” on page 41.
1. Power up the AXIS 7100. Press Menu
appears:
when this display
AXIS 7100
Version: 1.00
2. After a few seconds this display will be shown:
IP address:
000.000.000.000
23
24
Basic Installation
AXIS 7100 User’s Manual
3. Press Select
to edit the IP address:
Edit IP address:
000.000.000.000
4. Press Menu
to move through the digits and highlight each
digit, one at a time.
5. Use
as required.
to increase or decrease each highlighted digit,
6. Press Select
to confirm the changes.
7. Press Menu
to display the default router address setting:
Default router:
000.000.000.000
8. Press Select
to edit the default router address:
Edit router:
000.000.000.000
9. To change the value, repeat steps 4 - 6 above.
10. Press Menu
to display the subnet mask setting:
Net mask:
000.000.000.000
11. Press Select
to edit the subnet mask:
Edit net mask:
000.000.000.000
12. To change the value, repeat steps 4 - 6 above.
13. Press Menu
to display the node address. This address is
not editable. The node address should equal the AXIS 7100
serial number found on the underside label of the unit.
AXIS 7100 User’s Manual
Basic Installation
14. Press Menu
once more to display the final instructions:
..
Press ..... if you
are finished
15. Press Select
to exit the IP settings. The AXIS 7100 then
completes the startup sequence.
16. Write the name or IP address of the AXIS 7100 on the supplied
Instructions label and attach it to the top cover.
The AXIS 7100 is ready for use when the Status indicator stops
flashing and remains lit.
Note:
If you make a mistake while editing the parameters, press the Cancel key
on the control panel to cancel the operation.
Verifying the Network
Settings
Access the Advanced menu from the AXIS 7100 control panel to
verify that the chosen network settings are correct, as described
below:
1. Press and hold down the Menu key
simultaneously pressing the Select key
menu is displayed.
2. Use
3. Press Select
4. Use
settings.
Using a PC keyboard
while
. The Advanced
to find the Network Settings option.
to enter the submenus.
to scroll through and check the parameter
Connecting a PC compatible keyboard directly to the Mini-DIN
connector of your AXIS 7100 provides a quick and convenient
method for managing the unit and setting the IP address during
system start up. Follow the procedures below to set the IP
address from the keyboard.
25
26
Basic Installation
AXIS 7100 User’s Manual
Note:
The Administrator can disallow this function from the web-based
administration pages. For details refer to “User Options” on page 41.
1. The following commands are for the setup of the IP
parameters at start-up only. If the keyboard is not already
connected, make sure that the AXIS 7100 power supply is
disconnected before connecting the keyboard to the MiniDIN connector located on the rear panel.
Connect the AXIS 7100 power supply and Press Tab when
the following message appears:
AXIS 7100
Version 1.00
2. After a few seconds the following message will appear:
IP address:
000.000.000.000
3. Press Enter to edit the IP address:
Edit IP address:
000.000.000.000
4. Use the following keys to enter the IP address:
• Use the numeric keys to enter the digits.
• Press Left or Right arrow to edit the previous or next
digit.
• Press Backspace to erase the last entered digit.
• Press Space to move to the next three-digit group.
• Press Home or End to go to the first or last three-digit
group.
• Press Enter to save and exit.
• Press Esc to cancel.
The instructions above also apply for editing the router address
and subnet mask setting.
AXIS 7100 User’s Manual
Using DHCP, ARP,
RARP and BOOTP
Basic Installation
Use DHCP, ARP, RARP and BOOTP as an alternative to setting
the IP address from the control panel or keyboard. Follow the
appropriate instructions for the preferred method below.
Important!
Do not attempt to use the IP address used in the following examples.
Before you begin:
• Power
Make sure the AXIS 7100 is powered on and connected to the network.
• System Privileges
You will need administrator privileges on the Windows NT server or
root privileges on the UNIX system.
• Ethernet Address
Depending on the method you are using, you will need to know the
Ethernet address of your AXIS 7100. The Ethernet address is based
upon the AXIS 7100 serial number. You will find the number on the
underside label.
•
Using DHCP
IP Address
Acquire an unused IP address from your Network Administrator.
Follow these steps to use the DHCP method:
27
28
Basic Installation
AXIS 7100 User’s Manual
1. Edit or create a scope in the DHCP manager of the DHCP
daemon. For Windows NT servers, refer to the “Windows NT
Resource Kit” on how to do this. The entries made in this
scope typically include the following parameters:
• Range of IP addresses
• Subnet mask
• Default router IP address
• Lease duration
• Mail server IP address
• DNS server IP address
• Domain name
• NTP server IP address
2. Activate the scope.
Notes:
• DHCP is enabled by default but can be disabled by an Administrator
using the System Settings page.
• The IP address and all the other settings will be downloaded automatically. You do not need to restart the AXIS 7100.
Using ARP in Windows
In Windows 95/98 and Windows NT, you can download the IP
address using ARP. Perform the following commands to
download the IP address and verify the communication.
Important!
Windows 95 only: If the ARP table is empty, you must first ping an existing unit on your
network before setting the IP address of your AXIS 7100. Type arp -a to display the ARP
table.
From the DOS prompt, type the following:
arp -s <Internet address> <Ethernet address>
ping <Internet address>
AXIS 7100 User’s Manual
Basic Installation
The Ethernet address equals the serial number of the AXIS
7100 with each pair of digits separated by a hyphen.
Example:
arp -s 172.16.253.80 00-40-8c-11-00-86
ping 172.16.253.80
The host will return ‘Reply from 172.16.253.80...’ or a
similar message. This indicates that the address has been set and
that the communication is established.
Notes:
• ARP is enabled by default but can be disabled by an Administrator
using the System Settings page.
• Once the AXIS 7100 has established communication using an appropriate IP address, the arp/ping commands cannot be used to
change the address. The reason for this is to avoid accidental or unauthorized changes of the IP address. Restart the AXIS 7100 to make it
accept the setting of the IP address. You can perform a restart
remotely via the AXIS 7100 web interface. See “Specifying the System
Settings ”on page 39.
• When you execute the ping command for the first time, the response
time may be significantly longer than usual.
Using ARP in
UNIX and OS/2
In UNIX and OS/2, type the following commands to download
the IP address and verify the communication:
arp -s <host name> <Ethernet or node address> temp
ping <host name>
The Ethernet address or node address equals the AXIS 7100
serial number with each pair of digits separated by a colon.
29
30
Basic Installation
AXIS 7100 User’s Manual
Example:
arp -s spserv 00:40:8c:11:00:86 temp
ping spserv
The host will return ‘spserv is alive’ or a similar message.
This indicates that the address has been set and that
communication is established.
Notes:
• ARP is enabled by default but can be disabled by an Administrator
using the System Settings page.
• The arp -s command may vary between different systems. Some
BSD-type systems expect the host name and Ethernet address in
reverse order. IBM AIX systems require the additional argument
ether for Ethernet networks, e.g. arp -s ether spserv
00:40:8c:11:00:86 temp
• Once the AXIS 7100 has established communication using an appropriate IP address, the arp/ping commands cannot be used to
change the address. The reason is to avoid accidental or unauthorized
change of the IP address. Restart the AXIS 7100 to make it accept the
setting. You can perform a restart remotely via the AXIS 7100 web
interface. See “Specifying the System Settings ”on page 39.
• When you execute the ping command for the first time, the response
time may be significantly longer than usual.
Using RARP
in UNIX
Follow these steps to download the IP address using the RARP
method:
1. Append the following line to your Ethernet address table.
This is typically performed by editing the file /etc/ethers.
<Ethernet address>
<host name>
Example:
00:40:8c:24:c0:1c
spserv
AXIS 7100 User’s Manual
Basic Installation
2. If necessary, update your host table and alias name databases
as required by your system.
3. Start the RARP daemon, if it is not already running. This is
typically performed using the command rarpd -a
4. Restart the AXIS 7100 to download the IP address.
Note:
RARP is enabled by default but can be disabled by an Administrator using
the System Settings page.
Using BOOTP
in UNIX
Follow these steps to download the IP address using the BOOTP
method:
1. Append the following entry to your boot table. This is
typically performed by editing the file /etc/bootptab.
<host name>:ht=<hardware type>:vm=<vendor magic>:\
:ha=<hardware address>:ip=<Internet address>:\
:sm=<subnet mask>:gw=<gateway field>
where:
ht
vm
ha
ip
sm
gw
ether for Ethernet
rfc1048
The Ethernet or node address, i.e. the AXIS 7100 serial number
The IP address of the AXIS 7100
The subnet mask
The default router address
Example:
spserv:ht=ether:vm=rfc1048:\
:ha=00408c24c01c:ip=172.16.253.80:\
:sm=255.255.0.0:gw=172.16.253.254
2. If necessary, update your host table and alias name databases
as required by your system.
31
32
Basic Installation
AXIS 7100 User’s Manual
3. Start the BOOTP daemon, if it is not already running. This is
typically performed using the command bootpd -a
4. Restart the AXIS 7100 to download the IP address, default
router address and subnet mask.
BOOTP is enabled by default but can be disabled by an Administrator
using the System Settings page.
Mapping a Host Name to the IP Address
If you are using host names, you can map a unique host name to
the acquired IP address. Refer to your system manuals or to your
Network Administrator for instructions on how to perform the
name mapping on your particular system.
Note:
If the host name has not been included in the system host table, you can
still perform the following instructions on how to download the IP
address.
In this case, simply replace the host name entry with the IP address
wherever needed.
Registering and
Resolving
Host Names
In order to register the host name of the AXIS 7100 in networks
with dynamic IP address settings, WINS (Windows Internet
Name Service) is supported. It is recommended that this method
is used if you are setting the IP address of the AXIS 7100 using
DHCP.
WINS host name rules
WINS only supports 15 character long host names. If your host
name is longer than 15 characters, the AXIS 7100 truncates the
host name to 15 characters when registering with a WINS server.
AXIS 7100 User’s Manual
Basic Installation
Notes:
• The host name limitations conclude that the host name should be no
longer than 15 characters and it should only contain the characters
‘A - Z’, ‘a-z’ and ‘-’.
• Refer to your system manuals or to your network administrator for
instructions on how host name resolutions are performed on your
system.
Verifying your Installation
After successful installation, the AXIS 7100 will verify the
attached WORKiO copier and display the name of the detected
device.
If no destinations have been specified yet, the AXIS 7100 will
display:
Connect using
Web browser
If one or more destinations have already been specified, the
AXIS 7100 will display:
Send to:
xxxxxx
where “xxxxxx” is the first destination in the destination list.
To verify the communication, you can access the AXIS 7100
using a standard Web browser such as Netscape Navigator or
Internet Explorer:
1. Place a document in the WORKiO copier.
2. Start your Web browser.
33
34
Basic Installation
AXIS 7100 User’s Manual
3. Enter the name or IP address of your AXIS 7100 in the
location/address field.
Example:
http://172.16.253.80
4. The AXIS 7100 Home Page, the Scan Document page is
displayed. Click Scan. Depending on the image format
specified by the profile, the Web browser will display the
scanned image in an associated image viewer or ask you to
save the file.
Note:
Jan 1970 is the default value for the counter and will appear if the
administrator has not reset the counter.
AXIS 7100 User’s Manual
Section 4
Configuring the AXIS 7100
Configuring the AXIS 7100
This section is targeted specifically to persons responsible for the
administration of the AXIS 7100. The Administrator is granted
high-level privileges denied to the ordinary user.
Important!
To access the AXIS 7100 configuration file, you must first set the IP address as described
in “Assigning an IP Address ”on page 22.
Configure the AXIS 7100 from a standard Web browser such as
Netscape Navigator or Internet Explorer.
Alternatively, edit the configuration file using a text editor and
upload the file to the AXIS 7100 using FTP.
Important!
The following settings must be specified by the Administrator before the AXIS 7100 can
be used for distributing documents on your network:
• Network settings - define the parameters for TCP/IP, SMTP and printing protocols.
• Destinations - specify the e-mail address, file server or printer to which you wish to
send your document.
The Administrator can optionally modify:
• System settings - system information, administrator password, language, user privileges etc.
• RightFax Integration - configure the RightFax server, the AXIS 7100 and create an
XML DD file.
• Profiles
• Paper sizes
35
36
Configuring the AXIS 7100
AXIS 7100 User’s Manual
Overview of the Administration Tools
Online help
is available on every page within the AXIS 7100 web interface. This is of
particular relevance when configuring the unit and should be used as a first point of
reference for any administration queries. The help system is stored internally in the AXIS
7100.
The web-based administration tools provide a convenient
method for managing destinations, profiles, defining the
network protocol settings, establishing user privileges,
authentication etc. The tools are password protected and
available to the Administrator only.
Accessing the Tools
You can access the AXIS 7100 Home Page using a standard Web
browser such as Netscape Navigator or Internet Explorer.
1. Start the Web browser.
2. Enter the name or IP address of the AXIS 7100 in the
location/address field:
Example
http://172.16.253.80
AXIS 7100 User’s Manual
Configuring the AXIS 7100
3. This brings you to the AXIS 7100 Home Page.
4. Click admin.
A prompt for a username and password is displayed when
entering these pages for the first time during a Web browser
session. At the prompt, log on as root and use the default
password pass.
Note:
It is recommended that you change the password of your AXIS 7100 as
soon as possible, since all Axis products are shipped with the same
password as default.
37
38
Configuring the AXIS 7100
AXIS 7100 User’s Manual
5. The This AXIS 7100 page is displayed:
The Administrator can modify the system settings directly from
this page. Access the other Administration tools using the
control buttons to the left of the page.
AXIS 7100 User’s Manual
Configuring the AXIS 7100
Specifying the System Settings
Click This AXIS 7100 page to display software version, unit
hardware address, memory size information and the current
system settings.
Important!
When installing the AXIS 7100 for the first time, it is recommended that the
Administrator retains the default system settings, profiles and paper sizes. Optionally,
customize these when you are familiar with the unit operation and functionality.
Services overview
The Edit Button
The table below provides an overview of the information and services
provided by each button on this page:
Button
Description
Edit
For editing the General, Date & Time, User Options, International, Authentication and Meta Information settings.
See The Edit Button below.
View Settings
Lists the current parameter settings in the configuration
file.
Restart Server
Restarts the AXIS 7100. Removes all previously loaded
temporary destinations and profiles from the memory.
Factory Defaults
Restores the factory default settings and restarts the AXIS
7100 automatically. All previously loaded destinations are
erased from memory.
Supported Devices
Displays the list of the WORKiO digital imaging systems
copiers supported by the AXIS 7100.
Click the Edit button to display the This AXIS 7100 - Edit Page.
Clicking the appropriate tag displays the General, Date & Time,
User Options, Authentication, International and Meta Data
settings for your AXIS 7100 as described below:
39
40
Configuring the AXIS 7100
General
AXIS 7100 User’s Manual
Server Password and Confirm
This is the Administrator password required for accessing the
AXIS 7100 for administration tools.
To change the password, simply enter your new password in the
Server Password field. Repeat the new password in the Confirm
field to check the spelling and syntax.
Notes:
• Be sure to change the password of your AXIS 7100 as soon as possible, since all Axis products are shipped with the same password as
default.
• If you lose the Server password, you must restore the factory default
settings. See “Restoring Factory Default Settings ”on page 139.
• An asterisk * is displayed for each alphanumeric character that comprises the password in the Server password field of the This AXIS 7100
page.
Date & Time
If you are using time synchronization, specify the time zone in
which the AXIS 7100 operates. UTC is Universal Time
Coordinated which used to be known as Greenwich Mean Time
(GMT), i.e. the local time at the Greenwich meridian (zero
degrees longitude). No_DST means that automatic adjustment
for DST (Daylights Savings Time) is not included. However, the
country specific time zones include adjustment for DST.
The AXIS 7100 has a built-in real time clock with a back-up
battery which will keep the time when the power supply is
disconnected.
Automatically using the Network Time Protocol (NTP)
Click here to obtain date and time information from a time
synchronization source. Time stamps are used in the event log.
NTP Server
Specify the name or IP address of the NTP server used for time
synchronization.
AXIS 7100 User’s Manual
Configuring the AXIS 7100
SMB
Click here to obtain date and time information from Microsoft
Windows NT Network (SMB) - a time synchronization source for
NT domains.
Note:
To use Microsoft Windows NT Network (SMB) properly WINS must be
enabled and the Domain/GroupName parameter must be set to a valid
name.
Manually
Click here to set date and time manually.
User Options
Defines the privileges allowed to normal users by the
Administrator(s). Check the corresponding checkbox for each
task a user is allowed to perform, namely:
•
•
•
•
•
•
•
Add temporary e-mail destinations
Add temporary profiles
Scan documents to Web browser
Specify the sender of scanned documents
Configure network settings on the control panel
Specify file name for e-mail and file destinations
Specify subject for e-mail destinations
Notes:
• All tasks, except specifying the sender and Specify file name for e-mail
and file destinations are enabled by default.
• Configuring the network settings on the control panel allows the user
to change the IP Address using the control panel or the external keyboard.
• Specify file name for e-mail and file destinations allows the
user to enter a new file name for an FTP destination or e-mail destination.
41
42
Configuring the AXIS 7100
Authentication
International
AXIS 7100 User’s Manual
The authentication option makes it possible for the administrator
to allow access to the AXIS 7100 to authenticated users only.
For more information, please refer to “Specifying Authentication
Settings” on page 56.
Allows the Administrator(s) to select:
• The preferred language for messages displayed on the
AXIS 7100 control panel display - English, French,
German, Spanish, Italian and Swedish are supported
• The keyboard layout which is compatible with the
external keyboard
• The measurement unit to be used for displaying defined
paper sizes (centimeters or inches)
Notes:
• The language default is set to English and the measurements to
inches.
• When a new language is selected you must go back to the Profiles
page and click Restore Predefined Profiles to change the language in
the Profile Name list. This also applies to the language in the Paper
Sizes list, i.e. you must go back to the Paper Sizes page and click
Restore Predefined Paper Sizes.
Note: All user-defined profiles and modifications to predefined profiles
will be lost when you click Restore Predefined Profiles.
Meta Information
Meta Information handling enables the administrator to request
information from the user of the AXIS 7100. This information is
requested using an XML DD file. The user is prompted to enter
the information at the moment of scanning, using the connected
keyboard. For more information, please refer to “Meta
Information” on page 108.
AXIS 7100 User’s Manual
Configuring the AXIS 7100
Specifying Network Settings
Click Network Settings to view and modify the configuration
parameters for all supported protocols, namely:
•
TCP/IP - defines the IP Address, default router and subnet mask,
automatic download method (BOOTP, RARP or DHCP), domain
name, DNS server and WINS server.
Note:
The network settings are set automatically if you use RARP, DHCP or
BOOTP for downloading the IP address. However, it is recommended that
you verify the network settings using the Web browser interface,
regardless of how the initial network setup was done.
•
•
•
•
Web (HTTP) - an external URL reference with URL to page or
image options.
E-mail (SMTP) - defines the IP Addresses or DNS names for
primary and secondary e-mail servers, connection time-out, email reply address, BCC (blind carbon copy) address.
External Address Book - defines an external e-mail address book
on an LDAP server or a destination list on an FTP server which is
automatically retrieved and downloaded to the AXIS 7100.
Printing - defines the different printing parameters. Click the
checkboxes to enable printing in general and also to select the
supported printing protocols (LPD, Raw TCP/IP). All printing
parameters are enabled by default.
43
44
Configuring the AXIS 7100
Services Overview
AXIS 7100 User’s Manual
The table below provides an overview of information and services
available from this page
Button
Description
Wizard
Guides the user through the setup procedures for the following protocols - TCP/IP, E-mail (SMTP), the External
Address book and printing.
Note: You cannot set up all of the supported protocols
with one pass of the Wizard. After completing one protocol, you then return to the Network Settings Wizard page
where you can optionally proceed with another protocol.
Detailed View
Displays the Protocols page that allows all of the supported protocols to be set up within a single dialog.
Restart Server
Restarts the AXIS 7100. LED indicators flash during startup and self test. When they have stopped and the Network indicator starts flashing to indicate network
activity, the unit is ready for use. New configuration settings will then become active.
Note: Clicking Restart deletes all temporary destination
and profiles.
View Settings
Using the Wizard
Lists the current parameter settings in the configuration
file.
The Wizard provides a convenient way to set up the AXIS 7100
in your networking environment. Follow the instructions below
to configure the supported networking protocols:
1. Click Network Settings.
2. Click Wizard
to have the AXIS 7100 guide you through
the configuration procedures for each of the supported
network protocols.
3. Click Close.
AXIS 7100 User’s Manual
Configuring the AXIS 7100
Note:
The Wizard configures each supported protocol one at a time, i.e. after
configuring TCP/IP you must then initiate another pass of the Wizard to
configure the e-mail, web and printing protocols and the External
Address Book.
Detailed View
Follow the instructions below to configure all of the supported
networking protocols using the Detailed View.
Notes:
• The Network settings for the TCP/IP and e-mail (SMTP) protocols
must be specified by the Administrator before the AXIS 7100 can be
used for distributing reproduced documents on the network.
• You can optionally configure the External Address Book for automatic
retrieval and loading of e-mail addresses and/or other destination
types.
• You can optionally disable LPD or Raw TCP/IP printing support.
• In order to prevent conflicts with other network devices please be
sure to acquire a unique and unused IP address from your Network
Administrator.
• The Online help button
provides instructions and general information on all system parameters and is your first point of reference
for any administration queries.
1. Click Network Settings.
2. Click Detailed View
Services Overview
to display the Protocols dialog.
This table provides an overview of the supported protocol
settings describing both purpose and function:
Protocol setting
Purpose and function
TCP/IP
Defines the IP Address, default router and subnet mask, automatic download method (BOOTP, RARP or DHCP), domain name,
DNS server and WINS server.
An external URL reference with URL to page or image options.
Web (HTTP)
45
46
Configuring the AXIS 7100
AXIS 7100 User’s Manual
Protocol setting
Purpose and function
E-mail (SMTP)
Defines the IP Addresses or DNS names for primary and secondary e-mail servers, connection time-out, e-mail reply address
and Bcc address.
Defines an external e-mail address book on an LDAP server or
destinations list on an FTP server.
Enable printing support, enable LPD support and Raw TCP/IP support
External Address
Book
Printing
Note:
The AXIS 7100 configuration parameters are described in “The Parameter
List” on page 158.
Configuring the TCP/IP
Settings
Follow the instructions below to configure the TCP/IP settings:
1. From Detailed View, click the TCP/IP tag.
2. Check the appropriate checkbox to define your preferred
method for setting the IP Address automatically, i.e. DHCP,
BOOTP or RARP. For further information on these methods,
refer to “Assigning an IP Address ”on page 22.
Note:
Depending on how your network has been configured, other Internetrelated parameters such as the default router, subnet mask, mail server,
time server etc. might also be set automatically. However, it is
recommend that you verify the settings in the Protocols page when the
AXIS 7100 has been restarted and then enter any missing parameters
manually.
AXIS 7100 User’s Manual
Configuring the AXIS 7100
3. Enter the IP Address of your AXIS 7100
Notes:
• If the IP address is changed, you must re-establish the HTTP communication using the new address.
• If DHCP, BOOTP or RARP is enabled, your manual settings might be
overridden when you restart the AXIS 7100.
• You can also set the IP address from the AXIS 7100 control panel.
Refer to “Assigning an IP Address” on page 22.
4. Enter the IP address for the Default Router. All traffic directed
outside the local network (according to the subnet mask) is sent
to the default router. Any re-routing via other routers is done
automatically. The setting 0.0.0.0 indicates that no default
router is set.
5. Specify the Subnet Mask used for determining when the traffic
should be sent via a router. This number combined with the IP
address identifies on which network the AXIS 7100 is located.
For example, the normal class C mask is 255.255.255.0. The
setting 0.0.0.0 indicates that automatic router sensing is used.
47
48
Configuring the AXIS 7100
AXIS 7100 User’s Manual
6. Specify the Domain Name to which the AXIS 7100 belongs.
Domain refers to a set of computers on a network that have
been assigned a group name. A domain might contain two or
more workgroups.
7. Specify the IP address of the Primary DNS Server. DNS
(Domain Name System) servers are used for identifying
computers with names instead of IP Addresses.
8. Specify the IP address of the Secondary DNS Server that will
be used in case the primary DNS server is disconnected or
unavailable.
9. Check this box to enable WINS (Windows Internet Name
Service) over TCP/IP. WINS allows Windows-based clients to
locate NetBIOS resources on TCP/IP networks. WINS is
disabled by default.
10. Specify the IP address of the Primary WINS server.
11. Optionally specify the IP address of a Secondary WINS server.
The secondary WINS server will be used in case the primary
WINS server is disconnected or unavailable.
AXIS 7100 User’s Manual
Web (HTTP)
Configuring the AXIS 7100
Select Web(HTTP) to add a customized link to the AXIS 7100
home page (External Link):
Customized link
•
•
URL to Page: Enter a web address for easy access e.g. to
established guidelines and rules of usage for the AXIS 7100. The
full path must be specified, e.g. http://www.company.com
URL to Image: Link to an image used as a customized link e.g.
your company logotype. Specify the full path; for example:
http://www.company.com/images/logo.gif, or the path
relative to the URL of the page, e.g. images/logo.gif.
Note:
Note that the width of the image can not exceed 117 pixels. Leave blank
to use the standard button (External Link).
E-mail (SMTP)
The Network settings for the e-mail (SMTP) protocols must be
specified by the Administrator before the AXIS 7100 can be used
for distributing reproduced documents on the network.
Follow the instructions below to configure the e-mail (SMTP)
protocol.
49
50
Configuring the AXIS 7100
AXIS 7100 User’s Manual
1. From the Protocols dialog, click the E-mail (SMTP) tag.
2. Specify the name or IP address of the Primary Mail Server that
provides the e-mail facilities, e.g. mail or mail.domain.com or
172.16.253.80.
3. Optionally, specify the name or IP address of the Secondary
Mail Server. The secondary mail server is only used if the
primary mail server is disconnected or unavailable.
4. In the SMTP Port field, specify the number of the TCP/IP port.
5. Define the Connection Timout period, i.e. how long the AXIS
7100 is to wait before timing out when connecting to the email (SMTP) server. This must be greater than 5 but no more
than 65535 seconds.
6. In the Reply Address field, specify the e-mail address that is
to feature as the default sender when sending to e-mail
destinations. If authentication is enabled the e-mail address
of the authenticated user will be used instead.
7. Check the Send copy to Bcc recipient checkbox to enable the
option to send a blind carbon copy (Bcc) of an e-mail. Specify
the e-mail address of the recipient in the Bcc Address field.
AXIS 7100 User’s Manual
Configuring the AXIS 7100
Notes:
• The user can specify another sender at the moment of scanning. This,
however, does not apply if the administrator has enabled Authentication or if the Specify the sender of scanned documents option is not
selected (see the admin|Edit|User Options tab)
• Make sure that your AXIS 7100 has a valid SMTP reply address to
avoid rejection by spam filters.
• To be able to receive mail from the AXIS 7100 you may need to configure the IP address or host name of the AXIS 7100 in the mail
server.
External Address Book
A Destination Address Book can be retrieved from an LDAP
(Lightweight Directory Access Protocol) server or from a
specified file on an FTP server. Alternatively, you can choose
not to retrieve an address book.
Follow the instructions below to configure the External Address
Book:
51
52
Configuring the AXIS 7100
AXIS 7100 User’s Manual
1. From the Protocols dialog, click the External Address Book
tag.
Your options are:
•
•
No External Address Book - Select this option if you do not
want to retrieve an External Address Book.
External Address Book via LDAP (e-mail destinations only) Select this option to retrieve an external address book from an
LDAP (Lightweight Directory Access Protocol) server. For more
information on LDAP, see “LDAP” on page 146. Check the AXIS
7100 Support Web for more information on the settings for your
specific LDAP server.
LDAP Server - Specify the name or IP Address of the LDAP server.
Port Number - Specify the number of the TCP/IP port.
User - Specify the name for logging on to the LDAP server, e.g.
cn=name, o=companyname, c=countrycode. If left blank, no
authorization will be attempted. If the contents in this field does
not include a "=" or a comma, the string "cn=" is automatically
added to the beginning of the contents.
Password - Specify the password for logging on to the LDAP
server. If the User field is left blank, this setting will be ignored.
Confirm - Confirm the password to make sure it was spelled
AXIS 7100 User’s Manual
•
Configuring the AXIS 7100
correctly.
Name Field - Specify the name of the field that contains the
destination name.
E-mail Field - Specify the name of the field that contains the email address.
Search Base - Specify where to begin the search, e.g.
o=companyname, c=countrycode. There may be other required
settings depending on the LDAP server. Refer to the user
documentation of the LDAP server for more information.
Filter - Specify an LDAP filter in order to reduce the length of the
destination list. The filter can be a real LDAP filter, e.g.
(givenName=*). You can also specify a list of conditions, e.g.
mail=adm*,telephoneNumber=+1 800*. In this case, the AXIS
7100 will generate a real LDAP filter.
External Address Book from a File (e-mail, printer and file
destinations) - Select this option to read an external address
book from a file on an FTP server.
FTP Server - Specify the name or IP Address of the FTP server.
User - Specify the user name for logging on to the FTP server. If
left blank, the User and Password specified on the Destination
Default page will be used.
Password - Specify the password for logging on to the FTP
server. If the User field is left blank, this setting will be ignored.
Confirm - Confirm the password to make sure it was spelled
correctly.
Directory - Specify the directory on the FTP server where the file
is stored. Example: /pub/axis7100/address
If left blank, the root directory on the FTP server will be used.
File Name - Specify the name of the file.
The file containing the destination information must be a
text file using the following syntax:
53
54
Configuring the AXIS 7100
AXIS 7100 User’s Manual
[Destination-<destination name>]
Description=<destination name>
Transfer method=Scan-to-e-mail (SMTP)/
Scan-to-URL (SMTP & FTP)/
Scan-to-file (FTP)
Scan-to-print (LPD)
Scan-to-print (TCP)
Destination=<e-mail address>/<directory>/<queue>/<port>
Information level =Nothing/Basic/Complete
Profile =<profile>
Server=<ftp server>/<LPD server>/<printer>
User=<user name>
Password=<password>
File name=<file name>
Index file=Yes/No
Resolutions=<A subset of: 75 100 150 200 300 600 1200>
Paper sizes=<A subset of: Executive Letter
Legal Ledger A4 A3>
Duplex supported= Yes/No
Duplex selection=SingleSided/DoubleSided/AsScanned
LPD mode=SingleDataFile/SplitSourceFile/
BufferDataFiles/MultipleDataFiles
The Password, File name and Index file fields only apply to file
destinations. The Server and User fields only apply to file and
printer destinations. The last five fields only apply to printer
destinations. The Description, Transfer method and Destination
fields are mandatory for all destination types. For file and
printer destinations, the Server field is mandatory as well. If the
other fields are omitted, default values will be used. These are in
most cases defined on the Destination Default page.
For an example, create a destination with the selected transfer method
and check the config.ini file.
Notes:
• The external e-mail addresses will appear in alphabetical order
together with existing destinations in the destination list on the AXIS
7100 message display.
• The event log will show how many e-mail addresses that have been
loaded with LDAP or FTP.
AXIS 7100 User’s Manual
Printing
Configuring the AXIS 7100
Select Printing to set the printing parameters. The AXIS 7100
receives printing data (LPD or Raw TCP/IP) from the network
and sends it to the WORKiO copier for printing.
•
•
•
Enable Printing Support: Click the checkbox to enable/disable
printing via the AXIS 7100.
Enable the LPD Support: Click the checkbox to enable/disable
printing with the LPD printing protocol.
Enable the Raw TCP/IP Support: Click the checkbox to
enable/disable printing with the RAW TCP/IP printing protocol.
Note:
The printing parameters are enabled by default.
55
56
Configuring the AXIS 7100
AXIS 7100 User’s Manual
Specifying Authentication Settings
Authentication makes it possible for the administrator to allow
access to the AXIS 7100 for authenticated users only. Click the
Edit button on the This AXIS 7100 page and then click the
Authentication tag to modify the authentication parameters.
1. Click one of the radio buttons to disable/enable
authentication:
• Click None to disable authentication. Authentication is
disabled by default.
• Click LDAP server authentication to enable
authentication by this method. Specify the parameter
settings as described in “LDAP Server Authentication”
on page 57.
• Click Windows NT Server authentication to enable
authentication by this method. Click Change to access
the parameter settings described in “Windows NT Server
Authentication” on page 58.
AXIS 7100 User’s Manual
Configuring the AXIS 7100
2. In the Time before logout field, specify the number of seconds
that the AXIS 7100 is to wait for user input before
automatically logging out the authenticated user.
3. Check the Authenticated only when e-mail address is
retrieved checkbox if the user is not to be authenticated when
the AXIS 7100 fails to retrieve the matching e-mail address
from the authentication server.
Note:
NT Authentication can only search for the name corresponding to the
username and cannot retrieve the e-mail address itself. The e-mail
address matching the name is retrieved from the resident destinations
list.
4. Click Apply to save your changes, then click OK to return to
the This AXIS 7100 page.
If you want to return to the This AXIS 7100 page without
saving your changes click Cancel.
LDAP Server
Authentication
Parameter
LDAP Server
Port Number
Search Base
Name Field
E-mail Field
User ID Field
Description
Specify the name or IP Address of the LDAP server
Specify the number of the TCP/IP port used by the LDAP
server
Specify where to begin the search, e.g. o=company name,
c=country code
Specify the name of the field that contains the destination
name,
e.g. cn
Specify the name of the field that contains the e-mail address,
e.g. mail
Specify the User ID field that contains the user ID/user name of
the user to be authenticated, e.g. uid
Note:
The settings may differ depending on the LDAP server. Refer to the user
documentation of the LDAP server for more information.
57
58
Configuring the AXIS 7100
Windows NT Server
Authentication
AXIS 7100 User’s Manual
Click Change to display the Windows NT server authentication
page.
Parameter
Description
Server Name
Specify the name of the AXIS 7100 to be added in the Windows NT domain.
Specify the name of the domain where the AXIS 7100 belongs.
Domain
Create a Computer
Account in the
Domain
Username &
Password
Add the AXIS 7100 to the domain. Check this box to create the
account via this interface or use the Server Manager tool on a
Windows NT server.
Specify the username and password of the NT administrator.
Note:
Treat the added computer name as a security element. Before your AXIS
7100 has joined the domain, it is possible for a user to add a different
computer to your computer name and have it join the domain using the
computer account you have just created for your AXIS 7100.
For more Information see the Windows NT Help pages on creating a
computer account.
AXIS 7100 User’s Manual
Configuring the AXIS 7100
Specifying Destinations
A destination is used when sending scanned images from the
AXIS 7100 control panel and is defined as one of the following:
•
an e-mail address
•
a file on an FTP server referenced by a URL hyperlinks
•
a file on an FTP server
• a printer
Click Destinations to display the Destinations page for:
•
•
•
•
a list of currently available e-mail, file, printer and RightFax
destinations
editing and creating new destinations
creating copies of existing destinations
selectively deleting destinations
59
60
Configuring the AXIS 7100
Services Overview
The table below provides an overview of the information and services
provided by each button on this page
Button
Description
E-mail Destination New >>
Creates a new e-mail or RightFax destination.
File Destination New >>
Creates a new file destination.
Printer Destination New >>
Creates a new printer or RightFax destination.
URL for E-mail >>
Defines the storage location for images sent as
hyperlinks to e-mail destinations.
E-mail Subjects >>
Specifies the text to be displayed in the subject
field when sending to e-mail destinations.
Destination Defaults >>
Remove All Destinations
External Destinations
Creating and Editing
E-mail Destinations
AXIS 7100 User’s Manual
Note: US ASCII characters only.
Displays the default parameters for each destination, e.g. the associated profile for a particular
destination, the transfer type, etc.
Note: Editing the default settings causes all destinations using the default value to be changed automatically.
Deletes all destinations from table.
Displays the external destinations. Destinations
are displayed using the same syntax as an external address book stored on an FTP server
(see Network Settings | Detailed View)
E-mail destinations allow the users to send scanned images to
an e-mail address or RightFax server using the SMTP protocol.
Follow the instructions below to create new or edit existing email destinations.
1. Click Destinations.
2. Previously added e-mail, file and printer destinations are listed
in the table. Click Detailed to view the detailed settings.
AXIS 7100 User’s Manual
Configuring the AXIS 7100
3. If you want to edit an existing destination in the displayed list,
click the Destination Name link and proceed to step 5.
4. Click E-mail Destination New >> to add a new e-mail or
RightFax destination to the list. For more information on
RightFax integration, please refer to “RightFax Integration
with SMTP” on page 70.
5. Specify a descriptive name for the e-mail or RightFax
destination in the Destination Name field. This is the name that
will appear in the destination list.
6. Specify the e-mail address of the recipient or RightFax server
in the E-mail Address field. Multiple recipients must be
separated by a comma (,) e.g. [email protected],
[email protected]
7. From the drop-down Profile list, select the profile to be used
as the default for this destination.
Note:
The user can specify another profile from the AXIS 7100 control panel at
the moment of scanning. <Default-xx> is the default value specified on
the Destination Defaults page.
8. With reference to the table below, select the amount of
information to be attached with the image:
Option
Description
<Default-xx>
Default value specified on the Destination Defaults page
<Complete>
Information about the AXIS 7100, the connected digital copier/scanner, the parameter settings used when scanning etc.
<Basic>
Includes the image-related profile settings.
<None>
Does not include any information.
61
62
Configuring the AXIS 7100
AXIS 7100 User’s Manual
9. The e-mail can include the scanned image as an e-mail
attachment, or a hyperlink (URL) to the original file. Click the
appropriate radio button to determine how the scanned image
should be sent.
Important!
When selecting a URL that points to a scanned image, you must specify the location for
storing the scanned images. Click URL for E-mail to specify the directory where all such
images will be stored.
10. To complete this task, do one of the following:
• To enter a new destination, click Add to list. Once your
destination additions are complete, click Done to return
to the Destinations page.
• To save an edited destination click OK
Notes:
• You can enter more than one e-mail destination. Separate the different entries with a comma (,) e.g. [email protected], [email protected]
• You can also define an external e-mail address book on an LDAP
server or destinations list on an FTP server. See “External Address
Book” on page 51.
Adding Permanent
Destinations
The Administrator can permit users to add temporary e-mail
destinations using the New Destination button on the
User|Destination page. If this privilege is enabled, the five most
recently added temporary destinations will appear at the top of
the table on the Destinations page.
The Administrator can make these temporary destinations
permanent simply by clicking the Make Permanent
button.
Creating and Editing
File Destinations
File destinations
allows the user to store scanned images in a
directory on a file server using the FTP protocol.
AXIS 7100 User’s Manual
Configuring the AXIS 7100
Follow the instructions below to edit, copy or create a new file
destination:
1. Click Destinations.
• If you want to edit an existing destination in the
displayed list, click the Destination Name link and
proceed to step 2.
• If you want to copy an existing destination and modify
it, click
and proceed to step 2.
• Click File Destination New >> to add a new destination
to the list.
2. Specify a descriptive name for the file destination in the
Destination Name field. This is the name that will appear in the
destination list.
3. From the drop-down Profile list, select the profile to be used
as default for this destination.
63
64
Configuring the AXIS 7100
AXIS 7100 User’s Manual
Note:
The user can specify another profile from the AXIS 7100 control panel at
the moment of scanning. <Default-xx> is the default value specified on
the Destination Defaults page.
4. With reference to the table below, select the amount of
information to be included with the image:
Option
Description
<Default-xx>
Default value specified on the Destination Defaults page
<Complete>
Information about the AXIS 7100, the connected digital copier/scanner, the parameter settings used when scanning etc.
<Basic>
Includes the image-related profile settings
<None>
Does not include any information
5. Specify the name or IP address of the FTP server on which the
scanned image will be stored in the FTP Server field.
6. Specify the user name for logging on to the FTP server in the
User field.
Note:
Leaving the User field blank causes the user and password defined in the
Destination Defaults page to be used.
7. If required, specify the password for logging on to the FTP
server. Repeat the password in the Confirm field to check the
spelling and syntax.
8. Specify the directory on the FTP server where the image will
be stored.
9. Define the file name of the scanned image.
AXIS 7100 User’s Manual
Configuring the AXIS 7100
Note:
The filename defined in the Destination Defaults page is used if the
Filename field is left blank.
10. With reference to “Filename Sequence Numbers and
Extensions ”on page 65, optionally combine the filename with
a sequence number and/or a file extension, e.g.
<filename><sequencenumber>.<fileextension>
11. Specify the extension of the information file. If you do not
specify an extension the default value will be used.
12. To complete this task do one of the following:
• To save a new File Destination, click Add to list. Once
your File Destination additions are complete, click Done
to return to the Destinations page.
• To save an edited File Destination or to save a copy of a
File Destination, click OK.
Filename Sequence
Numbers and
Extensions
The filename defined within the New File Destination/Edit File
Destination page can be appended with a sequence number
and/or an extension. These numbers and extensions specify the
file name and define which application is needed to launch the
appropriate image viewer, i.e. tif, pdf.
Check the Append Sequence number to file name if you want
to sequentially save a series of image files. This causes a new
image file to be stored every time a user scans to the specified
destination. For example, if you select 01 as the sequence
number from the drop-down list, the first time you scan an
image to the specified destination, the file will be saved as
filename00. The next time the file will be saved as
filename01,... etc.
65
66
Configuring the AXIS 7100
AXIS 7100 User’s Manual
For a directory with many files, performance increases if you
store the sequence number on the FTP server. However, to do
that, the AXIS 7100 must be permitted to overwrite/delete files
in the specified directory.
The table below summarizes the available sequence numbers and
extensions:
Option
Description
Append sequence
number to file name
Adds a unique sequence number to the file name.
Start sequence with:
Selects the sequence number to be appended to the first image scanned to this destination. For example, if you choose
01, the first image will be called <filename>00, the second
will be called <filename>01, etc.
Store sequence
Check this box to store the sequence number on the FTP
number on FTP server: server. For a directory with many files, performance will in-
crease. However, the specified user must have change and
delete access rights to the specified directory on the FTP
server.
Append file extension
to file name:
Information File
Extension:
Creating and Editing
New Printer
Destinations
Raw TCP Printing
Check this box to add the file extension to the file name, i.e.
tif or pdf. The file extension will correspond to the profile
used. It is needed for automatically launching the appropriate image viewer.
Specify an extension for the information file.
Note: The information file will always be a text file. The information file extension is used e.g when you want to add
the *.xml extension to an XML file.
Printer destinations
allow users to send scanned or copied
images over the network to a network printer, using either the
Raw TCP or LPD printing method.
Follow the instructions below to edit or create a new TCP/IP
printer destination:
1. Click Destinations.
2. If you want to edit an existing destination in the displayed list,
click the Destination Name link and proceed to step 4.
AXIS 7100 User’s Manual
Configuring the AXIS 7100
3. If you want to add a new destination, click Printer Destination
New >> to display the New Printer Destination Page.
4. Enter a descriptive Destination Name for the printer.
5. Select Raw TCP.
6. Type the IP Address or Host Name of the destination printer
in the Printer field.
7. Specify the port number that the printer uses (normally 9100).
8. From the drop-down Profile list, select the profile to be used
as the default for this destination.
Notes:
• The user can specify another profile from the AXIS 7100 control panel
at the moment of scanning. <Default-xx> is the default value specified on the Destination Defaults page.
• Select the PCL image format as it is primarily for use with printer destinations.
67
68
Configuring the AXIS 7100
AXIS 7100 User’s Manual
9. Check the Include Page Header check box only if you want
date, time, destination, sent by, and page number to appear
on your printer output.
10. If the target printer supports double sided printing, check the
My Printer Supports Double Sided Printing checkbox and
define your printing preferences by clicking the associated
radio buttons, namely: Only Print Single Sided, Only Print
Double Sided or Print As Scanned.
11. Check the appropriate checkboxes to define the supported
resolutions and paper sizes for the target printer.
12. To complete this task do one of the following:
• If you have added a new printer destination, click Add to
List. After adding all of your required printers, click
Done.
• If you have edited or copied an existing printer
destination, click OK.
LPD Printing
Follow the instructions below to edit or create a new LPD printer
destination:
1. Click Destinations.
2. If you want to edit an existing destination in the displayed list,
click the Destination Name link and proceed to step 5.
3. Click Printer Destination New >> to display the New Printer
Destination Page.
4. Enter a descriptive Destination Name for the printer.
5. Check the LPD radio button.
6. Type the IP Address or Host Name of the LPD server in the
Server field.
7. In the Print Queue field, type the name of the target printer
queue on the server. Optionally, enter a username to identify
ownership of the print job.
AXIS 7100 User’s Manual
Configuring the AXIS 7100
8. Define the LPD Mode by clicking one of the adjacent radio
buttons, namely, Axis Compatible Print Server, Windows
Queue, Unix Queue or Other.
Notes:
• Click Other if your destination printer server is not Axis-compatible.
• Click the Unix Queue button only if you wish to distribute the file to a
dedicated LPD server on your network.
9. From the drop-down Profile list, select the profile to be used
as the default for this destination.
Note:
The user can specify another profile from the AXIS 7100 control panel at
the moment of scanning. <Default-xx> is the default value specified on
the Destination Defaults page.
10. Check the Include Page Header checkbox only if you want
date, time, destination, Sent By and Page Number to appear
on your printer output.
11. If the target printer supports double sided printing, check the
My printer supports double sided printing checkbox and
define your printing preferences by clicking the associated
radio buttons, namely, Only Print Single Sided, Only Print
Double Sided or Print As Scanned.
12. Define the supported resolutions and paper sizes for the target
printer by checking the appropriate check boxes.
13. To complete this task do one of the following:
• If you have added a new Printer Destination, click Add to
List. After adding all of your required printers, click
Done.
• If you have edited or copied an existing destination, click
OK.
69
70
Configuring the AXIS 7100
RightFax Integration
with SMTP
Configuring the
RightFax server
AXIS 7100 User’s Manual
For easy distribution of scanned material over SMTP you need to
configure the RightFax server and the AXIS 7100 (SMTP). You
also need to create an XML DD file and specify an e-mail
destination for RightFax.
Follow the instructions below to set up e-mail support on the
RightFax server:
1. Set up a new e-mail account on the SMTP server.
2. Make sure that an e-mail gateway is installed on the RightFax
server.
3. Start the RightFax Enterprise Fax Manager.
4. Right-click the e-mail gateway and select the Configure
Service menu.
5. Enter the POP account information.
6. Select the Use IETF fax addressing checkbox.
7. Set the mail fetching frequency (number of seconds between
POP requests)
Note:
The RightFax e-mail gateway logs the status for the retrieved e-mails in
the NT event log. Setting the event log level to verbose in the e-mail
gateway settings makes it easier to find any problems related to the email gateway.
Configuring the
AXIS 7100
SMTP (e-mail) support is set up from admin | Network Settings
| Detailed view | E-mail (SMTP). Fill in the SMTP server
information and fill in a valid e-mail address (i.e. an e-mail
address recognized by the RightFax server) in the Reply Address
field. For more information on SMTP support see “E-mail
(SMTP)” on page 49.
AXIS 7100 User’s Manual
Configuring the AXIS 7100
Note:
If Authentication is enabled in the AXIS 7100, the entered e-mail address
in step 5 will be ignored and the e-mail address of the authenticated user
will be used instead.
XML DD file for
RightFax Integration
E-mail Destination for
RightFax
You need to create an XML DD file to prompt the user to enter
the fax number when sending to a fax destination. See
“Example: RightFax Integration (SMTP)” on page 129 for more
information. Also, refer to the Rightfax embedded codes for a
description of all possible codes in the Output description
section.
The destination specified in the XML DD file must be set up as
an e-mail destination:
1. Click admin | Destinations | E-mail Destination New>>
2. Enter the destination name specified in the XML DD file e.g.
FAX.
3. Enter the RightFax e-mail address specified in the XML DD file.
4. For best results, select the Text Low profile (200x200 DPI) from
the drop-down list.
5. Click Add To List.
The installation and SMTP configuration process is now
complete and you are ready to send a scanned document to a
RightFax destination over SMTP.
RightFax Integration
with LPD
For easy distribution of scanned material over LPD you need to
configure the RightFax server and the AXIS 7100 (LPD). You
also need to create an XML DD file and specify a printer
destination for RightFax.
71
72
Configuring the AXIS 7100
Configuring the
RightFax server
AXIS 7100 User’s Manual
Follow the instructions below to set up LPD support on the
RightFax server:
1. Install an LPD server on the Rightfax server (e.g. the
Windows NT LPD server).
2. Create a queue on the LPD server.
3. Connect the queue to the HPFAX printer on the Rightfax
server.
XML DD file for
RightFax Integration
Printer Destination for
RightFax
You need to create an XML DD file to prompt the user to enter
the fax number when sending to a fax destination. See
“Example: RightFax Integration (LPD)” on page 131 for more
information. Also, refer to the Rightfax embedded codes for a
description of all possible codes in the Output description
section.
The destination specified in the XML DD file must be set up as a
printer destination:
1. Click admin | Destinations | Printer Destination New>>
2. Enter the destination name specified in the XML DD file e.g.
FAX.
3. Select the RightFax radio button.
4. Enter the RightFax server name and queue name.
5. Define a user name to be associated with the LPD print queue.
6. Select Windows Queue (set by default).
7. For best results, select the Text Low profile (200x200 DPI) from
the drop-down list.
8. Click Add To List.
The installation and LPD configuration process is now complete
and you are ready to send a scanned document to a RightFax
destination over LPD.
AXIS 7100 User’s Manual
Configuring the AXIS 7100
Specifying Profiles
A profile defines the WORKiO settings and image parameters to
be used when scanning and is optionally part of the destination
definition.
Note:
Although a profile is normally associated with a destination, the user can
override that setting by choosing another profile from the AXIS 7100
control panel at the moment of scanning.
Click Profiles for:
•
•
•
•
•
•
•
Viewing permanent and temporary profiles
Viewing the parameter settings
Editing a profile
Making temporary profiles permanent
Creating copies of an existing profiles
Selectively deleting profiles
Setting Profile defaults
73
74
Configuring the AXIS 7100
Services Overview
AXIS 7100 User’s Manual
The table below provides an overview of the information and
services provided by each button on this page
Button
Description
Profile New>>
Allows an administrator to create a new profile. See Creating new profiles below.
Profile Defaults>>
Allows the administrator to set the default paper size to be
used for all profiles using the default.
Restore Predefined
Profiles
The AXIS 7100 includes a number of predefined general purpose profiles. Clicking this button restores the predefined
profiles. See Predefined Profiles below for details.
Note: all user-defined profiles are lost if you restore the predefined profiles. This does not apply to Default Paper SIze
which must be set manually from admin | Profiles .
Creating and Editing
Profiles
Follow the instructions below to edit the existing profiles or
create new profiles for specific document types such as invoices,
mailings etc.
Click
to create a copy of an existing paper size. You can
edit the settings to create a new paper size based on existing
settings.
Notes:
• When you have selected a new language you must go to the Profiles
page and click Restore Predefined Profiles to change the language in the Profiles list. It is recommended that you select your preferred language before defining and modifying paper sizes and
profiles.
Note: All user-defined profiles (except the set default paper size) and
modifications to predefined profiles will be lost when you click Restore
Predefined Profiles.
• The AXIS 7100 will display an error message if the selected settings
combination is not valid as some combinations of settings are incompatible.
AXIS 7100 User’s Manual
Configuring the AXIS 7100
1. Click Profiles.
2. The previously added profiles are listed in the table. The Profile
Name is the text that appears in the profile list on the AXIS
7100 interface. If you want to edit an existing profile, click the
Profile Name link and proceed to step 4.
3. Click Profile New >> to add a new profile to the list.
4. In accordance with the information provided in the Profiles
Parameters table (below), define all of the parameters featured
in the New Profile/Edit Profile page.
5. To complete this task do one of the following:
• If you have added a new profile, click Add To List. Once
your profile additions are complete, click Done.
• Click Reset only if you wish to clear the current profile
settings.
• If you have edited or copied an existing profile, click OK.
6. Click Scan to scan the material currently placed in the digital
copier/scanner using the current profile settings. Depending
on the image format used, the Web browser will either display
the image or ask you to save the file.
Profiles Parameters
Parameter
Name
Options
Profile Name
-
Paper Size
•
•
•
•
•
•
•
•
Instructions
This is the name that will appear in
the profile list. Specify a descriptive name for the profile.
A3, A4, A5, B4, B4 (JIS), B5, Select the paper size from the
B5 (JIS)
drop-down dialog box.
Business card
Executive
Note: The default paper size can be
Ledger
changed from admin | Profile |
Legal
Profile Defaults
Letter (default)
If you perform Restore Predefined
Photo 3.5 x 5”
Profiles the set default Paper Size
Photo 4 x 6”
will not be changed back to Letter
(factory default).
75
76
Configuring the AXIS 7100
AXIS 7100 User’s Manual
Parameter
Name
Options
Instructions
Paper
Orientation
•
Click the appropriate radio button
to specify your chosen orientation.
•
Multipage
Documents
•
•
Portrait: top along the
short edge
Landscape: top along the
long edge
All pages in one file
Separate file for each page
Click the appropriate radio button
to select whether multipage documents should be saved in one multipage image file or separated into
one image file per page.
Note: Not all TIFF viewers support
multipage image files.
Resolution
-
Specify the resolution to be used
for scanning in dots per inch (DPI).
Intensity
0 - 100 (%)
Contrast
0 - 100 (%)
Data Type
•
Black and White
Note: Higher-resolution settings
produce higher-quality scanning.
However, your documents might
take longer to scan.
Enter the level of intensity as a
percentage ratio
Enter the level of contrast as a
percentage ratio.
Note: The contrast is the tonal gradation between the highlights,
mid-tones and shadows in an image.
Select data type depending on the
material you are scanning and the
imaging application you intend to
use.
AXIS 7100 User’s Manual
Configuring the AXIS 7100
Parameter
Name
Options
Instructions
Format -
•
•
•
•
•
•
•
•
•
Choose your combination of image
format and compression from the
methods displayed in the dropdown dialog.
Comp.
Predefined
Profiles
TIFF - No compression
TIFF - CCITT G.3 - one dim
TIFF - CCITT G.3 - two dim
TIFF - CCITT G.4
PDF - No compression
PDF - CCITT G.3 - one dim
PDF - CCITT G.3 - two dim
PDF - CCITT G.4
PCL - PCL5
Note: The format compression
choices within the drop down list
will vary dependent upon the selected Data Type. See “Guidelines
for Format and Compression” on
page 78 for further information on
each of the available techniques.
The AXIS 7100 is pre-installed with standard profiles to cover
most needs. This table lists the predefined profiles:
Name
Text
Text high
Text low
Text PDF
Text/Photo
Resolution
300
600
200
300
300
Type
black/white
black/white
black/white
black/white
black/white
Image format
TIFF/CCITT G.4
TIFF/CCITT G.4
TIFF/CCITT G.4
TIFF/CCITT G.4
TIFF/CCITT G.4
Note:
The resolution of the predefined profiles may vary, depending on the
capabilities of the connected WORKiO copier.
Temporary Profiles
If the Administrator allows users to add temporary profiles, the
five most recently added profiles will appear in the profiles list.
The Administrator can make temporary profiles permanent by
clicking the Make Permanent
button.
77
78
Configuring the AXIS 7100
Guidelines for Format
and Compression
AXIS 7100 User’s Manual
In editing or creating a new profile it is necessary to specify the
format and compression techniques that are to be employed. The
table below highlights the significant benefits of each method.
Format
TIFF
PDF
PCL
Comments
For black/white images. Both single- and multipage images are supported
For black/white images. Both single- and multipage images are supported. Requires the Adobe Acrobat Reader.
Profile used for print destinations - black and white only.
Notes:
• Compression techniques are distinguished by whether they remove
detail from the image. CCITT encoding is a family of lossless compression techniques for black/white images, of which CCIT G.4 is the most
efficient compression method.
• Although the generated TIFF files do not contain searchable text, you
can use an Optical Character Recognition (OCR) application to convert the bitmap to text that can be edited, indexed, searched or copied to other files.
• The generated PDF image files do not contain searchable text. You
can use Adobe Capture or the built-in capture function in Adobe
Acrobat to make the text searchable.
Specifying Paper Sizes
The Paper Sizes parameter defines the size of the scanned image
and is optionally part of the profile.
Note:
A user can override the Paper Size setting used by a profile by choosing
another paper size from the AXIS 7100 control panel at the moment of
scanning.
AXIS 7100 User’s Manual
Predefined
Paper Sizes
Configuring the AXIS 7100
The AXIS 7100 includes 14 predefined standard paper sizes to
cover most needs. This table lists the predefined paper sizes:
Name
A3
A4
A5
B4
B4 (JIS)
B5
B5 (JIS)
Business Card
Executive
Ledger
Legal
Letter
Photo 3.5” x 5”
Photo 4” x 6”
Width
(cm)
29.70
21.00
14.80
25.00
25.70
17.60
18.20
5.50
18.41
27.94
21.59
21.59
8.89
10.16
Length
(cm)
42.00
29.70
21.00
35.30
36.40
25.00
25.70
9.50
26.67
43.18
35.56
27.94
12.70
15.24
Width (inches)
Length (inches)
11.69”
8.27”
5.83”
9.84”
10.12”
6.93”
7.17”
2.17”
7.25”
11.00”
8.50”
8.50”
3.50”
4.00”
16.54”
11.69”
8.27”
13.90”
14.33”
9.84”
10.12”
3.74”
10.50”
17.00”
14.00”
11.00”
5.00”
6.00”
Follow the instructions below to optionally edit any of the
predefined paper sizes listed above, or create new ones to suit
your specific needs:
Note:
When a new language is selected you must go to the Paper Sizes page
and click Restore Predefined Paper Sizes to change the language
in the Paper sizes list. It is recommended that you select your preferred
language before defining and modifying paper sizes and profiles.
Note: All user-defined profiles and modifications to predefined paper sizes
will be lost when you click Restore Predefined Paper Sizes.
1. Click Paper Sizes to specify paper sizes. To edit a paper size
in the list, click the Paper Size Name link. To create a new
paper size, click Paper Size New >>.
Click
to create a copy of an existing paper size. You
can edit the settings to create a new paper size based on
existing settings.
2. From the New Paper Size page you can create a new paper size.
Enter a descriptive name, width and length for the paper size.
79
80
Configuring the AXIS 7100
AXIS 7100 User’s Manual
3. If you need to restore the predefined paper sizes, click Restore
Predefined Paper Sizes. Note that all your current paper sizes
will be lost.
PDF Rotation
The PDF rotation functionality allows you to scan a document
and rotate it from portrait to landscape and vice versa. This
option only affects the PDF output format on the WORKiO
copier. It cannot be changed at the moment of scanning.
Configuring Using a Text Editor and FTP
The AXIS 7100 configuration file includes all the system
parameter settings regarding network protocols, profiles, paper
sizes and destinations.
As an alternative to Web-based configuration, you can edit the
configuration file directly using a text editor and upload the file
to the AXIS 7100 using FTP.
Note:
To access the AXIS 7100 configuration file, you must first set the IP
address as described in “Assigning an IP Address ”on page 22.
Follow these instructions to edit the configuration file using
FTP:
Caution
Windows 95 has a directory called ‘config’ that contains important system files. It is important to
change to another directory using the cd command before modifying your AXIS 7100
configuration file from within a windows 95 environment. Failure to do this may result in some of
your files being overwritten
AXIS 7100 User’s Manual
Configuring the AXIS 7100
1. In a DOS or UNIX window, type ftp <Internet address>,
where <Internet address> is the name or IP address of
your AXIS 7100.
2. Login using the user id root and the password pass.
Note:
The password might have been changed. This is done by the
Administrator on the admin | Edit | General page.
3. Type get config.ini to download the configuration file to
your current directory.
4. Edit the file using your preferred text editor. In Windows 95
and Windows NT environments, you can for example use
Notepad.
Note:
Do not use MS Word or other similar word processor.
5. Type put config.ini to download the file to the AXIS 7100
and save it permanently.
6. To exit FTP, type the command quit, bye, or exit.
Notes:
• The configuration file can be used as a template when configuring
multiple document servers.
• It is sufficient to download the configuration parameters that have
changed. The other parameter settings will remain unchanged.
• All parameter settings apart from the IP address, Gateway and Subnet
mask can be changed using FTP. Please refer to “The Parameter List”
on page 158.
• If you upload the config.ini file the passwords will be represented by
‘*****’. These ***** must be changed to the actual password before
downloading the config.ini file to an AXIS 7100. The passwords can
also be changed via the web interface after downloading the config.ini file.
81
82
Configuring the AXIS 7100
AXIS 7100 User’s Manual
Scan Counter
The Counter functionality enables the authorized administrator
or service user to monitor the use of the WORKiO copier. To
access the Service pages, follow these instructions:
1. Type ‘service’ after the internet address of the AXIS 7100 in
the location/address field of your web browser and click
Enter.
For example: http://123.123.123.123/service
2. You will be prompted to enter User Name and Password. At the
prompt, log on as service and use the default password service.
Note:
We strongly recommend that the default password is changed by the
Service user to prevent unauthorized access to the Service page and
counter settings.
3. The Service page presents general information about the
counter functionality:
AXIS 7100 User’s Manual
Service Page Overview
Configuring the AXIS 7100
Total number of pages - counts the total number of pages
scanned and sent using the AXIS 7100. This counter cannot be
reset.
Counter since last reset - counts the number of pages scanned
since the counter was last reset.
Date of last reset - the date the counter was last reset.
1. Click Edit to access the pages where you can:
• Change the password
• Specify the e-mail address destination for the counter
statistics report
• Click the checkbox (default) if the counter is to be
increased only if the scanning is successful. If the check
box is empty, all started scanning jobs will be counted
Click Apply to save your changes without closing the dialog box
or click OK to save your changes and close the dialog box.
2. Click the Mail/Print button to access the page where you can:
• Click SendMailNow to send a scan counter report to the
specified e-mail destination
• Select a printer from the printer drop-down list and click
PrintNow to print a scan counter report to the selected
printer.
• Click Close to close the dialog box
3. Click Reset to reset the counter
Mail/Print
Scan Counter
To send a scan counter report, go to admin | Support and click
the Scan Counter link. The following dialog will appear:
83
84
Configuring the AXIS 7100
AXIS 7100 User’s Manual
Do one of the following depending on whether you wish to send
the report to the specified e-mail destination or to a printer.
• Click SendMailNow to send the counter report to the
specified e-mail destination
• Select a printer from the printer drop-down list and click
PrintNow
Note:
The e-mail address is set by the authorized service user on the service
page. See “Service Page Overview” on page 83 for details.
The printers are added from Destinations | Printer Destination New>>
Scan Counter Report
The scan counter report contains the following information:
• General information i.e. date, host name, host address
and connected scanner
• Counter information i.e. total number of pages scanned,
number of pages scanned since last reset and date of last
reset
AXIS 7100 User’s Manual
Section 5
Using the AXIS 7100
Using the AXIS 7100
This section describes how to use the AXIS 7100 and includes
the following information, given from the perspective of a user:
•
•
•
•
•
•
Sending methods
Sending to destinations
Sending multiple pages
Adding temporary destinations and profiles
Sending to the web browser
Viewing image files
Note:
“Section 4 - Configuring the AXIS 7100” is targeted specifically to users
responsible for the administration of the AXIS 7100. Please refer to this
section if you wish to access the AXIS 7100 as an Administrator.
85
86
Using the AXIS 7100
AXIS 7100 User’s Manual
Sending Methods
The AXIS 7100 supports the following basic methods for
distributing scanned and copied documents over the network:
•
•
•
•
•
•
Send-to e-mail destinations
Send-to-file destinations
Send-to-printer destinations
Send-to-RightFax
Send-to-URL
Send-to-Web browser
The AXIS 7100 allows scanned documents from WORKiO digital
imaging systems copiers to be distributed to e-mail, file and
printer destinations.
In addition to the resident profiles and destinations established
by your Administrator, users can also create both temporary email destinations and profiles, using either the Web-based user
interface or user keyboard (if connected by your administrator).
AXIS 7100 User’s Manual
Destinations
Using the AXIS 7100
Documents are typically distributed using the AXIS 7100 control
panel or an attached PC compatible keyboard (if connected by
your administrator), to selected e-mail, fax, file or printer
destinations.
Users can add temporary e-mail destinations using the Web
interface or keyboard if the destination you wish to send your
document to does not exist in the destination list.
Contact your Administrator if you wish to add a new file or
printer destination, or add a permanent e-mail address.
If there is a keyboard connected to the AXIS 7100, and if the
option to Specify a file name for a file destination
(admin|Edit|User Options) is enabled by the administrator, the
user can also enter a new file name for the file destination or email destination.
Send-to-E-mail
This allows document images to be distributed to any e-mail
address defined in the destination list.
E-mail transfer uses the Simple Mail Transfer Protocol (SMTP)
whereby the document image is sent as a MIME-encoded e-mail
attachment, or stored on a file server as an accessible hyperlink
within an e-mail notification. Double-clicking the hyperlink or
an e-mail attachment that is associated with an image viewer
automatically starts the appropriate application.
Send-to-File
This means that the document image is sent to and then stored
on a networked storage device. This could be on a server, a
client with a shared drive, a mainframe, or any chosen network
device available to your filing system. Image files are distributed
and archived using the File Transfer Protocol (FTP) that
facilitates the storage of files over the Internet.
Typically a file is sent to a specific software management
application, for example groupware, document management and
workflow systems.
87
88
Using the AXIS 7100
AXIS 7100 User’s Manual
Note:
Users can arrange to have their own directories on an FTP server to which
they can send document image information. In operating systems like
Windows 95/98 and Windows NT/2000, shortcuts to image directories
can be placed directly on the user’s desktop. This gives easy access to the
document image information.
It is strongly recommended that you choose the send-to-print
function for distributing documents to printer destinations.
However, in some circumstances it may be desirable to send an
image to a network printer using the send-to-file function
instead. To do this, you must ensure that the destination printer
supports FTP and PCL, or FTP and TIFF. Refer to the AXIS 7100
Support Web for more information.
Send-to-URL
Sending to URL (Uniform Resource Locator) is a combination of
send-to-e-mail and send-to-file, where images/documents are
stored on a file server. The recipient will receive an e-mail
containing the URL (Web link) to the file, instead of an e-mail
attachment. This off-loads the mail server from handling large
attachments.
Send-to-Web Browser
This is a convenient method for users that do not have an e-mail
address. It is also useful if you want to experiment with many
different profiles.
Simply place the document in your scanning device and access
the AXIS 7100 from a standard Web browser. Scanning is
triggered directly from your Web browser and the image is saved
within the Web browser dialog. The Web browser displays the
image in an associated viewer or asks you to save the file,
depending on the associated image format.
Send-to-Printer
This allows document images to be distributed to any printer
defined in the AXIS 7100 destination list using either Raw TCP
or LPD as the printing method.
AXIS 7100 User’s Manual
Using the AXIS 7100
Raw TCP printing support means that you can distribute your
document images across network segments to any TCP/IP printer
connected on a local or remote network.
Send-to-RightFax
This allows document images to be distributed to a RightFax
server defined in the AXIS 7100 destination list using either email (SMPT) or LPD as the data transfer method. For more
information on RightFax destinations, please refer to “RightFax
Integration with SMTP” on page 70 or “RightFax Integration
with LPD” on page 71.
Authentication
If the administrator has enabled authentication the user must
enter a user name and password to gain access to the AXIS
7100. If the authentication process is not enabled, proceed to the
next section“Sending to Destinations” on page 91.
1. When the following display appears, enter your user name
and press Menu (on the control panel) or Tab (on the
keyboard).
User Name:
2. Enter your password and press Menu (on the control panel) or
press Tab (on the keyboard):
Password:
3. If NT Authentication is enabled, the following prompt will
appear:
Domain:
Default
89
90
Using the AXIS 7100
AXIS 7100 User’s Manual
4. The following message will appear:
Login in progress
5. If the following message appears the authentication process
has failed. Press Cancel (on the control panel) or press Esc (on
the keyboard) to try again.
Login failed!
6. If the authentication process is successful the following
message is displayed informing you that you can log out by
pressing Cancel for two seconds (on the control panel) or Esc
(on the keyboard).
To logout press
Cancel 2 sec.
7. To continue press any key or wait until the following message
appears:
Send to:
xxxxxx
Note:
If no destinations are set the display will show the Add Address:
prompt.
AXIS 7100 User’s Manual
Using the AXIS 7100
Sending to Destinations
Note:
Before sending to an e-mail address or a file, the Administrator must
have set up the destinations as described in “Specifying Destinations” on
page 59.
Follow these instructions on the AXIS 7100 control panel:
1. The AXIS 7100 display shows “Send to: xxxxxx” when it is
ready for use. For example:
Send to:
Accounting Dept
2. Use
scrolling keys to find the required destination
from the list. Press and hold the key to autorepeat scrolling.
If you want to add a temporary E-mail destination, refer to
“Adding Temporary Destinations ”on page 94.
Note:
If a keyboard is connected you can easily search the list by pressing the
first letter(s) of the required destination.
3. If you want to send the image to more than one destination,
press Select
to choose each destination:
Send to:
+1
Accounting Dept
Note:
When sending to a printer, the image can not simultaneously be sent to
another destination type and can only be sent to one printer at a time.
4. Repeat steps 2 and 3, until all desired destinations are selected.
91
92
Using the AXIS 7100
AXIS 7100 User’s Manual
Note:
Be careful not to transmit images to an unwanted destination. The
scanned image is always sent to the destination shown in the display,
whether explicitly selected or not.
5. Optionally, press Menu
to change the default settings for
scanning parameters. You can select temporary settings for
profile and paper size. Use
to select the desired value.
6. Insert a single page into the flatbed or a stack of paper into the
sheet feeder of the connected WORKiO copier.
One single page or a stack of paper in the sheet feeder:
a. Press Send
to scan and send the image to the
destination in one step.
Several separate pages or stacks of paper:
a. Press Add
to scan each page or stack.
b. Insert the next page or stack and press Add
again.
Repeat the procedure until all the pages have been
scanned.
c. Press Send
to transmit the image to the destination.
During the scanning this message appears on the display:
Scanning #1
please wait
Note:
If you do not press Send within 60 seconds after scanning a page by
pressing Add the scan job will automatically be finished and sent.
7. When you have pressed Send
and the transfer of the
document image is completed, the AXIS 7100 is released for
other users to access.
AXIS 7100 User’s Manual
Using the AXIS 7100
Notes:
• By scanning multiple pages, you can add several pages to one image
file. See “Multipage Image Files” on page 93.
• If no operations are performed within five minutes of allocation, the
AXIS 7100 will return to its default settings.
• The AXIS 7100 keeps all temporary settings in memory for a set time
(about 1-2 minutes) from the last scan, and then resets all settings to
the default settings.
Note: if authentication is enabled, the time span before memory reset
is set by the administrator.
Multipage Image Files
Multipage documents are by default, collated and output into a
single PDF or TIFF image file.
Deselect the All pages in one file parameter only if you want
each page to appear separately in several PDF or TIFF files.
Notes:
• The PCL format sends several pages in a single PCL file.
• TIFF viewers not supporting multipage image files require that the
Multipage Documents parameter is set to Separate file for each page
using a profile. Alternatively, scan each page using the Send button.
• Double-sided is only available if the scanning device supports duplexing.
Paper orientation on
WORKiO copiers
To receive an upright image, the setting should be “Portrait” and
the paper should be placed with the short-edge in the ADF
(Automatic Document Feeder) or in the A4-R position on the
flatbed inside the digital copier.
Note:
The PDF rotation option can be used to enable the same feeder
orientation as when copying i.e long-edge first.
93
94
Using the AXIS 7100
AXIS 7100 User’s Manual
Adding Temporary Destinations
The e-mail list resident within the AXIS 7100 is initially created
by your administrator. If you want to send a scanned document
to an e-mail destination that is not featured in the list, you can
add a temporary e-mail destination using either:
• a standard PC keyboard
or
• a standard Web browser
Note:
The Administrator can disable the option for users to add temporary
destinations in which case the New Destination button will not appear.
Using a standard PC
Keyboard
Connecting a standard keyboard to your AXIS 7100 will allow
you to quickly search any destination within the resident list.
You can do this by simply typing in the first couple of
characters of the destination you wish to search for. The AXIS
7100 message display will automatically show the destination
that best matches the keyboard input.
Note:
If the searched destination does not exist within the resident list the
Add Address:prompt will be displayed as shown below.
Follow the instructions below to add a new e-mail address to the
list:
AXIS 7100 User’s Manual
Using the AXIS 7100
1. If the keyboard is not already connected, disconnect the
AXIS 7100 power supply, connect the keyboard to the
keyboard connector located on the rear panel, and then
reconnect the power supply.
2. Press the Insert key on your keyboard. The following prompt
will appear on the message display:
Add address:
3. Enter the new e-mail address you want to add, then press Enter.
Notes:
• Only the five most-recently added temporary destinations will appear
in the destination list. Contact your Network Administrator if you
want to add a destination permanently.
• A RightFax destination must be configured by the administrator and
cannot be added temporarily.
95
96
Using the AXIS 7100
AXIS 7100 User’s Manual
Please refer to the following table for information on additional
keyboard functions:
Key
Tab and Right arrow
Function
To scroll the menu
Enter
To select multiple destinations
To complete an address or subject entry
Up / Down arrows
To scroll and select menu options
Esc
To cancel the scanning process at any stage
To clear any selection made from the menu
To reset error messages
Note: Press Esc for 2 seconds to log out if authentication
is enabled
F1
To scan each page of bound materials, for example,
magazines and books
F2
To send the scanned material to the selected destination
and release the AXIS 7100 for other users. For a single
page/stack of sheets, use this key to scan the material
and send the image in one step
Space
To search the next word/name in an address
(e.g. J<Space>S to find John Smith)
Insert
To add an address or subject
Delete
To remove a temporary address
To delete characters when editing
To exit search mode
Backspace
To remove characters
Left arrow
To go backwards through the menu
Page Up
To go alphabetically to the next entry with a different
first character in the “Send to:” or “Sent by:” list
Page Down
To go alphabetically to the previous entry with a different first character in the “Send to:” or “Sent by:” list
AXIS 7100 User’s Manual
From a Web browser:
Using the AXIS 7100
Key
Home
Function
To go to the first entry in a list
End
To go to the last entry in a list
Follow the instructions below to remotely add temporary e-mail
addresses to the address list:
1. Start the Web browser.
2. Enter the name or IP address of your AXIS 7100 on the
location/address line.
Example:
http://172.16.253.80
This displays the AXIS 7100 Home Page
3. Click Destinations. The table lists the available destinations.
4. Click New Destination and specify the settings for the new
destination.
5. Click OK to save the destination temporarily.
97
98
Using the AXIS 7100
AXIS 7100 User’s Manual
Notes:
• Only the five most-recently added temporary destinations will appear
in the destination list. Contact your Administrator if you want to add
a destination permanently.
• All temporary destinations are erased when the AXIS 7100 is shut
down or re-started.
Adding Temporary Profiles
If you have tried all the available profiles but are still not
satisfied with the result of your scanned image, you can add a
temporary profile from the Web browser interface.
1. Start the Web browser.
Note:
The Administrator might not allow the user to add temporary profiles.
2. Enter the name or IP address of your AXIS 7100 on the
location/address line.
Example:
http://172.16.253.80
3. This brings you to the AXIS 7100 Home Page. Click Profiles.
4. The table lists the available profiles. Click New Profile and
specify your settings. If you place a document in the scanning
device, you can click Scan to monitor the results.
Note:
The Administrator can disable the option for users to add temporary
profiles in which case the New Profile button will not appear.
AXIS 7100 User’s Manual
Using the AXIS 7100
5. Click Add to save the profile temporarily. Contact your
Network Administrator to make a profile permanent.
Notes:
• Only the five most recently added temporary profiles will appear in
the profile list. Contact your Administrator if you want to add a profile permanently.
• All temporary profiles will be erased when the AXIS 7100 is shut
down or re-started.
Adding a Temporary E-mail Subject
There is a list of pre-defined e-mail subjects resident within the
AXIS 7100. If you want to send a scanned document with an
alternative e-mail subject, you can add a temporary e-mail
subject from the connected PC keyboard.
Follow the instructions below to add a temporary e-mail subject
to the list:
1. If the keyboard is not already connected, disconnect the
AXIS 7100 power supply, connect the keyboard to the
keyboard connector located on the rear panel, and then
reconnect the power supply.
2. When you have selected the e-mail destination and the sender
of the e-mail, press the Menu key on your AXIS 7100. The
following prompt will appear on the message display:
Subject:
3. Enter the new e-mail subject you want to add using the
keyboard, then press Send.
99
100
Using the AXIS 7100
AXIS 7100 User’s Manual
Notes:
• The e-mail subject will appear in the list of e-mail subjects and can be
made permanent by the administrator. See “Specifying Destinations”
on page 59 for details or contact the administrator.
• You can only add one temporary e-mail subject to the list. Any temporary e-mail subject will be overwritten.
Changing the Name of the Scanned Image Files.
To change the name of the scanned image file perform these
instructions from the AXIS 7100 control panel and keyboard:
1. Select one or more file destinations.
Example:
Send to:
+1
Accounting Dept
2. Press Tab and use the Left and Right arrows on the keyboard
to navigate in the menu list. The AXIS 7100 display will show
the following message with the default name or the previously
entered name for that specific file.
Enter file name:
Default name
Note:
You can also use the keyboard shortcut Ctrl s.
3. Edit the file name using the keyboard.
4. When you are finished press Enter and the AXIS 7100 will
return to the previous state so that you can change other
scanning properties and proceed as described in “Sending to
Destinations” on page 91.
AXIS 7100 User’s Manual
Using the AXIS 7100
Note:
If the file name already exists a sequence number will be added to the
file name if the Append sequence number to file name option under
admin|Destinations|File Destination New>> has been selected. If this
option has not been selected, the old file will be replaced.
Scanning Parameters
From the AXIS 7100 control panel, press Menu
to scroll
through the scanning menu. Use
to find the desired
value. If a keyboard is connected, press Tab and use the
UP/Down arrow keys to find the desired value or search the
menu by typing the parameter name (or the first letters in the
parameter name).
The table below describes the available parameters for each
destination type:
Parameter
Send to
Sent by
Destination Type
E-mail /URL FTP
yes
yes
yes
no
Comment
Printer
yes
yes
Subject
yes
no
no
Enter file name
yes
yes
no
Number of copies
Profile
Paper size
no
yes
yes
no
yes
yes
yes
yes
yes
If enabled by the
administrator.
Note: Always disabled
using Authentication.
If enabled by the
administrator
If enabled by the
administrator
Note:
If you do not specify anything, the default settings will be used.
101
102
Using the AXIS 7100
Profile
AXIS 7100 User’s Manual
The AXIS 7100 comes pre-installed with a set of standard
profiles designed to cover most needs. Refer to “Predefined
Profiles ”on page 102 for details.
The profiles are maintained by the Administrator. If you have
been granted permission by your administrator, you can define
temporary profiles. For details, refer to “Adding Temporary
Profiles” on page 98.
Select a profile appropriate to the document to be scanned.
Documents typically use one of the Text profiles. Pictures could
use one of the Text/Photo profiles.
Note:
Uncompressed TIFF may generate very large files.
Predefined Profiles
This table outlines when to use the predefined profiles:
Name
Text
(default)
Description
Black/white documents intended for OCR, or documents containing
small text. Suitable for most kind of document scanning. This is the
default profile.
Text high
Black/white documents containing very small text. Excellent for
OCR. If the digital copier/scanner does not support 600 dpi, its
maximum resolution will be used instead.
Text low
Black/white documents not intended for OCR, or documents containing large text, e.g. invoices. Suitable when maximum scanning
speed and minimum file size is required.
Text/Photo
Black/white documents with pictures. Especially good for faxing.
Not suitable for OCR.
Creates a Black and white PDF document; suitable for printing or
distribution as an e-mail attachment.
Text PDF
Paper Sizes
The AXIS 7100 comes pre-installed with 14 paper sizes designed
to cover most needs. The default paper size is Letter. The paper
sizes are maintained by the Administrator. See also the table on
“Predefined Paper Sizes ”on page 79.
AXIS 7100 User’s Manual
Using the AXIS 7100
Sending to your Web Browser
Follow these steps to scan to your Web browser:
1. Place the material in your scanner or digital copier.
2. Start the Web browser.
3. Enter the name or IP address of the AXIS 7100 on the
location/address line:
Example:
http://172.16.253.80
4. This brings you to the AXIS 7100 Home Page, the Scan
Document page.
We recommend that you add the address as a bookmark, or as a
link on the Department or Workgroup Web page.
5. Optionally change the default profile.
6. Click Scan and wait for the image to appear in your Web
browser. Depending on the image format specified by the
profile, the Web browser will display the image in an
associated viewer or ask you to save the file. For further
processing, you must save the image from within the viewer
as the Web browser will normally use a temporary file name.
103
104
Using the AXIS 7100
AXIS 7100 User’s Manual
7. If you are not satisfied with the result, you can try one of the
other available profiles or set up a new one by clicking Custom
>>.
8. If you have additional documents to scan, click Reserve
Scanner to lock the unit for your own use and then complete
the scanning from the AXIS 7100 control panel.
9. Insert a single page on the flatbed or a stack of paper into the
sheet-feeder of the attached digital copier or scanner.
10. At the AXIS 7100 control panel, continue as follows:
One single page or a stack of paper in the sheet feeder:
a. Press Send
to scan and transmit the image to your
Web browser in one step.
Several separate pages or stacks of paper:
a. Press Add
to scan each page or stack.
b. Insert the next page or stack and press Add
again.
Repeat the procedure until all your pages are scanned.
c. Press Send
browser.
to transmit the image to your Web
During the scanning this message appears on the display:
Scanning #1
please wait
11. When you have pressed Send
and the transfer of the
scanned image is completed, the AXIS 7100 is released for
other users to access.
AXIS 7100 User’s Manual
Using the AXIS 7100
Notes:
• By scanning multiple pages, you can accumulate several pages into
one image file. See “Multipage Image Files” on page 93.
• You must press the Add button or the Send button on the control
panel within 5 minutes. Otherwise, the operation will be executed
automatically.
• The Reserve Scanner function is not available when Authentication is enabled.
Viewing Image Files
The AXIS 7100 generates standard TIFF and PDF formats that
are supported by most image-related applications; and PCL
format, that is supported by most printers.
Although the AXIS 7100 does not rely on any product-specific
software installed on each client, tools for viewing and
manipulating the images are required.
There are basically two different types of imaging tools:
•
•
Tools for Image/Picture
Editing
Tools optimized for image/picture editing
Tools optimized for handling scanned documents
Most tools will work, as long as TIFF formats are supported.
105
106
Using the AXIS 7100
Tools for Viewing, OCR
and Archiving
AXIS 7100 User’s Manual
Tools for viewing, OCR and archiving generally support
multipage compressed TIFF. Document viewers are optimized for
presenting document data in a readable format on a screen.
Tools that combine viewing and simple archiving are becoming
increasingly popular.
• Although the generated TIFF image files do not contain searchable
text, you can use an Optical Character Recognition (OCR) application
to convert the bitmap to text that can be corrected, indexed,
searched or copied to other files.
• The generated PDF image files do not contain searchable text. You
can use Adobe Capture or the built-in capture function in Adobe
Acrobat to make the text searchable.
Acrobat Reader
The PDF format requires the Adobe Acrobat Reader. Acrobat
Readers for Windows (3.1, 95/98, ME, NT, 2000), Macintosh and
UNIX can be downloaded free of charge from Adobe Systems
Web site http://www.adobe.com
Adobe Acrobat Reader is also supplied on the AXIS Product CD.
Notes:
• When using the “Text” profiles for scanning documents, make sure
that the viewing tool supports multipage CCITT G.4-compressed TIFF;
the TIFF format is the most common standard for imaging and
archiving of scanned documents. If your application does not support
multipage documents, you can create a profile that generates single
page documents, or scan each page as a separate job.
• The AXIS 7100 is compatible with the majority of today’s popular
tools. However, if you find a tool that is not supported by the AXIS
7100, we would like to know about it. For information on how to contact us see “Preface” on page 3.
• For further information, including recommendations for specific tools
and sample images created by the AXIS 7100, see the Axis web site at
http://www.axis.com
AXIS 7100 User’s Manual
Associating Image
Formats with
Applications
Using the AXIS 7100
Applications are typically associated with a file format
automatically during the installation procedure. If not, we
recommend that you manually associate your image
applications with the supported image file formats, so that
double-clicking on an image icon launches the appropriate
application.
Follow the instructions below to associate an application with a
specific file format in Windows:
1. In Windows Explorer, click the View menu, click Options,
and then click the File Types tab.
2. To create a new file type, click New Type. To modify the
settings for an existing file type, select the type, and then click
Edit.
3. Specify a description for the file type and the file name
extension associated with this type of file.
4. Click New to define an action for this file type.
5. In the Action field, type Open. In the Application used to
perform action field, specify the path to the application you
want to use for opening files that have this extension.
107
108
Meta Information
Section 6
AXIS 7100 User’s Manual
Meta Information
Meta Information
The Meta Information functionality allows the Developer,
System Integrator, Administrator etc. of the AXIS 7100 Network
Document Server to define a list of information to be requested
(it can be required or optional information) from the user at the
moment of scanning. The user will be prompted for this
information before the document is scanned and sent over the
network.
This section describes Meta Information from the perspective of
the Developer/System Integrator/Administrator and the user.
The Meta Information will be sent together with the scanned
image in the Information File or as a separate document to a
different destination. The Meta Information file format is
specified by the Developer/System Integrator/Administrator in
XML, HTML or almost any other text format. The Developer can
also choose to send information set by the AXIS 7100 itself, e.g.
a time stamp or user identification.
This Meta Information can then be used by different applications
such as accounting software, workflow systems, archiving
systems, document management systems, imaging systems,
knowledge management systems etc or for storing in a database
server.
RightFax Integration
Meta Information is used to prompt the user to enter the number
of the RightFax server. For more information on RightFax server
integration, please refer to “RightFax Integration with SMTP”
on page 70 or “RightFax Integration with LPD” on page 71.
AXIS 7100 User’s Manual
Meta Information
Notes:
• The Meta Information functionality requires that there is a keyboard
connected to the AXIS 7100. If the Meta Information functionality is
enabled and you do not have a keyboard connected you will receive
the Error Message “Meta Data Enabled. Keyboard required”.
• XML (eXtensible Markup Language) is used as the language that
defines the requested information.
Specifying the
Meta Information
(XML DD File)
The administrator defines the list of requested information that
the user is required to enter before scanning the document. The
user is prompted to enter the information by messages on the
AXIS 7100 Document Server control panel display.
The administrator specifies these messages by writing an XML
DD (Document Description) file in a text editor. This file is then
saved on an FTP server and the AXIS 7100 will be configured to
retrieve the XML DD file from the specified FTP server. See
“Retrieving the XML DD file” on page 133.
Note:
You can write the XML DD file in any text editor although it is
recommended that you download a Freeware XML writer with XML
validation. There a several XML writers available in the AXIS 7100
Developer section at http://www.axis.com
XML DD file
The XML DD (Document Description) file specifies what the user
will be prompted for, and the format and contents of the output
information file. The file is limited to a size of 50 000 bytes. The
AXIS MetaData DTD defines the syntax of the XML DD file. For
more information see “Meta Information DTD” on page 151.
The built in html-based XML parser can be used for validating
an XML DD file. This enables the administrator to verify that the
XML DD file used for Meta Information is correct before setting
up the whole environment.
109
110
Meta Information
AXIS 7100 User’s Manual
Note:
This functionality is only for the validation of an XML DD file. Nothing of
the parsed XML DD file will be used or stored in any way.
Application
Examples
This section contains three examples of the Meta Information
functionality. The examples are complete with XML DD files. For
more examples, please refer to the White papers in the Developer
section at http://www.axis.com/products/axis_7100/
Note:
You cannot copy n’ paste the following examples into the XML parser. If
you want to try out the examples you can find them in the correct format
in the Developer section at http://www.axis.com
Example:
Archiving
You have an electronic archive (file server) for your scanned
documents and you want to store certain information together
with each document. The administrator can, for example,
request the following information before scanning the
document:
•
•
•
•
•
•
Example:
Invoice
Document Identification Number
Name of Document
Name of Issuer
Version Number
Classification
Level of Importance
You receive an invoice and you want to scan and send it over
your network to the Accounts Department and to the Orderer
with the following information:
• Invoice Number
• Date of Payment
• Name of Orderer
AXIS 7100 User’s Manual
Example:
Job applications
Meta Information
Your company receives a number of job applications and you
want to store these applications for future reference. The user is
prompted to enter the following information when scanning the
document:
•
•
•
•
Examples:
RightFax Integration
Job Description
Arrival Date
Personal Details of Applicant
Job Type
These are examples of XML files for RightFax integration over
e-mail and LPD. The user is prompted to enter the fax
number/fax recipient when scanning and sending the document
to a RightFax destination.
Example: Archiving
Electronic Archive
(File server)
The administrator wants to send the following information with
the scanned image (as specified in the “Archiving” example
above):
1. Document Identification Number
2. Name of Document
3. Name of Issuer
4. Version Number
5. Classification
6. Level of Importance
In this example the information is always asked and is not
associated with any specific destination. The XML DD file
generates the required messages (1 to 6) in this example.
111
112
Meta Information
XML DD file
AXIS 7100 User’s Manual
1. Document Identification Number:
(Required information)
<?xml version="1.0"?>
<!DOCTYPE MetaDataFile SYSTEM "metadata.dtd">
<MetaDataFile>
<AlwaysAsk>
<MetaData Required = "yes"
Id = "DOC_ID"
Prompt = "Doc Id No:"
ErrorMessage = "Wrong Id!"
DefaultValue = "00000"
Pattern = "[0-9]{5}"
/>
Notes:
• The value entered by the user must match the set pattern which is, in
this case, 5 digits.
• Make sure that the DefaultValue matches the Pattern in the XML DD
file. The Meta Data will be discarded if the DefaultValue and Pattern
do not match.
• When the Required attribute of the Meta Data is set to Yes the
Administrator must specify a pattern.
• See “Regular Expressions” on page 134 for a list of the defined
expressions.
2. Name of Document:
(Required information)
<MetaData Required = "yes"
Id = "DOC_NAME"
Prompt = "Doc Name:"
DefaultValue = "DEFAULT_NAME"
Pattern = ".+"
/>
AXIS 7100 User’s Manual
Meta Information
3. Name of the Issuer:
(This information is not required)
<MetaData Required = "no"
Id = "DOC_ISSUER"
Prompt = "Doc Issuer:"
DefaultValue = "DEFAULT_ISSUER"
/>
4. Document Version Number:
(This information is not required)
<MetaData Required = "no"
Id = "DOC_VERSION"
Prompt = "Doc Version:"
DefaultValue = "0.0"
/>
5. The user will not see the classification <DOC_CLASS> as the
information is hidden and used by the archiving system only.
Data with the required attribute defined as “hidden” is useful
when the administrator wants to define a default value that
will be included in the Information File.
<MetaData Required = "hidden"
Id = "DOC_CLASS"
DefaultValue = "AXIS7100_DOC"
/>
113
114
Meta Information
AXIS 7100 User’s Manual
6. The user is prompted to choose from a list of values. The values
in this example describe which level of importance the scanned
document has. The values are not editable in this example, but
if Editable is set to Yes the user can specify a value using the
external keyboard.
<MetaData Required = "yes"
Id = "DOC_IMPORTANCE"
Prompt = "Doc Importance:"
Editable = "no"
DefaultValue = "Medium">
<Value>Very high</Value>
<Value>High</Value>
<Value>Low</Value>
<Value>Very Low</Value>
</MetaData>
The information file will be sent to the “Archiving System”
destination with the entered value - in this case the archiving
system would be set to archive the document corresponding to
the specified level of importance.
<Output FileName="$DOC_IMPORTANCE$">
<To><Destination Description="Archiving
System"/></To>
AXIS 7100 User’s Manual
Meta Information
In this scenario, the archiving system understands the XML
syntax. An XML information file is generated (through the
CDATA section).
<Format><![CDATA[<?xml version="1.0"?>
<!DOCTYPE NewArchiveDocument SYSTEM
"newarchivedoc.dtd">
<NewArchiveDocument>
<DOC_ID>$DOC_ID$</DOC_ID>
<DOC_IMPORTANCE>$DOC_IMPORTANCE$</DOC_IMPORTANCE>
<DOC_NAME>$DOC_NAME$</DOC_NAME>
<DOC_ISSUER>$DOC_ISSUER$</DOC_ISSUER>
<DOC_VERSION>$DOC_VERSION$</DOC_VERSION>
<DOC_CLASS>$DOC_CLASS$</DOC_CLASS>
<HOST>$INT_HOST_ADDRESS$</HOST>
</NewArchiveDocument>
]]>
</Format>
</Output>
</AlwaysAsk>
</MetaDataFile>
Information File
The destination selected by the user will receive the image and
the information file. The “Archiving System” destination will
receive the following information file containing the
information entered by the user.
<?xml version = ”1.0”?>
<!DOCTYPE NewArchiveDocument SYSTEM
“newarchivedoc.dtd”>
<NewArchiveDocument>
<DOC_ID>12345</DOC_ID>
<DOC_IMPORTANCE>Medium</DOC_IMPORTANCE>
<DOC_NAME>AXIS 7100 User’s Manual</DOC_NAME>
<DOC_ISSUER>AXIS</DOC_ISSUER>
<DOC_VERSION>0.0</DOC_VERSION>
<DOC_CLASS>AXIS7100_DOC</DOC_CLASS>
<HOST>171.16.4.140</HOST>
</NewArchiveDocument>
115
116
Meta Information
AXIS 7100 User’s Manual
The XML code is now complete. Save the file on an FTP server.
For information on how to configure the AXIS 7100 to retrieve
the
XML DD file, see “Retrieving the XML DD file” on page 133.
Entering the
Required Meta
Information
Archiving
When the user wants to scan and send a document a destination
is selected from the list:
Send to:
any_destination
Note:
This example describes a scenario where the user is prompted to add the
information before scanning and sending a document, regardless of the
destination.
1. The following prompt will appear on the message display
when the Add/Send key has been pressed. The user is
prompted to enter the information and then press Enter. The
star indicates that this is required Meta Information and that
the user cannot scan without entering the requested
information.
Doc Id No:
.
*
If the entered information is invalid the following display
will be shown. The user must press Enter and try again to be
able to scan.
Wrong Id!
abcdef
AXIS 7100 User’s Manual
Meta Information
2. The user is prompted to enter the name of the document and
then press Enter. The star indicates that this is required Meta
Information and that the user can not scan and send a
document without entering the requested information.
Doc Name:
.
*
3. The user is prompted to enter the name of the person who
issued the document. This information is not required and can
be ignored by pressing Menu.
Doc Issuer:
Note:
The Menu button scrolls through the list of Meta Information. The Enter
button validates the entered information against the pattern defined in
the XML DD file.
4. The user is prompted to enter the version number of the
document. This information is not required and can be ignored
by pressing Menu.
Doc Version:
5. The user is prompted to enter the level of importance by which
the document is to be archived. The specified default value
appears in the display. Using the UP/Down arrows the other
values can be selected.
Doc Importance:
Medium
117
118
Meta Information
AXIS 7100 User’s Manual
Here is the same XML DD file in full:
<?xml version="1.0"?>
<!DOCTYPE MetaDataFile SYSTEM "metadata.dtd">
<MetaDataFile>
<AlwaysAsk>
<MetaData Required = "yes"
Id = "DOC_ID"
Prompt = "Doc Id No:"
ErrorMessage = "Wrong Id!"
DefaultValue = "00000"
Pattern = "[0-9]{5}"
/>
<MetaData Required = "yes"
Id = "DOC_NAME"
Prompt = "Doc Name:"
DefaultValue = "DEFAULT_NAME"
Pattern = ".+"
/>
<MetaData Required = "no"
Id = "DOC_ISSUER"
Prompt = "Doc Issuer:"
DefaultValue = "DEFAULT_ISSUER"
/>
<MetaData Required = "no"
Id = "DOC_VERSION"
Prompt = "Doc Version:"
DefaultValue = "0.0"
/>
<MetaData Required = "hidden"
Id = "DOC_CLASS"
DefaultValue = "AXIS7100_DOC"
/>
<MetaData Required = "yes"
Id = "DOC_IMPORTANCE"
Prompt = "Doc Importance:"
Editable = "no"
DefaultValue = "Medium">
<Value>Really high</Value>
<Value>High</Value>
<Value>Low</Value>
<Value>Really Low</Value>
</MetaData>
<Output FileName="$DOC_IMPORTANCE$">
<To><Destination Description="Archiving System"/></To>
<Format><![CDATA[<?xml version="1.0"?>
<!DOCTYPE NewArchiveDocument SYSTEM "newarchivedoc.dtd">
<NewArchiveDocument>
<DOC_ID>$DOC_ID$</DOC_ID>
<DOC_IMPORTANCE>$DOC_IMPORTANCE$</DOC_IMPORTANCE>
<DOC_NAME>$DOC_NAME$</DOC_NAME>
<DOC_ISSUER>$DOC_ISSUER$</DOC_ISSUER>
<DOC_VERSION>$DOC_VERSION$</DOC_VERSION>
<DOC_CLASS>$DOC_CLASS$</DOC_CLASS>
<HOST>$INT_HOST_ADDRESS$</HOST>
</NewArchiveDocument>
]]>
</Format></Output></AlwaysAsk>
</MetaDataFile>
AXIS 7100 User’s Manual
Meta Information
Example: Invoice Handling
Invoice
The administrator wants to send the following information with
the scanned image (as specified in the “Invoice” example above):
The information is associated with the destination. When a
destination with associated Meta Information is selected the user
will be prompted to enter the requested information. The XML
DD file generates the required messages (1 to 3) in this example.
1. Invoice Number
2. Date of Payment
3. Name of Orderer
In this example the information is associated with the
“Accounts” or “Orderer” destination. The XML DD file generates
the required display messages (1 to 5) in this example.
119
120
Meta Information
XML DD file
AXIS 7100 User’s Manual
1. Invoice number:
(Required Information)
<?xml version=”1.0”?>
<!DOCTYPE MetaDataFile SYSTEM “metadata.dtd”>
<MetaDataFile>
<Ask><When><Destination Description= “Accounts”/>
<Destination description=”Orderers”/></When>
<MetaData Required=”yes”
Id=”INVOICE_NO”
Prompt=”Invoice No:”
ErrorMessage= “Wrong No!”
DefaultValue= “00000”
Pattern= “[0-9]{5}”
/>
2. Date of Payment:
(Required Information)
<MetaData Required=”yes”
Id=”DUE_DATE”
Prompt=”Due Date:”
ErrorMessage= “Date: DD/MM/YYYY!”
Pattern= “[0-9]{2}/[0-9]{2}/[0-9]{4}”
/>
3. Name of Orderer:
(Required Information)
We want the user to enter a name so the pattern is created to
match a non empty string.
<MetaData Required=”yes”
Id=”ORDERER”
Prompt=”Orderer name:”
Pattern= “.+”
/>
AXIS 7100 User’s Manual
Meta Information
4. Close the elements.
</Ask>
</MetaDataFile>
Information File
The destination selected by the user will receive the image and
the Information File. The Information File will contain the
following Meta Information.
[MetaData]
INVOICE_NO = 12345
DUE_DATE = 07/10/2001
ORDERER = Name
XML DD file
Here is the same XML DD file in full:
<?xml version = “1.0”?>
<!DOCTYPE MetaDataFile SYSTEM “metadata.dtd”>
<MetaDataFile>
<Ask><When><Destination Description = “Accounts”/>
<Destination Description=”Orderers”/></When>
<MetaData Required = ”yes”
Id = ”INVOICE_No”
Prompt = ”Invoice No:”
ErrorMessage = “Wrong No!”
DefaultValue = “00000”
Pattern = “[0-9]{5}”
/>
<MetaData Required = ”yes”
Id = ”DUE_DATE”
Prompt = ”Due Date:”
ErrorMessage = “Date: DD/MM/YYYY!”
Pattern = “[0-9]{2}/[0-9]{2}/[0-9]{4}”
/>
<MetaData Required = ”yes”
Id = ”ORDERER”
Prompt = ”Orderer name:”
Pattern = “.+”
/>
</Ask>
</MetaDataFile>
121
122
Meta Information
Entering the
Required Meta
Information
Invoice Handling
AXIS 7100 User’s Manual
The user selects the Orderer or Accounts destination:
Send to:
Accounts
The Meta Information in this example is associated with these
destinations and the following messages will be displayed:
1. The user is requested to enter the number of the invoice and
press Enter.
Invoice No:
*
If the entered value is incorrect according to the pattern the
following display will be shown for two seconds before
returning to the previous prompt.
Wrong No!
abcdef
2. The user is requested to enter the date and then press Enter.
Due Date:
08/05/0000
*
3. The user is requested to enter the name of the orderer, then
press Enter.
Orderer name:
*
Example: Job Applications
Job Applications
The administrator wants to send the following information with
the scanned image (as specified in the “Job Applications”
example above):
AXIS 7100 User’s Manual
Meta Information
1. Job Description
2. Arrival Date
3. Personal Details of Applicant
4. Job Type
The XML DD file generates the required messages (1 to 3) in this
example.
XML DD file
1. Job Description:
(Required information)
<?xml version = "1.0"?>
<!DOCTYPE MetaDataFile SYSTEM "metadata.dtd">
<MetaDataFile>
<Ask><When><Destination Description="Job
Applications" /></When>
<MetaData Required = "yes"
Id = "JOB_ID"
Prompt = "Job Ref:"
ErrorMessage = "Wrong Job Ref!"
Pattern = "[0-9]{2}-[a-zA-Z]{2}-[0-9]{5}"
DefaultValue = "00-aa-00000"
/>
2. Arrival Date:
(Required information)
<MetaData Required = "yes"
Id = "ARRIVAL_DATE"
Prompt = "Arrival date:"
DefaultValue = "00/00/0000"
ErrorMessage = "DD/MM/YYYY"
Pattern = "[0-9]{2}/[0-9]{2}/[0-9]{4}"
/>
123
124
Meta Information
AXIS 7100 User’s Manual
3. Personal Details of Applicant - name:
(Required information)
<MetaData Required = "yes"
Id = "PERSON_NAME"
Prompt = "Name:"
Pattern = ".+"
/>
4. Personal Details of Applicant - date of birth:
(This information is not required)
<MetaData Required = "no"
Id = "PERSON_BIRTH"
Prompt = "Birth date:"
DefaultValue = "00/00/0000"
ErrorMessage = "DD/MM/YYYY"
Pattern = "[0-9]{2}/[0-9]{2}/[0-9]{4}"
/>
5. The user will be prompted to enter the type of job. There are
listed options but the user can also enter a specific value, for
example Manager.
<MetaData Required = "yes"
Id = "JOB_TYPE"
Prompt = "Applied Job Type:"
Pattern = ".+"
Editable = "yes">
<Value>Student</Value>
<Value>Clerk</Value>
<Value>Boss</Value></MetaData>
AXIS 7100 User’s Manual
Meta Information
The information file will be sent to the “Job Applications”
destination
<Output>
<Format>
# Job Application Form
JOB_ID = $JOB_ID$
ARRIVAL_DATE = $INT_DATE$
PERSON_NAME = $PERSON_NAME$
PERSON_BIRTH = $PERSON_BIRTH$
</Format>
</Output>
</Ask>
</MetaDataFile>
Note:
The administrator can choose to output information internally stored in
the AXIS 7100. For a list of these variables, see“Internally Defined
Variables” on page 137.
Information File
The destination selected by the user will receive the image and
the information file. The “Job Applications” destination will
receive the following information file containing the
information entered by the user.
# Job Application Form
JOB_ID
= 12-ab-12345
ARRIVAL_DATE = 07/10/2001
PERSON_NAME
= John Doe
PERSON_BIRTH = 05/05/1965
The XML code is now complete. Save the file on an FTP server.
For information on how to configure the AXIS 7100 to retrieve
the XML DD file, see “Retrieving the XML DD file” on page 133.
125
126
Meta Information
AXIS 7100 User’s Manual
Note:
The administrator has the option to specify the extension of the
Information File when saving the file on the FTP server under
admin|Destinations|new File Destination. If the extension is not specified
the default value will be used.
Entering the
Required Meta
Information
Job Applications
When the user wants to scan and send a document a destination
is selected from the list:
Send to:
Job Applications
Note:
This example describes a scenario where the user is prompted to add the
information on selecting the “Job Applications” destination.
1. The following prompt will appear on the message display.
The user is prompted to enter the information and then press
Enter. The star indicates that this is required Meta
Information and that the user cannot proceed without
entering the requested information.
Job Ref:
*
If the entered information is invalid (i.e. does not match the
pattern) the following display will be shown. The user must press
Enter and try again to be able to proceed.
Wrong Job Ref!
abcdef
AXIS 7100 User’s Manual
Meta Information
2. The user is prompted to enter the arrival date and then press
Enter. The star indicates that this is required Meta Information
and that the user can not proceed without entering the
requested information
Arrival Date:
*
3. The user is prompted to enter the name of the applicant and
then press Enter. The star indicates that this is required Meta
Information and that the user can not proceed without entering
the requested information.
Name:
.
*
4. The user is prompted to enter the date of birth of the applicant.
This information is not required and can be ignored by pressing
Menu.
Birth Date:
5. The user is prompted to enter the type of job the application
is for. The values are editable meaning that the user can scroll
among the listed values or enter a value using the external
keyboard.
Applied Job Type:
Note:
The Menu button scrolls through the list of Meta Information. The Enter
button validates the entered information against the defined pattern.
127
128
Meta Information
XML DD file
AXIS 7100 User’s Manual
Here is the same XML DD file in full:
<?xml version = "1.0"?>
<!DOCTYPE MetaDataFile SYSTEM
"http://10.13.16.165/admin/support/xml_parser.shtml?GetDTD=yes">
<MetaDataFile>
<Ask><When><Destination Description="Job Applications" /></When>
<MetaData Required = "yes"
Id = "JOB_ID"
Prompt = "Job Ref:"
ErrorMessage = "Wrong Job Ref!"
Pattern = "[0-9]{2}-[a-zA-Z]{2}-[0-9]{5}"
DefaultValue = "00-aa-00000"
/>
<MetaData Required = "yes"
Id = "ARRIVAL_DATE"
Prompt = "Arrival date:"
DefaultValue = "00/00/0000"
ErrorMessage = "DD/MM/YYYY"
Pattern = "[0-9]{2}/[0-9]{2}/[0-9]{4}"
/>
<MetaData Required = "yes"
Id = "PERSON_NAME"
Prompt = "Name:"
Pattern = ".+"
/>
<MetaData Required = "no"
Id = "PERSON_BIRTH"
Prompt = "Birth date:"
DefaultValue = "00/00/0000"
ErrorMessage = "DD/MM/YYYY"
Pattern = "[0-9]{2}/[0-9]{2}/[0-9]{4}"
/>
<MetaData Required = "yes"
Id = "JOB_TYPE"
Prompt = "Applied Job type:"
Pattern = ".+"
Editable = "yes">
<Value>Student</Value>
<Value>Clerk</Value>
<Value>Boss</Value></MetaData>
<Output>
<Format>
# Job Application Form
JOB_ID = $JOB_ID$
ARRIVAL_DATE = $INT_DATE$
PERSON_NAME = $PERSON_NAME$
PERSON_BIRTH = $PERSON_BIRTH$
</Format>
</Output>
</Ask>
</MetaDataFile>
AXIS 7100 User’s Manual
Meta Information
Example: RightFax Integration (SMTP)
RightFax Server
In this example the user is prompted to enter the fax number
when the FAX destination is selected from the list. The XML DD
file in this example generates the required message.
XML DD file
<?xml version="1.0"?>
<!DOCTYPE MetaDataFile SYSTEM "metadata.dtd">
<MetaDataFile>
<Ask><When><Destination Description=“FAX”/></When>
<MetaData Required = "yes"
Id = "FAX_NUM_IETF"
Prompt = "Fax Number:"
ErrorMessage = "Invalid number"
Pattern = "[0-9]+"
/>
<Output
Description=”fax=$FAX_NUM_IETF$fax.company.com”>
</Output>
</Ask>
</MetaDataFile>
The XML code is now complete. Save the file on an FTP server
and proceed to “Retrieving the XML DD file” on page 133 for
information on how to configure the AXIS 7100 to retrieve the
XML DD file.
Entering the
Required Meta
Information
When the user wants to scan and send a document to a fax, the
fax destination is selected from the list:
Send to:
FAX
129
130
Meta Information
AXIS 7100 User’s Manual
1. The following prompt will appear on the message display
when the Add/Send key has been pressed. The user is
prompted to enter the information and then press Enter. The
star indicates that this is required Meta Information and that
the user cannot scan without entering the requested
information.
Fax Number:
.
*
If the entered information is invalid the following display
will be shown. The user must press Enter and try again.
Invalid name
Note:
The Menu button scrolls through the list of Meta Information. The Enter
button validates the entered information against the pattern defined in
the XML DD file.
AXIS 7100 User’s Manual
Meta Information
Example: RightFax Integration (LPD)
RightFax Server
In this example the user is prompted to enter the fax number
when the FAX destination is selected from the list. The XML DD
file in this example generates the required message.
XML DD file
<?xml version="1.0"?>
<!DOCTYPE MetaDataFile SYSTEM "metadata.dtd">
<MetaDataFile>
<Ask><When><Destination Description= “FAX” /></When>
<MetaData Required = "yes"
Id = "FAX_NUM"
Prompt = "Fax Number:"
ErrorMessage = "Invalid number"
Pattern = "[0-9]+"
/>
<MetaData Required = "yes"
Id = "FAX_RECIPIENT"
Prompt = "Recipient Name:"
ErrorMessage = "Invalid name"
Pattern = ".+"
/>
<Output>
<Format>
<![CDATA[<toname:$FAX_RECIPIENT$><tofaxnum:$FAX_NUM$
]]>
</Format>
</Output>
</Ask>
</MetaDataFile>
The XML code is now complete. Save the file on an FTP server
and proceed to “Retrieving the XML DD file” on page 133 for
information on how to configure the AXIS 7100 to retrieve the
XML DD file.
131
132
Meta Information
Entering the
Required Meta
Information
AXIS 7100 User’s Manual
When the user wants to scan and send a document to a fax, the
fax destination is selected from the list:
Send to:
FAX
1. The following prompt will appear on the message display
when the Add/Send key has been pressed. The user is
prompted to enter the fax number and then press Enter. The
star indicates that this is required information and that the
user cannot scan without entering the requested
information.
Fax Number:
*
.
If the entered information is invalid the following display
will be shown. The user must press Enter and try again.
Invalid name
2. The user is prompted to enter the name of the recipient and then
press Enter.
Recipient Name:
.
*
Note:
The Menu button scrolls through the list of Meta Information. The Enter
button validates the entered information against the pattern defined in
the XML DD file.
AXIS 7100 User’s Manual
Meta Information
Retrieving the XML DD file
To download the XML file to the AXIS 7100, you must access
the AXIS 7100 embedded web pages using a standard Web
browser such as Netscape Navigator or Internet Explorer:
1. Start your Web browser.
2. Enter the name or IP address of your AXIS 7100 in the
location/address field.
Example:
http://172.16.253.80
3. This brings you to the AXIS 7100 Home Page. Click admin. Log
on as described in “Accessing the Tools” on page 36.
4. Click the Edit button on the This AXIS 7100 page and then
click the Meta Information tag to display the page where you
specify the Meta Information parameter settings.
133
134
Meta Information
AXIS 7100 User’s Manual
5. Click XML DD file via FTP to enable the Meta data
functionality. Specify the parameter settings as described in
the table below.
Parameter
FTP Server
User
Password
Confirm
Directory
Description
Specify the name or IP Address of the FTP server where the file
is stored.
Specify the user name for logging on to the FTP server
Specify the password for logging on to the FTP server. If the user
field is left blank, this setting will be ignored.
Confirm the password to make sure the spelling is correct.
Specify the directory on the FTP server where the file is stored.
If left blank, the root directory on the FTP server will be used.
Note: Specifying the root as “/” will work in the majority of FTP
servers.
File name
Specify the name of the file.
Reload Interval
Specify how often the XML DD file is reloaded. The value is
specified in whole hours.
Allow scanning
If enabled, the user is allowed to send a document without enwhen no XML DD tering any Meta Information even though the AXIS 7100 has
file retrieved
failed to retrieve the XML DD file from the FTP server, .
Alert the
If enabled, the AXIS 7100 will send an e-mail to the administraAdministrator
tor indicating that it was unable to retrieve the XML DD file
when no XML DD
file retrieved
6. Click Apply to save your changes, then click OK to return to
the This AXIS 7100 page.
If you want to return to the This AXIS 7100 page without
saving your changes click Cancel.
7. Click Event Log to check that the XML DD file was successfully
retrieved.
Regular
Expressions
Each MetaData object is defined in the XML DD (Document
Description) file. In this file the Administrator can set the pattern
which is defined by a set of regular expressions used to check
the lexical correctness of the value.
AXIS 7100 User’s Manual
Meta Information
Example:
•
•
Prompt=”Due Date:”
Pattern= “[0-9]{2}/[0-9]{2}/[0-9]{2}”
Prompt=”Orderer name:”
Pattern= “.+”
The format is enclosed into a string delimited by the quote (““)
character, new lines are not accepted in the regular expression.
The regular expressions are described here:
Character
""
.
+
*
?
[..]
r{1,5}
r{1}
r{2,}
r{,2}
^
$
"a|b"
|
(...)
\1
\b
\
“[0-9]”
"[a-z]+"
"abcd?"
"[A-Z]"
"i{1,3}"
"i{5}"
Description
empty string only
matches any character except new line. (This pattern will be the
default value of the Meta Information format field)
(postfix) matches the previous expression one or several times
(postfix) matches the previous expression zero, one or several times
(postfix) matches the previous expression once or not at all
character set; ranges are denoted with -, as in [a-z]; an initial ^, as
in [^0-9], complements the set
r could be repeated between 1 and 5 times *(upper limit: 48)
r must be repeated exactly once.
r must be repeated at least twice.
r could be repeated twice (i.e. 0, 1 or 2 times).
matches at beginning of line
matches at end of line
"a" or "b"
(infix) alternative between two expressions
grouping and naming of the enclosed expression
the text matched by the first (...) expression
(\2 for the second expression, etc)
matches word boundaries
quotes special characters.
"", "0", "14876328746", ...
"a", "qwerty", ...
only "abc" and "abcd" correct
only one letter between 'A' and 'Z" correct
only "i", "ii", "iii" correct.
only "iiiii" correct
135
136
Meta Information
AXIS 7100 User’s Manual
"i{2,}"
"i{,2}"
"^qwerty"
"qwerty$"
only "ii", "iii", "iiii", ...
only "" "i" and "ii"
"qwerty" correct but not "aqwerty"
"qwerty" correct but not "qwertyu"
Notes:
• infix notation:
Structure notation where the operator is located between the operands, e.g. (A+B).
• postfix notation:
Structure notation where the operator follows the operands, e.g.
(A,B)-.
• *The upper limit for repetitions is set to 48. (This limitation does not
apply if the Editable attribute in the XML DTD is set to NO)
Some more examples of regular expressions:
Example
"[0-9]{2}/[0-9]{2}/[0-9]{4}"
"[a-zA-Z]+)|([a-zA-Z]+.[a-zAZ]+)@[a-zA-Z]+.[a-z]{2,3"
Description
Date DD/MM/YYYY
E-mail address:
[email protected]
[email protected]
"(\([0-9]{3}\))?[0-9]{3}[
Telephone number
]{,1}[0-9]{4}"
"(123) 123-1234"
"(123)1231234"
"(123) 123 1234"
"[a-zA-Z ]+"
Name:
"John Doe"
"John"
"[0-9]{2} ?[0-9]{3}"
ZIP code
"12345"
"12 345"
"(1|2|3|4|5|6|7|8|9|10|11|12):[ Time :
0-9]{,2}(:[0-9]{0,2})
"1:05:59 AM"
?(AM|am|Am|PM|pm|Pm)"
"1:05:59 am"
"1:05:59 PM"
"1:05:59 pm"
"1:05 AM"
AXIS 7100 User’s Manual
Meta Information
"^(http://|ftp://|https://|go- URL : "http://www.axpher://)?([a-zA-Z0-9]+.)*[a-zA- is.com/prod/index.html"
Z0-9]+(/([a-zA-Z0-9]|-|.)+)*"
"ftp://ftp.axis.com/pub/"
"www.axis.com"
"http://www2.lemonde.fr/article/0,2320,seq-2039-53663MIA,00.html"
Internally Defined
Variables
There are several internal variables defined by the AXIS 7100
that can be output in the Information File. These internal
variables are listed below.
Example:
<Format>
The image is located at $INT_FILE_URL$
The time at the moment of scanning was $INT_TIME$
</Format>
This table contains a list of these internal variables:
Character
INT_FILE_URL
INT_FILE_NAME
INT_FILE_SIZE
INT_DATE
INT_TIME
INT_HOST_NAME
INT_HOST_ADDRESS
INT_SCANNER
INT_PROFILE
INT_PAPER_SIZE
Description
Specifies the URL of the image file. For a file on
an FTP server this URL will correspond to the
complete URL of the file. For an e-mail to a
pre-set destination it will correspond to the
URL specified on the Web interface.
Specifies the file name of the image file only.
Specifies the size of the image file.
Specifies the date of the image file.
Specifies the time of the image file.
Specifies the host name of the AXIS 7100 that
produced the file.
Specifies the IP address of the AXIS 7100 that
has produced the file.
Specifies the descriptive name of the scanner
that produced the image file.
Specifies the profile used for the scanning.
Specifies the paper size used for the scanning.
137
138
Meta Information
AXIS 7100 User’s Manual
INT_NUMBER_OF_PAGES
INT_WIDTH
INT_HEIGHT
INT_X_RESOLUTION
INT_Y_RESOLUTION
INT_BITS_PER_PIXEL
INT_DATA_TYPE
INT_PAPER_ORIENTATION
INT_FORMAT
INT_DOUBLE_SIDED
INT_INTENSITY
INT_CONTRAST
INT_DESTINATION
INT_SUBJECT
INT_USER_MAIL
INT_USER_ID
INT_MAC_ADDRESS
INT_LAST_RESET_DATE
INT_COUNTER_LAST_RESET
INT_COUNTER_TOTAL
More Information
Specifies the number of pages of the image
file.
Specifies the width of the image file.
Specifies the height of the image file.
Specifies the horizontal resolution of the image file.
Specifies the vertical resolution of the image
file.
Specifies the number of bits per pixel of the
image file.
Specifies the data type of the image file.
Specifies the paper orientation of the image
file.
Specifies the format of the image file.
Specifies the orientation of the image file.
Specifies the intensity of the image file.
Specifies the contrast of the image file.
Specifies the destination description that originated the image file.
Specifies the selected subject.
Specifies the e-mail address of the user.
Specifies the description of the user.
Specifies the MAC address of the Axis Network
Document Server that produced the image file.
The date when the counter was last reset
The counter at the time of the last reset
The counter total (cannot be reset)
For more information on the Meta Information functionality and
for more XML DD file examples, please refer to the White papers
in the AXIS 7100 Developer section at http://www.axis.com
AXIS 7100 User’s Manual
Appendix A
Troubleshooting
Troubleshooting
This appendix helps you to:
•
•
•
•
Restore factory default settings to the AXIS 7100
Interpret the AXIS 7100 front panel indicators
Interpret the AXIS 7100 error messages
Display the log file
Restoring Factory Default Settings
The factory default settings can be restored using one of the
following methods:
•
•
•
Push button
Web browser
FTP
Important!
When you restore the factory default settings, all your current settings including the
destinations and profiles will be lost. You will need to re-assign the IP address as
described in “Assigning an IP Address ”on page 22.
Push Button
Follow these steps to restore the default settings using the Push
button:
Important!
If you have forgotten the previously installed server password, the push button provides
the only method available to access the AXIS 7100, i.e. resetting the unit to factory
default settings.
139
140
Troubleshooting
AXIS 7100 User’s Manual
1. Turn off the AXIS 7100 by disconnecting the power supply.
2. Press and hold the Push button while you connect the AXIS
7100. Keep the Push button pressed until the Status indicator
flashes at regular two second intervals.
Push button
3. Release the Push button and wait at least two seconds (one
flash of the indicators).
4. Press and hold the Push button for at least five seconds until
the Status indicator remains constantly lit.
5. The AXIS 7100 is now reset to factory default settings.
6. Restart the AXIS 7100 by disconnecting and reconnecting the
power supply.
Web Browser
Follow these steps to reset to the defaults settings from a Web
browser:
1. Start the Web browser.
2. Enter the name or the IP address of the AXIS 7100 in the
location/address field. The AXIS 7100 Home Page is
displayed.
3. Click admin.
4. Click Factory Defaults.
The AXIS 7100 will now restart with the factory default
settings.
AXIS 7100 User’s Manual
FTP
Troubleshooting
Follow these steps to restore the default settings using FTP:
1. Log in to the AXIS 7100 with the command ftp <Internet
address>, where <Internet address> is the name or IP
address assigned to your AXIS 7100.
2. You will be prompted for user id and password. Use the user
id root, which has the default password pass.
3. Issue the command get defaults to restore the default
settings. The unit now restarts automatically.
4. Log out using the command quit, bye or exit depending on
your FTP version.
The AXIS 7100 will now restart with the factory default settings.
Front Panel Indicator Conditions
The Power LED is hardware controlled and should always
remain on when power is connected to the AXIS 7100. The
remaining LEDs are all software controlled.
Normal Conditions
This table shows the front panel indicators during normal
conditions:
Event
Status
LED
Busy LED
Network
LED
Power up
On
On
Flash
On
On
Off
On
Off
On
Off
Off
Flash
Sending
On
On
On
Off
Flash
Flash
Yellow
Flash
Blink
Blink
Idle
Flash loading
Remarks
Initial power to unit
Memory test
Self test in progress
Network LED flashes when network traffic is present
Network LED flashes when network traffic is present
During Flash loading, the Network LED blinks quickly
141
142
Troubleshooting
Error Conditions
AXIS 7100 User’s Manual
This table lists a summary of error conditions:
Event
Status
LED
Busy
LED
Network
LED
Remarks
Power up
On
Off
Off
Idle
Off
On
Off
Off
Off
Off
Yellow
Flash
Red
Flash
Flash
Off
Flash
Check parallel cable to the
WORKiO copier
Check RJ45 cable to network
Check RJ45 cable to network. If
known network traffic, the Network LED should flash.
Consult Network Administrator
Off
Off
Consult Network Administrator
Flash
Off
Consult Network Administrator
Red
Flash
Red
Flash
Yellow
Flash
Flash
Flash
Consult Network Administrator
Flash
Flash
Consult Network Administrator
Off
Off
Consult Network Administrator
Error in FLASH
PROM
Error in
DRAM/DIMM
DRAM/DIMM
configuration
error
SW-HW
combination error
Illegal serial no.
Flash load failed
Status Indicator Off
The Status indicator remains off if a problem with the scanning
device communication has occurred. The AXIS 7100 message
display may additionally provide error status information.
Network Indicator Off
The Network indicator flashes when there is network traffic. If it
remains off and you know there is network activity, check the
network connection.
AXIS 7100 User’s Manual
Troubleshooting
Error and Warning Messages
This table lists the error and warning messages that might
appear on the AXIS 7100 message display:
Message
Out of memory
Out of scanner image
memory
Unresolved name:
<server name>
Not available:
<server address>
Login failed:
<server address>
Disconnected:
<destination>
No valid mail recipient
found
Illegal address
<recipient>
Illegal directory on:
<server address>
Unable to open file on:
Write error on:
<server address>
No info file on:
<server address>
Paper jam
No paper in scanner
Scanner not ready, please
check scanner and retry
Could not connect to LDAP
server
The user specified for LDAP
is invalid
Invalid LDAP credentials
(e.g. invalid user or
password)
Description
The document image contains too much data. Please
try another profile.
The document image contains too much data. Please
contact your equipment supplier.
Cannot find the IP address mapped to <server name>.
Cannot establish communication with the server specified in <server address>. Please try again later.
Incorrect FTP server password specified for the file
destination.
The connection to the destination specified in <destination> has been lost. The image transfer has been
aborted.
All the selected e-mail destinations were incorrect.
Incorrect e-mail address specified for the e-mail destination.
The directory specified for the file destination does not
exist.
Default file name is missing.
Insufficient access rights to the directory specified for
the file destination.
The information file could not be stored on the FTP
server. Possible reasons are lack of memory or naming
conflicts. The image file will be removed.
Paper jam in the scanning device. Remove paper to
continue sending.
No paper in the sheet feeder.
The scanning device is busy. Please try again.
The DNS name or the IP address may be wrong. The
server may be unreachable.
Invalid user name for the LDAP server. Enter a correct
user name.
The LDAP server did not recognize the user with the
specified password.
143
144
Troubleshooting
AXIS 7100 User’s Manual
Message
Illegal LDAP filter specified
User and password are
required to connect to this
LDAP server
User and password can not
be used to connect to this
LDAP server
No destinations were
retrieved
LDAP error! No/several email address(es) were
retrieved
Missing mandatory FTP
parameter for external
address book
Scanner not
connected
Scanner not
supported
Scanning failed
Illegal queue for:
Illegal command for (The
printer may be busy):
Incorrect Value
Meta Data enabled.
Keyboard Required
Could not connect to
Windows NT domain
controller
Invalid Windows NT
credentials
Failed to retrieve user
information
Description
Invalid LDAP filter. Please enter a new value.
Please enter your username and password.
This LDAP server does not accept requests with the
specified username and password.
No destinations were retrieved. Change your LDAP settings and try again.
The user could not be authenticated by the LDAP server. Change the LDAP settings and try again.
Check the FTP settings for the external address book
and try again.
Please check the scanning device connection and try
again.
The attached scanning device is not supported. Digital
copying/scanning will not work properly.
An error occurred whilst sending. Please refer to earlier
messages.
The specified LPD print queue does not exist; check
spelling and syntax.
Incorrect LPD Mode selected for the specified printer
destination.
The entered value does not match the pattern specified by the administrator.
The meta Information functionality is enabled and requires that a keyboard is connected.
The name or the IP address may be incorrect or the
server may be unreachable.
Check the username and password and try again.
Check that the entered username has a corresponding
name listed in the destinations list.
Check that the XML values correspond with the specified pattern.
A value specified for XML
Meta Data <attribute>
ignored: the value has illegal
format
MetaData Enabled. XML DD The AXIS 7100 failed to retrieve the XML DD file from
file required
the FTP server. Contact the administrator.
XML Meta Data <attribute> The pattern for the attribute in the XML DD file is indiscarded: pattern is invalid correct.
AXIS 7100 User’s Manual
Troubleshooting
Displaying the Log File
The AXIS 7100 log file automatically logs all events and errors
that have occurred since the last restart. You can access the log
file using one of these methods:
•
•
Control Panel
Control panel
Web browser
Follow these steps to display the log file from the control panel:
1. Press Menu
and Select
the Advanced menu.
2. Use
3. Press Select
4. Use
Web Browser
simultaneously to display
to find the Server log option.
to enter the submenu.
to scroll through the messages.
Follow these steps to display the log file from a Web browser:
1. Start the Web browser.
2. Enter the name or IP address of the AXIS 7100 in the
location/address field:
Example
http://172.16.253.80
3. The AXIS 7100 Home Page is displayed. Click admin.
4. Click Event Log.
The event log is displayed.
145
146
LDAP
AXIS 7100 User’s Manual
Appendix B
LDAP
This section gives you an introduction to LDAP and how to use
it.
Introduction
LDAP (Lightweight Directory Access Protocol) is used to
program directory-enabled applications. It is a directory service
that allows people to locate other users, resources, services and
information. LDAP allows resources and services to be selected
with ease and accessed with location-independence.
Note:
LDAP works differently depending on the organization and the structure
of the system.
Structure Example
A structure can look like this:
Example:
Organization
Country
Organization Unit
AXIS
SE
Engineering
US
Marketing
Sales
Usual Attribute Types
These are the most typical attribute types (the LDAP server
implementation should understand these attribute types):
AXIS 7100 User’s Manual
LDAP
Attribute Type
Matches
objectClass
Describes the kind of object which
the entry represents.
cn
Contains the name of an object. If
the object is a person, it is typically
the person’s full name.
sn
Contains the family name of a
person.
c
Contains a two-letter country code.
l
Contains the name of a locality,
such as a city, county or other
geographic region.
st
Contains the full name of a state or
province.
street
Contains the physical address of the
object to which the entry
corresponds, such as an address for
package delivery.
o
Contains the name of an
organization.
ou
Contains the name of an
organization unit.
title
This attribute contains the title,
such as “Vice President”, of a person
within an organization.
147
148
LDAP
AXIS 7100 User’s Manual
The attribute types are used to create search filters. There are six
types of basic search filters and the syntax of the filters is in the
<attribute><operator><value> format. Complex search filters
can easily be constructed by combining these basic search filters
and other complex filters using the Boolean operations AND, OR
and NOT. The six basic filter components are presented in the
table below:
Filter Type
Format
Example
Matches
Equality
(<attr>=<val
ue>)
(sn=Smith)
Surnames
exactly equal to
Smith.
Approximate
(<attr>~=<va
lue>)
(sn~=Smitt)
Surnames
approximately
equal to Smitt
(for example,
that sounds like
Smitt - note the
misspelling).
Substring
(<attr>=[<le
ading>]*[<an
y>]*[<traili
ng>])
(sn=*smith*)
Surnames
containing the
string “smith”.
(sn=smith*)
Surnames
starting with
“smith”.
(sn=*smith)
Surnames
ending with
“smith”.
(sn=s*mi*th)
Surnames
starting with “s”,
containing “mi”
and ending with
“th”.
(sn>=Smith)
Surnames
lexicographically
greater than or
equal to Smith.
Greater than
or equal
(<attr>>=<va
lue>)
AXIS 7100 User’s Manual
LDAP
Filter Type
Format
Example
Matches
Less or
equal than
(<attr><=<va
lue>)
(sn<=Smith)
Surnames
lexicographically
less than or
equal to Smith.
Presence
(<attr>=*)
(sn=*)
All surnames.
Using the Boolean operators and a prefix notation, the basic
filters can be combined to form more complex ones. The ‘&’
character represents AND, the ‘|’ character represents OR and the
‘!’ character represents NOT. Here are some examples that
explain how to do that:
Filter Type
Format
Example
Matches
AND
(&(<filter1>
)(<filter2>)
...)
(&(sn=smith)
(objectclass
=person))
Entries with an
object class of
person and a
surname exactly
equal to Smith.
OR
(|(<filter1>
)(<filter2>)
...)
(|(sn=smith)
(cn=*smith))
Entries with a
surname exactly
equal to Smith
or a
commonname
ending in
“smith”.
NOT
(!(<filter>)
)
(!(mail=*))
Entries without
a mail attribute.
Note:
It is wise to create filters that sort out unwanted entries based on their
object class. For example, in an address book, you might only want to
retrieve entries of the “people” class, with the common name “John”,
leaving out computers called John. This could be achieved with the
following filter: (&(objectclass=person)(cn=john))
149
150
LDAP
AXIS 7100 User’s Manual
Note:
The way you construct your filter will has a large impact on how fast the
search is conducted. If you create a filter involving structures that the
directory server can not evaluate efficiently, performance is likely to
suffer. Apart from being familiar with the administrator and/or the inner
workings of the server itself, only trial and error can tell you whether
your filter is working efficiently or not.
Example searches
Here are some advanced search examples:
Searched
Filter to use
All persons in Sweden.
(&(objectclass=person)(c=S
E))
All entries at Axis independent of coun- (&(o=axis)(!(sn=smith)))
try, except the ones called Smith.
All persons at Axis Marketing in Sweden. (&(objectclass=person)(c=S
E)(o=axis)(ou=marketing))
All persons with a common name con- (&(objectclass=person)(cn=
taining “bert” at Axis Marketing or Sales. *bert*)(|(ou=marketing)(ou
=sales)))
AXIS 7100 User’s Manual
Appendix C
Meta Information DTD
Meta Information DTD
The DTD (Document Type Definition) is a specific definition of
the rules and syntax that the DD (Document Description) file
must follow. It contains the definition of the element hierarchy
and relation between these elements in the hierarchy. When
your XML document is processed, it is compared to its
associated DTD to be sure that it is structured correctly and that
all tags are correctly used.
You can download the DTD file from the internal web pages in
the Troubleshooting section at admin | support.
Meta Information DTD
Here follows the Meta Information DTD:
<?xml version="1.0" ?>
<!--=======================================
FILE:metadata.dtd
ROOT:MetaDataFile
DESCRIPTION:This file contains the DTD for the Meta
Data functionality. This functionality allows the
Administrator to define custom information that will
be required from the User at the moment of scanning.
This custom information can either be related to a
particular destination (for instance an Invoice
number when an invoice destination is selected) or
it can be requested regardless of the
destination.================================== -->
<!-- ========================================
ENTITY:MD_DTD_VERSION
DESCRIPTION:This entity contains the version number
of this DTD.=================================== -->
<!ENTITY MD_DTD_VERSION "1.00">
<!-- ========================================
ENTITY:MD_DOMAIN
DESCRIPTION:This entity contains the domain of this
DTD.=========================================== -->
151
152
Meta Information DTD
AXIS 7100 User’s Manual
<!ENTITY MD_DOMAIN "XML meta data">
<!-- ========================================
ELEMENT:MetaDataFile
PARENT:None
CHILD:AlwaysAsk (optional)
Ask
(zero or more)
ATTRIBUTES:None
DESCRIPTION:This element is the root element. It
allows the Administrator to define meta data that
will always be requested (gathered in the
"AlwaysAsk" section) regardless of the destination,
and meta data that will be requested only when a
particular destination is selected (gathered in the
"Ask"section).
============================================= -->
<!ELEMENT MetaDataFile (AlwaysAsk?, Ask*)>
<!ATTLIST MetaDataFile
Version CDATA #FIXED "&MD_DTD_VERSION;"
Domain
CDATA #FIXED "&MD_DOMAIN;">
<!-- ========================================
PARENT:MetaDataFile
CHILD:MetaData (one or more)
Output (optional)
ATTRIBUTES:None
DESCRIPTION:This element gathers the meta data that
is requested from the user regardless of the
destination. This does not imply that the different
meta data is required but just that it is not
destination dependent as the meta data gathered in
the "Ask" section is. For instance the Administrator
can always ask the User to identify himself. This is
not destination
dependent.=================================== -->
<!ELEMENT AlwaysAsk (MetaData+, Output?)>
<!-- ========================================
AXIS 7100 User’s Manual
Meta Information DTD
ELEMENT:Ask
PARENT:MetaDataFile
CHILD:When (one)
MetaData (one or more)
Output (optional)
ATTRIBUTES:None
DESCRIPTION:This element gathers the different meta
data that is Destination dependent. The
Administrator is able to specify the meta data which
is to be requested from the User on selecting a
specific destination (gathered in the "When"
element). This section also allows the Administrator
to define the specific format of the output for this
set of MetaData. For instance, the Administrator can
ask for an invoice number when the User selects the
invoice destination. He can also define a particular
output format that can easily be processed (by a
database for instance).======================== -->
<!ELEMENT Ask (When, MetaData+, Output?)>
<!-- ==========================================
ELEMENT:MetaData
PARENT:AlwaysAsk
Ask
CHILD:Value (zero or more)
ATTRIBUTES:
Required:
This attribute is an enumerated value that defines
if the User must enter the MetaData (="yes") or if it
can be skipped (="no") or if it is hidden to the User
(="hidden"). MetaData with the "Required" attribute
defined as "yes", is mandatory and must be entered
before the User can proceed with the scanning.
MetaData with the "Required" attribute defined as
"hidden", is useful when the administrator wants to
define a default value that will help in processing
the information entered by the User.
153
154
Meta Information DTD
AXIS 7100 User’s Manual
Id:
This attribute indicates the system and name the
MetaData is known by. This identifier must be unique
among all the MetaData elements.
Prompt:
This attribute contains the string that will be
displayed on the LCD display when requesting this
particular MetaData from the User. If the
Administrator does not specify the text the User
will be prompted with the "Id" attribute.
Label:
This attribute contains the output string when the
Administrator has not defined an output format. If
no labels are defined, the "Id" attribute will be
used instead.
ErrorMessage:
This attribute contains the string that will be
displayed when the value entered by the User does not
match the "Pattern" attribute. If the Administrator
does not specify this attribute, the default string
"Incorrect value!" will be displayed instead.
DefaultValue:
This attribute contains the output string for when
the MetaData is not required and not entered by the
User (attribute "Required" equal "no") or hidden
(attribute "Required" equal "hidden"). The default
value for this attribute is the empty string.
Pattern:
This attribute contains the regular expressions that
describe the expected format in the value entered by
the User. For more details on the Regular Expression
syntax see the User’s Manual. The default value for
this attribute is the match-everything pattern
(".*").
AXIS 7100 User’s Manual
Meta Information DTD
Editable:
This attribute is an enumerated value that defines
if the User is allowed to enter a value different
from the one purposed in the list of value defined
for this Meta Data. The User will be allowed if the
attribute is set to "yes" and will not be if the
attribute is set to "no"
DESCRIPTION: This element contains the information
specific to the meta data itself. See the attribute
descriptions for more
details.======================================= -->
<!ELEMENT MetaData (#PCDATA|Value)*>
<!ATTLIST MetaData
Required (yes|no|hidden) "no"
Id
ID #REQUIRED
Prompt CDATA #IMPLIED
Label CDATA #IMPLIED
ErrorMessage CDATA #IMPLIED
DefaultValue CDATA #IMPLIED
Pattern CDATA #IMPLIED
Editable (yes|no) "yes">
<!--==========================================
ELEMENT:Value
PARENT:MetaData
CHILD:None
ATTRIBUTES:None
DESCRIPTION:This element contains a specific value
for a Meta Data. This allow the User to choose the
value of a certain Meta Data among several
value.========================================= -->
<!ELEMENT Value (#PCDATA)>
<!-- ==========================================
ELEMENT:When
155
156
Meta Information DTD
AXIS 7100 User’s Manual
PARENT:Ask
CHILD:Destination (one or more)
ATTRIBUTES:None
DESCRIPTION:This element contains a list of the
different destinations that trigger the request of
the dependent MetaData elements from the User. When
one or more of the specified destinations is
selected by the User, the following MetaData will be
requested====================================== -->
<!ELEMENT When (Destination+)>
<!-- ==========================================
ELEMENT:Destination
PARENT:When
To
CHILD:None
ATTRIBUTES:Description:
This is the Id of the Destination. One restriction is
that the destination's description attribute must be
a valid destination description. This means that the
Administrator cannot define a new destination here.
DESCRIPTION:This element contains the description of
the defined destination======================== -->
<!ELEMENT Destination (#PCDATA)>
<!ATTLIST Destination
Description CDATA #REQUIRED>
<!-- ==========================================
ELEMENT:Output
PARENT:AlwaysAsk
Ask
CHILD:To (optional)
Format (optional)
ATTRIBUTES:FileName
AXIS 7100 User’s Manual
Meta Information DTD
This attribute indicates to the AXIS 7100 which
template it should use in order to determine the
remote file name. This template can contain
references to Meta Data’s Id, in order to create a
file name that is created with the values entered by
the User. This attribute overrides the value set for
the Destination.
DESCRIPTION:This element contains the specific
information for when the Administrator wants to
specify a format different from the traditional one.
The Administrator can also specify a destination for
the output file. ============================== -->
<!ELEMENT Output (To | Format | (To, Format))?>
<!--==========================================
ELEMENT:To
PARENT:Output
CHILD:Destination
ATTRIBUTES:None
DESCRIPTION:This element contains the particular
destination to which the output file should be
sent.======================================= -->
<!ELEMENT To (Destination))>
<!-- ==========================================
ELEMENT:Format
PARENT:Output
CHILD:None
ATTRIBUTES:None
DESCRIPTION: This element contains the custom
declaration that defines the output format defined
by the Administrator for this specific
destination.================================= -->
<!ELEMENT Format (#PCDATA)>
157
158
The Parameter List
Appendix D
AXIS 7100 User’s Manual
The Parameter List
This table below displays the AXIS 7100 parameter list. The
middle column shows applicable default values, and the righthand column a brief description of the parameter.
Important!
The parameters are case dependent and must be entered exactly as in the
table below.
Parameter name
Value
Description
[Server]
HardwareAddress
= 00:40:8c:18:02:3c
Date
Time
=yyyy-mm-dd
= hh:mm:ss
Specifies the AXIS 7100 hardware address which
is equal to the serial number.
Specifies the date in yyyy-mm-dd format
Automatically specifies the time zone in which
the AXIS 7100 operates using the Network Time
Protocol (NTP). Time can also be set manually
in hh:mm:ss format using the 24 hour clock.
FactoryDefaults
= no
Restart
= no
TimeZone
= UTC
TimeSyncSource
= NTP
ServerPassword
= pass
Note: The AXIS 7100 contains a real time clock
which means that the time will be kept even if
the power is turned off.
Set this parameter to yes to reset to factory
default settings. Note that all current settings
will be lost.
Set this parameter to yes to restart the AXIS
7100.
Specifies the time zone in which AXIS 7100
operates.
Specifies the time source for the AXIS 7100.
Valid values are NTP, Windows (SMB) or None.
Note:
To use Microsoft Windows NT Network (SMB)
properly WINS must be enabled and the
Domain/GroupName parameter must be set to a
valid name.
Specifies the Server password. The
Supervisor/Administrator will be prompted for
this password when trying to access the AXIS
7100 for administration tasks. The password is
used in basically all protocols, i.e. HTTP, SNMP
and FTP. Once written to the configuration file,
the password will be replaced by *'s,
representing each letter of the password.
AXIS 7100 User’s Manual
The Parameter List
Parameter name
Value
Description
DefaultProfile
DefaultPaperSize
TemporaryDestinations
=Text
= letter
= yes
TemporaryProfiles
= yes
WebScanning
= yes
SpecifySender
= no
FrontPanelConfiguration
= yes
PDFRotation
SpecifyFileName
=no
=no
SpecifySubject
=yes
Specifies the default profile.
Specifies the default paper size.
Specifies if users are allowed to add temporary
e-mail destinations.
Specifies if users are allowed to add temporary
profiles.
Specifies if users are allowed to use the Scan
Document facility. Scan Document means that
the user places a document in the digital
copier/scanner, and then displays or saves the
image via the AXIS 7100 Web browser interface.
Specifies if users are allowed to specify the
sender when scanning from the AXIS 7100
control panel.
Specifies if user may configure network settings
from the control panel.
Not used.
If enabled, this option allows the user to change
the file name for an FTP destination or e-mail
destination.
If enabled, this option allows the user to enter a
subject in the subject field.
[IP]
InternetAddress
= 0.0.0.0
DefaultRouter
= 0.0.0.0
NetMask
= 0.0.0.0
BOOTPEnable
= yes
DHCPEnable
= No
Specifies the AXIS 7100 IP address, which must
be a unique and valid address to prevent
conflicts with other network devices.
Specifies the IP address for the default router.
All traffic directed outside the local network
(according to the NetMask) is sent to the default
router. Any re-routing via other routers is done
automatically. The default 0.0.0.0 indicates that
no default router is set.
Specifies the subnet mask used for determining
whether the traffic should stay within the
network or be sent via a router. For example,
the normal class C mask is 255.255.255.0. The
default 0.0.0.0 indicates that automatic router
sensing is used.
Enables/Disables BOOTP for setting the IP
address.
Enables/Disables DHCP for setting the IP
address.
159
160
The Parameter List
AXIS 7100 User’s Manual
Parameter name
Value
Description
RARPEnable
= yes
DomainName
= company.se
PrimaryDNS
= 0.0.0.0
SecondaryDNS
= 0.0.0.0
NTPServer
=0.0.0.0
EnableWINS
PrimaryWINSserver
SecondaryWINSserver
ProtectIP
=yes
=0.0.0.0
=0.0.0.0
=Off
Enables/Disables RARP for setting the IP
address.
Specifies the name of the domain to which the
AXIS 7100 belongs. Domain refers to a set of
computers on a network that have been
assigned a group name. A domain might
contain two or more workgroups.
Specifies the IP address of the primary DNS
server. Used e.g. for setting up of destinations
with names instead of IP addresses.
Specifies the IP address of the secondary DNS
server, should the primary be unavailable or
disconnected.
Specifies the name or IP address of the NTP
server used for time synchronization.
Specifies if WINS is enabled
Specifies the name or IP address of the server
Specifies the name or IP address of the server
If enabled, the IP address cannot be changed
from the control panel using the Menu button
[HTTP]
ExternalLink
=www.company.name
ExternalImage
=
[SMB]
ServerName
=AXISCD0000
Domain/GroupName
=
NTDomainInstallation
=no
Specifies the URL to a customized link, e.g. to
your company’s web site. The link will be
available from the AXIS 7100 Web browser
interface.
Specifies the URL to the image that will indicate
the customized external link.
The server name in the SMB environment.
Default is AXIS<nnnnnn> where nnnnnn are the
last six digits of the serial number.
Name of the AXIS 7100 workgroup in SMB. If
not specified, the AXIS 7100 will appear in the
workgroup that comes first in alphabetical
order.
Set to yes when you want to install the AXIS
7100 in an NT domain.
AXIS 7100 User’s Manual
The Parameter List
Parameter name
Value
Description
[SNMP]
GetCommunityName
= public
TrapDestination
= 0.0.0.0
TrapCommunityName
= public
SystemContact
=
SystemName
=
SystemLocation
=
AuthenticationTrap
= disabled
Specifies the community that has read only
access to all supported SNMP objects except
WriteCommunity, SupervisorPassword and
ftpPassword. It corresponds to the
ReadCommunity SNMP object.
Specifies the IP Address which SNMP traps are
sent to. It corresponds to the TrapAddress
SNMP object. Default is 0.0.0.0, which means
that all SNMP traps are disabled.
Specifies the community for all generated SNMP
traps. It corresponds to the TrapCommunity
SNMP object.
Optional entry which should be in plain text and
may be used to show the name of the system
contact person.
Optional entry which should be in plain text and
may be used to show the name of the system.
Optional entry which should be in plain text and
may be used to show the location of the system.
Enables or disables the SNMP authentication
failure traps. It corresponds to the
snmpenableAuthenTraps (MIB-II) SNMP object.
[Clients]
InformationLevel
= Basic
FTPDefaultUser
= anonymous
FTPDefaultPassword
= [email protected]
FTPDefaultFileName
= img%3i.%e
Specifies the default amount of information to
be transmitted with a scanned image. If not set
for a destination, this setting will be used. Valid
values are Nothing, Basic or Complete. Basic
includes information about the AXIS 7100, the
connected digital copier/scanner, the parameter
settings used when scanning etc. Complete also
includes the image-related profile settings.
If not set for a destination, this username will
be used.
If not set for a destination, this password will be
used. This field can also contain the identity of
the user transmitting the scanned image. This is
useful for administrative purposes.
If no file name has been assigned to the
transmitted file, this name will be used. In the
default file name, img%3i.%e, %3i means a 3digit number and %e means the file extension,
e.g. img001.tif
161
162
The Parameter List
AXIS 7100 User’s Manual
Parameter name
Value
Description
SMTPReplyAddress
=
Specifies the e-mail address of the person
responsible for the administration of the AXIS
7100.
SMTPSubject
= A scanned image
SMTPSendBcc
=no
SMTPBccAddress
[email protected]
URL FTP Server
=
URL FTP User
=
URL FTP Password
=
URL Directory
=
URL
=
Use URL as default
= no
FTPDefaultInfoFileExtension
=txt
[International]
Language
= U.S. English
Unit
= inches
Keyboard Layout
= U.S. English
[Address Book]
Note: Be sure to configure the AXIS 7100 with a
valid SMTP reply address.
Specifies the default subject that will appear on
the Subject line of the e-mail containing the
scanned image.
Specifies the option to send a Bcc (blind carbon
copy).
Specifies the e-mail address of the recipient of
the Bcc (blind carbon copy).
Specifies the IP address of the FTP server on
which the scanned image will be stored.
Specifies the user name for logging on the FTP
server.
Specifies the password for logging on to the
FTP server
Specifies the directory on the FTP server where
the image will be stored.
Specifies an external URL to the specified
directory, e.g.
http://www.company.com/documents/filename
or ftp://ftp.company.com/documents/filename.
This could be necessary when scanning to
destinations outside your own company. If left
blank, the URL will be constructed from the
other fields.
Specifies the option to send the image as a
hyperlink to the location where the image is
stored.
Specifies the option to define the extension of
the Information File.
Specifies the language used on the AXIS 7100
message display. Valid values are U.S. English,
German, French, Italian, Swedish and Spanish.
Specifies the measurement units used, e.g. for
paper sizes. Valid values are inches or cm.
Specifies the keyboard layout that is compatible
with your external keyboard.
AXIS 7100 User’s Manual
The Parameter List
Parameter name
Value
Description
Retrieve Method
= None
FTP Server
=
FTP User
=
FTP Password
=
FTP Directory
=
FTP File Name
LDAP Server
=
=
LDAP Port
LDAP User
=389
=
LDAP Password
=
LDAP Search Base
=
LDAP Name Field
= cn
LDAP Mail Field
= mail
LDAP Filter
=
LDAP Reload Interval
=12
Specifies from where the address book will be
retrieved. None, FTP or LDAP.
Specifies the name or IP address of the FTP
server.
Specifies the user name for logging on to the
FTP server. If left blank, the FTPDefaultUser will
be used.
Specifies the password for logging on to the
FTP server. If left blank, the
FTPDefaultPassword will be used.
Specifies the directory on the FTP server where
the file is stored.
Specifies the name of the file on the FTP server.
Specifies the name or IP address of the LDAP
server.
Specifies the number of the TCP/IP port.
Specify the name for logging on to the LDAP
server, e.g.cn=name, o=company name,
c=country code. If left blank no authorization
will be attempted.
Specify the password for logging on to the
LDAP server. If the User Field is left blank, this
setting will be ignored.
Specifies where to begin the search, e.g.
o=companyname, c=countrycode
Specifies the name of the field that contains the
destination name.
Specifies the name of the field that contains the
e-mail address.
Specifies an LDAP filter to reduce the length of
the destination list, e.g. (givenName=*)
Specifies how often the external addresses are
to be reloaded. The value is specified in whole
hours and the default value is 12 hours.
[SMTP]
Primary Mail Server
=mail
Specifies the name or IP address of the SMTP
mail server that provides the e-mail facilities for
the AXIS 7100. If you are using DNS, specify the
name. Otherwise, specify the IP address. E.g.
mail or mail.domain.com or 192.36.253.80.
163
164
The Parameter List
AXIS 7100 User’s Manual
Parameter name
Value
Description
Secondary Mail Server
=
Connection Timeout
SMTP Port
[Authentication]
Authentication Method
=10
=25
Specifies the name or IP address of the
secondary mail server, should the primary be
unavailable or disconnected.
Specifies time before connection time-out.
Specifies the SMTP Port number
Authentication TimeOut
No mail fail
=60
=yes
LDAP Server
=
LDAP Port
LDAP Search Base
LDAP Name Field
=389
=o=company name,
c=country code
=cn
LDAP Mail Field
=mail
LDAP User ID Field
=uid
[Meta Data]
Retrieve Method
=None
FTP Server
=myFTPserver.company.com
FTP User
FTP Password
FTP Directory
=anonymous
=******
=metadata4axis7100
FTP File Name
=axis7100.xml
FTP Reload Interval
AllowScanIfDownloadFail
=12
=No
SendMailIfDownloadFail
=yes
=None
Specifies which authentication method is
enabled.
Specifies the time before automatic logout.
If enabled, the user will not be authenticated if
the matching e-mail address is not found.
Specifies the name or IP address of the LDAP
server
Specifies the number of the TCP/IP port
Specifies where to begin the search
Specifies the name of the field that contains the
destination name
Specifies the name of the field that contains the
e-mail address
Specifies the User ID Field that contains the user
ID/user name of the user to be authenticated
Indicates whether the Meta Information
functionality is used or not.
Specifies the name or IP address of the FTP
server that holds the Meta Information file.
Specifies the name used to log on to the server.
Specifies the password used to log on.
The directory where the AXIS 7100 will find the
Meta Information file.
Specifies the file that contains the Meta
Information.
Specifies the reload interval in hours.
Specifies if the user is allowed to scan despite
failing to retrieve the XML DD file from the FTP
server.
Specifies if the box is to send an e-mail to the
Administrator if it fails to retrieve the XML DD
file. The e-mail address is specified in Network
Settings | SMTP | Reply Address
AXIS 7100 User’s Manual
Parameter name
[Printing]
PrintingEnabled
LPDEnabled
RevtelEnabled
[Destinations]
Clear List First
Destinations
The Parameter List
Value
Description
=yes
=yes
=yes
Specifies the printing parameters.
Specifies if printing is enabled
Specifies if printing over LPD is enabled
Specifies if printing over Raw TCP is enabled
Specifies the available destinations.
=no
=x
Destination0
[Destination-name(FTP)]
Description
= Destination name
Transfer method
=Scan-to-file (FTP)
Destination
Profile
Server
=Directory
=Text
=ftp.axis.se
User
Password
File name
Index file
=name
=*****
=FTPImage
=no
[Destination-name(URL)]
Description
=name(URL)
Transfer method
Destination
[Destination-printer]
Description
Transfer method
Destination
=Descriptive name
Specifies the number of destinations defined in
the AXIS 7100.
Specifies the name of the destination
Specifies the name of the file destination. This is
the name that will appear in the destination list
on the AXIS 7100 message display.
Specifies how the scanned image should be
sent; that is by which protocol.
Defines the directory for Scan-to-file (FTP)
Specifies the name or IP address of the FTP
server that holds the file.
Specifies the name used to log on to the server.
Specifies the password used to log on.
Specifies the name of the file.
Defines the option to store the sequence
number on the FTP server.
Specifies the name of the destination (URL).
This is the name that will appear in the
destination list on the AXIS 7100 message
display.
=Scan-to-URL (SMTP & FTP) Specifies how the scanned image should be
sent; that is by which protocol.
[email protected]
Defines the E-mail address of the e-mail
recipient (SMTP).
=printer
=Scan-to-print (LPD)
Scan-to-print (TCP)
Scan-to-RightFax (LPD)
=Printer Queue
Specifies the name of the printer. This is the
name that will appear in the destination list on
the AXIS 7100 message display.
Specifies how the scanned image should be
sent; that is by which protocol.
Defines the print queue for scan to print (LPD).
165
166
The Parameter List
AXIS 7100 User’s Manual
Parameter name
Value
Information level
= Nothing, Basic or Complete Specifies the amount of image information to
be included with the image. Prints Date, time
information to the destination printer if the
value is set to something other than None. See
also [Clients] InformationLevel.
=IP address or DNS name
Dependent on the destination type, specifies the
IP address of the FTP server on which the
scanned image will be stored, or the printer
destination.
=75, 100, 150, 200, 300,
Specifies the resolution settings supported by
600, 1200
the destination printer.
Server
Resolutions
Description
Paper sizes
=Executive, Letter, Legal,
Ledger, A4, A3
Specifies the different paper sizes supported by
the destination printer.
Duplex supported
=Yes/No
Duplex selection
=SingleSided, DoubleSided
AsScanned
Defines if the printer destination has duplex
support; i.e. if it is capable of printing on both
sides of the paper
Defines the printing format for the printer
destination
LPD Mode
=SingleDataFile,
SplitSourceFile,
BufferDataFiles,
MultipleDataFiles
Specifies the LPD mode for the printer
destination
[Destination-name(SMTP)]
Description
=Descriptive name
Transfer method
=Scan-to-e-mail (SMTP)
Destination
[email protected]
Specifies the name of the e-mail destination.
This is the name that will appear in the
destination list on the AXIS 7100 message
display.
Specifies how the scanned image should be
sent; i.e. by which protocol. Also used for
RightFax destinations
Defines the E-mail address of the e-mail
recipient (SMTP).
Profile
[Subjects]
Clear List First
Subjects:
Subject0:
[Subject-A Scanned Image]
Description
=Text
[Profiles]
=no
=1
Subject-A Scanned Image
A Scanned Image
Specifies the text that will be used in the subject
field when scanning to e-mail destinations.
AXIS 7100 User’s Manual
The Parameter List
Parameter name
Value
Clear List first
Profiles
Profile0
Profile1
Profile2
Profile3
Profile4
[Profile-Text]
parameters.
Description
= no
=5
= Profile-Text
= Profile-Text high
= Profile-Text low
= Profile-Text PDF
= Profile-Text/Photo
Note that the parameters in this list apply to all profiles
X-Resolution
= 300
Y-Resolution
= 300
Data type
= Black & White
Paper size
Paper orientation
Image compression
File format
Double-sided
Document mode
=Executive, Letter, Legal,
Ledger, A4, A3
= Portrait
=CCITT G.4
=TIFF
= Off
=Multi page
Intensity
Contrast
= 50
= 50
[Paper sizes]
Clear List first
PaperSizes
= no
= 14
PaperSize0
PaperSize1
PaperSize2
= PaperSize-A3
= PaperSize-A4
=PaperSize-A5
=Text
Description
Specifies the name of the profile. This is the
name that will appear on the AXIS 7100
message display.
Specifies the resolution to be used for scanning
in dots per inch (dpi). Higher-resolution settings
produce higher-quality scanning. However, your
documents might take longer to scan. The
resolutions available depend the capabilities of
your digital copier/scanner.
Specifies the resolution to be used for scanning
in dots per inch (dpi).
Specifies data type depending on the material
you are scanning and the imaging application
you intend to use.
Specifies the default paper size for this profile.
Specifies how the document should be scanned.
Specifies the image compression
Specifies the file format.
Not used
Specifies if several separate images can be
scanned and sent in the same file.
Specifies the level of intensity.
Specifies the level of contrast. The contrast is
the tonal gradation between the highlights,
midtones and shadows in an image.
Specifies the number of paper sizes defined in
the AXIS 7100.
167
168
The Parameter List
AXIS 7100 User’s Manual
Parameter name
Value
PaperSize3
PaperSize4
PaperSize5
PaperSize6
PaperSize7
PaperSize8
PaperSize9
PaperSize10
PaperSize11
PaperSize12
PaperSize13
[PaperSize-A3]
parameters.
Description
= PaperSize-B4
= PaperSize-B4(JIS)
= PaperSize-B5
= PaperSize-B5(JIS)
= PaperSize-Business Card
= PaperSize-Executive
= PaperSize-Ledger
= PaperSize-Legal
= PaperSize-Letter
= PaperSize-Photo 3.5”x 5”
= PaperSize-Photo 4”x 6”
Note that the parameters in this list apply to all paper sizes
Width
Length
PDF Rotation
=11.69 inches
=16.54 inches
=No
=A3
Description
Specifies the name of the paper size. This is the
name that will appear on the AXIS 7100
message display.
Specifies the width of the paper.
Specifies the length of the paper.
Enables/Disables PDF rotation
AXIS 7100 User’s Manual
Appendix E
Updating the Software
Updating the Software
The system software for your AXIS 7100 is stored in a resident
flash memory chip that, like ordinary ROM memory, keeps its
contents even when the power is turned off. Flash memory is
unique because its contents can be erased and re-written.
This means that new system software can be easily loaded into
your AXIS 7100 over the network using FTP as soon as it becomes
available. Instructions on how to update the system software are
provided within this section.
Obtaining the Updated System Software
Your Dealer
Axis Web Site
Updating the
System Software
Contact your dealer to check if there have been any recent
updates of the software. You should have your present version
numbers ready to compare against the latest software updates
from Axis.
Check the Axis web site at http://www.axis.com where you can
download the latest versions of the software.
Before you begin:
To upgrade over the network you will need the following:
• The file with the new AXIS 7100 software, where the name file name
is in the form product-version.bin, i.e. 7100_1_00.bin for software
release 1.00.
• A computer on the network with TCP/IP and FTP.
• It is recommended that you make a backup copy of your current
config.ini file before updating.
169
170
Updating the Software
AXIS 7100 User’s Manual
Follow these steps to upgrade the AXIS 7100 software:
1. Log in to the AXIS 7100 with the command ftp <Internet
address> where <Internet address> is the name or Internet
address assigned to the AXIS 7100.
2. You will be prompted for user id and password. Use the user
id root which has the default password pass.
3. Issue the command bin to change to binary transfer mode.
4. Issue the command put <software name> FLASH where
<software name> is the name of the new software, e.g.
7100_1_00.bin.
5. During the flash load, the AXIS 7100 LCD will display the
message “Updating server” and a progress bar. Wait for the
flash load to finish. This normally takes 1 to 4 minutes. The
unit will then automatically restart with the new AXIS 7100
software.
6. Log out using the command quit, bye or exit depending on
your FTP version.
Caution
Be careful not to interrupt the upgrade process. If the upgrade is interrupted, try again. If this fails,
the AXIS 7100 may have to be re-initialized by your dealer.
Note:
If you are using a window-based FTP client application such as Ws_ftp or
Fetch, you must rename the new file <software file> to FLASH
before downloading.
AXIS 7100 User’s Manual
Appendix F
Supported Systems
Technical Specifications
Technical Specifications
Any system supporting TCP/IP, LPD (Line Printer Daemon),
HTTP (Hypertext Transfer Protocol) and optionally FTP (File
Transfer Protocol) and SMTP (Simple Mail Transfer Protocol)
Supported
Web Browsers
•
•
•
Netscape Navigator 4.0 or higher
Microsoft Internet Explorer 4.0 or higher
HTTP 1.0+ and HTML 3.0+ compatible web browsers
Supported Mail
Servers
•
•
•
•
•
Microsoft Exchange
Sendmail
Lotus Notes
Novell Groupwise
Compatible SMTP mail servers
Supported Fax Server
•
RightFax 7.0 or higher
Supported LDAP
Server Software
•
•
•
•
Microsoft Exchange 5.x, 2000
Lotus cc:Mail
Novell GroupWise
OpenLDAP
Supported Protocols
Supported Printers
HTTP, IP, FTP, SMTP, TCP, LPD, Raw TCP/IP SLP, ARP, RARP,
BOOTP, DHCP, ICMP, SNMP, LDAP, WINS, UDP, NTP, CFP
PCL printers
TCP/IP printing over Raw TCP or LPD supported.
171
172
Technical Specifications
Supported Devices
AXIS 7100 User’s Manual
The AXIS 7100 automatically senses the model of the attached
WORKiO, without user intervention.
•
•
•
•
WORKiO DP-3000E
WORKiO DP-2500E
WORKiO DP-2500P
WORKiO DP-2000P
•
•
•
•
WORKiO DP-150FP
WORKiO DP-150FX
WORKiO DP-150P
WORKiO DP-150PA
For the most recent list of supported WORKiO copiers, check the
AXIS 7100 support pages at http://www.axis.com or contact
your local dealer.
Supported Image
Formats
•
•
•
Control Panel
•
•
•
•
Installation
Network Management
Adobe PDF 1.2: the created PDF file contains uncompressed or
compressed bit images in CCITT G.3/G.4
TIFF 6.0: CCITT G.3 and G.4 for bilevel images: both single- and
multi-page TIFF are supported
PCL 5, TIFF 4.0
Alphanumeric LCD display with 2 rows / 16 characters, sidescrollable (40 characters) English, German, French, Spanish,
Italian and Swedish text available.
4 LED indicators signaling Status, Busy, Network, and Power.
7 keys for Menu, Up, Down, Select, Send, Add, and Cancel.
Menu for selecting Destination, Profile, Paper size, Subjects,
Number of Copies, Sender, Meta Information and File name.
Multiple selection of destinations possible. Error log.
IP address set from control panel, PC compatible keyboard (not
supplied as standard), or using ARP, RARP, BOOTP or DHCP.
Destinations established via Web browser, PC compatible
keyboard, or downloaded via LDAP or from an FTP server.
Configuration and Administration via a Web browser.
SNMP MIB-II.
AXIS 7100 User’s Manual
Technical Specifications
Security
Administrator’s login for configuration and administration. The
administrator specifies which destinations should be accessible
and whether users are allowed to add temporary e-mail
destinations.
Possibilty to set up a default destination (and optionally no
other) for fixed application use.
LDAP authentication supported.
Windows NT4 authentication supported.
Number of
Destinations
Depending on the length of the addresses, the Administrator can
define approximately 1500 destinations within the AXIS 7100;
the maximum number is generally limited by the User Storage
Area. External destinations are limited only by available RAM
memory.
Software Updates
Hardware
Logical Connection
Network Connectors
Parallel Port
Connector
Power supply
Flash memory allows central and remote updating of the AXIS
7100 software over the network using FTP.
CPU: 32 bit RISC Controller (ETRAX 100LX)
Flash memory: 2 MB
RAM: 16 MB
User Storage: 64 kB
IEEE 802.2, IEEE 802.3, SNAP and Ethernet II frame types
simultaneously
10baseT (twisted pair) and 100baseTX for Fast Ethernet.
25-pin DSUB parallel port, high-speed IEEE 1284 compliant,
bi-directional parallel cable
12V DC (13.6VA), via external power unit (AXIS PS-E)
173
174
Technical Specifications
Dimensions
Weight
Environmental
Approvals
AXIS 7100 User’s Manual
Height: 1.7 in (4.3 cm)
Width: 5.9 in (14.9 cm)
Depth: 8.8 in (22.4 cm)
1.5 lbs (0.7 kg)
Temperature: 40-105°F (5-40°C)
Humidity: 20-80% RHG, noncondensing
EMC:
FCC Part 15 Subpart B, Class A
VCCI Class B
C-Tick AS/NZS 3548
CE:
EN
EN
EN
EN
55022 ClassB 1998
55024 1998
61000-3-2 1995
61000-3-3 1995
Safety:
EN 60950, UL, CSA
Warranty
1 year
All specifications are subject to change without prior notice.
AXIS 7100 User’s Manual
Appendix G
Glossary
Glossary
ADF
Automatic Document Feeder
AIX
Advanced Interactive eXecutive. A version of the UNIX
operating system from IBM that runs on various IBM computers
including Mainframe systems
ARP
Address Resolution Protocol. A protocol within TCP/IP networks
that allows a host to find the physical address of a node on the
same network
Bcc
Blind Carbon Copy. Send a copy to the entered Bcc address but
do not indicate to the recipient that you have sent this copy.
BOOTP
Boot Protocol. A TCP/IP protocol, which allows an Internet node
to discover certain startup information such as its IP address
BSD
CCITT G.4
CMIP
DD
DTD
DHCP
Berkeley Software Distribution. The University of California,
Berkeley additions to the UNIX operating system
The most common format for compressed TIFF files. Used for
viewing and archiving of scanned documents
Common Management and Information Protocol
Document Description.
Document Type Definition. A specific definition of the rules and
syntax that the DD (Document Description) file must follow
Dynamic Host Configuration Protocol. A system based on
network interface card addresses, which is used to allocate IP
addresses and other configuration information for networked
systems
175
176
Glossary
AXIS 7100 User’s Manual
DNS
Domain Name System. A hierarchical naming system that uses a
combination of text names separated by periods to create a
unique name
FTP
File Transfer Protocol. The TCP/IP protocol used for transferring
files between computers on a network
HTML
HTTP
IP
LCD
LDAP
Hypertext Markup Language. A standard hypertext language
used to create web pages and other hypertext documents
Hypertext Transfer Protocol. The TCP/IP protocol for web based
communication, e.g. Web browsers
Internet Protocol. The TCP/IP session-layer protocol that
regulates packet forwarding by tracking IP addresses, routing
outgoing messages, and recognizing incoming messages
Liquid Crystal Display
Lightweight Directory Access Protocol. A protocol for accessing
on-line directory services
LPD
Line Printer Daemon. A protocol for network printing
LED
Light Emitting Diode
Meta
An underlying definition or description
MIB
Management Information Base. A database of network
configuration information used by SNMP and CMIP to monitor
or change network settings
Mini-DIN
PS/2
Connector used on a PC to connect a keyboard. If your keyboard
has a DIN connector, a DIN to Mini-Din adapter can be used
MIME
Multipurpose Internet Mail Extension. Enables transmission of
e-mail containing non-English characters as well as attachments
such as image files
AXIS 7100 User’s Manual
Glossary
NIS
Network Information Services. The security and file-access
databases on UNIX systems, previously known as Yellow Pages
NTP
Network Time Protocol. A protocol to get time from a timeserver
(NTP-server).
OCR
Optical Character Recognition. A technology that converts
scanned documents into editable and searchable text
PDF
Portable Document Format. A format for cross-platform
distribution of electronic documents. Can be viewed by anyone
that has Acrobat Reader from Adobe installed
RARP
Reverse Address Resolution Protocol. A TCP/IP protocol
governing the translation of a Data-Link Control (DLC) address
to an IP address
RISC
Reduced Instruction Set Computer. A processor that recognizes
only a limited number of assembly-language instructions
SMTP
Simple Mail Transfer Protocol. The TCP/IP protocol for
exchanging e-mail
SNMP
Simple Network Management Protocol. A TCP/IP protocol used
to manage and monitor nodes on a network
TCP
Transmission Control Protocol. The connection-oriented,
transport-level protocol used in the TCP/IP suite of protocols
TIFF
Tagged Image File Format. Format for storing bit-mapped
images. Typically used for scanned documents and
uncompressed images
UNIX
URL
A multi-tasking, multi-user operating system originally
developed by AT&T
Uniform Resource Locator. A way of specifying the location of
publicly available information on the Internet
177
178
Glossary
AXIS 7100 User’s Manual
UTC
WINS
XML
YP
Universal Time Coordinated
Windows Internet Name Service
Extensible Markup Language. Describes how to define a
collection of data. Sometimes referred to as meta data
Yellow Pages. The security and file-access databases on UNIX
systems These databases are now known as Network Information
Services
AXIS 7100 User’s Manual
Index
A
ADF 175
Administration tools 37
Advanced menu 145
AIX systems 30
Archiving 106
ARP 23
OS/2 29
UNIX 29
Windows 28
Assigning an IP address 22
Associating image formats 107
Attachments in e-mails 62
Authentication 11, 36, 39, 56, 89, 93
Authentication settings 56
AXIS Product CD 19, 106
Axis WWW Home Page 169
B
Bcc Address 46, 50
BOOTP 23, 31
Busy indicator 141
C
CCIT G.4 78
CCITT G.4 77, 106
Configuration 80
Administration 37
Destinations 60, 63, 66, 68
Paper sizes 78
Profiles 73, 78
Connectors
10baseT 12
keyboard 12
Control panel 14
Counter 82
D
Default router address 24
Default settings 139
Destination settings 60, 63, 66, 68
Destinations 35
DHCP 23, 27
DTD (Document Type Definition) 151
E
E-mail 8, 91
E-mail reply address 46
Error conditions 142
Error log 145
Ethernet 8
External Address Book 53
F
Factory default settings 139
File destinations 62
File formats 77
Fileserver 8
Filter 148
Flash memory 11
Front panel indicators 13, 141
FTP server 134
H
Host Name 32
I
Image formats 77
Image viewers 106
Image/Picture Editing 105
AXIS 7100 User’s Manual
Indicators
Busy 13
Network 13, 21
Power 13
Status 13
IP address 22
ARP 28, 29
BOOTP 31
control panel 23
DHCP 27
RARP 30
PDF Rotation 80
Photo 77, 79
Power indicator 141
Power supply 12, 18
Predefined paper sizes 79
Predefined Profiles 102
Predefined profiles 77
Printers 8
Profile settings 73, 78
Profiles 77, 102
Push button 12, 139
L
R
LDAP 146
LDAP server 171
Log file 145
M
Mail/Print Scan Counter 83
Measurement units 42
Message display 14
Meta Information 8, 108
multipage image files 93
N
net mask 24
Network settings 35
NTP Server 40
O
OCR 106
P
Paper orientation 93
Paper sizes 78, 102
Parallel Port 12
Parameter list 158
PC 8
PC Keyboard 22
PDF 106
RARP 23, 30
Resolution 77
Restoring default settings 139
RightFax 10, 89
RightFax Integration 108
RightFax over LPD 71
S
Scan Counter 83
Scanning parameters 101
Search filters 148
Sending to destinations 87
Sending to e-mail 87
Sending to file 87
Sending to Web browser 88, 103
Send-to-E-mail 87
Server log 145
Server password 37
Service pages 82
setting IP address 22
ARP 28, 29
BOOTP 31
control panel 23
DHCP 27
RARP 30
Setting up destinations 60, 63, 66, 68
Setting up paper sizes 78
AXIS 7100 User’s Manual
Setting up profiles 73, 78
SMB 41
SMTP 87
Specifying scanning parameters 101
Status indicator 141
Subnet mask 24
Support Services 5
Supported scanners 172
T
Temporary e-mail destinations 41, 62
Temporary E-mail Subject 99
Temporary profiles 41
Text profile 77
TIFF 77
Time 40
U
URL for e-mail 62
V
Viewing image files 105
W
WINS 32
Wizard 44
X
XML 108, 151
XML parser 109