Download Bluefish444 CreateHD User manual
Transcript
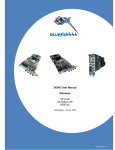
Bluefish444 Windows User Manual for Create|HD Create|3D Create|3D Ultra April 5th, 2011 1. Contents 1. Contents ............................................................................................................................................................... 2 2. Limited Warranty .................................................................................................................................................. 3 3. Introduction ........................................................................................................................................................... 4 Create|HD ................................................................................................................................................................. 6 Create|3D .................................................................................................................................................................. 6 Create|3D Ultra ......................................................................................................................................................... 6 Feature Comparison ................................................................................................................................................. 7 4. Bluefish444‟s Symmetry Application Overview .................................................................................................... 8 Symmetry workflow benefits and advantages .......................................................................................................... 9 Other Features ........................................................................................................................................................ 10 5. Hardware Details ................................................................................................................................................ 10 Minimum System Requirements ............................................................................................................................. 10 Recommended System Hardware .......................................................................................................................... 11 Storage Requirements ............................................................................................................................................ 12 Cable Connections.................................................................................................................................................. 13 6. Installation .......................................................................................................................................................... 14 Prepare your system ............................................................................................................................................... 14 Install 3rd party applications ................................................................................................................................... 14 Install the latest QuickTime player .......................................................................................................................... 14 Bluefish444 card installation – hardware ................................................................................................................ 14 Bluefish444 software installation ............................................................................................................................ 15 New Installations ..................................................................................................................................................... 15 Uninstall Bluefish4444 Software. ............................................................................................................................ 16 7. Feature Application............................................................................................................................................. 16 Bluefish444 Feature Application ............................................................................................................................. 16 8. Other 3rd Party Software .................................................................................................................................... 18 Adobe Creative Suite 5 - Premiere Pro CS5 (Application Software not included) ................................................. 18 Setting Up Premiere Pro CS5 ................................................................................................................................. 19 Capturing with Bluefish444 ..................................................................................................................................... 22 Playback Settings ................................................................................................................................................... 23 Export to Tape ........................................................................................................................................................ 23 Importing Footage ................................................................................................................................................... 25 Adobe After Effects CS5 (Application Software not included) ................................................................................ 26 Adobe SoundBooth CS5 (Application Software not included) ................................................................................ 29 Photoshop CS4 (Application Software not included) .............................................................................................. 29 Eyeon Fusion (Application Software not included) ................................................................................................. 30 9. Bluefish444 Support ........................................................................................................................................... 32 Bluefish444 support questionnaire ......................................................................................................................... 32 10.Support Resources ............................................................................................................................................ 33 11.Index .................................................................................................................................................................. 34 12.Support Contacts ............................................................................................................................................... 35 Create Range Windows User Manual 2. Limited Warranty Bluefish444 warrants that this product will be free from defects in materials and workmanship for a period of three (3) years for category A products and two (2) years for category B products from the date of purchase. This warranty is provided only to customers who register the Bluefish444 serial number at the place nominated on the Bluefish444 homepage. If a product proves to be defective during the warranty period, Bluefish444, at its option, will either repair the defective product without charge for parts and labor, or will provide a replacement in exchange for the defective product. In order to obtain service under this warranty, the customer must notify Bluefish444 of the defect before the expiration of the warranty period. The customer shall be responsible for packing and shipping the defective product to a designated service centre nominated by Bluefish444 with shipping charges prepaid. The customer will be responsible for shipping charges and duties payable on return of the repaired or replaced product to the customer‟s address. The customer must provide Bluefish444 with details of its nominated international courier company. This warranty shall not apply to any defect, failure or damage caused by improper use or improper or inadequate maintenance and care. Bluefish444 shall not be obligated to furnish service under this warranty a) to repair damage resulting from attempts by personnel other than Bluefish444 authorized resellers to install, repair or service the product, b) to repair damage resulting from improper use or connection to incompatible equipment, c) to repair any damage resulting or malfunction caused by the use of non Bluefish444 parts or supplies, d) to service a product that has been modified or integrated with other products when the effect of such a modification or integration increases the time or difficulty of servicing the product, or e) to repair or service a product that has been integrated and shipped as part of a workstation which may increase the risk of damage caused to the Bluefish444 card within the workstation during transit. This warranty specifically shall not apply to Bluefish444 products purchased second hand This warranty is given by Bluefish444 in lieu of any other warranties, expressed or implied. Bluefish444‟s responsibility to repair or replace defective products is the whole and exclusive remedy provided to the customer for any indirect, special, incidental or consequential damages. Category A: Epoch range Create range SD|Greed& SD|Greed Express SD|Dual Link Pro SD|Lite Pro&SD|Lite Pro Express Iridium AV Pro &Iridium AV Pro Express SD|Single Link Pro & SD|Single Link Pro Express SD|Ingest Pro&SD|Ingest Pro Express. Category B: SD|Fidelity, SD|Prime and SD|Focus 3 Create Range Windows User Manual 3. Introduction Every so often, the application of advanced technology, modern industrial design and manufacturing processes yields a break-through that delivers real advantages over its predecessors. Introducing Bluefish444's Create range of uncompressed HD and 2K capture cards. Bluefish444 I/O solutions deliver the highest standard in capture, playback and broadcast every time. The perfectionist‟s choice in RGB and DI, Bluefish444 delivers superior results for significantly less on all digital post and broadcast demands. Renowned for their robust stability and seamless workflow, Bluefish444 are the card of choice under the bonnet of many of the industry‟s leading OEM DI solutions. Support for the widest range of industry standard formats of any I/O solution from 8-bit YUV to 16-bit RGB. Absolutely No Compromise Bluefsh444‟s Create cards enjoy the pedigree of a proven track record delivering absolutely „No Compromise‟ professional results. Engineered using the highest quality components, Bluefsh444 delivers its superior quality through the power of hardware based parallel processing. Create boasts perfect signal processing delivering pristine image quality in 2K, HD & SD resolutions. Extreme reliability in mission critical environments makes Create the Professionals‟ Choice. Extreme Reliability 1000‟s of customers attest to using our products in „mission critical‟ environments such as digital intermediary post and live broadcast where they‟re running 24/7. 4 Create Range Windows User Manual Create|3D Ultra Features 12/10/8 bit 2K/HD/SD 3G-SDI I/O Dual-link RGB I/O 3D Stereoscopic I/O Video and Key Output HANC Ancillary data & VANC Closed capturing Genlock Bi, Tri and Cross Lock = Bi for HD, Tri for SD Real time hardware overlay for internal keying 3 x 1D LUTs on all SDI Outputs Built-in safe area, safe title and Letterbox generator RGB <=> YUV 12 bit Hardware Color conversion 3:2 Pulldown ISIM (Input Stream Integrity Management) 12 bit video processing throughout signal path for highest quality video RS422 Port 4-lane PCI-Express (8 and 16 lane compatible) 6 channels of AES/EBU I/O (Balanced, XLR) 8 Channels of AES ID3 I/O (Unbalanced, BNC) 16 Channels of embedded audio per SDI I/O 2 analog OUT channels -10dBu (Unbalanced, RCA) OUT Audio sample rate converters 16-bit and 24-bit capture Symmetry software included 3 year warranty Hardware Scaling Module Up, down & cross conversion between 2K/HD/SDresolutions 12 bit scale processing Sinc(x) video interpolation algorithm using 25 X 25 TAPS 1/128th sub pixel accuracy Frame store for frame rate conversion Hardware de-interlacing 3:2 Pulldown DVI/HDMI Preview Module Inbuilt Hardware Scaling Module for Up, Down, Cross Conversion of SD/HD/2K resolutions 2K/HD/SD resolutions previewed as DVI up to 1920 x 1200p 60Hz 4:4:4 2K/HD/SD resolutions previewed as HDMI up to 1920 x 1200p 60Hz 4:2:2 / 4:4:4 & 8 channels of 24bit embedded audio 3 x 1D LUTs for colour calibrating preview and log/linear conversion Supported APIs: DirectShow Filters API Mac OS X QuickTime API Compatible with popular retail applications: Adobe Creative Suite™ (Including Cineform 3D plugins) Autodesk 3D Studio Max™ Apple Final Cut Studio ™ (Including Cineform 3D plugins) Bluefish444 Symmetry™ Assimilate Scratch™ Eyeon Digital Fusion™ 5 Create Range Windows User Manual Create|HD DCC HD/SD 4:2:2 workflows Create|HD is targeted at the uncompressed HD/SD digital content creation workflow. It is ideal for creative artists looking to connect digital VTR‟s, cameras and monitors working in either HD or SD SDI. Create|HD allows for hardware based real-time up, down or cross-conversion during capture or playback. The same hardware based scaler intuitively accelerates real time effects within supported NLE and compositing software. Additionally, dual SDI outputs allow for original and converted signals to be output simultaneously. Create|3D File based digital intermediary 4:4:4 & 4:2:2 3D workflows Create|3D is targeted at the file based workflow of independent film making. Ingested files are edited and previewed from within Adobe Creative Suite and Final Cut Studio as part of an offline workflow. The offline project can then be used to re-conform color corrected material and mastered to SD, HD or 2K resolutions in single link, dual link or 3D stereoscopic output modes. Create|3D has 3 X 1D LUT‟s on all outputs allowing for calibration of the display device and log/linear conversion. Create|3D‟s DVI/HDMI preview output contains a high quality hardware based scaler. This converts the selected input or output to the LCD/Plasma‟s native resolution and frame rate, bypassing the lower quality internal scaler of the LCD/Plasma. This provides for low cost and flexible monitoring within the workflow as a wide range of TFT, Plasma and projectors can be used. Create|3D incorporates the Create|HD feature set and builds upon it by having dual link and 3D stereoscopic output and a high quality DVI/HDMI preview output. Create|3D Ultra For all digital Intermediary dual link 4:4:4 & 3D I/O workflows Bluefsh444 has built its reputation on RGB workflows and Create|3D Ultra brings together our 10 years of expertise in a cost-effective product integrated tightly with Symmetry for windows DI & 3D acquisition, preview and playback software. Create|3D Ultra incorporates the Create|HD and Create|3D feature sets and builds upon them by having a dual link and 3D stereoscopic input. 6 Create Range Windows User Manual Feature Comparison 720x486i Create|HD Video Modes Yes Create|3D Create|3D Ultra Yes Yes Yes Yes Yes Yes Yes Yes Yes Yes Yes Yes Yes Yes Yes Yes Yes Yes* Yes* Yes* Yes* Yes* Yes* No Yes* Yes* Yes Yes Yes No No Yes Yes Yes Yes Yes No Yes Yes Yes Yes Yes Yes Yes Yes Yes Yes Yes Yes Yes No No Yes No Yes @ 59.94 Hz NTSC 720x576i @ 50.00 Hz PAL 1280 x 720p @ 23.976Hz, 24Hz, 50Hz, 59.94Hz, 60Hz 1920x1080i @ 50Hz, 59.94Hz, 60Hz 1920x1080PsF @ 23.976Hz, 24Hz 1920x1080p @ 23.976Hz, 24Hz, 25Hz, 29.97Hz,30Hz 2048X1080p @ 23.976Hz, 24Hz 2048X1080i @ 47.96Hz, 48Hz 2048x1556PsF @ 14.98Hz, 15Hz Digital Video Input Signal Formats 3G-SDI capable Yes 12 bit Input & internal processing Yes 1 x 2K/HD/SD 4:2:2 SDI Yes 2 x 2K/HD/SD 4:2:2 SDI No 2 x 2K/HD/SD 4:4:4, 4:4:4:4 No (RGBA/YUVA) HD/SD 4:2:2:4 Video and Key No (YUVA) Digital Video Output Signal Formats 3G-SDI capable Yes 12 bit Output & internal processing Yes 2 x 2K/HD/SD 4:2:2 SDI Yes 2 x 2K/HD/SD 4:4:4, 4:4:4:4 No (RGBA/YUVA) HD/SD 4:2:2:4 Video and Key (YUVA) Hardware Scaling Module DVI/HDMI Preview (including hardware scaling) * Not supported by Adobe CS5 7 Create Range Windows User Manual 4. Bluefish444‟s Symmetry Application Overview Symmetry is Bluefish444's integrated 3D & DI acquisition, review and playback software for Windows OS and is bundled FREE with all I/O cards in the Epoch and Create ranges. The perfect balance between features and usability, Symmetry captures Cineon, DPX, Targa, QuickTime and AVI files allowing creative professionals to use footage on multiple applications across multiple platforms; eliminating the acute pain of re-rendering between tools. Symmetry dispenses with any loss issues associated with color conversion by giving the user the choice of which color space best suits their needs from 8-bit YUV up to 16-bit RGB. With complete frame accurate VTR control, Symmetry frees up the creative process to design and create rather than waste countless hours managing complex NLE systems just to get media in and out of a workstation. Error! Reference source not found. Equally comfortable as a digital intermediary or as a review and payout solution for digital content creators, compositors and editors; Symmetry‟s interface, to quote one customer is “monkey simple” with the capabilities of much more expensive systems. Do away with third party converters forever and utilize Symmetry as a standards converter for SDI between 2K/HD/SD and preview SDI as DVI/HDMI. Please refer to Symmetry manual for detail information, instructions and features at: http://www.bluefish444.com/support/downloads/docs_windows.asp 8 Create Range Windows User Manual Symmetry workflow benefits and advantages Desktop and SDI/DVI/HDMI preview of capture and playback. Batch capture, EDL capture, playback and playlist master to tape from/to various SDI devices such as HD VTR‟s, SDI equipped cameras, film scanners and dual link 4:4:4 devices. Capture to the highest image quality of 10-bit RGB sequential DPX and Cineon file formats to preserve all the data and metadata on file. Support for SMPTE and CGR capture and playback. Seamless integration with the leading Digital Intermediate solutions through the common use of 10-bit RGB DPX and Cineon file formats. Choose between multiple video file formats to capture, preview and playback such as DPX, Cineon, QuickTime, TARGA, AVI, and R3D(Native Red Footage). Support for 16 channels of embedded audio and 5.1 / 7.1 surround sound monitoring. Frame accurate RS422 control from/to the industry‟s leading VTR‟s, single link and dual link devices. Capture and playback DLL API available for developers. Software/hardware engineering integration from the same manufacturer providing reliability and stability. Capture and playback dual 3D SDI to any file format supported by Symmetry as left & right eye, side by side, top and bottom and others. Continued support and development in evolving formats including 3G Video modes e.g. 1080/50/59.94/60P and 2k 10bit 4:4:4. Avoid third party converters and utilise Symmetry presets for SDI standards conversion between 2K/HD/SD and preview SDI as DVI/HDMI. Supported File Formats 10 bit YUV QuickTime v210 8 bit YUV QuickTime 2VUY 10 bit RGB Cineon Sequential file format with options for: SMPTE/CGR 10 bit RGB DPX Sequential file format with options for: SMPTE/CGR 8 bit RGBA TARGA Sequential file format with options for: SMPTE/CGR 8 bit RGB TARGA Sequential file format with options for: SMPTE/CGR 8 bit YUV AVI R3D (Native Red Footage) - Playback New file formats added via software upgrades Supported Audio Features Uncompressed PCM WAV audio format in 16-bits or 24-bits at 48Khz sampling rate Embed audio into video file (for supported file formats) Single WAV file Multiple stereo WAV file Multiple mono WAV file Up to 16 embedded audio channels in video file (QuickTime & AVI) Broadcast wave info (BWF) option Support for RF64 5.1 & 7.1 surround sound monitoring of AES/EBU and AES ID3 Audio level monitoring 9 Create Range Windows User Manual Other Features Desktop and SDI/DVI/HDMI preview of playback and capture of all supported video modes, For supported HDMI/DVI monitoring solutions refer to Support Resources P51 Support for single link and dual link video modes SDI/DVI/HDMI preview of hardware signal format conversion between 2K/HD/SD including 3:2 pulldown Single frame grab capture Assemble and insert to tape Playlist and clip assembly for preview and mastering to tape EDL CMX 3600 support Media bin and loop playback Trim clip mode Audio and Video linking and unlink ability to create Sym files Keyboard shortcuts Save and load projects in XML format for versatile 3rd party application support and project archiving Drop frame error reporting on capture and playback reporting Restart capture when drop-frame occurs Built in system bench marking and logging feature Preview DPX files as logarithmic or linear 4:3 and 16:9 preview for SD widescreen footage Pre create option to avoid drop frame during long capture 1D LUT SDI/DVI/DHMI preview Command line interface for 3rd party developers 5. Hardware Details Minimum System Requirements The following system requirements are for capturing, playback and export/master to tape using Symmetry. Sequential file formats (Targa, DPX and Cineon) are far more intensive than clip based formats (AVI & QuickTime) due to the need for the disk array to read and write files at a rapid rate. Fragmentation is a common side effect and most apparent cause of performance regardless of free space available especially for sequential file formats. This issue can be resolved using Symmetry Pre Create Files option from the General Settings. Please ensure your storage solution is certified to support sequential file format in HD and 2K resolutions. For further information and an updated list of tested storage solutions go to the Bluefish444 website at: http://www.bluefish444.com/support/compatibility/hardware/storage.html 10 Create Range Windows User Manual CPU Operating System RAM Chipset Slot Video Storage Controller Device Video Storage Type Intel Dual/Quad Core Xeon Intel Duo Core 2 AMD Opteron 242+ Windows XP 32 bit SP2 QuickTime 7.4.5+ 2003 Server Direct X 9.0C Windows Vista 64-bit Windows 7 64-bit 2GB or more for compositing applications 7505/7525/5000X/5400/5520 series, Core i7, AMD One PCI-e; 4-Lane; Full-length (8 & 16 lane are compatible as well) Refer to the Storage Bandwidth Guide, use controllers supporting these bandwidths and above. e.g. SAS/SCSI-U320 Refer to the Storage Bandwidth Guide, use controllers supporting these bandwidths and above. e.g. SCSI to SCSI/SATA/SAS, FC to SATA* RAID 0 Recommended System Hardware The requirements below are given as a guide, performance vary for each system configuration. It is recommended to use certified and tested hardware configuration which available at: http://www.bluefish444.com/support/compatibility/hardware/ Card Slot Type Chipset System Memory Direct X QuickTime OS CPU Create range 4 lane PCI-e (8 and 16 lane are compatible as well) 7505/7525/5000X/5400/5520 series, Core i7, AMD 200+ HP XW9300, HP XW 8200, HP XW 8400 ( Dual Core), HP 8600, HP Z800, Apple MacPro. Additional self certified system integrators from: Globalstor, 1 Beyond, Boxx 2GB minimum ( Application dependant) Direct X 9C 7.4.5 or above Windows XP SP2 32-bit, server 2003, Vista 64-bit & Windows 7 64-bit Intel Dual/Quad Core Xeon Intel Duo Core 2 AMD Opteron 242+ 11 Create Range Windows User Manual Storage Requirements The Create product range is primarily an uncompressed capture and playback solution support QuickTime, AVI and sequential file format for digitizing and playback, providing an unprecedented level of quality on the Windows, Linux and Apple Mac OS systems. We do not recommend a storage solution that is using the motherboard onboard SATA/SAS controller (such as LSI Logic RAID controller), unless the device is a Bluefish44 certified solution. Storage Bandwidth and Capacity Guide W x H x Pixel Byte Size x Frame rate/1024² = MB/sec 1280 X 720P @ 59.94(29.97fps) 1920 X 1080 @ 50 (25fps) 1920 X 1080 @ 59.94(29.97fps) 1920 X 1080 @ 60 (30fps) 1920 X 1080 @ 25p 1920 X 1080 @ 29.97p 1920 X 1080 @ 30p 2048 X 1080P @ 24p 2048 X 1556 @ 24p HSDL @15p RGB(10) (40/10) MB/sec (frame size) 210.72 (3.51) 197.75 (7.9) 237.30 (7.9) 248.83 (7.9) 207.36 (7.9) 248.58 (7.9) 248.83 (7.9) 202.5 (8.43) 291.7 (12.15) 218.8 (12.15) RGBA(8) (40/10) MB/sec (frame size) 210.72 (3.51) 197.75 (7.9) 237.30 (7.9) 248.83 (7.9) 207.36 (7.9) 248.58 (7.9) 248.83 (7.9) 202.5 (8.43) 291.7 (12.15) 218.8 (12.15) RGB (8) (40/13) MB/sec (frame size) 162.09 (2.7) 155.52 (6.08) 186.44 (6.08) 186.63 (6.08) 155.52 (6.08) 186.44 (6.08) 186.63 (6.08) 155.7 (6.49) 194.5 (9.35) 145.8 (9.35) V210 (40/15) MB/sec (frame size) 149.16 (2.34) 132.58 (5.27) 138.24 (5.27) 165.73 (5.27) 165.89 (5.27) 138.24 (5.27) 165.73 (5.27) 165.89 (5.27) 135.0 (5.62) 194.4 (8.10) 2VUY (8) YUVS (8) MB/sec (frame size) 52.68 101.25 118.54 118.66 98.88 118.54 118.65 101.25 145.88 91.18 Note: Performance of systems may vary and is dependent of computer system components, storage configurations and work environments, Results and requirements found in this guide will be subject to change without notice. 12 Create Range Windows User Manual Cable Connections Optional HDMI/DVI Preview Dual & Single Link 4:4:4 HD SD I/O SDI Cameras MMCX to BNC Cable Beta cam SP SDI „A‟ OUTPUT SDI „B‟ OUTPUT SDI „A‟ INPUT SDI „B‟ INPUT* Break-out Cable Break-out Cable SDI Broadcast Monitor Analog /SDI I/O DIG AUDIO IN 1/2 DIG AUDIO IN 3/4 DIG AUDIO IN 5/6 DIG AUDIO IN 7/8 DIG AUDIO OUT 1/2 DIG AUDIO OUT 3/4 DIG AUDIO OUT 5/6 DIG AUDIO OUT 7/8 GENLOCK Analog Audio L Out Digital 5.1 Surround Sound RS 422 Analog Audio R Out Digital 7.1 Surround Sound 13 Create Range Windows User Manual 6. Installation The installation steps will include: Prepare your system. Install 3rd party applications. Install QuickTime version 7.4.5 or above Bluefish444 card installation - hardware Bluefish444 software installation 3rd party software setup (such as Adobe CS5 ) Prepare your system Ensure you have installed the latest BIOS, operating system, OS updates and drivers for your system. Please refer to the certified hardware guide section or the readme document for more information. http://www.bluefish444.com/support/compatibility/hardware/ Install 3rd party applications Supported 3rd party applications must be pre-install before running Bluefish444 installer. Supported applications installed after Bluefish444 software installation, will require re-installing Bluefish444 installer again. Install the latest QuickTime player Download and install the latest QuickTime installer available at the following site. http://www.apple.com/quicktime/download/ Bluefish444 card installation – hardware Place your system in an easily accessible place that has sufficient lighting. It is not recommend inserting the card in an awkward position that will increase the chances of a poorly contacted or incorrectly inserted card. Ensure your hands are clean and free of dirt and fluid. Make sure you are earthed and discharge any static build up before handling the Bluefish444 by touching the metal frame of the PC case. Do not touch the components on the PCB and do not touch the PCI slot mating edge. Remove your systems protective case. Remove the power cable from your system (!!!) Identify a free PCI-E slot (check your hardware configuration or contact your hardware supplier) Hold the card by the top of the PCI shield and at the top of the PCB at the opposite end of the PCI shield (this will reduce any chance of damage to the bluefish444 card circuitry). Insert the card into the correctly chosen slot by firmly pressing down on the metal PCI shield and the edge of the PCB. Secure the card with a screw or PCI clip (depending on the chassis). Replace the system chassis cover and connect the power to your system. 14 Create Range Windows User Manual Bluefish444 software installation Key points to remember when to run the Bluefish444 installer: You must have Administrator privileges. Always uninstall any previous installer before running the installation program. Always shut down your system, after installing the drivers, do not do a soft restart. Always run the installer if you change cards, even if it is the same model, as there might be different firmware changes. Always read the latest release notes Always install 3rd party software before installing Bluefish444 software New Installations Windows operating systems come in many forms (XP, Vista & 7). This installation procedure might include dialog-boxes that does not show on your OS or you might encounter dialog-boxes not mention in this document (User Account Control dialog in Win 7) The following steps are for new installation. 1. With the Bluefish44 card physically installed, turn on your system. 2. When Windows loads, you may be presented with “New Hardware Found“ dialog box. Cancel and close this dialog box. 3. Run the latest Bluefish444 installer. 4. Follow the installer on-screen steps (please ensure you read the license agreement before agreeing to it. If you do not agree to the license agreement installation will not continue). 5. In Windows XP, a Logo Certification dialog-box will come up, select Continue Anyway. 6. Select or de-select installing plug-ins to installed applications 7. Confirm applying of firmware upgrade 8. When installation finished, shut-down your system. Then boot up again. This will install the Bluefish444 Symmetry, drivers, update the firmware and install Bluefish444 Feature App and Symmetry for operating the card. To verify installation, start Bluefish444 Feature App and check the Card Information section is correct. Also, Bluefish444 card should come up in Device Manager under Sound, Video & game control. 15 Create Range Windows User Manual Uninstall Bluefish4444 Software. 1 Make sure you have closed all applications. 2 In the Windows Control Panel, go to “Add or Remove Programs” (XP) or “Uninstall or change program” (Win7) 3 Select Bluefish444 installer. Click Uninstall 7. Feature Application Bluefish444 Feature Application Bluefish444 Feature Application (or “Feature App“) is Bluefish444 control interface that runs independently to any applications using the card. It provides hardware monitoring and diagnostic tool such as: temperature, video I/O options and audio features that may not be controlled by other supported 3rd party applications. The Feature App will have different feature and tabs made available depending on the installed Bluefish444 hardware, Main Tab Card Information Section Provides general information about the card installed such as: card name pixel format firmware version Input & Output Video Mode temperature fan speed Pixel Format referred to the frame buffer mode or memory format the hardware is currently outputting, which is depending on the application in use. You can update the information by clicking refresh. Some of the pixel formats supported are: Pixel Format ARGB ARGB_PC CINEON/DPX V210 2VUY YUVA Color Space BGR+A RGB+A RGB YUV YUV YUV Link 4:4:4:4 4:4:4:4 4:4:4 4:2:2 4:2:2 4:2:2 Bit Depth 8 bit 8 bit 10 bit 10 bit 8 bit 8 bit 16 Create Range Windows User Manual Input Signal Type indicates the current signal the card is receiving on the SDI Input source from the deck or other signal source. Output Video Mode indicates the current video mode the card is outputting. Output Video Modeis controlled by the application (e.g. Adobe Premiere Pro, Symmetry, etc) Video Output Control This section gives you direct control of the output signal of your Bluefish444 card. Altering these settings will allow you to switch between outputting two video streams on both Outputs (SDI A & SDI B) or outputting video on SDI A and outputting key/alpha on SDI B Timing Adjust Reference Video Mode displays the input type that Bluefish444 card is detecting on the reference source. Reference Source allows you to select the reference source as either: Genlock BNC, SDI link A, SDI link B or Software. Horizontal adjusts the relative horizontal timing between the Genlock signal and the cards output signals. Vertical adjusts the relative vertical timing between the Genlock signal and the cards output signals. Set button commits any changes. Letter Box - Adjust the image matte (black bars) above and below the image. Video Input Source - For selecting the video input port (SDI A or B) Advanced Blanking control - More accurate and fully customize letter box settings. (When available) Misc Functions - Safe Picture and Safe Title are for displaying the „safe area‟ of the output signal. Audio Tab Default Audio Input Source allows you to select the audio input. Available options are: AES (digital); Analog; SDI A or SDI B. Digital Audio Analog Audio Routing Provide the option to monitor specific digital AES audio channel on analog speakers. Embedded Audio Output Setting Embedded audio channels are grouped together to be output on SDI A/B. Select which embedded audio group to be output. 17 Create Range Windows User Manual 8. Other 3rd Party Software Adobe Creative Suite 5 - Premiere Pro CS5 (Application Software not included) Adobe and Bluefish444 continue to work closely together to synergies between Adobe‟s software and Bluefish444 unique hardware capabilities. Bluefish444 adds support to Adobe Premiere Pro CS5 with real-time capture and playback of multiple file formats, resolutions, pixel depth rates and various color-spaces as well as the ability to playback any supported file format that can be imported by Premiere Pro CS5 such as MOV, R3D, AVI, MXF, FLV, and F4V etc. (some codecs must be installed into the operating system and work as a component inside the QuickTime or AVI formats). The real-time playback is controlled by system configuration and can enhance the effectiveness of playing multiple real-time video tracks, layers, effects and transitions. On 'Print to Tape' function or when highly intensive effects and layers are used, rendering is required in order to maintain the highest quality of a true 10 bit YUV uncompressed work-flow. Bluefish444‟s Create cards support multiple audio channels and the ability for remapping the output channels used for 5.1 surround sound monitoring. Supported Capture File Formats Bluefish444‟s Create cards support capturing to various file format such as: 10 bit YUV QuickTime v210 8 bit YUV QuickTime 2YUV 10 bit RGB Cineon Sequential file format 10 bit RGB DPX Sequential file format 8 bit RGBA TARGA Sequential file format 8 bit RGB TARGA Sequential file format 8 bit YUV AVI Supported Capture Video Modes HD 1920 X 1080i @ 60, 59.94 & 50 (interlaced per second) HD 1920 X 1080p @ 30, 29.97 & 25frames/second HD 1920 X 1080psf @ 24 & 23.98 frames/second HD 1280 X720p @ 23.98, 24, 50, 59.94 & 60 frames/second PAL & NTSC (Widescreen & 4:3) Supported Sequences Presets Uncompressed: Compressed: CineForm 3D: RED R3D: Sony XDCAM: All supported capturing video modes (see above) All supported capturing video modes (see above) Requires CineForm Neo3D R3D 512(quarter Resolution) to 2K (16:9/2:1) HD XDCAM 1080 50i/59.94i(SP) XDCAM EX 1080 50i/59.94i/23P/25P/29.97P(HQ) XDCAM EX 720 23p/29p/50p/59p HD XDCAM 1080 23p/25p/29.97p 18 Create Range Windows User Manual Setting Up Premiere Pro CS5 Creating a New Project Note: Unlike previous Premiere Pro versions, in CS5 the specifications of video mode/format/resolution are done on sequence settings rather than in the project settings. To start a new project: Open Premiere Pro and select to start a New Project Select from the one of Bluefish444 (BF) capture format: (AVI, QuickTime or Sequential) From the Setup button next to the drop-down Menu, select File Type – QuickTime, AVI, DPX, Cineon, TARGA. Audio channels – 2 Channel (Stereo), 6 Channel (5.1 Surround) Timecode Source–RP188 VITC, RS422, RP188 LTC Scale To – Select a Scaling option that is compatible with the input Video Signal. From the ‘Scratch Disks’ tab set the files location for capturing and preview. Note: Scratch Disks - capturing & previewing video and audio files should be set to the highest performance storage device in order to allow high data rate playback of the media. Please refer to the hardware manufacture documents. These settings can be changed later by selecting “Project → Project Settings →Scratch Disk or General” 19 Create Range Windows User Manual Sequence Presets Bluefish444 has the ability to work in various SD and HD settings in a compressed or uncompressed preview format. Selecting the appropriate presets from one of Bluefish444 presets folder let you playback and output SDI signal using Bluefish444 hardware direct from the timeline. Tracks Settings Tab Select the number of video tracks required on the timeline Select the required audio configuration (mono, stereo or 5.1 channels) from the drop down list Select the number of audio tracks required Note: Bluefish444 provides full support for surround sound 5.1 channels at 48 KHz uncompressed audio using AES/Analog/SDI embedded. When using any of the Bluefish444 presets, audio is played through the Bluefish444 hardware only. 20 Create Range Windows User Manual Premiere Pro CS5 Preferences settings There are different settings available through the Preference settings (Edit Preferences) that can be used to customize the look and behavior of Adobe Premiere Pro until you change them. This chapter will cover only the relevant and essential setups for editing with the installed Bluefish444 card. For more information refer to Adobe Premiere Pro CS5 manual. Audio Output Mapping Bluefish444 hardware has the capability for surround sound output with support for mapping and routing the timeline tracks to specific channels/speakers. From the drop-down menu select Bluefish444 Player Drag & drop the speakers icons to the corresponded location and track number Note: This can also be changed & set through the CS5 Audio Mixer, for more information read Premiere Pro manual Chapter 9: Editing Audio. Device Control For controlling the VTR/Deckand the port which is connected to the deck (RS422), select Bluefish Device Control and the Options button. Player settings You MUST select BFPlayer in order to use Bluefish444 card for playback and output. Note: Bluefish444 hardware always displays full resolution video even if the display quality for the Source or Program monitor is set differently. On the top left of the Source & Program window there is an indicator showing if real-time playback is playing (Green) or when dropped frames occur (Red). 21 Create Range Windows User Manual Capturing with Bluefish444 Bluefish444 hardware allows capturing to: AVI YUV 8-bit QuickTime v210 YUV 10-bit QuickTime 2VUY YUV 8-bit Cineon RGB 10-bit DPX RGB 10-bit TGA RGBA 8-bit Stereo (2 channels) or 5.1 Surround-Sound (6 channels) Following the previous steps, capturing or logging can be now started. 1. Select File → Capture (F5 shortcut) 2. At the Logging tab, use the Setup section to select the video and/or audio to capture 3. Type the Tape Name, Clip Name at the Clip Data section (clip Name can not be changed later) 4. Select the Settings Tab to adjust Video/Audio Settings, capture Locations, and Device Controls. 5. Select the IN/Out Points of the Material you wish to capture 6. Select Capture IN/OUT, Tape or Log Clip. Note: For more information on capturing in Premiere Pro refer to the Adobe Premiere Pro User Manual. Capture Settings: File Type – QuickTime, AVI, DPX, Cineon, TARGA. Audio channels – 2 Channel (Stereo), 6 Channel (5.1 Surround) Timecode Source–RP188 VITC, RS422, RP188 LTC Scale To – Select a Scaling option that is compatible with the input Video Signal. Refer to www.bluefish444.com or Symmetry Manual for details 22 Create Range Windows User Manual Playback Settings Bluefish444 sequence playback options are available when the sequence is active at: Sequence Settings -> Playback Settings… Available Options: YUV/RGB Matrix Range: Select SMPTE or CGR matrix range for SDI output. RT indicator: When enabled, a green/red indicator box on the Program desktop display will display whether the sequence is being play in real-time (GREEN) or not (RED). (1080 23/24) p/psf mode: Select psf mode for output progressive-scan video using interlaced equipment such as SDI broadcast monitor. It will divide a progressive frame into two segments/fields. BF Scaler on SDI Out: Enables scaling on the SDI Output. Only supported conversions will apply a change to the SDI Video Output. 3:2 Pulldown Patterns: Choose between Standard Pull down Pattern and Advance Pulldown Pattern. Export to Tape Bluefish444 hardware enables exporting from Bluefish444‟s sequence presets directly onto tape. To export sequence to a tape: 1. Make sure the recording device is connected to your Bluefish444 hardware using SDI cable and RS-422 connections. 2. To be able to control the deck from CS5, make sure the deck is on „receiving commands‟ mode or „Remote‟. 3. Activate the sequence you want to export and position the Work Area Bar over the section of the sequence you want to export or over all of the sequence. 4. In the main menu bar select FILE → EXPORT → Print To Tape. Note: Rendering to 10-bit YUV v210 might start automatically for best results. At this point the „Export to Tape‟ dialog box will open (see next page image) 23 Create Range Windows User Manual Export to Tape Modes There are three ways to export the timeline to tape: 1. Insert mode is used when required to export any combination of video and audio channels from the selected area of the timeline. Tape original timecode and un-selected channels (video & audio) are kept intact. 2. Assemble mode is used when exporting all video and audio channels from the selected area of the timeline. Tape original timecode as well as ALL channels will be over-written. 3. Record mode (also called 'Crash Record') is used for manual export to tape of the selected area of the timeline. This mode does not require setting In & Out point on the tape. The Insert and Assemble modes require setting an In point on the tape. Cue the Tape to the point at which you will start the recording and press “IN”, alternatively you can type the TC into the Window. The following two options may be used when exporting by either Insert and/or Assemble mode: VTR Preroll Seconds - this option is used to define the number of seconds by which to roll the tape before the specified In point. This will allow the deck to attain a constant speed before start of recording. Delay Clip Play – this option is used to define the number of frames used for delay. This is necessary with some VTR devices which require time delay between the start command and the actual start of playing. Current Tape Time VTR Controls VTR Current status Manual Input Cue point of VTR IN and OUT Buttons Duration Between IN and OUT Edit/Record Modes Preroll and Clip Delay settings Video/Audio Channel Selection 24 Create Range Windows User Manual Importing Footage To avoid issues, importing Bluefish444‟s sequential captured footage (such as DPX, Cineon or TGA) is done by importing the *.sym file created upon capturing. The *.sym file contain all the relevant information about that footage such as frame-rate, frame-size and more. More information on importing files and capturing in Premiere Pro can be found on Adobe Premiere Pro manual. More information regarding Bluefish444 capturing and the properties of the *.sym files can be found on Symmetry manual. 25 Create Range Windows User Manual Adobe After Effects CS5 (Application Software not included) Bluefish444 and Adobe® After Effects® CS5 software helps you create compelling motion graphics and blockbuster visual effects with efficiency and precision workflow that can be view on SDI broadcast monitor. Main Bluefish444 features include: Real-time playback and monitoring of HD and SD on a broadcast SDI monitor (via RAM player) 8 and 10 bit RGB frame buffer support 8 and 10 bit project mode support Dedicated QuickTime v210 exporter Real-time SD and HD color space conversion Supported sequence presets: Video Mode AE preset Supported Video Mode and frame rate 2k 1080 Custom 2048 x 1080 [email protected]/24fps/25fps/29.97fps/30fps 1080psf @23.98fps/24fps/25fps. HD 1080 HDTV 1920 x 1080 HD 720 HDTV 1280 x 720 PAL D1/DV 720 x 576 NTSC D1 720 x 486 1080i @25fps/29.97fps/30fps [email protected]/24fps/25fps/29.97fps/30fps 1080psf @23.98fps/24fps/25fps. 1280x720P SD PAL SD NTSC @ 60fps, 59.97fps. PAL 720x576 @25fps NTSC 720x486 @29.97fps Setting up Adobe After Effects CS5 Enabling Video monitoring output 1. Create a new project 2. In the Menu bar, select Composition New Composition 3. In the Basic tab, select a supported preset (frame size and frame rate) 4. Set the composite resolutions settings to full. Color Setting / Bit Depth Adobe After Effects project settings support 8; 16 or 32 bit color depth. Using with Bluefish444 card it can output 10 bit RGB 4:2:2 or 4:4:4 when in 16-bit project mode (through the real-time RAM or timeline preview). Refer to Adobe After Effects manual referring to project settings. 26 Create Range Windows User Manual CS5 Production Premium on 64-bit operating systems To making maximum use of the RAM in your computer with After Effects is to set the Memory & Multiprocessing preferences, including Render Multiple Frames Simultaneously. With Render Multiple Frames Simultaneously, After Effects can start separate background processes of the After Effects application to render multiple frames at the same time. This can really speed up renders, both for final output and for RAM previews. More info on AE documentation chapter: Memory & Multiprocessing preferences. Exporting to Premiere Pro and Symmetry If you wish for real time playback in Premiere Pro CS5 and/or Symmetry using Bluefish444 hardware, then you‟ll need to export your composition to a Bluefish444 supported file format such as: QuickTime v210 (recommended) QuickTime 2VUY Microsoft uncompressed AVI Cineon DPX TGA The audio will need to be export separately as WAV file format. 27 Create Range Windows User Manual Steps of exporting to Bluefish444 QuickTime v210 file format: 1. Highlight your composition timeline (make it the active window) 2. In the menu bar select Composition -> Make Movie ->Current Render window will open. 3. Select a file name and path to export tousing “Output To…” button. 4. Output Module: click the “Lossless” link option 5. Select Bluefish444 QuickTime Export from the drop down context menu. 6. In the Video output sections select Format options button 7. Select a frame Rate, Scan Type, and Colour Matrix, click OK. 8. Select Render to begin the rendering process Step 4 Step 3 Step 4 Step 6 Steps 7-8 Note: Please read Adobe After Effects Manual for further detail instructions regarding exporting to file. 28 Create Range Windows User Manual Adobe SoundBooth CS5 (Application Software not included) Using the Bluefish444 card you can record, mix, edit and master digital audio files with powerful tools that bring flexibility and control to your desktop studio. With support for ASIO audio interface, Adobe and Bluefish444 customers have the ability to monitor audio output on the same system with up to 8 channels of audio for 5.1 and 7.1 surround sound audio editing. Main features include: Monitoring of uncompressed audio channels equal to the audio selected output. Support 48000Khz monitoring AES/EBU (Balanced, XLR) monitoring 2 channels 0dBu (Balanced, XLR) or 2 channels -10dBu (Unbalanced, RCA) Setting up Adobe SoundBooth CS5 1. Select Edit Preferences Audio hardware 2. Select Bluefish444 ASIO from the Default Device Photoshop CS4 (Application Software not included) Bluefish444‟s Photoshop Exporter adds an important plug-in for broadcast graphic designers by allowing to quickly see Photoshop images on a high resolution broadcast monitor. This is important for checking color, positioning, line width, and other graphic issues that can change when moving images from a VGA to a broadcast monitor. Main features include: Support for NTSC, PAL, 720p, and 1080i. Pre built actions for hotkey updates Alpha and image channel output Support for 8-bit image output Automatic YUV conversion 29 Create Range Windows User Manual Supported image size: HDTV 1080i/p (1920x1080) HDV/HDTV 720 (720x1280) NTSC (720x480) PAL (720x576) Exporting 8-bit Image to Monitor: 1. Prepare your image as 8-bit RGB at a supported image size 2. Connect Bluefish444 Output to SDI monitor 3. Select File -> Export -> Bluefish444 HD1080i/HD720/NTSC/PAL Eyeon Fusion (Application Software not included) Fusion is designed to combine images from many sources and compose them into a final whole. Fusion supports real time playback of 8 and 10 bit RGB modes using Bluefish444 video output hardware which can be preview on a hi-resolution SDI broadcast monitor. Setting up Digital Fusion Setting Frame Buffer Monitoring Global: 1. Load Fusion and close the composition flow that loaded as default 2. Open File -> Preferences… 3. Under Global and new comp defaults -> I/O select the Bluefish444 option 4. Select the Video Out standard you wish to output using the Bluefish444 card 5. To switch between 10 and 8 bit support, toggle this check-box 6. To switch between RGB and YUV mode, toggle YUV option 7. Asynchronous option - is used to decide whether to wait or not, when viewing the result of a tool on the Bluefish card. If Asynchronous is off, Fusion will wait until the Bluefish card has completed displaying an image, before rendering and displaying the next image. If Asynchronous is on, Fusion will queue the image for display and immediately start rendering and displaying the next image. If the queue grows too long, images will be dropped. 30 Create Range Windows User Manual Error diffusion - provides the default setting for the Error Diffusion checkbox in the Saver tool's Format tab. When this is on, any rounding errors in the RGB -> YUV conversion are spread (diffused) among neighboring pixels so as to reduce visible artifacts. Path settings: File -> Preferences, expand “Globals and new comp defaults” Select Path Map option and change the following Path Maps options to your certified disk array for real-time payback; Disk Cache Previews Node monitoring Generate a new composition flow and add a loader node and attach a CC node. Ensure the Output settings equal the composition resolution in the preference settings Right click the CC node and select the option arrow for View On and select the Bluefish. Select Play. Fusion will render and cache to RAM until the entire available RAM is used. Real time preview will occur after the first render pass. Preview Fusion will default to creating a pre view in the preview paths folders that is set in the preferences section. This path along with all other paths should be pointing to the fasted array for your projects 1. 2. 3. 4. 5. Right Selecting the CC Node, Select the option arrow for Create/Play Preview on, Select Bluefish444 option The render setting dialog will pop up, select your desirable options Select Start Render. Fusion will render to the Preview folder on the array selected. 31 Create Range Windows User Manual 9. Bluefish444 Support Bluefish444 support questionnaire Before submitting a support call or email, please fill in the relevant questions from this questionnaire. This questionnaire will give us a better understanding of the problem/s and the different factors involves. Please be precise and clear, separate fact from speculation and do not include irrelevant detail. Answer the questions below before submitting your issue to analyze by our technical support team. Please attach to email any relevant screenshots and System Information (Run -> msinfo32.exe) for a detailed list of system information. Date: Name: Company Name: Phone number: Email: Website: Which Bluefish444 card is installed? What is the card serial number? Where and when was it purchased? What host system/workstation do you use? What Operating System(s) do you use? Which version of Bluefish444 Installer was used? What Bluefish driver version do you use? Which slot does the card install to? Hardware used How many Bluefish444 cards are installed? What type of processor(s)? What type of RAM, how much? Brand/model of graphics card? Brand/Model of motherboard? Which RAID card is used? What configuration? What are the test results of SCSIBenchMark.exe? (C:/Program Files/Bluefish444/Symmetry/) Which deck is being used? Software What version of Symmetry is in use? Which 3rd party software are installed and what version? Video Information What video mode(s) do you use (capture & playback)? What File Format do you use? Which SDI input and Out connectors are used for video In & Output? Do you capture audio? Embedded or AES? How many channels? 32 Create Range Windows User Manual General Questions Summary (how would you describe the problem): Description (details of your problem report, what application triggers the problem?): Steps to reproduce (possible steps or sequence of operation that can be used to recreate the problem in house, explain it so others can reproduce the problem and include any special setup steps): Actual Results (what the application did after performing the above steps): Expected Results (what the application should have done): Any other useful information: 10. Support Resources A list of frequently ask questions listed by application type: http://www.bluefish444.com/support/faqs/ Hardware compatibility Guide: This site has detailed information on tested and certified hardware categorized by motherboards, systems and integrators. http://www.bluefish444.com/support/compatibility/hardware/ Software compatibility guide: Current list of released retail software that is compatible with the Bluefish444 product range. Refer to this site often as new supported products a frequently released: http://www.bluefish444.com/support/compatibility/software/ For phone support you must register your product online at: http://www.bluefish444.com/products/warranty/register.asp 33 Create Range Windows User Manual 11. Index A After-Effects - Exporting to Premiere Pro and Symmetry · 26 After-Effects Color Setting / Bit Depth · 26 After-Effects Enabling Video output · 26 Audio Output Mapping · 21 M Minimum System Requirements · 10 N C Cable Connection · 13 Compatible retail applications · 5 Contents · 2 Create Board Features · 4 Create|2K Base · 5 Create|2K Ultra Base · 6 Create|HD Base · 5 CS5 Production Premium on 64-bit operating systems · 26 D New Installations · 15 P Photoshop - Supported image size · 29 Pixel Format · 16 Player settings · 21 Premiere Pro - Export To Tape steps · 25 Premiere Pro CS5 Preferences settings · 21 Premiere Pro Sequence Presets · 20 Premiere Pro Supported File Formats · 18 Premiere Pro Supported Sequences Presets · 19 Premiere Pro Supported Video Modes · 18 Device Control · 21 DVI/HDMI Preview · 5, 7 R E RS422 · 9 RT indicator · 23 Export to Tape Modes · 24 F Feature Application Audio Tab · 17 Feature Application Main Tab · 16 Feature Comparison · 6 H Hardware compatibility Guide · 32 Hardware Scaling Module · 5, 7 I Installation · 14 Introduction · 4 S Scratch Disks’ · 19 Setting up Adobe SoundBooth CS5 · 28 Setting up Digital Fusion · 29 Storage Requirements · 12 Support Contacts · 34 support questionnaire · 31 Support Resources · 32 Supported APIs · 5 Symmetry Application Overview · 8 Symmetry Other Features · 10 Symmetry Supported Audio Features · 9 Symmetry Supported File Formats · 9 Symmetry workflow benefits and advantages · 9 W Warranty · 3 K Key points installer · 15 Y YUV/RGB Matrix Range · 23 34 Create Range Windows User Manual 12. Support Contacts Australia - BlueFish444 (Head Office) 17b Market Street, South Melbourne Victoria, 3205 Australia China - UBS Consulting 601, Block 4, Wanda Square. 93 Jianguo Road 100022 Beijing P.R China Telephone: +61 (3) 9682 9477 Facsimile: +61 (3) 9682 9466 Telephone: +86 (10) 5820 6929, +86 1350 1287 726 Facsimile: +86 (10) 5820 6930 Email:[email protected] Web: http://www.bluefish444.com/ Email: [email protected] Web: http://www.ubschina.com/bluefish/ Europe - Bluefish444 Europe Ltd. Japan - Crescent Video Joel Street Farm, Joel Street, Pinner,Middlesex, HA5 2PD. United Kingdom 3-2-12 Midori, Sumida Tokyo 130-0021 Japan Telephone: +44 (0)20 8429 8345 Facsimile: +44 (0)20 8866 8207 Telephone: +81-3-5638-1818 Facsimile: +81-3-5638-1819 Email: jfall@bluefish444Europe Web: http://www.bluefish444europe.com Email: [email protected] India – Aditya Infotech Ltd South America – Digital Tree 12, 13 & 15-A, Janki Centre 29 Shah Industrial Estate Off Veera Desai Road Mumbai 400053 Libertad 1376, Capital Federal Buenos Aires Argentina Telephone: +91 22 2674 1595/96/97/98 Facsimile: +91 22 2674 1500 Telephone: +54 911 4023-7521 Email: [email protected] Web: http://www.adityagroup.com Web: http://www.crescentinc.co.jp/bluefish444 Email: [email protected] America Support Telephone: 1-617-418 1792 Email: [email protected] 35


