1
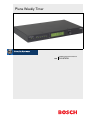
Plena Weekly Timer
Installation and User Instructions
en
PLN-6TMW
Plena Weekly Timer | Installation and User Instructions | Important Safeguards
Important safeguards
Prior to installing or operating this product, always read
the Important Safety Instructions, which are available as
a separate document (9922 141 7014x). These
instructions are supplied together with all equipment
that can be connected to the mains.
Thank you for choosing a Bosch Security Systems
product.
Bosch Security Systems | 2006-05 | 9922 141 50741 en
en | 2
Plena Weekly Timer | Installation and User Instructions | Table of contents
en | 3
Table of contents
Important safeguards ...................................................................................................................................................2
Table of contents ...........................................................................................................................................................3
1. Introduction ....................................................................................................................................................................5
1.1 Purpose .....................................................................................................................................................................................5
1.2 Digital document .....................................................................................................................................................................5
1.3 Intended audience ..................................................................................................................................................................5
1.4 Related documentation ..........................................................................................................................................................5
1.5 Alerts ..........................................................................................................................................................................................5
1.6 Signs ..........................................................................................................................................................................................5
1.6.1 Note signs ...........................................................................................................................................................................5
1.6.2 Caution Warnings and Dangers signs .........................................................................................................................5
1.7 Conversion tables ...................................................................................................................................................................6
2. System overview ...........................................................................................................................................................7
2.1 Plena ..........................................................................................................................................................................................7
3. Equipment .......................................................................................................................................................................9
3.1 Introduction ...............................................................................................................................................................................9
3.2 Controls, connectors and indicators ............................................................................................................................... 11
3.2.1 Front panel ....................................................................................................................................................................... 11
3.2.2 Display ............................................................................................................................................................................... 12
3.2.3 Rear panel ........................................................................................................................................................................ 13
3.3 Installation .............................................................................................................................................................................. 14
3.4 External connections ........................................................................................................................................................... 14
3.4.1 Connect the back-up power supply ........................................................................................................................... 14
3.4.2 Connecting other Plena devices ................................................................................................................................. 15
3.4.3 Power ................................................................................................................................................................................ 16
4. Switch on and off ....................................................................................................................................................... 17
4.1 Switch on ............................................................................................................................................................................... 17
4.2 Switch off ............................................................................................................................................................................... 17
5. Setting the date and time ........................................................................................................................................ 19
5.1 Summer and Winter (daylight saving) time settings .................................................................................................... 19
6. Manual settings .......................................................................................................................................................... 21
6.1 Selecting a program ............................................................................................................................................................ 21
6.2 Activating an output contact .............................................................................................................................................. 21
6.3 Temporarily pausing events ............................................................................................................................................... 21
6.4 Setting BGM levels .............................................................................................................................................................. 21
6.5 Locking the buttons and rotary selector ......................................................................................................................... 21
7. Programming a schedule ........................................................................................................................................ 23
7.1 Introduction ............................................................................................................................................................................ 23
7.2 Programming an event ........................................................................................................................................................ 23
7.3 Viewing and editing events ................................................................................................................................................ 26
8. Plena Weekly Timer Configuration software ..................................................................................................... 27
8.1 Introduction ............................................................................................................................................................................ 27
8.2 System requirements ........................................................................................................................................................... 27
8.3 Installing the software ......................................................................................................................................................... 27
8.4 Connecting to a PC ............................................................................................................................................................. 29
8.5 Starting the software ........................................................................................................................................................... 29
Bosch Security Systems | 2006-05 | 9922 141 50741 en
Plena Weekly Timer | Installation and User Instructions | Table of contents
en | 4
8.6 Main menu buttons .............................................................................................................................................................. 30
8.6.1 Setup ................................................................................................................................................................................. 30
8.6.2 System settings .............................................................................................................................................................. 30
8.6.3 Schedule programming ................................................................................................................................................. 30
8.6.4 Download schedule ....................................................................................................................................................... 30
8.6.5 Modify password ............................................................................................................................................................ 30
8.6.6 Save configuration file ................................................................................................................................................... 30
8.6.7 Open configuration file .................................................................................................................................................. 30
8.7 System settings .................................................................................................................................................................... 31
8.7.1 System setting ................................................................................................................................................................. 31
8.7.2 Time settings ................................................................................................................................................................... 31
8.8 Schedule programming ...................................................................................................................................................... 32
8.8.1 Schedule programming ................................................................................................................................................. 33
8.8.2 Upload configuration ..................................................................................................................................................... 35
8.9 Download schedule ............................................................................................................................................................. 36
8.10 Modify password .................................................................................................................................................................. 37
8.11 Save configuration file ......................................................................................................................................................... 37
8.12 Open configuration file ....................................................................................................................................................... 38
9. Technical data ............................................................................................................................................................. 39
9.1 Electrical ................................................................................................................................................................................. 39
9.2 Performance .......................................................................................................................................................................... 39
9.3 Audio inputs .......................................................................................................................................................................... 39
9.4 Audio outputs ........................................................................................................................................................................ 39
9.5 Mechanical ........................................................................................................................................................................... 39
9.6 Interconnection ..................................................................................................................................................................... 39
9.7 Environmental ........................................................................................................................................................................ 39
9.8 Controls and indicators ...................................................................................................................................................... 39
9.9 Clock accuracy (without sync) .......................................................................................................................................... 39
9.10 Power supply ......................................................................................................................................................................... 39
9.11 Parts included ....................................................................................................................................................................... 39
Bosch Security Systems | 2006-05 | 9922 141 50741 en
Plena Weekly Timer | Installation and User Instructions | Introduction
1
1.1
Introduction
Purpose
These Installation and User Instructions provide
information on installing, configuring, and operating the
Plena Weekly Timer.
1.2
1.6
Signs
1.6.1
Note signs
The signs used in combination with Notes provide extra
information about the Note. See the following
examples:
Digital document
Note
General sign for notes.
The Installation and User Instructions are also available
as a digital document in the Adobe Portable Document
Format (PDF). All references to pages, figures, tables,
etc. in this digital document contain hyperlinks to the
referenced locations.
1.3
Related documentation
The following related document is available: Plena
Voice Alarm System Basic System Manual
(9922 141 1036x).
1.5
Note
Consult the indicated source of information.
Intended audience
These Installation and User Instructions are intended
for installers and users of a Plena system.
1.4
en | 5
Alerts
Four types of alerts are used in this manual. The alert
type is closely related to the effect that may be caused if
it is not observed. These alerts - from least severe effect
to most severe effect - are:
• Note
Alert containing additional information. Usually, not
observing a note alert does not result in damage to
the equipment or personal injuries.
• Caution
The equipment can be damaged if the alert is not
observed.
• Warning
Persons can be (severely) injured, or the equipment
can be seriously damaged, if the alert is not
observed.
• Danger
Not observing the alert can result in death.
Bosch Security Systems | 2006-05 | 9922 141 50741 en
1.6.2
Caution Warnings and Dangers
signs
The signs used in combination with Caution, Warnings,
and Dangers indicate the type of hazard present. See the
following examples:
Caution, Warning, Danger
General sign for cautions, warnings and
dangers.
Caution, Warning, Danger
Risk of electric shock.
Caution, Warning, Danger
Risk of electrostatic discharge.
Plena Weekly Timer | Installation and User Instructions | Introduction
1.7
Conversion tables
In this manual, SI units are used to express lengths,
masses, temperatures etc. These can be converted to
non-metric units using the following information.
table 1.1: Conversion of units of length
1 in =
25.4 mm
1 mm =
1 in =
2.54 cm
1 cm =
1 ft =
0.3048 m
1m=
1 mi =
1.609 km
1 km =
0.03937 in
0.3937 in
3.281 ft
0.622 mi
table 1.2: Conversion of units of mass
1 lb =
0.4536 kg
1 kg =
2,2046 lb
table 1.3: Conversion of units of pressure
1 psi =
68.95 hPa
1 hPa =
0.0145 psi
Note
1 hPa = 1 mbar.
9
°F = --- ⋅ °C + 32
5
5
°C = --- ⋅ ( °F – 32 )
9
Bosch Security Systems | 2006-05 | 9922 141 50741 en
en | 6
Plena Weekly Timer | Installation and User Instructions | System overview
2
System overview
2.1
Plena
The Plena Weekly Timer is part of the Plena product
range. Plena provides public address solutions for places
where people gather to work, worship, trade, or to relax.
It is a family of system elements that are combined to
create public address systems tailored for virtually any
application.
The range includes:
• mixers
• preamplifiers
• power amplifiers
• a music source unit
• a digital message manager
• a feedback suppressor
• call stations
• an ‘All-in-One’ system
• a voice alarm system
• a timer
• a charger
The various elements are designed to complement each
other thanks to matched acoustical, electrical and
mechanical specifications.
Bosch Security Systems | 2006-05 | 9922 141 50741 en
en | 7
Plena Weekly Timer | Installation and User Instructions | System overview
Intentionally left blank.
Bosch Security Systems | 2006-05 | 9922 141 50741 en
en | 8
Plena Weekly Timer | Installation and User Instructions | Equipment
en | 9
3
Equipment
However, these options are only available if the Plena
Weekly Timer Configuration software is being used.
3.1
Introduction
The intuitive front panel allows users to easily switch
between the two programmable schedules. The
programmable output contacts can also be manually
activated, allowing for random events to take place; for
example, if a door lock has to be suddenly opened
(before the scheduled time), the user can push one of
the 6 output contact buttons on the front panel of the
unit. The Timer will re-lock the door as programmed
during the next applicable event.
The Plena Weekly Timer (which is perfectly suited for
connecting to the Plena Message Manager and Voice
Alarm System) is an accurate timer for use in public
address systems. It is ideal for schools, shopping malls
and all other venues, where regularly timed messages,
signals or other controls (such as the automatic locking
and unlocking of doors) are required.
The Timer can be programmed from:
• the controls on the front panel.
• a PC which has the Plena Weekly Timer
Configuration software installed.
If the Timer is programmed using the configuration
software, a USB cable is required to connect the PC to
the Timer.
A pause button also allows users to temporarily suspend
all events, with the exception of the clock display, while
pressing and holding the rotary selector allows the user
to lock all controls of the front panel. This safety feature
prevents unscheduled events from being accidently
activated.
See figure 3.1 (on the next page) for a schematic
overview of the Plena Weekly Timer.
The Timer has an audio input and output (cinch and
XLR) for attenuating BGM signals (see figure 3.1). The
volume can be directly controlled from the front panel,
or programmed to lower at set times. The Timer will
then automatically select the programmed volume at the
start of the next event.
This allows users to automatically adjust the background
music to suit the time of day; for example, music can be
automatically attenuated in the morning or evening
hours, or BGM can only be allowed at certain times of
the day.
Any single event can consist of:
• one of 14 pre-programmed chimes (which are
broadcast via the audio throughput).
• adjusting (or switching off) of the Back Ground
Music (BGM) - attenuation.
• any combination of output contacts that have
internal relays for connecting to numerous types of
equipment. There are 6 output contacts in total.
The Timer has a clock sync. input for synchronizing the
time with an external source; the correct time can also
be downloaded from a PC. This allows the Timer to be
synchronized with a time server. The Timer clock also
keeps track of the date, ensuring for the correct display
of weekdays, and automatic Summer/ Winter time
(daylight saving time) settings (according to European,
North American, user defined dates).
The output contacts can be set to: open, close, or
generate a pulse.
The Timer has a 24V backup power input with reversepolarity protection, as well as a backup battery that
preserves the correct clock setting. Synchronization is
done via the USB port. There is an RS-232 connector
on the back panel for connecting the Timer to a large
separate display.
The Timer has two weekly schedules that can be
individually programmed. Each day of the week has a
separate event set, which means that two separate
schedules can be programmed for any one day. Events
can be programmed to an accuracy of one minute, and
there is no limit to the number of events.
Pulse duration can be globally programmed, and
chimes shorter than one minute can be set to repeat a
number of times in the general system settings.
Bosch Security Systems | 2006-05 | 9922 141 50741 en
Plena Weekly Timer | Installation and User Instructions | Equipment
en | 10
Cinch
Cinch
IN
XLR
1
2
VCA
3
1
2
3
XLR
Chime Generator
1
Clock
Sync
Main µC
2
3
I/O
Expander
USB
4
Trigger Out
5
6
3x DIP
Switch
Push Buttons
Rotary Selector
LEDs
RS-232 Connector
Display
External Display
AC / DC Power Supply
F1
230V
±5V
Power Supply
115V
24V
Block Converter
DC / DC Converter
figure 3.1: Schematic overview of the Plena Weekly Timer
Bosch Security Systems | 2006-05 | 9922 141 50741 en
Plena Weekly Timer | Installation and User Instructions | Equipment
3.2
Controls, connectors and
indicators
3.2.1
Front panel
en | 11
See figure 3.2 for an overview of the controls and
indicators.
1 Program buttons, and indicator LEDs
1 through 2
2 Output contact buttons, and indicator LEDs
1 through 6
3 Save settings button - saves date and time set-up;
saves programed events
4 Set button - starts date and time set-up sequence;
starts and stops programming sequence
5 Pause button - temporarily suspends events, and
deletes events when in the programming mode
6 Main display - shows time, and program settings
7 Reset button - for resetting the software of the
Timer (use a pin to activate the small button)
8 Rotary selector - for selecting and confirming
settings
1
2
3
4
5
figure 3.2: Front panel
Bosch Security Systems | 2006-05 | 9922 141 50741 en
6
7
8
Plena Weekly Timer | Installation and User Instructions | Equipment
3.2.2
en | 12
Display
See figure 3.3 for an overview of the main display.
1 PAUSED - indicates that all events are temporarily
suspended (see section 6.3)
2 DELETE - indicates that the displayed event can be
deleted (see section 7.3)
3 SAVE - indicates that the date and time set-up
(see section 5), and programed events (see section 7)
can be saved
4 RUN - indicates that the Timer is running
5 SET - indicates that Set can be pressed at any time
to leave the programming sequence without
changing the settings
6 Sun symbol - indicates that Summer time (daylight
saving time) is selected (see section 5.1)
7 Chime symbol - showing the status of the chime
8 BackGround music symbol - with “-dB” setting
9 Chime volume
10 BackGround music volume
11 Time - in hours and minutes
12 Event number/ year
13 Event symbol
14 Trigger type - used for output contacts
(see table 7.2)
15 Day of the week
16 Hold - indicates that all controls on the front panel
are locked (see section 6.5)
1 2
3
4
5
6 7 8
9 10
12
13 14
figure 3.3: Main display
Bosch Security Systems | 2006-05 | 9922 141 50741 en
11
15
16
Plena Weekly Timer | Installation and User Instructions | Equipment
3.2.3
en | 13
Rear panel
See figure 3.4 for an overview of the connectors and
switches:
1
2
3
4
5
6
7
8
9
10
11
12
13
14
15
Audio loop through - Cinch input
Audio loop through - Cinch output
Audio loop through - XLR input (female)
Audio loop through - XLR output (male)
Trigger outputs (1 through 6)
Sync input - for synchronizing the Timer with an
external source
24V DC in - for backup power supply
Type plate - including 12nc number, and serial
number
DIP-switches (3pcs) - for Summer/Winter time
(daylight saving time) and service setup
RS-232 connector - for connecting clock display
USB connector - for connecting external PC
Earth connection screw
Voltage selector (115V/ 230V)
ON - OFF switch
Mains connector (3-pole)
1
2
13
3
4
5
67
figure 3.4: Rear panel
Bosch Security Systems | 2006-05 | 9922 141 50741 en
8
9
10
11 12
14
15
Plena Weekly Timer | Installation and User Instructions | Equipment
3.3
Installation
The Timer can be installed on a table-top or in a 19inch rack. Two rack-mounting brackets are supplied (see
figure 3.5 for installation details).
en | 14
3.4
External connections
3.4.1
Connect the back-up power
supply
The Timer has two 24 Vdc screw terminals (7) for
connecting a backup power supply. You must connect
an earth (12) to the unit to increase the electrical
stability of the system.
7
-
+
figure 3.5: Brackets for rack-mounting
12 V
D
C
12 V
D
+
C
12
figure 3.6: Back-up battery connections
Bosch Security Systems | 2006-05 | 9922 141 50741 en
Plena Weekly Timer | Installation and User Instructions | Equipment
3.4.2
en | 15
Connecting other Plena devices
The following inputs and outputs can be used to connect
the Timer to other Plena devices (see figure 3.7):
• Audio loop through - Cinch input
• Audio loop through - Cinch output
• Audio loop through - XLR input (female)
• Audio loop through - XLR output (male)
The cinch input and XLR input, as well as the cinch
output and XLR output are connected in parallel (see
figure 3.1).
This means that the Timer can be connected to other
Plena devices, using any combination of audio loop
through inputs and outputs.
For example, the “PLN-DVDT cinch out” can be
connected to the “Timer cinch in”, and the “Timer XLR
out” can be connected to the “Mixer Amplifier XLR in”
(preferred set-up). The “Timer cinch out” can also be
connected to the “Mixer Amplifier cinch in”.
PLN-DVDT
PLN-6TMW
figure 3.7: Connecting other Plena devices
Bosch Security Systems | 2006-05 | 9922 141 50741 en
LBB-1903
Plena Weekly Timer | Installation and User Instructions | Equipment
3.4.3
Power
1 Make sure the power switch (14) on the rear of the
Timer is set to the “O” position (see figure 3.8).
Caution
Potential equipment damage. Before
connecting the mains lead, always check the
voltage selector on the rear panel of the Timer.
2 Make sure the voltage selector (115V/ 230V) (13) is
correctly set for the country’s main voltage (see
figure 3.8).
3 Use the mains lead to connect the Timer to the
power supply (see figure 3.8).
13
14
Line
fus
T10L e
250V
figure 3.8: Mains lead
Bosch Security Systems | 2006-05 | 9922 141 50741 en
en | 16
Plena Weekly Timer | Installation and User Instructions | Switch on and off
4
4.1
Switch on and off
Caution
Potential equipment damage. Before applying
power, always check the voltage selector on the
rear panel of the Timer.
1 Make sure the voltage selector (115V/ 230V) (13) is
correctly set for the country’s main voltage (see
figure 4.1).
2 Set the power switch (14) on the rear of the Timer to
the “I” position.
14
Line
fus
T10L e
250V
figure 4.1: Power switch on rear panel
If mains power (or back-up power) is available, the
Program LEDs (1) and Contact LEDs (2) on the front of
the Timer will be momentarily lit during initial system
power up, and the main display will come on (see figure
4.2).
1
Switch off
Set the power switch (14) on the rear of the Timer to the
“O” position (see figure 4.1).
Switch on
13
4.2
en | 17
2
figure 4.2: Front panel LEDs
Bosch Security Systems | 2006-05 | 9922 141 50741 en
Plena Weekly Timer | Installation and User Instructions | Switch on and off
Intentionally left blank.
Bosch Security Systems | 2006-05 | 9922 141 50741 en
en | 18
Plena Weekly Timer | Installation and User Instructions | Setting the date and time
5
Setting the date and time
Note
You can also use the Plena Weekly Timer
Configuration software to set the date and time.
For more information, see section 8.
5.1
en | 19
Summer and Winter (daylight
saving) time settings
The clock can be set for European or North American
Summer/Winter time (daylight saving time). To do this:
1 Locate the set of DIP switches on the rear panel (see
figure 5.2).
Before using the Timer, you should make sure that the
date and time are correctly set. If necessary, adjust the
date and time as follows:
1 Make sure the Timer is switched on (see section 4).
2 Press and hold in the Set button until the year starts
to flash (see figure 5.1).
3 Turn the rotary selector to select the year, and then
push the rotary selector to confirm the setting. The
month number will start to flash.
figure 5.1: Starting the date and time set-up sequence
Using the same method as described in step 3:
4 Select the month and confirm. The day number will
start to flash.
5 Select the day and confirm. The hours (12) will start
to flash.
6 Select between 12 and 24 hour clock settings and
confirm. The hours will start to flash.
7 Select the hour and confirm. The minutes will start
to flash.
8 Select the minutes and confirm. The date and time
set-up is now complete.
9 Press the Save button to save your settings. The
normal run screen will be displayed.
Note
To modify the date and time, just press and hold
in the Set button. Then repeatedly press the
rotary selector to quickly jump to, and change,
the settings.
Bosch Security Systems | 2006-05 | 9922 141 50741 en
1 2 3
figure 5.2: Configuring Summer/Winter time (daylight
saving time)
2 Set the DIP switches according to table 5.1.
table 5.1 DIP switch settings for Summer/Winter time
(daylight saving time)
Status
Switch 1 Switch 2 Switch 3
European
Off
On
* Off
Summer/Winter
time
North American
On
Off
* Off
Summer/Winter
time
No Summer/
Off
Off
* Off
Winter time
selected
Summer/Winter On
On
* Off
time defined by
configuration
software
Note
Switch 3 is for service only, and should normally
be left in the Off (up) position.
Plena Weekly Timer | Installation and User Instructions | Setting the date and time
If no Summer/ Winter time (daylight saving time) is
selected (option 3 in the above table), you can use the
Program buttons on the front panel (see figure 3.2) to
manually switch between Summer and Winter time. To
do this:
• Press and hold in Program button 1 to switch to
Summer time (daylight saving time). A small symbol
of the sun will be displayed.
• Press and hold in Program button 2 to switch back to
Winter time. The small symbol of the sun will
disappear.
Bosch Security Systems | 2006-05 | 9922 141 50741 en
en | 20
Plena Weekly Timer | Installation and User Instructions | Manual settings
6
Manual settings
You can use the controls on the front panel to manually
override programmed events. The Timer will
automatically return to the programmed schedule at the
start of the next event.
6.1
6.3
Note
All events will be suspended until the Pause
button is pressed again, and the word “Paused”
is no longer displayed.
The Timer has two weekly schedules that can be
individually programmed (for more information on
programming, see section 7 and 8).
6.4
6.2
Activating an output contact
Setting BGM levels
Turn the rotary selector to manually set the BGM levels.
The Timer will then automatically select the
programmed volume at the start of the next event.
6.5
figure 6.1: Selecting a program
Temporarily pausing events
Press the Pause button on the front panel to temporarily
suspended all events. The word “Paused” will appear in
the display next to the button.
Selecting a program
Press the Program buttons 1 or 2 on the front panel to
switch between the two programs. When the program is
selected, the program LED will come on (see figure 6.1).
en | 21
Locking the buttons and
rotary selector
Press and hold in the rotary selector for a number of
seconds to lock all controls of the front panel. This is
useful if you do not want other users to accidently
trigger random events.
The word “Hold” will appear in the bottom right-hand
corner of the display (see figure 6.3).
The Timer has 6 programmable output contacts for
activating numerous types of equipment (for more
information on programming, see section 7 and 8).
Press one of the Contact buttons (1 through 6) on the
front panel to manually activate an output contact.
When the output is activated, the Contact LED will
come on (see figure 6.2).
figure 6.2: Manually activating an output contact
Bosch Security Systems | 2006-05 | 9922 141 50741 en
figure 6.3: Locking the controls of the front panel
Note
All controls will remain locked until the rotary
selector is pressed and held in again for a
number of seconds, and the word “Hold” is no
longer displayed.
Plena Weekly Timer | Installation and User Instructions | Manual settings
Intentionally left blank.
Bosch Security Systems | 2006-05 | 9922 141 50741 en
en | 22
Plena Weekly Timer | Installation and User Instructions | Programming a schedule
7
7.1
Programming a schedule
Introduction
7.2
en | 23
Programming an event
1 Make sure the Timer is switched on (see section 4).
2 Momentarily press and release the Set button. The
Program LEDs on the front panel will be alternately
lit (see figure 7.1).
This section describes how to use the controls on the
front of the Timer to program a schedule. The Timer
can also be programmed from a PC, using the Plena
Weekly Timer Configuration software (see section 8).
For a clear overview of the programmable schedule,
first see figure 8.14 in section 8.8.1. This figure shows
the Schedule programming window, which can be used
to program the Timer from a PC, using the Plena
Weekly Timer Configuration software.
The advantages of using the Plena Weekly Timer
Configuration software are:
• data can be quickly and easily entered.
• the user has a clear overview of the programmed
events.
• schedules can be created remotely, and by numerous
users.
• the schedule can be saved as a software file, and
printed out if required.
Note
If a PC is used to program the Timer, you must
disconnect the USB cable before using the
Timer. If you do not disconnect the USB cable,
the performance of the Timer might be affected.
figure 7.1: Selecting a program
3 Press and hold in the Program button for the
program you want to edit. The selected Program
LED will remain lit.
Note
If you selected the wrong program to edit, you
can press the Program button (1 or 2) to switch
between the two programs. The selected
program for editing will be displayed on the
main display, and the relevant LED will be lit.
4 Press and hold in the rotary selector to start the
programming sequence. The full display will reappear, and the day of the week will start to flash
(see figure 7.2).
Note
If you want to leave the programming sequence
at any time without changing the settings, press
the Set button.
figure 7.2: Programming the day and time of the event
Bosch Security Systems | 2006-05 | 9922 141 50741 en
Plena Weekly Timer | Installation and User Instructions | Programming a schedule
5 Turn the rotary selector to select the day that you
want to program, and then push the rotary selector
to confirm the setting. The hours will start to flash.
Using the same method as described in step 5:
6 Select the hour and confirm. The minutes will start
to flash.
7 Select the minutes and confirm. The event symbol
will start to flash, and the next available event
number will be displayed (see figure 7.3).
Note
If at this point you only want to edit or view
previously programmed events, see section 7.3
instead. Once you have pushed the rotary
selector, you will have to continue programming
the new event. See next step.
en | 24
table 7.1 (continued)
No. Timer chime types
9
Evacuation 554 Hz (100 ms), 440 Hz (400 ms)
10
Immediate danger- 600 Hz (200 ms),
pause (200 ms)
11
Fire alarm 440 Hz (12 s on, 12 s off)
12
Two-tone alarm 440 hz (1 s), 554 Hz (1 s)
13
650 Hz 1.8 s on, 1.8 s off Swedish standard
tone
14
Westminster chimes
Note
All dB settings for the chimes and BGM are
minus settings, because the Timer can only
attenuate (lower) any set signal; the timer
cannot amplify signals.
10 Set a dB level between 0 and -30 for the chime and
confirm. The BackGround Music dB symbol will
start to flash.
11 Set a dB level between 0 and -30 for the BGM and
confirm. The output contact trigger symbol will start
to flash.
figure 7.3: Event symbol with new number displayed
8 Push the rotary selector to confirm the new event
number. The number will then be assigned to the
new event, and the chime symbol will start to flash.
9 Select a chime type between 1 and 14, and confirm
(see table 7.1 for an overview of the chime types).
The chime dB symbol will start to flash.
table 7.1: Overview of programmed Timer chimes
No. Timer chime types
1
1.2 kHz (1 s)
2
554 Hz (2 s)
3
440 Hz (4 s)
4
554 Hz (1 s)
5
554 Hz (1 s), 440 Hz (1 s)
6
392 Hz (1 s), 523 Hz (1 s), 659 Hz (2 s)
7
554 Hz (1 s), 440 Hz (1 s), 493 Hz (1 s),
330 Hz (2 s)
8
659 Hz (1 s), 523 Hz (1 s), 392 Hz (1 s),
330 Hz (2 s)
Bosch Security Systems | 2006-05 | 9922 141 50741 en
Note
The Plena Weekly Timer has six output contacts
(see figure 3.4). Each output has four trigger
settings (see table 7.2).
12 Push the Contact buttons (1 through 6) to select the
required output. Once selected, the LED for the
output contact will be lit.
13 Turn the rotary selector to select the type of trigger
setting (see table 7.2), and then push the rotary
selector to confirm the setting.
14 Press the Save button to save the programmed event.
After a few seconds the full display will re-appear
and the word RUN will be displayed in the top lefthand corner. This indicates that programming of the
event is complete, and that the Timer is running.
15 To program the next event, repeat from step 2.
Plena Weekly Timer | Installation and User Instructions | Programming a schedule
table 7.2: Output contact trigger settings
Trigger
Status of event
settings
An event is switched on, and stays
on until switched off.
en | 25
Status of switch
Example
Closed
A light is switched on
An event is switched off.
Open
After a while, the same
light is switched off
An event is switched on, and then
immediately switched off (pulsed).
Closed, and then
immediately open
A message is started
No event selected.
The
symbol is only used for the
Plena Weekly Timer Configuration
software. If you do not want to select
an event using the display, turn the
rotary selector until no symbol is
displayed.
Open
Nothing happens
Note
The output contacts are Normally Open (NO)
contacts.
Note
When an event is started, the software will set
the output contacts according to the settings of
that current event (and will ignore the settings of
any previous events). For example, if an output
contact that was already open is set to open,
nothing will happen.
Bosch Security Systems | 2006-05 | 9922 141 50741 en
Plena Weekly Timer | Installation and User Instructions | Programming a schedule
7.3
Viewing and editing events
Note
Once you have pressed the rotary selector to
either “confirm a new event” or “edit an existing
one”, you will have to continue programming
that event. You cannot return to previous events
in any one programming session.
To view or edit an event, first follow steps 1 through 7 of
section 7.2. When the event symbol starts to flash, you
can either:
• turn the rotary selector to select other previously
programmed events, and then press the rotary
selector to continue editing that event as further
described in section 7.2.
• press the Pause button to delete the entry. After a few
seconds the full display will re-appear and the word
RUN will be displayed in the top left-hand corner.
This indicates that editing of the event is complete,
and that the Timer is running.
• press the rotary selector to confirm the new event as
described in step 8 of section 7.2.
Bosch Security Systems | 2006-05 | 9922 141 50741 en
en | 26
Plena Weekly Timer | Installation and User Instructions | Configuration software
8
Plena Weekly Timer
Configuration software
8.1
en | 27
2 Follow the instructions on the window, and then
click [Next]. A window similar to the one in figure
8.2 will appear.
Introduction
This chapter describes how to:
• install the Plena Weekly Timer Configuration
software (version: 1.0012).
• connect a PC to the Timer.
• program events, using the PC.
• upload schedules from the PC to the Timer.
• download schedules from the Timer to the PC.
8.2
System requirements
The configuration software can be installed on any PC
running Microsoft Windows 2000 or Microsoft
Windows XP operating systems. Before installing the
software make sure:
• the PC is working correctly, and is free of viruses.
• all other programs have been closed.
8.3
figure 8.2: Choose destination location
3 Choose the Destination Location Folder, and then
click [Next]. A window similar to the one in figure
8.3 will appear.
Installing the software
Proceed as follows:
1 Put the Plena CD-ROM in the CD-ROM drive of the
PC. The CD-ROM starts automatically and a
window similar to the one in figure 8.1 will appear. If
the CD-ROM does not start automatically:
• Go to Start > Run.
• Enter X:\index.html. (Replace X with the character of the CD-ROM drive).
figure 8.3: Select program manager group
figure 8.1: Welcome
Bosch Security Systems | 2006-05 | 9922 141 50741 en
Plena Weekly Timer | Installation and User Instructions | Configuration software
4 Select the Program Manager Group, and then click
[Next]. A window similar to the one in figure 8.4 will
appear.
7 Click [Finish] to complete the installation process.
The software is now ready to use.
figure 8.6: Installation complete
figure 8.4: Start installation
5 Follow the instructions on the window, and then
click [Next]. The software will start to install
(see figure 8.5).
figure 8.5: Installing the software
6 Wait until the installation is complete. A window
similar to the one in figure 8.6 will appear.
Bosch Security Systems | 2006-05 | 9922 141 50741 en
en | 28
Plena Weekly Timer | Installation and User Instructions | Configuration software
8.4
Connecting to a PC
The supplied USB cable can be used to connect a PC to
the Plena Weekly Timer (see figure 8.7). It is not
necessary to switch the Timer off.
8.5
en | 29
Starting the software
Proceed as follows:
1 Go to the desktop of Windows (see figure 8.8 for an
example).
Note
The configuration software can be also used
when the PC is not connected to the Timer, for
example, to program a new schedule at home.
figure 8.8: Windows desktop
2 Double-click the Plena Weekly Timer Configuration
icon. A window similar to the one in figure 8.9 will
appear.
figure 8.7: Connecting a PC to the Timer
Note
Make sure you disconnect the USB cable from
the Timer after uploading or downloading data.
If you do not disconnect the USB cable, the
performance of the Timer might be affected.
figure 8.9: Password
3 Enter the password (12345678) in the Enter password
field, and click the OK button. The main menu will
appear (see figure 8.10).
Note
The default password 12345678 can be
changed in the configuration software
(see section 8.6.5).
Bosch Security Systems | 2006-05 | 9922 141 50741 en
Plena Weekly Timer | Installation and User Instructions | Configuration software
8.6
Main menu buttons
After entering the correct password, the Main menu will
appear (see figure 8.10). Use the blue buttons on the left
of this window to access all windows of the
configuration software.
The various functions of the main menu are described
in full detail on the following pages (for more detailed
information, see section 8.7 through section 8.12).
8.6.2
en | 30
System settings
Use the System settings window to enter the global
system settings, and time settings (see section 8.7).
8.6.3
Schedule programming
Use the Schedule programming button to:
• Edit the programing for schedule 1 or 2.
• Upload the edited schedule to the Plena Weekly
Timer.
8.6.4
Download schedule
Use the Download schedule button to download
schedules from the Timer to the PC.
8.6.5
Modify password
Use the Modify password button to modify the password
for accessing the software.
8.6.6
Save configuration file
Use the Save configuration file button to save the current
configuration file.
8.6.7
Open configuration file
Use the Open configuration file button to open an
existing configuration file.
figure 8.10: Main menu
8.6.1
Setup
Select Setup, and then Language to set the required
language (see figure 8.11).
figure 8.11: Language setup option
Bosch Security Systems | 2006-05 | 9922 141 50741 en
Plena Weekly Timer | Installation and User Instructions | Configuration software
8.7
System settings
Use this window to enter:
• the global system settings.
• the global time settings.
8.7.2
•
•
Note
The global system settings in this window
influence all other general settings of the Timer
(also see section 8.8.1). For example, if “Chime
repeat” is set to 2, all chimes will be repeated
twice for any one event.
en | 31
Time settings
Click the “By system time” radio button, and then
the Set button to synchronize the Plena Weekly
Timer clock with the PC clock.
Click the “By input time” radio button, and then the
Set button to manually set the Plena Weekly Timer
to the required time. Click on the dates and times
individually, and use the arrows to adjust the settings.
After clicking the Set button, the new time settings will
be uploaded to the Plena Weekly Timer. If the PC and
Timer are not connected, a message will be displayed to
connect the USB cable.
From the main menu, click the System settings button.
The following window will appear (see figure 8.12).
Note
The Timer also has a clock sync. input for
manually synchronizing the time with an external
source (see figure 3.4).
During manual synchronization of the Plena
Weekly Timer clock, the minutes are pulled to
the nearest hour. For example, if the clock is set
to synchronize at 13:05, the Timer clock will be
set to 13:00. If the clock is set to synchronize at
12:55 the Timer clock will be set to 13:00.
figure 8.12: System settings window
8.7.1
System setting
1 Click the pull-down arrow for Pulse duration, and
select the number of seconds that all pulsed events
should last (select a value between 1 and 50). These
are all pulsed events for output contacts 1 through 6.
Note
By default, the minimum time between any two
programmable events is one minute.
2 Click the pull-down arrow for Chime repeats, and
select the number of times the chime should be
repeated (select a number between 1 and 10).
Typically this value is normally set to 1, unless you
want all programmed chimes to be repeated.
Bosch Security Systems | 2006-05 | 9922 141 50741 en
Plena Weekly Timer | Installation and User Instructions | Configuration software
8.8
Schedule programming
Use this button to:
• edit the programing for schedule 1 or 2.
• upload the edited schedule to the Plena Weekly
Timer.
1 From the main menu, click the Schedule
programming button. The following window will
appear (see figure 8.13).
figure 8.13: Programming and upload buttons
Note
The edit program function for schedule 1 and
schedule 2 is identical. Therefore for simplicity,
only program 1 is explained.
2 Click the Edit schedule programing 1 button. The
Schedule programming window will appear (see
section 8.8.1).
Bosch Security Systems | 2006-05 | 9922 141 50741 en
en | 32
Plena Weekly Timer | Installation and User Instructions | Configuration software
8.8.1
en | 33
Schedule programming
Use this window to program events.
Events can be:
• scheduled for each day of the week.
• assigned individual properties, such as the time the
event takes place, and the type of chime or trigger
required (see figure 8.14).
figure 8.14: Schedule programming window
1 Click the day tab (at the top of the window) to
display the day that you want to update.
2 Click the New button to add a new entry, or the Edit
button to edit an existing entry. See the explanation
of the various fields (Time, Chime, Chime volume,
BGM, etc.) on the following page.
3 After changing the parameters, click Save to save
your settings.
Bosch Security Systems | 2006-05 | 9922 141 50741 en
Note
All parameters will assume the programmed
status at the moment the event takes place.
Plena Weekly Timer | Installation and User Instructions | Configuration software
Time
Click the up or down arrow to change the time of a
scheduled event. Hours and minutes have to be clicked
on, and changed individually.
Note
By default, the minimum time between any two
programmable events is one minute.
If you change the time of an event to take place before
or after an existing event, the software will ask you if
you want to sort the event in the schedule. This means
that all events will be re-sorted according to the time.
You can select either YES or NO. Normally it is more
useful to have events sorted according to time.
Chime
Click the pull-down arrow to select a chime type
between 1 and 14 (see table 7.1 for an overview of the
chime types). None can also be selected. Short chimes
can also be set to repeat within the same minute in the
Global system settings (see section 8.7 for more
information).
Chime volume
Click the up or down arrow to change the volume of the
selected chime.
BGM
Click the pull-down arrow to set the Back Ground
Music (BGM) either ON or OFF.
BGM volume
Click the up or down arrow to change the volume of the
BGM.
Bosch Security Systems | 2006-05 | 9922 141 50741 en
en | 34
Trigger
The Plena Weekly Timer has six output contacts (see
figure 3.4). Each output has four trigger settings (see
table 7.2).
Delete
Click on an entry to select it. An orange box will appear
around the event to show that it is selected
Click the Delete button to delete the entire entry.
Copy and Paste
Use the Copy and Paste buttons to copy single events,
or all the events of one day, to another day.
To copy and paste single events to another day:
1 Click the day tab (at the top of the window) that you
want to copy from.
2 Click the Edit button.
3 Click on the event that you want to copy. An orange
box will appear around the event to show that it is
selected.
4 Click the “Copy one event to another day” radio
button.
5 Click the Copy button.
6 Click the day tab (at the top of the window) that you
want to paste to.
7 Click the Paste button. The copied event will be
inserted.
To copy and paste all the events of one day to another
day:
1 Click the day tab (at the top of the window) that you
want to copy from.
2 Click the Edit button.
3 Click the “Copy whole day events to another day”
radio button. Orange boxes will appear around all of
the events.
4 Click the Copy button.
5 Click the day tab (at the top of the window) that you
want to paste to.
6 Click the Paste button. The copied events will be
inserted.
Plena Weekly Timer | Installation and User Instructions | Configuration software
8.8.2
Upload configuration
Use this option to upload the edited schedule from the
PC to the Plena Weekly Timer.
en | 35
2 Click Upload configuration. The following window
will appear (see figure 8.16) showing that uploading
is taking place. When uploading is complete, this
window will close.
1 From the main menu, click the Schedule
programming button. The following window will
appear (see figure 8.15).
figure 8.16: Uploading data to the Plena Weekly Timer
figure 8.15: Programming and upload buttons
Bosch Security Systems | 2006-05 | 9922 141 50741 en
Note
Make sure you disconnect the USB cable
before using the Timer. If you do not disconnect
the USB cable, the performance of the Timer
might be affected.
Plena Weekly Timer | Installation and User Instructions | Configuration software
8.9
en | 36
Download schedule
Use this option to download the schedule from the
Plena Weekly Timer to the PC.
1 From the main menu, click the Download schedule
button. The following dialog box will appear
(see figure 8.17).
figure 8.18: “Save schedule as” window
figure 8.17: Download schedule dialog box
2 Click either Yes or No to the question “do you want
to save the present configuration file?”.
Caution
The downloaded schedule will overwrite the
schedule in the PC. If you do not want to loose
your settings, you should save the present
configuration file.
•
•
If you click Yes, a standard Save As window will
appear (see figure 8.18). Select the area where you
want to save the configuration file, and then click
Save.
If you click No, the software will start to download
the schedule from the Plena Weekly Timer to the
PC, and the Downloading window will appear
(see figure 8.19). When downloading is complete,
this window will close.
Bosch Security Systems | 2006-05 | 9922 141 50741 en
figure 8.19: Download configuration window
Note
Make sure you disconnect the USB cable
before using the Timer. If you do not disconnect
the USB cable, the performance of the Timer
might be affected.
Plena Weekly Timer | Installation and User Instructions | Configuration software
8.10
Modify password
8.11
en | 37
Save configuration file
Use the Modify password button to modify the
password for accessing the software.
Use the Save configuration file button to save the current
configuration file.
1 From the main menu, click the Modify password
button. The following window will appear
(see figure 8.20).
1 From the main menu, click the Save configuration
file button. The following window will appear
(see figure 8.22).
figure 8.20: Enter password window
2 Type in the current password, and then click OK.
The default password is 12345678. The following
window will appear (see figure 8.21).
figure 8.22: “Save configuration file as” window
2
Select the area where you want to save the
configuration file, and then click Save
Note
The default filename is based on the date set in
the computer’s clock (see figure 8.22).
figure 8.21: Modify password window
3 Type in the new password. The password must have
a minimum of four characters. The password is also
case sensitive. Therefore, pay attention to capital
letters when entering the new password.
4 Confirm the password, and then click OK.
Bosch Security Systems | 2006-05 | 9922 141 50741 en
Plena Weekly Timer | Installation and User Instructions | Configuration software
8.12
Open configuration file
Use the Open configuration file button to open an
existing configuration file.
1 From the main menu, click the Open configuration
file button. The following window will appear
(see figure 8.23).
figure 8.23: Open configuration file window
2 Select the configuration file that you want to open,
and then click Open. The configuration will be
loaded, and displayed on the Schedule programming
window (see figure 8.14).
Bosch Security Systems | 2006-05 | 9922 141 50741 en
en | 38
Plena Weekly Timer | Installation and User Instructions | Technical data
9
9.1
Technical data
Electrical
Supply voltage:
115/230 V(AC) ± 10% ac, 50/60 Hz
Power consumption:
30 Watts
9.2
Performance
Frequency response:
20 Hz - 20 kHz (-3 dB)
Total harmonic distortion:
< 0.01% (1 kHz)
Signal-to-noise:
> 85 dB
Dynamic range:
> 100 dB
9.3
Audio inputs
XLR nominal input
0 dBV (symmetrical)
9.4
Audio outputs
XLR nominal input
0 dBV (symmetrical)
9.5
Mechanical
Mounting
Free-standing or mounted in a 19" rack
Dimensions
(H x W x D) 44 x 483 x 3120 mm
(with brackets, without feet)
48 x 440 x 3120 mm (without brackets, with feet)
Weight
3 kg
Color
Charcoal with silver
9.6
Interconnection
Mains supply
Euro socket with built-in fuse
24DC back-up power
Removable Euro-style screw terminal
System configuration
RJ-45 connector
Bosch Security Systems | 2006-05 | 9922 141 50741 en
9.7
en | 39
Environmental
Operating temperature
-10 to +55 ºC
Storage temperature
-40 to +70 ºC
Relative humidity
<95%
9.8
Controls and indicators
Front panel
LCD display
Schedule and contact LEDs
Schedule selection
2 push buttons
Contact out selection
6 push buttons
Programming key
3 push buttons
Rotary encoder for volume control and setup menu
Rear panel
Summer/ Winter (daylight saving) time DIP switch
Mains selector 115V/230 V
9.9
Clock accuracy (without sync)
25 ºC
Better than 2 seconds a month
-10 ºC to 55 ºC
Better than 3.5 seconds a month (without sync)
9.10
Power supply
Mains
Euro Mains socket with built-in fuse
24 DC back-up power
Removable Euro-style screw terminal
All contacts
Normally energized (fail-safe)
Connector type
MC 1,5/6-ST-3,5
Rating
250 V 7 A voltage free
9.11
Parts included
PLN-6TMW
Rack mounting brackets
XLR cable
Mains cable (1.7 m)
Instructions for use
Plena bonus CD
Plena Weekly Timer | Installation and User Instructions | Technical data
Intentionally left blank.
Bosch Security Systems | 2006-05 | 9922 141 50741 en
en | 40
For more information visit
www.boschsecuritysystems.com
© Bosch Security Systems B.V.
Data subject to change without notice
2006-05 | 9922 141 50741 en