1
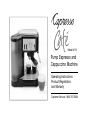
afé
C
Model #115
Pump Espresso and
Cappuccino Machine
Operating Instructions
Product Registration
and Warranty
Customer Service 1-800-767-3554
IMPORTANT SAFEGUARDS
into the wall outlet. To disconnect, turn any control ‘OFF’,
then remove plug from wall outlet.
12. Do not use appliance for other than intended use.
13. Use extreme caution when dispensing hot steam.
14. For household use only.
When using electrical appliances, basic safety precautions
should always be followed, including:
1. Read all instructions.
2. Do not touch hot surfaces. Use handles or knobs.
3 To protect against fire, electrical shock or personal injury,
do not immerse cord, plugs or appliance in water or
other liquid.
4. Close supervision is necessary when any appliance is
used by or near children.
5. Unplug appliance from outlet when not in use and before
cleaning. Allow appliance to cool before putting on or
taking off parts, and before cleaning the appliance.
6. Do not operate any appliance with a damaged cord or
plug or after the appliance malfunctions, or has been
damaged in any manner. Return appliance to the nearest
authorized service facility for examination, repair, or
adjustment.
7. The use of accessory attachments not recommended by
the appliance manufacturer may result in fire, electric
shock, or injury to persons.
8. Do not use outdoors.
9. Do not let cord hang over edge of table or counter top, or
touch any hot surfaces.
10. Do not place on or near a hot gas or electric burner, or in
a heated oven.
11. Always attach plug to appliance first, then plug the cord
SAVE THESE INSTRUCTIONS
SPECIAL CORD SET
INSTRUCTIONS
1. A short power supply cord (or detachable power-supply
cord) is provided to reduce risks resulting from becoming
entangled in or tripping over a longer cord.
2. Longer detachable power-supply cords or extension cords are
available and may be used if care is exercised in their use.
3. If a longer detachable power-supply cord or extension
cord is used,
a. The marked electrical rating of the detachable power-supply
cord or extension cord must be as great as the electrical
rating of the appliance,
b. If the appliance is of the grounded type, the extension
cord should be a grounding type 3-wire cord, and
c. The longer cord should be arranged so that it will not
drape over the counter top or table top where it can be
pulled on by children or tripped over.
3.
4. This appliance has a polarized plug (one blade is wider
than the other). As a safety feature, this plug will fit in a
polarized outlet only one way. If the plug does not fit fully
in the outlet, reverse the plug. If it still does not fit, contact
a qualified electrician. Do not attempt to defeat this safety
feature.
WARNING:
The system is under pressure during operation. Removing
the porta filter during operation can cause scalding and
injury. Remove the porta filter when brewing is complete,
and the appliance is no longer under pressure.
CAUTION
This appliance is for household use. Any servicing other than
cleaning and user maintenance should be performed by an
authorized service agent.
1. Do not immerse in water or try to disassemble appliance.
2. To reduce the risk of fire or electric shock, do not remove
the base. No user servicable parts are inside. Repair
should be done by authorized service personnel only.
3. Never use warm or hot water to fill the water container.
Use cold water only!
4. Keep hands and cord away from hot parts of the appliance
during operation.
5. Never clean with scouring powders or hard implements.
6. Operate the appliance with the driptray and support grid in
place.
7. Never heat inflammable liquids using steam.
8. Clean the steam tube only when the appliance is not under
pressure and the ON/OFF switch is in the ‘OFF’ position.
9. Follow the instructions for Decalcifying.
Customer Service
1-800-767-3554
Mon-Thu 9AM – 9PM • Fri 9AM – 8PM • Sat 9AM – 5PM
Eastern Standard Time.
email: [email protected]
Jura-Capresso LLC.
81 Ruckman Road, Closter, NJ 07624
201-767-3999 • Fax: 201-767-9684
Website: www.capresso.com
4.
Table of Contents
Page
Page
Important Safeguards ............................................................. 3
14. Decalcifying .................................................................... 14
Line Drawing, Fig 1 ................................................................. 6
15. Troubleshooting .............................................................. 14
1. The Capresso Café Espresso/Cappuccino Machine ......... 7
16. Recipes ........................................................................... 16
2. Before Using for the First Time .......................................... 7
17. Warranty ......................................................................... 17
3. Filling the Water Container ................................................. 8
18. Customer Service ........................................................... 17
4. Control Panel and Functions .............................................. 8
5. Warming the Internal Components and Cups .................. 10
6. Filling and Inserting the Porta Filter .................................. 10
APPLIANCE SPECIFICATIONS
7. Preparing Espresso .......................................................... 11
Name: Capresso Café
Voltage: 120V 60Hz
8. Preparing Cappuccino ...................................................... 11
Rated Input: 1050 W
9. Cleaning the Frothing Sleeve and Steam Tube ................ 12
Heating System: 1000W thermoblock heater,
thermostat controlled
10. Preparing Latte / Heating Other Liquids ........................ 12
Pump: 50W electromagnetic high power pump
11. Delivering Hot Water ....................................................... 13
Pressure: 12-16 bar (max)
12. Turning OFF the Capresso Café ..................................... 13
Dimensions: 12 x 8 x 11 inches, (303.5 x 203.5 x 274 mm)
Weight: 8.8 lbs, (4 kg)
13. Cleaning & Maintenance ................................................. 13
5.
1. The Capresso Café Espresso /
Cappuccino Machine
delicious cappuccino. The separate hot water function allows
you to make a cup of hot tea or instant soup in 30 seconds.
Thank you for purchasing the Capresso Café Espresso and
Cappuccino machine. For Warranty and Product Registration
please see the end of this booklet.
2. Before Using for the First Time
After carefully unpacking your Capresso Café, wash all removable
parts with warm soapy water and rinse thoroughly. Familiarize
yourself with the appliance and read the instructions manual.
Experts consider brewing coffee under high pressure to be the
ideal process to extract maximum flavor and aroma. The difference
between espresso and conventional coffee is that espresso
requires a shorter brewing time. This is also that reason that
espresso contains approximately 30% less caffeine than
conventional filter coffee. If possible, use thick-sided, pre-heated
espresso /cappuccino cups which stay hot longer. Add the sugar
before pouring espresso into the cup or simply shake some
sugar briefly into the cup, stirring just once or twice, otherwise
too much flavor escapes.
Plug the power cord into a grounded wall outlet according to the
safety instructions.
Rinse the internal components before making espresso. Fill the
water container and pump a few ounces of water through the
brew head (Fig.1, t) and the steam tube (Fig.1, j). Follow the
procedures in chapters 4 and 5 without using coffee.
The Capresso Café produces perfect espresso – coffee with a
thick, foamy layer on top called “crema.” The “crema” traps the
fine aromatics and the light gaseous flavors that register on the
palate. The “crema” keeps flavor locked in that would
otherwise escape. The high pressure and short brewing time
prevent the extraction of bitter oils and release less caffeine than
other brewing methods. Whether you are brewing a small 1 oz.
shot of espresso or a larger cup of pressure brewed coffee, your
Capresso Café will produce the absolute freshest and most
aromatic cup of “crema” coffee possible. Not only will your
Capresso Café make the perfect espresso, but within seconds
the easy to use frothing system turns your espresso into a
7.
3. Filling the Water Container To
Brew Espresso:
Open the lid and remove the
container.
Fill the container every day
with fresh, cold water.
Place the container back into
the appliance, pushing down
firmly to engage the base
valve. Close the lid.
4. Control Panel and Functions
c) The Function Switch selects Coffee (through the Brew
Head, Fig. 1,t) or Hot Water or Steam (through the
Steam Tube, Fig 1, j).
d) The Control Dial turns the pump on and off and directs
the flow of water or steam.
a) The ON/OFF Switch turns the machine on and off.
b The red heating light illuminates while the appliance is
heating up. When the operating temperature is reached,
the red light turns off and the green “ready” light
illuminates.
8.
To Brew Espresso:
• Push the Function Switch to Coffee/Hot Water.
• Rotate the Control Dial to the right to deliver Coffee.
• To stop brewing espresso, turn the Control Dial back to
0.
To Deliver Steam:
• Push the Function Switch to Steam.
• Rotate the Control Dial to the left to
deliver Steam/Hot Water.
• To stop delivering steam, turn the Control Dial back to
0.
To Deliver Hot Water:
• Push the Function Switch to Coffee/Hot Water.
• Rotate the Control Dial to the left to deliver Hot Water.
• To stop delivering hot water, turn the Control Dial back to
0.
9.
5. Warming Internal Components and Cups
6. Filling and Inserting the Porta Filter
Before making espresso, it is important to pre-warm all the
internal components in the appliance and to pre-warm the cups.
This procedure will add 10° to 15° F to the first cup of espresso.
The machines comes with a small (one-cup)
and large (two-cup, extra strong) sieve
(Fig. 1, r, s). One of them is inserted in the
Porta Filter (Fig. 1, o) the other one is stored
in the storage compartment (Fig. 1, c).
a) Turn on machine.
b) Set the function switch to Coffee/Hot Water.
a) Pull back on the filter lock on the porta filter
b) Place one of the sieves into the porta filter.
c) Ensure the relevant locking cams of the
porta filter are always located between the
projections on the sieve (see drawing).
d) With the measuring spoon, place one or
two level spoonfuls of espresso coffee into
the sieve.
e) Push down, or tamp, the coffee grounds
with the tamper side of the measuring spoon.
f) Wipe off any coffee grounds of the edge of
the porta filter.
c) Fill the water container with fresh, cold water and place in
appliance.
d) Insert the porta filter, without coffee and lock into place.
e) Place one or two cups underneath the porta filer.
f) After the green ready light illuminates, turn the Control Dial to
the right to the coffee-delivery position and allow some hot
water to pass into the cups.
g) Turn the Control Dial back to the 0 position to stop the flow.
h) Empty the cups, remove the Porta Filter.
TIP! Do not overfill the porta filter. Use the measuring spoon
provided. One level spoonful is sufficient for one cup.
TIP! Place espresso cups upside
down on the warming plate to
keep them warm. As long as
the machine is on, the internal
heater will keep the top plate
warm.
g) Pull back the filter lock.
Insert and lift the
porta filter into the
brew head at the
unlock position.
h) Turn the porta filter to
the right until it locks
into place.
10.
7. Preparing Espresso
8. Preparing Cappuccino
a) Fill the water container (chapter 3), pre-warm the parts
(chapter 5) and fill and insert the Porta Filter (chapter 6).
b) Place one or two espresso cups underneath the porta filter.
c) When the green ready light illuminates, turn the control
dial to the right to the coffee-delivery position.
d) When the desired amount of espresso is brewed, stop the
flow by turning the control dial to the center position 0.
Cappuccino is the combination of one or two shots of espresso
with an equal or larger amount of hot milk and milk froth (for
Latte see chapter 10).
e)
f)
g)
h)
i)
j)
Always start with cold milk. Skim or Fat-free milk will produce
the most froth and will provide a stronger espresso taste. 1% and
2% milk will produce less froth, and whole milk will produce less
than half the amount of froth of skim milk.
a) Fill a stainless steel pitcher with 6 to 8 oz. of milk, this will
provide enough froth for two to three cups of cappuccino.
Make sure that there is enough space left in the pitcher for the
milk and milk froth to expand.
b) First prepare your espresso (see chapter 8), but use larger,
pre-heated cappuccino cups instead of espresso cups.
c) Set the function switch to the Steam position. The red
heating light illuminates as the appliance is heated to
steam temperature.
d) Insert and slide the frothing
sleeve (Fig. 1, k) onto the
steam tube (Fig. 1, j) until it
makes contact. The frothing
sleeve must click into the groove.
e) Turn the frothing sleeve as far
as possible to the right to
lock it in place.
f) The appliance is ready to
deliver steam when the green
ready light illuminates.
Note: It is normal for the red heating light to illuminate during
brewing indicating the heater is warming the water as it flows
through.
Remove the cups and enjoy.
Remove the porta filter from the appliance.
Push the filter lock forward and hold to lock in the sieve.
Turn the porta filter upside down and tap out the used
coffee grounds.
Rinse sieve under warm water and make sure the holes are
free of coffee deposits.
When the green ready light illuminates, the machine is ready
to make the next espresso.
11.
Delivering Steam
Caution: the frothing sleeve might be hot!
c) Turn the function switch to the Coffee/Hot Water position.
d) Place a cup under the steam tube and turn the control dial to
the left to the Steam/Hot Water position to rinse the steam
tube for a few seconds.
e) Turn the control dial to 0 to stop the flow of water.
TIP! Although it is recommended to use a stainless steel pitcher
to froth milk, porcelain or ceramic cups can also be used.
g) Immerse the frothing sleeve into the milk so that the tip and
small side hole is just beneath the surface of the milk.
Immersing the frothing sleeve deep into the milk will not allow
the tiny bubbles to rise to the surface. It will heat the milk but it
will not froth the milk. The frothing sleeve should not come into
contact with the base of the milk pitcher while frothing.
10. Preparing Latte / Heating Other Liquids
Latte is the combination of one or two shots of espresso with an
equal or larger amount of hot steamed milk without or very little
froth. Prepare your espressos and then add steamed milk (see
below).
Producing Steam to Heat Liquids
The steam tube (without the frothing sleeve) can be used to
steam milk and heat or re-heat hot beverages, for example hot
chocolate, water or tea.
a) Fill the container with fresh water and place in the appliance.
b) Make sure the frothing sleeve is removed from the steam tube.
c) Set the function switch to Steam. When the green ready lights
illuminates, the machine is ready to deliver steam.
Note: It is normal for the red heating light to illuminate while
delivering steam. It is also normal for
the pump to make ticking noises when
delivering steam.
d) Immerse the steam tube into the
liquid and turn the Control Dial to
the Steam/Hot water position.
e) When heating is complete, turn
the control dial to the center
position 0 and remove the cup.
Frothing Milk
Note: It is normal for the red heating light to illuminate while
frothing. It is also normal for the pump to make ticking noises
when making steam.
h) Turn the control dial to the left to the
Steam/Hot Water position. The steaming
process will start immediately.
i) Froth and steam the milk.
j) To stop dispensing steam, turn the
control dial to the center position 0
and remove the pitcher.
k) Set the froth aside for a few moments
to allow the froth to thicken further.
l) Spoon the frothy milk over the espresso and then fill the
remainder of the cup with warmed milk.
9. Cleaning the Frothing Sleeve and Steam Tube
Note: Clean immediately after use.
a) Remove the frothing sleeve by turning it as far as possible to
the left and then pull it off of steam tube.
b) Rinse off the remaining milk under running water after each use.
12.
11. Delivering Hot Water
• Now you can turn off the machine.
The steam tube (without the frothing sleeve) can be used to
deliver hot water for hot drinks, for example, tea or ready-made
soups.
Note: If the water is not hot enough, set the Function Switch to
Steam to further heat the water with steam (see chapter 10). It is
normal for the red heating light to illuminate while delivering hot
water. It is also normal for the pump to make ticking noises
when making steam.
a) Fill the container with water and place in the appliance.
b) Remove the frothing sleeve from the steam tube (turn as far
as possible to the left and then pull it off the steam tube).
c) Set the function switch to
Coffee/Hot Water.
d) Place or hold a cup underneath
the steam tube. Turn the control
dial to the left to the Steam/Hot
Water position.
e) To stop the flow of hot water turn
the control dial back to the
center 0 position and remove the
cup or bowl.
Note: If the appliance is not used over a longer period of time,
remove the Porta Filter. This will extend the life of the seal inside
the Brew Head.
13. Cleaning & Maintenance
a Always disconnect the plug from the wall outlet and allow the
appliance to cool down before cleaning.
b) Do not immerse the appliance in water or any other liquid.
c) Do not use harsh abrasives to clean. Wipe down the appliance
housing with a damp cloth.
d) Wipe the brew head with a damp cloth. Caution hot! Danger
of burning or scalding!
e) Rinse the fresh water container, the support grid and drip tray
regularly with water.
f) Empty the drip tray regularly. If the red float fill level indicator
(Fig. 1, n) becomes visible through the opening in the support
grid, empty drip tray immediately.
g) If the inner screen becomes heavily soiled, it can be
unscrewed from the brew head, using a coin, for thorough
cleaning. Caution hot! Disconnect plug from wall outlet.
12. Turning OFF the Capresso Café
• Do not switch the appliance off immediately after making the
last coffee.
• Wait for a few seconds so that the thermo block heating
system can release any left over moisture into the tray. A hissing
sound can be heard as the steam expands. This is perfectly
normal.
13.
Cleaning the Steam Tube and
Frothing Sleeve see chapter 9.
g) Turn the control dial to the right to the coffee-delivery position.
Allow 1/3 to 1/2 of the solution to be pumped through the system.
h) If the tip of the steam tube becomes
blocked, use the hexagon key on the
measuring spoon to remove it. Clean with
a needle and replace. In case you lose the
tip, there is a spare tip included with the
machine.
Decalcifying the Steam Tube
Follow the instructions for ‘Decalcifying’,
(chapter 14) however, set the control dial
to the left to the Steam/Hot Water position instead. Remove the
frothing sleeve and place a bowl beneath the steam tube.
Note: There is no need to wait for the green ready light to illuminate.
h) Turn OFF the appliance, with the control dial in the coffeedelivery position.
i) Allow the solution to take effect for 10-15 minutes.
j) Turn ON the appliance and allow the rest of the solution to
pass through.
k) Important: After decalcifying, it is absolutely necessary to run
2 tanks full of fresh water through the appliance before putting
it back into use.
l) Replace inner screen and tighten the screw securely.
14. Decalcifying
15. Troubleshooting
When making espresso, always use cold clean water. Using
spring water or filtered water will slow down calcium build up.
How often depends on the water hardness; however a good rule
would be to decalcify the machine after 200-400 uses.
a) Use normal commercial liquid decalcifying agents (follow the
instructions for use) or dissolve 4 tablespoons of tartaric acid
or citric acid in 30 oz. water. Do not use vinegar as this will
considerably shorten the life of the seal.
b) Remove the porta filter.
c) Unscrew the inner screen from the brew head with a coin.
Wipe off any coffee residue with a damp cloth.
d) Fill the container with the decalcifying solution.
e) Place a large bowl beneath the brew head.
f) Switch ON the appliance and set the function switch to
Coffee/Hot Water.
COFFEE RUNS DOWN ON THE SIDE OF THE PORTA FILTER
A) Porta filter is not properly in contact position.
Turn the porta filter to the extreme right.
B) Edge of sieve not free of ground coffee.
Switch OFF the appliance, remove the porta filter holder and
clean the edges of the sieve.
C) Sealing ring inside brew head is dirty.
Remove the inner screen with a coin. Remove, clean and
replace the sealing ring. Caution hot.
D) Sealing ring no longer has elasticity.
Sealing ring must be replaced. See mail order form.
14.
LOUD PUMP NOISE
A) No water in container.
Fill with water.
B) Water container not correctly in position.
Raise water container and put into the correct position.
NO CREMA
A) Coffee old or too dry.
Use fresh coffee.
B) Coffee not pushed down firmly enough.
Tamp coffee grounds more firmly. Use a finer grind.
C) Coffee too coarse.
Use a finer grind.
D) Coffee blend not suited to espresso coffee.
Change brand of espresso.
NO OR VERY LITTLE COFFEE COMES THROUGH
PORTA FILTER
A) No water in container.
Fill the container with water.
B) Function switch set for Steam.
Remove porta filter, set function switch to 0, wait a minute for
machine to cool down. Turn function switch to Coffee/Hot Water.
C) Inner screen is blocked.
Remove porta filter and allow water to run through inner
screen. See section ‘Before Using for the First Time’.
If necessary, unscrew inner screen and clean.
Caution hot, disconnect plug from wall outlet.
ESPRESSO NOT HOT ENOUGH
See chapter 5.
NO STEAM FROM THE STEAM TUBE
Tip of steam tube is blocked. See chapter 13. If no steam or
water comes out of the steam tube, then decalcify the steam
tube. If the appliance is still blocked, call Jura-Capresso
customer service, see chapter 18.
NOT ENOUGH FROTH WHEN FROTHING MILK
A) Milk not fresh.
Use fresh milk.
B) Milk not suitable.
Use milk with no more than 1.5% fat content.
C) Milk was too warm from the start.
Use milk of fridge temperature.
D) Not enough milk to froth.
Use more cold milk.
ESPRESSO BREWS OUT ONLY AS DROPS
A) Coffee grounds are too fine or packed down too firmly.
Change brand of coffee, do not tamp the coffee grounds so
firmly. Use a coarser grind of coffee.
B) Inner screen is blocked.
Remove porta filter and allow water to run through inner
screen. See chapter 2. If necessary, unscrew inner screen and
clean. Caution hot, disconnect plug from wall outlet.
C) Machine blocked by calcium deposits. Decalcify the appliance.
See chapter 14.
15.
16. Recipes
WATER CONTAINER DRIPS WHEN REMOVED
Valve in base may be stuck.
Use finger to push valve back into place.
Espresso:
1 1/2 to 2 ounces, add sugar to taste.
Espresso ristretto:
small, strong, about 1 ounce
Espresso lungo:
medium and less concentrated, 2 to 2 1/2 ounces
Cappuccino:
Prepare one or two shots of espresso in a pre-warmed cappuccino
cup. Add steamed and frothed milk to taste. Garnish with cocoa
power or chocolate sprinkles.
Latte: Prepare one or two shots of espresso in a large cup.
Prepare steamed milk. Fill the remainder of the cup with warmed
milk.
Italian-style Iced Coffee:
Ingredients: 4 scoops of vanilla ice-cream; 1/2 cup of milk;
2 cups of cold, sweetened espresso; chocolate sprinkles.
UNEVEN CUP FILLING
A) Outlet in porta filter blocked.
Clean porta filter.
B) Support grid not level.
Remove, clean and replace support grid.
DIFFICULTY INSERTING PORTA FILTER
Groove on inside of brew head may be soiled by coffee ground
residue.
Disconnect plug from wall outlet, wipe down groove with damp
cloth. Caution hot!
ESPRESSO TASTES BITTER
Appliance has not been rinsed properly after decalcifying.
Run 2 containers full of fresh water through the appliance. See
chapter 14.
Mix the milk and espresso, pour over the ice-cream and
decorate with the chocolate sprinkles.
APPLIANCE DOES NOT OPERATE (NO POWER)
Mechanical or electronic defect.
Call the Jura-Capresso Customer Service, see chapter 18.
Espresso flambé:
Ingredients: 5 measures of brandy; 2 teaspoons of brown sugar,
2 cups of espresso; whipping cream.
MISSING PARTS
See Mail Order Form or call the Jura-Capresso Customer
Service, see chapter 18.
Pour the brandy into heat-resistant glasses, heat and then set
alight. Add sugar and stir. Pour espresso over the top and
garnish with a topping of whipped cream.
16.
damages” refers to the cost of repairing or replacing other property
which is damaged when this machine does not work properly.
The remedies provided under this warranty are exclusive and in
lieu of all others. This warranty gives you specific legal rights, and
you may also have other rights which vary from state to state.
17. LIMITED ONE-YEAR WARRANTY
This warranty covers your CAPRESSO machine, model #115
espresso machine. The model # can be found on the bottom of
the machine. This warranty is in effect for one year from the date
of the first consumer purchase and is limited to the United
States of America. This warranty covers all defects in materials
or workmanship (parts and labor) This warranty does not cover:
18. JURA-CAPRESSO CUSTOMER SERVICE:
• Any machine not distributed by JURA-CAPRESSO within the
United States.
JURA-CAPRESSO Inc.
81 Ruckman Road
CLOSTER, NJ 07624
• Any machine not purchased from an Authorized JURACAPRESSO Dealer.
• Commercial use of machine.
Help Line: 1-800-767-3554
9AM to 9PM Monday through Friday
9AM to 5PM Saturday Eastern Standard Time.
• Damage caused by accident, abuse, negligence, misuse,
improper operation or failure to follow instructions contained
in this manual.
• Any service or alteration performed by an unauthorized person,
company, or association.
If you call at any other time, please leave a message with your
telephone number and when we can call you back.
Other limitations and exclusions: Any implied warranties including
fitness for use and merchantability are limited in duration to the
period of the express warranty set forth above and no person is
authorized to assume for JURA-CAPRESSO any other liability in
connection with the sale of the machine. JURA-CAPRESSO
expressly disclaims liability for incidental and consequential
damages caused by the machine. The term “incidental
damages” refers to the loss of the original purchasers time,
loss of the use of the machine or other costs relating to the
care and custody of the machine. The term “consequential
Fax: 201-767-9684
Email: [email protected]
Website: www.capresso.com
17.