1
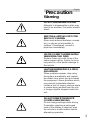
R
R
ALPINE ELECTRONICS, INC.
Tokyo office: 1-1-8 Nishi Gotanda,
Shinagawa-ku, Tokyo 141, Japan
Tel.: (03) 3494-1101
ALPINE ELECTRONICS OF AMERICA, INC.
19145 Gramercy Place, Torrance,
California 90501, U.S.A.
Tel.: (310) 326-8000
ALPINE ELECTRONICS OF CANADA, INC.
Suite 203, 7300 Warden Ave. Markham,
Ontario L3R 9Z6, Canada
Tel.: (905) 475-7280
CDE-7831E
ALPINE ELECTRONICS OF AUSTRALIA PTY. LTD.
6-8 Fiveways Boulevarde Keysborough,
Victoria 3173, Australia
Tel.: (03) 769-0000
FM/AM Compact Disc Receiver
ALPINE ELECTRONICS GmbH
Brandenburger Strasse 2-6 D-40880 Ratingen,
Germany
Tel.: 02102-45 50
• OWNER'S MANUAL
Please read this manual to maximize your enjoyment of the outstanding performance and feature
capabilities of the equipment, then retain the
manual for future reference.
ALPINE ITALIA S.p.A.
Via C. Colombo 8, 20090 Trezzano Sul
Naviglio MI, Italy
Tel.: 02-48 40 16 24
ALPINE ELECTRONICS FRANCE S.A.R.L.
98, Rue De La Belle Etoile, Z.I. Paris Nord Il
B.P. 50016 F-95945, Roissy,
Charles De Gaulle Cedex, France
Tel.: 01-48 63 89 89
ALPINE ELECTRONICS OF U.K., LTD.
13 Tanners Drive, Blakelands,
Milton Keynes MK14 5BU, U.K.
Tel.: 01908-61 15 56
OTE SENSOR EY
E
SOURCE
A.S.U
IND
U
LO
BBE
CLK
D
DN
F
BAND
UP
MAX
D.A.P
DEMO
D.A.P
IO
CO
Designed by ALPINE Japan
Printed in Japan
68P90579W13-O
REM
PWR
AUD
ALPINE ELECTRONICS DE ESPAÑA, S.A.
Portal De Gamarra 36, Pabellón 32
01013 Vitoria (Alava)-Apdo. 133, Spain
Tel.: 34-45-283588
INTLZ
NT
35W × 4
RO
L
TUNE·A.ME
MO
1
MONO
2
4
RPT
5
3
DE
M.I.X
SCAN
6
MIN
RL
LOUD
DX SEEK M.I.X. REPEAT
MONO ST
RF
BBE
CD RECEIVER 35W x 4
CDE-7831E
2
Precaution
English
Warning
DO NOT DISASSEMBLE OR ALTER
Attempts to disassemble or alter may
lead to an accident, fire and/or electric
shock.
KEEP SMALL ARTICLES OUT OF THE
REACH OF CHILDREN
Store small articles (batteries, screws,
etc.) in places not accessible to
children. If swallowed, consult a
physician immediately.
USE THE CORRECT AMPERE RATING
WHEN REPLACING FUSES
Replace fuses only with fuses of the
same ampere rating. Failure to do so
may result in a fire and/or damage to
the vehicle.
HALT USE IMMEDIATELY IF A PROBLEM APPEARS
When problems appear, stop using
the system immediately and contact
the dealer from whom you purchased
the equipment. Some problems which
may warrant immediate attention
include a lack of sound, noxious odors
or smoke being emitted from the unit,
or foreign objects dropped inside the
unit.
DO NOT OPERATE THE REMOTE
CONTROL WHILE DRIVING
Do not change settings while driving.
If operation requiring a prolonged
view of the display is required, stop
the vehicle in a safe location before
attempting operation.
3
Precaution
English
Caution
DO NOT RAISE THE VOLUME EXCESSIVELY
Keep the volume at a level where you
can still hear outside noises while
driving. Driving while unable to hear
outside sounds could cause an accident.
DO NOT USE THIS EQUIPMENT
OUTSIDE THE VEHICLE
Do not use this equipment for purposes other than those listed for a
vehicle. Failure to do so may result in
an electric shock or an injury.
KEEP FOREIGN OBJECTS OUT OF THE
CD COMPARTMENT SLOT
Keep any foreign objects, including
fingers, out of the CD compartment
slot.
STOP THE VEHICLE BEFORE CARRYING OUT ANY OPERATION THAT
COULD INTERFERE WITH YOUR
DRIVING
If loading or unloading a CD interferes
with your driving, stop the vehicle in a
safe location before attempting
operation.
DO NOT REPLACE THE BATTERY WITH
ONE NOT SPECIFIED. INSERT WITH
THE CORRECT BATTERY POLARITY
Do not replace with other than specified battery. When inserting the
battery, be sure to observe proper
polarity (+ and –) as instructed.
Battery rupture or chemical leakage
can cause an injury or equipment
malfunction.
4
Contents
English
Page
6 ............................................................................. Precautions
Detachable Front Panel
9 ........................................................ Detaching the Front Panel
10 ....................................................... Attaching the Front Panel
Basic Operation
10 ............................................................ Initial System Start-Up
11 ..................................................................... Automatic Setup
12 ..................................................... Turning Power On and Off
12 ................................................................... N.F.P. On and Off
13 ....................................................... Turning Loudness On/Off
14 .............................................. Adjusting Volume/Bass/Treble/
Balance/Fader
15 .............................................................. Selecting BBE Mode
16 ............................................................ Sound Guide Function
17 ........................................................................ Demonstration
Radio Operation
18 ........................................................................ Manual Tuning
19 .......................................................... Automatic Seek Tuning
20 .......................................................... Mono/Stereo Switching
21 .......................................... Manual Storing of Station Presets
22 .................................... Automatic Memory of Station Presets
23 .................... Storing into Direct Access Preset (D.A.P.) Band
24 ....................................................... Tuning to Preset Stations
CD Operation
25 ............................................................ Inserting/Ejecting Disc
25 .......................................................... Normal Play and Pause
26 ............................................................... Music Sensor (Skip)
26 .................................................. Fast Forward and Backward
27 ............................................................................ Repeat Play
27 ............................................................. M.I.X. (Random Play)
28 ................................................................ Scanning Programs
Clock Operation
28 ...................................................................... Displaying Time
29 ........................................................................... Setting Time
Remote Control
30 .................................................................................. Controls
32 .............................................................. Battery Replacement
33 ............................................................................... Disc Care
34 .............................................................. In Case of Difficulty
37 ....................................................................... Specifications
5
Precautions
English
Thermal Protection Circuit
INTLZ
REM
PWR
OTE SENSOR EY
E
SOURCE
A.S.U.
TITLE
CLK
UD
IND
LO
–
DN
UP
AUD
IO
CO
RO
L
TUNE
A. MEMO
MO
T. RCL
F
BAND
D.A.P. 1
NT
MONO 2
3
MAX
DISK
TITLE
MEMORY
D.A.P.
DX SEEK
MIN
RL
T.RCL RPT ALL M.I.X.
MONO ST
RF
LOUD
DE
M.I.X.
4
RPT
5
SCAN
6
TUNER/CD PLAYER CDA-7930
Be sure the temperature inside the vehicle is
between +60°C (+140°F) and –10°C (+14°F)
before attempting to play a disc. If the temperature is over +60°C (+140°F), the protection
circuit functions to stop the CD player, and
"– – – H" is displayed.
Moisture Condensation
You may notice the CD playback sound
wavering due to condensation. If this happens,
remove the disc from the player and wait about
an hour for the moisture to evaporate.
Damaged Disc
Do not attempt to play cracked, warped, or
damaged discs. Playing a bad disc could
severely damage the playback mechanism.
Never Attempt the Following
Do not grip or pull out the disc while it is being
pulled back into the player by the automatic
reloading mechanism.
Do not attempt to insert a disc into the unit
when the unit power is off.
Maintenance
If you have problems, do not attempt to repair
the unit yourself. Return it to your Alpine dealer
or the nearest Alpine Service Station for
servicing.
6
Precautions
English
Inserting Discs
Your player accepts only one disc at a time for
playback. Do not attempt to load more than one
disc.
Make sure the label side is facing up when you
insert the disc. Your player will automatically
eject any disc that is inserted incorrectly. If the
player continues to eject a correctly inserted
disc, push the Reset switch (located behind the
detachable front panel) with a pointed object
such as a ball-point pen.
Playing a disc while driving on a very bumpy
road may result in skips, but this will not scratch
the disc or damage the player.
New Discs
Center Hole
Bumps
Center Hole
New Disc
As a protective measure to prevent the CD from
jamming, the CD player will automatically eject
discs with irregular surfaces or inserted
incorrectly. When a new disc is inserted into the
player and ejected after initial loading, using
your finger, feel around the inside of the centre
hole and outside edge of the disc. If you feel
any small bumps or irregularities, this could
inhibit proper loading of the disc. To remove the
bumps, rub the inside edge of the hole and
outside edge of the disc with a ball-point pen or
other such instrument, then insert the disc
again.
Outside (Bumps)
7
Precautions
English
Installation Location
Make sure the CDE-7831E will not be installed
in a location subjected to:
• Direct sun and heat
• High humidity and water
• Excessive dust
• Excessive vibrations
Handling the Detachable
Front Panel
• Do not expose to rain or water.
• Do not drop or apply shock.
8
Detachable Front
Panel
1
Detaching the Front
Panel
2
1
English
English
INTLZ
Press the PWR button to turn off the power.
PWR
2
Press the release button until the front panel
pops out.
3
Grasp the left side of the front panel and pull it
out.
Note: To protect the front panel, place it in the
supplied carrying case.
9
Detachable Front
Panel
English
Attaching the Front
Panel
1
1. First, insert the right side of the front panel
into the main unit. Align the 2 small holes on
the front panel with the 2 projections on the
main unit.
2. Push the left side of the front panel until it
locks firmly into the main unit.
1
2
Note: Before attaching the front panel, make
sure that there is no dirt or dust on the
connector terminals and no foreign
object between the front panel and the
main unit.
Basic Operation
Initial System Start-Up
1
1
10
When operating the unit for the first time after
installation or after the vehicle's battery has
been disconnected and reconnected, set the
volume level to its minimum, then remove the
detachable front panel. Press the Reset switch
with a ball-point pen or any other pointed
object.
English
Basic Operation
2
Automatic Setup (A.S.U.)
1
1
This convenient feature sets up the unit
automatically after installation.
INTLZ
PWR
Press the PWR (POWER) button to turn on the
unit.
Note: When the ignition key is turned on then
the power is turned on immediately after
installation or resetting, the A.S.U.
function is activated automatically.
2
SOURCE
A.S.U.
Press and hold the A.S.U. (Automatic Setup)
button for at least 3 seconds to activate the
A.S.U. mode.
"ASU" blinks in the display.
The unit automatically performs the following
operations.
1. Activates Auto Memory mode.
2. Gradually sets the Bass, Treble, Balance
and Fader controls to their center positions.
3. Gradually increases the volume to the
position 12 in the display.
4. Turns the Loudness and BBE on.
5. Ends the A.S.U. mode.
11
English
Basic Operation
1
Turning Power
On and Off
1
Press the PWR button to turn on the unit.
Note: The unit can be turned on by pressing
any other button except the eject c and
CLK buttons.
INTLZ
The volume level gradually increases to the
previous level you were listening to before the
unit was turned off. Press the PWR button
again to turn off the unit.
PWR
N.F.P. On and Off
1
1
Press and hold the Eject button for at least 3
seconds.
With each press, N.F.P. is toggled On or Off.
NFP ON
NFP OFF
12
The Subwoofer Output is an adjustable, nonfading output. It does not utilize a low pass
filter, so, use an external filter and amp or amp
with integrated filter to connect to this output.
Then, turn on the N.F.P. to drive your
subwoofer.
Notes:
• Initial mode is N.F.P. OFF."
• Leave the "N.F.P. OFF" as long as the
Subwoofer output is not being used.
English
Basic Operation
Turning Loudness On/Off
1
Loudness introduces a special low- and highfrequency emphasis at low listening levels. This
compensates for the ear’s decreased sensitivity
to bass and treble sound.
1
Press and hold the AUDIO CONTROL button for
at least 2 seconds to activate or deactivate the
loudness mode.
LOUD
13
English
Basic Operation
Adjusting
Volume/Bass/Treble/
Balance/Fader
1 2
1
Press the AUDIO CONTROL button repeatedly
to choose the desired mode.
VOL
BAS
TRE
Note: If the AUDIO CONTROL knob is not
rotated within 5 seconds after selecting
the BASS, TREBLE, BALANCE, or
FADER modes, the control returns to
the VOLUME mode.
BAL
FAD
2
Rotate the AUDIO CONTROL knob until the
desired sound is obtained in each mode.
Note: The BASS and TREBLE settings for
each source (FM, AM and CD) are
automatically memorized. These
settings remain until you manually
change them.
14
English
Basic Operation
Selecting BBE Mode
3
1
1·2·4
BBE
The BBE (Barcus Berry Electronics) processor
installed in this unit is designed to correct the
phase distortion inherent in most loudspeaker
designs. Ensuring the phase integrity of the
signal driving the speakers improves the
accurate reproduction of the sound. When used
in conjunction with the equalizer and sound field
effects, optimum sound space enhancement
can take place.
Press the BBE button to turn on or off the BBE
mode. The BBE level is preset to “BBE +5” at
the factory.
Note: The BBE processor is most effective
when used in conjunction with the other
surround effects.
2
BBE
3
4
To change to a desired BBE level, press and
hold the BBE button for at least 2 seconds to
activate the BBE setting mode.
Rotate the AUDIO CONTROL knob clockwise
or countercloekwise to choose the desired level
upward or downward respectively. Each rotation
changes the level by one step.
The initial setting is +5 and you can select in 6
steps (from +1 to +6).
BBE
Press the BBE button to deactivate the BBE
setting mode.
Note: The BBE level setting is automatically
memorized. The setting remains until you
manually change it.
15
English
Basic Operation
Sound Guide Function
1
1
This function will give audible feedback with
varying tones depending upon the button
pressed.
INTLZ
PWR
BEEP ON
BEEP OFF
16
Press and hold the PWR button for more than 3
seconds. Each press toggles between the
BEEP ON and BEEP OFF modes.
The initial setting is the BEEP ON mode.
English
Basic Operation
Demonstration
1 2
In the Demonstration (DEMO) mode, the unit
scans each source; tuner and CD player.
1
F
DEMO
DEMO
2
F
DEMO
Press and hold the DEMO button for at least 3
seconds to activate the DEMO mode.
"DEMO" blinks in the display.
The unit automatically performs the following
scanning operation.
1. The unit goes into the Tuner mode and
scans the preset radio stations by playing
the first 10 seconds of each preset station
in the FM1, FM2 and AM bands.
2. Then the unit goes into the CD mode and
scans the selections on the loaded CD by
playing the first 10 seconds of each
selection starting with the first selection.
3. The unit continues scanning of the sources
as described in 1 to 3 above.
To end the DEMO mode, press the DEMO
button.
"DEMO" disappears from the display.
17
English
Radio Operation
1
4
Manual Tuning
2
3
1
SOURCE
A.S.U.
90.1
(Radio mode)
Press the SOURCE button to select the radio
mode.
T08 0'16
(CD mode)
2
Press the BAND button repeatedly until the
desired radio band is displayed.
F1
BAND
F2
AM
3
DX SEEK
Press the TUNE button repeatedly until "DX
SEEK" and "SEEK" disappears from the
display.
TUNE·A.ME
SEEK
Note: The initial mode is DX SEEK.
(OFF)
4
Press the DN or UP button to move downward
or upward one step respectively until the
desired station frequency is displayed.
DN
UP
F1
18
90.1
English
Radio Operation
1
4
Automatic Seek Tuning
2
3
1
SOURCE
A.S.U.
90.1
(Radio mode)
Press the SOURCE button to select the radio
mode.
T08 0'16
(CD mode)
2
Press the BAND button repeatedly until the
desired radio band is displayed.
F1
BAND
F2
AM
3
Press the TUNE button to illuminate the DX and
SEEK indicators in the display. With the DX
mode activated, both strong and weak stations
will be tuned in the Auto-Seek operation.
Press again to return to the local mode. The DX
indicator will turn off and the SEEK indicator will
remain illuminated. Now, only strong stations
will be tuned.
DX SEEK
TUNE·A.ME
SEEK
4
DN
UP
F1
90.1
Press the DN or UP button to automatically
seek a station downward or upward
respectively.
The unit will stop at the next station it finds.
Press the same button again to seek next
station.
19
English
Radio Operation
1 3
Mono/Stereo Switching
2
1
Press the "F" button. The function indicator on
the button will turn off.
F
2
F1
90.1
F1
90.1
ST
MONO 2
MONO
3
20
"ST" indicator appears when a stereo station is
tuned in.
Press the MONO button to switch from stereo
to monaural FM reception. This will help in
reducing the noise of weak FM Stereo
broadcasts. In the monaural mode, the MONO
indicator appears. Press the MONO button
again to return to the stereo mode.
Press the "F" button to activate the normal
mode. The function indicator will illuminate.
F
English
Radio Operation
1
Manual Storing of Station
Presets
1
D.A.P
1
MONO
2
M.I.X
4
RPT
5
3
SCAN
6
1. Select the radio band and tune in a desired
radio station you wish to store in the preset
memory.
2. Make sure that the Function indicator
illuminates, and press and hold any one of
the preset buttons (1 through 6) for at least
2 seconds until the station frequency on the
display blinks.
3. Press the preset button into which you wish
to store the station while the frequency
display is blinking (within 5 seconds).
The display stops blinking once the station
has been memorized. The display shows
the band, preset No. with a triangle (9) and
station frequency memorized.
4. Repeat the procedure to store up to 5 other
stations onto the same band.
To use this procedure for other bands,
simply select the band desired and repeat
the procedure.
A total of 24 stations can be stored in the preset
memory (6 stations for each band; FM1, FM2,
AM and D.A.P.).
Note: If you store a station in a preset
memory which already has a station,
the current station will be cleared and
replaced with the new station.
21
English
Radio Operation
1
Automatic Memory of
Station Presets
2
3
1
SOURCE
A.S.U.
90.1
(Radio mode)
Press the SOURCE button to select the radio
mode.
T08 0'16
(CD mode)
2
BAND
F1
Press the BAND button repeatedly until the
desired radio band is displayed.
F2
AM
3
TUNE·A.ME
A-MEMORY
Press and hold the A. ME button for at least 2
seconds. The frequency on the display
continues to change while the automatic
memory is in progress.
The tuner will automatically seek and store 6
strong stations in the selected band in order of
signal strength.
When the automatic memory has been
completed, the tuner goes to the station stored
in the preset location No. 1.
Note: If no stations are stored, the tuner will
return to the original station you were
listening to before the auto memory
procedure began.
22
English
Radio Operation
Storing into Direct Access Preset (D.A.P.) Band
1 3
A combination of radio stations from any band,
AM and FM (up to 6 stations) can be manually
preset onto the D.A.P. band.
2
1
Press the "F" button. The function indicator will
turn off.
F
2
D.A.P.
D.A.P. 1
Press the D.A.P. button until the D.A.P.
indicator appears.
Press the BAND button to select FM or AM.
The selected band will be displayed.
To memorize stations onto the D.A.P. band,
follow the steps for the automatic or Manual
Storing of Station Presets section above.
Note: This function can be used together
with the Automatic Memory Preset.
To cancel the D.A.P. mode, press the D.A.P.
button. The D.A.P. indicator will turn off.
3
Press the "F" button to activate the normal
mode. The function indicator will illuminate.
F
23
English
Radio Operation
2
1
1
Tuning to Preset Stations
3
SOURCE
A.S.U.
90.1
(Radio mode)
Press the SOURCE button to select the radio
mode.
T08 0'16
(CD mode)
2
Press the BAND button repeatedly until the
desired band is displayed.
F1
BAND
F2
AM
D.A.P.
3
D.A.P
1
MONO
2
M.I.X
4
RPT
5
2
24
3
SCAN
F1
6
90.1
To select the D.A.P. band, press the F button
then the D.A.P. button.
The D.A.P. indicator will appear in the display.
Make sure that the Function indicator
illuminates, and press the station preset button
that has your desired radio station in memory.
The display shows the band, preset number
with a triangle ( ) and frequency of the station
selected.
CD Operation
2
1
1
LOAD
2
EJECT
2
Inserting/Ejecting Disc
Insert a CD half way into the slot with the label
side facing up. The player automatically draws
the disc into the disc compartment.
The Disc indicator appears to show that a CD is
loaded.
Note: Three-inch (8cm) CD's cannot be used.
Press the eject c button when you want to
eject the CD.
Normal Play and Pause
1
1
2
English
Insert a CD. The CD player begins playback
from the first track on the disc. The display
shows the track number and elapsed time of
the track being played. When the last track is
played back the player returns to the first track
and begins playback from that point.
90.1
(Radio mode)
SOURCE
A.S.U.
If a CD is already loaded in the CD player,
press the SOURCE button to select the CD
mode:
T08 0'16
(CD mode)
TUNE·A.ME
Press the TUNE A. ME :/J button to place the
player in the Pause mode during the play mode.
To resume playback, press the TUNE A. ME :/
J button again.
25
CD Operation
1
English
Music Sensor (Skip)
1
T04 2'35
DN
T04 0'00
Momentarily press the DN g button once to
return to the beginning of the current track. If
you wish to access a track further back,
repeatedly press until you reach the desired
track. (The example shows the Music Sensor
operation starting from track No. 4.)
T03 0'00
T04 2'35
UP
T05 0'00
1
Note: The music sensor feature is functional
in the play or pause mode.
Fast Forward and
Backward
1
DN
26
Press the UP f button once to advance to
the beginning of the next track. If you wish to
access a track further ahead, press repeatedly
until the desired track is reached.
UP
Press and hold the DN g or UP f button
to quickly move backward or forward until you
reach the desired section of the track.
CD Operation
English
Repeat Play
1
1
RPT
Press the RPT button to play back repeatedly
the track being played. The REPEAT indicator
appears and the track will be played repeatedly.
5
REPEAT
Press the RPT button again to deactivate the
repeat play.
M.I.X. (Random Play)
1
1
M.I.X.
M.I.X.
4
Press the M.I.X. button in the play or pause
mode. The M.I.X. indicator will illuminate and
the tracks on the disc will be played back in a
random sequence. After all the tracks on the
disc have been played back once, the player
will begin a new random sequence play until the
M.I.X. mode is canceled.
To cancel M.I.X. play, press the M.I.X. button
again.
27
CD Operation
English
Scanning Programs
1
1
T01 SCAn
SCAN
6
T02 SCAn
Press the SCAN button to activate the Scan
mode. The first 10 seconds of each track will be
played back in succession.
To stop the Scan, press the SCAN button to
deactivate the Scan mode.
T03 SCAn
Clock Operation
1 2
Displaying Time
1
Press the CLK (Clock) button to display the
time. The unit displays the clock time.
CLK
12:00
2
28
CLK
Note: Selecting any tuner or CD function
while in the clock mode will interrupt
the time display momentarily. The
function selected will be displayed for
about 5 seconds before the time
returns to the display. The time will be
displayed even with power to the head
unit turned off, as long as the ignition
key is on.
Press the CLK (Clock) button to turn off the time
and show other functions.
English
Clock Operation
1
Setting Time
2 3 4
1
Press and hold the CLK (Clock) button for at
least 3 seconds until the time indication blinks.
CLK
12:00
2
Example: To adjust to 9:35.
9:00
Rotate the Audio Control knob to adjust the
hours while the time indication is blinking.
3
After the hour has been adjusted, press the
Audio Control button within 5 seconds or while
the hour indication is blinking.
4
Rotate the Audio Control knob to adjust the
minutes while the time indication is blinking.
The time is automatically set. Five seconds
after the adjustment, the time indication will
stop blinking.
9:35
9:35
29
English
Remote Control
Controls
6
1 Power Switch
Press the switch to turn the power on/off.
REMOTE
CONTROL
UNIT
RUE-4180
PWR
VOL
7
2
8
9
BAND
SOURCE
PROG
CD/3D/6D
2
Button
Radio mode: SEEK (UP) Button
CD mode: Press the button to advance to
the beginning of the next track.
3
Button
Radio mode: Pressing the button will
select, in descending order, stations
programmed into the radio’s presets as
shown below.
1
3
→ 6 → 5… 1
4
4 A.PROC Button
For the CDE-7831E, this button has no
effect.
A.PROC
5
5 Audio Select Button
Press to select the audio source.
6 Volume Adjustment Buttons
To increase the volume level:
button
Press the
To decrease the volume level:
button
Press the
30
English
Remote Control
7
6
Button
Radio mode: Pressing the button will
select, in ascending order, stations
programmed into the radio’s presets as
shown below.
→ 1 → 2… 6
REMOTE
CONTROL
UNIT
RUE-4180
PWR
1
VOL
7
2
8
3
8
Button
Radio mode: SEEK (DN) Button
CD mode: Press the button to go back to
the beginning of the current track.
9 Band/Program Button
Radio mode: BAND Button
Press the button, and the band will change
as shown below.
→ F1 → F2 → AM
4
9
BAND
SOURCE
PROG
CD/3D/6D
A.PROC
5
31
English
Remote Control
Battery Replacement
Applicable battery: Use one CR2025 or
equivalent.
Opening the battery case
1 Place the remote upside down on a flat,
level surface.
Looking at the back of the remote, grasp
the battery holder at the bottom of the unit
between your forefinger and thumb. Insert a
pointed object into the left side of the
elongated hole.
Slide the pointed object to the right (as
indicated by the arrow) while at the same
time pulling on the battery holder.
2 Pull the rear cover out with your thumb at
the same time.
1
2
C
Replacing the battery
Put the battery in the case with the (+) indication
upward as shown in the illustration.
R2
025
Closing the case
Push the battery holder back into the remote
until a click is heard.
32
Disc Care
English
Correct Handling
CORRECT
INCORRECT
Do not drop the disc while handling. Hold the
disc so you will not leave fingerprints on the
surface. Do not affix tape, paper, or gummed
labels to the disc. Do not write on the disc.
CORRECT
Disc Cleaning
Fingerprints, dust, or soil on the surface of the
disc could cause the CD player to skip. For
routine cleaning, wipe the playing surface with a
clean, soft cloth from the centre of the disc to
the outer edge. If the surface is heavily soiled,
dampen a clean soft cloth in a solution of mild
neutral detergent before cleaning the disc.
Disc Accessories
Transparent Sheet
There are various accessories available on the
market for protecting the disc surface and
improving sound quality. However, most of
them will influence the thickness and/or
diameter of the disc. Using such accessories
can cause the disc to be out of standard
specifications and may create operational
problems. We recommend not using these
accessories on discs played in Alpine CD
players.
Disc Stabilizer
33
English
In Case of Difficulty
If you encounter a problem, please review the
items in the following checklist. This guide will
help you isolate the problem if the unit is at
fault. Otherwise, make sure the rest of your
system is properly connected or consult your
authorized Alpine dealer.
Initial Turn-on After
Installation
Symptom
Cause and Solution
No function or display.
• Car's ignition is off.
– If connected following instructions, the
unit will not operate with the car's ignition
off.
• Improper power lead connections.
– Check power lead connections.
• Blown fuse.
– Check the fuse on the battery lead of the
unit; replace with the proper value if
necessary.
• Internal micro-computer malfunctioned due
to interference noise etc.
– Press the Reset button with a ball-point
pen or other pointed article.
34
English
In Case of Difficulty
Radio Mode
Symptom
Cause and Solution
Unable to receive stations.
• No antenna or open connection in cable.
– Make sure the antenna is properly
connected; replace the antenna or cable
if necessary.
Unable to tune stations in the seek mode.
• You are in a weak signal area.
– Make sure the tuner is in the DX mode.
• If the area you are in is a primary signal
area, the antenna may not be grounded and
connected properly.
– Check your antenna connections; make
sure the antenna is properly grounded at
its mounting location.
• The antenna may not be the proper length.
– Make sure the antenna is fully extended;
if broken, replace the antenna with a new
one.
Broadcast is noisy.
• The antenna is not the proper length.
– Extend the antenna fully; replace it if it is
broken.
• The antenna is poorly grounded.
– Make sure the antenna is grounded
properly at its mounting location.
35
English
In Case of Difficulty
CD Mode
Symptom
Cause and Solution
CD not functioning.
• Out of operating temperature range +50˚C
(+120˚F) for CD.
– Allow the car's interior (or trunk) temperature to cool.
CD playback sound is wavering.
• Moisture condensation in the CD Module.
– Allow enough time for the condensation
to evaporate (about 1 hour).
CD insertion not possible.
• The CD is already in the CD player.
– Eject the CD and remove it.
• The CD is being improperly inserted.
– Make sure the CD is being inserted
following instructions in the Owner's
Manual.
36
Unable to fast forward or backward.
• The CD has been damaged.
– Eject the CD and discard it; using a
damaged CD in your unit can cause
damage to the mechanism.
Sound skips due to vibration.
• Improper mounting.
– Securely re-mount the unit.
• Disc is very dirty.
– Clean the disc.
• Disc has scratches.
– Change the disc.
Sound skips without vibration.
• Dirty or scratched disc.
– Clean the disc; damaged discs should be
replaced.
Specifications
English
FM TUNER SECTION
Tuning Range ....................................................................................................... 87.5 – 108.0 MHz
Mono Usable Sensitivity ............................................................................ 9.3 dBf (0.8 µV/75 ohms)
50 dB Quieting Sensitivity ........................................................................ 13.5 dBf (1.3 µV/75 ohms)
Alternate Channel Selectivity ................................................................................................... 80 dB
Signal-to-Noise Ratio ............................................................................................................... 65 dB
Stereo Separation .................................................................................................................... 35 dB
Capture Ratio ......................................................................................................................... 2.0 dB
AM TUNER SECTION
Tuning Range ......................................................................................................... 531 – 1,602 kHz
Usable Sensitivity .................................................................................................... 2.2* µV/27.0 dB
(* IEC Standard)
37
Specifications
English
CD SECTION
Frequency Response ..................................................................................... 5 – 20,000 Hz (±1 dB)
Wow & Flutter (% WRMS) .......................................................................... Below measurable limits
Total Harmonic Distortion ..................................................................................... 0.008% (at 1 kHz)
Dynamic Range ...................................................................................................... 95 dB (at 1 kHz)
Signal-to-Noise Ratio ............................................................................................................... 95 dB
Channel Separation ................................................................................................ 85 dB (at 1 kHz)
REMOTE CONTROL
Battery Type ............................................................................................................ CR2025 battery
Battery Quantity .............................................................................................................................. 1
Dimensions (W × H × D) .......................................................................................... 39 × 6 × 90 mm
(1-9/16" × 1/4" × 3-1/2")
Weight (without battery) ............................................................................................... 17 gr (0.6 oz)
38
Specifications
English
GENERAL
Power Requirement ...................................................................... 14.4 V DC (11–15 V (allowable))
Maximum Power Output* ............................................................................................................... 35 W × 4
Output Voltage .................................................................................................. 1000 mV/10 k ohms
Maximum Pre-Output Voltage ..................................................................................... 4 V/10k ohms
Bass ........................................................................................................................ ±15 dB at 30 Hz
Treble .................................................................................................................... ±10 dB at 10 kHz
Weight ............................................................................................................... 1.7 kg (4 lbs. 12 oz)
CHASSIS SIZE
Width ............................................................................................................................. 178 mm (7")
Height .............................................................................................................................. 50 mm (2")
Depth ............................................................................................................................. 152 mm (6")
NOSEPIECE SIZE
Width ...................................................................................................................... 170 mm (6–3/4")
Height .................................................................................................................... 46 mm (1-13/16")
Depth ........................................................................................................................ 18 mm (11/16")
Note: Due to continuous product improvement,
specifications and design are subject to
change without notice.
*Under maximum operating voltage and input
signal, into 4 ohms.
39