1
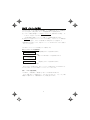
深 圳 市 信 华 翰 科 技 有 限 公 司
SHENZHEN XIN HUA HAN SCIENCE AND TECHNOLOGY CO.,LTD.
地址:深圳市福田区深南中路3007号国际科技大厦1101单元
电话:0755-83981612;0755-83981617 ;传真:0755-83558013
展销部:深圳市华强北赛格大厦7106室
网址:www.scanshop.cn www.aidcfirm.com
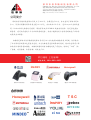
公司简介
深圳市信华翰科技有限公司成立于 2006 年,注册资金 500 万,办公室位于深圳市商业
中心,华强北商圈的国际科技大厦 1101 单元,办公面积 320 平方。是 Honeywell 金牌代理
商、Newland 新大陆特约代理商、摩托罗拉讯宝 SYMBOL 战略合作伙伴、优尼泰克授权
服务商。我司共代理有十几个品牌的条码设备,为客户提供优质丰富的条码相关产品和系
统集成专业服务。
扫描网是深圳市信华翰科技有限公司斥资 100 万打造的扫描枪的网上商城。信华翰为
了让中国的条码事业走得更好更快,让大众都能享受条码带来的便利,特此为全国商户带
来质优价廉的各类扫描枪,扫描网所售的所有扫描枪均是厂家授权,均经过“三测”(出
厂检测,到货检测,出货检测)的优良产品。
买扫描枪 上扫描网!
服务热线:400-609-8831
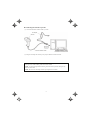
insPIRY
新大陆HR1030手持式扫描枪
北京意锐RC532二维码扫描平台
Honeywell
摩托罗拉 C11一维扫描枪
霍尼韦尔1900GHD二维码扫描枪
合作伙伴
TSC
Honeywell
insPIRY
zebex
OPTICON
Zebra斑玛
cino
2D Code Handy Scanner
2次元コードハンディスキャナ
GT10Q-SR
GT10Q-HR
Operator's Guide
操作ガイド
Operator's Guide (English)
操作ガイド
(日本語)
Appendices
付録
SPECIFICATIONS
仕様
QR-CODED PARAMETER MENU
QRコードメニュー
INTERFACE
インタフェース
US and Canada Regulations
This device complies with Part 15 of the FCC Rules, Canadian ICES-003 Rules.
Operation is subject to the following two conditions:
(1) this device may not cause harmful interference, and
(2) this device must accept any interference received, including interference that may cause
undesired operation.
This equipment has been tested and found to comply with the limits for a Class A
digital device, pursuant to Part 15 of the FCC Rules. These limits are designed to
provide reasonable protection against harmful interference when the equipment is
operated in a commercial environment. This equipment generates, uses, and can
radiate radio frequency energy and, if not installed and used in accordance with the
instruction manual, may cause harmful interference to radio communications.
Operation of this equipment in a residential area is likely to cause harmful
interference in which case the user will be required to correct the interference at his
own expense.
This Class A digital apparatus complies with Canadian ICES-003.
Cet appareil numérique de la classe A est conforme à la norme NMB-003 du Canada.
Changes or modifications not expressly approved by the party responsible for
compliance could void the user’s authority to operate the equipment.
Warning
This is a Class A product. In a domestic environment this product may cause radio
interference in which case the user may be required to take adequate measures.
この装置は、情報処理装置等電波障害自主規制協議会(VCCI)の基準に基
づくクラスA情報技術装置です。この装置を家庭環境で使用すると電波妨害を
引き起こすことがあります。この場合には使用者が適切な対策を講ずるよう要
求されることがあります。
The shape of the projected area marker differs according to the original target market.
This hand-held scanner with built-in area marker(five-point) is designed for use in the United
States and Canada only and should not be used in any other country.
Copyright © DENSO WAVE INCORPORATED, 2003
All rights reserved. No part of this publication may be reproduced in any form or by any
means without permission in writing from the publisher.
Specifications are subject to change without prior notice.
All products and company names mentioned in this manual are trademarks or registered
trademarks of their respective holders.
この操作ガイドの著作権は、株式会社デンソーウェーブにあります。
本書の内容に関しては、将来仕様改良などにより予告無しに変更することがあります。
本書に掲載されている会社名や製品は、一般に各社の商標または登録商標です。
2D Code Handy Scanner
GT10Q-SR
GT10Q-HR
Operator's Guide (English)
Preface
Please READ through these operating instructions carefully. It will enable you to operate your
scanner correctly.
After you have finished reading the instructions, keep this guide handy for speedy reference.
Contents
SAFETY PRECAUTIONS...........................................................................................................ii
Proper Care of the Scanner ..........................................................................................................vi
Chapter 1 Packing List and Names and Functions.................................................................... 1
Chapter 2 Preparation ................................................................................................................ 2
Chapter 3 Scanning Codes......................................................................................................... 4
Chapter 4 Setting Parameters .................................................................................................... 6
Appendix 1 SPECIFICATIONS............................................................................................A-1
Appendix 2 QR-coded Parameter Menu ...............................................................................A-5
Appendix 3 INTERFACE .................................................................................................A-17
For more information…
The detailed information on how to use the scanner is provided in the User's Manual separately
issued. You can download the User's Manual from the DENSO WAVE Web site at:
http://www.denso-wave.com/
i
SAFETY PRECAUTIONS
Be sure to observe all these safety precautions.
Please READ through this manual carefully. It will enable you to use the scanner correctly.
Always keep this manual nearby for speedy reference.
Strict observance of these warnings and cautions is a MUST for preventing accidents that
could result in bodily injury and substantial property damage. Make sure you fully understand
all definitions of these terms and symbols given below before you proceed to the text itself.
Alerts you to those conditions that could cause serious bodily
injury or death if the instructions are not followed correctly.
Alerts you to those conditions that could cause minor bodily injury
or substantial property damage if the instructions are not followed
correctly.
Meaning of Symbols
A triangle ( ) with a picture inside alerts you to a warning of danger. Here you see
the warning for electrical shock.
A diagonal line through a circle ( ) warns you of something you should not do; it
may or may not have a picture inside. Here you see a screwdriver inside the circle,
meaning that you should not disassemble.
A black circle ( ) with a picture inside alerts you to something you MUST do. This
example shows that you MUST unplug the power cord.
ii
To System Designers:
• When introducing the scanner in those systems that could affect human
lives (e.g., medicines management system), develop applications
carefully through redundancy and safety design which avoids the
feasibility of affecting human lives even if a data error occurs.
• If smoke, abnormal odors or noises come from the scanner, immediately
switch off the host computer, unplug the AC adapter and the interface
cable, and contact your nearest dealer.
Failure to do so could cause fire or electrical shock.
• If foreign material or water gets into the scanner, immediately switch off
the host computer, unplug the AC adapter and the interface cable, and
contact your nearest dealer.
Failure to do so could cause fire or electrical shock.
• If you drop the scanner so as to affect the operation or damage its
housing, switch off the host computer, unplug the AC adapter and the
interface cable, and contact your nearest dealer.
Failure to do so could cause fire or electrical shock.
• Never bring any metals into contact with the terminals in connectors.
Doing so could produce a large current through the scanner, resulting in
heat or fire, as well as damage to the scanner.
• Keep the AC adapter from water.
Failure to do so could cause fire or electrical shock.
• Use the dedicated AC adapter only.
Failure to do so could result in fire.
• Never use the scanner on the line voltage other than the specified level.
Doing so could cause the scanner to break or burn.
• Do not use the scanner where any inflammable gases may be emitted.
Doing so could cause fire.
• Do not scratch, modify, bend, twist, pull, or heat the power cable of the
AC adapter. Do not place heavy material on the cable or allow the cable
to get pressed under heavy material.
Doing so could break the cable, resulting in a fire.
iii
• If the power cord of the AC adapter is damaged (e.g., exposed or broken
lead wires), stop using it and contact your nearest dealer.
Failure to do so could result in a fire or electrical shock.
• Do not subject the reading window of the scanner to direct sunlight for
extended periods.
Doing so could damage the scanner, resulting in a fire.
• Do not put the scanner on an unstable or inclined plane.
The scanner may drop, creating injuries.
• Never put the scanner in places where there are excessively high
temperatures, such as inside closed-up automobiles, or in places
exposed to direct sunlight.
Doing so could affect the housing or parts, resulting in a fire.
• Avoid using the scanner in extremely humid areas, or where there are
drastic temperature changes.
Moisture will get into the scanner, resulting in malfunction, fire or
electrical shock.
• Do not place the scanner anyplace where it may be subjected to oily
smoke or steam, e.g., near a cooking range or humidifier.
Doing so could result in a fire or electrical shock.
• Never disassemble or modify the scanner; doing so could result in an
accident such as break or fire.
Doing so could result in a fire or electrical shock.
• If you are not using the scanner for a long time, be sure to unplug the AC
adapter from the wall socket for safety.
Failure to do so could result in a fire.
• Never cover or wrap up the scanner or AC adapter in a cloth or blanket.
Doing so could cause the unit to heat up inside, deforming its housing,
resulting in a fire.
Always use the scanner and AC adapter in a well-ventilated area.
iv
Never
disassemble
• Keep the power cable of the AC adapter from any heating equipment.
Failure to do so could melt the sheathing, resulting in a fire or electrical
shock.
• Do not scratch or modify the scanner or its interface cable. Do not bend,
twist, pull, or heat the cable.
Doing so could damage the scanner or its interface cable, creating a fire
hazard.
• Do not put heavy material on the scanner or its interface cable, or allow
the cable to get pressed under heavy material.
• Do not look into the light source from the reading window or do not point
the reading window at other people's eyes.
Eyesight may be damaged by direct exposure to this light.
• Do not use the scanner if your hands are wet or damp.
Doing so could result in an electrical shock.
• Never use chemicals or organic solvents such as benzene and thinner to
clean the housing. Do not apply insecticide to the scanner.
Doing so could result in a marred or cracked housing, electrical shock or
fire.
• Do not use the scanner with anti-slip gloves containing plasticizer.
The scanner housing may be broken, creating injuries, electrical shock,
or fire.
• When disconnecting the AC adapter from the wall socket, hold the AC
adapter body not the power cable.
The power cable may be broken, resulting in a burnt AC adapter,
electrical shock, or fire.
• During electrical storm activity, always unplug the AC adapter from the
wall socket.
Exposure to power surges could result in a damaged scanner or fire.
• When taking care of the scanner, unplug the AC adapter from the wall
socket for safety.
Failure to do so could result in an electrical shock.
v
• If the interface cable is damaged (e.g., exposed or broken lead wires),
stop using it and contact your nearest dealer.
Failure to do so could result in a fire or electrical shock.
• Do not drop the scanner.
The scanner housing may be broken, creating injuries.
Using the scanner whose housing is broken could result in smoke or fire.
Unplug the AC adapter from the wall socket and contact your nearest
dealer.
Proper Care of the Scanner
Dust or dirt accumulating on the clear plate of the code reading window will affect reading
performance. If you use the scanner in dusty areas, therefore, periodically check the clear plate
of the QR-code reading window and clean it if dusty.
• To clean the plate, first blow the dust away with an air brush. Then wipe the plate with a
cotton swab or the similar soft one gently.
• If sand or hard particles have accumulated, never rub the plate; doing so will scratch or
damage it. Blow the particles away with an air brush or a soft brush.
Limited Warranty on Software Products
In no event will DENSO WAVE be liable for direct, indirect, special, incidental, or
consequential damages (including imaginary profits or damages resulting from interruption of
operation or loss of business information) resulting from any defect in the software or its
documentation or resulting from inability to apply the software or its documentation.
vi
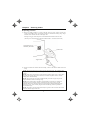
Chapter 1
Packing List and Names and Functions
Packing list
This package contains the following items:
- Scanner unit
- Operator's guide (this book)
Indicator LED
Illuminates in blue when the scanner
has read a code successfully. If any
error occurs, this LED flashes in red.
Names and functions
Magic key
Acts as an auxiliary key.
Any of these functions may be
assigned to the magic key*.
• Data retransfer function
• Ready/standby switching
function
• Readable code switching
function
• Marker mode switching
function
• Specific character transfer
function
• Auto sensing mode
switching function
• Barcode reader mode
switching function
(None of these functions is
assigned by default.)
Reading window
Bring this window to a
code to be scanned.
Trigger switch
Press this switch to start code
reading.
Pressing this halfway emits a
laser light.
Pressing this fully scans a code.
The following modes are
available*:
• Auto-off mode
• Momentary switching mode
• Alternate switching mode
• Continuous reading mode 1
• Continuous reading mode 2
• Auto sensing mode
(The auto-off mode is the factory
default.)
Vibrator
The vibrator is integrated here. There is a
choice of two vibrator operations: "OK
vibrations" and "NG vibrations."
The "OK vibrations" is the factory default.
Vibrator
The vibrator is integrated here. There is a
choice of two vibrator operations: "OK
vibrations" and "NG vibrations."
The "OK vibrations" is the factory default.
Interface cable
• RS-232C interface
*For more information…
For more information about the trigger switch function, magic key function, and indicator
LED, visit our Web site at:
http://www.denso-wave.com/
1
Chapter 2
Preparation
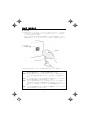
Connecting the interface cable to the scanner
(1) Pull the connector cover of the interface cable off its connector as shown below.
(2) Plug the cable connector into the connector located in the bottom of the scanner.
NOTE: As shown below, hold the scanner body, align the ▼ mark on the cable
connector with that on the scanner, and fully insert the interface connector.
Scanner
▼ mark
Interface connector
Connector cover
▼ mark
(3) Align the two bosses on the connector cover with cutouts in the scanner body, fit the
connector cover into the scanner, and turn it clockwise to lock it.
Cutout
Connector cover
Boss
Turn the cover until the
bosses come to be
horizontal.
Connector cover
2
Connecting the scanner to your PC
(1) Connect the RS-232C interface cable to your PC.
AC adapter
Scanner
RS-232C interface cable
(2) Plug the AC adapter into the DC power jack provided in the cable connector.
NOTE: When disconnecting the interface cable or DC power jack, hold the connector
housings not the cables. Pulling cables will result in breaks.
NOTE: Avoid connecting and disconnecting of connectors all if possible. Doing so may
result in weak contact.
NOTE: Be sure to use the adapter exclusively designed for the scanner.
3
Chapter 3
Scanning Codes
Operating procedure
(1) Bring the reading window to a target code and press the trigger switch. Pressing the
trigger switch halfway emits a laser light (marker) to indicate the scanning range. Align
the center of the marker with that of the target code.
Pressing the trigger switch fully turns on the illumination LED and scans the code.
(This step is not required in the continuous reading mode 1, 2 and auto sense mode.)
Code scanning range
indicated by the marker
Indicator LED
Trigger switch
(2) When the scanner has read the code successfully, it turns on the indicator LED in blue and
beeps.
NOTE: The actual scanning range is narrower than the marker range. The scanning range
is approx. 2.4" (6 cm) wide by 1.6" (4 cm) high when the scanning distance is approx. 3.9"
(10 cm).
NOTE: Allow only a single code to come within the scanning range. If two or more codes
lie within the scanning range at the same time, the scanner may fail to read or continue
reading those codes alternately.
NOTE: The scanner can read codes omnidirectionally. Note that a target code plus its
margin should lie within the scanning range.
NOTE: If the scanner fails to read due to specular effects or other factors, change the
scanning angle of the reading window or the distance from codes, and try it again.
(Specular effects occur when the reflection of the light from the label surface becomes
excessively strong. This can easily happen when the reflecting surface is polished or
covered with vinyl.)
NOTE: The marker range should be used merely as a guide. It does not assure that a code
within the marker range can be read.
4
Scanning modes
Regular read mode
This mode transfers the read code data when the scanner
has read the code successfully.
Data verification mode
This mode verifies the read code data against the master
code data stored in the scanner.
*For more information…
For more information about the data verification mode, visit our Web site at:
http://www.denso-wave.com/
5
Chapter 4
Setting Parameters
You may easily set parameters for communications conditions and readable codes in the
following two ways. Settings made in these ways will be retained even after the power is
turned off.
(1) Scanning parameter setting QR codes in the QR-coded parameter menu by pressing the
trigger switch.
The QR-coded parameter menu in Appendix 2 allows you to make basic settings.
(2) Using the Setting Software* to be run in your PC. (With the program, you may generate
a batch-process QR code to be scanned for setting.)
* The User's Manual and Setting Software can be downloaded from our Web site at
http://www.denso-wave.com/.
This chapter describes how to set parameters with the QR-coded parameter menu.
Parameter setting procedure using the QR-coded parameter menu
"Start setting"
Scan the "Start setting" QR code.
↓ The beeper sounds three times.
Scan necessary parameter setting QR codes.
Scan parameter setting
QR codes.
NOTE: When using the QR-coded parameter menu, scan QR
codes within three minutes. Otherwise, the scanner cancels
newly scanned parameters and returns to the previous
settings.
↓ The beeper sounds three times.
Scan the "End setting" QR code.
"End setting"
Scanning the "Defaults" QR code in the QR-coded parameter menu makes all items in the
menu revert to the factory defaults.
TIP: "Beeper volume" QR code in the QR-coded parameter menu
To set the beeper volume, you do not need to scan "Start setting" or "End setting" QR code.
Scanning the "Beeper volume" QR code cycles through the three beeper volume settings--High,
Medium, and Low. The factory default is High.
6
Setting the communications parameters
The scanner communicates with the connected PC in accordance with the RS-232C
asynchronous serial interface.
(1) Transmission speed
You may select the transmission speed from six choices ranging from 4,800 to 115,200 bps.
(Default: 38,400 bps)
(2) Characters
Characters that the scanner transfers are all ASCII codes except when binary codes are
specified. The character format may consist of the items listed below.
NOTE: When data contains binary data or 2-byte codes, selecting "7 bits" for the data bits
transfers such 2-byte data with most significant bits trimmed.
Start bits
1 bit (Fixed)
Data bits
7 bits or 8 bits
Parity
Even, odd, or none
Stop bits
1 bit or 2 bits
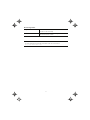
(3) Transmission format
The transmission format can be selected from the following two options:
Number of digits
Header
Code
mark
Prefix
Header
Prefix
Code
mark
n1
n2
n3
n4
Code
data
Suffi
x
Terminator
BCC
n4
Code
data
Suffi
x
Terminator
BCC
Number of digits
n1
n2
n3
Header:
None or STX
Terminator:
CR, LF, CR/LF, or ETX
Prefix/Suffix: Each of a prefix and suffix consists of up to eight ASCII characters (00h to
FFh). The length can be set in the Setting Software.
BCC:
The Block Character Check (BCC) exclusive-ORs all bits at the same bit
level in characters following the header and preceding the terminator in a
transmission block to generate a horizontal parity byte to be transferred in
a binary code. The BCC can be enabled or disabled. If no header is
prefixed, no BCC will be transferred.
7
8
2次元コードハンディスキャナ
GT10Q-SR
GT10Q-HR
はじめに
このたびは2次元コードハンディスキャナGT10Qをお買上げいただきまして、まこと
にありがとうございます。
この「操作ガイド」は、2次元コードハンディスキャナGT10Qの取り扱い方法、接続
方法、操作方法および清掃について説明しています。
ご使用の前にこの「操作ガイド」をよくお読みいただき、スキャナを正しく、効果的
にご活用ください。なお、この「操作ガイド」は必ず所定の場所に保管するようにし
てください。
操作ガイド
(日本語)
目次
安全上のご注意 ........................................................... ⅱ
お手入れについて ......................................................... ⅵ
第 1 章 構成品リストおよび各部の名称と機能 ................................ 1
第 2 章 使用前の準備 ...................................................... 2
第 3 章 読み取り方 ........................................................ 4
第 4 章 パラメータの設定 .................................................. 6
付録 1 仕様 ............................................................ A-1
付録 2 QR コードメニュー ................................................ A-5
付録 3 インタフェース ................................................. A-17
■
連絡先
この「操作ガイド」に関するご意見、ご質問は下記へご連絡ください。
(株)デンソーウェーブ
〒105-0001 東京都港区虎ノ門4丁目2番12号
電話:03-5472-0477
フリーダイアル
■
虎ノ門4丁目MTビル2号館
0120-585-271
詳しい情報は…
本製品の詳しい使い方は、別冊の取扱説明書をご覧ください。取扱説明書は、インタ
ーネットの弊社ホームページ(下記URL)からダウンロードできます。
http://www.denso-wave.com/
i
安全上のご注意
2次元コードハンディスキャナを
安全にお使いいただくために必ずお守りください
■ ご使用の前に、この操作ガイドの「安全上のご注意」をよくお読みの上、正しく
お使いください。
■ お読みになったあとは、お使いになる方がいつでも見られるところに必ず保管し
てください。
警告・注意表示は、製品を安全に正しくお使いいただき、あなたや他の人々への危害
や財産への損害を未然に防ぐために守っていただきたい事項を示しています。
その表示と意味は次のようになっています。
内容をよく理解してから本文をお読みください。
この表示を無視して、誤った取り扱いをすると、人が死亡または
重傷を負う可能性が想定される内容を示しています。
この表示を無視して、誤った取り扱いをすると、人が傷害を負う
可能性が想定される内容および物的損害のみの発生が想定され
る内容を示しています。
記号の意味
△記号は注意(警告を含む)を促す内容があることを示しています。
図の中に具体的な注意内容(左図の場合は感電注意)が描かれています。
記号は禁止(してはいけないこと)であることを示しています。
図の中や近くに具体的な禁止内容(左図の場合は分解禁止)が描かれていま
す。
●記号は必ずしてほしい内容を示しています。
図の中に具体的な指示内容(左図の場合は電源プラグをコンセントから抜い
てください)が描かれています。
ii
重要:システム設計者へ
● 薬品の管理等、人命に影響を与える可能性があるシステムでは、デ
ータが誤った場合でも人命に影響を与える可能性が無いよう、冗長
設計、安全設計には十分ご注意ください。
● 万一、煙が出ている、変なにおいや音がするなどの異常事態が生じ
た場合は、すぐにホスト側の電源スイッチを切り、ACアダプタとイ
ンタフェースケーブルのコネクタを抜いて販売店にご連絡くださ
い。
そのまま使用すると火災・感電の原因となります。
● 万一、機器の内部に異物や水などが入った場合は、すぐにホスト側
の電源スイッチを切り、ACアダプタとインタフェースケーブルのコ
ネクタを抜いて販売店にご連絡ください。
そのまま使用すると火災・感電の原因となります。
● 万一、機器を落としたりして動作しなくなったり、ケースが破損し
た場合は、ホスト側の電源スイッチを切り、ACアダプタとインタフ
ェースケーブルのコネクタを抜いて販売店にご連絡ください。
そのまま使用すると火災・感電の原因となります。
● コネクタの端子へ金属などを接触させないでください。
大電流が流れて発熱・発火したり、機器を破損したりする原因とな
ります。
● ACアダプタを水にぬらさないようにしてください。
火災・感電の原因となります。
● ACアダプタは指定のものをご使用ください。
それ以外のものを使用すると火災の原因となります。
● 指定された電源電圧以外では使用しないでください。
機器の破損・発火事故の原因となります。
● 引火性ガスが発生する場所で使用しないでください。
発火事故などの原因となります。
● ACアダプタの電源コードを傷つけたり、加工したり、無理に曲げた
り、ねじったり、引っ張ったり、加熱したりしないでください。ま
た、ACアダプタの電源コードの上に重いものをのせたり、ACアダプ
タの電源コードがなにか重いものの下敷きにならないようにして
ください。
電源コードが破損して、火災の原因となります。
iii
● ACアダプタの電源コードが傷んだら(芯線の露出、断線など)販売
店にご連絡ください。
そのまま使用すると火災・感電の原因となります。
● スキャナの読み取り口を長時間直接太陽に向けないでください。
機器が破損し火災の原因となることがあります。
誤った取り扱いをすると、視力障害の原因となります。下記の事項をお読みい
ただきご使用ください。
● コード読み取り位置を示すレーザ光をのぞき込まないでください。
● ぐらついた台の上や傾いた所など不安定な場所に置かないでくだ
さい。
落ちたりして、けがの原因となることがあります。
● 窓を閉めきった自動車の中や直射日光が当たる場所など非常に温
度が高くなる場所に放置しないでください。
ケースや部品に悪い影響を与え、火災の原因となることがありま
す。
● 湿気の多い場所・急激な温度変化のあるところで使用しないでくだ
さい。
水分が入り、故障・火災・感電の原因となることがあります。
● 調理台や加湿器のそばなど油煙や湯気が当たるような場所に置か
ないでください。
火災・感電の原因となることがあります。
● 機器を分解・改造しないでください。
火災・感電などの原因となることがあります。
分解禁止
● 長期間、機器をご使用にならないときは安全のため必ずACアダプタ
をコンセントから抜いてください。
火災の原因となることがあります。
iv
● 機器、ACアダプタは布や布団でおおったり、つつんだりしないでく
ださい。
熱がこもり、ケースが変形し、火災の原因となることがあります。
風通しのよい状態でご使用ください。
● ACアダプタの電源コードを熱器具に近づけないでください。
電源コードの被ふくが溶けて、火災・感電の原因となることがあり
ます。
● スキャナやインタフェースケーブルを傷つけたり、加工したり、ま
たはインタフェースケーブルを加熱したり、無理に曲げたり、ねじ
ったり、引っ張ったりしないでください。
スキャナやインタフェースケーブルが破損して、火災の原因となる
ことがあります。
● スキャナやインタフェースケーブルの上に重いものをのせたり、重
いものの下敷きにならないようにしてください。
● この機器の読み取り口から光源をのぞき込んだり、人の目に読み取
り口を向けないでください。
この光が目に当たると視力障害などを起こすことがあります。
● ぬれた手で使用しないでください。
感電の原因となることがあります。
● ベンジン、シンナーなどの化学薬品や洗剤で拭いたり、殺虫剤をか
けないでください。
ひび割れ、感電、引火の原因となることがあります。
● 可塑材入りのすべり止め付き手袋をはめて使用しないでください。
ケースが破損し、けが、感電、引火の原因となることがあります。
● ACアダプタをコンセントから抜く際は、必ずAC アダプタ本体を持
って抜いてください。
電源コードが断線をおこし、焼損や感電、火災の原因となることが
あります。
● 雷が鳴り出したら、早めにAC アダプタをコンセントから抜いてく
ださい。
機器が破損し、火災の原因となることがあります。
v
● お手入れの際は安全のため必ずACアダプタをコンセントから抜い
て行ってください。
感電の原因となることがあります。
● インタフェースケーブルが傷んだら(芯線の露出、断線など)販売
店に交換を依頼してください。
そのまま使用すると火災の原因となることがあります。
● 機器を落とさないでください。
ケースが破損してけがの原因になることがあります。
ACアダプタをコンセントから抜いて販売店にご連絡ください。
そのまま使用すると発煙・発火の原因となることがあります。
お手入れについて
読み取り口のプレート(透明な部分)にほこり・ごみが付着しますとコードの読み取
りに影響します。
ほこりの多いところでご使用の場合は読み取り口のプレート(透明な部分)にほこり
が付いていないか定期的に点検し、ほこりが付着しているときは清掃してください。
・ 清掃の方法は、まずエアーブラシでほこりを飛ばし、綿棒等の柔らかいもので軽く
ふき取ってください。
・ 砂などの硬いものが付着した場合は、こすると読み取り口のプレートに傷が付きま
すのでエアーブラシで砂などを飛ばすか、毛先の柔らかいブラシで掃いて取り除い
てください。
vi
第1章
構成品リストおよび各部の名称と機能
構成品の確認
以下のものが含まれています。
-
スキャナ本体
RS-232Cインタフェースケーブル
ACアダプタ
操作ガイド(本書)
各部の名称と機能
読み取り口
この部分をコードに
向け、読み取りを行います。
トリガスイッチ
読み取りを開始するときに
押してください。
- 半押しでレーザマーカー点灯
- 全押しでコード読み取り
用途により次のモードを選択
できます*。
・オートオフモード
・モメンタリスイッチモード
・オルタネートスイッチモード
・連続読み取りモード1
・連続読み取りモード2
・オートセンスモード
(工場出荷時はオートオフモードに
設定されています。)
表示LED
読み取りが完了すると青色に点灯し、
異常が発生すると赤色に点滅します。
マジックキー
読み取りやデータ転送の補助
キーとして動作します。
設定により次の機能を割り当て
ることができます*。
・ データ再転送機能
・ 読み取りON/OFF機能
・ 読み取りコード切り替え機能
・ マーカスイッチ機能
・ 指定キャラクタ転送機能
・オートセンスモード切り替え
機能
・ バーコードリーダモード切り
替え機能
(工場出荷時はいずれの機能も
設定されていません。)
バイブレータ
バイブレータが内蔵されています。読
み取り”OK”または”NG”時での振動を選
択できます。
(工場出荷時は読み取り”OK”時に振動
するように設定されています。)
インタフェースケーブル
・RS-232Cインタフェース
* 詳しい情報は...
トリガスイッチ機能、マジックキー機能、表示LEDの詳細は、弊社ホームページで
ご覧になれます。
http://www.denso-wave.com/
1
第2章
使用前の準備
スキャナにインタフェースケーブルを接続する
(1) インタフェ―スケーブルのコネクタカバーをコネクタ部からはずします。
(2) ケーブルのコネクタを、スキャナの底面にあるコネクタに接続します。
注意: 図のようにスキャナ本体を持って、スキャナとケーブルの▼マークを
合わせ、奥まで差し込んでください。
スキャナ
▼マーク
コネクタ
コネクタカバー
▼マーク
(3) コネクタカバーの突起をスキャナ本体の切り欠きに合わせて、はめ込み、右方向
に回してロックします。
切り欠き
コネクタカバー
突起
突起が横向きに
なるまで回す
コネクタカバー
2
コンピュータに接続する
(1) RS-232Cインタフェースケーブルをコンピュータに接続します。
ACアダプタ
スキャナ
RS-232Cインタフェース
ケーブル
(2) RS-232Cコネクタ部にあるDC電源ジャックにACアダプタを接続します。
注意: コネクタ、DC電源ジャックを取り外す場合は、コネクタを持って外してく
ださい。ケーブルを持って引き抜くと、断線の原因になります。
注意: コネクタの挿抜は、できる限りしないでください。コネクタの接触不良の
原因となります。
注意: 専用のACアダプタを必ずご使用ください。
3
第3章
読み取り方
操作手順
(1) 読み取り口をコードに近づけ、トリガスイッチを押してください。トリガスイッ
チの半押しで、読み取り位置を示すマーカが点灯しますので、マーカの中心をコ
ードの中心に合わせてください。
全押しで、読み取るための照明光が照射されコードが読み取れます。(ただし、
連続読み取りモード1、2、オートセンスモードの場合、この操作は不要です。)
マーカによる
コード読み取り範囲
表示LED
トリガスイッチ
(2) 読み取りが正常に完了すると、表示LEDが青色に点灯しブザーが鳴ります。
注意: マーカの幅よりも、読み取り可能範囲は狭くなっています。
読み取り距離10cmのとき、読み取り可能範囲は約6×4cmです。
注意: 読み取り視野に入れるコードは1つだけにしてください。同時に2つ以上の
コードがある場合は読み取れなかったり、交互に読みつづける場合があり
ます。
注意: コードは全方向どちらの向きでも読み取りは可能ですが、マージンを含め
読み取り視野に確実に入る位置で読み取ってください。
注意: スキャナの照明光や室内光とラベルの角度によっては、ラベルで反射した
光が部分的に極めて強くなる鏡面反射が起きて読み取りができないこと
があります。この場合はラベルとスキャナの角度や距離を変えてみてくだ
さい。
注意: マーカの表示範囲は目安であり、読み取り可能範囲内に入ったコードの読
み取りを保証するものではありません。
4
読み取りモード
通常読み取り
モード
データ照合読み
モード
読み取りが正常に完了したらデータを転送します。
読み取りしたコードのデータと登録したコードのデータが
一致しているかを判断します。
* 詳しい情報は...
データ照合読みモードの詳細は、弊社ホームページでご覧になれます。
http://www.denso-wave.com/
5
第4章
パラメータの設定
このスキャナは、以下の2通りの方法で通信、コード種類などのパラメータを設定す
ることができます。設定されたパラメータは電源をOFFしても保持されます。
(1) パラメータ設定用のQRコード(QRコードメニュー)を読み取らせて設定。(ト
リガスイッチを押して行います。)
- 本書の付録2のQRコードメニューを使って、基本的な設定が行えます。
(2) 設定ソフト *を使ってホストコンピュータから設定。(そのソフトで一括設定用
QRコードを生成し、スキャナで読み取らせて設定することも可能です。)
*
取扱説明書および設定ソフトは、当社のホームページ(www.denso-wave.com)から無償で
ダウンロードできます。
以下にQRコードメニューによる設定について説明します。
QRコードメニューによる設定手順
設定開始
「設定開始」QRコードを読み取らせます。
↓ブザーが3回鳴動
パラメータ設定
コードの読み取り
設定したい項目のQRコードを読み取らせます。
↓
設定終了
「設定終了」QRコードを読み取らせます。
ブザーが3回鳴動
「全デフォルト」を設定すると、QRコードメニューで設定するすべての項目がデフォ
ルトになります。デフォルトはQRコードメニューに< >で示します。
参考:「ブザー音量の調節」
この項目は、「設定開始」「設定終了」QRコードの読み取りは不要です。
「ブザー音量」QRコードを読ませると、ブザー音の大きさが「大」「中」「小」の順
(繰返し)に変わります。工場出荷時は「大」に設定されています。
6
通信パラメータの設定
通信形態は非同期シリアルインタフェースです。
(1) 転送速度
転送速度は4800bpsから115200bps(デフォルト: 38400bps)までの6種類の中から選
択できます。
(2) 転送キャラクタ
転送キャラクタは、バイナリコードの指定がある場合を除き、全てASCIIコードです。
そのフォーマットは、下記の項目の組み合わせを選択できます。
但し、データに漢字、バイナリデータが含まれる場合は、ワード長を7ビットに設定
すると、最上位ビット(MSB)を無視して転送します。
スタートビット
1 bit(固定)
ワード長
7 bits、8 bits
パリティ
EVEN,ODD,なし
ストップビット
1 bit、2 bits
(3) 通信フォーマット
以下に示す2通りを選択できます。
ヘッダ
コード
マーク
Prefix
ヘッダ
Prefix
コード
マーク
n1
桁
n2
数
n3
n4
コード
データ
Suffix
ターミネータ
BCC
n1
桁
n2
数
n3
n4
コード
データ
Suffix
ターミネータ
BCC
ヘッダ:
ヘッダなしまたはSTXを選択できます。
ターミネータ:
ETX、CR、LF、CR+LFより選択できます。
Prefix/Suffix: ASCII文字(00h~FFh)の組み合わせにより最大8バイト長まで
設定ソフトで設定できます。
BCC:
ヘッダの次からターミネータまでのEx-ORをとり、バイナリコ
ードで1バイト転送します。BCC転送の要否は選択できますが、
ヘッダなしの場合は転送されません。
7
8
Appendices
付録
SPECIFICATIONS
仕様
QR-CODED PARAMETER MENU
QRコードメニュー
INTERFACE
インタフェース
A-1
Appendix 1 SPECIFICATIONS
Item
Scanning
specifications
読み取り部
仕様
GT10Q-SR/GT10Q-HR
Readable codes
読み取りコード
Model 1 and Model 2 of QR Code, MicroQR,
PDF417,MicroPDF417, Maxi Code, Data Matrix,
EAN.UCC Composite
EAN-13/8, UPC-A/E, UPC/EAN with add-on,
Interleaved 2of5 (ITF), CODE 39, CODE93,
CODABAR (NW-7), CODE 128, EAN-128 and
RSS
Scanning resolution
最小分解能
0.25 mm (9.8 mils) min.
for two-dimensional codes
GT10Q-SR
0.15 mm (5.9 mils) min.
for bar codes
Scanning resolution
最小分解能
0.167 mm (6.5 mils) min.
for two-dimensional codes
GT10Q-HR
0.125 mm (4.9 mils) min.
for bar codes
Elevation angle
仰角
±35°
Tilt angle
傾角
±35°
Skew angle
スキュー角
360°
Light source
光源
LED (red)
LED(赤色)
Reading confirmation
読み取り確認
Blue LED, beeper and vibrator
青色 LED、ブザー、バイブレータ
Interface
インタフェース
Input power
requirements
入力電源
付録1
RS-232C asynchronous
RS-232C 非同期
Operating voltage range
使用電源電圧
100 to 240 VAC±10%
AC100V~240V±10%
Power consumption
(in Auto-off mode)
消費電力
(オートオフモード)
Max. 20 VA
最大 20VA
A-2
Item
Environmental
conditions
Operating temperature
range
環境条件
使用温度範囲
Operating humidity
range
GT10Q-SR/GT10Q-HR
0 to 50 °C
10 to 90% RH (No condensation allowed, wet-bulb
temperature 30°C max.)
使用湿度範囲
Dimensions 外形寸法 (W) x (D) x (H)
3.2 x 4.1 x 6.5 inches (82 x 103 x 165 mm)
Weight
重量
Approx. 210 g (excluding the cable)
約 210 g(ケーブルを除く)
Defaults デフォルト
Item
Defaults デフォルト
Readable codes
読み取り許可コード
Model 1 and Model 2 of QR Code, PDF417 and
Data Matrix
EAN-13/8, UPC-A/E, Interleaved 2 of 5 (ITF),
CODE 39, CODABAR (NW-7), CODE 128 and
EAN-128
Trigger switch control
トリガスイッチコントロール
Auto-off mode
オートオフモード
Magic key control マジックキーコントロール
No
Scanning mode 読み取りモード
Regular scanning mode 通常読み取りモード
Indicator LED when scanning is complete
読み取り完了時の表示LEDの点灯
Enable
点灯許可
Beeper when scanning is complete
読み取り完了時のブザーの鳴動
Enable
鳴動許可
Vibrator when scanning is complete
読み取り完了時のバイブレータの振動
Enable
振動許可
Transmission
format
通信形態
Transmission of code ID mark
コードマークの転送
Disable
転送禁止
Transmission of prefix
Prefixの転送
Disable
転送禁止
Transmission of no. of digits
桁数の転送
Disable
転送禁止
Transmission of BCC
BCCの転送
Disable
転送禁止
Transmission of suffix
Suffixの転送
Disable
転送禁止
機能無し
Header ヘッダ
None なし
Terminator ターミネータ
CR
A-3
Item
Defaults デフォルト
RS-232C interface
communication
Transmission speed
転送速度
38400 bps
RS-232C通信
Character length
データビット
8 bits
Parity パリティ
None なし
Stop bits ストップビット
1 bit
Reading black-and-white inverted codes
白黒反転コードの読み取り
Black code on white background
白黒ノーマルコード
Edit/Non-edit mode for split QR codes
QRコード連結モード
Edit mode
編集モード
A-4
Appendix 2 QR-CODED PARAMETER MENU
付録2
QRコードメニュー
Adjusting the beeper volume
ブザー音量の調節
This item can be set only by scanning the following QR code without scanning the "Start
setting" or "End setting" QR code.
この項目については、「設定開始」「設定終了」QRコードを読み取らなくても、この項目
のQRコードを読み取るだけで設定できます。
Beeper volume
ブザー音量の調節
A-5
Menu control
メニュー制御
"Start setting"
(When the "White code on
black background" is set)
"Start setting"
設定開始
設定開始(白黒反転
コード読み取り)
"Cancel"
キャンセル
"Defaults"
"End setting"
全デフォルト
設定終了
Communications mode
Procedure
アシンクロナスパラメータの指定
通信手順
"Non-acknowledge mode"
(default)
"ACK/NAK mode"
ACK・NAKモード
<ノーマルモード>
A-6
Communications conditions
Transmission speed
通信条件の指定
転送速度
"4800 bps"
"9600 bps"
"19200 bps"
"38400 bps"
(default)
<38400bps>
"57600 bps"
Data bit
"115200 bps"
ワード長
"7 bits"
"8 bits" (default)
7ビット
<8ビット>
A-7
Parity
パリティ
"No" (default)
<なし>
Stop bit
"Even parity"
"Odd parity"
偶数
奇数
ストップビット
"1 bit" (default)
"2 bits"
<1ビット>
2ビット
Transmission format
Header
通信フォーマット
ヘッダ
"None" (default)
"STX"
<なし>
A-8
Terminator
ターミネータ
"CR" (default)
"ETX"
<CR>
"LF"
Transmission of code ID mark
"CR LF"
コードマーク転送
"Disable" (default)
"Enable"
<禁止>
許可
Transmission of no. of digits
桁数の転送
"Disable" (default)
"Enable"
<禁止>
許可
A-9
BCC
BCCの転送
"Disable" (default)
"Enable"
<禁止>
許可
Reading modes
Reading MicroQR
読み取りモードの指定
マイクロQRコードの読み取り
"Disable" (default)
"Enable"
<禁止>
許可
Reading black-and-white inverted codes
白黒反転コードの読み取り
"Black code on white
background" (default)
"White code on black
background"
<白黒ノーマル
コード>
白黒反転コード
"Auto detection of black
and white inverted codes"
白黒反転自動判別
A-10
Edit/Unedit mode for split QR codes ("Structured Append")
QRコード連結モード
"Edit mode" (default)
"Unedit mode"
<編集モード>
未編集モード
"Batch editing"
連結コード一括編集
Reading PDF417
PDF417の読み取り
"Disable"
"Enable"(default)
禁止
<許可>
Reading MaxiCode
MaxiCodeの読み取り
"Disable" (default)
"Enable"
<禁止>
許可
A-11
Reading Data Matrix
Data Matrixの読み取り
"Disable"
"Enable"(default)
禁止
Readable codes
<許可>
読み取りコードの設定
UPC-A/E and EAN-13/8
Interleaved 2 of 5
UPC-A/E、EAN-13/8コードの読み取り
"Disable"
"Enable" (default)
禁止
<許可>
Interleaved 2 of 5コードの読み取り
"Disable"
禁止
"Enable with check
digits" (with check
digits transfer)
"Enable without check
digits" (default)
チェックデジット有り
の読み取り許可
(チェックデジット
転送あり)
<チェックデジット
無しの読み取り許可>
A-12
CODE 128
CODE 128コードの読み取り
"Disable"
"Enable" (default)
禁止
<許可>
CODABAR (NW-7)
CODABAR(NW-7)コードの読み取り
"Enable without check
digits" (default)
"Disable"
禁止
<チェックデジット
無しの読み取り許可>
"Enable with check
digits" (with check
digits transfer)
"Enable with check
digits" (without check
digits transfer)
チェックデジット有り
の読み取り許可
(チェックデジット
転送あり)
チェックデジット有り
の読み取り許可
(チェックデジット
転送なし)
Transmission of start/stop codes for CODABAR (NW-7)
CODABAR(NW-7)コードのスタート・ストップコードの転送
"Disable"
"Enable" (default)
禁止
<許可>
A-13
CODE 39
CODE 39コードの読み取り
"Enable without check
digits" (default)
"Disable"
禁止
<チェックデジット
無しの読み取り許可>
"Enable with check
digits" (with check
digits transfer)
"Enable with check
digits" (without check
digits transfer)
チェックデジット有り
の読み取り許可
(チェックデジット
転送あり)
チェックデジット有り
の読み取り許可
(チェックデジット
転送なし)
Transmission of starter/stop codes for CODE 39
CODE 39のスタート・ストップコードの転送
CODE 93
"Disable" (default)
"Enable"
<禁止>
許可
CODE 93コードの読み取り
"Disable" (default)
"Enable"
<禁止>
許可
A-14
Other settings
その他の設定
Trigger switch control トリガスイッチコントロール
"Alternate switching
mode"
"Auto-off mode"
(default)
<オートオフモード>
オルタネートスイッ
チモード
"Momentary switching
mode"
"Continuous reading
mode 1"
モメンタリスイッチ
モード
連続読み取りモード
1
"Continuous reading
mode 2"
"Auto sense mode"
オートセンスモード
連続読み取りモード2
Beeper control
ブザー制御
"Disable"
"Enable" (default)
鳴動禁止
<鳴動許可>
A-15
Indicator LED
Vibrator
表示LED
"Disable"
"Enable" (default)
点灯禁止
<点灯許可>
バイブレータ
"OK vibrations" (default)
"NG vibrations”
<”OK”時振動>
“NG”時振動
“Disable”
振動禁止
A-16
Appendix 3 INTERFACE
付録3
インタフェース
RS-232C interface
RS-232Cインタフェース
Dsub, 9-pin (female)
Pin No.
ピン番号
Signal
記号
Functions
機能
Signal IN/OUT
信号の方向
2
SD (TXD)
Send data
データ送信
Output
出力
3
RD (RXD)
Receive data
データ受信
Input
入力
5
SG
Signal ground
信号グランド
─
7
CS (CTS)
Ready to send
送信可
Input
入力
8
RS (RTS)
Request to send
送信要求
Output
出力
Interface circuits
インタフェース回路
Output circuit
出力回路
Input circuit
入力回路
TXD, RTS
RXD, CTS
Voltage polarity
電圧極性
Logical value
データ信号
+
0 (space)
ON
-
1 (mark)
OFF
A-17
Control level
制御信号
Wiring example
接続例
Shown below is an example of wiring the GT10Q up to the PC.
パソコンとの接続するときの配線例を以下に示します。
PC
GT10Q
A-18
Laser Devices
The scanner uses a laser light for indicating the scanning range. The intensity of laser light
might be too low to inflict bodily injury. However, do not look into the laser beam
The scanner complies with IEC 60825-1:1993+A2:2001 and 21 CFR 1040.10, 1040.11 except
for deviations pursuant to Laser notice No. 50, dated July 26,2001.
In accordance with Clause 5, IEC 60825-1, the following information is provided to the user:
LASER LIGHT
DO NOT STARE INTO BEAM
CLASS 2 LASER PRODUCT
Caution – Use of controls or adjustments or performance of procedures other than those
specified herein may result in hazardous laser light exposure.
DENSO WAVE INCORPORATED does not assume any product liability arising out of, or
in connection with, the application or use of any product, circuit, or application described
herein.
If it is judged by DENSO WAVE INCORPORATED that malfunction of the product is due
to the product having been dropped or subjected to impact, repairs will be made at a
reasonable charge even within the warranty period.
Intellectual Property Precaution
DENSO WAVE INCORPORATED ("DENSO WAVE") takes reasonable precautions to
ensure its products do not infringe upon any patent of other intellectual property rights of
other(s), but DENSO WAVE cannot be responsible for any patent or other intellectual
property right infringement(s) or violation(s) which arise from (i) the use of DENSO
WAVE's product(s) in connection or in combination with other component(s), product(s),
data processing system(s) or equipment or software not supplied from DENSO WAVE; (ii)
the use of DENSO WAVE's products in a manner for which the same were not intended nor
designed; or (iii) any modification of DENSO WAVE's products by other(s) than DENSO
WAVE.
●
本書の一部または全部を無断で複製・転載することは禁止します。
●
本書の内容に関しては、将来仕様改良などにより予告無しに変更する事がありま
す。
●
弊社では、お客様の生命、身体や財産に被害を及ぼすことなく安全に使っていた
だくために、細心の注意を払っております。当製品をご使用になる際には、本操
作ガイドおよび取扱説明書にしたがってください。
●
落下・衝撃によると弊社が判断した不具合に対しては、保証期間内であっても有
償修理となります。
●
弊社では、弊社製品が他の特許などを侵害しない為の適切な処置をとっています
が、以下の(1)-(3)のいずれかを原因として生じた特許などの侵害については、責
任を負いかねますのでご了承ください。
(1) 弊社以外から供給された部品、製品、装置、データ処理システムあるいはソ
フトウェアと組合わされて使用された場合
(2) 弊社製品が意図されない方法で使用された場合
(3) 弊社以外によってなされた弊社製品の改変
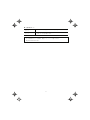
2D Code Handy Scanner
2次元コードハンディスキャナ
GT10Q-SR
GT10Q-HR
Operator's Guide
操作ガイド
Third Edition, May 2006
2006年5月 第3版作成
DENSO WAVE INCORPORATED
株式会社デンソーウェーブ 自動認識事業部
DENSO WAVE INCORPORATED
〒105-0001
東京都港区虎ノ門4丁目2番12号
虎ノ門4丁目MTビル2号館
4-2-12, Toranomon, Minato-ku, Tokyo, Japan
105-0001
http://www.denso-wave.com/
496817-0580