1
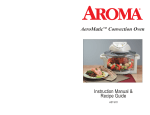
TM
QuikChef Plus
Instruction Manual
Model - ADF-135
Congratulations!
You will find the AROMA® Quik Chef Plus to be one
the most useful and versatile appliances in your home.
Published By:
Aroma Housewares, Inc.
6469 Flanders Drive
San Diego, CA 92121
U.S.A.
© 2001 Aroma Housewares Company
IMPORTANT SAFEGUARDS
Basic safety precautions should always be followed when using
electrical appliances, including the following:
1. Read all Instructions before using.
2. Do not touch hot surfaces. Use handles or knobs.
3. To protect against electrical shock, do not immerse the
appliance or electrical cord in water or other liquid.
4. Close supervision is necessary when any appliance is used by
or near children.
5. Do not leave appliance unattended while in use.
6. Unplug from outlet when not in use and before cleaning. Allow
to cool before putting on or taking off parts, and before
cleaning the appliance.
7. Do not operate any appliance with a damaged cord or plug or
after the appliance malfunctions or has been damaged in any
manner. Return appliance to the nearest authorized service
facility for examination, repair or adjustment.
8. The use of accessory attachments not recommended by the
appliance manufacturer may result in fire, electric shock or
injury.
9. Do not use outdoors.
10. Do not let cord touch hot surfaces or hang over the edge of a
counter or table.
11. Do not place on or near a hot burner or in a heated oven.
12. Extreme caution must be used when using or moving an
appliance containing hot oil or other hot liquids.
13. Do not use the appliance for other than intended use.
14. To disconnect power cord, turn the control to “OFF” then
remove plug from wall outlet.
15. Never overfill the pot with oil that exceeds 1.5 quart or make
sure oil level is no greater then 1/3 of the pot capacity.
This appliance is intended for Household Use Only.
SAVE THESE INSTRUCTIONS
1
SHORT CORD INSTRUCTIONS
1. A short power-supply cord is provided to reduce risks resulting from
becoming entangled in or tripping over a longer cord.
2. Longer extension cords are available and may be used if care is
exercised in their use.
3. If a longer extension cord is used:
a. The marked electrical rating of the extension cord should be at
least as great as the electrical rating of the appliance.
b. The longer cord should be arranged so that it will not drape over
the counter top or table top where it can be pulled on by children
or tripped over unintentionally.
POLARIZED PLUG
If this appliance has a polarized plug (one blade is wider than the other)
follow the instructions below:
To reduce the risk of electric shock, this plug is intended to fit into a
polarized outlet only one way. If the plug does not fit fully into the
outlet, reverse the plug. If it still does not fit, contact a qualified
electrician. Do not attempt to modify the plug in any way.
BREAKAWAY CORD
A breakaway power cord is provided for this deep fryer. The built-in
magnetism helps connect the cord easily plug in and pull out, which
reduce the risk of accident.
ONLY the breakaway cord provided in this package can be used for this
deep fryer. Do not attempt to use any other breakaway cord which is
NOT provided by the manufacturer or it may cause serious damage. Do
not let the cord come in contact with water or any liquid.
2
PARTS IDENTIFICATION
Knob
Glass Lid
Frying
Basket
Removable
Basket Handle
Enamel Pot
Temperature
Indicator Light
Carrying
Handle
Selection
Knob
Body
BEFORE FIRST USE
Before Using For The First Time
1. Wash the Frying Basket and Glass Lid with a sponge or
dishcloth in warm soapy water.
2. Rinse and dry thoroughly.
3. The interior pot should be cleaned with a damp sponge or
dishcloth. Do not immerse cord, plug, or Deep Fryer in water.
4. Wipe body clean with a damp cloth.
⎝ Do not use abrasive cleaners or scouring pads.
⎝ Do not immerse the appliance in water at any time
3
DEEP FRYING
Oil Selection
1. We recommend the following oils for healthier deep frying:
corn, canola, or blended vegetable oil. These oils are
cholesterol-free and low in saturated fats.
2. We do not recommend using peanut oil, soy oil, sunflower oil,
lard and drippings that may deteriorate quickly when heated.
Heavy flavored oils such as olive oil should also be avoided.
3. We do not recommend mixing old and new oil together as this
spoils new oil quicker.
Pre-Heat Oil
1
2
3
4
5
Fill the Enamel Pot with oil.
Be sure oil level is no greater then 1/3 of the pot capacity.
Plug into a wall-outlet.
Place Glass Lid on the unit.
Set the Selection Knob to the “FRY” position.
• The temperature indicator light will come on.
• When the unit has reached the frying temperature the
temperature indicator light will shut off.
• Note: The light may come on and off during operation
indicating the temperature is being maintained.
Note: The fryer may give off a slight odor and smokey haze during
the first use. This is normal and is due to the newness of the
product.
Figure 1
Figure 2
4
Frying Foods
1
Place food in the frying basket. Be sure not to overfill the
basket, as this may cause food not to cook properly.
2 Always shake frozen foods to remove ice particles prior to
frying. Fresh-cut French fries and other damp foods must be
dried before frying.
3 Slide the basket handle into the grove of the handle. (Figure 3)
4 When the temperature light goes out, carefully remove the
glass lid so steam escapes away from you.
5 Slowly lower the frying basket into the oil, then remove the
handle from the basket.
6 Replace Glass Lid
7 When frying is complete, re-attach the handle to the basket.
The basket has been designed to rest on the edge of the deep
fryer body. This allows excess oil to drain from food for
healthier meals.
8 Turn the Selection Knob to the “OFF” position.
9 Unplug the deep fryer and allow the fryer to completely cool
before moving or cleaning the appliance.
CAUTION:
¾ Do not drop the frying basket quickly into the hot oil because it
could overflow or splash hot oil.
¾ During frying hot steam will escape through the edge of the
glass lid. This is normal. Avoid this area when the fryer is in
use.
Figure 1
Figure 2
5
CLEANING INSTRUCTIONS
Changing The Oil
The oil does not need to be changed after each use. We
recommend changing the oil after approximately 8 to 10 uses but
sooner when frying heavily flavored or battered foods.
Storing The Oil
1. Be sure the fryer has completely cooled (approximately 4
hours) and is unplugged prior to storing the oil.
2. Before storing the oil, be sure to filter out any food particles
that may be left in the oil.
3. To filter - pour the oil into a container, then wipe the inner pot
with a paper towel to remove any food particles. Place paper
filter in the frying basket and pour the oil through the paper
filter back into the fryer or another container.
4. The oil may be stored in the fryer at room temperature (only if
the fryer is used on a regular basis) or you may store the oil in
a separate container in the fridge.
How To Clean
1. Be sure the fryer is unplugged and has completely cooled
before cleaning.
2. Wash the basket and lid with a sponge or dishcloth in warm
soapy water.
3. To clean the inner pot, pour warm water and dish soap into the
pot and use a sponge or dishcloth to remove grease. Empty the
pot and rinse with warm water
4. Clean the body of the fryer with a damp cloth and dry.
CAUTION:
¾ Do not immerse cord, plug or deep fryer in water.
¾ Do not use abrasive cleaners or scouring pads.
6
SLOW COOKING
1. Remove the cover and basket. Place the food directly into the
enameled pot. Cover the cooker.
2. Set the control to COOK or the desired temperature. When the
food starts to boil, reduce the temperature where the liquid justslightly bubbles.
3. Check occasionally to see if bubbling.
4. After cooking, test the food. Additional cooking can be done if
required. Additional time will make very little difference for
slow cooking.
5. During cooking it is best not to remove the lid to retain heat
and moisture.
6. Food can be served directly from the cooker.
7. Frozen food should be defrosted before cooking.
8. Most foods being slow cooked do not require stirring as the
natural action of the simmering juices keep everything moist.
9. If meat is very fatty, trim the fat or brown the meat first so the
food does not simmer in fat.
10. Make sure that there is sufficient liquid to cover any
vegetables.
STEWING
1. When making soups, stews, sauces, chili and other similar
liquid or semi-liquid recipes, never fill higher than 2 inches
from the top of the enameled pot to allow for expansion during
cooking.
2. Set the temperature control to WARM-STEAM.
3. Replace the lid.
4. Do not remove the lid during cooking or heat and moisture will
escape.
7
STEAMING
For steaming fresh and frozen vegetables, all actual cooking time
will be affected by the moisture content of the vegetables. Also,
personal preferences should be considered. If you like more
crispiness, use less time and adjust the amount of water, for softer
vegetables, use a longer time and more water.
1. All vegetables should be thoroughly cleaned and washed
before steaming.
2. Thin, leafy vegetables such as cabbage do not require as much
water as root vegetables such as carrots or turnips.
3. You might want to use a steamer basket to hold the items being
steamed.
4. Add sufficient water and set the temperature control to
STEAM.
5. Wait for a few minutes. Put the vegetables into the basket and
place the basket into the enameled pot, without the handle, then
put the lid in place.
6. Do not remove the lid during steaming as moisture will escape
and the cooking time will have to be extended.
7. If the lid is lifted add about 1/4 cup of boiling water to replace
the lost moisture.
8. If you wish to retain the juices from the food being steamed,
you can line the lower quarter of the basket with aluminum foil
to form a pan.
8
LIMITED WARRANTY
Aroma Housewares Company warrants this product free from
defects in material and workmanship for one year from provable
date of purchase in continental United States.
Within this warranty period, Aroma Housewares Company will
repair or replace, at its option, defective parts at no charge,
provided the product is returned, freight prepaid with proof of
purchase and U.S. $6.00 for shipping and handling charges to
Aroma Housewares Company. Please call the toll free number
below for return authorization number. Allow 2-4 weeks for return
shipping.
This warranty does not cover improper installation, misuse, abuse
or neglect on part of the owner. Warranty is also invalid in any
case that the product is taken apart or serviced by an unauthorized
service station.
This warranty gives you specific legal rights and they may vary
from state to state and does not cover areas outside the United
States.
AROMA HOUSEWARES COMPANY
6469 Flanders Drive
San Diego, California 92121
1-800-276-6286
M-F, 8:30 AM - 5:00 PM, Pacific Time
Website: www.aromaco.com
9