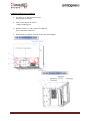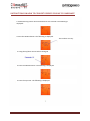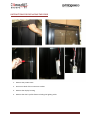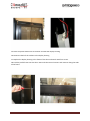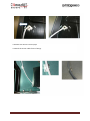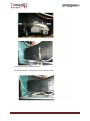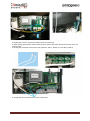
1
2011
WINE CABINETS
Technical manual
Multi-purpose wine cabinets
Wine ageing cabinets
Wine serving cabinets
MT-01 Indice 0
Page 1
TABLE OF CONTENTS
CHAPTER 1: GENERAL INFORMATION ................................................................................ 5
1. Wine and its requirements .............................................................................................. 5
2. Choices available to consumers ...................................................................................... 5
3. Different types of wine cabinets ..................................................................................... 5
4. Specifications................................................................................................................... 6
5. Operating principles: winter system ............................................................................... 8
The internal temperature increases gradually — the customer opens the door several times a day to
check the temperature: ............................................................................................................................... 11
Slow increase of the temperature: .............................................................................................................. 11
Loading a large number of very cold bottles: .............................................................................................. 11
How to check the functionality of the winter system: ................................................................................ 11
6. How should I transport my cabinet? ............................................................................. 12
7. I have not loaded as many bottles as the full capacity! ................................................ 12
CHAPTER 2: CLIMADIFF After Sales Service ...................................................................... 14
CHAPTER 3: MULTI-PURPOSE WINE CABINETS ................................................................. 17
1. Operating principles ......................................................................................................... 17
2. Accessories ....................................................................................................................... 18
2.1 The carbon filters ................................................................................................................................... 18
2.2 Lava stones ............................................................................................................................................ 19
3. Help resolving problems ................................................................................................... 19
3.1 Humidity level is too low: ...................................................................................................................... 19
3.2 Humidity level is too high: ..................................................................................................................... 20
3.3 Odours, moulds and labels coming off: ................................................................................................. 21
3.4 Water in the bottom of the cabinet (or on the floor in front of the cabinet) ....................................... 21
3.5 The temperature is too high .................................................................................................................. 21
3.6 The temperature is too low when a reading is taken with a submerged thermometer ....................... 22
3.7 Temperature is the same throughout the cabinet ................................................................................ 23
3.8 How do I determine the internal temperature and properly regulate the temperature of my wine
cabinet? ....................................................................................................................................................... 24
3.9 The cabinet is silent: .............................................................................................................................. 24
3.10 Noises or bangs:................................................................................................................................... 25
3.11 My wine cabinet's inner walls are expanding ...................................................................................... 25
CHAPTER 4: WINE AGEING CABINETS .............................................................................. 27
1. Operating principles ......................................................................................................... 27
2. Accessories ...................................................................................................................... 29
MT-01 Indice 0
Page 2
2.1 The carbon filters ................................................................................................................................... 29
3. Help resolving problems .................................................................................................. 30
3.1 Humidity level is too low: ...................................................................................................................... 30
3.2 Humidity level is too high: ..................................................................................................................... 31
3.3 Odours, moulds and labels coming off: ................................................................................................. 32
3.4 Water in the bottom of the cabinet (or on the floor in front of the cabinet) ....................................... 32
3.5 The temperature is too high .................................................................................................................. 32
3.6 The temperature is too low ................................................................................................................... 34
3.7 How do I determine the internal temperature and properly regulate the temperature of my wine
cabinet? ....................................................................................................................................................... 35
3.8 The cabinet is silent: .............................................................................................................................. 36
3.10 Noises or bangs:................................................................................................................................... 37
4. INTELITHERM UNIT .......................................................................................................... 38
CHAPTER 5: SERVING CABINETS ...................................................................................... 50
1. Operating principles ......................................................................................................... 50
1.1
Compression cabinets: .................................................................................................................... 51
1.2 Thermoelectric wine cabinets: .............................................................................................................. 51
2. Help resolving problems .................................................................................................. 51
2.1 Humidity level is too low: ...................................................................................................................... 51
2.2 Humidity level is too high: ..................................................................................................................... 52
2.3 Odours, moulds and labels coming off: ................................................................................................. 52
2.4 Condensation on the external side of the door ..................................................................................... 52
2.5 The inner walls are too hot .................................................................................................................... 52
2.6 The temperature is too high or too low ................................................................................................ 52
2.7 Fluctuations in the displayed temperature values ................................................................................ 53
2.8 Noises .................................................................................................................................................... 54
2.9 Sensors: Error codes and solutions (only to be completed by specialist technicians) .......................... 55
PARTICULAR FEATURES FROM THE DIVA RANGE ............................................................. 63
POSSIBLE ERROR CODES ....................................................................................................... 63
INSTRUCTIONS ON HOW TO CONVERT DEGREES CELSIUS TO FAHRENHEIT ....................... 64
MOUNTING MANUAL FOR SLIDING SHELVES ...................................................................... 66
MOUNTING MANUAL FOR FIXED SHELVES .......................................................................... 67
MOUNTING MANUAL FOR THE PRESENTATION BOX .......................................................... 68
INSTRUCTIONS FOR REPLACING THE DOOR......................................................................... 69
INSTRUCTIONS FOR INSTALLING A LIGHT ............................................................................ 74
INSTRUCTIONS FOR REPLACING SENSORS ........................................................................... 77
INSTRUCTIONS FOR REPLACING THE CONTROL UNIT .......................................................... 85
MOUNTING MANUEL FOR DIVA CONNECTING KIT .............................................................. 93
MT-01 Indice 0
Page 3
Chapter 1
GENERAL INFORMATION
MT-01 Indice 0
Page 4
CHAPTER 1: GENERAL INFORMATION
1. Wine and its requirements
Wine is the culmination of passion.
Thanks to its complexity, it develops very slowly and peacefully!
Wine requires the combination of several conditions to flourish and gradually reach its fullest
potential. Therefore the following five golden rules must be observed:
-
Constant temperature
Sufficient humidity
Dark environment
Pure air
No vibrations
The consistency of these conditions is vital and is the reason why wine cabinets were developed!
2. Choices available to consumers
First and foremost, a distinction must be made between ageing, preserving and serving
temperatures.
-
The ageing and storage temperature is 12°C irrespective of the type of wine.
Serving temperatures on the other hand vary according to the type of wine.
3. Different types of wine cabinets
Climadiff, the wine cabinet specialist, has therefore designed different types of cabinets.
Ageing: Climatic environment developed to reproduce the conditions of real wine cellars in the most
stable way to encourage optimum development of the best wines.
Multi-purpose: Single or multi-compartment environment which, thanks to a temperature gradient,
provides a combination of room temperature, preserving and serving areas.
MT-01 Indice 0
Page 5
Serving or temperature control: Climatic single or multi-compartment environment designed to
ensure you can enjoy your best wines at the right temperature so that the refined aromas come to
life.
The mechanical refrigeration system relies on one or several mechanical or electronic thermostats to
precisely regulate the temperature. The wine cabinet therefore operates in cycles of minor
temperature fluctuations, which can be observed in the cabinet's air flow. This is normal and the
temperatures which can be recorded randomly by placing a thermometer in the cabinet do not
reflect the exact temperature of the wine.
A stable average temperature is achieved inside the bottle thanks to this method of minor air
temperature fluctuations around the set point (temperature is regulated, required and controlled by
the thermostat).
The more bottles of wine you store in your wine cabinet, the more important the thermal mass
becomes, while the impact of possible ambient temperature fluctuations caused by thermal inertia
becomes less significant.
A snowball will melt very quickly, while a large snowman will take several days to disappear even
when temperatures are positive.
4. Specifications
Thermal inertia
Thermal inertia is the natural tendency of your bottles to maintain their initial temperature for long
periods in the event of a disruption to the thermal balance within their environment.
Therefore, the slow rate at which a possible temperature disturbance would cause your bottles to
reach a new balance point can also be determined.
It is worth noting that on average the conductivity of liquids (expect for water) decreases by 0.15%
per °C when the temperature rises.
Consequently, you do not need to worry if you notice temperature fluctuations within the cabinet
environment; your wines are perfectly protected! A cabinet filled with 200 bottles equates to a mass
of around 260 kg (on average a 75 cl bottle = 1.3 kg), which is quite a significant amount.
This phenomenon can be illustrated by comparing it to an ice cube. A single cube of ice exposed to
sunlight will melt very quickly, while a large number of ice cubes placed next to each and subjected
to the same conditions will take a lot longer to melt.
Humidity
Humidity is used to maintain moisture in the corks of the bottles and preserve their elasticity, sealing
qualities and prevent the wine from coming into contact with the air.
MT-01 Indice 0
Page 6
It is controlled through the combination of three factors:
-
Circulation of ambient, humid air
Functionality of the device
Inner surface covered in a paint with a high level of granularity (retains condensation
droplets)
During the cooling period (cold air dries out the air), frost forms and humidity levels can increase to
40%. While the compressor is shut down, the frost melts during the warming-up period and levels
can rise to 70%.
The average of these two values (40% + 70%) / 2 = 55% equates to the recommended humidity level
for preserving wine (55% +/-10%). The customer must be well aware of the fact that this is an
average.
In fact, if a customer rings and specifies that the humidity level is 50% and complains that it is too low
and particularly that it is at a constant level, it is highly probable that the reading was taken just after
a cooling period. The levels recorded inside the cabinet can therefore not remain fixed and will, on
the contrary, fluctuate several times a day.
Example: 65% +/- 10% = therefore equates to an average of 65% without causing a problem.
The duration of the cycle must also be taken into consideration. The operation of the compressor can
equate to 10% of the cycle, which increases the average in this particular case to more than 65%.
The relative humidity (measured by public hygrometers) does not directly specify the quantity of
water vapour in the air, but simply highlights the ratio between the state of the air in question and
saturated air at the same temperature and pressure.
Temperature
The
thermostat
enables
the
temperatures
to
be
increased
or
decreased.
The principle of an average temperature is the same as the one that applies to humidity. Following
each start-up of the compressor, the temperature will fall and following each standstill it will increase
again. The average of these two extremes equates to the average temperature required for
preserving wine. Example: (10°C + 14°C) / 2 = 12°C
Our multi-purpose wine cabinets have different temperature levels: colder at the bottom and
warmer
at
the
top.
This
is
achieved
by
distributing
the
static
cold.
This principle relies on the free and natural circulation of cold air, which is heavier and moves down
the cabinet environment. Once it is warmer, it naturally rises again. In the majority of cases, the
coldest area (between 6°C and 10°C) is therefore located at the bottom of the cabinet and the
warmer (between 12°C and 16°C) environment is located at the top, while the central section is for
preserving wine (between 10°C and 14°C) .
The inertia phenomenon of the temperature is also very important. Once 100 to 200 bottles are
loaded, their inertia plays a significant factor and even if the compressor shuts down for one or two
hours (or more), the wine inside the bottles is not subjected to the fluctuation.
It can be concluded that a prolonged change of 1°C in the air equals to a change of only 0.1°C in the
bottle.
MT-01 Indice 0
Page 7
The best way to determine a meaningful diagnosis is to fit a temperature recorder for 24 to 48 hours.
The curve clearly illustrates the average temperature and the corresponding fluctuations linked to
the shut-down and start-up periods of the compressor or winter system (refer to the section on the
winter system).
Also place a submersible thermometer in a bottle filled with water to determine the exact
temperature of the liquid.
This enables the explanatory drawings below to be illustrated precisely.
In all cases, where the winter system is implemented, the element located at the bottom of the
device generates a light mixture within the chamber, which momentarily eliminates the usual
separation between the various temperatures thanks to a natural convection phenomenon (hot air
is lighter than cold air). As soon as the compressor generates cold air, the separation between the
temperatures returns naturally.
5. Operating principles: winter system
This system enables any temperature fluctuations resulting from a severe winter to be compensated
in an unheated environment that most importantly is frost protected. If the unit is not frost
protected, the element does not have enough power to fight the incoming cold.
In all cases, where the winter system is implemented, the element located at the bottom of the
device generates a light mixture within the chamber, which momentarily eliminates the usual
separation between the various temperatures in multi-purpose models thanks to a natural
convection phenomenon (hot air is lighter than cold air).
The system comprises a thermostat that is preset at the factory, a sensor which depending on the
model is located below the top panel of the device, on the outside (on the rear of the device) or even
on the inside, and a heating element inserted in the foam below the start-up compressor or glued
behind the vaporizer (on multi-purpose models) in the internal tank.
The winter system will start up as soon as the ambient temperature recorded by the sensor at the
top of the device reaches around 8°C (preset at the factory). On models equipped with Intelitherm as
well as DIVA models, the setting is controlled electronically by the customer.
The element will then gradually reheat the inside of the cabinet to restore it to a value close to 12°C
(+/-2°C) even before the heat exchange affects the content of the bottles.
MT-01 Indice 0
Page 8
Minimum application temperature: +0°C.
Assuming that a wine cabinet is subjected to such extreme temperatures, the winter system will
work although it does not have enough power to compensate for extremely cold ambient
temperatures.
Compressor operating
Compressor and winter
system not operating
Compressor stops the
operation of the winter
system
Reheating in progress
Return to 12°C +/-2°C
At 25°C, the device is regulated by normal refrigeration.
At an ambient temperature of 10°C, the production of hot or cold air is not required.
At an ambient temperature of 8°C and below, the drop in the ambient temperature will change the
thermal balance of the air in the cabinet, although this will be significantly delayed by the insulator.
The display therefore indicates the temperature of the air in the cabinet, which does not include the
thermal inertia. The temperature of the bottles remains the same despite the recorded fluctuations.
Fluctuations can be recorded according to the length of the exposure to the cold.
If the reduction of the ambient temperature continues, the winter system will start up and begin
compensating for the drop in temperature. The internal reheating process is now in progress and will
slowly increase the temperature.
If the temperature shown on the display does not match the operator's expectations, this is perfectly
normal! Although the air temperature in the wine cabinet drops, the winter system increases the
temperature before a heat exchange with the contents of the bottles is even possible.
To illustrate this, anybody stood at the side of a swimming pool, whether it has an ambient
temperature of +35°C or +18°C will touch the water before diving in, simply because the air
temperature at a given moment (T) does not determine the temperature of the water as a mass.
In the event that it may be 35°C or 18°C, the water temperature could very well be 25°C, which is
often the case.
MT-01 Indice 0
Page 9
Always remember the concept of thermal inertia.
Ambient
temperature
Air temperature
in the cabinet
Increase in temperature before any
heat is exchanged with the bottle
Start-up of the
winter system
The conditions of the bottle can also be illustrated in a diagram in the event of a disturbance to the
ambient temperature.
The temperature log below was completed in an air-conditioned room to provide an overview of the
minimal "impact" an extreme change in the ambient temperature (drop from 30°C) would have on
the content of the bottle (impossible in reality).
MT-01 Indice 0
Page 10
The internal temperature increases gradually — the customer opens the door several times a day
to check the temperature:
It must be explained to worried customers who open the door very frequently in order to check the
winter system is working correctly, that this is detrimental to restoring a higher temperature in the
device. Each time the door is opened, a very significant amount of energy is lost, which further
impedes the reheating process (imagine heating your house with the doors and windows open, etc.).
Slow increase of the temperature:
To customers who complain that the temperature does not rise quickly enough, it must be explained
that the wine does not withstand drastic temperature fluctuations. This is why our winter system is a
low powered device ensuring a slow and gradual increase of the internal temperature and not
creating a thermal shock.
Loading a large number of very cold bottles:
The winter system must not only increase the internal temperature (air) but also that of the content.
On average, one bottle = 1.3 kg. Therefore, one hundred bottles generates a mass of 130 kg, which is
a considerable amount and will therefore require a long time with the door closed to reheat
everything very slowly.
Bear in mind the time required to cool one bottle of water from 18°C to + 4°C in the fridge. Adding
this bottle to the remaining content of the wine cabinet is enough to illustrate the applicable
phenomenon of thermal inertia.
The best way to determine a meaningful diagnosis is to fit a temperature recorder for 24 to 48 hours.
The curve clearly illustrates the average temperature and the corresponding fluctuations linked to
the shut-down and start-up of the winter system.
Place a submersible thermometer in a bottle filled with water to determine the exact temperature of
the liquid.
How to check the functionality of the winter system:
Checking the ambient temperature and the one inside the wine cabinet:
If the temperature in the cabinet is higher than the ambient temperature, the reheating process is in
progress. Leave the device running, limiting the amount of times the door is opened as much as
possible. These instructions are much more important to follow when the ambient temperature has
dropped.
Equip yourself with a cold spray.
Access the system's thermostat sensor located in the upper part of the cabinet.
MT-01 Indice 0
Page 11
Cool the sensor down again. Wait a few minutes, then place your hand on heating device located at
the back of the evaporator, on the lower part, for Hungarian models. On Portuguese models, you
must place your hand on the step above the compressor, inside the cabinet.
If heat is coming out, the system is working. If this is not the case, check the power supply to the
element, thermostat and/or replace if necessary (only to be completed by specialist technicians).
6. How should I transport my cabinet?
The cabinet must be transported as much as possible while being packed,
in order to prevent any damages.
If you need to transport the wine cabinet laying on its side, protect it well
and always place it on the side so that the compressor's
tail load is facing upwards.
7. I have not loaded as many bottles as the full capacity!
Our calculations are based on a standard bottle namely the most common: traditional 75 cl
Bordeaux. However, due to the variety and the number of differently shaped bottles, you might be
able to load less than the recommended amount (i.e. Bourgogne = approx. -30% compared to a
Bordeaux).
MT-01 Indice 0
Page 12
Chapter 2
After Sales Service
MT-01 Indice 0
Page 13
CHAPTER 2: CLIMADIFF After Sales Service
Any orders for spare parts should be sent to SIDEPAR via their website www.sidepar.fr, by
browsing to the section "Orders", "New order" and stipulating the following information for
orders under warranty:
-
Device reference/model
Serial number
Commissioning date
Description of the fault
Customer's address and telephone number
You can access detailed illustrations available on the website.
SIDEPAR S.A.S.
27-29 rue Henri Farman
93297 TREMBLAY-EN-FRANCE, France
Tel.: +33 (0) 141 514 070
Fax: +33 (0) 141 514 080
Email: [email protected]
MT-01 Indice 0
Page 14
No shipping costs are charged for parts under warranty. On the other hand, a contribution to the
operating costs (EUR 10.50, exclusive of tax regardless of the amount of the order) shall be charged
for all orders of parts that are no longer under warranty, any accessories or consumables.
In this case, transport costs for all shipments shall also be charged to you. Orders shall be processed
within 48 hours, although this can vary depending on the size of your orders.
Opening an account with SIDEPAR requires a prior application by the distributor/reseller. Once your
account has been opened, your login details to the site will be sent to you.
The website also enables you to monitor the progress of your orders and check the availability* of
the parts during input (*only as a guide, once the order is being processed by Sidepar the status for
the part may have changed).
MT-01 Indice 0
Page 15
Chapter 3
MULTI-PURPOSE
WINE CABINETS
MT-01 Indice 0
Page 16
CHAPTER 3: MULTI-PURPOSE WINE CABINETS
1. Operating principles
These devices are designed for preserving wine and controlling its temperature.
Preservation: maintaining the quality of wine over time.
Controlling the temperature: bringing the wine to the right service temperature.
The temperature distribution is controlled via a static principle: cold air is heavier than hot air.
Description of the device:
Carbon filter
Cooling thermostat
Room temperature
Evaporator
Preservation
Heating device
Lava stone
Heating thermostat
Compressor
Cooling white and
rosé wines as well as
champagnes.
Temperature:
The air temperature fluctuates between 6°C at the bottom and 14°C at the top (18°C in models
CA231GLW, EV503ZX and EV504ZX that are fitted with an element and a room temperature
compartment). At an ambient temperature of 25°C, it is wise to have the thermostat on setting 2 to
ensure the central section of the cabinet has an average temperature of 12°C.
The temperature is controlled by one or several thermostats in accordance with the technical
specifications of the device: "winter" system, room temperature or not, etc.
The thermostat located in the device is only intended for the production of cold air.
In ambient conditions of around 14°C or lower, it is not functional.
MT-01 Indice 0
Page 17
Humidity:
The average humidity is around 55% +/-10 (refer to the general notes): the average is calculated by
adding the instant peaks (several fluctuations throughout the day as part of the compressor's
operating and shut-down cycles) and dividing the total by two; for example (30% + 80%) / 2 = 55%.
The average level is determined by combining the circulation of ambient air, which is already loaded
with humidity via the carbon filter, by the operation of the device (condensation phenomenon) as
well as the use of lava stones which restore the humidity. Basically, ice forms on the evaporator
during the cooling period. As soon as the compressor stops, this ice melts and is absorbed by the lava
stones. Any surplus is extracted by a slanted discharge spout and then evaporates.
2. Accessories
2.1 The carbon filters
From model serial number 412xxx and onwards, only a single filter is installed. It is located at the top
left and is visible from the outside on the rear of the cabinet. Units produced before then have two
filters. They are located at the top left and bottom left and are visible from the outside on the rear of
the cabinet.
The filter has several purposes including: maintaining natural ventilation in the cabinet, preventing
bad odours and insects from entering while ensuring complete darkness inside the cabinet.
This natural ventilation has a knock-on effect on the humidity levels in the device.
If you notice any odours, moulds or labels that are coming off, it is highly likely due to the fact that
the filter has not being replaced.
The filter should be replaced annually.
Removal direction
Rear view
Internal view
There are two ways to remove it:
From the inside: this requires the top section of the cabinet to be emptied and to remove the
evaporator cover and the evaporator (plate at the bottom of the cabinet), which is tough and timeconsuming.
We recommend removing the filter by pushing from the outside to the inside and then retrieving the
filter by placing your hand behind the evaporator's cover from inside the cabinet. On cabinets
equipped with a grille on the rear of the device, this one must be removed.
The filter can be put back in place from inside or outside.
MT-01 Indice 0
Page 18
2.2 Lava stones
Lava stones absorb and then restore the humidity generated by the condensed water. They do not
have a predefined service life. Replace when the stones are showing signs of erosion. The stones
must be placed in the defrosting gutter (as indicated on the photograph) after being moistened with
water.
View of the location of the lava stones.
3. Help resolving problems
3.1 Humidity level is too low:
The humidity fluctuates continuously. Not only do individuals not have the proper equipment at their
disposal but with one or more instant temperature measurements it is not possible to determine or
validate the average temperature.
Following an instant reading, a user can call to announce an insufficient humidity level (30%).
Is the surface of the bottle dry?
The cabinet's atmosphere cannot be dry (due to the presence of water) and this illustrates the
difference between the relative air humidity (% indicated by the hygrometer) and the absolute value
relating to the number of grams of water in the air.
Check the ambient humidity level and the humidification of the lava stones in models which are
equipped with them.
If the ambient level is low, a moist sandbox may be added.
How many readings were taken? Using what type of device?
One or two readings a day are not enough (continuous fluctuations)
MT-01 Indice 0
Page 19
How long have you had this wine cabinet?
Check the carbon filter is not too old (to be replaced annually)
Where is the thermostat located? What is the temperature at the top of the cabinet compared to
the bottom?
Based on a physical principle, the cold air dries out the air while the compressor is in operation. If the
average temperatures are too low, adjust the thermostat setting.
Setting 3: Colder
temperature in the
cabinet
Setting 1: Higher
temperature in the
cabinet
Setting 0: Deactivate the thermostat
Is the cabinet located in an enclosed area that is not ventilated?
Moisten the lava stones or alternatively place a moist sandbox in the cabinet.
3.2 Humidity level is too high:
First of all reassure the customer that THIS PHENOMENON HAS ABSOLUTELY NO IMPACT ON THE
WINE obviously if maintained within normal proportions.
The worse that can happen is that the labels come off. Sprays that protect the labels are
commercially available (www.vinokado.com/fr)
On the other hand, we all imagine old, prestigious bottles to have labels that are covered in mildew
and are practically illegible. Therefore the presence of humidity can be a good thing.
How long have you had this wine cabinet?
Check that the carbon filter is not too old (replace annually); usually replacing the filter will eradicate
the problem.
How many readings were taken? Using what type of device?
One or two readings a day are not enough (continuous fluctuations)
Check that the hygrometer is reliable and accurate.
MT-01 Indice 0
Page 20
Ensure that the value indicated is not the result of an instant reading taken while the compressor
was shut down (the internal temperatures then rise again).
3.3 Odours, moulds and labels coming off:
The atmosphere in the cabinet is very humid: has the filter been replaced? (To be replaced annually)
If not, replace the carbon filter.
3.4 Water in the bottom of the cabinet (or on the floor in front of the cabinet)
This is not detrimental to the device and can be generated in the event that ambient temperatures
are higher than normal (very high temperatures)
Is the device new?
Readjust the wine cabinet (the feet are adjustable) to tilt it carefully towards the rear to force the
flow of condensation towards the discharge spout designed for this purpose.
Does the door shut correctly?
Check that the door closes correctly and that the seal is airtight.
Are the internal temperatures correct?
Check the average temperatures in the wine cabinet.
Record the minimum and maximum at a given point in the cabinet or insert a temperature recorder:
If the delta temperature is very close to the set point (+/- 4°C or more), at an average of 12°C, this
should equate to a minimum peak of 8°C and a maximum of 16°C. Adjust the cooling thermostat.
(Only to be completed by specialist technicians)
3.5 The temperature is too high
The best way to determine a meaningful diagnosis is to fit a temperature recorder for 24 to 48 hours.
The curve clearly illustrates the average temperature and the corresponding fluctuations linked to
the shut-down and start-up of the compressor or winter system.
Also place a submersible thermometer in a bottle filled with water to determine the exact
temperature of the liquid.
Where is the thermostat positioned? (if the ambient temperature is higher than 14°C)
The required internal temperature can be a readjusted reading: place the thermostat on a colder
application.
MT-01 Indice 0
Page 21
Check the functionality of the thermostat: if it is faulty, replace it (only to be completed by specialist
technicians)
Is the compressor cooling?
Several minutes after the compressor has been operating, place your hand on the evaporator inside
the cabinet:
If it is cold the refrigeration process is in progress.
If it is not cold, refer to the checks listed below.
Is the compressor continuously in operation?
Yes:
Check that there is no gas leak or an obstruction on the refrigerating circuit.
Replace the faulty part (condenser, evaporator, repair the welding) (only to be completed by
specialist technicians).
No:
Check the thermostat setting and adjust if necessary.
Check the gas load in the system, if there is not enough; refill it if necessary (only to be completed by
specialist technicians).
3.6 The temperature is too low when a reading is taken with a submerged thermometer
Is the device situated in an unheated environment?
Check this during the winter and ensure that the wine cabinet model is equipped with a winter
system.
How many readings were taken? How? Using what type of device?
Ensure that the value indicated is not the result of an instant reading taken while the compressor
was shut down (the internal temperatures then rise again).
Where is the thermostat located?
Adjust the position of the thermostat if necessary.
What is the local ambient temperature?
If the area is cold and the cabinet is equipped with a winter system, check the:
-
Heating thermostat
Element
And replace if necessary.
MT-01 Indice 0
Page 22
Is the door closed correctly? Is the door joint completely airtight?
A loss of energy will result in the continuous operation of the refrigerating units.
Formation of ice on the inside: unplug the unit and leave it to defrost
Check the cabinet settings
Ensure that a bottle is not blocking the door
If possible, replace the joint if it is deformed
Is the thermostat in the correct position?
Check the position of the thermostat (if the external temperature is higher than 14°C) and adjust the
position if necessary.
Replace if necessary (only to be completed by specialist technicians)
Is the correct amount of gas in the system?
Check the amount of gas in the system is not higher than the amount indicated on the display by
touching the compressor's suction device. If the copper tube is very cold, it can be assumed that
there is an excess of gas. If necessary, evacuate and then re-inject the amended amount of gas. (Only
to be completed by specialist technicians)
3.7 Temperature is the same throughout the cabinet
At an ambient temperature of below 14°C to 10°C in top section of the cabinet, the device will adjust
to the ambient temperature.
The production of hot or cold air is not required.
What is the local ambient temperature where the device is located?
If the temperature is above 14°C, the refrigerating units must operate intermittently.
If the ambient temperature is low enough for the winter system to operate (i.e. when the
compressor is deactivated) or when the winter system is in operation, the heating element located at
the bottom of the device generates a light mixture within the chamber, which momentarily
eliminates the usual separation between the various temperatures thanks to the natural convection
phenomenon (hot air is lighter than cold air).
How many readings were taken? How? Using what type of device?
Assuming that the refrigerating units are operating and are cooling normally, it must definitely be an
instant temperature reading.
In fact, if cold air is physically heavier than hot air, only an instant reading can result in sidestepping
this physical phenomenon and cause confusion.
MT-01 Indice 0
Page 23
3.8 How do I determine the internal temperature and properly regulate the temperature of
my wine cabinet?
Placing a thermometer in the atmosphere of the wine cabinet will only lead to confusion, even if that
is what everyone would do instinctively.
The wine cabinet was designed to maintain the temperature of the wine in the bottles at a constant
level rather than that of the air.
In contrast to the wine and even the material of the bottles, air does not have a mass or any inertia.
We can advise the following to the user:
To reproduce the conditions in the bottle as closely as possible, take a bottle of white or rosé wine
(in a transparent bottle), empty it, refill it with water and place a submersible thermometer or a fixed
sensor in it. Re-cork the bottle, seal with wax and place it amongst the other bottles.
This has a dual advantage: the recorded temperature equates to that of the wine, which does not
fluctuate like that of the air. By always maintaining a minimum period of 48 hours between two
readings, the user can then increase or decrease the thermostat setting to adjust the temperature of
the wine accordingly.
However, if the customer still wishes to place a thermometer in the cabinet, this should ideally be a
measuring device with a portable display that records the minimum and maximum values ensuring
that the average can easily be determined from the recorded values.
The instant temperature that is displayed is not of great importance if it is not ensured that the
internal temperature remains well within the "standard" limits. In fact, it must not be forgotten that
the thermometer's sensor is located in a wall and is therefore in a confined space which is also
subjected to external temperature influences.
3.9 The cabinet is silent:
If the local ambient temperature where the wine cabinet is located is approximately 12°C (+/- 2°C)
and in all other instances remains below 12°C:
ONLY the compressor will make a noise and will ONLY cool. Under these ambient conditions, it is
therefore normal not to hear it as the wine cabinet does not need a cooling period.
If the ambient temperature is permanently below 9°C, the heating circuit takes over and the
reheating process is maintained by an element. The device is therefore completely SILENT.
If the local ambient temperature where the wine cabinet is located is higher than 14°C and the
device is permanently silent (the compressor is not running):
Check that the cooling thermostat is operating correctly: push it out completely to trigger the
activation of the compressor. Be careful, if the device is in "Automatic defrosting mode" (not all
models are equipped with this function), you may need to wait at least 10 minutes with the door
open for the units to start-up provided that the temperature of the unit is higher than 18°C.
MT-01 Indice 0
Page 24
If nothing happens, the thermostat and/or the compressor are faulty. Replace (only to be completed
by specialist technicians)
To test the functionality of the refrigerating units (thermostat + compressor): (only to be completed
by specialist technicians)
Disconnect the thermostat terminals and bring together to generate a short-circuit. If the
compressor is activated, replace the thermostat.
If it is not activated, the compressor or the temperature switch is faulty (thermal protector faulty).
Repeat the same steps with the temperature switch. If the compressor is activated, replace the
temperature switch.
If it is not activated, replace the compressor.
3.10 Noises or bangs:
This concept is very objective.
Depending on its location, the time of day and a person's perception, the concept of noise varies
greatly. As means of an example, during the day a mosquito is completely inaudible. However, once
it is night and the noise of everyday life subsides, nothing is more unbearable, however, if the dB (A)
levels are measured it cannot be perceived.
The refrigerating gas circulates through coils. The gurgling noise, small creaks and light bangs are
normal.
Check to ensure a bridge of ice has not formed between the evaporator and the wall protection,
which can generate a considerable amount of noise when defrosting (remove the protection).
If the bangs occur during the start-up or shut-down or only when the compressor is deactivated;
replace the compressor (only to be completed by specialist technicians)
The contraction and expansion of the internal walls can generate creaking noises of varying intensity.
3.11 My wine cabinet's inner walls are expanding
Fault with the composition of the foam. First reinforced unit: serial no. 83600285. It is considered
faulty, if the difference between the top, middle and bottom is more than 1.5 cm. In this case, please
contact Climadiff After-Sales Service.
MT-01 Indice 0
Page 25
Chapter 4
WINE
AGEING CABINETS
MT-01 Indice 0
Page 26
CHAPTER 4: WINE AGEING CABINETS
1. Operating principles
Description of the device
CVP180
1.
2.
3.
4.
5.
6.
7.
8.
9.
10.
11.
12.
13.
14.
15.
16.
MT-01 Indice 0
Winter system light
Refrigeration light
ON/OFF light
Thermostat button
Temperature display
Carbon filter
Shelf
Condensation gutter
Foot (wheel)
CV196
Adjustable foot
Top panel
Handle
Inner door (silkscreen or cabinet record, depending on the model)
Lock (depending on the model)
Shelf rail mountings
Air vent (rear of the cabinet)
Page 27
These units are designed for ageing wine.
The ageing process consists of exposing young or partially aged wines to all of the optimum
conditions so that they develop to their full potential.
The homogenisation of the temperature operates on a thermodynamic principle and the distribution
of the cold: larger production of cold air in the top part and natural homogenisation without any
mechanical stirring.
The air temperature fluctuates between +10°C and +14°C. At am ambient temperature of +25°C, it is
generally advisable to have the thermostat on setting 3 to ensure the liquid has an average of
temperature 12°C.
The average humidity must be around 55% and 70%. The average is calculated by adding the instant
minimum and maximum peaks (several fluctuations throughout the day as part of the compressor's
operating and shut-down cycles) and dividing the total by two; for example (35% + 85%) / 2 = 60%.
The duration of a cycle must also be taken into consideration when calculating the average.
The thermostat located on the top panel of the device enables the relevant temperature to be
adapted by making it colder (setting 1) or warmer (setting 5), however this only controls the cooling
thermostat and not the heating circuit or the winter system in the device.
12°C +/-2°C
Temperature:
The air temperature is homogeneous from the top to the bottom without mechanical stirring.
This distribution of the cold prevents the use of a ventilator (generating tiny vibrations, which
increase electricity consumption). At an ambient temperature of 25°C, it is advisable to have the
thermostat on setting 3 to ensure the central section of the cabinet has an average temperature of
12°C.
The temperature is controlled by one or more thermostats in accordance with the technical
specifications of the device ("winter" and refrigeration setting).
The thermostat located on the top panel of the device is only intended for the production of cold air
and cannot be used to change the winter setting.
In ambient conditions of around +14°C or less, the compressor becomes ineffective unless used to
force the cabinet to operate by setting the thermostat to a maximum (1).
MT-01 Indice 0
Page 28
Depending on the thermostat, a temperature of 12°C may not be able to be achieved precisely on
setting 3. In such an instance, it is necessary to adjust the position of the cursor.
Please note that we have not used the entire adjustable range available on the
thermostat (3/4 end stop). You can therefore go beyond the specified reference
points, if necessary.
Humidity:
The average humidity is around 65% +/-10 (refer to notes): the average is calculated by adding the
instant peaks (several fluctuations throughout the day as part of the compressor's operating and
shut-down cycles) and dividing the total by two; for example (30% + 80%) / 2 = 55%.
The average level is determined by combining the circulation of the ambient air, which is already
loaded with humidity via the carbon filter, by the operation of the device (condensation
phenomenon) as well as the internal steel walls covered in a paint with a high level of granularity
that retains condensation droplets.
The device produces
cold air, which is
heavier than the warm
air and gradually
descends.
This
creates a pressure and
forces the air through
the hole located at the
bottom.
When the compressor is
running, it creates heat
that evaporates any water
condensation. Hot air
rises and this humid air is
sucked up to the carbon
filter.
While the compressor is in
operation, the air humidity is
sucked
up
by
the
evaporator and is then
transformed into frost.
When the compressor shuts
down,
the
internal
temperature increases and
the frost slowly melt.
Condensation is generated.
Any
excess
condensation
is
collected in a tank.
When the compressor
restarts, the circuit
closes and the air starts
to circulate.
2. Accessories
2.1 The carbon filters
A single filter is fitted. It is a black piece of plastic that is approximately 5 cm in diameter. It is located
at the top left from inside the cabinet and at the top right from the rear.
MT-01 Indice 0
Page 29
The filter has several purposes including the maintenance of the natural ventilation in the cabinet
and also preventing bad odours and insects from entering while ensuring complete darkness.
Combined with a hole to extract air (vent located at the bottom of the cabinet) it ensures a
continuous circulation of clean air in the cabinet.
This natural ventilation has a knock-on effect on the humidity levels in the device.
If you notice any odours, mould or labels that are coming off it is highly likely is that this is down to
the filter not being replaced.
The filter should be replaced annually.
It must be removed from the front where the
diameter is greater. Be careful not to remove the
plastic cover at the same time!
3. Help resolving problems
3.1 Humidity level is too low:
The humidity fluctuates continuously. Not only do individuals not have the proper equipment at their
disposal but with one or more instant temperature measurements it is not possible to determine or
validate the average temperature.
Following an instant reading, a user can call to announce an insufficient humidity level (30%).
Is the surface of the bottle dry?
Yes:
The cabinet's atmosphere cannot be dry (due to the presence of water) and this illustrates the
difference between the relative air humidity (% indicated by the hygrometer) and the absolute value
relating to the number of grams of water in the air.
No:
Check the ambient humidity levels.
If the ambient level is low, a moist sandbox may be placed in the cabinet's tank.
How many readings were taken? With what type of device?
One or two readings a day are not enough (continuous fluctuations)
MT-01 Indice 0
Page 30
How long have you had this wine cabinet?
Check the carbon filter is not too old (to be replaced annually)
Where is the thermostat located? What is the temperature at the top of the cabinet compared to
the bottom?
Based on a physical principle, the cold air dries out the air. If the average temperatures are too low,
adjust the thermostat setting.
Setting 1: Colder
temperature in the
cabinet
Setting 5: Milder
temperature in the
cabinet
---------- = Total available range of the regulator
Is the cabinet located in an enclosed room that is unventilated and dry?
Ventilate the unit frequently; a moist sandbox may be placed in the cabinet.
3.2 Humidity level is too high:
First of all reassure the customer that THIS PHENOMENON HAS ABSOLUTELY NO IMPACT ON THE
WINE obviously if maintained within normal proportions.
The worse that can happen is that the labels come off. Sprays that protect the labels are
commercially available (www.vinokado.com/fr).
On the other hand, we all imagine old, prestigious bottles to have labels that are covered in mildew
and are practically illegible. Therefore the presence of humidity can be a good thing.
How long have you had this wine cabinet?
Check that the carbon filter is not too old (replace annually); usually replacing the filter will eradicate
the problem.
How many readings were taken? With what type of device?
One or two readings a day are not enough (continuous fluctuations)
Check that the hygrometer is reliable and accurate.
MT-01 Indice 0
Page 31
How many readings were taken? How? Using what type of device?
Ensure that the value indicated is not the result of an instant reading taken while the compressor
was shut down (the internal temperatures then rise again).
3.3 Odours, moulds and labels coming off:
The atmosphere in the cabinet is very humid: has the filter been replaced? (to be replaced annually)
If not, replace the carbon filter.
3.4 Water in the bottom of the cabinet (or on the floor in front of the cabinet)
This is not detrimental to the device and can be generated in the event that ambient temperatures
are higher than normal (very high temperatures)
Is the device new?
Readjust the wine cabinet (the feet are adjustable) or tilt it carefully towards the rear and left to
force the flow of condensation.
Does the door shut correctly?
Check that the door closes correctly and that the seal is airtight.
Are the internal temperatures correct?
Check the average temperatures in the wine cabinet.
Record the minimum and maximum at a given point in the cabinet or insert a temperature recorder:
If the delta temperature is very close to the set point(4°C or more), at an average of 12°C this should
equate to a minimum peak of 8°C and a maximum of 16°C. Adjust the cooling thermostat. (Only to be
completed by specialist technicians)
White lines at the bottom of the tank:
These are lines of chalk from the water, which has dried after it has drained away. See below.
3.5 The temperature is too high
The best way to determine a meaningful diagnosis is to fit a temperature recorder for 24 to 48 hours.
The curve clearly illustrates the average temperature and the corresponding fluctuations linked to
the shut-down and start-up of the compressor or winter system.
Also place a submersible thermometer in a bottle filled with water to determine the exact
temperature of the liquid.
MT-01 Indice 0
Page 32
Where is the thermostat positioned? (if the ambient temperature is higher than 14°C)
The required ambient temperature can be a readjusted reading: place the thermostat on a colder
application.
Check the functionality of the thermostat: if it is faulty, replace it (only to be completed by specialist
technicians)
Is the compressor cooling?
Several minutes after the compressor has been operating, place your hand on the vaporizer inside
the cabinet:
If it is cold the refrigeration process is in progress.
If it is not cold, refer to the checks listed below.
Is the compressor continuously in operation?
Yes:
Check that there is no gas leak or an obstruction on the refrigerating circuit. (Only to be completed
by specialist technicians)
Replace the faulty part (condenser, vaporizer, repair the welding) (only to be completed by specialist
technicians).
No:
Check the thermostat setting and adjust if necessary.
Check the gas load in the system, if there is not enough; refill (only to be completed by specialist
technicians).
LIGHTS AND THE THERMOMETER: (on the following models)
Models with two lights and a thermometer in the centre, CV range ...
Located to the left of the thermometer, this light illuminates ORANGE when the heating
circuit is in operation.
Located to the right of the thermometer, this light illuminates GREEN when the
compressor is in operation. This is not a light that can be switched on.
The lights switch on and off intermittently when the corresponding (cooling or heating) system is
activated. This is perfectly normal.
MT-01 Indice 0
Page 33
The temperature indicated on the display keeps fluctuating:
This is predominantly a display and not a thermometer indicating the temperature of the wine in the
bottles.
As explained previously, the device works in cycles and fluctuations are therefore normal and only
indicate the air temperature at a given moment.
It is based on this principle of fluctuation to the air that a consistent average temperature is
maintained in the bottles.
To check the display is functioning correctly:
Place a thermometer in the cabinet, check the temperature that it displays and compare it to the one
indicated on the display on the panel. The thermometer must be positioned at the same height as
the sensor, however there will most certainly be a difference as the sensor is enclosed.
If there is a significant difference, replace the display (only to be completed by specialist technicians).
The temperature that is usually indicated on the display no longer appears:
Replace the batteries (2 x LR44):
Procedure: remove the display, open the rear compartment, replace the batteries, close and reinsert
the display.
Be careful not to pull it down too far so as not to change the position of the sensor.
3.6 The temperature is too low
Is the device situated in an unheated environment?
Check this during the winter and ensure that the wine cabinet model is equipped with a winter
system.
How many readings were taken? How? Using what type of device?
Ensure that the value indicated is not the result of an instant reading taken while the compressor
was in operation (the internal temperatures are colder = minimum peak).
What is the local ambient temperature?
If the area is cold and the cabinet is equipped with a winter system, check the:
-
Heating thermostat
Element
And replace if necessary.
MT-01 Indice 0
Page 34
Is the door closed correctly? Is the door joint completely airtight?
A loss of energy will result in the continuous operation of the refrigerating units.
Significant formation of ice on the inside: unplug the device and leave it to defrost.
Check the cabinet settings
Ensure that a bottle is not blocking the door
Replace the joint if it is deformed.
Is the thermostat in the correct position?
Check the position of the thermostat (if the external temperature is higher than 14°C) and adjust the
position if necessary.
Replace if necessary (only to be completed by specialist technicians)
Is the correct amount of gas in the system?
Check the amount of gas in the system is not higher than the amount indicated on the display by
touching the compressor's suction device. If the copper tube is very cold, it can be assumed that
there is an excess of gas. If necessary, evacuate and then re-inject the amended amount of gas. (Only
to be completed by specialist technicians)
3.7 How do I determine the internal temperature and properly regulate the temperature of
my wine cabinet?
Placing a thermometer in the atmosphere of the wine cabinet will only lead to confusion, even if that
is what everyone does.
The wine cabinet was designed to maintain the temperature of the bottles at a constant level rather
than that of the air.
In contrast to the wine and the material of the bottles, air does not have a mass or any inertia.
We can advise the following to the user:
To reproduce the conditions in the bottle as closely as possible, take a bottle of white or rosé wine
(in a transparent bottle to make it easier to read), empty it, refill it with water and place a
submersible thermometer or a fixed sensor in it. Re-cork the bottle, seal with wax and place it
amongst the other bottles.
This has a dual advantage: the recorded temperature equates to that of the wine, which does not
fluctuate like that of the air. By always maintaining a minimum period of 48 hours between two
readings, the user can then increase or decrease the thermostat setting to adjust the temperature of
the wine accordingly.
MT-01 Indice 0
Page 35
However, if the customer still wishes to place a thermometer in the cabinet, this should ideally be a
measuring device with a portable display that records the minimum and maximum values ensuring
that the average can easily be determined from the recorded values.
The instant temperature that is displayed is not of great importance if it is not ensured that the
internal temperature remains well within the "standard" limits. In fact, it must not be forgotten that
the thermometer's sensor is located in a wall and is therefore in a confined space which is also
subjected to external temperatures.
3.8 The cabinet is silent:
If the local ambient temperature where the wine cabinet is located is approximately 12°C (+/- 2°C)
and in all other instances remains below 12°C:
ONLY the compressor will make a noise and will ONLY cool. Under these ambient conditions, it is
therefore normal not to hear it as the wine cabinet does not need a cooling period.
If the ambient temperature is permanently below 9°C, the heating circuit takes over and the
reheating process is maintained by an element. The device is therefore completely SILENT.
If the local ambient temperature where the wine cabinet is located is higher than 14°C and
the device is permanently silent (the compressor is not running):
Check that the cooling thermostat is operating correctly: push it out completely to trigger the
activation of the compressor. Be careful, if the device is in "Automatic defrosting mode", you may
need to wait at least 10 minutes with the door open for the units to start-up provided that the
ambient temperature of the cabinet is higher than 18°C.
If nothing happens, the thermostat and/or the compressor are faulty. Replace (only to be completed
by specialist technicians)
To test the functionality of the refrigerating units (thermostat + compressor): (Only to be completed
by specialist technicians)
Disconnect the thermostat terminals and bring together to generate a short-circuit. If the
compressor is activated, replace the thermostat.
If it is not activated, the compressor or the temperature switch is faulty (thermal protector faulty).
Repeat the same steps with the temperature switch. If the compressor is activated, replace the
temperature switch.
If it is not activated, replace the compressor.
MT-01 Indice 0
Page 36
3.10 Noises or bangs:
This concept is very objective.
Depending on its location, the time of day and a person's perception, the concept of noise varies
greatly. As means of an example, during the day a mosquito is completely inaudible. However, once
it is night and the noise of everyday life subsides, nothing is more unbearable, however, if the dB (A)
levels are measured it cannot be perceived.
The refrigerating gas circulates through coils. The gurgling noise, small creaks and light bangs are
normal.
Check to ensure a bridge of ice has not formed between the evaporator and the wall protection,
which can generate a considerable amount of noise when defrosting (remove the protection).
If the bangs occur during the start-up or shut-down or only when the compressor is deactivated;
replace the compressor (only to be completed by specialist technicians)
The contraction and expansion of the internal walls can generate creaking noises of varying intensity.
MT-01 Indice 0
Page 37
4. INTELITHERM UNIT
INTELITHERM TECHNICAL MENU
This sub-menu is mainly used for factory testing and configuration purposes.
ONLY INTENDED FOR TECHNICIANS
!
You shall bear full responsibility for
any modification you make to the sub-menu
that cause a fault.
!
On the other hand, in the event of technical interventions, you can give this
document to an approved technician or your supplier's after sales team who
can request a code from Climadiff to grant them access to the menu
Display
- CONFIGURATION -
Description
To enter this menu simultaneously press both of the buttons until you hear an audible sound
MENU TECHNIQUE
(TECHNICAL MENU
CONFIGURATION)
> TECHNIQUE <
Temperature compensation: stagnation temperature set at the factory.
Please note: This function is only available to technicians and other authorised persons.
OFFSET TEMP (OFFSET
TEMPERATURE SETTING)
> TECHNIQUE <
TEST COMPRESSEUR
This menu is used to test the compressor by enabling it to manually switch ON and OFF. This
tests the electronic control of the compressor.
Please note: This function is only available to technicians and other authorised persons.
(COMPRESSOR TEST
SETTING)
> TECHNIQUE <
TEST RESISTANCE
This menu is used to test the resistance by enabling it to manually switch ON and OFF. This tests
the electronic control of the resistance.
Please note: This function is only available to technicians and other authorised persons.
(RESISTANCE TEST
SETTING)
> TECHNIQUE <
DYNAMIQUE TEXTE
(DYNAMIC TEXT)
- TECHNIQUE EXIT (exit setting)
MT-01 Indice 0
In this menu it is possible to authorise any automatic changes to the basic message in the main
menu. When "Texte Fixe" (set text) is selected, the screen permanently displays the internal
temperature. When "Texte Auto" (automatic text) is selected, the screen alternatively displays
the wine cabinet's internal temperature and the status of the controller. Default mode: "Cave à
vin" (wine cabinet) or another name that has been selected.
To return to the main menu, you must ensure you have definitely exited the programming
menu: Navigate this menu using the [ ] button until you see the message CONFIGURATIONS
EXIT (exit configuration), then simultaneously press both of the buttons until you hear two
beeps. This will return you to the device's main display menu, enable the new settings to be
applied and the device to be controlled.
Page 38
LOG
The "Historique" function (log) enables you to see a log of the minimum and maximum values
recorded by the module once the device has been connected to the power supply and for a certain
operating period.
To display the log, select the "Historique" function and continuously press for five to six seconds. The
display will then display (for example):
HISTORIQUE (LOG)
Min: 10°C; max: 13°C
This function also enables you to determine the average temperature which is generally present in
the mass.
MT-01 Indice 0
Page 39
OFFSET MENU
CAVE A VIN (WINE
CABINET)
Device's main display. To enter the configuration menu, simultaneously press the two
buttons (
). Two audible sounds (beep) will acknowledge your choice.
Temp. Int. (internal
temperature) 12°C
- Configurations Réfrigération
This option is used to select the value below which the compressor will be activated
FROID ON (COOLING ON). To select the settings menu, press the top arrow ( ) to
browse through the menu and select "Configurations menu technique" (configuration
of the settings menu).
(refrigeration
settings)
- CONFIGURATION MENU TECHNIQUE
To enter this menu simultaneously press both of the buttons until you hear an audible
sound
(CONFIGURATION OF THE
SETTINGS MENU)
< TECHNIQUE >
To enter the menu simultaneously press both of the buttons until you hear two
audible sounds.
Offset temp (offset
temperature setting)
Offset temp (offset
temperature setting)
Select the required temperature using both of the buttons, once selected,
acknowledge by pressing both of the buttons simultaneously until you hear two
beeps.
Sélection 0°C (setting:
0°C)
Offset temp (offset
temperature setting)
This information is automatically displayed for a few seconds. The device takes the
selected temperature into consideration.
REGISTRE 0°C (REGISTER:
0°C)
< TECHNIQUE >
The device returns to the offset temperature menu. Press the
"technique exit" (exit settings) is displayed.
arrow until
Offset temp (offset
temperature setting)
< TECHNIQUE >
Exit (exit settings)
Once this menu is selected, simultaneously press both of the buttons until you hear
two audible sounds.
CONFIGURATION -
The device returns to the settings menu in the configuration menu. Simultaneously
press both of the buttons until you hear two audible sounds.
MENU TECHNIQUE
(CONFIGURATION OF THE
SETTINGS MENU)
MT-01 Indice 0
Page 40
EXIT (EXITS SETTINGS)
To return to the main screen, you must ensure you have definitely exited the
programming menu: once you are in the CONFIGURATIONS EXIT (exit configuration)
menu simultaneously press both of the buttons until you hear two beeps.
CAVE A VIN (WINE
CABINET)
The previous command returns you to the operating device's main display menu,
enable the new settings to be applied and the device to be controlled.
CONFIGURATION -
Temp. Int. (internal
temperature) 12°C
MT-01 Indice 0
Page 41
COMPRESSOR TEST MENU
CAVE A VIN (WINE
CABINET)
Device's main display. To enter the configuration menu, simultaneously press the
two buttons (
). Two audible sounds (beep) will acknowledge your choice.
Temp. Int. (internal
temperature) 12°C
- Configurations Réfrigération
This option is used to select the value below which the compressor will be activated
FROID ON (COOLING ON). To select the settings menu, press the top arrow ( ) to
browse through the menu and select "Configurations menu technique"
(configuration of the settings menu).
(refrigeration settings)
- CONFIGURATION MENU TECHNIQUE
To enter this menu simultaneously press both of the buttons until you hear an
audible sound
(CONFIGURATION OF THE
SETTINGS MENU)
< TECHNIQUE >
Offset temp (offset
temperature setting)
< TECHNIQUE >
On this screen press the (
displayed.
) arrow until "test compresseur" (compressor test) is
Once this menu is selected, acknowledge by simultaneously pressing both of the
buttons until you hear two audible sounds.
Test Compresseur
(compressor test
setting)
[HAUT = ON] [Bas =
OFF] (UP = ON; DOWN
= OFF)
Press the
arrow to activate the start-up of the compressor.
Press the
arrow to activate the shut-down of the compressor.
Test Compresseur
(compressor test
setting)
EXIT [OFF]
To exit the menu simultaneously press both of the buttons until you hear two
audible sounds
Compresseur [OFF]
(compressor [OFF])
TECHNIQUE
Test Compresseur
(compressor test
setting)
TECHNIQUE
Exit (exits settings)
CONFIGURATION MENU TECHNIQUE
(CONFIGURATION OF THE
MT-01 Indice 0
On this screen press the (
displayed.
) arrow until "technique exit" (exit settings) is
On this screen, simultaneously press both of the buttons until you hear two audible
sounds
On this screen press the (
is displayed.
) arrow until "configurations exit" (exit configuration)
Page 42
SETTINGS MENU)
CONFIGURATION EXIT (EXITS SETTINGS)
To return to the main screen, you must ensure you have definitely exited the
programming menu: once you are in the CONFIGURATIONS EXIT (exit
configuration) menu simultaneously press both of the buttons until you hear two
beeps.
CAVE A VIN (WINE
CABINET)
The previous command returns you to the operating device's main display menu,
enable the new settings to be applied and the device to be controlled.
Temp. Int. (internal
temperature) 12°C
MT-01 Indice 0
Page 43
RESISTANCE TEST MENU
CAVE A VIN (WINE
CABINET)
Device's main display. To enter the configuration menu, simultaneously press the
two buttons (
). Two audible sounds (beep) will acknowledge your choice.
Temp. Int. (internal
temperature) 12°C
- Configurations Réfrigération
This option is used to select the value below which the compressor will be activated
FROID ON (COOLING ON). To select the settings menu, press the top arrow ( ) to
browse through the menu and select "Configurations menu technique"
(configuration of the settings menu).
(refrigeration settings)
- CONFIGURATION MENU TECHNIQUE
To enter this menu simultaneously press both of the buttons until you hear two
audible sounds
(CONFIGURATION OF THE
SETTINGS MENU)
< TECHNIQUE >
On this screen press the (
displayed.
) arrow until "test résistance" (resistance test) is
Offset temp (offset
temperature setting)
< TECHNIQUE >
Once this menu is selected, acknowledge by simultaneously pressing both of the
buttons until you hear two audible sounds.
Test resistance
(resistance test setting)
[HAUT = ON] [Bas =
OFF] (UP = ON; DOWN
= OFF)
Test resistance
(resistance test setting)
EXIT [OFF]
Press the
arrow to activate the start-up of the resistance.
Press the
arrow to activate the shut-down of the resistance.
To exit the menu simultaneously press both of the buttons until you hear two
audible sounds
Resistance [OFF]
TECHNIQUE
Test resistance
(resistance test setting)
On this screen press the ( ) arrow until "technique exit" (exit settings) is displayed.
TECHNIQUE
Exit
On this screen, simultaneously press both of the buttons until you hear two audible
sounds
CONFIGURATION MENU TECHNIQUE
(CONFIGURATION OF THE
SETTINGS MENU)
MT-01 Indice 0
On this screen press the (
displayed.
) arrow until "configurations exit" (exit configuration) is
Page 44
CONFIGURATION EXIT
CAVE A VIN (WINE
CABINET)
To return to the main screen, you must ensure you have definitely exited the
programming menu: once you are in the CONFIGURATIONS EXIT (exit
configuration) menu simultaneously press both of the buttons until you hear two
beeps.
The previous command returns you to the operating device's main display menu,
enable the new settings to be applied and the device to be controlled.
Temp. Int. (internal
temperature) 12°C
MT-01 Indice 0
Page 45
DYNAMIC TEXT MENU
CAVE A VIN (WINE
CABINET)
Device's main display. To enter the configuration menu, simultaneously press the
two buttons (
). Two audible sounds (beep) will acknowledge your choice.
Temp. Int. (internal
temperature) 12°C
- Configurations Réfrigération
This option is used to select the value below which the compressor will be activated
FROID ON (COOLING ON). To select the settings menu, press the top arrow ( ) to
browse through the menu and select "Configurations menu technique"
(configuration of the settings menu).
(refrigeration settings)
- CONFIGURATION MENU TECHNIQUE
To enter this menu simultaneously press both of the buttons until you hear an
audible sound
(CONFIGURATION OF THE
SETTINGS MENU)
< TECHNIQUE >
Offset temp (offset
temperature setting)
< TECHNIQUE >
On this screen press the (
displayed.
) arrow until "Dynamique texte" (dynamic text) is
Once this menu is selected, acknowledge by simultaneously pressing both of the
buttons until you hear two audible sounds.
Dynamique texte
(dynamic text)
[O] = OUI [N] = NON
([O] = YES [N] = NO)
Dynamique texte
(dynamic text)
Sélection active (active
selection)
Texte auto (automatic
text)
TECHNIQUE
Dynamique texte
(dynamic text)
TECHNIQUE
Exit
Press the top arrow
so that the display alternatively shows the different
information (refer to explanation above).
Press the down arrow so that the display permanently shows the device's internal
temperature only. Then, simultaneously press both of the buttons until you hear a
beep.
The device automatically displays the selected option (in this case: active selection)
for several seconds and then displays the following screen.
On this screen press the (
displayed.
) arrow until "technique exit" (exit settings) is
On this screen, simultaneously press both of the buttons until you hear two audible
sounds
CONFIGURATION MENU TECHNIQUE
(CONFIGURATION OF THE
SETTINGS MENU)
MT-01 Indice 0
On this screen, simultaneously press both of the buttons until you hear two audible
sounds
Page 46
CONFIGURATION EXIT (EXIT SETTINGS)
To return to the main screen, you must ensure you have definitely exited the
programming menu: once you are in the CONFIGURATIONS EXIT (exit
configuration) menu simultaneously press both of the buttons until you hear two
beeps.
CAVE A VIN (WINE
CABINET)
The previous command returns you to the operating device's main display menu,
enable the new settings to be applied and the device to be controlled.
Temp. Int. (internal
temperature) 12°C
MT-01 Indice 0
Page 47
SPECIFIC INSTRUCTIONS
* Do not allow children to play with the device and keep the device's programming unit out of their
reach.
* If there is any doubt relating to the programming or any uncertainty relating to the operation,
disconnect the power supply for at least three minutes, which will result in the module automatically
being reset to the default factory settings.
This can prove to be useful and prevents configuration errors and thus possible unwanted
malfunctions. Therefore do not hesitate to fall back on this method if you are in any doubt.
* The thermometer on the front displays the instant air temperature inside the wine cabinet. This
temperature can obviously fluctuate depending on the operational cycle of the device. This is
perfectly normal and therefore prevents frequent adjustments to the settings having to be made,
which would disrupt the good temperature management and cause possible malfunctions.
* It is important to remember that the total inertia of your cabinet is not reached until after a few
days of operation.
* If there is any doubt relating to the operation of your device, contact Climadiff S.A. Customer
Services or your supplier's After Sales Team.
MT-01 Indice 0
Page 48
Chapter 5
WINE SERVING CABINETS
Compressor temperature control wine cabinets
Thermoelectric wine cabinets
MT-01 Indice 0
Page 49
All of these models must be located in an environment with an ambient temperature of between
+16°C and +32°C. These are wine cooling devices that do not have a "winter" system making it
possible for them to be kept in an unheated environment.
CHAPTER 5: SERVING CABINETS
1. Operating principles
These devices are designed for cooling wine.
Controlling the temperature: bringing the wine to the right temperature for serving.
The homogenisation of the temperature is controlled by internal ventilation based on two cooling
principles: either through compression or by the Peltier thermoelectric system (limited capacity
wine cabinets):
1. In the first case, the air is cooled through the compression of coolant, which is propelled into
the cabinet by ventilators.
2. The Peltier model comprises a "cold" and a "warm" side. When a current passes through the
ventilators, heat is pumped on to the cold side and restored on the warm side (silent and few
vibrations although electricity consumption is high).
The temperature is controlled by an electronic card. Some models have two or even three
temperature zones. On these systems (with a cold ventilated system) the colder temperature is in
the top section and the warmer part is in the bottom. There is no winter system for temperature
control wine cabinets, which should therefore not be located in an unheated environment.
The humidity is not controlled. A tank permanently filled with water is required inside the cabinet
(following models).
Double zone models: keep a 4°C difference
between the 2 set temperatures
MT-01 Indice 0
Page 50
1.1 Compression cabinets:
Upper compartment:
It is equipped with an evaporator and a central ventilator that transmits cold air into the lower
compartment.
Lower compartment:
It is fitted with a heating element. Please note that this is not an actual heating system but rather an
adjustment system.
The temperature of the lower compartment is achieved through the simultaneous management of
hot and cold air production in the upper compartment.
1.2 Thermoelectric wine cabinets:
Two different types of conductive materials are linked by two junctions. In the case of the Peltier
effect, an electric current is maintained in a circuit, by placing a source of electricity which
releases heat at one junction and absorbs heat at the other.
This system does not contain coolant gas or CFC.
The following models have one or multiple temperature zones, each of which may contain its own
module.
2. Help resolving problems
2.1 Humidity level is too low:
WARNING! A lot of customers do not have the material adapted to record the humidity and can only
measure the instant humidity. The humidity changes several times a day, therefore it is not the
instant levels that are of interest to us but rather the average humidity level.
If the rate is lower than 50% this is completely normal. This is not a model with naturally controlled
humidity levels.
Unique solution: permanently have a tub filled with water inside the cabinet and open it on a regular
basis to stabilise the tank as these models are not equipped with an active carbon filter.
MT-01 Indice 0
Page 51
2.2 Humidity level is too high:
First of all reassure the customer that THIS PHENOMENON HAS ABSOLUTELY NO IMPACT ON THE
WINE. The worse that can happen is that the labels come off. Sprays that protect the labels are
commercially available (www.vinokado.com)
This is not a model with naturally controlled humidity levels.
Do not place the tub(s) of water (in the following models).
Check that the door joint is fitted correctly.
Do not open the door too often or for too long.
Check the delta temperature to determine if it is higher than 4°C around the set point (which is the
required temperature): replace the control card (only to be completed by specialist technicians)
2.3 Odours, moulds and labels coming off:
The atmosphere in the cabinet is very humid. Remember to ventilate to remove any excess humidity.
2.4 Condensation on the external side of the door
This is just a physical phenomenon relating to the fresh air in the device in contrast to the ambient
temperature.
2.5 The inner walls are too hot
This is normal, the condenser is located in the foam generating an exchange of energy whereby hot
air is extracted to cool.
2.6 The temperature is too high or too low
On certain models with a double temperature zone (refer to the operating instructions) you must
maintain a minimum difference of 4°C between the two compartments when selecting the
temperatures.
These models must be located in a room with an ambient temperature between +16°C and +32°C.
Check the ambient conditions.
Place a thermometer in the cabinet, check the temperature that it displays and compare it to the one
indicated on the display.
MT-01 Indice 0
Page 52
If there is a significant difference (more than 4°C) to the set point temperature, replace the display or
the control card (only to be completed by specialist technicians). A maximum tolerance of +/- 3°C is
permitted.
Check the Ω values of the sensors (only to be completed by specialist technicians)
Temperature is too high (compression and thermoelectric devices):
Check the temperature control: the ambient temperature may require the thermostat to be
adjusted.
1. Maybe the door is opened too frequently, preventing the temperature from returning to the
required level.
2. The door does not close completely.
3. Joint on the door is not airtight.
Temperature is too high (not standard, approx. 20°C or higher):
The compressor is continuously rotating without cooling:
1. Control card and/or sensor faulty.
2. Refrigerant leak.
3. Obstruction on the refrigerating circuit.
Temperature is too high (thermoelectric wine cabinets)
The ambient temperature may be too high and requires the temperature setting to be adjusted.
The technical limit of this refrigerating system, known as the PELTIER effect or thermoelectric
setting generally enables a maximum temperature of 15°C below the ambient temperature to be
achieved.
This is why it is advised to operate these devices at an ambient temperature of around
20°C/maximum of 25°C.
2.7 Fluctuations in the displayed temperature values
The device displays the instant air temperature in the cabinet and not the specified temperature
(refer to the device's operating instructions).
Different temperature values can therefore be recorded and do not precisely reflect the required
temperature. This is perfectly normal.
MT-01 Indice 0
Page 53
The frequent and brief fluctuations of the air temperature around the set point enable the operating
principle of the device (specified below) to reach a stable average temperature in the bottle, which in
contrast to the air has a mass and inertia.
Very frequent ON/OFF cycles:
Generally, frequent operations (linked to the internal ventilation) can be detected in these devices.
The mixture of air homogenises the internal temperature and, in the event of the door being opened
for prolonged periods, ensures the quick return to the original temperature. However, you can check
that:
1.
2.
3.
4.
5.
6.
The ambient temperature is not too high.
A large number of bottles was recently added.
The door is not opened too frequently.
The door does not close correctly.
Joint on the door is not airtight.
Sufficient air circulation is provided around the device.
2.8 Noises
This concept is very objective.
Depending on its location, the time of day and a person's perception, the concept of noise varies
greatly. As means of an example, during the day a mosquito is completely inaudible. However, once
it is night and the noise of everyday life subsides, nothing is more unbearable, however, if the dB(A)
levels are measured it cannot be perceived.
Gurgling noise, small creaks and light bangs caused by the circulation of gas are normal.
The contraction and expansion of the internal walls can generate creaking noises.
In certain devices, the number of ventilators ranges between two to five, which depending on the
model generates varying degrees of blast noise (recoding around 41 decibels). This is perfectly
normal.
MT-01 Indice 0
Page 54
For built-in models (page 1) check that any remnant packaging does not touch the condenser's
ventilator, as this can cause a loud noise.
Replace faulty ventilator(s) (only to be completed by specialist technicians)
Generally, the most sensitive ventilator in this regard is the condenser's ventilator, which on inbuilt models, is located at the rear next to the housing of the compressor.
Due to its angle, it can sometimes slightly misalign generating a noise.
2.9 Sensors: Error codes and solutions (only to be completed by specialist technicians)
Ref.: CV48AD – CV70AD
If the display shows code "EH", the temperature sensor is faulty.
Contact the Climadiff After Sales Service department to find out based on the serial number of the
device, if the unit can be replaced.
Ref.: CV48AD – CV70AD: red light permanently lit up
The red light lights up for prolonged periods if:
The required temperature is reached (in standby mode)
The device is located in an area that is too cold (refer to the specifications)
The temperature must be modified to increase the temperature: the device and its contents must
slowly increase the temperature to reach the new set point.
The DOLCE VINA1 (amber display) cannot be repaired, while the DOLCEVINA2 (bluish display) can be
repaired.
Ref.: CV22IX, CV52IXDZ, CV41DZX, CV44E, CV42TWIN, CV44SV, AV42XDP, CV168EI CV168EIDZ,
CV112EI, CV112EIDZ, AV121XDZ, AV154XDZ, AV143X3Z, VSV154
1. If the temperature display shows "E1": there is a connection problem with the sensor in the
cooling compartment. Replace the sensor.
2. If the temperature display shows "E2": there is a problem with the sensor in the cooling
compartment short circuiting. Replace the sensor.
3. If the temperature display shows "E3": there is a connection problem with the sensor on the
vaporizer. Replace the sensor.
4. If the temperature display shows "E4": there is a problem with the vaporizer's sensor short
circuiting. Replace the sensor.
MT-01 Indice 0
Page 55
5. If the temperature display shows "E7": there is connection problem with the sensor in the cooling
compartment. Replace the sensor.
6. If the temperature display shows "E8": there is a problem with the sensor in the cooling
compartment short circuiting. Replace the sensor.
If the display shows 37°C, 99F or a "continuous" symbol on some models that have an old version of
the control panel, replace the sensor.
7. If the temperature display shows "HI" (with regard to: AV143X3Z): "HI" on the display indicates
that the device's internal temperature is above 23°C after ten hours of operation.
Complete the following checks:
1. Connect and disconnect the device to the wall socket.
Adjust the temperature of the top and centre compartments to 5°C, the lower compartment
to 12°C (on models with three areas) or the top one to 5°C and the lower one to 12°C
(models with two areas).
2. Leave the device to operate empty for two to three hours.
After having completed these tasks:
1. If the external ventilator and the compressor are working correctly but the two or three
areas are not reaching the previously stipulated temperatures there is a gas leak or an
obstruction on the circuit.
2. If the higher compartment reaches the required temperature (on models with three areas) or
the other compartments (on models with two areas) cannot reach the temperature despite
all of the ventilators working correctly, the refrigeration valve is causing the problem and in
this instance should be replaced.
Inconsistent symbols on the display (compression cabinets):
Start by disconnecting the device for several minutes by removing the plug from the power supply
and then plugging it in again.
Sometimes this is enough to reboot the device.
Please note that if the power supply is disconnected for a prolonged period, the factory settings are
restored.
Otherwise replace the control and display panels. (Only to be completed by specialist technicians)
Ref.: AV24XI, AV45XDZI, AV46CDZI, AV79XDZI, AV80CDZI, AV93X3ZI
If the temperature display shows “EH or EL” the sensor is faulty. Replace the sensor.
MT-01 Indice 0
Page 56
CV52IXDZ: Replacing the condenser
1. Cut tube "A" on the compressor and
allow the gas to escape.
2. Heat contact points "B" and "C"
using a soldering iron.
3. Remove screws 1, 2 and 3 using a screwdriver,
then remove the condenser.
4. Put the new on in place, rinse the circuit and refill with gas.
MT-01 Indice 0
Page 57
MONO AND DUAL AREA TEMPERATURE CONTROL CABINETS
Ref.: CV22IX, CV52IXDZ, CV41DZX, CV44E, CV42TWIN, AV22 IX, CV44SV, AV42XDP, CV168EI
CV168EIDZ, CV112EI, CV112EIDZ, AV121XDZ, AV154XDZ, AV143X3Z, VSV154
Ω sensor values
T (°C)
-30
-29
-28
-27
-26
-25
-24
-23
-22
-21
-20
-19
-18
-17
-16
-15
-14
-13
-12
-11
-10
-9
-8
-7
-6
-5
-4
-3
-2
-1
R (KΩ)
33.81
32.06
30.19
28.43
26.79
25.25
23.81
22.47
21.20
20.01
18.90
17.86
16.90
15.95
15.09
14.27
13.51
12.79
12.11
11.47
10.87
10.31
9.774
9.272
8.790
8.352
7.930
7.532
7.156
6.802
T (°C)
0
1
2
3
4
5
6
7
8
9
10
11
12
13
14
15
16
17
18
19
20
21
22
23
24
25
26
27
28
29
R (KΩ)
6.466
6.149
88.50
5.566
5.298
5.044
4.804
4.577
4.362
4.158
3.965
3.781
3.608
3.443
3.286
3.138
2.997
2.863
2.736
2.615
2.500
2.391
2.287
2.188
2.094
2.005
1.920
1.839
1.762
1.688
T (°C)
30
31
32
33
34
35
36
37
38
39
40
41
42
43
44
45
46
47
48
49
50
51
52
53
54
55
56
57
58
59
R (KΩ)
1.618
1.551
1.487
1.427
1.369
1.314
1.261
1.211
1.162
1.116
1.073
1.031
0.9906
0.9524
0.9157
0.8807
0.8472
0.8152
0.7845
0.7551
0.7270
0.7001
0.6743
0.6496
0.6259
0.6032
0.5815
0.5606
0.5106
0.5214
T (°C)
60
61
62
63
64
65
66
67
68
69
70
71
72
73
74
75
***
***
***
***
***
***
***
***
***
***
***
***
***
***
R (KΩ)
0.5030
0.4853
0.4684
0.4521
0.4365
0.4214
0.0470
0.3931
0.3798
0.3670
0.3547
0.3429
0.3315
0.3206
0.3100
0.2999
***
***
***
***
***
***
***
***
***
***
***
***
***
***
Ω values of the sensors (only to be completed by specialist technicians)
Ref.: CV48AD – CV70AD: 10 K Ω to 25°C
MT-01 Indice 0
Page 58
NOISE LEVELS FOR TEMPERATURE CONTROL CABINETS
Reference
DOLCE VINA 2
CV16TX
CV22IX
CV39X
CV40MX
CV40DZ
CV41DZX
CV42TWIN
CV44E
CV50EI
CV52IXDZ
AV42XDP
CV112EIDZ
CV168EI
CV168EIDZ
VSV154
AV121XDZ
AV154XDZ
AV143X3Z
VSV12
DUOVINO
AV12DZX
CV48AD
CV70AD
MAV18
MAV28
MT-01 Indice 0
Noise level (db)
29
33
38
38
38
38
38
38
38
40
40
40
42
42
42
42
42
42
42
25
25
25
30
30
25
25
Page 59
Chapter 6
PRESERVATION,
SERVING AND AGEING
WINE CABINETS FROM THE
DIVA RANGE
MT-01 Indice 0
Page 60
DIVA RANGE – SENSORS LOCATION
SINGLE TEMPERATURE / AGEING
CABINET
DIVA RANGE – SENSORS LOCATION
SINGLE TEMPERATURE / AGEING
DIVA RANGE – SENSORS LOCATION
SINGLE TEMPERATURE / AGEING
Cold sensor
Hygrometry sensor
Cold sensor
MT-01 Indice 0
Page 61
DIVA RANGE – SENSORS LOCATION
MULTI-TEMPERATURE CABINETS
DIVA RANGE – SENSORS LOCATION
SINGLE TEMPERATURE / AGEING
DIVA RANGE – SENSORS LOCATION
SINGLE TEMPERATURE / AGEING
Heat sensor
Cold sensor
Cold sensor
MT-01 Indice 0
Hygrometry sensor
Page 62
PARTICULAR FEATURES FROM THE DIVA RANGE
POSSIBLE ERROR CODES
E01: P1
E02: P2
E03: P3
E09
E010
P1 = temperature sensor located in the bottom part: regulates the refrigeration function and the
winter system, if present.
P2 = temperature sensor located in the top part: regulates the superior resistance function; ONLY
available in multi-temperature wine cabinets, which are all equipped with this function.
P3 = sensor to measure the humidity levels and to control the humidification system (depending on
the model, option unavailable)
E01, E02 and E03: relevant sensor faulty or connection between the circuit board of the power card
and the sensor is lost.
E09: the safety thermostat has disconnected the refrigeration and heating functions as the internal
temperature is too low.
When the temperature at the bottom of the wine cabinet returns to 6°C or to the selected
temperature level, the compressor will restart.
Code E09 flashes with a triangle alert on the screen as long as the power supply and the plug are
disconnected from the mains supply for two to three minutes.
The symbol and the error code disappear as soon as the plug is reconnected to the mains supply.
If the temperature is still too cold in the lower section of the cabinet, the "triangle" symbol and the
error code reappear.
E10: communication cable for the circuit board and power card or the circuit board for the display is
faulty, or the cable is damaged.
Sensors P1, P2, P3 and the safety thermostat are inserted from the rear into foam tubes inside the
side walls.
PLEASE NOTE: THE SENSORS MUST BE PUSHED AS FAR AS POSSIBLE UNTIL RESTING AGAINST THE BOTTOM OF
THE TUBE
MT-01 Indice 0
Page 63
INSTRUCTIONS ON HOW TO CONVERT DEGREES CELSIUS TO FAHRENHEIT
1 Simultaneously presser all of the buttons for five seconds. The following is
displayed:
2 Press the ON-OFF button. The following is displayed:
This number can vary.
3 Using the up/down arrows select setting 18
4 Press the ON-OFF button. The following is displayed:
5 Press the up arrow. The following is displayed:
MT-01 Indice 0
Page 64
6 Press the ON-OFF button. The following is displayed:
7 Press the light button twice. The temperature is then converted to F°
MT-01 Indice 0
Page 65
MOUNTING MANUAL FOR SLIDING SHELVES
MT-01 Indice 0
Page 66
MOUNTING MANUAL FOR FIXED SHELVES
MT-01 Indice 0
Page 67
MOUNTING MANUAL FOR THE PRESENTATION BOX
MT-01 Indice 0
Page 68
INSTRUCTIONS FOR REPLACING THE DOOR
1. Remove the profile frame
2. Disconnect both of the connection sockets
3. Remove the display housing
4. Remove the door's profile frame including the lighting cable
MT-01 Indice 0
Page 69
5. Cut off the socket at the end of the cable
6. Remove the cable fittings
7. Remove the cable from the door
MT-01 Indice 0
Page 70
8. Remove the pivot from the upper hinge using a flatheaded screwdriver
9. Gently tilt the top of the door and lift as illustrated on
the photograph
10. Place the two plastic guards in the hole for the upper
hinge of the new door
11. Install the new door and attach using threaded rods
MT-01 Indice 0
Page 71
12. Insert the cable in the door and attach using plastic clamps as illustrated on the photograph
13. Prepare the end of the cable and install the wires in the socket; order of the colours: yellow, green,
brown, and white
14. Push the four metal connections on the socket using a thin screwdriver
MT-01 Indice 0
Page 72
15. Place the profile frame next to the door and take the display housing
16. Reconnect both of the sockets to the display housing
17. Replace the display housing in the frame of the door and attach with four screws
18. Push the profile frame into the door. Start with the internal corners and continue along the sides
of the frame.
MT-01 Indice 0
Page 73
INSTRUCTIONS FOR INSTALLING A LIGHT
1. Get the light
2. Remove the profile frame
MT-01 Indice 0
Page 74
3. Remove the screws from the display housing
4. Connect the lighting cable as illustrated on the photograph
5. Attach the display housing with the four screws
MT-01 Indice 0
Page 75
6. Place the cable along the channel
7. Put the profile frame back on the door starting with the internal corners, then the
external corners and concluding with the external sides
8. Clean the surface of the profile frame, remove the self-adhesive protective film from the
light and place the lighting band in the profile
MT-01 Indice 0
Page 76
INSTRUCTIONS FOR REPLACING SENSORS
1. Remove the label stuck to the sensor
2. Remove the paste from the pipe inlet
MT-01 Indice 0
Page 77
3. Remove the sensor from the pipe
4. Detach the sensor cable from its fittings
MT-01 Indice 0
Page 78
5. Remove the screws from the housing cover
6. Remove the screws from the switch box
MT-01 Indice 0
Page 79
The shortest cable on the switch box can limit access
to the sensor sockets.
If there is too much play in the door, the connection
cable can be pulled out by 20/30cm through the pipe
located at the back of the cabinet
MT-01 Indice 0
Page 80
7. Disconnect the sensor sockets from the electronic card
MT-01 Indice 0
Page 81
8. Connect the sockets on the new sensors to the switch box
S_RH: humidity sensor
S_P1: lower temperature sensor
S_P2: upper temperature sensor (only in multi-temperature cabinet)
COM: connection cable (display housing)
MT-01 Indice 0
Page 82
9. Replace the switch box fixing screws
10. Replace the box cover and fix in place using the screws
MT-01 Indice 0
Page 83
11. Insert the sensor approx. 30 cm into the pipe until the sensors come to a stop
12. Reseal the end of the pipe using paste, which shall initially remain uncovered
13. Affix the silver label to cover up the paste
14. Attach the sensor cable using the fixing elements
MT-01 Indice 0
Page 84
INSTRUCTIONS FOR REPLACING THE CONTROL UNIT
1. Unscrew the cover and remove
2. Remove the screws from the switch box
MT-01 Indice 0
Page 85
The shortest cable on the switch box can limit access
to the sensor sockets.
If there is too much play in the door, the connection
cable can be pulled out by 20/30cm through the pipe
located at the back of the cabinet
MT-01 Indice 0
Page 86
3. Unplug the sensors' connection sockets from the switch box
4. After having removed the sticker and the paste, remove the safety thermostat sensor from the
cabinet chest
5. Unplug the resistance connections from positions: 4SH-L, 4SH-N, H-L, H-N, WH-L, WH-N
6. Unplug the wire connections from the compressor
MT-01 Indice 0
Page 87
7. Disconnect the green/yellow wire connections from the earth: protective conductor on the switch
box, safety thermostat cover
8. Replace the control box with a new one containing the appropriate software (according to the spare
parts list)
MT-01 Indice 0
Page 88
9. Connect the new sensor's electric sockets to the box
S_RH: humidity sensor
S_P1: lower temperature sensor
S_P2: upper temperature sensor (only in multi-temperature cabinets)
COM: connection cable (display housing)
MT-01 Indice 0
Page 89
10. Connect the resistance cables to the the positions: 4SH-L, 4SH-N, H-L, H-N, WH-L, WH-N - in
accordance with the table below
MT-01 Indice 0
Page 90
11. Connect the wires from the compressor in accordance with the wiring diagram
12. Disconnect the green/yellow wire connections from the earth: protective conductor on the switch
box, safety thermostat cover
MT-01 Indice 0
Page 91
13. Secure the switch box screws
14. Replace the cover and fix in place with the screws
MT-01 Indice 0
Page 92
MOUNTING MANUEL FOR DIVA CONNECTING KIT
MT-01 Indice 0
Page 93
MT-01 Indice 0
Page 94
FINAL NOTES
This document is only intended for technical stations managed by the After Sales Services or the
retailer and must under no circumstances be passed on to the operator as it contains certain
procedures and information that must be overseen by approved technicians only.
We hope we have clarified information relating to Climadiff wine cabinets for you and shall remain at
your disposal for any questions that cannot be answered using this technical manual.
Do not hesitate to contact us with any suggestions or comments, which will enable us to improve and
expand this document.
Please find our contact details as well as those for SIDEPAR listed below. Upon request, SIDEPAR will
provide you with login access to its site also enabling you to access all of the specifications online.
CLIMADIFF S.A.
Les Docks – Atrium 10.5
10 Place de la Joliette
13567 Marseilles Cedex 2, France
Main reception
Customer service
Fax:
Website
Email for customers
+33 (0) 496 115 252
+33 (0) 491 917 314
+33 (0) 491 913 536
www.climadiff.com
[email protected]
SIDEPAR
27-29 Rue Henri Farman
93297 Tremblay en France, France
Spare parts
Maintenance
Fax:
Website:
MT-01 Indice 0
+33 (0) 141 514 070
+33 (0) 156 480 268
+33 (0) 141 514 072
www.sidepar.fr
Page 95