1
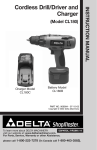
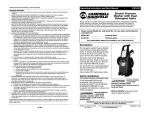
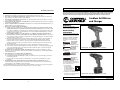
See Warranty on page 8 for important information about commercial use of this product.
DX111425CD & DX151905CD
Limited Warranty
1. DURATION: From the date of purchase by the original purchaser as follows: One Year.
2. WHO GIVES THIS WARRANTY (WARRANTOR): Campbell Hausfeld / Scott Fetzer Company, 100 Production
Drive, Harrison, Ohio, 45030, Telephone: (800) 424-8936
3. WHO RECEIVES THIS WARRANTY (PURCHASER): The original purchaser (other than for purposes of resale)
of the Campbell Hausfeld product.
4. WHAT PRODUCTS ARE COVERED BY THIS WARRANTY: Any Campbell Hausfeld cordless power tool supplied
or manufactured by Warrantor.
5. WHAT IS COVERED UNDER THIS WARRANTY: Substantial defects in material and workmanship which occur
within the duration of the warranty period.
6. WHAT IS NOT COVERED UNDER THIS WARRANTY:
A. Implied warranties, including those of merchantability and FITNESS FOR A PARTICULAR PURPOSE ARE
LIMITED FROM THE DATE OF ORIGINAL PURCHASE AS STATED IN THE DURATION. If this product is used
for commercial, industrial or rental purposes, the warranty will apply for ninety (90) days from the date
of purchase. Some States do not allow limitation on how long an implied warranty lasts, so the above
limitations may not apply to you.
B. ANY INCIDENTAL, INDIRECT, OR CONSEQUENTIAL LOSS, DAMAGE, OR EXPENSE THAT MAY RESULT
FROM ANY DEFECT, FAILURE, OR MALFUNCTION OF THE CAMPBELL HAUSFELD PRODUCT. Some States
do not allow the exclusion or limitation of incidental or consequential damages, so the above limitation
or exclusion may not apply to you.
C. Any failure that results from an accident, purchaser’s abuse, neglect or failure to operate products in
accordance with instructions provided in the owner’s manual(s) supplied with product. Accident,
purchaser’s abuse, neglect or failure to operate products in accordance with instructions shall also
include the removal or alteration of any safety devices. If such safety devices are removed or altered,
this warranty is void.
D. Normal adjustments which are explained in the owner’s manual(s) provided with the product.
E. Items or service that are normally required to maintain the product, i.e. contacts, grips, springs, triggers
or any other expendable part not specifically listed. These items will only be covered for ninety (90)
days from date of original purchase.
7. RESPONSIBILITIES OF WARRANTOR UNDER THIS WARRANTY: Repair or replace, at Warrantor’s option,
products or components which are defective, have malfunctioned and/or failed to conform within duration
of the warranty period.
8. RESPONSIBILITIES OF PURCHASER UNDER THIS WARRANTY:
A. Provide dated proof of purchase and maintenance records.
B. Call Campbell Hausfeld (800-424-8936) to obtain your warranty service options. Freight costs must be
borne by the purchaser.
C. Use reasonable care in the operation and maintenance of the products as described in the owner’s
manual(s).
9. WHEN WARRANTOR WILL PERFORM REPAIR OR REPLACEMENT UNDER THIS WARRANTY: Repair or
replacement will be scheduled and serviced according to the normal work flow at the servicing location,
and depending on the availability of replacement parts.
This Limited Warranty applies in the United States, Canada and Mexico only and gives you specific legal rights.
You may also have other rights which vary from state to state or country to country.
Operating Instructions and Parts Manual
DX111425CD & DX151905CD
Please read and save these instructions. Read carefully before attempting to assemble, install, operate or maintain
the product described. Protect yourself and others by observing all safety information. Failure to comply with
instructions could result in personal injury and/or property damage! Retain instructions for future reference.
BUILT TO LAST
Cordless Drill/Driver
and Charger
Unpacking
When unpacking this product,
carefully inspect for any damage that
may have occurred during transit.
General Safety
Information
This manual contains information that
is very important to know and understand. This information is provided for
SAFETY and to PREVENT EQUIPMENT
PROBLEMS. To help recognize this
information, observe the following
symbols.
Danger indicates
!
an imminently
hazardous situation which, if not
avoided, will result in death or serious
injury.
DANGER
Warning indicates
a potentially
hazardous situation which, if not
avoided, could result in death or
serious injury.
! WARNING
Model DX151905CD - Two Speed Ranges & variable speed trigger
Caution indicates a
!
potentially
hazardous situation which, if not
avoided, may result in minor or
moderate injury.
CAUTION
Notice indicates
important
information, that if not followed, may
cause damage to equipment.
NOTICE
The following safety precautions must
be followed at all times along with any
other existing safety rules.
1. Read all manuals
included with this
product carefully. Be
thoroughly familiar with
the controls and the
proper use of the equipment.
MANUAL
2. Only persons well acquainted with
these rules of safe operation should
be allowed to use this tool.
Model DX111425CD - Single speed range & variable speed trigger
REMINDER: Keep your dated proof of purchase for warranty purposes! Attach it to this manual or file it for safekeeping.
© 2006 Campbell Hausfeld/Scott Fetzer
8
For parts, product & service information
visit www.chpower.com
IN708800AV 6/06
DX111425CD & DX151905CD
Operating Instructions and Parts Manual
General Safety
Information (Cont’d.)
WORK AREA
Do not operate a
!
power tool in an
explosive atmosphere, such as in the
presence of flammable liquids, gases, or
dust. Power tools create sparks which
may ignite the fumes or dust.
WARNING
Keep work area
!
clean and well
lighted. Cluttered benches and dark
areas invite accidents.
CAUTION
Keep bystanders,
!
children, and
visitors away while operating a power
tool. Distractions can cause you to lose
control.
CAUTION
ELECTRICAL SAFETY
Recharge this
battery-operated
tool only with the charger specified for
the battery. A charger suitable for one
type of battery can create a risk of fire
when used with another battery.
! WARNING
Do not expose
!
power tools to rain
or wet conditions. Water entering a
power tool will increase the risk of
electric shock.
WARNING
Use this battery!
operated tool only
with its designated battery pack. Use of
any other batteries may create a risk of
fire.
WARNING
Avoid body contact
with grounded
surfaces such as pipes, radiators,
ranges, and refrigerators. There is an
increased risk of electric shock if your
body is grounded.
! WARNING
PERSONAL SAFETY
CALIFORNIA PROPOSITION 65
You can
!
create
dust when you cut, sand,
drill or grind materials such
as wood, paint, metal,
concrete, cement, or other
masonry. This dust often contains
chemicals known to cause cancer, birth
defects, or other reproductive harm.
Wear protective gear.
DANGER
This product or its
!
power cord
contains lead, a chemical known to the
State of California to cause cancer and
birth defects or other reproductive
harm. Wash hands after handling.
WARNING
Do not misuse this
!
product. Excessive
exposure to vibration, work in
awkward positions, and repetitive
work motions can cause injury to
hands and arms. Stop using any tool if
discomfort, numbness, tingling, or pain
occur, and consult a physician.
WARNING
1. Stay alert, watch what you are
doing, and use common sense when
operating a power tool. Do not use
tool while tired or under the
influence of drugs, alcohol, or
medication. A moment of
inattention while operating power
tools may result in serious personal
injury.
Avoid accidental
!
starting. Be sure
switch is in the locked or off position
before inserting battery pack, making
any adjustments, changing accessories,
or storing the tool. Carrying tools with
your finger on the switch or inserting
the battery pack into a tool with the
switch on invites accidents.
CAUTION
2. Remove adjusting keys or wrenches
before turning on the tool. A key or
wrench attached to a rotating part
of the tool may result in personal
injury.
3. Do not overreach. Keep
proper footing and
balance at all times.
Proper footing and
balance enable better
control of the tool in unexpected
situations.
4. Always work in a well-ventilated
area. Wear an OSHA-approved dust
mask and safety glasses.
5. Hold tool by insulated
gripping surface when
performing an
operation where the
tool may contact hidden
wiring. Contacting a “live” wire will
make exposed metal parts of the
tool “live” and shock the operator.
6. Keep hands away from rotating
parts.
7. Use clamps or another practical
way to secure the workpiece to a
stable platform. Never hold work in
your hand, lap, or against other
parts of your body when cutting.
8. Do not wear loose fitting clothing,
scarves, or neck ties in work area.
Loose clothing may become caught
in moving parts and result in
serious personal injury.
9. Do not wear jewelry when
operating any tool. Jewelry may
become caught in moving parts
and result in serious personal
injury.
Notes
TOOL USE AND CARE
Do not use tool if
!
switch does not
turn it on or off. Any tool that cannot
be controlled with the switch is
dangerous and must be repaired.
WARNING
Ensure the switch is
!
in the off position
before inserting battery pack. Inserting
the battery pack into the saw with the
switch on invites accidents.
WARNING
\ Under abusive
!
conditions, liquid
may be ejected from the battery. Avoid
contact. If contact accidentally occurs,
flush with water. If liquid contacts
eyes, seek medical help. Liquid ejected
from the battery may cause irritation or
burns.
WARNING
1. When battery pack is not in use,
keep it away from metal objects
such as paper clips, coins, keys,
nails, or screws that can make a
connection from one terminal to
another. Shorting the battery
terminals together may cause
sparks, burns, a fire, or damage to
the battery.
2. This tool must NOT be modified or
used for any application other than
that for which it was designed.
Do not force the
!
tool. Use the
correct tool for your application. The
correct tool will do the job better and
safer at the rate for which it is
designed.
CAUTION
3. Maintain tools with care. Keep
tools clean. Properly maintained
tools with sharp cutting edges are
less likely to bind and are easier to
control.
4. Check for misalignment or binding
of moving parts, breakage of parts,
and any other condition that may
affect the tool’s operation. If
damaged, have the tool serviced
before using. Many accidents are
caused by poorly maintained tools.
Maximum Size Drill Bits
Drill Model
Max. Bit Size
DX111425CD
3/8” (10 mm)
DX151905CD
3/8” (10 mm)
www.chpower.com
2
7
Operating Instructions and Parts Manual
Operation
(Cont’d.)
9. Combination pilot drill, shank drill
and countersink bits are available
from local supply houses for drilling
holes in one easy operation.
DRIVING SELF-TAPPING SCREWS
1. Drill pilot hole of correct size as
recommended by screw
manufacturer for fastener being
used.
2. Install proper screwdriver bit.
3. Set torque adjusting collar for
desired torque and set speed
selector to “1,” the low-speed
setting.
4. Set drill for correct rotation.
5. Position bit in head of screw.
6. Place end of screw into pre-drilled
hole, remove fingers, start drill and
drive screw.
7. As soon as screw has seated, release
trigger, and lift drill from screw.
DX111425CD & DX151905CD
DRIVING MACHINE SCREWS
1. Drill and tap correct hole size for
fastener to be used.
2. Start screw in hole with fingers and
drive as outlined under DRIVING
WOOD SCREWS.
TO REMOVE SCREWS
1. Set torque adjusting collar for
maximum torque and set speed
selector to LOW.
2. Install proper screwdriver bit.
3. Set screwdriver for reverse rotation.
4. Place bit in screw and start drill to
remove screw.
Maintenance
KEEP TOOL CLEAN
All plastic parts should be cleaned with
a soft damp cloth. NEVER use solvents
to clean plastic parts. They could very
possibly dissolve or otherwise damage
the material.
FAILURE TO START
Should your tool fail to start, make
sure battery pack is charged and
installed in drill.
BATTERY
The battery pack will discharge by
itself without damage if stored for
long periods of time, and may require
recharging before use.
TECHNICAL SERVICE
For information regarding the
operation or repair of this product,
please call 1800-251338.
Tool service must
!
be performed only
by qualified repair personnel. Service
or maintenance performed by
unqualified personnel could result in a
risk of injury.
CAUTION
create a risk of fire when used with
another battery.
General Safety
Information (Cont’d.)
5. Use only accessories that are
recommended by the manufacturer
for your model. Accessories suitable
for one tool may create a risk of
injury when used on another tool.
6. Some wood contains
preservatives which can
be toxic. Take extra care
to prevent inhalation
and skin contact when
working with these materials.
Request and follow all safety
information available from your
material supplier.
7. Store tools out of reach of children
and other untrained persons. Tools
are dangerous in the hands of
untrained users.
8. This tool must NOT be modified or
used for any application other than
that for which it was designed.
9. Do not use if chuck jaws or other
parts are cracked or worn.
10. Verify the drill’s rotation before
starting to drill, so it is correct for
the operation being performed.
11. Do not use drill as a router or try to
elongate or enlarge holes by
twisting the drill. Drill bits may
break and cause injury.
Each drill is
equipped with a
chuck capable of handling bits up to a
certain size – see chart titled “Maximum
Size Drill Bits.” Do not use bits larger
than those recommended.
NOTICE
For Replacement Parts or Technical Assistance, call 1800-251338
Description
Part
Number
Charger – 19.2V DC / 240 VAC, Australia
SV566900AV
Battery Pack – 19.2V DC / 240 VAC, Australia
DG101000PY
Charger – 14.4V DC / 240 VAC, Australia
SV567000AV
Battery Pack – 14.4V DC / 240 VAC, Australia
DG016800PY
Chuck – 3/8"
DG012100PI
Set Screw
SV446100AV
Case
DG015600TC
Please provide following information:
- Model number
- Serial number (if any)
- Part description and number as
shown in parts list
Address any correspondence to:
Campbell Hausfeld
Attn: Customer Service
100 Production Drive
Harrison, OH 45030 U.S.A.
Safety Instructions
for Charger and
Batteries
ELECTRICAL SAFETY
Before using battery charger, read all
instructions on battery charger, battery
pack, and product.
1. A battery-operated tool with
integral batteries or a separate
battery pack must be recharged
only with the specified charger for
the battery. A charger that may be
suitable for one type of battery may
Up to 24 volts DC
!
present at charging
terminals. Do not probe with conductive
objects. Danger of electrical shock or
electrocution.
If battery pack case
!
is cracked or
damaged, do not insert into charger.
Danger of electrical shock or
electrocution.
DANGER
DANGER
Avoid body contact
!
with grounded
surfaces such as pipes, radiators,
ranges, and refrigerators. There is an
increased risk of electric shock if your
body is grounded.
WARNING
Charger plugs must
!
match the outlet.
Never modify the plug in any way. Do
not use adapter plugs with grounded
chargers. Unmodified plugs and
matching outlets will reduce the risk of
electric shock.
WARNING
! WARNING Do not abuse cord.
• Never carry charger by its cord.
• Never pull the cord to disconnect
from receptacle. Pull charger case
rather than cord when
disconnecting charger.
2. Do not operate charger with
damaged cord or plug.
• Have a damaged or worn power
cord and/or strain relief replaced
immediately.
• Do not attempt to repair power
cord.
3. Make sure cord is located so that it
will not be stepped on, tripped
over, or otherwise subjected to
damage or stress.
4. Do not operate charger if it has
received a sharp blow, been
dropped, or otherwise damaged.
Take it to a qualified serviceman.
5. Do not disassemble charger or
battery pack. Take it to a qualified
serviceman when service or repair is
required. Incorrect reassembly may
result in a risk of electric shock or
fire.
6. Do not use an extension cord unless
absolutely necessary. Use of
improper extension cord could
result in a risk of fire and electric
Minimum Wire Size (AWG) of Extension Cord for Battery Charger
Length of Cord in Feet
25
50
100
150
AWG Size of Cord
18
18
18
16
shock. If an extension cord must be
used, make sure:
• That the size of the cord is at least
as specified in chart titled
“Minimum Wire Size (AWG) of
Extension Cord for Battery
Charger.”
• That the pins on plug of extension
cord are the same number, size and
shape as those of plug on charger.
• That the extension cord is
properly wired and in good
electrical condition.
• If an extension cord is to be used
outdoors it must be marked with
the suffix “W-A” or “W” following
the cord type designation to
indicate it is acceptable for outdoor
use. For example – SJTW-A
7. Unplug charger from outlet before
attempting any maintenance or
cleaning.
8. Charge the battery pack in a wellventilated area. Do not allow any
object to cover the charger and/or
battery pack while charging.
9. Do not store the charger or battery
pack in locations where the
temperature may reach or exceed
105°F (40°C), such as a metal tool
shed, or a car in the summer. This
can lead to deterioration of the
storage battery.
10. For optimal charging of the battery
pack, charge it in temperatures
between 65°-75° F (18°-24°C). Do
not charge the battery pack in an
air temperature below 40°F (4° C),
or above 105°F (40° C). Charging the
battery outside of this range can
adversely affect battery
performance.
11. Do not charge battery in damp or
wet locations.
12. Do not charge battery pack if it
feels hot to the touch. Wait for it to
cool.
13. Do not expose charger to rain, snow
or frost.
14. Do not incinerate battery pack. It
can explode in a fire.
15. Battery charger is not intended for
any other uses other than charging
the rechargeable battery. Any other
uses may result in risk of fire,
electrical shock, or electrocution.
16. The charger is ventilated through
slots in the top and the bottom of
the housing. Do not block the
ventilation slots or place in a
location where ventilation slots may
become blocked. Intense heat and
risk of fire may result.
www.chpower.com
6
3
Operating Instructions and Parts Manual
Safety Instructions
for Charger and
Batteries (Cont’d.)
BATTERY DISPOSAL
Do not attempt to
disassemble the
battery or remove any component
projecting from the battery terminals.
Fire or injury may result. Prior to
disposal, protect exposed terminals
with heavy insulating tape to prevent
shorting.
! WARNING
NICKEL-CADMIUM BATTERY
•
If equipped with a
nickel-cadmium
battery, the battery
must be recycled or
disposed of in an
environmentally
sound manner. Check with your
county’s Public Works Department
for information on recycling
batteries.
Charging Battery
REMOVING BATTERY PACK
Before charging, remove battery pack
from Drill/Driver by depressing the
battery release button and pulling the
battery pack out of tool.
GENERAL INSTRUCTIONS
With normal use, as battery pack
approaches the discharged state, you
will notice a sharp drop in tool
performance. When the tool is unable
to perform the task at hand, it is time
to recharge the battery pack.
Recharging the battery pack before
this condition is reached will reduce
DX111425CD & DX151905CD
the total work life of the pack.
Discharging the pack beyond this point
can damage the pack.
NOTE: Battery temperature will increase
during and shortly after use. Batteries
may not accept a full charge if they are
charged immediately after use. Do not
charge battery pack if it feels hot to the
touch. Wait for it to cool.
INITIAL CHARGING
Before using the cordless Drill/Driver
for the first time, charge the battery
fully. Depending on room temperature
and line voltage, the battery should be
fully charged in six (6) to ten (10)
hours.
CHARGING
Connect the current carrying prongs
on the power cord to a 230V / 240V AC
50Hz wall outlet. Connect the other
end of the power cord to the battery
pack. If the charger is equipped with
an LED, a red light will light up as long
as the battery pack is connected to the
charger and the charger is plugged in.
With normal use, the battery pack will
be fully charged after about three (3)
to six (6) hours. Disconnect charger
from power source when not in use.
IMPORTANT: THE BATTERY PACK
SHOULD NOT BE LEFT ON THE
CHARGER FOR MORE THAN
FORTY-EIGHT (48) HOURS.
Operation
VARIABLE-SPEED TRIGGER
SWITCH (some models)
If your Drill/Driver is equipped with
a variable-speed trigger switch, the
pressure you apply to the trigger
controls the tool speed. Apply more
pressure to increase the speed and
release pressure to decrease speed.
This accurate speed control allows you
to drill without center-punching and
to use the Drill/Driver as a power
screwdriver. Bits are available for
driving screws as well as running bolts
and nuts.
FORWARD/REVERSE BUTTON
This Drill/Driver is equipped with a
forward/reverse lever which is used to
change the rotation of the chuck. Do
not attempt to change the rotation
unless the chuck is completely stopped.
Moving the
Forward/Reverse
Button while chuck is rotating can
damage the tool.
NOTICE
Charger and Battery
For forward rotation, firmly press in on
the lever marked FWD. For reverse
rotation, firmly press in on the lever
marked REV.
TRIGGER LOCK
To activate trigger lock, move the
forward/reverse lever so it is centered
in the handle.
GEAR SHIFTING (DG151905CD only)
The DG151905CD Drill/Driver is
equipped with two separate gear
ranges, low and high. Low gear
provides high-torque and slower
drilling speeds for heavy duty work or
for driving screws. High gear provides
faster speeds for drilling lighter work.
To change speeds, slide switch to the
high or low position. Actuate trigger
slightly if the gear shift does not fully
engage.
Note: If Drill/Driver is running, but the
chuck will not turn, check to make sure
the gear shifting switch is pushed fully
into desired setting.
ADJUSTABLE CLUTCH
This Drill/Driver features 16 clutch
settings. Output torque will increase as
the clutch ring is rotated from 1 to 16.
1 to 2 for driving small screws.
3 to 4 for driving screws into soft
materials or plastics.
5 to 7 for driving screws into
softwoods.
8 to 10 for medium woods.
11 to 14 for driving screws into
medium / hard woods.
15 to 16 for driving screws into metal.
The “drill” position locks up the clutch
to permit heavy-duty drilling and
driving work. It also allows bits to be
changed quickly and easily in the
keyless chuck.
INSERTING BITS
Move Forward/Reverse Button to the
center “Off” position. Remove battery
pack (See “Charging Battery” section)
and rotate the clutch ring to the drill
bit symbol. Rotate the chuck sleeve
counterclockwise (viewing from chuck
end), and open chuck to approximate
drill bit diameter. Insert a clean bit up
to the drill bit flutes for small bits, or
as far as it will go for large bits. Close
chuck by rotating the chuck sleeve
clockwise and securely tighten by
hand.
Operation
(Cont’d.)
Do not use the
power of the drill
to loosen or tighten bit while holding
chuck. The spinning chuck will cause
friction burn or hand injury.
!
CAUTION
REMOVING CHUCK
Remove battery pack. Rotate clutch
ring to drill bit symbol and open chuck
all the way. Turn left-hand-threaded
screw inside chuck clockwise, and
remove it . Insert the short arm of a
3/8" hex key wrench and close jaws on
flats of wrench.
Strike long arm of wrench sharply
counterclockwise, remove wrench and
unthread chuck from spindle.
INSTALLING CHUCK
To install chuck, reverse “Removing
Chuck” procedure. Always keep the
spindle threads, chuck threads, and
securing screw free of debris.
GENERAL DRILLING
The front end of
!
the Drill/Driver may
be made “live” if the tool drills into
live wiring in the wall. TO PREVENT
ACCIDENTAL ELECTRICAL SHOCK, HOLD
DRILL/DRIVER ONLY BY THE SOFT GRIP
HANDLE.
WARNING
Safety
!
glasses
must be worn during
operation.
WARNING
1. Set torque adjusting collar for
drilling operation and set speed
selector to appropriate speed.
2. Be sure drill bit is securely gripped
in chuck.
3. Set FORWARD/REVERSE BUTTON for
clockwise rotation.
Make sure work is
!
held securely in a
vice or clamped in place prior to
starting drilling operation. Loose work
may spin and cause bodily injury.
CAUTION
4. Locate exact center for hole to be
drilled and using a center punch,
make a small dent in work.
5. Place tip of drill bit in dent made by
center punch, hold drill square with
work, and start the motor.
Applying too
!
much pressure may
cause the bit to overheat or break,
resulting in bodily injury or damaged
drill bits.
CAUTION
Apply steady, even pressure to keep
drill bit cutting. Too little pressure
will keep the bit from cutting.
Eventually, the excessive friction
created by sliding over the surface
will dull the cutting edges.
Always be alert
!
and brace yourself
against the twisting action of the drill.
CAUTION
6. If drill stalls or becomes jammed in
the hole, release trigger
immediately, remove drill bit from
work and determine cause of
stalling or jamming.
Do not squeeze
trigger on and off in
an attempt to free a stalled or jammed
drill. This will damage the motor.
NOTICE
The direction of rotation may be
reversed to help free a jammed bit.
Be sure direction of rotation is
RESET before attempting to
continue drilling.
7. Reduce the pressure on the drill just
before the bit cuts through the
work to avoid splintering wood or
stalling in metal.
8. When bit has completely
penetrated work and is spinning
freely, withdraw it from the work
while the motor is still running,
then turn off drill.
DRILLING WOOD
In addition to the instructions listed
under GENERAL DRlLLlNG, the
following also apply:
1. When using a twist drill in wood,
frequently withdraw it from the hole
to clear away chips which build up in
the flutes. This helps prevent
overheating and burning work.
2. If a backing block is used to keep
back of work from splintering,
clamp it securely in place. If a
backing block is not used with
spade bits or hole saws, ease up
pressure as soon as bit point breaks
through work, and complete the
hole from the opposite side.
DRILLING METAL
In addition to the instructions listed
under GENERAL DRlLLlNG, the
following also apply:
1. Use only good quality sharp high
speed steel twist bits when drilling
metal.
2. Start drilling with slow speed and
gradually increase speed as drill cuts.
The harder the material, the slower
the speed required. The softer the
material, the faster the speed.
3. When drilling a large hole, it is easier
to first drill a smaller hole and then
enlarge it to the required size.
4. The use of a lubricant, such as oil,
on the drill point helps keep the bit
cool, increases drilling action and
prolongs drill bit life.
5. If possible, punch the drilling
position first to prevent drill bit run
away.
DRIVING WOOD SCREWS
1. Drill pilot and shank clearance
holes. See chart titled “Suggested
Hole Sizes for Wood Screws.”
2. Install proper screwdriver bit.
3. Set torque adjusting collar for
desired torque and set speed
selector to “1,” the low-speed
setting.
4. Set drill for correct rotation.
5. Start screw straight in hole with
fingers.
6. Place bit on screw, start drill and
exert pressure to drive screw.
7. As soon as screw has seated, release
trigger, and lift screwdriver from
screw.
8. A lubricant, such as soap or wax,
may be used on screw threads for
ease of driving. This is particularly
important in hard wood.
Suggested Hole Sizes For Wood Screws
Screw
Size
Shank Drill
Clearance
Diameter
#6
#8
#10
#12
5/32
11/64
13/64
15/64
Pilot Drill Diameter
Soft
Wood
(.156)
(.172)
(.203)
(.234)
1/16
5/64
3/32
7/64
www.chpower.com
(.062)
(.078)
(.093)
(.109)
Hard
Wood
5/64
3/32
7/64
1/8
(.078)
(.093)
(.109)
(.125)
www.chpower.com
4
5