1
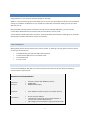
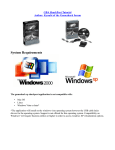
Xport 360 User Manual
CONTENTS
INTRODUCTION ............................................................................................................................................... 2
PACK CONTENTS...................................................................................................................................................... 2
SYSTEM REQUIREMENTS ............................................................................................................................................ 2
INSTALLING THE XPORT 360 SOFTWARE .......................................................................................................... 3
CONNECTING THE XPORT HARDWARE TO YOUR PC ......................................................................................... 3
CONNECTING DEVICES TO YOUR XPORT .......................................................................................................... 4
XBOX 360 HARD DRIVE ............................................................................................................................................ 4
XBOX 360 MEMORY CARDS ...................................................................................................................................... 4
XBOX 1 MEMORY CARDS .......................................................................................................................................... 4
INSTALLING USB DRIVERS (VERSION 2 NEW USB DRIVERS) .............................................................................. 4
XPORT 360 SOFTWARE .................................................................................................................................. 10
XPORT 360 SOFTWARE - INTRODUCTION ....................................................................................................... 10
ACCESSING FILES ON YOUR XBOX 360 HARD DRIVE ....................................................................................................... 10
CONNECTING TO YOUR XBOX 360 HARD DRIVE USING XPORT 360 ................................................................................ 11
UNDERSTANDING THE XBOX 360 FILE SYSTEM .............................................................................................. 12
USING DOWNLOADED XBOX 360 GAME SAVES ............................................................................................. 14
USING DOWNLOADED GAMESAVES – A STEP BY STEP GUIDE ......................................................................................... 14
WORKING WITH XBOX 360 MEMORY CARDS ................................................................................................. 15
CONVERTING .Z36 FILES TO .BIN .................................................................................................................... 16
TO CONVERT THE .Z36 FILE TO A .BIN FILE: ................................................................................................................ 16
COPYING A GAME SAVE TO YOUR 360 MEMORY CARD OR HARD DISK.......................................................... 16
1.
2.
COPY FROM A MEMORY CARD IMAGE (.Z36 OR .BIN) ........................................................................................... 16
COPY A GAME SAVE FOLDER ............................................................................................................................ 18
COPYING ONE XBOX 360 HARD DRIVE TO ANOTHER ..................................................................................... 20
XBOX 360 HARD DRIVE SECURITY SIGNATURE (HASH NUMBER) ................................................................................... 20
TRANSFERRING PROFILES AND ALL SAVES ................................................................................................................... 20
BROKEN HARD DISKS, SECURITY SECTORS AND “PART” BACKUP IMAGES ..................................................... 22
TRANSFERRING XBOX 1 SAVES TO YOUR XBOX 360 ....................................................................................... 23
TRANSFERRING XBOX 1 GAMESAVES – A STEP BY STEP GUIDE ....................................................................................... 23
UNDELETE / SHOW DELETED FILES ................................................................................................................. 25
UNDELETE USAGE .................................................................................................................................................. 25
SUPPORT ....................................................................................................................................................... 27
1
INTRODUCTION
Congratulations on your purchase of Datel’s XPORT for Xbox 360.
XPORT is a hard drive docking system that allows you to connect your Xbox 360’s hard drive to your PC without
making any hardware modifications to your hard drive or Xbox 360, and without needing to have your Xbox
360 near your PC.
With your XPORT docking station connected to your PC (via the supplied USB cables), you can instantly
connect Xbox 360 hard drives and memory cards and even Xbox 1 memory cards.
The PC software included with Xport provides an intuitive Windows-based interface, allowing you to move files
between Xbox and Xbox 360 devices and your PC with ease.
PACK CONTENTS
Before getting started, please check that all parts are present. If anything is missing; please contact customer
services (see end of manual).
•
•
•
•
1 x XPORT docking unit (with two USB cables attached)
1 x Xbox to Xbox 360 memory card adapter cable
1 x PC Software CD
1 x User manual
SYSTEM REQUIREMENTS
In order to use XPORT for Xbox 360, you need a computer and console set-up that meets the following
minimum system requirements:
MINIMUM SYSTEM REQUIREMENTS
Computer /
Processor
•
•
•
Personal computer with 800Mhz processor
256Mb RAM
800x600 SVGA display
Hard Drive
•
•
5Mb free hard drive space for installation
Up to 20GB free hard drive space for complete back-up
Connectivity
•
•
At least one free USB port.
Two USB ports required for direct transfer between a
memory card and Xbox 360 hard drive.
USB 2.0 highly recommended for high-speed data transfer
•
2
O/S
Console
Optional
•
Microsoft Windows XP Home or XP PRO
•
Xbox 360 with official Xbox 360 hard drive
•
•
Xbox 360 memory card(s)
Xbox memory card(s)
INSTALLING THE XPORT 360 SOFTWARE
Insert the XPORT 360 software CD ROM, and follow the on-screen prompts to install the software on your PC.
If the CD does not auto-run, browse to the CD and run the ‘SETUP’ program.
After installation, leave the CD ROM in your drive until you connect a device (see next chapter) to the XPORT
dock. At this point you’re most likely prompted to install drivers. Direct Windows to the root of the
installation CD for these drivers. Once this has happened, you can remove the software CD. If you are not
installing from CD Rom or have downloaded an update from the web, any new versions of the drivers can be
found in the installed programs folder (usually “C:\program files\datel\Xport 360” or “C:\program files
(x86)\datel\Xport 360”
At the end of the installation, you have the option to have a short-cut icon created on your desktop.
CONNECTING THE XPORT HARDWARE TO YOUR PC
XPORT has two high-speed USB leads integrated into its moulding. One lead is used to connect your PC to your
Xbox 360’s hard drive, with the other used to connect your PC to memory cards plugged into XPORT.
When the USB lead used for hard-drive connectivity is in use, a blue LED is illuminated on the front of the
XPORT. The memory card’s USB lead does not illuminate the LED.
Naturally, if you only have one spare USB port on your PC, you can switch between the leads depending on
whether you want to connect your computer to your console’s hard drive or its memory cards. But if you
connect them both, you can position your docking station conveniently next to your PC and leave it there, and
bring your hard drive or memory cards to your XPORT whenever you want to access their content using your
PC.
3
CONNECTING DEVICES TO YOUR XPORT
XBOX 360 HARD DRIVE
To connect an Xbox 360 hard drive to the XPORT dock, hook the rear of the hard drive (the rounded end)
under the lip at the back of the XPORT dock before lowering the drive onto the hard drive connector inside the
XPORT dock.
Ensure the connector aligns correctly before gently pushing down the front to latch the drive in place.
XBOX 360 MEMORY CARDS
Connect an Xbox 360 memory card to the XPORT dock by slotting it into the memory card port on the front of
the dock.
XBOX 1 MEMORY CARDS
Connect an Xbox 1 memory card to your XPORT dock using the supplied Xbox to Xbox 360 memory card
adapter cable. Attach your Xbox card to one end of the cable (the larger socket end) and the other end to the
memory card port on your XPORT dock.
INSTALLING USB DRIVERS (VERSION 2 NEW USB DRIVERS)
Note for users updating from Version1.xx software: Version 2 of the Xport software uses updated drivers to
version 1. For this reason if you were previously using version 1.xx of the Xport software and had installed the
USB drivers to use memory cards, you will need to update to the latest drivers.
Please note that the USB drivers are not required for Xbox 360 Hard Disk access, you only need to install the
USB drivers if you intend to use Xbox 360 memory cards and/or original Xbox (Xbox 1) memory cards.
To start, plug in your Xport hardware and also plug in a memory card into the device. If any “New device”
install drivers dialogs appear cancel them.
Open Devices Manager: Click the start button and click Run, in the Run box enter devmgmt.msc
If you are installing the USB drivers for the first time you will find two uninstalled devices called “Memory
Unit” and “Xbox Security Method 3, ……”. You only need to install the driver for the memory unit but if you
want to install for both of the new USB devices you can. Right click one of the devices to open the context
menu and select “update driver”.
4
If you are updating from Version 1.xx of the Xport software and have the old USB drivers installed; Locate your
existing Xport 360 device driver(s), they will be in the section “USBIO Controlled Devices” and be called “X360
MU USBIO – Device 1”. Right click one of the “X360 MU USBIO – Device 1” devices to open the context menu
and select “update driver”.
5
The “Hardware Update Wizard” will appear.
In the “Hardware Update Wizard” select “no, not this time” and click next.
6
Select “Install from a list or specific location (Advanced)” and click next.
Click the “Don’t search. I will choose the driver to install” and click next.
7
Click the “Have Disk” button.
You now need to select the new driver file. Click the Browse button and locate the new “Xport360_usb_v2”
driver file – it can be found at the install path:
32 bit Windows Xp/Vista:
C:\Program Files\Datel\Xport 360
Select the“Xport360_usb_v2.inf” file.
64 bit Windows XP/Vista:
C:\Program Files (x86)\Datel\Xport 360
Select the“Xport360_usb_v2_x64.inf” file.
8
The devices manager will now have the “Xport 360 USB V2 Device” listed in place of the old driver. If you have
more than one Xbox 360 Xport device repeat the update driver process for that device too.
9
XPORT 360 SOFTWARE
XPORT 360 SOFTWARE - INTRODUCTION
XPORT 360 is a PC software program that allows you to view and modify the contents of your Xbox 360’s hard
drive or memory card, file by file, when it’s connected to your PC using XPORT for Xbox 360.
XPORT 360 gives you access to your Xbox 360’s hard drive in a way Microsoft never intended. For the initiated,
this provides the ability to back up and restore files, download and use other players’ game saves shared over
the Internet and even modify the content of specific files. For the beginner, however, the Xbox 360’s file
system can be confusing and the potential to accidentally move or damage files means that caution should be
exercised.
Follow this guide to XPORT 360 carefully and you too can be a part of the growing community of gamers who
are harnessing this technology to do things that others only imagine.
ACCESSING FILES ON YOUR XBOX 360 HARD DRIVE
WARNING – POTENTIAL TO DAMAGE / LOSE DATA
By accessing your Xbox 360’s hard drive contents at file level, you are bypassing the safeguards the
Xbox 360 has in place to prevent you from damaging or corrupting either individual files or the
drive’s entire file system.
Before undertaking any modifications to files, or file structure whatsoever, we strongly recommend
backing up your entire Xbox 360 hard drive to your PC using the back-up functionality within the
XPORT PC software.
Datel cannot be held responsible for any loss or corruption of data caused by modifications you
have made to files or the file system on your Xbox 360 hard drive.
Make sure you read and understand all instructions and warnings relating to the file management
software you are using before making any changes.
10
CONNECTING TO YOUR XBOX 360 HARD DRIVE USING XPORT 360
When you first load XPORT 360 you’re presented with a dialogue box asking you to choose which device you
would like to access. Only devices that are connected correctly will be listed.
If the device you want to connect to (Xbox 360 hard drive, for example) is not listed, check the connection
between the hard drive and the XPORT dock and also between the dock and your PC.
SUPPORT TIP - If a memory card you know to be connected correctly does not appear in the list,
ensure you have installed the necessary drivers (see chapter 3) and check device manager for any
hardware conflicts, etc.
11
UNDERSTANDING THE XBOX 360 FILE SYSTEM
Now that you can connect your PC to your Xbox
360 hard drive and see its files, here follows a
brief outline of the Xbox 360 file system.
The Xbox 360’s hard drive is split up into three
partitions.
For all the topics covered in this guide, the only
partition we’re interested in is Partition 3.
To view the contents of Partition 3, double-click
its entry in the list.
If you have at least one Profile on your Xbox 360’s hard drive and have downloaded at least some content
from Xbox Live, when you open up Partition 3 you see a folder structure similar to this:
The top folder (all 000s) is where the 360 stores
all media content you download, like trailers and
demos, and is available to all profiles.
The folders below relate to each profile you have
set up on your machine and are used to store the
game saves for that profile.
TIP: If you have more profile folders showing than you have profiles currently on your Xbox 360, it’s
likely you have removed profiles from your machine but chosen to leave the content on the drive.
This content remains in a profile folder on your hard drive, but isn’t associated to an actual profile
through your 360’s dashboard.
12
To list what media content you have stored on
your hard drive (Arcade Demos, Themes,
Gamerpics and Videos), click on the ‘plus’ icon
next to the ‘Content’ folder (all 000s).
Because all files and folders on the Xbox 360 hard drive use an 8 or 16 character hexadecimal filename,
individual files can be difficult to identify. To help you identify specific files, try opening a file’s folder and
clicking on the file inside to see its file size.
To list what gamesaves you have in a particular
profile, click the ‘plus’ icon next to a profile’s
folder. When the folder opens, each sub folder
(which has an 8 character name such as
‘545407D4’) is a folder for a specific game. The
actual game save for that game is within another
sub-folder.
Another folder of interest to gamers who play Xbox 1 games on their Xbox 360 is the compatibility folder. This
is where Microsoft stores the drivers, patches and other files relating to Xbox 1 emulation. Most interestingly,
this is also where gamesaves for Xbox 1 games are stored; see the ‘Transferring Xbox 1 Gamesaves’ tutorial for
more info.
13
USING DOWNLOADED XBOX 360 GAME SAVES
Now you’ve backed up your Xbox hard drive’s valuable content to your PC (see Section 3.c.) and familiarised
yourself with the basics of the Xbox 360’s file system (see Section 3.d.), it’s time to get to the good stuff!
Game saves for Xbox 360 are readily available for download from a variety of sites on the ‘net like
www.360gamesaves.com. When you find a game save you would like to use on your Xbox 360, download it to
your PC’s hard drive and follow the steps below.
USING DOWNLOADED GAMESAVES – A STEP BY STEP GUIDE
Extract the Downloaded Folder
Files downloaded from www.360gamesaves.com are in compressed folders using the RAR format. Use a
program such as WinRAR (www.rarlab.com) or WinACE (www.winace.com) to extract the compressed folder
into a new, uncompressed folder. Make a note of the folder name.
Open your Profile Folder
Connect your Xbox 360 hard drive to your XPORT dock (as described in Section 2.d.) and open the ‘Content’
folder on Partition 3.
Now you need to open the folder for your gamer profile. Because there may be more than one profile on your
hard drive, you need to identify which profile is which. A good way to do this is to count the number of saves
available in your profile (using the Xbox 360 dashboard) and then find the profile with that number of saves on
your hard drive using XPORT 360.
When you have identified the profile you would like to put the save in, click on its folder (or click the ‘plus’
icon) to display its contents.
Identify the Correct Part of the Downloaded Save
IMPORTANT! You need to identify the correct part of the downloaded gamesave before adding it to your
profile.
Some gamesaves have been uploaded to www.360gamesaves.com and the gamer that created the gamesave
has included his profile folder in the .rar, others have been uploaded with only the game folder included.
The profile folder is the 16 character folder starting with “E000…”. You want the folder below the profile
folder (if it has been included) otherwise it will not work.
Example: If the folder you have downloaded is called “E0000C3E5A4FAEE5”, you need to open that folder and
find the folder inside, named something like “4E4D07D3”. It is the folder named “4E4D07D3” that you will be
dragging into your chosen profile.
Drag the Downloaded Gamesave into XPORT 360
14
Next, drag the downloaded save folder from your desktop (or wherever you downloaded it to) into the
window on the right corresponding to the open profile folder.
Once this is complete, you have successfully added a gamesave to your profile.
Check your Gamesave on the Xbox 360
Once you’ve completed Step iv, detach the hard drive from your XPORT and re-attach it to your Xbox 360.
Switch on your Xbox 360 and when the console boots up, check the saves in your profile using the dashboard.
You should see the new gamesave waiting for you!
WORKING WITH XBOX 360 MEMORY CARDS
All of the functionality described in the previous section for managing your Xbox 360 hard drive can also be
applied to your Xbox 360 memory cards.
To access the content stored on your Xbox 360 memory card, attach it to your XPORT dock (using the slot in
the front of the dock). Click on ‘File’ then ‘Open HDD or Memory Card’. Choose ‘Xbox 260 Memory Card’
when asked which device to open.
You’re now viewing the contents of your Xbox 360 memory card. The file system and directory structure is
virtually the same as that for the XPORT 360 hard drive (described in the previous chapter) however you will
notice 2 partitions instead of 3. Gamesaves, profiles other content is all stored in the ‘Content’ folder on
partition 2.
15
CONVERTING .Z36 FILES TO .BIN
You can use the Xport 360 software to convert .z36 files (compressed 360 memory card images) to .bin files
(uncompressed 360 memory card image).
“.z36” files are a popular memory card format which are generated by the “XChange 360” software (also by
Datel). They are simply compressed versions of the “.bin” memory card images.
“.bin” files can be used in the Xport 360 application as well as similar “Xplorer 360” application.
TO CONVERT THE .Z36 FILE TO A .BIN FILE:
1.
2.
3.
4.
5.
6.
7.
Run Xport 360.
Cancel the select device dialog box.
Go into the file menu, select "Open Image".
In the file selection box, select your “.z36” file.
Xport 360 will tell you that the “.z36” file is compressed and ask you if it can decompress it. Select
“OK”.
You will be prompted for a destination filename, a good idea is to use the same filename as you
opened but with a “.bin” extension.
You can use this .bin file in Xport 360 and/or Xplorer 360. Xport 360 will now have loaded the file
and be displaying its contents.
COPYING A GAME SAVE TO YOUR 360 MEMORY CARD OR HARD DISK
A common thing to do is get a game save from the internet and want to put it on your Xbox 360 so you can try
it out.
1. COPY FROM A MEMORY CARD IMAGE (.Z36 OR .BIN)
Part 1 – Open the image and find the save:
1.
Run Xport 360.
2.
Cancel the select device dialog box.
3.
4.
Go into the file menu, select "Open Image".
In the file selection box, select your memory card image file (“.z36” or “.bin”; if you select a
“.z36” file you will be prompted to decompress it to a “.bin” file, follow the on screen
prompts and supply a destination filename).
Xport 360 will now have loaded the memory card image file and be displaying its contents.
Open the "Partition 2" tree, and the "Content" tree.
Inside the “Content” tree you will see more folders. For each “profile” on the memory card
there is one folder (there might only be one). The “profile” folders are named with 15 letters
and numbers and look something like "E0000195A4F2F49".
5.
6.
7.
16
8.
Open a “profile” folder, inside you should see the actual game save folder. It will be 8
characters in length and look something like “454107E8”. Xport 360 will try to name it with
the real games name where possible, so it may look more like this:
“454107E8 (Roster-FKroster-com)”
Part 2 – Open the drive or memory card to copy to:
1.
Leave the copy of Xport 360 that you have the image file open in. Run a new, second copy of
Xport 360.
2.
In your new Xport 360 window, open your 360 hard disk drive or 360 memory card.
3.
Find the “Content “ folder on your HDD/MC. On a HDD it is in “Partition 3”, on a memory card it is
in “Partition 2”.
4.
Open the profile of the user you wish to copy the save to.
17
5.
From your first copy of Xport 360, drag the game save folder into the new copy of Xport 360 and
the selected profiles saves area.
The game save folder and its contents will now be on your 360 Hard disk (or memory card).
2. COPY A GAME SAVE FOLDER
If you have a save in the form of a zip file containing a folder named something like “454107E8” –
basically a name made up of around eight characters 0-9 and A-F - then you have a game save folder.
This needs to be copied to your user profile inside the content folder of either your hard disc or
memory card.
1.
Run Xport 360.
18
2.
Open your 360 hard disk drive or 360 memory card.
3.
Find the “Content “ folder on your HDD/MC. On a HDD it is in “Partition 3”, on a memory card it is
in “Partition 2”.
4.
Open the profile of the user you wish to copy the save to.
5.
Drag the save folder into the Xport 360, the save should be inside the user profile folder.
The game save folder and its contents will now be on your 360 Hard disk (or memory card).
19
COPYING ONE XBOX 360 HARD DRIVE TO ANOTHER
WARNING: You can NOT copy one Xbox 360 hard drive to another Xbox 360 hard drive using the “backup to
image” option!!!! It is possible to transfer individual files & folders (game saves, demos, etc).
XBOX 360 HARD DRIVE SECURITY SIGNATURE (HASH NUMBER)
Xbox 360 hard drives contain a security signature which is unique to each drive. Hence, if you backup your
hard disc to an image (a complete 20/60/120 gig hard disc image), and then write this image to a new Xbox
360 hard disc, the Xbox 360 will look at the security signature, see it is invalid for that drive and refuse to work
with it.
If you have done this, the only way to fix the hard disc is to restore its own image back, replacing its own
security signature. This can be done by restoring with an entire backup image or a “part” image either created
by yourself or the Xport software – the Xport software will automatically create a “part” image of any Xbox
360 hard disk it sees as a safety measure.
TRANSFERRING PROFILES AND ALL SAVES
So, you have a new hard disk drive for your Xbox 360 and want to transfer your profiles and game saves to it.
You can do this simply by copying “Content” folder which can be found in “Partition 3” of your hard disk.
You can copy the entire content folder - this will include every profile and save from your hard disk. Or you can
go inside the content folder and select just the profile folders that you want.
1.
Run Xport 360.
2.
Open your 360 hard disk drive or 360 memory card.
3.
Find the “Content “ folder on your HDD/MC. On a HDD it is in “Partition 3”, on a memory card it is
in “Partition 2”.
20
4.
Either drag the whole “Content” folder or ….
…. just the profile folder you want onto your PC.
5.
Connect the HDD or memory card you want to put the conten/profile on. Open the HDD/MC
(click “File->Open HDD or Memory Card”).
6.
Find the “Content “ folder on your HDD/MC. On a HDD it is in “Partition 3”, on a memory card it is
in “Partition 2”.
7.
(i) If you have the Content folder on you PC, drag this into the Partition area overwriting the
Content folder on the HDD/MC and updating it with any profiles it doesn’t have. (ii) If you have
just a profile folder on you PC, drag this into the Content folder in Xport 360.
21
BROKEN HARD DISKS, SECURITY SECTORS AND “PART” BACKUP IMAGES
OK, so you didn’t read the section in this manual titled “Copying One Xbox 360 Hard Drive to Another”, or if
you did – it was too late and your Xbox 360 no longer sees your hard disk.
Assuming you don’t have a backup image of your hard disk (with the security hash number intact), you have
one last chance. If you have been running version 1.08 or above of the Xport software and you plugged in your
hard disk then Xport will have made a safety backup of the hard disks security sectors – just as a safety
measure incase you somehow managed to overwrite this vital part of your hard disk.
These files are stored in the following location:
Windows XP: “C:\Documents and Settings\<username>\Application
Data\Datel\Xport 360\HDD Images”
Windows Vista: “C:\Users\<username>\AppData\Roaming\Datel\Xport 360\HDD
Images”
The locations are hidden, so you will need to have “show hidden files and folders” enabled (see Windows
help). You may need to be logged in with administrator rights on Vista.
Use the Xport 360 restore tool to restore the images to your hard disk. If you have had more than one Xbox
360 HDD plugged in then there will be more than one image file, in this case just restore each one in turn to
your hard disk and try them in your Xbox until the Xbox 360 sees the drive (one of them will be the correct one
and hence will work).
On the Xbox 360, your drive should appear under the “System” tab, click “Memory” to go into “Storage
Devices”. Assuming the drive now has the correct security sectors, it will probably need formatting by the
Xbox, use the “Device Options” on the yellow button to format the drive.
22
TRANSFERRING XBOX 1 SAVES TO YOUR XBOX 360
The following section requires an Xbox 1 gamesave, memory card and the game in question.
TRANSFERRING XBOX 1 GAMESAVES – A STEP BY STEP GUIDE
TIP: Ensure your games are compatible
Some Xbox 1 games are not compatible with Xbox 360 (though compatibility upgrades are periodically
released by Microsoft). Check the backward compatibility list at:
http://www.xbox.com/en-US/games/backwardcompatibilitygameslist.htm
TIP: Upgrade your Xbox 360
Ensure your Xbox 360 has been updated to the latest version of the Xbox 360 dashboard & backward
compatibility. See your user manual for information on how to do this.
Create a Gamesave for your Game on your Xbox 360
If you don’t already have a gamesave on your Xbox 360’s hard drive for the Xbox 1 game in question, run the
game on your Xbox 360 and make a gamesave. Now remove the game disk.
Copy the Gamesaves from your Xbox 1 Memory Card to your PC
Connect the Xbox 1 memory card containing the gamesaves you would like to transfer to your Action Replay
docking station to the XPORT using the memory card adapter (supplied). If the gamesaves are stored on your
Xbox 1’s hard drive, use the dashboard to transfer them to a memory card first.
Start XPORT 360 and choose ‘Xbox 1 Memory Card’ when you are asked to choose a device to open. Drag and
drop game saves from the memory card onto a folder on your PC.
Add the Gamesaves to your Xbox 360’s Hard Drive
Next, click ‘File’ and choose ‘Open Hard Drive or Memory Card’ in XPORT 360 and then choose the ‘Xbox 360
Hard Disk Drive’ to switch back to viewing your hard drive’s content.
Navigate to the ‘Compatibility > Xbox1 > UDATA’ folder on Partition 3.
23
Find the Xbox 1 gamesave folder you copied to your PC earlier (using My Computer etc), and then simply drag
and drop the Xbox 1 gamesave folder from your PC to the open folder in XPORT 360.
You should now be able to load your gamesaves for that game on your Xbox 360. Disconnect your hard drive
from your XPORT and attach it to your Xbox 360. Insert your Xbox 1 game disc into your Xbox 360 to play.
24
UNDELETE / SHOW DELETED FILES
Please note this is an advanced option that should be used with care and understanding so please read this
entire section of the manual if you intend to use the feature.
The undelete feature is NOT guaranteed to work but is provided as a last resort method for attempting to
retrieve accidently deleted files from your Xbox 360 device.
If you've accidently deleted something from your device and want to try and get it back, then as long as you
haven't saved anything else to the device since the deletion then there is a good chance that Xport can
retrieve the files/folders that were deleted.
UNDELETE USAGE
(1) Run the Xport software and open your "drive/memory card/image file" as normal.
(2) In the menu bar, click and open the "HDD/MC" menu, select the "Switch to Undelete mode" option.
(3) Browse your device contents as normal and find your deleted files/folders that you want to retrieve.
(4) Notice that deleted files and folders have a different description in the "Type" column. The
description states that it is a deleted file/folder and also states how likely it is that it can be
undeleted.
A deleted folder, not the first character is incorrect and its “Type” description:
A deleted file, note its name is still correct and its “Type” description tells you it’s a deleted file:
25
(5) Copy the file/folder to your PC's hard disk. Xport will attempt to recover the file no matter how
unretrievable it said the file was. Once you have copied off all the files you want to try to undelete to
your PC, switch back to normal mode (in the menu bar click "HDD/MC" and select the "Switch to
Normal mode" option. Now you can copy back your undeleted files from your PC to your device. Test
your undeleted files in your Xbox, there is no guarantee they will work, it all depends on a number of
factors
(6) like how large the files were (smaller than 32k are good), or how fragmented the files were, or if the
files data had been overwritten since being deleted.
Notes:
(1) When you have Xport in undelete mode you cannot write to or delete items on your device (switch
back to normal mode to do things like this).
(2) When folders are deleted the first letter in the name is corrupted. When you have undeleted/copied a
folder to your PC's hard disk you will need to change its first letter back to what it should be before
copying it back to your device. Hints: Profile folders start with 'E'. Game folders usually start with a '4'
or a '5'. The folders inside game folders usually start with a '0' (zero).
26
SUPPORT
For updates and the latest information on all Datel products please visit www.codejunkis.com
If you are experiencing difficulties with any aspect of your XPORT for Xbox 360, please ensure you have read
and understood the contents of this user manual before contacting Datel’s Technical Support department. You
can obtain online support and contact with our technical support engineers online at:
Web (US): http://us.codejunkies.com/support/
Web (Europe): http://uk.codejunkies.com/support/
US:
Tech Support 727-431-0650
24 Hour Toll Free Code Line 1-800-883-5078
Tech Support by Email [email protected]
CANADA:
Tech Support 866-557-5596
24 Hour Toll Free Code Line 1-800-883-5078
Tech Support by Email [email protected]
EUROPE:
Tech Support by Email [email protected]
Postal Address:
Customers Services
Datel Ltd
Stafford Road
Stone
Staffordshire
ST15 0DG
UNITED KINGDOM
Technical Support UK Tel: 0906 550 1236
- Calls cost £1 per minute. Lines open Mon - Fri 9am - 5pm
excluding Bank and other national holidays. You will be asked to confirm that you are aged 18 or over and have
the permission of the bill payer. UK residents only.
27