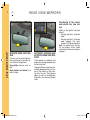
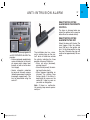
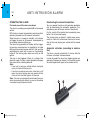
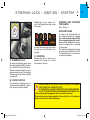
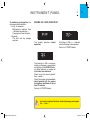
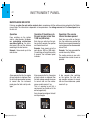
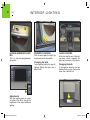
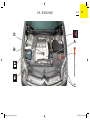
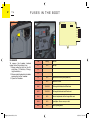
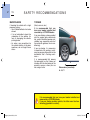
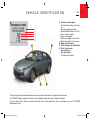
1
CITROËN C6
OWNER'S HANDBOOK
Anglais_indexe.indd 1
06/10/2005 14:09:02
CITROËN prefers
A partnership strong in innovation
CITROËN and TOTAL have been partners for more than 35 years in the
development of engines and lubricants that make the most of the very latest
technologies.
Oil that is state-of-the-art
The research teams at CITROËN and TOTAL are united in offering you the most
advanced engine/lubricant combination available.
With TOTAL, you are choosing the benchmark oil that best guarantees your
CITROËN vehicle’s performance and life-expectancy.
This is why CITROËN engines prefer TOTAL.
TOTAL partners CITROËN, YOUR
partner
Anglais_indexe.indd 2
06/10/2005 14:09:59
This handbook is compiled on the basis of all the equipment (whether
standard or optional) that is available, and of the technical specifications
that were known at the time of going to print.
The level of equipment on your vehicle depends on the model, the
options chosen and the country where the vehicle is marketed.
Some of the equipment mentioned in this handbook may only become
available at a later date.
Descriptions and illustrations are given without obligation.
AUTOMOBILES CITROËN reserves the right to modify its models and
their equipment without necessarily being bound to update the present
handbook.
The trained, professional staff of the CITROËN network are at your disposal to answer
any questions you may have.
We wish you safe and enjoyable motoring in your new CITROËN.
This handbook is an integral part of the vehicle.
Keep it where it can be easily consulted.
Do not forget to pass it on to the new owner, should you sell your
vehicle.
Création COMIDOC – Automobiles CITROËN – RCS PARIS 642 050 199 – Édition ALTAVIA/PRODITY – Imp. en UE
Anglais_indexe.indd 3
06/10/2005 14:10:06
X6-GE-5005
Édition 06/2005
Anglais_indexe.indd 4
06/10/2005 14:10:08
We thank you and we congratulate you on your choice.
Please read this handbook carefully before taking to the road.It contains essential
information about driving your vehicle and operating its equipment, as well as other
important advice to be rigorously followed.
The features on your vehicle and the way they operate is dependent on the model,
on the options chosen and on the country where the vehicle is marketed.
This document also contains practical advice and all you need to know about the
servicing and routine maintenance of your vehicle, thus assuring both your safety
and the reliability of your new CITROËN.
A thorough knowledge of your new vehicle will enable you to enjoy driving to the
full.
Anglais_indexe.indd Sec1:1
06/10/2005 14:10:08
CONTENTS
2
I
Chapter I
IN BRIEF
I
Dashboard ............................................................................................ 6-7
Instrument panel ..................................................................................8-9
Warning lamps ................................................................................. 10-11
Wipers ................................................................................................14-15
Signalling .........................................................................................16➟18
Steering column adjustment – Seat belt height adjustment ........ 19
Front seats ....................................................................................... 20-21
Memorisation ......................................................................................... 22
Seat belts warning lamp...................................................................... 23
IN BRIEF
IN BRIEF
Head-up display ............................................................................... 12-13
Rear view mirrors ......................................................................... 24➟26
Windows ................................................................................................. 27
Speed limiter.................................................................................... 28-29
Cruise control .................................................................................. 30-31
Air conditioning ..................................................................................... 32
Anglais_indexe.indd Sec1:2
06/10/2005 14:10:09
CONTENTS
II
Chapter II
3
DRIVING
II
Remote control ................................................................................ 33-34
Keys ......................................................................................................... 35
Code card .............................................................................................. 36
Anti-intrusion alarm ........................................................................ 37-38
Steering lock – Ignition – Starter ...................................................... 39
Driving – Starting the engine ............................................................. 40
Instrument panel
Engine oil level indicator ................................................................................................41
Maintenance indicator.................................................................................................... 42
Mileage recorder ............................................................................................................. 43
Fuel gauge ........................................................................................................................ 43
Rev counter ...................................................................................................................... 43
Night driving ..................................................................................................................... 44
Dashboard brightness ................................................................................................... 44
Multifunction displays
Colour screen C ..................................................................................................... 45➟48
NaviDrive colour display ............................................................................................... 49
Trip computer .......................................................................................................... 50➟55
Automatic gearbox ....................................................................... 56 ➟59
Electric parking brake.................................................................... 60-61
Brakes ..................................................................................................... 62
Electronic stability programme .......................................................... 63
Diesel particle filter .............................................................................. 64
Parking assistance .........................................................................65-66
Xenon dual function directional headlamps .................................... 67
Lane Departure Warning System ...................................................... 68
Speed-sensitive rear spoiler (deflector) ........................................... 69
Anglais_indexe.indd Sec1:3
06/10/2005 14:10:10
CONTENTS
4
III
Chapter III
COMFORT
III
Access .............................................................................................71➟73
Automatic air conditioning .......................................................... 74➟80
Rear automatic air conditioning ........................................................ 81
Rear seats ...................................................................................... 82➟84
Pack Lounge seats ............................................................................... 85
Airbags ................................................................................................... 86
Child restraints .............................................................................. 87➟89
Suspension with electronically controlled springing and damping .
90
Ground clearance adjustment ..................................................... 91-92
Interior lighting................................................................................. 93-94
Interior comfort ............................................................................ 95➟100
Boot ....................................................................................................... 101
Sun roof ................................................................................................ 102
IV
Chapter IV
MAINTENANCE
IV
Opening the bonnet ........................................................................... 103
Levels .................................................................................................... 104
Petrol engine........................................................................................ 105
Diesel engine ....................................................................................... 106
Levels - topping up ............................................................................. 107
12V battery................................................................................. 108➟110
Fuses ............................................................................................ 111➟116
Capacity ................................................................................................117
Anglais_indexe.indd Sec1:4
06/10/2005 14:10:10
CONTENTS
V
Chapter V
5
PRACTICAL ADVICE
V
Fuel ........................................................................................................ 119
Changing bulbs ......................................................................... 120➟123
Safety recommendations .................................................................. 124
Roof bars .............................................................................................. 125
Very Cold Protection .......................................................................... 126
Changing a wheel..................................................................... 127➟129
Towing – Lifting ................................................................................... 130
VI
Chapter VI
TECHNICAL SPECIFICATIONS
VI
General ................................................................................................. 131
Fuel consumption in litres/100 km (miles per gallon) ................ 132
Dimensions (in metres) ............................................................. 133-134
Vehicle identification .......................................................................... 135
ABC
ALPHABETICAL INDEX
USER PRECAUTIONS
Anglais_indexe.indd Sec1:5
138
I➟XXIV
06/10/2005 14:10:10
I
DA S H B OA R D
6
2
3
4
5
6
7
8
9
10
11
12
13
14
15
16
17
18
19
20
IN BRIEF
1
26
43
42
41
40
39
38
37
36
29
35
34
25
Anglais_indexe.indd Sec1:6
23
22
21
30
27
32
33
24
31
28
06/10/2005 14:10:10
1 Driver's seat adjustment controls and memories
2 Loudspeaker (Tweeter)
3 Fuel flap control
4 Controls :
• Lighting
• Direction indicators
• Rear foglamps
• Voice recognition
5 Drver's airbag
6 Horn
7 Instrument panel
8 Head-up display cavity
9 Controls :
• Windscreen wiper
• Screen wash
• Trip computer
10 Knob for adjusting the soft diffusion air conditioning on the
driver's side
11 Controls for adjusting the multifunction display angle
Rear passengers' seat belts
warning lamp
12 Sunlight sensor
13 Multifunction display
Anglais_indexe.indd Sec1:7
14 Controls for adjusting the dashboard brightness
Front passenger's seat belt
warning lamp
15 Knob for adjusting the soft diffusion air conditioning on the passenger's side
16 Central air vents
17 Controls :
• Radio mono CD or NaviDrive
• Main menu for the display
18 Passenger's airbag
19 Lateral air vent
20 Side window demister
21 Key switch :
Passenger' airbag activation/
deactivation
22 Glovebox :
• Vehicle document storage
• Audio-video sockets
23 Cabin temperature sensor
24 Air conditioning controls
25 Controls :
• Lane Departure Warning System
• Anti-intrusion alarm
26 Hazard lamps button
27 Ashtray
28 Gear lever
7
29 Automatic gearbox SPORT/
SNOW mode controls
30 Suspension controls :
• Ground clearance adjustment
• Sport mode
31 Electric parking brake
32 Cigar-lighter
33 Controls :
• ESP
• Central locking of doors and
boot
• Parking assistance
34 Cup-holder
35 Ignition switch
36 Radio control under the steering wheel
37 Knees airbag
38 Controls at the steering wheel :
• Speed limiter
• Cruise control
39 Steering column adjustment
40 Oddments tray
Fusebox access flap
41 Opening the bonnet
42 Head-up display controls
43 Controls :
• Windows
• Rear view mirrors
• Child safety
I
IN BRIEF
DA S H B OA R D
06/10/2005 14:10:15
I
I N S T R U M E N T PA N E L
8
PETROL VERSION
A
C
B
D
A
STOP
IN BRIEF
B
K
J
I
H
G
F
B
E
10-11/41-43
A
B
C
D
E
F
Signalling warning lamps
Operational warning lamps
Cruise control/speed limiter information
Fuel gauge
Trip mileage recorder
Total mileage recorder, maintenance indicator
G
H
I
J
K
Speed indicator
Display of automatic gearbox information
Display of suspension sport mode
Rev counter
Reset button for trip mileage recorder and maintenance indicator
Remark : Certain types of screen may adversely affect the readability of the instrument panel.
Anglais_indexe.indd Sec1:8
06/10/2005 14:10:15
I N S T R U M E N T PA N E L
I
9
DIESEL VERSION
A
C
B
D
A
STOP
B
K
J
I
H
G
F
E
B
10-11/41-43
A
B
C
D
E
F
Signalling warning lamps
Operational warning lamps
Cruise control/speed limiter information
Fuel gauge
Trip mileage recorder
Total mileage recorder, maintenance indicator
G
H
I
J
K
Speed indicator
Display of automatic gearbox information
Display of suspension sport mode
Rev counter
Reset button for trip mileage recorder and maintenance indicator
IN BRIEF
0
Remark : Certain types of screen may adversely affect the readability of the instrument panel.
Anglais_indexe.indd Sec1:9
06/10/2005 14:10:15
I
WA R N I N G L A M P S
10
These warning lamps may be accompanied by a message and/or a sound signal
STOP
lamp
warning
IN BRIEF
If this warning lamp
comes on, it is
imperative to stop the vehicle and
to switch the engine off. The warning lamp is accompanied by the
STOP symbol on the screen as
well as on the Head-up display.
Contact a CITROËN dealer.
Door open
If this warning lamp comes
on while the engine is running, it tells you that one of
the doors and/or the boot is open.
SERVICE
This warning lamp
remains lit up for
long as the fault
relating to the alert message is
present, if it is a serious fault.
Consult a CITROËN dealer as
soon as possible.
This warning lamp remains on only
for a short time for faults that are
minor.
Contact a CITROËN dealer.
To recall the corresponding alert
message. See « Log of alerts »
ABS
Electric parking brake,
brake fluid level, braking distribution malfunction
With the engine running, the lighting of this warnng lamp indicates
that the parking brake is on or not
properly released, that the brake
fluid level is low or that the braking
system is malfunctioning.
If the warning lamp remains on
even after you have released the
parking brake, stop immediately
and contact a CITROËN dealer.
See « Brakes ».
Anglais_indexe.indd Sec1:10
The ABS warning lamp
lights up when you switch
on the ignition: it should go
out after a few seconds. If it does
not go out, there could be a system malfunction. See « Brakes ».
Puncture(s)
If this warning lamp comes
on, it indicates a puncture
on one or more wheels.
The screen displays an image
which shows you which wheel
is affected. Contact a CITROËN
dealer.
ESP/ASR
Operating
If either of the ESP or ASR
systems is active, the warning
lamp flashes.
For a malfunction
If the vehicle is moving, the lighting
of this warning lamp accompanied
by a sound signal and a message
on the multifunction display indicates a malfunctioning of the system.
Contact a CITROËN dealer.
Deactivation
The lighting of the warning lamp
and of the button ESP indicates
that the system is deactivated.
Electric parking brake
When the engine is running, this warning lamp
lights up to indicate a malfunctioning of the electric parking
brake. The brake is not working
properly. Place the gearbox in the
Park position (P).
Consult a CITROËN dealer as
soon as possible.
06/10/2005 14:10:15
WA R N I N G L A M P S
If this warning lamp comes
on, it is reminding the
driver to fasten his seat belt. While
the vehicle is stationary it remains
on until the belt is fastened.
See « Seat belt not fastened warning lamp ».
Depollution system
If this warning lamp flashes
or lights up while you are
driving, this indicates a
problem with the depollution system.
Consult a CITROËN dealer as
soon as possible.
Front passenger's airbag deactivation
engine
pre-
See method for starting
the engine.
See « Driving ».
Sidelamps
See « Signalling ».
See « Airbags ».
Dipped beams
Front foglamps
See « Signalling ».
See « Signalling ».
Main beams
Foglamps (rear)
See « Signalling ».
See « Signalling ».
Left hand
indicator
Right hand direction
indicator
direction
See « Signalling ».
Diesel
heater
I
See « Signalling ».
If the hazard lamps are activated, this means that the direction indicators flash on both sides at the same time.
IN BRIEF
Driver's seat belt not
fastened
11
Fuel low
If this warning lamp comes
on, permanently on level
ground,
there
remain
around 9 l of fuel for a Petrol vehicle, or around 8 l of fuel for a Diesel vehicle.
Anglais_indexe.indd Sec1:11
06/10/2005 14:10:16
I
12
H E A D - U P D I S P L AY
3
4
1
2
ACTIVATION/DEACTIVATION
IN BRIEF
To activate/deactivate the Head-up
display : when you switch on the
ignition, press on button 1.
The function status (activated/deactivated) when you stop the engine
is retained when you restart.
The Head-up display projects
essential driving data into the
driver's field of vision. This enables
the driver never to take his eyes
off the road.
ADJUSTMENTS
OF
HEAD-UP DISPLAY
THE
Height adjustment
To adjust the height for the Headup display, press on buttons 2 and
3.
It is recommended to adjust it as
low as possible.
Brightness adjustment
The Head-up display has a brightness sensor so that the information
can be seen to the best advantage,
whatever the ambient brightness.
You can enhance the display
brightness at any time by rotating
the control 1.
The controls for the Head-up display are located beneath the air
vent on the driver's side.
Anglais_indexe.indd Sec1:12
Note :
• In certain extreme weather conditions (rain and/or snow, strong
sunlight), the Head-up display
may be momentarily subject to
interference.
• When emerging from a tunnel,
there is a certain delay before
the system can re-adapt the
display brightness to the outside conditions.
Remark : Certain types of spectacles may disperse the light coming
from the Head-up display.
There is memorisation of
driving positions as well as
those for the Head-up display
The adjustments you have made
for the Head-up display are
adopted alongside the driving position memorisations (see « Memorisation »): they are :
• Height adjustment.
• Brightness.
types
of
information
• The
selected.
If the Head-up display cannot be
seen, it is recommended to adjust
it for height (buttons 2 and 3) and to
check that it is activated (button 1).
06/10/2005 14:10:17
H E A D - U P D I S P L AY
B
To suspend display of a certain type of information :
C
G
D
F
E
CONTENT OF THE HEAD-UP
DISPLAY
A « Fuel low » alert
B « STOP » warning lamp
C « ESP » warning lamp
D Navigation instructions
E « SERVICE » warning lamp
F Main beams warning lamp
G Vehicle speed
To be aware of the significance of
the information projected on the
screen, see « Warning lamps ».
Remark : when navigation is in
operation, direction arrows will
flash. See NaviDrive instructions.
• Press button 4.
• Rotate the control 1 to select
the type of information you wish
to suspend.
• Press button 1.
The information flashes ; it will no
longer be displayed.
To quit the selection mode, press
button 4.
Note : The vehicle speed information, the « STOP » warning lamp
and the « ESP » warning lamp
cannot be suspended.
To restore display of a type
of information :
• Press button 4.
• Rotate the control to select the
information you wish to restore,
which flashes.
• Press button 1.
The information stops flashing : it
will be displayed.
To quit the selection mode, press
button 4.
I
Note : All the adjustments and
selections you made before stopping the engine are retained when
you restart. If there is a change of
driver, check whether these adjustments are suitable, alter them if
necessary.
ADVICE
• The windscreen of the vehicle
guarantees that the Head-up
display operates correctly. If
you need a replacement windscreen, make sure you obtain
this within the CITROËN network.
• No object must ever be placed
in or over the cavity situated on
top of the dashboard between
the windscreen and the rear of
the dashboard.
• To clean the glass, use a nonabrasive cloth.
IN BRIEF
A
13
You are advised to adjust
these controls only when
the vehicle is stationary.
Anglais_indexe.indd Sec1:13
06/10/2005 14:10:20
IN BRIEF
I
14
WIPERS
Position I : The wipe speed adjusts automatically to the speed of the vehicle.
Positions 1 and 2 : When the vehicle is stationary, the speed of the wipers
will reduce automatically.
For safety, the wiper system is deactivated when the ignition is switched
off.
When you switch the ignition on again, to reactivate the function :
Return to position 0, then go to the desired position.
Activation of the function is confirmed by one sweep of the wipers.
Automatic wipe : To activate automatic wipe, place the control stalk on
position 0, then press it downwards. The wipe speed will adjust according to
the intensity of the rain.
Note : One press downwards produces a single wipe, without deactivating
automatic wipe.
Deactivation of automatic wipe :
• Go to position I, then return to position 0.
CONTROL POSITIONS
2 : Rapid wipe.
1 : Normal wipe.
I : Intermittent wipe.
0 : Off.
One press downwards :
• AUTO : Automatic wipe activated.
• Single wipe.
• Or stop the engine.
WARNING
Do not cover the rain detector which is located behind the interior rear
view mirror and visible from outside the windscreen.
If washing the vehicle, with ignition on for example in an automatic car
wash, deactivate the wiper system.
For safety, the wiper system is
deactivated when the ignition
is switched off.
Anglais_indexe.indd Sec1:14
06/10/2005 14:10:22
WIPERS
15
I
CHANGING THE WIPER BLADES
If you have to replace them, the wiper blades have to be parked in the maintenance position. For this, switch off the
ignition and then within one minute move the wiper control stalk. The wipers stand up in a vertical position.
After replacement, switch on the ignition and move the wiper control stalk so that the wipers resume their normal
position.
Note : this action places the Piloted Deflector in the maintenance position. See « Piloted Deflector ».
WINDSCREEN WASH
To operate the windscreen wash, pull the wiper stalk towards you.
The screen wash is accompanied by a timed wipe of the windscreen, the
headlamp wash also activates if the dipped beams are on.
The display of a message indicates that there is only approx. one litre of
screen wash fluid remaining.
IN BRIEF
69
In freezing conditions, always check that the wiper blades are free to
operate.
Remove any accumulation of snow at the base of the windscreen.
Anglais_indexe.indd Sec1:15
06/10/2005 14:10:23
I
16
SIGNALLING
SOUND SIGNAL FOR HEADLAMPS LEFT ON
IN BRIEF
This operates when the driver's
door is opened, ignition off, to indicate that the vehicle lamps are still
on.
It stops when you close the door,
switch off the lamps or switch on
the ignition.
This signal does not operate if the
automatic lighting of headlamps
or the guide-me-home lighting are
active.
DIRECTION INDICATORS
HAZARD WARNING LAMPS
Left, downwards.
Right, upwards.
For a change of direction, move the
control stalk beyond the tight spot.
Stops automatically with the return
of the steering wheel.
This operates all the direction indicators simultaneously.
Only use them to indicate danger, for an emergency stop or for
driving in abnormal conditions.
The hazard lamps can also be
used with the ignition switched off.
Visible alert / headlamp
flash
EMERGENCY
OPERATION
OF
HAZARD
WARNING
LAMPS
A sudden deceleration of the vehicle causes the hazard lamps to
come on automatically.
They will cease to operate automatically, or manually if you press
the hazard lamps button on the
dashboard.
Pull the control towards you.
The headlamp flash can be made
even with the ignition switched off.
Horn
Press at the centre of the steering
wheel.
The direction indicators cannot operate if the hazard warning
lamps are on.
Anglais_indexe.indd Sec1:16
06/10/2005 14:10:24
SIGNALLING
All vehicle lamps off
I
GUIDE-ME-HOME LIGHTING
A
Rotate the ring A forwards.
Sidelamps on
Rotate the ring A forwards.
Dipped beams/main beams on
Dipped beams/main beams dipswitch
Pull the control stalk towards you to change between dipped beam and
main beam.
AUTOMATIC LIGHTING OF HEADLAMPS
This function switches on your
headlamps, to light your way when
you wish to walk from a carpark,
for example.
This function is activated :
• Manually by pulling the control A towards you, with the
ignition switched off.
• Automatically, provided :
- The automatic lighting of
headlamps is activated.
- To activate the guide-mehome lighting function, select
in the « Main menu », then in
« Personalisation/Configuration », the sub-menu for lighting and signalling, then activate the function.
See « Multifunction display ».
Note : It is possible to modify the
duration of the guide-me-home
lighting (approx. 60, 30 or 15 seconds) in the menu « Personalisation/Configuration ».
IN BRIEF
LIGHTING CONTROL STALK
17
Sidelamps and dipped beams come on automatically in poor ambient light,
or if the wipers are in continuous operation. They go out as soon as the
ambient light again become sufficient or when the wipers cease to operate.
Activation/deactivation of this function is possible in the menu « Personalisation/Configuration » in the « Main menu ».
Note : Activation of this function is immediate while deactivation require the
ignition to be switched off.
Take care not to cover the brightness sensor, which is visible from outside the windscreen, behing the interior rear view mirror.
34/46/49
Anglais_indexe.indd Sec1:17
06/10/2005 14:10:26
I
SIGNALLING
18
FRONT AND REAR
FOGLAMPS (RING C)
DAYTIME-RUNNING LAMPS
Lighting
With dipped/main beams on :
Rotate the ring C forwards.
C
IN BRIEF
Front foglamps on
These come on automatically when
the engine is running :
• If the function is activated in the
Main Menu. See « Multifunction
display ».
• Provided the lighting control
stalk is on position 0 and all the
headlamps are off.
If the daytime-running lamps are
active, the sidelamps will also be
on (depending on country specification).
Rotate the ring C forwards.
Front foglamps and rear foglamps on
Switching off
First action rearwards, rear foglamps off.
Second action rearwards, front and rear foglamps off.
Note : the foglamps should be used only in fog or in other conditions of poor
visibility.
In foggy conditions, if the ambient light is not such that the
headlamps come on automatically, it is up to the driver to switch
on dipped beams, and/or foglamps, manually
Anglais_indexe.indd Sec1:18
06/10/2005 14:10:27
The steering can be adjusted for
both height and reach.
With the vehicle stationary, first
adjust your seat to the most suitable position, then adjust the position of the steering wheel. See
« Driving position ».
To adjust the steering wheel :
1. Push the control downwards to
unlock the steering wheel.
2. Adjust the position of the steering wheel.
3. Raise the control to lock the
steering wheel.
19
The correct positioning of the
belt strap is through the middle of
the shoulder. See « Seat belts ».
To adjust the seat belt for height,
compress the control and slide it
in the desired direction.
I
IN BRIEF
S T E E R I N G C O L U M N A D J U S T M E N T – S E AT
B E LT H E I G H T A D J U S T M E N T
As a matter of safety, the adjustments in your driving position must
be made only while the vehicle is stationary.
Anglais_indexe.indd Sec1:19
06/10/2005 14:10:28
I
F R O N T S E AT S
20
ADJUSTMENT OF THE BACKREST ANGLE
Action the control 1 and adjust the angle of the backrest.
It is possible to tilt the backrest 45° forwards until it locks. To unlock it,
press control 1.
IN BRIEF
ADJUSTMENTS TO THE HEIGHT AND ANGLE OF THE
HEAD RESTRAINT
To raise it, pull upwards.
To lower it, press on the control 2 to unlock it, and simultaneously on the
head restraint itself.
To adjust the angle of the head restraint, tilt it forwards or rearwards at
the bottom.
To raise it, press control 2 to unlock it, then pull it upwards.
CONTROLS FOR THE HEATED SEATS
The front seats can be heated independently of each other. On the controls for the heated seats 3 located on the outer side of the seats, rotate
the knob to select any of three heat intensities :
1
0
1
2
3
3
2
: Off.
: Slight heat.
: Medium heat.
: Maximum heat.
Note : The heated seats only operate when the engine is running.
SEAT HEIGHT AND SLIDE ADJUSTMENTS
See following page.
Anglais_indexe.indd Sec1:20
06/10/2005 14:10:31
F R O N T S E AT S
21
I
ELECTRICAL ADJUSTMENTS
Adjustment of the backrest angle
A
To adjust the angle of the backrest, press button A.
B
C
D
A
Lumbar adjustment
To adjust the backrest lumbar support, press button B.
Seat height and slide adjustments
C
To slide the seat, press on the horizontal arrows on control
C.
To adjust the seat for height, press on the vertical arrows on
control C.
Adjustment of the seat cushion angle
To adjust the seat cushion angle, press on control D.
D
IN BRIEF
B
Note : These adustments remain available for a limited time :
• After you have opened a door
• After you have switched off the ignition
82/85
Do not drive the vehicle with the head restraints removed ; these
must be place, correctly adjusted.
Anglais_indexe.indd Sec1:21
06/10/2005 14:10:34
I
M E M O R I S AT I O N
22
2
1
IN BRIEF
M
The memorisation function allows
to make the following dashboard
adjustments :
• Driver's seat
• Exterior rear view mirrors
• Head-up display.
See « Rear view mirrors » and
« Head-up display ».
Youe have the possibility to memorise two driving positions using
buttons 1 and 2.
Anglais_indexe.indd Sec1:22
DRIVING POSITIONS MEMORISED VIA BUTTONS 1 AND
2
To memorise a driving position :
a.Place the igntion key in « Drive »
position (second position).
b. Make the adjustments to your
seat, the rear view mirrors
and lthe Head-up display.
c. Press successively on button
M then on button 1 (first driving
position) or 2 (second driving
position).
The memorisation is confirmed by
a sound signal.
Note : The memorisation of a
new driving position cancels and
replaces the previous one.
RECALL OF A MEMORISED
DRIVING POSITION
Vehicle stationary (ignition
on or engine running)
Press briefly on button 1 or 2 to
recall the corresponding memorised position.
The completion of the adjustments
is confirmed by a sound signal.
Vehicle in motion
Keep button 1 or 2 pressed down
to recall the corresponding memorised position.
Note : After a few consecutive
recalls of a memorised driving
position, the function deactivates
until the engine is started.
06/10/2005 14:10:36
S E AT B E LT S W A R N I N G L A M P
23
I
FUNCTIONING OF THE SYSTEM OF DETECTION
2
3
Driver's and front passenger's seats
When you switch on the ignition :
• If the driver's seat belt is not fastened, the warning lamp 1 illuminates in
the instrument panel.
• If the passenger's seat belt is not fastened, the warning lamp 3 lights
up.
Above 20 km / h, the warning lamp flashes for non-fastening/unfastening,
accompanied by a message and a sound signal for around 2 minutes. Then
the warning lamp(s) 1 and/or 3 remain on.
The driver's and the front and rear
pasengers' seats have sensors
that detect non-fastening/unfastening of the seat belts.
The fastened/non-fastened status
of the seat belts for each type of
seat is indicated by the illumination
or flashing of the warning lamps 1,
2 and 3.
When you switch on the ignition, warning lamp 2 lights up to make the driver
and any passengers aware.
Once the doors are closed and the engine started, a message tells you the
fastening status of the rear belts for 30 seconds.
After this time, if one or more of the rear belts are not fastened :
• Warning lamp 2 comes on, if your speed is less than around 20 km / h.
• Warning lamp 2 flashes, accompanied by a message and a sound signal
for about two minutes, if your speed is above around 20 km / h.
Note :
• The detection of non-fastening of rear seat belts is deactivated when you
switch off the ignition or if one of the vehicle's doors is opened.
• A child seat installed on the front passenger's seat may not be
detected.
IN BRIEF
Rear passengers' seats
OPERATION
1
The driver, after he has closed the doors and started the engine, must
make sure that the passengers :
• Have all fastened their seat belts
• Are using the seat belts correctly.
Anglais_indexe.indd Sec1:23
06/10/2005 14:10:37
I
24
REAR VIEW MIRRORS
Functioning of the interior
and exterior rear view mirrors
IN BRIEF
2
INTERIOR REAR VIEW MIRROR
The lever on the lower edge enables you to place the rear view mirror in either of two positions.
Day position : the lever is not visible.
Night position (anti-dazzle) : the
lever is visible.
Anglais_indexe.indd Sec1:24
1
AUTOMATIC INTERIOR AND
EXTERIOR REAR VIEW MIRRORS
Switch on the ignition and press
button 1.
• Warning lamp 2 on : automatic
mode.
• Warning lamp 2 off : automatic
mode stopped. The mirror
remains in its lightest definition.
Note : For optimal vision, the interior and exterior mirrors lighten
automatically when reverse gear is
engaged.
These provide an automatic and
progressive change between day
use and night use.
To prevent dazzle, the mirrors automatically become darker as a function of the intensity of light coming from the rear. They become
lighter as soon as the brightness
diminishes, thus ensuring optimal
vision.
06/10/2005 14:10:40
REAR VIEW MIRRORS
25
I
Adjustment of the rear view mirrors
This can operate when the ignition is switched on.
The driver selects the rear view mirror by moving control 1, to the left or
to the right, then adjusts the mirror in the four directions by acting on control 2.
Demisting-deicing of the rear view mirrors is linked with that for the rear
screen.
The adjustments you have made to the rear view mirrors are included in the
memorisation of driving positions. See « Memorisation ».
2
ELECTRIC EXTERIOR REAR
VIEW MIRRORS
Features
The end of the glass in the exterior rear view mirrors is aspherical,
so as to enlarge the lateral field of
vision.
Objects observed in the aspherical part of the rear view mirrors
are in reality closer than they
appear.
You must take this into account in
order to be properly aware of the
distances involved.
Anglais_indexe.indd Sec1:25
Fold-back of door mirrors
When the vehicle is parked, the door mirrors can be folded back either manually or electrically.
Electric fold-back
From the central position, one press towards the rear on control 1 folds the
rear view mirrors back.
To return them to the initial position, press again on control 1 towards the
rear.
Automatic fold-back
Automatic fold-back operates when you lock the doors.
Note : Automatic fold-back of the rear view mirrors can be deactivated. Contact a CITROËN dealer.
IN BRIEF
1
06/10/2005 14:10:42
I
REAR VIEW MIRRORS
26
ELECTRIC EXTERIOR REAR VIEW MIRRORS (CONTINUED)
In reverse gear: adjustment of the indexed positions for the
passenger’s and driver’s rear view mirrors
With the engine running :
1. Select the (driver's or passenger's) rear view mirror using control 1.
2. Engage reverse gear, the mirror glass automatically positions itself to
improve your vision of the pavement.
3. If necessary, adjust the mirror to your preference using the electric control.
1
Deactivation of the rear view mirror indexing function
IN BRIEF
To deactivate the function, move control 1 to the central position.
Anglais_indexe.indd Sec1:26
06/10/2005 14:10:43
WINDOWS
ELECTRIC OPERATION
The driver uses the controls located
on the door to operate the vehicle’s
electric windows.
SEQUENTIAL OPERATION
An action on the control to the first
notch causes a window movement
which stops as soon as the control
is released.
An action on the control to the
second notch causes the window
to close or open completely, a further press on the control stops the
movement.
Note : The window controls also
operate for a limited time after you
have switched off the ignition.
ANTI-PINCH
An anti-pinch device stops the
window from rising. If it meets an
obstacle, it goes back down.
Anglais_indexe.indd Sec1:27
WARNING
During this operation, the antipinch protection does not work.
I
CHILD SAFETY
This deactivates the controls in the
rear of the vehicle, both for the rear
windows and for opening the rear
doors from the inside.
For Pack Lounge seats, the seat
slide adjustments, and those for
the front seats from the rear of the
vehicle, are also deactivated.
This is activated by a press on button A located on the window control panel.
A message appears to confirm that
the child safety is activated.
It is still possible to open the doors
from the outside and to operate the
electric windows from the front of
the vehicle.
ALWAYS PAY ATTENTION TO WHERE CHILDREN ARE WHEN
OPENING OR CLOSING THE WINDOWS
Always remove the ignition key when leaving the vehicle, even if for a
short time.
Should there be any risk of a person becoming trapped by a window closing, you should immediately reverse the window movement. To do this,
press on the control concerned.
If the driver is operating the electric window controls for passengers, he
or she should ensure that no passenger is obstructing the window from
closing.
The driver must ensure that the electric windows are used properly by
passengers.
If closing the windows and sun roof using the remote control, the user
must make sure that no person is preventing the windows and/or sun roof
from closing properly.
IN BRIEF
A
After a battery disconnection or
if there has been a malfunction,
you have to reinitialise the antipinch function for each window :
• Lower the window fully using
the control, then close. It will
rise only a few centimetres.
Press repeatedly on the control
until the window is fully closed.
• Keep the control pressed for at
least a few seconds after the
window has fully closed.
27
06/10/2005 14:10:44
I
SPEED LIMITER
28
SELECTION OF THE SPEED LIMITER
B
3
1
To select the speed limiter, press on button 1 to display in
zone A of your instrument panel the symbol B for the speed
limiter.
The last speed memorised is also displayed.
TO ADJUST THE MAXIMUM SPEED
IN BRIEF
4
2
A
Provided the engine is running, you can select your maximum speed, with
short or long presses on :
• Button 3 to increase the speed or
• Button 4 to decrease the speed.
Remark :
Successive presses will allow to modify the speed in steps of 1 km / h and a
continuous press in steps of 5 km / h.
ACTIVATION OF THE MAXIMUM SPEED
When the desired maximum speed is displayed, press button 2 to activate
the speed limiter.
The information « OFF then disappears from the screen.
This driving assistance function
enables you to select a maximum speed that you wish not to
exceed. This must be greater
than 30 km / h.
Note : The information relating to
the limiter is displayed in zone A of
the instrument panel.
Anglais_indexe.indd Sec1:28
As long as the function is active, action on the accelerator pedal will not permit the programmed speed to be exceeded, unless you press the pedal hard
down to activate the switch at the end of its travel. See « Temporary override
of the maximum speed ».
Note : The vehicle speed may slightly exceed the memorised maximum
speed.
06/10/2005 14:10:45
SPEED LIMITER
29
I
DEACTIVATION
To deactivate the maximum speed, press button 2.
The information « OFF » will appear in the instrument panel.
This action does not cancel the memorised speed, which remains displayed in the instrument
panel.
The accelerator pedal has a switch at the end of its travel. By pressing the pedal hard down to activate this switch at
any time you can go faster than the memorised maximum speed.
During the time the limit speed is being exceeded, the displayed speed flashes.
You have only to release the accelerator pedal to return below the maximum speed, to restore the function.
Note : If during speed limitation the system cannot keep to the maximum speed (especially on a steep descent or if
you accelerate too hard), the speed flashes. Adapt your speed as necessary.
The function will re-engage when your speed has returned below the desired maximum.
TO CANCEL THE FUNCTION
• Give a long press on button 1.
• Or stop the engine.
The speed that you chose is memorised. The information disappears from the instrument panel.
If there is a malfunction, a message is displayed accompanied by a sound signal and lighting of the SERVICE warning lamp. Contact a CITROËN dealer.
IN BRIEF
TEMPORARY OVERRIDE OF THE MAXIMUM SPEED
A floor mat that is not recommended by CITROËN could slide underneath the accelerator pedal,
thus preventing you from temporarily overriding the maximum speed. Then it would be impossible
to exceed your desired speed, unless by actioning the button.
The driver still has to remain attentive and in complete control of his vehicle.
Anglais_indexe.indd Sec1:29
06/10/2005 14:10:47
I
C RU I S E C O N T RO L
30
SELECTION OF CRUISE CONTROL
C
To activate cruise control, press button 1 to display in zone A
of your instrument panel the symbol C for cruise control.
3
1
TO SELECT A CRUISE SPEED
IN BRIEF
4
2
At the time you select the function, no cruise speed has
yet been memorised.
A
Accelerate to the desired speed, then give a short press on button 3 or
button 4.
The cruise speed is then memorised. The cruise speed will
be displayed in zone A in the instrument panel.
0
This driving assistance function
allows you to drive at the speed of
your choce without the need to
action the accelerator.
Cruise control is available in the
higher gears only, for speeds
greater than 40 km / h.
Note : Information relating to
the cruise control is displayed in
zone A of your instrument panel.
Anglais_indexe.indd Sec1:30
You can then release the accelerator pedal. The vehicle will automatically
keep to that chosen speed.
Note : The vehicle speed may vary slightly from that memorised.
Temporary override of the cruise speed
While cruise control is in operation, it is always possible to go above the
cruise speed simply by pressing the accelerator pedal (for example to overtake another vehicle). The speed displayed flashes. You have only to release
the accelator pedal to return to your cruise speed.
Note : If during cruise control the system cannot keep to the cruise speed
(e.g. on a steep descent), then the speed flashes. If necessary, brake to curb
your speed.
06/10/2005 14:10:48
C RU I S E C O N T RO L
To adjust the memorised speed, displayed in zone A,
press :
• Button 3 to increase the speed or
• Button 4 to decrease the speed.
Remark : Successive presses will allow to modify the
speed in steps of 1 km / h and a continuous press in
steps of 5 km / h
Deactivation of cruise control with memorised
speed
You can deactivate cruise control :
• Either by pressing the brake pedal or the clutch
pedal.
• Or by the ESP or ASR systems being active.
• Or by pressing button 2.
Note : Cruise control is deactivated if the gear lever is
in neutral (position N).
These actions bring up the information
« OFF » in the instrument panel.
I
Reactivation of cruise control
• By recalling the memorised speed :
For that, press on button 2.
Your vehicle will automatically resume the memorised cruise speed which is displayed in the instrument panel.
Remark : If the cruise speed already memorised is far
higher than the current speed, the vehicle accelerates
hard until it reaches the memorised speed.
• By selecting the current speed :
Give a short press on button 3 or 4 as soon as you
have reached the desired speed.
The information « OFF then disappears from the
screen.
To cancel cruise control
• Give a long press on button 1
• Or stop the engine.
The speed that was chosen is no longer memorised.
If there is a malfunction, a message is displayed accompanied by a sound signal and lighting of the SERVICE
warning lamp. Contact a CITROËN dealer.
IN BRIEF
Adjustment of the memorised speed while
cruise control is in operation
31
These actions do not cancel your cruise speed which
remains displayed in the instrument panel.
Cruise control must only be used where the traffic conditions permit driving at a constant speed.
Do not use it on congested roads or when the weather or the road conditions are poor.
The driver still has to remain attentive and in complete control of his vehicle.
You are recommended to keep your feet within range of the pedals.
Anglais_indexe.indd Sec1:31
06/10/2005 14:10:50
I
AIR CONDITIONING
32
CONTROL PANEL
2a
5
6
1
7
2b
1
Automatic operation
2a Adjustment of temperature on
driver's side
2b Adjustment of temperature on
passenger's side
IN BRIEF
3a Adjustment of air distribution on
driver's side
3b Adjustment of air distribution on
passenger's side
3a
4
3b
4
Adjusting the air flow
5
Front demisting - deicing
6
Deicing – Demisting of rear
screen and exterior rear view
mirrors
7
Air recirculation – Entry of air
from outside
48-49/74-88
Anglais_indexe.indd Sec1:32
06/10/2005 14:10:50
R E M OT E C O N T RO L
A
C
B
D
33
II
CENTRAL UNLOCKING
A press on button A unlocks your vehicle.
This operation is confirmed by the rapid flashing of the direction indicators
and the lighting of the interior lamp (if the function is activated). It can also
deploy the exterior rear view mirrors.
CENTRAL LOCKING - CLOSING OF WINDOWS AND SUN ROOF
- DEADLOCKING
Note :
• The
simultaneous
use
of
other
high
frequency
equipment(mobile telephones,
domestic alarms, etc.) may
momentarily hinder the operation of the remote control.
• If there is a permanent fault, the
remote control has to be reinitialised. See « Changing remote
control batteries ».
• A short press on button B locks you vehicle.
• A long press on button B locks your vehicle and closes the windows and
the sun roof.
• Two successive presses on button B deadlocks the vehicle. It is then
impossible to open the doors from either inside or outside the vehicle.
This operation is confirmed by the direction indicators illuminating for approx.
2 seconds and by the interior lamp switching off. This also folds the exterior
rear view mirrors.
If any of the doors, or the boot, is open or not properly closed, the central
locking does not operate.
If closing the windows and sun roof using the remote control,
the user must make sure that no person is preventing the
windows and/or sun roof from closing properly.
It is dangerous to operate the deadlocking when a person
is in the vehicle as unlocking is impossible from the inside
(without the remote control).
Anglais_indexe.indd Sec1:33
06/10/2005 14:10:52
II
R E M OT E C O N T RO L
34
GUIDE-ME-HOME LIGHTING
FOLDING AND EJECTING THE KEY
A press on button C operates the
guide-me-home lighting (illumination of the sidelamps and dipped
beams for approx. one minute).
A second press prior to the end of
this timing cancels the guide-mehome lighting.
Button D is for folding and ejecting the key from its housing in the remote
control.
If you do not press on button D, you could damage the key mechanism.
LOCATING OF THE VEHICLE
Changing the remote control battery
To locate the vehicle on a carpark,
press button B, the interior lamps
come on and the direction indicators flash for a few seconds. The
vehicle remains locked.
Unclip the cover to gain access to the battery.
Battery : CR 0523 of 3 V.
After a change of battery, it may be necessary to re-initialise the remote
control. To do that, switch on the ignition and immediately action button B
on your remote control to trigger the action desired. This may take some ten
seconds.
Note : Make a careful note of the numbers for the keys and for the remote
control on the ASSISTANCE card. Keep this in a safe place.
Do not throw away the old batteries. They should be returned to a CITROËN
dealer or deposited at a recognised collection point (a camera shop, for
example).
REMOTE CONTROL BATTERY SPENT
This information is given by a message on the multifunction display, accompanied by a sound signal and by lighting of the SERVICE warning lamp.
Except when reinitialising, the remote control cannot function while the key is in the ignition, even
when switched off.
Warning: by inadvertently actioning the remote control, when for example it is in your pocket, you
can unlock the vehicle without your realising it.
However, if none of the doors is opened within thirty seconds following an unlocking, the doors will
automatically relock.
Warning : there a is a risk of damage if the replacement battery is not the correct one.
Only use batteries that are identical or equivalent to those approved by CITROËN.
Anglais_indexe.indd Sec1:34
06/10/2005 14:10:53
KEYS
35
II
CENTRAL LOCKING USING THE KEY
A brief action with the key locks the vehicle.
Deadlocking : Central locking using the key
ELECTRONIC IMMOBILISER
KEY
The key operates all the vehicle’s
locks as well as the ignition.
Note : For safety reasons, a buzzer
will sound if you have switched off
the ignition and opened the driver’s
door without having removed the
ignition key.
The key can be used to deactivate
the front passenger’s airbag. See
« Airbags ».
A second action straightaway with the key deadlocks the vehicle. It is then
impossible to open the doors from either inside or outside the vehicle.
Note :
• With the vehicle stationary and the engine switched off, locking is signalled by the flashing of the interior locking control warning lamp.
• If any of the doors, or the boot, is open or not properly closed, the central
locking does not operate.
ELECTRONIC IMMOBILISER
The ELECTRONIC IMMOBILISER device locks the engine supply system.
The system activates automatically as the key is removed from the ignition.
All the vehicle’s keys contain an electronic immobiliser device.
After you switch on the ignition, a dialogue starts between the key and the
electronic immobiliser device.
If the key is not recognised, you cannot start the vehicle.
If this occurs, leave your vehicle immobilised and contact a CITROËN
dealer.
It is dangerous to operate the deadlocking when a person is in the vehicle as unlocking is impossible
from the inside (without the remote control).
The key number is on the label attached to the key.
Should you lose your key or remote control, a CITROËN dealer can supply replacements.
If you unlock your vehicle using the key because of a problem with the battery, be aware that
opening/closing a door with the window closed can seriously damage the glass, even to the point
of breaking it. See « Access ».
Anglais_indexe.indd Sec1:35
06/10/2005 14:10:53
II
36
CODE CARD
In the event of a change of vehicle ownership, it is essential for the new
owner to possess the CODE card.
Never leave it in the vehicle.
A confidential card is given to the
new owner when he takes delivery
of his new vehicle.
This card bears a hidden access
code for the use of the CITROËN
dealer when servicing the electronic immobiliser device.
Do not scratch the protective
strip, the security of the immobiliser system depends on the information below remaining covered.
Should the card be lost, your
immobiliser system can no longer
be considered secure.
ADVICE
Keep the code card bearing your personal electronic immobiliser number in
a safe place (never in the vehicle).
If any key modifications become necessary (addition, cancellation or replacement of the key), It is essential to take the confidential card together with
all the keys to a CITROËN dealer.
Never attempt to modify the electronic immobiliser’s electrical
circuit, as that could render your vehicle undriveable.
Should the confidential card become lost, a CITROËN dealer
would have to undertake a major repair.
Anglais_indexe.indd Sec1:36
06/10/2005 14:10:54
A N T I - I N T RU S I O N A L A R M
A
37
II
DEACTIVATION OF THE
ALARM USNG THE REMOTE
CONTROL
The alarm is disarmed when you
unlock the vehicle (with a press on
button A on the remote control).
DEACTIVATION OF THE
ALARM WITH THE KEY
1
Your vehicle may be equipped with
an ANTI-INTRUSION ALARM. This
provides :
• Exterior perimeter protection by
means of detectors on the vehicle access points (doors, boot,
bonnet) as well as on the electrical supply.
• Interior volumetric protection
by means of ultrasonic sensors
(detecting movement inside the
passenger compartment). This
can be deactivated using the
control 1.
Anglais_indexe.indd Sec1:37
The installation also has a siren,
and a warning lamp on the control 1 which is visible from outside
the vehicle, indicating the three
possible statuses of the alarm :
• Alarm not active (disarmed),
warning lamp off.
• Alarm active (armed), the warning lamp flashes slowly.
• Alarm triggered (signalling an
intrusion), the warning lamp
flashes rapidly if the alarm is
deactivatéd by a press on the
control A. It stops as soon as
you switch on the ignition.
Note : If there is a malfunction,
the warning lamp remains permanently on.
Unlock the doors with the key. The
siren triggers. Enter the vehicle,
insert the key in the ignition and
turn it to the drive position to stop
the siren. Otherwise the siren will
continue for approximately 30 seconds.
06/10/2005 14:10:54
II
38
A N T I - I N T RU S I O N A L A R M
OPERATING THE ALARM
Deactivating the volumetric detection
First make sure all the doors are closed.
The alarm is armed by pressing button B on the remote
control.
With the alarm armed, the protections are active after 5
seconds (perimeter) and 45 seconds (volumetric).
When the alarm is armed (on standby), any intrusion
will trigger the siren for 30 seconds, accompanied by
the direction indicators lighting up.
The alarm then goes back on standby, but the triggering remains memorised and is signalled by the rapid
flashing of the warning lamp on control 1 after you have
deactivated the alarm with a press on the unlocking
button A. The flashing stops when you switch on the
ignition.
The siren is also triggered if there is a cutting of the
electrical supply. To stop it, restore the electrical supply
then press on the unlocking button A.
Note :
• If you want to lock your vehicle without arming the
alarm, just lock with the key only.
• If you lock your vehicle and a door, or the boot, is still
open, the central locking does not operate but the
alarm will arm itself after approx. 45 seconds.
Note : The siren is automatically deactivated (for example for disconnecting the battery) as soon as the vehicle
is unlocked using the remote control.
You can operate the alarm with perimeter protection
only, by deactivating the volumetric protection (if for
example you wish to leave an animal in the vehicle).
For this, switch off the ignition then immediately press
button 1 for at least one second.
The warning lamp on button 1 should come permanently on. It will start to flash when the alarm is armed.
Arm the alarm by locking your vehicle with the remote
control.
Anglais_indexe.indd Sec1:38
Automatic activation (according to destination)
The alarm is armed automatically, 2 minutes after the
last door, or the boot, has been closed.
In order to prevent the alarm from triggering when you
open one of the doors or the boot, it is essential to press
the unlocking button A again on the remote control.
A
B
06/10/2005 14:10:57
S T E E R I N G L O C K – I G N I T I O N – S TA R T E R
Depending on your vehicle version, the following warning lamps
are tested :
39
II
STARTING AND STOPPING
THE ENGINE
See « Driving ».
ECONOMY MODE
If one of these warning lamps does
not light up, this indicates a malfunction.
D : STARTING
S : STEERING LOCK
To unlock the steering, gently move
the steering wheel while turning the
key, without exerting undue force.
When you remove the key, turn your
steering wheel to lock the steering.
The key can only be removed when
in position S.
In order not to discharge the battery while the engine is stopped,
your vehicle goes automatically
into economy mode after a maximum of 30 minutes. Economy
mode is indicated by a message
on the screen.
The electrical components relating
to comfort are automatically cut off.
To reactivate them it is necessary
to restart the engine.
Release the key as soon as the
engine starts. Never turn it while
the engine is running.
M : DRIVE POSITION
The steering is unlocked (by turning the key in position M, if necessary move the steering wheel).
Anglais_indexe.indd Sec1:39
NEVER REMOVE THE IGNITION KEY BEFORE THE ENGINE
HAS COME TO A COMPLETE STOP.
IT IS ESSENTIAL ALWAYS TO DRIVE WITH THE ENGINE RUNNING,
SO AS TO RETAIN STEERING AND BRAKING ASSISTANCE (risk
of the steering lock engaging and loss of safety features).
When stationary, having removed the key, carefully turn the steering
wheel if you wish to lock the steering.
06/10/2005 14:10:57
II
40
D R I V I N G – S TA R T I N G T H E E N G I N E
Check that the automatic gear selector is in position P or N.
PETROL
DIESEL
Starting the engine
Starting the engine
Do not touch the accelerator.
Turn the key to the drive position.
Action the starter until the engine
starts up (not more than 10 seconds).
If the engine does not start at the
first attempt, switch off the ignition.
Wait 10 seconds, then action the
starter again as above.
Turn the key to the drive position.
Wait for the preheater warning lamp
to go out, if it is on, then action the
starter until the engine starts (not
more than 10 seconds).
If the engine does not start, switch
off the ignition.
Recommence the operation.
Note : During starting, do not touch
the accelerator.
ADVICE
Diesel vehicle
chargers
with
turbo-
Never stop the engine without
first having allowed it to idle for a
few seconds, this being the time
required for the turbochargers to
return to a normal speed.
Do not « flick » the accelerator at
the moment you switch off the ignition as this could seriously damage
the turbochargers.
DO NOT RUN THE ENGINE IN A CLOSED SPACE OR IN ONE
THAT IS INSUFFICIENTLY VENTILATED.
Anglais_indexe.indd Sec1:40
06/10/2005 14:11:00
I N S T R U M E N T PA N E L
On switching on the ignition, the
instrument panel indicates :
• Firstly, in suceesion :
- Maintenance indicator. See
« Maintenance indicator ».
- The engine oil level indicator.
• Secondly :
- The total and trip mileage
counters.
41
II
ENGINE OIL LEVEL INDICATOR
This display
operation.
indicates
normal
A flashing of « OIL – – » indicates
a malfunctioning of the indicator.
Contact a CITROËN dealer.
The flashing of « OIL » accompanied by a message, a sound signal
and lighting of the SERVICE warning lamp indicates an engine oil
level lower than minimum.
Check using the manual dipstick.
See « Levels ».
Check the engine oil level on horizontal ground with the engine
having been switched off for at
least 15 minutes.
Contact a CITROËN dealer.
an incorrect engine oil level can seriously damage your engine.
See « Levels ».
Anglais_indexe.indd Sec1:41
06/10/2005 14:11:00
II
42
I N S T R U M E N T PA N E L
MAINTENANCE INDICATOR
It informs you when the next routine sevice is due in accordance with the vehicle servicing schedule in the Maintenance Guide. This information is dependent on two parameters : the mileage covered, and the time elapsed since
the last visit.
Operation
From switching on the ignition
and for a few seconds, the spanner symbolising maintenance
operations lights up ; the instrument panel tells you the distance
remaining to the next service.
Example : there remain up to the
next service :
A few seconds after this, the engine
oil level indicator is displayed, then
the total mileage recorder resumes
its normal role. the instrument
panel gives the total and trip mileages.
Anglais_indexe.indd Sec1:42
Operation if the distance to
the next service is less than
1 000 km (600 miles)
Each time you switch on the ignition and for 5 seconds, the spanner
and the distance flash.
Example : there remain up to the
next service : 500 km (300 miles).
On switching on the ignition and for
5 seconds, the instrument panel
indicates :
A few seconds after this, the engine
oil level indicator is dsplayed, then
the total mileage recorder resumes
its normal role and the maintenance symbol remains lit up.
This is a warning to you that a
service must be carried out at the
earliest opportunity.
the instrument panel gives the total
and trip mileages.
Operation if the service
interval has been passed
Each time you switch on the ignition, the maintenance symbol and
the distance covered (preceded by
a minus) beyond the recommended
interval flash.
Example : You have exceeded the
service interval by 300 km.
The routine service on your vehicle needs to be carried as soon as
possible.
A few seconds after switching
on the ignition, the total mileage recorder resumes its normal
role and the maintenance symbol
remains lit up.
06/10/2005 14:11:01
I N S T R U M E N T PA N E L
Maintenance intervals
If you use your vehicle in particularly difficult conditions, it is
essential to have recourse to the
service schedule for « special
conditions » comprising shorter
intervals between services. See
« Maintenance Guide ».
43
II
MILEAGE RECORDER
Display
FUEL GAUGE
A
0
0
Reset to zero
Your CITROËN technician resets
the indicator to zero after each
service. However, if you do your
own servicing, the procedure for
resetting to zero is as follows :
1. Switch off the ignition.
2. Press on button A and keep it
pressed.
3. Switch on the ignition.
4. Keep button A pressed down
until the screen indicates « =0 »
and the maintenance symbol
disappears.
When the driver's door is opened
or the vehicle is unlocked with the
remote control, for around 30 seconds there is display of the mileage recorders and sometimes the
maintenance spanner.
A
0
If the fuel low warning lamp comes
on permanently on horizontal
ground, accompanied by a sound
signal, there remain around 9 l of
fuel (petrol version) or 8 l of fuel
(Diesel version).
When the second-to-last bar disappears, you still have approx. 5 l
of fuel.
0
Trip mileage recorder reset
This can operate when the ignition
is switched on.
With a long press on the zero
reset button A, the trip mileage displayed resets to zero.
REV COUNTER
When you approach maximum
engine speed, crossing into the red
zone indicates the need to engage
a higher gear.
Note : If the maximum time
between two oil changes is
reached before the mileage
has been covered, the maintenance spanner lights up and the
instrument panel indicates « 0 ».
Anglais_indexe.indd Sec1:43
06/10/2005 14:11:01
II
44
I N S T R U M E N T PA N E L – D I S P L AY
NIGHT DRIVING
• A first press on the DARK button puts the display on standby. Only the
time and the temperature remain displayed.
• A second press switches off the display and the instrument panel,
except for information concerning :
- The speed indicator.
- The automatic gearbox.
- Cruise control / Speed limiter if this has been activated.
Note :
- Temporary lighting of the display for modification of audio-CD adjustments and air conditioning.
- The display lights up if any of the other buttons on the display is pressed.
To revert to night driving, press just once on button DARK.
- All the displays come on if there is an alert.
• A third press returns you to normal lighting.
Anglais_indexe.indd Sec1:44
A
C
B
D
DASHBOARD BRIGHTNESS
With lamps switched on, press on
button C or D to alter the intensity
of the dashboard lighting.
In the « Main menu », you have a
« Configuration » menu, in which
you can adjust the display brightness. See « Display » and the
NaviDrive instructions.
For enhanced visual comfort, you
can also adjust the orientation of
the NaviDrive display by pressing
buttons A and B.
06/10/2005 14:11:02
M U LT I F U N C T I O N D I S P L AY S
45
II
COLOUR SCREEN C
1
2
3
4
D
Personalisation/Configuration
B
C
B
B
A
1
2
3
4
-
Outside temperature
Display zone
Date
Time
When the outside temperature
is between +3 °C and –3 °C, the
temperature display flashes (risk
of ice).
Note : The outside temperature
displayed may be higher than the
actual temperature if the vehicle is
stationary in bright sunlight.
The driver is advised not to operate the controls described below
while the vehicle is moving.
CONTROLS
A Access to the « Main menu » of
the display.
B Scroll through display menus.
C Selection in the menus of the
function chosen or value to
modify.
D Cancellation of the operation or
return to the previous display.
B
Main menu
Press on button A to bring up the
« Main menu » of the multifunction display. This menu gives you
access to the following functions :
Radio mono CD
See instructions for Radio
mono CD.
Trip computer
For :
• Entering the distance to
the destination.
• Access to the log of alerts
(recall of the alerts signalled
previously.
• Access to the status of functions, for example automatic
lighting of headlamps, ESP,
windscreen wipe.
For :
• Activating/deactivating :
- Automatic lighting of headlamps.
guide-me-home
- Automatic
lighting, with choice of duration.
- Daytime-running lamps.
- The Xenon dual-function directional headlamps.
• And choosing :
- The brightness and the colour
of the display, time, date and
units.
- The display language.
Air conditioning
For :
• Deactivating
the
air
conditioning.
• Deactivating/activating the differential adjustment of the air
conditioning on the driver's
side/passenger's side.
Bluetooth hands-free
kit
See instructions for Radio
mono CD.
Anglais_indexe.indd Sec1:45
06/10/2005 14:11:09
II
M U LT I F U N C T I O N D I S P L AY S
46
COLOUR SCREEN C
To access the trip computer's log of alerts :
B
D
C
B
B
A
B
TRIP COMPUTER
To enter the distance to be
travelled on the trip computer :
1. Press on A.
2. Use B to select the icon « Trip
computer », then confirm with a
press on C.
3. Select entry of distance using B.
Confirm your choice with a
press on C.
4. To choose the distance, select
the fgure you wish to modify
by using B, then confirm with a
press on C.
5. Use B to adjust the value, then
validate by pressing C.
6. Validate « OK » on the screen.
Anglais_indexe.indd Sec1:46
1. Press on A.
2. Use B to select the icon « Trip
computer », then confirm with a
press on C.
3. Select the log of alerts.
4. When the list displays, use B to
scroll through it.
5. Press D to return to the permanent display.
To access the status of functions : proceed in a similar manner.
PERSONALISATION/CONFIGURATION
To activate/deactivate the
automatic
guide-me-home
lighting :
1. Press on A.
2. Use B to select the icon « Personalisation-Configuration »
then confirm your choice by
pressing C.
3. Then select the sub-menu for
the vehicle parameters. Confirm
your choice with a press on C.
4. Using B, select lighting and
signalling. Confirm your choice
with a press on C.
5. Then press C to select/deselect
the guide-me-home lighting, to
activate/deactivate it.
After activation, choose the duration : press C then use B to select
the duration, then press C.
To activate/deactivate the
automatic lighting of headlamps :
Proceed in a similar manner by
selecting/deselecting the corresponding line.
Note : Activation of this function
is immediate while deactivation
require the ignition to be switched
off.
06/10/2005 14:11:11
M U LT I F U N C T I O N D I S P L AY S
47
II
COLOUR SCREEN C
To activate/deactivate the
daytime-running lamps :
To adjust the display brightness :
To adjust the date and the
time :
Proceed in a similar manner by
selecting/deselecting the corresponding line.
If you activate the daytime-running
lamps, they come on provided the
signalling control stalk is in position 0 and the headlamps are off.
If the daytime-running lamps are
active, the sidelamps will also be
on (depending on country specification).
1.Press on A.
2.Use B to select the icon « Personalisation-Configuration »
then confirm your choice by
pressing C.
3.Select the display configuration
with a press on B. Confirm your
choice with a press on C.
4.Select the brightness adjustment. Confirm your choice with
a press on C.
5.Select with a press on B, then
validate by pressing C, the
normal or alternative display
mode.
To adjust the brightness, select
the symbols « + » or « – » and
confirm your adjustment by
pressing C.
6.Validate « OK » on the screen.
To choose the display colour :
proceed in a similar manner.
1. Press on A.
2. Use B to select the icon « Personalisation-Configuration »
then confirm your choice by
pressing C.
3. Select the display configuration
with a press on B. Confirm your
choice with a press on C.
4. Select the adustment for the
date and the time, by pressing B, then confirm with a press
on C.
5. Press B to select the values you
wish to modify. Confirm your
choice with a press on C.
6. Do your adjustments with B,
then validate each adjustment
choice with a press on C.
7. Validate « OK » on the screen.
To activate/deactivate the
Xenon dual-function directional headlamps :
1. Press on A.
2. Use B to select the icon « Personalisation-Configuration »
then confirm your choice by
pressing C.
3. Then select the sub-menu for
the vehicle parameters. Confirm
your choice with a press on C.
4. Press B to select the driving
assistance. Confirm your choice
with a press on C.
5. Then with a press on C, select/
deselect the Xenon dual-function directional headlamps to
activate/deactivate them.
Anglais_indexe.indd Sec1:47
06/10/2005 14:11:12
II
M U LT I F U N C T I O N D I S P L AY S
48
COLOUR SCREEN C
To choose the language :
B
D
C
B
B
A
B
To choose units (for temperature, fuel consumption
etc.) :
1. Press on A.
2. Use B to select the icon « Personalisation-Configuration »
then confirm your choice by
pressing C.
3. Select the display configuration
with a press on B. Confirm your
choice with a press on C.
4. Then select the sub-menu for
units. Confirm your choice with
a press on C.
5. Use B to select the unit you
wish to modify, then validate
with a press on C.
6. Validate « OK » on the screen.
Anglais_indexe.indd Sec1:48
1. Press on A.
2. Use B to select the icon « Personalisation-Configuration »
then confirm your choice by
pressing C.
3. Select your choice of language,
via B.
4. Use B to select the desired language and validate your choice
by pressing C.
5. Validate « OK » on the screen.
AIR CONDITIONING
To activate/deactivate the air
conditioning :
1. Press on A.
2. Press B to select the air conditioning icon, then confirm your
choice by pressing C.
3. Use B to select the modification you wish to make to the air
conditioning and validate your
choice by pressing C.
To activate/deactivate the
left/right differential adjustment of the air conditioning :
1. Press on A.
2. Press B to select the air conditioning icon, then confirm your
choice by pressing C.
3. Use B to select the modification
you wish to make to the differential adjustment and validate
your choice with a press on C.
06/10/2005 14:11:13
M U LT I F U N C T I O N D I S P L AY S
49
II
N AV I D R I V E C O L O U R D I S P L AY
1
2
3
4
5
CONTROLS
A Access to the « Main menu » of
the display.
B Scroll through display menus.
C Selection in the menus of the
function chosen or value to
modify.
Scroll through display menus.
D Cancellation of the operation or
return to the previous display.
Press on button A to bring up the
« Main menu » of the multifunction display. This menu gives you
access to the following functions :
Navigation information
Traffic
See
NaviDrive
tions.
instruc-
C
B
B
See
NaviDrive
tions.
instruc-
Configuration, to activate/
deactivate the guide-mehome lighting, automatic
lighting of headlamps etc.
as well as to adjust the various parameters (time, date etc.).
See NaviDrive instructions.
Map
Audio
See
NaviDrive
tions.
B
A
Telephone
and
telematic services
Main menu
1 Outside temperature.
2 Directory.
3 Date.
4 Telephone.
5 Time.
When the outside temperature
is between +3 °C and –3 °C, the
temperature display flashes (risk
of ice).
Note : The outside temperature
displayed may be higher than the
actual temperature if the vehicle is
stationary in bright sunlight.
The driver is advised not to operate the controls described below
while the vehicle is moving.
B
D
instruc-
See
NaviDrive
tions.
instruc-
Video
Trip computer
See
NaviDrive
tions.
instruc-
See
NaviDrive
tions.
instruc-
Air conditioning
Directory
See
NaviDrive
tions.
Anglais_indexe.indd Sec1:49
instruc-
Refer to the explanations
given in the section « Colour screen C ».
06/10/2005 14:11:14
II
50
OPERATION
For selection and display of the
various types of information, give
short presses on the end of the
windcsreen wiper stalk.
Press on the « TRIP » button on
the radio panel, for permanent display of the trip computer information.
To reset the trip computer information to zero, keep the end of
the control stalk pressed for a few
seconds when you see the relevant
information displayed.
Anglais_indexe.indd Sec1:50
TRIP COMPUTER
The trip computer gives you access to :
• Three types of instantaneous information :
- Range.
- Instantaneous consumption.
- Distance remaining to be travelled.
• Three types of information for two Journeys 1 and 2 :
- The distance travelled.
- Average consumption.
- Average speed.
The Journeys
Journeys 1 and 2 are independent of each other but identical in use.
For example you can allocate Journey 1 to daily calculations and Journey 2 to monthly calculations.
Resetting a Journey to zero
When the desired Journey is displayed, give a long press on the end
of the wiper control stalk.
• Information concerning your vehicle :
- The oil temperature (for NaviDrive display only).
- The coolant temperature.
- The tyre pressures.
06/10/2005 14:11:17
TRIP COMPUTER
NaviDrive colour display
51
II
Colour screen C
Range
This is the distance that can still be travelled on the
amount of fuel remaining in the tank. When the distance
that can still be travelled is less than around 30 km (or
20 miles), only four dashes are displayed.
Instantaneous consumption
This is the result from the consumption recorded
within the last 2 seconds. This function will only display
above 30 km / h.
Distance to be travelled
To enter it, see « Multifunction display ».
Distance travelled
This is the distance that has been travelled since the
last reset to zero of the Journey selected.
Average consumption
This is the relationship between the fuel consumed and
the distance travelled since the last reset to zero of the
trip computer.
Average speed
This is obtained, from the last reset to zero of the trip
computer, by dividing the distance travelled by the time
taken (with ignition switched on).
Anglais_indexe.indd Sec1:51
06/10/2005 14:11:21
II
TRIP COMPUTER
52
OIL TEMPERATURE (NAVIDRIVE COLOUR DISPLAY)
This gauge informs you of the temperature of the oil in your
engine.
If the temperature is to high, the gauge indicates the maximum
level and the last, red bar flashes.
Contact a CITROËN dealer.
COOLANT TEMPERATURE
NaviDrive colour display
Colour screen C
This gauge informs you of the temperature of the
coolant fluid in your engine.
If the temperature is too high, the gauge indicates
the maximum level, the « STOP » warning lamp
lights up in the instrument panel and on the Head-up
display, accompanied by a sound signal and a message.
Stop the vehicle, contact a CITROËN dealer.
Anglais_indexe.indd Sec1:52
06/10/2005 14:11:22
TRIP COMPUTER
53
II
TYRE DEFLATION DETECTION
This function warns you of tyres that are deflated or punctured, by means of sensors that continuously monitor the
status of the vehicle's wheels, giving you this information on the screen (press the end of the wiper control stalk or on
the « TRIP » button for a permanent display).
NaviDrive colour display
Colour screen C
Display of tyres in good condition
Status from the sensors in the course
of initialisation
Anglais_indexe.indd Sec1:53
06/10/2005 14:11:23
II
54
TRIP COMPUTER
Tyre deflation alert
The SERVICE warning lamp comes on and the vehicle outline appears, accompanied by a message and a sound
signal.
The location of the wheel(s) concerned is clear from the vehicle outline, on which the affected wheel(s) will be flashing. Check the tyre pressures as soon as possible.
NaviDrive colour display
Colour screen C
Tyre very deflated
Tyre deflated
Puncture
The « STOP » warning lamp and that for puncture(s) light up, and the vehicle outline appears accompanied by a
message and a sound signal. The location of the wheel(s) concerned is clear from the vehicle outline, on which the
affected wheel(s) will be flashing.
NaviDrive colour display
Colour screen C
Stop immediately, avoiding any sudden actions with the steering wheel or the brakes.
Change the wheel with the affected tyre (whether punctured or very deflated), then have the tyre repaired and
all the pressures checked at the earliest opportunity.
The wheel with a damaged tyre (either in the boot or under repair) can no longer be detected (information
given by the vehicle outline or by a message) nor is the spare wheel able to be detected.
Anglais_indexe.indd Sec1:54
06/10/2005 14:11:23
TRIP COMPUTER
55
II
Wheel not detected
The SERVICE warning lamp comes on and the vehicle outline appears, accompanied by a message and a sound
signal.
The wheel(s) concerned can be identified from the vehicle outline, on which it (they) will be missing. If you have not
changed a wheel, such information indicates that the system is malfunctioning.
Contact a CITROËN dealer to have the faulty sensor(s) replaced.
NaviDrive colour display
Colour screen C
The deflation detection system is a driving aid, but which does not absolve the driver from the need to be vigilant and
responsible.
This system does not dispense with the requirement to check the tyres on a regular basis (see « Vehicle identification »), to make sure that the vehicle is behaving correctly and to avoid premature tyre wear arising from driving too
fast etc..
Do not forget to check the pressure in the spare wheel.
Note : If you drive at high speed, the system reminds you of the importance of checking your tyre pressures. This
information can be deactivated by a CITROËN dealer.
Any repair or replacement of a tyre on a wheel that is equipped with a sensor must be carried out
by a CITROËN dealer.
The system may suffer from temporary interference caused by radio transmissions on neighbouring
frequencies.
Anglais_indexe.indd Sec1:55
06/10/2005 14:11:25
II
56
A U T O M AT I C G E A R B O X
AUTOMATIC GEAR SELECTION LEVER
•
•
•
•
Parking (Position P).
Reverse gear (Position R).
Neutral (Position N).
The automatic gearbox offers
you :
- Operation in auto-active
mode, with automatic adaptation to your style of driving
as well as to the road profile
(Position D).
in
sequential
- Operation
mode, with manual gear
changing (Position M).
- Operation in Sport or Snow
automatic mode (Position
D: press successively on button A).
P
R
N
A
GEAR LEVER POSITION
The driving mode (SPORT or
SNOW) as well as the position
of the gear selector, or the gear
engaged, is displayed in the instrument panel.
For safety :
• The gear lever can only be disengaged from position P if
you are pressing the brake pedal.
• When a door is opened, an audible signal sounds if the
gear selector is not in position P.
• Before leaving the vehicle, make absolutely certain that
position P is selected.
Anglais_indexe.indd Sec1:56
06/10/2005 14:11:25
A U T O M AT I C G E A R B O X
57
II
The engine can only be started when the lever is at position P or N.
A safety device ensures that starting is impossible in the other positions.
After starting the engine, with selector on P, depress the brake pedal then
shift the selector to D, R or M :
• D for automatic mode.
• R for reverse gear.
• M to change to manual mode.
The change from position D (driving in automatic mode) to position M (driving in sequential mode) or vice versa can by made at any time.
USING THE AUTOMATIC GEARBOX
Parking
To avoid any movement of the vehicle when parked, select position P. Only engage it when the vehicle is
completely stationary. In this position the driving wheels are locked.Check that the selector is in the correct
position. Apply the electric parking brake firmly.
Reverse gear
Do not engage until the vehicle is stationary, foot on brake. To avoid gearbox snatching, do not accelerate
immediately after the selection.
Neutral
Do not select position N
if the vehicle is moving
(except in absolute necessity).
Anglais_indexe.indd Sec1:57
• Do not select position N if the vehicle is moving (except in
absolute necessity).
• Never select positions P or R if the vehicle is not completely stationary.
If while the vehicle is moving you inadvertently select position N, leave the engine to idle before engaging position D
or M.
06/10/2005 14:11:28
II
58
A U T O M AT I C G E A R B O X
AUTOMATIC FORWARD DRIVE
The gearbox always selects the gear best adapted to the following parameters :
• Style of driving.
• Road profile.
• Vehicle load.
In this way the gearbox operates without the need for your intervention.
For certain manoeuvres (for example overtaking), it is possible to obtain
maximum acceleration by pressing hard down on the accelerator pedal,
which may trigger automatic changedown to a lower gear.
Remarks :
• During braking, the gearbox may kick down automatically in order to offer
an effective engine brake.
• If you suddenly lift your foot off the accelerator, the gearbox will guard
your safety by not changing up again.
SEQUENTIAL FORWARD DRIVE
Selector position for manual gear changing
• Selector on M.
• Push the selector towards « + » to change up a gear.
• Pull the selector towards « - » to change down a gear.
Note :
• Passage from one gear to another is only possible when vehicle speed
and engine speed permit.
• The « SPORT » and « SNOW » modes are not available in sequential
operation.
• If the engine speed is too high, the gearbox automatically selects a higher
gear.
• If the engine speed is too low, the gearbox automatically selects a lower
gear.
The change from position D (driving in automatic mode) to position M (driving in sequential mode) or vice versa can by made at any time.
Anglais_indexe.indd Sec1:58
06/10/2005 14:11:29
A U T O M AT I C G E A R B O X
59
II
OPERATION IN SPORT OR SNOW AUTOMATIC MODE
With the lever on D, press button A to select any of the driving modes
SPORT, SNOW or NORMAL.
SPORT mode is for more responsive driving, to provide maximum
performance and acceleration.
The warning lamp in the instrument panel is lit up.
SNOW mode is for a more cautious driving style on slippery roads.
The warning lamp in the instrument panel is lit up.
A
NORMAL mode is selected by default when you start the engine. This driving mode is designed for the more usual types of driving conditions.
No warning lamp will light up in the instrument panel.
Remark : The driving mode selected before you switched off the engine will
be retained the next time you start up.
Flashing of the warning lamp for the position requested signals that this position has not yet been reached.
When the warning lamp is permanent, the position is confirmed.
If the SERVICE warning lamp comes on accompanied by a message and a sound signal, this is to alert
you to an operating fault.
In this case :
• A sharp hesitation may be felt when you select R for reverse gear.
• The gearbox is stuck in a gear.
• Do not exceed 100 km / h.
Consult a CITROËN dealer as soon as possible.
Anglais_indexe.indd Sec1:59
06/10/2005 14:11:33
II
E L E C T R I C PA R K I N G B R A K E
60
A
OPERATION
To park
With the vehicle stationary, operate
the parking brake by pulling then
releasing the control A.
Note :
• in all circumstances, select the
park position P.
• On steep gradients, turn the
steering towards the pavement.
• It is not possible to release the
electric parking brake if the key
is removed or in position S.
To quit a parking space
With the engine running, release
the electric parking brake, by
pressing the brake pedal or the
accelerator pedal and pulling then
releasing the control A.
If this warning lamp comes
on, this indicates that the
electric parking brake is
malfunctioning.
The brake is not on.
Put your gearbox in park position P.
The warning lamp comes
on if the parking brake is on
or not properly released
or if you try to release the
brake without pressing
on the brake pedal.
If these two warning lamps come on
together, this indicates that the electric parking brake
is malfunctioning.
The brake is on.
You are advised not to clean underneath the vehicle using a
high pressure system, as this could damage the electric parking
brake.
Anglais_indexe.indd Sec1:60
06/10/2005 14:11:35
E L E C T R I C PA R K I N G B R A K E
61
II
A
B
E
C
UNLOCKING IN
EMERGENCY
In the event of a malfunctioning
of the electric parking brake or of a
battery failure and if your gearbox
is not in the park position (P) :
1.Open the lower compartment in
the central armrest by actioning
the control B.
2.Detach the CD storage section
by pulling on the tabs C.
3.Disengage the strap from its
location D.
4.Pull the strap the unlock the
brake. A loud click confirms that
the brake is unlocked.
Remark : Presence of the diagnostic socket
Take care not to place dusty or damp items close to the socket E, which is
vital to the maintenance operations on your vehicle.
This strap cannot apply the parking brake. To re-apply the electric parking
brake (after first resolving the malfunction or the battery failure), pull then
release the control A. The time for applying the brake subsequent to the
emergency unlocking will be longer.
Anglais_indexe.indd Sec1:61
D
5.Make sure that you position
the strap back in its location D.
Otherwise, applyng the brake
will not be possible after five
attempts.
Contact a CITROËN dealer.
Note : During the emergency unlocking, the warning lamp for the electric
parking brake will light up
in the instrument panel.
Note : It is essential to
make sure that the parking brake warning lamp
does indeed light up in the
instrument panel.
06/10/2005 14:11:37
II
BRAKES
62
If the Electric Parking Brake is released, the lighting of this warning lamp along with the STOP
warning lamp, accompanied by a message, indicates either that the brake fluid level is low or that
the braking distributor is malfunctioning. It is essential to stop the vehicle. Consult a CITROËN
dealer as soon as possible.
ABS system
The ABS system enhances your safety by preventing the wheels from locking in the event of sudden braking
or in conditions of poor road adherence. It enables you to retain control of the steering.
The functioning capability of all the electrical components essential to the ABS is monitored electronically
before and during your journey. The ABS warning lamp lights up when you switch on the ignition: it should go out
after a few seconds.
If the monitoring warning lamp does not go out, that means that the ABS has disconnected because there is a fault.
Also, the fact that the monitoring warning lamp comes on during the journey shows that the ABS system is inactive.
In both cases, the normal braking system remains efficient, exactly as on a vehicle without ABS. However, in order
for the security associated with the correct functioning of the ABS to be restored, the vehicle should be examined as
soon as possible by a CITROËN dealer.
On roads with poor adherence (chippings, snow, ice etc.), it is always imperative to drive with prudence.
SYSTEM OF EMERGENCY BRAKING ASSISTANCE
The emergency braking assistance system helps you to attain the required braking pressure more rapidly, thus to
reduce the stopping distance. It operates as a function of the speed of action on the brake pedal, decreasing the
resistance to this action. To prolong this action of the emergency braking assistance system, simply keep your foot
on the brake pedal.
Anglais_indexe.indd Sec1:62
06/10/2005 14:11:40
E L E C T R O N I C S TA B I L I T Y P R O G R A M M E
63
II
ELECTRONIC STABILITY PROGRAMME (ESP) AND TRACTION
CONTROL (ASR)
These systems are closely associated with ABS and additional to it. In the
event of a loss of control of the vehicle by the driver, the ESP ESP system
acts automatically on one or more wheels and also on the engine to bring
the vehicle back on trajectory. The ASR ASR system optimises traction and
prevents wheel spin by acting on the brakes of the driving wheels as well as
on the engine. It also improves steering stability during acceleration.
A
OPERATION
When either the ESP or the ASR system is brought into operation
the warning lamp « ESP/ASR » flashes.
DEACTIVATION
In exceptional conditions (vehicle stuck in snow, soft ground, etc.) it may
prove useful to deactivate the ESP/ASR systems to allow the wheels to spin
and thus regain traction.
Press on button A, the « ESP/ASR » warning lamp, as well as the lamp on
the button A, light up. The ESP/ASR systems are no longer active.
The ESP/ASR systems will activate again :
• Automatically after the ignition has been switched off.
• Automatically when you drive at above approx. 50 km / h.
• Manually with another press on button A.
The ESP system offers increased
driving safety but is not in place to
encourage the driver to take additional risks or to drive at excessive
speeds.
The functioning of this system is
subject to compliance with the
manufacturer’s recommendations
on wheels (tyres and rims), brake
parts and electronic components,
as well as with the assembly and
repair procedures approved by
CITROËN.
After any collision, have this system
checked by a CITROËN dealer.
OPERATIONAL ANOMALY
If the systems malfunction, the « ESP/ASR » warning lamp comes on,
accompanied by a message on the multifunction display.
Contact a CITROËN dealer to have the system checked.
Anglais_indexe.indd Sec1:63
06/10/2005 14:11:40
II
64
D I E S E L PA R T I C L E F I LT E R
In addition to the catalytic converter, this filter contributes actively to the preserving of air quality, by collecting the
polluting particles that have not been burnt off. Black exhaust fumes are thus eliminated.
CLOGGING OF THE PARTICLE FILTER
If there is a risk of clogging, a message appears on the multifunction screen, accompanied by a sound
signal and the lighting of the SERVICE warning lamp.
This alert is caused by the particle filter starting to be saturated (in exceptionally prolonged urban driving, for example : reduced speed, traffic jams, etc.).
To regenerate the filter, it is advised to drive, as soon as possible when traffic conditions permit, at a speed of 60 km / h
or more for at least 5 minutes, until the alert message disappears. If this alert persists, contact a CITROËN dealer.
Note : If the vehicle has been running for long periods at very low speeds or at idle, vapour emissions may be seen
coming from the exhaust under acceleration. These have no consequences for the running of the vehicle or for the
environment.
The simultaneous lighting of the SERVICE warning lamp and the depollution system warning
lamp, accompanied by a message and a sound signal, indicates an increased risk of clogging.
Contact a CITROËN dealer as soon as possible.
DIESEL ADDITIVE LEVEL
If the additive level is low, a message appears on the multifunction screen, accompanied by a sound signal and the
lighting of the SERVICE warning lamp. It is necessary to have the additive topped up.
Contact a CITROËN dealer as soon as possible.
Anglais_indexe.indd Sec1:64
06/10/2005 14:11:42
PA R K I N G A S S I S TA N C E
Front
II
Rear
Proximity sensors are located in the front and rear bumpers of your vehicle.
When manœuvring in either forward or reverse gear, at a low speed less
than approx. 10 km / h, they inform you of the presence of any obstacle that
is within their zone of detection by :
• A sound signal emitted by the front or rear loudspeakers.
• Display of the outline of your vehicle with shading corresponding to the
area where an obstacle is detected.
As the vehicle approaches the obstacle, the sound signal tells you the position of the obstacle according to whether the sound is coming from the front
LH or RH or the rear LH or RH loudspeakers.
Note : The sound volume of your audio equipment reduces automatically
when a signal is being emitted.
Anglais_indexe.indd Sec1:65
65
As the vehicle approaches the
obstacle, the sound signal becomes
more and more urgent and the
shaded areas are displayed closer
and closer to the vehicle.
When the obstacle is less
than around 25 centimetres from the vehicle, the
sound
signal
becomes
continuous with display
of a « WARNING » panel on the
screen.
06/10/2005 14:11:42
II
PA R K I N G A S S I S TA N C E
66
OPERATION
1
ACTIVATION/DEACTIVATION
You can activate/deactivate the
parking assistance by pressing
button 1. When the parking assistance is inactive, the warning lamp
on button 1 is lit up.
Activation/deactivation of the parking assistance is memorised when
you stop the vehicle.
Remark : If you wish to tow a
trailer, it is necessary to deactivate
the parking assistance by pressing
button 1. The warning lamp on the
button lights up.
When you engage reverse gear,
a sound signal confirms to you that
the system is active. The outline of
your vehicle appears on the screen.
Any obstacles located to the rear
or to the front of the vehicle can be
detected.
When moving forward at a speed
less
than
approx. 10 km / h,
whether in neutral or in gear, the
vehicle outline appears on the
screen as soon as an obstacle is
detected in front of the vehicle. Any
obstacles located to the rear or
to the front of the vehicle can be
detected.
Remarks :
• The proximity sensors cannot
detect objects that are immediately under or over the bumpers.
• A thin object such as a spike,
a bollard or similar, can only
be detected at the start of the
manœuvre but not when the
vehicle arrives close up to it.
• In poor weather or in winter, you
need to ensure that the sensors
are not covered with mud or
with ice or snow.
When you engage reverse gear, a short sound signal followed by
another signal, accompanied by a message and lighting of the
SERVICE warning lamp, tells you that there is a malfunction.
Contact a CITROËN dealer.
Anglais_indexe.indd Sec1:66
06/10/2005 14:11:45
X E N O N D UA L F U N C T I O N D I R E C T I O N A L
HEADLAMPS
67
II
FEATURES
With dipped beams or main beams, the Directional headlamps function turns the headlamps in the direction the
road ahead is taking.
Your vision on bends is considerably enhanced.
Note : An automatic correction of the beam height enables you not to dazzle other drivers.
ACTIVATION/DEACTIVATION
Activated by default, this function
can be activated/deactivated in the
« Main menu » on the multifunction screen. See « Multifunction
display ».
The activated/deactivated status
is retained when you switch off the
engine.
Note : This function is not active
when the vehicle is stationary,
moving at very low speed, or in
reverse gear.
Function deactivated
Function activated
If there is a malfunction, a message informs you of a fault and the « Dipped beams » warning lamp
flashes. Have the system checked by a CITROËN dealer.
It is recommended to change both Xenon bulbs at the same time if there is a failure of one of
them.
Anglais_indexe.indd Sec1:67
06/10/2005 14:11:47
II
68
L A N E D E PA R T U R E W A R N I N G S Y S T E M
This driving assistance device warns you when you unwittingly cross a
lane marking (either a continuous or a dotted line on the road surface). It
is designed for use on motorways and dual carriageways, operating only
above speeds of approx. 80 km / h.
ACTIVATION/DEACTIVATION
A press on button 1 activates the function, the warning lamp on the button
lights up.
A second press on button 1 deactivates the function, the warning lamp on
the button goes out.
When you start the engine, the mode (activated/deactivated) selected when
you stopped the engine is retained.
1
OPERATION
Above a speed of around 80 km/h, if you cross a lane marking, you are alerted to this by a vibration within the cushion
of your seat :
• On the right hand side if you cross a lane marking to the right.
• On the left hand side if you cross a lane marking to the left.
The system does not alert you if one of your direction indicators is operating and for approx. 20 seconds after the
direction indicator has stopped.
Note : If there is an electronic malfunction a message is displayed, the SERVICE warning lamp in the instrument
panel comes on and you hear a sound signal. Contact a CITROËN dealer.
Remarks
This system is designed to identify traffic lane markings.
In certain cases it may trigger an alert that is unnecessary, for example if the vehicle passes over a directional arrow
or some unusual road marking.
The system's may be affected temporarily by conditions external to the vehicle :
• Detection of lane markings made difficult by :
- Markings being worn.
- Insufficient contrast with the general road surface.
• Sensors being negated by :
- Driving in snow or heavy rain.
- Driving on roads that are covered with mud or water
The driver still has to remain attentive and in
puddles.
complete control of his vehicle.
If there is prolonged interference, contact a CITROËN
dealer.
Anglais_indexe.indd Sec1:68
06/10/2005 14:11:49
SPEED-SENSITIVE REAR SPOILER
( D E F L E C TO R )
MAINTENANCE
The Piloted Deflector enhances
the aerodynamics and the braking
of your vehicle.
AUTOMATIC DEPLOYMENT
Two deployment stages are possible :
• The first deployment stage
is
from
around 65 km / h.
This prevails as long as
the speed remains above
approx. 25 km / h ; below this
speed, the Piloted Deflector
retracts completely.
• The second deployment stage
is
from
around 125 km / h.
This prevails as long as
the speed remains above
approx. 105 km / h ; below this
speed, the Piloted Deflector
returns to the first) deployment stage.
Anglais_indexe.indd Sec1:69
For any maintenance that may be
necessary on your Piloted Deflector (leaves or other components
jammed, deploy it in the maintenance position : Switch off the ignition then within one minute action
the wiper stalk. Your Piloted Deflector deploys.
Next, to retract it, start then drive at
over 10 km / h.
Note : The maintenance position
makes the wipers stand up vertically. See « Wash / wipe ».
69
II
IN THE EVENT OF A MALFUNCTION
If there is a malfunction, the Piloted
Deflector deploys. The deployment
of the Piloted Deflector is accompanied by a message, a sound signal and lighting of the SERVICE
warning lamp.
Consult a CITROËN dealer as
soon as possible.
ACCESSORIES
• It is recommended to place the
Piloted Deflector in the maintenance position before installing
an accessory on the boot (for
example a bicycle-carrier).
• Installation of accessories on
the vehicle (roof bars, roof box,
bicycle-carrier, etc.) limits the
effectiveness of the Piloted
Deflector.
If you wash the vehicle with a high pressure system, make sure that the
Piloted Deflector is closed.
06/10/2005 14:11:51
II
70
Anglais_indexe.indd Sec1:70
06/10/2005 14:11:52
ACCESS
LOCKING/UNLOCKING
FROM THE INSIDE
A press on the control A operates
the electric central locking and
unlocking, provided all the doors
are closed.
It is still possible to open the doors
from the inside.
Note : Control A is inactive if the
vehicle has been locked using the
remote control or the key.
The three statuses for locking/
unlocking the vehicle are signalled
by the warning lamp on the control A :
• It flashes when the vehicle is
locked, engine stopped.
• It lights up when the ignition is
switched on, vehicle locked.
• It goes out when the vehicle is
unlocked.
71
III
ANTI-THEFT PROTECTION
When you start the vehicle, doors
and boot closed, the system
automatically locks the doors
as soon as you reach a speed of
around 10 km / h.
Note : If a door has been opened,
this will lock again automatically
when the vehicle reaches approx.
10 km / h.
A
ANTI-THEFT
The boot locks automatically as
soon as the vehicle reaches a
speed of around 10 km/h.
Note : The opening of a door or
use of the control A unlocks the
vehicle.
Activation/Deactivation
of
the anti-intrusion protection
Give a long press on control A for
central locking until you see a message displayed.
Before changing or repairing the battery, open all four
windows.
If you have to unlock your vehicle with the key because of a
problem with the battery, any opening/closing of a door with
the window closed may seriously damage the glass to the
point of breaking it.
Anglais_indexe.indd Sec1:71
06/10/2005 14:11:52
III
ACCESS
72
To make it easier to open the doors,
the windows automatically open by
a few millimetres.
Note : This movement occurs
immediately you touch an interior
door handle.
The window recloses, automatically adjusting for a perfect seal.
A
IMPORTANT
This function has no anti-pinch. Do
not leave your hand on the window
when you close the door
Any interruption of your vehicle's
electrical supply will prevent the
windows from opening and closing
correctly.
ELECTRICALLY-CONTROLLED CHILD SAFETY
This deactivates the controls in the rear of the vehicle, both for the rear windows and for opening the rear doors from the inside.
For Pack Lounge seats, the seat slide adjustments, and those for the front
seats from the rear of the vehicle, are also deactivated.
Activation
The electric safety device is activated by pressing the control A located on
the windows control panel. A message appears to confirm that the child
safety is activated.
It is still possible to open the doors from the outside and to operate the electric windows from the front of the vehicle.
Before changing or repairing the battery, open all four
windows.
If you unlock your vehicle using the key because of a problem
with the battery, be aware that opening/closing a door with the
window closed can seriously damage the glass, even to the
point of breaking it.
Anglais_indexe.indd Sec1:72
06/10/2005 14:11:54
ACCESS
73
III
A
B
BOOT
Closing the boot
This can be unlocked, vehicle
stopped :
• With either the remote control
or the key.
• Using the interior central unlocking button, or simply by opening
a door.
Use the moulded handle on the
inside of the boot trim to lower the
boot.
Press firmly shut.
Opening from the outside
Press upwards on the lever A.
Note :
• In any event, as soon as the
vehicle is moving at more than
around 10 km / h, the boot is
locked.
• When the vehicle is stationary,
the boot unlocks when a door
is opened or if the interior central locking/unlocking button is
pressed.
Anglais_indexe.indd Sec1:73
UNLOCKING
GENCY
IN
EMER-
In the event of a problem with
unlocking the boot, the lock can be
released if you fold the rear benchseat :
1. Insert a screwdriver into the
aperture B in the lock.
2. Turn it until the boot is
unlocked.
In the case of Pack Lounge seats,
contact a CITROËN dealer.
06/10/2005 14:11:55
III
74
A U T O M AT I C A I R C O N D I T I O N I N G
A
B
A. Sunlight sensor
B. Soft
diffusion
system
C
C. Temperature and
humidity sensor
D. Ventilated storage under the
central armrest
D
Anglais_indexe.indd Sec1:74
06/10/2005 14:11:58
A U T O M AT I C A I R C O N D I T I O N I N G
75
AIR CONDITIONING
Air inlet
This system automatically adjusts the temperature, the
flow of air and the distribution of air inside the cabin,
depending on your desired comfort level.
Provided you retain automatic mode (by pressing button
« AUTO ») and all the air vents are open, you will maintain an optimum comfort level, also removing humidity
and misting, whatever the ambient climatic conditions.
The temperature inside the cabin cannot be lower than
the temperature outside if the air conditioning is not
operating.
To be effective, the air conditioning should only be used
with the windows closed. If after a lengthy stop in bright
sunlight the interior temperature is excessive, air the
passenger compartment by opening the windows for a
few moments, then close them again.
To keep the air conditioning compressor well sealed, it
is essential to operate the air conditioning at least once
in every month.
The air conditioning operates by using power from the
engine. This results in a slight increase in fuel consumption.
Check that the exterior grille for the air inlet, at the bottom of the windscreen, is clean and free of dead leaves,
snow, etc..
If washing the vehicle with a high pressure jet, avoid
targeting the air inlet zone.
Sensors
The automatic regulation of the air conditioning inside
the cabin uses a number of sensors (sunlight, ambient
temperature, inside temperature, etc.) relieving you of
the need to make your own adjustments within a normal
temperature range.
The humidity sensor is there to prevent misting inside
the vehicle.
Be careful not to obstruct the sensors A and C.
Anglais_indexe.indd Sec1:75
III
Air circulation
For your comfort we advise you to maintain a proper
distribution of air within the cabin, both at the front and
at the rear.
The air vents to the face have thumbwheels so that you
can adjust the flow of air, and grilles to orient the direction.
There are air vents on the floor underneath the front
seats and on the rear control panel, for enhanced heating of the rear seat positions.
Do not obstruct the air outlets located in the boot area.
Dust/pollen filter
There is a filter for excluding pollen and dust.
This filter has to be changed according to the vehicle
maintenance schedule. See « Maintenance Guide ».
Additional heating
Vehicles with an HDi engine may be provided with automatic additional heating for enhanced comfort.
It is normal to notice slight odours or smoke emissions,
especially when the vehicle is idling or stationary.
06/10/2005 14:12:01
III
A U T O M AT I C A I R C O N D I T I O N I N G
76
The system has a differentiated adjustment for the driver's side and passenger's side, in terms of temperature and air
distribution. The air flow is common to both sides.
Symbols and messages relating to the automatic air conditioning controls will display on the multifunction screen.
2a
5
6
1
7
2b
2. TEMPERATURE ADJUSTMENT
To adjust the temperature, press button 2a for the driver's side and button 2b for the passenger's side.
An adjustment around 21 will give you the optimum
comfort level. However, depending on your preferences
anywhere between 18 and 24 is quite usual.
Operating the air conditioning system on « AUTO »
guarantees good ventilation inside the cabin.
Note : There may be a discrepancy between the actual
cabin temperature and the figure displayed.
3a
4
3b
1. AUTOMATIC OPERATION
1
This is the normal operating mode for the system.
Depending on the temperature chosen, a press on this
button, confirmed by the lighting of the warning lamp,
will automatically and simultaneously bring all the following functions into play :
• Air flow.
• Cabin temperature.
• Air distribution.
• Air inlet.
It is recommended to keep all the air vents open. Just
by pressing any of the buttons, except for temperature
2a and 2b, you can change to manual mode. the warning lamp goes out.
Anglais_indexe.indd Sec1:76
06/10/2005 14:12:02
A U T O M AT I C A I R C O N D I T I O N I N G
Notes :
• When starting from cold, in order to prevent unwanted
cold air, the air flow will increase only gradually to its
optimum level.
• If you enter the vehicle after a fairly prolonged stop
and the temperature inside the vehicle is far from
comfortable, it serves no purpose to modify the
temperature that is displayed as an attempt to go
immediately to the desired comfort level. The system
automatically uses all of its power to compensate
the temperature gap as quickly as possible.
Notes :
• Water arising from the condensation in the air conditioning drains out through a hole provided for this
purpose ; a pool of water may thus form underneath
the vehicle when stationary.
• Whatever the time of year, even in cool weather the
air conditioning is useful in removing humidity and
misting.
• You are advised to have the air conditioning system checked on a regular basis. See « Maintenance
Guide ».
• If you are towing a heavy trailer and outside temperatures are high, the air conditioning may be temporarily paused if the engine cooling requires this.
Anglais_indexe.indd Sec1:77
77
III
Manual mode
One or more functions can be adjusted manually, while
still retaining the other functions in automatic mode.
Press on any of the buttons, except for temperature 2a
and 2b. « AUTO » will disappear from the multifunction
screen.
To return to « AUTO » mode, press button 1.
Stopping the air conditioning
Turn the control 4 to the left until the air flow stops completely. The symbol « OFF » appears on the screen.
The display and the warning lamps go out, indicating
deactivation of all the functions, except for rear screen
demisting.
The comfort level (temperature, humidity, odour, misting) is no longer controlled.
To reactivate the air conditioning, press button 1.
06/10/2005 14:12:03
III
78
A U T O M AT I C A I R C O N D I T I O N I N G
3. ADJUSTING THE AIR DISTRIBUTION
3a
Soft diffusion system
3b
The soft diffusion air conditioning unit situated at the
centre of the front console guarantees optimum diffusion of air for the front seat positions.
This unit eliminates annoying draughts and guarantees
an optimum temperature inside the cabin.
Successives or continuous presses on buttons 3a and
3b orient the flow of air on the driver's side or on the
passenger's side.
The symbol (arrows) corresponding to the orientation
chosen is displayed on the multifunction screen :
• Windscreen and side windows.
• Central, lateral and soft diffusion air conditioning
vents (if open).
• Passenger footwells.
• « AUTO » automatic distribution.
4. ADJUSTING THE AIR FLOW
4
Rotate the control to increase or decrease the flow of
air.
The symbol for air flow (helix) displays on the multifunction screen and fills in as the required flow increases.
To prevent misting and poor air quality in the passenger
compartment, take care to maintain a sufficient flow of
air.
Anglais_indexe.indd Sec1:78
Adjusting the air flow with soft diffusion air
conditioning
The driver and the passenger can adjust the air flow for
the soft diffusion air conditioning unit independently.
To adjust the air flow, rotate the control to the desired
position.
To close off the soft diffusion air conditioning, rotate the
control as far down as it will go.
In very hot weather, to improve the central and lateral
ventilation, closing off the soft diffusion air conditioning
is recommended.
06/10/2005 14:12:03
A U T O M AT I C A I R C O N D I T I O N I N G
5. FRONT DEMISTING - DEICING
79
III
7. AIR RECIRCULATION – ENTRY OF AIR
FROM OUTSIDE
7
5
Press button 5 for rapid clear windows. The warning
lamp comes on. This system controls the air conditioning, the air flow and the entry of air from outside. It
sends the ventilation towards the windscreen and side
windows.
A press on the 1 button returns you to « AUTO »
mode.
6. REAR DEMISTING - DEICING
Press successively on button 7 to select air entry mode.
The corresponding warning lamp lights up :
• Recirculation of air inside the cabin
This mode is for excluding unpleasant odours or
smoke coming from outside. It should be cancelled
as soon as possible to re-allow fresh air into the
cabin and thus prevent misting.
• Entry of air from outside
« AUTO » mode is deactivated.
Note : To return to « AUTO » mode, press button 7
for a third time, or button 1.
6
Press button 6, with the engine running, to start a rapid
deicing or demisting of the rear screen and rear view
mirrors. The warning lamp comes on.
This mode stops automatically as a function of the outside temperature. It can be paused by pressing again
on button 6 or by stopping the engine.
In the latter case, demisting will resume when the
engine is switched on again.
Note : The heated rear screen operates independently
of the automatic air conditioning.
Anglais_indexe.indd Sec1:79
06/10/2005 14:12:05
III
80
A U T O M AT I C A I R C O N D I T I O N I N G
To activate/deactivate
the air conditioning
system
Press on the control « CLIM » to go into the « air conditioning » mode. Then press button « OK » or on the
control to bring up the « Air Conditioning menu » on the
multifunction screen.
This menu allows you :
• To deactivate the air conditioning : « Cut aircon (A/
C OFF) ».
Press button « OK », or on the control, to validate
the offer to activate or deactivate the air conditioning.
The symbol « A/C OFF » displays on the multifunction screen in the case of deactivation.
Note :
- Your temperature adjustment value may not be
reached and you risk having the windows misted
up.
- You can cancel deactivation of the air conditioning,
by pressing the control 1 « AUTO ».
Anglais_indexe.indd Sec1:80
• To activate/deactivate the differentiation of the air
conditioning adjustment on the driver's side and on
the passenger's side.
After making your selection using the arrow keys,
press on « OK » or on the control, to validate the
offer to activate or deactivate the air conditioning.
Activation of this function makes the adjustments on the passenger's side identical to those
chosen by the driver.
Note : any manual action on button 2b or 3b returns
you to the independent adjustments.
A press on the « Menu » button brings up the
« Main menu » for access to choices similar
to those offered by the « CLIM » button.See
« Multifunction display ».
06/10/2005 14:12:06
R E A R A U T O M AT I C A I R C O N D I T I O N I N G
Deactivation
A
B
D
A press on any of the buttons B,
C or D, deactivates the automatic
operation of the rear air conditioning.
the warning lamp on button A goes
out.
Note : If the air conditioning in the
front of the cabin is stopped (function deactivated in the « Air conditioning » menu or via the control 4
for adjusting the air flow), then the
rear automatic air conditioning is
not available.
ADJUSTING THE AIR FLOW
C
AUTOMATIC OPERATION
Activation
When you press button A, the
automatic mode automatically and
simultaneously controls the air
flow and air distribution for the
rear air conditioning.
The warning lamp on button A
lights up.
It is recommended to keep both air
vents open.
If you press buttons B or D you
increase or decrease the flow for
the rear air conditioning.
The number of diode(s) lit up,
composing the symbol for air flow
(helix, situated between buttons B
and D) expresses its power level.
To deactivate the air flow and air
distribution for the rear air conditioning, press successively on button D so that all the diodes go out.
DISTRIBUTION
WELLS/HEADS
TO
81
III
FOOT-
Successive presses on button C
will modify the distribution of the air
flow.
Three directions are available :
• Passengers' heads.
• Passenger footwells.
• Passengers' heads and footwells.
The arrow lit up indicates the distribution of air chosen manually. In
« AUTO » mode, no arrow lights
up.
ADJUSTMENT OF THE FLOW
OF AIR INTO THE STORAGE
UNDER THE FRONT CENTRAL ARMREST
If you choose a maximum flow of
air in the rear by pressing B and
distribution towards passenger's
heads by pressing C, having closed
the rear air vents, you will obtain a
maximum flow of air into the storage beneath the armrest.
The temperature of the air distributed in the rear of the cabin
depends on that chosen for the front. The air flow and air
distribution in the rear of the cabin are influenced by the
adjustments made for the front.
Anglais_indexe.indd Sec1:81
06/10/2005 14:12:07
III
82
R E A R S E AT S
C
D
REAR HEAD RESTRAINTS
The rear head restraints have two
positions :
• A stowed position for when the
seat is not occupied.
• A deployed position for safety of
passengers, locking into place
including for a forward-facing
child seat.
To lower the head retraints, press
on the tab at the base.
To raise them, pull them upwards
to their maximum height, pressing
the unlocking button.
CONTROLS FOR HEATED
SEATS IN A BENCHSEAT
CONTROLS
FOR
PACK
LOUNGE HEATED SEATS
The rear seats can be heated independently of each other.
Use the controls C located under
the rear storage tray to activate the
heating.
The Pack Lounge seats can be
heated independently of each
other.
Use the controls D located on the
outside of the seats to select any
of three heating levels :
0
1
2
3
: Off.
: Slight heat.
: Medium heat.
: Maximum heat.
The seat temperature adjusts automatically.
Note : The heated seats only operate when the engine is running.
Anglais_indexe.indd Sec1:82
06/10/2005 14:12:09
R E A R S E AT S
83
III
1
2
FOLDING BENCHSEAT
The whole or just part of the benchseat can be folded. It is necessary to
remove the head restraints.
Seat cushion
Use the strap to lift the seat cushion, then rest it against the front seat backrests. When repositioning the seat cushion, make sure that the seat belt
buckles are correctly in place.
Anglais_indexe.indd Sec1:83
FLAP FOR TRANSPORT OF
LONG OBJECTS
A flap in the backrest, located to
the rear of the armrest, facilitates
the carrying of long objects.
Before installing any long objects,
fold the interior blind and then
make sure that the loads are properly secured, not obstructing the
movements of the gear lever.
This flap can be concealed by
means of a foldable cover with a
tab.
06/10/2005 14:12:13
III
R E A R S E AT S
84
A
B
LOCKING/UNLOCKING OF THE ACCESS INTO THE BOOT VIA
THE REAR BENCHSEAT
Seat cushion folded.
Stow the head restraints.
Press the control A located at the
end of the backrest and fully tilt forwards.
The benchseat backrest can be
folded in two sections. When you
reposition the backrest, make sure
that it locks in place.
Your vehicle's boot can be kept isolated from the passenger compartment.
To lock the access to the boot :
1.Place the benchseat in its correct position.
The red warning lamp on control A should no longer be visible.
2.Insert the ignition key in the
lock.
3.Lock it.
C
REAR CENTRAL SEAT BELT
Insert the first fastening C into the
front left hand(black) buckle, then
insert the second fastening B into
the front right hand buckle.
Before moving the seats
So as to avoid damaging the seat belts by jamming them, take care
to keep them to the sides of the backrest.
Anglais_indexe.indd Sec1:84
06/10/2005 14:12:15
PA C K L O U N G E S E AT S
85
III
A
B
ANGLE OF THE REAR LATERAL HEAD RESTRAINTS
ADJUSTING THE SEAT AND
ITS BACKREST
To alter the angle of the rear lateral
head restraints, lift them then tilt
them upwards.
You can adjust the longitudinal
position of the seat and the angle
of its backrest simultaneously using
the control A.
IMPORTANT
Pack Lounge seats cannot be
folded.
Remark : Use of the child safety
deactivates button A. See « Windows ».
Anglais_indexe.indd Sec1:85
LONGITUDINAL
ADJUSTMENT OF THE
FRONT PASSENGER'S
SEAT
For more room for the rear passenger, it is possible for the front passenger's seat to be slid forward
from the rear seat position.
To slide the front passenger's seat
forward, press on the control B at
the centre of the armrest.
Remark : This control B is not
active if adjustments are being
made simultaneusly at the front.
The front passenger's seat will
slide forward for as long as you
keep control B pressed. It stops
immediately you release control B.
Remark : Use of the child safety
deactivates button B. See « Windows ».
06/10/2005 14:12:17
III
AIRBAGS
86
AIRBAG EQUIPMENT
Your vehicle has :
• A driver's front airbag.
• A driver's knees airbag.
• A front passenger's airbag
which can be deactivated.
• Front lateral airbags.
• Front and rear curtain airbags.
• Rear lateral airbags.
Deployment of your airbags is
dependent on the degree of violence of the collision.
REACTIVATING THE FRONT
PASSENGER'S AIRBAG
A
FRONT PASSENGER'S AIRBAG DEACTIVATION
In order to be able to use a rear-facing child seat in the front passenger's seat position, it is imperative to
deactivate the passenger's airbag.
For that :
• With the ignition switched off,
insert the key into the switch A.
• Turn the key to the « OFF »
position, the passenger's airbag is deactivated.
The front passenger's airbag
deactivation warning lamp, in
the instrument panel, lights up
when you switch on the ignition.
Do not forget to reactivate the function.
For that : .
• With the ignition switched off,
insert the key into the switch A.
• Turn the key to the « ON » position, the airbag is activated.
The warning lamp in the instrument panel lights up for a few
seconds when you switch on
the ignition.
Should there be an airbag malfunction, the SERVICE warning
lamp comes on accompanied by a
message and a sound signal.
Note : It is compulsory to wear the
seat belt.
Never deactivate the passenger's
airbag when a passeger is present
(unless a child in a rear-facig child
seat).
In the front passenger's seat position, it is imperative to deactivate the front passenger's airbag if
you are installing a « rear-facing child seat » there. Otherwise the child risks being killed or seriously
injured should the airbag deploy.
Anglais_indexe.indd Sec1:86
06/10/2005 14:12:21
CHILD RESTRAINTS
CHILD SEATS SECURED BY
MEANS OF THE VEHICLE
SEAT BELT
In conformity with Directive 2000/3,
the table tells you to what extent
each of the seat positions in your
vehicle may take a child seat that
is secured by means of the vehicle
seat belt and approved as « Universal » as a function of the weight
of the child.
Consult « User Precautions »,
chapter on « Child Safety » at the
end of this handbook, in order
to ensure that you are installing
your child in conditions of maximum safety.
87
III
Weight of child
Seat position(s)
Front passenger’s (a)
Up to 10 kg
and up to 13
kg (groups 0
and 0+)
9 - 18 kg
(group 1)
15 - 25 kg
(group 2)
22 - 36 kg
(group 3)
U(R)
U(R)
U(R)
U(R)
Lateral rear
U
U
U
U
Central rear
L1, L2
X
L4
L4
U : Seat position suitable for the installation of a universal rear-facing child
seat and a universal forward-facing child seat position.
U (R) : Seat position suitable for installation of a universal rear-facing child
seat and of a forward-facing seat. The vehicle seat should be adjusted to the
highest position.
(a) : In the front passenger's seat position, it is imperative to deactivate the
front passenger's airbag if you are installing a « rear-facing child seat »
there. Otherwise the child risks being killed or seriously injured should the
airbag deploy.
Before placing your child in the front passenger’s seat position, consult the
legislation currently in force in your country on the carrying of children in this
position.
L- : Only the child seats indicated may be installed in the seat position concerned (depending on country). See « Child seats ».
X : Position not suitable for installation of a child seat of the weight group
indicated.
In the front passenger's seat position, it is imperative to deactivate the front passenger's airbag if
you are installing a « rear-facing child seat » there. Otherwise the child risks being killed or seriously
injured should the airbag deploy.
Take care to comply with the fitting instructions given in the child seat manufacturer’s installation
guide.
Anglais_indexe.indd Sec1:87
06/10/2005 14:12:22
III
CHILD RESTRAINTS
88
c
a
a
b
b
Pack Lounge seats
Conventional benchseat
ISOFIX ANCHORING POINTS
AND THE ISOFIX FASTENING SYSTEM
The ISOFIX fastening system
The ISOFIX child seat fastening system
The ISOFIX system features 3
rings for each lateral rear seat
position :
• Two bottom rings a and b
located between the backrest
and the seat cushion. These
are about 28 cm apart, concealed in the case of a benchseat under a flap with the logo
ISOFIX.
• One top ring c fixed on the rear
shelf, concealed under a flap
with the logo TOP TETHER
behind the head restraint.
ISOFIX child seats have two
latches which are easy to secure
on the two bottom rings a and b.
Some ISOFIX child seats also have
a top belt which is for attaching on
the ISOFIX top ring c.
To attach the top belt, raise the
head restraint of the vehicle seat,
then pass the buckle between the
two supports. Next fix the buckle
on the top ring c and tension the
top belt.
This fixing system is intended for
children weighing up to 18 kg.
The ISOFIX child seats rhat can be
installed in your vehicle are given
in the table opposite.
Your vehicle is type-approved
according to new ISOFIX directives. The lateral rear seats of your
vehicle are each equipped with regulation ISOFIX anchoring points.
Incorrect installation of a child seat
in a vehicle compromises protection of the child in the event of a collision. The ISOFIX system enables
you to minimise the risks posed by
incorrect fitting. The ISOFIX fastening system gives you a convenient,
strong and reliable fitting for a child
seat in your vehicle.
Anglais_indexe.indd Sec1:88
06/10/2005 14:12:22
CHILD RESTRAINTS
89
TABLE SUMMARISING THE INSTALLATION OF ISOFIX CHILD
SEATS
ISOFIX CHILD SEAT
RECOMMENDED
In compliance with European legislation (ECE 16), this table indicates which
of the ISOFIX child seats can be installed in seat positions in your vehicle
that are equipped with ISOFIX anchoring points.
For ISOFIX universal and semi-universal child seats, the ISOFIX size class,
defined by a letter from A to G, is shown on the child seat to the right of the
ISOFIX logo.
To install an ISOFIX child seat in an Pack Lounge seat position you
have to adjust the vehicle seat as far forward as possible. Once the
ISOFIX child seat is attached, it is then possible to recline the Pack
Lounge seat.
The ISOFIX child seat recommended for your vehicle is the
RÖMER Duo ISOFIX. It is marketed by the CITROËN network.
It is equipped with a top belt and so
is approved as an « ISOFIX universal » child seat, size class B1. It is
essential to use the top belt.
This ISOFIX child seat can also be
installed in seat positions that are
not equipped with ISOFIX anchoring points. In this case, it is compulsory to secure it to the vehicle seat
by means of the vehicle seat belt.
Weight of child/Age given as a guide
Type
of
child seat
Up to 10 kg
(group 0)
Up to around
6 months
Up to 10 kg
and up to 13
kg (groups 0
and 0+)
Up to around 1
year old
Shell
« Rear-facing »
ISOFIX
ISOFIX size class
F
G
C
D
E
9 - 18 kg (group 1)
From approx. 1 to 3 years
« Rearfacing »
C
D
« Forwardfacing »
A
B
B1
ISOFIX uniISOFIX
versal and
lateral
semi-unirear seats versal child
-
IL-SU
IL-SU
IUF
IL-SU
seats
IUF : Seat position suitable for installation of an ISOFIX universal child seat. ISOFIX « forward-facing » child seats equipped with a top belt for attaching on the top ring in the vehicle's ISOFIX seat
positions.
IL-SU : Seat position suitable for installation of an ISOFIX semi-universal child seat. ISOFIX « forward-facing » child seats equipped with a bar, ISOFIX « rear-facing » child seats, or ISOFIX shell
seats equipped with either a top belt or a bar.
Anglais_indexe.indd Sec1:89
III
In the front passenger's
seat position, it is
imperative to deactivate
the front passenger's
airbag if you are installing
a « rear-facing child seat »
there. Otherwise the child risks
being killed or seriously injured
should the airbag deploy.
Take care to comply with the
fitting instructions given in
the child seat manufacturer’s
installation guide.
06/10/2005 14:12:26
III
90
S U S P E N S I O N W I T H E L E C T R O N I C A L LY
C O N T RO L L E D S P R I N G I N G A N D DA M P I N G
Normal mode : This functioning mode filters the unevenness of the road
surface with the suppleness of the damping to produce a superlative ride.
Sport mode : a press on button A gives you a suspension that is more
adapted to a sporty style of driving. This functioning mode makes the damping firmer, for enhanced control of the vehicle body movements.
This symbol displays on your instrument panel.
SIGNALLING
A
Active suspension with piloted
damping and flexibility automatically and instantaneously adjusts
the dampers to your driving style,
as well as to the condition of the
road surface, this to achieve the
maximum comfort for you and your
passengers, as well as improved
roadholding.
Anglais_indexe.indd Sec1:90
• In the standard situation, button A is not lit up by day, it only illuminates
at night.
• In sport mode, after you press button A, the latter lights up in orange,
day or night.
Sport mode is not retained when you stop the engine.
If there is a malfunction, the SERVICE warning lamp comes on accompanied by a message and a sound signal. Contact a CITROËN dealer.
06/10/2005 14:12:26
GROUND CLEARANCE ADJUSTMENT
91
III
Maximum height
Changing a wheel.
Intermediate position
Position changes may only be
made when the engine is running.
The ground clearance is adjusted
automatically. You can however
modify the vehicle height in certain
specific cases.
For an increased ground clearance.
For use on difficult roads when travelling at reduced speed, as well as
on carpark ramps.
Normal road position
To change the position
Press once on one of the adjustment controls. The change of position is indicated at the start of the
adjustment by :
• A message or
• Temporary display of the initial
position with the symbol for the
position requested.
Note : You are recommended to
avoid any changing of position
while you have your foot on the
brake.
Viewing of the position of
the vehicle
On completion of the adjustment
you see either a message or an
illustration of the position attained
by the vehicle, with the appropriate
Anglais_indexe.indd Sec1:91
Minimum height
To facilitate loading or unloadng the
vehicle.
For workshop inspections.
Not to be used in normal driving.
For your safety if you are operating underneath the vehicle, it
is obligatory to support the vehicle with axle stands.
Display of the position requested confirms the completion of
the adjustment.
06/10/2005 14:12:28
III
92
GROUND CLEARANCE ADJUSTMENT
AUTOMATIC CORRECTION OF GROUND CLEARANCE
Your vehicle has active suspension with variable damping which is electronically controlled. This automatically regulates the ground clearance according to the vehicle speed and the road surface conditions.
Limits on access to the positions
Maximum height :
Impossible if speed > 10 km / h.
Intermediate position :
Impossible if speed > 40 km / h.
Normal road position : Always
permitted.
Minimum height :
Impossible if speed > 10 km / h.
Note : If the speed authorised for a
particular position is exceeded, the
vehicle reverts automatically to the
normal road position.
Anglais_indexe.indd Sec1:92
Signalling of a requested
position not authorised
On the display :
The display indicates for a short
time, via a message or by hatching
on the requested position, that the
adjustment is impossible.
The vehicle remains in the position
that is authorised and the display
confirms this position.
Automatic variation of ground
clearance
your
speed
• If
exceeds 110 km / h, on a good
road, the ground clearance is
lowered.
The vehicle reverts to the normal road position if the road
deteriorates or if your speed
comes below 90 km/h.
• When the vehicle is stationary
the ground clearance is lowered
to the parking position.
Note : If there is a malfunction, a
message is displayed accompanied by a sound signal and lighting
of the SERVICE warning lamp.
06/10/2005 14:12:30
INTERIOR LIGHTING
Automatic lighting
interior lamps
1
2
2
2
2
of
Rear
INTERIOR LAMPS
2. Spotlamps
1. Interior lamps
A press on button 1 of the front
interior lamp, switches the interior
lamps on or off.
Switching on and off is progressive
after an action on the remote control, but immediate after a press on
button 1.
Anglais_indexe.indd Sec1:93
A press on one of the buttons 2
switches the corresponding spotlamp on or off.
These only work when the ignition
is switched on.
the
• They come on when you remove
the ignition key, unlock the vehicle or open a door.
• They go out progressively when
the doors are closed, the vehicle
locked or the ignition switched
on.
Deactivation/Activation
automatic lighting
Front
III
93
of
A long press on button 1, deactivates the operaton of the inerior
lamps. To reactivate them, press
on the same button.
Changing bulbs
• To change a front interior lamp
bulb : Detach the transparent
screen. Use a bulb W 5 W.
• To change a rear interior lamp
bulb : Detach the two surrounds
of the transparent screen and
pull it away. Use a bulb W 5 W.
06/10/2005 14:12:30
III
INTERIOR LIGHTING
94
LATERAL AMBIANCE LIGHTING
This is in the zone designated by
the arrows.
PAVEMENT LIGHTING
FLOOR LIGHTING
With the door open, this lights up
the ground next to the vehicle.
In the front and the rear of the vehicle, when a door is opened, this
lights up the interior of the vehicle.
Changing the bulb
To change the bulb for the door sill
lighting : Detach the cover. Use a
bulb W 5 W.
Changing the bulb
To change the bulb for the floor
lighting (front or rear) : Detach the
cover. Use a bulb W 5 W.
C
D
Adjustments
With the vehicle lamps on, press
on buttons C or D to change the
brightness of the lateral ambiance
lighting.
Rear
Anglais_indexe.indd Sec1:94
06/10/2005 14:12:32
INTERIOR COMFORT
A
95
III
B
C
GLOVEBOX
CUP-HOLDERS
DRIVER'S ODDMENTS TRAY
To open the glovebox, pull on the
handle and lower the lid.
The glovebox has three sockets A
for connecting audio/video equipment.
To deploy the cup-holders, press
on button C.
To open the driver's oddments tray,
pull the handle towards you.
Changing the bulb
To change the bulb in the glovebox
lamp, detach the cover B, use a
bulb W 5 W.
While the vehicle is moving :
• The glovebox should remain closed.
• The cup-holders should remain stowed
Anglais_indexe.indd Sec1:95
06/10/2005 14:12:37
III
96
INTERIOR COMFORT
FRONT CENTRAL
ODDMENTS TRAY
To open, press on the chrome of
the central oddments tray.
Anglais_indexe.indd Sec1:96
REAR STORAGE
SEAT POCKETS
To open the storage tray, pull at the
centre of the drawer.
There are pockets on the rear of
the front seat backrests.
06/10/2005 14:12:43
INTERIOR COMFORT
97
CIGAR-LIGHTER
Rear cigar-lighter
Driver's floor mat
Front cigar-lighter
The two rear cigar-lighters are on
the central console below the air
vents.
If taking out the floor mat on the
driver's side, slide the seat rearwards as far as it will go and
remove the fixings.
When refitting, position the floor
mat correctly on the pins, then
attach the fixings. Check that it is
securely retained.
To avoid your feet becoming
jammed under the pedals :
• Use only a floor mat that is
suited to the fixings, already
present in the vehicle.
The use of these fixings is
essential.
• Never fit more than one floor
mat superimposed.
The front cigar-lighter is on the
central console.
Operation
The cigar lighter operates when
the ignition is on.
Push in and wait a few moments.
The cigar lighter will release automatically : gradually emerging for
easy removal.
Note : The cigar lighter makes use
of the 12 V accessory socket.
Anglais_indexe.indd Sec1:97
III
06/10/2005 14:12:46
III
98
INTERIOR COMFORT
ASHTRAY
Lateral ashtrays
To open it, press the flap at the
centre.
To empty the ashtray, pull the
assembly towards you.
Each passenger door has a lateral
ashtray.
To open, lift the ashtray lid.
To empty a lateral ashtray, after
opening, pull the inner section
upwards.
Refitting
Refitting
Reposition the ashtray in its housing, then press home.
Reposition the assembly
housing, then press home.
Central front ashtray
Anglais_indexe.indd Sec1:98
in
its
06/10/2005 14:12:50
INTERIOR COMFORT
A
B
99
III
C
D
FRONT ARMREST
The armrest gives you extra comfort in your driving position.
To optimise your driving position,
lift the control B and push the armrest forwards.
The armrest returns to its initial
position when you push it rearwards.
Storage areas
Two formats of stroage are available :
• To have big storage in the armrest, lift the control C.
• For small storage in the armrest, lift the control A.
Ventilation of the big storage
in the front armrest
HALF-MOON
STORAGE
COMPARTMENTS
The armrest has a ventilation duct
for the big storage.
This benefits from the air conditioning at a temperature identical
to the setting for the front of the
cabin area. To adjust the air conditioning flow, see « Rear automatic
air conditioning ».
The ventilation duct can be blocked
manually.
Each of the doors has half-moon
storage pockets in three compartments.
To access the half-moon storage,
push the recess D downwards.
For automatic closing of this storage, press again on the recess D.
Anglais_indexe.indd Sec1:99
06/10/2005 14:12:52
III
100
INTERIOR COMFORT
SUN VISOR
REAR BLIND
BADGE READER
To prevent dazzle from ahead, fold
the visor downwards.
The visors can be disengaged from
their central fixing and pivoted over
to the side windows if required.
Take the blind by its grip and unroll
it.
Engage the blind on the fixings on
each side of the third stoplamp.
The athermic windscreen has a
darkened area above the level of
the interior rear view mirror, to permit the optical registering of access
permits (e.g. motorway toll cards).
SUN VISOR WITH ILLUMINATED MIRROR
Illuminates automatically on opening the mirror cover flap (ignition
on).
CARD-HOLDER
This is situated above the sun
visor.
GRAB HANDLES
HOOKS
Anglais_indexe.indd Sec1:100
-
COAT
06/10/2005 14:12:56
B O OT
101
III
3
2
4
5
6
1
4
1 Pull strap (spare wheel stowage).
2 Boot lamp.
To change the bulb, detach the cover and use a bulb W 5 W.
3 Elastic straps.
4 12 V accessories socket (functions with the ignition switched on).
5 Boot lateral net.
6 Changer for 6 CDs.
Anglais_indexe.indd Sec1:101
06/10/2005 14:12:59
III
102
SUN ROOF
ANTI-PINCH
1
Glass sun roof
The sun roof is operated by the
electrical control A.
An action to the first notch of the
control starts a movement which
stops as soon as you release the
control.
An action to the second notch of
the control opens or closes the sun
roof fully. A further action stops the
movement.
Anglais_indexe.indd Sec1:102
An anti-pinch device is present to stop the sun roof from sliding shut. If it
meets an obstacle it slides in the opposite direction.
After a battery disconnection or if there has been a malfunction, you have to
re-initialise the anti-pinch function.
To do that, action the control A to the second notch to make the sun roof
open fully, then keep the control A pressed for at least 1 seconds.
Warning : During this manœuvre, the anti-pinch does not operate.
Your vehicle's sun roof has a manuallyoperated blind.
Always remove the ignition key when leaving the vehicle, even
if for a short time.
In the event of anything being caught by the sun roof closing,
you must reverse the roof movement.
To do that, reverse the position of the control concerned.
When the driver is operating the sun roof, he or she must always
make sure that the passengers are not preventing it from closing
properly.
The driver must ensure that passengers use the sun roof control
correctly.
PAY ESPECIAL ATTENTION TO WHERE CHILDREN ARE WHEN
OPERATING THE SUN ROOF.
06/10/2005 14:13:03
OPENING THE BONNET
103
IV
A
This operation should only
be performed while the vehicle is stationary.
Lift the lever A located under the bonnet close to the centre, then pull.
To release the bonnet, pull the control located under the dashboard
towards you.
Lower the bonnet carefully, then let it drop shut.
To close
Check that the bonnet is properly secured.
Anglais_indexe.indd Sec1:103
06/10/2005 14:13:05
IV
LEVELS
104
Refer to the chapter : User Precautions.
A
Air filter
Follow the requirements
set out in the Maintenance
Guide.
Windscreen/rear
screen
wash
and
headlamp wash fluid
Use CITROËN-approved
products wherever possible.
Capacity : See « Capacities ».
B
Engine coolant
The fluid level should be
between the marks MIN.
and MAX. on the header
tank.
Engine hot, wait at least 15 minutes.
Quality :
See
« Maintenance
Guide ».
Never do anything relating to
the cooling system of an engine
that is hot.
Poles « + » and « - » for
starting with a slave battery
See « Starting with a slave
battery ».
C
Anglais_indexe.indd Sec1:104
D
Engine oil
Check the engine oil level
on horizontal ground with
the engine having been
switched off for at least 15 minutes.
Quality :
See
« Maintenance
Guide ».
Pull out the manual dipstick.
The
level
should
be
between the marks MIN.
and MAX. on the gauge.
It must never exceed the
maximum.
Brake fluid
The level of fluid should be
between the marks MIN.
and MAX. on the reservoir.
Quality :
See
« Maintenance
Guide ».
If the warning lamp comes
on while you are driving, stop
immediately and contact a CITROËN dealer.
Power steering
suspension oil
and
For topping up, it is necessary to go to a CITROËN
dealer.
Quality :
Guide ».
See
« Maintenance
MAX.
MIN.
• If opening the bonnet when the engine is hot, even if it is
stopped and the ignition is switched off, remember that
the cooling fan may operate at any moment.
• Between routine servicing visits, check the level of engine
oil frequently as well as before going on a long journey.
06/10/2005 14:13:08
V6 ENGINE
105
IV
D
A
B
C
Anglais_indexe.indd Sec1:105
06/10/2005 14:13:08
IV
106
V6 HDi ENGINE
D
B
A
C
The diesel fuel circuit being
under high pressure :
ANY INTERVENTION ON THE
CIRCUIT IS PROHIBITED.
Anglais_indexe.indd Sec1:106
HDi engines are the result of advanced technology.
Any intervention requires special qualifications which only a
CITROËN dealer can guarantee.
06/10/2005 14:13:11
LEVELS
D
107
IV
B
1
1
TOPPING UP ENGINE OIL
Before filling, pull out the dipstick.
Check the dipstick after filling.
It must never exceed the maximum.
Screw the cap back on and close
the bonnet.
Quality :
See
« Maintenance
Guide ».
RADIATOR
FLUID
–
COOLANT
Checking the level and topping up
with fluid must always be done with
the engine cold.
Engine hot
Wait 15 minutes or for the temperature to be lower than 100°C and
then carefully unscrew the cap so
as to allow the pressure to drop,
protecting yourself with, say, a
cloth.
Topping up the coolant
The level of coolant 1 should be
between the MIN. and MAX. markings on the header tank.
Top up the level. If you have to
put in more than 1 litre, have the
cooling system checked by a CITROËN dealer.
Make sure that the cap is back
on properly.
Note : If you need to top up the
fluid frequently, this indicates a
malfunction which you should get
checked at the earliest opportunity.
Note : The cooling fan may operate for around 10 minutes after the
engine has stopped.
Quality :
See
« Maintenance
Guide ».
If opening the bonnet when the engine is hot, even if it is
stopped and the ignition is switched off, remember that the
cooling fan may operate at any moment.
Anglais_indexe.indd Sec1:107
06/10/2005 14:13:12
IV
1 2 V B AT T E R Y
108
D
C
B
A
BATTERY
ACCESS
LOCATION
AND
The battery is located in the boot
under the left hand wing trim.To
access the battery, rotate the pin
on the flap by a 1/4.
CHANGING THE BATTERY (Contact a CITROËN dealer).
1. Release the two pins on each side at the back of the boot, and remove
the boot floor.
2. On each side trim, release the two fixing pins A.
3. Undo the two screws B on each side and remove the sill embellisher.
4. On the side trim close to the battery, release the pin D.
5. Separate the side trim close to the battery, pulling hard to free the other
fixing points.
6. unclip the boot lamp C.
7. Disconnect both battery terminals.
8. Release the battery from its support.
9. Remove the battery.
Before changing or repairing the battery, open all four windows.
If you have to unlock your vehicle with the key because of a problem with the battery, any opening/
closing of a door with the window closed may seriously damage the glass to the point of breaking
it.
Anglais_indexe.indd Sec1:108
06/10/2005 14:13:15
1 2 V B AT T E R Y
109
IV
STARTING THE ENGINE AFTER DISCONNECTING AND RECONNECTING THE BATTERY
1. Turn the ignition key.
2. Wait approximately 1 minute before operating the starter in order to allow the electronic systems to re-initialise.
After the battery has been disconnected for a lengthy period of time, it may be necessary to re-initialise the following
functions :
• The anti-pinch on the windows.
• The anti-pinch on the sun roof.
• The multifunction display parameters (date, time, language, units of distance and of temperature).
• The Radio stations.
• The NaviDrive. See NaviDrive instructions.
IMPORTANT
In the event of a battery failure, and if the boot is closed, it is then necessary to feed an electrical supply to your
vehicle. See following page.
Anglais_indexe.indd Sec1:109
06/10/2005 14:13:17
IV
1 2 V B AT T E R Y
110
A Pole « + » on the vehicle being assisted (under the
red cover).
B Assisting battery.
C Pole « – » on the assisted vehicle (under the bonnet).
Check that the leads are well secured (risk of sparks).
Start the engine of the assisting vehicle.Let the engine
run for around 1 minute at a slightly accelerated idle.
Operate the starter on the vehicle being assisted.
It is essential to follow the indicated sequence correctly.
A
C
B
STARTING THE ENGINE WITH AN ASSISTING
BATTERY
If the battery is discharged, it is possible to use either
a separate emergency battery or a battery on another
vehicle.
If you use the battery on another vehicle, stop the
engine on the latter. The two vehicles must not come
into direct contact with each other.
Check that the assisting battery has sufficient voltage
(12 V).
Connect the cables according to the order indicated in
the diagram.
ADVICE
Do not touch the leads during the operation.
Do not lean over the batteries.
Disconnect the cables in reverse order, making sure
they do not touch together.
Never approach with a flame or create sparks in the vicinity of the battery (explosive gas).
The battery contains dilute sulphuric acid which is highly corrosive.
When handling batteries, always protect your face and especially your eyes.
In the event of any contact with the skin, rinse immediately with copious amounts of fresh water.
Anglais_indexe.indd Sec1:110
06/10/2005 14:13:17
FUSES
111
IV
DA S H B OA R D
G39
G40
G37
G38
G36
G35
G34
G33
G32
Dashboard fuses
G31
Box B
G30
There are two fuseboxes under the dashboard, one in
the engine compartment and another in the boot under
the left hand wing trim.
G29
FUSEBOXES
To access the fuses under the dashboard (on the left),
open the storage cover then push the lid to the right.
This descends. To access the fuses, pull back the trim.
REPLACING A FUSE
Good
Bad
Pliers A
Replacement fuses
and pliers A
Before replacing a fuse, you should ascertain the cause
of the fault and have it remedied. The numbers of the
fuses are indicated on the fusebox.
Replace the fuse that has blown with one of the
same rating (same colour).
Use the special pliers A placed on the flap close to the
fuseboxes. The flap also has spare fuses available.
Box C
F11
F2
SH
F9
F6
F5
F1
F7
F17
F4
F3 F10 F8
F13 F12 F14
F15
Anglais_indexe.indd Sec1:111
06/10/2005 14:13:19
IV
TA B L E O F F U S E S
112
DASHBOARD FUSES (BOX B)
Ref.
Rating
G 29
5A
Deflation detection
G 30
5A
Diagnostic socket
G 31
–
G 32
25 A
Amplifier
G 33
10 A
Hydraulic system
G 34
15 A
Automatic gearbox
G 35
15 A
Front passenger’s heated seat
G 36
15 A
Driver’s heated seat
G 37
–
G 38
30 A
G 39
–
G 40
30 A
Anglais_indexe.indd Sec1:112
Function
–
–
Central locking
–
Memorisation
06/10/2005 14:13:21
TA B L E O F F U S E S
113
IV
DASHBOARD FUSES (BOX C)
Ref.
Rating
Function
F1
–
–
F2
–
–
F3
5A
Airbags
F4
10 A
Braking system – Active bonnet – Diesel fuel additive system – Steering angle sensor – Cruise contol / speed
limiter – Photochromic rear view mirror
F5
30 A
Front window – Sun roof
F6
30 A
Rear window
F7
5A
Sun visor lighting – Glove box lighting – Interior lamps – Rear cigar-lighter
F8
20 A
Controls at the steering wheel – Display – Opening of windows – Alarm – Deflation detection – Changer for 6 CDs
F9
30 A
Front cigar-lighter
F 10
15 A
Boot relay unit
F 11
15 A
Steering lock
F 12
15 A
Driver’s and front passenger’s seat belt warning lamp – Rain and brightness sensor – Opening of windows –
Memorisation – Parking assistance – Front window – Audio system JBL
F 13
5A
Active bonnet
F 14
15 A
Lane Departure Warning System – Air conditioning – Instrument panel – Head-up display – Airbags – Bluetooth
Central locking – Child safety
F 15
30 A
F 16
SHUNT
F 17
40 A
Anglais_indexe.indd Sec1:113
–
Ventilation
06/10/2005 14:13:21
IV
114
FUSES
UNDER THE BONNET
1
10
2
3
5
4
6
7
8
9
11
12
13
14
FUSEBOX
To access the fusebox in the engine
compartment, undo each screw a
1/4 turn.
After a repair, take care to reclose
the cover.
Any repairs on the MAXI fuses (that give additional protection),
located in the fuseboxes, must be left to a CITROËN dealer.
Anglais_indexe.indd Sec1:114
06/10/2005 14:13:21
TA B L E O F F U S E S
115
IV
FUSES UNDER THE BONNET
Ref.
Rating
F1
20 A
Engine ECU – Cooling fan
F2
15 A
Horn
F3
10 A
Screen wash pump
F4
20 A
Headlamp wash
F5
15 A
Fuel pump (petrol) – Preheating – Injection (Diesel)
F6
10 A
Braking system
F7
10 A
Automatic gearbox
F8
15 A
Starter
F9
10 A
Active bonnet – Xenon dual function directional headlamps
F 10
30 A
Injectors – Ignition coil – Electrovalves (petrol) – Engine ECU – Fuel supply (Diesel)
F 11
40 A
Air conditioning
F 12
30 A
Windscreen wiper
F 13
40 A
BSI
F 14
–
Anglais_indexe.indd Sec1:115
Function
06/10/2005 14:13:22
IV
116
F U S E S I N T H E B O OT
1
2
3
4
5
G36
G37
G38
G39
G40
FUSEBOX
To access the fusebox located
under the left hand wing trim :
1. Move aside the trim on the LH
side.See « 12V battery : Changing the battery ».
2. Move aside the electrical cables
connecting to the fusebox.
3. Open the fusebox.
Anglais_indexe.indd Sec1:116
Ref.
Rating
Function
F1
15 A
Fuel flap
F4
15 A
Speed-sensitive rear spoiler (deflector)
F5
40 A
Heated rear screen
G 36
15 A / 25 A
LH Lounge Pack heated seat / Benchseat
G 37
15 A / 25 A
RH Lounge Pack heated seat / Benchseat
G 38
30 A
Electrical adjustments for the Lounge Pack seats
G 39
30 A
Cigar-lighter – Rear accessory socket
G 40
25 A
Electric parking brake
F2
F3
06/10/2005 14:13:22
C A PA C I T I E S
117
Capacity of fluid for windscreen wash
and headlamp wash (in litres)
ENGINE TYPE
(1)
(1)
Anglais_indexe.indd Sec1:117
Engine oil capacities (in litres)
IV
6,5
V6
V6 HDi
5,25
5,55
After draining with change of oil filter.
06/10/2005 14:13:23
IV
118
Anglais_indexe.indd Sec1:118
06/10/2005 14:13:23
FUEL
119
V
FUEL QUALITY
A label inside the filler flap tells you
which type of fuel to use.
A
A
While you are refuelling, the
engine must be stopped and the
ignition switched off.
For a petrol engine with a catalytic converter, unleaded fuel is
compulsory.
The filler neck is narrower to ensure
that only unleaded petrol can be
put in.
When you are seeking to fill your
tank, do not persist after the
third cut-off ; that could cause
your vehicle to malfunction.
To open the flap, press button A.
Undo the cap and attach it to the
tab on the inside of the flap.
Note : The fuel flap is locked when
you lock your vehicle with the
remote control.
The petrol engines are designed to
run on RON 95.
However,
for
better
performance (petrol engine), we recommend RON 98
If you should put in fuel that is not suitable for your vehicle's
engine type, it is imperative to have the tank drained before
you start the engine again.
Anglais_indexe.indd Sec1:119
06/10/2005 14:13:24
V
CHANGING BULBS
120
A
B
C
D
E
F
UPPER FRONT LENS
LOWER FRONT LENS
SIDE REPEATER
A Lateral lamp
B Dipped/main beam
C Sidelamp
Note : A light misting may appear
on the headlamp surface in certain
conditions of use.
For maintenance of the front lenses
and for changing of bulbs, contact
a CITROËN dealer. The bulbs for
lamps D and E have a common
bulb-holder.
D Direction indicator
E Daytime-running lamp
F Front foglamp
To change the side repeater, push
it forwards or rearwards to detach it
and contact a CITROËN dealer.
Your headlamps have Xenon bulbs.
Because of risks of electrocution, we advise you to contact a
CITROËN dealer if there is any problem.
It is recommended to change both bulbs at the same time if
there is a failure of one of them.
Your vehicle is equipped with an active bonnet. To be sure that
this safety feature is functioning correctly, contact a CITROËN dealer
for replacement of any of the components on the front panel.
Anglais_indexe.indd Sec1:120
06/10/2005 14:13:28
CHANGING BULBS
121
V
B
A
REAR CENTRAL LENS
A Reversing lamp
B Foglamp
The bulbs for lamps A and B have
a common bulb-holder. Contact a
CITROËN dealer.
To gain access to the bulb-holders, open the boot and undo the
four screws on the bodywork. Then
lower the boot lid in order to be
able to pull out the two rear lamp
units, without pulling on the electric
cables.
Use a tool to detach the bulb-holders and change the bulbs.
Note : The tool for undoing the
screws is to be found in the toolbox
in the spare wheel. See « Changing a wheel ».
After each operation,
check that the lamps
work.
THIRD STOPLAMP
NUMBER PLATE
Contact a CITROËN dealer.
Detach the transparent shield, then
pull out the bulb. Bulb : W 5 W.
Anglais_indexe.indd Sec1:121
06/10/2005 14:13:31
V
CHANGING BULBS
122
D
C
A
B
REAR LATERAL LENS
A Parking lamp.
Bulb : P21 W/5 W cristal.
B Stoplamp and parking lamp.
Bulb : P21 W/5 W.
C Direction indicator.
Bulb : P21 W cristal.
D Lateral lamp.
Bulb : W 5 W.
Anglais_indexe.indd Sec1:122
1.Open the rear LH flap or the two rear RH flaps, by rotating the pins a 1/4
turn.
06/10/2005 14:13:36
CHANGING BULBS
123
V
D
A
C
B
2.Use a tool to detach the two
lugs holding the lens.
4.Replace bulbs that are faulty.
5.Reposition the lens, first inserting the pin furthest forward,
then push.
Make sure that the rear screen
seals and the lamp units are
correctly located.
6.Secure the two lugs.
3.Without touching the seal, disengage the lamp unit upwards
and orient it so that the bulbs
are pointing outwards.
Anglais_indexe.indd Sec1:123
06/10/2005 14:13:40
V
124
S A F E T Y R E C O M M E N D AT I O N S
MAINTENANCE
TOWBAR
if cleaning the vehicle with a high
pressure system :
• Your Piloted Deflector has to be
closed.
• It is not advisable to clean the
underside of the vehicle, for
fear of damaging the electric
parking brake.
• As water may penetrate into
the vehicle interior via the door
apertures, do not target these
areas.
(Boat, caravan, etc.)
It is recommended that you
have your towbar installed and
removed by a CITROËN dealer.
If you are climbing a steep gradient
and the engine gets excessively
hot, certain functions become unavailable (e.g. sequential control of
the automatic gearbox, the air conditioning).
If you are towing, it is necesaary
to deactivate the parking assistance by pressing the control on the
dashboard. See « Parking assistance ».
It is recommended that remove
the towing ball, so that it does not
interfere with the functioning of the
proximity sensors, when you are
not using a trailer.
A
Dimensions (in metres) :
A : 0,971
It is recommended that you have your towbar installed and
removed by a CITROËN dealer.
If you are towing another vehicle, the latter must be freewheeling (gearbox in neutral).
Anglais_indexe.indd Sec1:124
06/10/2005 14:13:44
ROOF BARS
125
V
IMPORTANT
For your safety and to avoid damage to the roof, you should use roof bars that are tested and approved by AUTOMOBILES CITROËN for the design of your particular vehicle.
INSTALLATION
Four fixing points are provided on your vehicle.
Recommendations :
• Spread the load evenly, avoiding overloading on one
side.
• Position the heaviest weight as low down as possible.
• Tie the load down securely and add warning signs if
it is protruding.
• Drive conservatively, as the vehicle will be more vulnerable to side winds.
The stability of your vehicle may be altered.
• Remove the roof rack or roof bars when you are not
using them
Do not exceed the maximum permitted
load.
For the maximum distributed load on the
roof bars : see the chapter « General ».
Anglais_indexe.indd Sec1:125
06/10/2005 14:13:46
V
126
V E RY C O L D P ROT E C T I O N
INSTRUCTIONS FOR FITTING
THE TWO SNOW-GUARDS
Clip the component on the bumper
ribs.
Before fitting
After fitting
The two snow-guards provided with the vehicle (depending
on destination) should be fitted during the winter period and
removed for the summer months.
It is necessary to remove them whenever temperatures rise
above 10°C.
Anglais_indexe.indd Sec1:126
06/10/2005 14:13:49
CHANGING A WHEEL
V
127
TOOLS
The tools are to be found in a protective holder inside the spare
wheel. Pull back the retaining strap
to have access.
1
6
2
7
3
8
ACCESS TO THE SPARE WHEEL
To access the spare wheel
1. Lift the boot floor by means of the strap.
2. Anchor the strap on the roof of the boot.
3. To remove the spare wheel, detach the belt then push the wheel forwards
so as to be able to lift it.
TO REPOSITION THE SPARE WHEEL
To put the spare wheel back in the boot
1. Position the spare wheel flat in the boot, then pull it towards you.
2. Next place the toolbox inside the wheel, then secure the assembly with
the belt.
3. Release the strap to return the boot floor to its initial position
Tyre pressures
Tyre pressures are indicated on the label at the bottom of the centre pillar.
See « Vehicle identification » and « User Precautions ». On this label you
will see a pressure for normal speeds and a pressure for high speeds.
Anglais_indexe.indd Sec1:127
4
9
5
1.Handle
2.Jack
3.Tool for removing/refitting the
wheel bolts
4.Tool for removing the anti-theft
bolt protector
5.Centring guide
6.Tool for removing foglamps and
reversing lamps
7.Handle extension
8.Towing eye
9.Movable chock
06/10/2005 14:13:50
V
128
CHANGING A WHEEL
REMOVAL
1. Park the vehicle on stable, firm ground that is not slippery. Apply the
parking brake.
2. With the engine idling, adjust the ground clearance to maximum height.
See « Comfort » and « Adjusting the ground clearance ». Switch off the
ignition and engage first gear or reverse gear depending on any slope
(for a vehicle with automatic gearbox, select position P).
3. Position the chock at the wheel that is diametrically opposite the one to
be replaced.
4. Position the jack at one of the four jacking-points provided on the subframe close to the wheels, then use the handle to unwind the jack until it
reaches the ground.
5. Slide the removal tool 4 into the notch and lever vigorously to detach the
anti-theft bolt protector. See illustration. You can use the handle at the
extremity of the tool 4.
6. Slacken the wheel bolts.
7. Continue to extend the jack until the wheel is a few centimetres off the
ground.
8. Undo the bolts, remove the wheel.
4
Anglais_indexe.indd Sec1:128
Before positioning the jack, always adjust the vehicle's ground
clearance to the « maximum height » position and retain this
adjustment for as long as the jack is under the vehicle (do not
use the hydraulic adjustements).
Never get underneath the vehicle if it is supported only by the
jack.
The jack and all the tools are designed specifically for use on your
particular vehicle. Do not use them for any other applications.
Have the original wheel repaired and refitted as soon as
possible.
It is imperative not to exceed a speed of 80 km / h on the spare
wheel.
06/10/2005 14:13:55
CHANGING A WHEEL
REFITTING A WHEEL
WHEEL
USE
FOR TEMPORARY
If your vehicle is equipped with a
spare wheel for temporary use
only, when fitting it it is normal to
observe that the wheel bolts do not
come to bear on the wheel rim.
The spare wheel is secured by the
conical tapering of the wheel bolt’s
shaft. See illustration.
When refitting the original wheel,
ensure that the wheel bolt contact
surfaces are clean and in good
condition.
1. Fit the wheel on the hub, using
the centring guide. Make sure
that the contact surface between
the hub and the wheel is clean.
2. Screw in the bolts but do not
fully tighten them.
3. Lower the jack and remove it.
4. Tighten the wheel bolts, using
the wheelbrace.
5. Refit the embellisher.
6. Return
the
ground
clearance to the normal position.
See « Adjusting ground clearance ».
7. Ensure the tyre pressure is correct (see « Vehicle identification ») and have the balancing
checked.
129
V
WHEEL EQUIPPED WITH
DEFLATION
DETECTION
SENSOR
Such wheels have tyre pressure
sensors. It is essential to have
repairs carried out by a CITROËN
dealer.
ANTI-THEFT BOLTS
Each wheel is equipped with one
anti-theft bolt.
To remove it :
1. Remove the protector that is
covering it by means of the
tool 4 for « removing anti-theft
protectors ».
2. Use one of the two anti-theft
sockets, as well as the jack
handle.
It is imperative not to exceed a speed of 80 km / h on the spare
wheel.
The wheel bolts are specific to the type of wheel.
If the type of wheel is changed, check with your CITROËN dealer
that the wheel bolts are compatible with the new wheels.
Note : take care to note down the code number engraved on the
head of the anti-theft bolt socket. This will enable you to obtain
replacement anti-theft bolt sockets from a dealership.
Anglais_indexe.indd Sec1:129
06/10/2005 14:14:00
V
TOW I N G – L I F T I N G
130
ADVICE
Towing at low speed over a very
short distance is authorised in
exceptional cases depending on
the regulations in force.
Otherwise, it is necessary to
have your vehicle transported
on a recovery truck.
It is essential to check that the electric parking brake is released.
REQUIREMENT — TOWING
WITH AUTOMATIC GEARBOX
Place the selector on position N
(neutral).
TOWING WITH WHEELS ON THE GROUND
Towing eyes can be used at the front and at the rear of the vehicle.
Detach the cover :
• For the front cover, lever with a screwdriver at the top of the cover.
• For the rear cover, press on the right hand side.
The ignition key must be in position M to retain steering.
Use a bar with attachments to the towing eyes as above.
The towing eye is removable, to be stowed in the jack protection box inside
the spare wheel.
When the engine is not running, the steering and the braking
are no longer assisted.
If you are towing another vehicle, the latter must be freewheeling (gearbox in neutral).
Anglais_indexe.indd Sec1:130
Towing with « front or rear lifted »
or in the « minimum height »
position is prohibited.
06/10/2005 14:14:00
GENERAL
ENGINE TYPE
131
V6
V6 HDi
Approx. 72 l
Approx. 72 l
Unleaded petrol RON 95 - RON 98
Diesel fuel
15
13
12,43
12,43
230
230
Unladen weight
1816
1871
Fuel tank capacity (in litres)
Fuels to be used
French fiscal rating
Turning circle between walls (in metres)
Calculated maximum speed in km/h (mph)
Weights (kg)
Gross vehicle weight
2271
2335
Maximum weight on rear axle
1050
1050
Gross train weight (MTRA)*
3671
3735
10% < incline ≤ 12%
1400
1400
8% < incline ≤ 10%
1500
1400
incline ≤ 8%
1700
1400
Gross trailer weight (without brakes)
750
750
Trailer nose weight
70
70
Maximum roof rack load
80
80
225/55/R17
245/45/R18
245/45/R18
Gross trailer weight (within the Gross Train Weight limit) (1)
Dimensions of chainable tyres
Anglais_indexe.indd Sec1:131
VI
MTRA : Gross train weight.
Weights : Refer to the manufacturer's plate.
For a vehicle that is towing, the
speed must not exceed 100 km/h
(approx. 60 mph).
Gross trailer weight (with brakes)
can be increased up to :
• (1) 1 700 kg.
Provided you reduce the vehicle
weight so as not to exceed gross
train weight.
Observe your vehicle's towing
limits. It is essential to comply with
the max. Gross Trailer Weights and
speed limits as specified by legislation in each country.
Dimensions of chainable tyres :
All the tyres shown can be fitted
with chains.
For Belgium and Switzerland :
See homologation documents.
06/10/2005 14:14:03
VI
132
FUEL CONSUMPTION IN LITRES/100 KM
(MILES PER GALLON)
These consumption figures are established according to Directive 80/1268/CEE. Fuel consumption can vary depending on style of driving, traffic conditions, weather conditions, vehicle load, how the vehicle has been maintained and
on use of accessories.
ENGINE TYPE
Urban
Extra urban
Combined
CO2 emissions
(1)
(1)
V6
V6 HDi
16,3
12
8,2
6,8
11,2
8,7
266
230
Units in g/km for combined driving.
The fuel consumption figures quoted are correct at time of going to
press.
Anglais_indexe.indd Sec1:132
06/10/2005 14:14:03
DIMENSIONS (IN METRES)
A
2,900
B
1,124
C
0,884
D
4,908
E
1,586
F
2,080
G
1,558
H
1,860
I*
1,464
B
133
A
VI
C
D
I
*Without roof bars.
Anglais_indexe.indd Sec1:133
E
G
F
H
06/10/2005 14:14:03
VI
DIMENSIONS (IN METRES)
134
A
1,115
B
0,904 / 0,974
C
1,150
D
If a benchseat
1,663
E
0,378
F
0,449
F
C
E
D
B
A
Anglais_indexe.indd Sec1:134
06/10/2005 14:14:06
V E H I C L E I D E N T I F I C AT I O N
A
1
2
3
4
5
6
B
C
A
135
VI
A Chassis number plate
On the left hand door centre pillar.
1. EU type approval number.
2. Vehicle identification No. (VIN).
3. Gross vehicle weight.
4. Groos train weight.
5. Maximum weight on front axle.
6. Maximum weight on rear axle.
B Body serial number
C Serial number on dashboard
D Paint colour code
Tyre reference
Tyre pressures
On lower centre pillar.
D
The vehicle type and the identification number are also indicated on the registration document.
All CITROËN original replacement parts are available exclusively within the dealer network.
For your safety and in order to remain within the terms of the guarantee, you are advised to use only CITROËN
replacement parts.
Anglais_indexe.indd Sec1:135
06/10/2005 14:14:08
136
Anglais_indexe.indd Sec1:136
06/10/2005 14:14:10
137
Anglais_indexe.indd Sec1:137
06/10/2005 14:14:10
INDEX
138
ABC
A
ABS .............................................. 62
ABS system .................................. 62
Access ...................................71→73
Access to the boot ........................ 84
Additional heating ......................... 75
Adjusting the front seats ........20→21
Adjustment of rear
seats ............................ 82→84 - 85
Adjustment of the rear view
mirrors ........................................ 25
Advice on driving ............................ X
Air conditioning ....... 32 - 48 - 74→80
Air distribution ............................... 78
Air filter ....................................... 104
Air flow .......................................... 78
Air recirculation – Entry of air
from outside................................ 79
Airbags ............................86 - V→VII
Anti-intrusion alarm ...............37→38
Anti-pinch ............................ 27 - 102
Anti-theft ....................................... 71
Anti-theft bolts ............................ 129
Anti-theft protection ...................... 71
Ashtray ......................................... 97
Automatic gearbox ................56→59
Automatic lighting
of headlamps .............................. 17
Boot ..................................... 73 - 101
Brake fluid .................................. 104
Brakes .......................................... 62
Braking system ............................ XIII
Brightness sensor ......................... 12
C
Capacities ....................................117
Card-holder ................................ 100
Catalytic converter ..................... XVII
Central locking ....................... 33 - 35
Central unlocking .......................... 33
Changing a wheel ..............127→129
Changing batteries ....................... 34
Changing bulbs .................120→123
Changing the battery .................. 108
Checks ....................................... 104
Child restraints ............................. 87
Child safety .......................................
...... 27 - 72→74 - 87→89 - VIII→IX
Child seats .....................87 - VIII→IX
Cigar-lighter .................................. 97
Code card ..................................... 36
Colour screen C ....................45→48
Coolant temperature ..................... 52
Cruise control ........................30→31
Cruise speed .........................30→31
Cup-holders .................................. 95
B
D
Badge reader .............................. 100
Battery replacement ................... 108
Bluetooth ...................................... 45
Bonnet ........................................ 103
Dashboard .................................6→7
Dashboard controls ........................ 7
Date ....................................... 45 - 49
Date adjustment .................... 47 - 49
Anglais_indexe.indd Sec1:138
Daytime-running lamps ................ 18
Deadlocking ........................... 33 - 35
Deflation detection system ......... 129
Diesel particle filter ....................... 64
Diesel preheating .................. 11 - 40
Dimensions ........................ 133 - 134
Diodes ................................... 10→11
Dipped beams .............................. 17
Direction indicators ....................... 16
Driver’s floor mat .......................... 97
Driver’s oddments tray ................. 95
Driving .......................................... 40
Driving position ............................... II
Driving positions .................... 12 - 22
Dust/pollen filter ............................ 75
E
Economy mode ............................ 39
Ejecting the key ............................ 34
Electric parking brake ............60→61
Electrical accessories ............... XVIII
Electronic immobiliser .................. 35
Electronic stability
programme ESP ......................... 63
Emergency braking assistance
system (ABS) ............................. 62
Engine coolant ............................ 104
Engine oil ........................... 104 - 107
Engine oil level indicator ............... 41
ESP .............................................. 63
F
Flap for transport of long objects .. 83
Floor lighting ................................. 94
06/10/2005 14:14:10
INDEX
139
Maintenance intervals .................. 43
Maintenance of
the bodywork ............................ XXI
Maintenance position ................... 15
Maximum speed .................... 28 - 29
Memorisation ................................ 22
Mileage recorder .......................... 43
Multifunction displays .... 45→48 - 49
Foglamp ....................................... 18
Fold-back of door mirrors ............. 25
Folding benchseat ........................ 83
Front armrest ................................ 99
Front central oddments tray ......... 96
Front demisting - deicing .............. 79
Front foglamps ............................. 18
Front passenger’s airbag
deactivation ................................ 86
Front seats ............................20→21
Fuel ..................................... 43 - 119
Fuel consumption in litres/100 km
(miles per gallon) ...................... 132
Fuel gauge ................................... 43
Fuel quality ..................................119
Fuses ................................. 111→116
I
Keys ............................................. 35
Oil gauge .................................... 104
Oil temperature ............................. 52
G
L
P
General ....................................... 131
Glovebox ...................................... 95
Grab handles .............................. 100
Ground clearance
adjustment ...........................91→92
Guide-me-home lighting ........ 17 - 34
Lane Departure Warning System . 68
Levels (engine) ........................... 104
Levels (Temperature) ................. 107
Lighting ..................................17→18
Lighting control stalk ..................... 17
Lighting rheostat ........................... 44
Loads and towing ....................... XVI
Locating of the vehicle .................. 34
Log of alerts .................................. 46
pack lounge seats ........................ 85
Paint colour code ........................ 135
Parking assistance ................ 65 - 66
Pavement lighting ......................... 94
Personalisation/
Configuration .......................46→48
Power steering oil ....................... 104
Puncture ................. 10 - 54 - XI - XV
M
Radiator – coolant fluid ............... 107
Radio ..................................... 45 - 49
Rain detector ................................ 14
Rear automatic air
conditioning ................................ 81
Rear blind ................................... 100
Rear demisting - deicing ............... 79
H
Half-moon storage
compartments............................. 99
Hazard warning lamps .................. 16
Head restraints ............... 20 - 82 - 85
Head-up display ....................12→13
Headlamp flash ............................ 16
Heated seats ................................ 82
Horn .............................................. 16
Anglais_indexe.indd Sec1:139
Ignition .......................................... 39
Indexed position for the rear
view mirrors ................................ 26
Indicators ...................................... 16
Instrument panel ......... 8→9 - 41→44
Interior comfort ......................95→99
Interior lamps ................................ 93
Interior lighting ............... 93→94 - 94
Interior rear view mirror ................ 24
ISOFIX anchoring points .............. 88
ISOFIX child seats ........................ 88
ISOFIX fixings .............................. 88
K
Main beams .................................. 17
Main menu ............................. 45 - 49
Maintenance ... 103 - 104 - 106→107
- 108→110 - 111→116 - 117 - 124
Maintenance (Indicator) ................ 42
Maintenance indicator ...........42→43
ABC
N
NaviDrive ...................................... 49
NaviDrive colour display ............... 49
Night driving ................................. 44
O
R
06/10/2005 14:14:11
INDEX
140
ABC
Rear foglamps .............................. 18
Rear seats .............................82→83
Rear storage ................................. 96
Rear view mirrors ......................... 24
Recycling and
the environment...................... XXIII
Refitting a wheel ......................... 129
Remote control ......................33→34
Removing a wheel ...................... 128
Replacing a fuse ..........................111
Replacing bulbs .................120→123
Reset to zero ................................ 43
Rev counter .................................. 43
Roof bars .................................... 125
Running-in .................................. XIX
S
Safety
recommendations .......124 - XI→XII
Screen wash fluid ....................... 104
Seat belts ...............................23 - IV
Seat belts warning lamp ............... 23
Seat belt height adjustment .......... 19
Seat pockets ................................. 96
Sidelamps ..................................... 17
Signalling ...............................16→18
Snow chains ..................131 - X - XX
Snow-guards .............................. 126
Soft diffusion system ............. 74 - 78
Spare wheel ............................... 127
Speed limiter .........................28→29
Speed-sensitive rear spoiler
(deflector) ................................... 69
Sport mode ................................... 90
Anglais_indexe.indd Sec1:140
Spotlamps .................................... 93
Starter ........................................... 39
Starting ......................................... 39
Starting the engine ....................... 40
Starting the engine with
an assisting battery ...................110
Steering column adjustment ......... 19
Steering lock ................................. 39
STOP ............................................ 10
Sun roof ...................................... 102
Sun visor .................................... 100
Suspension oil ............................ 104
Suspension with electronically
controlled springing and
damping...................................... 90
T
Temperature adjustment .............. 76
Temperature and humidity
sensor..................................74→75
Time ................................ 45 - 47 - 49
Time adjustment .................... 47 - 49
Tools ........................................... 127
Towbar ........................................ 124
Towing ........................................ 124
Towing – Lifting ........................... 130
Trip
computer .......46 - 50→51 - 52→55
Turbochargers .............................. 40
Tyre deflation
detection ..............................53→55
Tyre maintenance ........................ XV
Tyre pressures ........... 127 - 135 - XV
Tyres ................................... 127 - XV
U
Unlocking in emergency ........ 61 - 73
User Precautions ............................. I
V
12V battery ............... 108→110 - XIV
V6 engine ................................... 105
V6 HDI engine ............................ 106
Vehicle identification ................... 135
Ventilated storage under
the central armrest ..................... 74
Very Cold Protection ................... 126
Visible alert ................................... 16
W
Warning lamps ....................... 10→11
Washing the vehicle ..................... 14
Wheel for temporary use ............ 129
Windows ....................... 27 - 72 - 108
Windscreen wash ......................... 15
Winter precautions ...................... XX
Wiper blades ................................ 15
Wipers ...................................14→15
X
Xenon bulbs ............................... 120
Xenon dual function directional
headlamps .................................. 67
06/10/2005 14:14:11
U S E R P R E C AU T I O N S
I
DRIVING POSITION ......................................................................................II
SEAT BELTS ........................................................................................ III – IV
AIRBAGS ............................................................................................. V ➟ VII
CHILD SAFETY .................................................................................. VIII – IX
ADVICE ON DRIVING .................................................................................. X
SAFETY RECOMMENDATIONS......................................................... XI – XII
BRAKING SYSTEM ................................................................................... XIII
BATTERY ................................................................................................... XIV
TYRES ........................................................................................................ XV
LOADS AND TOWING .............................................................................. XVI
CATALYTIC CONVERTER ....................................................................... XVII
ELECTRICAL ACCESSORIES ............................................................... XVIII
RUNNING-IN ............................................................................................. XIX
WINTER PRECAUTIONS ........................................................................... XX
MAINTENANCE .............................................................................. XXI – XXII
RECYCLING AND THE ENVIRONMENT ...............................................XXIII
Anglais_indexe.indd Sec2:I
06/10/2005 14:14:11
DRIVING POSITION
II
DRIVING POSITIONS
1 Correct
2 Incorrect (too close)
1
2
3
ADVICE ON ADJUSTING THE DRIVING POSITION
Adjusting the seat
See « Front seats ».
• Reach :
Adjust the seat so as to be able to :
- Fully depress the clutch.
- Place your right foot on the accelerator and your left foot on the foot
rest for driving.
Your thighs should be supported by the seat cushion.
• Backrest angle :
Adjust the angle of the backrest so that your back is comfortably supported along the full height of the seat. For the seat belts to be fully effective, do not drive with the backrest inclined excessively.
Head restraint :
For the head restraint to fulfil its role as an effective safety component,
the top of it should be at least as high as the top of the occupant’s head
or, failing that, positioned to its maximum height.
3 Incorrect (too far away)
Steering column adjustment
See « Steering column adjustment ».
Adjust the steering wheel so that
your arms are slightly bent in the
« quarter-past-nine »
position
when grasping the steering wheel.
Ensure that you can see all the
dashboard displays.
Floor mat on driver's side
To avoid your feet becoming jammed under the pedals :
• Make sure that the floor mat is correctly positioned.
• Never fit more than one floor mat superimposed.
Anglais_indexe.indd Sec2:II
As a matter of safety,
do not attempt to adjust
the driving position
when the vehicle is in
motion.
06/10/2005 14:14:11
S E AT B E LT S
III
Legislation makes it compulsory for all the vehicle's occupants to wear seat
belts, including pregnant women and however short the journey.
Never deactivate the passenger's airbag when a passeger is present (unless
a child in a rear-facig child seat).
A warning lamp informs you if the driver's and/or front/rear passengers' seat
belts are not fastened, when the ignition is switched on.
In the event of a collision or on emergency braking, the seat belt will hold you
in your seat, preventing you from being thrown from the vehicle.
Pyrotechnically pretensioned seat belts with force-limiters
In the event of a collision :
• The pretensioners pull back the front seat belts. The occupants are thus
held more firmly against their seats.
• The force limiters reduce the pressure of the seat belt against the occupant’s chest, thus enhancing the protection that the seat belt provides.
Warning
When
the
pretensioners
are
deployed, there is a light discharge
of harmless smoke and a loud
noise, both due to the detonation
of the integral explosive cartridges
that activate them.
Depending on the nature and the
force of the impact, this triggering
may happen prior to, and independently of, the deployment of the
airbags.
In all cases, the airbag warning
lamp comes on.
Anglais_indexe.indd Sec2:III
Seat belts and pyrotechnic pretensioner systems
They must be replaced following a deployment, this preferably by a CITROËN
dealer or by an authorised repairer.
By reason of the safety regulations in force, any check or any replacement
should preferably be carried out by the CITROËN network which guarantees
the work and ensures that it is done correctly.
Any repair that is not done in strict compliance with requirements could
result in the systems operating ncorrectly or randomly, with the risk of
bodily injuries being caused.
06/10/2005 14:14:17
IV
S E AT B E LT S
To unfasten the belt, press on the
red button in the buckle.
The belt retracts automatically
when not in use.
Recommendations
Functioning of the seat belt
Pull the belt down in front of you in
a steady movement, making sure
that it does not become twisted.
Press the fastening into its buckle.
Check that it is properly secured
and that the automatic locking
mechanism operates correctly by
pulling sharply on the belt strap.
The abdominal part of the strap
should be positioned as low down
as possible in the lap and as tight
as possible.
The chest part should be positioned if possible in the channel of
the shoulder.
Each belt has a reel that adjusts its
length automatically to the girth of
the seat occupant
Anglais_indexe.indd Sec2:IV
To be effective, a seat belt :
• Must be able to restrain a single
person of adult size
• Must not bear any signs of
being cut or frayed.
Do not swap buckles, as then they
would not fulfil their proper roles.
Before and after use, make sure
that the belt is correctly retracted.
If the seats have armrests, the
central part of the belt should pass
underneath.
Positioning of the belt recommended
for
pregnant
women
Position the lower part of the belt
as low down as possible on the lap,
so that it exerts no pressure on the
abdomen.
• Always adjust your seat belt while the vehicle is stationary.
• Do not pass the belt over hard or breakable objects that you
may have in your pockets.
• Never use clamps or clips to loosen your seat belt.
• Never carry a child on your knee.
• Regularly check the condition and cleanliness of the seat belts.
See « Maintenance ».
• Have the seat belts checked periodically by a CITROËN dealer as
well as after any accident, even a minor one.
06/10/2005 14:14:18
AIRBAGS
Area of side
impact
Area of frontal
impact
Area of side
impact
Areas of impact causing the airbag(s) to
inflate
Replacement of the pyrotechnic systems
associated with the airbags
They must be replaced following a deployment, this
preferably by a CITROËN dealer or by an authorised
repairer.
By reason of the safety regulations in force, any check
or any replacement should preferably be carried out
by the CITROËN network which guarantees the work
and ensures that it is done correctly.
Any repair that is not done in strict compliance with
the requirements could result in the systems operating
incorrectly or randomly, with the risk of bodily injuries
being caused..
Anglais_indexe.indd Sec2:V
V
Your vehicle may have :
• A driver’s airbag located in the steering wheel, under
the central cover.
• A knees airbag under the steering column.
• A passenger's airbag in the dashboard.
• Two side airbags located in the backrests of the driver’s seat and front passenger’s seat (door side).
• Two curtain airbags located on the interior edges of
the roof.
• The equipment for control, detection and operation.
These deploy the airbags depending on the intensity, angle and point of impact of the collision.
The passenger's airbag can be deactivated. See
« Deactivation of passenger's airbag ».
Each time you switch on the ignition, a warning lamp
lights up for a few seconds in the instrument panel.
If there is a fault, depending on version :
• The warning lamp flashes for a few minutes then
remains on.
• The warning lamp does not light up.
• A message appears on the display.
At the earliest opportunity, consult a CITROËN dealer
or authorised repairer.
06/10/2005 14:14:20
VI
AIRBAGS
User Precautions :
• The wearing of seat belts is compulsory for all
vehicle occupants.
• Children under ten years of age should always be
carried in the rear seats. See « Child safety ».
• The driver and passengers should always adopt a
normal upright sitting position to permit the airbags
to deploy.
• Never fix or attach anything to the steering wheel
central boss, to the sides of the front seats, to the pillars or to the roof, as this could cause facial injuries
should the airbags be activated.
• Never drive with your hands on the steering wheel
central boss or holding the branches of the steering
wheel.
• Do not smoke in the vehicle (risk of burns or injury
should the airbag be deployed.
• Do not leave any accessory or object on the dashboard or between your body and the airbag (risk of
malfunction or personal injury).
• Fit only seat covers that are approved by CITROËN.
Warning
When an airbag is deployed, there is a light discharge of
harmless smoke and a loud noise, both due to the detonation of the explosive cartridge that is integral to the
airbag system. The smoke is non-toxic but may cause
irritation to people suffering from respiratory problems.
The noise of the detonation may affect hearing for a
brief time.
Vacate the vehicle as soon as possible after the accident (provided it is safe to do so). If this is not possible,
open the windows or doors.
Despite all the safety precautions recommended, injuries to the head, arms and body cannot be excluded
following an airbag deployment under certain particular
conditions, considering the very nature of this type of
equipment and its mode of operation. This device can
only operate one single time. It cannot operate to provide further protection in the event of a second impact.
It is essential for the system to be repaired by a CITROËN dealer or authorised repairer.
IMPORTANT
For your safety, it is essential :
That you always sit with your back fully
supported by the backrest.
To ensure that passengers never place their feet
on the dashboard.
Anglais_indexe.indd Sec2:VI
06/10/2005 14:14:22
AIRBAGS
VII
Front airbags and knees airbags
The airbags are safety devices, complementary to the seat belts, designed to
operate in the event of a violent frontal impact. In such a situation, their role is to
inflate and to absorb the impact of the front occupant(s) on the dashboard, and
thus to reduce the risks of injuries to the head, chest and lower limbs.
These airbags will not be deployed by a minor frontal impact, or by a side or
rear impact, nor by the vehicle overturning, as their use would not serve any
purpose.
The front passenger’s airbag can be deactivated. See « Passenger's airbag
deactivation ».
Operation :
In the event of a violent frontal impact, the airbag(s) inflate instantaneously, tearing the break points that are worked
into the steering wheel central cover, the dashboard on the passenger's side and/or under the steering column. The
airbag(s) cushion the forward projection of the occupants(s) then rapidly deflate. The material of the front airbags may
then cause irritations to the skin.
Side airbags and curtain airbags
They are designed to come into play in the event of a substantial lateral impact
and are oriented to that particular impact zone.
The role of the side airbag is to place itself between the occupant (driver or front
passenger) and the door panel, thus limiting the risk of injuries to the chest.
The role of the curtain airbag is to place itself between the front or rear occupant and the windows, thus limiting the risk of injuries to the head.
These airbags will not be deployed by a minor impact on the side of the vehicle,
or by a front or rear impact, nor by the vehicle overturning, as their use would
not serve any purpose.
Operation :
In the event of a violent side impact, the side and curtain airbags on the side affected inflate instantly.
The side airbag absorbs the projection of the occupant on the door panel and then rapidly deflates.
The curtain airbags are located on the interior edges of the roof and deploy along the length of the side door windows.
The complete process takes approximately one tenth of a second.
Anglais_indexe.indd Sec2:VII
06/10/2005 14:14:22
VIII
When children are in the car
For maximum safety, consult the
competent authority in your country to be sure that you know the
rules for the carrying of children.
Observe the following recommendations :
• Children should not be left alone
in the vehicle.
• All children less than 12
years of age must be carried
in child seats that are appropriate to and approved for
their ages and weights. They
must be installed in seat positions equipped with seat belts.
Check that the child seat is in
compliance with current legislation, ensuring that it bears an
orange label featuring the range
of weights for which it is suitable
as well as its approval no..
Anglais_indexe.indd Sec2:VIII
CHILD SAFETY
• It is compulsory for a child
weighing less than 9 kg to be
transported in the rear facing
position. It is recommended
to use this position for as long
as possible (up to 2 or 3 years
old).
• Statistically, the safest seats for
the carrying of children are the
vehicle’s rear seat positions.
CITROËN recommends you to
install your child in one of the
rear seat positions, even when
using a rear-facing child seat.
• Children must not under any
pretext be carried on the knees
of a passenger (risk of being
thrown against the dashboard
or windscreen should there be
a collision).
• Children must not be allowed to
stand between the backrests of
the front seats, as they could be
thrown forwards under sudden
braking or in the event of a collision.
• The rear doors are equipped
with a « Child Safety » locking
device. This allows the doors
to be opened from the outside
unless they are under central
locking.
Each time you switch on the
ignition, check that this device
is activated.
• Never leave a child in a vehicle
that is exposed to sunshine.
• Before opening a door, make
sure that it is safe to do so.
• When leaving your vehicle,
remove the ignition key and
properly apply the parking
brake.
• Do not leave the key in the
vehicle, as children could lock
themselves in, either using the
remote control or by pressing
the central locking button.
Regulations for the carriage
of children in the front passenger seat position
If the child is travelling in a rearfacing child seat, it is essential to
deactivate the passenger's front
airbag. Otherwise the child risks
being killed or seriously injured
should the airbag deploy.
In the front passenger's seat, children less than 10 years of age
must not be carried « forward-facing », except if :
• The rear seats are occupied by
other children.
• The rear seats cannot be
used (if they are folded or not
present).
If your child is travelling forwardfacing in the front passenger seat
position, slide the front passenger
seat to an intermediate position
and leave the airbag activated.
06/10/2005 14:14:24
CHILD SAFETY
L1
CITROËN offers you a complete
range of child seats that can be
secured by means of the vehicle
seat belt. These child seats have
been tested on vehicles in collision conditions and they guarantee
maximum safety for your children.
They have also been selected for
their ease of installation as well as
for the comfort of the child.
In all cases, be sure to follow the
child seat fitting instructions as
detailed in the installation manual
provided by the seat manufacturer.
GROUP 0+ : from birth to 13 kg
(around 1 year old)
In the front passenger seat position, it is essential to deactivate
the front airbag. Otherwise the
child risks being killed or seriously
injured should the airbag deploy.
Britax Babysure (L1) : installed
rear-facing with a three-point seat
belt.
Anglais_indexe.indd Sec2:IX
L2
L3
For
installing
the
BRITAX
Babysure, there are two possible
belt routings: a standard routing
and an alternative routing called
« undershell belt », specifically
intended for the seat positions
equipped with a shorter seat belt.
Römer Baby-Safe (L2) : rear-facing, for use with a three-point seat
belt. The deep, reinforced shell is
designed to provide the maximum
protection to the child in the event
of a lateral impact.
GROUPS 2/3 (from 15 to 36 kg)
Recaro Start (L3): for use with a
three-point seat belt. The height
and width of the backrest as well
as the length of the seat cushion
should be adjusted as a function of
the age and girth of your child.
IX
L4
L5
Klippan Optima (L4) : for use
with a three-point seat belt. From
6 years old (approx. 22kg), only
height adjustment is required.
GROUPS 1/2/3 (from 9 to 36 kg)
Kiddy Life (L5 : for use with a
three-point seat belt. The height
and width of the backrest as well
as the length of the seat cushion
should be adjusted as a function of
the age and girth of your child. For
the safety of young children (from 9
to 18 kg), CITROËN recommends
you to use the protection apron.
Other child seats are recommended : see ISOFIX child seats
in the handbook. See « Child
restraints ».
The majority of serious injuries resulting from accidents occur
when a child either is not secured or is secured incorrectly.
It is essential to adhere to the child seat fitting instructions
as detailed in the installation manual provided by the seat
manufacturer. ISOFIX child seats are particularly recommended for
their ease and safety of use.
See « Child restraints ».
06/10/2005 14:14:24
A DV I C E O N D R I V I N G *
X
In wet,
weather
cold
and
foggy
• Keep your safety distance, slow
down, switch on dipped headlamps or foglamps if there are
areas of fog.
• Tyre adhesion is reduced on
wet or slippery roads, particularly if tyre treads are worn.
• Aquaplaning can occur even
with tyres in good condition.
• Change the windscreen wiper
blades when they start to leave
streaks on the glass.
• Be particularly careful if the
ambient temperature is 3°C or
lower (risk of ice on the roads).
• Never use the windscreen or
rear screen wash/wipe in frosty
weather on starting.
Driving on snow
• The very poor grip will considerably reduce traction power,
control of steering and braking.
• If you are using snow tyres,
drive carefully without sudden
acceleration or braking.
• Do not spin the wheels when
starting off, drive at reduced
speed.
• Driving downhill, make maximum use of engine braking
(in second gear or first gear),
touching the brakes as delicately as possible.
• Snow chains and snow tyres
are available from the CITROËN network, to offer you
greater safety.
Damaged and flooded roads
• Driving on poor road surfaces
can cause damage to tyres,
wheel rims, underbody and
suspension geometry settings.
• On flooded roads, water could
be sucked into the engine, causing severe and irreversible damage (destroying the engine).
• If you unexpectedly encounter
a flooded road and the depth of
water is such that it would touch
the underbody of the vehicle,
stop immediately and find an
alternative route.
*This list of recommendations is
not exhaustive.
Anglais_indexe.indd Sec2:X
Lighting and visibility
• Ensure that you can see and be
seen by others.
• Check that the windows and
the interior and exterior rear
view mirrors are clean. For
optimum wipe quality, use the
screen wash products that are
distributed by the CITROËN
network. Silicones are not recommended.
• Clean the wiper blades regularly using a soft cloth with
screen wash fluid. Residues of
grease, silicone product and
fuel will adversely affect the
wiper blades.
• Check that the rear view mirrors
are correctly positioned.
• Always carry a set of spare
bulbs.
• The vehicle lighting equipment
is designed specially for your
safety and that of others. All
lamps must be in good working
order, correctly adjusted and
clean.
ADVICE
Replace the wiper blades once or
twice a year, for example in Spring
and Autumn.
06/10/2005 14:14:26
S A F E T Y R E C O M M E N D AT I O N S
XI
OPERATE SAFELY
Work in safety
Any operation under the bonnet necessitates a number
of safety precautions.
Be particularly careful both before and during all checks
under the bonnet.
• Allow the engine to cool down.
• Keep children away from the vehicle.
• Make sure that you possess the necessary tools
and expertise.
The first rule of safety is to choose a suitable environment.
Do not use open roads or public rights of way. Other
traffic represents a hazard. If you need the engine
running, work outdoors and not in a confined space as
there is a health risk from exhaust gases.
Make sure that your vehicle is not parked over inflammable materials (dry grass, fuels, etc.) as the very high
temperatures associated with the catalytic converter
could ignite them.
Choose firm, level ground sheltered from the wind. Keep
children away from the vehicle.
Bonnet
Before opening the bonnet, make sure that your hands
and clothing are protected. Allow the engine to cool
down.
Make sure that the bonnet is stable in the open position.
Beware of gusts of wind that could cause the bonnet to
fall and cause seriuous injuries.
Moving parts
There will be a certain number of moving parts when
the engine is running.
Even when the engine is switched off, the cooling fan
could still operate without warning. Do not wear loose
clothing (ties, scarfs, etc.), tie back long hair, all of
which could become entangled in a pulley or be dragged
into a drive belt.
On the road
If a warning lamp comes on while you are driving, stop
the vehicle with due regard to the safety of other road
users and switch off the ignition.
Puncture
Switch on your hazard warning lamps and get all passengers away to a place of safety, well away from the
traffic (for example behind crash barriers or on the grass
verge).
Position the jack correctly to ensure that the vehicle is
stable. See « Changing a wheel ».
Never attempt any repairs under a vehicle that has been
jacked up, without first supporting it on axle stands or
some other reliable support.
Never underestimate the difficulties of
the repairs intended. Make sure that you
possess the necessary tools and level of
expertise to enable you to work in safety
Anglais_indexe.indd Sec2:XI
06/10/2005 14:14:26
S A F E T Y R E C O M M E N D AT I O N S
XII
Radiator
Fuel cut-off switch
In normal usage, the coolant temperature reaches or
exceeds 100°C. Never remove the cap of a radiator
that is hot: there is danger from projection of scalding
liquid and steam. See « Levels ».
The antifreeze contained in the coolant lends it the following properties :
• Protection against low temperatures (initial protection: -35°C).
• Anti-corrosion protection.
• Resistance to high operating temperatures
See the Maintenance Guide.
Your vehicle is equipped with a safety device which cuts
off the fuel supply in the event of a collision.
Oil
Petrol
Be extremely careful when decanting or draining petrol
or when repairing petrol leaks because of the high risk
of fire.
Diesel fuel
The diesel fuel system of An HDI vehicle is a high pressure system. Any repair work must be carried out by
suitably qualified personnel, such as can be guaranteed by the CITROËN network.
In normal use, the engine oil can exceed temperatures
of 130°C and thus can cause serious burns.
Exhaust system
Beware of the very high temperatures attained by the
various components of the exhaust system (risk of
burns).
AT ALL TIMES :
• Avoid attempting repairs while close to moving traffic. If this is absolutely necessary, take all possible
precautions.
• Ensure that your passengers seek safety away from the vehicle and off the roadway (road verges and
motorway hard shoulders are not safe places.
• Keep children away from the vehicle and in safety.
• Operate the hazard lamps and erect warning signs.
• Preferably summon assistance from a CITROËN-approved breakdown service.
• For guaranteed quality and safety, useCITROËN products.
Anglais_indexe.indd Sec2:XII
06/10/2005 14:14:26
BRAKING SYSTEM
XIII
Braking system
ABS system
Brake pads and linings
Your vehicle’s most important
safety feature, the braking system,
is provided by brake discs (or discs
and drums) and a dual hydraulic
circuit.
When the engine is running, power
assistance is provided so that
pedal effort is reduced.
The ABS system enhances your
safety by preventing the wheels
from locking in the event of sudden braking or in conditions of poor
road adherence. It enables you to
retain control of the steering.
Brake pad wear varies according
to the way you use your vehicle
(e.g. urban driving, frequent stops,
your style of driving or the type of
road).
Parking brake
Subject to ageing, the fluid should
be drained and refilled periodically.
Dirty fluid can reduce the efficiency
of the hydraulic system.
Follow the instructions in the
maintenance guide.
Note Follow the servicing schedules listed in the maintenance
guide scrupulously to ensure optimum performance and reliability.
Brakes
• If the brake warning lamp
comes on while you are driving,
stop immediately and contact
a CITROËN dealer.
• On wet roads, or after washing
the vehicle, there can be a slight
delay in brake response. From
time to time, apply the brakes
briefly so that the heat generated can dispel any moisture.
See « Driving : Brakes ».
Before leaving the vehicle, make
sure that the parking brake is sufficiently applied to prevent the
vehicle from moving if on a slope,
or if accidentally or deliberately
pushed.
As an additional precaution on
steep slopes :
• Apply the parking brake.
• Engage a gear.
• Turn the steering towards the
kerb (if there is one).
Brake fluid
When the engine is not running, the braking system will not
have power-assistance
The effort required on the brake pedal will be considerably
increased.
Take all reasonable safety precautions if you have to move the
vehicle.
Never drive the vehicle without the engine running.
Anglais_indexe.indd Sec2:XIII
06/10/2005 14:14:27
XIV
B AT T E R Y
12V BATTERY
Removal
If the vehicle is fitted with an alarm, this should be deactivated before disconnecting the battery.
Disconnect the battery leads, negative lead first.
Refitting
Ensure that the battery is correctly positioned.
On certain models, the flange should be midway
between the two battery terminals.
Reconnect the battery starting with the positive lead
first.
Precautions
• Ensure that the posts and terminals are clean.
• If they become sulphated (white deposit), disconnect and clean them.
• Never disconnect the leads while the engine is running.
• Never recharge the battery without first disconnecting the battery leads.
Recharging using a battery charger
The voltage must never exceed 15,5 volts and the
charging current must never exceed 20 % of the rating
marked on the battery casing (for example: 250 A, - setting: 50 amps maximum).
Length of charge : 24 hours maximum.
Only battery chargers with a constant, regulated voltage output should be used.
If the vehicle is not in use for a prolonged
period
If the vehicle is to be taken out of use for periods of
more than one month, the battery should be disconnected.
If a metal object makes a contact between the two battery terminals or between the battery + and the
bodywork, this causes a short-circuit (risk of fire and serious burns).
The battery releases minute quantities of hydrogen, a gas which is explosive under certain conditions.
Never use a flame or create sparks close to the battery.
The battery contains dilute sulphuric acid which is highly corrosive :
• When handling batteries, always protect your face and especially your eyes.
• In the event of any contact with the skin, rinse immediately with copious amounts of fresh water.
Anglais_indexe.indd Sec2:XIV
06/10/2005 14:14:27
TYRES
Inspect the tyres regularly for wear
and damage such as cuts, cracks
or bulges, etc..
Remove
any
foreign
bodies
(stones, pieces of metal) that may
have pierced the tyre. They could
cause further damage to the tyre
carcass.
Correctly inflated tyres provide :
• Optimum roadholding.
• Precise, light steering.
• Improved fuel economy.
• Increased tyre life.
Use the tyre pressures recommended by CITROËN.
Check the tyre pressures when the
tyres are cold, on a frequent basis.
Never reduce the pressure of a
hot tyre
Puncture
A punctured tyre should always
be removed from the rim and thoroughly examined for any secondary damage before attempting any
repair. When a repair is possible, it
should be carried out as soon as
possible to prevent further damage
to the tyre.
Tyre repair should be carried out by
a tyre specialist who will assume
responsibility for the repair.
XV
Under-inflated tyres can
overheat, leading to structural damage and the risk
of a blow-out.
Impacts with kerbs, potholes or
hidden obstructions in the road
can cause internal damage and
premature failure of the tyre. Such
impacts can also cause misalignment of the steering geometry and
subsequent rapid tyre wear.
Advice
We therefore recommend that
you have the tyres and suspension geometries checked after any
such incidents.
Prolonged driving on poor surfaces may be the cause of damage
which may only become evident at
a later date.
If replacing your tyres, it is essential to use the tyre sizes that are
recommended for your vehicle.
Contact a CITROËN dealer.
Wear indicators
Check the tread depth frequently.
Minimum legal depth: 1,6 mm.
Check the wear indicators and the
tread depth regularly as worn tyres
have reduced grip. The wear indicators show when a tyre is at its
safe wear limit.
Drive with extra caution on slippery roads
Make sure that all 4 tyres are always in good condition and that
the tyre pressures (including for the spare wheel) are always
set correctly.
Anglais_indexe.indd Sec2:XV
06/10/2005 14:14:27
XVI
L OA D S A N D TOW I N G
Carrying loads in your vehicle
In order to preserve the roadholding qualities of your vehicle, take
the following precautions.
• Never exceed the gross vehicle
weight.
• Modify your driving style and
speed to take account of the
additional load.
• Always anchor down any heavy
objects carried in the boot.
Never transport heavy objects
inside the vehicle unless they
are suitably lashed down. If
necessary, use the rear seats
and secure the loads with the
seat belts (protect the seats
and seat belts if necessary).
• Limit the use of the rear shelf to
light, soft items such as coats or
clothing. Remember that heavy
or hard objects can become
dangerous during harsh braking and, if they touch the rear
screen, could damage the heating elements.
• You are advised to adjust the
aim of the headlamps to compensate for the vehicle load.
Roof bars and roof box
Any loading of the vehicle roof will alter the behaviour of your vehicle when
in motion.
You are recommended to use roof bars and roof boxes that are approved
by CITROËN.
Towing (boat, caravan, etc.)
• Before departure :
- Check the tyre pressures of both car and trailer.
- Check all the exterior and signalling lamps of the car and trailer.
- Practice manoeuvring, especially reversing.
- Grease the towing ball hitch regularly, and remove it when not towing
for a long period.
• Spread the load inside the caravan and keep within the towing weight
limits.
• Always drive at moderate speeds, changing down a gear in good time
before hill climbs or descents. Be aware of the effect of side winds.
• Braking distances are increased. Use the brakes gently and progressively. Avoid sudden braking.
• If you have to park on an incline, make sure that the parking brake is
firmly applied. Check that the tow hitch is firmly attached and, if necessary, chock the wheels of the trailer.
When towing, the fuel consumption will increase.
Towing a vehicle
If you are towing another vehicle, the latter should be out of gear (gearbox
in neutral). Move the gear lever to neutral (position N for SensoDrive and
automatic gearboxes).
Observe your vehicle's towing limits
It is essential to comply with the max. Gross Trailer Weights and speed
limits as specified by legislation in each country.
For further information about the towing capacity of your vehicle and its
max. authorised Gross Train Weight, contact a CITROËN dealer
Anglais_indexe.indd Sec2:XVI
06/10/2005 14:14:28
C ATA LY T I C C O N V E R T E R
The petrol or diesel engine of your
vehicle is fitted with a catalytic
converter, a device which helps to
reduce the level of harmful emissions in the exhaust gases.
WARNING : The catalytic converter is a delicate component.
On petrol vehicles, it is essential
to use unleaded fuel.
XVII
Poor engine running can cause premature failure of the catalytic converter.
Precautions to be taken :
1. Keep to the recommended service intervals, as defined in the Maintenance Guide.
2. If difficult cold starting is experienced, contact a CITROËN dealer or
authorised repairer as soon as possible.
3. If engine misfiring is experienced, reduce speed and contact a CITROËN
dealer or authorised repairer as soon as possible.
4. Refill with fuel as soon as the minimum fuel warning lamp comes on. A
fuel level that is too low could cause poor running.
5. Never tow or push the vehicle to start it.
6. Do not run the engine with one or more spark plugs disconnected, not
even for test purposes.
7. Allow the engine to return to idle before switching off the ignition.
8. Do not park or drive over highly inflammable material (dry grass, fuels,
etc). as the catalytic converter will be very hot.
WARNING: EXHAUST GASES
Exhaust gases are very hot, keep people away from the exhaust tailpipe.
Exhaust gases contain carbon monoxide, a highly toxic gas which is colourless and odourless and therefore virtually undetectable. Breathing in carbon
monoxide can cause loss of consciousness and possible death.
For this reason, it is highly dangerous to run the engine in a confined space
or in a poorly ventilated area.
Using leaded petrol could destroy the catalytic converter and
cause serious damage to other components.
Anglais_indexe.indd Sec2:XVII
06/10/2005 14:14:29
XVIII
ELECTRICAL ACCESSORIES
Your vehicle's electrical system is designed to operate with either standard or optional equipment.
Before installing electrical equipment or accessories on your vehicle, consult a CITROËN dealer.
Some electrical accessories (radio, immobiliser, alarm, radio-telephone, etc). or the method by which they are
fitted can have negative effects on the functioning of your vehicle or be the cause of failures, on either the
electronic control systems, the audio system or the electrical charging circuit. Certain modifications and adaptations
of your vehicle's electrical system may therefore be necessary.
CITROËN declines all responsibility for the consequences and costs that are caused by faults or repairs on
your vehicle resulting from the installation of accessories that are not supplied and/or not recommended
by CITROËN and not installed in conformity with CITROËN requirements.
Anglais_indexe.indd Sec2:XVIII
06/10/2005 14:14:29
RU N N I N G - I N
XIX
Running-in period
During the first 1 500 km (1 000 miles), following the simple advice given below will optimise the performance, driving
pleasure and long-term reliability of your new vehicle :
• Pull away and accelerate gently, drive at moderate road speeds and avoid high engine speeds (if your vehicle has
a rev counter, limit engine speeds to 2/3 of the maximum).
• Do not drive for long periods at high road speeds.
• Avoid harsh braking.
• Do not tow a trailer during the first 1 000 km (600 to 700 miles).
From 1 000 km (600 to 700 miles) for petrol engines or 1 500 km (1 000 miles) for diesel engines, the road speed
and engine revs may be gradually increased, slowly building up to the maximum permitted. It should be noted that an
engine will not deliver its maximum performance until a running-in period of at least 3 000 km (2,000 miles) for petrol
engines or 5 000 km (3,000 miles) for diesel engines has been completed.
When your vehicle has covered between 1 500 and 2 500 km (1 000 and 1 500 miles), a first inspection carried out
by the CITROËN network is compulsory in order for you to benefit from the terms of the guarantee.
The change of engine oil, formerly carried out at this service visit, is now no longer necessary.
Check the engine oil level frequently during the running-in period,
as oil consumption could be relatively high at this time.
Anglais_indexe.indd Sec2:XIX
06/10/2005 14:14:29
XX
W I N T E R P R E C AU T I O N S
Starting in very cold weather
Snow chains
In very cold weather, the engine and gearbox oils become
much less fluid. To improve starting, depress the clutch
pedal before operating the starter motor, releasing the
pedal slowly once the engine has started.
Snow chains can be fitted on tyres with dimensions as
indicated in « General information ».
The chains should be fitted only on the front wheels.
Use only fine-link chains that are designed for your particular vehicle. Contact a CITROËN dealer.
If driving on roads which are not snow-affected, you
should remove the chains so that they, your tyres and
also the road surfaces are not damaged.
Diesel fuel heater
Your vehicle is equipped with a fuel heating system
which reduces the risk of fuel supply problems in cold
weather.
Radiator – coolant fluid
Top up preferably using CITROËN coolant fluid, which
protects the cooling and heating systems against frost
and corrosion.
From delivery of your vehicle, the coolant fluid gives
protection down to –35°C.
Screen wash fluid
For best results as well as for your safety, use only CITROËN approved products which protect at temperatures as low as –25° to –30°C.
ADVICE
When driving with snow-chains, speed should be
adapted to road and traffic conditions.
Special care is required in emergency braking.
Anglais_indexe.indd Sec2:XX
06/10/2005 14:14:29
MAINTENANCE
Washing the bodywork
In order to keep the bodywork and
paintwork in good condition, it is
necessary to wash the vehicle frequently, preferably using plenty of
water. However, do not wash the
car in direct sunshine or in very low
temperatures.
In all cases, wait until the surfaces
to be washed have cooled.
If you use a car-shampoo, rinse
thoroughly and wipe dry with a
chamois leather.
Polishing the paintwork
The paintwork of your vehicle
should be protected with a suitable car polish. Apply after washing
the vehicle when it is seen that the
water no longer forms beads on the
paint surface. CITROËN car polish
will protect against the elements,
including the effects of chemicals
in the atmosphere.
XXI
Bird droppings, insect deposits and tree resins can be extremely injurious to
the paint surface and their destructive action is accelerated considerably in
hot weather, so they should be removed as soon as possible.
If you wash your vehicle in an automatic car wash :
• The brush pressure should be as low as possible.
• The wash water should contain a detergent.
• A thorough rinsing should follow the detergent wash.
Modern car wash installations usually meet these criteria.
The repeated use of a poorly maintained car wash can cause micro-scratching of the paint surface causing the paint to appear matt, particularly in the
case of dark colours. A light polishing of the paint surface will restore the
finish.
If cleaning the vehicle with a high pressure jet, do not direct the jet onto the
various rubber protectors, e.g. driveshaft and steering gaiters, exterior trims,
roof seals, etc..
IMPORTANT
Never use high pressure jets or compressed air inside the engine compartment.
Tar spots on paintwork and
plastic finishers
Do not try to scrape off the tar but
use a CITROËN tar remover as
soon as possible.
Radio aerial
It is essential to unscrew the aerial lead when putting the vehicle
through an automatic carwash.
When setting off, apply the brakes briefly from time to time so
that the heat generated dries out the brakes.
Anglais_indexe.indd Sec2:XXI
06/10/2005 14:14:29
MAINTENANCE
XXII
Wheel embellishers and light alloy wheel
rims
Before and after washing, rinse thoroughly with clean
water. Wash with soapy water. To preserve the bright
finish, use a CITROËN car care product.
Minor damage to the paintwork
Touch in scratches and paint chips using a CITROËN
paint pencil or aerosol, carefully following the instructions provided. These paint pencils and aerosols are
available in all the CITROËN colours (see paint code
on the door pillar label).
Should you discover rust spots, consult a CITROËN
dealer or authorised repairer as soon as possible.
It is recommended to clean and reprotect the vehicle
underbody each time you have driven on salted roads.
Soft vinyl roof
If you wash the vehicle with a high pressure cleaner
(max. 90 bars), keep the jet more than 40 cm away from
the vehicle.
Fabric trims and seat belts
De-dust with a vacuum cleaner or brush. Remove any
stains using soapy water, or if necessary with CITROËN
textile cleaning products.
Do not use solvent products based on acetone or alcohol.
Note : For leather trim, soapy water is recommended
(do not use solvents or alcohol-based products).
Plastic mouldings, screens and displays
Remove dust with a non-abrasive cloth, then use an
appropriate CITROËN interior cleaning product.
ADVICE
For the most effective results, inside and outside your
vehicle, use CITROËN car care products.
When applying polish to the bodywork, take care to avoid the plastic components,as it will be difficult
to remove the deposits of polish afterwards.
If the vehicle is left exposed to the sun for a long period you are advised to cover the rear shelf and
the top of the rear seat backrests to protect them from harmful rays.
Anglais_indexe.indd Sec2:XXII
06/10/2005 14:14:29
RECYCLING AND THE ENVIRONMENT
AUTOMOBILES CITROËN observes the regulations
issued by European Directive 2000/53//CE relating to
vehicle end-of-life.
Your vehicle does not contain any substance or material
proscribed by Directive 2000/53/CE.
RECYCLING OF MATERIALS
Plastic materials :
All plastic and rubber components are marked for identification in conformity with the current regulations.
In order to simplify the recycling process, the range of
plastics used has been limited. Most of the plastic components are manufactured from thermoplastics which
can be easily recycled by melting, granulation or crushing.
Metals :
These are 100 % recoverable and recyclable.
Glass :
XXIII
PROTECTION OF THE ENVIRONMENT
By having your vehicle serviced in the CITROËN network you limit the risk of pollution as well as help to
protect the environment.
Used or damaged parts :
These parts must not just be thrown away. CITROËN
and its dealer network are committed to recycling such
parts in order to protect the environment.
Used oils :
By allowing the CITROËN network to perform all draining operations and collect the used oil, you limit the risk
of pollution.
Used batteries :
Do not throw away vehicle batteries or remote control
batteries as they contain metals which are toxic to the
environment. Take them to a CITROËN dealer, or to any
other approved collection point.
All glass components can be easily removed and collected in order to be processed by the glass industry.
Rubber :
Tyres and seals can be ground down to form re-usable
granules.
AUTOMOBILES CITROËN aims to ensure that its vehicles are manufactured to offer the best possible
performance while keeping down emission levels.
Anglais_indexe.indd Sec2:XXIII
06/10/2005 14:14:30
XXIV
Descriptions and illustrations are given without obligation.
AUTOMOBILES CITROËN reserves the right to modify its
models and their equipment without necessarily being bound
to update the present handbook.
Anglais_indexe.indd Sec2:XXIV
06/10/2005 14:14:30