1
DECT 6.0
SP6075
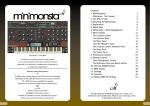
CONTENTS
Contents.................................................1
Main Feature...........................................2
Caution...................................................3
Package contents..................................3
Feature layout........................................4
Installation instruction.............................5
Menu overview.......................................6
What's on display...................................7
Function key description........................8
Read first before use..............................9
To set date and time..............................10
To set time on base ..............................10
To set time on handset ........................10
To set alarm tone...................................10
To set base alarm ................................10
Base alarm tone snooze on/off.............11
To set handset alarm ...........................11
To turn on/off handset power ................11
To lock/unlock keypad ..........................11
To make or answer calls .......................12
To make a call.......................................12
To make a call from redial list................12
To make a call from......................12
Caller Display(CID) list.................12
To mute the mouthpiece ..............12
To register and deregister ............13
To register a handset.................................13
To select a base unit .................................13
To de-register a handset.......................13
PhonebookMemory
memory management........14
Phonebook
Managem............ent
How to enter characters ?.....................14
To review phonebook memory..............15
To add a new phobebook entery...........15
To modify a phobebook memory..........15
To delete a new phobebook entery.......16
To delete all phobebook enteries...........16
To review phone memory status............16
To store redial number in phonebook...17
Call ID and call log management...........17
Caller Dispaly (CID)...............................17
~1~
Caller ID information on display.................17
CALL LOG managemnet...........................18
"ADD TO PB" from dialed call list..............18
"ADD TO PB" from received call list..........18
DELETE a call from received call list.........18
DELETE a call from the dialed call list.......19
"DELETE ALL" from the dialed call lis........19
Handset tones and volume setting.... ........19
To adjust Handset ringing melodies............20
To adjust Handset ringing volume .............20
To set handet TONES................................21
To turn key tone on/off...............................21
To turn battery low alert tone on/off............21
To turn out of range alarm tone on/off.......22
To use a multi- handset system.................22
To make an internal call.............................22
To transfer an outside call..........................22
To set up 3-way conference call.................23
Personalizing your handset ......................23
To change the handset name.....................23
To select handset display language...........24
To set handset call barring function............24
To set handset default settings...................25
To set handset LCD contrast.......................25
To turn on/off "NON-DISTURB" function...25
To turn off voice mail prompt icon..............25
Base basic setting from the handset...........26
To set base ring melody and volume..........26
To set dial mode(TONE or PULSE)............26
To set flash time..........................................26
To modify pin code......................................27
Reset base to default setting......................27
Base setting on base unit...........................27
Troubleshooting.........................................28
Cleaning and care.....................................29
Declaration and conformity........................29
Technical details........................................29
MAIN FEATURES
Enhanced digital technology ensuring clear&secure voice quality
GAP compatible
Handsfree function
Backlit LCD (optional)
LCD contrast adjustable(8 levels) for handset
Call Waiting
Handset powering down function
5 basic ringer tone ,5 polyphonic ringer tone and ring off
40 groups Missed Call memory(number and name)
10 groups Outgoing Call memory
50 groups Phonebook memory
DTMF/ FSK dual Caller ID system
5 steps digital volume control for ringer tone/earpiece/speaker on handset
Page, Intercom, 3-way conference
Auto answer
Keypad lock, Non-disturbance
Low battery indicator
FLASH
Alarm Clock
Time showing on LCD display
Maximum 5 handsets are linked to the same base unit,
and Maximum 4 Bases per Handset
Phonebook max 50 entries, max 12 characters of name and 20
digits of number per entry
Sixteen languages
~2~
CAUTION: When using telephone equipment, there are basic safety instructions that should always be followed.
Refer to the IMPORTANT SAFETY INSTRUCTIONS provided with this product and save them for future reference.
Important Safety Instructions
NOTE: Some of the precautions below may not apply to your product, e.g.: Battery and
power cord precautions.
When using your telephone equipment, basic safety precautions should always be followed to
reduce the risk of fire, electric shock and injury, including the following:
1. Read and understand all instructions.
2. Follow all warnings and instructions marked on the product.
3. Unplug this product from the wall outlet before cleaning. Do not use liquid or aerosol cleaners.
Use a damp cloth for cleaning.
4. Do not use this product near water (for example, near a bath tub, kitchen sink or swimming
pool).
5. Do not place this product on an unstable surface.
6. Slots and openings in the back or bottom of this product are provided for ventilation. To protect
them from overheating, these openings must not be blocked by placing the product on a soft
surface such as a bed, sofa or rug. This product should never be placed near or over a radiator
or heat register. This product should not be placed in any area where proper ventilation is not
provided.
7. Never push objects of any kind into the ventilation slots of this product as they may touch
dangerous voltage points or create a short circuit that could result in a risk of fire or electric
shock. Never spill liquid of any kind on the product.
8. Use only the power cord and batteries indicated in this manual.
9. This product should be operated only from the type of power source indicated on the marking
label. If you are not sure of the type of power supply in your home, consult your dealer or local
power company.
10. Plug the adaptor to the socket - outlet that is closest to the equipment and which is easily
accessible.
11. Do not allow anything to rest on the power cord. Do not install this product where the cord
may have anyone walking on it.
12. To reduce the risk of electric shock, do not disassemble this product, but take it to an
authorized service facility. Opening or removing parts of the telephone base or handset other
than specified access doors may expose you to dangerous voltages or other risks. Incorrect
reassembling can cause electric shock when the product is subsequently used.
13. Do not overload wall outlets and extension cords as this can result in the risk of fire or electric
shock.
14. The power adapter is intended to be correctly oriented in a vertical or floor mount position.
The prongs are not designed to hold the plug in place if it is plugged into a ceiling or an
under-the-table/cabinet outlet.
15. Unplug this product from the wall outlet and refer servicing to an authorized service facility
under the following conditions:
A. When the power supply cord or plug is damaged or frayed.
B. If liquid has been spilled onto the product.
C. If the product has been exposed to rain or water.
D. If the product does not operate normally by following the operating instructions. Adjust
only those controls that are covered by the operating instructions, as improper adjustment
of other controls may result in damage and often requires extensive work by an authorized
~3~
technician to restore the product to normal operation.
E. If the product has been dropped and damaged.
F. If the product exhibits a distinct change in performance.
16. Avoid using a telephone (other than cordless) during an electrical storm. There is a remote
risk of electric shock from lightning.
17. Do not use the telephone to report a gas leak in the vicinity of the leak.
18. Do not dispose of batteries in a fire. They may explode. Check with local codes for possible
special disposal instructions.
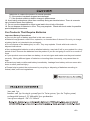
For Products That Require Batteries
Important Battery Precautions
● Use only the type of battery specified in this user manual
● Batteries may present a risk of fire, explosion, or chemical burn if abused. Do not try to charge
a battery that is not intended to be recharged.
● Do not dispose of the battery(ies) in a fire. They may explode. Check with local codes for
disposal instructions.
● Non-rechargeable batteries, such as alkaline batteries, may leak if left in your product for a long
period of time. Remove the batteries from the product if you are not going to use it for a month or
more.
● If your product uses more than one battery, do not mix types and make sure they are inserted
correctly. Mixing different types of batteries or inserting them incorrectly, may cause them to
lleak.
● Discard any leaky or deformed battery immediately. Leakage from battery acid can cause skin
burns or other personal injury.
● Please help to protect the environment by recycling or disposing of batteries according to
federal, state, and local regulations.
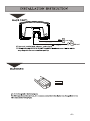
base unit 1pc
handset unit 1pc for single system(2pcs for Twin system, 3pcs for Triple system)
rechargeable battery(1.2V 400mAh) 2pcs per handset
base power adaptor --DC 6V 200mA
~4~
~5~
~6~
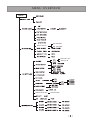
MENU OVERVIEW
MENU
BS MELODY
RING SETUP
BS VOLUME
SNOOZE OFF
SNOOZE ON
AREACODE SET
AREACODE?
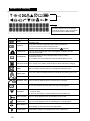
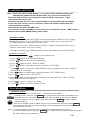
What's on display
icons
1).clock time and talk time
2).number field for call or phonebook
3).character field for CID or phonebook
4).character field for MENU display
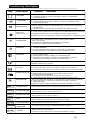
Icon
Description
MENU
Caller ID
Function
The menu icon will be shown when the user is accessing menu
operating mode,
1).The CID icon will be displayed when viewing the CID list.
2).The icon will flash when the CID list is full.
3).when user has new CID, it will blink with icon
together.
NEW CID
The icon will be displayed with "CID" mark together, it indicate user has
new CID not be read.
PHONEBOOK
1).The phonebook icon will be displayed while viewing or editing
phonebook memory .
2). In addition, the icon will flash when the Phonebook Memory is full.
1).In standby mode, the icon show battery level.
BATTERY LEVEL 2).In charge mode, battery level blinks to indicate handset is charging.
VMWI
RING OFF
The icon indicate user has new voice message from network service.
The icon will be displayed when external ring being set to off
EXTERNAL CALL This icon will be displayed when an external call is in progress.
INTERNAL CALL
ALARM ON
This icon will be displayed when an internal call is in progress.
1). The alarm icon will be shown when the alarm function is set to "ON".
2). The icon will flash when the alarm tone ring is being triggered.
ANTENNA
1). In standby mode, the antenna icon is steady, it means handset
link up on base,
KEY LOCKED
This icon will be displayed when the handset keys are locked.
2). when the icon flashes, it means handset lost link with base unit.
HANDSFREE
LEFT/RIGHT
UP/DOWN
~7~
The icon will be displayed when the speakerphone is being trigged.
when memorized number or CID number more than 12 digits, the icon
will be display to notice there are some digits hidden.
UP/DOWN for ring volume adjustment
UP/DOWN for earpiece and speakerphone volume adjustment
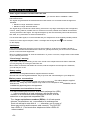
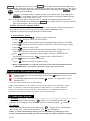
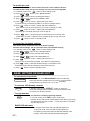
Function key description
Key
Description
OFF HOOK
Function
Definition
,
.
1). press it to enter
off-hook mode
for making or answering a call.
2). while an intercom call is coming in, press it to establish
an internal call.
,
HANDSFREE
,
,
1). In standby mode, press it to enter handsfree mode,
2). Under handsfree mode, press it to switch handsfree mode
and handset mode.
.
MENU/OK/MUTE
1). In standby mode, press the key
to enter menu program,
.
2). while editing menu and select settings , press it for confirming
the selection.
.
3). In talk mode, press the key to switch mute and un-mute.
OFF-HooK
.
1).In talk mode, press once to hang up the call(external and internal);
2). press and hold it for 3s to switch handset power on/off.
Power on/off / C
3).while edit menu or functions, press it to go back to standby mode.
PAUSE/REDIAL
INTERCOM
1). In talk mode , first pressing it for. "last number redial"
(only one group)
2).In dialling mode(talk mode dialling or predial),
press it to create a pause time(3.6s)
1). In standby mode, press it to set up an internal call to
another handset;
.
2) in external call mode,
press it to transfer an external to
another handset or establish 3-party conference call.
STAR/LOCK
HASH /Ring on/off
1).In standby mode, press and hold it about 3s to switch
the key lock on/off
2). briefly press it when setting up conference call
3). press and hold about 3s when in pulse dialling mode to
change to tone dialing for the rest of that call.
In standby mode, press and hold it about 3s to switch the
handset external ring on/off.
.
1). press to scroll up through the lists and menu options.
UP / CID
2). during talk mode, press to increase volume in the earpiece
3). in standby mode, press to review the caller ID list and loudspeaker.
.
DOWN/Outgoing call
1). press to scroll down through the lists and menu options.
2).during talk mode, press to decrease volume in the
earpiece and loudspeaker.
3). in standby mode, press to review the outgoing list
FLASH/EXIT/DEL
.
1). under talk mode, press it to execute "flash time" function,
you may need this function if your phone is connected to a PBX.
2). while edit menu or functions, press it to return previous
step operating.
3).press to erase a digit or letter while input a number or name.
press and hold the button on base to set base clock time.
TIME
TIME SETTING
ALARM 1
ALARM 1 SETTING
press and hold the button on base to set base alarm 1 time.
briefly press it to turn on/off alarm tone 1
ALARM 2 SETTING
press and hold the button on base to set base alarm 2 time.
briefly press it to turn on/off alarm 1
ALARM 2
EXIT
CONTRAST
EXIT
LCD CONTRAST
SNOOZR ALARM
SNOOZR/RING
PAGE
RING VOLUME
PAGE
When setting time, press the key to exit time setting.
briefly press it to adjust ring volume.
When alarm tone comes, press it to stop alarm tone.
In standby mode, press it to adjust base ring volume.
Briefly press it to call handset
Press and hold it about 3s to enter base registering mode.
~8~
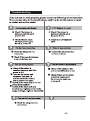
Read first before use
Radio signals between handset and base unit
To use your cordless handset and base unit together, you must be able to establish a radio
link between them.
The signal range between the handset and the base station is in accordance with the approved
standard.
•
•
Maximum range: 300metres outdoors
Maximum range: 50 metres indoor
The signal range could become lower during normal use. Any large metal object, like a refrigerator,
a mirror, a filing cabinet, metallic doors or reinforced concrete, between the handset and the base
unit may block the radio signal. The signal strength may also be reduced by other solid structures,
like walls, or by other radio or electrical interference.
For the best radio signal, it is recommended that your telephone is at the highest possible position.
If there is no radio signal reception, Base 1 message and the signal level
on the display.
icon will flash
Interference
If the sound quality gets worse as you move around while on a call, this is probably caused by
interference between the handset and the base unit, perhaps because you are too near to another
phone or other electrical equipment.
Move to a different position to clear the interference. If you do not move, it might cause a short break
or your call may be cut off.
"Out of range" warning
If you hear a warning tone during a call, or the sound in the earpiece becomes faint or distorted,
you may be going out of range of the base unit.
Move nearer to the base unit within 20 seconds, until the earpiece sound improves. Otherwise,
your call may be cut off.
Battery safety
ONLY use the rechargeable batteries supplied with the handset.
DO NOT use non-rechargeable batteries - they may burst and cause damage to your telephone.
Mains power connection
IMPORTANT - The CH-D707 base unit must be used with the mains adapter supplied
with the unit. Using any other adapter may result in non-compliance with EN60950, and will
invalidate any approval given to this apparatus.
Connection and conditions for use
You can connect your CH-D707 to a direct exchange line (DEL)
--- a line connected to a local exchange, with its own phone
number; to an extension socket connected to a DEL; or to an
extension on an approved compatible PBX.
The ringer equivalence numbers (RENs) of all instruments
(phones, fax machines, etc.) connected to an exchange line
must not add up to more than 4 ----- otherwise, one or more of
them may not ring and/or answer calls correctly. The CH-D707
has a REN of 1, and most other telephones have a REN of 1
unless marked
~9~
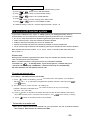
To set Date and Time
Note : If you subscribe to Caller Display , your CH-D707 time and date settings will
automatically updated by the network when you receive an incoming call.
The Caller Display service only sends the month and date, not the year, so you
may still need to set the year.
If the time and date are set on the cordless handset, it will automatically be updated
on the base unit, and vice-versa, if set time on base unit, handset display time will
automatically be updated.
The format for the date is DD-MM-YYYY.
The format for clock is HH:MM.The clock format can be switched by base "TIME" button.
between 12-hour(with AM/PM display) and 24-hour.
Set time on base:
In standby mode, press and hold "TIME" button till clock display flashes on "hour" setting,
then shortly press base "UP" or "DOWN key to set hour step by step, or long press "UP"
or "DOWN" button to continuously adjust the "hour".
After "hour" is set, press "TIME" button to confirm , "Minute"will flash and allow you set
"minute" on the same way as "hour" setting
* * During time setting, press "EXIT"button to exit previous setting and return to idle mode.
Set time on handset :
button to enter setting mode.
1). In standby mode, press
button to select "HS SETTINGS",
2). press
3).press
button to enter the next step setting,
button to select " DATE & TIME",
4). press
5).press
button to enter the selection, it will show "SET TIME",
6). press
button to enter time setting, blinking cursor will guides to set "hour"/"minute"
by numeral keys in sequence
button to confirm time setting and return to "SET TIME" menu.
7).press
8). press
button to select " SET DATE",
button to enter date setting, blinking cursor will guides to set "date"/"month"/
9).press
"year" by numeral keys in sequence
10). press
button to confirm date setting.
button to go back to stand-by mode.
11). press
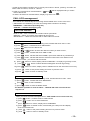
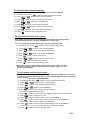
To set alarm tone
1. Set base Alarm
The base unit allows to set 2 clock alarm --->ALARM 1 & ALARM 2
In standby mode, press and hold
ALARM 1
ALARM 1
key on base unit to set the time of base alarm clock 1,
till the left clock icon start blinking, and "hour" digit also start flashing , press "UP" or "DOWN"
button to adjust "hour" to your desired value, then briefly press ALARM 1 key again, "minute"
digit start flashing,
press "UP" or "DOWN" button to adjust "minute" to your desired value, then briefly press ALARM 1
key LCD display will return to previous time(which is running) and base will sound a "du"tone to
inform alarm clock 1 is set.
Note : 1). during clock setting, long press "UP" or "DOWN" key to adjust the digit continuously.
2 ). in base standby mode, shortly press ALARM 1 key to switch "alarm 1" ring on/off, while the left clock
icon lights, "alarm 1" ring is switched on.
~10~
In standby mode, press and hold
ALARM 2
ALARM 2
key on base unit to set the time of base alarm
clock 2, till the right clock icon start blinking, and "hour" digit also start flashing , press "UP" or
"DOWN" button to adjust "hour" to your desired value, then briefly press ALARM 2 key again,
"minute" digit start flashing,
press "UP" or "DOWN" button to adjust "minute" to your desired value, then briefly press
ALARM 2 key ,LCD display will return to previous time(which is running) and base will sound
a "du" tone to inform alarm clock 1 is set.
Note : 1). during clock setting, long press "UP" or "DOWN" key to adjust the digit continuously.
2 ). in base standby mode, shortly press ALARM 2 key to switch "alarm 2" ring on/off, while the
right clock icon lights, "alarm 2" ring is switched on.
2. base alarm tone snooze on/off
While alarm 1 or 2 is switched on, and running time come to set time , base will ring with alarm
tone, and you can shut off the ringer tone by shortly pressing "SNOOZE" button,
otherwise ring will last 10s and will repeat at 5 minutes interval.
3. Set handset alarm
button to enter setting mode.
1). In standby mode, press
button to select "HS SETTINGS",
2). press
3).press
4). press
5). press
button to enter handset function setting,display will show "ALARM"
button to enter the selection, it will show "OFF"(extra-factory setting).
button to select "ON",
button to confirm the selection, handset display will show 00...00
6).press
and cursor will blink to let you to set alarm time (from left to right).
button to confirm the setting, display will show "SNOOZE ON"
7).press
and clock icon (you can press
button to select "SNOOZE OFF, )
button to confirm the selection
8).press
9).press
button to go back to stand-by mode.
** When "SNOOZE ON" is selected, alarm tone will repeat at 5 minutes interval.
if "SNOOZE OFF" is selected, alarm tone ring only sounds once.
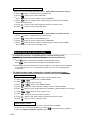
To switch on /off handaset power
1.While handset in "off" mode,Press and hold the
button for 3s to turn
handset 'ON'.
2. In standby mode, press and hold the
button for 3 seconds to turn
handset 'OFF'.
** Y ou can switch handset off to save battery
.
** When the handset is in "off" mode, the unit can not be used for emergency calls.
Note: To answer a call when the handset is switched off, you need to switch it
back on. It may take a few moments for the handset to re-establish a radio link
with the base unit(and handset will give a tone to tell "link-up").
To lock/unlock keypad
To lock
" button for 3 seconds till the icon
In standby mode,Press and hold "
appears on the display, all of handset keys are locked (except " " button) .
To unlock
While handset key locked, press and hold "
give a "du" tone, then unlock the keys, icon
*
" button for 3s, handset will
will disappear .
** Note: 1). while handset keys locked, you can not make any emergency call s.
2). while handset keys locked, you still can answer calls when handset is ringing.
~11~
To make and answer calls
To make a call
To make a call
1) press
button and the TALK icon
will appear,OR press
button
will appear, you will hear dial tone ,
a callthe SPEAKERPHONE icon
and
2). input telephone number by numeral keys to make a call.
3) press
button to end the call
** You can also make a call by using the Pre-Dialling function:
Key in the required telephone number in standby mode, and if you make a mistake you can
correct it by using the
button to delete digits , then get line by pressing
or
button,
The number will be dialled out automatically
**To insert a pause in the dialling number, press the
button, a letter "P" will be
shown in the number. While number is dialed out, 3.6s pause will be added.
To make a call from redial list
There are two ways to enter redial list:
To make a call from the redial list
In standby mode:
1). Press
button to enter the redial list(outgoing call), the handset
can maximum memorize 10 groups dialed number at most.
2). Press
or
button to scroll the redail list to find your desired number.
3). Press
4). press
or
button to dial out the number,
button to end the call
In talk mode,
After get line, first press
button , the unit will dial out one group of number,
(it is last number redial function of one group number)
To make a call from Caller Display(CID) list:
The unit can save 40 group of CID memory(number or name) .
1). In standby mode, press
2). Press
3). Press
4). press
or
or
button to enter CID list,
button to scroll the CID list to find your desired number or name.
button to get line to make a call.
button to end the call
To make a call from Caller Display (CID) list
To mute the mouthpiece
1).In talk mode, press
button at any time, mouthpiece is muted, display will
show "CALL MUTED", another side can not hear you under muting mode
2). second press
button to un-mute mouthpiece, "CALL MUTED" will disappear,
user return to normal talk mode
~12~
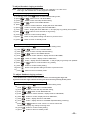
To register and deregister
To register a handset
Note : the registration has already been done on this device when ex-factory, antenna
icon
will appear at the top of right corner while handset power on. While antenna icon
is steady on display, it means handset has linked up with base unit.
If antenna icon blinks long time on display, it means lost linking with base units, you
are required to re-register the handset. process as below:
1).on base unit, press
button to start registering mode, base will give a beep tone
PAGE
with red LED start blinking (if more 2 minutes and register not suceed , blinking will stop,
you need to re-press "PAGE" key again) .
2). press
button on handset to enter menu setting mode, then press
button
to find "Registration" menu,
3). press
button to start handset registering mode, handset will display "searching",
4). if handset find base unit, display will show "PIN CODE", blinking cursor will guide to input
pin code 0000(default value).
5). if registration is sucessful, handset will give a long beep tone, then antenna icon is steady,
display will show
1, it means it is the first handset of the base unit.
6 ). if registration is not sucessful, handset will return to searching status, you need to try again.
To select a base unit
The handset can be registered to different base (up to a maximum of 4) at same time,
and you can select which base you want the handset to operate with.
If you select "AUTO" the handset will link with the first of the registered
bases that it finds.
1). In standby mode, press
button to enter setting mode.
2). press
or
3). press
button to enter handset function setting,
4). press
5). press
button to select "HS SETTINGS",
or
button to find "SELECT BASE",
button to enter next step, handset will show "BASE 1,
6). press
or
button to scroll " BASE 2", "BASE 3", "BASE 4", "AUTO"
if base number followed " ", it means handset had been registered on this base,
7).press
button to confirm, then handset link up to your desired base unit.
To de-register a handset
You may need to do this if you need to replace a faulty handset.
1). In standby mode, press
2). press
~13~
or
button to enter setting mode.
button to select "BS SETTINGS",
3). press
button to enter base menu setting,handset show " DEL HS"
4). press
button to enter next step setting, handset will show "PIN CODE"
5). press
button to confirm, after you input correct pin code(default 0000)
then handset will show "HS 1
6). press
or
"
button to select the desired handset(HS 2, 3, 4) which you
want to delete(Please note you only can delete HS which number followed with mark:
7). press
button to confirm the selection, handset will return to show "HS 1
)
"
(** the deleted handset will sound a beep tone, then show "unregistered").
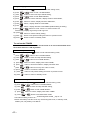
Phonebook Memory Management
You can store up to 50 numbers in each handset's Phone Book (memory). Each
number can have up to 20 digits, and you can store a name of up to 12 characters
with the number. (If you try to store more, the handset will give a sharp warning
tone and the extra letter/number will not be saved in memory.)
Also, you can select a different ringer melody for each entry,
but this will only work if you subscribe to CID
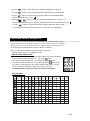
How to enter characters ?
To use the characters you press on the button where you see the character
once,
e.g. if you want to insert the letter "A" , you press
twice,
if you want to insert the letter "B" , you continously press
three times.
if you want to insert the letter "C" , you continously press
if you want to insert the letter "AA", wait a moment after first "A", till the
cursor jump to second letter location, then input second "A"
The detailed letters input rule, please see the following table.
Key pad table
_
,
?
A
B
C
2
D
E
F
3
G
H
I
4
J
K
L
5
M
N
O
6
P
Q
R
S
5th
?
2nd 3rd 4th
1
6th 7th
!
1st
!
á
8th
’
9th 10th 11th 12th
”
(
)
:
13th 14th
;
.
í
~
N
7
~
ú
T
U
V
8
W
X
Y
Z
9
space
0
+
-
@
=
/
\
[
]
*
#
~14~
Phonebook submenu structure:
"LIST"---- shows all of phonebook memories one by one
"NEW ENTRY"--- add a new phonebook entry
"EDIT RECORD"--- modify an existing phonebook memory
"DEL RECORD"--- delete a phonebook memory
"DELETE ALL
"--- delete all phonebook memories
"MEM STATUS"--- shows the number of entries programmed in the total phonebook capacitor.
To review phonebook memory(name and number):
you can enter phonebook menu to review phonebook list one by one.
1). In standby mode, press
2). press
button to enter handset setting mode,
button to select "PHONEBOOK",
3). press
button to confirm,handset show " LIST"
4). press
button to enter memory list, display will show first entry(as letter sequence)
or
button to review all of phonebook memories(name),
5). press
6). when display show phonebook name , press "0" button to switch phonebook number/name reviewing.
7). press
button to exit present setting and return to previous menu.
8). press
button to return to standby mode.
To add a new phobebook entery
1). In standby mode, press
2). press
3). press
4). press
button to enter handset setting mode,
button to select "PHONEBOOK",
button to confirm,handset show " LIST"
button once to find "NEW ENTRY"
button to confirm, display show " NAME?" , directly input name characters
5). press
numeral keys from key "2" to "9"(please read page 14-- "How to enter characters ? ")
6). while name input is finished , press
button to confirm, display will show "NUMBER"
directly input telephone numbers by numeral keys.
button to confirm,display will show "MELODY 1" and play ring melody to user,
7). press
8).press
or
button to select desired melody(total 10 kinds ring melody).
it is to let user to choose special ring melody for different phonebook memory. While incoming
call number match phonebook memory number, handset will sound chosed ring melody.
9). press
button to confirm, display return to "NEW ENTRY" to let user add more a memory.
10).press
button to exit present setting and return to previous menu.
11).press
button to return to standby mode.
NOTE: If error input for name and number, user can briefly press
button to erase one
character or one digit, press and hold
button to erase all of input, press
button to shift cursor to any character or digit.
To modify a phobebook memory
1). In standby mode, press
2). press
3). press
button to enter handset setting mode,
button to select "PHONEBOOK",
button to confirm,handset show " LIST"
4). press
button twice to find "EDIT RECORD"
5). press
button to confirm,display will show the first phonebook memory
~15~
or
6). press
or
button to scroll phonebook memories(name) to find the desired one,
7). press
button to start name character modification , blinking cursor guide user to
modify character,
8). press
button to confirm name and display will show phonebook number, blinking
cursor guide user to modify number.
9). press
button to confirm,display will show "MELODY 1" and play ring melody to user,
10). press
or
button to select desired melody(total 10 kinds ring melody).
it is to let user to choose special ring melody for different phonebook memory. While incoming
call number match phonebook memory number, handset will sound chosed ring melody.
button to confirm, display return to "NEW ENTRY" to let user add more a memory.
11).press
12).press
13).press
button to exit present setting and return to previous menu.
button to return to standby mode.
To delete a new phobebook record
1). In standby mode, press
2). press
3). press
button to enter handset setting mode,
button to select "PHONEBOOK",
button to confirm,handset show " LIST"
4). press
or
5). press
button to confirm,display will show the first phonebook memory
button to find "DEL RECORD"
6). press
or
7). press
button to confirm selection , handset will show "CONFIRM?"
button to scroll phonebook memories(name) to find the desired one,
8). press
button to execute the operation, handset will sound a beep tone and display
return to "DEL RECORD" menu to let user delete more a memory.
9). press
button to exit present setting and return to previous menu.
10).press
button to return to standby mode.
To delete all of phobebook records
1). In standby mode, press
2). press
3). press
button to enter handset setting mode,
button to select "PHONEBOOK",
button to confirm,handset show " LIST"
4). press
or
5). press
button to confirm, handset will show "CONFIRM?"
button to find "DEL ALL"
6). press
button to confirm the operation, handset will sound a beep tone and display
return to "DEL ALL" menu
7). press
button to exit present setting and return to previous menu.
8). press
button to return to standby mode.
To review phone memory status
It maybe helpful for user to know phonebook memory capacitor and occupied status if necessary
1). In standby mode, press
2). press
3). press
button to enter handset setting mode,
button to select "PHONEBOOK",
button to confirm,handset show " LIST"
button once to find "MEM STATUS" , handset will show " 01/50"(for instance)
4). press
"01" means one phonebook is saved in total memory, "50" means maximum memory
capacitor is 50.
5). press
button to exit present setting and return to previous menu.
6). press
button to return to standby mode.
~16~
To store redial number in phonebook
button to enter redial number list(10 groups at most)
1. in the idle mode, press
2). press
or
button to find the desired number ,
3). press
button , handset will show "ADD TO PB"
4). press
button , handset will show "NAME", input name character by numeral keys
5). press
button , handset will show the selected number with cursor flashes in the
end of number , you still can edit the number
button to confirm,display will show "MELODY 1" and play ring melody to user,
6). press
7). press
or
8). press
button to confirm, display return to dialed list to let user add more into memory.
button to select desired melody(total 10 kinds ring melody).
9). press
button to exit present setting and return to previous menu.
10).press
button to return to standby mode.
Caller ID and call log management
Caller Dispaly (CID)
To subscribe to this feature you need to contact your service provider, and there may be a charge
for this service.
Caller Display lets you see the phone numbers of your callers on the display before you answer.
Both answered and unanswered calls are stored, up to a maximum of 20 calls. When the caller
display list is full, any new caller display entry will replace the oldest record.
The caller display information includes:
the caller's number (up to 20 digits)
the date and time of the call
the caller's name (up to 12 characters) if the incoming number matches an entry in the phonebook
Note: it will also display the caller's name if the network sends it,
The display may also show the following:
UNAVAILABLE - if the number of the caller is unavailable, e.g. from an international
call. (This may also appear with a number, as certain networks can send
a "name unavailable" message with the caller's number.)
WITHHELD - if the call is from someone who has withheld their number.
"While a new caller incoming, handset will show caller number with new CID icon
and
and
. In standby mode, icon
will fl ash to inform user has new CID.
If the incoming number matches an entry in the phonebook, display will show number and name
alternatively,
To review caller ID list
Answered or unanswered incoming call are stored, user can reviewe caller ID information by two ways
" to review caller ID list
A>. use shortcut key "
1). In standby mode, user can press
button to enter caller ID list
2). press
or
button to scroll caller ID list,
B>. use "CALL LOG" menu to review caller ID list.
1). press
button to enter handset setting mode, handset will show "CALL LOG"
2). press
button, handset will show "RECEIVED"
3). press
4). press
button to enter caller ID list
~17~
or
button to scroll caller ID list,
**if caller ID information included name, it will only show name in the list, pressing "0" button can
switch caller ID number, number or call time.
**If caller is not answered or reviewed before , " " and " " " will be displayed while you review
review caller ID list
"
**If caller is answered or reviewed before , display only show icon "
CALL LOG managemnet
The handset can automatically save incoming call and dialed call in "CALL LOG" menu
( "RECEIVED" and "DIALED"), the user can manage these numbers if necessary.
"RECEIVED" ---caller ID list (incoming call)
"DIALED" ---redialed list(outgoing call)
CALL LOG structure
"ADD TO PB"---save a received call or dialed call into phonebook
"DELETE" ---delete a received call or dialed call from the list
"DELETE ALL" ---delete all received calls or dialed calls from the list
"ADD TO PB" from received call list
1). press
button to enter handset setting mode, handset will show "CALL LOG"
2). press
button, handset will show "RECEIVED"
3). press
4). press
button to enter caller ID list
5). press
or
button to select the desired number you want to save ,
button , handset will show "ADD TO PB"
6). press
button , handset will show "NAME", input name character by numeral keys
7). press
button , handset will show the selected number with cursor flashes in the
end of number , you still can edit the number
button to confirm,display will show "MELODY 1" and play ring melody to user,
8). press
9). press
or
button to select desired melody(total 10 kinds ring melody).
10).press
button to confirm, display return to dialed list to let user add more into memory.
11).press
button to exit present setting and return to previous menu.
12).press
button to return to standby mode.
"ADD TO PB" from dialed call list
1). press
button to enter handset setting mode, handset will show "CALL LOG"
2). press
button, handset will show "RECEIVED"
3). press
button to select "DIALED",
4). press
button to enter the dialed call list
The balance operation is same as above "ADD TO PB" from received call list
step 4 to 12.
DELETE a call from received call list
While you review received call list(see above "ADD TO PB" from received call list )
button , handset will show "ADD TO PB"
1). press
2). press
3). press
button once to select "DELETE"
button to confirm, display show "CONFIRM?"
4). press
button to double confirm, handset will give a beep tone and display
show next received call.
5). press
button to exit present setting and return to previous menu.
6). press
button to return to standby mode.
~18~
DELETE a call from the dialed call list
While you review the dialed call list(see above "ADD TO PB" from dialed call list )
button , handset will show "ADD TO PB"
1). press
2). press
3). press
button once to select "DELETE"
button to confirm, display show "CONFIRM?"
4). press
button to double confirm, handset will give a beep tone and display
show next received call.
5). press
button to exit present setting and return to previous menu.
6). press
button to return to standby mode.
"DELETE ALL" from the dialed call list
While you review the dialed call list(see above "ADD TO PB" from dialed call list
1). press
2). press
button , handset will show "ADD TO PB"
3). press
button to confirm, display show "CONFIRM?"
)
button twice to select "DELETE ALL"
4). press
button to double confirm, handset will give a beep tone and display
show "EMPTY" , then return to standby mode.
Handset tones and volume setting
To adjust the earpiece or speakerphone volume during a call
While making or answering a call with the handset:
1). Press
button to increase the earpiece or loudspeaker volume ,
press
button to decrease the earpiece or loudspeaker volume
. The display will show the volume level as you adjust it. The earpiece and loudspeaker
2).
can be adjusted from 1 to 5, You will hear an error tone if you try to adjust beyond
these limits.
To adjust earpiece and loudspeaker volume from handset menu
Adjust loudspeaker volume
1). In standby mode, press
2). press
3). press
4). press
5). press
or
button to enter handset setting mode,
button to find " HS SETTINGS"
button to enter next step
or
button to find "AUDIO SETUP"
button to confirm selection, display will show "SPK VOLUME",
6). press
button to enter, display will show "VOLUME 3" (default setting of ex-factory),
7). press
or
8 ). press
button to confirm your favority volume
9). press
button to exit present setting and return to previous menu.
10).press
button to return to standby mode.
button to scroll volume 1 to 5
Adjust earpiece volume
While you enter "AUDIO SETUP" submenu, and see "SPK VOLUME"
you also can choose "EAR VOLUME" by pressing
button, the balance operation
is same as "Adjust loudspeaker volume" step 6~10
~19~
To adjust Handset ringing melodies
Note: There are 10 different melodies to choose from. Melodies 1 to 5 are monotone rings, and melodies 6 to 10 are polyphonic melodies.
To adjust the ringing melody for intercom call
1). In standby mode, press
2). press
3). press
4). press
5). press
or
button to enter handset setting mode,
button to find " HS SETTINGS"
button to enter next step handset setting,
or
button to find "RING SETUP"
button to confirm selection, display will show "INT RING",
6). press
button to confirm, display will show "MELODY" ,
7). press
button , display will show "MELODY 1" and pre-play ring melody from speaker.
8). press
or
button to scroll 10 kinds of ring melody,
9). press
button to confirm melody setting
10).press
button to exit present setting and return to previous menu.
11).press
button to return to standby mode.
To adjust the ringing melody for external call
1). In standby mode, press
2). press
3). press
4). press
5). press
or
button to enter handset setting mode,
button to find " HS SETTINGS"
button to enter next step handset setting,
or
button to find "RING SETUP"
button to confirm selection, display will show "INT RING",
6). press
button to confirm, display will show "MELODY" ,
7). press
button , display will show "MELODY 1" and pre-play ring melody from speaker.
8). press
or
button to scroll 10 kinds of ring melody,
9). press
button to confirm melody setting
10).press
button to exit present setting and return to previous menu.
11).press
button to return to standby mode.
To adjust Handset ringing volume :
* The handset has a choice of five volume levels or of turning the ringer off.
If you have set the ringer volume to OFF, you won't hear any melody at this point.
To adjust ringing volume for intercom calls
1). In standby mode, press
2). press
3). press
4). press
5). press
or
button to enter handset setting mode,
button to find " HS SETTINGS"
button to enter next step handset setting,
or
button to find "RING SETUP"
button to confirm selection, display will show "INT RING",
6). press
button to confirm, display will show "MELODY" ,
7). press
button , display will show "VOLUME " ,
8). press
9).press
button , display will show "VOLUME 3"(default setting of factory)
or
button to scroll volume 1 to 5 and "volume off"
handset will pre-play ring melody to tell ring level.
10). press
button to confirm melody setting
11).press
button to return to standby mode.
~20~
To adjust ringing volume for external calls
1). In standby mode, press
2). press
3). press
or
4). press
or
5). press
button to enter handset setting mode,
button to find " HS SETTINGS"
button to enter next step handset setting,
button to find "RING SETUP",
button to confirm selection, display will show "EXT RING",
6). press
button to confirm, display will show "MELODY" ,
7). press
button , display will show "VOLUME " ,
8). press
9). press
button , display will show "VOLUME 3"(default setting of factory)
or
button to scroll volume 1 to 5 and "volume off"
handset will pre-play ring melody to tell ring level.
10). press
button to confirm melody setting
11).press
button to exit present setting and return to previous menu.
12).press
button to return to standby mode.
To set handet TONES
There are three handset tones that can be turned on or off via the handset menu.
All of these tones are "ON" by default.
(1). To turn key tone on/off
1). In standby mode, press
2). press
3). press
4). press
5). press
6). press
7).press
or
button to enter handset setting mode,
button to find " HS SETTINGS"
button to enter next step handset setting,
or
button to find "TONE SETUP",
button to confirm, display show "KEY TONE",
button to enter the selection, display will show "ON"
or
button to turn key tone "ON" or "OFF",
8). press
button to confirm the selection.
9). press
button to exit present setting and return to previous menu.
10).press
button to return to standby mode.
(2). To turn battery low alert tone on/off
1). In standby mode, press
2). press
3). press
4). press
or
button to enter handset setting mode,
button to find " HS SETTINGS"
button to enter next step handset setting,
or
button to find "TONE SETUP"
5). press
button to confirm, display show "KEY TONE"
6). press
or
button to find "BATTERY LOW"
The balance setting is same as " To turn key tone on/off " step 6 ~10.
Please note battery low alert tone only work during talk mode, in standby mode,
if battery low, only battery icon flashes.
~21~
(3). To turn out of range alarm tone on/off
1). In standby mode, press
2). press
or
3). press
4). press
button to enter handset setting mode,
button to find " HS SETTINGS"
button to enter next step handset setting
or
button to find "TONE SETUP"
5). press
button to confirm, display show "KEY TONE"
6). press
or
button to find "RANGE ALARM"
The balance setting is same as " To turn key tone on/off " step 6 ~10.
To use a multi-handset system
If you have a CH-D707 Twin, Triple or Quad system, you already have two, three or
four handsets. You can haveup to 5 handsets registered to the base unit, as numbers
1, 2, 3, 4 or 5 with more than one handset registered to your base unit, you can
>
>
>
>
make intercom calls from one handset to another handset
make an intercom call while you are on an outside call
transfer an outside call from one handset to another or to the corded base
set up a three-way conference call between yourself, an outside call and another handset
Each handset has its own number 1, 2, 3, 4 or 5 which is shown at the lower left corner
like as "HS-- 1".
Please note :
Among these handsets registered to the base, only one outside call and two intercom
calls can take place at the same time.
When a cordless handset is using the outside line, the other handsets
will show icon "
" in standby mode, if you want to get line , handset will give a
alert tone and then display "LINE BUSY" a moment, then drop line automatically.
but other handsets can still make a intercom call.
To make an internal call
For instance, HS1 make intercom call to HS2
1). Press
button on handset1, you hear a constant tone in the earpiece and handset 1
will show "HS ? 2, 3, 4"(if base unit registered 4 handset), handset 1 also show icon
( icon
blinks )
2). Key in the number of other handset (for instance 2)
handset 1 will show "CALLING HS 2". The called handset 2 will ring and the display
will show "HS1 CALLING".
3). Press
button on handset 2 to answer the intercom call, the two handset enter internal
talk mode, handset start to calculate internal talk time, icon
will be steady on display.
4). press
button to end internal call on any handset.
To transfer an outside call
When you've made or answered an outside call, you can transfer the call to another handset .
**For instance, HS1 transfer an outside call to HS2
~22~
1). Handset 1 in talk mode, press
button on handset1, you hear a constant tone
in the earpiece of hanset 1. Handset 1 display will show "HS? 2, 3, 4"(if registered 4 HS)
2). Key in one number of other handset (for instance 2) using the handset digit keys
handset 1 will show "CALLING HS 2". The called handset 2 will ring and the display
will show "HS1 CALLING".
3). Press
button on handset 2 to answer the intercom call, the two handset enter
intercom call mode, handset start to calculate talk time, icon
will be steady.
handset 1 still hold outside call, and icon
are shown on display together.
4). press
button on handset 1, outside call is transfered to handset 2.
Note: during step 1 to 3, outside call is put on hold all the time. If the called handset 2
not answer during 30s , handset 1 will automatically return to outside call.
To set up a three-way conference call
To set up a three-way conference between two handsets and an outside call
**For instance, HS1, HS2 , outside call
1). Handset 1 in talk mode, press
button on handset1, you hear constant tone
in the earpiece of hanset 1. Handset 1 display will show "HS? 2, 3, 4"(if registered 4 HS)
2). Key in one number of other handset (for instance 2) using the handset digit keys
handset 1 will show "CALLING HS 2". The called handset 2 will ring and the display
will show "HS1 CALLING".
3). Press
button on handset 2 to answer the intercom call, the two handset enter
internal call mode, handset start to calculate talk time, icon
will be steady.
handset 1 still hold outside call, and icon
are shown on display together.
4). Briefly press
button on handset 1 , two handset enter conference call with
outside call, icon
are shown on display together. Handset 1 display
"CONFERENCE", handset 2 display "INTERNAL"
Customising your handset
To change the handset name
1). In standby mode, press
2). press
3). press
4). press
or
button to enter handset setting mode,
button to find " HS SETTINGS"
button to enter next step handset setting
or
button to find "HS NAME"
5). press
button to enter edition, blinking cursor will guide you to input
characters of name (see page 14 : How to enter character? )
6). press
7).press
button to confirm,
button to return to standby mode.
**In standby mode, display will alternatively show "name +time(day/month)" and
"HS 1 + time(hour/minute)" in one line. So name character quantitycan not be more than 6 .
~23~
To select handset display language
You can select between 16 kinds of languages for the handset display.
1). In standby mode, press
button to enter handset setting mode,
2). press
or
button to find " HS SETTINGS",
3). press
4). press
5). press
6). press
button to enter next step handset setting,
or
button to find "LANGUAG"
button to enter language selection,
or
button to scroll 16 kinds language
7). press
button to choose your desired language,
8). press
button to return to standby mode.
To turn on/off handset Auto answer
This allows you to answer an incoming call automatically by simply picking
the handset up from the charging cradle(base or charge pod).
You can switch this function ON or OFF. The factory default is ON.
1). In standby mode, press
2). press
3). press
4). press
or
button to enter handset setting mode,
button to find " HS SETTINGS",
button to enter next step handset setting,
or
button to find "AUTO ANSWER"
5). press
button , display shows "ON"
6). press
or
7). press
button to confirm your choice,
8). press
button to choose "ON" or "OFF"
button to return to standby mode.
**While auto answer is set to "ON", if an external call is coming , handset
and base is ringing, just pick up handset from charge cradle, you will
get line automatically.
To set handset call barring function
You can set 4 numbers (up to 4 digits each) for call barring. When the call barring
is "ON", any numbers beginning with the programmed digits can not be dialed out
and the display will show "CALLS BARRED".
1). In standby mode, press
button to enter handset setting mode,
2). press
or
button to find " HS SETTINGS",
3). press
button to enter next step handset setting,
4). press
or
button to find "BARRING"
button to enter, display will show "PIN?"
5). press
input pin code 0000(default pin code).
6). press
button to confrim pin code, display will show "OFF"(default status)
7). press
8). press
button , display show "ON"
button to confirm, display will show "NUMBER 1"
9). press
button to enter number setting, display will show "NUMBER?"
directly input number (up to 4 digits) by numeral keys,
10). press
button to confirm input number, display return to "NUMBER 1"
as same way, you can set 4 groups barring number(up to 4 digits)
11). press
button to return to standby mode.
~24~
To set handset default settings
1). In standby mode, press
button to enter handset setting mode,
2). press
or
button to find " HS SETTINGS",
3). press
button to enter next step handset setting,
4). press
or
5). press
button to confirm , display will show "PIN?"
button to find "HS DEFAULT"
directly input pin code 0000(default pin code).
6). press
button to confirm, display will show "PB CLR-? Y/N"
with "y" letter blinks, you can press
button to choose "N"("N" blink)
If "Y" is selected , all of phonebook memeories will be deleted
If "N" is selected , all of phonebook memeories will not be deleted
7). press
button to confirm , handset display will power reset one time,
then handset will re-search base unit again.
* after handset default operating, handset menu setting items will be reset to
ex-factory status, besides actual display time and phonebook memories
(if you choose "N" while handset show "PB CLR-? Y/N" before default executing)
To set handset LCD contrast
1). In standby mode, press
button to enter handset setting mode,
2). press
or
button to find " HS SETTINGS",
3). press
button to enter next step handset setting,
4). press
or
5). press
button to confirm , display will show "LEVEL 5 "
6). press
or
button to find "CONTRAST"
button to choose suitable contrast what you like,
7). press
button to confirm the selection,
8). press
button to return to standby mode.
To turn on/off "NON-DISTURB" function
Turn on "NON-DISTURB" function
button about 3s, handset will give a beep tone,
In standby mode, press and hold
and icon
will appear on display, handset enter external call "NON-DISTURB" mode,
if external call comes, handset will not ring, but it still ring for internal call.
Turn OFF "NON-DISTURB" function
button
While handset is in external call "NON-DISTURB" mode, press and hold
will disappear on display,
about 3s, handset will give a beep tone, and icon
handset return to normal mode.
To turn off voice mail prompt icon
If you have applied voice mail service, and while you have a new voice mail,
the icon (
) will flash on the right top corner of LCD. You can get it
by calling service number.
When you have a voice mail prompt on handset display, but you are unwilling to get it,
and the prompt icon (
) does not disappear all the time, you can disable the icon
as below: press
is displayed, press
to standby mode,
~25~
button to review incoming call(CID) list, while CID number(or name)
button about 3s till handset sound a "di du" beep tone, then return
will disappear from display.
BASE BASIC SETTING FROM THE HANDSET
You can set some of the basic base functions from the cordless handset.
The base must be powered up and in idle mode, otherwise you will hear an
error tone when you try to access the "BS SETTING" menu.
To set base ring melody and volume
button to enter setting mode,
1). In standby mode, press
2). press
or
button to find " BS SETTINGS",
3). press
button to enter next step base setting,
4). press
or
5). press
button to confirm , display will show " BS MELODY"
button to find "RING SETUP"
6). press
button, display will show default melody type(for instance : MELODY 1)
7 ). press
or
8). press
button to confirm melody selection,
9). press
10). press
or
button to choose your favority ring melody type (total 5 kinds)
button to choose "BS VOLUME"
button, display will show default volume (for instance : VOLUME 2)
11) .press
.
or
12). press
button to confirm your setting,
button to return to standby mode.
13).press
button to choose your favority ring volume (total 3kinds+ volume off)
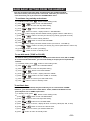
To set dial mode (TONE or PULSE)
The default setting of this telephone is TONE (also called Touch Tone, MF or DTMF)
It is recommended dial mode , you need not modify it except special requested by
netwrok.
1). In standby mode, press
button to enter setting mode,
2). press
or
button to find " BS SETTINGS",
3). press
button to enter next step base setting,
4). press
or
5). press
button to confirm , display will show "TONE"
6 ). press
or
7). press
8). press
button to find "DIAL MODE"
button to choose "TONE" or "PULSE",
button to confirm your select dial mode,
button to return to standby mode.
To set flash time
The Flash (also called Recall) may be needed if you are connected to a PABX.
However, you can select from 3 flash times: 100ms, 300ms and 600ms to meet
your telephone line or PABX requirement.
1). In standby mode, press
button to enter setting mode,
2). press
or
button to find " BS SETTINGS",
3). press
button to enter next step base setting,
4). press
or
5). press
button to confirm , display will show ex-factory value(100, 300, or 600)
6 ). press
or
7). press
8). press
button to find "FLASH TIME"
button to choose one kind of three,
button to confirm your selected flash time
button to return to standby mode.
~26~
To modify pin code
A PIN code is required to access some functions on the handset and base.
The default PIN is 0000, but you can change it to your personal 4-digit PIN.
1). In standby mode, press
button to enter setting mode,
2). press
or
button to find " BS SETTINGS",
3). press
4). press
button to enter next step base setting,
or
button to find "MODIFY PIN"
button to confirm , display will show "PIN ?"
5). press
input pin code by numeral keys (0000, if you did not change before)
6). press
button to confirm , display will show "NEW PIN "
input new pin code by numeral keys (if you need to change pin code)
button to confirm , display will show "REPEAT "
7). press
input new pin code again (same pin code as step 6)
button , handset will give a confirmation tone to tell pin code
8). press
modification success. If operation error, handset will give a long alert tone.
9). press
button to return to standby mode.
To reset base to default settings
This allows you to restore the base to its default settings.
The base menu settings will be returned to their initial default settings,
1). In standby mode, press
button to enter setting mode,
2). press
or
button to find " BS SETTINGS",
3). press
4). press
button to enter next step base setting,
or
button to find "BS DEFAULT"
button to confirm , display will show "PIN ?"
5). press
input pin code by numeral keys (0000, if you did not change before)
button , base and handset will give a confirmation tone
6). press
to tell base power reset and hanset re-link up with base unit.
7). press
button to return to standby mode.
BASEBASE
SETTING
ONSETTING
BASE UNIT
BASIC
FROM THE HANDSET
To set base to ring volume
SNOOZE/RING
In standby mode, press"SNOOZE/RING " button on base top,
base LCD will show present base ring volume, press the button
to adjust base ring volume from 1 to 3, OFF (circularly)
To set base LCD display contrast
CONTRAST
In standby mode, press" CONTRAST " button on base top,
base LCD will show different display contrast, press the button
to choose your favority contrast.
To page handset
PAGE
The function is for base searching handset.
In on-hook mode, press" PAGE " button on base top,
handset will ring with special melody(different INT,EXT ring melody)
handset display will show "PAGE....". press any button on handset
ring will stop at once.
BASE LED Indication
In charging mode, base red LED will keep lighting on.
In off-hook mode, base red LED will keep lighting on.
In registering mode, base red LED will keep blinking 120s.
In page mode, base red LED will keep blinking 60s.
~27~
Troubleshooting
~28~
Cleaning and care
§
Do not clean any part of your CH-D707 with benzene, thinners or other solvent chemicals
– this may cause permanent damage which is not covered by the Guarantee.
When necessary, clean it with a damp cloth.
§
Keep your CH-D707 away from hot, humid conditions or strong sunlight , and do not
let it get wet
Every effort has been made to ensure high standards of reliability for your CH-D707.
However, if something does go wrong, please do not try to repair it yourself – consult your
supplier.
§
Technical details
Digital Enhanced Cordless
Telecommunication (DECT6.0)
Standard
1.911 to 1.928 GHz
(bandwidth = 20 MHz)
Frequency range
Channel bandwidth
Operating time
Temperature range
Electrical power
Base UNIT
1.728 MHz
Up to 300m outdoors;
up to 50m indoors
Standby: 100 hours
Talking: 10 hours
Battery charge time: 24 hours
Operating range
Operating 0 C to 40 C
Storage -20 C to 60 C
HANDSET 500mAH NiMH
2.4V rechargeable battery pack.
input -230V AC 50Hz 45mA, output 6.0VDC
CHARGER POD
6.0V
The
port (connect to the
Port specification
mains power supply) is a SELV port with respect to EN41003.
The
port (connected to the telephone line) is a TNV port
with respect to EN41003.
~29~
200mA.
input -230VAC 50Hz 45mA, output 6.0V DC
100mA.
Limited Warranty
In the unlikely event that this product is defective, or does not perform properly, you may within ninety (90)
days from your original date of purchase return it to the authorized service center for repair or exchange.
TO OBTAIN WARRANTY SERVICE:
- Provide proof of the date of purchase within the package (dated bill of sale).
- Prepay all shipping costs to the authorized service center, and remember to insure your
return.
- Include a return shipping address (no P.O.Boxes), a telephone contact number, and the
defective unit within the package.
- Describe the defect or reason you are returning the product.
Your product will be repaired or replaced, at our option, for the same or similar model of equal value if
examination by the service center determines this product is defective. Products received damaged, as a
result of shipping will require you to file a claim with the carrier.
The shipping address of the authorized
service center is:
Southern Telecom Inc.
ATTN: Returns Department
14-C 53rd Street
Brooklyn, NY 11232
To obtain service after the warranty period, please e-mail: [email protected] with product
information, date of purchase and nature of the problem. Customer service will reply to the e-mail with
service instructions.
Warranty service not provided:
This warranty does not cover damage resulting from accident, misuse, abuse, improper installation or
operation, lack of reasonable care, and unauthorized modification. This warranty is voided in the event any
unauthorized person opens, alters, or repairs this product. All products being returned to the authorized
service center for repair must be suitably packaged.
Limitation of Warranty:
● THE WARRANTY STATED ABOVE IS THE ONLY WARRANTY APPLICABLE TO THIS PRODUCT. ALL OTHER WARRANTIES, EXPRESS OR
IMPLIED (INCLUDING ALL IMPLIED WARRANTIES OF MERCHANTABILITY OR FITNESS FOR A PARTICULAR PURPOSE) ARE HEREBY
DISCLAIMED. NO VERBAL OR WRITTEN INFORMATION GIVEN BY SOUTHERN TELECOM INC. IT’S AGENTS, OR EMPLOYEES SHALL
CREATE A GUARANTY OR IN ANY WAY INCREASE THE SCOPE OF THIS WARRANTY.
● REPAIR OR REPLACEMENT AS PROVIDED UNDER THIS WARRANTY IS THE EXCLUSIVE REMEDY OF THE CONSUMER, SOUTHERN
TELECOM INC. SHALL NOT BE LIABLE FOR INCIDENTAL OR CONSEQUENTIAL DAMAGES RESULTING FROM THE USE OF THIS PRODUCT
OR ARISING OUT OF ANY BREACH OF ANY EXPRESS OR IMPLIED WARRANTY ON THIS PRODUCT. THIS DISLAIMER OF WARRANTIES
AND LIMITED WARRANTY ARE GOVERNED BY THE LAWS OF THE STATE OF NEW YORK, EXCEPT TO THE EXTENT PROHIBITED BY
APPLICABLE LAW, ANY IMPLIED WARRANTY OF MERCHANABILITY OR FITNESS FOR A PARTICULAR PURPOSE ON THIS PRODUCT IS
LIMITED TO THE APPLICABLE WARRANTY PERIOD SET FORTH ABOVE.
How state law relates to this warranty:
● Some states do not allow the exclusion nor limitation of incidental, consequential damages, or limitations
on how long an implied warranty lasts so the above limitations or exclusion may not apply to you.
● This warranty gives you specific legal rights, and you also may have other rights that vary from state to
state.
Made In China • Designed In the USA
Distributed by: Southern Telecom Inc. Brooklyn, NY 11232
© 2009 Southern Telecom Inc. All Rights Reserved.
THE SHARPER IMAGE® name and logo are registered trademarks.
Manufactured and Marketed by Southern Telecom Inc. under license.
© The Sharper Image. All Rights Reserved.
~30~