1
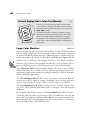
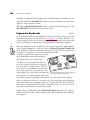
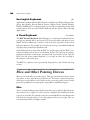
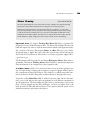
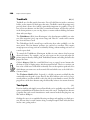
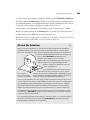
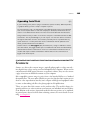
173
6
Basic
Peripherals
To operate your Mac, you need a few essential pieces of equipment
besides the computer itself. You need input devices (a keyboard and a
mouse, generally) to control the computer, and a monitor to see what
you’re doing.
Monitors and keyboards are provided with new Performa model Macs. Most
of the time these devices meet your needs, but you may want more features
to do more work (or have more fun). Perhaps you want a bigger monitor,
or you’ve grown tired of that broken key in the middle of your keyboard.
Maybe you’re uncomfortable with your mouse and have considered your
options. (How about a trackball instead of a mouse?)
And what about purchasing a scanner to get pictures and documents into
your Mac?
This chapter is about all these basic peripherals and we’ll provide you with
all the answers.
174
Chapter 6: Basic Peripherals
Contributors
Contents
John Christopher (JC)
is the chapter editor.
Monitors ........................................................................175
Finding What You Need...........................................................175
Small Color Monitors ...............................................................179
Medium-Size Color Monitors ...................................................181
Large Color Monitors...............................................................182
Brad Bunnin (BB),
principal author of The
Writer’s Legal Companion, is an attorney who
practices literary law.
Andreu Cabré (AC)
is a Catalan designer
living in Northampton,
Massachusetts.
Joe Matazzoni (JM), a
former Macworld editor,
writes about desktop
publishing and interactive media.
Randy B. Singer (RS)
is a practicing attorney,
an Apple legal fellow,
and a contributor to
Law Technology Product
News and Law Office
Computing.
Arthur Naiman (AN),
Sharon Zardetto
Aker (SZA), Susan
McCallister (SM),
and John Kadyk (JK)
edited earlier editions of
The Macintosh Bible,
from which sections of
this chapter were taken.
Keyboards ......................................................................183
Evaluating Keyboards...............................................................183
Standard and Extended Keyboards ..........................................185
Ergonomic Keyboards ..............................................................186
Keyboards With Trackballs........................................................187
Non-English Keyboards............................................................188
A Chord Keyboard ...................................................................188
Mice and Other Pointing Devices .................................188
Mice ........................................................................................188
Trackballs .................................................................................190
Touchpads ...............................................................................190
Pressure-Sensitive Tablets .........................................................192
Scanners.........................................................................193
How Scanners Work.................................................................194
Types of Scanners ....................................................................195
Evaluating Scanners .................................................................195
Color Flatbed Scanners ............................................................197
Monitors
Monitors
( JC)
Not all monitors are made alike. The choices you make when choosing a monitor will
determine whether you see your work in 256 colors or a million, and the quality of
the screen will determine whether you get a headache after an hour, or work comfortably all day. In this section, we’ll describe what to look for in a monitor (often
called a display), find out which ones will work with your Mac, and run through some
of the many choices on the market.
Finding What You Need
Choosing a monitor is one of the most important decisions you’ll make when setting
up your computer system. In this section, we’ll discuss important points to consider
when shopping for a monitor.
Monitor sizes (JK/BB). Most monitors fall into one of four size categories, based on
their shape and diagonal screen measurement. Don’t attach too much importance to
a screen’s physical size (it rarely matches the actual viewable image area).
• Small (12-inch to 15-inch) monitors are fine for typical home uses: writing letters,
using personal accounting software, playing games, and so on.
• Mid-size (16-inch or 17-inch) monitors allow you to display quite a bit more, but
they’re not quite tall enough to show the full length of a letter-size page with margins, or wide enough to show two adjacent pages.
• Full-page or portrait monitors (15-inch, but shaped differently than “small” 15-inch
monitors) are designed to show a full letter-size page, with a little room next to it to
leave the disk and Trash icons showing. The word portrait indicates the monitor’s
tall, rectangular shape (the term landscape is sometimes used to describe the shorter,
wider shape of ordinary monitors).
• Two-page (19-inch to 21-inch) monitors display two full letter-size pages
side by side, so they’re great for desktop publishers. They’re also useful
for graphic artists and people who
create spreadsheets or keep a lot of
documents open.
Small
Mid-size
Two-page
Full-page
The size of the monitor you choose depends on the kind of
work you do, as well as the amount of space you have available
on your desk.
175
176
Chapter 6: Basic Peripherals
Pixels and resolution (JK). The image you see on a Mac’s screen is made up of many
tiny dots called pixels. The amount of information that fits on a screen depends on
how many pixels it displays, which is called the screen’s resolution. For example, Apple’s
standard resolution for small external monitors is 640 pixels across the screen and 480
from top to bottom; for mid-size monitors, it’s 832 by 624; for portrait monitors, it’s
640 by 870; and for large monitors, it’s 1,024 by 768 or 1,152 by 870.
When you set a mid-size monitor to a resolution of 1,152 by 870, you’re putting a lot
more pixels in the same area, so the monitor uses smaller pixels, and everything on the
screen looks smaller. The size of the pixels used at a given resolution is measured in
pixels per inch, usually expressed as dpi (dots per inch).
G OOD
F E AT U R E
Monitors of the same general size and pixel dimensions often have different dpi
because they have different-size image areas. Macs are designed so a 72-dpi screen
displays at actual size. This means a one-inch line on the screen will print out as a oneinch line on paper.
Many monitors can be set up to display several different resolutions—depending on
the capabilities of the Mac they’re hooked up to—so you either cram more information onto the screen or blow everything up to a more readable size. Such monitors are
called multisync or multiscan monitors and can usually be used with PCs as well as
Macs. You generally need to get a special adapter plug from the monitor’s manufacturer—usually for free or cheaply—to make a particular resolution work, but if you’ve installed a display card, you
should be able to make the switch in the Monitors control
panel. Most manufacturers make software that allows their
monitors to make the switch without even restarting.
Richness of colors or grays ( JK/AN/SZA/SM/Mac Kenny).
On color monitors, each pixel can be black, white, or any of
over 16.7 million colors, including grays—an image of
almost photographic quality. You select which level of color
you want in the Monitors control panel.
The richness of the color palette available with a given Mac
and monitor setup is called its bit depth, which refers to the
number of bits the Mac’s memory assigns to each pixel. Onebit color gives you just black and white; 8-bit gives you 256
colors or shades of gray; 16-bit gives you over 32,000 colors
or shades of gray; and 24-bit gives you over 16.7 million.
Black and white in color. Changing
the resolution in the Monitors control panel to grayscale or black &
white will give your color monitor
a slight boost in the speed that
graphics appear on the screen, and
scrolling through a large graphic
will also be improved.
Monitors
177
The bigger the monitor, the more pixels it has, and the more memory is required for
a given bit depth. The number of colors you can actually get out of your machine
depends on the video capabilities of your Mac. So, for example, a Mac’s built-in video
support may be able to put 32,000 different colors or grays at once on a 16-inch
screen, but only 256 at once on a 21-inch screen, because it has so many more pixels.
With a 24-bit display card installed, the same Mac can produce 16.7 million colors on
either of those monitors.
Video support, display cards, and acceleration (JK). Current Macs have some
level of built-in video support, which means you can connect a monitor directly to the
Mac’s video port. But the level of support varies quite a bit between models, so don’t
assume you’ll be able to plug any monitor into any Mac. Generally, the more recent
and expensive the Mac model, the more kinds of monitors it will support. See Chapter
2 for a partial list of which Macs support which monitors.
On some Macs, you can expand the video support by buying a VRAM upgrade (see
Chapter 4 for more on VRAM), which will allow you to hook up a larger monitor or
get more colors on a small one. Otherwise, you’ll have to buy a display card (which
plugs into one of your Mac’s expansion slots).
If you work with large, full-color (24-bit) images, you may find that it takes forever for
the screen to redraw whenever you make a change or even drag an image a couple of
inches. If that’s the case, you’ll probably want to invest in a display card that includes
graphics acceleration. Some graphics accelerator cards can make changes appear several times faster than they would without acceleration, but they can also cost several
times more than a regular display card.
Two Monitors, One Mac
( JC)
Sometimes, having one monitor attached to your Macintosh isn’t enough. You might be
working on a large page layout and want to see it all. Having two monitors lets you spread
your work out across two displays. To accomplish this you need to install a video card inside
your Mac to support a second monitor.
The Monitors control panel lets you adjust the position of the second monitor, and its
Identify button displays a number on the corresponding monitor’s screen in case you get
confused. Other options let you specify which monitor will be used during startup and
which will display the menu bar.
G OOD
F E AT U R E
178
Chapter 6: Basic Peripherals
Image quality (JK/AN/BB). A monitor’s refresh rate—how often it redraws the image
on the screen—helps determine how steady and solid the image looks. (Don’t confuse
the refresh rate with the screen’s ability to keep up with the mouse when you move a
graphic around on the screen; the latter depends on the speed of the Mac and its
graphics acceleration, if it has any.)
The refresh rate is measured in Hertz (times per second)—abbreviated Hz. If a screen
refreshes too slowly, you get flicker (also called strobe). The larger the screen, the more
flicker is likely to bother you, so larger monitors usually have higher refresh rates.
(Actually, the refresh rate is linked to the monitor’s resolution, so a given monitor can
have different refresh rates depending on which resolution is being used.)
Generally, any monitor that’s connected to the Mac’s video port and operates at a
resolution of 640 by 480 pixels has to run at 67 Hz; if the resolution is any higher, it
runs at 75 Hz. The main exceptions are VGA monitors and SVGA monitors, which
were developed for PCs but can run on most current Macs. They can run as low as
60 Hz or even 56 Hz, although some Macs let you increase the refresh rate of
SVGA monitors up to 70 Hz or 72 Hz in the Monitors control panel by clicking the
Options button.
Peripheral vision is particularly sensitive to flicker, so if you’re in doubt about a screen,
turn away from it and see how it looks out of the side of your eye.
H OT T I P
G OOD
F E AT U R E
Several other factors contribute to image quality. Dot pitch, which is the distance
between individual dots of phosphor on the screen, affects the overall clarity of the
image. Generally, anything below .30mm (millimeters) is acceptable, and most Mac
monitors fall within that range. With color monitors, sharpness depends partly on the
ability of the display tube to focus the three color beams to hit the right spots on the
screen (this is called convergence, and a few monitors let you adjust for it—a very good
feature). Distortion refers to a screen’s tendency to misrepresent shapes—to display
straight lines as bowed, for example. It’s often most noticeable at the edges and corners of the screen, and it’s more common on large monitors.
Emissions and MPR II (JK). Monitors produce electromagnetic emissions—called
ELF and VLF (extremely low frequency and very low frequency) radiation—that,
according to some research, may increase your risk of cancer (for more on this subject, see Appendix A). There’s no conclusive evidence that a risk exists, and no level of
exposure that has been determined to be safe. The Swedish government has produced
a set of low-emissions guidelines called MPR II, and most current monitors adhere to
those standards.
Monitors
179
Energy Star ( JK). To cut down on
energy consumption, the Clinton
administration set up the Energy
Star program. Energy Star requires
all computer equipment sold to the
U.S. government to drop its power
consumption below 30 watts when
it’s not being used.
The Energy Saver control panel can be configured to switch an
Energy Star–compliant monitor into low-power mode and dim the
screen to black. It works in a similar way to the sleep mode built
into PowerBooks and supports any Quadra/Centris, LC III, or Power
Mac running system 7.1 or above. It can also be configured to
turn the Mac on and off at specific days and times so you can,
for example, call in and connect to your desktop Mac using your
PowerBook.
Equipment manufacturers don’t
want to be excluded from selling to
the Feds (they’re the world’s biggest
customer, after all, accounting for
ten percent of all computer equipment sales in the United States), so
most of them are changing their products to meet the standards. As a result, a lot
of hardware is being designed to go automatically into a low-power mode or turn
itself off when it’s not being used.
Energy Star–compliant monitors from Apple, NEC, and Radius have a screen-saver-like
feature that not only dims their screens, but reduces their power consumption by 50 to
85 percent when the Mac is not being used for a given length of time. To bring one of
these monitors back up to full power, you just move the mouse or hit any key.
Small Color Monitors
( JC)
Most people opt for small color monitors—they’re reasonably priced, they don’t take
up too much space on the desk, and they meet the needs of the typical user. For a
quick glance at all the monitors mentioned here see the table “Comparing Monitors,”
later in this chapter.
The Apple Multiple Scan 14 ($360) packs a lot of features into a small display. This
model represents Apple’s low end, yet it has front panel controls, a 12.4-inch viewable
image size, front-mounted stereo speakers, and a headphone jack. If you want a slightly larger viewable image size you should definitely consider Apple’s Multiple Scan 15
Display ($480). It has all the features of the Multiple Scan 14 but its speakers are
side-mounted and it gives you 13.3 inches of viewable image area. Apple monitors
carry a one-year replacement warranty.
G OOD
F E AT U R E
180
Chapter 6: Basic Peripherals
Accelerating Graphics With NuBus and PCI Cards
( JC)
For boosting the speed that graphics are displayed and seeing more colors on screen, you
might look into purchasing a graphics accelerator card. Starting with the Macintosh II series,
most desktop Macs have NuBus expansion slots built-in.
POWE R MAC
Power Macs (such as the 7200, 7500, 8500, and 9500 use PCI (peripheral component interconnect) cards which are reportedly capable of delivering three times the performance of
the NuBus type. Be sure to check the reviews in your favorite Mac publications to find
out which cards are the peak performers. (See Chapter 2 for more tips on installing NuBus
and PCI cards.)
NEC Technologies makes some excellent displays and consistently scores high in
reviews from Mac publications. The NEC MultiSync C400 ($330, average street
price) is an excellent basic monitor and has a 13.2-inch viewable image with no black
border, front panel controls, and a tilt-and-swivel stand. For color, clarity, and price,
it rivals Apple’s Multiple Scan 14.
G OOD
F E AT U R E
For a few dollars more NEC’s MultiSync XV15+ ($500, average street price) gives
you control of the display’s settings through the aid of an on-screen help manager.
NEC has an outstanding three-year warranty period which covers parts, labor, and—
most importantly—the picture tube (cathode ray tube) itself.
Sony’s Trinitron picture tube is almost legendary for quality and sharpness. With Sony’s
Trinitron Color Display CPD-1425 ($380) you get high quality at a decent price.
Like the other monitors mentioned here, it comes on a tilt-and-swivel base and offers
13.1 inches of viewable image area. This is a nice monitor for the price, but the
adapter necessary to connect it to the Mac will cost you an additional $15.
Another excellent monitor from Sony is the Multiscan 15SX ($550). It provides a
slightly larger viewable image area (13.9 inches) and front panel digital controls. All
of Sony’s monitors have a three-year warranty on parts and labor and two years on
the CRT.
So which one should you buy? Well, ultimately the decision will depend on your budget and the particular features you’re looking for.
Personally, I like the fact that NEC monitors have a long warranty period, and that
coverage includes the CRT. In the 15-inch size my first pick is the NEC MultiSync
XV15+, followed closely by the Apple Multiple Scan 15 Display (I like its integration
of speakers so I can listen to CDs).
Monitors
In the 14-inch size I like the price of the NEC MultiSync C400, and again the long
and thorough warranty. My second pick here is the Apple Multiple Scan 14 because
it’s full of high-end features and comes at a decent price.
Medium-Size Color Monitors
(BB/JC)
Not only are 16- and 17-inch color monitors bigger in screen size, but they are also
bigger in footprint (the space they take up on the desktop), weight, and bulk than the
14-inchers, and they cost more, yet they display less than twice as much information.
Despite the fact that they generally offer more controls over color and image, their
image quality usually isn’t as good as that of the smaller monitors. But if you need one,
here are a few recommendations.
Leading the pack is the affordable Apple Multiple Scan 1705 Display ($820 without
speakers, $850 with speakers). It features 15.8 inches of viewable image area and has
an anti-static and anti-glare screen.
Next up is NEC MultiSync XV17+ ($850, average street price). This model features
NEC’s Opticlear screen surface which gives it an anti-glare and anti-static coating.
Like its little brother (the XV15+), the XV17+ utilizes an on-screen help manager and
is covered by NEC’s three-year warranty.
If you need a monitor to help you create or use multimedia applications, the
AppleVision 1710AV Display ($1,160) is the one to get. It has front-mounted
speakers, a built-in microphone, headphone and external microphone jack, and ADB
ports. A non-AV model is also available with fewer ports for $1,040.
The Radius PrecisionView 17 ($1,100) uses a Sony Trinitron picture tube for high
image quality. It displays resolutions of up to 1,024 by 768, and is covered by Radius’
premium warranty with 24-hour replacement.
Sony’s Multiscan 17SF2 Trinitron Graphic Display ($1,100) has an on-screen display
with digital controls to adjust the picture within its 16-inch viewable image area. Sony
designed this model with home and corporate users in mind.
The NEC MultiSync XV17+ and the AppleVision 1710AV Display are my favorites
in this category. I prefer the MultiSync XV17+ for its picture clarity, advanced user
controls, and warranty coverage. The AppleVision 1710AV is also exceptional for all
its bells and whistles, and quality sound. For more details on the monitors mentioned
here see the table “Comparing Monitors.”
181
182
Chapter 6: Basic Peripherals
Portrait Display Labs’s Color Pivot Monitor
( JC)
Ever wish you could see the entire page of the document
you’re working on without scrolling up and down? Portrait
Display Labs has the answer with its two-in-one monitor the
Pivot 1700 ($1,100).
In portrait mode, the Pivot displays a complete 8.5-by-11
page (perfect for Web surfers and designers). With a quick
swivel of the display (without shutting down or quitting
the application you’re working in) you get a superb landscape view just right for large spreadsheets and multimedia
presentations.
Large Color Monitors
( JK/BB/JC)
You can now buy 19-, 20-, and 21-inch color monitors for under $2,000, but unless
you have a high-end Mac (one of the top Quadra or Power Mac models), you’ll have
to spend several hundred dollars more on a VRAM upgrade or a display card to get
decent color richness. If you have an older Mac, it probably won’t support this size
monitor at all, so you’ll have to buy a display card to use it at its intended resolution.
Only buy a large monitor if you genuinely need the large screen and have a place to
put it; you’ll find its presence overwhelming unless you can sit well back from it.
H OT T I P
Sony’s Multiscan 20SF Trinitron Graphic Display ($2,300) is a top-of-the-line
monitor with a 19.1-inch viewable screen area and front-panel digital controls. It is
designed for graphics professionals who need high resolutions for CAD, desktop publishing, and imaging applications.
The NEC MultiSync XE21 ($1,900, average street price) is loaded with high-end
features such as NEC’s Opticlear coating; a multilingual on-screen help program; a
large 19.8-inch viewable screen area, and it’s covered by a three-year warranty.
The Apple Multiple Scan 20 Display ($2,150) features a 19.1-inch viewable image
area. It uses a Sony Trinitron picture tube and has an anti-glare screen and integrated
ADB ports.
In the expensive-but-worth-it category is the Radius MultiView 21 ($2,150). It has a
.25mm dot pitch that makes text and images appear incredibly clear onscreen and
comes with its own Dynamic Desktop software that lets you switch resolutions without restarting the Mac or quitting applications. For an easy reference to all monitors
discussed in this section, see the following table.
Keyboards
Comparing Monitors
Model
Viewable
Image Area
Outstanding Features
Price
12.4 inches
Stereo speakers, headphone jack
$360
Small Color Monitors
Apple Multiple Scan 14
Apple Multiple Scan 15
13.3 inches
Stereo speakers, headphone jack
$480
NEC MultiSync C400
13.2 inches
Front panel controls, tilt-and-swivel stand
$330
NEC MultiSync XV15+
13.8 inches
On-screen help manager
$500
Sony Multiscan 15SX
13.9 inches
Front panel controls, tilt-and-swivel stand
$550
Sony Trinitron CPD-1425
13.1 inches
Front panel controls, tilt-and-swivel stand
$380
Medium-Size Color Monitors
Apple Multiple Scan 1705
15.8 inches
Stereo speakers, anti-static, anti-glare screen
$850
AppleVision 1710AV
16.1 inches
Stereo speakers, microphone, ADB ports
$1,160
NEC MultiSync XV17+
15.6 inches
Opticlear anti-static, anti-glare screen
$850
Radius PrecisionView 17
16
inches
Sony Trinitron picture tube
$1,100
Sony Multiscan 17SF2
16
inches
Digital controls
$1,100
Large Color Monitors
Apple Multiple Scan 20
19.1 inches
Anti-glare screen, ADB ports
$2,150
NEC MultiSync XE21
19.8 inches
Opticlear anti-static, anti-glare screen
$1,900
Radius MultiView 21
19.8 inches
Sony Trinitron picture tube
$2,150
Sony Multiscan 20SF
19.1 inches
Front panel digital controls
$2,300
Keyboards
( JC)
When you buy a modular Mac, the keyboard usually isn’t included. Most people will
automatically buy an Apple keyboard, even though there are plenty of others on the
market that might suit a particular purpose much better. Here are some hints on what
to look for and which products provide it.
Evaluating Keyboards
( JK/JC)
Keyboards may seem generic, but there are plenty of differences to consider. To do a
worthwhile comparison, use the information here to think about what you want.
Then find a keyboard in a store or catalog that seems to meet your needs. If you can,
try it out, or get a money-back guarantee; you won’t really be able to judge its performance until you’ve used it with your own Mac for awhile.
183
184
Chapter 6: Basic Peripherals
Key feel. Every keyboard has a slightly different feel. Do you prefer a hard, solid keystroke or a softer, mushier one? You’ll need to do some hands-on testing to decide.
Ergonomics. Using a keyboard a lot can also put you at risk for various injuries, some
of which can become permanent disabilities (see Appendix A for more on this). If
you’re constantly typing, you should seriously consider getting one of the specially
built ergonomic keyboards on the market designed to avoid injuries.
The numeric keypad. Most keyboards come with a numeric keypad, or at least have
an option to add one. The keypad saves a huge amount of time for people who enter
numbers a lot and can touch-type the ten-key layout. For people who don’t use it, the
keypad is just an obstacle on their hand’s way to the mouse.
H OT T I P
H OT T I P
You can assign other functions to the keypad. If you hit the v or n key while
using Microsoft Word, the number keys become controls for moving the insertion
point up or down, or to the start or end of a line. If a disability prevents you from
using the mouse, you can use the Easy Access control panel to make the number keys
on the keypad move the pointer.
Function keys and other controls. Apple’s extended and AppleDesign keyboards,
and many third-party keyboards, include 15 function keys, which some programs
(Microsoft Word and Excel, for example) use as shortcuts for standard commands.
You can also use macro programs like QuicKeys (described in Chapter 13) to assign
any function you want to these keys.
Built-in trackballs. Some keyboards have built-in trackballs, which save you the
expense of buying one separately. But don’t assume the keyboard’s trackball will work
the same way as others you might have used. Built-in trackballs tend to be smaller and
hard to control, which makes some of them virtually unusable.
Key arrangement. Some keyboards have unique layouts you may find very convenient or very annoying. You might, for instance, prefer a larger r or ∂ key.
Again, it’s ideal to try before you buy, or at least get a money-back guarantee.
Compatibility. Some early third-party keyboards were not fully compatible with
the Macintosh. These keyboards simply did not work for Mac-unique procedures
such as holding down the s key to disable extensions, or zapping the PRAM
( zoPR ), during startup. (The fine art of PRAM zapping and extension disabling is covered in Chapter 7.)
Fortunately most (if not all) non-Apple manufactured keyboards currently being sold
work as they’re supposed to. If you should happen to purchase one that doesn’t,
promptly return it.
Keyboards
The Cheap Keyboard Challenge
185
( JC)
Mom always said, “cheaper isn’t always better” and in most cases the old adage remains
true. Yet as consumers, we never stop looking for products that are high in quality and low
in price even though the two almost never go hand in hand. Bearing this in mind I set out
on a mission in search of the cheapest, high-quality keyboard I could find through three
mail-order catalogs.
Shopping for anything through a catalog can be challenging, especially since you don’t
know what you’re getting until it arrives. Fortunately purchasing through mail-order has an
advantage; a good number of products that are sold have a 30-day money-back guarantee
so they can be returned if they don’t meet your expectations.
All three of the keyboards I ordered were the extended type with 105 keys, an ADB cable
was included, and each tested fully Mac-compatible.
At $60 the MacWarehouse PowerUser 105 Extended was the most expensive model I
looked at. It has a durable design, carries a one-year warranty, but has no height adjustment, and pressing the keys down required some extra effort. I also didn’t like the small
∂ key; other keyboards feature one that is typically at least twice as wide. My advice is
to stay away from this keyboard as it is too expensive for what you get.
The best thing about Mac Zone’s Performantz Soft Touch Extended ($50) is the feel of
the keys. Although it may be a bit mushy for some, typing on this keyboard was virtually
silent and effortless. The warranty period is impressive—it’s covered for three years. This is a
good keyboard if you prefer the soft-touch feel.
Surprisingly, the cheapest keyboard, the MDS Mac-105M ($40, PC & MacConnection) was
the one I liked the best. It was the only one to come with an instruction manual, a two-year
warranty, and a nice, stylish design. The key feel was just about right—not too mushy with a
nice solid “click” as the keys are pressed. If you don’t want to invest big bucks to buy an
Apple brand keyboard, get this one.
Standard and Extended Keyboards
(AN/BB/JK/JC)
Not long ago Apple offered two styles of keyboard. The standard model had only 81
keys; the extended model featured 105 keys and a row of 15 function keys.
Apple no longer manufactures the 81-key model but currently makes two extended
keyboards: the AppleDesign (about $90 mail-order) and the Apple Extended
Keyboard II ($170 mail-order). Both of these keyboards are virtually identical except
the Extended II includes a plastic template that fits over the row of function keys that
serves as a reference for shortcuts. The AppleDesign is included with Performa model
Macs and has a nice contoured shape.
G OOD
F E AT U R E
186
Chapter 6: Basic Peripherals
A number of companies besides Apple make extended keyboards. DataDesk was one
of the first. I find their Mac101E ($120) lighter yet more satisfying to the touch than
Apple’s or other companies’ boards.
MicroSpeed’s Keyboard Deluxe Mac ($125) is certainly worth checking out as is the
Soft Touch Plus (about $50 mail-order) from Adesso.
Ergonomic Keyboards
(RS/JC)
As we mentioned earlier, heavy keyboard use can put you at risk for some very serious
and permanent injuries (to find out more, see Appendix A). People should be concerned enough over this issue to look for products that will protect rather than harm
them, and companies are beginning to develop keyboards for healthy computing.
G OOD
F E AT U R E
Most new keyboards on the market have some form of ergonomic support built-in
such as height adjustment or softer keys. But, the Kinesis Ergonomic Model 130
($275, Kinesis) is really the only keyboard made that can be considered 100 percent
ergonomic. It’s designed to correct the awkward postures that
can lead to repetitive stress injuries, and according to independent studies cited by Kinesis,
and reports from users, it really works.
The Kinesis left- and right-hand keys are
set in two concave bowls that are separated
by several inches of empty surface. The keys
are arranged so your thumbs are higher than
the rest of your hand, and palms face each
other slightly. The result is that your hands and The Kinesis Keyboard is split down the middle and
curved to fit the shape of your hands.
arms remain in a natural position while using
the keyboard, and very little finger movement is necessary to push down each key.
Some keys have been relocated, so you have to do a little relearning, but the keyboard
also has the ability to be remapped if necessary. Using the Kinesis requires much less
effort than a standard keyboard. I highly recommend trying one, even if you don’t
(yet) suffer from any kind of repetitive stress injury.
Another finger-friendly option, the Tru-Form Keyboard ($90 mail-order, Adesso),
features an ergonomically contoured design with a split keyboard layout and built-in
wrist support.
Keyboards
Type It For Me, Will You Mac?
( JC)
Wouldn’t it be nice if your Mac automatically typed the date or added your name at the
close of a letter or e-mail message? Well it can by using either of three different programs
that create scripts or shortcuts.
TypeIt4Me ($20) is a fantastic shareware program that maintains a list of words or entire
paragraphs you use frequently. By invoking certain keyboard or mouse combinations the
desired text appears instantly.
If you want to automate your Mac beyond merely typing, CE Software’s QuicKeys ($119)
program is definitely for you. QuicKeys pretty much does it all and you can create a different
set of shortcuts for every application you use. For more on QuicKeys see Chapter 13.
One Click ($129, WestCode) takes the idea of QuicKeys further by displaying customizable
button palettes to run the shortcuts and scripts you create. It’s extremely Mac-like and
easy to use.
Keyboards With Trackballs
( JC)
The latest trend these days seems to be keyboards with either a built-in trackball or
touch-sensitive trackpad. For roughly the same price as an extended keyboard, you get
built-in cursor control and save space on your desk. [While some may enjoy having their
left hand know what their right hand is doing by using the built-in cursor controls, asking
others of us to forsake our mouse is outright Mac-blasphemy!—JJ]
Currently two manufacturers sell keyboards with built-in trackballs: DataDesk makes
the TrackBoard ($150); and there’s also the TrakPro ($250) from Key Tronic.
Unfortunately built-in trackballs rarely work as well as their external cousins. The
feel, position of the clicking buttons, and movement of the built-in trackballs we’ve
tried were disappointing, so do go for a test drive before buying one.
Your best bet for a keyboard with built-in cursor control is TouchBoard ($180,
DataDesk) which features a touch-sensitive pad similar to those found on newer
PowerBooks. The TouchBoard’s pad offers better, more accurate control of the mouse
than a built-in trackball. It lacks a numeric keypad but you can add one for $70 if you
find you really miss it.
187
188
Chapter 6: Basic Peripherals
Non-English Keyboards
( JK)
Apple makes standard and extended keyboards for all the major Western European languages, plus Japanese, Korean, Russian, Persian, Hebrew, Greek, Turkish, Icelandic,
Finnish, and Flemish. To use them properly, you need the corresponding version of the
system software. You can order both the keyboard and the system software through
Apple dealers.
A Chord Keyboard
(Caleb Clark)
The BAT Personal Keyboard ($199, Infogrip) is a seven-button keyboard that lets
you type one-handed: there’s one key for each of your four fingers and three for your
thumb. You hit combinations (“chords”) of the seven keys to produce all the various
keyboard characters. For example, the chord for the letter g is the middle thumb and
ring finger keys pushed down simultaneously.
Standard keyboards are faster than the BAT for straight typing, but the BAT is convenient for things such as layout or text editing, because you can keep one hand on
the keyboard and one on the mouse, and never look away from the screen. I put the
BAT to the left of my standard keyboard so I can type on either one according to
the situation, and it works great.
The BAT has a palmrest and ergonomically designed keys, and it didn’t take long
to learn.
Mice and Other Pointing Devices
Mice are one of the Mac’s great innovations. They give you much more direct control
over what’s on the screen than any keyboard can. The mouse controls the pointer,
which gives you the ability to select objects on the screen and control cursors in word
processors, paintbrushes in art programs, and paddles in shuffleboard games.
Mice
There’s certainly nothing wrong with the mouse that comes with your Mac, but someday you may have to replace it, or there may be a substitute that would better fit the
way you use your Mac. For example, some mice and trackballs have extra buttons that
lock down for dragging objects, or for other purposes that you can assign. Here are
several alternative mice you might consider.
Mice and Other Pointing Devices
Mouse Cleaning
(SZA/SM/AN/RS/JK)
Over time, gunk builds up on the rollers inside a mouse, making it feel rough and causing
the pointer to skip jerkily around the screen. Luckily, there’s an easy way to fix it.
Remove the ring at the bottom of the mouse by turning it (or sliding it, on some older
mice) and drop the ball out into your palm. Then, using a penknife or pencil eraser, scrape
or rub off the track of crud that you’ll see on the rollers inside. Wipe the ball with a cloth,
and put the mouse back together. This little chore is really worth the time it takes. The difference between a gunky, rough mouse and a clean, smooth mouse is astounding.
Ergonomic mice (JC). Apple’s Desktop Bus Mouse II ($80) is ergonomically
designed and comes standard with new Macs. The Mouse II is molded to fit into your
hand and requires less effort to click the mouse button, which can help prevent injury.
For a fraction of the price, Kensington’s Mouse in a Box ($40) gives you a similar
design and shape as Apple’s but comes with a five-year warranty and an amazing 90day no risk trial. If you have an older mouse or need more ergonomic support this is
a good one to get.
The Kensington folks also make the two-button Kensington Mouse ($60) and programmable, four-button Thinking Mouse ($90). Both have a symmetrical shape and
allow their buttons to be configured to reduce repetitive tasks.
A cordless mouse (AN/JC). I’ve often found the cord on my mouse getting in my
way as I make the big, sweeping arm movements so typical of people with my particular constellation of neurological defects. The solution is a cordless mouse that transmits its motion to the Mac using either an infrared beam or through radio waves.
Logitech’s cordless MouseMan ($90) is molded to fit your palm and has three buttons—one to click and two that can be programmed to issue different commands for
specific applications. The MouseMan uses radio waves to transmit up to six feet away
from a receiver plugged into the Mac’s ADB port, and does not require them to be
lined up with each other like infrared devices. Four separate channels can be used to
eliminate interference from other radio devices.
189
190
Chapter 6: Basic Peripherals
Trackballs
(BB/JC)
Trackballs are a bit like upside-down mice. You roll a ball that sits inside a stationary
holder, so they require less desk space than mice. Trackballs control the pointer more
precisely than a mouse does (which is particularly important for graphics). They all
have at least two buttons: one that’s like a normal mouse button, and one that can lock
in the down position so you can drag objects or menus without holding the button
down with your finger.
The TurboMouse ($110) from Kensington is the best-known trackball; year after
year, Mac magazines give it top review ratings and “Best Of ” awards and it remains
one of our favorites as well.
The TurboMouse’s ball is much larger and heavier than other trackballs, so it has
more inertia. The four buttons’ position, size, and feel are excellent. They require
enough pressure to keep you from accidentally clicking, without making you aware of
a need to press hard.
G OOD
F E AT U R E
To control the TurboMouse, Kensington includes its own software that has many
advanced features. For example, you can select spots on the screen and make the
pointer jump to them by clicking both TurboMouse buttons and rolling the ball in the
proper direction.
G OOD
F E AT U R E
CoStar’s Stingray ($100) has a small ball that’s easy to control; its two buttons take
the form of a pair of sloping wings, which surround the ball. They’re so sensitive you
have to be careful not to click them accidentally. You can alter pointer speed and select
which button you want to use as the normal click and which to use as the click-lock—
a boon to lefties.
The Trackman Marble ($100, Logitech) is a highly ergonomic trackball that fits
comfortably into the palm of your hand. It has three buttons at the end of a large,
curved palmrest, and the trackball is off to the side for your thumb to control. You can
program two of the three buttons using the MouseKey software for custom shortcuts.
Touchpads
( JC)
If you’re familiar with Apple’s newest PowerBooks you’ve probably noticed the small
square touchpad below the keyboard used to move the cursor. Touchpads have become
a popular item and several manufacturers make external models that plug into any
Mac with an ADB port.
Guiding the cursor is accomplished by using one finger and applying very little pressure. Because they’re touch-sensitive using a touchpad requires little effort, but does
involve some getting used to.
Mice and Other Pointing Devices
A couple of the most popular touchpads available are the Adjustable Glidepoint
($80, Alps) and the QuePoint II ($75, MicroQue). Both of these touchpads feature
programmable buttons—the Glidepoint has three and the QuePoint has four. You can
also tap the surface of these touchpads to double-click on an icon.
A nice feature of the Glidepoint is the ability to adjust its base for more comfort.
Besides one additional button, the QuePoint also scores for its pass-through connector which allows other ADB devices to be connected to it.
When choosing one of these pads it’s really best to try before you buy, especially in
the rare event that you don’t like, or can’t get used to using one.
Me and My QuickCam
( JC)
Okay, so you spent several hours on your tax return, then worked up a few spreadsheets
and answered some e-mail. You and your Mac are probably ready for some fun. What’s
that? You’re bored with the latest shoot-’em-up space game? You say you’ve discovered all
the secrets in Brøderbund’s Myst? Allow us to introduce you
to the Connectix QuickCam (about $100 for the
grayscale version, $230 for the color model).
Slightly smaller than a billiard ball, with a tiny lens and
built-in microphone, the QuickCam captures 4-bit
grayscale or 24-bit color QuickTime video, and
takes still pictures, too.
Create QuickTime
video of yourself and your
friends with the QuickCam.
It’s an addictive little product, in fact you’ll be
amazed at all the ways you’ll discover to use it. On the
practical side you can use the QuickCam to add pictures to documents, newsletters, genealogy programs, databases, and even an
address book using a program such as TouchBase Pro.
Most of all, the QuickCam is fun. Just doing your best contorted, Jim Carey-like faces in front
of it can waste an entire afternoon. Beyond that, if you have kids—or pets—you really should
get a QuickCam. Imagine capturing video of your child, pet, friend, relative or significant
other, playing it back on your Mac at work when you’re feeling down. It could certainly
brighten your day and make everyone else in the office envious, or maybe a little jealous.
The QuickCam is also the perfect low-cost solution for videoconferencing. Used in conjunction with the free CU-SeeMe program from Cornell University, you can transmit video and
sound with others over the Internet.
For videoconferencing within the boundaries of your home, office, or over high-speed ISDN
phone lines, Connectix makes a program called VideoPhone ($150), which can be purchased separately or bundled with the QuickCam.
191
192
Chapter 6: Basic Peripherals
Pressure-Sensitive Tablets
(AC/JC)
Pressure-sensitive tablets let you imitate traditional
painting media, such as brushes or charcoal, by
changing the thickness, color, or opacity of a
line in proportion to the pressure you apply
with the stylus as you draw. A good tablet can
recognize at least 120 pressure levels (although
a lot of software still can recognize only 60). A
stylus should also be light, cordless, and responsive. Many styluses offer buttons to which you can
assign specific functions.
Some tablets also let you trace images placed under
a transparent sheet of plastic, control the ratio
between the active area of the tablet and the screen area
where you want to draw, and create macros, which can
be activated by the menu bar or stylus button.
Pressure-sensitive tablets let you create
and manipulate art the old-fashioned
way—by hand.
Wacom ArtZ and ArtPad tablets. Wacom, the industry leader for some time,
carries the ArtPad II ($150) and ArtZ ($390 for the 6- by 8-inch tablet) tablets which
can interpret as many as 256 pressure levels. Their stylish, featherweight stylus, the
UltraPen, has a programmable side switch you can use to assign different functions
and macros.
The best thing about the ArtZ tablets is that you can completely customize the performance of the stylus and the tablet, and save different sets of preferences for each
program you work with, so you don’t have to waste time switching them back and
forth. My favorite adjustment is the Custom Pressure Curve, which lets you control
the tablet’s response to different pressure levels, so you can, for example, obtain a
softer and more sensitive “brush”.
The ArtPad II tablet takes the economical route and offers a small 4- by 5-inch active
area. It’s great if you’re just getting started, or on a tight budget.
DrawingSlate II. The CalComp DrawingSlate II ($200 for the 6- by 9-inch
tablet), features a cordless stylus, and although it’s a little heavier than the Wacom’s,
it’s very responsive, and the tip has a great feel to it. The stylus has two buttons for
defining actions or commands that, together with the 18-function menu on the tablet,
make DrawingSlate a useful tool for working with macros.
Scanners
Expanding Serial Ports
( JC)
If you’re running out of places to plug in serial devices (such as modems, additional printers,
or graphics tablets) you have a couple of expansion options.
The least expensive route is an A/B switch box (for DIN8 pin devices) that you can purchase
from a local computer dealer or mail-order company for about $25, which allows the connection of one additional serial device. You’ll also need a serial cable that runs about $10.
Using a switch box lets you share one of the two serial ports on the Macintosh with an additional device. The only disadvantage is you can only use one of the two devices connected
through the switch box at a time. You could also potentially run into a problem with any
system extensions or control panels that need to communicate with the particular serial
device you have switched off on the A/B box.
A better solution is the Port Juggler ($95, Momentum, Inc.). Using a combination of hardware and software, Port Juggler handles up to four additional serial devices and automatically
switches between them as needed. It also never loses communication with devices such as
modems that require constant communication with the Mac. For the convenience Port
Juggler is well worth its price.
Scanners
Scanners are devices that convert images—typically photographs or other artwork—
into digital form so they can be stored and manipulated by computers. When used in
conjunction with OCR (optical character recognition) software, they can also convert
a page of text into an editable document on your computer.
Mac-compatible scanners range in price from a few hundred dollars to a hundred
thousand dollars. The ones under $10,000 are great for jobs that don’t require precise
detail or color reproduction, but they can’t compete with high-end equipment when
it comes to demanding jobs like color photographs in slick publications.
There are more than 100 scanners on the market today. The models change frequently and there are often variations even between one individual unit and another.
So in addition to the reviews of particular models in the next section, we’ve explained,
in general terms, what to look for when evaluating scanners. For more details on scanning, see Chapter 15.
193
194
Chapter 6: Basic Peripherals
How Scanners Work
( JM)
During scanning, light is reflected off (or passed through) the artwork and focused
onto CCDs (charge-coupled devices—basically, light sensors) that convert the light
energy to electricity. Color scanners use colored filters (or sometimes a prism) to read
red, green, and blue values separately, and then combine the three single-color scans
to yield a full-color image. Though the principle is the same for all scanners, units differ in how many readings per inch they take (the scanner’s resolution), how much
color information they capture at each reading (the scanner’s bit depth), whether they
take separate passes of the light source to read the red, green, and blue values (threepass scanners) or take all the readings in a single pass (minimizing the chance for misregistration and speeding up the scanning process), and the quality of the scanning
software that comes with the machine.
Bit depth ( JM). One-bit scanners read all sample points as either black or white.
There aren’t very many of these around anymore. Most people use 8-bit grayscale
scanners (for 256 shades of gray) or 24-bit color scanners (256 shades each of red,
green, and blue, for a total of more than 16 million colors).
Some scanners read 36 or 48 bits of information at each sample point, even though
their final product is a 24-bit file. Doing this reduces the amount of noise (inaccurate
data) that CCDs inherently produce. (The less noise there is in relation to total data
collected, the more usable information the scanner can deliver.)
This extra information doesn’t go to waste. A common problem when you alter scans
is that you lose information—if you brighten colors, for example, you might lose
image detail. But when you scan 48 bits, you can tell the scanner to digitally convert
only the brightest 16 million colors, say, so that its final 24-bit image contains the best
information.
Resolution ( JM/AN). A scanner’s resolution refers to the number of sample points per
inch it’s capable of capturing (often expressed as dpi, although spi is more accurate).
Some scanners are also rated in terms of total resolution, the maximum number of
points they can sample. To compare these two figures, divide the total resolution by each
dimension of your intended output, then average the two figures. For example, a scanner whose total resolution is 2,000 by 3,000 dots can output a 5- by 7-inch image at a
resolution of about 415 dpi (2,000/5 = 400; 3,000/7 = 428.6; (400+428.6)/2 = 414.3).
Scanners
Types of Scanners
195
( JM)
The two most common types of scanners are:
• Flatbed scanners. These operate like photocopiers; you
place the artwork on a glass surface, and a scan head
and light source move across it under the glass.
Flatbeds can scan almost anything that has at least
one flat side, even a slab of marble. Most of them
can’t scan transparencies or slides, but a growing
number of manufacturers offer attachments for that purpose. All flatbeds will scan up to at least 8.5 by 11 inches,
and some go up to 11 by 17 inches.
• Transparency scanners. As their name suggests, transparency scanners scan transparent materials such as 35mm slides, negatives, and
larger photographic transparencies (4 by 5 inches or 8 by 10 inches).
Evaluating Scanners
A flatbed scanner is the
perfect solution for getting flat and not-so-flat
art into your Mac.
( JM)
Evaluating scanners is easy if your scanned images will only be displayed on the screen;
just do some test scans and compare the results on a monitor like the one you’ll be
using. The best images to use for tests contain fine detail and a mix of bright and muted
colors; a human face is ideal, since small tonal shifts can make it look totally wrong.
If you’re going to print your scanned images, don’t try to evaluate them on a screen.
Scans that look dull on a screen may actually contain better data for printing than those
that look bright and colorful. It usually isn’t possible to make a scan and then print it
on the output device you’re planning to use, but you can at least avoid some of the most
obvious and common problems by making a few test scans and analyzing them with
Photoshop’s Levels chart (other image-editing programs have similar capabilities).
In the end, the quality of your scans will depend just as much on your skill in processing them as on how good a scanner you used. Just about every scan needs to be
brightened and sharpened in software, and no scanner program can take the place of a
good image-editing program like Photoshop (which comes bundled with many scanners). Also remember that, for most people, differences in quality won’t matter as much
as differences in convenience. Small color imbalances probably won’t bother you if
you’re producing newsletters, but a slow scanner will annoy you every time you use it.
The scanner should provide a Photoshop plug-in or some other software that enables
you to scan directly into your image-editing package. Because all scans need correction, most people find this the most convenient way to work.
H OT T I P
196
Chapter 6: Basic Peripherals
The Visioneer PaperPort
( JC)
Several years ago when computers
were first introduced they were
touted as a way to eliminate paper
in the office. Today we are still
buried in stacks of paper that
move from left to right on our
desks as we search for enough free
space to work. The folks at a company called Visioneer got a brilliant
Use the PaperPort
idea and developed the PaperPort,
to create a “paperless” office.
a small desktop scanner, to finally
get paper off our desks and into our Macs.
The PaperPort Vx ($300) uses virtually no space on your desk. The unit measures just
12 inches long and 3.75 inches high, and is specially designed to set up directly in front
of most Macs without blocking access to the floppy drive. Because it utilizes rollers, the
PaperPort can only be used for flat objects such as documents and photographs. It supports
8-bit grayscale (256 shades) and up to 400 dpi.
G OOD
F E AT U R E
The bundled software is excellent and includes everything you need to become a PaperPort
fanatic. Visioneer includes versions of OmniPage Lite, OCR software to convert scanned
images into text, Corex CardScan for storing scanned business cards, and PictureWorks
copier software that prints documents using features similar to those of a copy machine.
You can feed the PaperPort pretty much anything cluttering your desk: newspaper clippings,
receipts, invoices, reports, recipes, and of course, business cards. After a recent Macworld
Expo I decided to put the PaperPort to work on the stack of business cards I collected. I had
high hopes it would save me hours of manually typing each entry and indeed it did. Each
card was quickly input into the Mac, processed by the CardScan software, and converted
into text which I then imported into my address book program. The PaperPort got all the
cards (about 70 of them) into my Mac in just a couple of hours.
If you receive documents on your Mac through a fax modem the PaperPort is the ultimate
complement. It essentially acts like the input slot of a standard fax machine so you can
immediately fax back contracts or other documents that require your signature or notations.
The only drawback to the PaperPort is it requires the use of one of the Mac’s serial ports
which are typically occupied by a modem and printer. Fortunately the Visioneer folks realize
this and now have a SCSI upgrade kit ($70) so your PaperPort can be daisy-chained with
other SCSI devices. The PaperPort Vx costs less than a flatbed scanner, is faster, takes very
little space, and most importantly gets all those scraps of paper off your desk.
Scanners
Color Flatbed Scanners
( JC)
With nearly an infinite number of choices available we managed to whittle our picks
for scanners down to the following, based on reviews in Mac publications and through
word of mouth.
At the top of the heap is the Silverscanner DTP ($800, La Cie) which competes and
wins in both price and quality against other scanners on the market. The SilverScanner has an optical resolution of 400 by 800 dpi and a maximum bit depth of 30.
La Cie also makes the Silverscanner PRO ($600), a low-cost model designed for
home users and web-page creators. It supports 24-bit color and 300 by 300 dpi. With
its low price and La Cie’s reputation for quality, it is definitely worth checking out.
The ES-1200c ($1,300, Epson) is no slouch either. It’s competitively priced and is
often sold through mail-order catalogs for under $1,000. It comes with Adobe
Photoshop and is covered by a two-year warranty. It supports a resolution of 600 by
1,200 dpi with 30 bits.
Rounding out our top picks is the ScanTouch AX-1200 ($1,720, Nikon). It features
a resolution of 565 by 1,200 and a maximum depth of 30 bits. The ScanTouch costs a
little more than other scanners but the quality is superb.
The Apple Color OneScanner 600/27
( JC)
As we were going to press, Apple announced the Color OneScanner 600/27 ($600). Like
its predecessor, the Color One is a “one-pass” scanner (meaning that it scans the original
just once, rather than once each for red, green, and blue).
The centerpiece of the product is the OneScanner Dispatcher software which integrates
image and document processing features into a single program. This allows you to organize,
edit, print, fax, and archive documents and images.
A plug-in included with the OneScanner lets you scan directly into an image editing program like Adobe Photoshop. Also included is Xerox’s TextBridge OCR software for converting scanned documents into editable text form.
The Color One is smaller than most flatbed scanners measuring just 11 by 16 inches. It has
an optical resolution of 300 by 300 dpi, and enhanced resolution of 1,200 by 1,200 dpi. A
cool Xenon bulb keeps heat-sensitive originals from being damaged during scanning.
197
198
Chapter 6: Basic Peripherals
Editors’ Poll:
If You Were on a Desert Island and Could Have
Only One Peripheral, What Would it Be? Why?
BF: A joystick. What’s a Mac without games? Of course, this is coming from the games editor. If not a joystick, a Wacom tablet to allow drawing.
BW: Assuming I had a functional Mac/Monitor/mouse and power source: A video camera
and capture board, so I could produce my own shows and do stop-action animation with
bits of coral and dead crabs. Production would keep me busy during the day, and playback
would entertain me during the lonely nights.
JH: I’d take a CD-ROM player and a copy of the Myst sequel—when it’s released.
TL: No contest. A (wireless?) modem. That way, I could still surf the Web while I was
marooned and I could even send a message for help! (I am assuming that an internal hard
drive does not count as a peripheral here.)
JC: Probably a mouse with a long cord that I could use for fish bait!
JJ: A large speaker with mounds of spaghetti cable so I could enjoy listening to my CDs
while stretched out serenely on my SCSI-cable hammock.
SZA: Definitely a printer, for producing all the little notes I’d put in bottles that would say:
“If you’re reading this, you’re too close to my island!”
Back to
Table of Contents
Next chapter