1
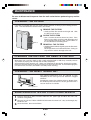
R
CLIMATISEUR DE CHAMBRE
DE TYPE PORTATIF
MANUEL D’INSTALLATION ET
D’UTILISATION
* Plasmacluster is a trademark of SHARP
Corporation.
* Plasmacluster est une marque de
commerce de SHARP Corporation.
FRANÇAIS
PORTABLE TYPE
ROOM AIR CONDITIONER
INSTALLATION AND OPERATION
MANUAL
ENGLISH
CV - P09FX
ENGLISH
This manual explains the proper use of your new air conditioner. Please read this manual
carefully before using the product. This manual should be kept in a safe place for handy
reference.
CONTENTS
• FOR CUSTOMER ASSISTANCE (U.S.) ................ E-2
• CONSUMER LIMITED WARRANTY (U.S.) ........... E-3
• FOR CUSTOMER ASSISTANCE (CANADA) ........ E-4
• CONSUMER LIMITED WARRANTY (CANADA) ... E-5
• PRECAUTIONS ..................................................... E-6
• INCLUDED ............................................................. E-9
• PART NAMES ........................................................ E-10
• INSTALL WINDOW PANEL ................................... E-12
• INSTALLATION AND REMOVAL OF EXHAUST HOSE ... E-16
• PRE-OPERATION CHECKS ................................. E-18
• COOL MODE ......................................................... E-20
• DEHUMIDIFICATION MODE ................................. E-21
• FAN MODE ............................................................ E-22
• VENTILATION MODE ............................................ E-22
• TO CHANGE AIR FLOW DIRECTION .................. E-23
• PLASMACLUSTER OPERATION ......................... E-24
• MEGA COOL OPERATION ................................... E-25
• ONE-HOUR OFF TIMER ....................................... E-25
• TIMER OPERATION .............................................. E-26
• AUXILIARY MODE ................................................ E-28
• DRAINAGE ............................................................ E-29
• MAINTENANCE ..................................................... E-30
• BEFORE CALLING FOR SERVICE ...................... E-31
Declaration of Conformity
SHARP ROOM AIR CONDITIONER CV-P09FX
This device complies with Part 18 of FCC rules.
Responsible Party:
SHARP ELECTRONICS CORPORATION
Sharp Plaza, Mahwah, New Jersey 07430-2135
TEL: 1-800-BE-SHARP
E-1
ENGLISH
• LOCATION ............................................................. E-9
FOR CUSTOMER ASSISTANCE (the United States)
To aid in answering questions if you call for service or for reporting loss or theft, please
record below the model and serial number located on the back side of the unit.
MODEL NUMBER
SERIAL NUMBER
DATE OF PURCHASE
Dealer Name
Address
City
State
Zip
Telephone
TO PHONE: Dial 1-800-BE-SHARP (237-4277) for:
SERVICE (for your nearest Sharp Authorized Servicer)
PARTS (for your Authorized Parts Distributor)
ACCESSORIES
ADDITIONAL CUSTOMER INFORMATION
TO WRITE: For service problems, warranty information, missing items and other assistance:
Sharp Electronics Corporation
Customer Assistance Center
1300 Naperville Drive
Romeoville, IL 60446-1091
TO ACCESS THE INTERNET: www.sharpusa.com
Please provide the following information when you write or call: model number, serial number,
date of purchase, your complete mailing address (including zip code), your daytime telephone
number (including area code) and description of the problem.
E-2
CONSUMER LIMITED WARRANTY
CONSUMER LIMITED WARRANTY FOR THE U.S. USERS
SHARP ELECTRONICS CORPORATION warrants to the first consumer purchaser that this Sharp brand product (the
“Product”), when shipped in its original container, will be free from defective workmanship and materials, and agrees
that it will, at its option, either repair the defect or replace the defective Product or part thereof with a new or
remanufactured equivalent at no charge to the purchaser for parts or labor for the period(s) set forth below.
This warranty does not apply to any appearance items of the Product nor to the additional excluded item(s) set forth
below nor to any Product the exterior of which has been damaged or defaced, which has been subjected to improper
voltage or other misuse, abnormal service or handling, or which has been altered or modified in design or construction.
In order to enforce the rights under this limited warranty, the purchaser should follow the steps set forth below and
provide proof of purchase to the servicer.
Neither the sales personnel of the seller nor any other person is authorized to make any warranties other than those
described herein, or to extend the duration of any warranties beyond the time period described herein on behalf of
Sharp.
The warranties described herein shall be the sole and exclusive warranties granted by Sharp and shall be the sole and
exclusive remedy available to the purchaser. Correction of defects, in the manner and for the period of time described
herein, shall constitute complete fulfillment of all liabilities and responsibilities of Sharp to the purchaser with respect to
the Product, and shall constitute full satisfaction of all claims, whether based on contract, negligence, strict liability or
otherwise. In no event shall Sharp be liable, or in any way responsible, for any damages or defects in the Product which
were caused by repairs or attempted repairs performed by anyone other than an authorized servicer. Nor shall Sharp
be liable or in any way responsible for any incidental or consequential economic or property damage. Some states do
not allow the exclusion of incidental or consequential damages, so the above exclusion may not apply to you.
THIS WARRANTY GIVES YOU SPECIFlC LEGAL RIGHTS. YOU MAY ALSO HAVE OTHER RIGHTS WHICH VARY
FROM STATE TO STATE.
Your Product Model Number & Description:
Warranty Period for this Product:
Additional Item(s) Excluded From Warranty
Coverage (If any):
Where to Obtain Service:
What to Do to Obtain Service:
CV-P09FX Portable Air Conditioner. Be sure to have this information
available when you need service for your Product.
One (1) year parts and labor from date of purchase. The
warranty period continues for a total of five (5) yeares from date
of purchase for the Sealed Cooling System parts; labor and
service are not provided free of change for this additional period.
Appearance items of the Product, filters, or accessories, or any
printed materials.
Product which has been used for rental and/or commercial
purposes.
From a Sharp Authorized Servicer located in the United States. To
find the location of the nearest Sharp Authorized Servicer, call Sharp
Toll Free at 1-800-BE-SHARP.
Contact your Sharp Authorized Servicer to obtain in-home service
for this Product.
The Servicer will come to your home, and if it is necessary to remove
the Product, the Servicer will reinstall it. Be sure to have Proof of
Purchase available.
TO OBTAIN SUPPLY, ACCESSORY OR PRODUCT INFORMATION, CALL 1-800-BE-SHARP, OR VISIT OUR WEBSITE AT
www.sharpusa.com
R
SHARP ELECTRONICS CORPORATION
Sharp Plaza, Mahwah, New Jersey 07430-2135
E-3
ENGLISH
The limited warranty described herein is in addition to whatever implied warranties may be granted to purchasers by
law. ALL IMPLIED WARRANTIES INCLUDING THE WARRANTIES OF MERCHANTABILITY AND FITNESS FOR
USE ARE LIMITED TO THE PERIOD(S) FROM THE DATE OF PURCHASE SET FORTH BELOW. Some states do not
allow limitations on how long an implied warranty lasts, so the above limitation may not apply to you.
FOR CUSTOMER ASSISTANCE (Canada)
To aid in answering questions if you call for service or for reporting loss or theft, please
record below the model and serial number located on the back side of the unit.
MODEL NUMBER
SERIAL NUMBER
DATE OF PURCHASE
Dealer Name
Address
City
Province
Postal Code
Telephone
TO PHONE: Dial 1-905-568-7140 for:
SERVICE (for your nearest Sharp Authorized Servicer)
PARTS (for your Authorized Parts Distributor)
ACCESSORIES
ADDITIONAL CUSTOMER INFORMATION
TO WRITE: For service problems, warranty information, missing items and other assistance:
Sharp Electronics of Canada Ltd.
Customer Care
335 Britannia Road East
Mississauga, Ontario L4Z 1W9
TO ACCESS THE INTERNET: www.sharp.ca
Please provide the following information when you write or call: model number, serial number,
date of purchase, your complete mailing address (including Postal Code), your daytime
telephone number (including area code) and description of the problem.
E-4
R
LIMITED WARRANTY
Consumer Electronics Products
Congratulations on your purchase!
Sharp Electronics of Canada Ltd. (hereinafter called “Sharp”) gives the following express warranty to the first consumer
purchaser for this Sharp brand product, when shipped in its original container and sold or distributed in Canada by
Sharp or by an Authorized Sharp Dealer:
This warranty shall not apply to:
(a) Any defects caused or repairs required as a result of abusive operation, negligence, accident, improper installation
or inappropriate use as outlined in the owner’s manual.
(b) Any Sharp product tampered with modified, adjusted or repaired by any party other than Sharp, Sharp’s Authorized
Service Centres or Sharp’s Authorized Servicing Dealers.
(c) Damage caused or repairs required as a result of the use with items not specified or approved by Sharp, including
but not limited to head cleaning tapes and chemical cleaning agents.
(d) Any replacement of accessories, glassware, consumable or peripheral items required through normal use of the
product including but not limited to earphones, remote controls, AC adapters, batteries, temperature probe,
stylus, trays, filters, belts, ribbons, cables and paper.
(e) Any cosmetic damage to the surface or exterior that has been defaced or caused by normal wear and tear.
(f) Any damage caused by external or environmental conditions, including but not limited to transmission line/
power line voltage or liquid spillage.
(g) Any product received without appropriate model, serial number and CSA and /or cUL markings.
(h) Any products used for rental or commercial purposes.
(i) Any installation, setup and/or programming charges.
Should this Sharp product fail to operate during the warranty period, warranty service may be obtained upon delivery
of the Sharp product together with proof of purchase and a copy of this LIMITED WARRANTY statement to an
Authorized Sharp Service Centre or an Authorized Sharp Servicing Dealer. In home warranty service may be provided
at Sharp’s discretion on any Sharp television with the screen size of 27” or larger and on any Sharp Over-the-Range
Microwave Oven.
This warranty constitutes the entire express warranty granted by Sharp and no other dealer, service centre or their
agent or employee is authorized to extend, enlarge or transfer this warranty on behalf of Sharp. To the extent the law
permits, Sharp disclaims any and all liability for direct or indirect damages or losses or for any incidental, special or
consequential damages or loss of profits resulting from a defect in material or workmanship relating to the product,
including damages for the loss of time or use of this Sharp product or the loss of information. The purchaser will be
responsible for any removal, reinstallation, transportation and insurance costs incurred. Correction of defects, in the
manner and period of time described herein, constitute complete fulfillment of all obligations and responsibilities of
Sharp to the purchaser with respect to the product and shall constitute full satisfaction of all claims, whether based
on contract, negligence, strict liability or otherwise.
WARRANTY PERIODS:
Audio Products
Camcorder
DVD Products
LCD Projector
LCD TV
Microwave Oven
Television Products
VCR Products
Vacuum Cleaner
Air Purifier & Air Conditioners
Parts & Labour (exceptions noted)
1 year
1 year
1 year
1 year (lamp 90 days)
1 year
2 years (magnetron component-3 additional years)
1 year (picture tube component-1 additional year)
1 year
1 year
1 year (filters 90 days)
To obtain the name and address of the nearest Authorized Sharp Service Centre or Dealer, please contact:
SHARP ELECTRONICS OF CANADA LTD. 335 Britannia Road East Mississauga, Ontario L4Z 1W9
SERVICE
G
H
E-5
CU
FA
CT
ION
BE THE BEST
TO
OU
TH R
For more information on this Warranty, Sharp Canada Products,
Accessory Sales, Dealer or Service Locations, please call (905)
568-7140
Visit our Web site: www.sharp.ca
IS
STOMER SAT
ENGLISH
Sharp warrants that this product is free, under normal use and maintenance, from any defects in material and
workmanship. If any such defects should be found in this product within the applicable warranty period, Sharp shall,
at its option, repair or replace the product as specified herein.
PRECAUTIONS
Points to keep in mind when using your air conditioner.
WARNINGS FOR USE
• Install the air conditioner in accordance with the installation instructions in the latter
section of this manual.
• Do not modify any part of this product.
• Do not insert anything into any part of the unit.
• Ensure the power supply used has an appropriate voltage rating.
Only use a three-pin grounded electrical AC socket rated 125V, 60Hz,
and 15 amps or more as shown on the right.
Use of a power supply with an improper voltage rating can result in
damage to the unit and possibly fire.
• Always use a fuse with the proper amp rating.
Do not, under any circumstances, use wire, pins or other objects in place of a proper fuse.
• In the event of any abnormality with the air conditioner (ex. a burning smell), turn it
off immediately and disconnect the power supply.
WARNING FOR POWER SUPPLY CORD
• This air conditioner uses a plug with a built-in fuse.
Read the precautions on the plug before using the air conditioner.
• Always conduct a “Power Plug Check” (See Page 18) before use to confirm the power
plug functions normally.
• This power plug must only be plugged into an appropriate wall socket. Do not use in
conjunction with any extension cords.
• Push the power plug securely into the socket and make sure it is not loose.
• Do not pull, deform, or modify the power supply cord, or immerse it in water.
Pulling or misuse of the power supply cord can result in damage to the unit and cause
electrical shock.
• A damaged power supply cord must be replaced with a new power supply cord obtained from the product manufacturer and not repaired. Replacement must be performed by manufactur's service agent in order to avoid a hazard.
NOTE
Radio or TV Interference
If this room air conditioner should cause interference to radio or television reception, try to
correct the interference by one or more of the following measures:
• Reorient or relocate the receiving antenna.
• Increase the separation between the room air conditioner and radio/TV receiver.
• Connect the room air conditioner into an outlet on a circuit different from that to which the
radio/TV receiver is connected.
• Consult the dealer or an experienced radio/TV technician for help.
E-6
WARNING ABOUT GROUNDING
• Do not under any circumstances cut or remove the round grounding pin from this plug.
Consult a qualified electrician or serviceman if
the grounding instructions are not completely
understood, or if in any doubt as to whether the
appliance is properly grounded.
If a grounding adapter is used, make sure the
socket box is fully grounded.
3-Pin socket
Grounded
socket box
Grounding adapter
Grounding wire
Screw
Tab for grounding
screw
Grounded socket
box
USAGE CAUTIONS
• Ventilate the room periodically during use, especially if using gas appliances.
• Be sure to turn the unit off and disconnect the power supply cord before performing
any maintenance or cleaning.
• Do not splash or pour water directly onto the unit.
Water can cause electrical shock or equipment damage.
• Drainage should be performed whenever moving the air conditioner. (See Page 29)
If any water remains in the tank, it may spill out while being moved.
• Remove the window panel in the event of particularly adverse weather.
Extremely adverse weather may cause water to leak in through the openings.
• To ensure proper drainage, the drainage hose must have no kinks or be on a different level during dehumidification mode.
The drained water may spill out into the room.
• The temperature around the drainage hose must not be below freezing point when
used.
Drained water may freeze inside the hose, causing water inside the unit to overflow into the
room.
• Do not block the exhaust air outlet with obstacles.
Cooling performance may be reduced or stop completely.
E-7
ENGLISH
• Improper use of the grounding plug can result in the risk of electric shock.
This appliance must be grounded. In the event
of an electrical short circuit, grounding reduces
the risk of an electric shock by providing a less
resistant conduit for the electric current.
This appliance is equipped with a cord that has a
grounding wire connected to a grounding plug.
The plug must be plugged into a socket that is
properly installed and grounded.
Grounding pin
3-Pin plug
PRECAUTIONS
NOTES ON OPERATION
• Allow 3 minutes for the compressor to restart cooling.
If you turn the air conditioner off and immediately restart it, allow three minutes for the
compressor to restart cooling. There is an electronic device in the unit that keeps the
compressor turned off for three minutes for safety.
• In the event of a power failure during use, allow 3 minutes before restarting the unit.
After power is reinstated, restart the air conditioner. If the power was off for less than three
minutes, be sure to wait at least three minutes before restarting the unit. If you restart the
air conditioner within three minutes, a protective device in the unit may cause the compressor to shut off. This protective device will prevent cooling for about 5 minutes. Any previous
settings will be canceled and the unit will return to its initial settings.
• Low temperature operation: Is your unit freezing up?
Freezing may occur when the unit is set close to 64°F in low ambient temperature conditions, especially at night.
In these conditions, a further temperature drop may cause the unit to freeze.
Setting the unit to a higher temperature will prevent it from freezing.
• Dehumidification mode increases room temperature.
The unit generates heat during dehumidification mode and the room temperature will rise.
Warm air will be blown out from the Exhaust air outlet, but this is normal and does not
indicate a problem with the unit.
• This air conditioner blows the warm air generated by the unit outside the room via
the exhaust hose while in cool mode.
Accordingly, the same amount of air as that blown out will enter the room from outside
through any openings into the room.
OPERATING CONDITIONS
• The air conditioner must be operated within the temperature range indicated below.
MODE
ROOM TEMPERATURE
COOL
64°F~95°F
Dehumidification 59°F~95°F
• A built-in safety device may cut off
operation if the temperature exceeds
these limits.
• When cooling operation is performed
at high room temperature, the fan
may run slightly slowed.
ENERGY EFFICIENCY TIPS
• Avoid direct sunlight.
Close blinds, drapes or shades to keep out direct sunlight while in cooling mode.
• Keep the filter clean.
Keeping the filter clean greatly aids efficient operation.
A dirty filter blocks the flow of air, making your air conditioner work harder and less efficiently. See page 30 on how to clean the filter.
• Turn off unnecessary lights.
Your air conditioner must remove the heat produced by your lights or other heat-producing
appliances. Turn off any lights or appliances that are not in use.
• Turn off the air conditioner when no one is home.
Use only when necessary. The less time the air conditioner is used, the lower the running
costs.
E-8
LOCATION
MIN.12"
(30cm)
MIN.12"
(30cm)
INCLUDED
Exhaust hose (1)
Window exhaust adapter (1)
Drainage Grommet (1)
Exhaust cover (1)
Bracket (1)
Extension panel (1)
Adjustment panel (1)
Window panel (1)
Rain guard (2) Insect guard net (1)
Hose clamp (1)
Screw (8)
Foam seal (1)
Foam seal (3)
(adhesive type)A
Foam seal (1)
(adhesive type)B
(thickness:1/5")
(thickness:2/5")
Remote control (1)
Battery (2)
(AAA.R03)
Manual (1)
SUGGESTED TOOLS FOR WINDOW PANEL INSTALLATION
1. Screwdriver(medium size Phillips)
2. Tape measure or ruler
3. Knife or scissors
4. Saw (In the event that the window panel needs to be cut down in size because the
window is too narrow for direct installation.)
E-9
ENGLISH
• The air conditioner should be placed on a firm foundation to minimize noise and vibration. For safe and secure positioning, place the unit on a smooth, level floor
strong enough to support the unit.
• The unit has casters to aid placement, but it should only
be rolled on smooth, flat surfaces. Use caution when
rolling on carpet surfaces. Do not attempt to roll the unit
over objects.
• The unit must be placed within reach of a properly rated
grounded socket.
• Never place any obstacles around the air inlet or outlet
of the unit.
• Allow at least 12" (30cm) of space from the wall for efficient air-conditioning.
PART NAMES
FRONT VIEW
1
1 Air Outlet
2
2 Vertical louvers
3
4
5
3 Horizontal louvers
4 PLASMACLUSTER Lamp (blue)
6
5 Remote control signal receiver
window
7
6 AUX. Button
8
9
0
7 OPERATION Lamp (red)
8 TIMER Lamp (orange)
0
9 MEGA COOL Lamp (green)
0
0 Air inlet
q
q Exhaust air outlet
w
w Window exhaust adapter
e
e Exhaust hose
r
r Remote control hook
REAR VIEW
t
y
u
t Air filters
y Drainage nozzle and stopcock
u Power supply cord hooks
i Drainpipe nozzle and stopcock
i
o Power supply cord
o
p Power plug
p
a
a Casters(4)
NOTE: Actual unit might vary slightly from above illustration.
E-10
REMOTE CONTROL
1
1 Transmitter
2 Display
3 POWER Button
4 LIGHTS Button
3
4
5
6
7
8
9
0
q
w
e
r
t
5 TEMPERATURE Button
6 PLASMACLUSTER Button
7 1 hr OFF Button
8 MODE Button
9 ON TIMER Button
ENGLISH
2
0 FAN Button
q OFF TIMER Button
w CANCEL Button
e LOUVERS Button
r RESET Button
t MEGA COOL Button
REMOTE CONTROL DISPLAY
y MODE SYMBOLS
y
u
: COOL
: DEHUMIDIFICATION
: FAN
: VENTILATION
p
i
a
o
s
u MEGA COOL SYMBOL
i PLASMACLUSTER SYMBOL
o FAN SPEED SYMBOLS
: AUTO
: Manual setting
p TEMPERATURE AND TIMER COUNT
DOWN INDICATOR
a TRANSMITTING SYMBOL
s ON TIMER / OFF TIMER SYMBOL
E-11
INSTALL WINDOW PANEL
Installation in a double-hung sash window
(See page 14 for installation in a sliding sash window. )
Hole
1
2
Connect the rain guards to the insect
guard net.
Insert all three projections on each rain
guard into the holes in the insect guard net.
Side “A” will now be uppermost, as indicated in the diagram.
Attach the guard combined above to the
window panel
Push the insect guard net firmly to ensure
that its four projections fit into the holes in
the window panel.
Side “A” will now be at the top, as indicated
in the diagram.
3
Cut the foam seal A (adhesive type) to
the proper length and attach it to the
window stool.
4
Attach the window panel to the window
stool.
If the inner width of the window is between 22" (559mm) and 24" (609mm)
inclusive.
Rain guard
Insect guard
net
"A"
Projection
Projection
Window panel
"A"
Foam seal A
(adhesive type)
Exhaust cover
Window
panel
The window panel cannot be installed in
windows less than 22" (559mm) wide, as
you will be unable to shut the exhaust cover.
Cut
Adjustment panel
(1) Remove the adjustment panel from the
window panel, and cut the window
panel to the same width as the window.
Window panel
(2) Open the window sash and place the window panel on the window stool
(3) Secure the window panel to the window
stool with 2 screws.
E-12
22"~ 24"
Window stool
Adjustment panel
If the inner width of the window is
between 24" (609mm) and 36.8"
(934mm) inclusive.
(1) Open the window sash and place the
window panel on the window stool.
(2) Slide the adjustment panel to fit the
window frame width.
24"~36.8"
(3) Secure the window panel to the stool with
3 screws.
If the inner width of the window is
between 36.8" (934mm) and 48"
(1219mm) inclusive.
ENGLISH
Extension panel
(1) Attach the extension panel to the
adjustment panel.
(2) Open the window sash and place the window panel on the window stool.
(3) Slide the adjustment and extension
panels to fit the window frame width.
(4) Secure the window panel to the window
stool with 4 screws.
5
36.8"~48"
Foam seal A
(adhesive type)
Cut the foam seals (adhesive type) A and
B to the proper length and attach it to the
window panel.
Attach foam seal A to the window panel and
extension panel, and attach foam seal B to
the adjustment panel.
6
Close the window sash securely against
the Window panel.
7
Cut the foam seal to an appropriate length
and seal the opening between the top of
the inner window sash and the outer window sash.
8
Attach a bracket with the screw.
Foam seal B
(adhesive type)
Foam seal
Bracket
E-13
INSTALL WINDOW PANEL
Installation in a sliding sash window
(See page 12 for installation in a double-hung window.)
"A"
1
Connect the rain guards to the insect
guard net.
Insert all three projections on each rain
guard into the holes in the insect guard net.
Side “A” will now be uppermost, as
indicated in the diagram.
Insect guard net
Hole
Rain guard
Projection
2
3
Attach the guard combined above to the
window panel.
Push the insect guard net firmly to ensure
that its four projections fit into the holes in
the window panel.
Side “A” will now be at the top, as indicated
in the diagram, when it is installed in the
window.
Window panel
"A"
Projection
Cut the foam seal A (adhesive type) to the
proper length and attach it to the window
frame.
Foam seal A
(adhesive type)
4
Install the window panel into the window
frame.
If the inner height of the window is
between 22" (559mm) and 24" (609mm)
inclusive.
The window panel cannot be installed in
windows less than 22" (559mm) high, as
you will be unable to shut the exhaust
cover.
Exhaust cover
Window
panel
Adjustment panel
(1) Remove the adjustment panel from the
window panel, and cut the window panel
to the same height as the window.
(2) Open the window sash and place the
window panel on the window frame.
Cut
Window
panel
22"~24"
(3) Secure the window panel to the window
frame with 2 screws.
E-14
If the inner height of the window is
between 24" (609mm) and 36.8"
(934mm) inclusive.
Adjustment
panel
(1) Open the window sash and place the
window panel on the window frame.
(2) Slide the adjustment panel to fit the
window frame height.
24"~36.8"
(3) Secure the window panel to the window
frame with 3 screws.
Extension panel
(1) Attach the extension panel to the
adjustment panel.
36.8"~48"
(2) Open the window sash and place the
window panel on the window frame.
(3) Slide the adjustment and extension
panels to fit the window frame height.
(4) Secure the window panel to the window
frame with 4 screws.
5
Cut the foam seals (adhesibe type) A and
B to the proper length and attach them to
the window panel.
Attach foam seal A to the window panel and
extension panel, and attach foam seal B to
the adjustment panel.
6
Close the window sash securely against
the Window panel.
Foam seal B
(adhesive type)
Foam seal A
(adhesive type)
7
Cut the foam seal to an appropriate length
and seal the opening between the side of
the inner window sash and the outer window sash.
8
Attach a bracket with the screw.
Bracket
Foam seal
E-15
ENGLISH
If the inner height of the window is between 36.8" (934mm) and 48" (1219mm)
inclusive.
INSTALLATION AND REMOVAL OF EXHAUST HOSE
The exhaust hose must be installed or removed in accordance with the usage mode.
MODE
EXHAUST HOSE
COOL, FAN, VENTILATION, DEHUMIDIFICATION with no container
Install
DEHUMIDIFICATION with container(minimum capacity 3 gallons)
Remove
Installation of the exhaust hose
1
Attach the window exhaust adapter to
the exhaust hose.
Extend one end of the exhaust hose and
insert it into the window exhaust adapter,
and turn it (approx. three times) until it
stops.
Make sure they are securely attached
afterwards.
Window
exhaust
adapter
Extend
Exhaust hose
2
3
Attach the exhaust hose adapter to the
unit.
Insert the two projections on the exhaust
hose adapter into the two holes on the
unit, and firmly attach them to each
other.
Projection
Hole
Slide and open the exhaust cover on
the window panel, and attach the window exhaust adapter.
Surface of window exhaust adapter
marked "TOP" should be at the top when
it is installed in a double-hung sash
window.
Surface of window exhaust adapter
marked "TOP" should be on the window
frame side when it is installed in a sliding
sash window.
"TOP"
The exhaust hose should be as short as possible for operational efficiency;
however, it must not be twisted or bent.
Unacceptable
Acceptable
E-16
Acceptable
Removal of the exhaust hose
ndow
haust
apter
2
Remove the window exhaust adapter.
Pull out and remove the window exhaust
adapter by pushing down two “PUSH”
markings, and slide and close the exhaust
cover in the window panel.
"PUSH"
ENGLISH
1
Remove the exhaust hose adapter from
the unit.
Lift up and remove the exhaust hose
adapter from the unit by pushing down on
the two projections.
Projection
E-17
PRE-OPERATION CHECKS
POWER PLUG CHECK
This air conditioner uses a fused power plug.
Always check the power plug before use.
1
2
3
Press the RESET button.
4
Press the RESET button until you hear another
CLICK.
The circuit breaker is activated, power is supplied,
and the air conditioner is now ready for use.
RESET
TEST
Insert the power plug into the wall socket.
Press the TEST button.
You will hear a CLICK if the circuit breaker is
functioning correctly.
Do not attempt to use the air conditioner if the above procedure is
impossible, as it is malfunctioning.
Disconnect the power plug and request service.
LOADING BATTERIES Use two AAA (R03) batteries.
1
Remove the battery cover at the
back of the remote control.
2
Insert batteries into the compartment, making sure the ± and
— polarities are correctly
aligned.
• Lines will appear on the display
when batteries are properly installed.
3
4
Reattach the battery cover.
+
−
−
+
Battery cover
Press the RESET button using a
thin pointed implement.
NOTES:
• The battery should last approximately one year under normal use.
• When replacing the batteries, always change both batteries at the same time, and
make sure they are the same type.
• If the remote control does not operate normally after replacing the batteries, press
the RESET button using a thin pointed implement.
• If you will not be using the unit for a prolonged period, remove the batteries from
the remote control.
E-18
HOW TO USE THE REMOTE CONTROL
Point the remote control towards the
units signal receiver window and
press the desired button. A beep
will sound when the unit receives
the signal.
• Make sure nothing, such as curtains,
blocks the signal receiver window.
• The remote control operates up to 23
feet (7 meters) away.
• Do not expose the signal receiver window to direct sunlight. This may adversely
affect its operation. If necessary, close the curtains to block out the sunlight.
• Use of a fluorescent lamp in the same room may interfere with transmission of the
signal.
• The unit may be affected by signals emitted from other remote controllers for
televisions, VCRs or other equipment used in the same room.
• Do not leave the remote control exposed to direct sunlight or near a heater. Protect the remote control from moisture and shock which can discolor or damage it.
To prevent the remote control from
being misplaced, hook it to the unit
when not in use.
When attached, to remove the remote
control from the unit, lift the remote
control up slightly and pull it out.
Remote control hook
E-19
ENGLISH
CAUTION
COOL MODE
1
Install the exhaust hose (See Page16), turn
the drainage nozzle to the CLOSE position,
and check the drainage nozzle is covered
Drainage nozzle
"CLOSE" position with the stopcock.
Stopcock
1
Press the MODE button to select COOL
mode.
COOL
32
DEHUM
FAN
VENT
Press the POWER button to start operation.
• The red OPERATION lamp on the unit will
light.
2
3
1
4
3
Press the TEMPERATURE button to set
the desired temperature.
• The temperature can be set within the range
of 64°F to 86°F.
4
Press the FAN button to set the desired fan speed.
AUTO
QUIET
LOW
HIGH
TO TURN OFF
Press the POWER button again.
• The red OPERATION lamp on the unit will turn
off.
E-20
DEHUMIDIFICATION MODE
In this mode, the air conditioner dehumidifies the room.
Dehumidification with container
4
5
Remove the exhaust hose (See Page 17)
Drainage nozzle
Turn the drainage nozzle to the OPEN position.
Stopcock
Pull the stopcock out from the drainage nozzle.
• When the stopcock is removed, a small amount of water
may be discharged from the drainage nozzle.
• Always perform this procedure with the unit turned off.
Drain water will spout out if attempted during operation.
"OPEN" position
Insert the hose clamp into a standard commercially-available hose (5/8" inner diameter, 7/8" outer
diameter) and attach the drain grommet to the
hose.
Drain grommet
Hose clamp
Attach the hose to the drainage nozzle, and secure
it with the hose clamp.
• Insert the hose securely into a container with a minimum
capacity of 3 gallons. Be sure to monitor the water level in
the container and empty as necessary. Do not operate in
dehumidify mode for more than 8 hours at a time. Be sure
to empty the water container whenever dehumidify mode is
started. Failure to empty the water container can cause
the container to overflow and cause damage to underlying
materials.
• Set the hose sloping downwards for easier drainage.
Moreover, do not bend the hose at any point, nor allow
the end to be submerged in water.
Hose
Dehumidification with no container
If draining of the water is not desirable, install the exhaust hose (See Page 16), turn the drainage nozzle to the
CLOSE position, and check that the drainage nozzle is covered with the stopcock. In this operation, the water
tank inside the unit may be full, the unit stops operating and then the TIMER, OPERATION and MEGA COOL
lamps are blinking, depending on room condition. In this case, drain out the water within the unit (See Page 29).
1
Press the MODE button to select DEHUMIDIFICATION mode.
COOL
2 2
DEHUM
FAN
VENT
Press the power button to start operation.
• The red OPERATION lamp on the unit will light.
• The temperature cannot be set.
• The fan speed is preset to AUTO and cannot be
changed.
1
TO TURN OFF
Press the POWER button again.
CAUTION
• The red OPERATION lamp on the unit will turn off.
When operating dehumidification with container, the unit generates heat during dehumidification mode and the room temperature will rise. Operate dehumidification with no container if
you don't want the room temperature to rise. This will help to slightly drop the room
temperature, but dehumidification performance will become less effective than when operating dehumidification with container.
E-21
ENGLISH
1
2
3
FAN MODE
In this mode, the air conditioner simply circulates the air without cooling it.
Install the exhaust hose (See Page16), turn the drainage nozzle to the CLOSE
position, and check the drainage nozzle is covered with the stopcock.
2
2
5
3
1
31
1
Press the MODE button to select FAN mode.
2
Press the POWER button to start operation.
3
Press the FAN button to set the desired fan
speed.
COOL
DEHUM
FAN
VENT
• The red OPERATION lamp on the unit will light.
• The temperature cannot be set.
QUIET
LOW
HIGH
TO TURN OFF
Press the POWER button again.
• The red OPERATION lamp on the unit will turn off.
VENTILATION MODE
In this mode, the air conditioner ventilates the air to outdoors.
Install the exhaust hose (See Page 16), turn the drainage nozzle to the CLOSE
position, and check the drainage nozzle is covered with the stopcock.
1
2
1
3
22
5
33
Press the MODE button to select VENT mode.
COOL
DEHUM
FAN
VENT
Press the POWER button to start operation.
• The red OPERATION lamp on the unit will light.
• The temperature cannot be set.
Press the FAN button to set the desired fan
speed.
• Although the louvers are closed and no air blows
out into the room, the external ventilation fan speed
changes.
1
QUIET
LOW
HIGH
4
TO TURN OFF
Press the POWER button again.
• The red OPERATION lamp on the unit will turn off.
E-22
TO CHANGE AIR FLOW DIRECTION
UP / DOWN AIR FLOW DIRECTION
1
Press the LOUVERS button on the remote control.
• The horizontal louvers will swing continuously.
Press the LOUVERS button again when
the horizontal louvers are at the desired
position.
• The horizontal louvers will stop moving.
• The adjusted position will be memorized and
the same position will be set automatically
when operated the next time.
NOTE
• During VENTILATION mode, UP/DOWN air flow
direction cannot be changed.
Horizontal louvers
LEFT / RIGHT AIR FLOW DIRECTION
Hold the vertical louver as shown in the diagram and adjust the air flow direction.
Vertical louvers
CAUTION
Never attempt to adjust the horizontal louvers manually.
• Manual adjustment of the horizontal louvers can cause the unit to malfunction when the remote
control is used for adjustment.
• When the horizontal louvers are positioned at the lowest position in the COOL or DEHUMIDIFICATION mode for an extended period of time, condensation may result.
Do not adjust the vertical louvers to the extreme left or right in the COOL mode with the fan
speed set to "QUIET ( )" for an extended period of time.
Condensation may form on the louvers.
E-23
ENGLISH
1
2
2
PLASMACLUSTER OPERATION
The Plasmacluster ion generator inside the air conditioner will release positive and
negative Plasmacluster ions into the room. Approximately the same numbers of positive and negative ions released into the air.
1
Press the PLASMACLUSTER button during
operation.
• The remote control will display “
”.
• The blue PLASMACLUSTER lamp on the unit will
light.
TO CANCEL
1
Press the PLASMACLUSTER button again.
• The PLASMACLUSTER lamp on the unit will turn off.
NOTES:
• Use of the PLASMACLUSTER function will be memorized and it will be activated the next time you turn on
the air conditioner.
• To turn off the PLASMACLUSTER Lamp, press the
LIGHTS button.
• PLASMACLUSTER operation cannot be set during
VENTILATION mode.
E-24
MEGA COOL OPERATION
In this operation, the air conditioner fan works at extra high speed with a setting
temperature of 59°F.
1
Press the MEGA COOL button during cooling
mode.
• The remote control will display "
".
• The temperature display will go off.
• The green MEGA COOL lamp on the unit will light.
TO CANCEL
Press the MEGA COOL button again.
1
NOTES:
• You cannot set the temperature or fan speed during MEGA COOL operation.
• The fan returns to the HIGH speed setting after the unit has run for 30 minutes in MEGA
COOL mode.
• The extra high fan speed may automatically slow down to protect the unit.
ONE-HOUR OFF TIMER
When the ONE-HOUR OFF TIMER is set, the unit will automatically turn off after one
hour.
1
Press the 1hr OFF button.
• The remote control displays “
”.
• The orange TIMER lamp on the unit will light.
• The unit will stop operating after one hour.
TO CANCEL
Press the CANCEL button.
1
CANCEL
• The orange TIMER lamp on the unit will turn off.
Alernatively, turn the unit off by pressing the
POWER button.
• The red OPERATION lamp and the orange TIMER
lamp on the unit will turn off.
NOTES:
• The ONE-HOUR OFF TIMER operation has priority over ON TIMER and OFF TIMER
operations.
• If the ONE-HOUR OFF TIMER is set while the unit is not operating, the unit will operate for
an hour at the formerly set condition.
• If you wish to operate the unit for another hour before the ONE-HOUR OFF TIMER is
activated, press the 1hr OFF TIMER button again during operation.
E-25
ENGLISH
• MEGA COOL operation is also cancelled when the
mode is changed, or when the unit is turned off.
• The green MEGA COOL lamp on the unit will turn off.
TIMER OPERATION
OFF TIMER
The unit will turn off automatically according to your setting.
Timer duration can be set from a minimum of half an hour (30 minutes) to a
maximum of 12 hours.
Up to 9.5 hours, you can set in half-hour (30-minutes) increments and from 10 to 12
hours, in 1-hour increments.
Point the remote control at the signal receiver window on the unit.
the OFF TIMER button and set the time
1 Press
as desired.
• The time setting will change as you press the
button as follows.
0.5h
1.0h
1.5h
10h
11h
12h
Hold the button down to speed through the settings.
1
• The orange TIMER lamp on the unit will light.
• The unit will emit a beep when it receives the
signal.
• The time setting will count down to show the remaining time.
TO CANCEL TIMER
Press the CANCEL button.
• The orange TIMER lamp on the unit will turn off.
Display shown when you
set the unit to turn off 2.5
hours later.
NOTES ON TIMER SETTING AND OPERATION
• The latest time setting will be memorized and will appear on the remote control display the next
time you set the OFF TIMER or ON TIMER.
• The OFF TIMER and ON TIMER can not be set together.
Only the most recent TIMER setting will be valid.
• While the ONE-HOUR OFF TIMER is set, the OFF TIMER and ON TIMER is settings are
unavailable.
• If the ONE-HOUR OFF TIMER is set while the OFF TIMER or ON TIMER activated, the ON
TIMER or OFF TIMER setting will be cancelled.
• If a power failure occurs while the OFF TIMER or ON TIMER is set, the TIMER setting will be
cancelled and will not be retrieved even after the power is restored.
E-26
ON TIMER
The unit will turn on automatically according to your setting.
Timer duration can be set from a minimum of half an hour (30 minutes) to a
maximum of 12 hours.
Up to 9.5 hours, you can set in half-hour (30-minute) increments and from 10 to 12
hours, in 1-hour increments.
Point the remote control at the signal receiver window on the unit.
the ON TIMER button.
1 Press
• The time setting will change as you press the button
as follows.
1
1.0h
1.5h
10h
11h
12h
Hold the button down to speed through the settings.
• The orange TIMER lamp on the unit will light.
• The unit will emit a beep when it receives the signal.
• The time setting will count down to show the remaining time.
Select the mode, temperature, fan speed setting
and PLASMACLUSTER operation as desired.
• When the temperature is set with the ON TIMER,
the temperature will show in the display for 5 seconds and then return to the time display.
• If you do not change the setting, the unit will operate
using the most recent setting.
Display shown when you set
the unit to turn on 6.5 hours
later.
TO CANCEL TIMER
Press the CANCEL button.
• The orange TIMER lamp on the unit will turn off.
E-27
ENGLISH
0.5h
AUXILIARY MODE
Use this mode when the remote control is not available.
1
1
Press the AUX. button on the unit.
• The red OPERATION lamp on the unit will
light and the unit will start operating in COOL
mode.
• The fan speed is set to AUTO.
• The temperature setting is automatically set
according to the room temperature.
TO TURN OFF
Press the AUX. button again.
• The red OPERATION lamp on the unit will turn off.
NOTES:
• If the AUX. button is pressed during normal operation, the unit will turn off.
• Upon starting AUXILIARY operation, the drainage pump inside the unit runs for
about a minute, which may produce an audible gurgling sound.
E-28
DRAINAGE
Prepare for drainage and drain out water within the unit in the following cases.
If the unit stops operating and the TIMER, OPERATION and MEGA COOL lamps are
blinking. (This indicates that the water tank inside the unit is full.)
Make sure to turn the unit off.
Turn the drainage nozzle to the OPEN
position.
Pull the stopcock out from the drainage
nozzle.
• When the stopcock is removed, a small amount of
water may be discharged from the drainage nozzle.
4
Insert the hose clamp into a standard
commercially available hose (5/8" inner
diameter, 7/8" outer diameter) and attach
the drain gromment to the hose.
5
Attach the hose to the drainage nozzle, and
secure it with the hose clamp.
• Prepare for draining, as drain water will come out
through the hose during operation.
6
Drainage
nozzle
Stopcock
"OPEN" position
Drain grommet
Hose clamp
Press the AUX. button on the unit twice.
• The water will drain out through the drainage hose.
Maximum amount of water that may be drained
out is approximately 41/5 pints.
• The OPERATION, TIMER and MEGA COOL
lamps will be blinking.
Hose
7
When drainage water stops running out from the hose, turn the unit off by
pressing AUX. button.
8
9
Remove the hose from the drainage nozzle, and replace the stopcock.
• This would take about one minute.
• Keep the hose clamp and drain grommet in case of re-used.
Turn the drainage nozzle to the CLOSE position.
Whenever the unit is moved (to provent water within the unit from spilling).
When the unit is not used for a long time.
1
2
Carry out the above procedures from 1 to 5.
Press the AUX. button on the unit.
• The water will drain out through the drainage hose.
Maximum amount of water that may be drained out is approximately 41/5 pints.
• The OPERATION lamps will light.
3
When drainage water stops running out from the hose, turn the unit off by
pressing AUX. button.
4
5
6
Remove the hose from the drainage nozzle, and replace the stopcock.
• This would take about one minute.
• Keep the hose clamp and drain grommet in case of re-used.
Turn the drainage nozzle to the CLOSE position.
Remove the stopcock from the drainpipe nozzle, and completely drain any
water within the unit.
• Always prepare a receptacle to collect the water
before draining. Maximum amount of water that
may be drained out is approximately 2/5 pints.
7
Stopcock
Replace the stopcock to the drainpipe nozzle.
Drainpipe nozzle
E-29
ENGLISH
1
2
3
MAINTENANCE
Be sure to disconnect the power from the wall socket before performing any maintenance.
CLEANING THE FILTERS
If the filter is clogged with dust, the airflow will be reduced, resulting in poor cooling performance. The filter should be cleaned every two weeks.
1
REMOVE THE FILTERS
2
CLEAN THE FILTERS
3
REINSTALL THE FILTERS
Filters
• Gently pull the filter handle to the right and slide
the filter out of the unit.
• Use a vacuum cleaner to remove any dust. If the
filters are very dirty, wash them with detergent and
rinse carefully with clean water. Dry the filters in
the shade before reinstalling them.
• Hold the filter handle and gently push the filter back
into place.
Never operate the unit without the filter. Doing so
may result in serious damage to the unit.
CLEANING THE UNIT AND THE REMOTE CONTROL
Wipe them with a soft, dry cloth or with a cloth moistened with a mild soap. Carefully remove
any residue by wiping with a damp cloth and dry completely.
Avoid splashing water onto the unit. Water can dangerously damage the electrical insulation.
Never use harsh chemicals or abrasive cleaners on any part of the unit. To avoid damaging the
unit, do not use hot water (120°F/50°C or hotter) when cleaning.
CLEANING THE INSECT GUARD NET
The cooling performance may be reduced or stop
completely if the insect guard net becomes clogged
with dust.
Periodically remove the window exhaust adapter from
the window panel and clean the insect guard net with a
vacuum cleaner or suchlike.
Insect guard net
MAINTENANCE AFTER AIR CONDITIONER SEASON
drainage to drain out water within the unit. (See Page 29 "When the unit is not
1 Perform
used for a long time").
the unit the FAN or VENTILATION mode for about half a day to thoroughy dry
2 Operate
inside the unit.
3 Clean the filters, then reinstall them.
E-30
BEFORE CALLING FOR SERVICE
If the unit appears to be malfunctioning, check the following points before calling for
a service.
AIR CONDITIONER DOES NOT OPERATE AT ALL
• Is the unit plugged in or is the plug loose?
• Has the fuse blown or is the circuit breaker tripped?
• Did you restart the unit within 3 minutes of a power failure?
If the power was off for less than 3 minutes when, you restarted the air conditioner, a protective
device may cause the compressor to shut off, preventing cooling for about 5 minutes.
• Are the OPERATION, TIMER and MEGA COOL lamps blinking?
The water tank inside the unit is full. It must be drained. (See page29)
• Check the power plug. (See page18)
• Is it set to FAN, DEHUMIDIFICATION or VENTILATION mode?
Cooling does not take place in these modes. Change the MODE setting.
• Are the filters clogged with dust?
Clean and replace the filters.
• Is the cooling coil frozen?
No air will blow out if the cooling coil is frozen.
Run the air conditioner in FAN mode with the fan speed set to "HIGH" until all ice dissipates.
• Is the temperature set properly?
• Is the window exposed to direct sunlight?
Close the curtains or blinds to minimize solar energy heating the room.
• Is the exhaust hose too long?
For efficient operation, make the hose as short as possible. The exhaust hose must not be
twisted or bent.
SOUNDS
• The unit may seem rather loud for the first 2 to 3 minutes when the unit is turned on. This is the
sound of the compressor starting-up and is perfectly normal.
• A soft, swishing noise can be heard immediately after the unit is turned on or off, and also during
operation. This is the sound of the refrigerant flowing inside the unit.
• A low buzzing noise is emitted when the unit is generating Plasmacluster ions.
• This air conditioner evaporates water condensed during cooling operation within the unit through the
exhaust air outlet. Although water flowing sound way be heard, this is normal.
• An audible gurgling sound may be heard for about a minute upon starting AUXILIARY mode. This is
sound of running drainage pump inside the unit.
• An audible gurgling sound may be heard when the unit is operated on a gently sloping floor.
Place the unit on a level floor.
TIMER DOES NOT WORK PROPERLY
• If a power failure occurs while the TIMER is set, the TIMER setting will be cancelled and will not
be retrieved even after the power is restored. This is normal for this unit.
THE UNIT FAILS TO REACT TO THE REMOTE CONTROL SIGNAL
• Check the batteries in the remote control. Replace if necessary.
• Try to send the signal again with the remote control pointed directly at the unit’s signal receiver
window.
• Check whether the remote control batteries are installed with the polarities properly aligned.
THE DISCHARGED AIR HAS AN ODOR
• Plasmacluster ion generator emit small traces of ozone which may produce an odor. These ozone
emissions are below safety levels set by the FDA.
E-31
ENGLISH
AIR CONDITIONER DOES NOT COOL PROPERLY