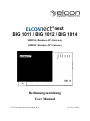
1
next BIG 1011 / BIG 1012 / BIG 1014 SHDSL-Business-IP-Gateway SHDSL Business IP Gateway Bedienungsanleitung User Manual © ELCON Systemtechnik GmbH 2010 Art.-Nr. 103142 BIG 101x Sicherheitshinweise • • • • • • • • • • • • • • • • Bitte lesen Sie die Warnhinweise, Sicherheitsbestimmungen sowie das Systemhandbuch gewissenhaft durch, bevor Sie mit der Installation des BIG 101x beginnen. Nur so können Sie das Gerät in seinem vollen Funktionsumfang nutzen und Schäden durch unsachgemäßen Gebrauch vermeiden (Feuer, Elektroschocks, Verletzungen usw.). Bewahren Sie das Systemhandbuch sorgfältig auf. Der BIG 101x entspricht dem aktuellen Stand der Technik und den anerkannten sicherheitstechnischen Regeln. Verwenden Sie beim Auspacken des Gerätes keine spitzen Gegenstände, um Beschädigungen an Gehäuse oder Kabeln zu vermeiden. Betreiben Sie das Gerät und die mitgelieferten Teile (Kabel usw.) nur in einwandfreiem Zustand und unter strenger Beachtung des Systemhandbuchs. Arbeiten am Gerät einschließlich Öffnen des Gerätes darf nur autorisiertes Fachpersonal durchführen. Dabei sind die ESD-Schutzmaßnahmen nach DIN 100 015 zu beachten. Außer den in diesem Handbuch beschriebenen Handlungen dürfen keine Änderungen am Gerät sowie an den mitgelieferten Teilen (Kabel usw.) vorgenommen werden. Vermeiden Sie Arbeiten am Gerät und dessen Komponenten bei Gewittertätigkeit (Trennen und Herstellen von Kabelverbindungen). Achten Sie beim Anschluss des Gerätes auf die richtige Netzspannung (→ Technische Daten)! Das Gerät darf nicht weiter als 1,5 Meter von der Steckdose entfernt montiert werden. Das Gerät besitzt keine eigene Trennvorrichtung zur Unterbrechung der Spannungsversorgung, da es für Dauerbetrieb ausgelegt ist. Achten Sie daher darauf, dass das Steckernetzteil stets leicht zugänglich ist. Verlegen Sie Netz- und Anschlusskabel so, dass eine Unfallgefahr durch Stolpern oder Hängen bleiben ausgeschlossen wird. Betreiben Sie das Gerät nur im Temperaturbereich zwischen 0°C und +45°C! Schützen Sie das Gerät vor direkter Sonneneinstrahlung und vor Feuchtigkeit. Wenn Sie das Gerät aus einer kalten Umgebung in eine wärmere Umgebung bringen, dann kann dies zu einer Betauung des Gerätes führen. Betaute Geräte dürfen nicht in Betrieb genommen werden. Warten Sie mit der Inbetriebnahme, bis das Gerät trocken ist. An den Schnittstellen des Modems dürfen nur Geräte angeschlossen werden, die die elektrischen Sicherheitsbestimmungen nach EN 60950 erfüllen und das CE-Zeichen tragen. Alle angeschlossenen Geräte müssen passende Steckverbindungen besitzen, anderenfalls sind geeignete Adapter zu verwenden. Alle angeschlossenen Geräte dürfen nur an den vorgesehenen Schnittstellen betrieben werden. Beachten Sie die Installations- und Sicherheitshinweise in dem vorliegenden Systemhandbuch und halten Sie diese ein. Version: 2010/12/01 BIG 101x Safety precautions • • • • • • • • • • • • • • • • Please read carefully the warnings and safety precautions in this system manual before you start installation of your BIG 101x. These instructions enable you to use the full functionality of the device and to avoid damage which may result from improper use (fire, electric shock, injuries etc.). Keep this manual at a safe place. The BIG 101x has been manufactured according to state-of-the-art technology and complies with the generally accepted safety standards. Do not use sharp-edged tools for unpacking the device: they could damage cables or the enclosure. The device and its accessories (cable etc.) shall be operated only in faultless condition, while strictly observing these system manual. Only authorized personnel are allowed to open the enclosure and to carry out interventions in the device. Please observe the protective measures with respect to electrostatic discharge as per DIN 100 015. Manipulations on the modem or attached parts (cables etc.) other than those described in this manual are not allowed. Refrain from interventions in the modem and its parts during thunderstorms (in particular, avoid plugging and unplugging of cables). When connecting the modem, pay attention to comply with the required mains voltage. (→ Technical data)! The device shall not be installed farther than 1.5 m from the socket. The device has no separate switch for interrupting the power supply, since it has been designed for continuous operation. So make sure the plug-in power supply module is always easily accessible. Lay the power supply and connection cables in a way to prevent accidents (such as tripping over the cables). The device shall be operated only between 0°C and +45°C. Protect the device from direct sun radiation and extreme humidity. When the device is taken from a cold environment into a warmer one, it may be bedewed. In this case the equipment must not be put into operation. So please wait until the modem is dry again. Connect to the modem interfaces only such terminal devices which meet the safety requirements acc. to EN 60950 and which are labelled with the CE symbol. The terminal devices shall have appropriate connectors; otherwise adequate adapters have to be used. Connected equipment shall only be operated at the corresponding interfaces that have been designed for them. Pay attention to the instructions on installation and safety in this document and ensure compliance with them. Version: 2010/12/01 3 BIG 101x Sehr geehrte Kundin, sehr geehrter Kunde, mit dem ELCONnect next BIG 101x haben Sie ein Gerät erhalten, welches nach dem neuesten Stand der Technik entwickelt und unter höchsten Anforderungen gefertigt wurde. Sollte einmal etwas nicht wie beschrieben funktionieren, nehmen Sie bitte mit Ihrem Anbieter oder Händler Kontakt auf, von dem Sie dieses Gerät erworben haben. Dieser verfügt über die notwendigen Fachkenntnisse und wird Ihnen gern weiterhelfen. Wir wünschen Ihnen viel Freude mit Ihrem BIG 101x. Dear Customer, Your ELCONnect next BIG 101x is a product that represents state-of-the-art technology and has been manufactured in compliance with highest quality standards. Should it happen that something is acting up other than described, please contact your provider or salesman who has offered you the device. He will have the necessary knowledge to offer you the required support. And now enjoy your BIG 101x! 4 Version: 2010/12/01 BIG 101x Inhalt DEUTSCH ..................................................................................................................................... 7 1 1.1 1.2 2 2.1 2.2 2.3 2.4 2.5 2.6 2.7 2.8 2.9 3 3.1 3.2 3.3 3.4 3.5 3.6 3.7 3.8 3.9 3.10 3.11 4 5 5.1 5.2 5.3 Technische Beschreibung des BIG 101x .......................................................................... 7 Anwendungsbereich.......................................................................................................... 7 Blockschaltbild ................................................................................................................. 8 Installation ........................................................................................................................ 9 Systemvoraussetzungen zur Installation des BIG 101x.................................................... 9 Lieferumfang .................................................................................................................... 9 Wahl des Montageortes / Befestigung des Gerätes .......................................................... 9 Gehäuse und Lage der Anschlüsse / LEDs ..................................................................... 10 Stromversorgung............................................................................................................. 11 LCT-Port und integrierter Web-Server (LAN1) ............................................................. 11 LAN-Port (LAN2 bis LAN4) ......................................................................................... 12 SHDSL-Port (WAN-Schnittstelle) ................................................................................. 13 Signalisierung ................................................................................................................. 14 Inbetriebnahme, Konfiguration und Management .......................................................... 16 Inbetriebnahme ............................................................................................................... 16 Verwendung des internen Web-Servers (Web-GUI) ...................................................... 16 Menü „System“ ............................................................................................................... 17 Menü „WAN“ ................................................................................................................. 20 Menü „Switch“ ............................................................................................................... 21 Menü „SHDSL“ .............................................................................................................. 23 Menüpunkt „SNMP“....................................................................................................... 25 Lokales Firmware-Update .............................................................................................. 26 Neustart des BIG 101x .................................................................................................... 28 Pflege und Wartung ........................................................................................................ 28 Abbau des BIG 101x....................................................................................................... 28 Technische Daten............................................................................................................ 29 Wichtige Hinweise .......................................................................................................... 30 Herstellererklärung ......................................................................................................... 30 Gewährleistung ............................................................................................................... 30 Rechte und Warenzeichen .............................................................................................. 30 Version: 2010/12/01 5 BIG 101x ENGLISH .................................................................................................................................... 31 1 1.1 1.2 2 2.1 2.2 2.3 2.4 2.5 2.6 2.7 2.8 2.9 3 3.1 3.2 3.3 3.4 3.5 3.6 3.7 3.8 3.9 3.10 3.11 4 5 5.1 5.2 5.3 6 Technical description of the BIG 101x ........................................................................... 31 Scope of application........................................................................................................ 31 Block diagram ................................................................................................................. 32 Installation ...................................................................................................................... 33 Minimum system requirements for installation of the BIG 101x ................................... 33 Scope of delivery ............................................................................................................ 33 Selecting the place of installation / Fixing the device .................................................... 33 Housing and position of the connectors / LEDs ............................................................. 34 Power supply................................................................................................................... 35 LCT-port and integrated Web-Server (LAN1) ............................................................... 35 LAN-Port (LAN2 ... LAN4) ........................................................................................... 36 SHDSL-port (WAN-interface) ....................................................................................... 37 Signalling ........................................................................................................................ 38 Putting into operation, Configuration and Management ................................................ 40 Putting into operation...................................................................................................... 40 Use of the internal Web-Server (Web-GUI) ................................................................... 40 Menu „System“ ............................................................................................................... 41 Menu „WAN“ ................................................................................................................. 44 Menu „Switch“ ............................................................................................................... 45 Menu „SHDSL“ .............................................................................................................. 47 Menu item „SNMP“........................................................................................................ 49 Local Firmware Update .................................................................................................. 50 Restart of the BIG 101x .................................................................................................. 52 Maintenance .................................................................................................................... 52 Uninstallation of the BIG 101x ....................................................................................... 52 Technical Data ................................................................................................................ 53 Important notes ............................................................................................................... 54 Manufacturer´s declaration ............................................................................................. 54 Warranty ......................................................................................................................... 54 Rights and trademarks .................................................................................................... 54 Version: 2010/12/01 BIG 101x DEUTSCH 1 1.1 Technische Beschreibung des BIG 101x Anwendungsbereich Die speziellen Anforderungen heutiger Geschäftskunden an eine moderne und effiziente Kommunikationsinfrastruktur erfordern hochflexible, leistungsfähige Übertragungssysteme und Endkundengeräte. Die Produkte der Serie Business IP Gateway (BIG) sind speziell für die Anforderungen von Geschäftskunden entwickelt worden. Die BIG10-Produkte sind optimiert für Datenanwendungen wie die Übertragung von InternetDaten, die Anbindung von Außenstellen an eine Zentrale durch den Aufbau virtueller Netze (VLAN) oder die Übertragung von Sprach- und Videodaten in Echtzeit für VoIP und Videokonferenzen (siehe Bild 1). Dazu sind zahlreiche Funktionen für ein effizientes Bandbreitenmanagement und der Priorisierung von Diensten und Schnittstellen implementiert. Der BIG 101x verfügt über eine gemanagte Bridge-Funktion, kann jedoch in weiteren Schritten zu einem Router ausgebaut werden. Für die Übertragung der Daten zum IP-Backbone stehen bis zu 4 SHDSL-Leitungen zur Verfügung, die mittels eSHDSL-Verfahren Datenraten von bis zu 5,7 Mbit/s je Leitungspaar bereitstellen können. Durch das spezielle EFM-Bonding der SHDSL-Leitungen kann die Gesamtkapazität des Geschäftskundenanschlusses auf bis zu 10 Mbit/s erweitert werden. So lassen sich Bandbreitenerweiterungen durch Aufnahme weiterer SHDSL-Leitungen in die Bonding-Gruppe sehr einfach realisieren und Kundenwünsche nach höheren Bandbreiten schnell umsetzen. Die hohe Verfügbarkeit des Geschäftskundenanschlusses sowie der einzelnen Dienste kann garantiert werden. Die lokale und Fernkonfiguration bzw. das Management wird durch das implementierte Local Craft Terminal (LCT) bzw. durch den implementierten SNMP-Agenten gewährleistet und garantiert damit minimalen OAM-Aufwand. Bild 1: Anwendungsbeispiele des BIG 101x Version: 2010/12/01 7 BIG 101x 1.2 Blockschaltbild Im nachfolgenden Bild 2 sind die Hauptfunktionsblöcke des BIG 101x dargestellt. Bild 2: Blockschaltbild BIG 101x Diese bestehen im Wesentlichen aus der WAN-Schnittstelle sowie den lokalen Ports LAN1 bis LAN4, deren Funktionen nachfolgend beschrieben sind: SHDSL-WAN-Schnittstelle: Über diese 4-Port-SHDSL-Schnittstelle wird das BIG 101x mit dem DSLAM (WAN-seitig) verbunden. Es sind alle 4 SHDSL-Leitungen über eine RJ-45-Buchse geführt, so dass nur ein Kabel für die Verbindung mit der Telefondose (RJ-45) verwendet werden kann. Je nach DSLAM-Konfiguration werden 1-4 SHDSL-Leitungen für die Übertragung in einer BondingGruppe mit dem DSLAM verwendet. Der SHDSL-Transceiver leitet dann die Daten je nach Konfiguration an die entsprechenden internen Schnittstellen oder die Ports LAN1 bis LAN4 weiter. Schnittstellen LAN1 bis LAN4: An diese Ethernet-Schnittstellen werden die kundenseitigen Endgeräte sowie ein PC / Notebook für die lokale Überwachung und ggf. Konfiguration angeschlossen. LAN1 ist als LCT-Schnittstelle für den Zugang zum integrierten Web-Server zur lokalen Konfiguration und Statusüberwachung konfiguriert. Die LAN2-4 stellen die Kundenschnittstellen für den angeschlossenen Computer oder Router dar (s. Kap. 2.7; LAN3&4 sind noch nicht in Funktion). Die LAN2 ist direkt mit der WAN-Schnittstelle verbunden (switched). In späteren Software-Releases können ggf. weitere LAN-Ports werksseitig freigeschaltet und das BIG 101x mit weiteren Funktionen versehen werden. 12-V-DC-Stromversorgungsanschluss: An dieser Buchse wird das im Lieferumfang befindliche Steckernetzteil angeschlossen. Das interne DC-/DC-Netzteil bereitet dann daraus die notwendigen internen Spannungen auf. 8 Version: 2010/12/01 BIG 101x 2 Installation 2.1 Systemvoraussetzungen zur Installation des BIG 101x • • • • 2.2 Netzsteckdose mit Nennspannungsbereich 100 V … 240 V / 50 Hz … 60 Hz 1-4 Kupfer-Doppeladern für die eSHDSL-WAN-Verbindung Notebook oder PC mit Betriebssystem ab Windows® 98 SE; MAC; Linux und vollduplexfähiger Netzwerkkarte (Schnittstelle: 10/100Base-T); CPU: ab Pentium II®, 500 MHz Werkzeug (Wasserwaage, Bleistift, Bohrmaschine, Bohrer Ø 6 mm, Schraubendreher, kleine Zange) Lieferumfang Folgende Einzelteile sind im Lieferumfang enthalten: • • • • • • 2.3 Verpackung BIG 1011 (1-Port SHDSL, Art.-Nr. 900212) oder BIG 1012 (2-Port SHDSL, Art.-Nr. 900213) oder BIG 1014 (4-Port SHDSL, Art.-Nr. 900214) Netzteil (Zuleitung 1,5 m) Netzwerkkabel (3 m, gelb) Kurzbedienungsanleitung Beipackbeutel für die Wandmontage (2 Schrauben mit Dübel) Wahl des Montageortes / Befestigung des Gerätes Der BIG 101x ist für die Wandmontage oder zum Einsatz als Tischgerät vorgesehen. Bevor Sie mit der Montage beginnen, lesen Sie bitte folgende Hinweise aufmerksam durch: • Überprüfen Sie, dass alle Teile vollzählig und in einwandfreiem Zustand sind. Defekte Teile dürfen nicht benutzt werden. • Der Installationsort muss trocken sein und darf keiner direkten Sonneneinstrahlung ausgesetzt sein. • Die Belüftungsöffnungen des BIG 101x dürfen nicht verdeckt werden. Der BIG 101x ist für den Einsatz in geschlossenen Räumen geeignet und sollte möglichst an der Wand befestigt werden. Installieren Sie den BIG 101x in der Nähe der vom SHDSLDSLAM kommenden Kupferdoppeladern (Anschlussdose). Ebenso muss sich in der Nähe des BIG 101x eine Netzsteckdose befinden. Da der BIG 101x für den Dauerbetrieb ausgelegt ist, befindet sich kein Netzschalter am Gerät. Die Trennung vom Stromnetz erfolgt durch Abziehen des Steckernetzteils. Achten Sie darauf, dass das Steckernetzteil stets leicht zugänglich ist. Stellen Sie sicher, dass bei Wandmontage an der vorgesehenen Montagestelle keine Leitungen (Strom, Wasser, Gas, Telefon, Koaxialkabel, Glasfaser) unter Putz verlegt sind. Während des Betriebs entwickelt der BIG 101x eine fühlbare, aber völlig ungefährliche Betriebstemperatur. Um eine ungehinderte Wärmeableitung zu gewährleisten, darf der BIG 101x nicht in Version: 2010/12/01 9 BIG 101x Gehäuse ohne ausreichende Wärmeableitung eingebaut werden. Ebenfalls aus diesem Grund ist das Gerät auch vor intensiver Wärmeeinwirkung, z.B. durch Heizkörper oder Sonneneinstrahlung zu schützen. Halten Sie Feuchtigkeit vom BIG 101x fern. Vermeiden Sie eine sehr staubhaltige Umgebung. Die Montagehinweise finden Sie direkt auf der Bohrschablone. Für die Montage trennen Sie ggf. den BIG 101x bitte vom Stromnetz, da sonst die Gefahr besteht, dass Sie spannungsführende Teile berühren. Bohren Sie unter Zuhilfenahme der Bohrschablone die entsprechenden Löcher und drehen Sie die beiliegenden Schrauben hinein. Hängen Sie danach das Gerät an den beiden Schrauben auf. Schließen Sie danach die Endgeräte (PC/ Router) an die LAN2Schnittstelle und die vom DSLAM kommende SHDSL-Leitungen an die mit WAN beschriftete Schnittstelle an. Verbinden Sie zum Schluss das beiliegende Netzteil mit der Netzsteckdose und dem 12-VDC-Port am BIG 101x. Die Betriebsbereitschaft wird durch die PWRLED (siehe Abschnitt 2.9 LED-Signalisierung) angezeigt. 2.4 Gehäuse und Lage der Anschlüsse / LEDs Reset-Taster LEDs Gehäuse-Oberteil Oberteil-Cover OberteilVerschluss RJ45-Buchse (eSHDSL, WAN) LAN2–4 (R-J45) LAN1 / LCT (RJ-45) DC-Buchse/ Netzteil Der BIG 101x ist in einem kombinierten Tisch-/ Wandgehäuse untergebracht. Die Anschlüsse befinden sich im unteren Teil und die Anzeige-LEDs im oberen Teil des Gehäuses (siehe nachfolgende Abbildungen). Bild 3: Lage der Anschlüsse und der Anzeige- bzw. Bedienelemente des BIG 101x 10 Version: 2010/12/01 BIG 101x Die Frontansicht auf der linken Seite zeigt die Ethernet-Schnittstellen (LAN1 für LCT und LAN2 – LAN4 für den LAN-Anschluss). Weiterhin befinden sich an der Frontseite der Anschluss für die 12-V-Spannungsversorgung sowie der WAN-Anschluss (4 × SHDSL). An der Seite des BIG 101x befindet sich wie in Bild 4 ersichtlich der Reset-Taster, der hinter der rechten Service-Öffnung mittels eines Stiftes / einer Büroklammer bedient werden kann. Wird der Taster kurz (< 4 Sekunden) gedrückt, erfolgt ein Reset (Reboot) des BIG 101x. Wird der Taster länger (> 4 Sekunden) gedrückt, erfolgt ein Rücksetzen aller Einstellungen der User-Daten (Low-level-Zugang). Während des Drückens leuchten die LINK- und LANLEDs (inkl. Status-LEDs) nacheinander auf. Das Zurücksetzen der Daten aus dem High-level-Zugang erfolgt über eine spezielle Prozedur (siehe Kapitel 3.3). Reset-Taster Bild 4: Seitenansicht Im oberen rechten Bereich des BIG 101x-Gehäuses befindet sich die LED-Anzeige. Die einzelnen LEDs haben folgende Bedeutung (Details siehe Kapitel 2.9): LED PWR (gelb): LED ALARM (rot): LED LINK (grün / gelb): LED LAN (grün / gelb): 2.5 Anzeige der internen Stromversorgung Anzeige von Alarmzuständen Statusanzeige der WAN-Schnittstelle (SHDSL) Statusanzeige der LAN-Schnittstelle (LAN1 bis LAN4) Stromversorgung Für die Stromversorgung des Gerätes wird ein externes Steckernetzteil 12 V / 1,2 A verwendet, welches über einen zweipoligen EU-Stecker verfügt und im Lieferumfang enthalten ist. Der Eingangsspannungsbereich des Netzteils liegt zwischen 100 V … 240 V (50 Hz … 60 Hz), die Ausgangsspannung für den BIG 101x beträgt 12 V DC. 2.6 LCT-Port und integrierter Web-Server (LAN1) Die LAN1-Schnittstelle ist als LCT-Port (Local Craft Terminal) konfiguriert. Der LCT-Port bietet den direkten Zugang zum integrierten Web-Server (Web-GUI). Um die Einstellungen und Konfigurationen, die über den Web-Server vorgenommen werden können, vor unberechtigtem Zugriff zu schützen, verfügt das BIG 101x über einen zweistufigen Zugangsschutz: Im Low-level-Zugang können vorwiegend Statistiken eingesehen werden. Im High-level-Zugang stehen dem Nutzer alle Schreib- und Leserechte zur Verfügung. Es können Konfigurationen an der WAN- und LAN-Schnittstelle und an den SwitchEinstellungen vorgenommen werden. Des Weiteren sind ein Software-Update des BIG 101x sowie das Zurücksetzen auf dessen Werkseinstellung möglich. Über den SNMP-Remote-Zugriff lässt sich der lokale Zugriff auf den Web-Server beeinflussen. Version: 2010/12/01 11 BIG 101x 2.7 LAN-Port (LAN2 bis LAN4) Die LAN2/3/4-Schnittstellen können als Datenschnittstellen konfiguriert werden. Bei dem vorliegenden Gerätestand ist nur die LAN2-Schnittstelle für den Anschluss des Kundenequipments (CPE/ Router) aktiv und wird im Bridge-Mode betrieben, wobei der Datenstrom von und zur WAN-Schnittstelle nicht über den Netzwerkprozessor geführt, sondern direkt der WAN-Schnittstelle übergeben wird. Folgende Parameter bzw. Funktionen werden von den LAN-Ports unterstützt: • • • • Standard Ethernet-Protokoll IEEE 802.3 IEEE 802.1Q, 802.1d, native Multicast maximale MTU-size: 1500 Bytes 4 × RJ45 Ethernet 10/100 Base-T, MDI/MDIX-Autosensing (Pin-Belegung gem. Bild 5) Bild 5: LAN-Schnittstelle MDIX-Pinbelegung 12 Version: 2010/12/01 BIG 101x 2.8 SHDSL-Port (WAN-Schnittstelle) Der BIG 101x verfügt über einen 4-Kanal-SHDSL-Transceiver, der am Gerät über eine RJ-45 angeschlossen wird. Die Anschlussbelegung ist in folgender Abbildung dargestellt: Link 3 (3,6) Link 1 (4,5) Link 2 (1,2) Link 4 (7,8) Top view 12345678 Front view Link 2: 1,2 Link 3: 3,6 Link 1: 4,5 Link 4: 7,8 Bild 6: WAN-Schnittstelle Pinbelegung Der BIG 101x arbeitet im NT-Mode mit deaktiviertem PMMS/Lineprobing-Verfahren. Dies garantiert eine wartungsfreie Konfiguration, da feste Bitratenprofile verwendet werden und die Vorgaben zur Aushandlung der Übertragungsparameter vom DSLAM aus gesteuert werden. Bei der Verwendung von mehr als einem Leitungspaar werden die einzelnen Links zu einer Bonding-Gruppe (EFM-Bonding) zusammengefasst. Dies ermöglicht in Abhängigkeit der Einstellungen im DSLAM eine Bandbreite von 2,5 Mbit/s …10 Mbit/s. Zur Erhöhung der Reichweite werden bis zu 8 Zwischenregeneratoren (4 ZWR2MS-EFM je Verstärkerstelle bei 4-fach Bonding) unterstützt. Version: 2010/12/01 13 BIG 101x 2.9 Signalisierung Die nachfolgenden Tabellen zeigen die detaillierte LED-Signalisierung des BIG 101x. Bezeichnung Betriebszustand LINK (WAN) LAN Power (gelb) LINK (grün) LAN (grün) Alarm (rot) Status (gelb) Bemerkungen Status (gelb) Inbetriebnahme Power ON an Initialisierung an Betriebsbereit an 3 × Aufblinken der anderen LEDs blinkt mit 1 Hz an min. 1 SHDSLLine sync. SHDSL Down (ready) / Down (idle) an blinkt mit 1 Hz bzw. an aus aus Alarm-LED leuchtet, wenn min. eine SHDSL-Line aktiv war G.hs transfer an blinkt mit 1 Hz bzw. an flashing aller 2 sec. Anzahl der FlashPulse zeigt erste aktivierende Line an G.hs Lineprobing an blinkt mit 1 Hz bzw. an flashing kurze Unterbrechung der leuchtenden LED Training an blinkt mit 1 Hz bzw. an blinkt mit 1 Hz min. 1 SHDSLLine im Status Training Data Mode an blinkt mit 1 Hz bzw. an blinkt mit 2 Hz min. 1 SHDSLLine im DataMode Tabelle 1: LED-Signalisierung Teil 1 14 Version: 2010/12/01 BIG 101x Bezeichnung Betriebszustand LINK (WAN) LAN Bemerkungen/ Ergebnis Power (gelb) Alarm (rot) LINK (grün) Status (gelb) LAN (grün) PCS sync an blinkt mit 1 Hz bzw. an an an min. 1 SHDSLLines der EFMBonding-Gruppe ist sync. IP-Adresse noch nicht zugewiesen PCS sync an blinkt mit 1 Hz bzw. an an aus alle SHDSLLines der EFMBonding-Gruppe sind sync. IP-Adresse noch nicht zugewiesen PCS sync an aus an aus alle SHDSLLines der EFMBonding-Gruppe sind sync. IP-Adresse zugewiesen Status (gelb) LAN-PORTS disconnect an aus aus LCT-Link an LAN-LED blinkt bei Datentransfer LAN-Link an LAN-LED blinkt bei Datentransfer an Ausgangssituation Fehleranzeigen 1 Link down (PAF4) an an an alle Links down an interne Fehler an Softwareupdate an an Download an blinkt Flashprogrammierung an alle LEDs sind an und werden im Uhrzeigersinn nacheinander ausgemacht an blinkt blinkt blinkt Tabelle 2: LED-Signalisierung Teil 2 Version: 2010/12/01 15 BIG 101x 3 3.1 Inbetriebnahme, Konfiguration und Management Inbetriebnahme Mit Anliegen der Stromversorgung, Aktivierung der WAN-Schnittstelle und nach erfolgter Autokonfiguration (IP-Adresse für Management-Port) ist der BIG 101x inklusive Managementfunktion betriebsbereit. Die gesamte Verbindung zwischen DSLAM und BIG 101x wird vom Netzbetreiber in Betrieb genommen und ist vorkonfiguriert bzw. konfiguriert sich durch die Autokonfiguration selbst. Weitere Konfigurationseinstellungen direkt am BIG 101x sind normalerweise nicht notwendig. Die nachfolgenden Kapitel beschreiben daher nur Zusatzfunktionen, die für den Abruf von Statusinformationen aus dem BIG 101x oder für eine ggf. erforderliche Fehlerfindung und Entstörung notwendig sind. Voraussetzung für die Inbetriebnahme der Datenverbindung / LCT über den BIG 101x ist eine korrekte Installation der Netzwerkkarte Ihres PCs. Nähere Hinweise dafür entnehmen Sie bitte den Unterlagen des Herstellers der Netzwerkkarte. Für weitere Fragen bzgl. der Konfiguration Ihres PC wenden Sie sich bitte an Ihren Internetanbieter. 3.2 Verwendung des internen Web-Servers (Web-GUI) Über den geräteinternen Web-Server lässt sich mit Hilfe eines angeschlossenen PCs am LCTPort (LAN1) die grafische Benutzeroberfläche Web-GUI (Graphical User Interface) aufrufen. Als Web-Browser können alle bekannten Browser (Internet Explorer, Firefox, Safari, Opera, etc.) verwendet werden. Für den Zugriff auf das Web-GUI gehen Sie wie folgt vor: (1) (2) (3) Stellen Sie sicher, dass die Netzwerkeinstellungen Ihres Computers ein automatisches Beziehen der IP-Adresse durch einen DHCP Server zulassen. Fragen Sie ggf. Ihren Netzwerkadministrator, um die Einstellungen vorzunehmen. Verbinden Sie die LAN-Schnittstelle Ihres Computers mit der LAN1-Buchse des BIG 101x mittels eines LAN-(Ethernet-)Kabels. Nach Anschluss des Computers am BIG 101x wird diesem eine IP-Adresse automatisch zugewiesen. Die Einstellung einer festen IP-Adresse am PC ist ebenfalls möglich. Weisen Sie dazu Ihrem Computer folgende Daten zu: Voreinstellung Adressbereich Subnetzmaske Gateway-Adresse normaler Nutzer erweiterter Nutzer Benutzername Passwort Benutzername Passwort Benutzereinstellung 192.168.1.2 bis 255 255.255.255.0 192.168.1.1 admin admin isp-admin isp-admin Öffnen Sie jetzt den Web-Browser Ihres Computers und tragen in die Adresszeile folgendes ein: http://192.168.1.1 16 Version: 2010/12/01 BIG 101x Hinweis: Stellen Sie ggf. sicher, dass Ihre Proxy-Einstellungen korrekt sind. Nach erfolgreichem Verbindungsaufbau erscheint das folgende Login-Fenster. Bild 7: Anmeldebildschirm Nach Eingabe von Benutzernamen und Passwort und Klicken auf „Anmelden“ öffnet sich der Startbildschirm. Wenn Sie dort nicht innerhalb von ca. 3 Sekunden das ELCON-Logo in der Mitte des Bildschirmes anklicken, wird zunächst die Gerätestatusseite angezeigt, aus der Sie den Zustand aller Ports (aktiv, nicht aktiv, etc.) entnehmen können. Mit einem Klick auf das ELCON-Logo gelangen Sie zu den im Folgenden beschriebenen erweiterten Systemeinstellungen. Änderungen in den jeweiligen Menüs werden immer durch Klick auf den Anwenden-Button (Haken) übernommen und durch Klick auf „Einstellungen speichern“ im Gerät dauerhaft gesichert. 3.3 Menü „System“ Über den Menü-Punkt „System“ sind die systemspezifischen Einstellungen des BIG 101x wie z.B. die Systemzeit (NTP), die Änderung des Zugangs-Passwortes sowie das Ausführen eines Geräteneustarts, die Wiederherstellung der Standardeinstellungen und das Firmware-Upgrade des BIG 101x erreichbar. Bild 8: Systemeinstellungen Version: 2010/12/01 17 BIG 101x In dem Untermenü „System-Zeit“ lässt sich die Zeitsynchronisation des BIG 101x auf einen NTP-Server (Network Time Protocol) im Netz des Betreibers aktivieren und der zu verwendende Server einstellen. Zur automatischen Synchronisation haken Sie die Checkbox „NTP aktivieren“ an und tragen Sie unter „NTP Server“ die IP-Adresse / Name des zu verwendenden NTP-Servers ein. Weiterhin kann die Zeitzone gemäß Installationsort des BIG 101x selektiert werden. Bild 9: Einstellung der Systemzeit Im Untermenü „Passwort ändern“ können Sie den aktuellen Benutzernamen und das aktuelle Passwort sowie die maximale Zeitdauer bis zum automatischen Abmelden bei Inaktivität einstellen. Mit Klick auf den Anwenden-Button und nachfolgendem Klick auf „Einstellungen speichern“ werden die neuen Login-Daten ins Gerät permanent übernommen. Bild 10: Einstellung der Login-Daten für den Zugang zum BIG 101x 18 Version: 2010/12/01 BIG 101x Im Untermenü „Standardeinstellungen“ können Sie die Geräteeinstellungen auf die werksseitigen Default-Einstellungen zurücksetzen. Mit dem Button „User Parameter zurücksetzen“ werden die Login-Daten des „Admin“-Zuganges (Low Level) und mit dem „Zurücksetzen auf Werkseinstellung“ alle Geräteparameter auf die Werkseinstellungen (Auslieferzustand) zurückgesetzt. Bild 11: Wiederherstellen der Standardeinstellungen des BIG 101x Im Untermenü „Neustart“ können Sie bei Bedarf einen Reboot (Neustart) des Gerätes auslösen, falls das Gerät nicht mehr reagieren sollte. Die Funktion ist mit dem Druck auf den Reset-Button am Gerät identisch. Bild 12: Neustart des BIG 101x Der Menüpunkt „Firmware Upgrade“ ist im Kapitel 3.8 ausführlich erläutert. Version: 2010/12/01 19 BIG 101x 3.4 Menü „WAN“ Im Menüpunkt „WAN“ können Sie die IP-Konfiguration des BIG 101x zur Erreichbarkeit des Gerätes von der WAN-Schnittstelle für Managementzwecke vornehmen. Werksseitig ist das Gerät auf DHCP, also das automatische Beziehen der Daten von einem DHCP-Server, eingestellt. Für eine statische Konfiguration wählen Sie als „WAN Konfigurationstyp“ Statisch und geben dann unter VLAN-MGMT die notwendigen Adressdaten und die VLAN-ID (VID) ein. Der Managementverkehr wird dann immer mit der eingestellten VID (Default: VID = 3) in Richtung WAN gesendet. Bild 13: WAN-Konfiguration des BIG 101x 20 Version: 2010/12/01 BIG 101x 3.5 Menü „Switch“ Im Menü „Switch“ lassen sich Einstellungen der LAN-Ports wie Auto Negotiation und die Flusssteuerung (Flow-Control) für die nachgeschalteten Geräte einstellen. Bild 14: Konfiguration der LAN-Ports Per Default sind der LCT-Port auf Auto Negotiation und der Datenport LAN2 auf 100M FullDuplex eingestellt und bedürfen keiner Änderung. Sollte es Übertragungsprobleme mit der Gegenstelle (CPE) geben, lässt sich hier die Bitrate auf Half- oder Full-Duplex und 10 MBit/s bzw. 100 MBit/s fest oder Auto-Neg einstellen. Durch das Anhaken von „Flow Control“ lässt sich die Flusssteuerung für den jeweiligen LAN-Port ein- bzw. ausschalten (Default: Ein). Im Untermenü „Statistiken“ kann bei Bedarf (z.B. für die Fehleranalyse) die Anzahl der gesendeten (Tx) und empfangenen (Rx) Pakete / Bytes (z.B. fehlerfreie, fehlerbehaftete, Oversize, Undersize, etc.) bzw. die Art und Größe der Pakete auf den LAN- und WAN-Ports nachverfolgt werden. Ein Klick auf „Alle zurücksetzen“ setzt die Counter auf Null, bei „Aktualisieren“ werden die Counter in der Oberfläche (Web-GUI) auf den momentanen Zustand aktualisiert. Version: 2010/12/01 21 BIG 101x Bild 15: Statistik der LAN und WAN Ports 22 Version: 2010/12/01 BIG 101x 3.6 Menü „SHDSL“ Der Menüpunkt „SHDSL Status“ zeigt den aktuellen Zustand der 4 SHDSL-Leitungen (PCS Sync/ G.hs Handshake/ Training etc. und die Sync-Datenrate) sowie die Qualitätsparameter der Leitung (SNR, Loop Attenuation) an. Ebenso wird die im Gerät verwendete Firmware des SHDSL-Übertragungsbausteines (SDFE, IDC) angezeigt. Bild 16: Anzeige des SHDSL-Status Der Untermenüpunkt „Performance“ zeigt die aktuellen Performance-Daten der SHDSLLeitungen (z.B. aktive, gestörte oder stark gestörte Sekunden) des laufenden 15-MinutenIntervalls an. Eine Erklärung (Hilfe) zu den verwendeten Begriffen (TMP. ES etc.) erhalten Sie, wenn Sie den Mauszeiger über das entsprechende Parameterfeld bewegen. Bild 17: Anzeige der SHDSL Performance Daten Die „Performance History“ zeigt die Performance-Daten der SHDSL-Leitungen der letzten 24 Stunden in 15-Minuten-Intervallen. Zum Auswählen der zu betrachtenden SHDSL-Leitung ist auf den entsprechenden Reiter (Linie 1 bis Linie 4) zu klicken. Version: 2010/12/01 23 BIG 101x Bild 18: Anzeige der SHDSL Performance Records (24 Std.) 24 Version: 2010/12/01 BIG 101x 3.7 Menüpunkt „SNMP“ Im Untermenüpunkt „SNMP“ lässt sich der SNMP-Support sowie das Senden von SNMPTraps (z.B. Zustandsänderungen wie linkUp, linkDown und Alarme) an einen SNMPManager (Trap Host) konfigurieren. Dabei lässt sich mit „SNMP aktivieren“ der generelle Fernzugriff auf den BIG 101x mittels SNMPv2-Protokoll erlauben oder für Testzwecke deaktivieren. Bitte beachten Sie, dass beim Deaktivieren dieser Checkbox kein Zugriff mehr vom SNMP-Manager auf das Gerät möglich ist! Unter RO (Read Only) Community-Name kann bei Bedarf das voreingestellte Passwort für den lesenden und unter RW (Read/ Write) Community-Name das Default-Passwort für den schreibenden Zugriff angepasst werden. Das Feld MIB-II sysLocation erlaubt zur besseren Identifikation der einzelnen BIG 101xGeräte das Eingeben des aktuellen Standortes des Gerätes. Bild 19: SNMP-Einstellungen Bei der manuellen Konfiguration von SNMP-Traps (Default: Aus) ist die Checkbox „SNMPTraps aktivieren“ anzuhaken. Im Feld „Trap-Empfänger IP-Adresse“ ist die IP-Adresse und unter Trap-Empfänger Port der verwendete UDP-Port des Trap-Zieles (SNMP Manager/ Trap Host) einzutragen. Die Meldungen werden dann mit dem unter Trap Community-Name angegebenen Passwort an den Trap-Host gesendet. Mit „Anwenden“ (Haken anklicken) und „Einstellungen speichern“ sichern Sie die vorgenommenen Einstellungen dauerhaft im Gerät. Version: 2010/12/01 25 BIG 101x 3.8 Lokales Firmware-Update Klicken Sie zum Einspielen einer neuen Gerätefirmware für den BIG 101x auf „System“ im linken Bereich und anschließend auf den Unterpunkt „Firmware-Upgrade“. Nach einem Klick auf den Menüpunkt sehen Sie folgenden Bildschirm mit Angabe der aktuell im Gerät befindlichen Firmware-Version und dem Auswahlfeld für eine neue Software. Bild 20: Auswählen der entsprechenden Gerätefirmware Mit einem Klick auf „Durchsuchen...“ öffnet sich ein Dateimanager-Fenster zur Auswahl der Firmwaredatei, die Sie einspielen möchten. Geben Sie dort den entsprechenden Pfad und den Namen der Datei an und bestätigen Sie mit einem Klick auf den Anwenden-Button. Damit wird der Dateiname (inkl. Pfad) in das Web-GUI übernommen und in dem Feld neben dem Durchsuchen-Button angezeigt (siehe nachfolgendes Bild). 26 Version: 2010/12/01 BIG 101x Bild 21: Auswählen der entsprechenden Gerätefirmware (Fortsetzung) Nach den Klick auf den Anwenden- Button (siehe Bild 21) erfolgt noch eine Sicherheitsabfrage (Bild 22). Bild 22: Bestätigung des Upgrade-Prozesses Bitte bestätigen Sie diese Abfrage durch einen Klick auf OK, worauf noch ein letzter Hinweis (Bild 23) angezeigt wird. Bild 23: Warnung vor Nicht-Erreichbarkeit während Upgrade Version: 2010/12/01 27 BIG 101x Mit Bestätigen durch einen Klick auf „OK“ (Bild 23) wird der Upgrade-Prozess gestartet. Wurde die Option „Nach Firmware-Upgrade auf Werkseinstellung zurücksetzen“ aktiviert, erfolgen im Anschluss das Löschen der User-Parameter und ein Neustart des Gerätes mit den Werkseinstellungen (Factory Setting). Während des Updates wird die Zeitdauer bis zur erneuten Betriebsbereitschaft angezeigt. Bild 24: Neustart des BIG 101x nach FW-Upgrade Nach erfolgtem Neustart des BIG 101x wird im Web-Browser das Login-Fenster (siehe Bild 7 auf Seite 16) angezeigt. Wurde das FW-Upgrade mit der Option „Zurücksetzen auf Werkseinstellung“ durchgeführt, ist der BIG 101x wieder unter der IP-Adresse 192.186.1.1 erreichbar. Etwaige vorherige Änderungen der Geräte-IP-Adresse sind erneut durchzuführen. 3.9 Neustart des BIG 101x Sollte sich der BIG 101x in einem undefinierten Betriebszustand befinden (z.B. wenn keine Datenübertragung möglich ist), drücken Sie den Reset-Taster. Dieser befindet sich auf der rechten Gehäuseseite. Um einen Neustart auszuführen, betätigen Sie den Reset-Taster kurz mit einem spitzen Gegenstand. Führt dies nicht zum Erfolg, nehmen Sie bitte mit Ihrem Internetanbieter Kontakt auf. 3.10 Pflege und Wartung Ihr BIG 101x ist wartungsfrei. Die Reinigung erfolgt mit einem trockenen Tuch. Verwenden Sie niemals scheuernde oder ätzende Reinigungsmittel. Ziehen Sie das Steckernetzteil aus der Steckdose bzw. nehmen Sie das Gerät während der Reinigung außer Betrieb. 3.11 Abbau des BIG 101x Zum Abbau des BIG 101x lösen Sie zunächst sämtliche Kabel, beginnend mit dem Steckernetzteil. Nach Entfernen aller Kabel (SHDSL, LAN1-4, 12 V DC) kann das Gerät von der Wand abgenommen werden. 28 Version: 2010/12/01 BIG 101x 4 Technische Daten SHDSL-Schnittstelle SHDSL-Schnittstelle EFM-Bonding SHDSL-Anschluss gem. ITU-T G.991.2 G.SHDSL.bis, 4- SHDSL Leitungspaare gem. IEEE 802.3ah 1 × RJ-45 LAN-Schnittstellen Ethernet LAN LAN2 … LAN4 (Ethernet-Bridge) 3 × RJ45; 100 Mbit/s; Vollduplex; Auto MDI / MDIX; Transparent Bridging mode LCT-Schnittstelle Ethernet LAN DHCP LAN1 (Zugang zur Web-GUI) 1 × RJ45; Auto MDI / MDIX; Auto-Negotiation Zuweisung der IP-Adresse durch integrierten DHCP-Server Management Remote Management Firmware-Update SNMP-Management (SNMPv2); optional Dynamische Konfiguration mittels TFTP Fern- und lokales Firmware-Update Stromversorgung Steckernetzteil (Euro-Stecker) Betriebsspannungsbereich 100 V … 240 V AC Frequenzbereich 50 Hz … 60 Hz Stromaufnahme ≤ 0,5 A Stromversorgung BIG 101x Nennspannung 12 V DC Stromaufnahme < 1,2 A Gehäuse Ausführungsvariante Anzeigeelemente Gehäuseabmessungen Gehäusefarbe Gewicht Kunststoffgehäuse mit integrierten Anzeigeelementen und physikalischen Schnittstellen 6 LEDs zur Statusanzeige 240,4 × 160,4 × 48,2 mm3 (B × T × H) signalweiß (RAL 9003) 0,5 kg Umgebungsbedingungen (gemäß ETS 300 019) Lagerung und Transport Lufttemperatur: -40°C ... +70°C Luftfeuchtigkeit: 5% ... 95% Betrieb Lufttemperatur: 0°C ... +45°C Luftfeuchtigkeit: 5% ... 95% Standards, Zertifikate EMV Sicherheit CE Kennzeichnung Version: 2010/12/01 ETSI EN 300 386, EN 55022 Klasse B, ETSI ES 201 468, ITU-T K.21 EN 60950-1 29 BIG 101x 5 5.1 Wichtige Hinweise Herstellererklärung Der Hersteller erklärt, dass das ELCONnect next BIG 101x für die Übertragung von Informationsdaten vorgesehen ist und bei bestimmungsgemäßer Verwendung den geltenden Normen bezüglich Sicherheit und elektromagnetischer Verträglichkeit entspricht. 5.2 Gewährleistung Die vorliegende Dokumentation von ELCON Systemtechnik GmbH basiert auf dem aktuellen Stand der Technik. Trotz aller Sorgfalt lassen sich Fehler und technische Ungenauigkeiten nicht immer vermeiden. Als Ergebnis des schnellen technischen Fortschrittes behält sich ELCON das Recht vor, technische Änderungen und Entwicklungen durchzuführen. Aus diesem Grunde gibt ELCON keine Garantie für den Inhalt des vorliegenden Dokumentes. Außerdem ist ELCON nicht verantwortlich für den Verlust oder die inkorrekte Nutzung von Informationen und Daten, welche aus dem Gebrauch des Dokumentes resultieren können. Weiterhin ist ELCON nicht verantwortlich für Zerstörungen oder indirekte Zerstörung (dies beinhaltet auch finanzielle Verluste, verzögerte Geschäftstransaktionen oder Geschäftsabbruch sowie ähnliche Konsequenzen), welche durch falsche Benutzung der Geräte entstehen. Die vorliegende Dokumentation erläutert die Funktionsweise des ELCONnect next BIG 101x und erklärt die Installation und den Gebrauch des Gerätes. Für weitere Informationen zum Betrieb peripherer Geräte und Anlagen, insbesondere zur Installation von Computerhardware sowie den netzseitig verfügbaren Zugangstechnologien informieren Sie sich bei Ihrem Telekommunikationsnetzbetreiber oder Internet Service Provider beziehungsweise in den jeweiligen Nutzerhandbüchern. Es ist möglich, dass in der Dokumentation beschriebene Leistungsmerkmale nicht im konkreten Anwendungsfall genutzt werden können. 5.3 Rechte und Warenzeichen Mit Bezug auf die in der Dokumentation enthaltenen Daten garantiert ELCON nicht für die Nichtexistenz von industriellen Eigentumsrechten (Warenzeichen, Patente, Gebrauchsmuster, etc.). Warenzeichen, Markennamen, Firmen- und Produktnamen im generellen Gebrauch sind Subjekt zum jeweiligen Warenzeichen, Patent, Gebrauchsmuster und registrierten Designrechten. Die vorliegenden Informationen dürfen weder teilweise noch im Ganzen kopiert, übersetzt, nachgedruckt oder in irgendeiner anderen Weise transferiert werden. Der Bezug von Software und Geräten unterliegt den Allgemeinen Geschäftsbedingungen sowie den Lizenzbedingungen der ELCON Systemtechnik GmbH. 30 Version: 2010/12/01 BIG 101x ENGLISH 1 1.1 Technical description of the BIG 101x Scope of application Business customers today need a modern and efficient communication infrastructure, so they require extremely flexible, high-performance transmission systems and terminal equipment. The products from the Business IP Gateway (BIG) series are specially designed for business customers. The BIG10 products are optimized for pure data applications, such as the transmission of Internet data, the connection of external locations to a central office by setting up virtual local area networks (VLAN), or the transmission of voice and video information in real time for VoIP and video conferences (see figure 1). To this effect, a wide range of functions for efficient bandwidth management and priotitization of data and services has been implemented. The BIG 101x offers a managed bridge function, and can be further upgraded to a router. Data transmission to the IP backbone runs over max. 4 SHDSL lines, which can provide data rates of up to 5.7 Mbps per each line pair, using the eSHDSL transmission method. The special EFM-Bonding allows increasing the total capacity of the business customer access to even 10 Mbps. Bandwidth expansions can be very easily realized by adding further SHDSL lines to the bonding group, so that the customer’s demand for higher bandwidths will be met without delay. High availability of the business client access and the individual services can be guaranteed. Local and remote configuration and -management are realized through the integrated Local Craft Terminal (LCT) resp. the implemented SNMP-Agent and therefore guarantee very low OAM-expenditures. Figure 1: Sample applications of the BIG 101x Version: 2010/12/01 31 BIG 101x 1.2 Block diagram Below figure 2 shows the main function blocks of the BIG 101x. Figure 2: Block diagram BIG 101x Basically, they consist of the WAN-interface and the local ports LAN1 to LAN4, whose functions are described below: SHDSL-WAN-interface: The 4-port-SHDSL-interface is the port over which the BIG 101x is linked with the DSLAM (WAN-side). All 4 SHDSL-lines are connected over an RJ-45 socket, so that only one cable can be used for the connection with the phone socket (RJ-45). According to the DSLAMconfiguration, 1-4 SHDSL-lines are used for transmission in a bonding group with the DSLAM. The SHDSL transceiver transmits the data in accordance with the configuration to the respective internal interfaces or the ports LAN1 to LAN4. Interfaces LAN1 to LAN4: The Ethernet interfaces are the ports to which the CPEs and a PC / notebook for local monitoring and configuration, if applicable, are connected. LAN1 has been configured as LCT-interface to provide access to the integrated Web-Server, and thus serves for local configuration and status monitoring. The LAN2-4 represents the customer ports for the linked computer or router (see subsection. 2.7; LAN3&4 have not yet full functionality). The LAN2 is directly linked to the WAN-port (switched). Upcoming software releases may offer further LAN-ports by default, may provide the BIG 101x with further functions. 12-V-DC power supply: The plug-in supply unit (included in delivery) is connected to this socket. Based on this, the internal DC-/DC-mains unit generates the required internal voltages. 32 Version: 2010/12/01 BIG 101x 2 Installation 2.1 Minimum system requirements for installation of the BIG 101x • • • • 2.2 Power socket providing nominal voltage range 100 V … 240 V / 50 Hz … 60 Hz 1-4 copper wire pairs for the eSHDSL-WAN-connection Notebook or PC running on OS Windows® 98 SE or any later versions; MAC; Linux and full-duplex network interface card (interface: 10/100Base-T); CPU: Pentium II®, 500 MHz or higher diverse tools (water-level, pencil, drilling machine, drill Ø 6 mm, screwdriver, pliers) Scope of delivery Below parts are included in delivery: • • • • • • 2.3 Packaging material BIG 1011 (1-Port SHDSL, Order No. 900212) or BIG 1012 (2-Port SHDSL, Order No. 900213) or BIG 1014 (4-Port SHDSL, Order No. 900214) Mains unit (mains lead 1.5 m) Network cable (3 m, yellow) Short operating manual Toolkit bag for wall mounting (2 screws incl. dowels) Selecting the place of installation / Fixing the device The device BIG 101x can be mounted to the wall or installed as desktop unit. Before you start installing the unit, please read through the following instructions: • Make sure that all parts are complete and in faultless condition. Defective parts must not be used. • Select a place of installation which is dry and not exposed to direct sun radiation. • Do not conceal the ventilation slots on the BIG 101x. The BIG 101x has been designed for in-house use in closed rooms and should be mounted to the wall, if possible. The BIG 101x should be placed close to the copper wire pairs coming from the SHDSL-DSLAM (junction socket) and next to a mains socket. Since the BIG 101x is determined for continuous operation, it has no mains switch. For disconnection from the electricity grid, just remove the plug-in power supply unit. So the wall power supply should always be easily accessible. Prior to wall mounting, make sure that there are no concealed supply lines (power, water, gas, telephone, coaxial or fiber cable) at the intended installation place. During operation, the BIG 101x is markedly warming up, but this operating temperature is not dangerous at all. However, to provide for unimpeded heat dissipation, the BIG 101x must not be installed into a fully closed casing, lacking of a sufficiently dimensioned breather hole. For the same reason the device shall also be protected from intensive heating, caused e.g. by heating appliances or direct sun radiation. Further, do not expose the modem to a very humid or dusty environment. Version: 2010/12/01 33 BIG 101x The mounting instructions can be found on the drilling template. During installation the BIG 101x must be disconnected from the electricity grid, otherwise the user is at danger to touch active parts of the device. Use the drilling template to mark and drill the needed holes and insert the screws that are enclosed in delivery. Then hang up the device on the two screws. After this connect your terminating equipment (PC/ Router) to the LAN2-interface, and link the SHDS Lines that come from the DSLAM to the WAN port. At the end connect the enclosed mains unit to the mains socket and the 12-VDC port on the BIG 101x. The device is now ready for operation: this is indicated by the PWR-LED (see section 2.9 LED signalling). 2.4 Housing and position of the connectors / LEDs Reset button LEDs Upper casing part Upper cover Upper part latch RJ45 socket (eSHDSL, WAN) LAN2–4 (R-J45) LAN1 / LCT (RJ-45) DC socket / mains unit The device BIG 101x is accommodated in a combined desktop-/ wallmount housing. The connectors are placed in the bottom part, whereas the LED display can be found in the upper casing part (see figures below). Figure 3: Position of connectors and display/ operating elements of the BIG 101x 34 Version: 2010/12/01 BIG 101x The front view on the left shows the Ethernet ports (LAN1 for LCT and LAN2 – LAN4 for the LAN-connection). In addition to that, the front panel provides a socket for the 12 V power supply and the WAN-connection (4 × SHDSL). On the side of the BIG 101x there is the Reset button (behind the right-side service opening, as shown in figure 4), which can be operated by means of a pin / a paperclip. If this button is pressed for a few seconds (< 4 s), the BIG 101x will perform a reset (rebooting). By keeping the button pressed for more than 4 seconds, all user data will be reset (low-level access). While the button is pressed, the LED for LINK and LAN (including all status LEDs) are flashing up subsequently. The data reset from the high-level access is realized through a special procedure (see subsection 3.3). Reset button Figure 4: Side view The LED display section is on the right upper part of the BIG 101x housing. The LEDs provide the following information (For details see subsection 2.9): LED PWR (yellow): LED ALARM (red): LED LINK (green / yellow): LED LAN (green / yellow): 2.5 Internal power supply status information Signalling of alarm conditions Status display of the WAN-interface (SHDSL) Status display of the LAN-interface (LAN1 ... LAN4) Power supply Power supply of the device is effected through an external wall power supply 12 V / 1.2 A, which is equipped with a two-pin Europlug and included in delivery. The input voltage of the mains unit ranges between 100 V … 240 V (50 Hz … 60 Hz), the output voltage of the BIG 101x is 12 V DC. 2.6 LCT-port and integrated Web-Server (LAN1) The LAN1-interface has been configured as LCT-port (Local Craft Terminal). The LCT-port provides direct access to the integrated Web-Server (Web-GUI). To protect the settings and configurations, which can be realized via the Web-Server, against unauthorized access, the BIG 101x has a dual access protection: Low-level access mainly enables access to statistical information. High-level access makes all read/write rights available to the user. The user may carry out configurations at the WAN- and LAN-port, and he/she can change the switch settings. It is also possible to perform a software update of the BIG 101x and a reset to its default settings. Local access to the Web server can be influenced via SNMP-Remote access. Version: 2010/12/01 35 BIG 101x 2.7 LAN-Port (LAN2 ... LAN4) The LAN2/3/4-ports can be configured as data interfaces. With the available device version, only LAN2-interface has been enabled for connection of the customer devices (CPE/ Router). This port is operated in bridge mode, whereby data traffic to the WAN-interface and vice versa is not transmitted via the network processor, but is directly passed to the WAN interface. Below find the parameters and functions that will be supported by the LAN-ports: • • • • Standard Ethernet Protocol IEEE 802.3 IEEE 802.1Q, 802.1d, native Multicast Maximum MTU size: 1500 bytes 4 × RJ45 Ethernet 10/100 Base-T, MDI/MDIX-Autosensing (Pin assignment as illustrated in fig. 5) Figure 5: LAN-interface MDIX-Pin assignment 36 Version: 2010/12/01 BIG 101x 2.8 SHDSL-port (WAN-interface) The BIG 101x has a 4-channel SHDSL-transceiver which is linked to the device via an RJ-45 connector. The pin assignment is shown in the figure below: Link 3 (3,6) Link 1 (4,5) Link 2 (1,2) Link 4 (7,8) Top view 12345678 Front view Link 2: 1,2 Link 3: 3,6 Link 1: 4,5 Link 4: 7,8 Figure 6: Pin assignment of WAN-interface The BIG 101x works in NT-mode with disabled PMMS/Lineprobing method. This ensures maintenance-free configuration, since fixed bit rate profiles are applied, while the settings for negotiation of the transmission parameters are being controlled from the DSLAM side. When using more than one line pair, the individual links are pooled to one bonding group (EFMbonding). Depending on the DSLAM settings, this allows for a bandwidth between 2.5 Mbps and 10Mbps. Range increase is supported by using up to 8 regenerative repeaters (4 ZWR2MS-EFM for each amplifier with quadruple bonding). Version: 2010/12/01 37 BIG 101x 2.9 Signalling The following tables shows the detailed LED signalling of the BIG 101x. Designation Operating status LINK (WAN) LAN Power (yellow) LINK (green) LAN (green) Alarm (red) Status (yellow) Remarks Status (yellow) Start-up Power ON ON Initialisation ON Ready ON The other LEDs are flashing 3 times flashes at 1 Hz ON min. 1 SHDSLLine sync. SHDSL Alarm LED shines if min. one SHDSL-Line was active Number of flash pulses shows first activating Line Down (ready) / Down (idle) ON flashes at 1 Hz or ON G.hs transfer ON flashes at 1 Hz or ON flashing at 2 s G.hs Lineprobing ON flashes at 1 Hz or ON flashing short interruption of the shining LED Training ON flashes at 1 Hz or ON flashes at 1 Hz min 1 SHDSLLine in Status Training Data Mode ON flashes at 1 Hz or ON flashes at 2 Hz min 1 SHDSLLine in Data mode OFF OFF Table 1: LED signalling part 1 38 Version: 2010/12/01 BIG 101x Designation Operating status LINK (WAN) LAN Remarks Power (yellow) Alarm (red) LINK (green) Status (yellow) LAN (green) PCS sync ON flashes at 1 Hz or ON ON ON min. 1 SHDSLLine of the EFMBonding Group is synchronized IP-address not yet assigned PCS sync ON flashes at 1 Hz or ON ON OFF all SHDSL-Lines of the EFMBonding Group are synchronized IP-address not yet assigned PCS sync ON OFF ON OFF all SHDSL-Lines of the EFMBonding Group are synchronized IP-address assigned Status (yellow) LAN-PORTS disconnect ON OFF OFF LCT-Link ON LAN-LED flashes upon data transfer LAN-Link ON LAN-LED flashes upon data transfer ON Initial situation Fault signalling 1 Link down (PAF4) ON ON ON all Links down ON internal error ON Software update ON ON Download ON flashes Flash programming ON all LED are ON and they are switched off in clock-wise direction ON flashes flashes flashes Table 2: LED signalling part 2 Version: 2010/12/01 39 BIG 101x 3 Putting into operation, Configuration and Management 3.1 Putting into operation After application of the supply voltage, Activation of WAN interface and completed selfconfiguration (IP address for Management port) the BIG 101x inclusive its managementfunction is ready for work. The complete line between DSLAM and BIG 101x will be put into operation by your operator. It has a preset configuration or makes the required settings automatically by auto-configuration. Normally, there is no need to perform further configuration settings directly on the BIG 101x. So the following chapters only provide a description of additional functions, which are used for polling of status information of the BIG 101x, or which may be required for troubleshooting in case of need. Prerequisite for proper operation of your data link / LCT via the BIG 101x is the correct installation of the network interface card to your PCs. Detailed information on this should be received in the documentation provided by the card manufacturer. Further questions about configuration of your PC should be addressed to your Service Provider. 3.2 Use of the internal Web-Server (Web-GUI) The device-internal Web-Server enables the user to call the Web-GUI (Graphical User Interface) with the help of a PC to be connected to the LCT-Port (LAN1). For this, all standard browsers (Internet Explorer, Firefox, Safari, Opera, etc. can be used as Web-Browser). To get access to the Web-GUI, please proceed as follows: (1) (2) (3) Make sure that the network settings on your computer allow for an automatical assignment of the IP-address via DHCP-server. In case of doubt ask your network administrator to perform the settings. Link the LAN-interface of your computer with the LAN1-socket of the BIG 101x by means of a LAN-(Ethernet) cable. When the computer is linked with the BIG 101x, an IP-address will be automatically assigned. It is also possible to set a fixed IP-address at the PC. To this effect, the following data have to be assigned to your computer: Default setting Address range Subnet mask Gateway-address regular user advanced user User name Password User name Password Individual user setting 192.168.1.2 to 255 255.255.255.0 192.168.1.1 admin admin isp-admin isp-admin Now open the Web browser of your computer and enter the following information into the address line: http://192.168.1.1 40 Version: 2010/12/01 BIG 101x Note: Please make sure that your proxy settings are correct. Below Login window appears after connection has been set up successfully: Figure 7: Login window After entering the user names and the password, a click upon on the „Login“ button opens the start screen. If you do not click on the ELCON-Logo within the next 3 seconds (in the centre of the screen), first appears the device status page, showing the status of all ports (active, inactive, etc.). With a click upon the ELCON-Logo you change to the enhanced system settings which are described below. Changes in the individual menus will always be accepted by clicking on the application button (ticking) and durably stored in the device with a click on „Save settings“. 3.3 Menu „System“ The system-specific settings of the BIG 101x, such as system time (NTP), change of the authorization password, execution of a device restart, restoration of the default settings and the firmware upgrade of the BIG 101x are realized via the menu item „System“. Figure 8: System settings Version: 2010/12/01 41 BIG 101x The submenu „System Time“ allows the user to enable time synchronization of the BIG 101x with an NTP-Server (Network Time Protocol) in the operator´s network and to set the server that shall be used. To activate the automatical sychronization, put a tick in the checkbox „NTP enable“ and enter the IP-address/ name of the NTP-server under „NTP Server“. Also, you may select the time zone in line with the installation place of your BIG 101x. Figure 9: Setting of the system time The submenu „Change password“ allows you to set the user name and the password, as well as the maximum time until the automatical logout in case of inactivity. With a click upon the „Apply“ button and subsequent click on „Save settings“ the new login data will be permanently stored and applied in the device. Figure 10: Setting of login data for access to the BIG 101x 42 Version: 2010/12/01 BIG 101x The sub-menu „Standard settings“ allows you to reset the device parameters to the default settings that have been preset upon delivery. Pressing the button „Reset User Parameters“ resets the login data of the „Admin“ access (low level), while the command „Reset to default configuration“ resets all device parameters to their standard values (state upon delivery). Figure 11: Restore the default settings of BIG 101x Submenu „Restart“ enables you to reboot (restart) the device if need be, e.g. in case the device would fail. The function is the same as when actuating the reset button on the device. Figure 12: Restart of the BIG 101x The menu item „Firmware Upgrade“ is detailed in chapter 3.8. Version: 2010/12/01 43 BIG 101x 3.4 Menu „WAN“ The menu item „WAN“ allows you to perform the IP-configuration of your BIG 101x, to make the device accessible from the WAN-interface (for management operations). By default the device has been set to DHCP, i.e. automatical data download from a DHCP-server. For static configuration, select „Static“ as „WAN configuration type“ and enter then the required address information and the VLAN-ID (VID) under VLAN-MGMT. The management traffic will then always be sent with the set VID (default: VID = 3) in WAN direction. Figure 13: WAN configuration of the BIG 101x 44 Version: 2010/12/01 BIG 101x 3.5 Menu „Switch“ The menu „Switch“ allows the user to perform settings of the LAN-ports, such as Auto Negotiation and Flow Control for the downstream devices. Figure 14: Configuration of the LAN ports By default the LCT-port has been set to Auto Negotiation, while the data port LAN2 is set to 100M Full-Duplex – both ports need not to be changed. If problems occur during communication with the remote site (CPE), the bit rate can be set as fixed value to half- or full duplex and 10 Mbps resp. 100 Mbps. By putting a tick in the checkbox „Flow Control“ the latter can be enabled or disabled for the respective LAN-Port (default setting is: ON). The submenu „Statistics“ provides an option in case of need (e.g. for fault analysis) to track the number of transmitted (Tx) and received (Rx) packets / bytes (e.g. fault-free, erroneous, oversized, undersized, etc.) or, resp., type and size of the packets on the LAN- and WANports. Upon clicking on „All reset“ the counter will be zeroed, whereas the command „Update“ sets the counters on the Web-GUI to their current status. Version: 2010/12/01 45 BIG 101x Figure 15: Statistics of the LAN ports and WAN ports 46 Version: 2010/12/01 BIG 101x 3.6 Menu „SHDSL“ The menu item „SHDSL Status“ shows the current status of all 4 SHDS Lines (PCS Sync/ G.hs Handshake/ Training etc. and the Sync data rate) as well as the quality parameters of the line (SNR, Loop Attenuation). Also, the device-internal firmware of the SHDSL-transmitter component (SDFE, IDC) is indicated. Figure 16: SHDSL status information The submenu item „Performance“ shows the current performance data of the SHDS Lines (e.g. active, disturbed or heavily disturbed seconds) of the current 15-minutes interval. Additional information (Help support) to the terms used (TMP. ES etc.) will be provided when you move the mouse pointer over the respective parameter field. Figure 17: SHDSL Performance Data Version: 2010/12/01 47 BIG 101x The „Performance History“ shows the performance data of the SHDS Lines over the past 24 hours at intervals of 15 minutes. To select one of the 4 SHDS Lines, just click on the respective flag (Line 1 to Line 4). Figure 18: SHDSL Performance Records (24 hours history) 48 Version: 2010/12/01 BIG 101x 3.7 Menu item „SNMP“ The submenu item „SNMP“ allows the user to configure the SNMP-support and the transmission of SNMP-Traps (e.g. status changes such as linkUp, linkDown and alarms) to an SNMPManager (Trap Host). By ticking the checkbox „SNMP enable“ it is possible to generally allow remote access to the BIG 101x via SNMPv2-protocol, or to have it disabled for test purposes. Please note that after disabling this checkbox the SNMP-Manager has no access to the device any more! The option RO (Read Only) Community Name allows the user in case of need to change the default password for Read access, while the option RW (Read/ Write) Community Name offers to modify the default password for write operations. For better identification of the individual BIG 101x-devices, the field MIB-II sysLocation allows the user to enter the current location of the device. Figure 19: SNMP-settings When SNMP-Traps (Default: Off) are configured manually, it is necessary to put a tick in the checkbox „Enable SNMP-Traps”. The IP-address shall be entered in the field „Trap-Receiver IP-address“, whereas the Trap-Receiver Port has to be filled with the used UDP-port of the Trap-destination (SNMP Manager/ Trap Host). Messages will then be transmitted to the TrapHost with the password that has been indicated as Trap Community Name. By selecting the option „Apply“ (putting a tick) and „Save settings“ the settings that have been made will be saved in the device. Version: 2010/12/01 49 BIG 101x 3.8 Local Firmware Update To upload a new device firmware for the BIG 101x, click upon „System“ in the left area, and then on the sub-item „Firmware-Upgrade“. Now the following window appears on the screen, showing the current firmware version and the choice box for selecting a new software. Figure 20: Selection of the respective device firmware A click on „Browse...“ opens the file manager window, which allows the user to select the firmware file he/she intends to install. Enter there the according path and name of the file and acknowledge this by clicking on the “Apply” button. The file name (incl. path) will then be applied to the Web-GUI and displayed in the field next to the „Browse“ button (see following figure). 50 Version: 2010/12/01 BIG 101x Figure 21: Selection of the respective device firmware (continued) After clicking on the „Apply“ button (see figure 21) you will be prompted to acknowledge your settings (see figure 22). Figure 22: Acknowledgement of the upgrade process Please acknowledge the request by clicking on OK. This action will be followed by a warning message (see figure 23). Figure 23: Warning of non-accessibility during upgrade procedure Acknowledgement by clicking on „OK“ (figure 23) starts the upgrade process. If the option „Reset to default settings after firmware upgrade“ has been enabled, the user parameters will be deleted and the device performs a restart with the default configuration (factory settings). Version: 2010/12/01 51 BIG 101x During the update procedure, the timeout is indicated until the device will be again ready for operation. Figure 24: Restart of the BIG 101x after FW-Upgrade After restart of the BIG 101x the Web-Browser shows the Login window (see figure 7 on page 42). If the firmware upgrade was performed with the option „Reset to default settings“, the BIG 101x is again accessible at the IP-address 192.186.1.1. If, prior to this, changes of the device IP address have already been made, they have to be repeated. 3.9 Restart of the BIG 101x In case you find the BIG 101x in an undefined operating state (e.g. when no data transfer is possible), press the Reset button on the right side of the casing with a pointed tool (i.e. pen or paper clip) for a short moment. If you don´t succeed, please contact your Internet provider. 3.10 Maintenance Your BIG 101x is maintenance-free. For cleaning please use a dry cloth. Never use aggressive or caustic detergents. Before cleaning, remove the power supply unit out of the socket, or put the device out of operation. 3.11 Uninstallation of the BIG 101x To uninstall the BIG 10, first disconnect all cables, starting with the power supply unit. After all cables are removed (SHDSL, LAN1-4, 12 V DC) , the device can be taken from the wall. 52 Version: 2010/12/01 BIG 101x 4 Technical Data SHDSL interface SHDSL interface EFM Bonding SHDSL-connection acc. to ITU-T G.991.2 G.SHDSL.bis, 4- SHDS Line pairs acc. to IEEE 802.3ah 1 × RJ-45 LAN interfaces Ethernet LAN LAN2 … LAN4 (Ethernet Bridge) 3 × RJ45; 100 Mbps; full duplex; Auto MDI / MDIX; Transparent Bridging mode LCT interface Ethernet LAN DHCP LAN1 (access to Web-GUI) 1 × RJ45; Auto MDI / MDIX; Auto-Negotiation IP-address assignment through integrated DHCP-server Management Remote Management Firmware Update SNMP Management (SNMPv2); optional dynamic configuration by means of TFTP Remote and local Firmware Update Power supply of plug-in power supply module (Euro plug) Operating voltage range 100 V … 240 V AC Frequency range 50 Hz … 60 Hz Current consumption ≤ 0.5 A Power supply of BIG 101x Nominal voltage 12 V DC Current consumption < 1.2 A Casing Design version Display elements Dimensions Colour Weight Plastic casing with integrated display elements and physical interfaces 6 LEDs for status information 240.4 mm × 160.4 mm × 48.2 mm (W × D × H) signal white (RAL 9003) 0.5 kg Environmental conditions (according to ETS 300 019) Storage and transport Temperature: -40°C ... +70°C Humidity: 5% ... 95% Operation Temperature: 0°C ... +45°C Humidity: 5% ... 95% Standards, Certificates EMC Safety CE marking Version: 2010/12/01 ETSI EN 300 386, EN 55022 Class B, ETSI ES 201 468, ITU-T K.21 EN 60950-1 53 BIG 101x 5 5.1 Important notes Manufacturer´s declaration The manufacturer confirms that the ELCONnect next BIG 101x has been designed for the transfer of data information and, subject to its proper usage, complies with the relevant safety standards and the applicable EMC requirements. 5.2 Warranty This documentation compiled by ELCON Systemtechnik GmbH is based on best available technology. However, although applying due diligence, it is impossible to exclude all mistakes and technical inaccuracies. In view of the rapid technological progress, ELCON reserves the right to modifications and improvements. For this reason ELCON assumes no liability for the content of this document. Further, ELCON shall not be responsible for any loss or incorrect use of information or data which may result from using this document. In addition, ELCON cannot be held liable for damages, whether direct or indirect (including, but not limited to, financial losses, delayed business transactions, disruption of business or similar consequences), incurred as a result of improper use of the equipment. This documentation has been made to explain the functionality of the BIG 101x and describes installation and application of the device. Further information on the operation of peripheral equipment and installations, in particular about the installation of cable TV networks, computer hardware and the available access technologies, can be received from your telecommunications network operator or Internet Service Provider, or the respective user manuals. Note: This documentation may describe performance features which cannot be used in the specific application case. 5.3 Rights and trademarks With respect to the information contained in this documentation ELCON provides no warranties as for the non-existence of industrial property rights (trademarks, patents, utility models, etc.). Generally used trademarks, trade names, company and product names are subject to the respective trademark, patent, utility model or registered design rights. The information in this document must not be copied, neither in full nor in extracts, translated, reprinted or transferred in any other way. The purchase of software and equipment shall be governed by the General Terms and Conditions for the Sale and Supply of Products and Services and the License Conditions of ELCON Systemtechnik GmbH. 54 Version: 2010/12/01 BIG 101x Version: 2010/12/01 55 BIG 101x 56 Version: 2010/12/01