1
TANDY 200
Owner's Manual
Cat. No. 26-3860
The FCC Wants You to Know . . . This equipment has been
certified to comply with the limits for a Class B computing
device, pursuant to Subpart J of Part 15 of FCC Rules. Only
peripherals (computer input/output devices, terminals, printers,
etc.) that are certified to comply with the Class B limits may be
attached to this computer. Operation with non-certified
peripherals is likely to result in interference to radio and TV
reception. If this occurs, try relocating the receiving antenna, or
relocating the computer.
Tandy® 200 Software:
© 1985 Microsoft Incorporated.
All Rights Reserved.
The software in the Tandy 200 microcomputer is retained in a read-only memory (ROM)
format. All portions of this software, whether in the ROM format or other source code
form format, and the ROM circuitry, are copyrighted and are the proprietary and trade
secret information of Tandy Corporation and Microsoft. Use, reproduction or
publication of any portion of this material without the prior written authorization by
Tandy Corporation is strictly prohibited.
Tandy® 200 Owner's Manual
© 1984 Tandy Corporation
All Rights Reserved.
Reproduction or use, without express written permission from Tandy Corporation
and/or its licensor, of any portion of this manual is prohibited. While reasonable efforts
have been taken in the preparation of this manual to assure its accuracy, Tandy
Corporation assumes no liability resulting from any errors or omissions in this manual,
or from the use of the information contained herein.
r
r
I
,
J
r
I
TERMS AND CONDITIONS OF SALE AND LICENSE OF TANDY COMPUTER
EQUIPMENT AND SOFTWARE PURCHASED FROM RADIO SHACK
COMPANY-OWNED COMPUTER CENTERS, RETAIL STORES AND RADIO
SHACK FRANCHISEES OR DEALERS AT THEIR AUTHORIZED LOCATIONS
LIMITED WARRANTY
I.
CUSTOMER OBLIGATIONS
A. CUSTOMER assumes full responsibility that this computer hardware purchased (the "Equipment"), and any
copies of software included with the Equipment or licensed separately (the "Software") meets the specifications,
capacity, capabilities, versatility, and other requirements of CUSTOMER.
B. CUSTOMER assumes full responsibility for the condition and effectiveness of the operating environment in which
the Equipment and Software are to function, and for its installation.
^
LIMITED WARRANTIES AND CONDITIONS OF SALE
A. For a period of ninety (90) calendar days from the date of the Radio Shack sales document received upon
purchase of the Equipment. RADIO SHACK warrants to trie original CUSTOMER that the Equipment and the
medium upon which the Software is stored is free from manufacturing defects. This warranty is only applicable
to purchases of Tandy Equipment by the original customer from Radio Shack company-ownod computer
centers, retail stores, and RadlD Shack franchisees and dealers at their authorized locations The warranty is
void if the Equipment's case or cabinet has been opened, or if the Equipment or Software has been subjected to
improper or abnormal use. If a manufacturing defect is discovered during the stated warranty period, the defective
Equipment must be returned to a Radio Shack Computer Center, a Radio Shack retail store, a participating Radio
Shack franchisee or a participating Radio Shack dealer for repair, along with a copy of the sales document or
lease agreement. The original CUSTOMER'S sole and exclusive remedy in the event of a defect is limited to the
correction of the defect by repair, replacement, or refund of the purchase price, at RADIO SHACK'S election and
sole expense. RADIO SHACK has no obligation to replace or repair expendable items.
B. RADIO SHACK makes no warranty as to the design, capability, capacity, or suitability for use of the Software,
except as provided in this paragraph. Software is licensed on an "AS IS" basis, without warranty. The original
CUSTOMER'S exclusive remedy, in the event of a Software manufacturing defect, is its repair or replacement
within thirty (30) calendar days of the date of the Radio Shack sales document received upon license of the
Software The defective Software snail be returned to a Radio Shack Computer Center, a Radio Shack retail store,
a participating Radio Shack franchisee or Radio Shack dealer along with the sales document.
C Except as provided herein no employee, agent, franchisee, dealer or other person is authorized to give any
warranties of any nature on behalf of RADIO SHACK.
D EXCEPT AS PROVIDED HEREIN, RADIO SHACK MAKES NO EXPRESS WARRANTIES, AND ANY IMPLIED
WARRANTY OF MERCHANTABILITY OR FITNESS FOR A PARTICULAR PURPOSE IS LIMITED IN ITS DURATION
TO THE DURATION OF THE WRITTEN LIMITED WARRANTIES SET FORTH HEREIN.
E
Some states do not allow limitations on how long an implied warranty lasts so the above limitation(s) may not
apply to CUSTOMER.
III. LIMITATION OF LIABILITY
A EXCEPT AS PROVIDED HEREIN, RADIO SHACK SHALL HAVE NO LIABILITY OR RESPONSIBILITY TO CUSTOMER
OR ANY OTHER PERSON OR ENTITY WITH RESPECT TO ANY LIABILITY, LOSS OR DAMAGE CAUSED OR
ALLEGED TO BE CAUSED DIRECTLY OR INDIRECTLY BY "EQUIPMENT" OR "SOFTWARE" SOLD, LEASED,
LICENSED OR FURNISHED BY RADIO SHACK, INCLUDING, BUT NOT LIMITED TO, ANY INTERRUPTION OF
SERVICE, LOSS OF BUSINESS OR ANTICIPATORY PROFITS OR CONSEQUENTIAL DAMAGES RESULTING FROM
THE USE OR OPERATION OF THE "EQUIPMENT" OR "SOFTWARE." IN NO EVENT SHALL RADIO SHACK BE
LIABLE FOR LOSS OF PROFITS, OR ANY INDIRECT, SPECIAL, OR CONSEQUENTIAL DAMAGES ARISING OUT OF
ANY BREACH OF THIS WARRANTY OR IN ANY MANNER ARISING OUT OF OR CONNECTED WITH THE SALE,
LEASE, LICENSE, USE OR ANTICIPATED USE OF THE "EQUIPMENT" OR "SOFTWARE."
NOTWITHSTANDING THE ABOVE LIMITATIONS AND WARRANTIES, RADIO SHACK'S LIABILITY HEREUNDER FOR
DAMAGES INCURRED BY CUSTOMER OR OTHERS SHALL NOT EXCEED THE AMOUNT PAID BY CUSTOMER FOR
THE PARTICULAR "EQUIPMENT" OR "SOFTWARE" INVOLVED.
B. RADIO SHACK shall not be liable for any damages caused by delay in delivering or furnishing Equipment and/or
Software.
C. No action arising out of any claimed breach of this Warranty or transactions under this Warranty may be brought
more than two (2) years after the cause of action has accrued or more than four (4) years after the date of the
Radio Shack sales document for the Equipment or Software, whichever first occurs.
D Some states do not allow the limitation or exclusion of incidental or consequential damages, so the above
limitation(s) or exclusion(s) may not apply to CUSTOMER.
IV. SOFTWARE LICENSE
RADIO SHACK grants to CUSTOMER a non-exclusive, paid-up license to use the TANDY Software on one computer,
subject to the following provisions:
A. Except as otherwise provided in this Software License, applicable copyright laws shall apply to the Software.
B. Title to the medium on which the Software is recorded (cassette and/or diskette) or stored (ROM) is transferred to
CUSTOMER, but not title to the Software
C. CUSTOMER may use Software on one host computer and access that Software through one or more terminals if
the Software permits this function
D. CUSTOMER shall not use, make, manufacture, or reproduce copies of Software except for use on one computer
and as is specifically provided in this Software License Customer is expressly prohibited from disassembling the
Software.
E
CUSTOMER is permitted to make additional copies of the Software only for backup or archival purposes or if
additional copies are required in the operation of one computer with the Software, but only to the extent the
Software allows a backup copy to be made. However, for TRSDOS Software, CUSTOMER is permitted to make a
limited number of additional copies for CUSTOMER'S own use.
F. CUSTOMER may resell or distribute unmodified copies of the Software provided CUSTOMER has purchased one
copy of the Software for each one sold or distributed The provisions of this Software License shall also be
applicable to third parties receiving copies of the Software from CUSTOMER.
G. All copyright notices shall be retained on all copies of the Software
V. APPLICABILITY OF WARRANTY
A The terms and conditions of this Warranty are applicable as between RADIO SHACK and CUSTOMER tc either a
sale of the Equipment and/or Software License to CUSTOMER or to a transaction whereby Radio Shack sells or
conveys such Equipment to a third party for lease to CUSTOMER.
B. The limitations of liability and Warranty provisions herein shall inure to the benefit of RADIO SHACK, the author,
owner and or licensor of the Software and any manufacturer of the Equipment sold by Radio Shack.
VI. STATE LAW RIGHTS
The warranties granted herein give the original CUSTOMER specific legal rights, and the original CUSTOMER may
have other rights which vary from state to state.
To Our Customers
Congratulations on purchasing the Tandy
200—a truly revolutionary
portable computer!
This manual shows how to immediately
start using all 6 of the Tandy 200 built-in
programs, how to relate these programs
with each other, and how to do many of
today's most exciting and practical
applications.
The best way to use this manual is to start
at the beginning and try all the examples.
If you are in a hurry, though, to do one
application, take 5 or 10 minutes to read
Chapter 1 first. Then skip to the chapter
that interests you.
After reading this manual, you can get indepth information on the more featurefilled programs from the other Tandy 200
manuals:
• Tandy 200 Multiplan Manual
• Tandy 200 TELCOM Reference Manual
• Tandy 200 BASIC Reference Guide
Please feel at ease with the Tandy 200.
Pressing the wrong key or typing the wrong
information does no damage to a computer. You can usually correct a mistake
simply by typing the information again correctly. If this does not work, turn to
"Help" in the back of this manual.
Contents
11 Starting Up
Turn on the Tandy 200 and start
programs. Use the clock, calendar,
and calculator. Connect and use the
printer
21 Writing Notes and Letters
(TEXT)
Enter and display text
conveniently— wherever you
are. Then print the text or
save it on tape
SI Cutting, Pasting, and
Finding Text (TEXT)
Find, cut, paste and copy text
without having to retype it.
13
41 Finding Schedules and
Addresses (SCHEDL and
ADDRSS)
Select and list today's appointments and addresses. Store
alarms to remind you of
appointments
19
5/ Planning (PLAN)
Use a spreadsheet to plan
finances and schedules
23
6/ Dialing Telephone Numbers (TELCOM)
Store and automatically dial
telephone numbers. Use tone
or pulse dialing—whatever is
required by your telephone
service
29
71 Communicating with
Another Computer (TELCOM)
Connect to CompuServe
Information Service and access
its many data bases
35
8/ Programming (BASIC)
Learn to type and run simple
but useful BASIC programs
41
91 Expanding the Tandy 200
Choose from a variety of
Tandy 200 add-on equipment,,
programs, and publications
45
References
49
IV
Chapter II
Starting Up
This chapter shows how to start the Tandy
200 and enter programs. You will need the
Tandy 200 power adapter (Cat. No.
26-3804) or 4 Size AA alkaline batteries.
i
I :
Starting Up / 1
Starting the Tandy 200
1. Open the Tandy 200 case
and turn on the Memory Power
Switch:
If using batteries, insert them as
shown:
•o
c•
1
a
[.o
c
3. Press the Power Switch, and
adjust the DISP dial to your
field of vision:
Never turn this switch off. Doing
so causes you to lose all information you have stored in the
Tandy 200.
2. Supply electric or battery
power:
If using electricity, connect the
Tandy 200 to an electric outlet,
using the Tandy 200 power
adapter. (Use only the Tandy 200
power adapter!)
2 / Starting Up
Battery power lasts 14 hours.
When the red battery indicator
turns on, you have about 20
minutes of battery power left:
banks, press (F1 ) or (TAB) to
move to Bank #2 and Bank #3.
Note: You can get a Radio
Shack Computer Center to
modify the Tandy 200 so that
you can use rechargeable
batteries.
Using the Main Menu
On your screen is a menu similar
(but not identical) to this:
1
2
J
/
a n 1 5 . 1 9 8 4 S a t 1 0 : 3 2 : 1 8 l l # 11 ( C ) M i c r o s o f t
BJHIM
TEXT
TELCOMp
AODRSS
SCHEDL
MSPLAN
4
3
5
Note: If you do not see this
menu, press (F8), the spacebar,
or(SHIFT)and(BREAK) at the
same time to "return" to it.
This is the Main Menu. It gives
you this information:
1. Today's date and time. You
will set this later in this chapter.
2. The number of the randomaccess memory bank (called
RAM bank, for short) that you
are now using. The Tandy 200
uses a RAM bank to store information. If you purchased extra
3. The number of bytes
(characters) remaining in the
currently-used RAM bank. At
startup, you have room to store
about 19,590 characters in each
RAM bank.
4. The functions you have
available: Bank, Copy, and Kill.
5. The 6 program files that come
with the Tandy 200—BASIC,
TELCOM, ADDRSS, SCHEDL,
TEXT, and MSPLAN. These are
built in to the Tandy 200's readonly memory (ROM) and, with
the exception of SCHEDL, are
available from any of the RAM
banks. (SCHEDL is available
only from Bank 1.)
The remaining spaces are empty
now but will contain the names
of the files (programs or data)
you store in RAM. Each RAM
bank has room for 47 files.
Entering a File
The file in reversed characters is
ready to enter. "Move" to other
files by pressing the arrow keys
(at the top of the keyboard).
Move to BASIC. Then "enter"
it. (Press the (ENTER) key.) You
see BASIC'S startup message:
Tandy 200 Software
Copyright 1984 Microsoft
19334 Bytes Free
Starting Up / 3
"Exit" BASIC by pressing CED
(at the top of the keyboard).
Move to, enter, and exit 2 other
files—TEXT and T E L C O M using the same keys: the arrow
keys, (ENTER], and CED.
Note: If you accidentally enter
SCHEDL, ADDRSS, or
MSPLAN, you will need to exit
these programs somewhat differently. SCHEDL and ADDRSS
initially ask you to exit by pressing the spacebar. MSPLAN requires that you exit by pressing
fSHlFT) and (BREAKl at the
same time.
Setting the Clock and
Calendar
Enter BASIC. Then press
(ENTER) so that " O k " is the last
line on your screen. Check the
CNUM] key at the bottom of your
keyboard; if it is pressed, release
it.
Enter today's day: Use the format DAYS = "day", with "day"
abbreviated—MON, TUE, WED,
THU, FRI, SAT, or SUN. For
example, if today is Tuesday, type:
DAYS = " T U E " (ENTER)
(To produce uppercase letters,
use (SHIFT) or (CAPS LOCKl,
just as you would on a normal
tvnpwritpr ^
-j
f
~
• • '
- * * - -
• /
Enter today's date: Use the
format DATES = "yy/mm/dd".
For example, if today is March
4, 1985, type:
4 / Starting Up
DATES = "03/04/85" CENT!
Enter the time: Use the format
TIMES = "hh:mm:ss", with
military hours. For example, if it
is now 4:03 p.m. and 15 seconds,
type:
TIMES = "16:03:15" (ENTER)
If you get an error message:
Perhaps you omitted the quotation marks, omitted a leading 0,
or used a wrong abbreviation.
Press (ENTER). Then type the
day, date, or time again
correctly.
When finished: Check to be
sure that BASIC stored the correct day, date, and time. Type:
PRINT DAYS (ENTER!
PRINT DATES (ENTER]
PRINT TIMES (ENTER]
Return to the Main Menu (by
pressing ("Ftp), and you see the
current day, date, and time.
Using the
Calculator
The Tandy 200 has a 4-function
calculator. To turn it on, press
and lock the (NUM) key (to turn
on the "numeric keypad"); then
press (GRPH) (to turn on the
calculator). You see the
calculator's display on the top
line of your screen.
Calculator
0
The right keys are now numeric.
Use them to make quick computations. For example, compute
26 X 38 4- 127 in the following
manner. Note that you need to
use a * rather than an X symbol
for multiplication:
When you
type:
27
38
+
127
fENTER)
The top line
of the screen
shows:
Calculator
Calculator
Calculator
Calculator
Calculator
Calculator
*
*
+
+
27
27
38
1026
127
1153
In addition to the numeric
keypad, the Tandy 200 calculator
has these special keys:
fBKSP)—deletes the last
character
fSHIFTlDELI—deletes the last
entry
rsHlFTKDEU twice—deletes
the entire operation
(ENTER]—enters or continues
a calculation
GD—adds (same as ® )
CB—subtracts (same as Q )
CD—multiplies (same as C*D)
CD—divides
All other keys are "locked out"
while the calculator is on. Turn
off the calculator by pressing
(BREED. Turn off the numeric
keypad by releasing (NUM].
You can use the Tandy 200
calculator at the Main Menu or
while running any of the Tandy
200 programs. It will have no effect on the program you are
running.
Turning Off the Tandy 200
When finished using the Tandy
200, simply press the Power
Switch (but be sure to leave the
Memory Power Switch on). If
you forget to turn off the power,
the Tandy 200 waits 10 minutes
and then turns it off for you.
Keeping Information Safe in
Memory
The next chapters show how to
store information in the Tandy
200's RAM. The Tandy 200's internal battery keeps this information in RAM even when the
power is off. Make sure this internal battery never dies:
• Never turn off the Memory
Switch on the bottom of the
Tandy 200. This turns off the
internal battery. We suggest
that you put tape over this
switch so nobody turns it off:
•o
c
(I s
1
9
.©
c>.
• If you need to let the Tandy
200 sit idle for more than 5-15
days, be sure that it has batteries in it and that these batteries are not dead. The Tandy
200's internal battery needs
some kind of power source so
that it can keep itself charged.
Starting Up / 5
Using a Printer
Note: If you do not have a
printer, skip to the next chapter.
You can use any Radio Shack
"parallel" printer with the Tandy
200. To connect it, you need to
purchase the Tandy 200 printer
cable (Cat. No. 26-1409).
Unpack your printer. Refer to
your printer's owner's manual
for instructions on:
9
Inserting a ribbon
9
Inserting paper
• Turning on the printer's power
• Turning the printer online
Turn all equipment off. Then
make these connections:
With the printer connected and
online, press the (.PRINT) key (at
the keyboard top). The printer
prints what is on your screen. In
later chapters you will learn more
uses of the printer.
Chapter 1 Summary
Tandy 200
To print the screen: Press
To turn on the "numeric
keypad": Press CHDH).
To enter the "all caps" mode:
Press (CAPS LOCKl
To turn on the calculator:
Press CHDE); then SEED.
To turn off the calculator:
Press (GRPH); then release fNUMl
Main Menu
To enter a file: Press (ENTER).
To move to a file: Use the
arrow keys.
To move to another RAM
bank: Press CED or (TAD.
BASIC
To enter the day, date and
time: Use the DAYS, DATES,
and TIMES commands.
Do not force the connections;
they work only 1 way. If they
are difficult to make, you may
have the cable uDside-down,
6 / Starting Up
Note: Each chapter lists functions you might want to
remember. Tandy 200 functions
(such as (PRINT) or (WM)) work
the same no matter what program you are using. Other functions (such as (ED) might work
differently with each program.
Chapter 21
Writing Notes and Letters (TEXT)
In this chapter, you will create a "text"
file. You will learn how to store notes,
letters, sales orders, or any information in
this file and, if you have a printer, how to
print the information as a formatted
document.
Writing Notes and Letters / 7
Creating a Text File
Assume you want to create a text
file to store seminar notes. To
create the file, enter the TEXT
program. TEXT asks:
File to edit?
Note how TEXT adjusts the
words that wrap to the next line.
You see this on your screen:
''Use of P o r t a b l e C o m p u t e r s at C u s t o m e r
Locations,'' Computer Seminar, June 15,
1984:«
>. E n t e r o r d e r s - *
2. T r a n s m i t o r d e r s to main c o m p u t e r - *
3 . A c c e s s t i m e s h a r i n g computer-*
Enter a name for a file that has
6 or fewer characters. For example, type SEMINR (ENTER!
TEXT creates a file named
SEMINR. You see a blank screen
with a back arrow and a blinking
box.
The back arrow is the end of the
file. The blinking box (called the
"cursor") is your position in the
file.
Entering Text
Release the fCAPS LOCK] key if
it is pressed to get out of the
"all caps" mode. Then type
these notes letting the words
"wrap" from one line to the
next. (The only time you need to
press [ENTER), the carriage
return, is when you must end a
line, such as the end of a
paragraph.)
"Use of Portable Computers
at Customer Locations,"
Computer Seminar, June 15,
1984: (ENTER!
1. Enter orders (ENTER)
2. Transmit orders to main
computer (ENTER)
3. Access timesharing
computer CE
8 / Writing Notes and Letters
To correct mistakes: Use the
fBKSP) key (at the top, right corner). It backspaces and erases.
To insert text: Using the arrow
keys, move the cursor to position
at which you want to insert text;
then type your insertion. For example, move the cursor up to the
"U" in "Use" and type Reps .
TEXT adjusts your text
accordingly:
' ' R e p s Use of P o r t a b l e C o m p u t e r s at
Customer L o c a t i o n s , 1 1 Computer Seminar,
June 15, 1984:-*
1. E n t e r orders-*
2. T r a n s m i t o r d e r s to m a i n c o m p u t e r - *
3. A c c e s s t i m e s h a r i n g computer-*
To delete text: Move the cursor
on top of the character you want
deleted; then press (SHIFT)
(DELI. For example, move to the
" 1 " in "June 15" and delete it
by pressing (SHIFT) and then
(DELI at the same time. ((DEL) is
actually a shifted (BKSPl key.)
" R e p s Use of P o r t a b l e C o m p u t e r s at
Customer Locations,11 Computer Seminar,
J u n e 5, 1984:-*
1. E n t e r orders-*
I. T r a n s m i t o r d e r s to m a i n c o m p u t e r - *
3. A c c e s s t i m e s h a r i n g computer-*
To repeat text: Press a key and
hold it down for a while. TEXT
repeats the key, over and over.
You may be repeating characters
faster than TEXT can process
them. You then discover that
TEXT "remembers" what you
type. You see TEXT "catch up"
with you even after you finish.
Entering and Exiting
a Text File
To exit the text file and return to
the Main Menu, press (FBI. The
Main Menu shows the name of
the file you created—
SEMINR.DO. The .DO extension tells you that SEMINR.DO
is a text file—not a program.
Also note that you now have
fewer bytes free. This is because
of the memory consumed by
SEMINR.DO. Move to
SEMINR.DO's position on the
Main Menu, and you see its
precise length at the bottom.
Now re-enter SEMINR.DO.
(Move to SEMINR.DO and press
(ENTER).) You see the information still there—just as you left
it.
Try turning the Tandy 200's
power off and then on again.
The information that you store
in the Tandy 200 remains safe—
even when the power's off—and
will remain safe as long as you
follow the precautions listed in
Chapter 1.
Printing a Text File
In Chapter 1, you learned how
to print a display by pressing
(PRINT). To print an entire text
file, such as SEMINR.DO, you
need to enter the text file and
press (SHIFT) (PRINT).
Enter SEMINR.DO. Press
(SHIFT) and (PRINT) at the
same time. TEXT shows how it
will format what it prints:
Width: 80
Left-Margin: 0
Page size: 66
Line/Page: 65
Top margin: 0
Writing Notes and Letters / 9
You can change any of these
numbers by using the arrow keys
to position the cursor, then typing a new number. Use numbers
within these ranges:
Width: 10 to 132
Left Margin: 0 to 121
Page size: 0 to 99
Line / Page: 0 to 99
Top margin: 0 to (page size—
line/page)
Once satisfied with the settings,
press (ENTER). TEXT asks:
We recommend you use Radio
Shack's CCR-81 or CCR-82 computer recorder (Cat. No. 26-1208
or 26-1209), which includes a
recorder-to-computer cable (Cat.
No. 26-1207).
To connect the recorder: Plug
in the 3-pronged end of the
cable: the black plug to EAR,
the large grey plug to AUX, and
the small grey plug to REM.
Connect the other end of the
cassette connector to the back of
the Tandy 200:
Continuous Y/N?
Type Y (ENTER) if you want to
print all the pages continuously;
type N (ENTER) if you want the
printer to temporarily stop after
each page.
If you decide you do not want to
print, press (SHIFT) and
(BREAK) at the same time.
((BREAK) is at the upper left corner.) No matter what program
you are using, you can always
use (SHIFT) (BREAK! to cancel
the current operation.
Saving a Text File on Tape
Using tape, you can store endless
numbers of files: large files, old
files, infrequently-used files, and
backup files of important informstion 3*7 storing tl^^^s fji^c Q*\
tape, you can use the Kill function (described later in this
chapter) to free up RAM space
for the files you use every day.
10 / Writing Notes and Letters
To save a text file: Insert a
blank tape in the recorder, and
rewind it to the start. (If using a
tape with a leader, forward the
tape past the leader.) Press the
recorder's PLAY and RECORD
buttons until they lock. Press
and TEXT prompts:
Save to*
Enter a filename using 6 or fewer
characters; for example, type
SEMINR [ENTER). The recorder
turns on, records, and then stops
automatically. We recommend
you store 2 or 3 copies of the
file.
To protect a file: Once you
have recorded a file on tape, you
may want to write-protect the
tape. To do so, remove the 2
notches on top of the tape:
With the notches removed, you
can load information from the
tape, but you cannot record
anything on it. If you ever want
to cancel this write-protection,
put some tape over the 2
notches.
To load a file: Rewind the tape
and press the PLAY button until
it locks. Set the volume between
4 and 6, for the CCR-81, or on
" P " , for the CCR-82. Press
CED, and TEXT prompts:
Load from:
In response to this prompt you
can simply press (ENTER) (to
load the next file) or enter a
specific filename, such as
SEMINR (ENTER) (to load the
specified file).
Type SEMINR (ENTER). TEXT
turns on the recorder and, when
it finds the SEMINR file,
displays the message:
Found: SEMINR.DO
When the above prompt disappears, TEXT has finished loading
SEMINR.DO into RAM.
Deleting, Copying, and
Renaming a File
The Tandy 200 lets you delete,
copy, and rename any Tandy 200
file except the built-in program
files. (The built-in programs are
in read-only memory (ROM) and
cannot be altered.) To use these
functions, return to the Main
Menu.
To delete a file: Move to a
file's position on the Main Menu
and press the Kill key (CED). The
Main Menu gives you a chance
to reconsider by asking "Are you
sure? (Y/N)". Press CS if you
are sure and the file is deleted
from RAM.
To copy a file to another
bank: Move to a file's position
on the Main Menu, and press the
Copy key (CED). The Main Menu
asks for a "Destination Bank:".
Type the number of another
bank, and the file is copied.
Writing Notes and Letters / 11
The Copy function can be used
only by customers with multiple
banks. If you have only one
bank, you can use the (PASTE)
key to copy a text file, as instructed in the next chapter.
To rename a file: Enter BASIC
and, at the Ok prompt, enter the
NAME command using this format: NAME "oldname" AS
"newname" (ENTER). Enter the
full filename, including its extension, for example, NAME
"SEMINR.DO" AS
"MEMO.DO" (ENTER)
Chapter 2 Summary
Tandy 200
To stop an operation: Press
To insert text: Move the cursor
anywhere in the text and type.
To delete a character: Move
the cursor on top of a character
and press fSHIFTlfDELi.
To print a text file: Press
(SHIFTXPRINTl, answer the
print formatting questions, and
To save a text file on tape:
Press (T3~); then type a filename.
To load a text file from tape:
Press CBD; then type a. filename.
Main Menu
To copy a file to another
bank: Move to the file and press
CFD.
To delete a file: Move to the
file and press CRT).
To see a file's size: Move to the
file's position.
TEXT
To move the cursor: Use the G3
QCDCD.
To move to the next line: Let
the words "wrap" as you type,
or press (ENTE
12 / Writing Notes and Letters
BASIC
To rename a file: Use the
NAME command.
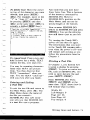
Chapter SI
Cutting, Pasting, and Finding
Text (TEXT)
Information on paper is static and cumbersome to change. In contrast, the information you store in a Tandy 200 text file is
flexible and simple to change. This chapter
shows the easy way to "edit" text without
retyping it.
Cutting, Pasting, and Finding Text / 13
Sample File
iQDMoves to the top
of the display
|QD Moves to the bottom of the display
Moves to the top
of the file
Moves to the bottom of the file
As an example of editing text,
suppose you are a sales representative and want to update orders
from customers' stores. Create a
text file named ORDERS.DO
that has these orders:
ELM F U R N I T U R E *
pine tables
pine chairs
maple tables
*
JONES F U R N I T U R E *
maple tables
pine cabinet
redwood s h e l v e s
*
HANDY J O E *
15*
5*
18*
Using the Edit Function Keys
To edit a file, use TEXT'S function keys—CED through CE5D—at
the top of the keyboard. To see
what these keys do, press
( LABEL) (also at the keyboard
top). At the bottom of your
screen, you see:
3*
5*
20*
Find Load Save List Copy Cut Sel
(You can use (TAB) to go to the
next column, just as on a normal
typewriter.)
Using the Cursor Movement
Keys
You have learned that you can
move the cursor with the arrow
keys. To move the cursor quickly, you can use a combination of
an arrow key and a (SHIFT) or
CCTRLD key.
LLEDGD Moves to the
word
lRl Moves to the
word
f CTRL~K~*"* Moves to the
of the line
CCTRDG3 Moves to the
of the line
right
left
CT
ri ht
Menu
Each function is above a
number. For example, "Menu"
is above the number 8. This tells
you that you can return to the
Main Menu with the CBD key.
You can turn this bottom line on
and off with the (LABEL) key.
Finding Text
Suppose you want to quickly
find all orders of "maple
tables." First move to the start
of the text. Then press the Find
key (CED).
You see "String:" at the bottom
of the screen. Enter the "string"
of characters you want to find:
left
14 / Cutting, Pasting, and Finding Text
String: maple tables
You see TEXT quickly jump to
the first occurrence of "maple
tables":
ELM FURNITURE-*
pine t a b l e s
pine chairs
g a p Ie t a b l e s
TEXT shows what you have just
selected in reverse characters. If
this is not the text you want,
press (SHIFT) (BREAK) to cancel
the operation and try it again:
15-*
5-*
18-*
JONES F U R N I T U R E 4
maple t a b l e s
pine cabinet
redwood s h e l v e s
3. Select text using any of the
cursor movement keys. In this
case, press (SHIFTIF7! 3 times.
34
5-*
204
ELM FURNITURE-*
•ma
4
HANDY JOE-4
maple
184
tables
4
Find
Load S a v e
L i s t Copy C u t S e l M e n u 4
lEi^HISIHnHKEI^H
JONES F U R N I T U R E 4
maple t a b l e s
pine cabinet
redwood s h e l v e s
34
54
204
4
i
[
-
Find the next occurrence of the
same string. Press CE3D and, to
find the same string, simply press
HANDY
(ENTER!
Find
Try to find a third occurrence of
the string. TEXT prints "No
Match". There are no more occurrences of "maple tables" in
your text.
Selecting Text
—
Now suppose you need to "cut"
Elm Furniture's order of "pine
tables". To cut text, you first
"select" what you want to cut:
~
1. Move to the start of the text
you want to select. In this case,
move to the " p " in "pine
tables".
2. Press the Select key (GED).
This puts you in the "select
mode."
Load Save
L i s t Copy C u t S e l Menu
Cutting Text
With text selected, you can cut it
simply by pressing the Cut key
(COD). You see:
ELM F U R N I T U R E 4
pine chairs
maple t a b l e s
5-*
184
4
JONES F U R N I T U R E S
maple t a b l e s
pine cabinet
redwood s h e l v e s
3-*
5-*
204
4
HANDY
Find
'
J0E4
J0E4
Load S a v e
L i s t Copy C u t S e l Menu
imHRHnnffinH
Cutting, Pasting, and Finding Text / 15
Pasting Text
When you cut text, it is actually
transferred to an area of memory
called the "paste buffer." With
the (PASTE] key (at the top), you
can "paste" this text anywhere
you want.
Paste the text into Jones Furniture's order. Move to the "r"
in "redwood." Then paste the
text in place by pressing
ELM FURNITURE-*
pine chairs
maple t a b l e s
-*
JONES FURNITURE-*
maple t a b l e s
pine cabinet
pine tables
redwood s h e l v e s
5-*
18-*
HANDY JOE-*
'
.
.
••••-••
.IONFS FURNITURE-*
Find Load Save List Copy Cut
After selecting text, press the
Copy key (CRT)) to copy the text
into the paste buffer. Then move
to where you want the copied
text to be—in this example, just
under the " H " in "Handy
Joe"—and press
3-*
5-*
15-*
20-*
.
ELM FURNITURE-*
pine chairs
maple tables
•
'
pine chairs
maple t a b l e s
5-*
18-*
•*
Find Load Save L i s t Copy Cut S e l Menu
• • • • H ^ K I H i n lEHHlS^HH^RXHI
Copying Text
Now suppose the next customer,
Handy Joe, wants the exact
"copy" of Jones Furniture's
order. First, select the text you
want to copy. In this example:
1. Move just under the " J " in
"Jones Furniture."
2. Press (ED.
3. Use the cursor movement keys
to select the following text. (In
this example, press (CTRL) GD
and then press CD 4 times.)
JONES FURNITURE-*
maple t a b l e s
pine cabinet
pine tables
redwood s h e l v e s
3-*
5-*
15-*
20-*
-4
HANDY JOE-*
maple t a b l e s
pine cabinet
pine tables
redwood s h e l v e s
3-*
5-*
15-*
20-*
Find Load Save L i s t Copy Cut S e l Menu
Moving Text to Other Files
The information you cut or copy
into the paste buffer remains
there even after you exit a file.
Because of this, you can move
text from 1 file to the next as
16 / Cutting, Pasting, and Finding Text
: \
:I
long as both files are in the same
RAM bank. For example, assume
you want to move some text
from ORDERS.DO to
SEMINR.DO:
1. Select a block of text from
ORDERS.DO and cut (CBD) or
copy (fFD) it into the paste
buffer.
2. Enter SEMINR.DO and, at
the position where you want the
text inserted, press (PASTE).
Clearing the Paste Buffer
Just like text files, the contents
of the paste buffer consume
memory. After cutting and
pasting or copying and pasting a
large block of text, less memory
is available.
You can "clear" the paste buffer
by replacing its contents with
nothing. To do this, press (F 7),
the Select key, and then copy
nothing into the paste buffer by
pressing 1F5], the Copy key. The
paste buffer now contains
nothing, which, of course, consumes no memory.
You may find the amount of
memory consumed by the paste
buffer to be somewhat confusing. If so, refer to Reference C.
Listing Information
from a File
TEXT includes an additional
function, called LIST, that lets
you select information from a
text file. This function works in
a similar way as the SCHEDL
and ADDRSS programs and is
described in the next chapter.
Chapter 3 Summary
Tandy 200
To turn on and off the
function-key display: Press
TEXT
To move to the next word:
Press (SHIFT) and B o r S .
To move to the next line: Press
(CTRL) and 3 or 3 .
To move to the top or bottom
of the screen: Press (SHIFT)
and CD or CD.
To move to the top or bottom
of the file: Press (CTRL) and CD
or CD.
To find text: Press CED; then
enter what you want to find.
To select text: Press (F7 ); then
use the cursor movement keys.
To cut text: Select text and
press (F6).
To copy text: Select text and
press (F5). Then move to where
you want it copied, and press
a
ASTE
Cutting, Pasting, and Finding Text / 17
Chapter 41
Finding Schedules and Addresses
(SCHEDL and ADDRSS)
This chapter shows how to use the Tandy
200 SCHEDL and ADDRSS programs—as
well as a LIST program from which both
SCHEDL and ADDRSS are variations—to
select information from a file. You will
also learn how to store alarms in a
schedule file.
Finding Schedules and Addresses / 19
Using SCHEDL with NOTE.DO
The SCHEDL program selects
"records" from a file named
NOTE.DO. So before using
SCHEDL, you need to create
NOTE.DO. Use TEXT, as you
have done in previous chapters,
to create NOTE.DO; then insert
these records:
To select records, press the Find
key (CUD) and tell SCHEDL
which records you want to find.
For example, press (F1); then
type due (ENTER!:
Schd: Find due (ENTER)
SCHEDL selects all the records
in NOTE.DO that have the word
"due":
9/18/85, product schedules d u e *
9/23/85, 2:30, staff meeting-*
9/23/85, 1 1 : 4 5 , lunch with J o n e s *
10/10/85 reviews d u e *
10/18/85 announcement due*
11/01/85 1 0 : 3 0 , N e w Y o r k f l i g h t , U n i t e d
Airlines-*
10/05/85 4 : 4 5 , r e t u r n f l i g h t , A m e r i c a n
Airlines
11/07/85 p r o p o s a l d u e
Schd: Find due-*
9/18/85, product schedules due
1 0 / 1 0 / 8 5 , reviews due
1 0 / 1 8 / 8 5 , announcement due
1 1 / 0 7 / 8 5 , proposal due
Schd:
tamm
A record is any text—a word,
line, paragraph, or even an entire
file—that ends with (ENTER).
The above file has 8 records.
Your records can be in any format. The above records are just
1 example.
Once you have created
NOTE.DO, you can use
SCHEDL to select records from
it. Return to the Main Menu and
enter SCHEDL. SCHEDL, like
all Tandy 200 programs, shows
oil
itc
fiit-»/-«ti/-»r*c r\rt tVio K/-\tt-/-\rn
line. Also like all Tandy 200 programs, SCHEDL lets you use
[LABEL ) to turn on and off the
bottom line.
Find
Edit Lfnd
Henu
Try using other words to find
records: 10/, product meeting,
flight, and lunch. If SCHEDL
cannot display all the records on
one screen, it asks:
More Quit
Press the More key (CRT) or (M))
to see the next display or the
Quit key(CHD or (3D) to quit the
selection.
If you have a printer, you can
use the Lfnd key (CED) rather
than the Find key. SCHEDL
prints your selected information
on the printer.
20 / Finding Schedules and Addresses
Using ADDRSS with ADRS.DO
ADDRSS selects records from a
file named ADRS.DO, rather
than NOTE.DO. Other than
that, ADDRSS and SCHEDL
work the same.
For example, using TEXT, create
a file named ADRS.DO with
these records:
Rick S c h e l 1 : 2 1 4 / 9 2 5 - 7 9 9 3 : 453 Red
River, Dallas, TX, 75229-«
Ellen Dunlap:312/374-4822: 916
Orunmond, Chicago, IL, 65219-*
JoeShmou :2H/876-2222: 815 Maple,
Dallas, TX, 75219-*
Glenda Elliott : 8 1 7 / 8 2 4 - 3 3 8 5 : 7 1 6 A p e x ,
Ft. Uorth, TX, 87112*
From the Main Menu, enter any
text file from which you want to
select records; for example, enter
the ORDERS.DO file that you
created in an earlier chapter.
After entering the text file, press
the List function key ((F4)).
At the top of the screen, you see
the name of your text file—in
this example, ORDERS.DO—and
can select records from this file.
A record, as you recall, is any
text—such as a word, line, or
paragraph—that ends with
(ENTER).
For this example, select all
records that have the word
"table". Type CED table
(ENTER). This causes LIST to
display these records:
As with NOTE.DO, it makes no
difference what format you use
for the records. However, by
enclosing telephone numbers in
colons (:), you will be able to
autodial these numbers using the
TELCOM program later in this
manual.
maple tables
maple tables
oak tables
maple tables
oak tables
18
3
15
3
15
When finished listing records,
return to the text file by pressing
the Edit function key (CED).
To find addresses, return to the
Main Menu and enter the
ADDRSS program. Then find:
TX, 214, and Joe Shmow.
Organizing Records
Using LIST with other Text Files
You have learned that you can
use SCHEDL to select records
from NOTE.DO and ADDRSS
to select records from
ADRS.DO. Both are variations
of the Tandy 200 LIST
program—and LIST lets you
select records from any text file.
You can easily find information
in NOTE.DO and ADRS.DO if
the information in these files is
consistent. You may want to try
using symbols to tag
information.
Finding Schedules and Addresses / 21
For example, in NOTE.DO, you
may want to use an asterisk (*)
to tag each critical date and a
number sign (#) to tag each each
personal date:
dd/dd/dd is a date; it must include all 6 digits (even the
year) separated by slashes.
tV.tf.tt is a time; it must include all 6 digits (even the
seconds) separated by colons.
A is an "alarm flag." message
is any message you want
displayed.
10/03/85, 11:45, lunch with
Jones #
10/10/85, reviews due
10/18/85, announcement due *
Or, in ADRS.DO, you may want
to use a code such as **IN** to
tag the members of an insurance
organization or **PR** to tag
prospective clients:
Rick Schell :214/925-7993:
453 Red River,
Dallas, TX, 75229 **IN**
Ellen Dunlap :312/374-4822:
916 Drummond,
Chicago, IL, 65219 **PR**
Joe Shmow :214/876-2222:
815 Maple,
Dallas, TX, 75219 **IN**
Setting Alarms
The Tandy 200 lets you store any
number of alarms in the
NOTE.DO file. Each alarm
causes it to beep and display
whatever comment you have
stored with the alarm. To store
an alarm in NOTE.DO use this
exact "alarm format":
For example:
09/23/85,14:30:00,A,staff
meeting
On September 23, 1985 at 2:30
P.M., the Tandy 200 will beep
and return to the Main Menu.
You can then press (SHIFT)
{LABEH and the Tandy 200 will
display "staff meeting."
Chapter 4 Summary
SCHEDL, ADDRSS, and LIST
To find records: Press CE3D;
then enter what you want to
find.
To find and list records on the
printer: Press Q3D; then enter
what you want to find.
Note: SCHEDL finds records
from NOTE.DO; ADDRSS,
from ADRS.DO; and LIST,
from any text file.
ddldd/dd,tt:tt:tt,A,message
22 / Finding Schedules and Addresses
Chapter 5/
Using Spreadsheets
(PLAN)
Often executives need to analyze how
various "what ifs" will affect company
plans. What if the cost of labor rises by
10%? What if materials' costs are cut? To
help with this kind of analysis, Tandy 200
comes with a spreadsheet program called
MSPLAN, a subset of the popular
Multiplan program.
Using Spreadsheets / 23
Designing a Simple Spreadsheet
As a simple example of how to
use a spreadsheet, assume you
need to analyze how varying
costs will affect January's total
production costs:
1%cttvujjds
TttaJL
At the Main Menu, enter
MSPLAN. MSPLAN asks:
File to use?
Enter a file name. For this example, type COSTS (ENTER].
Multiplan then displays a blank
spreadsheet with 4 columns
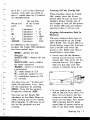
across and 15 rows down:
24 / Using Spreadsheets
The cursor is at Row 1, Column
1 (R1C1). Move to the next column (R1C2) by pressing £D.
Keep moving right and you see
that, although you can see only 4
columns at a time, the spreadsheet actually has 63 columns.
Move down and you see that it
actually has 99 rows.
Move to R1C2, and type
January. You see what you are
typing at the bottom of the
screen. If you make a mistake,
use (BKSP) to correct it:
1
1
2
3
4
5
6
7
8
9
10
11
12
13
14
Value: January
2
3
Press (ENTER), and January appears at your current position—
R1C2:
T
2 T
3
4
Assume you make a mistake and
want to "blank out" January.
Position the cursor at January.
Press CE2D, the Blank function
key, and then (ENTER).
1
!
2
January
Labor
Materials
3
2000
Total
(As with other Tandy 200 programs: You can see the meaning
of all Multiplan's function keys
by using the [LABEL] key. You
can cancel a function and return
to the spreadsheet by pressing
Finish the speadsheet design by
entering Labor, Materials, and
Total in the positions shown
below:
2
I
January
3
Labor
Materials
Entering
Formulas
You could enter 8000
(2000 + 6000) as the total. 8000,
however, is a static total and
defeats the purpose of an electronic spreadsheet. Enter the
total's formula instead: the sum
of R3C2 (which is now 2000) and
R4C2 (which is now 6000).
Move to the total position
(R6C2), and enter the formula:
= R3C2 + R4C2
2 I
January
Labor
Materials
Entering Data
You are now ready to enter data.
Enter 2000 and 6000 in the positions shown:
2000
6000
Total
9
10
11
12
13
14
Value: =R3C2+R4C2
Using Spreadsheets / 25
Multiplan prints the result of this
formula—8000—in the total
position.
I
January
Labor
Materials
4
2000
6000
Total
Now enter different numbers for
labor and materials costs.
Multiplan instantly adjusts the
total.
Note: If Multiplan does not print
the total, perhaps you omitted
the equal sign (=) when entering
the formula. Blank out your
mistake and enter the formula
again. If it still does not enter
the correct result, perhaps 2000
and 6000 are in the wrong
row/column positions. Blank
them out and try again.
If Multiplan prints
"ttVALUE!,"
you have entered a
number—2000 or
6000—incorrectly. Perhaps you
preceded the number with a
blank space. Blank out both
numbers and enter them again.
26 / Using Spreadsheets
Entering and Exiting
Spreadsheet
Files
Return to the Main Menu by
pressing COD. On the Main
Menu, you see COSTS.CO. The
.CO extension tells you that
COSTS is a spreadsheet file,
rather than a text file or a
program.
From the Main Menu, you can
enter and use COSTS.CO just as
you can enter a text file—by
moving to the file and pressing
[ENTER). You can also delete,
copy to another bank, or rename
the file, just as you can with a
text file.
Learning More about
Spreadsheets
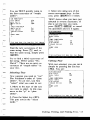
This chapter gives a simple example of a spreadsheet. With 63
columns and 99 rows, and with
Multiplan's many commands and
features, you can make a much
more sophisticated spreadsheet.
Imagine, for example, the power
of the spreadsheet shown in
Figure 1.
To learn how to use Multiplan's
many features, as well as some
helpful Multiplan commands
(such as commands that save a
spreadsheet to tape or copy a
spreadsheet to the same bank^
read the Multiplan manual that
comes with the Tandy 200.
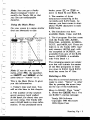
HcuJL
Cerate,
idtaJL Costs
Figure 1. Spreadsheet
Chapter 5 Summary
To blank a value: Move the
MSPLAN
To move the cursor: Use the ar-
cursor to the value you want
blanked; then press (F2).
row keys.
To enter a value: Move the cursor to where you want the value;
then type it and press CENTER).
To enter a formula: Move the
cursor to where you want the
formula, type = followed by the
formula; then press CENTER).
Using Spreadsheets / 27
6/ Dialing Telephone Numbers
(TELCOM)
This chapter shows how to autodial
telephone numbers and switch between tone
and pulse dialing. To use any of the
features described in this chapter, you need
a modem cable (Cat. No. 26-1410).
Dialing Telephone Numbers / 29
Connecting to the Telephone
Open the packet containing the
modem cable. Save the instructions for use later in this manual.
Connect the Tandy 200 to the
telephone in either of these ways.
(It makes no difference which
way you use.)
Enter TELCOM. TELCOM's
bottom line gives the meaning of
its function keys. As with the
other programs, you can use
(LABEL) to turn on and off this
display.
Find Call Stat Term
Menu
Setting TELCOM Parameters
TELCOM's top line gives its
currently-set parameters. Only 2
of them are important for
autodialing:
MI1ENN,0,10 pps
• The " M " tells TELCOM to
use the built-in modem. (You
must use the built-in modem
to autodial.)
• The "10 pps" tells TELCOM
to pulse dial at 10 pulses per
second.
Set the DIR/ACP switch to DIR:
If your display shows different
values for these 2 parameters,
press the Status function key
(CE2D) and enter the new value by
typing M7IlENN,O,10 pps
CENTER]. Then press CHD
CENTER) to see that you have set
the parameters correctly.
Autodialing Numbers
Press the Call function key (CE2D)
and you see "Call." Now type
the number you want to call.
Examples:
555-1212
l-(214)-352-3535
9/555-1212
30 / Dialing Telephone Numbers
Be sure to include all digits required to dial the number. (For
example, a " 1 " or " 9 " may be
required, or perhaps the "*" or
"#" symbols are required.)
TELCOM ignores extra symbols,
such as the hyphen (-) and the
slash (/). As with other programs, you can use (BKSP) to
correct mistakes.
Before pressing (ENTER), pick up
the telephone receiver. Press
(ENTER] and you hear TELCOM
dial the number.
Finding and Autodialing
Numbers
You can find and autodial a
telephone number stored in
ADRS.DO (Chapter 4) as long as
you have enclosed it in colons
(:). For example, assume
ADRS.DO contains this number:
Joe Shmow : 1-214/876-2222:
815 Maple,
Dallas, TX, 75219
To find and autodial this
number:
1. Press the TELCOM FIND key
((F1)), and enter any part of the
record you want to find. To find
the record containing Jow
Shmow, for example, you could
enter 214, Dallas, TX, or Joe:
Telcom: Find Joe
TELCOM displays the first
record that contains these
characters. Example:
Joe Shmow :214/876-2222
2. At the bottom of the screen
TELCOM asks whether you want
to call (Call), find the next
record containing these
characters (More), or quit finding
records (Quit):
Call More Quit
Since this is the record containing the number you want to dial,
press Call (CEE). TELCOM
shows the number as it dials.
3. Before TELCOM finishes
dialing, pick up the telephone
receiver—Otherwise, the connection will be broken.
Fast Pulse Dialing
By dialing at 20 pps (20 pulses
per second), you can dial
numbers twice as fast. Press the
Stat key (CED) and change the 10
pps to 20 pps:
M7IlENN,O,20 pps (ENTER)
(As stated earlier, you can press
CED (ENTER"] to check that you
have entered the parameters correctly.) Your local telephone
system may not be able to use 20
pps. If not, change back to 10
pps.
Dialing Telephone Numbers / 31
Tone Dialing
Many long distance services require that you send it tones, produced by tone dialing. To get
TELCOM to tone dial, change
10 pps to T:
M7I1ENN,O,T (ENTER)
Your local telephone system may
not be able to use tone dialing.
If not, you can still send tones to
a long distance service as
follows:
1. Set TELCOM for tone
dialing.
2. Using manual dialing, call
the long distance service. (By
dialing manually, you are using
pulse dialing, which your local
telephone system requires.)
3. Wait for the long distance
service to give its signal.
(Typically, this is a long, audible
tone.)
4. Using the CALL key,
autodial the expected numbers.
(By autodialing, you are using
tone dialing, which your long
distance service requires.)
32 / Dialing Telephone Numbers
Storing Pauses in Autodial
Sequences
Assume that you use a long
distance service, and you normally dial Joe Shmow with
this sequence:
1. First you dial the long
distance service's number
(335-4190).
2. Then you pause for about 4
seconds for the service to sound
a tone.
3. Then you dial account information (548-559), followed by
Joe Shmow's number
(1-214/876-2222).
You can store this entire sequence in ADRS.DO with 2
equal signs (=)—each stores a
2-second pause:
Joe Shmow :335-4190
= =548-559/1-214/876-2222:
815 Maple,
Dallas, TX, 75219
The above example assumes you
do not need to switch modes
(tone/pulse) while dialing the
number. You can switch modes
only one way: by manually using
the STAT key.
Disconnecting from the
Telephone
For convenience, you can disconnect the Tandy 200 from the
modem cable, but still leave the
modem cable connected to the
telephone. If you do this, you
need to complete the circuit that
normally goes to the Tandy 200
by connecting it to it to the
modem cable's "shorting" plug:
Chapter 6 Summary
TELCOM
To find and autodial a
number: Press (FT), enter any
part of a record in ADRS.DO,
and press ( F2 ) to call.
To enter and autodial a
number: Press CED and enter the
number.
To reset communication
parameters: Press CE3J; then
enter the new parameters.
To display the current communication parameters: Press
(FT).
Dialing Telephone Numbers / 33
Chapter 71
Communicating with Another Computer
(TELCOM)
This chapter shows how to communicate
with CompuServe Information Service, a
large multi-purpose computer service, and
access its many data bases. You can access
CompuServe from anywhere in the United
States and Canada.
Communicating with Another Computer / 35
What You Need
To communicate with CompuServe, you need a way of connecting to an ordinary telephone—You can use either:
• The Tandy 200 modem cable
that you used in the last
chapter—This is the most
reliable because it connects the
Tandy 200 directly to the
telephone wire.
or
• An acoustic coupler (Cat. No.
26-3805)—Use this when you
cannot directly connect to a
telephone (for example, when
using a pay phone).
You also need to find the following CompuServe materials that
come with the Tandy 200 modem
cable:
• A packet containing a CompuServe user ID and password—
You can use this ID and password to access CompuServe
for 1 hour, free of charge,
during "standard time" (6PM
to 5AM).
• A pamphlet listing CompuServe's telephone numbers—
CompuServe has numbers in
almost all the major U.S.
cities; you can use any of
these numbers to access
CompuServe.
If you do not have a modem
cable, you can obtain a CompuServe ID, password, and telephone number by calling
CompuServe—(800) 848-8199 or,
in Ohio, (614) 457-0802—or by
purchasing the Radio Shack
Universal Signup Kit (Cat. No.
26-2224).
Connecting to
CompuServe
1. Set the TELCOM
Parameters.
Enter the TELCOM program and
check its parameters. The last
parameter (10 pps, 20 pps, or T)
is only for autodialing, but the
others must be:
M7E1ENN.0
If your parameters are different,
press the Stat key (CED) and then
type M7E1ENN,O (ENTER!.
Then press CED (ENTER") again
and you should see the correctly
set parameters.
2. Connect to the
telephone.
Modem Cable: Connect the Tandy 200 to the telephone as you
did in the last chapter. Be sure
the DIR/ACP switch (on the
left) is set to DIR.
Acoustic Coupler: Connect the
acoustic coupler to the Tandy
200 PHONE jack (on the rear).
Set the DIR/ACP switch (on the
left) to ACP.
36 / Communicating with Another Computer
3. Call the CompuServe network.
Dial any of CompuServe's access
numbers. If using the modem
cable, you can dial any way you
want—manually or automatically. If using the acoustic
coupler, you can dial only 1
way—manually.
4. Establish a terminal
connection.
When you hear CompuServe's
computer tone, press the term
key (LE4J). If using the acoustic
coupler, you should now place
the phone in the coupler:
Prev Down Up Full BRK Bye
If these functions do not appear,
hang up the telephone and try
again. Check that you have the
right phone connection, communication parameters settings,
and ACP/DIR switch settings.
6. Press
CCTFTLI
(S3.
While holding down (CTRL),
press COD. This connects you to
CompuServe Information Service.
7. Enter Your User ID.
CompuServe asks for your user
ID. Enter the user ID from your
CompuServe packet, for
example:
User ID: 76338,448 (ENTER)
8. Enter Your Password.
CompuServe asks for a
password. Enter the password
from your CompuServe packet,
for example:
5. Wait for the terminal
function key Display.
Password: AGING;MELLOW
A few seconds after you press
the Term key, the Tandy 200
establishes a terminal connection
with CompuServe and shows
these functions on the bottom of
your screen:
To keep your password confidential, CompuServe does not let
your password appear on your
screen.
CENTER)
Communicating with Another Computer / 37
Your First
Session
CompuServe
Note: Although your session
with CompuServe should closely
resemble the one described in this
chapter, do not expect it to be
identical. CompuServe often
revises or improves its menus and
prompts.
CompuServe normally starts up
with a "top menu." For your
first session, though, CompuServe may ask preliminary
questions.
After each question CompuServe
typically shows a selection of
responses and prompts you for
your choice. For example:
0
1
2
3
4
5
6
Explanation of terminal
types
VIDTEX software
compatible
ANSI compatible (VT-100)
VT52
Teleray
CRT
Other
Key choice:
Notice in this example that you
can choose " 0 " and CompuServe
gives you instructions. CompuServe often offers "online instructions" such as these.
• What kind of terminal do you
have? Select "Other".
• How many lines does your terminal have? Select " 1 6 " .
• How many characters per line
does your terminal have?
Select " 4 0 " .
• Do you want to read or agree
to CompuServe's service
terms? Select the option that
lets you "exit the service".
(You can agree to the terms
and sign up for continued service later, after becoming
more familiar with
CompuServe.)
In each case, type the appropriate menu selection number;
then press (ENTER! For
example:
Key choice: 3 (ENTER)
If you make a mistake, use
(CTRL) (TfJ to backspace. (The
fBKSP) key does not work with
CompuServe.) Press (CTRL) and
then, while holding down
(CTRL), press CED.
CompuServe
Menus
After its preliminary questions
and messages, CompuServe
displays a "top menu" similar to
this:
The following are some questions
CompuServe may ask and how
we suggest you respond.
38 / Communicating with Another Computer
1. Home Services
2. Business & Financial
3. Personal Computing
4. Services for Professionals
5. The Electronic Mali1"1
6. User Information
7. Index
Enter your selection number,
or H for more information !
This menu leads you to a series
of submenus. After each menu,
you see the " ! " sign, which is
CompuServe's menu prompt. In
response to the "!" prompt, you
can enter your menu selection
(for example, 1 (ENTER!) or a
CompuServe command such as:
• P (ENTER)—to see the
previous menu.
• T dHHFD—to go back to the
top menu.
• BYE (ENTER)—to exit
CompuServe.
For example, typing T (ENTER)
at the " ! " prompt always returns
you to the top menu or the first
menu of the system.
Seeing TELCOM's
Previous Screen
Sometimes CompuServe's information may scroll off your
screen faster than you can read
it. When this happens, you can
use one of TELCOM's terminalmode function keys, the
"previous screen" key (CED).
Press CED to see the previous
screen; then CED again to return
to the current screen. TELCOM
keeps 2 screens in memory at all
times.
Logging Off CompuServe
CompuServe computes your
online time by the minute rather
than the hour. If you logoff
after using only 15 minutes of
free time, for example, you can
logon again for an additional 45
free minutes.
To logoff CompuServe:
1. Wait until you see the " ! "
prompt on your screen. If CompuServe is displaying a long
message, you can usually return
to the " ! " prompt by pressing
CcTFtn (CD. (Hold down (CTRL)
while pressing CEO.)
2. Type BYE (ENTER). CompuServe logs off and displays the
amount of time you have been
online.
After logging off, press
TELCOM's Bye key (CED) and,
when TELCOM asks if you are
sure, type Y (ENTERl. TELCOM
then exits its terminal mode. You
see TELCOM's original functionkey display on the bottom of the
screen:
Find Call Stat Term
Menu
Communicating with Another Computer / 39
Subscribing to CompuServe
Each time you log on during
your free hour, CompuServe asks
if you want to read and agree to
its service terms. By agreeing to
these terms, you will be able to
sign up, while online, for continued CompuServe service.
CompuServe then will ask for
billing information. Be prepared
to give either your: (1) Master
charge number, (2) Visa charge
number, or (3) bank address and
checking account number.
After signing up, CompuServe
bills you only for the time you
spend online (unless you use
special services). At this writing,
CompuServe's online charge is:
$6.00/hour—standard time
$12.50/hour—prime time
(This is CompuServe's charge for
a 300-baud modem line—which is
the only kind of line you can use
with the Tandy 200 modem cable
or acoustic coupler.)
Learning More About
Communications
You can use use TELCOM to
communicate with many other
public-access computer services,
such as Dow Jones and The
Source. You can also use
TELCOM to communicate and
exchange text files with private
computers, such as an office or a
timesharing computer.
To learn about TELCOM communications, read the Tandy 200
TELCOM Manual. The
TELCOM manual also shows
how to use TELCOM features—
such as saving online
information—that are useful
when communicating with other
computers.
Chapter 7 Summary
TELCOM Terminal Mode
To enter terminal mode: Press
CF4I
To see the previous menu:
Press fm.
To disconnect from the terminal mode: Press ("Ftp.
CompuServe Menu Commands
To go to the previous menu:
Type P [ENTER).
To go to the top menu: Type T
(ENTER).
To logoff: Type BYE (ENTER).
CompuServe Control Characters
To backspace: Press (CTRL).
To break: Press (CTRL)fcI
40 / Communicating with Another Computer
Chapter 81
Running BASIC Programs (BASIC)
This chapter shows how to type and run
simple programs, using the BASIC
programming language.
Running BASIC Programs / 41
Entering BASIC
Enter BASIC from the Main
Menu in the same way you
entered the other programs (by
moving to BASIC and pressing
(ENTER]). You see BASIC'S
prompt:
Ok
Press the (LABEL) key and you
see the meaning of BASIC'S
function keys on the bottom of
the screen.
Typing and Running a BASIC
Program
Before typing a program, erase
anything you may have accidentally stored in BASIC'S memory.
Press (ENTER); then type:
NEW (ENTER)
Now type this simple BASIC
program exactly as shown:
10 CLS(ENTER)
20 PRINT @ 175,
" H E L L O ! " CENTER)
30 PRINT @ 242, " I SEE
WE SPEAK THE SAME
LANGUAGE
" (ENTER)
40 PRINT @ 410,
"BASICALLY SPEAKING."
(ENTERl
When you run this program, the
CLS command will clear the
screen. The PRINT @ command
will tell BASIC to display text on
the screen at the specified
position.
42 / Running BASIC Programs
To see if you have entered all the
lines in this program correctly,
press the List function key
(CUD). If you typed a line incorrectly, simply press (ENTER) and
type it again correctly. When
finished typing the program,
press (ENTER).
Test the program by pressing the
Run function key (CUD). Your
screen shows:
HE L LOI
I SEEWE SPEAK THE SAME LANGUAGE
BASICALLY SPEAKING.
Ok
: 1
File Load Save Run List
Menu
1] [F2] [F31 [F4] [F51 [F6] [F7] [F8]
Saving a BASIC Program
To save the program in RAM,
press the Save function key
(CED). BASIC displays:
SAVE "
Enter a name for the program.
For example, type HELLO
Return to the Main Menu (by
pressing fRD) and you see a new
file—HELLO.BA—on the menu.
The .BA extension tells you that
HELLO is a BASIC program.
~~~
You can run HELLO anytime
you want by moving to
HELLO.BA's position on the
Main Menu and pressing
[ENTER].
Loading a BASIC Program
—
__
You might want to load a program back into BASIC so that
you can revise and edit it. To do
so, enter BASIC and press the
Load function key (CUD). BASIC
displays:
LOAD "
—
____
_
—-
Type HELLO (ENTER). Press the
List key (CUD) and you see that
HELLO.BA is loaded into
BASIC.
Editing a BASIC Program
with TEXT
To edit a BASIC program, press
(ENTER) and, at BASIC'S "Ok"
prompt, type:
Learning More About BASIC
Many books are available in
computer stores that teach how
to program in BASIC. You can
use any of these books to learn
how to program and use the
Tandy 200 BASIC Reference
Guide to learn which BASIC
commands the Tandy 200 uses.
Chapter 8 Summary
BASIC
To erase BASIC memory: Type
NEW (ENTER).
To list a BASIC program:
Press (ED.
To run a BASIC program:
Press Q3D.
To save a BASIC program:
Press (~F3~); then enter a filename.
To load a BASIC program:
Press (ED; then enter a filename.
To edit a BASIC program:
Type EDIT (ENTER]. (Return to
BASIC by pressing CBD.)
EDIT (ENTER)
This command loads the BASIC
program into TEXT. You can
now edit the BASIC program,
just as you edit a TEXT file.
When finished editing, press
CEfiD, and the program is loaded
back into BASIC.
Running BASIC Programs / 43
Chapter 91
Expanding the Tandy 200
This chapter shows how you expand the
Tandy 200 with add-on equipment and programs, and also gives sources for additional information on the Tandy 200.
Expanding the Tandy 200 / 45
Tandy 200 Equipment
The Tandy 200 lets you connect
any of the following equipment:
• A printer. You can get a hardcopy of information as shown
in this manual by using any
Tandy or Centronicscompatible parallel printer.
• A cassette recorder. You can
increase your storage capacity
as shown in this manual by
using any cassette recorder—
we recommend the CCR-81
recorder (Cat. No. 26-1208)
which comes with the required
cable (Cat. No. 26-1207).
• Extra RAM. You can expand
the Tandy 200's RAM to 72K
by adding up to a total of
three 24K RAM banks.
• A bar code reader. You can
optically scan product code
labels by adding the Tandy
Bar Code Reader (Cat. No.
26-1183).
• A disk drive. You can expand
the power of the Tandy 200 to
that of a larger computer by
purchasing the Tandy
Disk/CRT display unit (Cat.
No. 26-3806). This gives you
one 5 lA" floppy disk drive
and can be attached to a normal television uispiay or video
monitor.
46 / Expanding the Tandy 200
• A direct connect modem
cable. You can directly connect the Tandy 200's built-in
modem to the telephone as
shown in this manual by using
the Tandy 200 Modem Cable
(Cat. No. 26-1410).
• An acoustic coupler. You can
connect the Tandy 200's builtin modem to any telephone
(even in a phone booth) as
shown in this manual by using
the Tandy 200 Acoustic
Coupler (Cat. No. 26-3805).
• An external modem. In addition to the Tandy 200 built-in
modem, you can also use any
RS-232-compatible external
modem. See the Tandy 200
TELCOM manual for more
information.
• Another computer. You can
directly connect to the RS-232
connector of another computer
by purchasing an RS-232 cable
(Cat. No. 26-4403) and a null
modem adapter (Cat. No.
26-1496). See the Tandy 200
TELCOM manual for
information on how to do
this.
i1
!I
Tandy 200 Programs
You can purchase many additional Tandy 200 programs that
enhance the capabilities of the
Tandy 200 built-in programs or
let you do additional functions:
• Tandy-supported software.
These programs are supported
and supplied by Tandy. You
can get a list of available programs at any Radio Shack
Computer Center.
• Tandy express order software.
These programs are supplied
by Tandy, but supported by
the vendors that developed the
programs. You can also get a
list of these programs at any
Radio Shack Computer
Center.
• Programs from other suppliers. These programs are
supplied and supported by
outside vendors. You can find
out the programs that are
available for the Tandy 200 by
reading the portable computing magazines, described
below.
You will normally be able to
purchase programs either as
ROM cartridges (which you can
plug into the bottom of the Tandy 200) or as cassette tapes
(which you will need to load into
RAM using a cassette recorder).
Please note that most Model 100
programs will not work on the
Tandy 200. The only Model 100
programs that will work on the
Tandy 200 are programs that are
written in BASIC and use no
operating system calls.
Tandy 200 Information
For additional information on
the Tandy 200, see the following
publications:
• The 3 other manuals that
come with the Tandy 200:
Tandy 200 Multiplan Manual,
Tandy 200 TELCOM
Reference Manual, and Tandy
200 BASIC Reference Manual.
• Tandy 200 Technical
Reference Manual (Cat. No.
26-3861). This manual gives
information on the Tandy 200
operating system calls as well
as technical information on
how to program the hardware.
• Tandy 200 Portable Computer
(Cat. No. 26-3869). This book
will be sold through Radio
Shack Computer Centers.
• Portable 100, Computer Communications, Inc., 15 Elm St.,
Camden, Maine 04843; and
PCM, Falsoft, Inc., 9529
Highway 42, Prospect, Kentucky, 40059. These two
magazines are for owners of
portable computers.
Expanding the Tandy 200 / 47
(T
1.1
(:
References
A.
B.
C.
D.
E.
Help
Text Special Keys
Memory Required by TEXT Paste Buffer
BASIC Programs
Tandy 200 Technical Information
References / 49
Reference A! Help
This reference helps with problems you may encounter while
going through this manual. For
additional help, see the
TELCOM, Multiplan, and
BASIC manuals.
General
Red battery light on. When the
light first comes on, you have 20
minutes of battery power left.
Immediately turn the power off,
and insert new batteries or use
the AC power cord.
Screen and keyboard freezes.
This could be caused by several
factors: (1) The calculator may
be on. Turn it off by pressing
(GRPH) and then unlocking
(NUM). (2) An operation may be
in progress. Press (SHIFT) and
then fBREAK) at the same time.
Try this several times. (3) The
Tandy 200 may be hung up. At
last resort, press Reset, the small
button on the rear of the Tandy
200 next to the RS232C connector. Try this several times.
Cannot return to Main Menu.
Press one of the following keys:
ODD, the spacebar, or (SHIFT)
(BREAK! (at the same time).
A file is no longer on Main
Menu. You may be in the wrong
RAM bank. Press CED or (TAB")
to move from bank to bank.
50 / References
No files are on the Main Menu.
Check the Memory Switch on the
bottom of the Tandy 200. If it is
off, all the contents in RAM
have been permanently erased.
Screen blank. Use the DISP dial
on the right side of the Tandy
200 to adjust your display. If
this does not help, push the
power button to make sure the
power is on. Then check for
dead batteries or an improperly
connected AC power cord.
Image not clear. Use the DISP
dial (located on the right side of
the Tandy 200) to adjust the
screen to your field of vision.
Characters printing as numbers.
Depress the NUM key (at the
bottom of the keyboard) and the
right keys print as characters,
rather than numbers on a
numeric keypad.
Characters printing as all caps
only. Depress (CAPS LOCiD to
get in the upper- and lowercase
mode.
TEXT, SCHEDL, ADDRSS,
and MSPLAN
Insertion is slow. This happens
when you are inserting text at the
beginning of a long scrolling
string of text. To shorten the text
string, insert a carriage return by
pressing (ENTER). (You can
delete the carriage return later.)
Memory full error. Select a
smaller block of text. See
"Reference C, Memory Required
by the TEXT Paste Buffer."
2. The ACP/DIR setting: If using the modem cable, this switch
must be set to DIR; if using the
acoustic coupler, it must be ACP.
ADRS.DO or NOTE.DO not
found. You do not have a file
named NOTE.DO or ADRS.DO
in the specific RAM bank you
are using.
3. The communication parameters: Make sure they are set to
M7E1ENN, O.
#VALUE! error. Your formula
asks MSPLAN to make a
computation on strings, rather
than numbers. (If a space
precedes a number, MSPLAN
regards its value as a string. For
example, " 32" is a string; " 3 2 "
is a number.) Change all strings
to numbers.
—
TELCOM
Cannot establish a connection. If
you do not get TELCOM's
terminal function-key display
(Prev, Down, Up, etc.), you have
not established a connection for
one of many reasons.
1. The connectors: If using the
modem cable—the beige cable
goes to the wall line, the grey
cable goes to the phone line, and
the plug goes to the Model 200
PHONE socket. If using the
acoustic coupler—the telephone
speaker goes to the acoustic
coupler microphone, the
telephone microphone goes to the
acoustic coupler speaker, and
and the plug goes to the Model
200 PHONE socket.
4. CompuServe's baud rate: You
must call one of CompuServe's
300-baud numbers.
5. The sequence for establishing
terminal connections: Make sure
you hear CompuServe's
computer tone before pressing
the TERM key.
CompuServe is sending many
unreadable characters. This is
usually because you do not have
your communication parameters
set correctly. With CompuServe,
they should be M7E1ENN, O.
CompuServe is sending
occasional unreadable characters.
This is probably caused by a bad
telephone line. Hang up and try
again.
CompuServe's characters are
scrolling faster than you can read
them. Press the Previous key
(OLD) to see the previous screen.
Press (F1 ) again to see the
current key.
The characters you type appear
in duplicate. Press (ED to change
from "Half" to "Full."
References / 51
The characters you type appear
differently on your display. Com
puServe is echoing the characters
it is receiving from you, and thej
are different from the characters
you are typing. This is probably
caused by a bad telephone connection. Hang up and try again.
BASIC
TM Error. Type the command
again exactly as shown in the
manual. You have probably
omitted quotation marks or a
dollar sign.
SN Error. Type the command
again. You have made a
typographical error.
FF Error. Type the command
again using the complete
filename, including the extension.
Be sure you spell it as shown on
the Main Menu.
Program running continuously.
Press ( S H I F T ) CBREAK) to stop
program execution.
Program ill-formed. The BASIC
program contains lines without
line numbers in the beginning.
Go back to TEXT and be sure
each line in the BASIC program
begins with a line number and
ends with an (ENTER) character.
Reference Bl
TEXT Special Keys
This reference lists the special
(CTRL), (GRPH), and (CODE)
characters you can use with the
TEXT program.
Keys
TEXT
By pressing (GRPH) and another
key, you can display the following characters on your screen.
(These characters will not print
on the printer.)
\
\
{
1
1
(ffiPHH
(GHEH)9
fflH)_
(SBHDO
}
-
A
i*
e
*
t
ft
an
SHPHJf
(GSHDx
dfflc
(GRHDa
(SSEDh
(GRFHlt
(SHPH1I
(SBFffir
®H)s
±
ft
z
i\
flSRFffl]
(GRFHlp
(EHHDm
(SRFffi/
J
<
References / 52
(SHEB)-
(GREET
(BBPffl =
(SRFH)i
(SgPKJc
(BRFffiy
(SRPHlu
(BfiPB),
i I
(SEDq
%
(BRPfflw
(BRPffib
(BJEffln
%
(SRFff).
t
(SBEDo
•
—
—
fGRPff).
(SRPffil
(ffiHDk
(BRPff)2
0
(BBPH13
<y
(BBPH)4
(MH)5
£
(BRPH18
¥
[BRPff)7
e
(BBPH1G
(BffPff)6
TJE'XTl
Keys
By pressing (CODE) and another
key, you can display the following characters on your screen.
(These characters will not print
on the printer.)
(BRPffiZ
•
(upper left) (BRPffi!
£
(upper right) (BBPffifd
"
e
(lower left) (BRPH)#
•
(lower right) (BHPH1S
a
L
fGRPH]%
(BBPH1 '
—
(upper)
(fflffilQ
_
(lower)
(jSBPTCW
(left)
(ISRPffiE
(right)
fflPffiR
1
1
r
fEOCF)
•i
(TSRPHIF
•
(SRPH1X
r
(JSRPHIU
-
fiSJgHlP
(BgHIO
T
(Bffffil
rCOCPs
(ESBBR
fCOBFlC
V*
fCOPFlp
%
fCOPR;
1
/2
(BJCB/
f
fCODRO
A
(COPRA
0
(EBEEO
0
(EBPRU
®DD[
a
ItOBFla
0
(EOBflo
(BBPH):
u
(SSffiM
B
(fflBu
(EBBBS
t|
fCODE) +
i
E
(BRPffiS
16RHDD
t
•
[SRPff; A
k
(BJED'
tEBBDx
(BffiDc
(MB"
(EBBBM
CEBBB)
References / 53
T
W
e
N
(HDET
TEXT I
@BBd
By pressing [CTRL) and one of
these keys, you can do the same
cursor movement and editing
functions as the keys described in
Chapters 2 and 3.
u
(MB,
a
(CODF) v
(CODE) =
a
(MBF
(MBI
e
®D£3
£
t
(EBBB8
6
SBDE9
u
(HDE7
-
(EOW)-
e
i
(fflBe
(fflBi
a
(ESBBq
i
SBDBk
6
(fflBI
u
(CODElj
n
(EBBDn
a
fCOBflz
e
i
(tSPT)!
1
(tSPT;l
dM)
E
(SEED
A
fCW;Q
£
OEBK
(fflEL
(HfiBJ
(fflBY
6
0
B
R
54 / References
(CBDT, X
Keys
Control
Operation:
Character
(CTRLXT) Same as
(CTRLifF) Same as
(CTRL)fCi Same as
IFT
Same as
Same as
Same as
Same as
tion key
Same as
Same as
Same as Select function key
Same as
Same as Find function key
Same as Copy function key
Same as
Same as
Same as
Same as
Same as
key
Same as
tion key
(CTRUCW) Same as
CSHDCS Same as
(CTRL)fYl Same as
(SHIFT)
Same as
;
)
Reference Cl Memory Required
by the TEXT Paste Buffer
This reference explains the
memory that the TEXT program's paste buffer needs to use
to cut and paste or copy and
paste text.
Whenever you cut or copy text,
TEXT puts a copy of that text in
the paste buffer, and the text remains in the paste buffer until
you replace it with something
else. This requires additional
memory—more than you might
at first think is necessary.
For example, assume you want
to cut and paste 5,000 bytes
(characters) of text. To do this,
you need an additional 5,000
bytes of memory for the paste
buffer to use.
• When you "copy" the text,
TEXT puts an extra copy of
the 5,000 bytes into the paste
buffer.
• When you "paste" the text,
TEXT puts an extra copy of
the 5,000 bytes into the text
file.
If you do not have enough
memory to cut and paste or copy
and paste a large block of text,
TEXT will give you a "memory
full" error. An easy solution to
this problem is to simply divide
the large block into smaller
blocks and then work with each
block individually.
• When you "cut" the text,
TEXT moves the 5,000 bytes
from the text file to the paste
buffer.
• When you "paste" the text,
TEXT puts an extra copy of
the 5,000 bytes into the text
file.
As another example, assume you
want to copy and paste 5,000
bytes of text. To do this, you
need an additional 10,000 bytes
of memory—5,000 bytes for the
paste buffer to use and 5,000
bytes for the copy.
References / 55
Reference Dl
BASIC Programs
This reference provides some
simple BASIC programs you
might want to enter and save.
When entering a BASIC program, you must type it exactly as
shown. A misspelled word or
misplaced parenthesis could cause
the program not to run.
LOAN.BA
This program computes a full
amortization table of a loan.
You input: (1) the full amount of
the loan (do not type a comma
or a dollar sign), (2) the interest
you pay, and (3) the total
number of months to pay off the
loan (for example, 20 years X 12
= 240 months).
10 CLS.-INPUT "TYPE
LOAN AMOUNT";L
20 INPUT "ANNUAL INEREST RATE IN PERCENTER
30 INPUT "NUMBER OF
MONTHS TO PAY OFF
LOAN";M
40 R = R * .01/12
50 P =.R * L/(1-(1+R)A(M))
60 I°/o=l:OA = L:CLS
70 PRINT "NUMBER INTEREST PRINCIPAL NEW
D A T "
8OF1$ = "#####,###.#####,
56 / References
90 F2$ = "MONTHLY
PAYMENT =$##,###.##"
100 F3$ = "TOTAL INTEREST PAID = $##,###.##"
110 X = X + 1
120 MC = R * L
130 PP = P—MC
140 NB = L—PP
150 TI = TI + MC
160 PRINT USING
F1$;I%,MC,PP,NB
170 IF X = 14 THEN
GOSUB 240
180 IF 1% <> M THEN 1%
= 1% + 1: L = NB: GOTO
110
190 GOSUB 240
200 PRINT "ON $ " OA
"LOAN AT " R*1200 "% INTEREST RATE FOR " 1%
"MONTHS"
210 PRINT:PRINT USING
F2$;P
220 PRINT USING F3$;TI
230 END
240 INPUT "PRESS (ENTER)
TO CONTINUE";R$: X= 0:
CLS
250 RETURN
SORT.BA
This program sorts all the
records in ADRS.DO; then stores
the sorted list in SORT.DO.
Warning: If you already have a
file named SORT.DO, running
this program will delete all information in the file.
:i
You can rename SORT.DO with
the NAME command described
in Chapter 2.
10 CLEAR 1000:DIM
N$(100)
20 CLS:I=1
30 OPEN "ADRS.DO" FOR
INPUT AS 1
40 IF EOF(l) THEN 80
50 LINE INPUT #1, N$(I)
60 1 = 1 + 1
70 GOTO 40
80 CLOSE #1
90 OPEN "SORT.DO" FOR
OUTPUT AS 1
100 CLS
110 PRINT
137,
"SORTING
120 I = 1-1
130 X = 0
140 X = X + 1
150 IF X > I THEN 230
160 IF N$(X) = "ZZ" THEN
140
170 FOR Y = 1 TO I
180 IF N$(Y) < N$(X) THEN
X =Y
190 NEXT Y
200 PRINT #1, N$(X)
210 N$(X) = "ZZ"
220 GOTO 130
230 CLOSE #1
240 PRINT @ 137,
"FINISHED"
250 END
BAR.BA
This program lets you input 12
numbers, then displays a simple
bar chart of the numbers. (When
you have finished running the
program, press (SHIFT]
(BREAK).)
10 CLEAR 1000: DIM D(12)
20 FOR 1 = 1 TO 12
30 PRINT "DATA FOR
MONTH " LINPUT D(I)
40 IF D(I) > YH THEN YH
50 NEXT I
60 YL = YH
70 FOR I = 1 TO 12
80 IF D(I) < YL THEN YL
= D(I):NEXT I
90 CLS: M = 1: XA = 562
100 FOR I = 1 TO 12
110 PRINT @ XA, M;
120 XA = XA + 3:M = M
+ 1
130 NEXT I
140 P = (YH + YL)/55:X1 =
16
150
FOR I = 1 TO 12
160 Yl = 55-(D(I)/P)
170 LINE (XI,Yl)180 X l = X l + 18:Yl=0
190 NEXT I
200 GOTO 200
Reference / 57
Reference El Tandy 200
Technical Information
This reference contains information on how to change the Tandy
200 default power up conditions,
how to restore it to its original
memory condition, and also gives
technical information on all the
Tandy 200 device interfaces.
Auto Power-Off Settings
If inactive for 10 minutes, the
Tandy 200 turns itself off. You
can change this 10-minute time
interval or completely cancel the
power-off function.
To change the 10-minute time interval: Enter BASIC and type the
POWER command using the format POWER n. n is a number
from 10 to 255—The Tandy 200
will multiply n times 6 seconds.
For example:
POWER 10 (ENTER]
The above command sets the
time interval to 1 minute (10 X 6
seconds = 60 seconds):
To cancel the auto power-off
function: Enter BASIC and type
the following:
POWER CONT
58 / References
Cold Restart
If you ever need to restore the
Tandy 200 to its original memory
condition, you can do so with a
cold restart.
Warning: This will erase all files
you have stored in memory.
To do a cold restart, press
(CTRLIPAUSE) while either
pressing the Power Switch or
pressing Reset.
Specifications
Power Source: AM Battery (x4)
(23-552) AC Adapter (DC 6V,
Center minus) (26-3804)
Weight: 3 lbs. 13.5 oz.
(1.3608 kg)
Dimensions: H5/8" (L) x 8/ 4 "
(D) x 2 " (H) (29.41 cm x
20.95 cm x 5.08 cm)
Temperature: Operating 41 °F
(5°C) to 104°F (40 °C) Storage
- 4 0 ° F (-40°C) to 160 °F
(71 °C)
Humidity: Operating 20% to
85% RH (non-condensing)
Storage 10% to 95% RN
(non-condensing)
Micro Processor: 8OC85 (8 bits
CPU) 2.4 MHz
RS-232-C Interface
Cassette Interface
Cassette Interface
RS-232C Interface
Pin
No.
1
2
3
4
5
6
7
8
9
10
11
12
13
14
15
16
17
18
19
20
21
22
23
24
25
Symbol
GND
TXR
RXR
RTS
CTS
DSR
GND
N C
N C
N C
N C
N C
N C
N C
N C
N C
N C
N C
N C
DTR
N
N
N
N
N
Description
Transmit Data
Receive Data
Request to send
Clear to send
Data set ready
Pin
No.
1
2
3
4
Symbol
REM 1
GND
REM 2
Rx C
5
T x C
6
7
8
GND
N C
N C
Description
Remote
Remote
Receive data for
CMT
Transmit data for
CMT
GND
Input level: Inpedance lOOohm
(800mV - 5Vpp)
Output level: Inpedance 3.3Kohm
(650mVpp)
REMote: 6 VDC 0.5A max.
Data terminal
ready
C
C
C
C
C
References / 59
Parallel Printer Interface
Parallel Printer Interface
(Centronics)
Parallel Printer Interface
(Centronics)
Pin
No. Symbol Description
1 STROBE Strobe pulse from
the Computer to
printer.
2
GND
Ground
3
PDO
Bit 0 (lsb) of output data byte
4
GND
Ground
5
PD1
Bit 1 of output
data byte
6
GND
Ground
7
PD2
Bit 2 of output
data byte
GND
8
Ground
9
Bit 3 of output
PD3
data byte
10 GND
Ground
11 PD4
Bit 4 of output
data byte
12 GND
Ground
13 PD5
Bit 5 of output
data byte
Pin
No. Symbol
14 GND
15 PD6
16
17
GND
PD7
18
19
20
21
GND
NC
GND
BUSY
22
23
24
25
GND
N C
GND
BUSY
26
N C
Description
Ground
Bit 6 of output
data byte
Ground
Bit 7 of output
data byte
Ground
Ground
Input to Computer from Printer
Ground
Ground
Input to Computer from
Printer, high indicates device
selected.
E S B H B H B E E B B E
25
26
23
24
E
E
21
22
B
19
20
E
17
18
S
15
16
B
13
14
E
11
12
B
9
10
B
7
8
E
B
5
6
3
4
2
B
B
B
1
r
J
60 / References
Modem Interface
Bar Code Reader Interface
Bar Code Reader
Modem Interface
Pin
No. Symbol
1 TL
2
3
4
5
6
7
8
Description
Conventional
Telephone Unit
GND
Logic GND
R x MD Direct Connection
to Tel Line
(RING)
R x MC Acoustic Coupler
Connection (MIC)
T x M C Acoustic Coupler
Connection
(Speaker)
VDD
RD for answering
telephone
T x MD Direct Connection
to Tel Line (TIP)
RP
Ringing Pulse
Pin
No. Symbol
N C
1
2
R x DB
3
4
5
6
7
8
9
Description
Receive data from
bar code reader
N C
N C
GND
N C
GND
N C
VDD
I
\
o o
o o
I •'
Ground
Ground
O
G
O
))
o o
/
• • JJ
References / 61
40 Pin External
Bus Signal Interface
4() Pin External Bus Signal
Pin
No. Signal
Pin
No. Signal
1
2
3
4
5
6
7
8
9
10
11
12
13
14
15
VDD
GND
ADO
AD2
AD4
AD6
A8
A10
A12
A14
GND
RD
IO/M
ALE
CLK
40
39
38
37
36
35
34
33
32
31
30
29
28
27
26
16
RD +WF. 25
17 INTR
18 GND
19 RAM
RESET
20 N C
20
24
23
22
VDD
GND
ADI
AD3
AD5
AD7
A9
All
A13
A15
GND
WR
SO
SI
CE for
I/O Cont.
RESET
out
INTA
GND
NC
21
NC
19 18 17 16 15 14 13 12 11 10 9
8
O Q Q B Q Q Q B O B Q E I O B Q Q B Q B Q
21
22
23
24
25
26
62 / References
27
28
29 30
31
32
33
34
35
36
37
38
39 40
Index
{BREAK) 10
(CODE) 53
f
fnWD See Calculator and
TEXT
•
(
.
f
I
f
(
[
11
1
1
[
1
1
I
I
I.
L
fGRPH") 52
(LABEL) 14
(PASTE) See TEXT
(PRINT] See Printer
Acoustic coupler 36, See
also TELCOM
Add-ons 46
ADDRSS 21
Alarms 22
Autodialing 30
Auto power-off 58
Bar code reader 46
Bar code reader interface 61
BASIC
Help 52
Running a program 42
Sample programs 56
Saving a program 42
Typing a program 42
Batteries 2
Bytes 3
Calculator 4-5
Cassette interface 59
Cassette recorder See Tape
Clock 4
Cold restart 58
CompuServe See TELCOM
Copying
Files 11
Text 16
Day, entering 4
Date, entering 4
Deleting files 11
Dialing See Autodialing
Disk drive 46
External Bus signal
interface 62
Files 3
Copying 11
Deleting 11
Renaming 12
Help 50-52
LIST 21
Main Menu 3
Memory Power Switch 2, 5
Modem cable 29, See also
TELCOM
Modem interface 61
MSPLAN
Blanking mistakes 25
Creating a spreadsheet 24
Entering data 25
Entering formulas 25
#VALUE! error 26
Parallel printer interface 60
Power adapter 1, 2
Printer
Connections 6
Printer interface 60
Printing display 6
Printing a text file 9
RS-232 Interface 59
Random access memory bank
(RAM bank)
Description 3
Extra 46
Read-only memory (ROM) 3
Renaming files 12
SCHEDL 20
Tape Recorder
Cassette interface 59
Connections 10
Loading text files 11
Protecting 11
Saving text files 10
Index / 63
TELCOM
Autodialing numbers 30
Connecting to CompuServe
36-40
Connecting to telephone 30
Disconnecting from
telephone 33
Finding numbers 30
Help 51
Modem interface 61
RS-232 Interface 59
Seeing previous screen 39
Setting parameters 30
Storing pauses in
sequences 32
Terminal connection 37
Using autodial sequences
30
Using pulse dialing 31
Using tone dialing 32
Telephone See Autodialing
TEXT
Correcting mistakes 8
Creating a file 8
Cursor Movement Keys 14
Cutting text 15
Deleting text 9
Entering text 8
Finding text 14
Help 50-51
Listing 17, 21
Pasting text 16
Printing 9
Repeating text 9
Saving to tape 10
Selecting text 15
Time, entering 4
Specifications 58
LVALUE! error 26
;I
J.J
64 / Index
SERVICE POLICY
Radio Shack's nationwide network of service facilities provides quick, convenie- -"•
and reliable repair services for all of its computer products, in most i n s t a n c ^ =
Warranty service will be performed in accordance with Radio Shack's Limit - =
Warranty. Non-warranty service will be provided at reasonable parts and l a t r :
costs.
Because of the sensitivity of computer equipment, and the problems which ex ^
result from improper servicing, the following limitations also apply to the service offered by Radio Shack:
1. If any of the warranty seals on any Radio Shack computer products are broke
Radio Shack reserves the right to refuse to service the equipment or to v c
any remaining warranty on the equipment.
2. If any Radio Shack computer equipment has been modified so that it is <r
within manufacturer's specifications, including, but not limited to, the instaiiat
of any non-Radio Shack parts, components, or replacement boards, th
Radio Shack reserves the right to refuse to service the equipment, void a_
remaining warranty, remove and replace any non-Radio Shack part f o u n c
the equipment, and perform whatever modifications are necessary to retL
the equipment to original factory manufacturer's specifications.
3. The cost for the labor and parts required to return the Radio Shack comp
equipment to original manufacturer's specifications will be charged to
customer in addition to the normal repair charge.
RADIO SHACK
A Division of Tandy Corporation
U.S.A.: Fort Worth, Tfexas 76102
CANADA: Barrie, Ontario L4M 4W5
TANDY CORPORATION
AUSTRALIA
91 Kurrajong Road
Mount Druitt, N.S.W. 2770
BELGIUM
Pare Industriel De Naninne.
5140 Naninne
U.K.
Bilston Road Wednesbury
West Midlands WS10 7JN
2A5
KTXI0OO«O3
Printed in Japan