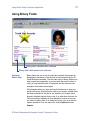
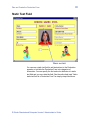
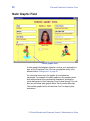
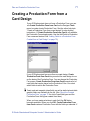
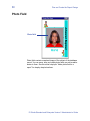
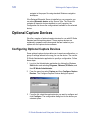
1
Welcome to the
ID Works Standard and Enterprise
Online Reference Library
This library contains information about Datacard® ID Works®
Standard and Enterprise identification software version 5.0 or higher.
Some information included here may not apply to your environment.
Please choose a title below to view the document, or click on the titles
to the left of this page.
ID Works Operator’s Guide
ID Works Administrator’s Guide
Smart Driver and ImageCard® Printer and
Magnetic Stripe Plug-ins
Datacard® 150i and 275/280P/295 Card Systems:
Guide for Use with ID Works Software
Using the Online Reference Library
Legal Notices
Conventions
Comments? Suggestions?
ID Works Standard and Enterprise Version 5 Online Reference Library
Notices
© 1999–2004 DataCard Corporation. All rights reserved.
U.S. Patent No. 6,632,250.
This publication and the accompanying software are proprietary to
DataCard Corporation and are protected under U.S. patent and
copyright laws as well as various international laws and treaties. This
publication may not be copied, translated, sold, or otherwise
transferred to a third party, in whole or in part, without the express
written permission of DataCard Corporation.
Information in this publication is subject to change without notice.
DataCard assumes no responsibility for any errors that may appear in
this publication.
Datacard, ID Works, ImageCard, and UltraGrafix are trademarks and
registered trademarks of DataCard Corporation in the U.S. and other
countries. Advanced Imaging Technology, Express, Magna, Platinum,
Select, and Tru are trademarks of DataCard Corporation.
Adobe and Acrobat are registered trademarks and Type Manager is a
trademark of Adobe Systems Incorporated. Microsoft and Windows
are registered trademarks of Microsoft Corporation. Pentium is a
registered trademark of Intel Corporation.
All other product names are trademarks of their respective owners.
Portions of this product were created using LEADTOOLS © 19912001 LEAD Technologies, Inc. ALL RIGHTS RESERVED.
Portions of the bar code technology of this product are copyrighted by
StrandWare, Inc.
Enterprise
Edition Only!
Binary PDF417 barcode technology provided in this product is
copyrighted by TAL Technologies, Inc.
ID Works Standard and Enterprise Version 5 Online Reference Library
Conventions Used in this Library
Notes remind or inform you of something you should know before
proceeding.
D Tips remind
or inform you of
a feature or
method that
could save you
time and energy.
Names of menus, dialog box options, and buttons appear in bold
type.
File names also appear in bold type, and the variable part of the file
name is in bold italics (for example, project name.iwx indicates that
you supply the project name while iwx remains constant).
Names of keyboard keys appear in large and small capital letters (for
example, ENTER).
Information you enter appears in regular italic type (for example, you
may be instructed to type Admin to log in to an ID Works application).
Parts of dialog box names that change depending on a name you
supplied appear in brackets [ ].
Enterprise
Edition Only!
Features that are available only in ID Works Enterprise applications
are identified by this phrase in the left margin.
Blue text indicates a jump (link) to the referenced topic for online
reading. See the document Using the Online Reference Library for
tips on reading documents online.
ID Works Standard and Enterprise Version 5 Online Reference Library
Comments? Suggestions?
Please send comments, suggestions, or corrections to:
ID Works Information Development
Mail Stop 210
Datacard Group
11111 Bren Road West
Minnetonka, MN 55343-9015 USA
Or send an e-mail message to:
[email protected]
ID Works Standard and Enterprise Version 5 Online Reference Library
Operator’s Guide for
ID Works Standard and Enterprise
Version 5
October 2004
ii
Contents
About the Operator’s Guide . . . . . . . . . . . . . . . . . . . . . . . . . . . . . . . . . . . . . . . . . . v
Chapter 1: System Overview . . . . . . . . . . . . . . . . . . . . . . . . . . . . . . . . . . . . . . . . . . . . .
Introducing the ID Works “Project” . . . . . . . . . . . . . . . . . . . . . . . . . . . . . . . . . . . .
Getting Started . . . . . . . . . . . . . . . . . . . . . . . . . . . . . . . . . . . . . . . . . . . . . . . . . . . . .
Log In to an ID Works Application . . . . . . . . . . . . . . . . . . . . . . . . . . . . . . . . . . . .
Changing Your User Password . . . . . . . . . . . . . . . . . . . . . . . . . . . . . . . . . . . . . .
Using the Welcome Dialog Box . . . . . . . . . . . . . . . . . . . . . . . . . . . . . . . . . . . . . .
Using ID Works Applications . . . . . . . . . . . . . . . . . . . . . . . . . . . . . . . . . . . . . . . .
Opening a Project . . . . . . . . . . . . . . . . . . . . . . . . . . . . . . . . . . . . . . . . . . . . . . . . . .
1
1
3
3
4
4
5
6
Chapter 2: Using the ID Works Production Application . . . . . . . . . . . . . . . . . . . . . . . 9
Using an ID Works Project . . . . . . . . . . . . . . . . . . . . . . . . . . . . . . . . . . . . . . . . . . 10
Entering Information in Text Fields . . . . . . . . . . . . . . . . . . . . . . . . . . . . . . . . . . 11
Entering Information in Date Fields . . . . . . . . . . . . . . . . . . . . . . . . . . . . . . . . . . 13
Selecting Information in List Fields . . . . . . . . . . . . . . . . . . . . . . . . . . . . . . . . . . 14
Using Photo Fields . . . . . . . . . . . . . . . . . . . . . . . . . . . . . . . . . . . . . . . . . . . . . . 15
Photo from File. . . . . . . . . . . . . . . . . . . . . . . . . . . . . . . . . . . . . . . . . . . . . . . 16
TWAIN . . . . . . . . . . . . . . . . . . . . . . . . . . . . . . . . . . . . . . . . . . . . . . . . . . . . . 18
TWAIN (Fast) . . . . . . . . . . . . . . . . . . . . . . . . . . . . . . . . . . . . . . . . . . . . . . . . 19
Video for Windows . . . . . . . . . . . . . . . . . . . . . . . . . . . . . . . . . . . . . . . . . . . . 19
Video for Windows (Fast). . . . . . . . . . . . . . . . . . . . . . . . . . . . . . . . . . . . . . . 20
Optional Cameras . . . . . . . . . . . . . . . . . . . . . . . . . . . . . . . . . . . . . . . . . . . . 21
Selecting a Different Photo Source . . . . . . . . . . . . . . . . . . . . . . . . . . . . . . . 21
Cropping and Adjusting Photos . . . . . . . . . . . . . . . . . . . . . . . . . . . . . . . . . . 21
Exporting Images . . . . . . . . . . . . . . . . . . . . . . . . . . . . . . . . . . . . . . . . . . . . . 25
Adjusting Photo Backdrop Removal Parameters . . . . . . . . . . . . . . . . . . . . . 25
Using Signature Fields . . . . . . . . . . . . . . . . . . . . . . . . . . . . . . . . . . . . . . . . . . . 29
Signature from File. . . . . . . . . . . . . . . . . . . . . . . . . . . . . . . . . . . . . . . . . . . . 30
Optional Capture Devices . . . . . . . . . . . . . . . . . . . . . . . . . . . . . . . . . . . . . . 30
Using Binary Fields . . . . . . . . . . . . . . . . . . . . . . . . . . . . . . . . . . . . . . . . . . . . . . 31
Data from File. . . . . . . . . . . . . . . . . . . . . . . . . . . . . . . . . . . . . . . . . . . . . . . . 32
Optional Capture Devices . . . . . . . . . . . . . . . . . . . . . . . . . . . . . . . . . . . . . . 32
Verifying Identity. . . . . . . . . . . . . . . . . . . . . . . . . . . . . . . . . . . . . . . . . . . . . . 33
Mandatory Fields . . . . . . . . . . . . . . . . . . . . . . . . . . . . . . . . . . . . . . . . . . . . . . . . 33
Read-only Fields . . . . . . . . . . . . . . . . . . . . . . . . . . . . . . . . . . . . . . . . . . . . . . . . 33
Previewing Cards . . . . . . . . . . . . . . . . . . . . . . . . . . . . . . . . . . . . . . . . . . . . . . . 33
Printing Cards . . . . . . . . . . . . . . . . . . . . . . . . . . . . . . . . . . . . . . . . . . . . . . . . . . 35
ID Works Standard and Enterprise Version 5 Operator’s Guide
iii
Using a Project that is Connected to a Database . . . . . . . . . . . . . . . . . . . . . . . .
Changing Information in a Database . . . . . . . . . . . . . . . . . . . . . . . . . . . . . . . . .
Entering a New Database Record . . . . . . . . . . . . . . . . . . . . . . . . . . . . . . . . . . .
Deleting a Database Record . . . . . . . . . . . . . . . . . . . . . . . . . . . . . . . . . . . . . . .
Using a Project that is Connected to a Directory Service . . . . . . . . . . . . . . . . .
Changing Information in a Directory Service . . . . . . . . . . . . . . . . . . . . . . . . . . .
Creating a New Directory Service Entry . . . . . . . . . . . . . . . . . . . . . . . . . . . . . .
37
38
40
41
42
42
44
Chapter 3: Using the ID Works Reporting Application . . . . . . . . . . . . . . . . . . . . . . .
Reporting Procedure Overview . . . . . . . . . . . . . . . . . . . . . . . . . . . . . . . . . . . . . .
Selecting a Report . . . . . . . . . . . . . . . . . . . . . . . . . . . . . . . . . . . . . . . . . . . . . . .
Selecting Records . . . . . . . . . . . . . . . . . . . . . . . . . . . . . . . . . . . . . . . . . . . . . . .
Printing Reports . . . . . . . . . . . . . . . . . . . . . . . . . . . . . . . . . . . . . . . . . . . . . . . . .
45
45
46
46
47
Chapter 4: Searching the Data Source . . . . . . . . . . . . . . . . . . . . . . . . . . . . . . . . . . . .
Performing a Quick Search . . . . . . . . . . . . . . . . . . . . . . . . . . . . . . . . . . . . . . . . . .
Refining the Quick Search . . . . . . . . . . . . . . . . . . . . . . . . . . . . . . . . . . . . . . . . .
Viewing Search Results . . . . . . . . . . . . . . . . . . . . . . . . . . . . . . . . . . . . . . . . . . .
Navigating Search Results . . . . . . . . . . . . . . . . . . . . . . . . . . . . . . . . . . . . . . . .
Running a Stored Advanced Search . . . . . . . . . . . . . . . . . . . . . . . . . . . . . . . . . .
Creating a Stored Search . . . . . . . . . . . . . . . . . . . . . . . . . . . . . . . . . . . . . . . . . . .
Filter Tab . . . . . . . . . . . . . . . . . . . . . . . . . . . . . . . . . . . . . . . . . . . . . . . . . . . . . .
Using the Multi-value Constraint List . . . . . . . . . . . . . . . . . . . . . . . . . . . . . .
Adding and Clearing Constraints . . . . . . . . . . . . . . . . . . . . . . . . . . . . . . . . .
Modifying a Constraint . . . . . . . . . . . . . . . . . . . . . . . . . . . . . . . . . . . . . . . . .
Sort Order Tab . . . . . . . . . . . . . . . . . . . . . . . . . . . . . . . . . . . . . . . . . . . . . . . . . .
Manage Tab . . . . . . . . . . . . . . . . . . . . . . . . . . . . . . . . . . . . . . . . . . . . . . . . . . .
Changing a Stored Search . . . . . . . . . . . . . . . . . . . . . . . . . . . . . . . . . . . . . . . .
Deleting a Stored Search . . . . . . . . . . . . . . . . . . . . . . . . . . . . . . . . . . . . . . . . .
Search Rules . . . . . . . . . . . . . . . . . . . . . . . . . . . . . . . . . . . . . . . . . . . . . . . . . . . . .
Text Fields . . . . . . . . . . . . . . . . . . . . . . . . . . . . . . . . . . . . . . . . . . . . . . . . . . . . .
= Constraint Rule . . . . . . . . . . . . . . . . . . . . . . . . . . . . . . . . . . . . . . . . . . . . .
IN Constraint Rule . . . . . . . . . . . . . . . . . . . . . . . . . . . . . . . . . . . . . . . . . . . .
IS NULL Constraint Rule . . . . . . . . . . . . . . . . . . . . . . . . . . . . . . . . . . . . . . .
IS NOT NULL Constraint Rule . . . . . . . . . . . . . . . . . . . . . . . . . . . . . . . . . . .
51
51
52
54
56
57
57
58
59
60
60
61
62
63
63
64
64
64
65
66
66
ID Works Standard and Enterprise Version 5 Operator’s Guide
iv
Numeric Fields . . . . . . . . . . . . . . . . . . . . . . . . . . . . . . . . . . . . . . . . . . . . . . . . . .
= Constraint Rule . . . . . . . . . . . . . . . . . . . . . . . . . . . . . . . . . . . . . . . . . . . . .
> Constraint Rule . . . . . . . . . . . . . . . . . . . . . . . . . . . . . . . . . . . . . . . . . . . . .
< Constraint Rule . . . . . . . . . . . . . . . . . . . . . . . . . . . . . . . . . . . . . . . . . . . . .
BETWEEN Constraint Rule . . . . . . . . . . . . . . . . . . . . . . . . . . . . . . . . . . . . .
IN Constraint Rule . . . . . . . . . . . . . . . . . . . . . . . . . . . . . . . . . . . . . . . . . . . .
IS NULL Constraint Rule . . . . . . . . . . . . . . . . . . . . . . . . . . . . . . . . . . . . . . .
IS NOT NULL Constraint Rule . . . . . . . . . . . . . . . . . . . . . . . . . . . . . . . . . . .
Date Fields . . . . . . . . . . . . . . . . . . . . . . . . . . . . . . . . . . . . . . . . . . . . . . . . . . . .
EXACT DATE Constraint Rule. . . . . . . . . . . . . . . . . . . . . . . . . . . . . . . . . . .
SINCE Constraint Rule . . . . . . . . . . . . . . . . . . . . . . . . . . . . . . . . . . . . . . . .
BEFORE Constraint Rule. . . . . . . . . . . . . . . . . . . . . . . . . . . . . . . . . . . . . . .
BETWEEN Constraint Rule . . . . . . . . . . . . . . . . . . . . . . . . . . . . . . . . . . . . .
PREVIOUS _ DAYS Constraint Rule . . . . . . . . . . . . . . . . . . . . . . . . . . . . . .
PREVIOUS _ MONTHS Constraint Rule . . . . . . . . . . . . . . . . . . . . . . . . . . .
IS NULL Constraint Rule . . . . . . . . . . . . . . . . . . . . . . . . . . . . . . . . . . . . . . .
IS NOT NULL Constraint Rule . . . . . . . . . . . . . . . . . . . . . . . . . . . . . . . . . . .
Image Fields . . . . . . . . . . . . . . . . . . . . . . . . . . . . . . . . . . . . . . . . . . . . . . . . . . .
All selected fields have data Constraint Rule. . . . . . . . . . . . . . . . . . . . . . . .
At least one selected field has data Constraint Rule . . . . . . . . . . . . . . . . . .
At least one selected field is empty Constraint Rule . . . . . . . . . . . . . . . . . .
All selected fields are empty Constraint Rule. . . . . . . . . . . . . . . . . . . . . . . .
67
67
68
68
69
69
70
70
71
71
72
73
73
74
74
75
75
76
77
77
77
77
Index . . . . . . . . . . . . . . . . . . . . . . . . . . . . . . . . . . . . . . . . . . . . . . . . . . . . . . . . . . . . . . . 79
ID Works Standard and Enterprise Version 5 Operator’s Guide
v
About the Operator’s Guide
This document is one of three sources of information about
Datacard® ID Works® Standard and Enterprise identification
software.
•
•
•
The CD insert tells how to install ID Works software.
The online help system tells you how to perform ID Works tasks.
You can access the online help system from the Help menu in
each ID Works application or by pressing the F1 key.
This Operator’s Guide, part of the Online Reference Library,
gives additional background information about using the various
features available in the ID Works applications. It also suggests
the order in which tasks should be performed.
ID Works Standard and Enterprise Version 5 Operator’s Guide
vi
ID Works Standard and Enterprise Version 5 Operator’s Guide
System Overview
1
Datacard® ID Works® Standard and Enterprise
identification software includes four applications:
ID Works Designer lets a System Administrator
create projects that meet your organization’s
specific needs for card designs, report designs, data entry, and
database access.
In some organizations, one person performs all the Designer
functions. In others, a graphic artist may be responsible for card
designs while a programmer, database administrator, and/or
manager develop the Production Forms, reports, and connections.
ID Works Production lets you use the projects you create in the
Designer application to gather information, access your database,
and print identification cards.
ID Works Reporting lets you generate and print image-rich reports
from your database.
ID Works Administrator contains tools to manage user accounts,
monitor security, and configure your ID Works software.
Introducing the ID Works “Project”
An ID Works project is similar to a folder or directory on a computer: it
is the container that holds information about an identification
implementation.
A project contains a Production Form and one or more card designs
(although a card design is not required). Optionally, your project can
contain one or more report designs and one or more stored searches.
By using field connections, information entered in a Production Form
can be saved in a database, printed on a card, used in a report, or all
of the above. The Production Form can also be used to query an
existing database so that you can add or change information in the
database or print cards and reports using information in the database.
ID Works Standard and Enterprise Version 5 Operator’s Guide
2
System Overview
ID Works Standard and Enterprise Version 5 Operator’s Guide
3
System Overview
Getting Started
The rest of this chapter explains the steps you take to begin using
your ID Works identification software.
Log In to an ID Works Application
To begin using ID Works software, double-click the ID Works
Standard and Enterprise Production or Reporting shortcut icon on
your desktop.
Production
shortcut icon
Reporting
shortcut icon
Start button
In the User Login dialog box, type the User Name and User Password
given to you by your System Administrator, and then click the Log in
button.
When you are logged in to an ID Works application, you do not need
to supply your user name and password again to start another ID
Works application.
ID Works Standard and Enterprise Version 5 Operator’s Guide
4
System Overview
Changing Your User Password
Each time you log in to an ID Works application you have the
opportunity to change your user password. To change your
password, click the Change Password button any time before
completing the login. The Login and Change Password dialog box
opens, where you must supply your user name, current password,
and a new password. You will also need to type the new password a
second time for verification. Then click the Log in button to complete
the change and log in to the ID Works application.
Passwords can be 1 to 10 characters long and can include any
character you can type from the keyboard. Passwords are not case
sensitive. That is, ADMIN, admin, and AdmiN are all treated as the
same.
Using the Welcome Dialog Box
After you have changed your password or entered it and clicked Log
in, the Welcome dialog box appears.
From this dialog box you can open an existing project—either a
sample project or one that was designed specifically for your
organization. If the project you want to open is not listed, click Open
projects or More projects to display the Open Project dialog box,
which lists all ID Works projects available to you.
ID Works Standard and Enterprise Version 5 Operator’s Guide
5
System Overview
You can also choose not to have the Welcome dialog box display by
clearing the check mark next to Show this window at startup. If you
hide the Welcome dialog box and later want to show it again, from the
menu bar, select View and then Show Welcome on startup. The
selection you make applies only to the Windows user name you used
to log in and only to the application you logged into. Other ID Works
applications have separate settings for showing the Welcome
window.
Using ID Works Applications
If you are familiar with your Microsoft® Windows® operating system
and typical office applications, such as word processing and
presentation software, ID Works software will feel familiar to you. ID
Works applications let you perform most actions several ways: by
selecting menu commands with the mouse, or with the keyboard, or
by clicking a toolbar button, or by clicking the right mouse button and
selecting from the pop-up menu. Key commands or shortcuts for
actions common to many applications—such as cut, paste, and
save—follow Microsoft Office conventions; you do not have to relearn
your favorite shortcuts.
Most ID Works applications have several toolbars, and you can
display or hide toolbars on a case-by-case basis. When you rest the
mouse pointer on a toolbar button, the name and function of the
button appears.
A status bar at the bottom of the window provides additional
information about the application. As with toolbars, you can choose to
view or hide the status bar.
ID Works Standard and Enterprise Version 5 Operator’s Guide
6
System Overview
Menu bar
Toolbars
Status bar
Opening a Project
To open a project, from the menu bar select File and then Open
Project (either with the mouse or with the keyboard).
The Open Project dialog box opens. Select a project from the list of
projects that are available to you and then click the Open button.
ID Works Standard and Enterprise Version 5 Operator’s Guide
7
System Overview
When you open an ID Works project, it appears the way the last
project did when it was closed. For example, if the last project was
closed with the Card Preview showing, the project you select will
open with the Card Preview showing.
ID Works Standard and Enterprise Version 5 Operator’s Guide
8
System Overview
ID Works Standard and Enterprise Version 5 Operator’s Guide
Using the ID Works
Production
Application
2
This chapter uses the sample projects that came with your ID Works
software to explain your tasks. The projects you will use will be
created to meet your specific needs, but they will probably follow the
same general principles.
Your System Administrator may have configured your computer to
require logging in again if you have not used the Production
application after a certain period of time. If that happens, you will see
a dialog box similar to the following.
ID Works Standard and Enterprise Version 5 Operator’s Guide
10
Using the ID Works Production Application
Using an ID Works Project
How your project opens depends on what privileges you have. If you
are allowed to enter new records, the pointer will be in the field that
the designer of the project designated as the starting field. (This is
usually the field in the upper left corner of the window.) If your project
is connected to a database, the New button on the toolbar will be
“pushed in” and there will be a check mark next to the New command
on the Record menu.
You can start entering information immediately. Most fields will have
a prompt that indicates the kind of information you are to enter in the
field. As mentioned, you can move between fields by tabbing or by
clicking with the mouse.
The following sections discuss how to enter information into each
type of field you may find in your project.
If you need to start over with the record and your project is connected
to a database, from the menu bar select Record and then Refresh.
All fields will return to the way they were when you selected the
record from the database.
If you need to start over with the record and your project is not
connected to a database, from the menu bar select Field and then
Clear All. All fields will return to the way they were when you opened
the project.
ID Works Standard and Enterprise Version 5 Operator’s Guide
Using the ID Works Production Application
11
Entering Information in Text Fields
Text fields
Most fields will be text fields. You can enter in a text field any
character on your keyboard: uppercase letters, lowercase letters,
numbers, punctuation marks, special characters, or spaces. There
will, however, be a maximum number of characters you can enter in a
text field. If a text field stops accepting characters, it may be that you
have reached the maximum field length. If your project connects to a
database, the maximum field length of text fields is often set to match
the maximum number of characters allowed in the corresponding
database column.
If you enter more characters than the text field entry box can display,
the text might scroll. You can see all the text using the HOME, END, left
arrow, and right arrow keys. You can also ask the project designer to
make the text field wide enough to display all the text.
ID Works Standard and Enterprise Version 5 Operator’s Guide
12
Using the ID Works Production Application
Some text fields may appear with characters already entered for you.
For example, an identification number might appear with hyphens
separating groups of digits. These fields have a “mask” applied to
them to make your job easier. As you type data into these fields, the
pointer will skip over the characters that are already there. Some
other ways masked text fields might behave are:
•
Converting characters. For example, lowercase characters you
type might automatically be changed into uppercase characters.
•
Requiring that you enter something in a field. If you try to print a
card or save a record without entering a value in such a text field,
you will see the message, “Mandatory character not present.”
When you click OK to clear the message, the pointer will appear
in the field you need to complete.
•
Requiring a certain kind of character. If you type a letter into a
phone number field that is masked to accept only numeric
characters, the letter will not be accepted and the computer bell
will sound.
Other text fields may be completely filled in for you. If a completed
field has gray text, you cannot change the contents. If the text is any
other color, it was supplied as a convenience to you but you can
change it.
ID Works Standard and Enterprise Version 5 Operator’s Guide
Using the ID Works Production Application
13
Entering Information in Date Fields
Date field
Date fields have separator characters (often slashes or hyphens) in
them. You must enter numbers for the day, month, and year in the
order that was specified when your project was created. If the prompt
for the date field does not tell you whether to enter the month first or
second and you enter it in the wrong position, an error message will
appear when you try to print a card or save the record. You can easily
change the order.
Some date fields also require that you enter a time. The time part of
the date field will appear to the right of the date. You must enter
numbers for the hour, minute, and second part of the time. If your
project uses the 12-hour time format, you will also need to enter AM
or PM.
ID Works Standard and Enterprise Version 5 Operator’s Guide
14
Using the ID Works Production Application
If you make a mistake while entering a date, move the pointer to the
right of the incorrect character, press the BACKSPACE key, and then
type the correct number.
Selecting Information in List Fields
List field
List fields have an arrow at the right side of the field. Instead of typing
information in them, you make a selection from the items in the list.
To see all the choices, click and hold on the arrow. Move the mouse
until the choice you want is highlighted, then release the mouse
button. If you prefer to use the keyboard, the up and down arrow keys
scroll through the list choices. See the online help topic “Select an
item in a list field” for additional ways to use the keyboard to make list
field selections.
Some list fields are there just to save you typing and ensure that
information stored in a database is consistent. In a project that has
ID Works Standard and Enterprise Version 5 Operator’s Guide
15
Using the ID Works Production Application
more than one card design, a list field controls which card is printed
for the current cardholder. For example, a school might have one
card design for Freshmen, another for Sophomores, and so on. The
list field that determines which card is printed would then have
Freshman, Sophomore, Junior, and Senior choices.
Using Photo Fields
Photo field
What happens when you enter a photo field depends on how your
project was set up, whether your system has a camera, and, if so,
what kind of camera it is. The most common behavior is for a photo
capture to begin as soon as you enter the photo field. If no dialog box
opens, you must start the capture operation. From the menu bar,
select Capture and then Capture.
ID Works Standard and Enterprise Version 5 Operator’s Guide
16
D If you need
to select a
source, check
with your System
Administrator.
They may have
forgotten to
assign a source.
Using the ID Works Production Application
The dialog box for the default photo source opens. If an “Unable to
capture photo . . .” message appears, you must select a source for
the photo. From the menu bar, select Capture and then Select
Capture Source or click the right mouse button and select Select
Capture Source from the menu. See the online help topic “Select a
photo source” for step-by-step instructions.
The following paragraphs show the dialog boxes that open for the
photo sources that are available on all ID Works computers.
Photo from File
If the photo source selected is Photo from File, the Open dialog box
opens. You use standard Windows navigation techniques to find the
drive, folder, and file that contains the photograph that should be
used. Your supervisor or ID Works System Administrator will supply
you with the file location and file naming scheme to use. The Open
dialog box “remembers” the last directory you used. If most of your
photo files are in the same directory, you do not have to do much
navigating. When you select a file, a “thumbnail” of the file displays so
you can verify that you have the correct file.
ID Works Standard and Enterprise Version 5 Operator’s Guide
Using the ID Works Production Application
17
ID Works software supports the following file types:
BMP
Windows Bitmap
EPS
Encapsulated PostScript
JPG
Joint Photographic Experts Group File Interchange Format
(single image per file)
J2K
JPEG 2000 File Format
PCT
Macintosh PICT Drawing
PCX
PC Paintbrush
PNG
Portable Network Graphics
PSD
Adobe Photoshop® (3.0)
TGA
TARGA® Image File Format
TIF
Tagged Image File Format (single image per file,
uncompressed only)
WMF
Windows Metafile
When you have found the file you want, click Open. The Photo Crop
and Adjust dialog box opens, where you can center the subject or
crop out (eliminate) unnecessary background. See “Cropping and
Adjusting Photos” on page 21.
ID Works Standard and Enterprise Version 5 Operator’s Guide
18
Using the ID Works Production Application
TWAIN
If the photo source selected is TWAIN, the TWAIN Interface dialog
box opens. (The TWAIN standard specifies how an application, such
as ID Works Production, can activate a scanner, digital camera, or
other image-capturing device.)
When you click the Select Source button, the Select Source dialog
box opens. It lists all the TWAIN devices installed on your computer.
Select the device you want to use and click the Select button. The
Select Source dialog box closes. In the TWAIN Interface dialog box,
click the Acquire Photo button. The software application that is
associated with the device you selected opens.
Because there are many different TWAIN devices made by many
different manufacturers, this document cannot supply explicit
instructions for using your TWAIN device. See the documentation that
came with your device, or ask your supervisor or ID Works System
Administrator for step-by-step instructions.
ID Works Standard and Enterprise Version 5 Operator’s Guide
Using the ID Works Production Application
19
TWAIN (Fast)
If the photo source selected is TWAIN (Fast), the software
application that is associated with the last TWAIN device used in an
ID Works project (or the only TWAIN device installed on your
computer) starts. Because there are many different TWAIN devices
made by many different manufacturers, this document cannot supply
explicit instructions for using your TWAIN device. See the
documentation that came with your device or ask your supervisor or
ID Works System Administrator for step-by-step instructions.
Video for Windows
If the photo source selected is Video for Windows, the Video for
Windows Interface dialog box opens. (Video for Windows is a
Microsoft standard interface for storing and playback of video and
audio information. It also lets you capture a single frame to a bitmap
or JPEG file. Single-frame capture is the capability of Video for
Windows that ID Works software uses.)
When you click the Select Source button, the Select Source dialog
box opens. It lists all the Video for Windows devices installed on your
computer.
Select the device you want to use and click the OK button. The Select
Source dialog box closes.
ID Works Standard and Enterprise Version 5 Operator’s Guide
20
Using the ID Works Production Application
If the Source list shows a Video for Windows source (possibly
designated VFW) and a Windows Driver Model (WDM) source for
your camera, selecting the Windows Driver Model entry usually gives
better results.
In the Video for Windows Interface dialog box, click the Acquire
Photo button. The Video for Windows Camera dialog box opens.
When your subject is ready, click Take Photo. The camera captures
the image and the label on the button changes to Retry. If the photo is
unacceptable (for example, if the subject’s eyes are closed), click
Retry. If the photo is acceptable, click OK. The Photo Crop and Adjust
dialog box opens. See “Cropping and Adjusting Photos” on page 21.
Video for Windows (Fast)
If the photo source selected is Video for Windows (Fast), the Video
for Windows Camera dialog box opens immediately. You do not have
to select a source.
ID Works Standard and Enterprise Version 5 Operator’s Guide
Using the ID Works Production Application
21
Optional Cameras
In addition to the photo sources already described, your ID Works
system may include an optional capture device, such as the Datacard
Tru photo solution. These optional devices have special software that
makes them especially easy to use with your ID Works system.
Optional cameras are explained in their own online documents, which
you access through the Windows Start menu.
Selecting a Different Photo Source
If you have the necessary privilege, you can use a photo source other
than the one specified when your project was created. For example, if
the project is set to automatically start the software for a TWAIN
device, you can close the dialog box that opens automatically. Then,
with the photo field still selected (there will be a border around the
photo field), select a different source for the photo. From the menu
bar, select Capture and then Select Capture Source or click the
right mouse button and select Select Capture Source from the popup menu. See the online help topic “Select a photo source” for stepby-step instructions.
Cropping and Adjusting Photos
If your ID Works project allows you to crop photos, the Photo Crop
and Adjust dialog box will open as soon as you have selected your
photo. Your photo will appear in the image area with four squares,
called sizing handles, around the outside.
ID Works Standard and Enterprise Version 5 Operator’s Guide
22
Using the ID Works Production Application
To zoom in on the subject (eliminate unnecessary background), click
and drag any sizing handle, then release the mouse button. The crop
box proportions, set by the project designer, remain constant.
After you have zoomed in, your subject may no longer be centered in
the crop box. To adjust the position of the crop box, move the mouse
until the pointer is inside the crop box. The pointer changes to a fourway arrow. Click and drag the crop box to the position you want, then
release the mouse button.
When the photo is as you want it, click the OK button. The Photo
Crop and Adjust dialog box closes, and the photo appears in the
photo field.
Most of the time, cropping and adjusting is all you need to do to a
photo. But the Photo Crop and Adjust dialog box also offers the
following advanced capabilities.
ID Works Standard and Enterprise Version 5 Operator’s Guide
Using the ID Works Production Application
23
Rotating Photos
Some previously taken photos may have an orientation different from
the one you need. You can compensate for this by rotating the photo
as necessary. Each time you click the Rotate button, the photo
rotates one-quarter turn clockwise.
Any cropping or adjusting you did is lost when you rotate a photo. If
you need to rotate the photo, do that first, then crop and adjust.
Selecting an Exposure
If the subject of the photo has a very light or very dark complexion,
you can improve the quality of the photo to some degree by clicking
the Photo Selection button.
ID Works Standard and Enterprise Version 5 Operator’s Guide
24
Using the ID Works Production Application
An array of nine different brightnesses appears, with the original
exposure in the center. Select a photo by clicking it with the mouse or
by using the arrow keys to move the selection box.To adjust the
contrast of the photo, select the More button. You can also select
from nine choices for saturation. At any time you can start over or
select OK or press ENTER to accept the currently-selected photo.
Your selection appears in the image area of the Photo Crop and
Adjust dialog box.
Remember, the final quality of the image is also affected by the
printer you are using to print your ID cards. Changing lighting and
camera settings should always be the first steps you take to improve
the photo. This selection option will not make up for poor data.
Starting Over
You can undo all your changes (cropping, exposure selection,
rotation) by clicking the Restore Original button.
Cropping and Adjusting Existing Photos
If you have the necessary privilege, you can crop or adjust photos
that have been captured previously. First, locate the database record
that contains the photo you need to change. See chapter 4,
Searching the Data Source, or go to the online help topic “Find a
record with Quick Search” or “Find a record with Advanced Search”.
Select the photo field and, if necessary, cancel the dialog box that
automatically opens. From the menu bar, select Capture and then
Crop and Adjust Photo. The Photo Crop and Adjust dialog box
opens.
ID Works Standard and Enterprise Version 5 Operator’s Guide
Using the ID Works Production Application
25
Exporting Images
You can save photos you see in the Production window for use in
other applications. For example, the editor of your organization’s
newsletter might want to use photos you take. The Capture menu
command, Export, lets you save an image in any of the following
formats:
BMP
Windows Bitmap
EPS
Encapsulated PostScript
JPG
Joint Photographic Experts Group File Interchange Format
(single image per file)
J2K
JPEG 2000 File Format
PCT
Macintosh PICT Drawing
PCX
PC Paintbrush
PNG
Portable Network Graphics
PSD
Adobe Photoshop® (3.0)
TGA
TARGA® Image File Format
TIF
Tagged Image File Format (single image per file,
uncompressed only)
WMF
Windows Metafile
See the online help topic “Export a photo to a file” for step-by-step
instructions.
Adjusting Photo Backdrop Removal Parameters
Your ID Works project may be set to remove the background from
photos of cardholders. This is often done so the card background
shows all around the person. The background is removed as a card is
printed. Photos are stored with the background in place, and the
success of the background removal depends on how evenly-colored
the background is on the photo.
If your project uses background removal, you must use the Card
Preview to verify that all the background has been removed. (See
“Previewing Cards” on page 33.) If some of the background remains
ID Works Standard and Enterprise Version 5 Operator’s Guide
26
Using the ID Works Production Application
and if you have the necessary privilege, you can use the Capture
menu command, Adjust Backdrop Removal Parameters, to
improve the image on the card.
In the Removal Method area, select Remove color from entire
photo if backdrop color is surrounded by another color (for example,
if you can see through the subject’s hair style, as in this photo). Be
aware, however, that if any part of the subject’s face or clothing is the
same color as the backdrop, that feature will also be removed. For
example, if the subject is wearing a shirt that has checks the same
color as the background, the checks in the shirt will be removed.
In the Removal Sensitivity area, select if some of the backdrop is
visible in the Card Preview. Select if some of the subject has been
removed.
After you have made changes to the settings, the results appear in
the large Backdrop Removed area. The original image is shown in the
smaller area next to the Help button.
ID Works Standard and Enterprise Version 5 Operator’s Guide
Using the ID Works Production Application
27
If you are satisfied with the adjusted image, click OK. The Adjust
Photo Backdrop Removal Parameters - Basic dialog box closes and
the results of your adjustment are shown in the Card Preview. The
adjusted settings are used until you move off the current record. If
you click Cancel, the dialog box closes and your adjustments are
discarded. For additional capabilities, click Advanced Controls.
In the Removal Method area, if you select Remove color from
around the person, you can select from Low, Medium, or High
edge detection sensitivity.
In the Removal Sensitivity area, you increase or decrease the
spectrum of colors that are considered to be backdrop. Three
attributes determine what we think of as a color.
•
Hue is described with the words we normally think of as
describing a color (red, yellow, etc.).
•
Saturation might be described with words like vivid or pale. It
talks about the dominance of the hue.
ID Works Standard and Enterprise Version 5 Operator’s Guide
28
Using the ID Works Production Application
•
Value deals with lightness or darkness--how much black is in the
color.
You increase or decrease the range for the attribute by clicking the up
or down arrow or by using the up or down arrow keys on your
keyboard. When you increase the range, more of the background
color is removed.
You can control the ranges individually or you can select Move all
ranges together to control them as a group. You can also return to
the factory default settings or to the settings you last saved by clicking
the appropriate button.
When adjustments are complete, you can choose to use the current
settings for the current image only, for all images in the current
database search results, or for all photos from now on. If you select
Use for all photos, these settings become the ones you would return
to if you clicked the Saved Settings button at some future time.
ID Works Standard and Enterprise Version 5 Operator’s Guide
29
Using the ID Works Production Application
Using Signature Fields
Signature field
What happens when you enter a signature field depends on how your
project was set up, whether your system has a signature pad, and, if
so, what kind of signature pad it is. The most common behavior is for
a dialog box to open as soon as you enter the signature field. If no
dialog box opens, you must start the capture operation. From the
menu bar, select Capture and then Capture.
ID Works Standard and Enterprise Version 5 Operator’s Guide
30
D If you need
to select a
source, check
with your System
Administrator.
They may have
forgotten to
assign a source.
Using the ID Works Production Application
The dialog box for the default signature source opens. If an “Unable
to capture signature . . .” message appears, you must select a source
for the signature. From the menu bar, select Capture and then Select
Capture Source or click the right mouse button and select Select
Capture Source from the pop-up menu.
Signature from File
If the signature source selected is Signature from File, the Open
dialog box opens. You use standard Windows navigation techniques
to find the drive, folder, and file that should be used. Your supervisor
or ID Works System Administrator will supply you with the file location
and file naming scheme to use. The Open dialog box “remembers”
the last directory you used. If most of your signature files are in the
same directory, you do not have to do much navigating.
Optional Capture Devices
In addition to Signature from File, your ID Works system may
include an optional signature capture device, such as the Datacard
Signature Capture Package. These optional devices have special
software that makes them especially easy to use with your ID Works
system. Optional devices are explained in their own documents,
which you access through the Windows Start menu.
ID Works Standard and Enterprise Version 5 Operator’s Guide
Using the ID Works Production Application
31
Using Binary Fields
Binary field—data has been collected
Binary field—data needs to be collected
Enterprise
Edition Only!
Binary fields give you a way to collect and use data that cannot be
displayed as characters or that should not be interpreted by the ID
Works Enterprise software. The two main uses for binary fields are to
load a smart card application on a smart card chip and to collect or
verify (or both) biometric data. Fingerprints and iris scans are two
examples of biometric technologies.
What happens when you enter a binary field depends on how your
project was set up, how the field is used in your project, whether data
has been collected for the field or not, whether your system has a
biometric template capture device, and, if so, what kind of device it is.
The most common behavior is for a dialog box to open as soon as
you enter the binary field. If no dialog box opens, you must start the
capture operation. From the menu bar, select Capture and then
Capture.
ID Works Standard and Enterprise Version 5 Operator’s Guide
32
D If you need
to select a
source, check
with your System
Administrator.
They may have
forgotten to
assign a source.
Using the ID Works Production Application
The dialog box for the default source opens. If an “Unable to capture”
message appears, you must select a source for the binary field. From
the menu bar, select Capture and then Select Capture Source or
right-click on the field and select Select Binary Data Source from the
menu that appears.
Data from File
If the source selected is Data from File, the Open dialog box opens.
You use standard Windows navigation techniques to find the drive,
folder, and file that should be used. Your supervisor or ID Works
System Administrator will supply you with the file location and file
naming scheme to use. The Open dialog box “remembers” the last
directory you used. If most of your data files are in the same directory,
you do not have to do much navigating.
Optional Capture Devices
In addition to Data from File, your ID Works system may include an
optional biometric template capture device, such as the Datacard
Tru™ Fingerprint Solution. These optional devices have special
software that makes them especially easy to use with your ID Works
system. Optional devices are explained in their own documents,
which you access through the Windows Start menu.
ID Works Standard and Enterprise Version 5 Operator’s Guide
Using the ID Works Production Application
33
Verifying Identity
If your project is connected to a biometric device and the binary field
has data, you will probably be asked to verify a cardholder against the
stored biometric data. See the documentation that came with your
biometrice device for verification procedures. If you need to recapture
biometric data, with the pointer over the binary field right-click and
select Capture from the menu.
Mandatory Fields
There may be some fields on your Production Form that require you
to supply information. Project designers often indicate which fields
are mandatory with bold prompts, differently-colored prompts, or an
asterisk or other symbol in the prompt. If you try to print a card or
save the record without completing a mandatory field, a message box
appears. When you click OK to clear the message, the pointer
appears in the mandatory field so you can complete it.
Read-only Fields
There may be some fields on your Production Form that contain
information you cannot change, such as a person’s birth date or the
number of times a card has been printed for that person. Those fields
are there for your information only. The pointer will not move to them
when you tab through the form and you cannot click in them to place
the pointer there. Read-only fields will, however, appear in Quick
Search windows if the ID Works project designer specified that they
should. See chapter 4, Searching the Data Source.
Previewing Cards
If your ID Works project includes a card design (and almost all of
them do) you can see how the card will look as you are entering
information in the Production window.
To see a preview of the card that will be printed, from the menu bar
select View and then Card preview – front or Card preview – back.
A Card Preview opens. (You can see previews of both sides of the
card by selecting each card preview menu command in turn.)
ID Works Standard and Enterprise Version 5 Operator’s Guide
34
Using the ID Works Production Application
You can move the Card Preview to a different location by clicking on
its title bar and dragging it to the new location. You can change the
size of the Card Preview by moving the mouse to an edge of the Card
Preview until the pointer turns into a two-way arrow, then clicking and
dragging the edge of the Card Preview until it is the size you want.
The Card Preview will maintain the proper height-to-width ratio. The
computer “remembers” the size of the Card Preview you set from day
to day and from project to project. The next time you select Card
Preview, the Card Preview opens the size you last set.
If your card design includes a barcode and if you enter too much data,
the barcode in the Preview will change to diagonal lines. If you enter
the wrong kind of data in the Production Form field associated with
the barcode (for example, a letter if the barcode type only accepts
numbers), the barcode in the Preview will change to a crosshatch
pattern.
Too much barcode data
Unsupported barcode data
If your card design includes a field that is printed with the topcoat
panel of the printing ribbon, that field will be displayed as white text or
shape. If the field is a graphic or photo, as in the following illustration,
it will appear as a black-and-white image.
ID Works Standard and Enterprise Version 5 Operator’s Guide
Using the ID Works Production Application
35
Printing Cards
You may be able to print cards, print multiple copies of a card, reprint
cards, or some combination. Your ID Works administrator determines
your card printing privileges.
If your ID Works project is not connected to a database, you must
print each card as you gather the information.
If your project is connected to a database, you can print each card as
you gather the information or you can collect information on a group
of cardholders (saving it in a database) and then print the cards in a
batch. Working with databases is explained in the next section of this
chapter.
You can print cards from either the Production Form view or the Table
view. (See the online help topics “Select Production Form View” and
“Select Table View”.) In table view, you can select a subset of records
returned from a search and print cards for only the selected records.
See chapter 4, Searching the Data Source, starting on page 51, for
more information.
Card printing works the same whether you print cards singly or in
batches:
1
Gather the cardholder information or select the record(s) to print.
2
To print a single card, from the menu bar select File and then
Print Card or click the Print button on the toolbar.
To print cards for all the records you selected, from the menu bar
select File and then Print All or click the Print all button on the
toolbar.
The Print Card(s) dialog box opens.
ID Works Standard and Enterprise Version 5 Operator’s Guide
36
Using the ID Works Production Application
3
If necessary, select your card printer from the list.
4
If you want to print more than one copy of the card(s), enter the
number of copies you want.
5
If your printer has a magnetic stripe or smart card encoder, you
can choose to print the card, encode the card, or both by
selecting the appropriate check boxes.
6
Click OK. If you chose to print cards for multiple records, the
Batch Print Status dialog box opens.
Clicking the Cancel button stops processing cards. However,
cards that have already been processed will still be sent to the
printer and cards that have been sent cannot be retrieved.
If you print cards in batches and if your ID Works project was set up to
allow it, you can track the progress of your print request after it has
been sent to the printer:
1
From the Windows Start button, select Settings and then
Printers or Printers and Faxes. The appropriate dialog box
opens.
2
Double-click on your card printer. A window with the name of your
printer opens. For each card in the print queue, the Document
Name column shows the contents of the field that was designated
for print tracking (for example, the Name field).
ID Works Standard and Enterprise Version 5 Operator’s Guide
Using the ID Works Production Application
3
37
To update the list, from the menu bar of the printer window, select
View and then Refresh.
You can use a Windows printer capability to cancel a print job
that is in the printer’s queue. See Windows help for printers for
more information.
Using a Project that is Connected to a
Database
Many ID Works projects are connected to a database. That is, the
information you gather is saved for future use not only by you but also
by other departments in your organization. In other cases, much of
the information was entered into the database by someone else, and
you retrieve it, add to it (perhaps the photograph), and save changes
to the database record.
Enterprise
Edition Only!
ID Works Enterprise edition allows projects to use a directory service
instead of a database. Using a project that is connected to a directory
service is explained on page 42.
If your ID Works project is connected to a database, your menu bar
will have a Record menu and your toolbar will include up to eleven
additional buttons and a list box.
Record menu appears when the
project is connected to a database
Additional buttons and list box
appear when the project
is connected to a database
Databases store information in tables. Each row of the table is called
a record, and that is why the new menu on the menu bar is named
Record—it deals with database records. Each column of the table is
known as a field. A column contains a category of information, such
as a name, a telephone number, or a photograph of the person
described in the record. The information you enter in fields in the ID
ID Works Standard and Enterprise Version 5 Operator’s Guide
38
Using the ID Works Production Application
Works Production window can be stored in and retrieved from
columns in a database table. Searching the database to retrieve
information is explained in chapter 4, Searching the Data Source.
Changing Information in a Database
If you have permission to make changes to information in the
database, a Save button will appear on your toolbar and the Record
menu will have a Save command.
To change information in a database:
1
Locate the record you need to change. See chapter 4, Searching
the Data Source, or go to the online help topic “Find a record with
Quick Search” or “Find a record with Advanced Search”.
2
Click in or tab to the field that needs to be changed and correct
the information.
3
If you need to reverse all the changes you made to the record,
from the menu bar, select Record and then Refresh. The
information returns to the way the record is stored in the
database.
4
When all changes have been made, from the menu bar, select
Record and then Save (or click the button on the toolbar that
looks like a diskette). The changed information is saved in the
database.
ID Works Standard and Enterprise Version 5 Operator’s Guide
Using the ID Works Production Application
39
To make the same change to multiple database records:
1
Create a search request that finds all the records you want to
change (and only the records you want to change). See chapter
4, Searching the Data Source, or go to the online help topic “Find
a record” for more information.
2
Change one or more fields in the first record.
3
From the menu bar, select Record and Update All. A
confirmation message appears.
4
Click Yes to change all records in the current group of records.
If you change a photo, signature, or binary field, a message will
appear saying that the photo, signature, or binary field will be
changed on the current record but not any other records in the group.
You will have the opportunity to cancel the update operation or
proceed.
ID Works Standard and Enterprise Version 5 Operator’s Guide
40
Using the ID Works Production Application
Entering a New Database Record
If you have permission to create records in the database, a New
button will appear on your toolbar and the Record menu will have a
New command.
To add a new record to a database:
D Save time
and effort when
entering many
new records.
From the
Record menu,
select Auto
New Record
on Save. A new
record will be
started as soon
as you save the
current new
record.
1
From the menu bar, select Record and then New (or click the
button on the toolbar that has a yellow starburst). All fields are
cleared or set to their default value.
2
Enter data into the fields. See the online help topics “Enter data
into a text field” and related topics, as well as “Take a photo” for
step-by-step instructions.
3
If you need to start over with the record, from the menu bar,
select Record and then Refresh. All fields will return to the way
they were in step 1, above.
4
When all information has been entered, from the menu bar, select
Record and then Save (or click the button on the toolbar that
looks like a diskette). The new record is saved in the database.
An ID Works project can be set up so that a record is automatically
saved to the database each time a card is printed. Ask your ID Works
System Administrator if your project has been set up this way. If so,
you do not have to remember to save each record.
ID Works Standard and Enterprise Version 5 Operator’s Guide
Using the ID Works Production Application
41
Deleting a Database Record
If you have permission to delete database records, a Delete button
will appear on your toolbar and the Record menu will have a Delete
command.
To delete a record from a database:
1
Locate the record you need to delete (see chapter 4, Searching
the Data Source, or go to the online help topic “Find a record”).
2
From the menu bar, select Record and then Delete (or click the
button on the toolbar that has an X). A confirmation message
appears.
3
Click Yes to delete the record. The record is deleted from the
database.
To delete multiple records, repeat the procedure above or use your
database program directly. Another way to delete multiple records is
to create a search request that finds all the records you want to delete
(and only the records you want to delete). See chapter 4, Searching
the Data Source, or go to the online help topic “Find a record” for
more information. Then, from the menu bar, select Record and
Delete All (if Delete All is available).
ID Works Standard and Enterprise Version 5 Operator’s Guide
42
Using the ID Works Production Application
Using a Project that is Connected to a
Directory Service
Enterprise
Edition Only!
Some ID Works Enterprise projects are connected to a directory
service for data storage. If your ID Works project is connected to a
directory service, your menu bar will have a Record menu and the
Quick Search button will be available on your Database Toolbar (if
you have it selected in the View menu).
Record menu appears when the project is
connected to a directory service
Search button is available when the project
is connected to a directory service
Directory services store information in objects. There can be many
entries in an object. Each entry is composed of attributes that have
one or more values. For example, an employee entry could have a
“last name” attribute. The information you enter in fields in the ID
Works Production window can be stored as attribute values.
Searching the directory service to retrieve information is explained in
chapter 4, Searching the Data Source.
Changing Information in a Directory Service
If you have permission to make changes to information in the
directory service, a Save button will appear on your Database
Toolbar and the Record menu will have a Save command.
ID Works Standard and Enterprise Version 5 Operator’s Guide
Using the ID Works Production Application
43
To change information in a directory service:
1
Locate the entry you need to change. See chapter 4, Searching
the Data Source, or go to the online help topic “Find a record with
Quick Search”.
2
Click in or tab to the field that needs to be changed and correct
the information.
3
If you need to reverse all the changes you made to the entry,
from the menu bar, select Record and then Refresh. The
information returns to the way the entry is stored in the directory
service.
4
When all changes have been made, from the menu bar, select
Record and then Save. The changed information is saved in the
directory service.
To make the same change to multiple directory service entries:
1
Create a search request that finds all the records you want to
change (and only the records you want to change). See chapter
4, Searching the Data Source, or go to the online help topic “Find
a record with Quick Search” for more information.
2
Change one or more fields in the first entry.
3
From the menu bar, select Record and Update All. A
confirmation message appears.
4
Click Yes to change all entries in the current group.
If you change a photo, signature, or binary field, a message will
appear saying that the field will be changed on the current entry but
not any other entries in the group. You will have the opportunity to
cancel the update operation or proceed.
ID Works Standard and Enterprise Version 5 Operator’s Guide
44
Using the ID Works Production Application
Creating a New Directory Service Entry
If you have permission to create entries in the directory service, a
New button will appear on your Database Toolbar and the Record
menu will have a New command.
To add an entry to a directory service:
D Save time
and effort when
creating many
new entries.
From the
Record menu,
select Auto
New Record
on Save. A new
entry will be
started as soon
as you save the
current new
entry.
1
From the menu bar, select Record and then New. All fields are
cleared or set to their default value.
2
Enter data into the fields. See the online help topics “Enter data
into a text field” and related topics, as well as “Take a photo”, for
step-by-step instructions.
3
If you need to start over with the entry, from the menu bar, select
Record and then Refresh. All fields will return to the way they
were in step 1, above.
4
When all information has been entered, from the menu bar, select
Record and then Save. The new entry is saved in the directory
service.
An ID Works project can be set up so that an entry is automatically
saved to the directory service each time a card is printed. Ask your ID
Works System Administrator if your project has been set up this way.
If so, you do not have to remember to save each entry.
ID Works Standard and Enterprise Version 5 Operator’s Guide
Using the ID Works
Reporting
Application
3
This chapter uses the sample projects that came with your ID Works
software to explain tasks you will perform in the ID Works Reporting
application. The projects you use will be created to meet your specific
needs, but they will probably follow the same general principles.
This chapter gives you background information about using the ID
Works Reporting application. While you are using the software you
can get step-by-step instructions on the task you are doing by
pressing the F1 key or by selecting Help Topics from the Help menu.
Reporting Procedure Overview
There are four steps for using the ID Works Reporting application:
1
Open a project. (See “Opening a Project” on page 6.)
2
Select a report.
3
Select information to fill the report.
4
View or print the report.
ID Works Standard and Enterprise Version 5 Operator’s Guide
46
Using the ID Works Reporting Application
Selecting a Report
Reports for ID Works projects are created in the Designer application.
You select a report to view or print from the menu bar or from the
toolbar. See the online help topic “Select a report” for step-by-step
instructions.
Select a report from this list
Selecting Records
Most ID Works projects are connected to a database. That is, the
information gathered with the Production application is saved for
future use not only by you but also by other departments in your
organization.
To use ID Works Reporting, your project must be connected to a
database. If the project you select is not connected to a database, ID
Works Reporting presents a message and closes the project. If the
project you select is connected to a database, your menu bar will
have a Record menu and your toolbar will include seven additional
buttons and a list box.
Record menu used to retrieve records from a
database and view retrieved records
Toolbar buttons and list box used to
retrieve records from a database and
view retrieved records
Databases store information in tables. Each row of the table is called
a record, and that is why the new menu on the menu bar is named
Record—it deals with database records. Each column of the table is
known as a field. A column contains a category of information, such
as a name, a telephone number, or a photo image of the person
described in the record. The Reporting application lets you retrieve
information stored in a database table and view or print it on a report.
ID Works Standard and Enterprise Version 5 Operator’s Guide
Using the ID Works Reporting Application
47
Searching the database to retrieve information is explained in
Chapter 4, Searching the Data Source.
Enterprise
Edition Only!
ID Works Enterprise edition allows projects to use a directory service
instead of a database. Except for searching, the kind of data source
used in your ID Works project does not affect how you use the
Reporting application. Searching is explained in Chapter 4, Searching
the Data Source, starting on page 51.
Printing Reports
You can print paper copies of your reports from the Production Form
view or from the Table view. See the online help topic “Print a report”
for step-by-step instructions. Report printing uses standard Windows
Print dialogs.
You can also see a preview of your printed report (see the online help
topic “Preview a report printout”). While in the print preview window
you can page through the pages of a multi-page report, view two
pages side by side, enlarge the report content (Zoom In) or reduce it
(Zoom Out), print the report, or close the print preview. Printing the
report or closing the print preview returns you to the view you were
using previously.
ID Works Standard and Enterprise Version 5 Operator’s Guide
48
Using the ID Works Reporting Application
You can change the Page Setup for a report. Page Setup includes
settings for paper size, orientation, and margins (top, bottom, left, and
right). See the online help topic “Change the page setup for a report”
for step-by-step instructions.
ID Works Standard and Enterprise Version 5 Operator’s Guide
Using the ID Works Reporting Application
49
If you change Page Setup properties, the Reporting application will
ask if you want the new properties applied to all reports in the project.
Any changes you make to Page Setup properties are used until you
make other changes or until you close the project. When the project is
opened again, the default page setup (specified by the person who
designed the project) is used.
When you print a report, the ID Works Reporting application puts as
many records on a page as possible. If you change the paper size or
margins significantly, fewer (or more) records may fit on a page. If
you change the Page Setup properties so much that no report blocks
will fit on a page, the Reporting application warns you.
ID Works Standard and Enterprise Version 5 Operator’s Guide
50
Using the ID Works Reporting Application
ID Works Standard and Enterprise Version 5 Operator’s Guide
Searching the Data Source
4
Most ID Works projects are connected to a
database.
Enterprise
Edition Only!
ID Works Enterprise projects can, instead, use a
directory service for data storage. Because searching a directory
service is similar to searching a database, this chapter will use
“database” to apply to both types of data source. Differences for
directory services are marked with the symbol at the left of this
paragraph.
You get information out of a database by searching it. There are two
methods for searching the database: Quick Search, for simple or onetime searches, and Advanced Search, for more complicated
searches. You (or the ID Works project designer) can use Advanced
Search to store search criteria for searches you will perform
repeatedly.
Performing a Quick Search
To perform a simple or one-time search of the database, click the
button on the toolbar that has a magnifying glass on it (the Quick
Search button), or from the menu bar, select Record and then Quick
Search. The Quick Search dialog box opens.
If the Quick Search button and menu command do not appear on
your ID Works window, you do not have permission to search the
database or you are restricted to running stored searches. Contact
your ID Works administrator to gain permission to search the
database.
ID Works Standard and Enterprise Version 5 Operator’s Guide
52
Searching the Data Source
Scroll bars
The Quick Search dialog box contains a field for each searchable
field in your Production Form. For example, you may see fields for
First Name and Last Name. You search on these fields by entering a
full or partial name. If necessary, use the scroll bars to see all of the
searchable fields. You can also change the size of the dialog box by
dragging one of the lower corners.
You will never see a photo, signature, or binary field in a Quick
Search dialog box because you cannot enter search criteria for those
kinds of fields. In addition, the project designer may have excluded
some Production Form fields from the Quick Search dialog box to
keep it simple.
The kind and amount of information you enter in the Quick Search
dialog box determines how many records the database system finds
for you. If you click the Quick Search button without entering
anything in any of the fields, the database system shows you all the
records in the database. For example, if a database for a project has
15 records, clicking the Quick Search button without making any
entries in the dialog box results in 15 records.
Refining the Quick Search
Selecting all the records in the database is fine to demonstrate how a
search works on a small sample database. But it is not practical when
your database contains hundreds or thousands of records. You can
reduce the number of records displayed by entering more specific
information in one or more search fields and by using wildcard
characters. For example, in the project Sample Loyalty, the following
ID Works Standard and Enterprise Version 5 Operator’s Guide
Searching the Data Source
53
Quick Search dialog box returns 2 records—all the records of people
in the database whose last names start with R.
This search uses the % (percent) wildcard character. It stands for any
number of characters after the R. You can also use the _
(underscore) wildcard character to substitute for a single character.
For example, entering Jo_n would find John and Joan but not
Johann.
Enterprise
Edition Only!
Only one wildcard character works when searching ID Works
Enterprise projects connected to a directory service. The asterisk (*)
represents zero or more characters at that position in the string of
characters you typed.
Wildcard characters do not work in date fields or in fields attached to
number fields in the database. You must enter exact values in these
types of fields.
If your database is case sensitive, your searches will be, too. You
must use capital letters as appropriate.
If you enter data into more than one search field, the database
system looks for records that match all fields.
ID Works Standard and Enterprise Version 5 Operator’s Guide
54
Searching the Data Source
Viewing Search Results
You can view the results of your database searches in two ways.
Production Form view presents the information one record at a time in
a graphical presentation. While in Production Form view you navigate
the search results as described in “Navigating Search Results” on
page 56.
Table view presents a screenload of records at a time in the form of a
table or chart. Table view may be useful if your search results in more
than one or two records. (See the online help topic “Select Table
View”.)
ID Works Standard and Enterprise Version 5 Operator’s Guide
Searching the Data Source
55
To change the width of a
column, place the pointer
between columns, then
click and drag the column
boundary.
Use scroll bars to see additional information.
While in Table view you navigate the search results using the same
techniques you use navigating Windows Explorer. You can also
select records in Table view the way you select files in Windows
Explorer. If you select a single record and then switch to Production
Form view (see the online help topic “Select Production Form view”),
the record you selected appears in the Production Form view. If you
select more than one record and then switch to Production Form
view, the last record you selected appears in the Production Form
view.
In the Production application, if you select only some records while in
the Table view and then from the File menu choose Print Selected
Cards, only the records you selected are printed.
In the Reporting application, if you select only some records while in
the Table view and then choose the Selection option in the Print
dialog box, only the records you selected are printed on your report.
ID Works Standard and Enterprise Version 5 Operator’s Guide
56
Searching the Data Source
Navigating Search Results
When a database search finds multiple records, the title bar of the ID
Works application window changes to describe which record is
currently visible and the total number of records that met the
specifications of the search. Also, the Next and Last buttons on the
toolbar become available for use (as well as the Next and Last
commands on the Record menu). If you click the Next button, the
title bar changes to “Record 2 of ...” and the First and Previous
buttons on the toolbar (as well as the First and Previous commands
on the Record menu) also become available for use. You can also
use the PAGE DOWN and PAGE UP keys to move through records.
ID Works Standard and Enterprise Version 5 Operator’s Guide
Searching the Data Source
57
Running a Stored Advanced Search
Enterprise
Edition Only!
Stored and advanced searches are not available in ID Works projects
connected to directory services.
Stored searches are useful if you perform the same search
repeatedly. Instead of typing the search information in the Quick
Search dialog box every time, you simply select the name of the
stored search from a list. Because stored searches are created using
the Advanced Search feature, you can search for additional kinds of
records, such as records that still need a photo. See “Creating a
Stored Search”.
To run a stored search:
1
Select Record and then Run Stored Search. A menu listing the
available stored searches appears to the right of the Record
menu.
2
Select the stored search to run. The search results appear in the
project window, and the name of the stored search appears in the
title bar of the window.
To repeat a stored search, simply click the Run Stored Search
button on the toolbar.
Creating a Stored Search
To create a stored search, click the button on the toolbar that has a
magnifying glass over a form (the Advanced Search button) or, from
the menu bar, select Record and then Advanced Search. The
Advanced Search dialog box opens. It has three tabbed pages and a
common area at the bottom that contains a display of the SQL search
ID Works Standard and Enterprise Version 5 Operator’s Guide
58
Searching the Data Source
string in its current state, a Search button for executing the search,
and Close and Cancel buttons.
Pressing ENTER on your keyboard while in the Advanced Search
dialog box is the same as clicking the Search button: the dialog box
closes and the search results appear in the application window. If you
reenter the Advanced Search dialog box, it appears as it was when
you executed the search. The ID Works software continues to
“remember” your last search until you close the project.
Filter Tab
On the Filter tab, Production Form field name lists all fields on the
current project’s Production Form that are directly connected to a
database table column. Composite fields are not listed. When you
select a field from the list in Production Form field name, the
prompt for that field appears in Production Form prompt and
possible selections become available in Constraint rule. When you
ID Works Standard and Enterprise Version 5 Operator’s Guide
Searching the Data Source
59
select a constraint rule, appropriate Field Constraint and Constraint
Detail selections become available for the current rule. Constraint
rules available for each Production Form field type, constraint values
required for those rules, and other details are given in “Search Rules”
on page 64.
Definitions of potential selections in the Field Constraint area are:
Include NULL values — If selected, records with null values in the
field (no information in the database column) will be included in the
search results.
Match text case-insensitive — If selected, case will be ignored. For
example, if you enter Smith for the Constraint value, records
containing “Smith”, “smith”, and “SMITH” (as well as other uppercase
and lowercase combinations of these letters) will be included in the
search results. Use this option when the database you are connected
to is case sensitive and capitalization in the database may be
inconsistent. This selection has no effect if the database is not case
sensitive.
Exclude constraint detail — If selected, all records that do not
match the Constraint value will be included in the search results.
Use this option when it is easier to define records that should not be
included.
In the Constraint Detail area, you may be required to enter
information in Constraint value only, in Constraint value and
Ending constraint value, or in the Multi-value Constraint List area. If
the Production Form field you selected is connected to a date type
database column, the Constraint value and Ending constraint
value have an arrow at the right side of the field. You can click the
arrow to select a date from a calendar or type a date in the field.
Using the Multi-value Constraint List
To select records that match any of a number of criteria (for example,
to select records for employees living in New York, London, or
Amsterdam), select the IN constraint rule. The Insert button in the
Multi-value Constraint List area becomes available. When you click
Insert, the Constraint List dialog box opens. Here you enter
constraint criteria (for example, Amsterdam to select employees living
in Amsterdam). When you click OK, the Constraint List dialog box
closes and the constraint you entered appears in the list of
constraints. You can insert as many constraints as necessary. You
ID Works Standard and Enterprise Version 5 Operator’s Guide
60
Searching the Data Source
can change or delete constraints in the list by selecting them and then
clicking Edit or Delete.
Wildcard characters may not be supported by your database for
entries in the Multi-value Constraint List. Consult your database
documentation for more information.
Adding and Clearing Constraints
When you have entered the required constraint detail for the
Production Form field and constraint rule you selected, the Add
Constraint button becomes available. When you click Add
Constraint, the constraint is added to the search string displayed at
the bottom of the dialog box, becoming part of your search when
executed.
Clear Constraint and Clear All Constraints are always available.
Clear Constraint removes from the search string the constraint
information for the Production Form field currently selected; Clear All
Constraints removes all constraint information from the search
string.
Modifying a Constraint
If you need to change a constraint, select the field you want to
change. The Constraint rule and Constraint values display the current
settings for that field. After making your changes, click Add
Constraint. The constraint is updated in the search string displayed
at the bottom of the dialog box.
ID Works Standard and Enterprise Version 5 Operator’s Guide
Searching the Data Source
61
Sort Order Tab
The Sort Order tab lets you control the order in which records are
presented. For example, you might want records shown in
alphabetical order by last name. The Sort Order tab allows for a twolevel sort, as shown in the example above. Specifying a sort order is
optional. If you do not select a sort order, search results will be
presented in an order determined by the database system.
In the Primary Sort area on the Sort Order tab, Production Form
field name lists all the text, list, date, auto sequence, and print count
fields on the current project’s Production Form. When you select a
field, the prompt for that field appears in Production Form prompt
and the buttons for selecting ascending or descending order become
available. The Secondary Sort area also becomes available, with the
remaining Production Form fields eligible for sorting listed in
Production Form field name.
ID Works Standard and Enterprise Version 5 Operator’s Guide
62
Searching the Data Source
When you have selected a field name in the Primary Sort area, the
Add Sorting button becomes available. When you click Add
Sorting, the sort order you specified is added to the search string
displayed at the bottom of the dialog box. Clicking Clear Sorting
removes all sort order information from the search string.
Manage Tab
The Manage tab lets you save your searches by name. It also lists
any existing stored searches for the current project and gives you a
way to change them.
If you entered search criteria on the other tabs of the dialog box
before clicking the Manage tab, “New Search” appears in the
Manage Opened Search area, as in the previous example. When you
click Save or Save As, the Store Advanced Search dialog box opens,
where you type the name you want to use for the stored search. After
ID Works Standard and Enterprise Version 5 Operator’s Guide
Searching the Data Source
63
an advanced search is named, clicking Save saves any changes you
made under that name.
Stored search names can be up to 25 characters long. They can
include spaces but they cannot contain any of the following
characters: \ / : * ? “ < > |
Stored search names are case-insensitive and must be unique within
the project. That is, if your project has a search named Needs Photo,
you cannot name a new search NEEDS PHOTO.
The current search criteria will remain active until you open another
search or close the project. To prevent accidentally losing your
changes, you can choose to have your search permanently saved in
its current form each time you select Search by selecting
Automatically save changes on Search.
If you click New, any search criteria you entered is cleared and you
can start over with a new search.
Changing a Stored Search
To change a stored search, select the search from Stored searches
for this project and then click Open. The name of the search you
selected appears in the Manage Opened Search area. Make the
necessary changes on the Filter and Sort Order tabs and then return
to the Manage tab of the dialog box. Click Save to save your changes
permanently or click Save As to choose a different name and keep
the original search.
Deleting a Stored Search
To delete a stored search, select the search from the Stored
searches for this project list and then click Open. The name of the
search you selected appears in the Manage Opened Search area.
Click Delete and then click Yes to permanently delete the search.
ID Works Standard and Enterprise Version 5 Operator’s Guide
64
Searching the Data Source
Search Rules
The rest of this chapter lists the constraint rules available for each
type of Production Form field, gives the required Constraint Detail for
each field type-constraint rule combination, and explains how the
Field Constraint options affect the constraint. Use this information for
reference if your searches do not return the results you expect.
Text Fields
Possible constraints for Production Form text fields or list fields
connected to a text database column are:
Supported Options
Constraint Rule
Required Detail
Exclude
Case Insensitive
NULL
=
A value
Yes
Yes
Yes
IN
Multi-value
Constraint List
Yes*
Yes†
Yes
IS NULL
None
No
No
No
IS NOT NULL
None
No
No
No
* Excludes entire list.
† Applies to entire list.
= Constraint Rule
Use the = rule to create a single-value text match. It supports using
the SQL wildcard characters % and _. If you do not choose any of the
options described below, the = rule is equivalent to the support
offered in the Quick Search dialog box. If you use a wildcard
character, the actual query will contain a LIKE operator. Example:
where EMPLOYEE.LASTNAME LIKE ‘Jon%’
If you do not use a wildcard character, the query will contain an =
operator. Example: where EMPLOYEE.LASTNAME = ‘Jones’
ID Works Standard and Enterprise Version 5 Operator’s Guide
Searching the Data Source
65
Exclude Option
If you select Exclude constraint detail, the search will return all the
values that do not match the constraint detail. Example:
where EMPLOYEE.LASTNAME <> ‘Jones’
Case Insensitive Option
D You can use
the exclude and
case-insensitive
options together
to exclude a
value regardless
of whether it is
uppercase or
lowercase.
The Match text case-insensitive option provides a way to find
matches without worrying about whether each character is uppercase
or lowercase. It converts the constraint detail text to uppercase and
uses the SQL UPPER function on the column. Example:
where UPPER(EMPLOYEE.LASTNAME) = ‘JONES’
Some databases, such as Access, provide this option natively. For
those databases, this option has no effect.Some databases, such as
Access, provide this option natively.
NULL Option
The Include NULL values option provides a way to include records
when the field has no entry in addition to the other values you are
searching for. Example: where ((EMPLOYEE.LASTNAME = ‘Jones’)
OR (EMPLOYEE.LASTNAME IS NULL))
You can use the Include NULL values option with either or both of
the other options.
IN Constraint Rule
Use the IN rule when you need to match several distinct values.
Example: where EMPLOYEE.LASTNAME IN (Jones, Li, Garcia)
Exclude Option
If you select Exclude constraint detail, the search will return all the
values that do not appear anywhere on the list. It applies an SQL
NOT to the constraint. Example: where EMPLOYEE.DEPARTMENT
NOT IN (‘Engineering’, ‘Marketing’, ‘Sales’)
ID Works Standard and Enterprise Version 5 Operator’s Guide
66
Searching the Data Source
Case Insensitive Option
D You can use
the exclude and
case-insensitive
options together
to exclude a
value regardless
of whether it is
uppercase or
lowercase.
The Match text case-insensitive option provides a way to find
matches without worrying about whether each character is uppercase
or lowercase. It converts the constraint detail text to uppercase and
uses the SQL UPPER function on the column. Example:
where UPPER EMPLOYEE.DEPARTMENT IN (‘ENGINEERING’,
‘MARKETING’, ‘SALES’)
Some databases, such as Access, provide this option natively. For
those databases, this option has no effect. Some databases, such as
Access, provide this option natively.
NULL Option
The Include NULL values option provides a way to include records
when the field has no entry in addition to the other values you are
searching for. Example: where (EMPLOYEE.DEPARTMENT IN
(‘Engineering’, ‘Marketing’, ‘Sales’)) OR (EMPLOYEE.DEPARTMENT
IS NULL)
You can use the Include NULL values option with either or both of
the other options.
IS NULL Constraint Rule
Use the IS NULL rule to find records when the field has no entry.
Example: where EMPLOYEE.LASTNAME IS NULL
No options are available with the IS NULL constraint rule.
IS NOT NULL Constraint Rule
Use the IS NOT NULL rule to match everything but NULL values for
this field. Example: where EMPLOYEE.LASTNAME IS NOT NULL
No options are available with the IS NOT NULL constraint rule.
ID Works Standard and Enterprise Version 5 Operator’s Guide
67
Searching the Data Source
Numeric Fields
Possible constraints for Production Form auto sequence fields, print
count fields, list fields, and text fields connected to a numeric
database column are:
Supported Options
Constraint Rule
Required Detail
Exclude
Case Insensitive
NULL
=
A value
Yes
No
Yes
>
A value
Yes
No
Yes
<
A value
Yes
No
Yes
BETWEEN
Two values
Yes
No
Yes
IN
Multi-value
Constraint List
Yes*
No
Yes
IS NULL
None
No
No
No
IS NOT NULL
None
No
No
No
* Excludes entire list.
= Constraint Rule
Use the = rule to match an exact value. Example:
where EMPLOYEE.DNMBR = 716
Exclude Option
If you select Exclude constraint detail, the search will return all
records with values that do not match the value you entered.
Example: where EMPLOYEE.DNMBR <> 716
NULL Option
If you select Include NULL values, the search will return all records
with NULL values in addition to records that contain the value you
entered. Example: where ((CARD.PRINTCOUNT = 0) OR
(CARD.PRINTCOUNT IS NULL))
ID Works Standard and Enterprise Version 5 Operator’s Guide
68
Searching the Data Source
You can use the Include NULL values option with the Exclude
constraint detail option.
> Constraint Rule
Use the > rule to find records with values greater than the value
entered (that is, more positive). Example: where EMPLOYEE.AGE >
65
Exclude Option
If you select Exclude constraint detail, the search will return all
records with values less than or equal to the value you entered.
Example: where EMPLOYEE.AGE <= 65
NULL Option
If you select Include NULL values, the search will return all records
with NULL values in addition to records that contain values greater
than the value you entered. Example: where ((EMPLOYEE.AGE >
65) OR (EMPLOYEE.AGE IS NULL))
You can use the Include NULL values option with the Exclude
constraint detail option.
< Constraint Rule
Use the < rule to find records with values less than the value entered
(less positive). Example: where EMPLOYEE.AGE < 18
Exclude Option
If you select Exclude constraint detail, the search will return all
records with values greater than or equal to the value you entered.
Example: where EMPLOYEE.AGE >= 18
NULL Option
If you select Include NULL values, the search will return all records
with NULL values in addition to records that contain values less than
the value you entered. Example: where ((EMPLOYEE.AGE < 18) OR
(EMPLOYEE.AGE IS NULL))
ID Works Standard and Enterprise Version 5 Operator’s Guide
Searching the Data Source
69
You can use the Include NULL values option with the Exclude
constraint detail option.
BETWEEN Constraint Rule
Use the BETWEEN rule to find records with values between two
bounding values (and including the bounding values). Example:
where EMPLOYEE.AGE BETWEEN 18 AND 65
Exclude Option
If you select Exclude constraint detail, the search will return all
records with values outside the bounding values you entered. It
applies an SQL NOT to the constraint. Example:
where EMPLOYEE.AGE NOT BETWEEN 18 AND 65
NULL Option
If you select Include NULL values, the search will return all records
with NULL values in addition to records that contain values between
the values you entered. Example: where ((EMPLOYEE.AGE
BETWEEN 18 AND 65) OR (EMPLOYEE.AGE IS NULL))
You can use the Include NULL values option with the Exclude
constraint detail option.
IN Constraint Rule
Use the IN rule to match multiple values. Example:
where EMPLOYEE.DNMBR IN (716, 729, 766)
Exclude Option
If you select Exclude constraint detail, the search will return all the
records with values that do not appear anywhere on the list. It applies
an SQL NOT to the constraint. Example: where EMPLOYEE.DNMBR
NOT IN (716, 729, 766)
NULL Option
If you select Include NULL values, the search will return all records
with NULL values in addition to records that contain values you
ID Works Standard and Enterprise Version 5 Operator’s Guide
70
Searching the Data Source
entered. Example: where ((EMPLOYEE.DNMBR IN (716, 729, 766))
OR (EMPLOYEE.DNMBR IS NULL))
You can use the Include NULL values option with the Exclude
constraint detail option.
IS NULL Constraint Rule
Use the IS NULL rule to find records when the field has no entry.
Example: where CARD.PRINTCOUNT IS NULL
No options are available with the IS NULL constraint rule.
IS NOT NULL Constraint Rule
Use the IS NOT NULL rule to match everything but NULL values for
this field. Example: where CARD.PRINTCOUNT IS NOT NULL
No options are available with the IS NOT NULL constraint rule.
ID Works Standard and Enterprise Version 5 Operator’s Guide
71
Searching the Data Source
Date Fields
The display and entry format for stored search dates is controlled by
the Short date style setting in the Regional Settings Properties
dialog box of the Control Panel. Setting the Short date style to use a
two-digit year may result in a year with a century that is not what the
user expected. To avoid this possibility, select a Short date style
setting that uses a four-digit year.
Possible constraints for Production Form date fields are:
Supported Options
Constraint Rule
Required Detail
Exclude
Case Insensitive
NULL
EXACT DATE
A date
Yes
No
Yes
SINCE
A date
Yes
No
Yes
BEFORE
A date
Yes
No
Yes
BETWEEN
Two dates
Yes
No
Yes
PREVIOUS _
DAYS
An integer (1 - 31)
No
No
No
PREVIOUS _
MONTHS
An integer (1 - 12)
No
No
No
IS NULL
None
No
No
No
IS NOT NULL
None
No
No
No
EXACT DATE Constraint Rule
Use the EXACT DATE rule to match an exact date value. Because
time may not be specified for the field but may be stored in the
database, this constraint is turned into a BETWEEN constraint for the
entered date between 00:00:00 and 23:59:59. Example:
where EMPLOYEE.HIREDATE BETWEEN 2000-11-16 00:00:00
AND 2000-11-16 23:59:59
ID Works Standard and Enterprise Version 5 Operator’s Guide
72
Searching the Data Source
Exclude Option
If you select Exclude constraint detail, the search will match any
date other than the one you entered. It applies an SQL NOT to the
constraint. Example: where EMPLOYEE.HIREDATE NOT
BETWEEN 2000-11-16 00:00:00 AND 2000-11-16 23:59:59
NULL Option
If you select Include NULL values, the search will return all records
with NULL values in addition to records that contain the date you
entered. Example: where ((EMPLOYEE.HIREDATE BETWEEN
2000-11-16 00:00:00 AND 2000-11-16 23:59:59) OR
(EMPLOYEE.HIREDATE IS NULL))
You can use the Include NULL values option with the Exclude
constraint detail option.
SINCE Constraint Rule
Use the SINCE rule to match any date greater than the entered date
(that is, going forward in time). Because time may not be specified for
the field but may be stored in the database, the time 23:59:59 is
added to the date. Example:
where EMPLOYEE.HIREDATE > 2000-11-16 23:59:59
Exclude Option
If you select Exclude constraint detail, the search will match any
date less than or equal to the one you entered. Example:
where EMPLOYEE.HIREDATE <= 2000-11-16 23:59:59
NULL Option
If you select Include NULL values, the search will return all records
with NULL values in addition to records that contain dates greater
than the date you entered. Example:
where ((EMPLOYEE.HIREDATE > 2000-11-16 23:59:59) OR
(EMPLOYEE.HIREDATE IS NULL))
You can use the Include NULL values option with the Exclude
constraint detail option.
ID Works Standard and Enterprise Version 5 Operator’s Guide
Searching the Data Source
73
BEFORE Constraint Rule
Use the BEFORE rule to match any date less than the entered date
(that is, going backward in time). Because time may not be specified
for the field but may be stored in the database, the time 00:00:00 is
added to the date. Example:
where EMPLOYEE.HIREDATE < 2000-11-16 00:00:00
Exclude Option
If you select Exclude constraint detail, the search will match any
date greater than or equal to the one you entered. Example:
where EMPLOYEE.HIREDATE >= 2000-11-16 00:00:00
NULL Option
If you select Include NULL values, the search will return all records
with NULL values in addition to records that contain dates less than
the date you entered. Example: where ((EMPLOYEE.HIREDATE <
2000-11-16 00:00:00) OR (EMPLOYEE.HIREDATE IS NULL))
You can use the Include NULL values option with the Exclude
constraint detail option.
BETWEEN Constraint Rule
Use the BETWEEN rule to find records with dates between two
bounding dates (and including the bounding dates). The Constraint
value must have a date earlier than Ending constraint value. To
search for dates in the future, set the Ending constraint value first
and then the Constraint value. Because time may not be specified
for the field but may be stored in the database, the time 00:00:00 is
added to the date you enter in Constraint value and 23:59:59 is
added to the date you enter in Ending constraint value. Example:
where EMPLOYEE.HIREDATE BETWEEN 1995-11-11 00:00:00
AND 1995-12-31 23:59:59
Exclude Option
If you select Exclude constraint detail, the search will return all
records with dates outside the bounding dates you entered. It applies
an SQL NOT to the constraint. Example:
ID Works Standard and Enterprise Version 5 Operator’s Guide
74
Searching the Data Source
where EMPLOYEE.HIREDATE NOT BETWEEN 1995-11-11
00:00:00 AND 1995-12-31 23:59:59
NULL Option
If you select Include NULL values, the search will return all records
with NULL values in addition to records that contain dates between
the dates you entered. Example: where ((EMPLOYEE.HIREDATE
BETWEEN 1995-11-11 00:00:00 AND 1995-12-31 23:59:59) OR
(EMPLOYEE.HIREDATE IS NULL))
You can use the Include NULL values option with the Exclude
constraint detail option.
PREVIOUS _ DAYS Constraint Rule
This constraint offers a relative date. When you open the search, the
starting date is calculated as Current Date - x Days where x is the
Constraint value you entered (from 1 to 31). Because time may not
be specified for the field but may be stored in the database, this rule
expands to use a > clause with time set to 00:00:00. Example: (query
opened on March 17, 2000, with Constraint value set to 1)
where CARD.ISSUEDATE > 2000-03-16 00:00:00
No options are available with the PREVIOUS _ DAYS constraint rule.
PREVIOUS _ MONTHS Constraint Rule
This constraint offers a relative date. When you open the search, the
starting date is calculated as the same day x months ago where x is
the Constraint value you entered (from 1 to 12). If the current day
does not exist in the starting month, the highest valid date for the
month is used. Because time may not be specified for the field but
may be stored in the database, this rule expands to use a > clause
with time set to 00:00:00. Example: (query opened on March 31,
2000, with Constraint value set to 1)
where CARD.ISSUEDATE > 2000-02-29 00:00:00
This behavior matches the operation of the Windows Explorer Find
File function.
No options are available with the PREVIOUS _ MONTHS constraint
rule.
ID Works Standard and Enterprise Version 5 Operator’s Guide
Searching the Data Source
IS NULL Constraint Rule
Use the IS NULL rule to find records when the field has no entry.
Example: where EMPLOYEE.HIREDATE IS NULL
No options are available with the IS NULL constraint rule.
IS NOT NULL Constraint Rule
Use the IS NOT NULL rule to match every record without NULL
values for this field. Example:
where MEMBER.TERMDATE IS NOT NULL
No options are available with the IS NOT NULL constraint rule.
ID Works Standard and Enterprise Version 5 Operator’s Guide
75
76
Searching the Data Source
Image Fields
Image field constraints are more complicated than other field types
because you can specify how an image field is treated as part of a
collection of image fields.
Possible constraints for Production Form photo, signature, or binary
fields are:
Supported Options
Constraint Rule
Required Detail
Exclude
Case Insensitive
NULL
All selected fields
have data
None
No
No
No
At least one selected
field has data
None
No
No
No
At least one selected
field is empty
None
No
No
No
All selected fields are
empty
None
No
No
No
If there is only one image field in your project—or if you need to query
only one of the image fields in your project—selecting either All
selected fields have data or At least one selected field has data
gives the same result. Similarly, selecting either At least one
selected field is empty or All selected fields are empty gives the
same result.
If your project has more than one image field and you need to
examine more than one of them for a search, the image fields that
share the same rule are grouped.
If images are stored as files, the existence constraint rules check for a
path in the database, not the actual file. If a file is moved, renamed, or
deleted, the Production user will receive a “file not found” message
when the operator attempts to view the record.
No options are available with any of the image field constraint rules.
ID Works Standard and Enterprise Version 5 Operator’s Guide
Searching the Data Source
77
All selected fields have data Constraint Rule
Use this rule to find records where an image exists for all image fields
that share this rule. Example: where (EMPLOYEE.FRONT IS NOT
NULL AND EMPLOYEE.RIGHT IS NOT NULL)
At least one selected field has data Constraint Rule
Use this rule to find records where at least one of the specified
images does not exist. Example: where (EMPLOYEE.FRONT IS
NULL OR EMPLOYEE.RIGHT IS NULL)
At least one selected field is empty Constraint Rule
Use this rule to find records where at least one of the specified
images exists. Example: where (EMPLOYEE.FRONT IS NOT NULL
OR EMPLOYEE.RIGHT IS NOT NULL)
All selected fields are empty Constraint Rule
Use this rule to find records where none of the specified images
exists. Example: where (EMPLOYEE.FRONT IS NULL AND
EMPLOYEE.RIGHT IS NULL)
ID Works Standard and Enterprise Version 5 Operator’s Guide
78
Searching the Data Source
ID Works Standard and Enterprise Version 5 Operator’s Guide
Index
Symbols
% wildcard character 53
< constraint rule, numeric database
field 68
= constraint rule
numeric database field 67
text field 64
> constraint rule, numeric database
field 68
_ wildcard character 53
A
Administrator application
definition 1
Advanced Search
Filter tab 58
Manage tab 62
running 57
search rules 64
Sort Order tab 61
All selected images exist constraint rule 77
Any of the selected images do not exist
constraint rule 77
Any of the selected images exists
constraint rule 77
B
barcode field
errors in Production 34
BEFORE constraint rule 73
BETWEEN constraint rule
date field 73
numeric database field 69
binary field
using in Production application 31
biometrics 31
C
card
previewing 33
printing 35
constraints
applying and clearing 60
multi-value constraint list 59
D
data from file, using in Production
application 32
database 37
adding a record in Production
application 40
changing information in Production
application 38
deleting a record in Production
application 41
database, using
Reporting application 46
searching
advanced search 57
for all records 52
quick search 51
wildcard characters 53
viewing records 56
date field
BEFORE constraint rule 73
BETWEEN constraint rule 73
entering information in Production
application 13
EXACT DATE constraint rule 71
IS NOT NULL constraint rule 75
IS NULL constraint rule 75
PREVIOUS _ DAYS constraint rule 74
PREVIOUS _ MONTHS constraint
rule 74
ID Works Standard and Enterprise Version 5 Operator’s Guide
80
Index
search constraints 71
searching in database 53
SINCE constraint rule 72
Designer application
definition 1
directory service 42, 47
adding a record in Production
application 44
changing information in Production
application 42
wildcard characters 53
E
EXACT DATE constraint rule 71
I
image field
All selected images exist constraint
rule 77
Any of the selected images do not exist
constraint rule 77
Any of the selected images exists
constraint rule 77
None of the selected images exists
constraint rule 77
search constraints 76
See also photo field, signature field
IN constraint rule
numeric database field 69
text field 65
IS NOT NULL constraint rule
date field 75
numeric database field 70
text field 66
IS NULL constraint rule
date field 75
numeric database field 70
text field 66
K
keyboard shortcuts 5
L
list field
selecting from in Production
application 14
log in 3
M
manage Advanced Search 62
mandatory field on Production form 33
mask, text field 12
mouse, using in ID Works 5
Multi-value Constraint List 59
N
None of the selected images exists
constraint rule 77
numeric database field
< constraint rule 68
= constraint rule 67
> constraint rule 68
BETWEEN constraint rule 69
IN constraint rule 69
IS NOT NULL constraint rule 70
IS NULL constraint rule 70
search constraints 67
O
opening a project
Production application 6
P
page setup for reports 48
password
changing 4
photo
adjusting 21
capturing with TWAIN device 18
capturing with Video for Windows
device 19
cropping 21
cropping (existing) 24
exporting 25
ID Works Standard and Enterprise Version 5 Operator’s Guide
81
Index
removing backdrop 25
rotating 23
selecting 23
source, selecting in Production
application 21
photo field
See also image field
using in Production application 15
photo from file, using in Production
application 16
pop-up menu 5
previewing cards 33
previewing reports 47
PREVIOUS _ DAYS constraint rule 74
PREVIOUS _ MONTHS constraint rule 74
print preview 47
printing
reports 47
printing cards 35
tracking print requests 36
Production application
definition 1
entering information 11
printing cards 35
taking photos 15, 29, 31
using a database 37
Production Form view 54
Production window
moving around in 10
project
definition 1
using in Production application 10
Q
Quick Search 51
R
read-only field on Production form 33
records, selecting 46
report, selecting 46
Reporting application
using a database 46
reports, page setup 48
right-click menu 5
S
search constraints
date field 71
image field 76
numeric database field 67
text field 64
search rules 64
searching database
quick search 51
stored search 57
wildcard character 53
signature
from file, using in Production
application 30
signature field
See also image field
using in Production application 29, 31
signatures, capturing 29
SINCE constraint rule 72
sort order for Advanced Search 61
stored search
changing 63
creating 57
deleting 63
managing 62
running 57
valid name 63
T
Table view
navigation 55
text field
= constraint rule 64
entering information in Production
application 11
IN constraint rule 65
IS NOT NULL constraint rule 66
IS NULL constraint rule 66
mask 12
ID Works Standard and Enterprise Version 5 Operator’s Guide
82
Index
toolbars 5
topcoat 34
TWAIN
device, using in Production
application 18, 19
interface standard 18
V
valid name
stored search 63
Video for Windows
standard interface 19
W
Welcome dialog box 4
wildcard characters
directory service 53
wildcard characters in database
searches 53
ID Works Standard and Enterprise Version 5 Operator’s Guide
Administrator’s Guide for
ID Works Standard and Enterprise
Version 5
October 2004
ii
Contents
About the Administrator’s Guide . . . . . . . . . . . . . . . . . . . . . . . . . . . . . . . . . . . . . vii
Chapter 1: System Overview . . . . . . . . . . . . . . . . . . . . . . . . . . . . . . . . . . . . . . . . . . . . . 1
Introducing the ID Works “Project” . . . . . . . . . . . . . . . . . . . . . . . . . . . . . . . . . . . . 1
Supporting ID Works Features . . . . . . . . . . . . . . . . . . . . . . . . . . . . . . . . . . . . . . . . 3
Modular Design . . . . . . . . . . . . . . . . . . . . . . . . . . . . . . . . . . . . . . . . . . . . . . . . . . 3
Security . . . . . . . . . . . . . . . . . . . . . . . . . . . . . . . . . . . . . . . . . . . . . . . . . . . . . . . . 3
Getting Started . . . . . . . . . . . . . . . . . . . . . . . . . . . . . . . . . . . . . . . . . . . . . . . . . . . . . 4
Logging In to an ID Works Application . . . . . . . . . . . . . . . . . . . . . . . . . . . . . . . . 4
Changing Your User Password . . . . . . . . . . . . . . . . . . . . . . . . . . . . . . . . . . . . . . 4
Using ID Works Applications . . . . . . . . . . . . . . . . . . . . . . . . . . . . . . . . . . . . . . . . 6
Working with Fields . . . . . . . . . . . . . . . . . . . . . . . . . . . . . . . . . . . . . . . . . . . . . . . 7
Inserting Fields. . . . . . . . . . . . . . . . . . . . . . . . . . . . . . . . . . . . . . . . . . . . . . . . 8
Selecting Fields . . . . . . . . . . . . . . . . . . . . . . . . . . . . . . . . . . . . . . . . . . . . . . . 8
Sizing Fields. . . . . . . . . . . . . . . . . . . . . . . . . . . . . . . . . . . . . . . . . . . . . . . . . 10
Arranging Fields . . . . . . . . . . . . . . . . . . . . . . . . . . . . . . . . . . . . . . . . . . . . . . 10
Changing Field Properties . . . . . . . . . . . . . . . . . . . . . . . . . . . . . . . . . . . . . . 11
Cutting, Copying, and Pasting Fields . . . . . . . . . . . . . . . . . . . . . . . . . . . . . . 11
Developing a Project . . . . . . . . . . . . . . . . . . . . . . . . . . . . . . . . . . . . . . . . . . . . . 12
Create the ID Works Project . . . . . . . . . . . . . . . . . . . . . . . . . . . . . . . . . . . . 12
Create the Card Design . . . . . . . . . . . . . . . . . . . . . . . . . . . . . . . . . . . . . . . . 13
Create the Production Form. . . . . . . . . . . . . . . . . . . . . . . . . . . . . . . . . . . . . 13
Create the Report Design . . . . . . . . . . . . . . . . . . . . . . . . . . . . . . . . . . . . . . 13
Specify a Database . . . . . . . . . . . . . . . . . . . . . . . . . . . . . . . . . . . . . . . . . . . 13
Tie It All Together. . . . . . . . . . . . . . . . . . . . . . . . . . . . . . . . . . . . . . . . . . . . . 13
Try It Out . . . . . . . . . . . . . . . . . . . . . . . . . . . . . . . . . . . . . . . . . . . . . . . . . . . 14
Implement Production . . . . . . . . . . . . . . . . . . . . . . . . . . . . . . . . . . . . . . . . . 14
Chapter 2: Plan and Create the Card Design . . . . . . . . . . . . . . . . . . . . . . . . . . . . . . .
What Is a Card Design? . . . . . . . . . . . . . . . . . . . . . . . . . . . . . . . . . . . . . . . . . . . . .
Card Window . . . . . . . . . . . . . . . . . . . . . . . . . . . . . . . . . . . . . . . . . . . . . . . . . . .
Orientation . . . . . . . . . . . . . . . . . . . . . . . . . . . . . . . . . . . . . . . . . . . . . . . . . . . . .
Size . . . . . . . . . . . . . . . . . . . . . . . . . . . . . . . . . . . . . . . . . . . . . . . . . . . . . . . . . .
Background . . . . . . . . . . . . . . . . . . . . . . . . . . . . . . . . . . . . . . . . . . . . . . . . . . . .
Topcoat . . . . . . . . . . . . . . . . . . . . . . . . . . . . . . . . . . . . . . . . . . . . . . . . . . . . . . .
Types of Card Fields . . . . . . . . . . . . . . . . . . . . . . . . . . . . . . . . . . . . . . . . . . . . . . .
Text Field . . . . . . . . . . . . . . . . . . . . . . . . . . . . . . . . . . . . . . . . . . . . . . . . . . . . . .
Photo Field . . . . . . . . . . . . . . . . . . . . . . . . . . . . . . . . . . . . . . . . . . . . . . . . . . . .
Date Field . . . . . . . . . . . . . . . . . . . . . . . . . . . . . . . . . . . . . . . . . . . . . . . . . . . . .
17
17
17
18
19
20
21
22
22
23
24
ID Works Standard and Enterprise Version 5 Administrator’s Guide
iii
Signature Field . . . . . . . . . . . . . . . . . . . . . . . . . . . . . . . . . . . . . . . . . . . . . . . . .
Barcode Field . . . . . . . . . . . . . . . . . . . . . . . . . . . . . . . . . . . . . . . . . . . . . . . . . .
Magnetic Stripe Field . . . . . . . . . . . . . . . . . . . . . . . . . . . . . . . . . . . . . . . . . . . . .
Smart Card Field . . . . . . . . . . . . . . . . . . . . . . . . . . . . . . . . . . . . . . . . . . . . . . . .
Variable Graphic Field . . . . . . . . . . . . . . . . . . . . . . . . . . . . . . . . . . . . . . . . . . . .
Static Text Field . . . . . . . . . . . . . . . . . . . . . . . . . . . . . . . . . . . . . . . . . . . . . . . . .
Static Graphic Field . . . . . . . . . . . . . . . . . . . . . . . . . . . . . . . . . . . . . . . . . . . . . .
Non-Printable Area . . . . . . . . . . . . . . . . . . . . . . . . . . . . . . . . . . . . . . . . . . . . . .
Line . . . . . . . . . . . . . . . . . . . . . . . . . . . . . . . . . . . . . . . . . . . . . . . . . . . . . . . . . .
Rectangle . . . . . . . . . . . . . . . . . . . . . . . . . . . . . . . . . . . . . . . . . . . . . . . . . . . . .
Ellipse . . . . . . . . . . . . . . . . . . . . . . . . . . . . . . . . . . . . . . . . . . . . . . . . . . . . . . . .
Common Card Field Characteristics . . . . . . . . . . . . . . . . . . . . . . . . . . . . . . . . .
Names . . . . . . . . . . . . . . . . . . . . . . . . . . . . . . . . . . . . . . . . . . . . . . . . . . . . .
Alignment . . . . . . . . . . . . . . . . . . . . . . . . . . . . . . . . . . . . . . . . . . . . . . . . . . .
Sample Data . . . . . . . . . . . . . . . . . . . . . . . . . . . . . . . . . . . . . . . . . . . . . . . .
Position/Size . . . . . . . . . . . . . . . . . . . . . . . . . . . . . . . . . . . . . . . . . . . . . . . .
Fonts . . . . . . . . . . . . . . . . . . . . . . . . . . . . . . . . . . . . . . . . . . . . . . . . . . . . . .
Text Field Colors . . . . . . . . . . . . . . . . . . . . . . . . . . . . . . . . . . . . . . . . . . . . .
Arranging Fields on the Card . . . . . . . . . . . . . . . . . . . . . . . . . . . . . . . . . . . . . . .
Printing Sample Cards . . . . . . . . . . . . . . . . . . . . . . . . . . . . . . . . . . . . . . . . . . . .
Printing Cards in the Production Application . . . . . . . . . . . . . . . . . . . . . . . . . . .
Card Design Considerations . . . . . . . . . . . . . . . . . . . . . . . . . . . . . . . . . . . . . . . . .
24
25
29
30
31
32
33
34
34
35
35
36
36
36
36
37
37
38
38
39
40
40
Chapter 3: Plan and Create the Production Form . . . . . . . . . . . . . . . . . . . . . . . . . . .
What Is a Production Form? . . . . . . . . . . . . . . . . . . . . . . . . . . . . . . . . . . . . . . . . .
Production Form Window . . . . . . . . . . . . . . . . . . . . . . . . . . . . . . . . . . . . . . . . .
Background . . . . . . . . . . . . . . . . . . . . . . . . . . . . . . . . . . . . . . . . . . . . . . . . . . . .
Size . . . . . . . . . . . . . . . . . . . . . . . . . . . . . . . . . . . . . . . . . . . . . . . . . . . . . . . . . .
Types of Production Form Fields . . . . . . . . . . . . . . . . . . . . . . . . . . . . . . . . . . . . .
Text Field . . . . . . . . . . . . . . . . . . . . . . . . . . . . . . . . . . . . . . . . . . . . . . . . . . . . . .
Text Field Masks . . . . . . . . . . . . . . . . . . . . . . . . . . . . . . . . . . . . . . . . . . . . .
Photo Field . . . . . . . . . . . . . . . . . . . . . . . . . . . . . . . . . . . . . . . . . . . . . . . . . . . .
Date Field . . . . . . . . . . . . . . . . . . . . . . . . . . . . . . . . . . . . . . . . . . . . . . . . . . . . .
Signature Field . . . . . . . . . . . . . . . . . . . . . . . . . . . . . . . . . . . . . . . . . . . . . . . . .
List Field . . . . . . . . . . . . . . . . . . . . . . . . . . . . . . . . . . . . . . . . . . . . . . . . . . . . . .
Composite Field . . . . . . . . . . . . . . . . . . . . . . . . . . . . . . . . . . . . . . . . . . . . . . . . .
Print Count Field . . . . . . . . . . . . . . . . . . . . . . . . . . . . . . . . . . . . . . . . . . . . . . . .
Auto Sequence Field . . . . . . . . . . . . . . . . . . . . . . . . . . . . . . . . . . . . . . . . . . . . .
Binary Field . . . . . . . . . . . . . . . . . . . . . . . . . . . . . . . . . . . . . . . . . . . . . . . . . . . .
Event Button . . . . . . . . . . . . . . . . . . . . . . . . . . . . . . . . . . . . . . . . . . . . . . . . . . .
Static Text Field . . . . . . . . . . . . . . . . . . . . . . . . . . . . . . . . . . . . . . . . . . . . . . . . .
Static Graphic Field . . . . . . . . . . . . . . . . . . . . . . . . . . . . . . . . . . . . . . . . . . . . . .
41
41
42
43
44
44
45
46
52
55
56
57
58
60
62
63
64
65
66
ID Works Standard and Enterprise Version 5 Administrator’s Guide
iv
Common Production Form Field Characteristics . . . . . . . . . . . . . . . . . . . . . . . .
Names . . . . . . . . . . . . . . . . . . . . . . . . . . . . . . . . . . . . . . . . . . . . . . . . . . . . .
Alignment . . . . . . . . . . . . . . . . . . . . . . . . . . . . . . . . . . . . . . . . . . . . . . . . . . .
Sample Data . . . . . . . . . . . . . . . . . . . . . . . . . . . . . . . . . . . . . . . . . . . . . . . .
Position/Size . . . . . . . . . . . . . . . . . . . . . . . . . . . . . . . . . . . . . . . . . . . . . . . .
Fonts . . . . . . . . . . . . . . . . . . . . . . . . . . . . . . . . . . . . . . . . . . . . . . . . . . . . . .
Text Field Colors . . . . . . . . . . . . . . . . . . . . . . . . . . . . . . . . . . . . . . . . . . . . .
Field Options . . . . . . . . . . . . . . . . . . . . . . . . . . . . . . . . . . . . . . . . . . . . . . . .
Arranging Fields on the Production Form . . . . . . . . . . . . . . . . . . . . . . . . . . . . .
Changing the Tab Order of Fields . . . . . . . . . . . . . . . . . . . . . . . . . . . . . . . . . . .
Creating a Production Form from a Card Design . . . . . . . . . . . . . . . . . . . . . . . .
Adding Fields to a Production Form Created from a Card Design . . . . . . . . . .
About the Created Production Form . . . . . . . . . . . . . . . . . . . . . . . . . . . . . . . . .
67
67
67
67
67
68
68
68
69
70
71
72
72
Chapter 4: Plan and Create the Report Design . . . . . . . . . . . . . . . . . . . . . . . . . . . . .
What Is a Report Design? . . . . . . . . . . . . . . . . . . . . . . . . . . . . . . . . . . . . . . . . . . .
Report Window . . . . . . . . . . . . . . . . . . . . . . . . . . . . . . . . . . . . . . . . . . . . . . . . .
Report Properties . . . . . . . . . . . . . . . . . . . . . . . . . . . . . . . . . . . . . . . . . . . . . . .
Report Block Layout. . . . . . . . . . . . . . . . . . . . . . . . . . . . . . . . . . . . . . . . . . .
Header and Footer . . . . . . . . . . . . . . . . . . . . . . . . . . . . . . . . . . . . . . . . . . . .
Page Setup . . . . . . . . . . . . . . . . . . . . . . . . . . . . . . . . . . . . . . . . . . . . . . . . . . . .
Types of Report Fields . . . . . . . . . . . . . . . . . . . . . . . . . . . . . . . . . . . . . . . . . . . . .
Text Field . . . . . . . . . . . . . . . . . . . . . . . . . . . . . . . . . . . . . . . . . . . . . . . . . . . . . .
Photo Field . . . . . . . . . . . . . . . . . . . . . . . . . . . . . . . . . . . . . . . . . . . . . . . . . . . .
Date Field . . . . . . . . . . . . . . . . . . . . . . . . . . . . . . . . . . . . . . . . . . . . . . . . . . . . .
Signature Field . . . . . . . . . . . . . . . . . . . . . . . . . . . . . . . . . . . . . . . . . . . . . . . . .
Barcode Field . . . . . . . . . . . . . . . . . . . . . . . . . . . . . . . . . . . . . . . . . . . . . . . . . .
Variable Graphic Field . . . . . . . . . . . . . . . . . . . . . . . . . . . . . . . . . . . . . . . . . . . .
Static Text Field . . . . . . . . . . . . . . . . . . . . . . . . . . . . . . . . . . . . . . . . . . . . . . . . .
Static Graphic Field . . . . . . . . . . . . . . . . . . . . . . . . . . . . . . . . . . . . . . . . . . . . . .
Common Report Field Characteristics . . . . . . . . . . . . . . . . . . . . . . . . . . . . . . . .
Names . . . . . . . . . . . . . . . . . . . . . . . . . . . . . . . . . . . . . . . . . . . . . . . . . . . . .
Alignment . . . . . . . . . . . . . . . . . . . . . . . . . . . . . . . . . . . . . . . . . . . . . . . . . . .
Sample Data . . . . . . . . . . . . . . . . . . . . . . . . . . . . . . . . . . . . . . . . . . . . . . . .
Position/Size . . . . . . . . . . . . . . . . . . . . . . . . . . . . . . . . . . . . . . . . . . . . . . . .
Fonts . . . . . . . . . . . . . . . . . . . . . . . . . . . . . . . . . . . . . . . . . . . . . . . . . . . . . .
Text Field Colors . . . . . . . . . . . . . . . . . . . . . . . . . . . . . . . . . . . . . . . . . . . . .
Arranging Fields on the Report Block . . . . . . . . . . . . . . . . . . . . . . . . . . . . . . . .
Previewing and Printing Sample Reports . . . . . . . . . . . . . . . . . . . . . . . . . . . . .
75
75
76
77
77
77
78
78
79
80
81
81
82
85
86
87
87
87
88
88
88
88
89
89
90
ID Works Standard and Enterprise Version 5 Administrator’s Guide
v
Chapter 5: Using Databases with ID Works Projects . . . . . . . . . . . . . . . . . . . . . . . . 91
Supported Databases . . . . . . . . . . . . . . . . . . . . . . . . . . . . . . . . . . . . . . . . . . . . . . 91
Connecting to Multiple Tables in a Database . . . . . . . . . . . . . . . . . . . . . . . . . . 92
Table Types . . . . . . . . . . . . . . . . . . . . . . . . . . . . . . . . . . . . . . . . . . . . . . . . . . . . 93
Database Login . . . . . . . . . . . . . . . . . . . . . . . . . . . . . . . . . . . . . . . . . . . . . . . . . 93
Using Schema/Owner Name to Identify Tables in Production . . . . . . . . . . . . . . 94
Data Types . . . . . . . . . . . . . . . . . . . . . . . . . . . . . . . . . . . . . . . . . . . . . . . . . . . . 95
Controlling Database Activities . . . . . . . . . . . . . . . . . . . . . . . . . . . . . . . . . . . . . . 98
Database Design Considerations . . . . . . . . . . . . . . . . . . . . . . . . . . . . . . . . . . . . . 99
Understanding Database Errors . . . . . . . . . . . . . . . . . . . . . . . . . . . . . . . . . . . . 99
BLOB-related Considerations . . . . . . . . . . . . . . . . . . . . . . . . . . . . . . . . . . . . . 100
File Name Considerations . . . . . . . . . . . . . . . . . . . . . . . . . . . . . . . . . . . . . . . . 100
Creating a Database from ID Works Designer . . . . . . . . . . . . . . . . . . . . . . . . . . 102
Adding Fields to a Database Created from ID Works Designer . . . . . . . . . . . 103
About the Created Database . . . . . . . . . . . . . . . . . . . . . . . . . . . . . . . . . . . . . . 104
Importing Data from a Text File to an Access Database . . . . . . . . . . . . . . . . . 106
Exporting Data from an Access Database to a Text File . . . . . . . . . . . . . . . . . 107
Chapter 6: Using a Directory Service with ID Works Projects . . . . . . . . . . . . . . . .
Supported Directory Services . . . . . . . . . . . . . . . . . . . . . . . . . . . . . . . . . . . . . . .
Directory Service Login . . . . . . . . . . . . . . . . . . . . . . . . . . . . . . . . . . . . . . . . . . . .
Data Types . . . . . . . . . . . . . . . . . . . . . . . . . . . . . . . . . . . . . . . . . . . . . . . . . . . . . .
Project Design Considerations . . . . . . . . . . . . . . . . . . . . . . . . . . . . . . . . . . . . . .
Using the Field Connector Window . . . . . . . . . . . . . . . . . . . . . . . . . . . . . . . . . .
109
109
110
110
110
112
Chapter 7: Connecting Fields . . . . . . . . . . . . . . . . . . . . . . . . . . . . . . . . . . . . . . . . . .
What Is the Field Connector? . . . . . . . . . . . . . . . . . . . . . . . . . . . . . . . . . . . . . . .
Field Connections Window . . . . . . . . . . . . . . . . . . . . . . . . . . . . . . . . . . . . . . . . .
Data Source Area . . . . . . . . . . . . . . . . . . . . . . . . . . . . . . . . . . . . . . . . . . . . . .
Production Form Area . . . . . . . . . . . . . . . . . . . . . . . . . . . . . . . . . . . . . . . . . . .
Production Output Area . . . . . . . . . . . . . . . . . . . . . . . . . . . . . . . . . . . . . . . . . .
Connect and Disconnect Buttons . . . . . . . . . . . . . . . . . . . . . . . . . . . . . . . . . .
Restrictions on Connections to Database Columns . . . . . . . . . . . . . . . . . . . .
Restrictions on Connections to Card Design Fields . . . . . . . . . . . . . . . . . . . .
Restrictions on Connections to Report Design Fields . . . . . . . . . . . . . . . . . . .
113
113
114
115
116
116
116
117
118
119
Chapter 8: Working with Capture Options . . . . . . . . . . . . . . . . . . . . . . . . . . . . . . . .
Capturing Photos . . . . . . . . . . . . . . . . . . . . . . . . . . . . . . . . . . . . . . . . . . . . . . . . .
Photo from File . . . . . . . . . . . . . . . . . . . . . . . . . . . . . . . . . . . . . . . . . . . . . . . .
TWAIN Interface . . . . . . . . . . . . . . . . . . . . . . . . . . . . . . . . . . . . . . . . . . . . . . .
Video for Windows Interface . . . . . . . . . . . . . . . . . . . . . . . . . . . . . . . . . . . . . .
Capturing Signatures . . . . . . . . . . . . . . . . . . . . . . . . . . . . . . . . . . . . . . . . . . . . . .
121
121
122
124
125
126
ID Works Standard and Enterprise Version 5 Administrator’s Guide
vi
Capturing Biometric Templates . . . . . . . . . . . . . . . . . . . . . . . . . . . . . . . . . . . . .
Optional Capture Devices . . . . . . . . . . . . . . . . . . . . . . . . . . . . . . . . . . . . . . . . . .
Configuring Optional Capture Devices . . . . . . . . . . . . . . . . . . . . . . . . . . . . . .
Configuring Biometric Devices . . . . . . . . . . . . . . . . . . . . . . . . . . . . . . . . . . . .
127
128
128
130
Chapter 9: Working with Printer Options . . . . . . . . . . . . . . . . . . . . . . . . . . . . . . . . .
Introducing Printer Plug-ins . . . . . . . . . . . . . . . . . . . . . . . . . . . . . . . . . . . . . . . .
Specifying Plug-ins . . . . . . . . . . . . . . . . . . . . . . . . . . . . . . . . . . . . . . . . . . . . . . .
Printing Multiple Copies of Cards . . . . . . . . . . . . . . . . . . . . . . . . . . . . . . . . . . .
Printing Graphics with the Card Printer’s K-panel . . . . . . . . . . . . . . . . . . . . . .
Field Properties Print Options . . . . . . . . . . . . . . . . . . . . . . . . . . . . . . . . . . . . .
Override Field-level Settings . . . . . . . . . . . . . . . . . . . . . . . . . . . . . . . . . . . . . .
Printing Order . . . . . . . . . . . . . . . . . . . . . . . . . . . . . . . . . . . . . . . . . . . . . . . . .
Specifying the Print Queue Path . . . . . . . . . . . . . . . . . . . . . . . . . . . . . . . . . . . .
133
133
133
134
134
135
137
137
138
Chapter 10: Production-only Systems . . . . . . . . . . . . . . . . . . . . . . . . . . . . . . . . . . .
Physical Components . . . . . . . . . . . . . . . . . . . . . . . . . . . . . . . . . . . . . . . . . . . . .
Network Access . . . . . . . . . . . . . . . . . . . . . . . . . . . . . . . . . . . . . . . . . . . . . . . . . .
Locate the Users File on a File Server . . . . . . . . . . . . . . . . . . . . . . . . . . . . . .
Database Considerations . . . . . . . . . . . . . . . . . . . . . . . . . . . . . . . . . . . . . . . . . .
Distributing ID Works Projects . . . . . . . . . . . . . . . . . . . . . . . . . . . . . . . . . . . . . .
Exporting ID Works Projects . . . . . . . . . . . . . . . . . . . . . . . . . . . . . . . . . . . . . .
Importing ID Works Projects . . . . . . . . . . . . . . . . . . . . . . . . . . . . . . . . . . . . . .
139
139
140
140
141
142
142
142
Chapter 11: Projects with Multiple Cards . . . . . . . . . . . . . . . . . . . . . . . . . . . . . . . . . 145
Chapter 12: System Security . . . . . . . . . . . . . . . . . . . . . . . . . . . . . . . . . . . . . . . . . . .
ID Works Security Features . . . . . . . . . . . . . . . . . . . . . . . . . . . . . . . . . . . . . . . .
Managing Users . . . . . . . . . . . . . . . . . . . . . . . . . . . . . . . . . . . . . . . . . . . . . . .
Changing the Admin User Name Password. . . . . . . . . . . . . . . . . . . . . . . .
User Privileges . . . . . . . . . . . . . . . . . . . . . . . . . . . . . . . . . . . . . . . . . . . . . .
Locating the Users File . . . . . . . . . . . . . . . . . . . . . . . . . . . . . . . . . . . . . . .
Requiring Login after Inactivity. . . . . . . . . . . . . . . . . . . . . . . . . . . . . . . . . .
Tracking Activity with the Audit Log . . . . . . . . . . . . . . . . . . . . . . . . . . . . . . . . .
Viewing the Audit Log . . . . . . . . . . . . . . . . . . . . . . . . . . . . . . . . . . . . . . . .
Exporting the Audit Log . . . . . . . . . . . . . . . . . . . . . . . . . . . . . . . . . . . . . . .
Windows Security Features . . . . . . . . . . . . . . . . . . . . . . . . . . . . . . . . . . . . . . . .
Installing and Uninstalling ID Works Software . . . . . . . . . . . . . . . . . . . . . . . . .
Locating Project Files . . . . . . . . . . . . . . . . . . . . . . . . . . . . . . . . . . . . . . . . . . .
Protecting Project Files from Modification . . . . . . . . . . . . . . . . . . . . . . . . . . . .
147
147
148
148
149
149
150
151
153
154
154
154
154
155
ID Works Standard and Enterprise Version 5 Administrator’s Guide
vii
About the Administrator’s Guide
This document is one of three sources of information about
Datacard® ID Works® Standard and Enterprise identification
software.
•
•
•
The CD insert tells how to install ID Works software.
The online help system tells you how to perform ID Works tasks.
You can access the online help system from the Help menu in
each ID Works application or by pressing the F1 key.
This Administrator’s Guide, part of the Online Reference Library,
explains why you might want to use the various features
available in the ID Works applications. It also suggests the order
in which tasks should be performed. The Online Reference
Library also contains documents about printer plug-ins available
for use with ID Works Standard and Enterprise.
ID Works Standard and Enterprise Version 5 Administrator’s Guide
viii
ID Works Standard and Enterprise Version 5 Administrator’s Guide
System Overview
1
Datacard® ID Works® Standard and Enterprise
identification software includes four applications:
ID Works Designer lets you create projects that
meet your organization’s specific needs for card
designs, report designs, data entry, and database access.
In some organizations, one person performs all the Designer
functions. In others, a graphic artist may be responsible for card
designs while a programmer, database administrator, and/or
manager develop the Production Forms, reports, and connections.
ID Works Production lets a Production operator use the projects you
create in the Designer application to gather information, access your
database, and print identification cards.
ID Works Reporting lets a Production operator generate and print
image-rich reports from your database.
ID Works Administrator contains tools to manage user accounts,
monitor security, and configure your ID Works software.
Introducing the ID Works “Project”
An ID Works project is similar to a folder or directory on a computer: it
is the container that holds information about an identification
implementation. In fact, when you create an ID Works project, the
software creates a folder on your hard drive with the name you give
the project. And, just as you can have many folders on your
computer, you can have many ID Works projects. The only limitation
is your disk capacity.
A project contains a Production Form and one or more card designs
(although a card design is not required). Optionally, your project can
contain one or more report designs and one or more stored searches.
By using field connections, information entered in a Production Form
can be saved in a database, printed on a card, used in a report, or all
of the above. The Production Form can also be used to query an
existing database so that you can add or change information in the
database or print cards and reports using information in the database.
ID Works Standard and Enterprise Version 5 Administrator’s Guide
2
System Overview
ID Works Standard and Enterprise Version 5 Administrator’s Guide
3
System Overview
Supporting ID Works Features
So far, this chapter has described how ID Works software lets you
create and use identification projects in the way that is best for your
organization. A number of peripheral features that support this
flexibility deserve mention.
Modular Design
ID Works identification software was designed to be modular, so you
need purchase only the truly necessary components for each of your
locations. For example, a corporation with a headquarters and five
manufacturing plants might choose to have all ID Works projects
designed at headquarters on a system with the ID Works Designer
application, and then export the projects to the manufacturing plants,
where ID Works Production and Reporting applications are used. The
process for implementing ID Works projects on production-only
systems is explained in Chapter 10, Production-only Systems.
Another aspect of modular design is the ability to add image capture
options and printer options through the use of plug-ins. Using plug-ins
means the latest card printing technology can be supported by ID
Works software quickly. In addition, some capture options can be
configured specifically for your environment. Capture and printing
options are described in Chapter 8, Working with Capture Options
and Chapter 9, Working with Printer Options respectively.
Security
An identification program is not secure if the computer system that
gathers information and produces the ID cards is not secure. ID
Works Standard and Enterprise identification software gives you a
number of ways to ensure the security of your identification program.
Using the ID Works Administrator application, you authenticate users
with individual, password-protected accounts. User account
privileges can be tailored to allow access to specific applications,
activities, and projects. Significant user actions, such as logging in,
opening projects, and printing cards, create entries in an audit log.
You can review and print the audit log using the ID Works
Administrator application.
ID Works Standard and Enterprise Version 5 Administrator’s Guide
4
System Overview
You can track changes ID Works users make to your database. In ID
Works Designer you specify whether changing a Production Form
field is to be recorded in the audit log.
See “System Security” on page 147 for complete information.
Getting Started
The rest of this chapter explains the steps you take to begin using
your ID Works identification software.
Logging In to an ID Works Application
To begin using ID Works software, double-click the ID Works
Designer shortcut icon on your desktop.
In the User Login dialog box, type your User Name and User
Password, and then click the Log in button.
The default User Name and User Password are Admin and Admin. If
you have not already done so, change the password for the default
user account and create a user account with System Administrator
privileges for yourself. See “Changing the Admin User Name
Password” on page 148 for more information.
When you are logged in to an ID Works application, you do not need
to supply your user name and password again to start another ID
Works application.
Changing Your User Password
Each time you log in to an ID Works application you have the
opportunity to change your user password. To change your
password, click the Change Password button any time before
completing the login. The Login and Change Password dialog box
opens, where you must supply your user name, current password,
and a new password. You will also need to type the new password a
second time for verification. Then click the Log in button to complete
the change and log in to the ID Works application.
Passwords can be 1 to 10 characters long and can include any
character you can type from the keyboard. Passwords are not case
ID Works Standard and Enterprise Version 5 Administrator’s Guide
5
System Overview
sensitive. That is, ADMIN, admin, and AdmiN are all treated as the
same.
Using the Welcome Dialog Box
After you have changed your password or entered it and clicked Log
in, the Welcome dialog box appears.
From this dialog box you can start a new project (see “Create the ID
Works Project” on page 12) or open an existing project. If the project
you want to open is not listed, click Open projects or More projects
to display the Open Project dialog box, which lists all ID Works
projects loaded on your computer.
You can also choose not to have the Welcome dialog box display by
clearing the check mark next to Show this window at startup. If you
hide the Welcome dialog box and later want to show it again, from the
Designer menu bar, select View and then Show Welcome on
startup. The selection you make applies only to the Windows user
name you used to log in and only to the Designer application. Other
ID Works applications have separate settings for showing the
Welcome window.
ID Works Standard and Enterprise Version 5 Administrator’s Guide
6
System Overview
Using ID Works Applications
If you are familiar with your Microsoft® Windows® operating system
and typical office applications, such as word processing and
presentation software, ID Works software will feel familiar to you. ID
Works applications let you perform most actions several ways: by
selecting menu commands with the mouse, or with the keyboard, or
by clicking a toolbar button, or by clicking the right mouse button and
selecting from the pop-up menu. Key commands or shortcuts for
actions common to many applications—such as cut, paste, and
save—follow Microsoft Office conventions; you do not have to relearn
your favorite shortcuts.
Most ID Works applications have several toolbars, and you can
display or hide toolbars on a case-by-case basis. When you rest the
mouse pointer on a toolbar button, the name and function of the
button appears.
A status bar at the bottom of the window provides additional
information about the application. As with toolbars, you can choose to
view or hide the status bar.
ID Works Standard and Enterprise Version 5 Administrator’s Guide
7
System Overview
Status bar
These fields show
sample data.
Working with Fields
Every element on a Production Form, card design, or report block is
considered a field. Every field has a name. The Designer application
names fields as you insert them, but you can change the systemsupplied name (Text Field 1, for example) to a more descriptive name
(such as FirstName). Giving fields descriptive names will help you
when you are using the field connector to associate Production Form
fields with card or report block fields and database table columns.
Field names can be up to 100 characters long and can contain any
character you can type on your keyboard.
ID Works Standard and Enterprise Version 5 Administrator’s Guide
8
System Overview
If you will connect your ID Works project to an existing database,
consider giving your ID Works Production Form fields the same
names as the database table columns with which they will be
associated.
Using the View menu, you can choose to have the fields in your
Production Form, card design, and report block show either field
names or sample data (which you provide) as you work in the ID
Works Designer application.
Inserting Fields
To insert a field, from the menu bar, select Insert and then the type of
field you want to add to your Production Form, card, or report block.
You can copy and paste fields within a project component and
between a card and report block. You cannot paste fields between
the Production Form and a card or report block. You can, however,
create Production Form fields from card fields. See the online help
topic “Add fields to a Production Form from a card design”.
The types of fields you can insert depend on whether the Production
Form, card design, or report block is active. Some field types, such as
list fields, can be inserted only in a Production Form. Others, such as
a magnetic stripe field, apply only to a card design.
Selecting Fields
When a field is inserted, it is automatically selected, meaning that you
can make changes to it. A field that is selected has a border of
diagonal lines and six or eight squares (called sizing handles) around
the border, depending on the type of field. In addition, when a single
field is selected, the status bar reports the field name, field type,
component name, and component type (card, Production Form, etc.).
ID Works Standard and Enterprise Version 5 Administrator’s Guide
9
System Overview
Text fields have six sizing handles
Graphics fields have
eight sizing handles
There are four ways to select a field that was previously inserted,
position your mouse pointer over the field you want to change and
click.
You can also select two or more fields at a time. Position your mouse
pointer over one of the fields you want to select and click. Hold down
the SHIFT or CTRL key while clicking on the additional fields.
When multiple fields are selected, you can move them as a group,
align them, or make them the same size.
ID Works Standard and Enterprise Version 5 Administrator’s Guide
10
System Overview
Sizing Fields
With a few exceptions, you can change both the width and height of
any field in an ID Works project. The easiest way to change the width
of a field is to drag a sizing handle until the field is the size you want.
You can also change the height of graphic-oriented fields by dragging
a sizing handle. Graphic-oriented fields include photos, graphics, and
shapes. See the ID Works Designer online help topic “Size a field
proportionately” for information on avoiding distortion of graphics.
To change the height of a Text field or Static Text field, change the
size of the Font. See “Changing Field Properties” on page 11.
Arranging Fields
When you insert a field, the Designer application places it near the
upper left corner of the Production Form, card design, or report block.
To move a selected field, place the mouse pointer over the field. The
pointer changes to a four-way arrow. Hold down the left mouse button
while you move the field to its new location and then release the
mouse button.
As mentioned, you can select multiple fields and then move or align
them. For example, to make your Production Form look consistent,
select all the fields in the first row and then (using the Format or right
mouse click menu) align the fields using the Bottom selection.
Repeat with each row. Then select the left-most field in each row, and
align them using the Left selection. See the ID Works Designer online
help topic “Align fields” for additional options.
If fields overlap, you may need to arrange them by using the stacking
order. To understand the stacking order, imagine that each field you
place on the Production Form, card design, or report block is on a
separate sheet of clear plastic. The first field you place is on a plastic
sheet next to the object’s background; the second field is on a sheet
in front of the first sheet, and so on. When you select a field, you can
bring that field all the way to the front of the stacking order, bring it
one position toward the front, send it all the way to the back of the
stacking order, or send it one position toward the back. Commands to
change the stacking order of fields are available on the Format menu
of the menu bar.
ID Works Standard and Enterprise Version 5 Administrator’s Guide
11
System Overview
Changing Field Properties
In addition to changing a field’s size and location, you can change
other properties of the field in the Edit Field Properties dialog box. To
access the Edit Field Properties dialog box, with the field selected,
from the menu bar select Edit and then Field Properties.
The Edit Field Properties dialog box changes depending on the type
of field you have selected. The illustration above shows the Edit Field
Properties dialog box for a date field on a Production Form. Chapters
2 (for card design fields), 3 (for Production Form fields), and 4 (for
report block fields) describe the properties of each field in detail.
You can format the text properties of multiple text-based fields at one
time. See the online help topic, “Format text properties for multiple
fields” for step-by-step instructions.
Cutting, Copying, and Pasting Fields
You can use standard Windows operations to delete a selected field
from your Production Form, card design, or report block, copy a
selected field to a clipboard, and paste a copy of a field that is on the
clipboard into your Production Form, card design, or report block.
You cannot copy and paste fields between the Production Form and a
card or report block.
ID Works Standard and Enterprise Version 5 Administrator’s Guide
12
System Overview
When you cut a field, it is placed on the clipboard. It stays on the
clipboard until it is replaced by a different field or you close the
project.
Developing a Project
An ID Works project involves a Production Form, one or more card
designs, connections between the Production Form and card design,
and, optionally, reports and connections to your database. It does not
matter which part of the project you start with. This document
describes card designs first because many people find it easiest to
think about a card—something you can hold in your hand. If your
main interest is in how your identification system uses your existing
database, you might want to start your design with database
considerations.
Furthermore, ID Works applications support an iterative design
process. You can start with a card design, move to the Production
Form, use the field connector to associate Production Form fields
with card fields and database table columns, and then go back and
refine your card design or make changes to the Production Form.
Create the ID Works Project
You create a new project in the ID Works Designer application. You
can either create a project from scratch or start with one of the
sample projects provided with the ID Works software. And after you
have completed your first ID Works project, you can use it as a
starting point for subsequent projects.
To create a new project from scratch, either select Create a new
project on the Welcome dialog box when you log in or select File and
then New Project from the Designer menu bar. See the online help
topic “Create a new project” for step-by-step instructions.
If you use one of the sample projects that includes a database as a
starting point, follow the step-by-step instructions in the online help
topic “Modifying a sample project” to ensure that your database will
not be overwritten if you need to reinstall your ID Works software.
Each project has a set of properties that applies to the project as a
whole.You can set whether your project will have more than one card
design, which database (if any) your project will connect to, and
ID Works Standard and Enterprise Version 5 Administrator’s Guide
13
System Overview
whether your project will use fonts installed in the printer in addition to
fonts available with Windows. Projects with multiple card designs are
explained in Chapter 11, Projects with Multiple Cards. Using
databases with ID Works projects is explained in the Operator’s
Guide. See the ID Works Designer online help topic “Use printer
fonts” for more information on that subject.
Create the Card Design
See Chapter 2, Plan and Create the Card Design for complete
information.
Create the Production Form
See Chapter 3, Plan and Create the Production Form for complete
information.
Create the Report Design
See Chapter 4, Plan and Create the Report Design for complete
information.
Specify a Database
Chapter 5, Using Databases with ID Works Projects explains
database considerations.
If you do not have a database of cardholder information, you can
create one using the ID Works Designer application. See “Creating a
Database from ID Works Designer” on page 102.
Tie It All Together
Chapter 7, Connecting Fields explains what you need to do to retrieve
information from your database, save information to your database,
and print information on cards and reports.
ID Works Standard and Enterprise Version 5 Administrator’s Guide
14
System Overview
Try It Out
Run the project in the Production and Reporting applications to make
sure it behaves as expected and produces error-free results:
•
Are text fields wide enough for all the characters that need to be
entered in them?
•
Are any composite fields on the Production Form configured
correctly, and coordinated with the corresponding card or report
block field?
•
Can you save records to the database—and retrieve them?
Also consider having your Production operators test the project and
make suggestions for improvement.
Implement Production
If your Production users will work with a copy of the database on a
local hard drive, the database must be located in exactly the same
path on all computers in the system.
Consider developing stored database searches for queries that your
Production operators will perform repeatedly. Stored searches are
created using the Advanced Search editor in the ID Works Production
application and exported with projects.
When you export an ID Works project, you make a Project Export File
containing all the information necessary for the project. See the
Administrator online help topic “Export a project” for step-by-step
instructions.
While it is possible to use diskettes as the export medium, it is
recommended that you export large or multi-card projects to a
network drive or high-capacity removable medium, such as a USB
flash drive.
When you import an ID Works project that was previously exported,
you return the files to a form that can be used by ID Works Standard
and Enterprise applications. The import utility creates a directory and
places the restored files in the location specified for project files. See
the ID Works Administrator online help topic “Import a project” for
step-by-step instructions.
ID Works Standard and Enterprise Version 5 Administrator’s Guide
15
System Overview
Magnetic stripe configurations are not stored with ID Works projects.
Therefore, the Export utility in ID Works Administrator does not
include the magnetic stripe configuration you may have created if
your card design includes a magnetic stripe field. See the Online
Reference Library document for your printer for information about the
location of configuration files and methods for distributing those files
to other computers in your system.
If you are designing a project that will be used in a number of
facilities, Chapter 10, Production-only Systems, explains how to set
up computers that have only the ID Works Production application.
ID Works Standard and Enterprise Version 5 Administrator’s Guide
16
System Overview
ID Works Standard and Enterprise Version 5 Administrator’s Guide
Plan and Create
the Card Design
2
What Is a Card Design?
A card design defines how a plastic identification card or other printed
output will look when printed: what information will be the same on
each card (such as a logo or enterprise name) and what information
will vary from card to card (the cardholder’s name or photo). The card
design also specifies whether information will appear on one or both
sides of the card and whether the card will have a magnetic stripe or
other non-printable area, such as a signature panel.
In this chapter, the term “card” is used to mean any printed output,
including prescription labels, wrist bands, and other kinds of output in
addition to plastic cards. Each card is considered a new document.
You cannot print multiple cards to a page; use the ID Works Reporting
application for this purpose.
ID Works Standard and Enterprise projects can contain zero, one, or
more card designs. Those designs can be similar or completely
different. For example, an employer can use a basic card design for
most employees’ identification badges but add “Trained in First Aid”
to badges of employees who have successfully completed a
recognized course. That same employer could have a completely
different design for a card to be displayed inside employees’ cars to
verify parking privileges. See Chapter 11, Projects with Multiple
Cards.
You can create card designs from start to finish or modify one of the
sample card designs provided with your ID Works software.
Card Window
You use the Card window in ID Works Designer to create the design
for your cards. It contains the following parts.
ID Works Standard and Enterprise Version 5 Administrator’s Guide
18
Plan and Create the Card Design
Title bar
Rulers
Design area
Title bar—The title bar shows the name of the card you are editing
(Family Pass Card in the example above). If you are viewing the back
side of the card, that is noted in the title bar. The title bar changes
color when that card side is active.
Rulers—The rulers help you locate and size card fields. You turn the
rulers on and off by using the View menu. You specify the unit of
measure to display in the computer’s Control Panel, Regional
Settings property sheet, Number tab, Measurement system setting.
Close your project before changing the unit of measure to display.
Design area—This area represents the card and shows how the card
will look when printed. You place all card fields in this area.
Scroll bars appear if the size of the Card window is smaller than the
size of the card. Use the Maximize button (on the title bar) to make
the Card window as large as possible.
You can create a two-sided card design by simply viewing the back of
the card and placing fields on it. See the online help topic “Create a
two-sided card” for step-by-step instructions.
Orientation
When you start an ID Works project, you have the opportunity to
decide whether you want your card to be in portrait or landscape
orientation. You can change the card orientation during the design
process, but if you do, you will probably have to move some fields to
keep them visible on the card.
ID Works Standard and Enterprise Version 5 Administrator’s Guide
19
Plan and Create the Card Design
Portrait orientation
Landscape orientation
The front of the card can have a different orientation from the back.
If the cards you will use have a magnetic stripe, it is typical to
designate the side with the magnetic stripe as the back of the card
and select landscape orientation for it. Printers differ in how cards
must be placed in the input hopper for the magnetic stripe to be
encoded. They also differ in how information is printed on the back of
the card, compared to the front. If a test card does not print the way
you want, you can rotate the print orientation 180 degrees without
changing how the card displays in the Card window. See the online
help topic “Set card printing options” for step-by-step instructions.
Size
When you start a new project, the card design is the industrystandard CR80 card size. You can change the card size to CR50
(another industry-standard size) or you can define a custom card
size. You can change the card size during the design process, but if
you do, you will probably have to move some fields to keep them
visible on the card. See the online help topic “Change card size” for
step-by-step instructions.
Because of the system resources needed to print large cards,
Datacard recomends using the Report designer for sizes larger than
4 x 6 inches (10 x 15 centimeters).
ID Works Standard and Enterprise Version 5 Administrator’s Guide
20
Plan and Create the Card Design
Background
You can specify that your card background be printed with a color,
with a graphic, or with both. You can use graphics in any of the
following formats
BMP
Windows Bitmap
EPS
Encapsulated PostScript
JPG
Joint Photographic Experts Group File Interchange Format
(single image per file)
PCT
Macintosh PICT Drawing
PCX
PC Paintbrush
PNG
Portable Network Graphics
PSD
Adobe Photoshop® (3.0)
TGA
TARGA® Image File Format
TIF
Tagged Image File Format (single image per file,
uncompressed only)
WMF
Windows Metafile
See the online help topic “Add a graphic or color to a card
background” for step-by-step instructions.
You can specify that your background graphic be converted to
grayscale and, optionally, printed with the K-panel of the printer
ribbon. See “Printing Graphics with the Card Printer’s K-panel” on
page 134 for complete information.
If your printer supports edge-to-edge printing and you want your
background to print to all edges of the card, you must select that
option on the Printing tab of the Edit Card Design Properties dialog
box. See the online help topic “Set card printing options” for step-bystep instructions.
Because of the method used to print on plastic cards, dark solid
colors may darken at the trailing end of the card. You can
compensate for this by using a graphics software package that allows
ID Works Standard and Enterprise Version 5 Administrator’s Guide
21
Plan and Create the Card Design
you to create a solid-colored bitmap that gradually lightens at the
trailing end and using that bitmap as the card background.
Topcoat
A topcoat is a layer of material applied to the top of a card that
protects the image beneath from chemicals and abrasion and adds a
level of protection against card tampering.
If your printer supports topcoat, you can specify that the entire
surface of the card have a topcoat or that only the rectangles for
certain fields have a topcoat applied. The following table describes
how these two levels of topcoat interact.
Full Card Topcoat
Field Topcoat
ON
OFF
ON
Topcoat over this
field and parts of
card without fields
Topcoat applied only to
this field area
OFF
Topcoat over parts
of the card without
fields but no topcoat
on this field
No topcoat
Alternatively, you can specify that the content of a field be printed
using the topcoat print panel. For example, you could place a static
text field on the back of the card and set the display text for the field to
the name of your organization. On the Appearance tab of the field’s
properties dialog box, set the Foreground Color to white and specify
that the topcoat panel be used. When the card is printed, your
organization’s name will be printed using the topcoat panel. If the
topcoat panel uses ultraviolet material, the text will be visible only
under ultraviolet light.
A topcoat would interfere with the operation of some fields, such as
magnetic stripe field. For this reason, you cannot specify a topcoat for
certain fields.
ID Works Standard and Enterprise Version 5 Administrator’s Guide
22
Plan and Create the Card Design
Types of Card Fields
Card fields are the building blocks of all card designs. You must
create a card field for each item you want to print or encode on the
card. You define each card field by type. The type specifies the field’s
contents.
ID Works Standard and Enterprise Designer applications include 14
types of card fields: text, photo, date, signature, barcode, magnetic
stripe, smart card, variable graphic, static text, static graphic, nonprintable area, line, rectangle, and ellipse.
Text Field
Text field
Text fields print information that changes from one card to the next,
such as cardholder data. The data originates in the database or
directly from the Production Form, where the operator captures it.
You can specify the font and color attributes of a text field, as well as
rotate it. See “Fonts” on page 37.
You can also specify that the size of the text will automatically shrink
if necessary to fit a large amount of text in the field. The font size
shrinks to a minimum of 6 points. If at 6-point type the text still does
not fit, characters are dropped from the end.
See the online help topic “Add a text field to a card” for step-by-step
instructions.
ID Works Standard and Enterprise Version 5 Administrator’s Guide
23
Plan and Create the Card Design
Photo Field
Photo field
Ghosted
photo field
Photo fields contain the cardholder’s captured image. You can move
and size photo fields, as well as rotate and add a border to them. You
can specify that the backdrop be removed from the image at
Production time. For complete information, see “Adjusting Photo
Backdrop Removal Parameters” in the Operator’s Guide.
You can also specify that a photo field appear “ghosted” or semitransparent. If you apply the ghosting option, you can specify the
degree of opacity for the photo.
Ghosted photos, photos with borders, and photos that use
background removal will not print correctly if they are on a card side
configured to print using only the K-panel.
Alternatively, you can specify that the photo be converted to
grayscale and, optionally, printed with the K-panel of the printer
ribbon. See “Printing Graphics with the Card Printer’s K-panel” on
page 134 for complete information.
See the online help topic “Add a photo field to a card” for step-by-step
instructions.
Some photo field options are not compatible with others. If you select
an option that is not compatible with an option you previously
selected, ID Works Designer will present a message alerting you to
the conflict.
ID Works Standard and Enterprise Version 5 Administrator’s Guide
24
Plan and Create the Card Design
Date Field
Date field
Date fields contain a date and, optionally, time, in the format you
specify on the Production Form. You can specify the font and color
attributes of a date field, as well as rotate it. See “Fonts” on page 37.
See the online help topic “Add a date field to a card” for step-by-step
instructions.
Signature Field
Signature field
Signature fields print the signature of the card holder, which can be
captured with a signature pad or scanned or photographed. The
signature originates in the database or directly from the Production
Form, where the operator captures it. You can specify the size and
rotation of the field. See the online help topic “Add a signature field to
a card” for step-by-step instructions.
ID Works Standard and Enterprise Version 5 Administrator’s Guide
25
Plan and Create the Card Design
Barcode Field
Barcode field
You create barcode fields to print barcodes on your cards. With some
types of barcodes, you can specify density, error checking, and
whether the barcode field uses a checksum algorithm. The kind of
barcode you use in your card design is determined by the barcode
reading equipment you use. See the documentation for your barcode
reader to determine what barcode type to select. That documentation
will also explain the rules for determining valid information for the
barcode type you will use.
You select the barcode type on the Advanced tab of the Edit Field
Properties [Barcode] dialog box. The following table lists the barcode
types ID Works software supports, as well as the options available
with each barcode type.
Barcode Type
Options Available
Codabar
Checksum: none, Mod 16, Mod 10,
Mod10Lib, Mod10Lun
Density: High, Medium, Low
Code 128 Auto
Density: High, Medium, Low
Code 128 A
Density: High, Medium, Low
Code 128 B
Density: High, Medium, Low
Code 128 C
Density: High, Medium, Low
Code 39
Checksum: none, Mod 43, Mod10Lib,
Mod10Lun
Density: High, Medium, Low
ID Works Standard and Enterprise Version 5 Administrator’s Guide
26
Plan and Create the Card Design
Barcode Type
Options Available
Code 39 Extended
Checksum: none, Mod 43
Density: High, Medium, Low
Code 93
Checksum: none, 2 Mod 47s
Density: High, Medium, Low
Code 93 Extended
Checksum: none, 2 Mod 47s
Density: High, Medium, Low
EAN/JAN-13
Supplemental Digits: 0, 2, 5
Density: High, Medium, Low
EAN/JAN-8
Supplemental Digits: 0, 2, 5
Density: High, Medium, Low
HIBC
Checksum: none, Mod 43
Density: High, Medium, Low
Interleaved 2 of 5
Checksum: none, Mod 10, Mod10Lib,
Mod10Lun
Density: High, Medium, Low
MSI Plessey
Checksum: none, Mod 10, Mod 11
Density: High, Medium, Low
PDF417 (text only;
binary data not
supported)
Error Correction: none, Level 1 through
Level 8 (maximum)
PDF417 (Binary)*
Error Correction: none, Level 1 through
Level 8 (maximum), Auto
Density: High, Medium, Low
Density: High, Medium, Low
Postnet Zip + 4
(no options available)
UCC128
Checksum: none, Mod 10
Density: High, Medium, Low
UPCA
Supplemental Digits: 0, 2, 5
Density: High, Medium, Low
ID Works Standard and Enterprise Version 5 Administrator’s Guide
27
Plan and Create the Card Design
Barcode Type
Options Available
UPCE – 0 System
6 Digit
Supplemental Digits: 0, 2, 5
UPCE – 1 System
6 Digit
Supplemental Digits: 0, 2, 5
UPCE 11 digit
Supplemental Digits: 0, 2, 5
Density: High, Medium, Low
Density: High, Medium, Low
Density: High, Medium, Low
* Available only in ID Works Enterprise. Sample data is limited to
ASCII characters.
The Background Color Options area of the Advanced tab lets you
choose a background color for the barcode field. The default
background color is white. If you have specified a color for the card
background, the Use Card Background Color setting becomes
available.
If you use a color other than white for the barcode background, print a
sample card and test it in your barcode reading equipment to make
sure the colors and size you chose can be read reliably.
The Interpretation Text Options area of the Advanced tab lets you
choose to have the contents of the barcode displayed in regular text.
When Interpretation Text On is selected you can also specify the font
characteristics of the text and the location of the text relative to the
barcode.
You must provide sample barcode data to display and print on the
sample card. You do this on the General tab of the Edit Field
Properties [Barcode] dialog box. If you enter too much sample data,
the field is filled with diagonal lines. If the barcode type does not
support the data you entered, the field is filled with a crosshatch
pattern.
ID Works Standard and Enterprise Version 5 Administrator’s Guide
28
Plan and Create the Card Design
Too much
barcode data
Unsupported
barcode data
You must inform your Production operators about the amount and
kind of data that can be entered in barcode fields. Or, use a text field
mask or a composite field on the Production Form to ensure that
acceptable data is entered. See “Text Field Masks” on page 46 or
“Composite Field” on page 58 for additional information.
See the online help topic “Add a barcode field to a card” for step-bystep instructions.
ID Works Standard and Enterprise Version 5 Administrator’s Guide
29
Plan and Create the Card Design
Magnetic Stripe Field
Magnetic stripe
field
You create magnetic stripe fields to encode information in the
magnetic stripe area of your cards. The ID Works Designer
application places the magnetic stripe field in the correct location for a
three-track magnetic stripe on the most common card stock. If you
are using cards with a different number of tracks, you can change the
height of the field. You can also move the field up or down on the
landscape-oriented card. You cannot change the width of the
magnetic stripe field or move it left or right.
You must specify the encoding device, as well as the configuration of
the device, to be used for the magnetic stripe. You do this on the
Encoding tab of the Edit Field Properties [Magnetic Stripe] dialog
box. You can also change an existing configuration or create a new
configuration on this tab by clicking the Edit Configurations button.
See the documentation for your specific magnetic stripe encoder for
information on editing a configuration.
See the online help topic “Add a magnetic stripe field to a card” for
step-by-step instructions.
ID Works Standard and Enterprise Version 5 Administrator’s Guide
30
Plan and Create the Card Design
Smart Card Field
Smart card field
You create a smart card field to block out the area of your card that is
used by the smart card chip. Seeing the field will help you remember
not to place any other field on top of a smart card chip that requires
contact. You can, however, place fields on the opposite side of the
card from the smart card chip. ID Works Designer places the smart
card field to comply with ISO 7816-2, the ISO/ANSI financial
community standard. If the cards you use follow a different standard,
you must move and size the smart card field to correspond with the
position and size of the chip in your cards.
You can specify that your card stock contains contactless smart card
chips. If you specify contactless smart card chips, the appearance of
the field changes and you can print and apply topcoat over the field.
You can specify the encoding device, as well as the configuration of
the device, to be used for the smart card. You do this on the
Encoding tab of the Edit Field Properties [Smart Card] dialog box.
See the online help topic “Add a smart card field to a card” for stepby-step instructions.
Programming of the smart card chip is done outside of the ID Works
software, by another application.
ID Works Standard and Enterprise Version 5 Administrator’s Guide
Plan and Create the Card Design
31
Variable Graphic Field
Variable graphic field
A variable graphic field lets you specify which graphic is printed on a
card based on the value of an associated Production Form field
(usually a list field). You can also specify that no graphic be printed.
For example, an employer might want to identify what department
employees work in. The card design for that employer’s identification
badges could have a variable graphic field that prints a money bag
for Accounting department employees, a T-square for Design
department employees, and a drill for Manufacturing department
employees.
You can use graphics in any of the formats listed in “Background” on
page 20.
Because about eight percent of men and four-tenths of a percent of
women have some “color blindness”, it is unwise to rely on color
coding alone to differentiate among variations in a card design.
You can select one color in the graphic to be rendered as
transparent, allowing a card background color to show through. Note,
however, that transparency will not print correctly if it is on a card side
configured to print using only the K-panel.
You can specify that the graphic appear “ghosted” or semitransparent. If you apply the ghosting option, you can specify the
degree of opacity for the graphic. A ghosted graphic will not print
correctly if it is on a card side configured to print using only the Kpanel.
Alternatively, you can specify that the graphic be converted to
grayscale and, optionally, printed with the K-panel of the printer
ID Works Standard and Enterprise Version 5 Administrator’s Guide
32
Plan and Create the Card Design
ribbon. See “Printing Graphics with the Card Printer’s K-panel” on
page 134 for complete information.
See the online help topic “Add a variable graphic field to a card” for
step-by-step instructions.
More complex differences in card design, such as changing between
portrait and landscape orientation, require separate card designs.
Separate card designs are discussed in Chapter 11, Projects with
Multiple Cards.
Some variable graphic field options are not compatible with others. If
you select an option that is not compatible with an option you
previously selected, ID Works Designer will present a message
alerting you to the conflict.
Static Text Field
Static text field—
Word Wrap selected
A static text field prints the same text on each card. You must specify
the text to appear in the static text field and you can specify the font
and color attributes of a static text field. All text in a static text field
displays with the same font and color attributes. You can rotate a
static text field. The static text field supports multiple lines of text. The
height of the field increases as necessary if you select the Word
Wrap check box on the Edit Field Properties [Static Text] dialog box
and if you type enough text in the Edit Display Text dialog box to
require a second line. You can force a new line by pressing CTRL +
ENTER in the Edit Field Properties [Static Text] dialog box. See the
online help topic “Add a static text field to a card” for step-by-step
instructions.
ID Works Standard and Enterprise Version 5 Administrator’s Guide
Plan and Create the Card Design
33
Static Graphic Field
Static graphic field
You define a static graphic field to print a graphic, such as your
organization’s logo, on each card. For a list of graphic formats you
can use, see “Background” on page 20.
You can size and rotate static graphic fields. You can also specify
that the graphic appear “ghosted” or semi-transparent. If you apply
the ghosting option, you can specify the degree of opacity for the
graphic.
You can select one color in the graphic to be rendered as
transparent, allowing a card background color to show through.
Static graphics that use ghosting or transparency will not print
correctly if they are on a card side configured to print using only the
K-panel.
Alternatively, you can specify that the graphic be converted to
grayscale and, optionally, printed with the K-panel of the printer
ribbon. See “Printing Graphics with the Card Printer’s K-panel” on
page 134 for complete information.
See the online help topic “Add a static graphic field to a card” for stepby-step instructions.
Some static graphic field options are not compatible with others. If
you select an option that is not compatible with an option you
previously selected, ID Works Designer will present a message
alerting you to the conflict.
ID Works Standard and Enterprise Version 5 Administrator’s Guide
34
Plan and Create the Card Design
Non-Printable Area
Non-printable
area field
You create a non-printable area to ensure that an area of a card is not
printed over, topcoated, or used for another purpose. When you
insert a non-printable area, ID Works Designer sizes and positions it
in the correct location for the signature panel of the most common
card stock. Because there are many variations in the size and
placement of signature panels on cards, you can define the size and
position of the non-printable area. You can also use the non-printable
area field for other purposes. See the online help topic “Add a nonprintable area to a card” for step-by-step instructions.
Line
Line field
You can add horizontal and vertical lines to your card design. You
can choose from 10 line weights with square or rounded ends. You
can size and rotate the line in 90-degree increments. You can also
select any color available on your computer for your lines.
See the online help topic, “Add a line to a card” for step-by-step
instructions.
ID Works Standard and Enterprise Version 5 Administrator’s Guide
35
Plan and Create the Card Design
Rectangle
Rectangle field
You can add rectangles to your card design. You can choose from 10
line weights for the outside line of the rectangle, and you can choose
to have round or square corners. You can specify that the rectangle
be filled or empty, and you can specify the color of fill and of the
outside line of the rectangle.
See the online help topic, “Add a rectangle to a card” for step-by-step
instructions.
Ellipse
Ellipse field
You can add ellipses to your card design. You can choose from 10
line weights for the outside line of the ellipse and whether the ellipse
is filled or empty. You can specify the color of fill and of the outside
line.
See the online help topic, “Add an ellipse to a card” for step-by-step
instructions.
ID Works Standard and Enterprise Version 5 Administrator’s Guide
36
Plan and Create the Card Design
Common Card Field Characteristics
Many field types have common characteristics, or properties. You can
change a field’s properties in the field properties dialog box. To
access the field properties dialog box, select the field and, from the
menu bar, select Edit and then Field Properties (or double-click on
the field). Most card fields have the following properties.
Names
All card fields, regardless of their type, are given a default name when
they are created. Named fields are necessary to connect card fields
with Production Form fields and to select fields using only the
computer keyboard. You can change the field name at any time,
replacing the default name (for example, Text Field 1) with a
meaningful, easy-to-remember name (such as FirstName).
Field names can be up to 100 characters long and can contain any
character you can type on your keyboard.
Alignment
Most fields have an alignment property. The choices available
depend on whether the field contains characters or graphical
information.
Sample Data
Variable fields that can contain characters let you supply sample data
for use when viewing the card design in Sample Data view and when
printing sample cards. You type information that might appear in the
field. Variable fields that can contain an image use a sample image
that is appropriate for the field type.
ID Works Standard and Enterprise Version 5 Administrator’s Guide
Plan and Create the Card Design
37
Position/Size
All fields have position and size properties. You can change these
properties by typing new values in a dialog box or by using the
mouse. For some complicated card designs that have mandated
sizes and positions for fields, you can prevent inadvertent changes to
fields by selecting Disable direct field movement or sizing for this
card design on the Edit Card Design Properties dialog box. See the
online help topics “Prevent changing a card field with the mouse”,
“Move a field”, and “Change a field’s size” for step-by-step
instructions.
Fonts
You can select from many fonts for the text, static text, and date fields
on your cards. ID Works Designer uses Arial, an OpenType font that
is supplied with Windows, as the default font. OpenType fonts are
preceded by an “O” in fonts lists.
Because the OpenType format is an extension of TrueType,
characteristics of TrueType fonts also apply to OpenType fonts.
Because TrueType fonts always produce the same results no matter
what printer the card is printed on, it is strongly recommended that
you use only these fonts in your card designs. The results of using
non-TrueType fonts with more than one card printer are
unpredictable. In addition, TrueType fonts can always be rotated.
Fonts are often installed by applications. Before using a font, make
sure it is available on each ID Works computer in your organization.
If the printer you will use to print cards has printer fonts installed and
you want to use them, you must select Display Printer Fonts and a
printer for the project on the Printer Fonts tab of the Edit Project
Properties dialog box. See the online help topic “Use printer fonts” for
step-by-step instructions. Printer fonts appear in the fonts list for card
fields preceded by a printer icon. They never appear in the fonts list
for Production Form fields.
You can use Type 1 fonts if you also have Adobe® Type Manager™
software installed on each computer in your system.
Variable fields that always contain characters let you specify that the
font size should automatically shrink to accommodate a large amount
ID Works Standard and Enterprise Version 5 Administrator’s Guide
38
Plan and Create the Card Design
of text. The font size shrinks to a minimum of 6 points. If at 6-point
type the text still does not fit, characters are dropped from the end.
Text Field Colors
You can select both a foreground and background color for your text
fields. The foreground color refers to the color of the text in the field.
If you specify black for the foreground color of a text, static text, or
date field, you can choose to have the text printed using the black
panel (K-panel) of the printer ribbon if the card printer is using a
ribbon with a black panel. The black panel produces a truer black and
sharper characters than printing using a combination of the cyan,
magenta, and yellow panels. You can either specify that the
background be transparent (the default) or that it be a solid color.
The printer does not print white. If you define the field to print in white
text, the printer will “knock out” the characters, allowing the surface of
the card (usually white) to show through. The Use topcoat panel
check box also becomes available when white is the selected color.
See “Topcoat” on page 21 for more information.
Arranging Fields on the Card
Each time you insert a field on the card, ID Works Designer places it,
with default values for properties, in the upper left corner of the card.
You need to change its properties to suit your needs and move it to
the correct location on the card. Use the alignment commands on the
Format menu to make sure fields are perfectly lined up either
horizontally or vertically.
ID Works Standard and Enterprise Version 5 Administrator’s Guide
Plan and Create the Card Design
39
Before fine-tuning the card layout, print a sample card. This allows
the software to determine printer characteristics and size fields more
accurately.
Save time by copying and pasting formatted fields rather than always
inserting a new, default field. For example, in the sample card above
the “Date of Birth” field was created and formatted. Then it was
copied and pasted for the “Blood Type” field (see the online help
topic “Cut, copy and paste fields” for step-by-step instructions) and
the Field Name and Display Text were changed on the General tab of
the Edit Field Properties [Static Text] dialog box. The designer did not
have to change the font characteristics for the copied field.
Alternatively, you can format the text properties of multiple text-based
fields at one time. See the online help topic, “Format text properties
for multiple fields” for step-by-step instructions.
Printing Sample Cards
While you are designing your card, you can print sample cards by
selecting Print Sample Card from the File menu on the menu bar or
from the right mouse button menu or by clicking the Print Sample
Card button on the toolbar. For best results, use the same card stock
and printing supplies your Production operators will use.
Sample cards are always printed with the sample data you supplied
for the card fields.
Sample cards are not encoded. To check that magnetic stripes are
encoded correctly, start ID Works Production and print a card.
ID Works Standard and Enterprise Version 5 Administrator’s Guide
40
Plan and Create the Card Design
Printing Cards in the Production Application
You can set up your ID Works project to help Production operators
track the progress of print requests. On the Printing tab of the Card
Design Properties dialog box, select a field to identify print jobs. See
“Printing Cards” in the Operator’s Guide for information on using this
feature in the Production application.
Card Design Considerations
As you are designing your card, keep in mind what you want the card
to do. Will it be used primarily for access control? To record time and
attendance? As name tags? Will cards be examined closely or is it
important for them to be readable from a distance? A single card can
accomplish two or more objectives, but crowding too much
information on a card can impair its usability.
Because approximately eight percent of men and four-tenths of a
percent of women have some “color blindness”, it is not a good idea
to rely entirely on color coding to distinguish between related card
designs.
ID Works Standard and Enterprise Version 5 Administrator’s Guide
Plan and Create the
Production Form
3
What Is a Production Form?
The Production Form is the graphical display the Production operator
uses to gather cardholder information and print cards and reports.
Through the Production Form you can also allow the operator to
search a database, add records to the database, add or update
information in the database, or delete database records. The operator
can gather and save text (such as the cardholder’s name) or images
(such as a photograph of the cardholder).
An ID Works project contains one Production Form. You can create a
Production Form from start to finish, modify the form in one of the
sample projects provided with the ID Works software, or use the
Create Production Form from Card command on the Tools menu
to create the Production Form.
ID Works Standard and Enterprise Version 5 Administrator’s Guide
42
Plan and Create the Production Form
Production Form Window
You use the Production Form window to design the form for your
project. It contains the following parts:
Title bar
Design area
Title bar—The title bar changes color when the Production Form
window is active.
Design area—This area represents the window the Production
operator will use. You place all form fields in this area.
ID Works Standard and Enterprise Version 5 Administrator’s Guide
Plan and Create the Production Form
43
Background
You can specify that the background of your Production Form has a
color, a graphic, or both. You can use graphics in any of the following
formats:
BMP
Windows Bitmap
EPS
Encapsulated PostScript
JPG
Joint Photographic Experts Group File Interchange Format
(single image per file)
PCT
Macintosh PICT Drawing
PCX
PC Paintbrush
PNG
Portable Network Graphics
PSD
Adobe Photoshop® (3.0)
TGA
TARGA® Image File Format
TIF
Tagged Image File Format (single image per file,
uncompressed only)
WMF
Windows Metafile
All fields are placed on top of the background. If you do not specify a
background, the form background will be the color specified for a
Window on the Appearance tab of the Control Panel Display
Properties dialog box.
See the online help topic “Add a background color or graphic to a
Production Form” for step-by-step instructions.
ID Works Standard and Enterprise Version 5 Administrator’s Guide
44
Plan and Create the Production Form
Size
You can specify that your Production Form be limited to one of five
fixed sizes or that its size adjust automatically to accommodate the
fields you add. Adjusting automatically is the default for a new
Production Form.
Specifying a fixed size may be important if you want to make sure
Production operators with small monitors will be able to enter data in
all fields without scrolling.
If you specify a fixed size for your Production Form, ID Works
Designer checks each current field and reports any that lie outside
the right or bottom boundary of the Production Form. In addition, the
software prevents you from dragging fields off the Production Form.
See the online help topic “Set Production Form size” for step-by-step
instructions.
Types of Production Form Fields
Fields are the building blocks of your Production Form. You must
create a field for each item you want to appear on the form, each
piece of variable data you want to appear on your cards or reports,
and each field you want to connect to a database.
ID Works Standard Designer includes ten types of Production Form
fields: text, photo, date, signature, list, composite, print count, auto
sequence, static text, and static graphic. ID Works Enterprise
Designer adds the binary field type for a total of eleven types of
Production Form fields.
ID Works Standard and Enterprise Version 5 Administrator’s Guide
45
Plan and Create the Production Form
Text Field
Text fields
Text fields allow the Production operator to gather alphanumeric data.
The data can then be printed on a card or report, saved in a
database, or both. You can specify a prompt that reminds the
Production operator what data to enter in the field. You can also
specify the font and color attributes of the operator prompt and the
text the Production operator will enter.
If the data will be saved to a database, you may want to specify the
number of characters that will be accepted in the text field, so the field
length is correct for the associated database field. You can also let
the ID Works program set the field length for you when you use the
field connector. If the text field uses a mask, you should specify a
number of characters large enough to display any literal mask
characters as well as the data value. See “Text Field Masks” for more
information.
You can also specify that a text field be filled with the ID Works user
name of the Production operator when a record is created, when a
ID Works Standard and Enterprise Version 5 Administrator’s Guide
46
Plan and Create the Production Form
changed record is explicitly saved, or both. Alternatively, you can
specify that the sample data you supply be used as the default value
for Production operators.
See the online help topic “Add a text field to a Production Form” for
step-by-step instructions.
Text Field Masks
You can use a mask on a text field to format data and provide some
control over what values can be entered. With a text field mask you
can place literal characters (such as spaces, dashes, and
parentheses) in the display of the entered data, convert characters to
a set format (such as uppercase text), or restrict entered characters
(for example, to numeric characters). Text field masks are helpful
when storing numeric data (for example, telephone numbers) in text
database columns. When stored as a text string, numeric values can
be searched using wildcard characters.
You establish a mask on the Mask tab of the Edit Field Properties
[Text] dialog box. (See the online help topic “Add a mask to a
Production Form text field” for step-by-step instructions.) The Mask
tab displays a preview of what the field will look like to the Production
operator as well as the minimum field length required to enter data
using the mask in Production. You must set the Input Length on the
General tab to a value equal to or larger than the field length
required. Note that the minimum field length required to display the
mask is not the size of the database column required to hold the
entered data. The required database column size may be smaller
because literals are not stored in the database.
Masked fields are limited to 100 characters.
Available mask characters and their behavior in the Production
application are described in the following tables.
ID Works Standard and Enterprise Version 5 Administrator’s Guide
Plan and Create the Production Form
47
Numeric Mask Characters:
Character
0
Description
Placeholder for one digit (0 through 9)
Entry is required and the Mandatory field property is
selected automatically.
9
Placeholder for one digit (0 through 9), plus sign,
minus sign, or space
Entry not required. Unentered data become spaces
when the data is saved, displayed in the card or
report preview, or printed on a card.
#
Placeholder for one digit (0 through 9), plus sign,
minus sign, or space
Entry not required. Unentered data is removed when
the data is saved or displayed in the card or report
preview. Spaces are removed when the data is
saved, displayed in the card or report preview, or
printed on a card or report.
Use the # mask character when the value entered might be a number
or a minus sign. Do not use more than one # mask character in a
field. Use the 0 or 9 mask character when you store a number as text
in the database (for example, when storing a telephone number).
ID Works Standard and Enterprise Version 5 Administrator’s Guide
48
Plan and Create the Production Form
Alphabetic Mask Characters:
Character
L
Description
Placeholder for one alphabetic character (A through
Z or a through z)
Entry is required and the Mandatory field property is
selected automatically.
?
Placeholder for one alphabetic character (A through
Z or a through z), hyphen, single quote, period, or
space
Entry not required. Unentered data become spaces
when the data is saved, displayed in the card or
report preview, or printed on a card or report.
B
Placeholder for one uppercase alphabetic character
(A through Z)
Entry is required and the Mandatory field property is
selected automatically. Lowercase characters are
converted to uppercase upon entry.
>
Placeholder for one uppercase alphabetic character
(A through Z), hyphen, single quote, period, or
space
Entry not required. Unentered data become spaces
when the data is saved, displayed in the card or
report preview, or printed on a card or report.
Lowercase characters are converted to uppercase
upon entry.
e
Placeholder for one lowercase alphabetic character
(a through z)
Entry is required and the Mandatory field property is
selected automatically. Uppercase characters are
converted to lowercase upon entry.
ID Works Standard and Enterprise Version 5 Administrator’s Guide
Plan and Create the Production Form
Character
<
49
Description
Placeholder for one lowercase alphabetic character
(a through z), hyphen, single quote, period, or space
Entry not required. Unentered data become spaces
when the data is saved, displayed in the card or
report preview, or printed on a card or report.
Uppercase characters are converted to lowercase
upon entry.
Alphanumeric Mask Characters:
Character
A
Description
Placeholder for one alphabetic character (A through
Z or a through z) or digit (0 through 9)
Entry is required and the Mandatory field property is
selected automatically. Equivalent to 0 mask + L
mask characters.
a
Placeholder for one alphabetic character (A through
Z or a through z), digit (0 through 9), hyphen, single
quote, period, or space
Entry not required. Unentered data become spaces
when the data is saved, displayed in the card or
report preview, or printed on a card or report.
Equivalent to 9 mask + ? mask characters.
ID Works Standard and Enterprise Version 5 Administrator’s Guide
50
Plan and Create the Production Form
General Mask Characters:
Character
&
Description
Placeholder for any one character except
underscore and space
Entry is required and the Mandatory field property is
selected automatically.
C
Placeholder for any one character except
underscore
Entry not required. Unentered data become spaces
when the data is saved, displayed in the card
preview, or printed on a card.
Literals (Note that the Production operator is not allowed to enter a
value into a position occupied by a literal.):
Character
Description
.
(period)
Decimal symbol “smart” literal
,
(comma)
Digit-grouping symbol “smart” literal
The actual character displayed in Production is the
character specified for the decimal symbol in the
Number page of the Control Panel Regional
Settings Properties dialog box. If the decimal symbol
specified is multiple characters, the left-most
character is used. Unlike other literals, the decimal
symbol is saved with the data value.
The actual character displayed in Production is the
character specified for the digit-grouping symbol in
the Number page of the Control Panel Regional
Settings Properties dialog box. If the digit-grouping
symbol specified is multiple characters, the left-most
character is used. The digit-grouping symbol is not
saved with the data value but is reapplied when data
is retrieved.
ID Works Standard and Enterprise Version 5 Administrator’s Guide
Plan and Create the Production Form
Character
$
51
Description
Currency symbol “smart” literal
The actual character displayed in Production is the
character specified for the currency symbol in the
Number page of the Control Panel Regional
Settings Properties dialog box. If the currency
symbol specified is multiple characters, the left-most
character is used. The currency symbol is not saved
with the data value but is reapplied when data is
retrieved.
Any other
character
\
Any character not listed in the Mask Character
column of this table appears as is in the text entry
field. The character is not saved with the data value
but is reapplied when data is retrieved.
Escape character for a mask character.
Precede the mask character with a backslash to
have it appear as a literal. For example, to display
an A in the text field, enter \A in the Mask box. The
character is not saved with the data value but is
reapplied when data is retrieved.
Text field masks are fully functional in the Quick Search dialog box in
Production. That is, literal characters appear in the field and search
characters entered are restricted to ones that satisfy the mask (plus
the % and _ wildcard characters). For example, if the text field mask
requires a number, the Production operator must enter nothing, a
number, or a partial number plus wildcard characters in the Quick
Search dialog box.
If the text data saved contains leading spaces, the search string must
be left empty or use a % character as the first character of the string.
Consider using a mask character that requires input as the first
character in the field, so Production operators do not have to start
searches with a % character. Also consider giving Production
operators information about how best to search in masked text fields
or create stored searches for them so they can easily retrieve the
correct information.
The Advanced Search dialog box does not use the mask.
ID Works Standard and Enterprise Version 5 Administrator’s Guide
52
Plan and Create the Production Form
Some sample text field masks are:
•
US/Canadian telephone number with optional area code:
(999)000-0000
•
•
Gender: B
Last Name (up to 20 characters): L????????????????????
examples: ten Sythoff, Smith-Jones, Van Buren
Photo Field
Photo field
Photo fields provide a way to capture the cardholder’s image or
access a previously-captured image stored in a database or in a
separate file. You can specify how large the photo field appears on
the Production Form, whether there is a prompt for the operator, and
the font and color attributes of the prompt. You can also specify the
image capture method (taking a photo with a specific camera, using
an image in an existing file, etc.) and the image manipulation options
the operator will have.
ID Works Standard and Enterprise Version 5 Administrator’s Guide
53
Plan and Create the Production Form
Consider making the photo field on the Production Form the same
proportions as the photo field on the card. For example, if the photo
area on the card is square, make the photo field on the Production
Form square by entering the same number for Height as for Width on
the General tab of the Edit Field Properties [Photo] dialog box. On
the Advanced tab of the dialog box, select Crop Box With Shape of
This Field. This determines the shape of the black crop box with
sizing handles that appears when a photo file is opened. For some
cameras, it also determines the frame that appears around the
capture area in a live display.
Also consider selecting Automatically When Field Selected in the
Capture Initiation area of the Advanced tab. If this option is selected,
the image capture method you specified will automatically launch
when the Production operator enters the photo field. If this option is
not selected, the Production operator must make a menu selection or
double-click after entering the field.
You can specify where to store a photo, in the database or as a file
outside of the database, on the Storage tab of the Edit Field
Properties [Photo] dialog box. See “File Name Considerations” on
page 100. You can also specify the format in which the photo is
stored. Formats available are:
Format
File Extension
Adobe Photoshop 3.0
psd
JPEG File Interchange Format
jpg
JPEG 2000 File Format
j2k
Portable Network Graphics
png
Tagged Image File Format
tif
TARGA® Image File Format
tga
Windows Bitmap
bmp
If you choose JPEG File Interchange Format or JPEG 2000 File
Format, you can also specify a compression factor or that the file be
compressed to a target file size.
ID Works Standard and Enterprise Version 5 Administrator’s Guide
54
Plan and Create the Production Form
When you select to use a compression factor, a slider appears, letting
you select the compression factor to use. Minimum compression
results in the highest quality but largest file size; maximum
compression results in the lowest quality but smallest file size. There
are many settings between the minimum and maximum
compressions.
When you specify to use a target file size, a box appears that lets you
select a target file size.
Notes:
•
Compressing each photo to a set file size will result in photos that
vary in quality.
•
If the uncompressed file size is smaller than the target file size,
nothing will be done to increase the file size. Such files could be
substantially smaller than the target size.
•
Selecting a target file size of 65,000 bytes or greater will create
files that cannot be stored in an Oracle database as BLOBs.
See the online help topic “Add a photo field to a Production Form” for
step-by-step instructions. Also see chapter 8, Working with
Capture Options, for more information.
ID Works Standard and Enterprise Version 5 Administrator’s Guide
55
Plan and Create the Production Form
Date Field
Date field
Date fields allow you to collect and save date and time information in
database date-type format using the mask, or pattern, you specify.
Date masks available are MM/DD/YYYY, DD/MM/YYYY, and YYYY/
MM/DD. Time masks are None - Date Only, 12 hour format, and 24
hour format.
The date can be entered by the Production operator or automatically
captured using the system date. You can specify that the system date
and time be captured and saved to the database when a new record
is created, when a changed record is explicitly saved, or both. If the
date will be entered by the operator, you can specify a prompt for the
field. Consider including the date mask you selected in the prompt, as
in the example.
You can also specify the font and color attributes of the operator
prompt and the text the Production operator will enter. See the online
help topic “Add a date field to a Production Form” for step-by-step
instructions.
ID Works Standard and Enterprise Version 5 Administrator’s Guide
56
Plan and Create the Production Form
Signature Field
Signature field
Signature fields provide a way to capture the cardholder’s signature
or access a previously-captured signature stored in a database or in a
separate file. You can specify how large the signature field appears
on the production form, whether there is a prompt for the operator,
and the font and color attributes of the prompt. You can also specify
the signature capture source (capture with the signature pad or using
a signature stored in a file).
You can specify where to store a signature, in the database or as a
file outside of the database, on the Storage tab of the Edit Field
Properties [Signature] dialog box. See “File Name Considerations” on
page 100.
See the online help topic “Add a signature field to a Production Form”
for step-by-step instructions.
ID Works Standard and Enterprise Version 5 Administrator’s Guide
Plan and Create the Production Form
57
List Field
List field
When used in the ID Works Production application, a list field
produces a list box rather than a text box. The values you specify
appear in the list. The data-driven card production feature in ID Works
software relies on list fields to provide a mechanism for switching
between card designs. (See chapter 11, Projects with Multiple Cards,
for more information.) You can have as many list fields as necessary
on a Production Form, but only one can be used to select the card
design in data-driven card production. The variable graphic card field
is also best used with a list field.
List fields help reduce data input errors and variations. For example,
assume you need to capture the work site for your employees, that
your organization has six sites, and that sometimes site names are
abbreviated and other times they are spelled out. To complicate
matters, assume one of the sites has a name that is often misspelled.
You can establish a list field that contains the official abbreviations for
your sites. Your Production operators simply select the appropriate
site from the list, saving time and reducing spelling errors.
You can specify a prompt for the field and how the field will look on
the form—the font and color attributes of the operator prompt and the
values in the list. You can enter list field values in the Designer
ID Works Standard and Enterprise Version 5 Administrator’s Guide
58
Plan and Create the Production Form
application or import them from a file that you know is correct. You
can change the order of items in the list after you have entered them.
You can also specify the default value for the list field, that is, the
value that will be displayed if the Production operator clears the form
or starts a new record. The default value is usually the value that is
selected most often. For example, if the list contains office locations,
the office with the most employees would be designated the default
selection. If you do not specify a default value, the software uses the
first value you entered as the default. To force the Production
operator to make a selection, you can add a blank entry. A blank
entry is always the default value for a list field.
See the online help topic “Add a list field to a Production Form” for
step-by-step instructions.
Composite Field
Composite field
You create a composite field to print two or more fields of cardholder
data in a single card field. Composite fields are also used to create
data for magnetic stripe encoding and to ensure that the right amount
ID Works Standard and Enterprise Version 5 Administrator’s Guide
Plan and Create the Production Form
59
and kind of data is rendered in barcodes. You must create a
Production Form field for each item of data that you want to combine
in the composite field. These subfields can be text, date, list, or print
count fields.
You define the composite field on the Advanced tab of the Edit Field
Properties [Composite] dialog box. You select each subfield that is to
print within the card field from a list of fields on the Production Form.
For each subfield you can specify that trailing spaces or other
characters (such as hyphens in an identification number) be
removed. Or you can specify that the subfield be filled with a
character you choose, and you specify whether the fill characters
appear before or after the significant characters. You also specify any
spaces or other constant characters you want to appear between the
subfields. To specify a non-printing constant character, use the \b
escape sequence followed by three numeric digits representing the
decimal value for the ASCII character. For example, to insert a
carriage return and line feed in a constant field, type \b013\b010. The
ASCII null character is not allowed.
After you have added subfields to the composite, you can move them
left or right with buttons on the dialog box or by pressing CTRL + left
arrow or CTRL + right arrow. You can also delete a subfield from the
composite.
For example, you may have captured and saved the cardholder’s first
name and last name separately (to store them in separate database
fields) but want to print them in a single card field. You would create a
composite field that specifies the cardholder’s first name as the first
subfield, adds a space in a constant string, and specifies the
cardholder’s last name as the last subfield.
Because Production operators do not enter data directly into a
composite field, you do not need to supply a prompt. Also, you can
specify that the composite field be hidden from the Production
operator, to keep the Production Form easy to use. See “Field
Options” on page 68.
You cannot connect the composite production field to a database field
(instead, you connect the Production Form fields you used to build
the composite field), but you do connect the composite field to one or
more card or report fields.
See the online help topic “Add a composite field to a Production
Form” for step-by-step instructions.
ID Works Standard and Enterprise Version 5 Administrator’s Guide
60
Plan and Create the Production Form
Print Count Field
Print count field
If your ID Works project is connected to a database, you can use a
print count field to indicate how many times a card has been printed
for a user record. You may want to use a print count field if you have
a policy to charge for replacement cards.
An ID Works Production Form can have only one print count field.
You can specify the input length of the print count field. If the input
length is 1, the maximum print count value is 9; if the input length is 2,
the maximum print count value is 99. When the maximum value is
exceeded, the value rolls over to 0.
Print count fields are always Read Only. The Production operator
does not have to enter a value for the field; indeed, the Production
operator cannot change the value stored in the database. Instead, the
Production application increments the value in the print count field as
necessary. If a Production operator enters information for a new
record and saves the record to the database but does not print a card,
the print count field has a value of 0. If a Production operator retrieves
ID Works Standard and Enterprise Version 5 Administrator’s Guide
Plan and Create the Production Form
61
a record and prints a card, regardless whether the operator changes
any other cardholder information, the print count field is incremented
by one. The print count field also increments if a card is encoded
without printing.
If the Production operator prints multiple copies of a card in one print
job, the print count value is incremented by the number of copies
printed. In this situation, if the print count field is connected to a text
field on the card design, each copy of the card will have the same
value printed on it—the number of the last card printed. The same
holds true if the print count field is connected to an encodable field,
such as a magnetic stripe field.
The Production application increments the print count field value
when a print job is submitted. If the card fails to print or encode, the
field value cannot be decremented through ID Works applications.
You can, however, use your database application to correct the
record.
When you add a print count field to your Production Form, the
Designer application selects the Save On Print option on the
Database tab of the Edit Production Form Properties dialog box. If
you delete the print count field from a Production Form, Designer
asks whether you want Save On Print enabled after the print count
field is removed.
Production operators can use the print count field to determine which
database records still need to have cards printed for them by
searching for records with a 0 in the print count field. Records entered
into the database outside of ID Works that have a null value in the
database table column associated with the print count field will not be
included in the search results. To see records with print count of 0 or
null, use the Advanced Search feature with the NULL option,
described in the Operator’s Guide.
See the online help topic “Add a print count field to a Production
Form” for step-by-step instructions.
ID Works Standard and Enterprise Version 5 Administrator’s Guide
62
Plan and Create the Production Form
Auto Sequence Field
If your ID Works project is connected to a database, you can use an
auto sequence field to create a unique database value when a record
is inserted in the database. You can specify the length of the field, the
minimum value that will be used for the sequence, a prompt for the
field, and how the field will look on the form—the font and color
attributes of the operator prompt and the value. You can also specify
that the database value be modified when the record is updated.
Auto sequence fields are always Read Only.
A Production Form can have only one auto sequence field.
When a Production operator saves a record from a Production Form
that has an auto sequence field, the ID Works software queries the
database to determine the current maximum value for that database
table column. If the current maximum value is larger than the
minimum value specified in the field properties, the value used for the
record is 1 greater than the current maximum value. If the current
maximum value is smaller than the minimum value specified, the
value used for the record is the minimum value. The same process is
used when a database record is updated if you have specified that
the database table column associated with the auto sequence field be
modified when the record is updated.
Because the auto sequence field requires a database query before
each record is inserted, inserting records will be slower. In addition, if
multiple users attempt to insert records simultaneously to a shared
database, there is a chance that a duplicate value will be used and
will result in a “duplicate key” error for all but the first user. If your
database can generate an auto sequence number (Access and SQL
Server do), allowing the database server to control the assignment of
the value will reduce contention and improve ID Works performance
for tables with a large number of rows.
Conversely, you should use the Production Form auto sequence field
if you want to use the value for naming an image file, either by itself or
as part of a composite field. A database-generated number cannot be
used because the number is not available when the file name is
created.
See the online help topic “Add an auto sequence field to a Production
Form” for step-by-step instructions.
ID Works Standard and Enterprise Version 5 Administrator’s Guide
Plan and Create the Production Form
63
Binary Field
Binary fields
Enterprise
Edition Only!
Binary fields provide a way to collect and store data that cannot be
displayed, such as smart card application code or biometric
templates. You can also use a binary field to store non-binary data
that should not be interpreted by the ID Works software, such as a
text file that contains supplemental information.
Binary fields usually require that you write one or more additional
programs using the ID Works Software Development Kit to capture
and use binary data.
You can specify a prompt for the field and the appearance of the field
when it is empty and when it has data in it.
You also specify the source of the data for the field. Data can come
from an existing file or from a biometric device supported by the
Datacard Biometric Server. You can specify where to store binary
data, in the database or as a file outside of the database, on the
Storage tab of the Edit Field Properties [Binary] dialog box. See “File
Name Considerations” on page 100.
ID Works Standard and Enterprise Version 5 Administrator’s Guide
64
Plan and Create the Production Form
As with photo and signature fields, you can specify that the capture
source of the data be started automatically when the Production
operator enters the field by selecting Automatically When Field
Selected in the Capture Initiation area of the Advanced tab. If this
option is selected, the capture source you specified will automatically
launch when the Production operator enters the binary field. If this
option is not selected, the Production operator must make a menu
selection or double-click after entering the field.
See the online help topic “Add a binary field to a Production Form” for
step-by-step instructions.
Event Button
The ID Works Software Development Kit lets programmers develop
event handler programs that extend the capabilities of the ID Works
Production application. In most cases, an event handler program is
associated with an existing Production Form field or application
command. Sometimes, however, no existing control is appropriate. In
that case, you can add a button to the Production Form that the
Production operator will click to start the event handler program.
You can specify the text that appears on the button as well as the font
and size of the text. See the online help topic “Add an event button to
a Production Form” for step-by-step instructions.
You must train Production operators on the use of any event buttons
you add to your Production Form. Because event buttons are seldom
used, chapter 2, Using the ID Works Production Application, in the
Operator’s Guide does not explain them.
ID Works Standard and Enterprise Version 5 Administrator’s Guide
65
Plan and Create the Production Form
Static Text Field
Static text field
You can use a static text field to add instructions to the Production
operator or to divide the Production Form into categories of
information. You can specify the font and color attributes of a static
text field and you can rotate the field. See the online help topic “Add a
static text field to a Production Form” for step-by-step instructions.
ID Works Standard and Enterprise Version 5 Administrator’s Guide
66
Plan and Create the Production Form
Static Graphic Field
Static graphic field
A static graphic field displays a graphic, such as your organization’s
logo, on the Production Form. You can use graphics in any of the
formats listed in “Background” on page 43.
You can select one color in the graphic to be rendered as
transparent. For example, the static graphics in the example above
have white selected to be rendered as transparent, allowing the
yellow background of the Production Form to show through. You can
also size and rotate static graphic fields. See the online help topic
“Add a static graphic field to a Production Form” for step-by-step
instructions.
ID Works Standard and Enterprise Version 5 Administrator’s Guide
Plan and Create the Production Form
67
Common Production Form Field Characteristics
Many field types have common characteristics, or properties. You can
change a field’s properties in the field properties dialog box. To
access the field properties dialog box, select the field and, from the
menu bar, select Edit and then Field Properties (or double-click on
the field). The properties that appear in the dialog box vary depending
on the field type.
Names
All Production Form fields, regardless of their type, are given a default
name when they are created. Named fields are necessary to connect
Production Form fields with card and database fields and to select
fields using only the computer keyboard. You can change the field
name at any time, replacing the default name (for example, Text Field
1) with a descriptive name (such as FirstName).
Field names can be up to 100 characters long and can contain any
character you can type on your keyboard.
Alignment
Most fields have an alignment property. The choices available
depend on whether the field contains characters or graphical
information.
Sample Data
Variable fields that can contain characters let you supply sample data
for use when viewing the Production Form in Sample Data view. You
type information that might appear in the field. Variable fields that can
contain an image use a sample image that is appropriate for the field
type.
Position/Size
All fields have position and size properties. You can change these
properties by typing new values in a dialog box or by using the
mouse. See the online help topics “Move a field” and “Change a
field’s size” for step-by-step instructions.
ID Works Standard and Enterprise Version 5 Administrator’s Guide
68
Plan and Create the Production Form
Fonts
You can select from many different fonts for character-based fields
and prompts on your Production Form. ID Works Designer uses Arial,
an OpenType font supplied with Windows, as the default font. See
“Fonts” on page 37 for more information.
Text Field Colors
You can select both a foreground and background color for your
character-based fields. The foreground color refers to the color of the
text in the field. You can specify either that the background be
transparent (the default) or that it be a solid color.
Field Options
You can specify optional properties for Production Form fields. The
options available depend on the type of field. Production Form field
options are:
•
Hidden
If selected, the field is not visible to the Production operator and
does not appear on the Quick Search window but is available for
advanced searches. For example, you may need to retrieve
sensitive information from a database to encode on a magnetic
stripe. Composite fields are often hidden to avoid operator
confusion.
•
Mandatory
If selected, the Production operator will not be allowed to save
the database record or print the card until this field is completed.
Consider indicating which fields are mandatory by using bold type
for the operator prompt or including an asterisk in the prompt.
Creating a text field mask that requires entry automatically
selects this option.
•
Read Only
If selected, the Production operator can see the information in
this field but cannot change it in the database or on the form. The
field is dimmed when viewed in the Production application.
ID Works Standard and Enterprise Version 5 Administrator’s Guide
Plan and Create the Production Form
•
69
Write to Log
If selected, an entry will be made to the audit log when the
operator saves records to the database or deletes records from
the database in the Production application.
•
Searchable
If selected, the field will appear in the Quick Search dialog box in
the Production application. This option has no effect on the
Advanced Search dialog box; all fields connected to a database
column table are searchable with Advanced Search.
Arranging Fields on the Production Form
Each time you insert a field on the Production Form, ID Works
Designer places it, with default values for properties, in the upper left
corner of the form. You need to change its properties to suit your
needs and move it to the correct location on the form.
D Use the
arrow keys on
the keyboard for
fine adjustments.
Use the alignment function to arrange fields in straight rows and
columns. First align each row, adjusting the spacing between rows
while the entire row is selected as a group. Then align each column,
again adjusting the spacing between columns while the entire column
is selected as a group. See the online help topic “Align fields” for stepby-step instructions.
Save time by copying and pasting formatted fields rather than always
inserting a new, default field. Insert your first text field and format it as
needed (see the online help topic “Add a text field to a Production
Form” for step-by-step instructions). For any additional text fields you
need on your Production Form, copy the first text field, then paste it
(see the online help topic “Cut, copy and paste fields” for step-by-step
instructions) and change the other properties, such as field name and
prompt text.
Alternatively, you can format the text properties of multiple text-based
fields or the prompt properties of multiple fields at one time. See the
online help topics, “Format text properties for multiple fields” and
“Format prompt properties for multiple fields” for step-by-step
instructions.
ID Works Standard and Enterprise Version 5 Administrator’s Guide
70
Plan and Create the Production Form
Changing the Tab Order of Fields
By default, the Production Form will open with the pointer in the first
field you created. When the Production operator presses the TAB key,
the pointer will move to the second field you created and so on
through the form. If the first field you entered ends up at the bottom of
the form, the second field in the upper right corner, the third in the
middle, and the fourth in the upper left corner, tabbing between fields
will send the pointer bouncing all over the form, and that can be
confusing to the operator.
You can determine the tab order of the fields so the fields are entered
in a logical progression, without regard to the order in which you
created them. Hidden and read-only fields, such as the composite
field in the illustration above, are not part of the tab order. See the
online help topic “Change the field tab order” for step-by-step
instructions.
ID Works Standard and Enterprise Version 5 Administrator’s Guide
Plan and Create the Production Form
71
Creating a Production Form from a
Card Design
If your ID Works project does not have a Production Form, you can
use Create Production Form from Card on the Designer Tools
menu to create a basic Production Form. See the online help topic
“Create a Production Form from a card design” for step-by-step
instructions. (If Create Production Form from Card is not available,
the Production Form already exists. Use the Add Fields to Production
Form command instead. See “Adding Fields to a Production Form
Created from a Card Design” on page 72.)
If your ID Works project has more than one card design, Create
Production Form from Card lets you select the card design to use
as the basis of the Production Form. You can change the Production
Form name. Create Production Form from Card presents a list of
card fields that can be placed on the Production Form. You select
which fields to add to the Production Form.
Smart card and magnetic stripe fields, as well as static text and static
graphic fields, are omitted from the list. (See “About the Created
Production Form” on page 72 for a list of card field types and the
Production Form field types created from them.)
When you have made selections in each field, the OK button
becomes available. When you click OK, Create Production Form
from Card creates a Production Form with the fields you selected. If
ID Works Standard and Enterprise Version 5 Administrator’s Guide
72
Plan and Create the Production Form
your project is not connected to a database, you are asked if you
want to create a database from the Production Form. Selecting Yes is
the same as selecting Create Database from Production Form
from the Tools menu. See “Creating a Database from ID Works
Designer” on page 102.
After the Production Form is created, you can add static text, static
graphics, or a background color or graphic; rearrange the fields; edit
fields; or add new fields. In other words, you can change the
Production Form as though you created it “from scratch”.
Adding Fields to a Production Form Created from a
Card Design
Developing an ID Works project often involves several iterations. You
may decide to add a field to the card design after you create the
Production Form. If your project includes multiple card designs, you
may have additional fields, on additional card designs, that you want
to include on your Production Form. The Add Fields to Production
Form command on the Tools menu lets you add card fields to an
existing Production Form quickly and easily. See the online help topic
“Add fields to a Production Form from a card design” for step-by-step
instructions.
Deleting a field on the card does not delete the corresponding
Production Form field.
About the Created Production Form
Create Production Form from Card and Add Fields to Production
Form create field types as follows:
Card Field Type
Production Form Field Type
Text
Text
Photo
Photo
Date
Date
Signature
Signature
ID Works Standard and Enterprise Version 5 Administrator’s Guide
73
Plan and Create the Production Form
Card Field Type
Production Form Field Type
Barcode
Text
Variable Graphic
List
The field name assigned to each Production Form field matches the
card field name used to create it. The operator prompt for each field is
the field name. If Create Production Form from Card created a list
field on the Production Form because you selected a variable graphic
field in a card design, it also inserted list values for the list field. In
other words, values you specified on the Advanced tab of the Edit
Field Properties [Variable Graphic] dialog box are copied into the list
field on the Production Form. See the online help topic “Define list
field contents” for step-by-step instructions. Matching Production
Form and card fields are automatically connected. (See “Connecting
Fields” on page 113.)
ID Works Standard and Enterprise Version 5 Administrator’s Guide
74
Plan and Create the Production Form
ID Works Standard and Enterprise Version 5 Administrator’s Guide
Plan and Create
the Report Design
4
What Is a Report Design?
A report design defines how a paper report will look when printed:
what information will be the same for each record in the report (such
as a logo or enterprise name), what information will vary from record
to record (the subject’s name or photo), how the elements will be
arranged within each report block, and what information will appear at
the top and bottom of each page of the report.
Information for reports comes from the database the ID Works project
is connected to. You cannot use ID Works reports without a
database.
ID Works projects can contain zero, one, or more report designs.
Those designs can be similar or completely different.
You can create report designs from start to finish or modify one of the
sample report designs provided with your ID Works software.
The report block is the basis of the report design. You define the size
of the report block, what fields it contains, whether it has a border,
and what the border looks like. Depending on how you specify the
report block, a printed report might have a single report block per
printed page, as in the Employee of the Month report in the Sample
Corporate project, or it could have many report blocks per page as in
the Student Class Report in the Sample Loyalty project.
ID Works Standard and Enterprise Version 5 Administrator’s Guide
76
Plan and Create the Report Design
Report Window
You use the Report window in ID Works Designer to create the report
block. It contains the following parts.
Title bar
Rulers
Design area
Title bar—The title bar shows the name of the report you are editing
(Student Class Report in the example above). The title bar changes
color when the window is active.
Rulers—The rulers help you locate and size report fields. You turn the
rulers on and off by using the View menu. You specify the unit of
measure to display in the computer’s Control Panel Regional Settings
Properties dialog box, Number tab, Measurement system setting.
Close your project before changing the unit of measure to display.
Design area—This area represents the report block and shows how a
single record will look when printed. You place all report fields in this
area.
Scroll bars appear if the size of the Report window is smaller than the
size of the report. Use the Maximize button (on the title bar) to make
the Report window as large as possible.
ID Works Standard and Enterprise Version 5 Administrator’s Guide
Plan and Create the Report Design
77
You can work in the report window in Field Names view or in Sample
Data view. The illustration above uses Sample Data view.
If you are working in Field Names view and rotate a report block field,
the field name does not rotate with the field. Field names are always
displayed horizontally and are contained in a box with a white
background.
To open a report window, either create a new report or open a report
that already exists in your project. See the online help topics “Create
a report design” and “Open an existing report design”.
Report Properties
You use the Edit Report Design Properties dialog to name your
report, specify the layout of the report block, and define the header
and footer for the report. See the online help topic “Access the Edit
Report Design Properties dialog box”.
Report Block Layout
When you insert a new report, the report block measures 6.5 inches
wide by 2.25 inches high (16.5 cm wide by 5.7 cm high). You can
change the size of the report block on the Block Layout tab of the
Edit Report Design Properties dialog. You can also specify whether
the report block has a border, how thick the border is, and what color
it is. See the online help topic “Change the block layout for a report
design” for step-by-step instructions. When you print a report, the ID
Works Reporting application will place as many report blocks as
possible on the page.
Header and Footer
You can specify a header to print at the top of each page of your
report, a footer to print at the bottom of each page, or both. Headers
and footers can contain one line of text, one graphic, or both. Text can
be information that you type as well as information the system
determines: page number, the total number of pages in the report, the
date and time the report was printed, the name of the stored search
used to create the report, and the ID Works user name of the person
who printed the report. You can also specify the alignment for the
header or footer information and the type font, style, size, and color
ID Works Standard and Enterprise Version 5 Administrator’s Guide
78
Plan and Create the Report Design
used. The graphic can be above or below the line of text and aligned
as you specify.
Specifications for the header are completely independent from
specifications for the footer. See the online help topic “Format the
header or footer” for step-by-step instructions.
Page Setup
ID Works reports have page setup specifications, as many programs
that print to paper printers do. Using the Page Setup dialog box you
can specify the size of paper the report will be printed on, the source
of the paper, the orientation of the report (portrait or landscape), and
the margins on all four sides of the paper.
Your computer must be attached to a paper printer to change Page
Setup specifications.
Types of Report Fields
Report fields are the building blocks of report blocks. You must create
a report field for each item of information you want to print in the
report block. Each report field has a type that specifies the field’s
contents.
ID Works Standard and Enterprise Designer include eight types of
report fields: text, photo, date, signature, barcode, variable graphic,
static text, and static graphic.
ID Works Standard and Enterprise Version 5 Administrator’s Guide
79
Plan and Create the Report Design
Text Field
Text field
Text fields print information that changes from one record to the next,
such as a person’s name. You can specify the font and color
attributes of a text field as well as rotate it. See “Fonts” on page 88.
You can also specify that the size of the text will automatically shrink
if necessary to fit a large amount of text in the field. The font size
shrinks to a minimum of 6 points. If at 6-point type the text still does
not fit, characters are dropped from the end.
See the online help topic “Add a text field to a report” for step-by-step
instructions.
ID Works Standard and Enterprise Version 5 Administrator’s Guide
80
Plan and Create the Report Design
Photo Field
Photo field
Photo fields contain a captured image of the subject of the database
record. You can move, size, and rotate photo fields, as well as add a
border to them. See the online help topic “Add a photo field to a
report” for step-by-step instructions.
ID Works Standard and Enterprise Version 5 Administrator’s Guide
Plan and Create the Report Design
81
Date Field
Date field
Date fields contain a date and, optionally, time, in the format you
specify on the Production Form. You can specify the font and color
attributes of a date field, as well as rotate it. See “Fonts” on page 88.
See the online help topic “Add a date field to a report” for step-by-step
instructions.
Signature Field
Signature fields print a signature, which can be captured with a
signature pad or scanned or photographed, then stored in the
database. You can specify the size and rotation of the field. See the
online help topic “Add a signature field to a card” for step-by-step
instructions.
ID Works Standard and Enterprise Version 5 Administrator’s Guide
82
Plan and Create the Report Design
Barcode Field
Barcode field
Barcode fields are necessary on reports when you want to duplicate a
card design in a report block. With some types of barcodes, you can
specify density, error checking, and whether the barcode field uses a
checksum algorithm. The kind of barcode you use in your report block
is determined by the barcode reading equipment you use. See the
documentation for your barcode reader to determine what barcode
type to select. That documentation will also explain the rules for
determining valid information for the barcode type you will use.
You select the barcode type on the Advanced tab of the Edit Field
Properties [Barcode] dialog box. The following table lists the barcode
types ID Works software supports, as well as the options available
with each barcode type.
Barcode Type
Options Available
Codabar
Checksum: none, Mod 16, Mod 10,
Mod10Lib, Mod10Lun
Density: High, Medium, Low
Code 128 Auto
Density: High, Medium, Low
Code 128 A
Density: High, Medium, Low
Code 128 B
Density: High, Medium, Low
Code 128 C
Density: High, Medium, Low
Code 39
Checksum: none, Mod 43, Mod10Lib,
Mod10Lun
Density: High, Medium, Low
ID Works Standard and Enterprise Version 5 Administrator’s Guide
83
Plan and Create the Report Design
Barcode Type
Options Available
Code 39 Extended
Checksum: none, Mod 43
Density: High, Medium, Low
Code 93
Checksum: none, 2 Mod 47s
Density: High, Medium, Low
Code 93 Extended
Checksum: none, 2 Mod 47s
Density: High, Medium, Low
EAN/JAN-13
Supplemental Digits: 0, 2, 5
Density: High, Medium, Low
EAN/JAN-8
Supplemental Digits: 0, 2, 5
Density: High, Medium, Low
HIBC
Checksum: none, Mod 43
Density: High, Medium, Low
Interleaved 2 of 5
Checksum: none, Mod 10, Mod10Lib,
Mod10Lun
Density: High, Medium, Low
MSI Plessey
Checksum: none, Mod 10, Mod 11
Density: High, Medium, Low
PDF417 (text only;
binary data not
supported)
Error Correction: none, Level 1 through
Level 8 (maximum)
Postnet Zip + 4
(no options available)
UCC128
Checksum: none, Mod 10
Density: High, Medium, Low
Density: High, Medium, Low
UPCA
Supplemental Digits: 0, 2, 5
Density: High, Medium, Low
UPCE – 0 System
6 Digit
Supplemental Digits: 0, 2, 5
Density: High, Medium, Low
ID Works Standard and Enterprise Version 5 Administrator’s Guide
84
Plan and Create the Report Design
Barcode Type
Options Available
UPCE – 1 System
6 Digit
Supplemental Digits: 0, 2, 5
UPCE 11 digit
Supplemental Digits: 0, 2, 5
Density: High, Medium, Low
Density: High, Medium, Low
The Interpretation Text Options area of the Advanced tab lets you
choose to have the contents of the barcode displayed in regular text.
When Interpretation Text On is selected, you can also specify the font
characteristics of the text and the location of the text relative to the
barcode.
You must provide sample barcode data to display on the report block
and print on the sample report. You do this on the General tab of the
Edit Field Properties [Barcode] dialog box. If you enter too much
sample data, the field is filled with diagonal lines. If the barcode type
does not support the data you entered, the field is filled with a
crosshatch pattern.
Too much
barcode data
Unsupported
barcode data
See the online help topic “Add a barcode field to a report” for step-bystep instructions.
ID Works Standard and Enterprise Version 5 Administrator’s Guide
Plan and Create the Report Design
85
Variable Graphic Field
A variable graphic field lets you specify which graphic is printed in a
report block based on the value of an associated Production Form
field (usually a list field). You can also specify that no graphic be
printed. You can use graphics in any of the following formats:
BMP
Windows Bitmap
EPS
Encapsulated PostScript
JPG
Joint Photographic Experts Group File Interchange Format
(single image per file)
PCT
Macintosh PICT Drawing
PCX
PC Paintbrush
PNG
Portable Network Graphics
PSD
Adobe Photoshop® (3.0)
TGA
TARGA® Image File Format
TIF
Tagged Image File Format (single image per file,
uncompressed only)
WMF
Windows Metafile
For example, an employer might want to identify what department
employees work in. The report block for that employer’s new hire
report could have a variable graphic field that prints a money bag for
Accounting department employees, a computer for IT department
employees, and a drill for Manufacturing department employees. See
the online help topic “Add a variable graphic field to a report block” for
step-by-step instructions.
ID Works Standard and Enterprise Version 5 Administrator’s Guide
86
Plan and Create the Report Design
Static Text Field
Static text fields—
one for each
combination of
font and color
attributes.
Word Wrap
selected.
A static text field prints the same text in each report block. You must
specify the text to appear in the static text field and you can specify
the font and color attributes of a static text field. All text in a static text
field displays with the same font and color attributes. You can rotate a
static text field. The static text field supports multiple lines of text. The
height of the field increases as necessary if you select the Word
Wrap check box on the Edit Field Properties [Static Text] dialog box
and if you type enough text in the Edit Display Text dialog box to
require a second line. You can force a new line by pressing CTRL +
ENTER in the Edit Display Text dialog box. See the online help topic
“Add a static text field to a report” for step-by-step instructions.
ID Works Standard and Enterprise Version 5 Administrator’s Guide
87
Plan and Create the Report Design
Static Graphic Field
Static graphic field
You define a static graphic field to print a graphic, such as your
organization’s logo, in each report block. You can use graphics in any
of the formats listed in “Variable Graphic Field” on page 85.
You can size and rotate static graphic fields. See the online help topic
“Add a static graphic field to a report” for step-by-step instructions.
Common Report Field Characteristics
Many field types have common characteristics, or properties. You can
change a field’s properties in the field properties dialog box. To
access the field properties dialog box, select the field and, from the
menu bar, select Edit and then Field Properties (or double-click on
the field). The properties that appear in the dialog box vary depending
on the field type.
Names
All report fields, regardless of their type, are given a default name
when they are created. Named fields are necessary to connect report
fields with Production Form fields and to select fields using only the
ID Works Standard and Enterprise Version 5 Administrator’s Guide
88
Plan and Create the Report Design
computer keyboard. You can change the field name at any time,
replacing the default name (for example, Text Field 1) with a
meaningful, easy-to-remember name (such as FirstName).
Field names can be up to 100 characters long and can contain any
character you can type on your keyboard.
Alignment
Variable fields have an alignment property. The choices available
depend on whether the field contains characters or graphical
information.
Sample Data
Variable fields that can contain characters let you supply sample data
for use when viewing the report block in Sample Data view and when
printing sample reports. You type information that might appear in the
field. Variable fields that can contain an image use a default image as
sample data.
Position/Size
All fields have position and size properties. You can change these
properties by typing new values in a dialog box or by using the
mouse. See the online help topics “Move a field” and “Change a
field’s size” for step-by-step instructions.
Fonts
You can select from many fonts for the text, static text, and date fields
on your reports. ID Works Designer uses Arial, an OpenType font that
is supplied with Windows, as the default font. See “Fonts” on page 37
for more information.
Variable fields that always contain characters let you specify that the
font size should automatically shrink to accommodate a large amount
of text. The font size shrinks to a minimum of 6 points. If at 6-point
type the text still does not fit, characters are dropped from the end.
ID Works Standard and Enterprise Version 5 Administrator’s Guide
Plan and Create the Report Design
89
Text Field Colors
You can select both a foreground and background color for your text
fields. The foreground color refers to the color of the text in the field.
You can specify either that the background be transparent (the
default) or that it be a solid color.
The printer does not print white. If you define the field to print in white
text, the printer will “knock out” the characters, allowing the surface of
the paper (usually white) to show through.
Arranging Fields on the Report Block
Each time you insert a field on the report block, ID Works Designer
places it, with default values for properties, in the upper left corner of
the block. You need to change its properties to suit your needs and
move it to the correct location in the report block.
Save time by copying and pasting formatted fields rather than always
inserting a new, default field. Insert your first text field and select the
font family and size you want to use (see the online help topic “Add a
text field to a report block” for step-by-step instructions). For the
additional fields, copy the first text field, and then paste it (see the
online help topic “Cut, copy and paste fields” for step-by-step
instructions) and change the Field Name and the text in the Sample
Data box on the General tab of the Edit Field Properties [Text] dialog
box. You will not have to change the font characteristics again.
Alternatively, you can format the text properties of multiple text-based
fields at one time. See the online help topic, “Format text properties
for multiple fields” for step-by-step instructions.
ID Works Standard and Enterprise Version 5 Administrator’s Guide
90
Plan and Create the Report Design
Previewing and Printing Sample Reports
While you are designing your report, you can see an on-screen
preview of the report or print sample a sample report. See the online
help topics “Preview a sample report” and “Print a sample report” for
step-by-step instructions.
Your computer must have a paper printer installed to preview or print
sample reports.
Sample reports are always printed with the sample data you supplied
for the report fields.
ID Works Standard and Enterprise Version 5 Administrator’s Guide
Using Databases with ID
Works Projects
5
If you want to save information entered in the
Production Form for future use or if you want to
use existing information to print cards or reports, you will do it by
connecting fields in your Production Form to columns in a database.
Enterprise
Edition Only!
ID Works Enterprise also offers the option of using a Directory
Service for data storage. See chapter 6, Using a Directory Service
with ID Works Projects, for complete information.
This chapter assumes you have an understanding of database
concepts in general as well as your database system in particular.
You do not need to be the database administrator to use this chapter,
but you may need to consult with that person as you make decisions.
If you do not currently have a database, see “Creating a Database
from ID Works Designer” on page 102.
Supported Databases
ID Works software uses OLE DB to connect with your database. Your
operating system gives you the following OLE DB providers:
•
•
•
Microsoft Jet 4.0 OLE DB Provider (for Access databases)
Microsoft OLE DB Provider for ODBC Drivers
Microsoft OLE DB Provider for SQL Server
Other providers may be installed with client software for your
database. You can also purchase additional providers from thirdparty vendors. ID Works software requires ODBC providers at version
3.0 and above. The ODBC provider must support ODBC core
interface conformance and extended SQL grammar conformance.
ODBC level one interface conformance is necessary when using a
schema qualifier on a table or view.
ID Works Standard and Enterprise Version 5 Administrator’s Guide
92
Using Databases with ID Works Projects
You select the OLE DB provider and data source for your project by
clicking the Select button on the Data Source tab of the Edit Project
Properties dialog box. (To access the Edit Project Properties dialog
box, from the menu bar, select File and then Project Properties.)
Clicking the Select button launches the Microsoft Data Link
application, a wizard-like program that changes depending on the
choices you make. Online help is available for the Data Link
application.
See the ID Works ReadMe file for the provider recommended for your
database product.
If you must use the ODBC provider, use the ODBC Data Source
Administrator to create an identically-named data source on each
computer on which your ID Works project will be used. (A System
DSN is recommended.) You access the ODBC Data Source
Administrator through your computer’s Control Panel.
Connecting to Multiple Tables in a Database
ID Works Standard and Enterprise support multiple related tables.
Multiple tables have some advantages over a view, the most
important being that updates are less restrictive. The ID Works
software derives relationships between tables by using foreign keys if
ID Works Standard and Enterprise Version 5 Administrator’s Guide
Using Databases with ID Works Projects
93
they are available or by matching column names if there are no
foreign keys or if an ODBC provider is used. A project can be
connected to up to ten tables.
Always connect Production Form fields to the database parent table
columns first. Connect child table columns after all the parent table
columns are connected. Child table key columns used to relate
records to the parent table do not require a connection. They will be
automatically kept in sync with the parent table by the ID Works
application.
Table rows must be related in a one-to-one relationship if inserts or
deletes are allowed for the project. Updating will work with a one-tomany relationship if updates are restricted to data in the child tables.
Selection supports a one-to-many relationship.
The Delete All command is not selectable in the Production
application if the project is connected to multiple database tables.
Table Types
Database table and column names should follow the restrictions
listed in the table on page 104. There may be exceptions to this list
for your database. If you use characters on the restricted list, try the
project using the ID Works Production software to make sure you can
connect to the database as well as search for and store data
correctly.
The Show Table Types area of the Edit Project Properties Data
Source tab lets you limit the kinds of tables you will see while working
in the ID Works field connector. Filtering out unneeded information
will simplify the task of connecting Production Form fields to their
corresponding database fields. The particular database you use may
not support all the table types listed.
Database Login
You access the database when you use the Field Connections
window in ID Works Designer. In ID Works Production, Reporting,
and View, you access the database when you open a project that has
connections to a database.
If the database you will connect to requires a user name and
password for access, the Project Properties dialog box, Data Source
ID Works Standard and Enterprise Version 5 Administrator’s Guide
94
Using Databases with ID Works Projects
tab, Database Login area gives you have three choices for setting up
your project:
Use database login settings—ID Works users must supply a
separate database user name and password to access the
database.If you enter a user name and password in the Connection
tab of the Data Link Properties dialog box, the user name may be
displayed as a default name in the database login prompt.
Use ID Works user name and password—The ID Works
application passes your ID Works user name and password to the
database server whenever you access the database. If you choose
this option, you must assign the same user names and passwords for
ID Works access that the database administrator assigns for
database access. In addition, you should warn ID Works users not to
change their ID Works passwords. If an ID Works password were
changed and then passed to the database server, the database
security software would detect a wrong password. Depending on the
database used, the user might be asked to reenter the database
password or the user might be denied access. If you choose the Use
ID Works user name and password option, do not enter any user
name or password information in the Connection tab of the Data Link
Properties dialog box.
Use this user name and password—The ID Works application
passes the user name and password you supply for the project to the
database engine whenever you access the database. Because the
user name and password are not displayed, users cannot use them to
gain access to the database outside of an ID Works application. This
offers a higher level of security.
Using Schema/Owner Name to Identify Tables in
Production
Some databases require the owner name as part of the table or view
name to guarantee that the correct object is being referenced. For
most databases, it is possible to avoid this restriction by using public
synonyms to create an alternate name for the table.
If your database system does not support public synonyms—or if
your database administrator chooses not to use them—you should
select Use schema/owner name to identify tables in Production
on the Data Source tab. This option places the schema name in front
ID Works Standard and Enterprise Version 5 Administrator’s Guide
95
Using Databases with ID Works Projects
of every table name when SQL strings are created in ID Works
Production.
If you are using public synonyms, you should not select the Use
schema/owner name to identify tables in Production option.
Data Types
Datacard has tested the databases listed in the following tables.
Corresponding data types for ODBC databases depend on the
database product vendor. Refer to the ID Works ReadMe file for a
complete list of databases tested with your version.
ID Works fields of type Text map to:
Access data types
Text(255)*, Number(Integer)†,
Number(Long Integer)†,
AutoNumber(Long Integer)†,
Number(Single)†, Number(Double)†
DB2 data types
Varchar(255)*, Integer†, Smallint†,
Decimal†, Double‡, Real‡
Oracle data types
VarChar2(255)*, Number(x,y)†
SQL Server data types
Varchar(255)*, Integer†, Smallint†,
Decimal†, Numeric†, Float‡, Real‡
* Maximum length.
† Production operators will not be able to use wildcard characters in
the Quick Search dialog box for fields connected to a database
column of this type. The Advanced Search dialog box can be used
to search for a range of numeric values.
‡ Production operators will not be able to search fields connected to
a database column of this type using the Quick Search dialog box.
Consider clearing the Searchable field option for Production Form
fields connected to database columns of this type. See “Field
Options” on page 68.
ID Works Standard and Enterprise Version 5 Administrator’s Guide
96
Using Databases with ID Works Projects
ID Works fields of type Binary1, Photo, or Signature map to:
Access data types
BLOB: OLE Object
File: Text(255)
DB2 data types
BLOB: Blob
File: Varchar(255)
Oracle data types
BLOB: Long Raw, BLOB*
File: Varchar2(255)
SQL Server data types
BLOB: Image
File: Varchar(255)
* BLOB is supported if the Oracle 8i or greater ODBC driver or OLE
DB provider is used and configured appropriately. (See the Read
Me File for details on limitations.)
ID Works fields of type Date map to:
Access data type
Date/Time
DB2 data types
Date, Timestamp
Oracle data type
Date
SQL Server data types
Datetime, Small Datetime
If the database’s date data type supports time, but a time mask is not
specified for the Production Form date field, a default time value
(typically 00:00:00) is assigned to each inserted date value. When
searching using a date, ID Works software searches for times
between 00:00:00 and 23:59:59 on that date.
1Binary fields are only available in ID Works Enterprise.
ID Works Standard and Enterprise Version 5 Administrator’s Guide
97
Using Databases with ID Works Projects
ID Works fields of type List map to:
Access data types
Text(100)*, Number(Integer),
Number(Long Integer),
Number(Single), Number(Double)
DB2 data types
Varchar(100)*, Integer, Smallint,
Decimal
Oracle data types
VarChar2(100)*, Varchar (if fixed
length), Number(x,y)
SQL Server data types
Varchar(100)*, Char (if fixed length),
Integer, Smallint, Bit, Decimal
* Maximum length.
ID Works fields of type Print Count map to:
Access data types
Number(Integer), Number(Long
Integer)
DB2 data types
Integer, Smallint
Oracle data type
Number(x,0)
SQL Server data types
Integer, Smallint
ID Works Standard and Enterprise Version 5 Administrator’s Guide
98
Using Databases with ID Works Projects
ID Works fields of type Auto Sequence map to:
Access data types
Number(Integer), Number(Long
Integer)
DB2 data types
Integer, Smallint
Oracle data type
Number(x,0)
SQL Server data types
Integer, Smallint
To prevent duplicate values, the column connected to the auto
sequence field should be restricted to unique values using an index or
constraint.
Controlling Database Activities
Depending on the type of database used, there are two or three
levels of database access control in an ID Works project. The
database administrator is the only person who can grant privileges,
and granting privileges happens outside of the ID Works program.
For some databases, you can further restrict access (but not extend
access) when you select the data source.
The best place to restrict Production operators’ database access is
on the Database tab of the Edit Production Form Properties dialog
box. There you can prevent operators from creating new database
records, saving changes to records, deleting records, or searching
the database. Note that when you use the Database tab of the Edit
Production Form Properties dialog box to restrict database access,
those restrictions are applied to all ID Works users of the project,
regardless of the user privileges individual user accounts were
granted when the accounts were set up. The print count field
overrides settings on the Database tab of the Edit Production Form
Properties dialog. That is, if Save is cleared on the Database tab of
the Edit Production Form Properties dialog and a Production operator
prints a card, the database record will still be updated to increment
the database table column associated with the print count field.
You can restrict individual users’ database access through the
Manage User Accounts utility in the ID Works Administrator
application. Each user’s privilege to search, add or change records,
ID Works Standard and Enterprise Version 5 Administrator’s Guide
Using Databases with ID Works Projects
99
and delete records can be enabled or disabled. See “User Privileges”
on page 149.
Any privilege restrictions set outside of the ID Works application
(such as database security) cannot be bypassed.
You can also use the Edit Production Form Properties dialog box to
ensure that database records are updated by selecting the Save On
Print option in the Automatic Actions area. Using this feature also
eliminates the need for an explicit “save” operation for each card
printed.
Database Design Considerations
Because ID Works applications are often only a part of an
organization’s overall security and identification system, it is not
possible to cover in this document all the ways ID Works software
might interact with your organization’s database.
Understanding Database Errors
If database errors occur when using the Production application, the
error messages will come directly from the database program. ID
Works software does not filter or change the messages in any way.
You may want to provide your Production operators with user
documentation for your database product or develop your own error
recovery document.
ID Works Standard and Enterprise Version 5 Administrator’s Guide
100
Using Databases with ID Works Projects
BLOB-related Considerations
When using an OLE DB provider, the combined size of all binary
large object (BLOB) fields on a record cannot exceed 1 megabyte.
The maximum size of an individual BLOB field is determined by
dividing 1 megabyte by the number of BLOB fields in the record. For
example, if the record has four BLOB fields, each will have a
maximum of 250 kilobytes. An average head-and-shoulders photo
saved by the ID Works Production application using the default JPEG
storage settings is about 20 kilobytes. If you decide to use another file
format to store photos, be sure to test the project using actual
images.
If a BLOB exceeds the maximum size, the Production operator will
receive a warning message, the BLOB will be truncated to the
maximum length allowed, and the record will be saved with the
truncated BLOB.
File Name Considerations
Photo images, signature images, and binary data1 can be stored in
the database or they can be stored as files outside of the database. If
they are stored as files, two storage options are available:
•
Use ID Works Path — Only the file name is saved in the
database. The current setting for the photo, signature, or binary
path is used as the path to store the file when the record is
inserted into the database and as the path to find the file when
the record is read from the database. This option is useful when
you want to move the files to different locations over time. You
can use the ID Works Administrator application to specify where
photo image, signature image, and binary files should be stored.
See the Administrator help topic “Set the system paths” for stepby-step instructions.
•
Select Path — The entire path is saved in the database. If your
ID Works project will be used on more than one computer and
you select the path for image files, you can use universal naming
(starting with \\) for the path specification. Using universal naming
1Binary fields are available only in ID Works Enterprise.
ID Works Standard and Enterprise Version 5 Administrator’s Guide
Using Databases with ID Works Projects
101
means you do not have to ensure that all computers in your
system map drives the same way.
Use caution when changing between Use ID Works Path and Select
Path or using the System Paths utility in ID Works Administrator to
change the ID Works path after you have begun capturing images.
Changing any of these settings may cause the software to not find
previously-captured images.
You can also specify a Production Form field to use as the file name.
Specifying a Production Form field may help you find files when using
another application. For example, if you specify that the Employee
Number field be used as the file name for a photo, the image for the
person whose employee number is 12345 would have the file name
12345.jpg. If you have multiple photo fields on the Production Form,
you can use a composite field to differentiate the photos. For
example, you could create a composite field that combines the
employee number field with the constant string “left” and specify that
composite field as the Field to Use as File Name for the left profile
photo. See “Composite Field” on page 58 and the online help topic
“Add a composite field to a Production Form” for more information.
If you do not specify a Production Form field to use as the file name or
if you specify a field that does not yield a unique file name, the
software will construct a unique file name.
If the field used to name the file is empty, the file name will be created
as if no field name was selected. To prevent this, mark fields used to
name photos as Mandatory and do not use fields connected to
AutoNumber database columns. See “Field Options” on page 68 and
the online help topic “Set field options” for more information. To use a
unique number for the file name, consider using the ID Works auto
sequence field instead of a database-generated value. See “Auto
Sequence Field” on page 62.
ID Works Standard and Enterprise Version 5 Administrator’s Guide
102
Using Databases with ID Works Projects
Creating a Database from ID Works
Designer
If you do not currently maintain a database for cardholder information,
you can use the ID Works Designer application to create a Microsoft
Access 2000 database for your ID Works project. The Create
Database from Production Form command on the Tools menu is
available if the current project is not attached to a database. See the
online help topic “Create a database” for step-by-step instructions.
Create Database from Production Form lets you select the location
and name of the database. The name of the database table will be
the same as your project name except that any spaces or special
characters in the project name will be removed. See “About the
Created Database” on page 104.
Create Database from Production Form presents a list of
Production Form fields that can be included in the database table.
You select which fields to add to the table.
ID Works Standard and Enterprise Version 5 Administrator’s Guide
Using Databases with ID Works Projects
103
Only simple variable Production Form fields are available to add to
the database table. Static text, static graphic, and composite fields
are omitted from the list.
You must also select a Primary Key field from the set of text fields you
specified to be included in the database table. The Primary Key field
must contain information that is unique to a given record, such as an
employee number.
You can specify that the Primary Key field you selected should be
automatically incremented for each record added to the database. If
you select Make Primary Key an AutoNumber field, the Production
Form field you selected as the Primary Key field will be Read Only.
The first record saved to the database will have a value of 1 for this
field; the second record saved will have a value of 2, and so on.
If you select an auto sequence field as the primary key, Make
Primary Key an AutoNumber Field will be unavailable.
When you have made selections in each field, the OK button
becomes available. When you click OK, a Summary dialog box opens
that allows you to review your selections and either back up to
change them or finish the database creation task.
When you choose Finish, Create Database from Production Form
creates the database and the table, adds the specified fields to the
table, adds the database to the project properties, opens a
connection to the new table, and connects each Production Form
field to its corresponding database field. If you selected Make
Primary Key an AutoNumber field and if the Production Form field
designated as the Primary Key field was not designated as Read
Only, Create Database from Production Form selects the Read
Only option for that field.
Adding Fields to a Database Created from ID Works
Designer
Developing an ID Works project often involves several iterations. You
may decide to add a field to the Production Form or to add
information to the database that you first thought you did not need to
save. The Add Production Form Fields to Database command on
the Tools menu becomes available after you have created a
database for your project using the Create Database from
ID Works Standard and Enterprise Version 5 Administrator’s Guide
104
Using Databases with ID Works Projects
Production Form menu command. Add Production Form Fields to
Database is available only when you are working in the project that
created the database. See the online help topic “Add fields to a
database” for step-by-step instructions.
You must close the ID Works project in the Production or Reporting
application before adding fields to the database.
Deleting a field on the Production Form does not delete the
corresponding database field. ID Works Designer does not provide a
way to delete database fields.
About the Created Database
ID Works project and field names can contain characters that are not
allowed in database table and field names. Database names must
start with a letter and cannot contain any of the following:
space (leading, trailing, and
embedded)
control characters (ASCII
values 0 through 31)
. period
, comma
! exclamation point
; semi-colon
‘ accent grave
: colon
[ ] brackets
= equal sign
“ quotation marks
> greater than
/ slash mark
< less than
\ backslash
? question mark
- hyphen
@ at sign
% percent
^ accent circumflex (caret)
& ampersand
~ tilde
( ) parentheses
{ } braces
* asterisk
| vertical bar
ID Works Standard and Enterprise Version 5 Administrator’s Guide
105
Using Databases with ID Works Projects
+ plus
# number sign (hash)
When Create Database from Production Form creates a database
table, it names the database the same as the ID Works project except
that it removes the characters listed above. For example, if your ID
Works project is named My Project, Create Database from
Production Form would create a database table named MyProject
(without the space).
When creating database field names, Create Database from
Production Form and Add Production Form Fields to Database
start with the Production Form field name, remove any characters
that are not allowed, and add “IDW” to the start of the name. Adding
this prefix prevents the inadvertent creation of a database field name
that is a reserved word. If removing characters from Production Form
field names results in duplicate database field names, the software
tells you to change a Production Form field name. For example,
Production Form fields named “First Name” and “FirstName” would
both result in the database field name “IDWFirstName” and you
would receive an error message.
Database field names are limited to 64 characters. If the field name is
longer than 64 characters after the characters mentioned above are
removed, only the first 64 characters are used.
The Access field types created are:
Production Form Field Type
Database Field Type
Text or List
Text
Date
Date/Time
Photo, Signature, or Binary*
BLOB: OLE Object
File: Text
Print Count
Number(LongInteger)
Auto Sequence
Number(LongInteger)
* Binary fields are only available in ID Works Enterprise.
Database text fields created for ID Works text or list fields are set to
255 characters, which is the maximum length for ID Works text fields.
ID Works Standard and Enterprise Version 5 Administrator’s Guide
106
Using Databases with ID Works Projects
This ensures that all data entered in a Production Form text field will
be saved in the database. Database text fields created for ID Works
photo, signature, or binary fields stored as files are set to 255
characters.
Importing Data from a Text File to an
Access Database
You can use a utility in the ID Works Administrator application to
create a Microsoft Access 2000 database that contains information
from your text file, to add records to an existing Access database, or
to replace the existing database records with information from your
text file. The Import Data from Text File command on the Tools
menu starts a four-step wizard that requests the information
necessary to complete the import operation. Online help is available
for each step by selecting the Help button on each page of the
wizard.
Information you will need includes:
•
The name and location of the text file, the character that is used
as the field separator, the character (if any) that starts and ends
text fields, and whether the first row of the file contains field
names. Valid field separator characters are comma (,), tab,
semicolon (;), and space. Text field delimiter character choices
are double quote (“) and none.
•
The name and location of the database to create or the existing
database to use and the names of the database table and
columns that are to be created or changed.
•
The text file field you want to be the primary key field.
Alternatively, you can have an AutoNumber column created in
the database table. If you select to have an AutoNumber column
created, duplicate records in your text file will result in duplicate
database records. If you specify one of the text file fields to be
used as the primary key, any duplicate records will be identified
and the second occurrence will not be placed in the database.
ID Works Standard and Enterprise Version 5 Administrator’s Guide
Using Databases with ID Works Projects
107
Exporting Data from an Access Database
to a Text File
You can use a utility in the ID Works Administrator application to
create a text file that contains information from a Microsoft Access
2000 database. The Export Data to Text File command on the
Tools menu starts a four-step wizard that requests the information
necessary to complete the export operation. Online help is available
for each step by selecting the Help button on each page of the
wizard.
Information you will need includes:
•
The name and location of the database, the table name if the
database contains more than one table, and the columns to
export.
•
The name and location of the text file, the character to use to
separate fields, the character to use to delimit text fields, whether
to export column names as the first line of the file, and whether to
overwrite the file if it already exists. Valid field separator
characters are comma (,), tab, semicolon (;), and space. Text
field delimiter character choices are double quote (“) and none.
ID Works Standard and Enterprise Version 5 Administrator’s Guide
108
Using Databases with ID Works Projects
ID Works Standard and Enterprise Version 5 Administrator’s Guide
Using a Directory Service
with ID Works Projects
6
Enterprise
Edition Only!
ID Works Enterprise offers the option of using a
directory service for data storage.
This chapter assumes you have an understanding of directory service
concepts in general as well as your directory service in particular. You
do not need to be the directory service administrator to use this
chapter, but you may need to consult with that person as you make
decisions.
Supported Directory Services
ID Works Enterprise works with directory services that comply with
the Lightweight Directory Access Protocol (LDAP) version 3.0.
You select the directory service for your project by completing the
Directory Service tab of the Edit Project Properties dialog box. (To
ID Works Standard and Enterprise Version 5 Administrator’s Guide
110
Using a Directory Service with ID Works Projects
access the Edit Project Properties dialog box, from the menu bar,
select File and then Project Properties.) See the online help topic,
“Connect to a directory service” for step-by-step instructions.
Directory Service Login
Connections to the directory service require a login to authenticate
the user. You connect to the directory service when you use the Field
Connections window or the Directory Service tab of the Edit Project
Properties dialog box in ID Works Designer. In ID Works Production,
Reporting, and View, you connect to the directory service when you
open a project that has connections to a directory service.
If you select Save Login Settings in Project, you can store a
complete username and password with the ID Works project to
relieve the Production operator of the need to log in to the directory
service as a separate step. If you also select Always Prompt for
Login, you can supply partial login information that is completed by
the Production user. Login information you store with the ID Works
project is not encrypted.
Data Types
ID Works supports directory service text and binary data types.
You can connect Production Form text-based fields to directory
service text attributes. Production Form text-based fields are text and
list fields as well as photo, signature, or binary fields using a path
storage option.
You can connect Production Form photo, signature, or binary fields
using the database storage option to directory service binary
attributes.
Project Design Considerations
Consider the following limitations when designing a project connected
to a directory service:
•
Production Form Auto Sequence and Print Count fields cannot be
used.
ID Works Standard and Enterprise Version 5 Administrator’s Guide
Using a Directory Service with ID Works Projects
111
•
Production Form Date fields can be used but cannot be
connected to the directory service. In other words, information in
Date fields cannot be stored or retrieved.
•
If Production operators are to add entries to the directory service,
you must include a Production Form field that is connected to the
cn attribute.
•
Consider selecting the Mandatory check box for any Production
Form field that will be connected to a “must” attribute in the
directory service.
•
ID Works Enterprise supports a single value per attribute. Do not
connect a Production Form field to a multi-valued directory
service attribute.
•
A project cannot be connected to multiple directory service
objects.
In addition, you should be aware of the following limitations in the
Production, Reporting, and View applications:
•
•
•
Advanced search and stored search are not available.
•
Some directory services compare only the first value of multivalue attributes when being searched.
•
In the Production and Reporting applications, the Print All
command will print the first attribute value for each entry that has
multi-value attributes.
•
In the Production application, directory service entries cannot be
deleted. New entries can, however, be inserted.
•
In the Production application, deleting a value in a Production
Form field sets the directory service entry attribute value to a
string with no length.
Only the first value is returned for multi-value attributes.
Referrals are not supported for searches. Values that return a
referral will be shown as blank.
ID Works Standard and Enterprise Version 5 Administrator’s Guide
112
Using a Directory Service with ID Works Projects
Using the Field Connector Window
When a project uses a directory service for data storage, the Data
Source area of the Field Connector window is as shown below.
The Source field will show the Host Name you entered on the
Directory Service tab of the Project Properties dialog box. It is for
reference only and cannot be changed in this window.
The Object Type list will contain all the object type names found on
the specified host. You must select the object type to use for your
project.
The Attribute list displays all the attributes for all object types on the
host, not just the one you selected.
The Production Form and Production Output areas appear and the
Connect and Disconnect buttons behave as described in Chapter 7,
Connecting Fields.
ID Works Standard and Enterprise Version 5 Administrator’s Guide
Connecting Fields
7
Chapters 2 and 4 described the types of fields
you can place on card designs and reports,
chapter 3 explained the types of fields available
on a Production Form, and chapters 5 and 6
described the types of database fields and
directory services ID Works software supports. This chapter explains
how to make connections between the following:
•
Production Form fields and database table fields or directory
service attributes, so the Production operator can retrieve,
update, create, and delete database records or retrieve, update,
and create directory service entries
•
Production Form fields and card fields, so information on the form
can be printed or encoded on the card
•
Production Form fields and report fields, so information on the
form can be viewed or printed on a report
What Is the Field Connector?
The ID Works field connector lets you establish connections between
and among fields on the various parts of your ID Works project. You
can connect a Production Form field in three ways:
•
Connect to both the database and the card or report design. In
this case, data entered in the Production Form is printed on the
card or report and saved in the database. If data is already in the
database, the Production Form is the conduit for printing that
information on the card or report.
•
Connect to the card design only. You may want to print something
on the card that does not need to be saved to the database. For
example, you might give cardholders the option of having a
shortened form of their name on their cards, but it is not likely that
you will need to store that information in your database.
ID Works Standard and Enterprise Version 5 Administrator’s Guide
114
Connecting Fields
•
Connect to the database only. If you use the ID Works Production
Form as a data entry vehicle, you can collect and store
information in your database without using it on a card or report.
A home address is an example of information you might collect
and save in the database but not print on a card or report.
When making connections, select the Production Form field first and
then the database table column field or card or report design field.
Field Connections Window
You use the Field Connections window to establish connections
between fields. From the menu bar, select View and then Field
Connector. The Field Connections window contains three areas:
Data Source, Production Form, and Production Output.
When you open the Field Connections window, the Production Form,
card design, and report block windows change to viewing field names
(if you had been viewing sample data). This helps you associate field
names in the Field Connections window with fields on your
Production Form and output designs.
Enterprise
Edition Only!
ID Works Enterprise edition allows using a directory service for data
storage. This option results in some differences in the Field
Connections window. See “Using the Field Connector Window” on
page 112 for complete information.
ID Works Standard and Enterprise Version 5 Administrator’s Guide
115
Connecting Fields
Data
Source
Production
Form
Production
Output
Data Source Area
The data source you specified in the Data Source tab of the Edit
Project Properties dialog box appears in the Source field. The Table
field shows the name of the database table or, if the data source you
specified has more than one table, it lists the names of the available
tables in alphabetical order. You use this list to select the table you
want to connect to.
In the Column field you will see the names of the columns in the table
specified in the Table field. The column names appear in alphabetical
order. If you click on a column name that is connected to a Production
Form field, a line appears showing the connection.
When you connect to multiple tables, make connections to the parent
table first. When you connect a Production Form field to a column in a
child table, ID Works Designer adds that table’s primary key columns
and any columns related to the parent table via foreign keys or
common column names. ID Works Production will insert or update
information in these related columns automatically when a record is
saved. See “Connecting to Multiple Tables in a Database” on
page 92.
ID Works Standard and Enterprise Version 5 Administrator’s Guide
116
Connecting Fields
Production Form Area
The name of your Production Form, specified in the General tab of
the Edit Production Form Properties dialog box, appears in the
Design field. Below that, the names of the data input fields in your
Production Form are listed in alphabetical order.
Production Output Area
Choices for the Type field are Card and Report. If you select Card,
the Design field shows the name of the card design for your ID Works
project or, if the project has more than one card design, it lists the
names of the available card designs in alphabetical order. You use
this list to select the card design to which you want to connect a
Production Form field. In the Field area, the names of card fields that
will change from card to card appear in alphabetical order. If you click
on a card field that is connected to a Production Form field, a line
appears showing the connection.
If you select Report for the Type field, the Design list contains the
names of the report designs created for the project, in alphabetical
order. You use this list to select the report design to which you want
to connect a Production Form field. The Field area lists the report
fields that will change from record to record. If you click on a report
field that is connected to a Production Form field, a line appears
showing the connection.
Static text, static graphic, and non-printable area fields on a card or
report block are not listed because they cannot be connected to a
field on the Production Form.
Connect and Disconnect Buttons
Two sets of buttons let you connect and disconnect fields. The
buttons between the Data Source area and the Production Form area
are for connections between fields in those two parts of the ID Works
project, and the buttons between the Production Form area and the
Production Output area are for connections between fields in those
two parts of the project.
ID Works Standard and Enterprise Version 5 Administrator’s Guide
117
Connecting Fields
Restrictions on Connections to
Database Columns
A Production Form field can be connected to one and only one
database table column, and a database table column can be
connected to one and only one Production Form field. The ID Works
software enforces these restrictions in two ways. First, if you select a
Production Form field that is already connected to a database table
column, the Table and Column fields in the Data Source area change
(if necessary) to show you the connected table and column name.
You can remove that connection by clicking the Disconnect button.
Secondly, if you still try to make a multiple connection, you will see an
error message telling you to remove the original connection.
You can connect Production Form fields only to compatible database
table columns. For example, if you try to connect a text field on your
Production Form to a database table column with a type of date, the
ID Works software will display an error message. See “Data Types”
on page 95 for compatible field and database types.
Composite fields cannot be connected to a database column.
Instead, connect the fields from which the composite is made.
To ensure that all the data you collect using the Production Form is
saved in the database and, conversely, to ensure that all the data in
the database can be displayed on your Production Form, the length of
text fields on your Production Form should match the length of the
database table column to which they will be connected. If you connect
text fields of unequal length, the ID Works software will offer to
change the length of the Production Form text field to match the
length of the database table column.
If you change the data type, length, or name of a database column
after you have connected it to a Production Form field or if you
change the Production Form field length after you have connected it
to a database column, you must disconnect and reconnect the fields
or errors may occur when the project is used.
ID Works Standard and Enterprise Version 5 Administrator’s Guide
118
Connecting Fields
Restrictions on Connections to
Card Design Fields
You can connect a Production Form field to as many card design
fields (on as many card designs) as necessary, provided the field
types are compatible. For example, if a card design includes a photo
and ghosted photo, a single photo field on the Production Form can
be connected to both card design photo fields. The following table
lists compatible field types.
Production Form Field
Compatible Card Design Fields
Text
Barcode, Magnetic Stripe,
Smart Card, Variable Graphic, Text
Photo
Photo, Smart Card
Date
Date
Signature
Signature, Smart Card
List
Barcode, Magnetic Stripe,
Smart Card, Variable Graphic, Text
Composite
Barcode, Magnetic Stripe,
Smart Card, Text
Print Count
Barcode, Magnetic Stripe,
Smart Card, Text
Auto Sequence
Barcode, Magnetic Stripe,
Smart Card, Text
Binary*
PDF417 (Binary) Barcode,
Magnetic Stripe, Smart Card
* Binary fields are only available in ID Works Enterprise.
Each card design field can have only one connection. To combine
information from two or more Production Form fields in a card design
field, create a composite field on the Production Form and then
connect the composite field to the card design. Note that photo fields,
ID Works Standard and Enterprise Version 5 Administrator’s Guide
119
Connecting Fields
signature fields, and binary fields (available only in ID Works
Enterprise) cannot be used as a subfield in a composite field.
Restrictions on Connections to
Report Design Fields
You can connect a Production Form field to as many report block
fields (on as many report designs) as necessary, provided the field
types are compatible. The following table lists compatible field types.
Production Form Field
Compatible Report Block Fields
Text
Barcode, Variable Graphic, Text
Photo
Photo
Date
Date
Signature
Signature
List
Barcode, Variable Graphic, Text
Composite
Barcode, Text
Print Count
Barcode, Text
Auto Sequence
Barcode, Text
Binary
not applicable
Each report block field can have only one connection. To combine
information from two or more Production Form fields in a report block
field, create a composite field on the Production Form and then
connect the composite field to the report design.
ID Works Standard and Enterprise Version 5 Administrator’s Guide
120
Connecting Fields
ID Works Standard and Enterprise Version 5 Administrator’s Guide
Working with
Capture Options
8
In addition to using a computer keyboard to
gather character-based information, ID Works
identification software lets you capture photo images, signatures, and
biometric templates, all of which are stored as binary data.
Capturing Photos
The ID Works Production application includes three ways of capturing
photo images:
•
•
Using images stored as files on your system or network.
•
Using any camera that complies with the Microsoft Video for
Windows or Windows Image Acquisition (WIA) standard
interface.
Using any capture device (camera, scanner) that complies with
the TWAIN interface standard.
In addition, your system may include an optional capture device, such
as the Datacard Tru™ photo solution.
You select the default capture device on the Source tab of the Edit
Field Properties [Photo] dialog box. The Default Photo Source list has
the following choices:
•
No Capture
Use if images are already stored in your database and the
Production operator usually will not take new photos. The
operator will be able to select a capture device in exception
cases.
•
Photo from File
Use if previously-captured images are stored on your system or
network as files. See “Photo from File” on page 122.
•
TWAIN
Lets the Production operator select the TWAIN device to use to
take the photo. See “TWAIN Interface” on page 124.
ID Works Standard and Enterprise Version 5 Administrator’s Guide
122
Working with Capture Options
•
TWAIN (Fast)
Use if only one TWAIN device is loaded on the computer or if one
TWAIN device will be used most often. Selects the last TWAIN
device used. See “TWAIN Interface” on page 124.
•
Video for Windows
Lets the Production operator select the Video for Windows device
to use to take the photo.
•
Video for Windows (Fast)
Use if only one Video for Windows device is loaded on the
computer or if one Video for Windows device will be used most
often. Selects the last Video for Windows device used.
In addition, the Default Photo Source list includes any optional
capture devices present on your computer.
Production operators should be given the privilege to select a capture
device if they will need to change the photo source.
Photo from File
If you specify Photo from File on the Source tab of the Edit Field
Properties [Photo] dialog box (and if you selected Automatically
When Field Selected in the Capture Initiation area of the Advanced
tab), Production operators will see the Open dialog box when they
enter the photo field on the Production Form. The operator can
navigate to the proper file using standard Windows navigation
techniques.
ID Works Standard and Enterprise Version 5 Administrator’s Guide
Working with Capture Options
123
ID Works software supports the following graphics formats:
BMP
Windows Bitmap
EPS
Encapsulated PostScript
JPG
Joint Photographic Experts Group File Interchange Format
(single image per file)
J2K
JPEG 2000 File Format
PCT
Macintosh PICT Drawing
PCX
PC Paintbrush
PNG
Portable Network Graphics
PSD
Adobe Photoshop® (3.0)
TGA
TARGA® Image File Format
TIF
Tagged Image File Format (single image per file,
uncompressed only)
WMF
Windows Metafile
ID Works Standard and Enterprise Version 5 Administrator’s Guide
124
Working with Capture Options
TWAIN Interface
If you specify TWAIN on the Source tab of the Edit Field Properties
[Photo] dialog box, Production operators will see the TWAIN Interface
dialog box when they enter the photo field on the Production Form.
The operator must select a device (by clicking the Select Source
button and selecting from available sources listed in the Select
Source dialog box) and then activate the device by clicking the
Acquire Photo button. When the operator clicks the Acquire Photo
button, ID Works Production launches the software application
provided by the manufacturer of the TWAIN device.
If the operator clicks the Cancel button on the TWAIN Interface dialog
box, the dialog box closes. The operator is then able to select another
photo source from the Capture menu.
If you specify TWAIN (Fast) on the Source tab of the Edit Field
Properties [Photo] dialog box, the ID Works Production application
launches the software application provided by the manufacturer of the
TWAIN device that was used most recently (or for the only TWAIN
device on the computer). If more than one TWAIN device is loaded on
the computer but none of them have been used yet, the Production
application launches the software for the device that would appear
first on the Select Source dialog box. Specifying TWAIN (Fast) can
save your Production operators up to four mouse clicks for each
photo they take.
Because you can use any TWAIN-compliant device from any
manufacturer, ID Works documentation cannot provide step-by-step
procedures for Production operators to follow. You must develop
those procedures for your operators.
ID Works Standard and Enterprise Version 5 Administrator’s Guide
Working with Capture Options
125
Video for Windows Interface
If you specify Video for Windows on the Source tab of the Edit Field
Properties [Photo] dialog box, Production operators will see the Video
for Windows Interface dialog box when they enter the photo field on
the Production Form.
The operator must select a device (by clicking the Select Source
button and selecting from available sources listed in the Select
Source dialog box) and then activate the device by clicking the
Acquire Photo button. When the operator clicks the Acquire Photo
button, the Video for Windows Camera dialog box opens.
If the operator clicks the Cancel button on the Video for Windows
Interface dialog box, the dialog box closes. The operator is then able
to select another photo source from the Capture menu.
If you specify Video for Windows (Fast) on the Source tab of the
Edit Field Properties [Photo] dialog box, the ID Works Production
application launches the software application provided by the
manufacturer of the Video for Windows device that was used most
recently (or for the only Video for Windows device on the computer).
ID Works Standard and Enterprise Version 5 Administrator’s Guide
126
Working with Capture Options
If more than one Video for Windows device is loaded on the computer
but none of them have been used yet, the Production application
launches the software for the device that would appear first on the
Select Source dialog box. Specifying Video for Windows (Fast) can
save your Production operators up to four mouse clicks for each
photo they take.
Capturing Signatures
The ID Works Production application includes a way to use
signatures stored as files on your system or network. In addition, your
system may include an optional capture device, such as the Datacard
Signature Capture Package.
You select the default capture device on the Source tab of the Edit
Field Properties [Signature] dialog box. If you specify Signature from
File on the Source tab of the Edit Field Properties [Signature] dialog
box (and if you selected Automatically When Field Selected in the
Capture Initiation area of the Advanced tab), Production operators
will see the Open dialog box when they enter the signature field on
the Production Form. The operator can navigate to the proper file
using standard Windows navigation techniques.
ID Works software supports storing signatures in Windows bitmap
(.bmp) and Windows metafile (.wmf) formats.
ID Works Standard and Enterprise Version 5 Administrator’s Guide
Working with Capture Options
127
Capturing Biometric Templates
Enterprise
Edition Only!
The ID Works Enterprise Production application includes Data from
File as a way of using biometric templates stored as files on your
system or network. In addition, your system may include an optional
capture device, such as the Datacard (SecureTouch) Fingerprint
Reader.
You select the default capture device on the Source tab of the Edit
Field Properties [Binary] dialog box.
If you select Data from File as the Source Type, the binary data
source list becomes available and has the following choices:
•
No Capture
Use if biometric templates are already stored in your database
and the Production operator usually will not acquire new
templates. The operator will be able to select a capture device in
exception cases.
•
Data from File
Use if previously-captured data is stored on your system or
network as files. If you selected Automatically When Field
Selected in the Capture Initiation area of the Advanced tab,
Production operators will see the Open dialog box when they
enter the binary field on the Production Form. The operator can
ID Works Standard and Enterprise Version 5 Administrator’s Guide
128
Working with Capture Options
navigate to the proper file using standard Windows navigation
techniques.
If the Datacard Biometric Server is installed on your computer, you
can select Biometric device as the Source Type. The Device list
contains all biometric devices installed on your computer; the
Configuration list shows the configurations available for the selected
device.
Optional Capture Devices
We offer a number of optional capture devices for use with ID Works
Standard and Enterprise systems. These capture devices are
explained in separate online documents that are loaded on your
system with the capture device software.
Configuring Optional Capture Devices
Some optional capture devices allow you to create a configuration—a
group of settings tailored to the way you use the device. You use the
ID Works Administrator application to specify a configuration. Follow
these steps:
1
Log in to the Administrator application by clicking the Windows
Start button and selecting Programs, Datacard, ID Works, and
then ID Works Administrator.
2
From the menu bar select Capture and then Configure Capture
Devices. The Configure Capture Devices dialog box opens.
3
From the list, select the capture device you want to configure and
click Configure. The configuration dialog box for the device you
selected opens.
ID Works Standard and Enterprise Version 5 Administrator’s Guide
Working with Capture Options
129
If no device names appear in the list, none of the capture devices
installed on your system can be configured.
If you selected Video for Windows as the device to configure, the
Video for Windows Interface dialog box opens.
a
If you have more than one Video for Windows device loaded
on the computer, click Select Source and choose the
camera you want to configure from the Select Source dialog
box.
b
Click Configure. The Configure Capture Device dialog box
opens.
c
Click the button for the configuration option you want to
change. The device’s configuration dialog box opens.
If a button is unavailable, that option cannot be configured for
your device.
ID Works Standard and Enterprise Version 5 Administrator’s Guide
130
Working with Capture Options
4
See documentation for the capture device for information about
making selections and saving the configuration. When you close
the configuration dialog box, you return to the Configure Capture
Devices dialog box.
5
Click Close.
Configuring Biometric Devices
Enterprise
Edition Only!
Biometric devices have a dual purpose. They not only capture
templates, they also verify that information from a live person
matches the previously-stored template. As with the capture-only
devices, you use the ID Works Administrator application to specify a
configuration. Follow these steps:
1
Log in to the Administrator application by clicking the Windows
Start button and selecting Programs, Datacard, ID Works, and
then ID Works Administrator.
2
From the menu bar select Capture and then Configure
Biometric Devices. The Datacard Biometric Server dialog box
opens.
3
Select the device you want to configure from the Devices list.
4
Click Add. The configuration dialog box for the device you
selected opens.
ID Works Standard and Enterprise Version 5 Administrator’s Guide
Working with Capture Options
131
5
See documentation for the capture device for information about
making selections and saving the configuration. When you close
the configuration dialog box, you return to the Datacard Biometric
Server dialog box.
6
Click Exit.
The Datacard Biometric Server also lets you manage existing
configurations, distribute configurations to other locations, and test
your biometric device. See the ID Works Administrator online help
system for step-by-step instructions.
ID Works Standard and Enterprise Version 5 Administrator’s Guide
132
Working with Capture Options
ID Works Standard and Enterprise Version 5 Administrator’s Guide
Working with
Printer Options
9
ID Works applications work with two kinds of
printers. You print reports using the same kind of
paper printer you would use to print a word processing document or
spreadsheet. The ID Works Reporting application uses standard
Windows Print dialogs; no additional software is necessary to print ID
Works reports.
Printing ID cards is more complex because card printers offer
features, such as topcoating and encoding, that are not available on
paper printers. In addition, each card printer has a different set of
available features.
Introducing Printer Plug-ins
ID Works applications rely on software modules called plug-ins to
provide the interfaces between the main ID Works applications and
the various card printers and encoders for magnetic stripes. This
design allows support of a wide variety of printers without changing
the ID Works software.
The printer plug-in simply “plugs in” to the ID Works application.
ID Works
Application
Printer
Plug-in
Encoder
Plug-in
Similarly, a magnetic stripe encoder plug-in plugs in to the printer
plug-in, extending the capability of the printer.
Specifying Plug-ins
If the driver for your card printer is installed on your computer when
you install the ID Works software, the ID Works installation program
automatically associates the correct printer plug-in with your card
printer. If you add a card printer to your system after installing ID
Works software, you must specify the association by using the
Assign Printer Plug-ins utility in the ID Works Administrator
ID Works Standard and Enterprise Version 5 Administrator’s Guide
134
Working with Printer Options
application. See the ID Works Administrator online help topic “Assign
printer plug-ins” for step-by-step instructions. Printer plug-ins must be
assigned on each computer that prints cards with your ID Works
project.
You specify the magnetic stripe encoder plug-in to use by selecting a
device on the Encoding tab of the magnetic stripe field properties
dialog. See “Magnetic Stripe Field” on page 29.
Printing Multiple Copies of Cards
When a Production operator specifies that two or more copies of a
card be printed, the exact method of fulfilling the request depends on
the printer plug-in specified.
If the generic printer plug-in is selected, the plug-in will send the
number of copies specified to the printer driver and will create a
single print job.
The behavior of other printer plug-ins is described in Online
Reference Library documents. To access the Online Reference
Library, from the Windows Start button select Programs, Datacard,
ID Works, User Documentation, and then Online Reference
Library.
Printing Graphics with the
Card Printer’s K-panel
You have two ways of controlling whether and how the black panel of
the printer ribbon (the K-panel) is used to print graphics. You can
specify K-panel printing on a field-by-field basis with the field property
sheet or you can specify that all graphics on a card side be printed
with the K-panel using a utility in the ID Works Administrator
application.
ID Works Standard and Enterprise Version 5 Administrator’s Guide
Working with Printer Options
135
Field Properties Print Options
Text, static text, date, line, rectangle, and ellipse fields let you select
the K-panel whenever you select black as the color.
Card photo, static graphic, and variable graphic fields and the
graphics used for card backgrounds all have Print Options that let you
control use of the printer’s K-panel.
If you select Color, the image will be printed with the yellow,
magenta, cyan, and black printer ribbon panels (if the printer ribbon
being used has a black panel). If you also select Print black using
YMC panels, black pixels in the image will be printed by using all
three of the other panels. This gives a more natural appearance to
the image.
Your card printer’s driver may automatically print black using the
YMC panels for photos and graphics. In that case there is no need to
use this option. Check your printer documentation to determine your
printer driver settings.
If you select Grayscale, the ID Works software will convert the
colored pixels in your image to shades of gray. You must specify
grayscale conversion if your card printer uses ribbons that have only
one color panel—typically a K-panel—but you can use this feature
with color ribbons as well. Converting photos to grayscale results in
an image similar to a black-and-white photograph printed in a paper
ID Works Standard and Enterprise Version 5 Administrator’s Guide
136
Working with Printer Options
document. The quality of the image depends on whether you also
selected Use K-panel if available, as shown here:
Grayscale selected
Grayscale and Use K-panel
if available selected
A photo, static graphic, or variable graphic field that has Grayscale
and Use K-panel if available selected will display on the screen with
its background color (usually white for graphics) blocking the fields
behind it. When printed, the background will be transparent.
You can use the Configure K-Panel Printing utility in the ID Works
Administrator application to adjust the contrast of grayscale images
printed with the K-panel. Contrast refers to the degree of difference
between the lightest and darkest areas of the graphic.
ID Works Standard and Enterprise Version 5 Administrator’s Guide
Working with Printer Options
137
First select the printer you will use. Then move the slider and click
OK. Because contrast conversions are done at print time, the
Designer card design and Production Card preview windows cannot
show the results of changing the contrast setting. Print a test card and
adjust your settings if necessary. See the online help topic,
“Configure K-panel printing” for step-by-step instructions. You must
make this contrast adjustment on each ID Works computer and for
each printer used by the computer. The contrast setting will be used
for all grayscale images in all projects for the selected printer.
Override Field-level Settings
You can have ID Works software ignore the Print Options settings for
photo, static graphic, and variable graphic fields and instead convert
them to grayscale for printing with the K-panel (black) of your card
printer ribbon. You do this with the Configure K-Panel Printing utility in
the ID Works Administrator application. You specify K-panel printing
for the front of the card, the back of the card, or both.
Because card side grayscale conversions are done at print time, the
Designer card design and Production Card preview windows always
display graphics in color. You must print a card to see the results of
the settings.
If you uninstall ID Works software and later reinstall it, you must
recreate the K-panel configuration settings. Also, you must set up Kpanel configurations on each ID Works computer and for each printer
used by the computer.
See the Administrator online help topic “Configure K-panel printing”
for step-by-step instructions.
Printing Order
Selecting Grayscale and Use K-panel if available does not change
the stacking order of fields in the Designer application but it does
have that effect when printing. (See “Arranging Fields” on page 10 for
more information about the stacking order.) For example, assume a
card design has a photo field with Grayscale and Use K-panel if
available selected and a text field that specifies blue text in front of
the photo field. When the card is printed, the photo field is printed
last—on top of the blue text field—because the black panel of the
printer ribbon is the last panel in the YMCK sequence.
ID Works Standard and Enterprise Version 5 Administrator’s Guide
138
Working with Printer Options
The ID Works software has no way of knowing whether the printer
has a K-panel. If there is no K-panel in the printer ribbon, fields that
have Grayscale and Use K-panel if available selected will print
using the yellow, magenta, and cyan panels at the same time as nonblack fields print. That is, each card side will use only one set of
printer ribbon panels.
Specifying the Print Queue Path
When a Production operator issues a Print or Print All command, the
ID Works software creates a complete image of each card side to be
printed and places the image in a print queue on the ID Works
computer. If the printer has enough memory to store the image, it is
sent to the printer. Because card printing is not as fast as generating
the card images, a backlog of images to be printed can develop. And
because that backlog can require a large amount of disk space
(especially if the card design is complex), you may want to specify a
location for the print queue that you are sure will have sufficient room.
See the Administrator online help topic “Set the system paths” for
step-by-step instructions.
ID Works Standard and Enterprise Version 5 Administrator’s Guide
Production-only
Systems
10
ID Works software was designed to
be modular, so you need to
purchase only the truly necessary applications for each of your
locations. For example, a corporation with a headquarters and five
manufacturing plants might choose to have all identification cards and
ID Works projects designed at headquarters on a system with the
Designer application, then export the projects to the manufacturing
plants, where ID Works Production products are used.
This chapter is written for the ID Works System Administrator. It pulls
together all the information you need to consider when you distribute
ID Works projects to production-only systems.
Physical Components
Your overall system will work most consistently if all the ID Works
stations in it have the same image capture devices and printers.
Having identical components will allow you to set default values that
save your Production operators time and effort. For example, assume
all your ID Works systems have the Datacard Tru photo solution as
the image capture device. When you add a photo field to the
Production Form for your project, you can specify the Tru photo
camera as the Default Photo Source on the Source tab of the Edit
Field Properties [Photo] dialog box and you can specify that the
camera initiate capture as soon as the Production operator enters the
field (by selecting Automatically When Field Selected on the
Advanced tab of the dialog box). When used by the ID Works
Production application, a project with the settings described above
will save the Production operator two steps (selecting the photo
source and starting the capture process).
Individual computers in your system can have different processing
capabilities without significantly affecting how projects are used, but
different monitor capabilities may affect how the Production window
appears. If you develop and test your project on a large format, high
resolution monitor but the Production operators will be using smaller
monitors with lower screen resolution, there may be a difference in
ID Works Standard and Enterprise Version 5 Administrator’s Guide
140
Production-only Systems
what the operators see. Consider developing and testing your
projects with a display that matches the lowest common denominator
display in your overall system.
You must make some configuration settings, such as the one for
converting graphics to grayscale for printing with one-color ribbons,
on each computer in your system.
Network Access
Will all your users have access to the same network? If they will, you
can use capabilities of the network to simplify the maintenance of
your ID Works identification system.
For example, placing your ID Works project files on a file server
simplifies the process of updating projects because you have to
change the project in only one place, instead of sending updated
project files to each location and coordinating the change-over to the
new project. See “Locating Project Files” on page 154 for additional
information.
Locate the Users File on a File Server
Placing the users file (the file that contains user account information)
on a file server will prevent accidental deletion of the users files from
individual computers. A single, server-based users file also reduces
the time you spend on maintaining user account information (you only
have to maintain one file) and ensures that users will have access to
the ID Works software no matter which computer they use. If you
place the users file on a file server, for each computer in your system
you must install ID Works software using the Custom Install option
and specify the users file location.
ID Works Standard and Enterprise Version 5 Administrator’s Guide
Production-only Systems
141
Database Considerations
Will your Production users access a central database on the
network? The settings you must make depend on the database
product used:
•
Access — Use the full path name (not a mapped drive) to specify
the database connection on the Data Source tab of the Edit
Project Properties dialog box. Using the full path name means
you do not have to ensure that all the computers in your system
map drives the same way. See Chapter 5, Using Databases with
ID Works Projects, for more information.
•
•
Oracle — Each client must have a matching service name.
•
OLE DB provider for ODBC drivers — You must create an
identically-named ODBC data source on each computer on which
you install ID Works software. (A System DSN is recommended.)
You access the ODBC Data Source Administrator through your
computer’s Control Panel.
SQL Server — Each client must have access to the server and
database named in the project.
If your Production users will work with a copy of the database on a
local hard drive, the database must be located in exactly the same
path on all computers in the system.
Consider developing stored database searches for queries that your
Production operators will perform repeatedly. Stored searches are
created using the Advanced Search editor in the ID Works Production
application and exported with projects.
ID Works Standard and Enterprise Version 5 Administrator’s Guide
142
Production-only Systems
Distributing ID Works Projects
The final steps in setting up production-only ID Works systems
involve exporting the ID Works project from the computer on which it
was designed and importing it on the production-only computers or
server. You use the ID Works Administrator application for both of
these steps.
Exporting ID Works Projects
When you export an ID Works project, you make a Project Export File
containing all the information necessary for the project. See the
Administrator online help topic “Export a project” for step-by-step
instructions.
While it is possible to use diskettes as the export medium, it is
recommended that you export large or multi-card projects to a
network drive or high-capacity removable medium, such as a USB
flash drive.
Configurations for magnetic stripe encoders are not stored as part of
the project and must be exported separately. See the Online
Reference Library document for your printer for information on
distributing encoder configurations.
Enterprise
Edition Only!
Configurations for biometric devices must be exported separately.
See the Administrator online help topic “Export a biometric device
configuration”.
Configurations for a camera or a signature pad cannot be exported
and must be configured separately for each computer using these
devices.
Importing ID Works Projects
When you import an ID Works project that was previously exported,
you return the files to a form that can be used by ID Works Standard
and Enterprise applications. The import utility creates a directory and
places the restored files in the location specified for project files. See
the ID Works Administrator online help topic “Import a project” for
step-by-step instructions.
Magnetic stripe configurations are not stored with ID Works projects.
Therefore, the Export utility in ID Works Administrator does not
ID Works Standard and Enterprise Version 5 Administrator’s Guide
Production-only Systems
143
include the magnetic stripe configuration you may have created if
your card design includes a magnetic stripe field. See the Online
Reference Library document for your printer for information about the
location of configuration files and methods for distributing those files
to other computers in your system.
If you have used the ID Works Software Development Kit (SDK) to
create event handlers or plug-ins, you must distribute that software
separately. See the ID Works Software Development Kit
Programmer’s Reference Guide for complete information.
Enterprise
Edition Only!
Configurations for biometric devices must be imported separately.
See the Administrator online help topic “Import a biometric device
configuration”.
ID Works Standard and Enterprise Version 5 Administrator’s Guide
144
Production-only Systems
ID Works Standard and Enterprise Version 5 Administrator’s Guide
Projects with Multiple
Cards
1
You can use one or more variable
graphic fields to make minor
changes to a card design, but if you require significantly different
cards (for example, changing between portrait and landscape
orientation), you must create additional card designs. See “Variable
Graphic Field” on page 31.
You can have as many different card designs as you need in your ID
Works project. The only theoretical limit is the amount of disk space
you have for storing the designs. There are, however, practical
considerations. When an ID Works project is opened in Designer,
every card design in the project is loaded into RAM. A large number
of card designs may reduce your system’s performance.
Which of the card designs in the project will be printed is determined
by a list field in the Production Form. The list field may or may not be
connected to and stored in a column in a database table. For
example, a school district might want one style of ID cards for faculty
and a different design for non-teaching staff. The database column in
the school district’s employee database that specifies the type of
employee can be connected to the list field that determines which
card design is printed. This is the classic implementation of datadriven card production.
On the other hand, an employer can use one card design for
employees’ identification badges and a completely different design
for a card to be displayed inside employees’ cars to verify parking
privileges. Many, if not most, employees would be issued both kinds
of cards. In this case, the decision as to which card to print would be
made by the Production operator and not stored in a database at all.
You can combine data-driven card production with variable graphic
fields in the card designs for even more flexibility. In the example of a
parking card, you could add a graphic that indicates which parking lot
an employee is allowed to use.
ID Works Standard and Enterprise Version 5 Administrator’s Guide
146
Projects with Multiple Cards
Follow these steps to create a project with multiple card designs:
1
Enable data-driven card production. See the Designer online help
topic “Enable data driven card production” for step-by-step
instructions.
2
Create and name your card designs. See Chapter 2, Plan and
Create the Card Design.
3
As you create your Production Form, include a list field that has
an option for each card design in your project. See Chapter 3,
Plan and Create the Production Form. Also see the online help
topic “Add a List Field to a Production Form” for step-by-step
instructions.
4
Optional: Select a Data Source to be associated with your
project. See Chapter 5, Using Databases with ID Works Projects
or Chapter 6, Using a Directory Service with ID Works Projects.
5
Connect Production Form fields to card design and (optionally)
database table columns. This includes connecting the list field on
the Production Form to a database column table if appropriate.
See Chapter 7, Connecting Fields.
6
Connect list field values to card designs. See the Designer online
help topic “Connect list field selections to card designs”.
ID Works Standard and Enterprise Version 5 Administrator’s Guide
12
System Security
An identification program is not
secure if the computer system that
gathers the data and produces the
ID cards is not secure. This chapter
is written for the ID Works System
Administrator, the person responsible for ensuring the security of an
organization’s ID Works systems. It assumes a basic understanding
of network security concepts and Administrator privileges on the local
network.
ID Works identification software offers two levels of security features:
those provided as part of the ID Works software and those available
through the Windows operating system.
ID Works Security Features
Security features built into the ID Works software include:
•
User name and password required for access to all ID Works
applications.
•
Production workstations can be configured to log users out after a
specified period of inactivity.
•
Users can change their passwords quickly and easily,
encouraging frequent changes.
•
System Administrators have full flexibility in granting or restricting
access to ID Works applications and features within applications.
•
Audit log tracks activity on each computer on which ID Works
software is installed.
•
System Administrator/project designer can specify additional
actions to track in audit log.
•
Project designer can further restrict database access for all users
of an ID Works project. (See “Controlling Database Activities” on
page 98.)
ID Works Standard and Enterprise Version 5 Administrator’s Guide
148
System Security
Managing Users
The ID Works System Administrator should create a separate user
account for each person who will use ID Works software. The user
account contains a user name (or login name), an optional
description (perhaps the user’s full name), the user password, and
user privileges. There is no limit to the number of user accounts you
can have.
A default user account is created when ID Works software is installed.
The user name for the default account is Admin, and the password is
also Admin.
If you have not already done so, log in to the ID Works Administrator
application using the Admin user name and change the password.
Changing the Admin User Name Password
1
From the Windows Start button select Programs, Datacard, ID
Works, and then ID Works Administrator. The User Login
dialog box opens.
2
Click the Change Password button. The Log in and Change
Password dialog box opens.
3
Type Admin in the User Name and User Password fields. (Press
TAB to move through the fields or click in the next field with the
mouse.)
Passwords can be 1 to 10 characters long and can include any
character you can type from the keyboard. Passwords are not
case sensitive. That is, ADMIN, admin, and AdmiN are all treated
as the same.
4
In the New Password and Verify New Password fields, type the
password of your choice.
5
Click the Log in button. A message confirms that the password
was changed.
ID Works Standard and Enterprise Version 5 Administrator’s Guide
149
System Security
User Privileges
As a System Administrator, you determine what actions a user can
perform when you add a new user. You can also change an existing
user’s privileges. In either case, a wizard enforces dependencies
among privileges.
You can base privileges on an existing user. For example, you can
create a generic Production operator user, ProdOp, that has the
privileges you want all your Production operators to have. Then,
when you need to authorize a new Production operator, you can copy
privileges from the ProdOp user, adding and deleting privileges as
necessary for the new Production operator.
You can restrict users to certain projects. For example, a school
might hire temporary workers to help with enrollment at the start of
the term. If you restrict those workers to the ID Works project for
enrolling students, they will not be able to access other ID Works
projects, such as the one for making faculty IDs.
There can be more than one user with System Administrator
privileges, and there must be at least one user with System
Administrator privileges at all times. To ensure that you do not delete
the last System Administrator, you cannot delete your own user
account.
Locating the Users File
If all your ID Works Production users have access to a network and if
you choose the Custom Install option when installing your ID Works
software, you can install the users file (the file that contains user
account information) on a server. Placing the users file on a server
will prevent accidental deletion of the users files from individual
computers. A single, server-based users file also reduces the time
you must spend on maintaining user account information (you only
have to maintain one file) and ensures that users will have access to
the ID Works software no matter which computer they use.
The ID Works users file is protected by setting the security
permissions on the folder where the file is located. You should deny
Delete and Delete Subfolders and Files permissions for the folder.
These permission settings allow users access to the file for logging in
and changing their password, but do not allow access to the folder so
that the users file could be deleted or overwritten.
ID Works Standard and Enterprise Version 5 Administrator’s Guide
150
System Security
During installation is the only time you can select the location of the
users file. You cannot move it after installation.
Requiring Login after Inactivity
Because the Production application is used to modify a database and
print cards, you may want to require that the user log in again after a
period of inactivity. This would help prevent unauthorized users from
printing cards or starting another ID Works application when a
Production operator forgets to log out before leaving the workstation
unattended.
You can set the length of the inactivity period from 5 to 30 minutes in
5-minute increments. See the Administrator online help topic,
“Configure Automatic Production Log Off” for step-by-step
instructions.
When the specified amount of time has elapsed without Production
application activity, a dialog box similar to the following appears.
When the user clicks Unlock, the User Login dialog box appears for
the user to enter a user name and password.
ID Works Standard and Enterprise Version 5 Administrator’s Guide
151
System Security
Tracking Activity with the Audit Log
ID Works software maintains a separate record on each computer of
the following activities:
Administrator application
Change the number of audit log entries
Designer application
Open a project
Save a project
Save a project under a different name
Create a database for a project
Add columns (fields) to a database
Delete a card
Delete the Production Form
Print a sample card
Import/Export
Import a project
Export a project
Production application
Open a project
Total cards printed per project
Save a stored search
Save a stored search with a different name
Delete a stored search
Delete all selected records
Update all selected records
Reporting application
Open a project
Total reports printed per project
Save a stored search
Save a stored search with a different name
Delete a stored search
ID Works Standard and Enterprise Version 5 Administrator’s Guide
152
System Security
Security
Add a user account
Delete a user account
Log in to an ID Works application (when no other ID Works
application was running)
Log out of the last ID Works application running
Unsuccessful login attempt
View Application
Open a project
Total reports printed per project
Save a stored search
Save a stored search with a different name
In addition to these system activities, the designer of an ID Works
project can specify that an entry be written to the audit log every time
a Production operator saves changes to the content of a certain field
to the database. You do this by selecting the Write to Log Field
Option on the General tab of the Edit Field Properties dialog box. For
example, to log that a record was added to the database, select Write
to Log for the Employee Number field in the Production Form.
If Write to Log is selected for any field in the Production Form,
printing a card is also recorded in the audit log. Note, however, that if
the card fails to print or encode, the audit log entry is not removed.
Similarly, if Write to Log is selected for any field in the Production
Form, deleting a record from the database is recorded in the audit
log. If more than one field has Write to Log selected, an audit log
entry is created for each field having the Write to Log property set. If
Delete All is used to delete records, a summary audit log entry will be
written in addition to each field-level entry. The summary entry will
appear after the individual log entries.
If Delete All is used to delete records or if Update All is used to
update records but no Production Form field has Write to Log
selected, a summary audit log entry will be written.
Text fields, date fields, list fields, print count fields, and auto
sequence fields can be logged.
ID Works Standard and Enterprise Version 5 Administrator’s Guide
153
System Security
Viewing the Audit Log
Because the audit log is an encrypted file, the only way to view it is by
using the ID Works Administrator application. If your ID Works user
name has audit log viewing privileges, you can examine and print the
audit log. From the ID Works Administrator application menu bar
select System and then View Audit Log. The Audit Log Viewer
dialog box opens.
You can choose to display audit log entries for all users or for a single
user by making a selection from the User(s) list in the Display area of
the Audit Log Viewer dialog box. Similarly, you can limit the sources
for the entries displayed to a single source by selecting from the
Source(s) list. Changing the selection in the User(s) and Source(s)
lists does not remove log entries; you can see all entries again by
returning the User(s) and Source(s) list selections to <All>.
You can select the maximum number of entries in the audit log by
entering a number between 24 and 10000 in the Maximum Number of
Entries field. The number of entries currently in the audit log appears
in the Number Displayed field. When the maximum number of entries
has been reached, the oldest entry drops off.
You can sort the entries in the audit log on any column by clicking the
column heading. Click the column heading again to reverse the sort
order.
To print the audit log, click the Print button on the Audit Log Viewer
dialog box. The Audit Log Report dialog box lets you specify the
information that will appear on each page of the report as well as the
appearance of the information on the page.
ID Works Standard and Enterprise Version 5 Administrator’s Guide
154
System Security
Exporting the Audit Log
You can export audit log entries for archiving or for detailed analysis
in another program, such as Microsoft Excel. When you click the
Export button, the audit log entries matching the current display filter
are saved in a tab-delimited text file. For example, if Production is
selected for Sources in the Display area of the Audit Log Viewer
dialog box, only events from the Production application will be
displayed and exported. The Export log to file dialog box lets you
select the location and file name for the exported file. See the online
help topic “Export the audit log” for step-by-step instructions.
Windows Security Features
ID Works software uses features of the Windows 2000 Professional,
or Windows XP operating system to enhance the security of your
identification system.
Each user of a Windows 2000 or Windows XP workstation or network
must have a Windows user account. You can use the privileges
associated with those accounts to restrict users to read-only access
to ID Works project files.
Installing and Uninstalling ID Works Software
You must be logged in to the Windows operating system using a user
name with System Administrator privileges to install or uninstall ID
Works software. This helps prevent accidental deletion of the
software.
Locating Project Files
By default, ID Works project files are located in the C:\Program
Files\Datacard\ID Works\Projects directory, although you can select a
different location for the ID Works directory (and consequently the
Projects subdirectory) during installation. You can move project files
after installation, perhaps placing them on a server, where they can
be accessed by as many ID Works computers as you have in your
system. Placing project files on a server simplifies the process of
updating projects that are used on multiple computers.
ID Works Standard and Enterprise Version 5 Administrator’s Guide
155
System Security
You use the ID Works Administrator application to change the
location of project files after installation. See the online help topic “Set
the system paths” for step-by-step instructions.
The Set System Paths utility only changes the location of projects
you create after using the utility; it does not move previously created
projects. You can move previously created projects using Windows
Explorer or by exporting them to the new location using the Export
and Import tools in ID Works Administrator. See the online help topics
“Export a project” and “Import a project” for step-by-step instructions.
Protecting Project Files from Modification
Whether you locate your project files on a server or on local hard
drives, you can protect them from modification by setting the “Readonly” attribute in the file’s Properties dialog box. You can then allow
read-only access to users through their Windows user accounts.
ID Works Standard and Enterprise Version 5 Administrator’s Guide
156
System Security
ID Works Standard and Enterprise Version 5 Administrator’s Guide
Index
A
Access database in Production-only
systems 141
Administrator application
audit log utility 153
configure capture devices 128, 130
definition 1
exporting projects 14, 142
importing projects 14, 142
locating project files 154
manage user accounts 148
alphabetic mask characters 48
alphanumeric mask characters 49
audit log 3, 151
export 154
limiting entries in view 153
maximum number of entries 153
printing 153
sorting entries 153
specifying entry on Production Form 69
specifying events to log 152
viewing 153
auto sequence field
connections between Production form and
card 118
connections between Production form and
report design 119
database column types 98
Production form 62
automatic Production log off 150
B
background
card design Print options 135
Production form 43
background color
card fields 38
Production Form fields 68
report fields 89
barcode field
card 25
composite field for 59
report 82
binary data, storing as file 100
binary field
connections between Production form and
card 118
database column types 96
biometric templates
from file 127
biometric templates, capturing 127
C
camera 121
capture device 139
optional 128
card
edge-to-edge printing 20
card design
definition 17
multiple cards in a project 145
orientation 18
size 19
card field
aligning 10
arranging 38
barcode 25
common characteristics 36
date 24
ellipse 35
line 34
magnetic stripe 29
non-printable area 34
photo 23
position and size control 37
rectangle 35
signature 24
smart card 30
static graphic 33
static text 32
text 22
valid name 36
variable graphic 31
Card window 17
ID Works Standard and Enterprise Version 5 Administrator’s Guide
158
Index
composite field 58
connections between Production form and
card 118
connections between Production form and
report design 119
configure capture devices 128, 130
connections 113
between Production form and card 118
between Production form and
database 117
between Production form and report
design 119
CR50 19
CR80 19
K-panel printing 135
Production form 55
report 81
Designer application
connecting fields 113
creating cards 17
creating reports 76
creating the Production form 41
definition 1
directory service
data types supported 110
login 110
project design limitations 110
setup 109
dithering 134
D
database
connections to Production form 117
export to text file 107
database setup
adding fields 103
automatic creation 102
automatically saving records 99
binary large object (BLOB) 100
column valid name 104
connecting to a project 91
create database 102
design considerations 99
error messages 99
import from text file 106
login 93
multiple-table 92
restricting privileges 98
table types 93
table valid name 104
valid name 104
database, using
with production-only systems 141
date field
card 24
connections between Production form and
card 118
connections between Production form and
report design 119
database column types 96
E
edge-to-edge card printing 20
ellipse field
K-panel printing 135
ellipse field on card 35
export projects 14, 142
F
field
accessing properties dialog box 11
aligning 10
changing size 10
copying 11
cutting 11
definition 7
inserting 8
moving 10
pasting 11
selecting 8
stacking order 10
field color
card 38
Production Form 68
report 89
Field Connections window 114
field connector, definition 113
field name view 8
filename, see valid name
ID Works Standard and Enterprise Version 5 Administrator’s Guide
159
Index
font
card field 37
Production form field 68
report field 88
foreground color
card fields 38
Production Form fields 68
report fields 89
foreign keys 92
format, graphics 123
connections between Production form and
card 118
connections between Production form and
report design 119
database column types 97
in multiple-card project 145
literal mask characters 50
log in 4
default user name 148
login after inactivity 150
G
M
general mask characters 50
graphic
Production form background 43
graphics format 123
grayscale printing 135
magnetic stripe
card orientation for 19
composite field for 58
encoder configurations 15, 142
magnetic stripe field 29
mandatory field on Production form 68
mask characters
alphabetic 48
alphanumeric 49
general 50
literals 50
numeric 47
mask, text field 46
maximum number of audit log entries 153
measurement system 18, 76
modular design 3
mouse, using in ID Works 6
multiple-table databases 92
H
halftone 134
hidden field on Production form 68
I
ID Works Path 100
image
capturing 121
storing as file 100
import projects 14, 142
installing ID Works software 154
K
keyboard shortcuts 6
keys, foreign 92
K-panel printing 134
L
landscape orientation 18
limiting audit log entries in view 153
line field
K-panel printing 135
line field on card 34
list field 57
N
name, see valid name
non-printable area field 34
numeric mask character 47
O
ODBC
data source 141
driver 92
OLE DB provider 91
one-color printing 135
Oracle in Production-only systems 141
orientation of card 18
ID Works Standard and Enterprise Version 5 Administrator’s Guide
160
Index
P
password
changing 4
requirements 148
photo
capturing 121
from file 122
storing as file 100
photo field
card 23
card Printing options 135
connections between Production form and
card 118
connections between Production form and
report design 119
database column types 96
report 80
plug-in 3
definition 133
printer, assigning 133
pop-up menu 6
portrait orientation 18
print count field
connections between Production form and
card 118
connections between Production form and
report design 119
database column types 97
Production form 60
Print Queue Path 138
printer 139
printer plug-in, assigning 133
printing
audit log 153
printing cards
multiple copies 134
sample card in Designer application 39
with K-panel 134
printing reports
sample report in Designer application 90
Production application
definition 1
Production form
background 43
connections to database 117
definition 41
window 42
Production form field
aligning 69
arranging 69
auto sequence 62
changing order for operators 70
common characteristics 67
composite 58
date 55
field options 68
hidden field 68
list 57
mandatory 68
photo 52
print count 60
read-only 68
searchable 69
static graphic 66
static text 65
tab order 70
text field 45
valid name 67
write to log 69
production-only system 139
project
creating 12
definition 1
developing 12
project files
locating 140, 154
protecting from change 155
project properties 12
R
read-only field on Production form 68
rectangle field
K-panel printing 135
rectangle field on card 35
report block 75
report design 75
report field
arranging 89
common characteristics 87
date 81
ID Works Standard and Enterprise Version 5 Administrator’s Guide
161
Index
photo 80
signature 81
static graphic 87
static text 86
text 79
valid name 88
variable graphic 85
Report window 76
Reporting application
definition 1
right-click menu 6
ruler 18, 76
S
sample card, printing 39
sample data 7
sample data view 8
sample report, printing 90
scanner 121
searchable field on Production form 69
security 3
security features
in ID Works 147
in Windows operating systems 154
signature
from file 126
storing as file 100
signature field
card 24
connections between Production form and
card 118
connections between Production form and
report design 119
database column types 96
report 81
signatures, capturing 126
size
card design 19
report block 77
smart card field 30
sorting audit log entries 153
SQL Server in Production-only systems 141
stacking order 10
static graphic field
card 33
card Printing options 135
Production form 66
report 87
static text field
card 32
K-panel printing 135
Production form 65
report 86
system path 100, 138
T
text field
card 22
connections between Production form and
card 118
connections between Production form and
report design 119
database column types 95
K-panel printing 135
mask 46
Production form 45
report 79
toolbars 6
topcoat 21
TWAIN
device 122
interface 124
interface standard 121
U
uninstalling ID Works software 154
user account 148
default account 148
privileges 149
user name
automatic insertion 45
user password
changing 148
users file, locating on file server 140, 149
V
valid name
card field 36
database table or column 104
Production form field 67
ID Works Standard and Enterprise Version 5 Administrator’s Guide
162
Index
report field 88
variable graphic field
card 31
card Printing options 135
report 85
Video for Windows 125
view
field name 8
sample data 8
W
Welcome dialog box 5
write to log field on Production Form 69, 152
ID Works Standard and Enterprise Version 5 Administrator’s Guide
Datacard Smart Driver and
ImageCard Printer and
Magnetic Stripe Plug-ins
ii
Datacard Smart Driver and ImageCard Printer and Magnetic Stripe Plug-ins
Contents
Introduction to this Guide . . . . . . . . . . . . . . . . . . . . . . . . . . . . . . . . . . . . . . . . . . . . . . . 1
What is a Plug-in? . . . . . . . . . . . . . . . . . . . . . . . . . . . . . . . . . . . . . . . . . . . . . . . . . . . . . 1
Assigning Printer Plug-ins . . . . . . . . . . . . . . . . . . . . . . . . . . . . . . . . . . . . . . . . . . . . . . 2
Printing Multiple Copies of Cards . . . . . . . . . . . . . . . . . . . . . . . . . . . . . . . . . . . . . . . . . 2
Designing an ID Works Project to Encode Magnetic Stripes . . . . . . . . . . . . . . . . . . . 2
Creating a New Encoder Configuration . . . . . . . . . . . . . . . . . . . . . . . . . . . . . . . . . . . . 4
Changing an Encoder Configuration . . . . . . . . . . . . . . . . . . . . . . . . . . . . . . . . . . . . . . 6
Deleting an Encoder Configuration . . . . . . . . . . . . . . . . . . . . . . . . . . . . . . . . . . . . . . . 7
Distributing Encoder Configurations . . . . . . . . . . . . . . . . . . . . . . . . . . . . . . . . . . . . . . 8
ID Works Standard and Enterprise Version 5 Online Reference Library
Datacard Smart Driver and ImageCard Printer and Magnetic Stripe Plug-ins
1
Introduction to this Guide
This document explains how to use the Datacard® Smart Driver
Printer and Magnetic Stripe Plug-in with ID Works® identification
software. It explains two sets of plug-ins:
•
The Datacard Smart Driver Printer Plug-in and Datacard Smart
Driver Magnetic Stripe Plug-in, recommended for use with any
printer that uses the Datacard Smart Driver printer driver
•
The DataCard ImageCard® Select/IV Plug-in and Datacard
Select/IV Magnetic Stripe Plug-in, for use with SP35, Select™
Class, ImageCard IV, Magna™ Class, Magna™ Platinum™
Series, Express™ Class, Select™ Class with Advanced Imaging
Technology™, Select™ Platinum™ Series, and Magna™ Class
with Advanced Imaging Technology™ printers
The DataCard ImageCard Select/IV plug-ins are provided in this
release for the convenience of customers who have existing ID
Works identification software projects configured to use them. If you
are creating a new ID Works project, you should use the Smart Driver
plug-ins.
What is a Plug-in?
A plug-in is a software module that provides an interface between the
main ID Works applications and a peripheral device (such as a card
printer) or between the peripheral device and a component within the
device (such as an encoder for magnetic stripes).
ID Works
Application
Printer
Plug-in
Encoder
Plug-in
The printer plug-in connects to the ID Works application and the
magnetic stripe plug-in connects to the printer plug-in.
You can create and save multiple configurations for the ID Works
Basic. A configuration is a group of settings tailored to the way you
use the device. For each configuration, you can specify certain
options to suit your needs.
ID Works Standard and Enterprise Version 5 Online Reference Library
2
Datacard Smart Driver and ImageCard Printer and Magnetic Stripe Plug-ins
Assigning Printer Plug-ins
You specify associations between available printer plug-ins and
installed printers by using the Assign Printer Plug-in utility in the ID
Works Administrator application. See the online help topic “Assign
printer plug-ins” for step-by-step instructions.
If the printer driver was installed on the computer before the ID Works
software was installed, the assignment is made automatically. Printer
plug-ins must be assigned on each computer that prints cards with
your ID Works project.
Printing Multiple Copies of Cards
When a Production operator specifies that two or more copies of a
card be printed, the exact method of fulfilling the request depends on
the features included on the card.
If the card requires neither smart card encoding nor card completion
status (a Software Development Kit feature), the plug-in will send the
number of copies specified to the printer driver and will create a
single print job.
If the card has a smart card chip, the ID Works software will create
one print job for each copy of each card.
If the request includes card completion status, the plug-in will display
an error message and stop the print job. To print multiple copies of a
card with card completion status, submit multiple requests, each with
a card quantity of 1.
Designing an ID Works Project to
Encode Magnetic Stripes
Follow these steps to design an ID Works project that includes
magnetic stripe encoding:
1
On your Production Form, insert a field for each magnetic stripe
track you want to encode. To combine information from two or
more fields on a track, create a composite field. See the online
help topic “Add a composite field to a Production Form” for stepby-step instructions.
ID Works Standard and Enterprise Version 5 Online Reference Library
Datacard Smart Driver and ImageCard Printer and Magnetic Stripe Plug-ins
3
2
In your Card design, insert a magnetic stripe field. See the online
help topic “Add a magnetic stripe field to a card” for step-by-step
instructions.
3
Double-click on the magnetic stripe field. The Edit Field
Properties [Magnetic Stripe] dialog box opens.
4
On the Encoding tab, select Datacard Smart Driver Magnetic
Stripe Plug-in or Datacard Select/IV Magnetic Stripe Plug-in
in the Device list.
5
Also on the Encoding tab, select an encoder Configuration. See
“Creating a New Encoder Configuration” on page 4 or “Changing
an Encoder Configuration” on page 6.
6
Click OK. The Edit Field Properties [Magnetic Stripe] dialog box
closes.
7
Using the Field Connector, connect Production Form fields to the
appropriate tracks in the Production Output area. See the online
help topic “Connect fields” for step-by-step instructions.
8
Print a test card for your project using the ID Works Production
application.
Test cards printed in the ID Works Designer application are not
encoded.
ID Works Standard and Enterprise Version 5 Online Reference Library
4
Datacard Smart Driver and ImageCard Printer and Magnetic Stripe Plug-ins
Creating a New Encoder Configuration
To create a new configuration by copying an existing configuration,
see Changing an Encoder Configuration.
Follow these steps to create a new encoder configuration:
1
Open or create an ID Works project that has a Card design with a
magnetic stripe field.
2
Select the magnetic stripe field and open the Edit Field Properties
[Magnetic Stripe] dialog box. See the online help topic “Add a
magnetic stripe field to a card” for step-by-step instructions.
3
On the Encoding tab of the Edit Field Properties [Magnetic
Stripe] dialog box, select Datacard Smart Driver Magnetic
Stripe Plug-in or Datacard Select/IV Magnetic Stripe Plug-in
in the Device list.
4
Click the Edit Configurations button. The Datacard Smart Driver
Magnetic Stripe Configurations dialog box opens (if using the
Datacard Select/IV Magnetic Stripe Plug-in, dialog box titles will
be different).
5
Click the New button. The New Magnetic Stripe Configuration
dialog box opens.
6
Type a name and click OK. The Datacard Smart Driver Magnetic
Stripe Configuration : [name] dialog box opens.
ID Works Standard and Enterprise Version 5 Online Reference Library
Datacard Smart Driver and ImageCard Printer and Magnetic Stripe Plug-ins
5
It may be helpful to give the configuration the same name as the
ID Works project that will use it.
7
(Optional) In the Designer Field Names area, change the track
names from the default values (Track 1, Track 2, Track 3) to the
names of the Production Form fields that will supply data for the
tracks.
8
If data for any of the tracks will be received in ASCII hexadecimal
format, select the checkbox below that track.
9
In the Module area, select the type of encoding required by the
equipment that will read the cards.
10 If necessary, select the Coercivity setting appropriate for the card
stock that will be used.
If you select a specific coercivity, this setting will override the
coercivity setting in the printer driver.
11 Click Save. The Datacard Smart Driver Magnetic Stripe
Configuration : [name] dialog box closes. Click Exit. The
Datacard Smart Driver Magnetic Stripe Configurations dialog box
closes.
ID Works Standard and Enterprise Version 5 Online Reference Library
6
Datacard Smart Driver and ImageCard Printer and Magnetic Stripe Plug-ins
Changing an Encoder Configuration
Follow these steps to change an encoder configuration:
1
Open or create an ID Works project that has a Card design with a
magnetic stripe field.
2
Select the magnetic stripe field and open the Edit Field Properties
[Magnetic Stripe] dialog box. See the online help topic “Add a
magnetic stripe field to a card” for step-by-step instructions.
3
On the Encoding tab of the Edit Field Properties [Magnetic
Stripe] dialog box, select Datacard Smart Driver Magnetic
Stripe Plug-in or Datacard Select/IV Magnetic Stripe Plug-in
in the Device list.
4
Click the Edit Configurations button. The Datacard Smart Driver
Magnetic Stripe Configurations dialog box opens (if using the
DataCard Select/IV Magnetic Stripe Plug-in, dialog box titles will
be different).
5
Select the Configuration you want to change and click Edit. The
Datacard Smart Driver Magnetic Stripe Configuration : [name]
dialog box opens.
6
Make the necessary changes.
7
Click Save to save your changes with the current configuration
name. The Datacard Smart Driver Magnetic Stripe Configuration :
[name] dialog box closes.
– or –
Click Save As to save your changes under a new configuration
name without changing the original configuration. The Save
Configuration as dialog box opens. Type a configuration name
and click OK.
ID Works Standard and Enterprise Version 5 Online Reference Library
Datacard Smart Driver and ImageCard Printer and Magnetic Stripe Plug-ins
8
7
Click Exit to close the Datacard Smart Driver Magnetic Stripe
Configurations dialog box. Click OK to close the Edit Field
Properties [Magnetic Stripe] dialog box.
Deleting an Encoder Configuration
Follow these steps to delete an encoder configuration:
1
Open an ID Works project that has a Card design with a magnetic
stripe field.
2
Select the magnetic stripe field and open the Edit Field Properties
[Magnetic Stripe] dialog box. See the online help topic “Add a
magnetic stripe field to a card” for step-by-step instructions.
3
On the Encoding tab of the Edit Field Properties [Magnetic
Stripe] dialog box, select Datacard Smart Driver Magnetic
Stripe Plug-in or Datacard Select/IV Magnetic Stripe Plug-in
in the Device list.
4
Click the Edit Configurations button. The Datacard Smart Driver
Magnetic Stripe Configurations dialog box opens (if using the
DataCard Select/IV Magnetic Stripe Plug-in, dialog box titles will
be different).
5
Select the Configuration you want to delete and click Remove. A
confirmation dialog box opens.
6
Click Yes to remove the configuration. Click Exit to close the
Datacard Smart Driver Magnetic Stripe Configurations dialog box
and then click OK to close the Edit Field Properties [Magnetic
Stripe] dialog box.
ID Works Standard and Enterprise Version 5 Online Reference Library
8
Datacard Smart Driver and ImageCard Printer and Magnetic Stripe Plug-ins
Distributing Encoder Configurations
The magnetic stripe plug-ins store configurations in the ID Works\bin
directory in a file named SmartDriverMagStripe.INI or
ICEMagStripeCfg.INI. The default location for the ID Works\bin
directory is in C:\Program Files\ Datacard\ID Works\bin, but the ID
Works installation program gave you the option to install the ID Works
files to a different location. Search for the file in Windows Explorer if
you do not know its location.
Because configurations are not stored with ID Works projects, the
Export utility in ID Works Administrator does not include any encoder
configurations you may have changed or created for your card
designs. If you will distribute your ID Works project to other
computers in your system, you must ensure that the encoder
configurations are available on those computers. There are two ways
to accomplish this:
•
Recreate the encoder configurations on each computer in your
system (requires a copy of ID Works Designer on each
computer).
•
Distribute the .INI file by copying it (using Windows Explorer) from
the computer on which it was created to the other computers in
your system.
ID Works Standard and Enterprise Version 5 Online Reference Library
Datacard 150i and 275/280P/295
Card Personalization Systems:
Guide for Use with
ID Works Software
ii
Datacard 150i and 275/280P/295 Card Personalization
Systems: Guide for Use with ID Works Software
Contents
Introduction to this Guide . . . . . . . . . . . . . . . . . . . . . . . . . . . . . . . . . . . . . . . . . . . . . . . 1
What is a Plug-in? . . . . . . . . . . . . . . . . . . . . . . . . . . . . . . . . . . . . . . . . . . . . . . . . . . . . . 1
Assigning Printer Plug-ins . . . . . . . . . . . . . . . . . . . . . . . . . . . . . . . . . . . . . . . . . . . . . . 2
Printing Multiple Copies of Cards . . . . . . . . . . . . . . . . . . . . . . . . . . . . . . . . . . . . . . . . . 2
Project Design Considerations . . . . . . . . . . . . . . . . . . . . . . . . . . . . . . . . . . . . . . . . . . . 3
Project Properties . . . . . . . . . . . . . . . . . . . . . . . . . . . . . . . . . . . . . . . . . . . . . . . . . . . . 3
Card Design Properties . . . . . . . . . . . . . . . . . . . . . . . . . . . . . . . . . . . . . . . . . . . . . . . 4
Card Size . . . . . . . . . . . . . . . . . . . . . . . . . . . . . . . . . . . . . . . . . . . . . . . . . . . . . . . 4
Card Background . . . . . . . . . . . . . . . . . . . . . . . . . . . . . . . . . . . . . . . . . . . . . . . . . 5
Field to Identify Print Jobs . . . . . . . . . . . . . . . . . . . . . . . . . . . . . . . . . . . . . . . . . . 5
Topcoat . . . . . . . . . . . . . . . . . . . . . . . . . . . . . . . . . . . . . . . . . . . . . . . . . . . . . . . . 5
Edge To Edge Printing . . . . . . . . . . . . . . . . . . . . . . . . . . . . . . . . . . . . . . . . . . . . 6
Rotate Print Orientation 180 Degrees . . . . . . . . . . . . . . . . . . . . . . . . . . . . . . . . . 6
Portrait Orientation . . . . . . . . . . . . . . . . . . . . . . . . . . . . . . . . . . . . . . . . . . . . . . . 6
Back Side of Card . . . . . . . . . . . . . . . . . . . . . . . . . . . . . . . . . . . . . . . . . . . . . . . . 6
Card Fields . . . . . . . . . . . . . . . . . . . . . . . . . . . . . . . . . . . . . . . . . . . . . . . . . . . . . . . . . 7
Text and Date Fields . . . . . . . . . . . . . . . . . . . . . . . . . . . . . . . . . . . . . . . . . . . . . . 7
Static Text Fields . . . . . . . . . . . . . . . . . . . . . . . . . . . . . . . . . . . . . . . . . . . . . . . . . 8
Barcode, Signature, Static Graphic, and Variable Graphic Fields . . . . . . . . . . . . 9
Photo Fields . . . . . . . . . . . . . . . . . . . . . . . . . . . . . . . . . . . . . . . . . . . . . . . . . . . . 10
Magnetic Stripe Fields . . . . . . . . . . . . . . . . . . . . . . . . . . . . . . . . . . . . . . . . . . . . 10
Smart Card Fields . . . . . . . . . . . . . . . . . . . . . . . . . . . . . . . . . . . . . . . . . . . . . . . 10
Embossing/Indent Limitation . . . . . . . . . . . . . . . . . . . . . . . . . . . . . . . . . . . . . . . . . . 11
Graphic Size Limitation . . . . . . . . . . . . . . . . . . . . . . . . . . . . . . . . . . . . . . . . . . . . . . 11
Using the Datacard 150i or 275/280P/295 Magstripe Plug-in . . . . . . . . . . . . . . . . . .
Designing an ID Works Project to Encode Magnetic Stripes . . . . . . . . . . . . . . . . . .
Creating a New Magnetic Stripe Encoder Configuration . . . . . . . . . . . . . . . . . . . . .
Changing a Magnetic Stripe Encoder Configuration . . . . . . . . . . . . . . . . . . . . . . . .
Deleting a Magnetic Stripe Encoder Configuration . . . . . . . . . . . . . . . . . . . . . . . . .
11
12
13
15
16
Distributing Encoder Configurations . . . . . . . . . . . . . . . . . . . . . . . . . . . . . . . . . . . . . 17
Job Tracking . . . . . . . . . . . . . . . . . . . . . . . . . . . . . . . . . . . . . . . . . . . . . . . . . . . . . . . . . 17
ID Works Standard and Enterprise Version 5 Online Reference Library
Datacard 150i and 275/280P/295 Card Personalization
Systems: Guide for Use with ID Works Software
iii
Troubleshooting . . . . . . . . . . . . . . . . . . . . . . . . . . . . . . . . . . . . . . . . . . . . . . . . . . . . . . 18
Embossing/Indent/Magnetic Stripe Fonts Do Not Appear in the List of Fonts Available
for Text Fields . . . . . . . . . . . . . . . . . . . . . . . . . . . . . . . . . . . . . . . . . . . . . . . . . . . . 18
Users Cannot Print to the 150i or 275/280P/295 System . . . . . . . . . . . . . . . . . . . . 19
I Get “Limits Exceeded” Errors Printing Cards in ID Works Production . . . . . . . . . . 22
ID Works Standard and Enterprise Version 5 Online Reference Library
iv
Datacard 150i and 275/280P/295 Card Personalization
Systems: Guide for Use with ID Works Software
ID Works Standard and Enterprise Version 5 Online Reference Library
Datacard 150i and 275/280P/295 Card Personalization
Systems: Guide for Use with ID Works Software
1
Introduction to this Guide
This document explains how to use the Datacard® 150i or 275/280P/
295 Card Personalization System with ID Works® identification
software. It explains two sets of plug-ins:
•
The Datacard 150i Plug-in and the Datacard 150i Magstripe Plugin, for use with the Datacard 150i Card Personalization System
•
The Datacard 275/280P/295 Plug-in and the Datacard 275/280P/
295 Magstripe Plug-in for use with the Datacard 2xx Card
Personalization Systems
This document gives background information about how ID Works
applications use plug-ins to translate card designs into language the
Card Personalization System can understand and use. It also
explains how ID Works features relate to features in your Card
Personalization System, as well as which ID Works features cannot
be used with your System. Finally, this document lists the steps you
must take to ensure that the ID Works applications produce the
correct results on the System.
What is a Plug-in?
A plug-in is a software module that provides an interface between the
main ID Works applications and a peripheral device (such as a card
printer) or between the peripheral device and a component within the
device (such as an encoder for magnetic stripes). The Datacard 150i
or 275/280P/295 Plug-in connects to the ID Works application, and
the Datacard 150i or 275/280P/295 Magstripe Plug-in connects to the
printer plug-in.
ID Works
Application
Datacard
150i or 275/280P/295
Plug-in
Datacard
150i or 275/280P/295
Magstripe Plug-in
ID Works Standard and Enterprise Version 5 Online Reference Library
Datacard 150i and 275/280P/295 Card Personalization
Systems: Guide for Use with ID Works Software
2
You can create and save multiple configurations for the Card
Personalization System. A configuration is a group of settings tailored
to the way you use the device. For each configuration, you can
specify certain options to suit your needs.
In addition to using the 150i or 275/280P/295 plug-ins, you can use
the generic printer plug-in with your Card Personalization System.
The 150i and 275/280P/295 plug-ins, however, provide the following
advantages:
•
The ID Works magnetic stripe field is supported; there is no need
for magnetic stripe fonts.
•
Topping for embossed text can be controlled by the ID Works
card design.
•
Card completion status is available for Software Development Kit
users.
•
The ability to do smart card personalization.
Assigning Printer Plug-ins
You specify associations between available printer plug-ins and
installed printers by using the Assign Printer Plug-in utility in the ID
Works Administrator application. See the online help topic “Assign
printer plug-ins” for step-by-step instructions.
If the printer driver was installed on the computer before the ID Works
software was installed, the assignment is made automatically. Printer
plug-ins must be assigned on each computer that prints cards with
your ID Works project.
Printing Multiple Copies of Cards
When a Production operator specifies that two or more copies of a
card be printed, the 150i or 275/280P/295 plug-in creates a separate
print job for each copy. If the multiple copy request includes using
card completion status (a Software Development Kit feature), the
plug-in will display an error message and stop the print job. To print
multiple copies of a card with card completion status, submit multiple
requests, each with a card quantity of 1.
ID Works Standard and Enterprise Version 5 Online Reference Library
Datacard 150i and 275/280P/295 Card Personalization
Systems: Guide for Use with ID Works Software
3
Project Design Considerations
D Print sample
cards from the
Designer
application to
your 150i or
275/280P/295
System to
ensure that your
card design will
work in ID Works
Production.
ID Works Designer includes features that cannot be used with the
Card Personalization System. The Designer application does not
know what kind of output device you will use, so it cannot give
feedback at design time to tell you that you are using a feature that
your System does not support. Furthermore, the options installed in
your Card Personalization System also affect which ID Works
features you can use. This section explains which ID Works features
you should avoid in your card designs.
Conversely, the Card Personalization System has features that other
card printers do not, and those features unique to the Card
Personalization System require special procedures in ID Works
Designer. This section also explains how to implement special Card
Personalization System features in your ID Works projects.
Project Properties
You must specify that you want to use embossing, indent, or
magnetic stripe fonts resident in the Card Personalization System.
Follow these steps:
1
Open the Edit Project Properties dialog box. (See the Designer
online help topic, “Access the Edit Project Properties dialog box”.)
2
On the Printer Fonts tab, select Display Printer Fonts and then
select your Card Personalization System as the Card Printer.
ID Works Standard and Enterprise Version 5 Online Reference Library
Datacard 150i and 275/280P/295 Card Personalization
Systems: Guide for Use with ID Works Software
4
3
Click OK. The Edit Project Properties dialog box closes.
Card Design Properties
You change properties of the overall card design using the Edit Card
Design Properties dialog box. (See the Designer online help topic,
“Access the Edit Card Design Properties dialog box”.)
Card Size
CR80 is the only card size supported by the Datacard 150i and 275/
280P/295 Plug-ins.
To use CR50 or custom card sizes with the Datacard 275/280P/295
Card Personalization System, use the generic printer plug-in and
printer fonts for magnetic stripe encoding. Smart card encoding is not
available when using the generic printer plug-in. (See the Designer
online help topic, “Change card size”.)
ID Works Standard and Enterprise Version 5 Online Reference Library
Datacard 150i and 275/280P/295 Card Personalization
Systems: Guide for Use with ID Works Software
5
Card Background
Because the 150i System does not support graphics, any background
specified in your card design will be ignored.
For the 275/280P/295 System, do not use a colored card
background. You can use single-color graphics if the UltraGrafix®
module is part of your System.
Field to Identify Print Jobs
Because the Datacard 150i and 275/280P/295 plug-ins bypass the
Windows print spooler, any field selected to identify print jobs is
ignored.
See “Job Tracking” on page 17 for more information.
Topcoat
When used with a Card Personalization System, the Topcoat setting
on the Printing tab of the Edit Card Design Properties dialog box
indicates that all embossed text will have topping foil applied if your
System includes the topper module. Topping makes embossed text
easier to read.
Because embossed text must be on the front side of the card, the
Topcoat setting for the back side of the card is ignored.
ID Works Standard and Enterprise Version 5 Online Reference Library
Datacard 150i and 275/280P/295 Card Personalization
Systems: Guide for Use with ID Works Software
6
Edge To Edge Printing
Because the 150i System does not support graphics, Edge To Edge
Printing, if selected, will be ignored.
Do not attempt to use edge-to-edge printing on a 275/280P/295
System, either by supplying a background graphic that covers the
entire card or by placing fields closer than 0.1 inch (2.5 mm) from any
edge of the card.
Rotate Print Orientation 180 Degrees
Because the emboss and indent fonts can operate in only one
orientation, this selection is not supported. If your 275/280P/295
System includes the UltraGrafix option, you can rotate graphics fields
and text fields that use TrueType or OpenType fonts on a field-byfield basis.
Portrait Orientation
Because the emboss and indent fonts can operate only in landscape
orientation, this selection is not supported. If your 275/280P/295
System includes the UltraGrafix option, you can rotate graphics fields
and text fields that use TrueType or OpenType fonts on a field-byfield basis to achieve a portrait effect.
Back Side of Card
See the Designer online help topic, “Create a two-sided card”. The
only types of fields that are allowed on the back side of a card are:
•
Magnetic Stripe — used with the Datacard 150i or 275/280P/295
Magstripe Plug-in to encode magnetic stripes. The Card
Personalization System does not need to have magnetic stripe
fonts installed. If your card design includes a magnetic stripe
field, it cannot use magnetic stripe fonts.
•
Text that specifies an indent font installed in the System.
For convenience in positioning a text field using an indent font,
you can place a Non-Printable Area on the back side of a card
and then position the text field on top of the non-printable area.
•
Text — up to three fields that specify a magnetic stripe font
installed in the System. If your card design includes text fields
that specify a magnetic stripe font, it cannot use an ID Works
ID Works Standard and Enterprise Version 5 Online Reference Library
Datacard 150i and 275/280P/295 Card Personalization
Systems: Guide for Use with ID Works Software
7
magnetic stripe field. The ID Works magnetic stripe field is the
recommended method for encoding magnetic stripes.
Card Fields
You change properties of the individual fields on the card design
using the Edit Field Properties dialog box. (See the Designer online
help topic, “Access the Edit Field Properties dialog box”.)
Text and Date Fields
If your 275/280P/295 System includes the UltraGrafix option, you can
specify TrueType or OpenType fonts for text and date fields. They will
behave as described in the ID Works Administrator’s Guide with the
following exceptions:
•
•
The Topcoat setting is ignored. See “Topcoat” on page 5.
•
The Use K-Panel if available setting is ignored.
Datacard recommends using the default values for Foreground
Color and Background Color.
If your System includes embossing fonts, you can use them for text
and date fields with the following limitations:
•
•
•
•
Embossing fonts can be used only on the front side of the card.
On the 150i System, if topping foil is to be applied to the
embossed text, the field must be located in the lower half of the
card. In addition:
•
The Left position of the field must be 0.238 inch (6 mm) or
greater.
•
The sum of the Left and Width values must be 3.137 inches
(79 mm) or less.
•
For a 7 cpi font, the Top position must be between 1.188 and
1.859 inches (30 and 47 mm).
•
For a 10 cpi font, the Top position must be between 1.188
and 1.922 inches (30 and 49 mm).
The Alignment setting is ignored. All text is left-justified.
The Rotation, Topcoat, Automatically Adjust Font Size, and
foreground and background color settings are ignored.
ID Works Standard and Enterprise Version 5 Online Reference Library
Datacard 150i and 275/280P/295 Card Personalization
Systems: Guide for Use with ID Works Software
8
If your System includes indent fonts, you can use them for text and
date fields with the following limitations:
•
On the 275/280P/295 Systems, indent fonts can be used only on
the back side of the card.
•
•
The Alignment setting is ignored. All text is left-justified.
The Rotation, Topcoat, Automatically Adjust Font Size, and
foreground and background color settings are ignored.
Static Text Fields
If your 275/280P/295 System includes the UltraGrafix option, you can
specify TrueType or OpenType fonts for static text fields. They will
behave as described in the ID Works Administrator’s Guide with the
following exceptions:
•
•
The Topcoat setting is ignored. See “Topcoat” on page 5.
•
The Use K-Panel if available setting is ignored.
Datacard recommends using the default values for Foreground
Color and Background Color.
If your System includes embossing fonts, you can use them for static
text fields with the following limitations:
•
•
•
Embossing fonts can be used only on the front side of the card.
On the 150i System, if topping foil is to be applied to the
embossed text, the field must be located in the lower half of the
card. In addition:
•
The Left position of the field must be 0.238 inch (6 mm) or
greater.
•
The sum of the Left and Width values must be 3.137 inches
(79 mm) or less.
•
For a 7 cpi font, the Top position must be between 1.188 and
1.859 inches (30 and 47 mm).
•
For a 10 cpi font, the Top position must be between 1.188
and 1.922 inches (30 and 49 mm).
The Alignment setting is ignored. All text is left-justified.
ID Works Standard and Enterprise Version 5 Online Reference Library
Datacard 150i and 275/280P/295 Card Personalization
Systems: Guide for Use with ID Works Software
•
Word Wrap is ignored. A static text field that uses embossing
fonts can be only one line. Use multiple static text fields for
multiple lines of text.
•
The Rotation, Topcoat, Automatically Adjust Font Size, and
foreground and background color settings are ignored.
9
If your System includes indent fonts, you can use them for static text
fields with the following limitations:
•
On the 275/280P/295 Systems, indent fonts can be used on only
the back side of the card.
•
•
The Alignment setting is ignored. All text is left-justified.
•
The Rotation, Topcoat, Automatically Adjust Font Size, and
foreground and background color settings are ignored.
Word Wrap is ignored. A static text field that uses indent fonts
can be only one line. Use multiple static text fields for multiple
lines of text.
Barcode, Signature, Static Graphic, and Variable Graphic Fields
Because the 150i System does not support graphics, these fields will
be ignored.
If your 275/280P/295 System includes the UltraGrafix option, these
fields will behave as described in the ID Works Administrator’s Guide
with the following exceptions:
•
•
•
•
The field must be on the front side of the card design.
The Topcoat setting is ignored. See “Topcoat” on page 5.
Background Color for a barcode field is not supported.
If you use Interpretation Text options for a barcode field, you
must select an OpenType or TrueType font for the text.
ID Works Standard and Enterprise Version 5 Online Reference Library
Datacard 150i and 275/280P/295 Card Personalization
Systems: Guide for Use with ID Works Software
10
Photo Fields
Because the 150i System does not support graphics, photo fields will
be ignored.
If your 275/280P/295 System includes the UltraGrafix option, photo
fields will behave as described in the ID Works Administrator’s Guide
with the following exceptions:
•
•
•
•
•
The field must be on the front side of the card design.
The Topcoat setting is ignored. See “Topcoat” on page 5.
Datacard recommends that any border used be black.
Ghosted photos are not supported.
Datacard recommends that the Configure K-Panel Printing utility
in the ID Works Administrator application not be used with the
Card Personalization System. The Datacard 275/280P/295 Plugin automatically optimizes graphics for printing with a one-color
ribbon.
Magnetic Stripe Fields
If your 275/280P/295 System includes a magnetic stripe option (all
150i Systems have magnetic stripe capability), ID Works magnetic
stripe fields will behave as described in the ID Works Administrator’s
Guide with the following exception:
•
The field should be on the back side of the card design.
See “Designing an ID Works Project to Encode Magnetic Stripes” on
page 12 for complete information.
Smart Card Fields
If your Card Personalization System includes a smart card module
and a smart card encoder plug-in is installed on your computer, smart
card fields will behave as described in the ID Works Administrator’s
Guide with the following exception:
•
The field must be on the front side of the card design.
See the documentation for the installed encoder plug-in for more
information.
ID Works Standard and Enterprise Version 5 Online Reference Library
Datacard 150i and 275/280P/295 Card Personalization
Systems: Guide for Use with ID Works Software
11
Embossing/Indent Limitation
On the 275/280P/295 Systems, you can use up to 11 fields that,
combined, use embossing fonts and indent fonts.
Graphic Size Limitation
When the Datacard 275/280P/295 Plug-in prepares data for a 275/
280P/295 System with the UltraGrafix option, it combines all the
information that will be printed with the UltraGrafix option into a
composite graphics file. This includes background graphics, static
graphics, variable graphics, barcodes, signatures, photos, and text
and date fields that use TrueType or OpenType fonts.
The 275/280P/295 System can accept a graphics file of 60 KB or
less. Graphics files that are too large produce an error at print time.
The only way to tell whether the composite graphics file will be under
the size limit is to print sample cards from the Designer application.
See the Designer online help topic, “Print a sample card”.
If your card design contains variable graphics or a photo field, print
samples from the Production application using a variety of photos and
all possible graphic elements. If any of your sample cards produces
an error message, consider simplifying your card design.
Using the Datacard 150i or 275/280P/295
Magstripe Plug-in
This section gives step-by-step instructions for using the Datacard
150i or 275/280P/295 Magstripe Plug-in to encode magnetic stripes
on plastic cards.
It is possible to encode magnetic stripes without a Datacard
Magstripe Plug-in by using magnetic stripe fonts, but Datacard
recommends using the plug-in that was developed for your Card
Personalization System. If you will encode smart card chips using a
smart card plug-in and encode a magnetic stripe on the same card,
you must use the appropriate Datacard Magstripe Plug-in.
ID Works Standard and Enterprise Version 5 Online Reference Library
Datacard 150i and 275/280P/295 Card Personalization
Systems: Guide for Use with ID Works Software
12
Designing an ID Works Project to Encode Magnetic
Stripes
Follow these steps to design an ID Works project that includes
magnetic stripe encoding:
1
On your Production Form, insert a field for each magnetic stripe
track you want to encode. To combine information from two or
more fields on a track, create a composite field. See the
Designer online help topic “Add a composite field to a Production
Form” for step-by-step instructions.
The Datacard Magstripe Plug-ins add the necessary start
sentinels before sending data to the encoding module.
Consider using masks on the text fields connected to magnetic
stripe tracks to ensure that only valid characters will be entered.
See “Text Field Masks” in chapter 3 of the ID Works
Administrator’s Guide.
2
In your Card design, insert a magnetic stripe field on the back
side of your card. See the Designer online help topic “Add a
magnetic stripe field to a card” for step-by-step instructions.
3
Double-click on the magnetic stripe field. The Edit Field
Properties [Magnetic Stripe] dialog box opens.
4
On the Encoding tab, select Datacard 150i Magstripe Plug-in
or Datacard 275/280P/295 Magstripe Plug-in in the Device list.
5
Also on the Encoding tab, select an encoder configuration. See
“Creating a New Magnetic Stripe Encoder Configuration” on
page 13 or “Changing a Magnetic Stripe Encoder Configuration”
on page 15.
6
Click OK. The Edit Field Properties [Magnetic Stripe] dialog box
closes.
7
Using the Field Connector, connect Production Form fields to the
appropriate tracks in the Production Output area. See the
Designer online help topic “Connect fields” for step-by-step
instructions.
ID Works Standard and Enterprise Version 5 Online Reference Library
Datacard 150i and 275/280P/295 Card Personalization
Systems: Guide for Use with ID Works Software
8
13
Print and encode a test card for your project using the ID Works
Production application.
Sample cards printed in the ID Works Designer application are
not encoded.
9
Verify that the card can be read in a magnetic stripe reader.
Creating a New Magnetic Stripe Encoder
Configuration
To create a new configuration by copying an existing configuration,
see “Changing a Magnetic Stripe Encoder Configuration” on page 15.
Follow these steps to create a new encoder configuration:
1
Open or create an ID Works project that has a Card design with a
magnetic stripe field.
2
Select the magnetic stripe field and open the Edit Field Properties
[Magnetic Stripe] dialog box. See the Designer online help topic
“Add a magnetic stripe field to a card” for step-by-step
instructions.
ID Works Standard and Enterprise Version 5 Online Reference Library
Datacard 150i and 275/280P/295 Card Personalization
Systems: Guide for Use with ID Works Software
14
3
On the Encoding tab of the Edit Field Properties [Magnetic
Stripe] dialog box, select Datacard 150i Magstripe Plug-in or
Datacard 275/280P/295 Magstripe Plug-in in the Device list.
4
Click the Edit Configurations button. The MagStripe
Configurations dialog box opens.
5
Click the New button. The New MagStripe Configuration dialog
box opens.
6
Type a name and click OK. The MagStripe Configuration : [name]
dialog box opens.
It may be helpful to give the configuration the same name as the
ID Works project that will use it.
7
(Optional) In the Designer Field Names area, change the track
names from the default values (Track 1, Track 2, Track 3) to the
names of the Production Form fields that will supply data for the
tracks.
ID Works Standard and Enterprise Version 5 Online Reference Library
Datacard 150i and 275/280P/295 Card Personalization
Systems: Guide for Use with ID Works Software
15
In the Module area, the only type of encoding available is IAT.
8
Click Save. The MagStripe Configuration : [name] dialog box
closes. Click Exit. The MagStripe Configurations dialog box
closes.
9
Click OK to close the Edit Field Properties [Magnetic Stripe]
dialog box.
Changing a Magnetic Stripe Encoder Configuration
Follow these steps to change an encoder configuration:
1
Open or create an ID Works project that has a Card design with a
magnetic stripe field.
2
Select the magnetic stripe field and open the Edit Field Properties
[Magnetic Stripe] dialog box. See the Designer online help topic
“Add a magnetic stripe field to a card” for step-by-step
instructions.
3
On the Encoding tab of the Edit Field Properties [Magnetic
Stripe] dialog box, select Datacard 150i Magstripe Plug-in or
Datacard 275/280P/295 Magstripe Plug-in in the Device list.
4
Click the Edit Configurations button. The MagStripe
Configurations dialog box opens.
5
Select the configuration you want to change and click Edit. The
MagStripe Configuration : [name] dialog box opens.
6
Make the necessary changes.
7
Click Save to save your changes with the current configuration
name. The MagStripe Configuration : [name] dialog box closes.
– or –
ID Works Standard and Enterprise Version 5 Online Reference Library
Datacard 150i and 275/280P/295 Card Personalization
Systems: Guide for Use with ID Works Software
16
Click Save As to save your changes under a new configuration
name without changing the original configuration. The Save
Configuration as dialog box opens. Type a configuration name
and click OK.
8
Click Exit to close the MagStripe Configurations dialog box.
9
Click OK to close the Edit Field Properties [Magnetic Stripe]
dialog box.
Deleting a Magnetic Stripe Encoder Configuration
Follow these steps to delete an encoder configuration:
1
Open an ID Works project that has a Card design with a magnetic
stripe field.
2
Select the magnetic stripe field and open the Edit Field Properties
[Magnetic Stripe] dialog box. See the Designer online help topic
“Add a magnetic stripe field to a card” for step-by-step
instructions.
3
On the Encoding tab of the Edit Field Properties [Magnetic
Stripe] dialog box, select Datacard 150i Magstripe Plug-in or
Datacard 275/280P/295 Magstripe Plug-in in the Device list.
4
Click the Edit Configurations button. The MagStripe
Configurations dialog box opens.
5
Select the configuration you want to delete and click Remove. A
confirmation dialog box opens.
6
Click Yes to remove the configuration. Click Exit to close the
MagStripe Configurations dialog box and then click OK to close
the Edit Field Properties [Magnetic Stripe] dialog box.
ID Works Standard and Enterprise Version 5 Online Reference Library
Datacard 150i and 275/280P/295 Card Personalization
Systems: Guide for Use with ID Works Software
17
Distributing Encoder Configurations
The Datacard 150i and 275/280P/295 Magstripe Plug-ins store
configurations in the ID Works\bin directory in a file named
DCC295MagStripe.INI or DCC150iMagStripe.INI. The default
location for the ID Works\bin directory is in C:\Program
Files\Datacard\ID Works\bin, but the ID Works installation program
allows you to install the ID Works files to a different location. Search
for the file in Windows Explorer if you do not know its location.
Because configurations are not stored with ID Works projects, the
Export utility in ID Works Administrator does not include any encoder
configurations you may have changed or created for your card
designs. If you will distribute your ID Works project to other
computers in your system, you must ensure that the encoder
configurations are available on those computers. There are two ways
to accomplish this:
•
Recreate the encoder configurations on each computer in your
system (requires a copy of ID Works Designer on each
computer).
•
Distribute the .INI file by copying it (using Windows Explorer) from
the computer on which it was created to the other computers in
your system.
Job Tracking
Because the Datacard 150i and 275/280P/295 Magstripe Plug-ins
bypass the Windows print spooler, the method described in the
Production help topic, “Track card printing jobs” does not apply. The
ID Works Print Job Monitor, automatically loaded with your ID Works
software product, provides an alternate way of tracking jobs through
the Card Personalization System.
To begin using the ID Works Print Job Monitor, from the Windows
Start button select Programs, Datacard, ID Works, Tools, and then
Print Monitor.
ID Works Standard and Enterprise Version 5 Online Reference Library
18
Datacard 150i and 275/280P/295 Card Personalization
Systems: Guide for Use with ID Works Software
Click Help to see descriptions of the information provided by the Job
Monitor and procedures for using it.
Troubleshooting
The interplay among the Windows® operating system, the ID Works
software (including the Datacard plug-ins), the 150i or 275/280P/295
driver, and the physical 150i or 275/280P/295 System is complex. An
incorrect setting in any component can result in unexpected results.
This section lists some common symptoms and the steps you should
take to remedy them.
Embossing/Indent/Magnetic Stripe Fonts Do Not
Appear in the List of Fonts Available for Text Fields
First make sure you have specified that printer fonts are used in the
project. See “Project Properties” on page 3. Note that performing the
last step of the procedure (clicking OK) is required. Closing the Edit
Project Properties dialog box in any other way is not adequate, even
if the Printer Fonts tab appears to have the correct settings when you
enter it.
If the fonts still are not available, check that the fonts have been
selected in the driver. See the Installation and Technical Reference
Manual for your printer driver for information on selecting fonts in the
printer driver.
ID Works Standard and Enterprise Version 5 Online Reference Library
Datacard 150i and 275/280P/295 Card Personalization
Systems: Guide for Use with ID Works Software
19
Users Cannot Print to the 150i or 275/280P/295
System
Under the Windows 2000 operating system, a Datacard Card
Personalization System cannot switch back and forth between
printing from ID Works identification software applications and from
non-ID Works applications.
The serial communication port to which the Card Personalization
System is attached is locked by the operating system when the
printer driver is installed. Only the printer driver has access to the
port. Because the ID Works software cannot use the driver, it is
prevented from communicating with the System. The printer driver
can be redirected from the serial communication port that the Card
Personalization System is attached to, allowing the ID Works
software to access the serial port and communicate with the System.
However, this redirection prevents sending information to the System
from any other application. If you need to access the System from the
ID Works software and from other applications, you will need to take
the following steps before you change applications.
Preliminary Steps:
The following steps are needed to support using the Card
Personalization System from ID Works applications.
1
Install and test the Card Personalization System and printer
driver. (The steps needed to accomplish this are documented in
the Printer Driver for the Datacard 150i, 28x, and 450 Series
Printers on Windows NT and 2000 Installation and Technical
Reference Manual,which came with your Card Personalization
System.)
2
Install ID Works software and Datacard plug-ins.
3
Assign the appropriate plug-in to the System using the ID Works
Administrator Assign Printer Plug-ins utility. See the Administrator
online help topic, “Assign printer plug-ins”.
4
Set the ID Works project properties to use printer fonts from the
installed Card Personalization System. See “Project Properties”
on page 3.
5
Attach the System to serial communication port 1.
ID Works Standard and Enterprise Version 5 Online Reference Library
Datacard 150i and 275/280P/295 Card Personalization
Systems: Guide for Use with ID Works Software
20
Freeing the Serial Communication Port for ID Works Printing:
The following steps remove the lock from the serial port, allowing ID
Works applications to communicate with the System.
1
Open the Printers folder by clicking Start, then Settings, and
then Printers.
2
Right-click the Card Personalization System in the list and select
Properties from the menu. The screen will look something like
the following:
3
On the Ports tab of the Properties dialog box, select FILE. You
will see something similar to the following dialog box:
ID Works Standard and Enterprise Version 5 Online Reference Library
Datacard 150i and 275/280P/295 Card Personalization
Systems: Guide for Use with ID Works Software
4
Click OK. The Properties dialog box closes.
5
Close the Printers folder.
21
The serial port is now free for use with ID Works applications.
Reassigning the Serial Communication Port to the Printer
Driver:
Before using a non-ID Works application with the Card
Personalization System, redirect the printer driver to serial
communication port 1. Refer to the instructions above for information
on accessing the printer Properties dialog box.
ID Works Standard and Enterprise Version 5 Online Reference Library
Datacard 150i and 275/280P/295 Card Personalization
Systems: Guide for Use with ID Works Software
22
I Get “Limits Exceeded” Errors Printing Cards in ID
Works Production
This error indicates that a text or graphics field extends too far to the
right. Adjust your card design so that:
•
The maximum number of characters in the text field does not
extend too far to the right.
•
(275/280P/295 System with UltraGrafix option only) All graphics
(static graphics, variable graphics, and photos) are at least 0.1
inch (2.5 mm) from the right edge of the card.
Alternatively, ask your Datacard Service Representative to change
the configuration of your 275/280P/295 System so that Check Card
Limits Error is OFF. If you disable card limits checking, Datacard
recommends that you use text field masking to ensure that instances
of too much data are caught during input.
ID Works Standard and Enterprise Version 5 Online Reference Library
Using the ID Works
Online Reference Library
ii
Using the ID Works Online Reference Library
Contents
Welcome . . . . . . . . . . . . . . . . . . . . . . . . . . . . . . . . . . . . . . . . . . . . . . . . . . . . . . . . . . . . . 1
Why We Chose PDF . . . . . . . . . . . . . . . . . . . . . . . . . . . . . . . . . . . . . . . . . . . . . . . . . . . . 1
Reading the Library Online . . . . . . . . . . . . . . . . . . . . . . . . . . . . . . . . . . . . . . . . . . . . . .
Getting Around . . . . . . . . . . . . . . . . . . . . . . . . . . . . . . . . . . . . . . . . . . . . . . . . . . . . . .
Moving from Page to Page . . . . . . . . . . . . . . . . . . . . . . . . . . . . . . . . . . . . . . . . .
Returning to the Last View . . . . . . . . . . . . . . . . . . . . . . . . . . . . . . . . . . . . . . . . .
Viewing a Page . . . . . . . . . . . . . . . . . . . . . . . . . . . . . . . . . . . . . . . . . . . . . . . . . . . . .
Changing the Magnification . . . . . . . . . . . . . . . . . . . . . . . . . . . . . . . . . . . . . . . . .
Moving a Page Around . . . . . . . . . . . . . . . . . . . . . . . . . . . . . . . . . . . . . . . . . . . .
Finding a Topic . . . . . . . . . . . . . . . . . . . . . . . . . . . . . . . . . . . . . . . . . . . . . . . . . . . . . .
Jumping from the Bookmark List . . . . . . . . . . . . . . . . . . . . . . . . . . . . . . . . . . . . .
Jumping from Within a Page . . . . . . . . . . . . . . . . . . . . . . . . . . . . . . . . . . . . . . . .
Searching by Keyword . . . . . . . . . . . . . . . . . . . . . . . . . . . . . . . . . . . . . . . . . . . . .
Printing Pages . . . . . . . . . . . . . . . . . . . . . . . . . . . . . . . . . . . . . . . . . . . . . . . . . . . . . .
2
2
2
2
3
3
3
4
4
5
5
6
ID Works Standard and Enterprise Version 5 Online Reference Library
Using the ID Works Online Reference Library
1
Welcome
Welcome to the Datacard® ID Works® identification software Online
Reference Library. This library contains end-user documentation to
help you understand, create, and use ID Works projects.
Some information included here may not apply to your environment.
For example, if you do not encode magnetic stripes on your cards,
you will not need to read the Smart Driver and ImageCard® Printer
and Magnetic Stripe Plug-ins document.
Conversely, your system may include some equipment, such as a
TWAIN-compliant camera, that Datacard does not manufacture or
sell. Such equipment is not documented in this library. See the
manufacturer’s documentation for those products.
Why We Chose PDF
Documents are stored in this library using the Adobe® Acrobat®
Portable Document Format, or PDF. Distributing product information
as PDF files has several advantages:
•
PDF offers you extensive search capabilities. A full-text index is
available for every file in the library.
•
You can use hypertext jumps to move about in a file you are
reading on line.
•
You can print the documents for reference or to read when you
are away from your computer. If your printer can print on both
sides of a piece of paper, the PDF documents you print will look
just like a traditional hard copy manual.
ID Works Standard and Enterprise Version 5 Online Reference Library
2
Using the ID Works Online Reference Library
Reading the Library Online
Online manuals contain the same information as paper manuals, but
you use them a little differently:
•
Instead of turning pages by hand, you use the mouse to “jump” to
the page you want to read.
•
To find a topic, you can browse a list of “bookmarks,” scan the
table of contents, or perform a keyword search.
•
When you find the information you need, you can either read it on
your computer monitor or print it.
Getting Around
In an online manual, you can move from page to page as you would
in a book. You can also jump back to whichever page you viewed
most recently.
Moving from Page to Page
Click these buttons to “turn the pages” of the document. The inside
buttons send you to the previous page and the next page. The
outside buttons send you to the first page and last page of the
document.
Returning to the Last View
Click the left button to return to the page you viewed most recently
and the right button to return to the current page.
ID Works Standard and Enterprise Version 5 Online Reference Library
Using the ID Works Online Reference Library
3
Viewing a Page
Magnifying a page can make the text—and especially the graphics—
easier to read. However, magnified pages are often too big to fit on
screen all at once. To see different parts of a page, you can move the
page around inside the window.
Changing the Magnification
To see graphics more clearly, select the number in this control (at the
bottom of the screen), type 134 or 192, and then press ENTER.
To return to the original view, click the button on the right. The other
buttons in this cluster let you see more of the page.
You can also select a magnification by choosing from those listed in
the View menu.
Moving a Page Around
When you click this button, the cursor becomes a hand, which you
can use to drag the page around inside the window. (You can also
use the scroll bars to scroll a page.)
ID Works Standard and Enterprise Version 5 Online Reference Library
4
Using the ID Works Online Reference Library
Finding a Topic
There are two ways to get to the information you need. You can:
•
Jump to a topic from the bookmark list on the left side of your
window.
•
Perform a keyword search for a topic.
Jumping from the Bookmark List
The list of “bookmarks” on the left side of the screen shows the
contents of the entire document. The first bookmark in the list returns
you to the contents page for the entire Online Reference Library.
When the pointer is over a bookmark, it turns into a hand with a
pointing finger.
When you click a bookmark icon, that topic appears in the window.
To view a topic or
subtopic, click the
page icon.
To display
subtopics, click
the plus sign.
To get a full view of
the bookmark list,
click this line and
drag it to the right.
ID Works Standard and Enterprise Version 5 Online Reference Library
Using the ID Works Online Reference Library
5
Jumping from Within a Page
Cross-references within the document are links to the referenced
page. They appear in colored text. When the pointer is over a jump, it
turns into a hand with a pointing finger:
Searching by Keyword
You can also find information by performing a keyword search. For
example, if you are looking for instructions on installing a wuzzle, you
might perform a keyword search for “installing” or “wuzzle.” Reader
scans for the word in the text, and then allows you to jump to every
instance it finds.
To perform a keyword search:
1
Click the “find” button.
2
Type the word you want to find, and then press ENTER. Reader
will search for the word.
3
Reader will jump to the first appearance of the word (if the word is
found). To see the next appearance, press CTRL+F and then
ENTER.
ID Works Standard and Enterprise Version 5 Online Reference Library
6
Using the ID Works Online Reference Library
Printing Pages
You can print a single page, a range of pages, or an entire manual.
1
Press CTRL+P, or from the menu bar select File and then Print.
2
Specify the page or page range you want to print.
3
Click OK.
ID Works Standard and Enterprise Version 5 Online Reference Library