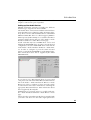
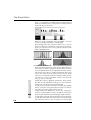
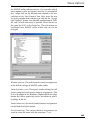
1
Manual
The present documentation is protected by law. All rights, especially the right of duplication,
circulation and translation is reserved.
No part of this publication may be reproduced in form of copies, microfilms or other processes, or transmitted into a language used for machines, especially data processing machines,
without the express written consent of the publisher.
All copyrights reserved.
MAGIX is a registered trademark of MAGIX Entertainment Corp. All other product names
are trademarks of their respective owners.
Errors and changes to the contents as well as program modifications are reserved.
© 1994 —2000 Copyright by MAGIX Entertainment Products GmbH
VST™ is a Registered Trademark of Steinberg® Soft- und Hardware GmbH.
All other trademarks are property of their respective owners. Technical specifications subject
to change without notice. Correct as of July 2000.
Table of Contents
Table of Contents
Preface 9
Contents of packaging 10
System Requirements 12
Installation 13
Our copy protection for your safety 15
Notes on the electronic manual 15
Introduction 16
What is MAGIX music studio generation 6? 16
Sound Cards 17
Testing the Sound Card 18
The MIDI Interface 18
Reading the Manual 19
Digital Audio Basics 19
CD Sound 20
Direct-to-disk Recording 20
Setting up Your Equipment 20
Setting up Your Audio Devices 21
PART 1 - MIDI STUDIO: TUTORIAL 25
Audio Cabling 26
Just Like a Multitrack 26
Mixing Desk without Sub Groups 26
Mixing Desk with Sub Groups 27
MIDI Installation 28
Interface Connection 28
MIDI Cable Connections 28
Tape Synchronization 30
Audio: Recording and Playback 31
Concept: Tracks, Audio Files, and Regions 31
Audio Recording 35
Sample Editor and Digital Factory 38
The Sample Editor Window 38
Digital Factory 39
The Waveplayer 40
The Waveplayer Window 40
Mixdown with MAGIX midi studio generation 6 44
The Mixer and HyperDraw 44
The Track Mixer 44
Audio Channel Strips 45
MIDI Channel Strips 46
3
Table of Contents
Automated Mixing 48
Graphical Mixdown with HyperDraw 49
Audio Instruments 51
MIDI: Recording and Playback 53
Flow of MIDI Signals 53
Recording Notes and Playing Them Back with Sound Generators 55
… if there still is no sound … 56
Recording, Playing Back, and Deleting Sequences 57
Fine or Rough Copying and Shifting of Sequences 58
Sequence Play-Back Parameters 58
The Autoload Song 60
Event Editor 61
The Event Float Window 63
Transport Functions 64
Score Editing and Printout 67
Interactive Score Editor 67
Editing Sequences in the Score Editor 67
Matrix Editor 69
Preparing files for CD burning 71
File Format 71
Mixdown by Track Bouncing 71
Post-Production 72
Troubleshooting 74
PCI Faults 75
SCSI and IDE Faults 76
Faulty Cables 76
Hardware Conflicts 77
Sound Cards 78
Viruses 79
Graphic Cards 79
Re-installing the Operating System 79
Updating the Operating System 80
Formatting the Hard Disk 80
PART 2 - MIDI STUDIO: REFERENCE
Using MAGIX midi studio generation 6 82
Conventions of this Manual 82
The Mouse 82
Window Functions 86
Selection Techniques 93
Edit Operations 95
General Functions of the Editors 96
Key Commands 100
Global Functions 103
4
81
Table of Contents
Song Administration 103
Transport Functions 106
The Transport Window 106
Bar Ruler 111
Cycle Mode 112
Recording 114
Chase Events 117
Arrange Window 119
Overview 119
Tracks 120
The Patch Name Editor 122
The Track Parameters 124
Sequences 126
Sequence Playback Parameters 131
Quantization 135
Groove 137
Hyper Draw in the Arrange window 137
Altering the Display 140
Reset Functions 141
Using Audio in the Arrange Window 142
Regions in the Arrange Window 142
Audio Recording 149
Functions 153
Mixers and Audio Objects 155
The basics 155
The Track Mixer 156
EQ’s, Effects and Plug-Ins 157
Audio Instruments 165
The Synthesizers—Audio Instruments 166
Faders and Level Adjustment 175
Routing 176
Automation 178
The Audio Window 180
Layout 182
Display 183
Operation 185
File Administration 189
Other Functions 195
Audio Driver 196
EASI/ASIO 196
The Sample Edit Window 197
Layout 198
Display 198
The Sample Edit Window In Use 201
5
Table of Contents
Functions 205
The WavePlayer 211
The WavePlayer window 211
The Event List 216
Display 217
Operation 217
Event List Structure 220
Event Type Structure 222
Event Float Window 225
The Drum Editor 227
Event Definitions 228
Event Definition Parameter Box 229
Operation 232
The Matrix Editor 236
Display 236
Editing Notes 237
Functions 240
Score Edit Window 241
Opening the Score Editor 241
Layout and Printing 244
Tempo 260
Tempo List Editor 260
The Graphic Tempo Editor 262
Tempo Functions 262
Synchronization 263
Synchronization Window 263
Special Functions 267
Synchronizing Video Files 269
The Basics 270
Song Settings and Preferences 278
Song Settings 278
Preferences 283
Standard MIDI Files 288
Basics 288
Glossary 290
6
Table of Contents
PART 3 - AUDIO STUDIO: TUTORIAL 299
New features in the generation 6 version 300
Quickstart 301
The first recording 301
The first arrangement 304
Terminology 307
Overview 307
Clip 307
Handle 308
Marker 308
Objects 308
Range 309
Section 309
Virtual Projects (VIPs) 310
Wave projects 311
Virtual Editing Concepts 313
Working with Objects 313
Working with Ranges 316
Volume 319
Output modus 320
Tips & Tricks 321
Working in Projects 321
Mixer 323
Performance 323
Recording/Playback 324
The Effects 325
Effects in the VIP 325
Mixer-Effects 326
Effect Calculations and Signal Manipulations 326
Internet-Functions 328
Web Publishing (Upload) 328
FTP Download 329
Burning of CDs (deluxe version only) 330
RedBook 330
Data Transfer 330
Burning CDs in MAGIX Audio Studio 330
DSP Display 332
The Individual Mouse Modes 334
Universal Mode 334
Range Mode (Secure Mode) 335
Draw Volume Mode 335
Draw Panorama Mode 335
Curve Mode 336
7
Table of Contents
Context Help mode 336
Cut mode 336
Zoom mode 336
Object separator mode 337
Pitch-shift/Time stretch mode 337
Draw wave mode (only wave projects) 337
Shortcuts 338
General 338
Range 339
Function keys 339
Mouse 340
Button overview 341
Upper Toolkit bar 341
Lower toolbars 342
Range bar 343
Problems & Solutions 344
PART 4 - AUDIO STUDIO: REFERENCE
Menu File 350
Menu Edit 363
Menu View 371
Menu Object 378
Menu Effects 387
Menu Range 404
Menu CD (deLuxe-Version) 410
Menu Tools 416
Menu Playback 420
Menu Options 431
Menu Window 447
Menu Help 455
INDEX - MIDI STUDIO 457
INDEX - AUDIO STUDIO 479
8
349
Preface
Preface
Congratulations on your purchase of MAGIX music studio generation 6!
Creating your own music or video soundtracks in a home
studio has become more and more popular. But the wide
variety of available equipment and software often confuses beginner and professional musicians alike. MAGIX
music studio generation 6 offers the perfect solution by allowing you to create high quality productions in a quick
and easy manner.
MAGIX music studio generation 6 transforms your PC
into a complete, virtual sound studio. It allows you to arrange and produce on the highest level—with any 16bit
sound card. Of course, you can also integrate other studio
equipment without any problems. This program ensures
professional production results which can be integrated
with existing and future musical studio equipment. The
following pages will introduce you in detail to the various
functions and possibilities of MAGIX music studio generation 6. Experience music like never before—turn your
PC into your own home studio.
Enjoy!
Your MAGIX Entertainment Team
9
Contents of packaging
Contents of packaging
Please make sure that the objects indicated
here are included in your packaging.
Program-CD
This CD contains the MAGIX Music World with the installation program of MAGIX music studio generation 6.
Manual
For a quick intro with MAGIX music studio generation 6
or to learn in-depth about the program, we recommend
that you take a look at the manual.
Registration card
Please send us your registration card today! MAGIX provides e-mail and phone support to its registered users. We
will also keep you up-dated on new products, up-grades,
etc.
MAGIX music network
Become a MAGIX networker! Your avantages:
– the Mega-NetWork items on offer on the MAGIX
Homepage
– The latest info and demos will be sent to you free of
charge.
– There is a Sound and Song Exchange for all
NetWorkers on the MAGIX Homepage. Here you can
swap sounds, songs and experiences and chat with
other NetWorkers.
10
Contents of packaging
– You can participate in MAGIX soundpool raffles.
Simply fill in the enclosed Winnings Card and send it
back to us as quickly as possible! Or join in online:
http://www.magix.com/network/
– Charts to join in on: MAGIX music studio generation 6
is not only multimedia software, but also the key to
participating in the MAGIX music network charts on
the Internet. Send in your masterpieces! You can
upload them directly from the program via the new web
publishing wizard!
Support
If you are unable to correct your problem with MAGIX
midi studio generation 6 contact MAGIX support:
Info
U.S.A.
Europe
[email protected]
[email protected]
Webpage
http://www.magix.com/
Fax
(310) 656-0234
++49 - (0)89-7691041
Telephone
—
0181 968 1554
Please supply the following information:
– Configuration of your system (Processor, RAM, hard
disk, etc.)
– Sound card configuration (Type, Driver)
– Information on whether other audio components are
operating properly
Legal Notice
Most chart hits and whole CDs can be downloaded from
the Internet as MP3 files. However, many of these downloads are illegal. Works protected by copyright may not be
downloaded or presented on your own homepage without
the express knowledge and consent of the copyright
owner. Free transfer and trade with such music files is
punishable by law.
There are, however, many sites offering free MP3 for
downloading. A selection of them can be accessed directly
via the MAGIX homepage (http://www.magix.com/).
Your own compositions can be presented as you wish on
homepages and in the network.
11
System Requirements
System Requirements
To run MAGIX music studio generation 6 you require the
following:
– Pentium PC running at a minimum speed of 200
MHz, preferably faster. A Pentium II or III is strongly
recommended. General rule of thumb: The faster the
machine, the more number of Audio tracks and virtual
instruments are obtainable.
– Windows 95/98/2000, 64 MB of RAM (recommended
128 MB RAM).
– 16 bit sound card
– A minimum of 100 MB of hard disk space for the
program plus additional hard disk space to store digital
audio files. CD-quality stereo sound (16 Bit, 44.1 kHz)
uses ≈10MB of hard disk space per stereo minute’s
worth of recording.
– A Super-VGA resolution monitor or better with a
minimum resolution of 800 × 600 pixel and 16 Bit
High Color.
– A CD-ROM drive and a MS-compatible mouse.
– A MIDI interface or PC sound card with a MIDI interface. If you want to use MAGIX music studio generation 6’s digital audio playback facilities, you will also
need a sound card which supports digital audio. See the
sound card section for more information.
12
Installation
Installation
1
Put the Installation CD in your CD-ROM drive.
Put the Installation CD in
your CD ROM drive
2
With Windows 95/98/2000 the installation manager
starts automatically. If it doesn’t, open the Explorer and
click on the letter corresponding to your CD ROM drive
and double click on Mworld.exe.
Autostart of the installation
or
Activation of the CD-ROM
and
double click on Mworld.exe
3
To start the installation process, click on Install MAGIX
music studio generation 6.
4
The Installation Wizard appears. Simply follow the instructions and click on “NEXT” to continue. When all files
are copied on the hard disk, a program group will be established and the installation is completed. Confirm with
“Finish”. The program automatically starts with a Demo
Project. Later you can start the program with the icon in
the Windows start menu.
13
Installation
The MAGIX Music World is the starting point for everything that you’ll find on the Installation CD such as information about other MAGIX products and our website.
You will always find the latest & greatest about MAGIX
music studio generation 6.
INSTALL
Click here to install
MAGIX music studio generation 6
DEMOS
Get demo versions and information about other MAGIX
programs.
WWW
Visit our website at www.magix.net to get
updated information about MAGIX and to
order additional products and sound or
videopools on-line.
14
BROWSE CD
Browse through the file
structure of the CD ROM.
playR jukebox
To install the MAGIX
playR jukebox, click
on this button.
EXIT
Click here to exit
the MAGIX Music
World.
Installation
Our copy protection for your safety
MAGIX music studio generation 6 is copy protected in order to stop software piracy. For your convenience, the copy
protection is very simple to use: just make sure that the
original program CD is in its drive while booting MAGIX
music studio generation 6 for the very first time that’s all.
Please remember that you will have to insert the original
CD as described above whenever you launch the program
for the first time after a reinstall.
Notes on the electronic manual
The manual in the packaging only contains an introduction into the elementary functions of MAGIX music studio generation 6. If you wish to learn more about the program, please refer to the complete user manual in the
form of an electronic document. Please make sure that the
objects indicated here are included in your packaging!
Before you can start using the electronic manual you must
first install Adobes ACROBAT READER. To do so, simply
click on the “Install Manual” icon in the MAGIX music
studio generation 6 program group. If ACROBAT
READER is installed on your system already, then you
dont need to install it again, of course.
The ACROBAT READER installation program requires
you to Restart Windows! We therefore recommend you
close all Windows applications before you install ACROBAT READER. After installation, you launch ACROBAT
READER by simply clicking on its program icon.
The complete electronic manual file is stored in the
MAGIX music studio generation 6 program root directory! In the folder that contains the MAGIX music studio
generation 6 programs, you’ll find the electronic manual
file with the ending .PDF. Open this file in Acrobat Reader
and you’ll have access to the complete manual.
15
Introduction
Introduction
What is MAGIX music studio generation 6?
16
MAGIX music studio generation 6 uses your PC as a complete, virtual sound studio. Your hard drive becomes a
highly sensitive recording tool. The sound chip of your
sound card, a microphone, your instruments or the
soundtrack of your video become the sound sources. You
have access to two highly optimized programs that are
compatible with each other: MAGIX music studio generation 6 combines a hard disk recording program with a
MIDI Sequencer.
Harddisk-Recording means digital recording of audio signals directly to the hard drive. Through the analog/digital
transformer, analog audio signals are transformed into
digital information that are saved to the hard drive as
WAV files.
MIDI means “Musical Instruments Digital Interface” and
controls the sound sources such as synthesizers or sound
cards. A MIDI file only contains information which note is
played when and how whereas WAV files are digital representation of real audio signals. That’s why MIDI files are
much smaller than WAV files.
MAGIX audio studio generation 6 allows the perfect recording and editing of sounds in WAV format. On 24 audio tracks (48 with MAGIX audio studio generation 6 deluxe), you can work with professional effects and editing
tools—even for real-time editing of video sound tracks.
Per FTP connection you can use the internet as a boundless image and sample pool and load the multimedia
building blocks from the World Wide Web directly into
your arrangement. The MAGIX web publishing area is
there for the publishing of your work—one mouse click
takes you into the charts. Every surfer is entitled to vote,
the best songs and videos will receive attractive prices…
MAGIX midi studio generation 6 controls the synthesizer-chip on your sound card (or of external MIDI instruments). In addition you get a polyphonic Waveplayer with
filter and envelope capabilities, allowing you to play your
WAV files as if you were using them in an external sampler. Furthermore the MAGIX midi studio generation 6
features 256 MIDI tracks (1.000 with MAGIX midi studio
generation 6 deLuxe) on which you can simultaneously
record and playback. And finally you get 4 (6 with MAGIX
midi studio generation 6 deLuxe) audio instrument
tracks, on which you can play and record the built-in two
(three with MAGIX midi studio generation 6 deLuxe) syn-
Introduction
thesizers. As an alternative to the MAGIX synthesizers,
you can also use VST™2.0-instruments.
You can record WAV files both in MAGIX audio studio
generation 6 and MAGIX midi studio generation 6, and
soon you’ll appreciate both possibilities. You can, for instance, draft a song in MAGIX midi studio generation 6,
play it back and simultaneously record sounds with a microphone. You can transform the MIDI files into WAV
files by using the recording function.
Both studios are only a mouse click apart! Take your audio
tracks from MAGIX midi studio generation 6 to MAGIX
audio studio generation 6 and vice versa. MAGIX music
studio generation 6 lets you do all this and more with a
very user-friendly interface. Right after the first steps,
you’ll be able to use the programs intuitively.
Sound Cards
There are dozens different PC sound cards on the market.
MAGIX music studio generation 6 works with all Windows compatible sound cards, i. e. with all that have a
driver for Windows 32 Bit Operating Systems. These drivers are listed in “Multimedia” of the Windows Control
Panel. It’s safe to assume that all modern sound cards are
Windows compatible.
Most sound cards have a synthesizer-chip for the playback
of MIDI. Additionally, most sound cards support the play
back of digital audio data. If you work with MAGIX music
studio generation 6, your sound card must have separate
drivers for MIDI and Audio playback (which most modern
sound cards do).
MAGIX music studio generation 6 supports all sound
cards that can be addressed via an ASIO or EASI driver.
The available options depend on the specific ASIO or
EASI driver you will be using. Please refer to the instructions that came with your driver. MME and DirectSound
drivers are supported via so-called MME-to-EASI respectively DirectSound-to-EASI wrapper.
Please note: If you want to use the Waveplayer, you must
use a DirectSound driver. And only DirectSound drivers
allow the simultaneous use of the Waveplayer and digital
audio tracks.
MAGIX music studio generation 6 supports sound cards
with a stereo output. Digital interfaces such as S/PDIF or
AES-EBU are also supported. MAGIX music studio generation 6 deluxe supports sound cards with up to four audio
outputs.
17
Introduction
But please note: Some older sound cards cannot play back
digital audio data. As long as you have Windows drivers,
you can use such sound cards with MAGIX music studio
generation 6; however not for playing back audio data.
Some other older sound cards use only one driver for both
Audio and MIDI. In that case, you can you MAGIX music
studio generation 6 only for MIDI or Audio but not for
MIDI and Audio simultaneously.
Testing the Sound Card
Make sure your sound card is installed correctly and the
drivers are set up properly before using MAGIX midi studio generation 6. The software which comes with the
sound card should include routines to test the card. You
must make sure it is running correctly under Windows,
not just DOS. An easy way to test the card is with the Media Player which you will find in Windows’ Accessories
Program Group. Look in the Device menu and you should
see MIDI Sequencer… and, if your card supports digital
audio, Sound…
Try playing the CANYON.MID file which Windows installs automatically in the Windows directory. Then try
playing a .WAV file. Again, there should be some in the
Windows directory. If either of these items is missing
from the Device menu it means the drivers have not been
loaded. Go back to the Drivers Control Panel and install
the correct drivers. Refer to your sound card’s manual and
the Windows Users’ Guide for more information.
The MIDI Interface
Many sound cards have a built-in MIDI interface which is
accessed from a joystick connector on the back of the card.
To use it you need a MIDI adapter. One end plugs into the
joystick socket and the other terminates in MIDI plugs or
sockets which you connect to your MIDI equipment.
Some sound card packs include the adapter but many of
the cheaper ones do not. There are also several dedicated
MIDI interfaces available. Many are on plug-in cards
which are fitted and installed into the PC just like a sound
card. There are also external MIDI interfaces which connect to the PC’s printer port or serial port. You can install
them without opening up your PC and they are ideal for
use on portable PCs. You still have to install driver software for them. Some have a Thru socket which enables
you to plug in your printer and use it without removing
the interface. Other’s don’t.
18
Introduction
Reading the Manual
Few people like reading manuals. Many software users
prefer to point and click their way around a program to
discover what it does and how it works. MAGIX midi studio generation 6 has an intuitive interface so if you know
a little about sequencers you will probably be able to learn
how most of the program works by this approach. You can
dip into the manual to look up any features you require
more information about. If you are a newcomer to sequencing we strongly recommend working through the
Tutorial. It uses a practical, hands-on approach to explain
all of MAGIX midi studio generation 6’s main functions
and by the end you should be well on the way to becoming
a sequencing expert. We recommended even the more experienced user read the Tutorial in order to become familiar with how the various parts of the program work. Finally, do at least flip through the Reference section. It not
only contains detailed information about every menu,
window and function in MAGIX midi studio generation 6
but it also includes examples of how many functions can
be used in a practical way.
Digital Audio Basics
If you’re familiar with the principles of digital audio you
can skip this section. This is a brief introduction to the
subject to help you get the most out of MAGIX midi studio
generation 6’s digital audio playback facilities. Digital audio recording is the process of converting audio data—
sound—into digital data which can be stored on a computer. The device which does this is built into most sound
cards and is known, quite helpfully, as an Audio-to-Digital
converter. This is often abbreviated as A-to-D, ATD or just
AD.
To convert the digital data back into sound, the card uses a
DA (Digital to Audio) converter. To capture sound, the AD
converter takes a sample of a sound source a specific number of times per second. This is known as the sample rate
and is measured in kHz or so-many thousand samples per
second. The higher the rate, the more samples the AD
converter takes and the more accurate the digital representation of the sound will be. The sampling resolution is the
accuracy or fineness of the measuring scale used to store
the numbers and is measured in bits. Currently there are
two resolutions commonly in use: 8 bits and 16 bits. To
give you an idea of the relevance of the sampling resolution, imagine two people are building a house. One is using a measuring stick marked to the nearest foot. The
19
Introduction
other has a stick marked to the nearest inch. Although the
house built with the stick measuring to the nearest foot
may not fall down, the one using the finer scale will build
a more accurate house.
New Audio Engine: MAGIX music studio generation 6
now works with a new, significantly improved audio engine. It offers shorter latency times, faster fader response,
improved VST™ support and overall better performance.
Monitoring, that is, listening to the input signal at the audio output, is now available. You will find these new driver
settings on the pages “Audio Drivers” and “Audio Drivers
2” in the Audio menu.
CD Sound
CD quality audio is recorded at a sample rate of 44.1 kHz
with 16 bit resolution. Many Multimedia programs use a
lower rate such as 22.05 kHz or 11.025 kHz, and many use
8 bits. This is often quite adequate if the sound is played
through inexpensive PC speakers but you would certainly
be able to tell the difference if it played through a good hifi system.
Direct-to-disk Recording
One minute of CD-quality sound requires 10 MB of storage space. Clearly it’s impractical to store this in RAM. It is
more practical to store your samples on disk. During playback this data has to be read on the fly so you need a reasonably fast hard disk if the data is to be played back accurately. Most modern disks are capable of this but some
older ones may have problems, especially if they are running in a slow PC. With MAGIX midi studio generation 6
you can playback digital audio which has previously been
saved to disk.
Setting up Your Equipment
Make sure the MIDI interface or sound card and MAGIX
midi studio generation 6 are correctly installed. If you are
using an external MIDI keyboard connect its MIDI Out to
the interface’s MIDI In. If you are also using the sounds
on the keyboard, connect its MIDI In to the interface’s
MIDI Out. If you are using the sounds on a sound card
this is not necessary. If you want to use a keyboard for recording but a MIDI sound module for playback, connect
the module’s MIDI In to the interface’s MIDI Out. If you
want to use MAGIX midi studio generation 6’s digital au20
Introduction
dio playback facility, make sure the sound card’s audio
output is connected to a pair of speakers.
Setting up Your Audio Devices
MAGIX midi studio generation 6 handles two different
hardware type categories: PC AV and ASIO.
The PC AV driver communicates with the audio hardware
using the EASI protocol (Emagic Audio Streaming Interface). There are two dedicated EASI drivers called EASI
MME and EASI DS. These so-called wrappers (MME to
EASI respectively DS to EASI) are accessible in the Driver
parameter field in the PC AV area of the Audio > Audio
Hardware & Drivers > Audio Driver menu page.
Sound cards that only have an MME driver can be used
utilizing the EASI MME driver. In order to use the desired
configuration, select the EASI MME driver under PC AV
in the Audio > Audio Hardware & Drivers > Audio Drivers. In order to configure it, press the switch “Control
Panel” or start the file EASIMME.exe in the Magix folder.
More information about this is supplied by the EASI
MME HELP file.
If you want to use a DirectSound driver for your sound
card, please select the driver EASI DirectSound under PC
AV in the Audio > Audio Hardware & Drivers > Audio
Drivers. In order to configure it, please press the switch
“Control Panel” and create a virtual device containing the
appropriate DirectSound driver. More information about
this is supplied by the Help file.
ASIO drivers are a separate category, accessible on the Audio > Audio Hardware & Drivers > Audio Driver 2 menu
page.
Please select the option that suits the drivers supplied with
your audio card. Now on to the audio engine parameters
21
Introduction
as displayed in the Audio Driver/Audio Driver 2 menu
pages.
Monitoring
This option allows you to switch monitoring (i.e. listening
to the actual input signal) on or off. Please note that monitoring is processed only via software—a certain delay is
inevitable. If you are listening to the recorded signal
through your mixing desk, you should switch this option
off.
Volume Smoothing [ms]
This parameter defines the length of the fade between two
consecutive volume values for an audio track. When setting this value to 0 you might hear zipper noise when
moving a volume fader during playback. Higher values
soften the volume changes and eliminate the zipper noise.
Max. Number of Audiotracks
The Audio Engine requires free system memory. The
amount of memory needed depends on the maximum
number of tracks to be played, and on the number of I/O
channels supplied by the driver. This setting allows you to
reduce the amount of memory used by the driver, by reducing the number of tracks. This may be sensible when
you want to run other applications or audio hardware
types simultaneously.
Larger Disk Buffer
This option influences the amount of audio data that is
read from the disk in advance. This option is switched off
by default, matching the demands of fast hard drives and
powerful computers. If you get frequent error messages
while running your MAGIX midi studio generation 6 in
this mode, you should switch this setting on, so that you
can play back more tracks, achieving higher reliability.
However, more RAM is needed in this case.
Larger Process Buffer
This parameter determines the size of the native buffer
used to compute mixers and effects. Do not activate this
option if you own a fast computer. This shortens response
times to operations such as volume changes or Solo. Experiment to find the setting that coaxes the best performance from your system.
Only available for ASIO are the following parameters.
Clock Source
22
This let’s you choose between the internal synchronization via MAGIX midi studio generation 6’s internal clock
and external synchronization received via the digital input
of the sound card.
Introduction
ASIO Buffer Delay
Some drivers do not communicate their input/output delay settings correctly to MAGIX midi studio generation 6.
If you experience irregularities, try correcting them with
these settings. Refer to the manual of your ASIO audio
card.
Max. I/O streams
Here you set the number of input signal streams coming
from your ASIO-compliant card and the number of output
streams going to your ASIO-compliant card. These are
limited to 2 input streams and 2 output streams (MAGIX
midi studio generation 6) respectively 4 output streams
(MAGIX midi studio generation 6 deLuxe).
23
Introduction
24
Part 1
Tutorial
midi
studio
25
Audio Cabling
Audio Cabling
Just Like a Multitrack
1
Insert
2
Insert
3
Insert
4
Insert
5
Insert
6
Insert
Insert
26
8
12 11 10 9
Right - Main Out - Left
R Main Insert L
R Aux Return 4 L
To the
recording inputs
Send / Return
R Tape Out L
Aux Send 4
Aux Send 3
R
Tape In
L
R Aux Return 3 L
Insert
Insert
Insert
Insert
7
Insert
Line
Line
Line
Line
Line
Line
Line
Line
Line
R Aux Return 2 L
Aux Send 2
Line
Line
Line
Mic
R Aux Return 1 L
Aux Send 1
Mic
Mic
Mic
Mic
Mic
Mic
Mic
Mic
Mic
Mic
Mic
for the
outputs
The audio cabling between the various components in
your system depends largely on your setup. Generally, the
audio hardware is connected just like a conventional multitrack machine. This applies even though the audio hardware usually has fewer inputs than outputs and has its
own internal virtual mixing desks. Hardware that has only
two analog inputs, is connected the same way you would
connect a multi-track’s track 1 and 2 inputs, that is, to the
mixing desk sub group outputs 1 & 2. These two inputs are
not exclusively assigned to MAGIX midi studio generation
6’s track 1 and 2. For example, to record on track 8, you
might use input 1, while recording tracks 7 and 8 would
use both inputs 1 and 2.
The playback outputs will in turn be wired to your mixer’s
tape or line inputs. You should try to avoid the use of auxiliary inputs (Effect Returns, Aux Returns) as these would
limit your effects, tone control, and routing options.
Two wiring examples for different mixing desks will illustrate this further. The MAGIX midi studio generation 6’s
inputs and outputs refer to the in/outputs of the audio
hardware as well as the audio in/outputs of the sound
card. This chapter deals only with analog connections to
mixing desks.
Mixing Desk without Sub Groups
If your analog mixing desk does not offer sub groups, proceed as follows:
Connect the audio hardware outputs to the first of your
desk channels’ Line or Tape inputs. Use as many channels
as your audio hardware will output. Use the remaining
channels for your other sound sources, effect processors,
and microphones.
If you find yourself short on channels, you can wire
MAGIX midi studio generation 6’s outputs to your desk’s
Aux Returns (or “Effect Returns”). This really cannot be
avoided with smaller mixers, but it is no big deal, since
MAGIX midi studio generation 6 offers extensive EQ and
processing power, anyway.
Your mixing desk will most likely offer at least two Aux
Sends (not to be confused with Aux Returns)—they are
usually “pre-fader”, or can be switched to such, with a dedicated button. “Pre-fader” means that the signal is taken
before it enters the channel fader (volume slider). This
means that the pre-fader Aux Send will output that chan-
Audio Cabling
nel’s signal, even if its fader is all the way down. This kind
of output is usually referred to as a monitor output, and
may actually be labelled as such. So, each channel has two
knobs that are used to create a mix which is sent to the
desk’s corresponding auxiliary (or monitor) output. Connect these two outputs to the audio hardware’s two inputs.
For example, if the two pre-fader Aux Sends are labelled
“Aux 3” and “Aux 4”, you would connect a cable from the
desk’s “Aux 3 Output” to the first audio hardware input
and another from Aux4 to the second.
You can now control MAGIX midi studio generation 6’s
inputs with the Aux Send controls (and their master
sends).
1
2
3
4
5
6
7
8
9
10
11
12
R Control Room L
R Main Insert L
Right - Main Out - Left
DirectOut DirectOut DirectOut DirectOut DirectOut DirectOut DirectOut DirectOut DirectOut DirectOut DirectOut DirectOut
Tape Input Tape Input Tape Input Tape Input Tape Input Tape Input Tape Input Tape Input Tape Input Tape Input Tape Input Tape Input
Studio Monitor Out
R Aux Return 2 L
R Tape Out L
Aux Send 4
L
R
Aux Send 3
Aux Send 2
Tape In
7
8
Send / Return
Insert
Insert
Insert
Insert
Insert
Insert
Insert
Insert
Insert
Insert
Insert
Insert
R Aux Return 1 L
Line
Line
Line
Line
Line
Line
Line
Line
Line
Line
Line
Line
Mic
Mic
Mic
Mic
Mic
Mic
Mic
Mic
Mic
Mic
Mic
1
2
(Sub
Groups)
Bus
Outputs
3
4
Aux Send 1
If your mixing desks has sub groups, use them for recording. Connect the first sub group output to MAGIX midi
studio generation 6 input 1, and the second to MAGIX
midi studio generation 6 input 2. The recording level is
now controlled with the sub group faders.
Connect the outputs to the first few channels’ Line or Tape
inputs. Connect the rest of your sound sources (effect processors, microphones etc.) to the remaining channel inputs.
During recording, route the channels that are to be recorded, or the sub groups to your desk’s stereo (master)
outputs. If your audio hardware supports more audio inputs, connect more sub group outputs to them as needed.
Avoid connecting the MAGIX midi studio generation 6 recording inputs to your desk’s main output (Main Out)—
these, as well as the Control Room output that usually carries the same signal, are meant for your monitoring equipment and your stereo or two track tape machine. This output includes a mix of MAGIX midi studio generation 6’s
output signal, which you do not want to re-record.
A DAT mastering machine is not required, as MAGIX
midi studio generation 6 can master CD-Rs, in conjunction with a CD burner. If you choose to use a conventional
mastering machine, a DAT or MiniDisc recorder or an analog tape deck, connect it directly to the mixing desk’s
main output.
5
Mixing Desk with Sub Groups
6
Mic
from the
outputs
to the
recording inputs
27
MIDI Installation
MIDI Installation
Interface Connection
Please consult your sound card or MIDI interface manual
for the correct connection of a MIDI interface. The most
common ways to add MIDI functionality to computers
are:
– Multiport MIDI interfaces, including separate devices
like Emagic’s Unitor8 MkII.
– Sound card with MIDI interface
– via a General MIDI module or keyboards’ integrated
interface, usually labeled “To Host” interface.
Connecting Emagic Unitor8 MkII
These short instructions may suffice for the Unitor8 MkII
multiport interface: connect the Unitor8 MkII supplied
cable from your PC’s COM2 port to the RS-232 connector
on the Unitor8 MkII. Then install the driver under Windows.
If you wish to use a modem or other device on the COM2
port however, you will need to use an RS-232 switch box,
which can be purchased from most computer shops.
Any MIDI interface that supports the Windows MME
standard will work with MAGIX midi studio generation 6.
See the manufacturer’s instructions for information on
the proper installation of any needed drivers.
MIDI Cable Connections
MIDI Local Off
If your keyboard has an internal sound source, it is important that you stop the keyboard from generating sounds directly from its own keyboard. If you buy a new keyboard
that is to be used without a sequencer, and connect it
straight to an amplifier, you would expect the device to
make a sound when you press its keys—in other words the
keyboard is connected to the sound generator. However,
this is exactly what you do not want when using the keyboard with a sequencer. In this scenario, the keyboard is
used as the computer’s input device, while the computer
will play the various connected tone generators, be they
the keyboard’s own sound generator, or any other connected sound modules. If you wanted to control and
record another sound module with your keyboard, its own
sounds would get in the way—that is why the keyboard
must be separated from its own internal sound generator.
This function is known as “Local Off”, and can be set directly at your keyboard. The sequencer will speak to your
28
MIDI Installation
keyboard’s tone generator just like any other connected,
keyboardless sound module.
If you cannot find the “Local” function under your keyboard’s MIDI menu, consult its manual as how best to
proceed for sequencer use. Some keyboards allow you to
select from among “Local”, “MIDI” or “Both” for each of
their so-called “Parts”—in this case, the “MIDI” setting is
equivalent to “Local Off”.
MIDI Inputs/outputs
If your computer has an internal or external MIDI port, or
has a MIDI capable sound card connected, hook the keyboard “MIDI Out” to the computer’s “MIDI In” (on the interface, sound card etc.). If the keyboard can generate its
own sounds, connect the computer’s “MIDI Out” to the
keyboard’s “MIDI In”. If your computer (or the MIDI device) offers more than one MIDI output, connect any
other tone generators to these. If the computer only has
one MIDI output, you need to connect the second tone
generator’s MIDI In to the keyboard’s MIDI Thru port. A
third device can be connected to the second’s MIDI Thru,
and so on. The MIDI Thru port always delivers a copy of
the signals coming into the device’s MIDI In. It is preferable, however, to use a direct connection from a computer’s MIDI Out to a device, rather than chaining too
many devices, one after another. This is because timing
problems may occur in the chain, if many MIDI commands are sent in a short time, due to the slight delays introduced by each MIDI In to MIDI Thru transaction. If
your computer also has several MIDI inputs, you can connect the MIDI outputs of other MIDI expanders there.
Keyboards and Expanders with “To Host” Interface
The “To Host” interface, which allows a direct connection
to the computer, can be found on many of the more costeffective MIDI sound modules, as well as on many entrylevel keyboards. This in effect is a simple integrated MIDI
interface, with one MIDI In, and one MIDI Out for the
computer. An instrument with a “To Host” interface is
controlled directly; the MIDI In and Out serve as MIDI
connections for the computer, to allow further instruments,
such as another keyboard to be connected. This proves
very cost-effective for entry level setups, which may include only one keyboard and another sound module. The
expense of a dedicated computer MIDI interface, or card is
not initially required.
If you are working with such a module, first install the
driver software supplied by the manufacturer.
29
MIDI Installation
Connect the keyboard MIDI Out to the sound module’s
MIDI In, and the module’s MIDI Out to the keyboard’s
MIDI In (assuming it can generate sounds). Connect the
“To Host” interface to the computer, usually to a serial
port.
Tape Synchronization
Details on how to synchronize MAGIX midi studio generation 6 with digital or analog tape machines, multitrackers, or video editing systems and their wiring requirements can be found in the reference manual.
30
Audio: Recording and Playback
Audio: Recording and Playback
Concept: Tracks, Audio Files, and Regions
MAGIX midi studio generation 6 combines a MIDI Sequencer with a Hard Disk Recorder. A Hard Disk Recorder is similar to a DAT Recorder or a Sampler: it allows
digital recording and playback of audio signals. The hard
disk recording medium provides many advantages over
the magnetic tape medium; no rewinding is required, and
the data is read from and written to various sectors of the
hard disk almost simultaneously. The recordings to be
played back simultaneously may be located at any position
on the hard disk. The Hard Disk Recorder perceives sound
recording edits as play instructions—i. e., an actual edit or
cut does not occur. Subsequently, any edits of the material
can be revoked and the original condition restored. This is
generally referred to as non-destructive editing. CD players with programmable title sequences are based on a
comparable principle: if you choose to listen to the titles
on the CD in reverse order, the CD player will not change
the data (the actual sequence) on the CD—which would be
destructive. The program merely plays the titles in the
changed sequence—which is non-destructive.
Number of Audio Tracks
On a multi-track tape recorder, the number of tracks that
can be recorded simultaneously, the total number of
tracks on the tape, the number of tracks that can be played
back simultaneously, and the number of outputs for the
playback of the tracks are the same. So, for example, with
an 8-track device, you may simultaneously record 8 tracks,
store 8 tracks on the tape, and play back these 8 tracks
through 8 outputs.
A Hard Disk Recorder like MAGIX midi studio generation
6 operates differently. In its case, the number of tracks
and outputs depend on the audio and computer hardware
being used. The following applies, for example, to the
MAGIX midi studio generation 6 with a sound card with
two in- and outputs:
– You may simultaneously record two mono signals (or
one stereo).
– There is an almost unlimited number of virtual tracks,
i. e., recordings that may be located on the hard disk
under MAGIX midi studio generation 6. The number
of tracks is only limited by the hard disk capacity.
– The number of tracks that MAGIX midi studio generation 6 can play back simultaneously—the so-called
physical tracks—depends mostly on the hard disk and
31
Audio: Recording and Playback
on the computer. But 24 (respectively 48 tracks with
MAGIX midi studio generation 6 deLuxe) tracks are
the maximum with MAGIX midi studio generation 6.
– The sound card has two outputs for simultaneous playback of the physical tracks. Since MAGIX midi studio
generation 6 provides a digital mixer with sound
controls and sound effects, the fact that there are fewer
outputs than simultaneously played-back tracks does
not present the same limitation it would with a tape
based system.
Depending on the available hardware, MAGIX midi studio generation 6 acts virtually like a polyphonic sampler
with at least one stereo input and one stereo output, with
hundreds of different samples loaded on the hard disk. The
number of tracks that can be recorded simultaneously, the
number of tracks that can be played back simultaneously,
and the number of audio outputs depend on the hardware.
The hardware play-back tracks are represented in the audio mixer by channels, which are similar to the channels
of a conventional mixer. The MAGIX midi studio generation 6’s mixer mixes all tracks, including effects, together
on one or more stereo outputs.
The channels of the mixer also represent the hardware on
the software display level. The number of tracks displayed
by MAGIX midi studio generation 6 upon start-up is hardware-dependent, i. e. it depends on the computer and the
available audio hardware.
Audio Files and Regions in the Audio Window
Select Audio > Audio Window to open the Audio window.
In the Audio window, you can display and manage all Audio Files. Audio Files are the actual samples, i. e., the actual
sound recordings. To load an Audio File select the local
command > Add Audio File in the Audio Window.
A dialog box appears, in which you can select the file from
a hard disk or from a folder. To record a new audio file, see
instructions below.
MAGIX midi studio generation 6 can be used to continuously play back sound tracks just like a tape recorder.
However, this is not necessary.
The Arrange window displays audio tracks horizontally.
Rectangular bars visually represent the location and
length of the audio phrases within the song.
These sections are called Regions and may include a small
portion of the audio file or the entire audio file.
32
Audio: Recording and Playback
In the Arrange window the regions on the audio tracks
and the sequences on the MIDI tracks look the same. Operation and editing are identical, for the most part (top).
The audio window shown above displays all logged audio
files and their regions—however, without the timing reference in the song.
The Arrange window shows the audio track regions on a
time axis, whereas the Audio window shows the available
audio files in a non-chronological sequence. On the left
side, the audio file names are listed in bold. The region
33
Audio: Recording and Playback
names are indented, in regular type, and displayed with a
padlock. The regions are only visible if the arrow to the left
of the audio file name is pointing downward (click on the
arrow to toggle). The audio file regions are shown in a
dark shade inside the rectangles. The areas outside the regions are shown in a light shade. You may move the region boundaries by dragging them with the mouse
pointer. To prevent accidental adjustments, click on the
padlock to secure the region settings.
Moving the beginnings and ends of regions provides an
easy, non-destructive editing method for the audio material. Nothing will be deleted. You may, for example, cut off
the last syllable of a song line—and then restore this syllable by defining it in another region of the audio file, or by
extending the region!
It is often very useful to open one Audio window and one
Arrange window at the same time. You then can grab regions with the mouse pointer in the Audio window and
drag them onto the desired track in the Arrange window.
If you are using the Windows version, you must first select the respective track in the Arrange window and set the
song position line to the position at which you want the region to be triggered.
In this context you should note that MAGIX midi studio
generation 6 automatically remembers the various window configurations as Screen Sets. Just press the respective
key, from 1 to 9, to recall the windows that were open
when you last selected this screen set. The screen set number is shown on the main menu display (on top) at the
right side of the Window entry.
Summary: Within Audio Files you define Regions. These
regions are displayed in the Arrange window, where they
are arranged on a Track. This track is then played back
through a channel of the integrated Track mixer.
In the Audio window, you can play back a region, by pointing at it and holding the mouse button depressed. Playback will start at the position of your cursor. Alternatively,
you can click the loudspeaker icon at the left and the selected region will be played back from its beginning. If the
Cycle symbol is enabled, the region will loop continuously, which is very useful, for example, when adjusting
the length of a drum loop. The lower button defines the
play-back channel. If you are using multiple audio hardware systems, a similar button for the selection of audio
hardware will be available.
The small, black arrowbelow the waveform display of the
regions is the anchor. It serves as the region’s timing ref34
Audio: Recording and Playback
erence point, i. e., if a region is assigned to the beat position 14 1 1 1, this anchor will be positioned on the 14 1 1 1
beat. Although this point will always be at the beginning of
newly recorded regions, it does not necessarily have to be
placed there. An up-beat syllable, or the breathing-in of the
singer prior to the first syllable can sound before the anchor, which is quantized on a time grid. Caution: moving
the anchor will also change the arrangement’s timing reference.
Audio Recording
Setting the Recording Path
Prior to the first recording, you must define a hard disk
and a folder for storing the audio files created during recording. In the Audio window, select Audio File > Set Audio Record Path. Use the File Selection box to create a
folder with the name of the song. This folder will hold the
created audio files.
1
2
It is generally best to preselect the maximum recording
time as it allows MAGIX midi studio generation 6 to premap the location on the hard drive to which the files will
be recorded 1. If the final recording is shorter than the selected time, the reserved storage space will automatically
be freed up again. However, for various reasons it is not
advisable to preselect a significantly longer recording time
than necessary. Click on the Set button to define a hard
disk and a folder in which the audio files shall be stored 2.
Recording in the Arrange Window
The Default Song, which opens when MAGIX midi studio
generation 6 starts, contains some audio tracks. “Audio
tracks” are simply tracks on which an Audio Object has
been assigned. To assign an audio object to a new track,
point to a track name and hold the mouse button depressed. In the flip-down menu select an Audio Object.
The audio object symbolizes a channel of the track mixer
with the same number.
35
Audio: Recording and Playback
Whenever an audio track is activated for recording
(record-ready), an audio file will be created during recording with a region spanning the entire audio file length.
Just as on a multi-track device, several tracks can be activated at once. The region will appear in the Arrange window exactly at the location that you recorded; i. e., you can
record just as you would with a conventional tape recorder. The only difference compared to a MIDI recording
is that the audio track must be activated (record ready);
however, it does not have to be selected.
In the Arrange window, there are two buttons between the
numbers and names of the tracks. The left button (M)
mutes the track (Mute), the right button (R) activates the
track for recording (REC). Similar buttons can be found in
the audio objects underneath the fader: these buttons are
also used to mute a track or to enable or disable recording
of a track (M and REC).
While both record-ready buttons for a track (in the Arrange window or in the Audio Object) are always coupled,
the effect of the mute button may be different under certain circumstances: in the Arrange window, muting always affects the respective track. The mute button at the
audio object, however, is used to mute the respective playback channel of the audio hardware—this way, all tracks
played back through this channel are muted. Please note
that in the Arrange window several tracks can be played
back through the same audio object (play-back channel),
however, with the limitation that only one of these tracks
can be heard at a time (the track with the region started
last).
The recorded regions in the Arrange window look the
same as the MIDI tracks. Using View > Object Colours
you can, however, select different colors. During the recording of an audio track, a waveform will be displayed.
With a larger, vertical display, the waveform display will
appear under the regions, whereas the MIDI sequences
will show small notes. The largest display can be selected
next to the scroll bars at the lower right edge of the window.
This display cannot be enabled, if HyperDraw is activated.
HyperDraw is a function allowing the graphical input of
level and panning processes, which will be displayed instead of the notes and waveforms. HyperDraw is described in the chapter section titled Graphical Mixdown
with HyperDraw on page 49.
36
Audio: Recording and Playback
Copying and Moving Regions
In the Arrange window, regions (and MIDI sequences)
can be shifted by dragging them with the mouse. If you
hold ctrl while dragging, a copy is created. To select several
regions or sequences hold shift while clicking or select
them by collecting them in a rubber band. During shifting, the selected regions or sequences will always jump to
a grid position. The grid corresponds to the divisions visible on the bar ruler. It can be changed all the way down to
the nominator of the beat type using the horizontal telescope.
If you want to use the format value as grid, hold alt while
shifting. The format value is displayed in the Transport
bar, in a field just under where the Time Signature is displayed. If you don’t want to use any grid, hold alt-shift
while shifting. This way, the regions and sequences are
shifted by single ticks, which is useful to correct rhythmic
irregularities in single song syllables.
Recording the Input
Just as with professional multi-track devices, MAGIX midi
studio generation 6 does not provide a Record Level. The
analog recording must be adjusted using the source device. Typically, this would be the sub-group fader of an analog mixer. However, the channel of the on-screen mixer
provides a record level display which you can use to monitor the recording level. To display this record level, double-click on the audio track name. Digital inputs cannot be
adjusted during recording—which is not necessary under
that circumstance anyway.
37
Sample Editor and Digital Factory
Sample Editor and Digital Factory
The Sample Editor Window
Open the Sample Editor by double-clicking on a region—
in the Arrange window or in the Audio window or by
choosing Audio > Sample Editor.
38
In addition to non-destructive editing, MAGIX midi studio generation 6 audio files can also be edited destructively in many different ways. The Sample Editor provides
a detailed display of the audio file and all of the tools required for editing. It selects the exact region within the audio file—this is very practical, since all functions for
changing data always affect the selection.
With MAGIX midi studio generation 6 deLuxe you can
avoid major errors, i. e., accidental deletions, by first creating a backup copy of the entire audio file (Audio File >
Create Backup). If needed, you can restore your original
copy at any time by selecting Audio File > Revert to
Backup. This backup functionality is not provided by
MAGIX midi studio generation 6, so you have to be careful.
The Functions allow modification of the level or the amplitude (of the level control). For example, Normalize will
raise the overall level of an audio file until the loudest
peaks are at full amplitude. Fade in and fade out, the insertion of digital silence or the playback in reverse are
more, but not all, functions available in the Functions
menu. See for yourself what they can do for you—experiment and have fun!
With MAGIX midi studio generation 6 deLuxe you can
ensure that the selection boundaries are always positioned
at zero crossings, by selecting Edit > Search Zero Cross-
Sample Editor and Digital Factory
ings. This is desirable because non-zero cross points will
cause small ‘snaps’ or ‘pops’ to occur.
The ruler along the top of the waveform display defaults to
using Samples as the unit of measurement. If you wish to
see the waveform in relation to bars and beats simply select View > Show Length as... > Bars&Beats (MAGIX midi
studio generation 6 deLuxe only). Please note that the
measurement will not relate to the regions actual position
in the song unless you enter the Sample Editor by double
clicking on the region in the Arrange Window. The reason
for this should be somewhat self-evident—regions in the
Audio window have no musical beat reference.
Digital Factory
Only with MAGIX midi studio generation 6 deLuxe you
get even more breathtaking destructive editing features—
collectively referred to as the Digital Factory. Here, we’ll
briefly introduce you to two of them: the Time Machine
and the Audio Energizer.
If you playback a record, a tape, or a sample at a speed
other than the original, you will not change just the duration but also the sound and pitch of the output. The Digital
Factory’s Time Machine allows you to modify the frequency spectrum (or “pitch”) and the duration of a sample
independently from each other! The calculation for this
task is extremely complex and with extreme values may
cause a degradation of the sound quality. However, the
Time Machine is ideal for correcting a badly intonated
note or even transposing an entire mix within a reasonable range (say ±2 or 3 semitones). It is also perfect for
changing the tempo of a drum loop, without affecting the
pitch.
Similar to a compressor, the Audio Energizer will increase
the loudness of an audio file, even if the digital level
boundary has been reached (not exceeded!).
39
The Waveplayer
The Waveplayer
The Waveplayer Window
MAGIX midi studio generation 6’s built-in WavePlayer
lets you play back any WAV-files you like—polyphonically,
with filter and envelope treatments. If that sounds like
owning a real sampler, you’re right, but you don’t have to
buy an expensive piece of hardware. So how do you use the
WavePlayer? Easy—just follow our small tour, and
chances are that you’ll never have to read the WavePlayer
section in the reference manual. The only real precondition is that after you fasten your seatbelt and load MAGIX
midi studio generation 6, you must select a DirectSound
driver for the WavePlayer under Audio > Audio-Hardware
& Drivers. This is because the WavePlayer works only with
a DirectSound driver and only DirectSound drivers allow
you to use the WavePlayer and the audio features of
MAGIX midi studio generation 6 simultaneously. Got a
few WAV-files at hand? Fine, let’s start.
What you really got to know
40
Click on the Wave track in the Arrange window. Open the
WavePlayer window via Options > WavePlayer. On the left
side of the WavePlayer window you can see a horizontal
keyboard. To the right of each key you can see the name of
each note. To the right of each note name you can see the
File Name box. Left-clicking on such a box opens the standard Windows File Selector. Select and open a WAV-file.
You have now assigned this WAV-file to the key associated
to the File Name box. Don’t like the WAV you assigned?
No problem: simply right-click on the File Name box to
erase the key/WAV-assignment, then repeat the above
procedure to assign a new WAV-file.
Now that you have assigned a WAV to a key, it will only
play when you press this specific key. So let’s define a keyboard zone in which you can play this WAV-file. Right beside the File Name box you see the controls for each WAVfile, arranged on a kind of grey crossbeam. Grab the upper
or lower edge of the crossbeam without touching any
other controls, and a double-arrow will appear, allowing
you to stretch the crossbeam into a vertical rectangle. This
rectangle defines the keyboard zone in which you can play
the WAV-file.
There is only one limitation in doing this: you can extend
the keyboard zone down all the way you like, but you can
only extend it one octave (twelve semitones) upwards. This
means that playing on your keyboard allows you to transpose down as far as you like, but an upward transposition
The Waveplayer
is limited to twelve semitones. It is important to be aware
of the interdependence between the upper keyboard zone
and the Tune parameter at this point. If Tune is set to
+1200, you won’t be able to transpose the WAV-file any
further upwards because it is already transposed an octave
up via Tune because Tune is measured in cents, and one
cent equals 1/100 of a semitone.
Now that we have introduced Tune, we can also get right
into the other parameters of the crossbar. You can determine which parameters you would like to see via View.
The active default settings are: Parameters, Keyboard, Filter
Parameter and Filter Parameters as Knobs. To start with, we
suggest that you just leave them on.
Let’s have a look at the parameters from left to right. Tune
is already familiar to you. Next come Start and Length: here
you can adjust from which point (in samples) the WAVfile is played back when you start it, and how long (in samples) the part played back will be.
Trigger defines the playback mode: set Trigger to Gate and
the WAV-file will only play back as long as you hold the
key. When set to Freerun, the WAV-file will play back for
its whole length, regardless of whether you release or hold
the key. Hint: Freerun is especially suitable for drum
sounds.
Soundshaping via the VCA: We’ll leave out the Lnk
checkbox for the moment and move to the On checkbox.
Check it to activate the sound shaping section of the WavePlayer. Uncheck it to save computing power that could
otherwise increase the polyphony of the WavePlayer, but
then you won’t be able to tweak those nice parameters
we’ll now describe.
The sound shaping parameters are divided into two
groups: VCF and VCA. We will start with the VCA. The
VCA group lets you alter the volume of your WAV-file over
time. Attack (Atk) allows you to automatically fade in your
WAV-file from zero level to full level. The smaller the Attack value, the faster you will hear the WAV-file at full
level. Increase the Attack value and it will take more time
for the WAV-file to gradually fade in. Decay (Dcy) allows
you to fade out your WAV-file from full level to zero level.
Small Decay values will give you rapid fade-outs, large values will correspondingly lengthen the fade out time. At
maximum Decay value there will be no fade out at all; you
will hear the WAV-file for its full length (or not, if Trigger
is set to Gate and you release the key before the WAV-file
has reached its end).
41
The Waveplayer
It is important to know that the Decay phase follows the
Attack phase: first you can fade in a WAV-file, then you
can fade it out. It is not possible to first fade it out and then
fade it in.
The last parameter in the VCA group is Vel. With Vel you
set how much the level of the WAV-file depends on the velocity (how fast you hit a key on your velocity-sensitive keyboard). The higher the Vel value, the faster you have to hit
your keys to reach full level. Experiment with these three
parameters to get to know them.
Soundshaping via the VCF: Let’s now go to the VCF
group. Here you can give your WAV-file a new tone colour
and a new tone colour curve. This is accomplished via two
basic parameters: Frq and Res. With Frq, you can make
your WAV-file sound “darker”: the smaller the value for
Frq, the darker your sound. With Res, you can make your
WAV-file sound “sharper”: the higher the value for Res,
the sharper your sound. Experiment with these two parameters and you will very quickly get the idea of how to use
them.
The VCF group also features the parameters Atk, Dcy and
Vel, expanded with the parameter Env. With these parameters you can control Frq automatically. Try this example: turn Frq all the way down, Env all the way up and set
Vel to 0. Now play with the Atk parameter: with small Atk
values the sound becomes bright almost immediately.
With large Atk values the sound starts very dull and it
takes quite a long time before it becomes bright. Dcy
works as you’d expect the other way around: with small
values the bright-dark progression will take almost no
time, while large Dcy values increase the amount of time
required for the bright-dark progression. With Dcy at maximum, there will be no bright-dark progression at all. To
put it briefly: Atk determines how long it takes for the
dark-bright progression and afterwards Dcy determines
how long it takes for the bright-dark progression.
With Env you determine how big the difference is between
dark and bright of the dark-bright-dark-progression produced with Atk and Dcy. With small Env values you will be
almost unable to hear the dark-bright-dark progression
produced with Atk and Dcy, while large Env values will let
your hear this progression very clearly. Don’t be afraid to
experiment in order to become familiar with the possibilities.
Lastly, Vel controls how hard you have to hit the keys to
reach the value specified with Env. With small Vel values
42
The Waveplayer
the specified Env value will be reached even with soft
touches of the keys. But with large Vel values you will have
to hit the keys very hard in order to reach the specified Env
values. Take your time to get familiar with these interdependencies.
Altogether now: Now that you’ve learned about the
parameters associated to a single WAV-file, let’s move on
to that mysterious Lnk checkbox. The explanation is quite
simple. Assume you’ve got two WAV-files loaded, one on
C4 and one on C5. Check the Lnk box for the WAV-file on
C4. Its VCF, VCA and Trigger parameters will disappear
and are replaced with the corresponding parameters of the
WAV-File on C5. To indicate this, its parameter crossbeam gets linked to that of the WAV-File on C5. In other
words, checking a Lnk box on a WAV-file replaces its parameter settings with those of the next WAV-File above. If a
WAV-file has no WAV-file above itself, it will have no Lnk
checkbox, because there is nothing it can be linked to.
What is Lnk good for? Here is an example: imagine you
have ten WAV-files, different recordings of a piano at different pitches. You have them beautifully laid out across
the keyboard and then you want to make them all a little
darker. Without Lnk, you could spend quite a lot of time
with this task because you have to change the parameters
of each and every WAV-file. But with Lnk activated in all
but the topmost WAV-file, all you have to do is to change
the parameters for the topmost WAV-file in order to apply
the same a parameters to them all.
Lost your way? That’s it. Your WavePlayer crash-course
ends here. Just two more things: if you lost track while experimenting, you can easily set all parameters back to
their default values via Initialize > Default Parameters.
And if you really want to start all over again, you can clear
all WAV key assignments at once via Initialize > Delete All
Assignments. So go ahead, experiment and have fun!
43
Mixdown with MAGIX midi studio generation 6
Mixdown with MAGIX midi studio generation 6
The Mixer and HyperDraw
The music you produce with MAGIX midi studio generation 6 can be mixed down within the program. For this, a
fully automated mixer and a graphical editing view are
available:
– The Track mixer
– HyperDraw.
The Track mixer allows you to mix both audio tracks and
MIDI tracks at the same time. It always displays all of the
tracks you are working with. The mixer can be fully automated. Data that you input from other editors will directly
affect the mixer’s display and vice versa.
Hyper Draw provides another option for mixing and editing . This view provides an easy way to view your mix in
the Arrange window.
The Track Mixer
The Track mixer can be opened in the Arrange window by
selecting Window > Open Mixer. MAGIX midi studio
generation 6 will automatically create a mixer which offers a channel for every audio and MIDI track. The channel sequence corresponds to the sequence of the audio objects and the midi tracks in the track list of the Arrange
window.
There is one thing that MAGIX midi studio generation 6
inherently cannot do: The audio outputs of all connected
external MIDI sound generators must be mixed down as
audio signals to a stereo recording, since the CD will require a stereo mix in the end. This is usually accomplished
together with the computer’s audio outputs or your audio
hardware. Therefore, a separate, physical mixer still will
44
Mixdown with MAGIX midi studio generation 6
be required in order to merge the signals, to control the
level during recording, and also to accommodate the microphone amplifiers. This mixer, however, can be considerably smaller than a mixer used in a comparable studio
with a multi-track tape recorder. Additionally, you can mix
together all audio signals with a uniform level, while
MAGIX midi studio generation 6 will control the volume
, pan, and any other effects that your MIDI device(s) may
have.
Audio Channel Strips
Stereo- and Mono Channel Strips
You can recognize the stereo channels by the two overlapping circles on the button in the lower left corner of the
channel strip. Click on this Stereo Link button to change
the stereo channel to two mono channels with individual
controls for each channel. The master section sends the
mix to the stereo output
By clicking on the Stereo Link button, two adjacent objects
will be merged to one stereo object, creating a stereo channel. To the left of the fader, there is a level control display
showing the channel’s (the track’s) level after the fader.
Above the fader, there is a pan control (stereo: balance
control), and below the fader you will find a button (S) for
soloing (post fader listening) and muting (M) of the track.
The Record Ready button arms the track for recording
(REC) (Record Ready). One difference between audio recordings and MIDI recordings is that for audio recordings
the tracks will have to be armed just as with a multi-track
tape recorder.
Each channel provides inserts for assigning effects directly to the track, and busses for sending to returns.
Effects: The number of real-time effects MAGIX midi
studio generation 6 can calculate simultaneously depends
on the computer’s CPU power, speed, and the amount of
RAM available.
Equalizer: On each audio channel EQ’s can be used.
MAGIX midi studio generation 6 uses fixed built-in EQs,
while MAGIX midi studio generation 6 deLuxe allows you
flexible insertion of EQs: click-hold on the Thru field labeled EQ and select the EQ you need out of the flipmenu.
The effects: Additional audio objects represent so-called
busses, which are typically used as effect sends. Each
channel-strip has a knob for controlling the amount of sig-
45
Mixdown with MAGIX midi studio generation 6
nal sent to the assigned effect. In the return channels
click-hold one of the fields labeled Insert assign effects,
like Reverb, Chorus or Delay for the effect. If you turn Eff1
up on a channel, then signal from that track will be sent to
whatever effects you have inserted on the Effect 1 return
object. If you assign Effect 2 to a track, then turning up the
send knob will send signal from that track to the effect(s)
assigned to the Effect 2 return object.
The effects are assigned as post Fader; i. e., the relation between original signal and effect signal remains constant,
even if the fader is moved.
To access edit parameters for the assigned effects, doubleclick the effect name in the green insert field.
The number of realtime-effects that MAGIX midi studio
generation 6 can compute simultaneously depends on the
computing power of your computer. The maximum is
four effect busses with three effect-inserts each (with
MAGIX midi studio generation 6 deLuxe) or two effect
busses with three effect-inserts each (with MAGIX midi
studio generation 6).
MIDI Channel Strips
General MIDI
46
General MIDI is not a deviation from the MIDI standard.
If an instrument bears the GM logo, this merely means
that the following minimum features are included:
– 16x Multi Mode (16 different sound on 16 different
MIDI channels, the so-called parts); all of them can be
played polyphonically with dynamic part assignment (it
is not necessary to set the number of parts for each
sound);
– at least 24 voices (parts) (24 notes can sound simultaneously);
– 128 standardized sound programs (program number 1
is always the piano…);
– 26 Drum and percussion sounds with standardized
keyboard layout on channel 10;
– Chorus and Hall Effects;
– Certain MIDI commands can be recognized (velocity,
pitch bender, modulation wheel, and others).
Most General MIDI instruments provide more minimum
features. The above list is by no means complete. General
MIDI instruments offer two advantages: 1) song files can
easily be exchanged between different systems with different instruments, since sounds and keyboard layout are
somewhat standardized. Solo entertainers, for example,
can purchase song files from third parties and use them
Mixdown with MAGIX midi studio generation 6
without any problems, regardless of the sound generator
brand used. 2) The low-cost General MIDI sound modules
can be used to design complete arrangements, allowing
you to create a good pre-production at a very low cost. Professional productions, however, will require the transfer
of many sounds to instruments, which sound better and
more distinct.
Roland has developed a General MIDI standard called
General Standard (GS), which is fully forward compatible
with General MIDI. If you are working with a Roland GS
sound generator, you can adapt the GM/GS/XG Mixer to
its configuration. Yamaha has developed a General MIDI
standard called Extended General MIDI (XG), which is
fully backwards compatible not only with General MIDI,
but also with GS. If you are working with a Yamaha XG
sound generator, you adapt the GM/GS/XG Mixer to its
configuration. Some Yamaha instruments bear the XG
logo, although they are not compatible with General
MIDI. These are merely designed for interplay with other
XG instruments (Yamaha P-50m, Yamaha VL 70m). To
adapt your system touch the button shown on the right
and select the appropriate setting.
The MIDI Channel Strips are merely a remote
control.
A mixer is used to mix audio signals. This is not the case
with this part of the Mixer. It is rather a remote control for
a sound generator in the shape of an on-screen mixer.
Why? Here is an example:
On your sound module (or on the sound generator of your
keyboard) you can adjust how loud the sound coming in
on MIDI channel 3 should be. This volume parameter can
also be set through MIDI without ever touching the sound
module. To set the volume of the sound on channel 3 to a
value of 65 “MIDI units” (value range 0—127) you will
send a MIDI volume command with the channel ID 3 and
the value 65. MIDI Volume is a controller command, to be
exact: a controller 7 command. In the Event Editor, this
command would look like this:
MAGIX midi studio generation 6 will send exactly this
command, if you set the fader (volume slider control) of
channel 3 in the GM/GS/XG Mixer to a value of 65. The
faders will send controller 7, the pan control will send controller 10, the reverb control will send controller 91—and
so on. It is not necessary to remember all of these controller numbers. Just use the GM/GS/XG Mixer as remote
47
Mixdown with MAGIX midi studio generation 6
control for the sound generator. Watch the display to see
how the settings change while operating the GM/GS/XG
Mixer.
Please note that the sound generator will actually work in
Multi Mode (“General MIDI“), not in Performance Mode.
Also make sure that the GM sound generator is connected
to the proper port (MIDI output).
All volume adjustments and the selection of sound programs must always be carried out in MAGIX midi studio
generation 6—never adjust the sound generator! Otherwise your mixdown will not be saved with the song. It is
not necessary to separately save mix parameters at the
sound generator. You only have to open the MAGIX midi
studio generation 6 song with the settings made under
MAGIX midi studio generation 6. Rule of Thumb: Never
touch your sound module, except to turn it on or off, or to
save new sound programs. Comparable situation: Any
corrections you make on a printout using White-Out have
no effect on the text file saved on your hard disk.
Effect Paths of the GM/GS/XG Mixer
The GM/GS/XG Mixer provides knobs to control two effects on each channel. With these controls you can define
for each part, how much Hall effect (Reverb) and how
much Chorus effect should be applied to the respective
sound. Not all General MIDI sound modules support this
feature—however, most of them do. With GM and XG instruments you can also recall various effect typesand edit
them. The cutoff frequency of the low-pass filter is the major deciding factor for the harmonic content of the sound.
This parameter could have been called “Brilliance“. Technically, this effect is not comparable to an equalizer in
form of a “Treble“ control. But in real-life applications, it
usually serves as an effective sound control. This feature
may not be supported by some of the older General MIDI
sound generators. The effects settings and the cutoff controls work for all GS and XG instruments.
Automated Mixing
48
The mixer in MAGIX midi studio generation 6 is fully automated. Full automation means: Every control movement can be recorded, edited and played-back. For example, if the trumpet on track 12 initially is supposed to be
loud, then become a little softer, and finally pan more to
the right, you will operate the channel (channel 12 on the
Track mixer) only once—during the recording! For every
subsequent play-back, the trumpet will automatically repeat your mixdown.
Mixdown with MAGIX midi studio generation 6
Any time you save a song, all of the adjustments made on
the mixer will be saved also.
Mixing Automation with the Track mixer
The mixing automation of the Track mixer is easy to explain: Record, operate the Track mixer, finish.
The automation data of the Track mixer will be recorded
as MIDI sequences on the track for which you moved the
fader or knob. The same applies to audio tracks, which will
also be mixed down as MIDI commands.
The audio channel controls send MIDI controller commands just like MIDI channels; the Volume Fader (volume slider control) sends Controller No. 7 (MIDI Volume). The meaning of the controller numbers is defined
in the MIDI Standard. The sound generator will respond
with a volume adjustment for the sound on the respective
MIDI channel. If you open the Event Editor for the sequence created due to your mixing movements during recording, you can view the MIDI Controller data—and also
edit them just like any other MIDI data.
In the NUM column you will find Controller Number 7.
The Info column shows “Volume”. Controller 10 is Pan.
You can edit the mixing process by deleting command or
changing values (VAL).
The same data is visible in HyperDraw and can also be edited. The next sections describes Hyper Draw (bottom
graphic).
Graphical Mixdown with HyperDraw
Volume and Pan can be graphically input, edited, and
viewed using HyperDraw. Following is an example of a
mix displayed in the Arrange window with HyperDraw enabled:
Volume events (MIDI Volume, Controller 7) appear as yellow lines, pan events (Controller 10) as orange lines on a
blue background.
To enable HyperDraw in the Arrange window:
– Select the desired sequence(s).
49
Mixdown with MAGIX midi studio generation 6
– Using the Zoom Tool, select a large, vertical view
(important!)
– Select View > HyperDraw > Volume.
Click in the left half of the blue field in the lower range of
a sequence. At that location, a yellow, horizontal line will
start. It represents a volume command (Controller 7).
Click to the right at another height. Now you have created
a series of volume commands, which are spaced between
the two volume commands you have entered. You can
grab the points and move them anyway you want: changing the time or the value. To delete a point, grab it and
drag it beyond the right border of the sequence, i. e., outside the region. You can view your data in the Event Editor. Or you may open the Track mixer and watch how the
mixer’s fader will move during play-back like it is being
moved by an invisible hand (in the main menu select:
Window > Open Mixer). Using View > Hyper Draw > Pan
you can enter Pan events in the same way. The applicable
controller number (7 for Volume) is very small and shown
at the left side.
When working with HyperDraw, you will frequently need
an enlarged display of a sequence. For this purpose, the
magnifying glass function is readily available: Press and
hold the alt key and draw a frame around the respective sequence (group). Make sure to always start the frame in the
background of the Arrange window. The selected section
will be enlarged immediately. Now you can continue your
HyperDraw edits comfortably. To restore the original size,
click alt in the background.
Please note that in MIDI is a serial protocol meaning that
all events are sent to each port sequentially, which may
negatively affect the timing. If you are working with only a
few MIDI ports, where each of the ports includes many
channels, complex mixes, with a lot of controller data, may
cause timing problems.
50
Audio Instruments
Audio Instruments
MAGIX midi studio generation 6 supports the new, included Magix synthesizers M-TB 6 (MAGIX midi studio
generation 6 deLuxe only), Carpet Sweeper and Percusor.
Outfitted with an innovative user interface, the units provide subtractive synthesis that meets the classic analog
ideals. They offer everything that made the analog synthesizer so famous: rich basic sound, punchy filters, flexible
modulation possibilities and extremely fast envelopes.
The synthesizer instruments integrate seamlessly within
MAGIX midi studio generation 6’s internal digital mixer;
all plug-ins effects can be used and all parameters can be
automated. The direct connection with the sequencing engine of MAGIX midi studio generation 6 guarantees unsurpassed precision through sample-accurate timing that
is superior to any external MIDI synthesizer. Beside these
built-in synthesizers MAGIX midi studio generation 6
supports VST™2.0 instruments as well.
To use the new instruments, MAGIX midi studio generation 6 features a new category of audio objects in MAGIX
midi studio generation 6, called “audio instruments”.
These can have the synthesizers or VST™2.0 plug-in in
their top insert slot. The default song—the song that
opens if you move your Autoload away from the Magix
music studio folder—has readily configured audio instruments.
An audio instrument is an audio track with the track parameter “Cha” switched to one of the “Instruments (1-4)”
(with MAGIX midi studio generation 6) or “Instruments
(1-6)” (with MAGIX midi studio generation 6 deLuxe). So
each audio track can be made an audio instrument by setting its “Cha” parameter in its object parameter box to an
instrument channel. But it is more convenient to create a
new audio instrument by simply selecting Functions >
Track > Create Audio Instrument Track.
Please make sure that you have inserted the desired synthesizer in the Audio Instrument mixer channel in the
Mixer window, and that you have selected the track of this
Audio Instrument mixer channel in the Arrange window.
Now double-click on the inserted synthesizer plug-in to
see and access all those lovely knobs. As synthesizers are
all about creating and playing new sounds, we will just tell
you how to set up these instruments for usage, and encourage you to experiment with them. They come with
plenty of pre-programmed settings that serve as starting
points for your own, unique sound creations. You can load
51
Audio Instruments
these presets by clicking on the small triangle in the head
of the plug-in window. What more can we say—go ahead
and have fun!
52
MIDI: Recording and Playback
MIDI: Recording and Playback
Flow of MIDI Signals
Typically, a keyboard is used to play in MIDI data; however
Guitar-to-MIDI and Drum-to-MIDI controllers are also
available. Your keyboard probably has an integrated sound
generator, or perhaps you are using a master keyboard
controller without an internal sound generator in connection with one or more MIDI sound generators. The MIDI
sequencer will record the notes you are playing on the keyboard. During recording and playback, the sequencer will
trigger the connected MIDI sound generators. Unlike audio recordings, MIDI tracks do not record any sounds.
They record information, such as the time at which keys
on the keyboard were hit, the strike speed and the release
speed. Using the sequencer, this information can be edited in any way desired, or played back as is. Even though
MIDI tracks can only be played back on MIDI instruments, the MIDI sequencer offers a multitude of advantages over an audio recorder. There is one thing about
MIDI recording that should always be kept in mind:
The sequencer always plays the instruments live, so the instruments always need to be present. For example, if a
synthesizer voice is required by the bass, it cannot play
anything else. By contrast, audio recorders use multiple
tracks to record entire choirs, or to record multiple parts
with one synthesizer voice. Consequently, MIDI recording requires many voices. It is quite typical to have 64
voices in one sound module. If you are working with several MIDI sound generators, the significance of the number of voices will become apparent very quickly.
An exception are the new “audio instruments”, accessed
via the new, correspondingly named track objects. Seen
from the “input aspect”, these are MIDI instruments, as
they are “played” via MIDI commands from the sequencer. Seen from the “output aspect”, they are audio instruments, as their output signal is directly generated and
played back by the computer, just as the audio tracks.
Advantages of MIDI Recordings over Audio Recordings:
– You may change the sound, either of the sound generator’s sound program or the sound generator itself,
anytime after recording.
– You may insert, delete, or change notes, even if the
notes are sounding on the same track. From a
sustained C-major seventh chord you can create a C
53
MIDI: Recording and Playback
–
–
–
–
–
–
minor chord by deleting the B Natural, and changing
the E to an Es. Re-recording is not required.
The timing of the notes can be changed or quantized
(optimized on a time grid) any way you like.
The tempo and pitch of the notes can be handled totally
independently of each other—without complex calculations or loss of sound quality.
During recording, you could select a slow tempo and
then choose an unplayable high tempo during playback without affecting the pitch.
1.000 tracks (MAGIX midi studio generation 6 deLuxe)
respectively 256 (MAGIX midi studio generation 6) are
available.
Only a small storage space is required. Data handling is
extremely fast, even with less powerful computers.
Well arranged note displays (note print-out, note
editor), Matrix Editor and Event Editor (listing) allow
for very organized editing. Sound sequences can be
input at the computer “virtually“ without playing an
instrument.
Advantages of Audio Recordings over MIDI Recordings:
– You can record any instruments without MIDI connection—such as vocals or acoustic guitar.
– No instruments are required for play-back. Individual
voices can be used several times (e. g., choir recordings
using only one voice).
– The time resolution is very precise and always consistent. There is no deviation of phase relations between
individual notes. The play-back level for mixdowns is
always exactly the same.
The above points indicate the following: all MIDI instruments should be recorded on MIDI tracks. The MIDI level
production should be carried as far as possible, before
starting the first audio recording. Prior to the first audio
recording, the tempo of the song should be clearly defined. Subsequent tempo changes are possible, however,
they involve time and a loss in quality.
Naturally, all non MIDI instruments have to be recorded
on audio tracks. MIDI instruments have to be recorded on
audio tracks only if the number of voices in MIDI is insufficient, if the instruments will not be available for playback, or if a mixdown is required.
54
MIDI: Recording and Playback
Advantages of Audio Instruments: With the virtual
Audio Instruments, the advantages and disadvantages of
both MIDI and Audio Recordings are “equalized”:
– You can play as many tracks as the audio engine is able
to produce audio material on your computer.
– No external instruments are needed for play-back.
– One audio instrument can be called up several times.
– High consumption of computing power.
– Precise and consistent time resolution.
Recording Notes and Playing Them Back with
Sound Generators
You use the keyboard to play notes into your computer.
The computer will forward the notes in real-time to a
sound generator so you can hear what you are playing.
This always applies, even if the output is stopped (Stop),
paused (Pause), recording (Record) or playing back (Play).
Very important: If you are working with a keyboard with
an integrated sound generator, you must set Local Off!
Recording always takes place on the currently highlighted
track in the Arrange window. Every track will be assigned
to a MIDI output (MIDI Out) and a MIDI channel (Channel).
If you are working with only one General MIDI
Instrument…
…and your MIDI interface has only one MIDI output, you
may use the empty default song, which is opened upon
start-up of MAGIX midi studio generation 6, and immediately record and play-back MIDI notes. The same applies for sound generators with a GS logo (Roland) or XG
logo (Yamaha) as well as for any other sound generator
with up to 16x multi-mode.
Creating a new Track
To create a new track in the Arrange window:
– Select Functions > Track > Create MIDI Track.
– At the left side of the screen, just below the box with
those nice little tools like scissors etc. in it, you find the
track parameter box. Here you can select an icon for the
new track: Just click-hold on the icon and select one out
of the appearing flipmenu.
– In the parameter-field below the icon you can select the
MIDI channel for the track. This setting has to match
the MIDI channel on which your sound generator
receives MIDI data.
– Again a parameter-field below you can select the MIDI
port of your interface, to which your sound generator is
connected.
55
MIDI: Recording and Playback
– Click on the Prg field, so it is checked. Move two field to
the right to select the number of the sound program.
Watch the sound generator display to see how the
sound programs change after you select and change the
program number. The number of the sound module
may deviate by 1, since some devices count from 1 to
128, whereas MIDI counts from 0 to 127. The same
applies to program numbers with the octal system (8 x
8 sound programs, typical for Roland).
– If your sound generator provides several banks with
128 sound programs per bank, also select the bank (left
to the program number in the track parameter box,
where initially “÷” is displayed). Unfortunately, the
toggle commands for sound banks are not uniform for
all instruments. Refer to the manual of your sound
generator to find out which bank select command your
sound generator needs. Select that command in the
flip-menu Bank Select Command under Options >
Settings > Record Options.
– Play on your keyboard: Now you should hear the sound
module with the selected sound!
… if there still is no sound …
– At the far right of the Transport window, there is a
display for incoming MIDI signals (In) and outgoing
MIDI signals (Out). Little note symbols should appear
here while you are playing (see arrow; when releasing
keys, the note symbols appear with strike-through
markings).
56
– If you cannot hear anything, check the cable connection
between the keyboard’s MIDI Out and the MIDI In of
the computer interface. Check that everything is
plugged in. Go to Options > Settings > MIDI options…
and make sure that the input filter does not filter out
the incoming sounds (The note symbol should not be
marked).
– If signals are displayed at the In display of the Transport window but none appear in the Out window,
ensure that you still have selected the same track for the
set up instrument, and that it is not muted. The button
right next to the track number in the Arrange window
(see left illustration) mutes the track (Mute). If the
Mute button is hidden through the View menu, the
MIDI: Recording and Playback
muted track will have a period to the left of its number
(see right illustration).
– Does the MIDI instrument provide a MIDI In display?
If yes, it must light up while playing. Is there a direct
cable connection between the MIDI Out of your interface, and MIDI In of the sound generator? Are the
audio connections correct? Does the sound generator
have several stereo outputs? Perhaps Part 1 of the sound
generator is routed to an unamplified stereo output.
Double-check by connecting a headphone directly to
the sound generator.
– Is the sound generator really set to Multi Mode, or did
you select “Performance” or “Single Sound” instead of
“Multi”, receiving on only one (different) MIDI
channel? It is recommended that you always work in
multi mode, even if layered sounds will initially be
unavailable. Such sound layers can be organized more
logically and clearly on the MAGIX midi studio generation 6 level with its various tracks than in the sound
module.
– If sound generation is integrated into the keyboard,
each part must be set individually for receiving
incoming MIDI notes (Local Off, just called “MIDI” by
some manufacturers). All parts must be set to “Local
Off”!
Recording, Playing Back, and Deleting
Sequences
In the Arrange window, set the song position line (the vertical line which shows the beat position during play-back)
to the desired position. You may grab and drag the line, or
you can click on the bottom half of the beat ruler to directly
position the line.
– Start the recording by pressing (RECORD) and play a
*
few sounds. To repeat the recording, press
* again
while the recording is still running.
– Stop the recording by pressing enter (STOP). Press
enter again to return to Beat 1 (or, in the Cycle mode, to
the left Locator).
– Play back your recording by pressing 0 (PLAY). Press 0
again during the play-back to start over at the same
position.
57
MIDI: Recording and Playback
– The recorded sequence is still selected and, therefore,
shown in black. Press Backspace to delete everything
that is selected—in this case the sequence you just
recorded.
– Press strg-z (Undo) to undo the last action. In this case
you can undo the deletion.
Fine or Rough Copying and Shifting of
Sequences
Sequences are handled in the Arrange window the same
way as regions: If you want to use the format value as grid,
hold alt, if you want to use single ticks, hold alt-shift while
shifting. If you hold (additionally) strg while shifting, a
copy is created.
Sequence Play-Back Parameters
The play-back parameters of each sequence can be
changed. Play-back parameters include Transposition,
Quantization, and Velocity.
The play-back parameters do not affect the data in the sequences. They merely define how the sequences should be
played back. This means that you may make changes at
any time to these parameters, and at any time you may go
back to your original performance. If you do wish to actually change the underlying data, there is a function to do
so. This function is called Normalize and is accessed
through Functions > Sequence Parameters > Normalize
Sequence Parameters. This will apply all the play-back parameter settings you have made to the data. The settings
in the parameter box will be reset to zero, since the actual
MIDI data now will reflect the settings you have chosen.
Normally you would only use this function when exporting your song as a Standard MIDI file. The only parameter
not affected by “Normalize“ is Quantization. If you wish to
permanently set the quantization, the use Functions > Sequence Parameters > Fix Quantize. Again, you normally
would only do this when exporting the song as a Standard
MIDI file. When working within MAGIX midi studio generation 6, it’s a real advantage to keep your options open,
by leaving these settings as play-back parameters. This
way, you are free to change your mind at any time.
As long as no object is selected—you can do this by clicking once on the background in the Arrange window—the
play-back parameters automatically apply to all of the objects currently being recorded. However, if objects are selected, the play-back parameters will apply only to them. If
58
MIDI: Recording and Playback
nothing is selected, then “MIDI Thru“will be shown in the
sequence parameter box instead of the sequence name.
Name
Double-click to enter a name for the sequence in the top
line.
Quantization
Quantization allows you to correct the timing of a sequence with extreme precision. Quantization corrects the
timing of the note-ons, while maintaining the original
length of each note. If you wish to retain the original timing of your performance, set the Quantization to “Off
(3840)“. There are many quantization options, including
several odd tuplet and swing settings.
Loop
If you enable “Loop”, the selected object will be repeated
until it encounters another object in the same track, or until the end of the song is reached. Loops can be very useful
for providing the correct beat with a played Hihat track instead of with a metronome. For this, just record one, two,
or four beats of Hihat and quantize to a sixteenth or an
eighth. Loop the sequence (Loop: On), and a perfectly
timed Hihat will accompany you. Later the loops can be
converted to real copies for further editing by selecting
Functions > Sequence Parameters > Turn Loops to Real
Copies.
Transpose
This function allows you to transpose sequences in halftone steps. An octave has 12 half-tone steps. You can,
therefore, transpose a sound by one octave upward or
downward with +12 or −12!
Velocity
MIDI differentiates 127 speeds with which a note can be
struck—from the softest pianissimo (1) up to the hardest
fortissimo (127). If you enter the value +18, the original velocity will increased by 18 points, i. e., it will be movedtowards “forte”.
Dynamics
A form of “MIDI compression“ can be achieved with Dynamics, i. e., the differences between piano and forte, can
be compressed (levelled). For this you select a value below
100%. Values over 100% emphasize the differences between the strike velocity of individual notes (Expansion). If
you want a constantly stronger and more uniform strike
velocity for your keyboard play, try the following setting:
Velocity = +20 and Dynamics = 50%!
59
MIDI: Recording and Playback
Gate Time
This parameter allows you to shorten or lengthen the duration of the notes in a selected sequence by a percentage.
This can be useful to create staccato or legato effects very
quickly. It can also be used to compensate for the differing
attack/release characteristics that you may encounter
when assigning a sequence to ply with different sounds.
Percentages lower than 100 will shorten the notes, above
100 will lengthen them.
Delay
This function allows you to move up the play-back of a
track (negative values) or to delay it (positive values). The
Delay function is not only used for rhythmic effects, but
also to compensate for sounds with slow attack times. By
advancing the track a few milliseconds, even slowly fading
in string sounds will sync with other sounds with faster attack times.
The Autoload Song
A Song named “Autoload”
After you have become familiar with the basics of MAGIX
midi studio generation 6, you should create a default song
which includes all settings so you can start a recording at
any time. You can also record a drum track with kick,
snare, and eights from Hihat, which will then accompany
you like a sophisticated metronome. You can also prepare
a standard arrangement including a track for piano, bass
and strings. Further, you can prepare Screen Sets for the
window combinations which suit your work method and
your monitor size. Put the Autoload Song on your desktop, and start it by double-clicking it. You should always
save your songs with a different name: File > Save As…).
With the autoload file, the basic setup of tracks and other
major settings needs to be done only once. It can be modified occasionally, if you add a new instrument to your collection, for example, or if you get rid of one.
60
Event Editor
Event Editor
Open the Event Editor by selecting Window> Open Event
List.
NOTE: If you wish for the Event Editor to be the editor that
is opened when you double-click on a sequence in the Arrange window, open the Options > Settings > Global Preferences menu and select Double-click to open Event Edit in
Arrange from the flip menu at the bottom of the window.
The Event Editor displays all data chronologically in a text
format within a table. The Event Editor has no graphical
features, and its arrangement and display of notes is not
comparable to the easy overview provided by the Score and
Matrix Editors. However, it is by nature the most efficient
editor, showing you every MIDI event, with its type and its
values (data bytes) in plain text. All of these parameters are
accessible for editing. In fact, you could do a complete production without ever leaving the Event Editor. The MIDI
event type is shown in one of the middle columns of the
display. This makes it easy to quickly discern between
Note, Volume (controller 7), Modulation wheel or any
other type of data. Below is an Event window with a collection of MIDI events of all types. (thought not necessarily a
real life collection of events, it is useful for this demonstration.
With the buttons on the left side you can determine which
data types should be visible. You can also use the buttons
61
Event Editor
to add events directly from the Event Editor. You do this by
simply clicking on the desired button with the pen tool.
You may select events by rubberbanding them within the
Status column. (the column under the word Status at the
top portion of the window.) Be careful not to grab the timing positions or the data lines, as you may change their values without wanting to.
Identity of buttons, starting at top left and moving down in
criss-cross fashion: Notes, Program Commands, Pitch
Bender, Any Type of Controllers, Channel Pressure (Aftertouch, Pressure Dynamics), Poly Pressure (polyphonic
pressure dynamics), System Exclusive Data, Contents of
System Exclusive Data.
Note-Off Events, i. e., commands to end notes, are not displayed separately. Instead the length of the notes is shown
on the information line for Note-On Commands.
Application Example: Deleting unwanted Controller
data
Let’s assume that an otherwise perfect keyboard performance is flawed because of too much modulation wheel
data. The Event Editor makes it very easy to delete only this
unwanted data. You could then re-record just the modulation wheel performance and merge it back into the sequence containing the note data. Here is how you might
proceed with such a task. Open the Event Editor and select
a modulation wheel command (controller 1). Select Edit >
Select > Select Similar Objects.
All modulation wheel commands are now selected.
Delete them by pressing Backspace. Close the Event Editor. In the Arrange window, select Functions > Track >
Create MIDI Track to create a new, identical track on
which you will re-record the modulation wheel commands
only. Using the Merge Tool you can then merge these
commands anytime with the currently edited note sequence.
You should also take note that the same value can be
changed simultaneously for all selected events in the
Event Editor. For example, once all the modulation wheel
events were selected above, you could have reduced the
amount of modulation wheel effect for one of the events
and the values for all the other events would have changed
simultaneously by the same amount. You could also use a
similar procedure to alter the time position of any selection of events.
62
Event Editor
The Event Float Window
The Event window may not be as intuitively designed as
the Score Editor or Matrix Editor. However, its detailed information and direct access to all Events parameters are
invaluable. The Event Float window, a relative of the Event
Editor, allows you to access this same information easily
and compactly from within any other edit window. The
Event Float is like a single ‘slice’ of the Event editor and
will always display the currently selected event (if more
than one event is selected, the first event is shown). Just as
with the Transportation window, the float window always
floats, i. e., is never covered by another window. To open
an Event Float window select Options > Event Float in the
main menu.
63
Transport Functions
Transport Functions
To open the Transport bar select Window> Open Transport. (NOTE: A Transport bar will already be open if you in
the first screen set of the default song.) The Transport bar
includes all buttons for playback, recording, pause, fast
forward and rewind, as well as the locator and a field for
selecting the tempo. The Transport bar is a floating window; i. e., it is always on top and will never be covered by
another window.
Click on the flip menu switch and select larger to increase
the size of the Transport window. You may also choose enable Legend. which will provide descriptive labels for each
of the Transport bar functions. This can be helpful while
you are becoming familiar with them. Once you know
these functions, you can disable the legend in order to
save space on the screen.
We recommend that you move away from using the
mouse to operate the basic transport functions as soon as
possible. If you get used to the keyboard shortcuts right
from the beginning, at least for the most commonly used
commands, you can increase your work speed drastically.
The illustration shows the default keys of the computer
keyboard that correspond to the Transport field buttons.
, 0 enter
*
alt-c
alt-s
Please note that the keyboard layout can be completely defined by the user. If you are using the supplied “PowerKeys” keyboard layout, Stop is 0, Play is enter, and Solo is
s.
The Position Slider helps indicating and editing the current song position.
64
Transport Functions
Punch, Cycle, Skip Cycle
Press “Stop” twice to set the song position line back to the
beginning of the song (or, if Cycle is enabled, to the next locator to the left). This double-hit of the Stop key is very
useful, if you want to start playing back or recording from
the beginning of the song. With this function no rewinding is required. Record Toggle (preset to space bar) allows
you to manually drop (or: punch); i. e., enter or exit a recording while the sequence is already playing. (drop in /
drop out).
Cycle will continuously repeat the playback or recording
between the left and right locator. You can directly click
and drag on the beat position of each locator to change
their value. If you double-click them, a text field opens in
which you can type in an exact value. Type in a “space” or
“.” to separate between the data positions of location, i. e.,
type “5.3.1.1” to set the locator to bar 5, beat 3. (NOTE:
MAGIX midi studio generation 6 will also “round off” the
values of positions not entered so typing “5.3” would render the same result as typing “5.3.1.1”) The illustration on
the left shows the input of 14 in the left locator (seen
graphically it actually is on top), by double-clicking Backspace, 1, 4, and enter. The “right“ (lower) locator is set to a
beat of 20.
For intensive editing of a song section, you can repeat it
continuously using the Cycle function. To enable this
function, press and hold your mouse button and move
over the respective area in the upper half of the bar ruler.
In the Cycle mode, playback and recording will be repeated only between the two locator positions.
This Cycle range is highlighted with a thick, orange bar on
the bar ruler. As an alternative to the previous described
method, you can change the locator positions by grabbing
the lower corners of this bar and dragging them with the
mouse.
To skip a section, press and hold the mouse button and
move over the section from right to left. The Skip Cycle
range is shown as a very thin bar at the top of the bar ruler.
Under Skip Cycle, the left locator will have a later position
than the right locator.
Count-In and Metronome
The count-in and metronome settings are set as follows:
65
Transport Functions
– Select Options > Settings > Recording Options. In the
bottom flip-down menu you can choose None, One,
Two, Three, or Four beat count-in. You can also select
the option Wait for Note, which will repeat a quarter
note count-in, until you play the first note and the
recording starts.
– In the Recording Options you can choose if the
computer loudspeaker should click during recording
and/or playback.
– Select Options > Settings > Metronome Settings to
define a MIDI channel and MIDI notes to be used as
metronome. You might, for example, use the Rim Shot
of your sound module as metronome click.
Auto Drop
The Auto Drop function is used to automate the process of
dropping in and out of record. When it is enabled, MAGIX
midi studio generation 6 will drop in and out of record at
the designated left and right locator points, i. e., at the left
locator recording will start, at the right locator MAGIX
midi studio generation 6 will switch back to playback. You
can also use Drop mode in conjunction with Cycle, in
which case a total of four locator points are displayed.
In the example below playback will start at beat 2. At beat
4, MAGIX midi studio generation 6 enters the recording
(drop in). At beat 8, playback is re-activated (drop out). At
beat 9, playback starts over beginning with beat 2.
If you want MAGIX midi studio generation 6 to act and
feel like a real tape player for MIDI recordings; i. e., that
the range within the drop locators will actually be erased
and replaced instead of just recording an additional sequence, select Replace.
If Solo is selected, you can listen only to the selected track.
All other tracks will be muted.
66
Score Editing and Printout
Score Editing and Printout
Interactive Score Editor
Open the Score Editor by selecting Window > Open Score.
In the Options > Settings > Global Preferences menu you
can choose which Editor window will open when you double-click on MIDI sequences.
If one of the Editor windows such as the Score Editor is
open, you can watch during the performance how MAGIX
midi studio generation 6 displays your play as notation on
the screen. The notation serves two major purposes: 1)
MAGIX midi studio generation 6 allows you to print out
your score. The program also provides many graphical elements, display options, and smart text functions, as well
as chord and stop symbols. 2) The Score Editor is a very
practical tool for corrections, amendments and other edits
of your recording.
Please read the operating manual to learn about the extensive options for typesetting camera-ready music sheets
with MAGIX midi studio generation 6.
Editing Sequences in the Score Editor
To practice editing in the Score Editor, record a short sequence and purposefully perform some ‘bad’ notes in the
key of C. In a melody accidentally slide over an unwanted
67
Score Editing and Printout
f sharp down to the actually intended g, and play a C-Minor
chord where a C-Major chord should be played. Then correct these errors as follows:
– Double-click the recorded track. The Note Editor will
open with a display of the Score.
– Grab the f sharp with your mouse. The f sharp will
sound and be selected: it will blink. Press Backspace to
delete. The f sharp is deleted.
– Grab the e flat of the incorrect C-Minor chord and drag
it one half-tone step upwards. The e flat changes to an e,
and the C-Minor changes to a C-Major chord.
– Try using the pen tool to add notes.
Please notice the Score Tutorial on the separate Tutorial
CD. It consists of a .pdf file and a few example songs.
68
Matrix Editor
Matrix Editor
Open the Matrix Editor by selecting Window > Open Matrix.
NOTE: If you wish for the Matrix Editor to be the editor
that is opened when you double-click on a sequence in the
Arrange window, open the Options > Settings > Global
Preferences menu and select Double-click Sequence to open
Matrix Edit in Arrange from the flip menu at the bottom of
the window.
The Matrix Editor is perhaps the best editor for editing
Note length. It is also useful for those who are unfamiliar
with classical notations and who will therefore not feel at
home in the Score Editor. The Matrix Editor displays the
individual notes as bar diagrams—similar to the sequences in the Arrange window.
Note durations are an important element in musical expression and precise play. With conventional notation,
phrasing is left for the most part to the performer. The
Matrix Editor not only displays very exact note beginnings
and ends, it also indicates the strike dynamics with little
beams within the bars.
Sometimes notes are accentuated not by their dynamics
but by playing them very short or staccato. This is especially typical with organ parts, since organ sounds are not
generally velocity sensitive. In these situations, it is also
very important that the notes of a chord end at precisely
the same time. The Matrix Editor is the ideal tool for this
type of editing.
69
Matrix Editor
Now the note beginnings are aligned exactly on the grid.
You can shorten the notes by grabbing them at their right
lower corner. If you simultaneously hold ctrl-shift, all of
the selected notes will receive the same length.
In some editors, the Q buttoncan be used to quantize the
selected notes.
If you touch the Q button, a selection box appears. In this
box you define the grid on which the notes should be
quantized. The selection of a quantizing grid activates the
quantization. Subsequent quantizations can be activated
by clicking on the Q button.
Above the quantize button there is a field which shows the
current resolution of the grid lines to which the notes will
snap when moved. To move the notes without any grid
lines, hold down shift-alt while moving the notes.
You may use the Velocity tool to change the dynamics of a
selection of notes. With the tool selected, just click and
drag up or down on a note or selection of notes. The length
of the “velocity bar(s)” will change to reflect the change.
70
Preparing files for CD burning
Preparing files for CD burning
File Format
Special software like MAGIX audio studio is required for
the burning of CDs. This software accepts single songs in
the form of single stereo files. The sequence and numbering of the titles will be organized by the CD software. The
CD burner software requires the file format WAV. WAV
files with the following characteristics:
– stereo,
– 16 bit
– 44.1 kHz sampling rate
These type of files can be created with MAGIX midi studio
generation 6. This chapter describes the procedure used
to create these files.
Mixdown by Track Bouncing
Recording MIDI Instruments as Intermediate Audio
Mixdowns: MAGIX midi studio generation 6 allows you
to digitally merge various audio tracks without playing
back the song (digital mixdown). But only MAGIX midi
studio generation 6 deLuxe allows you to record the final
mixdown in real-time, for using internal plug-in effects
and external real-time effects processors (like reverb and
multi-effect devices) during the final mixdown and manual intervention. This technique is called Track Bouncing
and is described in the following. To accomplish this, you
might first record the signals of all MIDI instruments to
be played back by MAGIX midi studio generation 6 deLuxe in their entirety on to a single stereo audio track and
then mute all MIDI tracks.
Only mix the signals that you will actually need on the recording input of MAGIX midi studio generation 6 deLuxe. Do not turn them louder than necessary, to avoid
unwanted noise.
For automatic mixing, see chapter “Mixdown with
MAGIX midi studio generation 6“.
Track Bouncing: It is not necessary to re-record the total
of all audio tracks through the analog inputs, or to use another master device. MAGIX midi studio generation 6 deLuxe provides a Track Bounce function, which allows you
to master the mixdown in real-time on the hard disk—using a file format that the CD burner will recognize. Open
the Audio Mixer or the Track Mixer (open the Track Mixer
in the Arrange window by selecting: Window > Open
71
Preparing files for CD burning
Mixer…). Press the Bounce button on the track object
which plays back all tracks, i. e., the Master fader. The
Bounce dialog box appears. In this dialog box you can set
the beat range across which the mixdown should span.
This dialog also displays the required storage space.
Click on the Bounce button, or confirm by pressing return. In the displayed dialog box enter the hard drive and
the folder to which you want to write the mixdown of your
song as an WAVE file.
Post-Production
Final editing of the stereo recording will take place in the
Audio window and in the Sample Editor. At first you may
have to cutany remaining unwanted material at the beginning and/or end of the mixdowns.
Grab the regions in the Audio window next to their lower
corners, and shorten them.
Open the Sample Editor by double-clicking the region,
and check the region’s starting and ending point (Anything important cut off? Any unnecessary pauses?). Once
you’ve made the desired selection, choose Functions >
Trim.
With MAGIX midi studio generation 6 deLuxe you can
perform a composite compression for that powerful hit
sound—select Factory > Audio Energizer.
72
Preparing files for CD burning
With MAGIX midi studio generation 6 you have to be satisfied with putting your original sound with maximum
volume onto the CD: enable Functions > Normalize. If a
very loud CD is desired, one of these options must be selected.
If a sampling rate other than 44.1 kHz was used, you must
also use the Sample Rate Converter. Under Factory >
Sample Rate Converter (MAGIX midi studio generation 6
deLuxe) or Functions > Sample Rate Converter (MAGIX
midi studio generation 6) you can convert the sampling
rate after the fact from 48000 to 44100 Hertz. It is recommended that you record the production for the CD right
from the start with 44.1 kHz.
73
Troubleshooting
Troubleshooting
Possible Symptoms
74
They may be rare, but every computer user inevitably experiences seemingly severe computer problems at some
point, whether they be crashes where the mouse freezes,
the screen locks up, or the display becomes plastered with
error messages. Even mature, well written operating systems cannot protect you completely from hardware conflicts, bugs , or other problems.
Experience has shown that such system problems are
rarely caused by a defect in our programs or hardware
products, since they are rigorously tested by a diverse
range of musicians and studio users in a variety of applications, looking for any faults or problems.
This does not mean that the possibility of errors can be
completely ruled out; problems can crop up especially as
the various applications, operating systems and drivers
are all developed and improved in parallel by unrelated
teams, leading to occasional compatibility problems. We
do, however provide fixes in the form of software updates,
as soon as we become aware of such problems, and are
grateful to any users who make us aware of them.
If you suffer from system crashes or errors, you may well
find the tips in this chapter helpful, even if the problems
are ultimately unrelated to our products. In most cases,
these problems, once identified, can be rectified with a
minimum of effort, although tracing the cause of such
problems can be time consuming. You will be able to overcome most of these problems without needing to consult
an expert—this chapter will guide you on how to proceed.
It is best to eliminate the classic causes of problems before
you suspect a hardware defect, or another fault, especially
before you send your machine for repair, or your software
for a refund! Take care, though: some of these suggestions
may only cure the symptoms, and could therefore complicate the identification of the actual cause of the problem.
Persistent problems will require the advice of an expert.
If you have bought the computer together with the sound
card and other hardware, it is a good idea to test that the
computer is functioning as expected, with just a mouse,
keyboard, and display attached, before installing the card
and additional hardware (hard disks, printers etc.). Most
new computers come with pre-installed software, which
should allow you to test to see that everything is working
correctly. Once you have switched off everything, you can
proceed to install any hard disks, modems, scanners etc.
Troubleshooting
Now check that everything is still working as it should. If
so, you can unplug all cables from the back of the computer and begin to install the sound card.
If disaster strikes…
… your first priority should be to make a backup of your
most important documents. Attempt to copy your files
(lyrics, songs, tax declarations) to diskettes, hard, or removable drives, without launching their associated applications. While you are at it, you should also make timely
backup copies of your software’s installation diskettes.
You can skip this step for CD-ROMs, but even CDs require extra care: neither of its two sides should be
scratched. Once you have made backups of your private
files, and programs, the chances of a true disaster are all
but eliminated. Never skip making regular backups, even
if everything is working perfectly—eventually, any hard
disk may crash. A system crash can be caused by:
– operator error,
– a software conflict (e. g. incompatibility between two
programs),
– overloading of the system’s resources,
– faulty cable connections (or missing termination), or
– a hardware defect.
Eliminate the first two causes before deciding to have your
hardware repaired.
If the problem persists, make precise note of the following:
– what you were doing at the time of the error (which
program, which function, which applications were
open);
– the exact text of any error messages and/or error
numbers (if applicable);
– the version of the operating system, as well as of the
program where the error occurred;
– your system configuration.
– After each crash: Check the files and file structure of
your system hard disk with a suitable program like
Scandisk. If necessary, repair the files and file structure
of your system hard disk. We highly recommend
checking your hard disks with the Scandisk program
regularly, so as to rule out any hard disk related problems in the first place.
PCI Faults
PCI technology relies on highly accurate timing synchronization in your computer’s data stream. Unfortunately,
there are certain PCI card combinations that will cause
75
Troubleshooting
conflicts with each other, despite the fact that each on its
own is working perfectly, and within the PCI specifications. PCI problems like this can cause seemingly random
system crashes.
– Check whether the same problem persists after you
have removed the PCI card. Of course, you need this
card to work, but try to work on the machine for several
hours without the card—if the problems have gone
away, you have found the culprit. If the problems
persists however, you can safely rule out PCI problems
as being the cause.
– Try to use the PCI card in another slot. It is quite
possible to solve conflicts by simply swapping slots.
SCSI and IDE Faults
Faults in the SCSI or IDE chain can have a variety of consequences. SCSI, SCSI2 and IDE are parallel interfaces,
and can be used to connect hard and removable drives, CD
burners, and other drives, as well as scanners to your computer. Always take care with the following:
– The total length of all cables must be as short as
humanly possible, and the cables should be of the best
quality.
– The connectors must sit securely in their sockets, i. e.
securely screwed or clipped into place.
– Each SCSI ID (a number from 0—7) must be allocated
only once per SCSI bus.
– The last device in a SCSI chain must usually be terminated with a resistor block. Some devices have internal
termination, that can be switched in/out. If no termination is available, you will need an external terminator
(which looks like a single connector). This will be
connected to the last device’s output. Although this
may seem to contradict with the previous statements, it
has been known for a SCSI chain to work better without
termination. If you suffer from seemingly random
system failures, without an obvious cause, you may well
experiment with different device order combinations.
Also experiment with, and without termination for the
last device in the chain.
Faulty Cables
Cable faults are a common problem, which can cause all
manner of problems.
The use of the right monitor cable is important—simply
having the correct connector at either end is not sufficient.
Before you assume an unrelated hardware fault, please
76
Troubleshooting
test whether the cable may be at fault by swapping it for a
new one. Another common problem is loose internal
computer connections, which especially can occur after
computer transport. With awareness of the warranty requirements, as well as all safety precautions, our more
technically minded readers may wish to fasten the internal
connectors, with all due care. Be careful though: disconnect the power cable first, and wait for the high voltage to
drop. Ground yourself with the computer. This can prevent many visits to the repair man (or the hospital). However, we cannot be held responsible for any computer manipulation of this kind.
Hardware Conflicts
The installation of various PCI cards and the use of external devices (like MIDI interfaces) can cause hardware
problems—these sound more intimidating than they actually are. If Windows does not respond the way it used to
after having installed new hardware, it will be useful to begin to localize the problem. Start Windows in Safe Mode.
– Restart the computer.
– During startup (while still in DOS mode) the message
“Windows is starting” will appear—press F8 as soon as
it does.
– Choose Safe Mode by selecting 3 and confirm your
choice with return. Windows will now launch in Safe
Mode. Your video and audio card features will not be
available—for example, the screen resolution will be
lower than usual.
You can, at this point call up the Windows Help file, which
can help you in many cases. Choose Start > Help. The
“Contents” section has an entry for “Troubleshooting”.
Now, right-click the “My Computer” icon on your desktop,
and choose “Properties”, then select “Device Manager”.
77
Troubleshooting
– If you see any small yellow exclamation mark warning
symbols (click on any plus signs to check all the
entries), you have found the root of your problem.
– Select the hardware entry that is causing the hardware
conflict, and click the “Properties” button.
– Pay close attention to the notes Windows gives about
the hardware, for example about resource conflicts.
Hardware resources such as IRQ numbers cannot be
changed in Safe Mode. Instead remove the device from
the Device Manager and restart your machine. You can
now re-install the hardware. On a related topic, please
note that IRQ conflicts can be avoided by setting your
BIOS parameters correctly. However, BIOS settings
should only be changed by experienced users. Consult
your computer or music dealer for advice in this area.
Sound Cards
If MAGIX midi studio generation 6 complains with the
error “PCAV Error xx : padUnprimeFailed (xx is a number) on start up, one of three causes could be the culprit:
1. There is no sound card installed in your computer;
2. The sound card or its drivers are not stereo or 16bit capable (this applies to older sound cards);
3. The sound card is currently in use by another program—the Windows CD Player, a wave editor, or the like;
If the first instance, uncheck the ‘PC AV’ checkbox in Audio > Audio Hardware & Drivers. Exit MAGIX midi studio
78
Troubleshooting
generation 6, and start it again—everything should now
work.
If the second case applies, you will need to install more recent drivers, or change the sound card altogether. Please
ask your sound card’s manufacturer.
In the third instance you simply need to close down the
other programs and start MAGIX midi studio generation
6 again.
Advanced users can use the settings accessible via the
“Control Panel” switches in Audio > Audio Hardware &
Drivers > Audio Drivers to manually control MAGIX midi
studio generation 6’s sound card use.
Viruses
Regrettably, there are some malicious people, who program and distribute virus solely to cause damage. Check
your drives regularly for viruses, especially if you are in
regular contact with other people’s data carriers, or download from the Internet. Not all virus programs are able to
detect the tricky macro viruses, and others which are as yet
unknown to virus protection software developers.
Graphic Cards
Graphic cards and graphic drivers can cause many problems. Always ensure that you have the latest drivers for
your graphic card installed.
If you are confronted with inexplicable problems, install
the Standard VGA graphics driver. This is sensible even if
the actual symptom appears unrelated to graphics use. If
the graphic card or its driver is responsible for the problem, the use of the Standard VGA driver should cure it.
Re-installing the Operating System
Sometimes parts of your computer’s Operating System
get corrupted. There are dozens of reasons for this. Then
re-installing the operating system (Windows 95/98/
2000) from your installation CD-ROM is a good idea.
To prevent such time-consuming actions, you should
make sure that you only install software that you really
need and use. Do not mess too much with installing each
and every piece of software that comes across your way.
And stay away from cracked software, not only for legal
reasons, but also for cracks are likely to play havoc with
your computer’s operating system in order to avoid the
cracked software’s copy protection. Please remember: Realtime audio processing as carried out by Magix music studio generation 6 is a “Formula One” race for your com79
Troubleshooting
puter, so make sure your system is in VERY good shape.
Learn about this in internet news groups or computer music magazines.
Updating the Operating System
Sometimes the faults simply come down to the operating
system. You can usually find updates to your operating
system, free of charge. Operating system upgrades can be
conveniently download from the Internet. The Internet is
a gold mine for solutions to problems, and a great meeting
place for solution seekers. Many computer magazine websites have links from their home pages, to pages that offer
solutions to many common problems.
If all else fails, there is only one thing left to do:
Formatting the Hard Disk
Formatting the hard disk is the last resort you should attempt before sending the computer for repair. This will
erase all files on your hard disk, and most probably also
any garbage data that may be causing your problems. The
formatting process will erase all files, so make backups of
all your files and programs first, and make sure to verify
those backups to ensure that they have been successful.
Note that all invisible authorization files will also be lost,
so uninstall your authorizations of other software first. On
a related note, consider the importance of sending us your
registration card so that you can get help when a hard disk
disaster strikes.
In order to allow formatting of the internal hard drive you
need to start your computer from another, either from the
CD-ROM or an external hard disk. To rule out a Virus
problem however, it is advised that your reformat all your
hard drives in the same session—after all, a CD-ROM cannot be infected with a virus (unless it was infected to begin
with.). Install MAGIX midi studio generation 6 again. If
the problem still persists, a hardware conflict or conflict
between the program and the operating system is most
likely. If the problem only occurs with a specific program,
you will need to get in touch with the software manufacturer. If the problem occurs with several applications, you
will need to get in touch with your computer dealer.
80
Part 2
Reference
midi
studio
81
Using MAGIX midi studio generation 6
Using MAGIX midi studio generation 6
This chapter summarizes MAGIX midi studio generation
6’s general operating functions.
But first, a quick word about this manual.
Conventions of this Manual
Menu Functions: If the text is dealing with functions which
can be reached via hierarchical menus, the different menu
levels are described as follows: Menu > Menu entry >
Function.
Key Commands: When a function can be operated by a key
command of the same name, you will see this symbol at
the side of the text. If names differ, or if a function is only
available as a key command, its name will be printed like
this: Key Command.
Options and Parameters: The options you can set from the
Preferences or Song Settings, and the parameters in dialog boxes are printed like this: Parameters.
Different parameter values are printed like this: Parameter
value.
Graphics: Sometimes this manual uses graphics from
other MAGIX programs. This is due to technical reasons
and does not influence the usability of this manual. However we apologize for this inconvenience.
The Mouse
Basic functions
Unless stated otherwise, the left mouse button is the one
you should use whenever “the mouse button” is mentioned.
Clicking: Place the mouse pointer on the object (button, input field, etc.) and press the mouse button once.
Double-clicking: The same as clicking on an object, but you
press the mouse button twice, in quick succession. You
can set the appropriate time-span for this in the System
Controls.
Grabbing or Clicking and Holding: The same as clicking on
an object, but you keep the mouse button held down.
Moving or Dragging: Grab the object and move the mouse
(keeping the mouse button held down) to the desired position.
Mouse Input
Checkboxes: Checkboxes are square boxes which become “checked” when you click them to activate an option
82
Using MAGIX midi studio generation 6
(or function). Click them again to remove the “check” and
deactivate the option.
Pull-down Menus: Pull-down menus open when you
grab certain input fields or buttons. You choose a command by moving the mouse onto the desired item. If you
want to choose an item which is outside the visible section,
– move the mouse over the top or bottom edge of the
menu; the further you move it, the faster you will scroll
through the menu.
– now click using the right mouse button. You can then
let go of both mouse buttons.
Mouse as Slider: You can set practically all the numerical parameters, (even note values or names) by grabbing
the parameter value and moving the mouse up or down. If
the parameter is made up of several separate numbers
(e.g. song position), you can adjust each number individually.
Using the Mouse for In/Decrementing: All the parameter values which can be set using the mouse as a slider
may also be increased or decreased in single units by
clicking on the top or bottom half of the value with the left
or right mouse buttons while holding down the alt.
Numerical Input: Double-clicking on a numerical parameter value opens an input field. The previous value appears pre-selected, (i.e. highlighted) to allow it to be overwritten by a new entry. You can also use the mouse to
make a partial selection in an input field so that only the
highlighted part is overwritten (for more on this, see the
section Numerical Value Input from page 220 onwards).
As long as the input field is open, all the keys may be used
for inputting data only, and may not be used for key commands (the exceptions are the main menu functions).
… by arithmetic: At any time, you can enter numbers by
typing in an arithmetical operation, e.g. “+2” or “−5”,
which then simply changes the current value by that
amount.
… as ASCII-symbols: You can also input numbers as
ASCII symbols: just put a ` or " in front of it, and the
ASCII code will be input as a number. For example:
"! gives 33
"a gives 97
83
Using MAGIX midi studio generation 6
This function is particularly useful for entering text in SysEx strings.
Text Input: You input text names in the same way as
numbers, but you only have to click the name fields once
to allow input.
Numbered Names: As you might expect, you can give any
number of selected objects the same name. If the name
ends in a number, the number will automatically be incremented by 1 for each object. This allows you to name all
the sequences on one track quickly.
Disabling automatic numbering: To turn off the automatic
numbering, place a space after the number at the end of
the name. All the selected objects will then end in the
same number.
Tools and the Toolbox
MAGIX midi studio generation 6 allows recorded data to
be handled graphically. This means that you don’t have to
carry out operations by inputting commands via number
tables, but rather by manipulating graphic “objects”.
When editing objects graphically, you always have two
tools available at the mouse pointer position: one is already active, the other is activated by the right mouse button.
You change the currently active tool by clicking on the
toolbox. The mouse pointer then adopts the shape of the
tool you click on, so that you can tell what its function is by
looking at the symbol: the Eraser is used for deleting, the
scissors for cutting and the glue tool for merging objects.
To assign a tool to the right mouse button, click on the desired tool in the Toolbox, with the right mouse button.
Effective Range of the Tools:
– Tools are effective only in the working area of the
window they were selected from (you can define individual tools for each opened window).
84
Using MAGIX midi studio generation 6
– A tool basically affects the objects you click on. If the
clicked object is already selected, the tool operates on all
other selected objects, as well.
Selecting Tools: You select the tool you want to use by
clicking on it in the toolbox (or clicking while holding
down the right mouse button for the alternate tool).
If a toolbox is opened at the mouse position you can also
use one of the number keys to choose a tool at the corresponding position. The tools are always numbered from
left to right and top to bottom. Press the Show Tools key
again to switch to the pointer, and close the box.
Opening the Toolbox at the Mouse Position: Use Show Tools
(default: esc) to open a toolbox at the mouse position. This
window will disappear as soon as
– you choose a tool by mouse click,
– you choose a tool bypressing a number key,
– you click anywhere outside the tool window or
– press any key.
Info Line: When operating many of the tools an info line
appears at the edge of the window for as long as the mouse
button is held down. The info line replaces the local
menus in the window. This info line provides useful feedback about the type of operation you are performing.
The Tools: Pointer: The pointer is the default tool. The
mouse also takes on this shape outside the working area
when you are choosing from a menu or inputting a value.
Within the working area the pointer is used for selecting
(by clicking on objects), moving (by grabbing and dragging), copying (by holding down ctrl and dragging) and editing lengths (by grabbing the bottom right corner and
dragging). Grabbing and dragging anywhere in the background opens a rubber band (see page 94).
Pencil: The pencil is used to add new objects. You can also
select, drag, and alter the length of objects.
Eraser: The Eraser deletes clicked objects. When you click
on a selected object all of the currently selected objects are
deleted (as if you had used delete).
Text Tool: The text tool is used to name arrange objects or
add text to a musical score.
Scissors: The scissors are used to split arrange objects, e.g.
before copying or moving individual sections (see page
129).
Glue Tool: The glue tool is the opposite of the scissors: all
selected objects are merged into a single object, which is
85
Using MAGIX midi studio generation 6
given the name and track position of the first of the objects
on the time axis (more on this on page 129).
Solo Tool: Grabbing with the solo tool allows you to listen
to only selected objects during playback. Moving the
mouse vertically also outputs any events the cursor
touches, even when the sequencer is stopped (please refer
also to section Soloing sequences from page 130 onwards).
Mute Tool: Clicking on an object with the mute tool stops
it from playing and places a dot in front of its name, to indicate that it is muted. You can unmute it by clicking it
again with the tool. If multiple objects are selected, the setting of the object you’ve clicked on applies to all selected
objects (see also section Muting sequences from page 130
onwards).
Magnifying Glass: The magnifying glass allows you to
zoom in on a “rubber-banded” section, right up to full
window size. You revert to normal size by clicking on the
background with the tool(for more on this, see the section
Zooming Selectively from page 88 onwards). You can also
access this function via other tools by holding down alt.
Finger: The finger is used in the Matrix Editor to alter note
lengths.
Crosshair: The Crosshair is used in the Drum Editor to input a linear series of parameter values.
Layout tool: The layout tool is used for graphically moving
objects in the Score Editor to optimize the display (e.g.
bars to lines: “Local Formatting”) without altering the timing of actual MIDI events.
Size Tool: The size tool is used to adjust the size of graphic
elements in the score.
Velocity Tool: In the note (i.e. Matrix and Score) editors),
you can use the V tool to change the velocity of notes.
Window Functions
The basic functions of the MAGIX midi studio generation
6 windows are the same as those in other Windows application programs. However, the display options in MAGIX
midi studio generation 6’s windows are far more extensive.
In MAGIX midi studio generation 6, you can open different combinations of windows (even several of the same
type) and adjust each one individually. All open windows
in a song are constantly updated. This means that the windows update to follow the song position, and any alterations that you make in one window immediately update
the display of all the other windows you are working with.
It is also easy to save different window arrangements
86
Using MAGIX midi studio generation 6
(called “screen sets”), and recall them at the push of a button.
Working with windows
Opening windows: All MAGIX midi studio generation 6
windows can be opened via the Window main menu. You
can open as many of the same type of window as you like.
Closing windows: You close windows (alt f4) by clicking
on the close symbol in the top right of the windows.
Setting window size: As is usual for Windows, you can
change window size by positioning the mouse over a Window edge, or corner and pulling.
Maximizing window size: The windows maximize button,
in the upper right corner of the window, toggles the window between its maximum size, and the size it was before
you clicked on the button .
Minimizing window size: Clicking on the minimize button
reduces the window to its minimum size. Double-clicking
on a minimized window restores it to its original size.
Selecting the Working Area: Scroll Bars: The
scroll
bars are situated at the right and bottom edges of a window, if you can only see one section of the working area in
either the vertical or horizontal dimension.
You can move the visible section by clicking the arrows or
grabbing and dragging the scroll slider. There are two
points of note:
– The size of the scroll slider in relation to the size of the
entire scroll bar corresponds to the size of the visible
section in relation to the overall size of the window,
– the visible section changes as you move the scroll
slider.
X/Y Element: The X/Y element is situated in the bottom
left corner of the window. By grabbing and dragging it you
can move the horizontal and vertical window section, as if
you were dragging both scroll bars simultaneously.
Page Scrolling: Use the key commands Page Up, -Down,
-Left and -Right to scroll one page up, down, left or right, as
if you had clicked in the grey region above / below the vertical scroll bar, or to the left / right of the horizontal scroll
bar. The key commands Page Top, -Bottom, -Left most and Right most take the visible section of the working area to
the top, bottom, left or right, just as if you had grabbed one
X
X
87
Using MAGIX midi studio generation 6
of the scroll sliders, and moved it to one of its extreme positions.
X
X
Zooming: Below the vertical scrollbar and right beside
the horizontal scrollbar you find two hatched fields. These
fields are used for vertical respectively horizontal zooming
and are therefore referred to as telescopes. Clicking the
left, smaller side of the telescope symbol reduces the size
of the objects in the display, allowing you to see more objects in the same space (zoom out) and clicking the right,
larger side enlarges the objects in the display (zoom in).
The vertical telescope is for vertical zooming (Zoom Vertical In/Out, default assignment: ctrl page up/ctrl page
down), while the one with the horizontal arrow handles
horizontal enlargement (Zoom Horizontal In/Out, default
assignment page up/page down). In some windows, only
one telescope is available, and this then handles both horizontal and vertical zooming at once.
Whike “zooming”, the top left selected object is kept in the
visible region, whenever possible.
Zooming Selectively: Zooming In On One Section of the
Screen: To enlarge a section of the screen to the size of the
whole window use the magnifying glass tool to drag a
“rubber band” over the section you want. You can do this
more than once.
Reverting to the Previous Zoom Setting: Click on the background with the magnifying glass. This will return the
zoom to the original setting, by backtracking through the
previous steps.
You can call up the magnifying glass functions with any
other tool (apart from the pencil) by holding down alt. The
pointer will still look like the previous tool, but if you “rubberband” with it, it will behave like the magnifying glass.
Window Elements: Adjusting the Size of the Window Elements: If you move the mouse over the top left corner of
the arrange area the mouse pointer turns into a crosshair.
By dragging it, you can now adjust the size of the bar ruler,
arrange area, track list, and transport buttons. You can
also adjust the window elements in the Score, Drum and
Matrix Editors using the same method.
Concealing/Revealing the Transport Functions: Use View >
Transport to display or remove the transport panel buttons from the top left corner of the Drum, Matrix or Arrange windows. The number of buttons and indicators depends on the amount of space available (see the section
88
Using MAGIX midi studio generation 6
X
Adjusting the Size of the Window Elements from page 88 onwards).
Concealing/Revealing the Parameters: The function View >
Parameters (Hide/Show Parameters) allows you to display
or remove the entire area to the left of the Arrange and Editor windows, which contains the sequence parameters,
track parameters, and the toolbox. Hiding these parameters gives you more space for the editor window itself.
In many windows, you can hide and/or reveal further
screen elements, such as the toolbox. These display options are always available from the View menu.
Menus
Because of MAGIX midi studio generation 6’s great range
of functions, most of them are not found in the main
menus, but appear as local menus. These are always in the
menu bars of the MAGIX midi studio generation 6 windows where they are required.
Hierarchical Menus: You use the menus (whether
main or local) in the same way as in other application programs: grab the menu title, move the mouse over the desired item , and release the mouse button. In hierarchical
menus, there is a right-pointing arrow after the item. If
you highlight this item, a sub-menu drops down to the
right. To choose an item from this sub-menu, move the
mouse to the right, into the sub-menu, and then vertically
over the desired item. Releasing the mouse button will activate the selected function.
Using a keyboard: You can also select the active window’s
menu using alt, and step through the menus in the usual
way using cursor left and cursor right (or by hitting the
typewriter keys for the underlined letters) to select the one
you want. You then use cursor down and cursor up to select the menu entry you want (or carry out the menu function immediately by hitting the key for the letter underlined in the menu function’s name).
If you encounter a hierarchical entry (which has a triangle
at the end of the entry line), you can use cursor right to access the sub-entries (cursor left closes the sub-menu
again) and, again, use cursor down/up to make your selection.
When you have chosen your function, hit return to activate it.
Fixed key commands: Some menu functions can be accessed via fixed keystrokes or combinations of keystrokes.
The keys (or combinations thereof) are shown on-screen
89
Using MAGIX midi studio generation 6
next to the menu entries and operate globally. For example, you can open a song with ctrl o, or copydata to the
Clipboard (=Copy) via ctrl c.
Please note that you may assign practically any other function to any key you like using the Key Commands window.
Menu options with “…” in their title: Three periods,
like this: …, next to the menu function title indicate that
the entry does not activate a function immediately, but instead opens a dialog box.
Dialog Boxes
In Dialog boxes, you can hit the thick-bordered button by
pressing return, or by clicking with the mouse.
As per usual for Windows, you can toggle the thick border
from button to button with cursor left/right.
Window Types
There are two different types of window in MAGIX midi
studio generation 6: normal windows and float windows.
The contents of all the windows belonging to the current
song are always updated, no matter what the type of window.
Normal Windows: You can open as many normal windows as you want, including several of the same type. Even
though the contents of all the windows is constantly updated, only one of the windows ever has the status of being
the “top”, or “active” window. This is the window which is
in the foreground when several normal windows are overlapping.
Top or Active Window: This window can be recognized by
its fully-shaded title list. The main distinguishing characteristic of this window is that key commands only affect
this window, and not any of the others. Windows > Next
Window (ctrl+tab) brings the next window forward if it is
fully covered up by others.
Background Windows: Background windows are identified
by the color of their title bar. This color is determined by
your “Appearance settings in Windows. You bring the
window to the foreground by clicking on it, clicking on the
title bar, or calling up one of the local menu functions.
90
Float Windows: MAGIX midi studio generation 6
knows two float windows: the Transport window and the
Event Float window. Float windows are so called because
they always “float” in the foreground, even above the top
normal window (if there are too many open float windows,
they will inevitably cover each other up—just click on
Using MAGIX midi studio generation 6
them to bring them to the front). Float windows are recognizable by their narrower title bar, which contains no
name. Mouse operations can be carried out in the same
way as in normal windows.
Main Menu Window: MAGIX midi studio generation 6
Main Menu window is the main window of the program.
You will find all menu items here. There are:
– Global Menus, which are always visible (e.g. File);
– Window related menus: they belong to a certain
window type (e.g. Score Window) and are only visible
when this window type is the active window. It only
contains functions relevant for the corresponding
window type.
As is common on Windows computers, you can address a
menu using using the alt key. Keep this window at its preset maximized size, there isn’t much point in making it
smaller.
The “Minimize Window” button can be used to switch between MAGIX midi studio generation 6 and other applications. You can get back to MAGIX midi studio generation 6 at any time by clicking the MAGIX midi studio
generation 6 symbol in the Task Bar.
Press alt tab to toggle directly between MAGIX midi studio generation 6 and any other application.
Relationships between Windows
The two buttons at the top left of a window (shown here),
determine its relationship to the song position (Catch), or
to other windows (Link, Show Contents, or Contents
Catch).
Catch: The Catch function means that the visible section
of a window follows the song position as the song plays.
If the button with the walking man on it is lit (i.e. if it is
green), the window’s display follows the song position as
the song plays. If the button is not lit, the display does not
update, even when the song position line moves past the
right edge of the visible portion of the window(Catch Clock
Position).
Automatic Catch Disabling: If you move the visible section
manually, Catch is automatically switched off, so that the
new section you have chosen doesn’t then disappear, as
the display is updated to the song position line.
Autocatch: The function Enable Catch when Sequencer starts
(Options > Settings > Global Preferences…) always enables Catch mode whenever you press play or pause.
X
91
Using MAGIX midi studio generation 6
Link, Show Contents, and Contents Catch: You can
define these display options to control how information is
displayed when working with related editor windows.
Link: When the button with the chain link icon is activated
(i.e. when it is this window always displays the same contents as the top window. The display is adjusted whenever
the selection in the top window is altered.
Here’s an example: imagine the top window is an editor.
In Link mode, the other editor windows can display the
same data in another form (though please remember: you
cannot have any event display as the background window
of an Arrange window while in Link mode).
Contents Link: Double-clicking on the link button (dark
blue) activates Contents Catch mode. This means that the
window always shows the contents of the object selected
in the top window. The display is therefore always one
level below that of the top window.
Here’s an example: if the top window is an Arrange window, in Contents Link mode the editor windows can show
the events of a selected sequence. Selecting a different sequence in the Arrange window will cause the display of
the linked editor to switch to that sequence, as well.
Contents Catch: By simultaneously switching on Catch
and Contents Link, you activate Contents Catch mode. Initially, this is equivalent to Contents Link mode, but when
the song position reaches the next object on the same
track, the contents of this object are then displayed.
You could use this mode in an Arrange window, much as
you would in Contents Link mode. The editor windows
would then show the events of the sequence which is currently being played on a track.
Screensets
Normally you will lay out your windows on the screen in a
way that suits your way of working. This layout with various windows, with all their different parameters (display,
zoom, position of each window) is called a screenset, and
can be stored. You can then swap between different
screensets, much as you might swap between different
computer monitors.
Storing Screensets: Screensets are numbered from 1—
99 using only the numbers 1—9. You can see the number
of the current screenset in the main menu next to the
word Window.
92
Using MAGIX midi studio generation 6
You don’t have to save screensets with an explicit command. It happens automatically as soon as you switch to
another screenset. Thus, without any effort, your current
working view is always stored on the current screenset.
Switching Screensets: Just input the number of the desired screenset (1—9). For two-digit screensets hold down
alt while inputting the first digit.
Protecting Screensets: Use the key command Lock/unlock current screenset to protect the current screenset from
being altered. A # then appears in front of the screenset
number. Repeat the key command to unlock the
screenset.
The New Song command deactivates all Screenset locks.
X
Copying Screensets: To copy the current screenset to a
destination screenset, hold down shift when you switch
screensets.
Copying Screensets between Songs: Close all the windows
you want to copy in the screenset, switch to the other song,
and reopen the editors. They will have retained their sizes
and shapes in the new song.
The reason for this is that the preset values for window position, size, and all other pertinent parameters are stored
in memory when you manually close a window, so that the
settings remain the same the next time windows of the
same type are opened again.
Sequencer-controlled Switching: You can automatically switch screensets using meta event # 49—just add it
to a sequence in the Event Editor.
– Set the song position to the point where you’d like the
screenset to change.
– Right mouseclick in the Event Editor on the button
shown. The inserted meta event has the default value
50 (Song Select).
– Alter the number in the NUM column from 50 to 49.
This changes the name to Screenset.
– Input the desired screenset number in the data bythe
column (VAL).
You can stop the switching by muting the sequence that
contains the Meta 49 event.
Selection Techniques
Whenever you want to carry out a function on one or more
objects, you have to select the object(s) first. This applies to
93
Using MAGIX midi studio generation 6
arrange objects and individual events alike. Selected objects are either displayed in inverse color, or will flash (the
latter in the Score editor).
The selection status of an object applies to all windows. An
object selected in one window will also be selected in all
other windows that display that object. Changing the top
window doesn’t affect the selection (as long as you don’t
click on the background, which deselects everything. Be
sure to click on the window’s title bar).
X
X
X
94
Selecting Individual Objects: Individual objects may
be selected by clicking on them, and deselected by clicking
in the background, or by selecting another object.
You can also use the key commands Select next/previous
Object (default: K/ J, in the Event List: M/ I).
Selecting Alphabetically: tab selects the next alphabetical
object. In the Arrange window pressing any letter key selects the first object whose name begins with this letter
providing there is no key command assigned to this key.
Selecting Several Objects: To select several non-contiguous objects , hold down S as you click them. As subsequent objects are selected this way, the previous selections
are retained. This also works with horizontal or rubber
band selection.
Horizontal Selection: To select all objects on a track, click
on the track name in the track list. In the same way, you
can select all events with a certain event definition in the
Drum Editor, by clicking on the event definition name, or
all notes of a certain pitch in the Matrix Editor by clicking
the relevant key on the screen keyboard.
In Cycle mode, the above selects only the events within the
Cycle zone.
“Rubber-Banding”: To select objects which are close together, click on the background and drag a “rubber band”
over them.
All objects touched, or enclosed by the rubber band will be
selected.
Toggling the Selection Status: When you make any selection (including by rubber band or horizontal selection),
holding down shift at the same time will reverse the selection status of the objects.
You can reverse the selection status of all objects using
Edit > Select > Toggle Selection. For example: if you want
to select all objects except for a few, first select these few
and then choose Toggle Selection.
Using MAGIX midi studio generation 6
Selecting Following Objects: To select all objects after the
current one (or, if no object is currently selected, to select
all objects after the song position), choose Edit > Select >
Select All Following.
Selecting Objects within the Locators (Vertical selection):
Edit > Select > Select inside Locators selects all objects lying wholly or partly within the locators.
X
Selecting all Objects: To select all objects, select Edit >
Select All or press ctrl a.
Deselecting All Objects: You can deselect all objects by clicking on the background or using the key command Deselect
All.
X
X
X
Edit Operations
The local edit menus in MAGIX midi studio generation
6’s various windows all take the same form. The first item
is Undo. Below Undo are the typical clipboard functions
and at the bottom of each are the main selection commands.
Undo: Undo allows you to reverse the previous edit. Under Options > Settings > Global Preferences…, you can
disable the warning message that normally appears when
you activate Undo, by checking the Disable safety alert for
Undo box.
The key command for Undo is always ctrl z.
X
The Clipboard
The clipboard is an invisible area of memory into which
you cut or copy selected objects so that you can paste them
into a different position.
The clipboard spans all songs, which means you can use it
to exchange objects between songs.
Cut: All selected objects are removed from their current
position and placed on the clipboard. The previous contents of the clipboard are overwritten in the process (key
command ctrl x).
X
Copy: A copy of all selected objects is placed on the clipboard. The selected objects are also left in place. Here too,
the previous contents of the clipboard are overwritten (key
command ctrl c).
X
Paste: All objects from the clipboard are copied into the
top window. The clipboard is not erased in the process
(key command ctrl v).
X
95
Using MAGIX midi studio generation 6
The contents of the clipboard are added at the current
song position (if they are events or arrange objects). The
song position is incremented by the length of the pasted
objects.
In the Arrange window, the contents of the clipboard are
pasted to the selected track. If events are pasted in the Arrange window, either a new sequence is created for them,
or the events are added to a selected sequence.
Any objects that existed previously are unchanged.
X
Delete: Any selected objects are erased. Delete has no effect on the clipboard and is the same as pressing backspace or delete.
General Functions of the Editors
Control output via MIDI: Switching on the MIDI Out
button causes MIDI events to be output when they are
added, selected, or edited. This allows you to audibly monitor every editing stage, whether you are scrolling through
the Event List (automatic selection) or transposing a note.
Automatic Scroll Functions: … scrolling to the Song position: The button with the walking man on it activates the
Catch function, which means that the window view will always show the current song position.
Contents Link: Clicking on the button with the chain
symbol on it activates the link function, and double-clicking it activates the “show contents” function. In “show
contents” mode, the window always displays the contents
of an object selected in the top window; in link mode the
window shows the same objects as the window where you
are making the selections.
For a full description of the catch and link functions see
page 91.
In Editor windows, contents link is usually active. You can
then, for example, select some sequences in an arrange
window, and when you switch to a screenset with an open
editor window, you will see the contents of the selected sequence(s).
Selection Commands and Editing Functions
X
96
Setting Locators by Objects: The Functions > Objects
> Set Locators by Objects command allows you to set the
locators in all the Editors (just as in the Arrange window)
so that they just encompass the currently-selected events.
Using MAGIX midi studio generation 6
Edit Functions: For a description of the undo and clipboard functions (particularly adding events at the Arrange
level), refer to page 95.
Altering Note Lengths: While changing the lengths of
multiple objects you can make all lengths equal by holding
shift ctrl.
Repeating or Copying Events: To repeat selected events
once or several times (with adjustable rounding of the position of the first repeated event), you can use the function
Functions > Object > Repeat Objects.
X
Deleting Events: The basic techniques are the same as
for deleting sequences:
– delete deletes all selected events,
– the Eraser also deletes all selected events, and any
events that you click with it (whether previously
selected or not).
Step-time Recording
Step-time recording allows you to enter notes via the keyboard, but not at any defined tempo as in real-time recording. After each note is inserted, the sequencer “steps”
ahead by an increment which is determined by the division setting in the Transport window. Every note or chord
you enter automatically receives the note value of the display format, or a multiple of it. MIDI Step-time input is activated in the Score, Event List and Matrix Editors by
pressing the MIDI In button.
Here’s how to do it. Select an existing sequence, or create
one in the Arrange with the Pencil tool. Open one of the
note editors (Score, Event List or Matrix).
– Switch on MIDI In.
– Play and hold a note or chord. You may even hit the
notes for the chord one after another, if you like. The
important thing is that at least one note remain pressed
from the beginning.
– Release the last note. This moves the song position by
one step (the format value on the transport), and you
may enter a new note.
– Rests are entered with the sustain pedal. Each time you
press this, you step through the song by the format
value, without entering a new note.
– You may enter longer notes or chords by pressing the
sustain pedal while holding down the note(s).
You may change the format value on the Transport at any
time, even while you are holding down notes.
X
97
Using MAGIX midi studio generation 6
Step-time input is also possible from the score display.
However, the quantize value Default should be avoided, as
the note display will then change every time the step size
is altered.
If you are step-time recording in the Score Editor you can
also define the note value by clicking notes in the part box
(but only if step-time recording is switched on.)
Keyboard Control: When employing step-time input,
there are a few special, non-editable key commands that
can only be used if the keys in question have not been redefined for another purpose (see the section Key Commands Window from page 101 onwards).
tab or space bar: as the sustain pedal. (please note that
space bar is the default key for Record Toggle. If you wish to
use space bar to move along in steps, you will first have to
delete this key assignment; see the section Deleting Assignments from page 102 onwards).
n jumps to the next bar division position; so in 4⁄4 time,
to the next quarter note.
m jumps to the next bar.
b moves back a step and erases the event there.
a sets the division value to 1⁄4.
s sets the division value to 1⁄8.
d sets the division value to 1⁄16.
q sets the division value to 1⁄32.
w sets the division value to 1⁄64.
e the current division value is set to the next highest triplet value: for example from 1⁄16 to 1⁄24.
e the current division value is set to the next lowest triplet value: for example from 1⁄16 to 1⁄12.
The key commands will continue adding these values, as
long as the MIDI controller key is held down.
X
Editing via MIDI input: By double-clicking on the
MIDI In button, you switch on “Edit by MIDI In Mode”.
The values of the MIDI data being input are then used to
edit the “Pitch” and “Velocity” of the currently-selected
note. The note length remains unchanged. In contrast to
MIDI step-time input, no new data is created; what exists
already is merely changed. The key commands Next / Previous Event allow you to move one note further forward or
back.
Event Quantization
98
The Event Editor has a separate quantization function
which can be applied to all selected events. Unlike quantization for arrange objects the event quantization applies to
Using MAGIX midi studio generation 6
all events, not just notes. It irreversibly alters their positions ( only notes can be returned to their original recorded positions).
Quantizing Events: Select the events that you want to
quantize.
You open the pull-down Quantization menu by grabbing
the “Q” button shown here.
This is identical to the matching pull-down menu for the
playback parameters, and contains its own quantization
grid (for details see the section Quantization from page 135
onwards). As soon as you choose an item from the menu,
all the selected events are quantized.
Please remember that you can only reverse note quantization. All other events are permanently shifted.
To apply the same quantization grid to another series of
selected events (even in other Editor windows), select
Functions > Quantize again, or click quickly on the “Q”
button again.
X
Note Quantization
Normally, all notes in a sequence are quantized according
to the Quantization parameter in the sequence parameter
box and the extended sequence parameter box (explained
in greater detail in the section Quantization from page 135
onwards).
To quantize single notes in either of the Note Editors (the
Matrix or Score Editors) you can use the Q tool, as well as
event quantize.
If you click on a single note (or a selected group ) with the
Quantize tool, and hold down the mouse button, the quantize menu should open and you can choose the quantization you want.
If you click quickly on notes, the last quantize value will be
used again, just as with the Quantize Again command.
If you click on the background with the Q tool you get the
usual rubber band for selection of several objects at once.
Special note for working in the Score window: the display
quantize setting will have an effect on how this works.
Unquantizing Notes: Note events can be returned to their
original record positions, or moved by hand, by selecting
the setting Qua off (3840),or by clicking on the Q button
while holding down ctrl.
You can also unquantize all the currentlyselected notes by
clicking on them with the Q tool while holding down ctrl.
You achieve the same result by selecting Functions > DeQuantize.
X
99
Using MAGIX midi studio generation 6
Display Functions
The section Window Functions from page 86 onwards describes the basic window functions, including how to lay
out the window elements to make more space for the
event display in the graphic editors, and how to operate
the zoom functions.
Many of the display options in the editor windows correspond to those in the Arrange window:
By choosing View > Parameters you can hide or show the
parameter fields to enlarge the window’s working area.
The key command is Hide/Show Parameters.
In the Matrix and Drum Editors you can conceal or reveal
the transport panel in the top left corner by choosing View
> Transport.
Key Commands
X
You can activate many MAGIX midi studio generation 6’s
functions via key commands. The Key Commands window is where you assign key commands to the keys.
Whenever this manual mentions a key command, this refers to a command which can be called up by a keystroke.
This allows you to completely customize MAGIX midi studio generation 6 to suit your own working style.
If any function described in this manual is also available
via a key command with the same name you will see this
symbol.
Your personal key assignments are stored (together with
the settings of the Preferences pages) in a file called
“MAGIX midi studio g6.prf” in your PC’s Windows
folder. You should:
– make a backup of this file at another location on your
hard disk;
– make a floppy disk backup of it in case you need to use
a MAGIX midi studio generation 6 system on another
computer.
When you install updates to your version of MAGIX midi
studio generation 6, your personal key commands will remain unaltered.
Special Keys: Some keys have special functions:
– The modifier keys shift, ctrl, and alt can only be used in
conjunction with other keys.
– The backspace key has the fixed function “delete
selected objects”. It can only be assigned a function in
conjunction with the modifier keys shift, ctrl, and alt .
– The ctrl+f4 key (close window) and ctrl+alt+f4 key
combination (close application) cannot be reassigned.
100
Using MAGIX midi studio generation 6
– The key combinations assigned to the options in the
main menu bar cannot be reassigned. The relevant keys
are displayed after the main menu items.
– The + and – keys increase or decrease any selected parameter value in single units. However, they can be
assigned different functions which overwrite this function.
– The keys tab, n, m, b, a, s, d, q, w, e, r have invisible
predefined functions for step recording, which can also
be overwritten if you choose to redefine them.
Key Commands Window
The Key Commands window can be opened by selecting
Options > Settings > Key Commands….
X
All the available key commands are listed on the right side.
They are grouped according to the following categories:
– Global commands
– Functions affecting all windows (various windows)
– Functions affecting all Editor windows (various
sequence Editors)
– Functions for the Arrange window
– Functions for the Score Editor (Score window)
– Functions for the Event List Editor (Event window)
– Functions of the Audio window
– Functions of the Waveform editors
A “*” in front of the description of the function indicates
that the function is only available as a key command. To
the left you can see the currently-assigned key.
Assigning a Function to a Key:
– Click the Learn Key button.
– Select the desired function with the mouse.
101
Using MAGIX midi studio generation 6
– Press the desired key, if necessary together with the
desired modifier key(s) (shift, ctrl, and alt ).
– If you want to make another assignment, repeat steps 2
and 3.
– Deactivate Learn Key!
You can also set the key (Key) and the modifier via pulldown menus in the parameter box (top left).
Deleting Assignments:
– Click on Learn Key, to erase the key assignment.
– Use the mouse to select the function whose keyyou
want to delete.
– Press backspace.
– To erase more assignments, repeat the second and
third steps.
– Deactivate the Learn Key button.
Checking the Function of a Key: Deactivate
Learn
Key, and press the key whose function you want to check.
The function will be automatically selected, and displayed
in the middle of the window.
Making the Display Clearer: You can use the Hide
Used and Hide Unused buttons to remove all the used, or
unused key commands.
All the other Key Commands window functions remain
available for you to use.
Finding Key Commands: Due to the large number of
possible key commands, it can sometimes be difficult to
find one in particular. For this reason, MAGIX midi studio generation 6 offers a Find function, which lets you
search for a key command by typing in its name (or a part
thereof).
Simply click in the white space to the right of the Find: button and enter the string of characters you’re searching for.
The window will then display only those key commands
containing that character string (plus the selected command, even if it doesn’t contain that string).
The Key Commands window remains active, even in Find
mode; you don’t have to leave this mode to continue making assignments.
The Find function is not case-sensitive, it makes no distiction between upper, and lower case characters.
The Hide Unused and Hide Used buttons work in combination with Find, but obviously, this means you must switch
off both in order to see all the commands that fit the
102
Using MAGIX midi studio generation 6
search criteria, regardless of the commands’ current assignment.
The Find: button switches Find mode off and on. The button is automatically activated if a string of characters is entered.
By choosing Options > Scroll To Selection the key commands window will scroll to the currently selected key
command. The same function will automatically be performed when the FIND button will be disabled.
You will find other helpful functions under the Options
menu. Options > Import Key Commands… allows you to
import the key commands from another .prf file. This imports only the key commands, not the rest of the settings
stored in a .prf file. Just in case: Please make a backup
copy of your existing .prf before importing other key commands.
If you want to printout your key commands, use Options >
Copy Key Commands to Clipboard, paste the key commands into a text editor—and print them.
Global Functions
Object Colors
In the Arrange window you can define a color for selected
objects. View > Object Colors… (Open Object Colors) opens
a color palette. Selecting the key command a second time
closes the palette.
Click on the color you want to fill in all the selected objects
in that color.
Newly-recorded sequences acquire their tracks’ colors.
X
Online Help
MAGIX midi studio generation 6 has an online help facility: the .HLP file is automatically installed, and needs to be
in the MAGIX midi studio generation 6 folder. You can
call up the online help via Help > Help.
Song Administration
All events, other objects and settings (apart from the Preferences and key commands) are components of a song.
Songs are handled in the main File menu.
New Song
When you first launch MAGIX midi studio generation 6,
it opens a preset standard song. After just a short time,
you will have learned how to make your own adjustments
to screensets and to song settings, and will no doubt want
to keep these settings for use in future songs, as they are
suited to the way you personally work with MAGIX midi
studio generation 6. The best way to do this is to set up
103
Using MAGIX midi studio generation 6
your own “default song”, and save it in the same folder as
the MAGIX midi studio generation 6 program, calling it
“Autoload”.
Autoload Song: If you want MAGIX midi studio generation 6 to automatically load a specific song when you boot
up the program, just name this song “Autoload” and save
it in the same folder as the MAGIX midi studio generation
6 program.
Now, every time you boot up MAGIX midi studio generation 6, the Autoload.MSP song will be opened automatically (provided you don’t start MAGIX midi studio generation 6 by double-clicking on a different song altogether).
X
Creating a new Song: If you select File > New (ctrl n), a
new default song is created.
Loading a Song
X
You use File > Open (ctrl o) to bring up a typical file selection box.
Special Functions
Checking/repairing Songs: If you double-click on the
display on the Transport which shows the remaining
number of free events (see page 108), the memory will be
reconfigured. At the same time, the current song will be
checked for any signs of damage, structural problems and
unused blocks.
If any unused blocks are found—which normally
shouldn’t happen—you will be able to remove these, and
repair the song.
Saving Songs
X
X
X
104
When you select File > Save (or ctrl s) the current song will
be saved with its current name intact.
If you don’t wish to overwrite the last version of this song
saved under this name (which is what will happen if you
just use File > Save or ctrl s), try using File > Save As…
Here, you can enter a new name for the song (and select a
new directory or even create a new folder). The next time
you save using straight Save (ctrl s), the new name and file
path will be used.
Reverting to the Saved Version: Anytime you make a
mistake, you can undo it by selecting Edit > Undo (ctrl z).
If you have made some really serious blunders (unlikely as
that may be), or you decide that since the time you last
saved, your creative outpourings have gone in the totally
wrong direction, you may find the function File > Revert
Using MAGIX midi studio generation 6
to Saved very helpful. This replaces the current song with
the previously saved version.
Closing a Song
File > Close (ctrl w) closes the currently active song. If you
have made any changes since the last time you saved,
MAGIX midi studio generation 6 will ask you if the song
should be re-saved before closing, to preserve the changes
you have made.
X
Quick Start of the last four Songs
The last items in the File menu, just above the Quit command, are the last four songs you used—allowing you
quick restarts of your recent works.
Quitting the Program…
Choose File > Quit (ctrl q) to leave the program. If you
have not yet saved your last changes, you will be asked if
you want to do so before quitting (press return to save).
105
Transport Functions
Transport Functions
The Transport Window
The Transport window is used to control and display recording and playback functions.
Being a float window, it is always in the foreground, and
can never be covered by other windows.
Opening the Transport Window
X
To open the Transport window, select Open Transport
from the Window main menu.
Closing the Transport Window: Click on the close symbol
on the top right of the window.
The Transport Bar in Other Windows
You can also configure a fixed Transport window in the
Arrange, Score, Drum and Matrix windows. When you
choose View > Transport, the transport bar functions appear in the top left corner. The number of visible buttons
and displays depends on the size of this area. Move the
mouse cursor to the lower right corner of this area to
change the cursor into a cross. With this you can grab the
lower right corner and thus change the size of the area.
Altering the Display
To move the Transport window around the screen grab it
by its title bar.
The Transport window pull-down menu opens when you
click on the triangle symbol in the lower left corner. This is
where you change the way the Transport window looks.
Smaller/Larger: You can adjust the size of the Transport
bar to several different size settings.
Legend: This display option conceals/reveals a description
of all the window elements, and is very helpful if you are
still getting to know the program.
Position Slider: This hides/shows a stripe at the bottom
edge of the window whose size represents the current
amount of the song shown on screen relative to the entire
song length (read the section Song End from page 109 on106
Transport Functions
wards). You can also grab the stripe and move it quickly, to
take you to a different song position.
Parameter Fields and Displays
All the displays in the Transport panel (apart from the
song name), can be used for inputting data. You can either
input the numbers via the keyboard, after double-clicking
on the display field, or adjust the individual numbers using the mouse as a slider.
Position Display: The current song position is shown in
two formats:
Above: SMPTE time.
Hours: Minutes: Seconds: Frames / Subframes.
For more on setting the song Start time when using external SMPTE sync, please read the section SMPTE Offset
from page 264 onwards. Below: bar position
Bar—Beat—Division—Ticks.
A beat corresponds to the denominator in the time signature, a division is a freely-definable part of a beat (see section Time Signature and Divisions from page 108 onwards).
A tick is the smallest possible bar subdivision or system
quantization—just 1/3840 note.
Buttons: There is a column of four small gray buttons, between the locator display area, and the tempo display area.
The bottom two of these are aligned just to the right of the
two locator points. The upper of these will take the SPL to
the left locator, when pressed. The lower button will take
the SPL to the right locator.
Locators: You define two sets of locator points, one for
the Cycle zone, and the other for the Autodrop zone.
The locators on the left define the cycle region, which is a
passage that can be constantly repeated (take a look at the
section Cycle Mode from page 112 onwards).
The locators on the right define the autodrop range (take a
look at the section Autodrop from page 110 onwards). They
are only displayed when the cycle and autodrop functions
are both switched on.
Any mention of the left or right locators is a reference to
the left-hand cycle locators. The top one is the left locator
and the bottom one is the right locator.
107
Transport Functions
X
Switches: On the right of the cycle locators are two placement buttons. When you click on either of the buttons, the
song position jumps to the relevant locator.
Tempo: The tempo is given in quarter notes per minute or
beats per minute (bpm). In MAGIX midi studio generation 6 it ranges from 0.5 to 9999 bpm and is given to a
precision of 4 decimal places.
Programming Tempo Changes: Please refer to the section
Tempo from page 260 onwards.
X
Time Signature and Divisions: Bar numerator/ Bar denominator/ Division: The division defines the third format
value in all position displays (i.e. in the Event Window),
and forms the grid for various length and placement operations. The division is normally set to 1/16 notes, but has
a value range of 1/4 to 1/96 note. If the note value of the division is equal to or greater than the bar denominator, the
third value of the position display is automatically removed.
Programming Time Signature Changes: If you alter the bar
numerator or denominator in the Transport window, a
time-signature change is created at the start of the bar
where the current song position is. This is shown in the
bar ruler, to the left of the bar number. Of course, a time
change does not affect the absolute positions of the events
that are already there.
You can also add time signature changes directly in the
Score Editor. For more about this, see the section Time signatures from page 253 onwards.
Editing Time Signature Changes: Move the Song Position
Line to the first bar with the particular time signature you
want to change. Set the new time signature from the transport bar.
You can also edit the time signature in the Score Editor, by
double-clicking on it.
Erasing Time Signatures: Simply change the time signature back to the value of the previous time signature.
You can also erase time signatures in the Score Editor by
selecting them. and hitting delete. To erase all time signatures, select Edit > Select > Select Similar Objects before
doing this.
MIDI Monitor and Panic Function: The top line at the
far right shows the last MIDI message received, and the
bottom line the last MIDI message transmitted. The monitor is mainly used to check the MIDI connections.
108
Transport Functions
Click on the MIDI monitor to silence any hanging notes.
If this doesn’t work, double-clicking on it should do the
trick (Full Panic; take a look at the section For hanging
notes—Panic Function from page 141 onwards).
X
Song Title: The title of the active song is shown below
the MIDI monitor.
Song End: Below the song title, on the right, you are
given the position of the song end. As soon as the sequencer reaches this position, it stops automatically, except when recording. In this case the song end is automatically moved to the end of the recording.
For internal system reasons, the maximum length of a
MAGIX midi studio generation 6 song is 8550 quarter
notes, or about 2138 bars in 4/4 time.
A song can therefore last a maximum of around 70 minutes at a tempo of 120bpm. At 95bpm, the maximum
length is over an hour and a half.
If you need to increase this length, e.g. for video synchronization, just halve the tempo. You can achieve the same
result by using 4/8 time instead of 4/4 time, and treating
quarter notes as eighth notes.
A 4/8 song at a tempo of 60bpm (equivalent to 4/4 at a
tempo of 120) has a maximum length of more than 4273
bars, or over 2 hours and 22 minutes.
Keys and Buttons
All the functions of the Transport panel are also available
as keyboard commands, even if the Transport window is
not open.
Transport: The basic functions of these keys are the
same as on tape machines, or cassette recorders, and
should be familiar to everyone. Here are a few special features.
Record: Recording normally starts after the count-in, at the
start of the current bar. In cycle mode, it starts at the left
locator. You can also choose to have one beat constantly repeated, until a MIDI message is received, at which point
recording begins (more on this on page 114).
Pause: Pauses recording or playback until you press pause
or play again. During paused recording, you can add individual events which will still be recorded.
Play: Starts playback at the current position, or in cycle
mode from the left locator.
Stop: Ends recording or playback—the sequencer stops. If
the sequencer is already stopped, pressing stop moves the
X
X
X
X
109
Transport Functions
song position to the song start, or in cycle mode to the left
locator.
Rewind/Forward: If the sequencer is stopped, these work
as normal. Both normal (Rewind/Forward) and fast (Fast
Rewind/ Fast Forward) winding are available via the keyboard.
X
X
X
X
X
X
X
X
110
Mode: The mode buttons do not immediately trigger an
action, but switch operating states. The activated mode is
signalled by the relevant button being illuminated.
Cycle: Switches to cycle mode (more on this on page 112).
Autodrop: Switches to autodrop mode (more on this on
page 116).
Replace: Switches to replace mode (more on this on page
115).
Solo and Solo Lock: In solo mode, only the selected objects
are played. The data output from all other objects is
muted. This is known as: “soloing the objects”. You can of
course, change the solo mode of objects by changing what
you have selected (if necessary, refer to the section Selection Techniques from page 93 onwards).
If you want to carry out specific functions on individual
objects, regardless of the soloed sequences, you have to be
able to select these objects without affecting the solo status.
This is what the solo lock function is for. After soloing the
desired objects, double-click on the solo button, whose colors will then be inverted (as shown). You can now alter the
selection without affecting the solo status of the objects.
Sync: This button allows you to synchronize MAGIX midi
studio generation 6 from an external source. If MAGIX
midi studio generation 6 is running by itself, or acting as
a synchronization source (i.e. master), this button should
not be activated. When you first boot MAGIX midi studio
generation 6, Manual Sync mode is automatically
switched off.
Grabbing the sync button opens a pull-down menu, where
you can define the following:
– the type of external synchronization (more on this on
page 263),
– direct access to the tempo editors (more on this on page
260).
Metronome: This button is used to turn the metronome on
and off. MAGIX midi studio generation 6 keeps a separate
record of its setting for recording and playback. Grabbing
the button opens a pull-down menu where
Transport Functions
– you have direct access to the Recording Options
(described on page 278),
– you have direct access to the MIDI Metronome Click
settings.
Bar Ruler
There is a bar ruler at the top of all the horizontal timebased windows (i.e. the Arrange, Matrix, Drum and
Score).
This ruler is used to display and set the;
– song position,
– start/end of the song and
– cycle and autodrop locators.
Display
Depending on the zoom settings (page 88) the bars are
shown at the top edge in units of 1, 4, 8 or 16. Changes in
time signature are also shown here.
In the bottom third, there is a vertical line for each bar.
The shorter lines represent one beat, but are not always
visible (depending on the zoom setting).
Start and End Markers:
The song start is normally at position 1 1 1 1. You can move
the song start to an earlier position for playing upbeats or
program change commands, by grabbing and dragging it
with the mouse. The position display in the top left of the
window will tell you where it is. The song end (default: bar
201) can be set using the same method, or via the numerical display (see page 109).
Song Position Line
The song position line (SPL) is a vertical line which indicates the current song position in all horizontal, timebased windows. You can grab the line with the mouse, and
drag it to the desired position (but only if there is no object
at the mouse position when you drag it). Choosing Wide
Song Position Line under Options > Settings > Display
Preferences… switches to a thicker SPL.
111
Transport Functions
X
Direct Placement… Since it is fairly difficult to grab the
SPL in the window itself, you can also directly position it
using the bottom third of the bar ruler. Just click here to
make the SPL jump to the point you’ve clicked at.
…while starting or stopping: Double-clicking on the bottom
third of the bar ruler repositions the SPL, and also toggles
between playback (or record) and stop.
…numerically: Choosing Goto Position (default key: G),
calls up the dialog box shown above, to allow you to input
the song position numerically. The last division used (bar
position or SMPTE time) is automatically selected, with
the last input value as a default. Since the numbers are
registered from the left, it is enough just to enter the bar
number.
…in the score: In the Score Window you can set the SPL directly by clicking into a staff at the desired position while
pressing ctrl. This function is only available when the sequencer is stopped. The chosen position is displayed in
the infoline while the mouse key is pressed.
A hint: This method is especially handy when working in
page view mode, since there is no bar ruler in this case.
Cycle Mode
In cycle mode, a chosen passage of your current song is
constantly repeated. This is useful for;
– composing part of a song,
– practicing a recording,
– recording individual tracks consecutively
– editing events.
The cycle region is shown as a black stripe in the top part
of the bar ruler.
Switching On Cycle Mode
X
There are four ways of switching cycle mode on and off;
– clicking on the cycle button,
– using the Cycle key command,
– clicking on the top part of the bar ruler, and
– inputting graphically via the bar ruler.
How MAGIX midi studio generation 6 behaves in
Cycle mode
– The Song Position Line jumps from the end of the cycle
region to the beginning;
– The Play command starts playback from the beginning
of the cycle region;
112
Transport Functions
– To start playback from another position, hit Pause
twice, or Pause and then Play;
– At the cycle jump point, you can use the Chase Events
function ( more on this later)—Options > Settings >
Chase Events… > Chase on Cycle Jump)
– You can determine the way recording works in cycle
mode, by using the various options on the Options >
Settings > Recording Options… page (for more on this,
take a look at the section Recording in Cycle Mode from
page 115 onwards).
Defining the Cycle Region
Graphically using the Bar Ruler:
– Click-hold in the top third of the bar ruler, and define
the desired region, by dragging the mouse (dragging
from right to left generates a Skip Cycle; see above).
– Grab the bar in the middle to reposition it.
– Grab the bottom corner to move the start or end points
of the cycle (you can even do this while the sequencer is
still running.). If you set the start and end points to the
same position, cycle mode is switched off.
– You can reset the nearest edge of the beam by clicking
on it while holding down shift, even if the beam is
outside the visible range, or if cycle mode is switched
off.
When you set the size of a cycle graphically in the bar
ruler, your sizes are quantized to the nearest bar. The locator positions can only be changed division by division at
high zoom resolutions, or if you hold down alt as you drag.
If you hold down shift and alt, at a really high zoom resolution, you can drag and change the size of the region in
ticks.
To set locator positions that do not lie on whole bar lines
regardless of the zoom resolution, enter your locator positions numerically in the Transport window.
Numerical Entry: The positions of the left and right locators (start and end points of the cycle) are shown in the
Transport window, where they can also be altered.
Skip Cycle
When you are playing the song you can skip a passage,
which is useful for trying out the musical effect of various
transitions.
Setting up Skip Cycle: Drag out the skip cycle region
from right to left in the bar ruler.
113
Transport Functions
If there is already a (normal) cycle region just move the left
locator after the right locator.
The skip region is shown as a very thin strip at the top
edge of the bar ruler.
Features of Skip Cycle Mode: When the SPL reaches
the right locator it skips to the left locator (i.e. the “right”
and “left” locators swap positions).
Skip cycle is a quick way of leaving out a passage in an Arrangement, without having to physically delete it from all
the tracks, make a backup, etc.
You can also use it when editing, to leave out those parts of
the song which you don’t want to be affected by the edit.
Recording
X
Choosing a Track: First you have to select the track you
want to record on, for example by clicking on it (more on
this on page 120). Remember, just one track can be selected. During the recording, the incoming events are
stored in a sequence, on the selected track.
Note: If you want to record fader, knob or button movements of normal audio tracks, just open the mixer and do
what you have to do. All your changes will be recorded (as
MIDI events) on the corresponding audio track.
Changing Tracks: You can change the record track, without having to stop recording —just select a new track, for
example via the Select previous / next track command (default keys: cursor up or down).
Count-in
X
After you press the record button, the recording begins
with a count-in. This is defined under Options > Settings
> Recording Options…. The choices are:
No count-in
The recording begins without a count-in.
Wait for note MAGIX midi studio generation 6 repeats
the first 1/4 note (or note value of the bar denominator)
until a MIDI note is received. The recording then begins.
1-6 Bar count-inThere is a 1—6 bar count-in (default: 1
bar).
2/4 - 9/4 count-in2—9 quarternotes count-in.
…Click only during count-in: If the Options > Settings > Recording Options… > Click only during Count In option is active, the click will be switched off after the count-in—socalled “Drummer mode”.
114
Transport Functions
This is often useful if the section of the song just before
the part you’re recording lacks the sort of rhythmic information necessary to play new parts in time, but when
there’s plenty of rhythmic reference, once the section
you’re recording to gets going.
Record Options
Record Toggle (default: space bar) switches between playback and record mode.
Record into selected sequences: Normally a new sequence is
created during every recording. Under Options > Settings
> Recording Options… you can activate Merge New Recording With Selected Sequences, so that any new data is incorporated into an existing sequence, when this sequence is
selected.
Replace Mode: To activate replace mode, press the replace button. In replace mode, any newly recorded data is
always stored in a new sequence. In addition, any existing
sequences on the destination track are cut at the punch in/
out points of the recording, and any data between these
points is deleted.
X
X
Destructive MIDI Recording: If you select Merge New
Recording With Selected Sequences (r) and switch on replace
mode (the recording head symbol in the Transport window), the new events you record will replace the ones in
existing sequences.
The Merge/Replace combination can itself be coupled
with the Autodrop and/or Cycle functions.
Recording in Cycle Mode
All settings for recording in cycle mode can be made in the
Recording Options of the Song Settings (see page 278).
You can either use several cycles to record a single sequence (Merge only New Sequences in Cycle Record
checked), or you can create a new sequence for every cycle
(…unchecked). A new track can be automatically created
for each of these sequences (Auto Create Tracks in Cycle
Record). The sequences you create can also be automatically muted (Auto Mute in Cycle Record). This mode is very
well suited to recording several consecutive versions of a
solo, and then picking the best one.
Cycle and Replace: During a cycle recording in replace
mode, existing sequences are deleted during the first cycle, from the punch-in point to either a punch-out point or
up to the end of the cycle. When the second cycle begins,
recording continues, but no more sequences are deleted.
115
Transport Functions
If you want to replace the end of an existing sequence, you
don’t have to stop recording before the second cycle begins: the start of the existing sequence remains intact.
Autodrop
Autodrop means automatically going into and out of
record at previously defined positions. Autodrop mode is
most commonly used to re-record a badly played section of
an otherwise well played recording. The advantage is; you
can concentrate on the playing.
If cycle is not active, the left and right locators serve as
drop-in, and drop-out points. Autodrop is activated by
clicking the autodrop button.
Defining the Autodrop Region:
If both cycle and autodrop are active, there is an independent pair of locators available for the autodrop. In this
case, there will be two stripes in the bar ruler, the top one
representing the cycle region, and the bottom one the autodrop range. The autodrop stripe can be graphically altered in exactly the same way as the cycle stripe. If the bar
ruler display is very narrow, holding down ctrl as you alter
it will ensure that all your actions apply to the autodrop
stripe. To activate autodrop graphically in the bar ruler,
drag down the stripe while holding down ctrl.
For graphic operations, the grid scale can be reduced to division resolution by holding down alt, and to tick resolution by holding down shift alt.
Setting Autodrop Numerically: The positions of the
autodrop locators are displayed numerically, to the right of
the cycle locators on the Transport window. Their position
can be altered by changing the numbers from here.
Recording in Autodrop Mode: To carry out an autodrop recording, put the sequencer into record anywhere
before the drop-in point. Any events which you play before
the drop-in or after the drop-out are channelled through
the sequencer as usual, but are not recorded.
If the song position line is behind the right locator when
you start recording, recording automatically begins at the
drop-in point, after the count-in.
Combining Cycle and Autodrop
116
Transport Functions
If you want to improve a difficult part of a certain passage,
you can use a combination of cycle and autodrop. Cycle
mode lets you practice as many times as you like before
the “final take”. Each time, only the autodrop range is recorded. You can use the previous section to “get into the
groove”.
Recording with Skip Cycle: If skip cycle is switched on
the cycle region is left out during the recording.
Chase Events
Chase Events is a function which searches all the sequences playing at a jump-in point. The function examines what all these sequences are doing before the jump-in
point, to find out which events would be affecting playback
at the jump-in point, if it had been reached by playing
through the song, rather than by just jumping there.
This is a complex point to grasp, so here’s another explanation:
If you start playback of a song in the middle, by jumping
straight to that point (via Cycle mode looping or by direct
placement), you might expect there to be problems with
note playback. If an important note started playing just before the play-start point, you would expect MAGIX midi
studio generation 6 to miss it, and the note would not
sound. Notes, however, are not the only potential problem. If there were a maximum pitch-bend message just
before the play-start point, playback would leave this out
too. Fortunately, MAGIX midi studio generation 6 is
smarter than your average MIDI sequencer, to misquote
Yogi Bear…
Open the Options > Settings > Chase Events… to set up
the chase events function.
The function searches all the sequences playing at the
play-start point, looking before the play-start for a selection of the following:
– any notes still due to be playing at the play-start point;
– any notes still due to be playing at play-start, because of
a held-down sustain pedal (Chase sustained Notes);
– program changes;
– pitch-bend information;
– continuous controllers 0—15;
– continuous “switch” controllers 64—71;
– all other controllers (all other Controls);
– monophonic (channel) aftertouch;
117
Transport Functions
– polyphonic aftertouch;
– SysEx data (the last SysEx message before the play-start
point is transmitted)
Special Note:
There is a potential problem with chasing notes that are
being used to trigger a drum loop in the WavePlayer of
MAGIX midi studio generation 6. Unless you are lucky
enough to start the sequence precisely at the beginning of
the sample loop, the sample will be triggered at the wrong
time and therefore, they will be played out of sync with the
rest of the sequence, (at least until the next trigger note).
The problem is that the WavePlayer, as almost every other
sampler, can only play its samples from the beginning,
and cannot synchronize them to the beat by starting in the
middle.
Well, here’s how you solve that one:
Activate the No Seq Trp parameter in the Track parameter
box of the WavePlayer, and switch off Chase Notes in No
Seq Trp Instruments unter Options > Settings > Chase
Events…. The result is that whenever the song jumps to a
new position, your drum loops will not play until they
reach the next “trigger note”.
Note: The No Seq Trp parameter actually prevents transposition by the sequence playback parameters, which is also
not desirable for drum sounds.
118
Arrange Window
Arrange Window
Overview
The Arrange window is the heart of MAGIX midi studio
generation 6. Study it closely because it is the view of the
program that you will see most often when you’re working
with the program.
7
6
5
3
2
4
1
It appears in the first screenset whenever you start
MAGIX midi studio generation 6. The arrange area 1 is
where all MIDI information is recorded on horizontal
“tracks”. Individual MIDI or audio recordings are called
“sequences”, and are displayed as beams. Above the arrange area is the bar ruler which displays position information 2.
To the left of the arrange area is the track list 3. This is
where you name each track and determine which sound
program should play the MIDI information or which audio object plays back the audio data of each track. You can
make various settings for the track parameters in the
Track parameter box 4 in the lower left corner.
Because the sequences are arranged graphically, you can
also use specialized mouse tools from the tool box 5 to
help you perform different operations.
The sequence parameter box 6 is where you set the playback parameters for the individual sequences such as
transposition and “quantization”.
In the upper left corner is the transport panel 7 which is
functionally almost identical to the Transport window.
119
Arrange Window
X
Opening the Arrange window: The Arrange Window can be
opened by selecting Windows > Open Arrange in the
main menu.
Tracks
Each individual track is stretched horizontally across the
arrange area and the tracks are stacked vertically. A track is
where the notes and other MIDI events are recorded.
In the track list each track is numbered from top to bottom. During playback a small “level indicator” appears
over the track number. This indicates the velocity of the recorded notes and shines red for a maximum velocity
value. The little “c” stands for Controller command.
Adjust the MIDI channel, MIDI port and the icon of each
track in the Track parameter box.
Generally, only one track can be selected at any one time.
The exception is with combining MIDI and audio recording, where it is possible to select one audio and one MIDI
track simultaneously.) During recording, a sequence is
created on this track containing the recorded MIDI events,
audio or mixing data.
Selecting a Track
X
You select a track by clicking its name or icon in the track
list. This also selects all objects on the track (if the Cycle
function is switched on, it only selects the objects within
the defined cycle region ).
Use the Select Next/Previous Track function to select the
track above/below it in the track list (key command: cursor
up/down).
Changing tracks while keeping selection: If
you
click on a new track while holding down ctrl, the track will
be selected without changing the existing selection of sequences.
Sorting Tracks: To change the position of a track in the
track list, grab the track near the track number and drag it
up or down.
Copying a Track: Drag a track, as described above, while
holding down ctrl and you will get a copy of this track at
the desired target location. The settings of the new track
are the same as the ones of the old track.
Creating tracks
120
To create a track, use the Functions > Track > Create MIDI
Track command to create a new track for MIDI data, use
the Functions > Track > Create Audio Track command to
Arrange Window
create a new track for audio data, or use the Functions >
Track > Create Audio Instrument Track command to create a track for the new MAGIX synthesizers or VST™2.0Instruments. The new track is created at the same position
as the track currently selected, and all the tracks below it
are moved down accordingly.
To create a track at the bottom of the track list, double-click
in the track list below the lowest track .
The new track always has the same settings as the selected
track.
Moving Objects onto a Track: The function Functions
> Object > Move Selected Objects to current track moves
all selected sequences from different tracks onto the selected track. The time position of all the sequences is retained.
This is useful for displaying sequences in a stave or gathering together regions of different vocal takes.
X
Deleting Tracks
To delete the selected track, use the Functions > Track >
Delete Track function. If there are any objects on the track
a warning message appears first.
If there is no object selected in the arrange area you can
perform the same function by pressing delete.
A third method is to grab the track as if to reposition it (see
above) and remove it from the track list by dragging it to
the left.
X
Naming tracks
To name a track use the right mouse key to double-click on
the track name in the list. Now you can edit the name of
the currently selected track. The edited track name will be
shown in the Arrange window. If you use a ∗ symbol in
front of a track name the corresponding, selected Patch
Name will be shown instead. This is also true when you
leave the track name blank.
121
Arrange Window
Please note: In case you haven’t enabled Program Change
for the selected track in the Track Parameter Box (see below), the track name will always be shown.
Muting Tracks
Both MIDI and audio tracks have mute buttons on the left
of the track list between the track number and the icon.
Muting a track stops it from playing.
Selecting a Program
By clicking on a track’s name (or icon) in the track list and
holding down the mouse button, you open a flip menu.
This is where you select another program.
The Patch Name Editor
As discussed earlier it is possible to change the patch
numbers (sounds) of your MIDI keyboard via MIDI Program Change Commands. Many keyboards are able to
store more than 128 programs and need therefor another
memory category which are called banks. Each bank contains up to 128 programs and according to the MIDI specifications it is possible to address up to 16,384 banks via
MIDI Bank Change Commands.
This is handy, yet there is one big disadvantage: Instead of
real patch names you would select only cryptic numbers.
The Patch Name Editor changes this forever. With its help
you will be able to select programs (patches) and banks by
name instead of numbers because the Patch Name Editor
allows you to give a name to each patch of each bank of
each MIDI port. It is even possible to program a Bank
Change Command for each MIDI Port. For convenience
these settings will be used for all of your songs.
122
Arrange Window
How do you work with the Patch Name Editor ?
Simply select a MIDI Track. Clicking and holding the
mouse pointer on the track name will open a menu from
which you can select a patch by name. Similar, select a
MIDI Track, and go to the Track Parameter Box on the left
side of your computer screen. Click and hold on the program number until a menu opens from which you can
choose a patch for this track by selecting a name. In the
same way, by clicking and holding on the bank number
within the track parameter field it is possible to select a
bank by name. For this to function the banks need to be
named first.
Where do the names come from?
Program and Bank Names are entered with the Patch
Name Editor. You will get to the Patch Name Editor by either double clicking on the track name or with the menu
Function > Track > Edit Patch Names. The Patch Name
Editor is divided in several areas: the bank name, a bank
select pop-up menu, a Bank Change Command pop-up including several Bank Change Command formats, a little
triangular symbol and finally the patch names.
Please note: all edits you perform in this window will be
used for the port of your currently selected track. To edit
the Patch Names of a different MIDI port select another
track and then double click its track name. This will open
the Patch Names of the corresponding MIDI port assigned to this track.
Patch names
A simple click will select a patch within the current bank.
To edit the patch name just double click the name you like
to change. By default the General MIDI Patch Names are
used in this window.
The triangle
Here you will reset the Patch Names of the current bank
as either patch numbers or as standard General MIDI
Patch Names. Furthermore the names can be edited via
the clipboard using Cut, Copy and Paste commands. To
edit the names of whole banks comfortably copy and past
the names of the bank to an empty word processing document. Edit the names in the word processing document
and copy all of them back into the bank. Make sure you
don’t alter the tabs and returns in the word processing
document.
123
Arrange Window
Bank Select Pop-Up
Here you select the bank of your choice. You can choose
among 126 bank of the 16,384 possible discussed earlier.
If none is selected the patch names of bank 0 are used.
Bank names
Here you name the currently selected bank. If you haven’t
previously selected a bank but enter a name, this name
will be used for bank number 0.
Bank Change Command Format pop-up
Unfortunately some manufacturers interpret the bank
change commando not as specified in the MIDI standard,
but use their own formats. Thus you can select in this popup menu which bank change format will be active for the
currently selected MIDI port. The formats also take into
account gaps in the bank numbering system of some devices. This allows you to comfortably select any bank offered by your device.
Please note: If you don’t change the bank change format
in this pop-up the program will use the bank change format which has been set in Option > Settings > Recording
Options.
The Track Parameters
In the track parameter box you can set on which MIDI
port and channel the sequences of the selected track are to
be sent and which icon this track should have. Also, here
you choose the sound program, how loud and where in
the stereo field the track data should be heard.
Selecting an Icon: Grabbing the icon opens a flip menu
where you can choose an icon to represent the instrument.
Color of the Instrument Icon: The color of the instrument
icon of the selected track can be changed via View > Object
colors…, as long as no Arrange object (a sequence) is selected.
Setting a MIDI Port and Channel: The MIDI channel
and the MIDI port are set on the right of the Cha parameter. This defines the channel on which the track outputs
data, so that your MIDI instrument can receive the data.
If for the MIDI channel you choose the setting „All“, the
events of the sequence will be sent to your instrument carrying their individual channel. For all other Cha settings
the individual event’s channels will be ignored and replaced by the Cha channel.
124
Arrange Window
The MIDI port is set in the flip menu directly below the
channel setting. This menu lists the available MIDI drivers.
Adjusting the sound of a Track: The Prg, Vol and Pan
parameters transmit program changes, volume controllers (#7) and pan controllers (#10) respectively.
If there is no check in the respective box the default value
is used. The corresponding value is only transmitted if you
place a check in the box (by clicking it) . If there is already
a check in the box, any value alterations you make are
transmitted immediately.
A program change may be selected on the right via a flip
menu; volume and panning are set using the mouse as a
slider. If you hold down alt, any value can be increased or
decreased by clicking on it and tapping the left or right
mouse button.
To the left of the program number, there is an extra parameter which is used for Bank Select. If your sound source
can receive Bank Select messages (check in your synth
manual for format details), you can switch between different banks, each containing a maximum of 128 sounds. For
this to work you must tell MAGIX midi studio generation
6 via the Patch Name Editor or via Options > Settings >
Recording Options…, which Bank Select message your instrument is expecting.
As many devices cannot receive these messages, you can
deactivate this parameter by making the adjustment
shown to the right.
As many devices cannot receive these messages, you can
deactivate this parameter by making the adjustment
shown to the right.
Recording Program Changes, Volume or Pan controllers:
Any of the types of events that can be transmitted by
checking the right square in the track parameter box can
also be stored when in record mode. For example, in
record-pause mode, you can store program changes at
specific positions in the following way:
– Remove the “x” in the box next to Prg (or Vol, or Pan);
– Click on Pause, then Record;
– Move the Song Position line to the place you want;
– Choose the sound (program) you want (or the volume/
pan setting you want);
– Click on the box next to Prg (or Vol, or Pan). Each
selected event will be sent and recorded.
– Click on Stop to exit Record mode.
125
Arrange Window
In this context, please remember MAGIX midi studio generation 6’s sophisticated Mixer Automation features as described in the mixer chapter.
The values of the Parameters Prg, Vol and Pan in the track
parameter box will not be updated every time such control
change events will be played back.
Sequences
Sequences are containers for the MIDI events within
them. Their purpose is to make things clearer and easier
to deal with. They also correspond to the musical convention of treating a phrase or a riff as a single unit. It is often
better to apply many operations (e.g. quantization) to
these units rather than to individual notes.
Sequences within a track can be partly or wholly overlapped, but for clarity’s sake this should generally be
avoided.
Remember that all the following operations with a plural
in the heading (sequences) apply just to selected sequences.
Creating a Sequence
Normally a sequence is created automatically when you
record on the selected track. It begins at the start of the bar
in which the first events were recorded and stops at the
end of the bar in which the last event was recorded.
Sequences can also be created by directly inserting events
from the clipboard into the Arrange window (see the section Inserting events from page 131 onwards).
Creating an Empty Sequence: Click with the pencil at
the position in the Arrange area where you want the empty
sequence to begin. You can now enter the events manually
in one of the Editors.
Deleting Sequences
You can delete all the selected sequences by clicking them
with the eraser or by pressing delete. You can also delete
any non-selected sequence by clicking it with the eraser.
Of course if you accidentally delete a sequence you can restore it by choosing Edit > Undo (ctrl z) immediately afterwards.
Moving Sequences
Sequences may be moved by grabbing them and dragging
them with the mouse pointer. You can move sequences
both along the timeline and from one track to another.
126
Arrange Window
Copying Sequences
To copy sequences to another point in the song or to other
tracks, hold down ctrl while moving the sequence.
Making multiple copies of sequences: The function
Functions > Object > Repeat Objects menu allows you to
repeat one or more selected sequences. The repetition always starts at the end of the sequence itself or at the end of
the latest (timewise) sequence.
Number of Copies: This is where you enter the number of
copies (excluding the original).
Adjustment: This is where you determine whether you
want a copy to begin exactly at the end of the original (or
the previous copy) (setting: None) or whether you want the
start-point to be “quantized”. In most cases the Auto setting will do what you want.
Please also note that there is a sequence parameter called
“Loop”, which repeats a sequence over and over up to the
next object on the same track (see the section Loop from
page 132 onwards). This may be preferable to copying sequences in many cases.
X
Altering the Length of Sequences…
Grab the sequence at the bottom right corner with the
pointer or pencil. You can now move the end of the sequence wherever you want. Even when you shorten sequences the data in them is never deleted; playback just
stops at the end of the sequence.
… of multiple selection … You can change the length of
multiple objects in the same way. The length will be
changed by the same absolute value.
… to the same absolute length: If you want to make all selected sequences the same absolute length—even if they
had different original lengths—simply hold ctrl shift
while changing the length (just as in the Matrix Editor or
the Event List).
… to the same end position: If you want to end all selected
sequences to the same time hold shift while changing the
length.
… Adjusting the start: You can also adjust the length of
the sequence by grabbing it at the bottom left corner.
However, you can never move the left corner beyond the
first event in the sequence, i.e. you can never “hide” events
from the front. If you want to remove the start of a sequence you have to cut it and mute or delete the start.
127
Arrange Window
…rounded to whole bars: The function Functions >
Object > Snap Objects rounds the start to the nearest
whole bar.
When you lengthen or shorten sequences this never alters
the position of the events contained within it. If you wish
to do so, please do the following:
…by time-compressing or -expanding: Hold down ctrl
while you are altering the length. The timing of the events
in the sequence will be stretched or compressed in proportion to the amount by which you’ve altered the length.
Using this method you can make a rhythm sequence play
“half-time” by stretching it to twice the original length, or
“double-time” by shortening the length to half the original.
…to adjust it to fit its contents: The function Functions > Object > Set Optimal Object Sizes reduces or increases the length of an object so that it is just large
enough to contain the events (or other objects) within it.
The object borders are rounded to the nearest bar.
If you hold down alt when you call up this function the
borders are rounded to the nearest beat instead.
X
…to adjust it to fit other sequences: When
you
choose Functions > Object > Remove Overlaps all selected
sequences in a track are searched for overlaps. If an overlap is found the sequence that begins first is shortened by
enough to remove the overlap.
Choosing Functions > Objects > Tie Objects by Length
Change all selected sequences will be lengthened until the
beginning of the next sequence on the same track.
…using a Finer Grid
All these operations (moving/copying, lengthening/shortening) snap to the bar or beat grid (depending on the current resolution of the bar ruler and the setting of the zoom
function). However, there are two ways of reducing the
grid:
Display Format values as grid scale: alt + operation.
No grid (ticks as grid scale):
alt shift + operation.
All you need to do is hold these keys during the particular
operation.
Let’s say you want to shorten a sequence in a 4/4 bar so
that the “4” is played but not the “4 and” of the last bar. Enlarge the screen display until you can see quarter notes in
the bar ruler. Now grab the bottom right corner of the ob128
Arrange Window
ject and move the mouse to the left until the sequence is
shortened by one quarter note. Then press (and hold) alt
and move the mouse carefully to the right until the sequence has become one division longer. While you are doing this the right side of the Arrange window’s title bar
shows the track number followed by the current length of
the object in bars, beats, divisions and ticks. The three
right-hand numbers should be “3 1 0”.
Dividing Sequences…
Choose the scissors. Now click the desired sequence(s)
and keep the mouse button held down. The left side of the
title bar of the Arrange window shows the current position
of the mouse. When you release the mouse button, all selected objects are cut at the relevant position. The grid is
based on the Display Format value. This value is displayed
and editable on the Transport window, just below the
Time Signature indicator.
If any notes overlap other notes by more than a 1/16 note,
the following dialog will appear on-screen:
Overlapping Notes found! Do you want to keep, to shorten
or to split those? [KEEP|SHORTEN|SPLIT]
KEEP (default) leaves all notes unaltered. The sequence is
cut as usual, but when you do this, you can end up with
notes in the left-hand half that are much longer than the
sequence now is. Such notes are played normally, unless
“Clip Length” is set to cut off all sounding notes at the end
of a sequence.
SHORTEN truncates all overlapping notes, so that they
end at the point where the sequence was divided.
SPLIT divides overlapping notes across the two sequences
created when a cut is made; two subsequent notes are created, with the same pitch and velocity, and the same total
length as the original note.
…multiple division with the scissors: If you hold
down ctrl while cutting an object with the scissor tool, the
selected sequence will be cut into several pieces, whose
lengths are determined by the length of the first segment.
For example: To divide a 16-bar sequence into 8 2-bar sequences, cut the sequence at the start of bar 3 while holding down ctrl.
Merging Sequences
You can merge two or more selected sequences in a track
into a single sequence by clicking on one of them with the
glue tool.
This merges all selected sequences, even those on different tracks, into a single sequence in which all the events
X
129
Arrange Window
from the individual objects retain their original time position. Be aware that the individual MIDI channels are replaced by the MIDI channel of the current track. The new
object adopts the name and track of the first (timewise) of
the merged objects.
See the section Merge/Normalize and MIDI Channels from
page 134 onwards for more on this.
Demixing Sequences
The function Functions > Demix > Demix by Event Channel searches the selected sequence for events with different MIDI channels. A separate sequence containing all
the relevant events is created for every MIDI channel
found. Each of these sequences is created on a track with
the same MIDI channel. If no such tracks exist the tracks
are created on a track with the original channel.
Muting sequences
X
Often when you are arranging, you will want to test musical ideas out by muting certain objects. This is what the
mute tool is for.
You can mute individual or selected objects by clicking on
them with the tool. They are then displayed with a dot before the object name. Clicking a muted object reverses this
state (unmuting).
You can perform the same function using the Mute Folders/Sequences key command.
Soloing sequences
X
You can solo any selected sequences using the Solo button
in the Transport window or the key command of the same
name. Double-clicking on the Solo button “locks” the soloed status, so that changing the selection doesn’t affect
what is being soloed. This is especially useful when you
want to make changes to the Playback parameters of a sequence while listening to a specific solo group. A further
click (or using the key command again) quits solo mode.
For more on this, read the section Solo and Solo Lock from
page 110 onwards.
The solo tool enables you to solo individual or selected objects by clicking them and holding down the mouse button. Release the mouse button to end solo listening.
Naming a Sequence
One sequence: click the sequence with the text marker tool
and a text input box appears. Enter the name and press return, or click another object, or the background.
The same applies if you are entering the name in the sequence parameter box.
130
Arrange Window
Special Functions
Inserting events: MIDI events can be added directly to
the selected track on the Arrange window, at the current
song position, from one of the edit windows (or even from
another song) via the clipboard.
This function allows you to insert MIDI events—e. g.
from the Matrix Editor—directly into the Arrange window. MAGIX midi studio generation 6 checks as it does
this that you have selected a sequence, and then adds the
data to that sequence. If you have not selected any sequences, MAGIX midi studio generation 6 will create a
new sequence on the selected track.
Sequence Playback Parameters
The sequence parameter box is located to the left of the
track list above the tool box.
Displaying Sequence Parameters: When you select a sequence object, its parameters are automatically displayed
in the sequence parameter box. If the sequence parameter
box isn’t visible, select View > Parameters).
None of these parameters alter the original data of the sequence, they only affect the playback.
Default Sequence parameters: If no sequence is selected, the upper line of the sequence parameter box will
read “MIDI Thru”. When you record a new sequence, the
settings in the >MIDI Thru< parameter box are carried
over into the new sequence’s parameter box. The MIDI
Thru parameter box can therefore be viewed as an adjustable “default” parameter box.
Realtime processing: By now you should understand that
incoming MIDI data is always relayed “through” the track
that is currently selected. What you may not know is that
this data is processed through the previously described
MIDI Thru parameter box. The MIDI Thru parameters
are always displayed and editable when there are no sequences selected. (click on the window background to deselect all sequences).
Editing Several Sequences Simultaneously: If several sequences are selected, the number of selected sequences is displayed, instead of the name. If you now alter
any sequence parameter this alteration affects all the selected sequences. If a parameter was set differently in the
individual sequences, a >*< appears. You can still alter
this parameter for all the selected sequences and the value
131
Arrange Window
differential will be retained (relative alteration). If you
want to set the same value for all the selected sequences
hold down ctrl while you input the value (absolute alteration).
Opening and Closing: To the left of the name is a small
triangle; clicking this toggles between showing or hiding
the contents of the box, just like folders in the Windows
Explorer. Closing the box leaves more room for the elements below.
The Sequence Parameters: If a sequence parameter is
set to its default value, the display of the parameter value is
hidden to make the display clearer.
Name: The top line in the sequence parameter box simply
shows the name of the selected sequence.
Qua: Covered in section Quantization from page 135 onwards.
Loop: Value range: On or Off. Normal value: Off.
When switched On ,the object is repeated on its track until
it comes up against another object. A loop also finishes at
the song end marker. These repeats are displayed as grey
beams (with no object name). The length of each loop is
exactly the same as the length of the original object, so if
you want to create polyrhythmic structures, try experimenting with the length of the original object.
X
To end a loop early simply create an empty sequence with
the pencil at the desired beat.
Functions > Sequence Parameter > Turn Loops to Real
Copies transforms the loops into real copies of the original
object and simultaneously switches the Loop parameter
for the resulting objects to off.
Transpose: Value range: ±96 semitones. Normal value: 0.
132
Arrange Window
All note events contained in the sequence are transposed
up or down by the selected amount during playback.
If you want to transpose by octaves, grab to the left of the
parameter field between the word “Transpose” and the actual value. This opens a flip menu to allow direct input of
octave transpositions.
Velocity: Value range: ±99. Normal value: 0.
All notes in the relevant object are offset by the selected
value. Positive values are added and negative ones subtracted, although naturally it is impossible to go outside
the limits prescribed by the MIDI Standard (0—127). If
you select a velocity offset that exceeds the maximum or
minimum possible value for a particular note, that note
will play at the extreme possible range. For example, a setting of >+20< will cause a note with a velocity of 120 to
play at 127.
Dynamics: Normal value: 100%.
This parameter also affects the velocity values of the notes,
but instead of adding or subtracting a fixed amount, the
differences between “soft” and “loud” notes (the dynamics) are increased or decreased. This works in a similar
way to a compressor or expander. Values above 100% expand the dynamics and so increase the difference between
“loud” and “soft”, while values below 100% compress the
dynamics, i.e., reduces the differences in velocity.
The FIX setting means that all notes are transmitted with
a velocity of 64. When used in conjunction with the velocity parameter (see above) it is therefore possible to set any
fixed velocity value.
Gate Time: Value range: see diagram. Normal value: 100%.
The term “gate time” stems from the technology used in
analog synthesizers and refers to the time between pressing and releasing a key. This parameter therefore affects
the absolute note duration or length. This should not be
confused with the musical note value, which normally refers to the amount of time until the next note. The technical term “gate-on time” or “note length” is described musically as extreme staccato and legato. The parameter
range is referenced to this scale. “Fix” means extreme
staccato; likewise the other values below 100% shorten the
note lengths. Values above 100% lengthen the notes. The
“leg.” setting produces a completely legato effect for all the
133
Arrange Window
notes, no matter what their original lengths, eliminating
all space between notes in the affected sequence.
Delay: Normal value: 0.
This parameter alters the time position of the selected objects. Positive values correspond to a delay (laid-back playing style or dragging), negative values cause a pre-delay
(driving or rushing).
The units are ticks. A tick is the smallest time resolution in
a sequencer, which in the case of MAGIX midi studio generation 6 is 1/3840th note. On the right side of the delay
value field you can use the mouse as slider to input the
value.
If you click to the left, between the word “Delay” and the
delay value, the flip menu shown here appears for you to
set the delay in terms of note value.
The delay parameter is mainly used for musical purposes.
It is also a way of fixing timing problems that may occur
for a variety of reasons. Some examples of these are:
– The attack phase of the sound is too slow. A good musician will automatically compensate for this by playing
the notes slightly early. With very slow sounds you may
need a pre-delay of over 100 ms to even them out.
– The sound generator is reacting too slowly to the
incoming note-on messages. Older multitimbral sound
generators often take tens of milliseconds before beginning to output a voice. This effect may be better
compensated for by using the delay parameter in the
track parameter box, since this will affect all sequences
on all tracks sending to the slowly reacting device.
– The delay in outputting the voice is not constant
because it depends where it comes in the order of notes
arriving serially at the sound generator. You should
therefore try pre-delaying rhythmically important
tracks by as little as one tick—it can work wonders!
X
X
134
Fixing/Neutralizing Sequence Parameters: You can
normalize the sequence parameter settings of all selected
objects using the command Functions > Sequence Parameter > Normalize Sequence Parameters (Normalize). This
means that all settings are actually written to the data and
the playback parameters resume their normal values. The
audible result remains the same. The loop is not affected.
Merge/Normalize and MIDI Channels: Just like the Glue
tool, the Normalize function is intelligent with respect to
stored MIDI channel numbers. If all stored events have
the same MIDI channel number, the channel will be
Arrange Window
changed into that of the current track. If the events are on
different channels, MAGIX midi studio generation 6 will
ask whether you would like to convert the channels or not.
Quantization
Quantization is the rhythmic correction of notes to a specific time grid. Any inaccurately played notes are moved to
the nearest position on this grid.
For example, if the smallest notes in a passage are 1/16th
notes, you should use 1/16th quantization to move all recorded notes to their ideal rhythmic value. This will only
work if no note has been played more than 1/32nd from
the ideal position, otherwise the note will be moved 1/16th
later or earlier than the proper position.
How It Works
Quantization settings are made in the sequence parameter box. They are non-destructive playback parameters, so
they can be replaced by another setting at any time. This
also means that by setting the Qua parameter to off (3840)
you can always revert to the unquantized original recording. Unlike other playback parameters, quantization affects the way notes are displayed in the editor windows,
thus allowing you to see from the position of the notes
what effect the quantization parameters are having. The
quantization affects only notes, not other types of events
(e.g. controllers).
For every note event, two positions are stored internally:
the original position that was played in, and the playback position (also shown in the Editor windows). For unquantized sequences, both positions are the same. Each time
you quantize, a new playback position is calculated from
the original position.
The Fix Quantize command (see the section Fixing the
Quantization from page 136 onwards) overwrites the original position with the playback position. The same thing
happens if you change a note in one of the Editors manually—although then you can’t return to the original value.
What events can be quantized: Quantization
only
works on notes, not on other types of events like controllers. Apart from notes, all events have just one position parameter, which you can leave or change permanently by
using Event Quantize or dragging with the mouse.
To quantize events other than notes, read the section
Quantizing Events from page 99 onwards.
Essentially, quantization works on the whole sequence. To
quantize single notes only, use the note quantization in
135
Arrange Window
one of the Editor windows (see the section Note Quantization from page 99 onwards). Keep in mind that this overwrites the original record position of the quantized note.
If you wanted to quantize various parts of a sequence differently, you could divide the sequence up, and use different quantization settings on each part of the sequence.
You can then recombine the parts of the original sequences without this affecting the way the parts are
played.
The quantization grid always begins at the start of a sequence. If the sequence does not start at the beginning of
the bar, neither does the quantization grid.
Qua: The quantization grid is accessed from a flip menu
under the Qua parameter in the sequence parameter box.
Quantization off: The setting off(3840) plays the notes with
the finest possible time resolution: 1/3840 note, which is
practically unquantized playback.
Normal quantization: The settings 1/1, 1/2, 1/4, 1/8, 1/16, 1/
32 and 1/64 note quantize the sequence to the equivalent
note value.
Triplet quantization: The settings 1/3, 1/6, 1/12, 1/24, 1/48
and 1/96 note quantize the sequence to triplet note values.
A 1/6 note is equivalent to a quarter triplet, 1/12 note to an
eighth triplet, 1/24 note to a sixteenth triplet and 1/48 note
to a thirty-second triplet, etc.…
Mixed quantization: The setting 8 & 12 corresponds to
eighths and eighth triplets, 16 & 12 to sixteenths and eighth
triplets and 16 & 24 to sixteenths and sixteenth triplets.
Mixed quantization always applies both note values and
thus naturally requires greater precision when playing.
Odd quantization: The setting 9-Tuplet means novetuplets
(1 bar = 9 beats), 7-Tuplet is septuplets (1 bar = 7 beats), 5Tuplet/4 is quarterquintuplets (1 bar = 5 beats), and 5-Tuplet/8 is eighthquintuplets (1 bar = 10 beats).
Fixing the Quantization: In the same way that the
other sequence parameters can be normalized, the quantization settings can also be adopted permanently by the
stored data.
To do this, use the menu command Functions > Sequence
Parameter > Fix Quantize.
Of course once this is done it is impossible to revert to the
original recording.
Pre-quantization: The Fix Quantize function is especially
suited to pre-quantization. For example, if a recorded sequence cannot be immediately quantized to a 1/16 swing
without producing a few incorrect notes, start by quantiz136
Arrange Window
ing it to 1/16th notes and then call up Fix Quantize. You
can now apply any swing quantization to this cleaned-up
version of the sequence.
If you are recording a hi-hat pattern consisting of 1/16
notes and one single 1/32 note, first play the rhythm
(quantized to 1/16 notes) without the 1/32 note and choose
Fix Quantize. You can now raise the quantization to 1/32
notes and add the extra note without misquantizing any
badly-played 1/16 notes.
Groove
In the early days of sequencers, many people thought that
electronic music sounded mechanical or sterile. This impression (which, at the time, might have been a fair observation) was based on the fact that sequencers could only
output notes that were quantized. This is no longer the
case. MAGIX midi studio generation 6’s resolution is so
high that at a tempo of 120 it can differentiate between two
notes that are just 520 microseconds apart. This is equivalent to a single oscillation cycle of the highest note that
you can play on a soprano saxophone!
So, if you think modern sequencers always sound mechanical, you probably haven’t yet had the pleasure of
working with Logic. Of course, using the above-mentioned quantization functions, it is still possible to generate sterile timing if that is what you actually want.
Hyper Draw in the Arrange window
Hyper Draw is the easiest way to create and edit volume
and pan changes in the Arrange window. The changes in
MIDI data are made by graphically inserting points, which
represent fixed controller values.
The points are then interpolated automatically by MAGIX
midi studio generation 6, which creates a series of events
to smoothly connect the MIDI data from one fixed point to
another. These automatically generated events are recalculated every time you edit the curve points.)
137
Arrange Window
Hyper Draw is activated on a per sequence basis. For example, you could open Hyper Draw windows to control
volume in one sequence, and pan in another.
In sections where the MIDI data being edited does not
change in value, the data curve appears as a thin, horizontal line.
You must choose a large enough vertical zoom resolution
in order to see the Hyper Draw curves.
Activating Hyper Draw: To activate Hyper Draw for the
currently-selected sequence(s), select View > Hyper Draw
> Volume (example). You can select different Hyper Draw
modes for different sequences
Event type: You can choose the following types of events
directly from the Hyper Draw menu
– Volume
– Panning
MIDI Channel: By calling up View > Hyper Draw > Channel… you can choose the MIDI channel on which events
will be displayed and edited. If you select any here, events
will be shown regardless of their MIDI channel. When inserting events, the most recently selected MIDI channel
will be used.
Display: When sequences are displayed in Hyper Draw
mode, both the MIDI channel and the Controller being
edited are displayed on the left, divided by a comma.
,
MIDI channel (1)
controller # (7; Volume)
If the channel is set to any (default) the first number
(MIDI channel) will not be displayed. Then the controller
events of all channels will be displayed. Inserted events get
the channel of the track.
Deactivating Hyper Draw: To switch off Hyper Draw
for selected sequence(s) choose View > Hyper Draw > off.
Hyper Draw—Functions: Making Hyper Draw visible:
If you can’t see the blue Hyper Draw window, increase the
vertical resolution (zoom) of the Arrange window, either
with a key command, the telescope icons, or by holding
down A and using the magnifying glass tool.
138
Arrange Window
Quick Delete: You can delete all events displayed in Hyper
Draw for a sequence by shift ctrl-double-clicking in the
blue Hyper Draw area.
Adding new points: Just click on the blue background of
the Hyper Draw display—you can use either the pointer or
the pencil, and a point will appear. As long as you hold
down the mouse, you can move any of these points. The
position and value are displayed in the Info line on the upper edge of the Arrange window.
No events will be inserted into the sequence until you release the mouse button.
Deleting points: Click briefly on any point to delete it.
Moving an existing point: Just grab a point with the mouse
and move it. If you hold down the mouse button while you
do this, you can restore erased curve points by dragging
the mouse over where they used to be.
Fine-tuning curve points: While you move a point, hold
down alt. You will then be limited to moving the point vertically, but be able to select all 127 possible steps.
.Using Colors with Hyper Draw: You can globally assign colors for different controller numbers and MIDI
channels, which are then used as presets to display the
Hyper Draw lines. However the background color for Hyper Draw (blue) is fixed.
Select a Hyper Draw sequence, open the color selection
window by choosing View > Object Colors... and choose a
color. This will globally assign the color to this controller
and channel. Now whenever you select this controller on
this channel in any song, the color assignment will be
used.
If you want to change the color of a sequence, you must
first deactivate the Hyper Draw function.
Making practical use of Hyper Draw: Hyper Draw is very
simple to use. For example, choose View > Hyper Draw >
Volume. A blue area appears beneath the sequence name
and by clicking here with the mouse you can insert or delete the points. You can also move the points by holding
down the mouse button. While you are editing an Info line
appears at the top of the Arrange window indicating the
bar position and controller value.
If you want to edit pan values choose View > Hyper Draw
> Pan. This means that only pan events will be generated
and displayed. This rule applies to all types of events, i.e.
only one type can be displayed at any one time.
If you’ve selected Cha: All in the current track parameter
box, so that all MIDI channels 1—16 will play back, you
139
Arrange Window
will have to choose the MIDI channel you want to edit via
View > Hyper Draw > Channel….
Editing Edges, Move and Copy with HyperDraw engaged:
You can still move and copy sequences that have Hyper
Draw active, by grabbing them by their top edges in the title list.
When Hyper Draw is active, you can still change the start
and length of a sequence, but you have to grab it in the top
name zone instead of the blue Hyper Draw area in order to
move the left or right edge, or (for moving and copying), in
the middle of the name area. Just delete the points by
clicking on them and vreate them anew at the desired position. If possible, lengthen the sequence before and after
the area in which you want to create controller changes.
If Hyper Draw starts behaving oddly…
Hyper Draw supports Program Change events. These are
not interpolated like Controller events to give smooth
curves; instead, one program number remains set until
the next point.
Controller events will only be displayed if their MIDI
channel matches the one set for Hyper Draw (set by calling up View > Hyper Draw > Channel…).
If you make alterations to a group of events (e.g. volumes)
in another editor (e.g. the Event or Hyper Editor), the Hyper Draw display will not update until you have selected or
deselected the relevant sequence.
Altering the Display
For information on the basic window functions, please refer to the section Window Functions from page 86 onwards.
Display Menu
In order to maximize the usable space within the Arrange
window, in the Display menu of the Arrange window you
can switch off the display of both the Transport and the Parameters.
Object Display
Making Sequence Parameters Visible: Enlarge the display using the vertical zoom button. If the zoom setting is
large enough, you will be able to see the sequence parameters displayed in the bottom half of all the objects. Here
you can directly edit the sequence parameters with the
mouse (by means of sliders and/or flip menus).
140
Arrange Window
Contents Visible in the Object: If you vertically zoom
the display further, you will be able to see the actual events
contained within the objects.
Sequences show notes and controller events.
Altering the Background of the Arrange: Use the
function View > Grid to switch on/off a track/bar number
grid in the arrange area’s background.
View > White Background toggles the background between grey/high resolution and white.
Reset Functions
To switch off stuck notes, click on the MIDI monitor in
the Transport window, or hit “STOP” twice in rapid succession. In both cases, reset messages are sent, as defined
in Options > Settings > Reset Preferences….
For hanging notes—Panic Function: If the notes
continue to sound, then your sound sources may not be
able to respond to “All Notes Off” messages. If this happens, try the following:
Double-click on the MIDI Monitor in the Transport window (or use the key command Send discrete Note Offs). Separate Note Off messages will now be sent for every note on
all channels of every MIDI port. That should do the trick.
Unwanted modulation—Controller Reset: Options
> Send to MIDI > Reset Controllers transmits a control
change message #121 with the value 0 (reset all controllers) on all MIDI channels and outputs used by existing
tracks. This neutralizes all sound alteration caused by
MIDI controllers like modulation or pitch wheels.
If some sounds are suddenly too quiet—
Volume Reset: The function Options > Send to MIDI >
Maximum Volume transmits a control change message
#7 (main volume) with a value of 127 on all MIDI channels
and outputs used by existing tracks. This sets all channels
to their maximum volume, giving your sound sources the
optimum signal/noise ratio.
X
X
X
141
Using Audio in the Arrange Window
Using Audio in the Arrange Window
Regions in the Arrange Window
Creating Regions
When you record audio, MAGIX midi studio generation 6
automatically creates regions which represent your recording both in the Arrange window and Audio window.
To import an existing audio file recorded in another application or from another MAGIX midi studio generation 6
song, it is necessary to manually place the region into the
Arrange window.
Immediately after importing audio files from other songs,
we recommend physically copying the files to the current
song folder using the Audio window function “Copy
Files”. Answer “Change References?” with “Yes”, otherwise destructive editing of these audio files will also affect
the original song.
To play back a region at a specified point in a song, you
have to place the region in the Arrange window first (section Adding a Region to the Arrangement from page 189 onwards).
A quick reminder: when you place regions onto tracks,
don’t forget to allocate each track its own audio object. For
more information about this, take a look at the section Audio Tracks: Basics from page 149 onwards.
Inserting Audio Files using the Pencil tool: Audio
files can be inserted by shift-clicking on audio tracks with
the Pencil tool at the desired position. A file selector appears that lets you choose the file you wish to insert. The
length of new regions inserted in this way defaults to the
complete file length, which can be freely edited later.
Dividing Regions: When you divide a region using the
scissors tool, you create two new regions. The newly created segments of the region take the same name and append it with a sequential number.
Resolution: When you are selecting a cutting point with the
scissor tool, you can move it backwards and forwards in
steps of one division. If you need a finer resolution, press
alt after you have selected the sequence with the scissor
point. To obtain the maximum resolution (ticks) press
shift, as well.
Erasing Regions
Regions can be erased either by selecting them and pressing backspace, or by clicking on them with the Eraser tool.
142
Using Audio in the Arrange Window
Erasing recordings: When you erase a region that you have
just recorded (since opening the song), MAGIX midi studio generation 6 will ask if you also want to erase the corresponding Audio File. This is a good way to avoid using
up unnecessary space on the hard drive by storing bad
takes and unwanted recordings.
If the recording was made before the song was loaded for
the current session, this question does not appear. This
prevents you accidentally deleting valuable recordings.
Pressing backspace will only remove the region from the
Arrange area. If you want to delete the corresponding Audio Files from the hard disk, you can do so by choosing
Audio File > Delete File(s) in the Audio window.
Copying Regions
Creating New Regions: Copies of regions are made exactly the same way as MIDI sequences—by dragging them
while holding down ctrl. This automatically creates a new
region in the Audio window. The new region will retain
the same name as the old one, but will be numbered sequentially.
This allows you to alter the start and end-points of the copied region independently of the original. It is comparable
to a genuine copy of a MIDI sequence, which is created in
the same way.
Making Multiple Copies of Regions: By
choosing
Functions > Edit > Repeat Objects… you can make multiple copies of both audio regions and MIDI sequences.
Further details of this function are described in section
Making Multiple copies of Sequences.
Another way to make regions repeat is to use the Loop parameter in the Region parameter box (see section Loop
from page 145 onwards).
The command Functions > Sequence Parameter > Turn
Loops to Real Copies changes the loops into audio regions.
The arrange objects which are created, however, represent
the same region. Thus any alterations in the length of the
region or audio material affect all objects.
X
Moving Regions
You can grab regions in the Arrange window with the
mouse and move them around just like MIDI sequences.
Movements are made in steps of one beat (e.g. quarter
notes—see below).
If you hold down alt while moving sequences, you can
move them in steps of one division (in sixteenths, for example).
143
Using Audio in the Arrange Window
If you hold down alt and shift while moving sequences,
you can move them by single ticks (maximum resolution).
You can also use the Delay parameter in the Region parameter box to shift the placement of the regions (see section Delay from page 146 onwards).
Fine-tuning: In practice, a resolution of “1 tick” will usually
be fine enough.
To move a region by a finer resolution than ticks, i.e. by a
resolution of 1 sample word, please use the Anchor in the
Audio window or Sample Edit window.
Don’t forget that all cloned regions in the Arrange window
will be affected as well.
Moving sequences in the Event List: You can also
move sequences by inputting data in the Event List. Select
the region you wish to edit and choose Windows > Open
Event List. You can then move sequences by units of a single tick if you wish, by changing the value in the Position
column.
1
X
144
Audio files in the Arrange window 2 can also be displayed
alphanumerically in the Event List 1. Highly accurate position or length changes can be carried out easily using the
Event List.
Inserting at the record position: You can copy (ctrl c) or cut
(ctrl x) a region into the Clipboard, and then use Edit >
Paste at Original Position to insert it into the selected track
at the original record position.
Using Audio in the Arrange Window
Changing Start and End Points
You can shorten or lengthen any region by grabbing it by
its lower right hand corner with the mouse and dragging
it. You cannot make a region longer than its original audio
file. This means that all the other regions derived from that
region will be lengthened by the same amount.
Of course, the same goes for any changes you make to the
start point of a region. Such a change can be made by grabbing the lower left edge of the region with the mouse and
dragging.
You can edit start and end points much more accurately
with the Sample Editor, which can be opened by doubleclicking on the region. Simply slide the “S”and “E” markers to change the Start and End points of the region. While
moving the start point, use the ctrl-key to make sure that
the Anchor, and therefore the timing relative to the rest of
the arrangement, remains unchanged. Keep in mind that
the Anchor must be inside the region. If you wish to move
the start point to the right, first move it to the approximate
desired position while in the Arrange window. Then open
the sample editor and use the ctrl-key to move the start
point to the exact position.
Region Parameter Box
Name: Just as with MIDI sequences, the top line of the sequence parameter box is for giving a name to the region.
You can name several selected regions at once; the regions
are then given the same name and distinguished only by
different numbers at the end of the name. MAGIX midi
studio generation 6 inserts these numbers automatically
unless you deliberately leave a space at the end of the
name.
When you change the title of a region, the corresponding
region is also renamed in the Audio window.
Loop: As with MIDI sequences, you can use the loop parameter to set a region to loop automatically. The loop repeats until it reaches the next region on that track or the
end of the song. Don’t forget that these loops are based on
the sample grid of the region. This means that even if the
song tempo matches precisely, after a while the loop repeats may start to go out of sync. You can avoid this by setting the end point of the region to an exact measure
boundary. In these cases, it may be better to use the Repeat
Objects function (section Edit Functions from page 97 onwards).
145
Using Audio in the Arrange Window
Delay: Just as with MIDI sequences, you can advance or
delay the playback of regions, the smallest available units
being ticks.
The Region Anchor
The Anchor is a region’s temporal reference point. When
you move a region, it’s not the start point that is displayed
in the Info column, as with MIDI sequences—it’s the Anchor point.
To guarantee perfect sync between (for example) a one-bar
drum loop and your sequencer, the Anchor must be assigned to a well-defined musical point. If the loop begins
with a significant level peak (say a kick drum beat), set the
Anchor to the point where the volume of that beat is at its
precise peak.
The following procedure can be useful in determining
whether the Anchor is set to its optimum position or not:
play a drum sequence in via MIDI that duplicates the
main rhythmic stresses of the drum loop. You should then
be able to correct the Anchor position by ear.
1
2
3
5
4
146
Using Audio in the Arrange Window
The changes made to the position of the Anchor in the Audio window (2 and 4) directly affect the region in the Arrange window (1 and 3). The position of the audio shifts
relative to the sequencer’s time axis, while the Anchor remains tied to the same bar value, and is marked by a dotted line 5.
147
Using Audio in the Arrange Window
MIDI Sequences and Regions compared
The following table sums up the main differences between audio regions and MIDI sequences. There are some
notes at the bottom of the table to clarify the most important points.
Characteristic
MIDI sequences
Regions
Composed of discrete data
Yes
No, because regions are just references to parts of audio files
Can be given names
Yes
Yes
Sequence parameter “Loop” available
Yes
Yes
Sequence parameter “Quantize” available
Yes
No, but the position of regions themselves can be quantized, using the
Event List display on the Arrange
level
Sequence parameter “Transpose”
available
Yes
No
Sequence parameter “Velocity” available
Yes
No
Sequence parameter “Dynamics”
available
Yes
No
Sequence parameter “Gate Time”
available
Yes
No
Sequence parameter “Delay” available
Yes
Yes
Freely positionable
Yes
Yes
Left or Right Corner Edit
Yes
Yes, and this affects the audio region,
but not the position of the audio signals relative to the time axis of the
sequencer
Can be cut with the
scissor tool
Yes
Yes, creates new regions
Concealable intro
No
Yes
Have a variable
musical reference
point
No
Yes, a variable Anchor. This affects
all the regions derived from one
region and can change the position
of the audio signals relative to the
time axis of the sequencer
148
Using Audio in the Arrange Window
Characteristic
MIDI sequences
Regions
Can be turned off
with the Mute function
Yes
Yes
Can be soloed
Yes
Yes
Naturally, some of the parameters that can be applied to
MIDI events have no effect on audio signals.
Only regions have the flexible reference point provided by
the Anchor.
The fundamental functions (such as the freely determinable position and length, and the ability to name, mute,
and solo) are generally available to all types of objects
(MIDI sequences, regions and Alias objects).
Audio Recording
This section deals with audio recording only. For details
on general preparations before making an audio recording please refer to the relevant sections in the Audio Driver
chapter.
Audio Tracks: Basics
In the preset Standard Song the audio tracks of all tracks
of the hardware are pre-defined (“Audio1” to “AudioX”).
Adjustments to the audio objects can be made directly
from the Arrange window. The Audio Track Parameter
Box is located under the Toolbox. There you can set the
icon of the audio track and the MIDI channel, on which
the corresponding mixer channel receives its MIDI data.
Val determines whether the fader of the corresponding
mixer channel shows its value in dB (−∞ dB to +6 dB) or as
regular MIDI values (0 to 127).
The fields Dev and Cha are essential. Under Dev you must
set the driver of your audio card. Using Cha you determine, from which channel of your audio card the corresponding track in the Arrange window will be played back.
Normally you don’t need to know this, because your standard Song is set automatically (as mentioned above). If on
the other hand you create a new audio track via Track >
Create Audio Track, you will have to deal with these settings. The newly created audio track is not equipped with
the “R” switch to record-enable the track (see below). The
reason is that for this new audio track, looking at Cha in
the Audio Track parameter box, no channel of your audio
card has been assigned: Cha is set to “off”. Click-holding
“off” opens a flip menu to assign an audio channel of your
149
Using Audio in the Arrange Window
card. Having done this, the “R” switch of this track appears. We will describe the function of this switch in the
next chapter.
“Arming” Tracks
1. Method:
– Click the switch with the red “R” in the track list. If the
switch is still not visible, you should switch on the
driver for the relevant audio hardware in Audio > Audio
Preferences… Audio Driver and then restart MAGIX
midi studio generation 6.
2. Method:
– Open the Track Mixer per key command or from the
Audio window by selecting Windows > Open Mixer).
– Click on the REC button of all the audio objects whose
tracks you wish to record to.
Click the audio object once more (as shown above) to disarm the track again.
You can only make audio recordings on tracks that have
been armed, no matter what track is highlighted in the Arrange window.
– If you choose a MIDI track, you’ll record MIDI events.
– If you choose an audio track, you’ll record on all the
tracks that have been armed (record enabled).
– Space is reserved on the hard disk for armed tracks, and
is no longer available for Undo files. For this reason
MAGIX midi studio generation 6 will automatically
disarm audio tracks if editing in the Sample Editor
when the hard disk is nearly full.
– You can record simultaneously on one MIDI track and
several audio tracks together by clicking the MIDI track
and the audio tracks you’re going to record to, while
holding down shift.
If several Arrange window tracks are assigned to the same
audio track (e.g. “Audio 1”), then the new audio file (or region) will be recorded to the selected track.
“Disarming” all tracks: If several tracks are record-enabled,
you can instantly disable them all at once by clicking one
of the flashing REC buttons while holding down ctrl.
Recording Modes
MAGIX midi studio generation 6 gives you many options
for starting audio recordings at various points in your
song.
150
Standard Recording with Count-In: You can start recording at any point you like in a song by setting the Song
Position Line to the desired place. If the audio tracks you
want to record to are correctly set, and the necessary input
Using Audio in the Arrange Window
signals are connected and properly adjusted, just hit the
record switch on the Transport bar, or press *.
A “count-in” will sound. Signals will be recorded during
this time. Depending on the number of tracks required,
MAGIX midi studio generation 6 will pause for a short
time between the record button being pressed and the recording actually starting.
During recording, the Recording float window opens.
This displays the remaining recording time.
MAGIX midi studio generation 6 will automatically create
a region in the Arrange window after recording. You can
listen back to the new recording in the Arrange window as
the overview is created.
X
Pre-programmed Drop-Record: MAGIX midi studio
generation 6’s autodrop function can be used on audio
tracks just as it can with MIDI sequences. You enable autodrop by clicking on the autodrop switch on the Transport bar. Here is a step by step breakdown of the procedure:
207 AudioDrop
3
4
1
2
The autodrop switch must be turned on.
You can set the autodrop locators numerically in the
Transport window.
3 The autodrop recording zone is marked out by a thick
orange bar in the middle third of the bar ruler.
4 Recording only takes place within the autodrop zone
you have set up, with the exception of a short “lead-in”
just before recording is due to start (see below).
The autodrop zone start and end points can be set either
from the bar ruler or by using the locators in the Transport
bar. Please note that if the Cycle function is switched on,
you can set the Autodrop Locators in the window to the
right of the Cycle Locators (under tempo).
Start the recording. MAGIX midi studio generation 6 will
begin recording about one bar before the drop-in locator;
afterwards a region will be created that exactly corresponds to the length of the autodrop zone. This method allows the start of the region to be lengthened later if desired, so that the lead-in becomes audible. However, doing
1
2
151
Using Audio in the Arrange Window
this does not change the position of the recording relative
to the time axis.
A small tip: if you wish, you can even define a small autodrop zone within a larger Cycle Zone (see below). This can
be handy if a player needs to re-record a difficult passage
in the middle of a song, and requires many attempts to get
it right.
Record and Pause Mode: If MAGIX midi studio generation 6 is in pause mode you can start audio recording by
clicking “Record Toggle”,“Pause” or ”Play”. Recording
then begins at the current song position.
Audio Cycle Recording: You can make audio recordings even when “Cycle” is switched on. A new track is created for every cycle. All the tracks created are still played
via the same audio object. This prevents the tracks from
being played simultaneously.
If you stop recording just after the end of a full cycle, no region is created for the cycle which has just begun. However, the audio material is not lost, but is recorded after the
last region in the audio file.
The whole recording (during all cycles) is stored in a single audio file. This audio file is split into regions which are
as long as the length of the cycle. The region for the previous cycle is automatically muted at the beginning of the
next cycle.
Audio Cycle Recording also works when you are simultaneously recording two channels (e.g. stereo tracks).
After recording, please take note… After you’ve made your
first audio recording in a song, you should not make any
further adjustments to the tempo of that song. Decide on
a tempo and all the changes in tempo well before the first
audio recording, and stick to it! Audio recordings have a
fixed playback rate and can only be matched to new tempos if you’re prepared to go through a great deal of hassle.
The time compression/expansion algorithms currently
available only permit you to match audio to new tempos
when the tempo differences involved are relatively small;
if you try and use them to significantly change the tempo
of your audio recording, its quality may be significantly
compromised.
If you’ve made your audio recordings in real time, playing
them in over the top of, say, an existing MIDI arrangement, we don’t particularly recommend that you move the
Anchor of any of your regions very often. You can make
152
Using Audio in the Arrange Window
slight adjustments to the timing of your regions using the
“Delay” object parameter.
Functions
Digital Mixdown
Using MAGIX midi studio generation 6, you can mix
down audio data in the digital domain from within the Arrange window. This is done with the glue tool. This function is non-destructive, as MAGIX midi studio generation
6 always creates a new file for the mixed-down material.
This new audio file is stored on your hard drive, so you
should keep an eye on available space.
To carry out a mixdown, you choose the glue tool from the
toolbox and use it to select the required regions for mixdown (if necessary using shift as well).
No Mixdown Situation:
– If there are several regions (mono or stereo) in a row on
the same track, which have been cut out of one region
using the scissors tool, i.e. which originate in this order
from the same audio file, no mixdown is carried out.
Instead, a single region is simply created over the entire
area. This gives the desired result, without using up any
additional disk space.
MAGIX midi studio generation 6 can recognize associated regions even if there are gaps between the regions.
The determining factor is that the relative position of the
regions in the Arrangement corresponds to the relative
position of the regions in the audio file.
– In the Arrange window if you want to mix two regions
whose tracks are panned to opposite sides, no mixdown
is carried out.
The two resulting mixdown files would be identical to the
original audio files in the used areas of the regions. If you
don’t need the unused areas of the audio files choose “Optimize Files”.
“Mixdown” of Regions in a Track: If several regions that
run concurrently (i.e. not after one another) are selected
from one track, the program does not mix them down. Instead, you are asked to create a new audio file, which is
named after the first region. The selected regions are then
mixed together without any changes to volume, and without clip scanning.
If there are empty sections between two regions, these are
added into the new audio file as silent passages.
Genuine Mixdown with Clipscan: If you combine audio
data from two or more tracks, the current values for pan
and volume found in the Mixer for the individual tracks
X
153
Using Audio in the Arrange Window
will define the pan and volume settings in the new audio
files. If you combine both sides of a stereo audio file, first
set the pan controls of the component mono sides to hard
left and hard right, respectively.
You can carry out a mixdown while the sequencer is playing.
After the digital clipping scan (Clipscan) is over and the
mixdown is complete, MAGIX midi studio generation 6
replaces the previously selected regions with one region
which contains the new, mixed-down audio file in it’s entirety. If you wish, you can use the undo function to restore the original audio regions. If you do this, you will
then be asked if you wish to keep the newly created mixed
audio file, or delete it. If you decide to keep it, it will remain in the audio window, and can be further processed
there.
During a mixdown the Clipscan function uses 32-Bit resolution to ensure that the highest possible level is maintained without clipping.
Hyper Draw for Regions
Hyper Draw™ can also be used directly on audio regions
and can be used, for example, to draw changes in volume
and panning.
Choose View > Hyper Draw > … . If you are not yet familiar with Hyper Draw please refer to the “Hyper Draw” section in “The Arrange Window” chapter of the MAGIX
midi studio generation 6 manual.
When you use Hyper Draw on audio regions, MIDI events
are created, which are always organized together with the
audio region. You can also edit these MIDI events in the
Event List or Drum Editor.
154
Mixers and Audio Objects
Mixers and Audio Objects
The basics
Your Studio Equipment probably consists of one or more
Multi Timbral Sound Module(s) with stereo analogue outputs, Microphone(s) and Guitar Pre-Amps or similar analogue signal sources, as well as a solid (hardware) Mixing
desk (analogue or digital, at any rate a separate device). A
chapter in the Installation Handbook describes how to
connect these instruments to the audio in- and outputs,
or, as the case may be, the respective Sound Card for
MAGIX midi studio generation 6. With your Hardware
Mixing desk you route the various signals that you want to
record, using Subgroups when possible, to MAGIX midi
studio generation 6’s Recording Inputs (i.e. the Sound
Card). The Hardware Mixing desk also contains the required separate Microphone Pre-Amplifier. In the simplest case these tasks could also be done by separate Microphone Pre-Amps (Voice Processor, for instance) or by
Sound Modules with integrated Mixing functions. The
Hardware Mixing desk, however, performs a further function, mixing the analog signals from your MIDI multi timbral sound module with the MAGIX midi studio generation 6 Audio output signals from the soundcard.
– MAGIX midi studio generation 6 mixes the Audio
Signals that are fed to the Sound Card with its own
effects.
– The instrumental part levels and the effect levels, that
is, the entire mix of the signal output by your sound
module, is remotely controlled by MAGIX midi studio
generation 6.
– The Track Mixer performs both of the following functions simultaneously: The control of the MIDI multi
timbral sound machine (that is Level, Pan, Effects of
the different Parts) as well as mixing the audio tracks
within MAGIX midi studio generation 6 (Level
controls, Panning and so on). The actual electrical
mixing together, resulting in the stereo signal that you
will hear from the speakers, is once again the job of the
Mixing Desk.
– Any mixing action in Logics mixers, that is: every movement of a fader or knob can be recorded simply by
pressing the record button. Afterwards, the passage
with the recorded movements of the controls can be
played back, and you will see how the knobs move just
as you have recorded them. Since the data controlling
these knobs are MIDI controller events, you can edit
155
Mixers and Audio Objects
them like all the other events—for instance with the
Drum Editor.
The Track Mixer
X
The Track Mixer is the simplest and most convenient way
to mix audio and MIDI tracks. MAGIX midi studio generation 6 creates a mixer based on all tracks which are assigned to the track list of the Arrange window. It contains
as many channels as there are tracks. The mixer deals with
both audio and MIDI tracks. These are laid out in the
same order as in the Arrange window. Each channel represents a track in the Arrange window: the audio channels
correspond to the audio tracks, the MIDI channels correspond to the MIDI tracks. The parameters which you adjust on the Track Mixer are also available in the Arrange
window. You open the Track Mixer via the key command
or, from the Arrange window, via Windows > Open Mixer.
On the left is the parameter display which tells you
(among other things) which effects are assigned to the aux
sends. Selected tracks are framed in red.
Display: The Track menu is where you define what types
of track are displayed in the track mixer. You can switch
off MIDI tracks if necessary. Although the effect and master (output) objects are not track objects, they can also be
displayed in the track mixer.
The View menu is where you customize the display to suit
your requirements. You can hide the labels for the userdefined pots on the MIDI mixer channels, which saves a
great deal of space. You can individually switch off the display of the program numbers, bank numbers, the user-defined pots on the MIDI mixer channels (Assign), the pan
pots (Pan), the faders (Volume), and the track names and
numbers, to make more space. You can also switch off display of the equalizer, the aux sends, and Plug-Ins for the
audio channels.
Like the other editors, the track mixer is always stored in
the Screensets. You can switch between these using the
number keys 1—9, or you may call up two digit screensets
by holding down shift while entering the first digit.
Setting Knobs to their defaults: Clicking a fader or
knob in MIDI tracks while holding alt resets the value to a
neutral value. The neutral value is zero for all controls except Volume = 100, and Pan, Balance, Cutoff = 64 (center
position).
156
Mixers and Audio Objects
Send all Mixer Data: By choosing Options > Send All
Mixer Data you can transmit all currently visible mixer
knobs and faders to MIDI.
Track Selection when Playing or Recording: You can prevent
the track selection from changing whenever you make an
adjustment to a channel, while MAGIX midi studio generation 6 is in recording- or non-recording mode. For both
situations there is an independent parameter. You can access these parameters by choosing Options > Change
Track in Record Mode and Options > Change Track in
Play Mode.
GM, GS, XG: To adapt the Track Mixer to the MIDI standard supported by the sound module you are using, to the
right of the mixer channels you will find a flip menu
where you can choose between the standards GM, GS, and
XG.
EQ’s, Effects and Plug-Ins
With the mixer you get CPU-based real-time effects with
any audio hardware that can be addressed with MAGIX
midi studio generation 6’s own audio drivers. There are
EQs, Reverb, Delay and others, which are included in this
product. In addition, MAGIX midi studio generation 6 allows for real-time effects made by different software manufacturers to be integrated into MAGIX midi studio generation 6’s audio signal-flow. These are managed exactly
like the internal effects of MAGIX midi studio generation
6.
Memory : A propriety Plug-In requires between 10 and
400 KB. A single DirectX Plug-In, with its own graphic interface (editing window), can require up to 2 MB. Please
ensure that you have enough free memory.
Refer to the section on memory in the Installation manual.
Effect Returns
In MAGIX midi studio generation 6 all effects except the
EQs are sent to effect objects (Return). This makes these
effect objects effect returns. If you insert a reverb effect in
an Insert of a Return, you are applying reverb to your mix
by
– setting up a Send to the Return in all desired audio channels of the mixer, by selecting the corresponding effect
object from one of the send inserts on the audio fader
(and adjusting its level) and
– adjusting the output level (fader) of that effect object
To choose an effect, grab one of the Inserts boxes on the effect object, with the mouse. Once the desired effect has
157
Mixers and Audio Objects
been assigned to the insert, a double-click on its name
opens its parameter box.
Bypassing Inserts: Inserts can be bypassed (switched
off) by clicking on the insert name while holding the strgkey.
The names of activated effects will be displayed with a
highlighted background, the names of bypassed effects
will have a grey background.
When you click the little box with the triangle, you will see
the options for the plug-ins: Copy Setting, Paste Setting,
Load Setting, Save Setting as…, Save Setting). The functionality is pretty self-explanatory: Copy a setting from one
plug-in to the other (copy/paste), save the setting on the
harddisk for later use, load a previous saved setting, or
save an existing setting under another name to preserve
the actual file.
The settings for a plug-in are stored in a folder named after the plug-in. All these plug-in-settings folders for the
different plug-ins reside in a folder called Plug-In Settings. The folder Plug-In Settings resides in the folder of
your MAGIX midi studio generation 6 program. Please do
not touch this folder hierarchy—everything is set up correctly by the installation routine.
Equalizer (EQ)
Three bands of equalization are available per track. For
treble control there is a shelving high frequency filter. For
bass control there is a shelving low frequency filter.The
midrange can be controlled with a semi-parametric sweep
EQ. You can control the amount of treble and bass using
the shelving type knobs (H and L). For the mid band, using knob “f” you can (in kHz) determine at which frequency you want to increase or decrease the level using
knob M.
All EQ adjustments can be automated. Please read section
Automation from page 178 onwards.
Sends (Aux Sends)
158
The Sends allow you to send a portion of any signal out of
the signal’s audio object, to an internal effect or auxiliary
output. The Send routing options available vary depending on the hardware you are using. Sends are always “post
fader”, meaning that the level of the track fader will affect
the amount of signal sent to the aux effect.
Click on an empty Send slot and choose one of the possible four send destinations, using the flip menu that appears. When you have chosen the send destination, you
can regulate the amount of signal supplied to the send us-
Mixers and Audio Objects
ing the Send Amount knob control. As you are adjusting
the level, the relevant value appears in the menu box, to
the left of the pot. You may assign up to 2 sends per track.
Normalizing the Send Level: You can reset the Sends to
0dB (90) with a ctrl-click on the knob.
MAGIX midi studio generation 6’s Real-Time
Effects
You can add any of the real-time effects by click-holding
on an insert slot of the return.
Double-clicking an already assigned insert slot opens the
relevant plug-in edit window. This is where you can edit
the parameters of the real-time effects. The Stereo Delay
effect only works if the corresponding Return path is
switched to stereo. The effects explained:
Chorus
The Chorus effect can
be used to make a signal “bigger”, particularlythe stereo Chorus
(s/s). The Chorus effect is based on a very
short digital delay
with a periodically modulated Delay Time parameter. The
pitch of the delayed signal rises and falls periodicallylike
the playback of a tape recorder when the tape speed is
changed with the pitch knob. The modulated signal is
mixed with the original signal, which simulates the effect
of several voicesplaying or singing the same musical part.
Mix: determines the ratio between the dry and effected
signal.
Intensity: The modulation width of the chorus effect (the
amount of pitch deviation).
Speed: The modulation frequency of the chorus effect.
Flanger
A flanger works almost like a Chorus,
but with shorter Delay
Times being used and
with the effected signal being fed back to
the input. This creates
resonances and filtering effects based on
the frequency of the modulation, and the harmonic content of the original signal. With the Delay Time constantly
changing, the harmonics rise and fall through the audio
spectrum, creating the characteristic metallic flanging ef-
159
Mixers and Audio Objects
fect. The first parameters are the same as with the Chorus
effect described above.
Feedback: “Feedback” controls how much of the delayed
signal is routed back into the input. Negative values mean
that the phase of the routed signal is inverted. This will result in a resonance that will be one octave lower, and only
its odd-numbered harmonics will remain. You can use
“Feedback” to increase the intensity of the flanger which
can produce very dramatic effects.
Stereo Delay
The stereo delay, as
the name suggests,
delays the audio signal, or simply creates
echoes of the original
signal.
Left/Right Delay: The
“Time” parameter defines the delay time in
milliseconds. Very small values (up to 10 ms) produce resonances, larger values (10 to 100ms) produce doubling-effects, and even greater values produce echoes.
Feedback: “Feedback” controls how much delayed signal is
routed back to the input, which allows you to control the
number of repeats .
Cross Feed: This parameter determines how much of the
left channel is routed to the right and vice versa. Higher
values result in more complex reflection clusters.
Fast Reverb
Reverbs require far
more processing than
other real-time effects,
especially with high
quality values. The
Fast Reverb is a good
sounding reverb that
puts less strain on the
system than other reverbs.
Pre Delay: Pre delay determines the amount of time between the original signal and the initial reflection. With
the right level of pre delay, the reverb gains space. The
ideal values are normally between 5 and 50 ms. Very small
values may sound better in solo mode, but in the mix can
lead to “mushing” of the signal with its reverb. Larger values can be interesting for combined delay/reverb effects,
160
Mixers and Audio Objects
but in nature this would only occur if the sound source
was outside a tunnel opening.
Reflectivity: The density of the reverb. High values lead to a
reverb that is more dense, which depending on the sound
material may sound better, but less natural. With room
simulation, the “Density” determines the composition of
the virtual reflective surfaces. Higher settings simulate
harder surfaces, lower settings softer surfaces.
Roomsize: The “Roomsize” parameter defines the size of
the simulated room. Small rooms have denser, more
closely spaced reflections, less air damping of the soundwaves between the reflections off the walls, and therefore
more complex phase relations between reflections.
Hi Cut / Lo Cut: Using the Low Pass (High Cut) and the
High Pass (Low Cut) you can determine the frequency
range of the reverberation.
There is one additional, new control for the Fast Reverb.
Density/Time—you can look at this parameter as a “room
sound thickness” control. Low Density/Time values will
make the reverb sound thin with audible reflections.
While high Density/Time values will produce a thicker or
denser room sound but sometimes introduces a metallic
color as well.
Digitizer
Crunch it, crush it and
chew up your tracks.
You want the sound of
dirty, lo-rez digital
gear? Then you need
the Digitizer—deadly
digital distortion. Use it on anything that needs a “bit”
less.
You only need two controls: Downsampling and Resolution.
Decreasing the Downsampling amount will reduce your
high end and introduces digital artifacts. Lowering the
Resolution raises the crunch factor. Your source signal will
get more and more metallic and finally breaks up into the
unintelligible. (note: extreme use of the Digitizer might
damage your speakers, so take care!)
Daft Filter
Are you looking for that techno feel or does your track
need some analog ‘phatness’? The Daft Filter builds on
the sound of the analog era. A classic lowpass filter with
resonance, complete with a built-in low frequency oscillator to automate the famous techno filter sweeps.
161
Mixers and Audio Objects
The Cutoff control removes the bright highend content of your
source audio to the
point where it becomes
dull (not “dull” as in
boring, but rather “less
bright”) and eventually disappears completely.
Resonance adds emphasis to the sound. High Resonance
values will produce the characteristic whistle and scream
you are probably familiar with from your favorite techno
songs.
Intensity introduces an up and down motion to the filter.
The higher the Intensity values, the more pronounced the
motion will become.
The speed of the filter’s up and down motion can be adjusted with the Speed control.
Mono Delay
162
This is the mono version of the Stereo Delay
plug-in and should be
used on mono audio
channels. With the delay you can produce repeating echoes and metallic, resonating effects.
The controls are similar to the controls of the Stereo Delay.
With Mix you control how much of the delay effect is
heard in relation to the original. Higher values mean more
of the effect is mixed to your original signal. At Mix 100%,
you will only hear the delay.
With Delay Coarse, you dial-in the delay time. This is the
time after which your original signal starts repeating.
High values create what you know as echo or repetitions.
Small values create metallic, resonating effects. Deleay
Coarse works together with Delay Fine. Delay Fine can dialin the delay time in much smaller steps. Add Delay Fine to
Delay Coarse to get the total delay time.
The Feedback control. This is where you adjust how many
times your original signal repeats. At 0% you hear only
one repetition. Raise the Feedback control and more and
more repetitions occur until at 99% the sound seems to
continue endlessly.
High Cut and Low Cut are tone controls for each delay repetition. Raise High Cut and the repeating sound will get
duller over time. Raise the Low Cut control to reduce the
Mixers and Audio Objects
low end over time. The repeating sound will appear to get
thinner.
Try experimenting with delay times less than 10 ms. You
will discover many nice robotic and metallic sounds.
Compressor
Do you have audio tracks which sometimes are too soft
and other times too loud? This is where the MAGIX Compressor comes in! The Compressor can even out volume
differences and also give an audio track more punch. Vocals, Bass Guitar and Kick Drums are normally good candidates for this treatment.
Threshold can be seen as a effect depth control. The lower
you set the Threshold the more of the audio signal is being
compressed. In other words, this is a control where lower
means more.
Ratio determines the intensity of the applied compression. The control values are expressed in ratios, hence the
name. A 1:1 ration means there is no compression, with
higher RATIO settings the effect intensity rises. At 29:1
(the highest ratio you can dial-in) your audio signal gets
completely squashed as if a ceiling is pressing down on it.
The Compressor has become a limiter!
Attack and Release deal with time. The Attack time tells you
how long it will take until the full compression intensity is
reached (Ratio) and the Release time determines how long
it will take for the compression to subside to zero. In a
manner of speaking, Attack fades in the Compressor while
Release fades it out again. 0 Attack will make your track
sound more even, while a little higher setting gives you
more punch.
Some experimentation is needed to master the Compressor, as it is one of the most fundamentally useful—but
misunderstood—tools in music production. Start with a
Ratio of 3:1, Attack time of 10 ms and a Release time of
about 100 ms. The Threshold depends on your signal. Try
settings of about −20 dB first.
Functions of the Plug-In Window: Every Plug-In window has a row of switches at the top whose functions are
the same in all Plug-Ins.
Link: If the Link button is switched off (default), you can
open several Plug-In windows simultaneously.
If the Link button is switched on this Plug-In window is
used to display all double-clicked Plug-Ins.
Bypass: The bypass switch takes the whole effect out of the
signal flow. The effect’s input signal is routed directly to
the output unaltered.
163
Mixers and Audio Objects
Choosing an Audio Object: If you have used the displayed
effect algorithm in another effect object, you can simply
swap between the objects. You can quickly compare settings.
Insert Slot Selection: If you have installed more Plug-Ins in
other insert slots of the same effect object, you can quickly
change to the other Plug-Ins. This allows you to quickly
balance the settings of all the Plug-Ins within an object.
Plug Ins from Other Manufacturers
DirectX: MAGIX midi studio generation 6 supports the
DirectX standard, which allows real-time effects made by
different software manufacturers to be integrated into
MAGIX midi studio generation 6’s audio signal-flow.
Please follow the installation instructions from the PlugIn manufacturers to ensure their correct installation.
There is an application on the MAGIX midi studio generation 6 program CD that allows you to exclude certain
Plug-Ins—the Plug-In-Enabler. Due to some technical
changes with the new audio engine, some Direct Show
plug-ins which appeared in generation 5 may not appear
MAGIX midi studio generation 6. If so, exit MAGIX midi
studio generation 6, and start the latest version of the
plug-in enabler in order to re-activate the deactivated plugins, assuming that these had been working correctly before.
The Plug-Ins are automatically available in the Plug-In
menu, along with MAGIX midi studio generation 6’s own
effects. This is the menu which opens when you open an
audio object’s Insert button ( in an effect object).
Double click an inserted Plug-In to open its editor. If the
selected Plug-In does not have its own editor, MAGIX
midi studio generation 6’s standard surface will be used to
access the Plug-In’s parameters.
VST™2.0 Support: MAGIX midi studio generation 6
supports the use of VST™2.0 plug-ins. Of course, this
means that VST™1.x plug-ins are now also supported.
Please note the difference: VST™1.x plug-ins work as audio-in/audio-out plug-ins, as do your built MAGIX plugins, and are thus to be inserted in the effect objects (see
above). However, VST™ 2.0 plug-ins work as MIDI-in/
audio-out plug-ins, as do your built-in MAGIX synthesizer
plug-ins, and are thus to be inserted in audio-instrument
objects (see below). These support the stereo outputs of
the relevant plug-ins.
164
Mixers and Audio Objects
To work with VST™ plug-ins in MAGIX midi studio generation 6, copy the plug-in files to the folder called “VSTPlugIns” in the corresponding directory. Simply create a
folder with this name if one does not already exist—but
the installation routine will have it done for you. In order
to prevent particular plug-ins from being shown in the
plug-in list, move the plug-in file to another folder, which
could be named “Vst_unused”.
MAGIX midi studio generation 6 now supports programs
for VST™/VST™2.0 plug-ins, if a plug-in provides program memory. You will find a new menu in the title bar of
the plug-in window that displays the currently chosen program (“PROG 01” etc.). Double click on a program name
to rename it.
Version 6 also allows the Plug-In enabler to activate and
deactivate VST™ plug-ins. Click on the flip menu in the
middle of the Enabler window to switch between both formats. It is possible to apply DirectX and VST™ plug-ins simultaneously; you do not deactivate one format when you
switch to another.
Like MAGIX midi studio generation 6’s own plug-ins,
VST™ plug-ins can also be automated. This type of automation is not possible with DirectShow plug-ins due to
technical reasons based on the principle of the DirectShow interface.
Audio Instruments
MAGIX midi studio generation 6 supports the new, included MAGIX synthesizers Carpet Sweeper and Percusor. Outfitted with an innovative user interface, the units
provide subtractive synthesis that meets the classic analog
ideals. They offer everything that made the analog synthesizer so famous: rich basic sound, punchy filters, flexible
modulation possibilities and extremely fast envelopes.
The synthesizer instruments integrate seamlessly within
MAGIX midi studio generation 6’s internal digital mixer;
all plug-ins effects can be used and all parameters can be
automated. The direct connection with the sequencing engine of MAGIX midi studio generation 6 guarantees unsurpassed precision through sample-accurate timing that
is superior to any external MIDI synthesizer.
To use the new instruments, version 6 features a new category of audio objects in MAGIX midi studio generation
6, called “audio instruments”. These can have the synthesizer plug-in in their top insert slot. The default song—the
song that opens if you move your Autoload away from the
165
Mixers and Audio Objects
MAGIX midi studio generation 6 folder—has readily configured audio instruments.
An audio instrument is an audio track with the track parameter “Cha” switched to one of the “Instruments (1-4)”.
So each audio track can be made an audio instrument by
setting its “Cha” parameter in its object parameter box to
an instrument channel. But it is more convenient to create
a new audio instrument by simply selecting “Functions >
Track > Create Audio Instrument Track”.
Remarks on the Use of Audio Instruments
The instruments offer an opportunity to reduce system
load. Please only assign as many voices that you expect to
need for a particular task; for example, one voice is usually
enough for a bass or snare drum.
Please note that muting an audio instrument track in Arrange does not reduce system load.
When an audio instrument track is selected, it is ready to
be played in real-time and consequently produces some
system load. Normally MAGIX midi studio generation 6
releases system resources used by the Audio Engine when
the sequencer is stopped. But this is not true if an audio
instrument track is selected in Arrange and is therefore
available for real-time playing. Selecting a MIDI track or a
normal audio track exits this “stand by” mode and releases
reserved system resources again when the sequencer is
stopped.
Audio instruments can only be addressed through corresponding audio instrument tracks in Arrange. Audio instrument tracks process the sequence parameters Quantize, Transpose or Delay in real-time. All other sequence
parameters become effective after they are normalized.
Loops and aliases must be converted to “real” copies. If
you want to shorten sequences, please divide them with
the scissors tool and erase the part you do not need any
more. The reason for this is the totally different internal
handling of an audio instrument as compared to external
MIDI instruments. The good thing is: the MIDI timing of
audio instruments is sample accurate.
To hear instrument plug-ins along with plug-in effects inserted afterwards, MAGIX midi studio generation 6 must
be in play mode.
The Synthesizers—Audio Instruments
Introduction
166
With Generation 6 you now have access to everything a
complete professional music production studio offers—
thanks to the built-in synthesizers. To make it as easy as
Mixers and Audio Objects
possible to work with these synthesizers, each of them is
tailored to a special task; for example, the “Carpet
Sweeper” is built to deliver warm and full pad sounds
which give your tracks that soft and spacious feeling. By
tailoring each new synthesizer to a special purpose we
were able to reduce the number of parameters, resulting
in an ease and speed of use unparalleled by conventional
synthesizers.
To make the new synthesizers still easier to use, each even
comes with its own preset selection. By all means use
these as a starting point for your own sound creations but
don’t be afraid to experiment with all the parameters as
well. This is the most enjoyable way to learn about the synthesizers—and it is the best way to create your own
sounds that will set your tracks apart from those of your
competitors.
We know that you do not want to be bothered with the jargon normally associated with synthesizers so, rather than
talking in confusing technical terms, we will use a musical
and understandable language to help you get the most out
of our synthesizers as soon as possible. There are, however, some terms and principles that have to be understood before getting to each synth in detail. Here we go—
Principles
Synthesizers produce their sounds by providing control
over the pitch, the timbre and the volume of a sound.
To do this, each synthesizer has a sound source, called oscillator. An oscillator produces a sound that goes on forever. The pitch of this sound can be adjusted and played
via your keyboard. Typically you can select between waveforms that provide different sound characteristics, with
the proviso that they all sound very bright.
This bright sound from the oscillator is then passed to the
filter, which controls the timbre of the sound. A filter can
make the bright sound darker or duller (not dull as in
“boring”, but rather “less bright”), with the amount of
“darkness” being adjustable with the Cutoff control. Furthermore a filter can also add some sharpness or pronunciation to a sound. The amount of sharpness is controlled
with the Resonance control. When Resonance is turned up,
the sharpness gets so pronounced that the filter itself
might start outputting an additional sound. This can be
pitched with Cutoff.
The interaction of the oscillator and the filter gives us lots
of sonic variety—control the pitch of the entire sound at
the oscillator, select different bright sound characteristics
at the oscillator, give the sound a timbre anything between
167
Mixers and Audio Objects
bright and dark or sharp and soft with the filter. Remember though, that the sound output by the filter still goes on
endlessly. This is where the amplifier comes in. It gives a
beginning and an end to the endless sound by simply
turning its volume up from zero and down to zero.
Okay, now you have learned how and where in a synthesizer the three basic sonic parameters—pitch, timbre and
volume—are controlled. But there is one final step waiting
to be taken in order to fully understand how a synthesizer
does what it does. And that is that each of the parameters
pitch, timbre and volume can not only be controlled manually—like twisting a control named “volume” or
“pitch”—but can be controlled automatically by the synthesizer itself.
To do this, a synthesizer offers not only the above-mentioned oscillator, filter and amplifier modules, but also
some additional modules that produce adjustable curves.
These curves can be one-shot or repeat periodically, and
are used to alter pitch, timbre or volume automatically.
Here are two examples: first, imagine an additional module that produces a periodically repeating curve that goes
up and down and up and down and so on. Now imagine
this curve controls pitch. The result? Pitch goes up and
down and up and down and so on, according to the curve.
In this case, we say that pitch is “modulated” by the curve
that goes up and down and up and down and so on.
Second example: imagine an additional module that produces a one-shot curve that goes up, when you press a key
on your keyboard, and that goes down, when you release
the key. Now imagine that this curve controls volume. The
result? The sound starts when you press a key, and it ends
when you release it. In this case, we say that volume is
modulated by the curve that goes up when you press a key
on your keyboard, and that goes down when you release
the key.
To sum everything up, a synthesizer gives you manual
control of the three basic parameters of sound: pitch, timbre and volume. Furthermore, a synthesizer can control
these parameters automatically by itself, which is called
modulation. And now let’s get straight to the astounding
capabilities of your new synthesizers. Enjoy!
Please note:
The following explanations of the synthesizers are designed to be read when you like. It is not necessary to read
the explanations in a specific order; you can start with the
synthesizer you first wish to get acquainted with. This
means of course that some explanations will be repeated
168
Mixers and Audio Objects
in each synthesizer’s section. As you know, there is always
a price to pay—but we figured out that this method will get
you started as soon as possible.
To get the most out of the following, we recommend that
you have your MAGIX midi studio generation 6 up and
running on your computer, with your audio and MIDI interfaces and a MIDI keyboard connected. Further, please
make sure that you have inserted the desired synthesizer
in the Audio Instrument mixer channel in the Mixer window, and that you have selected the track of this Audio Instrument mixer channel in the Arrange window. Finally,
please load the setting “test” into the synthesizer. Ready?
OK, let’s start.
The Synthesizers—Carpet Sweeper
The Carpet Sweeper is designed to give you warm, soft
and animated pad sounds, thus creating spacious atmosphere in your music. As opposed to bass synthesizers like
the M-TB6, the Carpet Sweeper is designed as a chordal
instrument providing eight voices, meaning that you can
play up to eight notes at a time.
The sound generation of the Carpet Sweeper begins with
an oscillator, with which pitch or frequency can be adjusted with the three pushbuttons at the left. Only one of
them can be active at a time. They select the general pitch
of the Carpet Sweeper in octave steps. The meaning of the
numbers on the switches stems—believe it or not—from
the pipes of church organs. Back then, the length of a pipe
was measured in feet. The shorter a pipe the higher the
pitch or frequency of its sound. Doubling the length of
pipe resulted in halving its pitch. So, 16 is one octave below 8, while 32 is one octave below 16.
Back to the Carpet Sweeper. Its oscillator can, of course,
not only be tuned, but offers a choice of two entirely different basic sounds: a “sawtooth” and a “pulse” wave. Locate
the big Mix control and turn it. You will notice that you
169
Mixers and Audio Objects
can switch between the sawtooth wave at the very left of
the dial, and the pulse wave, which continuously covers
the rest of the dial’s turn. Listen closely to sonic differences of the waves—the sawtooth wave gives you a bright,
string-like sound, while the pulse wave covers a continuous range from bright, hollow, clarinet-like sounds at the
left of the Mix control, and bright, nasal, clavinet-like
sounds at the right end of the Mix control. And, of course,
everything between, depending on the setting of Mix. As
the icons indicate, turning Mix clockwise narrows the
width of the pulse wave. Try it and listen to the results.
There is another difference between these two waves. Select the sawtooth wave, locate the Vib/PWM control and
turn it up. You will hear the pitch of the sound going up
and down and up and down and so on. This cyclic pitch
change is called a “vibrato”, thus the abbreviation in Vib/
PWM. The vibrato intensity is set with Vib/PWM. The vibrato speed is set with the Speed control below Vib/PWM.
Now switch Mix to pulse wave and turn on Vib/PWM. You
will not hear a vibrato, but a cyclic change in the sound
color itself. This sound change is achieved by modulating
the width of the pulse wave, as if you would manually turn
the Mix control. This is called “pulse width modulation”,
abbreviated to PWM. The speed of this cyclic sound
change is again controlled with the Speed control below
Vib/PWM. Both principles, vibrato and PWM, are the key
features to bring life and animation to your pad sounds.
So much about the oscillator of the Carpet Sweeper, on to
the filter. It features the main controls already familiar to
you from the introduction: Cutoff for darkening the sound,
Resonance for sharpening it. Please try these controls intensively, as they are the most effective and thus important tools for your sound creations.
Let us jump to the Attack and Release sliders. They control
the volume course of the sound. The higher Attack, the
longer it takes the sound’s level to raise from zero to full
level when you press a key. As long as you hold the key, the
sound’s level will be full. As soon as you release a key, the
sound’s level will fall from full to zero in the time specified
with Release. The higher Release, the longer it takes the
sound’s level to fall from full level to zero when you release a key.
But Attack and Release are not only used to control the level
course of the sound, they can also be used to move Cutoff
automatically up or down from the position you set. Please
note that you will not see the Cutoff control itself moving,
but you will hear the appropriate effect. To hear it, turn
170
Mixers and Audio Objects
Cutoff half way up, locate AR Int just left of the middle between Cutoff and Resonance and turn it up. As you press a
key, you will hear a change in timbre as you would move
Cutoff manually. Leave AR Int turned up and try out different Attack and Release positions. You will find that AR Int
controls the amount of the automated Cutoff movement,
while Attack and Release control the times with which this
timbre shift takes place.
AR Int can be set to positive or negative values. Positive
AR Int values makes Cutoff raise from its original position
with the time specified by Attack as you press a key, and
fall down to its original value in the time specified by Release as soon as you release a key. Negative AR Int values
makes Cutoff fall down from its original position with the
time specified by Attack as you press a key, and rise up to
its original value in the time specified by Release as soon as
you release a key.
You can make AR Int sensitive to your playing. Try turning up Velo Filter below AR Int. This will make AR Int react to how hard you hit a key. If Velo Filter is turned full
down, it does not matter how hard you hit a key. Turning
it up clockwise increases the sensitivity, meaning that you
have to hit a key harder to reach the AR Int value you have
set. And if you do not want any Cutoff movement at all,
simply press the little “zero” symbol right above AR Int.
This will reset AR Int.
The final output level of the Carpet Sweeper is controlled
with the big Volume control. Sideways below Volume sits
Velo Volume: Turn it up to make the sound’s level react to
how hard you hit a key.
That leaves us with three mysterious buttons in the upper
right of the Carpet Sweeper. Besides Vib/PWM, these
three switches are the final key for animated, swirling
sounds. Try them and hear for yourself how they breathe
life and motion into your sounds. You can deactivate these
effects by clicking on an already activated effect.
The Synthesizers—Percusor
The Percusor is the most elaborate and universal synthesizer of your music studio. Together with the the Carpet
Sweeper, the Percusor puts all the synthesizer magic at
your disposal, and its sonic capabilities start where Carpet
Sweeper reach their borders. Its full-featured ADSR section is especially suited for fine-crafted percussive sounds.
The Percusor is, as is the Carpet Sweeper, designed as a
polyphonic instrument providing eight voices, so that you
can play up to eight notes at a time.
171
Mixers and Audio Objects
172
For enormous sonic wealth, the sound generation of the
Percusor offers a special oscillator, the pitch or frequency
of which can be adjusted with the three pushbuttons at the
left of the Percusor. They select the general pitch of the
Percusor in octave steps. Only one of them can be active at
a time. The meaning of the numbers on the switches
stems from the length of pipe organs, as the length of a
pipe was measured in feet. The shorter a pipe the higher
the pitch, or frequency, of its sound. Doubling the length
of pipe resulted in halving its pitch. So, 8 is one octave below 4, and 16 is one octave below 8.
There is another similarity between those big pipe organs
and the Percusor—both are able to produce new timbres
by mixing existing ones. But instead of routing air
through a pipe system, the Percusor’s oscillator offers six
sliders for convenient mixing of six different sounds. Locate the six sliders and move them up and down, one by
one. We will start from the left, with the slider from the triangle wave. In the synthesizer world waves are named after their shape; when viewed through an oscilloscope—
which is kind of a TV set for watching the shapes of electrical waves—the triangle wave does indeed look like a triangle.
The triangle wave does not sound as bright as the other
waveforms you will encounter on the next sliders. It resembles a softly blown flute with quite a lot of low-end energy. Use it as an addition to give your sound creations a
nice bottom end, or use it stand-alone for pleasant, mellow
sounds. Next comes the sawtooth slider. The sawtooth is
one of the two the most popular synthesizer waveforms. It
sounds very bright and rich, resembles stringed instruments and is a good starting point for almost any sound
experiment. The other one of the most popular synthesizer waveforms is the square wave, right beside the sawtooth slider. Compared to the sawtooth, the square wave
Mixers and Audio Objects
sounds bright as well, but with a hollow, clarinet-like character. The next two sliders do also give you square waves,
but their pitch is one or two octaves lower, respectively,
than the pitch of the other waves. Use them to give your
sounds a really huge, wide character and the deepest
basses. Or try this for unusual bright timbres: set the octave switch to 4 feet, pull down the sliders of all waves but
the square wave two octaves below the original pitch. Now
carefully pull up the sawtooth slider and note how bright
your square wave gets…
The remaining slider is for the noise waveform. This
sounds exactly as it reads: noisy. It is non-pitched, meaning it has no audible pitch and is thus independent from
the note you play or from the setting of the octave
switches. When used alone, this is the waveform of choice
for all kinds of non-pitched percussion instruments, explosions, and sound effects like wind or waves. If you mix
it to the other waves, you can emulate things like breath
noise in a flute, or, when added at a very, very low volume,
it can give your sound that animated high-end sparkle.
That’s almost all about the oscillator of the Percusor, so
let’s move on to the filter. It features the main controls already familiar to you from the introduction: Cutoff for
darkening the sound, Resonance for sharpening it. You
will find them in the middle of the Percusor’s surface.
Please try these controls intensively, as they are, together
with the almost endless mix combinations of the waveform sliders, the most effective and thus important tools
for your sound creations.
In between the filter controls and the six waveform sliders
you will find the Vib/Wah control. Turn it to the left. You
will hear the pitch of the sound going up and down and up
and down and so on. This cyclic pitch change is called a
“vibrato”, thus the abreviation in Vib/Wah. The vibrato intensity is set with the left range of Vib/Wah. The vibrato
speed is set with the Speed control below Vib/PWM.
Now turn Vib/Wah to the right: You will not hear a vibrato,
but a cyclic change in the sound color itself, as if you
moved the Cutoff control manually up and down and up
and down and so on. And this is exactly what is happening, but it is now done automatically for you by the Percusor. The speed of this so-called “Cutoff modulation” is
controlled with the Speed control below Vib/Wah. If you
do not want to hear neither vibrato nor cutoff modulation,
just click the little “zero” symbol above the Vib/Wah control.
173
Mixers and Audio Objects
Just in the middle between Cutoff and Resonance you will
find three switches named 1/3, 2/3 and 3/3. An engaged
switch can be deactivated by clicking on it again. To learn
what they do, deactivate these switches, pull down all
waveform sliders but noise, turn Cutoff quite down and
raise Resonance slowly till the noise gets a distinct whistling character. When you now play different keys on your
MIDI keyboard you will notice that the pitch of this whistling is not affected by the notes you play. Now activate 3/
3 and play some notes again. You will hear that you can
now almost play the whistling like any other waveform.
This is done by controlling the Cutoff by the note you play.
It will not exactly track the notes you play, but don’t worry.
These are the inaccuracies that make a digital synthesizer
that is calculated inside a computer sound like an analog
synthesizer made out of resistors, transistors and diodes—parts that react to temperature and thus always
have some kind of uncontrollable “life”. With the other
settings 2/3 and 1/3 the Cutoff will not track the notes
played as closely as with 3/3.
Let’s jump to the sliders on the right side of the Percusor:
A (stands for “Attack”), D (stands for “Decay”), S (stands
for “Sustain”) and R (stands for “Release”). They control
the volume curve of the sound: the higher the attack time
(A), the longer it takes the sound’s level to raise from zero
to full level when you press a key. Continue to hold the key
and the sound’s level will fall down to the sustain level set
with the sustain slider S in the decay time set with the D
slider. The higher the decay time, the longer it takes the
sound’s level to fall from full level to sustain level. As long
as you hold the key, the sound’s level will then stay at the
sustain level. As soon as you release a key, the sound’s
level will fall from sustain level to zero in the release time
specified with R slider. The higher the release time, the
longer it takes the sound’s level to fall from sustain level to
zero when you release a key. So, while A, D and R adjust
times, S adjusts a level. Please note that your sound will
die to zero in the decay time even when you hold a key if
sustain level is set to zero.
But ADSR sliders are not only used to control the level
curve of the sound, they can also be used to move Cutoff
automatically up or down from the position you set. Please
note that you will not see the Cutoff control itself moving,
but you will hear the appropriate effect. To hear it, turn
Cutoff half way up, locate ADSR Int below the right side of
Cutoff and turn it up. As you press a key, you will hear a
change in timbre as you would move Cutoff manually.
174
Mixers and Audio Objects
Leave ADSR Int turned up and try out different ADSR
slider positions. You will find that ADSR Int controls the
amount of the automated Cutoff movement, while ADSR
sliders control the curve form with which this timbre shift
takes place.
ADSR Int can be set to positive or negative values. Positive
ADSR Int values make Cutoff raise from its original position with the curve specified by the ADSR sliders as you
press a key, and fall down to its original value when you release a key. Negative ADSR Int values makes Cutoff fall
down from its original position with the curve specified by
ADSR as you press a key, and rise up to its original value
when you release a key.
You can make ADSR Int sensitive to your playing style.
Try turning up Velo Filter above ADSR Int. This will make
ADSR Int react to how hard you hit a key. If Velo Filter is
turned full down, it does not matter how hard you hit a
key. Turning it up clockwise increases the sensivity,
meaning that you have to hit a key harder to reach the
ADSR Int value you have set. And if you do not want any
Cutoff movement at all, simply press the little “zero” symbol right above ADSR Int. This will reset ADSR Int.
The final output level of the Percusor is controlled with
the Volume control. Sideway below Volume sits Velo Volume: turn it up to make the sound’s level react to how hard
you hit a key.
To give your carefully crafted Percusor sounds that cutting
edge, make sure you give the Chorus and Overdrive controls to the right of the Percusor’s surface a try. Chorus will
broaden your sounds with a swirling effect, and Overdrive
will give them the aggressive bite to cut through even the
densest arrangements.
Faders and Level Adjustment
Level Meter: The channel strips have a level meter for
displaying playback or monitor level.
When you arm a track in preparation for recording, the
meter will display the input level.
Peak Hold: As with conventional mixing desk meters,
peak values are “held” on the display for a few seconds, so
that they can be read more easily. Even if your CPU processing capacity is not sufficient for a smooth display, it
reliably shows the last maximum level.
Clip Detector: If the signal overloads, and goes into clipping, the Clip detector (the red “virtual LED” at the top of
175
Mixers and Audio Objects
the meter) will light and remain lit. You can reset the detector by clicking anywhere on the meter.
Adjusting the level: The fader on each track object sets
its playback level. The recording level is not set in MAGIX
midi studio generation 6, but at the source supplying the
signal. You cannot adjust the level on the digital input.
MAGIX midi studio generation 6’s fader shown here is
used to control the monitor level.
The level reading of the audio objects and the aux sends
can be shown in decibels (dB) or MIDI controller values.
To change the scale, select the appropriate object and alter
the “Val as” parameter. A MIDI volume of 90 is equivalent to 0 dB.
The maximum boost is +6 dB. You can reset the volume
fader to 0dB (90) by ctrl-clicking.
During Recording: An independent monitoring level is
available if a Track object is record enabled. When the object is again disarmed, the original level will be restored.
Routing
Mute control: You can mute any audio object by pressing the button marked “M”. Pressing the button again restores the previous level.
Pan/Balance: Mono objects feature a Pan control which
determines the position of a signal in the stereo image.
Stereo objects, on the other hand, possess Balance controls. The balance control differs from the pan control in
that the former controls the relative levels of two signals
(L/R) at their outputs. The latter merely shares one signal
proportionally between two outputs.
You can reset the pan control to center (64) with a ctrlclick.
Track arming: The Rec control (see right) “arms” a track,
making it ready for recording. Once the track has been
armed, the control flashes red. During actual recording, it
remains lit red all the time.
If the control is flashing but gray-red in color, no audio
track has been selected in the Arrange window. No recording can take place.
Rec controls only exist for Track objects. Please note that
the number of Track objects which can be armed at the
same time, is limited to the number of tracks which your
audio hardware can record simultaneously.
176
Mixers and Audio Objects
You can select which available input the Track object will
record from, by using the input selector switch, found in
the I/O section of the Track object. Click-holding on the
switch will reveal a flip-menu, showing all available inputs
for your hardware. If the record track is stereo, the inputs
will be displayed in pairs (Input 1-2, Input 3-4, etc.). For
mono tracks, they will be displayed individually.
If you are using different audio hardware systems, you can
record on all hardware simultaneously.
Solo: All audio objects have a solo button. This mutes all
other audio objects. The muted objects are marked with a
flashing “M” in the mute button. Please note that this does
not mute MIDI tracks.
You can solo several objects at once.
ctrl-clicking releases other active solo buttons, so that you
only hear one channel (“Interlocking Solo” or “Solo Toggle”).
ctrl-clicking any activated solo button removes the solo status from all audio objects.
Solo Safe: When you solo a channel, if you want to hear the
signal together with its effects, the effect return channels
should not be muted. Unlike conventional mixing desks,
MAGIX midi studio generation 6 can scan the entire signal flow and leave the effect return channels open.
The same applies when you solo an effect return signal.
The channels feeding the effect are muted (“taken out of
the routing”) but their effect sends remain open so that
the effect still receives a signal.
Of course the automatic mute-suppression only applies to
the internal effect returns. If you are using external effect
units via effect objects, the scan will keep the effect master
sends open. However, MAGIX midi studio generation 6
cannot know which of the input objects you are using as
effect returns for the external effect units. You need to
manually switch these input objects to “solo safe”—just
like in a conventional mixing desk.
alt-clicking an inactive solo button makes this audio object
“solo safe”. This stops it being muted when you solo another channel. “Solo safe” status is marked by a cross in
the solo button.
alt-clicking again removes the solo safe status.
Mute Remote Control: Mutes used to be recorded as
Volume Controller events. Now Controller #9 is used instead. This allows you to control muting e.g. via hardware
controllers.
177
Mixers and Audio Objects
Value 127
Value 0
Value 64
Mute (actually any value except 0 or 64)
Switch off mute
Toggle mute
Stereo Objects
All the types of audio objects (Track, Input, and Output)
may be used configured as stereo.
Audio sequences on the tracks of stereo objects are always
dealt with together, no matter what the operation being
performed. If you open the Sample Edit window, both
sides of the stereo pair are shown there, and processed together.
Creating Stereo Objects: To do this, select the object
named “Audio 1” (click on its name, at the bottom). Click
on the Mono symbol, at the bottom left of the object, next
to the REC button.
The button will now show two interlinked circles, indicating that it is now a stereo object.
If you click-hold on this button, you will see a flip-menu,
giving you four choices:
Mono
Sets the track to play mono files.
Stereo
Sets the track to play stereo files.
The Effects: Whatever parameters you adjust for stereo objects, the changes affect both sides equally. The pan control becomes a balance control.
Stereo objects have their own set of parameters for setting
level, balance, aux send and EQ. As a result, you can toggle
between stereo and mono object types without losing the
parameters for each type.
Any combination of stereo and mono recordings is permitted. you can set tracks 1 and 2 each to stereo, and use
tracks 3 and 4 for mono recording s, if you wish.
Automation
178
On a mixing desk, Automation is the ability to record the
changes to the levels of the various audio channels over
time, and then recall and reproduce these changes automatically when mixing.
“Full” automation allows you to recall the adjustments to
all of the parameters on a desk, such as the pan and EQ
settings, as well as all the channel levels.
Naturally, the “virtual” mixing desk of MAGIX midi studio generation 6 is fully automated. This includes all buttons, fader and knob movements.
Fader movements—just as with MIDI events—are recorded on a track. This track will consist of a sequence
with corresponding MIDI events from the respective fader
Mixers and Audio Objects
or knob. After being recorded, these events can be edited,
just like any other MIDI sequence.
The different channel tracks in the mixer create events
with different MIDI channels. When automation data is
recorded—from the adaptive mixer, the automation data
is recorded to the corresponding track in the Arrange window.
Example: Let’s say you have three tracks: a bass track, a piano track (both MIDI tracks), and an audio drum loop on
an audio track in the Arrange window. Click on the Record
button in the Transport window, and then move any fader
or knob on the mixer, and automation data will be recorded. If the fader for the piano channel on the mixer is
moved, MAGIX midi studio generation 6 automatically
creates a new sequence on the piano track in the Arrange
window. Move the volume fader for the drum loop, and a
new sequence is written to the corresponding track in the
Arrange window. During the recording process, it is possible to jump back and forth between the mixer channels.
The mixer assigns automation data to the correct track automatically.
Operation: Select Windows > Open Mixer in the main
menu bar.
Click on “Record” in the Transport window.
Move the the faders, knobs, or buttons on the mixer.
179
The Audio Window
The Audio Window
MAGIX midi studio generation 6 allows you to access all
digitally stored audio recordings (audio files) are available
in the Wave format (.WAV) or AIFF. All recordings made
using MAGIX midi studio generation 6 are stored as
Wave files.
The Audio window of a MAGIX midi studio generation 6
song is where you organize all the audio files used in the
song on the hard disk. It doesn’t matter whether these audio files have just been recorded or whether they were copied weeks ago from a CD-ROM onto the hard disk. The
Audio window gives a MAGIX midi studio generation 6
song access to any compatible data on the hard disk.
There is no timing assignment of the recordings in the
Audio window. An audio file contains no information on
its time position in relation to the musical sequencer’s
time axis. This assignment is made by arranging sections
of the audio files, known as “regions”, in the Arrange window in the same way as MIDI sequences.
The Audio window is really like a catalog for audio files. It
also gives you an overview of what regions have been defined for each audio file.
Here you can define new regions and edit, delete, or rename existing ones. When you edit them here, the accuracy is limited to units of 256 sample words. To make
more precise edits use the Sample Edit window.
These regions can then be dragged directly into the Arrange window, where they now may be arranged as audio
sequences.
The menus in the Audio window contain all the operations relating to the administration of audio files and regions, plus the System parameters of the hard disk recording hardware (HDR hardware).
Opening the Audio Window
To open the Audio window choose Windows > Open Audio. You can open several Audio windows at once (even
within one Screenset) for example, if you want to use different zoom factors.
180
The Audio Window
1
2
3
4
8
10
11
9
5
14
12
6 7
Link button
Region cycle button
Monitor button
Selection field for the output channel for monitoring
Tool box for the Audio window
Click this small triangle to show or hide the regions in
the relevant audio file
7 Click the lock symbol to protect the parameters of the
region
8 The name of the audio file (large print)
9 The name of a region (small print)
10 Grab and drag this point to adjust the horizontal window division
11 Region box with waveform display
12 Display of the audio passages outside the current region
13 The Anchor—musical reference point in the region
If you add an audio file to the Audio window, MAGIX
midi studio generation 6 automatically creates a region
encompassing the entire length of the file.
You can create as many regions as you want from the
same audio file and there are also no limits in terms of
length, as long as the region is no longer than the source
audio file.
Regions can be moved with the mouse into the Arrange
window. The audio file is then played at the desired song
position.
1
2
3
4
5
6
181
The Audio Window
Layout
On the left side of the window is a thin column. At the top
this are the mode buttons, and at the bottom are the tools.
This is what is described in the following sections.
The column to the right lists the audio files, and their regions by name.
Further to the right, the region waveform s are displayed
graphically in the large white area of the window. A region
is shown as a boxed, black or colored area, while the rest of
the audio file is shown in light gray indicating that this
part of the audio file is not used for the region.
Zoom Functions
The two telescope symbols at the top right, just below the
title bar can be used to enlarge or reduce the display (zoom
function).
You can use the telescope symbol on the left to enlarge or
reduce the vertical display area altering the height of the
region waveform display.
The telescope symbol on the right is for enlarging or reducing the horizontal display size, i.e., altering the time
display of the regions .
The Mode Buttons
The mode buttons allow you to select different operating
modes. These affect both the display and the playback of
regions in the Audio window.
Link: Link mode in the Audio window means that whenever you select an audio region in the Arrange window the
same region is automatically selected and displayed in the
Audio window.
You can switch link mode on or off by clicking the button
with the chain link icon.
“Hidden regions” cannot be displayed in link mode. If you
want to display them you have to “Show” the regions (see
section Hiding and Showing Regions from page 183 onwards).
182
Monitoring: You can play regions directly in the Audio
window. This monitoring is not related to the time axis of
the sequencer. There are several ways of playing a region:
Playing from a specific position: Click-hold the desired region in the waveform display with the mouse. Playback
starts at the point where you clicked. This allows you to
play specific sections.
Playback stops as soon as you release the button.
Playing the whole region: If you want to play an entire region, select it by clicking the name of the region in the au-
The Audio Window
dio list. Now click the button with the speaker symbol to
start playback. Click the button again to stop playback.
As well as using the mouse, you can also start or stop this
type of playback using the “Play/Stop Region” key command.
Stereo playback: If a region from a stereo file is selected,
clicking the speaker icon plays both sides of the stereo file.
However, if you click the icon while holding down ctrl or
shift only the selected region (mono) is played. If you subsequently select a region from another stereo file, MAGIX
midi studio generation 6 goes back to playing in stereo.
X
Region Cycle: Regions may be looped continuously during monitoring. To switch “region cycle” on or off, click
the button with the circular arrow symbols. This mode applies to all regions in the Audio window.
This cycling only affects the monitoring in the Audio window and has no effect on song playback. It should not be
confused with the cycle function in the Arrange window.
You can adjust the start and end points of the region in
real time while the region is being cycled. This is useful
for setting precise region lengths, for example when “polishing” drum loops.
Choosing the Audio Output for Monitoring: The
actual routing of the audio signals to the different outputs
is done in the Arrange window (using the audio object in
the track list).
However, you can choose a specific channel of the audio
hardware for monitoring in the Audio window. Set the desired output in the Cha button below the speaker icon.
Display
The Audio List
The list display of the audio files and regions, (known as
the audio list) gives an overview of all the audio files used
in the current song and the regions contained within
them. This is where audio files can be added, removed, deleted, or renamed. Regions can also be created, deleted
and renamed.
Hiding and Showing Regions: After you add an audio
file, you can see the file name in the Audio window in
large print. This takes up minimal screen space, and
shows you as many currently used files as your zoom setting and monitor size will allow. There is a small triangular arrow directly next to the file name 1.
183
The Audio Window
1
2
Click the small triangle 2 next to an audio file to reveal its
regions. Like the list display of folders in the Explorer, this
shows you the “contents” of the audio files—i.e. the relevant regions. The arrow is now pointing downward toward
the regions, which are shown in small print. Click the triangle again to hide the regions.
You can also press ctrl while clicking on this triangle to
quickly Hide/Show ALL regions.
The Waveform Display outside the Region
MAGIX midi studio generation 6 defaults to showing the
waveforms outside the defined region area in light gray.
You can alter the display yourself by clicking inside the region while holding down ctrl and keeping the mouse button held down. A flip menu appears containing the following options:
None : No waveform display outside the regions.
Bright : Waveform display
outside the regions colored
1
light gray.
Middle : Waveform display
outside the regions colored
medium gray.
Dark : Waveform display
outside the regions colored
2
dark gray.
Overview Calculation
In addition to the pure audio data, an audio file also contains data which is required for graphic display of the
waveform in the Audio window and Sample Editor (“Overview” data).
Automatic Overview Calculation: If the option Create Overviews after recording is switched on in Audio > Audio Preferences…, graphic overviews are automatically calculated
right after audio recording.
If you switch off this option, overviews are not calculated
automatically. However, you can start them manually.
Starting Overview Calculation manually : Sometimes when
you load/import audio files, you have to carry out the cal184
The Audio Window
culation manually if the audio files don’t contain any overview data.
Controlling the Overview Calculation: The calculation of the overview data for an audio file is shown in a
float window. This calculation is carried on in the background so you can continue working with MAGIX midi
studio generation 6.
You can position this float
window wherever you
want—the last position is
saved in the Preferences.
Double-clicking this window opens a dialog box.
If you stop the calculation by clicking Abort you can still
play the audio file—but bear in mind that without an overview it will not be easy to edit.
Continue carries on the overview calculation in the background as it normally would.
Clicking Finish transfers the calculation to the foreground
and therefore speeds it up considerably. The disadvantage
is that you cannot use your computer for anything else until it is finished.
Update File Information: By editing an audio file in an external sample editor like MAGIX audio studio artefacts of
the audio file—e.g. its length—may change. If you call up
this function via Audio File > Update File Information
MAGIX midi studio generation 6 will be informed of the
change.
Operation
Selection Techniques
There are several different ways of selecting audio files
and regions in the Audio window.
To select a single item just click either its name in the audio list, or the waveform display.
If you hold down shift at the same time you can select several items, even if they are spread out. In the audio list you
can also use the “rubber band selection”.
To select all items at once choose Edit > Select > Select All
(ctrl a).
Audio Files: Selecting the next Audio File: The key command Select Next Audio File selects the next audio file in
the audio list.
Selecting the Previous Audio File: The key command Select
Previous Audio File selects the previous audio file in the audio list.
X
X
185
The Audio Window
X
X
Audio Files and Regions: Selecting used Regions: When
you choose Edit > Select Used all audio files and regions
used in the arrangement of the song are selected.
Selecting unused Regions: Choosing Edit > Select Unused
selects all those audio files and regions which are not used
in the arrangement of the current song.
For example, you can call up this function at the end of a
production to delete any items that are not required (backspace).
Edit Commands
All the standard edit commands are available in the Audio
window. As usual, they apply to the currently selected entries (whether audio files or regions).
The Cut, Copy and Paste commands only apply to exchanging items between two different songs. An audio file can
only appear once in a song’s audio list, and so cannot be
copied within a song. For instructions on how to physically copy an audio file to the hard disk, please see the section Copying Audio Files from page 192 onwards.
Cut: The selected audio files or regions are cut out, i.e.
moved to the clipboard. They are removed from the Audio
window. Shortcut: ctrl x.
Copy: The selected audio files and their regions are copied
to the clipboard. They remain in the Audio window. Shortcut: ctrl c.
Paste: The contents of the clipboard are added (providing
they contain audio files and their regions from another
song). Shortcut: ctrl v.
Clear: Any selected audio files or regions are deleted. You
can achieve the same effect by pressing backspace.
Don’t forget; the functions Cut or Clear do not delete audio files from the hard disk, they just remove them from
the Audio window of the current song.
If regions from the audio files in the Arrange window are
being used as audio sequences these sequences will be deleted from the Arrange window as well.
If you want to delete the selected audio files from the hard
disk, select Audio File > Delete File(s).
Undo: Reverses the Previous Command (Shortcut: ctrl z).
You should call up this function if you want to reverse an
action.
Not all actions can be reversed using Undo. If you select a
function which you cannot Undo, you will be warned of
this before you can execute the function.
186
The Audio Window
Regions
Creating a Region: Select the desired audio file and
choose Audio File > Add Region. The new region will appear in the list, after the existing regions.
Copying a Region: If you select an existing region and then
carry out the Add Region function, another region is created whose definition (start, end, Anchor) is exactly the
same as the selected region.
X
Deleting a Region: You can use the Eraser tool to delete
one or more regions. If any of these regions exist in the Arrange window, they will be removed from there, as well.
You should therefore be careful when using this tool.
However, the Undo function is always available, if you inadvertently remove a needed region.
You can also delete any selected regions with delete.
Altering the Limits of a Region: You can directly alter
the limits of a region in the graphic display using the region edit (finger) tool.
You can also use the normal mouse pointer. Just make
sure you grab the region by the lower third when carrying
out the following actions:
Moving the Start Point: To adjust the start point of a region, grab the left border. You can now adjust the start
point.
Moving the End point of a Region: To adjust the end point
of a region grab, the right border. You can now adjust the
end point.
Moving the whole Region: You can also move an entire region within an audio file, by grabbing it in the middle. The
tool turns into two arrows pointing left and right. If the region is very small, use the zoom function to enlarge the
section. Make sure you can see the two arrows before making any alterations.
If you want to adjust the limits of the region without moving the Anchor, hold down ctrl during the operation. This
applies to moving the start or end points, as well as moving the whole region.
X
Moving the Anchor: To move the Anchor, grab the
small Anchor triangle below the region. The tool turns
into the region edit tool. A guide line appears above the
Anchor triangle.
With audio sequences in the Arrange window, the Anchor
is marked by a vertical, dashed line.
187
The Audio Window
Fine Movement: The graphic display in the Audio window is optimized for quick and simple organization of the
audio files and regions. This involves displaying as many
things as possible simultaneously in a window. The finest
resolution for positioning the start point, end point and
Anchor, is therefore limited to units of 256 samples. This
is usually sufficient.
However, sometimes you need to make precise adjustments down to the individual sample words. Drum loops
are a good example. The Sample Edit window is better
suited to these situations. To open the Sample Edit window for a region, double-click on that region.
Protecting the Region Parameters: Regions can be
“locked”, to protect against accidentally altering the start
and end points, or the Anchor position. The small lock
symbol next to every region can be opened and closed by
clicking it. If it is locked, you can play the region, but you
cannot edit it.
A protected region can still be deleted.
Renaming Audio Files and Regions: To rename audio
files and regions in the Audio window, just double-click
the name in the audio list. A text input box appears where
you can type in a new name.
Before renaming audio files the following warning appears:
Keep in mind other songs may use the same file! Do you
still want to rename the file?
You should check whether the audio file that you want to
rename is used by another song. If it is, don’t rename the
file, otherwise it will not be found or played by the other
song.
MAGIX midi studio generation 6 helps you in these situations:
– MAGIX midi studio generation 6 alters the name of an
audio file in all currently opened songs which use this
file.
– MAGIX midi studio generation 6 automatically assigns
the new name to any SDII stereo file which is
connected to the renamed file, and is stored on the
same storage location, on the same drive (and has the
same name).
You can rename regions whenever you like.
Providing the regions have the same names as their audio
files, any renaming of the audio files is automatically carried over to their associated regions.
188
The Audio Window
Adding a Region to the Arrangement: To add a region to the song arrangement, drag its graphic display into
an open Arrange window to create an audio sequence.
First select the desired track in the Arrange window and
move the song position line to the position where you
want to create the audio sequence.
Grab the middle of the graphic display of the region in the
Audio window and drag it into the Arrange window.
Don’t worry if the region starts to play. It will stop playing
as soon as you move the mouse pointer outside the Audio
window. You can prevent this by using the region drag
tool (the small hand with the outstretched fingers), or by
grabbing the name of the region in the Audio List and
dragging it into the Arrangement.
File Administration
Record File
Defining the Record Path: Every recording in the Arrange window creates a new audio file. To keep track of
your recordings, you should tell MAGIX midi studio generation 6 where the data is to be written before you start
recording.
You can also define a file name for the audio files that are
recorded—a kind of working title—which MAGIX midi
studio generation 6 will automatically keep using, by appending a series of numbers to the file name for every
subsequent recording.
The path (folder) for audio recordings can be set individually for each song. You can also have different paths for
different audio hardware systems running simultaneously.
To call up the dialog window for these settings, open the
Audio window and choose Audio File > Set Audio Record
Path… or open the Record menu (click-hold the Record
button). The menu entries are:
Pre-Allocate Recording Files: If this option is selected,
MAGIX midi studio generation 6 creates the audio file for
the next recording after you record-enable the track. In addition, at the end of every recording, the audio file for the
next recording is immediately created. This allows you to
start audio recordings quickly.
Unused recording files are deleted when you quit MAGIX
midi studio generation 6.
189
The Audio Window
Maximum Recording Time (Recommended): xxx Minutes:
This parameter defines the maximum recording time for
new audio files in minutes; this determines the size of the
temporary recording file.
You can switch this option off, in which case a record file
as big as the whole free memory from within the currently
selected hard disk will be created.
Disadvantage:
– the audio file can be heavily fragmented, if the actual
recording time is much less than the maximum available value.
It is strongly recommended that you switch on this option,
and set a top limit for the recording time.
If there is not enough storage space available, the maximum length of the recording is temporarily reduced. During the recording you can see how much time is available
in the Record Float window (with the red bar).
When you enter the Recording Time remember…
Important: the display of the remaining memory and the
maximum recording time depends on the following factors:
– the number of tracks which are to be recorded simultaneously.
– the sample rate.
It is always advisable to choose a much smaller value than
the maximum possible recording time. Otherwise after
the first recording there will not be enough space for further recordings unless you reduce the value.
Global Record Path / Song Record Path: The Global Record
Path was available in earlier versions. It is stored in Preferences and applies to all songs. The advantage is that you
don’t have to define a record path in every new song before
you can record, providing you don’t mind recording files
for every song into the same folder.
The Song Record Path allows you to organize the audio recordings for each song into its own folder. The advantage
here, is that when you change between different songs,
any new recordings are automatically stored in that song’s
folder, without having to switch the path manually.
Set: These buttons can be used to define the recording
path. You can create a new folder (if required) in the dialog
box.
To the right, you will see the current driveand the remaining capacity (only if the drive is registered).
190
The Audio Window
If you click-hold the drive the entire path is displayed. This
way you can see exactly which folder you are recording
into.
Here is an example illustrating the individual steps:
It is usually advisable to store all the audio files from one
recording session or song in its own folder. Let’s suppose
the song you are working on is called “Morning Light”.
– Choose Audio File > Set Audio Record Path.
– Create a new folder by clicking the “folder”symbol in
the file selection box.
– Call the folder something like “Morning Light Audio”
and click Open.
– Now enter a working name for the audio files. It is a
good idea to enter a name which mentions the song and
the type of recording. If you are recording vocals for the
song “Morning Light” you could use something like
“Morning LeadVoc” as a working name.
– Then click Store.
For every new recording a successive number is added to
the name. For example:
Morning LeadVoc.#01
Morning LeadVoc.#02
Morning LeadVoc.#03 …
You can change the path and name whenever you want, by
calling up the Set Record Path function again.
Let’s assume you want to record the lead guitar for our example song “Morning Light”. Enter a new name such as
“Morning LeadGuit”.
When you choose the Path remember…
– If the hard disk to which the path leads is not connected
or is switched off, the path is deleted.
– If you rename the drive, MAGIX midi studio generation 6 will not be able to find it.
Adding Audio Files
If you want to use an audio file stored on the hard disk in
the current song choose Audio File > Add Audio File…, or
simply drag them from Windows to the desired position
in the arrange window.
Click Cancel in the file selection box when you have finished choosing the files.
The file names will then be listed in the Audio window.
Add Audio Files from CD: If files have been added
from CD, or some other protected volume MAGIX midi
studio generation 6 asks you for a path, so it can copy
these files onto the hard disk.
X
191
The Audio Window
Removing Audio Files: To remove an audio file from
the current song, select its name in the Audio window and
press backspace. This does not delete the file from the
hard disk.
Creating Audio Files
Audio files are normally created by making a recording.
After a digital mixdown of regions in the Arrange window
a new audio file is also created (see section Digital Mixdown from page 153 onwards).
X
Deleting Audio Files: In theory audio files are displayed and organized by theWindows operating system in
exactly the same way as all the other Windows files. You
can therefore delete or copy them in Windows Explorer.
However, this has the following disadvantages:
– If you delete an audio file you may not know if it is
needed in a song.
– If you accidentally delete audio files MAGIX midi
studio generation 6 warns you of this when you load
the song. In addition, there will still be items in the
Audio window and Audio sequences in the Arrange
window which originally referred to the missing audio
file and have therefore been “orphaned”. This detracts
from a clear overview of the song.
For this reason, it is safer to delete redundant audio files
in the Audio window. First, select the audio files which
you want to delete. Be careful, because once files have
been deleted they are gone for good. You cannot use the
Undo function to recover deleted audio files.
Choose Audio File > Delete File(s). You will see an alert
message informing you of the number of audio files about
to be deleted.
Click Cancel to abandon the deletion process, or click Delete to permanently delete the files.
Here too, you should make sure that the files about to be
deleted are not being used in any other songs.
Copying Audio Files
192
The Audio File > Copy File(s) function copies files to a different location on your hard disk (or other storage medium). When you copy a file you can enter a new name in
the file selection box.
MAGIX midi studio generation 6 checks whether there is
enough space to copy the selected file(s) at the target location. If there is already a file with the same name there,
MAGIX midi studio generation 6 asks whether you want
to replace it. MAGIX midi studio generation 6 also gives
The Audio Window
you the opportunity of replacing the audio file in the song
with the file that you have just copied.
Data format: MAGIX midi studio generation 6 allows saving audio files in the formats Wave (.wav) or AIFF (Audio
Interchange File Format).
Moving Audio Files
The Audio File > Move File(s) function enables you to
move audio files on your hard disk. Unlike the copy function, the source file disappears afterwards.
If the source drive/partition is the same as the target
drive/partition the files are simply moved to the other
folder. This is a very quick and convenient way of organizing the drive and the song.
Choose “Select Used” from the Edit menu of the Audio
window (this refers to the files which are being used in the
Arrange window), and move them to a new folder. This
folder will then contain just the audio files from this song.
Be very careful when using this function. A different song
may use the same audio files. The next time you start the
other song, you will then have to locate the files that you
have moved.
MAGIX midi studio generation 6 updates the information
on the new path for all open songs which use this audio
file. Thus, you can open every song which uses the audio
file(s) you are moving. Then move the files to the new location, and save the songs to transfer the storage reference(s).
Other Functions involving Audio Files
Reassigning Audio Files: If MAGIX midi studio generation 6 cannot find one or more audio files—for example
when it opens a song—the regions are shown as gray areas in the Audio window.
If the files are available under a different name or if you
want to assign a “replacement” file, you can do this as follows:
193
The Audio Window
Double-click the relevant region, or select Audio File >
Update File Information.
Choose Locate in the dialog box and a file selection box
opens, where you can load the desired audio file.
What to do if MAGIX midi studio generation 6
cannot find an Audio File: Sometimes MAGIX midi
studio generation 6 cannot find a file which was previously used in the song. This could be due to one of the following :
– You have not connected the relevant hard disk or you
have renamed the drive.
– You have stored the files in a different drive, or moved
them to another drive.
– You have renamed the files in Windows Explorer, or
renamed them in the Audio window of another song.
– You have deleted the files.
In this case MAGIX midi studio generation 6 produces
this dialog box:
You can respond in any of the following ways:
Locate: The current drive is searched for this name. If the
search is unsuccessful, MAGIX midi studio generation 6
asks you if you want to search other drives for these files.
This enables you to assemble songs even if you have copied or moved the relevant files onto other media.
Skip: (Don’t search for this file). Use this function if you
know that this audio file no longer exists or has been renamed. This button changes to “Skip All” if after the first
skip, yet another audio file could not be found.
Skip All (for Several Files): (Don’t search for any more
files). Use this function if you know that all audio files in
this song no longer exist, or have been renamed.
194
The Audio Window
Other Functions
Choosing the Sample Rate: In the Options menu of the
Audio window you can choose one of the available sample
rates, for example 44.1kHz or 48kHz. (If you are not sure
which one you need please refer to the Introduction manual).
The sample rate setting is global and applies to the playback of all audio files in the current song. It is not possible
to play different audio files simultaneously using different
sample rates.
If you have loaded several songs, eachwith different sample rates, MAGIX midi studio generation 6 can automatically take account of this when you switch songs. Each
song can only contain files of one sample rate.
Converting the Sample Rate: MAGIX midi studio generation 6 can digitally convert sample rates:
– Double-click a region in the Audio window to open the
Sample Editor.
– Press ctrl a to select the whole file.
– Choose Functions > Sample Rate Convert….
– Enter the desired sample rate in Hertz next to Destination (Hz) (e.g. 44100), and
– Press return.
For more detailed instructions see section Sample Rate
Converter from page 209 onwards.
195
Audio Driver
Audio Driver
EASI/ASIO
The driver settings for the sound card are covered in the
Installation manual. Please refer to it for the relevant settings.
196
The Sample Edit Window
The Sample Edit Window
The Sample Edit window offers an enormous number of
data-editing functions which are used to process individual audio files. You can edit mono as well as stereo files.
You can set the lengths of audio regions with extreme precision (down to single-sample resolution) by making use
of the window’s adjustable zoom resolution. The anchor
points can also be positioned here with the same degree of
accuracy.
Opening the Sample Edit Window
There are various ways of opening a Sample Edit window:
– Select Audio > Sample Editor.
– Double-click on any audio region in the Arrange
window; this opens that region in the Sample Editor.
– Double-click on any region in the Audio window; this
takes that region into the Sample Editor.
If no region is selected, MAGIX midi studio generation 6
will ask if you’d like to load a new file into the Sample Edit
window.
If you’re dealing with a stereo region or audio sequence,
both channels/audio files will be displayed in the Sample
Edit window, with the left side on top, and the right side
below.
If you open the Sample Edit window from the Arrange
window, as opposed to the Audio window, the bar ruler is
able to reference the regions position in the song.
A dotted line indicates no time connection (Audio window), while a broken one indicates a time connection for
the region, which is being used as an audio region in the
Arrange window.
197
The Sample Edit Window
Layout
1
2
7
5
3
6
4
1
2
3
4
5
6
7
8
8
This is the overview; the entire audio file is depicted
here.
This is the parameter box for the current selection,
and shows the start point and length of the selected area.
When the Catch (“walking man” symbol) button is activated it insures that the playback position is always
visible in the window. The other controls operate as in
the Audio window.
Amplitude Scale (readings as percentage).
The dotted frame shows the extent of the section visible in the display area.
Detailed waveform display.
The horizontal time ruler displays the name of the edited region at the top left. Beneath that is the time position in the audio file, in various formats.
The Start point, Anchor and End point of the currently
selected region can be changed by simply grabbing,
and dragging them.
Display
Overview
198
Between the Sample Edit window’s title strip and bar ruler
is the so-called “Overview”. This display always shows the
full length of the currently selected audio file, regardless
of the zoom resolution set by the telescope symbols.
Please note that no idea of scale is given in the overview; a
kick drum sample lasting 0.3 seconds could take up the
same space here as a choral passage lasting 15 minutes.
The Sample Edit Window
During playback, the current position is indicated by a vertical line, moving in real time. This is visible in both the
overview and the detailed waveform display.
The current selection is also displayed in the overview.
The section visible in the detailed waveform display is
shown in the overview as a dotted rectangle.
1
2
The overview: the dotted box 1 shows the section of window currently displayed in the detailed waveform display.
Part of the selection 2 is also visible.
Functions in the overview: A short mouse click on the
overview brings the area clicked on into the detailed waveform display.
A long click on the mouse resumes playback from this position. Releasing the mouse button halts playback once
more.
Double-clicking lets you listen to the sample from the position clicked.
Window functions
The Catch and Link functions work in pretty much the
same way as in the other edit windows.
Catch Mode: Catch mode insures that the Sample Edit
window always displays the area around the current playback position (whether you are playing the song, or monitoring the sample). Catch is turned on and off either by
clicking the switch with the “walking man” symbol on it or
via the key command.
Link Mode: Link mode insures that any audio sequences
selected in the Arrange window are displayed in the Sample Edit window. Link mode is turned off and on by click199
The Sample Edit Window
ing the switch marked with the “linked chain” symbol or
via the key command.
If you often work in Link mode, give this a try: open a
Sample Edit window and switch on Link mode. Now close
the window. MAGIX midi studio generation 6 now leaves
Link mode permanently on.
Double-click on the audio region you wish to view. You
can see straight away that the display in both windows is
linked.
The Detailed Waveform Display
The Zoom Tool: Just as in the other windows, there is a
zoom tool in the Sample Edit window toolbox (the magnifying glass). If you use this tool to draw a rectangle, the selected area of the window will be magnified so that it fills
the whole screen. You can also repeat the action. Clicking
the mouse once (with the tool) returns you to the previous
zoom resolution.
You can access the zoom function even more conveniently
by pressing alt, if the pointer tool is selected. Before you
can draw a magnification box, you have to click on an
empty space in the window.
X- and Y-Axes Scales: The Y-axis has a vertical scale
showing the waveform amplitude in percentage units.
The X-axis (the time ruler) shows the course of the audio
file over time. This corresponds to the display in the other
time-based windows. The “Zero point” is represented by
“1 1 1 1”, but lengths are measured from “0 0 0 0”.
Don’t forget that this display format also affects the figures shown in the Info line and the selection parameter
field:
200
Absolute and Relative Time: The different axis scales
in the Sample Edit window can be displayed on the basis
of one of two different reference values:
– by reference to the time axis of the song (absolute position)
– by reference to the beginning of the audio file (relative
position)
Relative Position: The units in the time axis (between the
Overview and the waveform display) will be displayed with
dotted lines when it is displaying the Relative Position.You will be in this mode if you open the Sample Editor from the Audio window, or if the Sample Editor is in
Link mode, and you select a region in the Audio window.
The beginning the section is automatically assigned the
value zero, or in Bar/Beat terms, “1 1 1 1”. Please note that
The Sample Edit Window
this does not necessarily match the actual song position.
The calculation of all remaining musical sections is then
done using the current song tempo.
Absolute Position: You can recognize this format by the
broken line below the units in the time axis.There will be
a broken line below the units in the time axis when it is
displaying the Absolute Position. You will be in this mode
if you open the Sample Editor from the Arrange window,
or if the Sample Editor is in Link mode, and you select a region in the Arrange window.
Time is measured from the start of the Song, which is
given the value zero (or 1 1 1 1 in Bar/Beat terms). In this
instance the time axis shows the absolute (song) time and
the figures do not refer to the audio file.
The Sample Edit Window In Use
Monitoring Sample Playback
There are various ways of playing back the sections of audio visible in the Sample Edit window, making it possible
to hear audio as you edit it. Playback occurs independently
of the position of the sequencer in a Song. If, on the other
hand, you’d like to hear the selected audio passage in the
context of the whole song, you’ll have to use the transport
controls as usual.
Playback from the overview: Monitoring
playback
from the overview display is carried out in exactly the
same way as with regions in the Audio window. Simply
click-hold the mouse at the point at which you wish to begin playback. Releasing the mouse causes playback to
stop. You can also start monitoring from any position by
double-clicking there.
Playing the current selection: To play back the current selection, click on the switch depicting a small loudspeaker.
You can also perform this function with the key command
Play/Stop Selection.
X
Playback from a certain position: If you double-click
at any point on the time axis, the audio file will play back
from this point, to the end of the current selection. If you
double-click on a point beyond the selected area, the audio
file will play right to its end.
Cycle Playback Mode: On the left-hand side of the Sample Edit window, just above the Loudspeaker symbol, is
201
The Sample Edit Window
the Cycle button. If you turn this on, the currently selected
section of audio will cycle continually when sample edit
window playback is engaged.
Please note that you can change the start and end points of
the selected area, while monitoring it in cycle playback
mode. In this way, you could edit the start and end points
of (say) a drum loop until it loops perfectly.
Choosing the Audio Output: The small box under the
loudspeaker symbol allows you to choose the output channel to be used for monitoring. If you’re editing a stereo
file, the right channel will be sent to the next-highest available output channel.
Set the number of the output you want to use in the Cha
box under the loudspeaker symbol.
Make sure that the pan positions of both channels are set
as widely as possible.
Automatic Scrolling
You use the scroll strip on the bottom and right edges of
the Sample Edit window to scroll through the detailed
waveform display in the usual way.
Making Selections
Selecting the Whole Audio File: You can select the
entire audio file with the function Edit > Select > Select All
(ctrl a).
Manual Selection: To select a particular section of an
audio file, click on the start or end of the area you want to
select, hold down the mouse button, and move the mouse
to the right or left.
To change the boundaries of a selection: By clicking on a selection while holding down shift, you can
change its existing start and end points at any time.
Whether you change the start point or end point by doing
this, is determined entirely by whether the point you
clicked on was nearer to the start or end of the selection.
The closest one wins…
Changing the Further Selection Limit: If you hold down ctrl
shift the further selection boundary is changed (rather
than the nearer).
Moving a Selection: If you hold down ctrl, you can shift
the whole selection without changing its length.
202
The Sample Edit Window
The Selection Parameter Box: Please note that the
start point and length of the current selection are shown in
the selection parameter box at all times.
1
2
3
Editing Regions in the Sample Editor: If accuracy is
what you need, you should edit the start and end points of
regions in the Sample Edit window, not the Audio window.
The same goes for any adjustments you make to the anchor, which in many cases should really be placed on the
amplitude peaks, rather than at the start of the attack
phase of the sound. A good example would be recordings
of brass instruments, which may take some time to build
to a peak. By moving the anchor to these peaks, the region
will snap to the grid in your arrangement using the anchor
as the pivot point. The flexible zoom settings allow you to
be as precise as you like, going right down to the level of
single bits, at the highest magnification.
Be Careful! Any changes to the position of the Anchor
point will change the relative position of that audio region
in the song. Since the region start is the default position
for the anchor you must also take care when changing a
region’s start point.
The small markers on the lower edge of the waveform display allow you direct access to the boundaries of the region
and the anchor. As usual, you can just grab them, and
pull!
203
The Sample Edit Window
1
3
2
Protecting the Anchor point: If you move the start or end
points of a region past the anchor point, the anchor point
will also move. This is quite often not what you want to
happen.
Holding down ctrl while you move the start or end markers of a piece of audio prevents the anchor from moving.
Editing commands
Like the other windows, the Sample Edit window features
the usual edit commands Cut, Copy, Paste, Clear and
Undo under its Edit menu (or via the keyboard).
Please note: in the Sample Edit window all these commands (except Copy) change the data on the audio files itself; in other words, they behave destructively. Consequently, they cannot be reversed using the “Undo”
command.
Cut: cuts a selected passage out of an audio file and copies
it to the Clipboard. All the following sections of audio
move forward to fill the gap.
Copy: copies a selected passage to the Clipboard, leaving
the selected area in its original location.
Paste: Inserts the contents of the Clipboard at the cursor
position, or start point of the selection. If there is no selection available, the cursor acts as the paste point (it is
shown as a thin dotted line). If audio data is present behind the paste point, it is moved back to make room for
the Clipboard contents. If anything is selected at the time
of the paste, it is deleted and replaced by the Clipboard
contents.
Clear: Erases the selection without placing it in the clipboard. All data beyond the deleted passage is pulled forward to fill the gap.
204
Undo: Cancels the last edit command used, and reverses
its effect. This also works with the destructive editing com-
The Sample Edit Window
mands described in the section Functions from page 205
onwards.
Remember that the Undo function in the Sample Editor is
organized separately from the rest of the program. This allows you to try out the edit in the Arrangement. If you
don’t like it you can go back to the Sample Editor and reverse the edit using the Undo function.
• Space is reserved on the hard disk for armed tracks
which is not available for undo files. MAGIX midi studio
generation 6 therefore automatically switches off recordready status for audio tracks, if the disk is nearly full, and
this would make an edit possible in the Sample Editor.
Functions
The following section describes various useful functions
available in the Sample Edit window, for perfecting audio
recordings. You can use these to add the finishing touches
to your work.
Each of the commands affects only the currently selected
audio. If you want to use them to alter the whole audio file,
you have to use the Select All function beforehand.
All of the following functions are destructive, so they
change files stored on your hard drive. You can use the
Undo function—but only until you make another destructive edit. So you could, for example, change the start and
end points of the selected audio in between destructive edits, without losing your undo facility.
Since the Undo function in the Sample Editor works independently of the rest of the program, you can try out an
edit in the Arrangement and make changes there. As soon
as you open the Sample Editor again (or bring it into the
fore ground), the Undo function is available for the last destructive sample edit.
Before these functions are executed, you are asked to confirm them as a safety measure. This confirmation dialog
box can be turned off by choosing Audio > Audio Preferences > Warning before process Function in Sample Edit
(Menu) or … (Key).
Normalize: Normalization is the process by which a digital signal is bought up to its highest possible level, without
introducing distortion. Normalizing is possible in MAGIX
midi studio generation 6 by selecting Functions > Normalize.
This is done in the following way; MAGIX midi studio
generation 6 finds the point with the highest volume (−
xdB) in the currently selected audio, and determines how
X
205
The Sample Edit Window
far this is from the maximum possible level. The level of
the whole selection is then raised by this amount. The dynamic balance of the audio passage remains unaltered—it
merely gets louder.
513 Normalize
1
2
Example showing the “Normalize” function. 1 Before 2
After
Please note that the start and end points for the section being normalized should generally not fall within a continuous section of audio, as this will result in abrupt increases
in volume after normalization. The start and end points
should therefore be located in sections that also contain
pauses. Occasionally, you should remove any unwanted,
audible noises that fall in gaps in the music with the aid of
the “Silence” function.
X
206
Change Gain: You can use Functions > Change Gain to
raise or lower the level of a passage of audio by a specific
amount.
A dialog box appears in which you can set the required
level change in percent (Change relative:).
If you click on Search Maximum, the highest peak level is
determined and the value is then calculated that would be
used to normalize the audio file.
The value results in absolute: displays the maximum level
that would be achieved by changing the gain by the
amount shown in the Change relative: box.
You should never make a gain change that results in a
value over 100%, as this would create digital clipping.
The gain change is effected by hitting Change (or return).
The Sample Edit Window
Fade In: You use Functions > Fade In to create a fade in.
You set up the period of time over which the fade-in will
occur with the help of the currently selected audio (as
shown in 1 and 2). Volume is set to zero at the left start
point of the selection, and the fade-in occurs over the
length of the selection.
1
X
2
Example showing the “Fade In” function. 1 Before 2 After
Fade Out: Functions > Fade Out works in the same way
as Fade In, except that the fade works in the opposite direction. This lets you fade passages out automatically.
1
X
2
Example showing the “Fade-Out” function. 1 Before 2 After
Fading Tips: 1: Common fades (like the typical fade-out at
the end of a track) can also be achieved with the help
of the mixer faders or using Hyper Draw. The advantage of using MIDI volume to achieve the fade is that
your audio doesn’t need to be edited in any way.
2: If you use the Silence function (see below) to remove
unwanted background noise from silent passages,
small jumps in volume can sometimes appear at the
start and end points of selections, as well as on the
flanks of the audio signal. In this case, select only a
small area (e.g. within and just in front of the flank of
the signal) and then use the “Fade-in” function.
Silence: You use Functions > Silence to remove all data
from a selected area. The waveform material contained in
the selected audio passage and the corresponding amplitude values are all set to zero. You can use this function to
silence the unwanted background noise in quiet passages.
X
207
The Sample Edit Window
1
2
Example showing the “Silence” function. 1 Before 2 After
X
Invert: Functions > Invert completely reverses the phase
of all the currently-selected audio material. All negative
amplitude values become positive, and vice versa. While
this doesn’t change the file audibly, if it is heard in isolation, you can use Invert to correct phase cancellation errors, particularly if you’re mixing down to mono. This is
particularly valuable when several out of tune signals (or
several signals processed with chorus pedals) are to be
mixed down to mono together. The effect depends on the
audio material.
518 Invertieren
1
2
Example showing the “Invert” function. 1 Before 2 After
X
Reverse: You reverse the selected audio passage by selecting Functions > Reverse.
1
2
Example showing the “Reverse” function. 1 Before 2 After
X
208
Trim: By selecting Functions > Trim you can erase all the
regions that aren’t selected. Use “Trim” to remove unimportant passages from the start and end of your Audio
Files.
The Sample Edit Window
1
2
Example showing the “Trim” function. 1 Before 2 After
Make sure that the areas you are about to delete do not
contain any regions which you may need. Regions outside
the selection will be lost, and regions which are partly outside will be shortened. If any such regions are being used
in the Arrange an alert box appears, giving you the option
of cancelling the trim function.
Remove DC Offset: When using poorly constructed audio hardware, direct current (DC) can be undesirably layered over the audio signal. This results in a vertical shift in
the waveform position, which can be clearly seen in the
Sample Editor. During playback, this can cause crackling
sounds at the start and end of the audio region.
1
2
Waveform with 1 and without 2 DC Offset
With Functions > Remove DC Offset it is possible to center the waveform around the zero amplitude line, to avoid
crackling at cut points.
Sample Rate Converter
The Sample Rate Converter is used for converting the
sample frequency. For example, audio files which have a
48kHz sample rate (recorded on a Hi-Fi DAT recorder and
digitally transferred into the computer), can be converted
to 44.1kHz.
Normally you will want to convert the sample rate of a
whole audio file. To do this, select the whole audio file in
the Sample Editor (ctrl a). Select Functions > Sample Rate
Convert… in the Sample Edit window. To execute the
function click the Convert button.
X
209
The Sample Edit Window
Parameters: Source (Hz)
This shows the previous sample rate of the audio file.
However, to enable you to change incorrectly stored sample rate formats (for example after editing in other programs)—or for effects—you can enter any value you like
here. You should only use this function if you know what
you are doing.
Destination (Hz)
Here you can enter the desired sample rate to which the
selected area is to be converted.
In most professional audio circles only the 44.1 kHz sample rate is used. There is little audible advantage in using
48kHz. This format is mostly used with older DAT machines.
210
The WavePlayer
The WavePlayer
The WavePlayer window
The WavePlayer of MAGIX midi studio generation 6 provides polyphonic playback—including filter and envelope
treatment—of any WAV-files you like. This is just like
having a dedicated sampler without buying expensive external hardware.
As with the MAGIX midi studio generation 6 in general,
the CPU of your computer also computes the WavePlayer.
Therefore, in order to get a lot of voices and fast computation of all processes simultaneously, the following simple
rule-of-thumb applies: the faster the CPU and the larger
the RAM, the better. Don’t try to save money on these
items, especially if you are planning a new purchase. False
economy at the beginning could very possibly lead to frustration later on.
WavePlayer driver: In order to use the WavePlayer,
please bear in mind that you have to select a DirectSound
driver for the WavePlayer under Audio > Audio Hardware
& Drivers > Audio Driver, because the WavePlayer works
only with a DirectSound driver.
If you want to use the WavePlayer and the audio features
of MAGIX midi studio generation 6 simultaneously, you
have to use a DirectSound driver for PC AV also.
Controlling the WavePlayer: The Waveplayer is controlled via its special track in the Arrange. This track cannot be erased.
The Track parameter box of the WavePlayer: The
Track parameter box of the WavePlayer differs only
slightly from those of MIDI tracks (see section The Track
Parameters from page 124 onwards). You will notice that
there are no settings for the MIDI port and channel as
these are not necessary for the WavePlayer.
You will, however, find a new checkbox: No seq trp. Transpositions of sequences on the WavePlayer track will be ignored if this is checked. This is very useful if the WavePlayer plays back drumloops or drumkits, because
transposing such elements would result in unwanted timing shifts and timbral mutations (see also section Chase
Notes in ‘No Seq Trp’ Instruments from page 281 onwards).
Opening the WavePlayer window: You can call up the
WavePlayer window via Options > WavePlayer…, the re-
211
The WavePlayer
leated key command or a double-click on the WavePlayer
track.
The Structure of the WavePlayer
In the WavePlayer window you see the note range from
A0 to C6. You can assign a separate WAV-file to each of
these 64 notes. Each WAV-file sound can be shaped via an
independent synthesizer-like sound shaping section consisting of a VCF with an envelope and a VCA with an envelope.
In addition, each WAV-file can span a note range than
greater than one note and thus be played polyphonically
just like on a real sampler. Furthermore you can adjust the
synthesizer-parameters for multiple WAV-files simultaneously.
Finally, the output of the WavePlayer can be adjusted in
level and balance. Unlike the previously mentioned settings, level and balance are not set in the WavePlayer window, but in the Mixer and/or the Track parameter box.
Assigning WAV-files
A click on the File Name field opens a file selector box in
which you can select and load a WAV-file. This WAV-file
gets assigned to the key belonging to the File Name field
you clicked on.
A right-click on an already assigned File Name field erases
that WAV-file from the WavePlayer keyboard assignment.
Adjusting the keyboard range: Right beside the File
Name field you find the settings of the assigned WAV-file,
arranged on a grey crossbeam. The upper and lower edges
of this crossbeam can be grabbed and moved with the
mouse to define the keyboard range of a WAV-file. Please
note that while a WAV-file can be transposed down as far
as you wish, its upward transposition is limited to an octave. This applies if the upward transposition is achieved
by playing the keyboard, using the Tune parameter or a
combination of both of them.
The parameters of a WAV-file in the WavePlayer
Each WAV-file in the WavePlayer has its own parameter
set. The View menu allows you to decide which parameters you wish to see.
Tune: The pitch of a WAV-file is adjusted in cent (1 cent =
1/100 semitone). The adjustable range is ±1.200 cents (that
equals ± 1 octave).
212
Start and Length: Adjusts the point in the WAV-file
from which it gets played back when pressing a key (Start)
The WavePlayer
and how much of the WAV-file will be played back from
the Start point (Length). Both parameters are displayed in
samples. If View > Wave Display is active, these parameters can be changed graphically with the mouse in the
wave display.
Trigger: Determines how a WAV-file is played back. If
Gated is selected, the WAV-file will only be played back as
long as you hold the corresponding key. If Freerun is selected, the WAV-file will be played back to its full length,
regardless how long you hold the key. Freerun is especially
suited for drum or percussive sounds.
Link: This checkbox is only visible if you have loaded
more than one WAV-file into the WavePlayer . Checking
this box for a specific WAV-file means that its VCA, VCF
and envelope settings will be determined by those of the
WAV-file immediately above.
On: This checkbox is only visible if you have not activated
Link for this specific WAV-file. If you check On, you’ll activate the sound shaping section consisting of VCA, VCF
and envelopes for that specific WAV-file, and any WAVfiles linked to it.
Please note that you can save computing power by deactivating the sound shaping section, therefore possibly gaining more voices for the WavePlayer.
Soundshaping via VCA and envelope: These
parameters let you change the volume curve of a WAV-file. In
honour of good old analogue synthesizers, this section is
called VCA, which stands for Voltage Controlled Amplifier. While the VCA is responsible for the volume change,
it is itself controlled by an envelope which determines how
the volume changes over time.
The envelopes of the WavePlayer have two time sections:
Attack (Atk) and Decay (Dcy). Attack determines the time
the envelope needs to change gradually from zero level to
full level. Decay starts immediately after Attack has finished and determines how much time the envelope needs
to change gradually back from full level to zero level. In
other words, if you press a key, the envelope starts at zero
level, changes gradually over the Attack time to full level
and then falls gradually back from full level to zero level in
the Decay time.
The WavePlayer uses the curve of such an envelope to control the VCA. It then takes a WAV-file and puts it through
213
The WavePlayer
the VCA. You then hear the WAV-file with a new volume
curve, determined to your taste via the envelope parameter
settings. Fade in the WAV-file automatically in the Attack
time and then fade it out automatically in the Decay time;
the smaller the values for Attack or Decay, the shorter the
fade-times. There is only one exception: if Decay is set to
maximum, there won’t be any fade-out at all and the
WAV-file will sound till it is finished.
Vel in the VCA section stands for Velocity and determines
how dependent the volume of a WAV-file is on the velocity
with which you hit a key. The larger value Vel has, the
harder you have to hit a key to gain the maximum volume.
Soundshaping via VCF and envelope: This
section
changes the tone colour of a WAV-file. The section responsible for tone colour changes in an analogue synthesizer was called VCF, which stands for Voltage Controlled
Filter, so we used this abbreviation here.
The WavePlayer uses lowpass-filters. Broadly speaking,
these filters let the deep parts of a sound passed, but not
the high parts, thus changing the brightness of a sound.
The Frequency (Frq) of such a filter determines the border
between the deep and the high parts of a sound. Technicians call this the cutoff-frequency. To put it briefly, the
lower the Frq value, the duller the sound will be .
With Res (Resonance) you can emphasize the parts of the
sound that are in the immediate neighbourhood of the
cutoff-frequency (or the deep-high border). The higher Res
is, the sharper the overall sound.
As is the case with the VCA, the VCF (more precisely, the
cutoff-frequency) is also controlled via its own envelope.
Env determines the influence of the envelope. The interplay between Frq, Atk, Dcy and Env is as follows: press a
key, and the cutoff-frequency starts at the value adjusted
via Frq, rises in the Atk-time to a value equalling the sum
of Frq and Env, and falls back from that to Frq in the Dcytime. As in the VCA-envelope, if you set Dcy to maximum,
Dcy will be disabled and the cutoff-frequency will stay on
the sum of Frq and Env for the duration of the sample.
Finally, Vel controls how hard you have to hit the keys in
order to reach the value specified by Env. If you go for
small Vel values, you will reach Env even with soft key
strokes.If you choose large Vel values, you’ll have to hit the
keys quite hard in order to reach the value specified by
Env.
214
The WavePlayer
Global WavePlayer parameters
With Initialize > Default Parameters, all WavePlayer parameters are set back to default values.
Initialize > Delete All Assignments clears all key-WAVfile-assignments immediately, so you can start from
scratch at once.
View allows you to exclude certain parameter groups from
display to save space or protect them against unwanted adjustment.
View > Wave Display means that, in addition to the numeric information, each WAV-file will be graphically displayed as a waveform. The WavePlayer plays only the black
marked section of the graphic. You can adjust the borders
of that region and its position with the mouse.
View > Parameters: If this item is checked, you have access to the parameters Tune, Start and Length of all WAVfiles.
View > File Info provides you with the following valuable
information about each WAV-file: Format, Sample Rate
and Size. These values are read-only.
View > Keyboard displays a keyboard at the left window
edge to make the note-WAV-file-assignment easier.
View > Filter Parameters activates the display of the VCF
and VCF section.
View > Filter Parameters as Knobs: Displays the VCA and
VCF parameters as knobs instead of numbers.
215
The Event List
The Event List
The Event List displays MIDI data in the form of a “list”,
combining all the data-editing functions of the other editors, (except for graphic operations and the expressive options offered by the Score Editor).
Usage: The Event List is used whenever you need to make
precise alterations to recorded data, and the graphic display of the other editors is not suited to the task. It is the
only editor which gives you access to all recorded event
data. You can also restrict what you see, allowing you to
edit only specific event types.
X
Opening the Event List: To open the Event List and
view the contents of the selected sequence, choose Windows > Open Event List, or use a self-defined key
command (Open Event Editor…).
1
2
4
5
3
You can also open it by double-clicking on a sequence with
the right mouse button.
Structure: The standard buttons are supplemented by
two scroll arrows 1 to help you move through the list. The
event type buttons below them 2 allow you to filter specific
event types from the display, and access or add them (by
clicking on them with the right mouse button). Beneath
the toolbox is the quantization grid selection field for the
event quantize function (above 3). There is also a field for
defining the Division value (to the right of 3) which corresponds to the Division value as set in the Transport win216
The Event List
dow. If the Catch function is switched on, the arrowshaped position marker 4 will always point to the current
event. The structure of the actual list display 5 is described
on page 220.
Display
The event type buttons allow you to “filter” the display to
remove individual event types from the Event List, so that
you can view only the specific types of events you are interested in. Click the desired button with any tool (except the
pencil).
If a button is grayed out, that event type will not be displayed.
All the functions affect only the events displayed, so nondisplayed events are protected from any alterations you
make.
Here is a short overview. For more detailed information
on the individual event types see page 222.
The note symbol stands for note events.
The symbol with the dual-digit, seven-segment display
stands for program change events.
The hand wheel symbol with a marker in the middle
(pitch bend wheel) stands for pitch bend events.
The hand wheel symbol with a marker at the bottom
(modulation wheel) stands for all control change events.
The single weight symbol stands for aftertouch events
(channel pressure).
The multiple weights symbol stands for polyphonic key
pressure events (polyphonic aftertouch).
This symbol stands for SysEx events.
The symbol with a row of zeros and ones is called the full
message button. This does not filter out any type of event
but affects the display of all event types.
Normally the display in the Event List is restricted to one
line per event. When the full message display is active, all
information stored along with the event is shown too. This
is particularly important for editing SysEx messages.
When examining note events in the Event List, you will
also notice MAGIX midi studio generation 6’s internal
score layout information included in the list. You can edit
this in the Event List if you want, but it serves little purpose.
Operation
Scrolling: Clicking either of the scroll arrows moves the
display up or down by one event. The event at the position
217
The Event List
X
marker is always selected (so the existing selection
changes as you scroll). The scrolling speed can be varied as
you scroll, by vertically moving the mouse. The key command Scroll to Next/Previous Event is also available from
the Event window, and has the same end result.
Remember that if the MIDI Out button is switched on every newly selected event will be played. This means you
can scroll through the list and audibly monitor the events
as you go.
If you want to keep the selected event where it is, use the
usual scroll bar functions.
Selection Techniques: When selecting events with the
mouse, you should click near the status column to avoid
any unintentional parameter alterations.
You can use any of the standard selection techniques here:
individual selection by clicking on objects, multiple selection using the rubber band, or both of these (without altering the previous selection), in conjunction with shift.
Don’t forget you can also make selections according to
specific criteria via the Edit menu (read the section Selection Techniques from page 93 onwards).
Any events which you remove from the display by clicking
on the event type buttons are immediately deselected. This
ensures that all the functions affect only the displayed (selected) events.
Special Selection Functions: Some selection commands (which can be accessed from within all the Editor
windows via their Edit menus), can also be utilized in the
Event List by selecting an item with the mouse while holding down additional modifier keys.
1. If you click on an event while holding down ctrl, you
select all events between the last event that was selected and the current one.
2. If you hold down alt and select an event, all similar
events will also be selected.
3. If you select an event while holding down the alt and
ctrl keys, all identical events will be selected.
Event Editing
Adding Events: To add an event, click on the desired
event type button with the pencil (or with any other tool
while holding down the right mouse button). The event is
then added at the current song position, and is automatically selected.
218
The Event List
Duplicating Events: To duplicate an existing event (for
example, so you can alter the parameter value of the copy)
click on the original event with the pencil. An input box
appears—this is where you enter the position for the
newly-duplicated event. If you just hit return, the duplicate will appear at the same place as the original.
Pasting from the Clipboard: When adding events using the
clipboard’s Paste function, a position input box will appear, allowing you to type in the position of the first event.
Once again, if you confirm by just pressing return, the
original position of the event is retained. The relative positions are also always maintained.
This means that the events are not added at the song position, as in the graphical editors. For more details on the
way the clipboard works, please refer to page 95.
Moving Events: To move an event in time, alter its position indicator. As soon as you alter its position, the list is
automatically sorted, even though the currently selected
event remains the same.
Altering Values
Event positions or parameter values can be altered in the
usual way by using the mouse like a slider (grabbing and
dragging), or via text input (just double-click on the parameter value).
You cannot alter the type of events using this method,
however. To alter the event type, you must add an event of
the desired type, and then delete the original event.
Altering the Values of Several Events: If a parameter
of a selected event is altered, it will affect the same parameter in all selected events.
Relative Value Alteration: When you alter parameter values
in a multiple selection, the relative differences between
the parameter values remain unchanged. The parameter
values that you grab or double-click on can therefore only
be altered until the value of one of the selected events has
reached its maximum or minimum value.
Flexible Relative Value Alteration: If you want to continue
altering a parameter value in a multiple selection (even if
one of the values in the selection has reached its maximum or minimum), hold down ctrl while you move the
mouse, or press return to confirm a numerical input.
Absolute Value Alteration: If you want to set a parameter to
the same value for all selected events, hold down the shift
and ctrl keys while you use the mouse as a slider.
219
The Event List
Numerical Value Input: If you want to directly input a
number, double-click the relevant parameter.
Event List Structure
The individual columns in the list have the following
meanings:
X
Position: The position of the events in the song; for note
events this means the beginning of the note. The units
represent bars, beats, divisions, and ticks (see page 111).
Counting begins at 1 for each unit (first bar, first beat, first
division, first tick: 1 1 1 1), and continues until it is carried
over to the next largest unit.
Numerical inputs start from the left (which means you
can enter just the bar number if you want). The units can
be separated by either spaces, dots, or commas.
Position within the Sequence: If you select View > Local Position, the event positions do not refer to the absolute location within the song but to the relative position within the
sequence.
Status: This is where you can see the event type, as specified by the status byte of a MIDI message (for details, refer to the section Event Type Structure from page 222 onwards). You cannot directly edit this parameter.
Cha: The MIDI channel used to record an event.
Remember that during playback this MIDI channel will
be replaced by the Cha parameter of the track. The event is
only output to the recorded MIDI channel when the Cha
parameter is set to All.
You should also keep in mind that with notation, the
record MIDI channel is used to assign a polyphonic voice
to the note. (for more on this, read Arrange Window).
Num, Val: These columns contain event data bytes. Their
meaning depends on the event type:
Status
Num
Val
Note
Pitch
Velocity
Control
Controller number
Value
220
The Event List
Status
Num
Val
Pitch
LSB
MSB
C-Press
(not used)
Value
P-Press
Pitch
Value
Program
Bank Select
Program number
Length/Info: With controller events, this column shows
the controller name, and with SysEx events, the manufacturer’s name.
With pitch bend events, a 14-bit value is displayed here,
which is composed of the first (Num) and second (Val)
Data bytes combined. This value can be edited directly
from here.
With notes or sequences, the length is displayed here.
Here too, the units are bars, beats, divisions, and ticks. For
the sake of clarity, when the length begins with one or
more zeros, the “_” symbol is used instead. The minimum
length is 1tick (_ _ _ 1) not 0 ticks, because it makes no
sense to simultaneously switch a note on and off.
Numerical input starts on the right, working to the left—
and you can enter just ticks if you want. The units can be
separated by either spaces, dots, or commas.
End instead of Length: If you choose View > Length as absolute Position you can make the length display show the
absolute position of the note off event, instead of its length
from the note on.
X
List Structure on the Arrange Level
When you double-click on any entry, you move up one
level in the folder/sequence hierarchy. You may also move
up a level by double-clicking the white area above or below
the list entries (if visible).
This allows you to see all the arrange objects in the current
song. On the arrange level, the list has the following columns:
221
The Event List
Position: The start of the arrange object (see page 220).
Name: Name of the sequence. You can alter the name with
the text tool.
Track: Displays the track number. You cannot edit this
value from here (you might totally destroy your arrangement if you could). If you want to move arrange objects to
other tracks, it is better to do it graphically from the Arrange window.
Length: The length of the arrange object (see page 221).
Event Type Structure
Note Events:
Num
MIDI note number (note #). The range is from C-2 (note
#: 0) to G8 (note #: 127). Middle C is note # 60 and in
MIDI terminology is called C3.
On some keyboards/synth modules (notably those made
by Korg and Roland), the note range is C-1 (#0) to G9
(#127). In these cases middle C is called C4.
In the Preferences (Display page) you can reference the
display to the description used most frequently on your
devices (Display middle C as…).
Val
Velocity of a note from 1 to 127. The value 0 carries the note
off message, and thus is not available.
Length/Info
Length of the note. Although MIDI can only transfer note
on or note off messages, MAGIX midi studio generation 6
actually stores the position and length of all the notes
which makes them easier to access musically. The note off
message is generated automatically during playback.
Program Change Events:
222
Program change events can be transmitted to connected
MIDI devices to call up different patches. These may be
sounds in a synthesizer, programs in an effect unit, or
snapshots in an automated mixing desk.
The Event List
Val
A program number between 0 and 127.
Some manufacturers (e.g. Yamaha) number the programs
in their devices from 1 to 128, not 0 to 127. In this case, you
have to subtract 1 from the program number given in the
device itself.
Other manufacturers use various methods of dividing into
groups (or banks) and sounds. The most common is dividing into 8 groups of 8 sounds, each numbered 1 to 8.
These devices respond to program numbers 0—63 by calling up storage locations 11—88. The instruction manuals
for these devices should contain conversion tables to assist
you.
Num
Bank select. Normally you will see this symbol, which
means no bank select will be sent. If you assign a number
between 0 and 62, a bank select event is sent before the
program change event. This allows you to address different sound banks (e.g. preset, internal, card) inside your
synthesizer. The synthesizer must be able to recognize
controller 32 as bank select, but unfortunately this standard is not yet widely used. If you have any problems with
bank select, check your synthesizer’s manual to see
whether, and how it responds to bank select commands.
Pitch Bend Events:
Pitch bend events are used to continuously vary the pitch.
They are usually generated by a centered pitchbend wheel
or a joystick on your keyboard.
Num
Fine pitch bend division (LSB). Many keyboards just
transmit the value 0. If the pitch bend wheel has an 8-bit
resolution, you will see the value 0 or 64 here.
Val
The effective pitch value (MSB) of 0—127. The value 64
corresponds to the mid-way setting of the wheel.
Length/Info
The 14-bit value is displayed in this column as a decimal
figure ranging from −8192 to 8191. This value may be edited in this column in the usual way.
Control Change Events:
223
The Event List
These event types are used to transfer MIDI controllers
(e.g. modulation, sustain, volume and pan).
Num
The number of the controller. All the various MIDI controllers (such as the modulation wheel or sustain pedal)
have their own numbers (#1 or #64 respectively). Some
other effects are also defined, such as volume (#7) or pan
(#10).
Controllers that are defined in the MIDI Standard are described in the Length/Info field.
Val
Value of the controller. Continuous controllers have a
range of 0—127. Switch controllers (#64—#90), transfer
only two states; off (val=0) and on (val anything between 1
and 127).
Aftertouch Events:
Aftertouch (or channel pressure) events are generated by a
mechanical pressure sensor beneath the keyboard. The resulting sound modulation affects all the notes on that particular MIDI channel.
Num
This column is empty with aftertouch events, since they
have only one data byte.
Val
Strength of the pressure on the keyboard (0—127).
Poly Pressure Events:
Poly pressure events are generated by mechanical pressure sensors beneath each individual key. The resulting
sound modulation affects only that particular note.
Only a few keyboards currently support this capability.
Num
224
MIDI note.
The Event List
Val
Strength of the pressure on the key.
Meta Events:
Meta events are not MIDI events, but are control messages specific to MAGIX midi studio generation 6. They
are used to automate specific MAGIX midi studio generation 6 functions, and organize objects in the notation
which cannot be represented by MIDI events.
To create a meta event, click on the Full Message button
with the right mouse button.
Num and Val
Num determines the function of the Meta Events you create, and Val is the value that is sent. In the Event List window you should only ever insert and edit the following
Num values:
Num = 47
Send Byte to MIDI. This sends the track
any byte value (Val) between 0 and 255 ($00-$FF). As an
example of how to use this Meta Event, if you send 246 as
the byte, this is equivalent to a MIDI tuning request
message. The display will show “Send Byte $F6”. Only use
this Meta Event if you know what you’re doing—if you
don’t, your sound modules and synths may start to behave
very oddly indeed…
Num = 49
Goto Screenset. This event calls up a
screenset (Val determines the number). The track is irrelevant.
Num = 50
Song Select. This event will switch songs
on a MIDI data filer (Val = the stored song number), if you
have one connected. The track for this event is irrelevant.
Num = 52
Stop Song. Playback will be stopped.
Event Float Window
The event float window can be accessed from most other
windows.
Select Options > Event Float… (or the key command Open
Event Float) to open an event float window. This gives information on the currently-selected object, and can be
compared to a single line of the Event List. You can edit all
the parameters in this window.
X
225
The Event List
The following parameters are displayed:
– the start point of the selected object in bars, beats, divisions, and ticks,
– the type or name of the selected object,
– the recorded MIDI channel and first data byte (if the
selected object is an event)—for notes, the name—and,
if there is one, the second data byte;
– length of the selected object in bars, beats, divisions,
and ticks.
Clicking on the video symbol (on the extreme left) toggles
the position and length display between SMPTE time and
the normal display.
Clicking on the SMPTE symbol with the right mouse button turns the “MIDI Out” button on or off, and with it the
monitor that gives MIDI playback in the Event float window).
226
The Drum Editor
The Drum Editor
Usage
The Drum Editor has many uses. The main ones are creating and editing drum sequences, and graphically editing
controller data.
Opening the Drum Editor
To open a Drum Editor window, select Windows > Open
Drum Edit (ctrl right mouse button double-click, or a selfdefined key command). You will then be able to see the
contents of the sequence selected in the Arrange window.
1
2
4
3
5
Structure
The structure of the Drum Editor window resembles that
of the Arrange window: there is the horizontal bar ruler at
the top (1) and the optional transport panel (2, currently
disabled) in the top left corner. On the left is the optional
parameter area (3), next to it the event name column (4)
and to the right of that the editing area (5) which can be
likened to the area containing the tracks in the Arrange
window.
The individual lines in the Drum Editor are functionally
similar to the tracks in the Arrange window, in that each
line has an event definition which determines the event
type displayed in this line. When you select a line in the
name column, its event definition is shown in the parameter box.
The display of the events takes the form of a horizontal
row of vertical beams whose height indicates the value of
the relevant event. You can directly alter the value by grabbing the beam slider.
227
The Drum Editor
Event Definitions
The event definition of a drum edit line determines which
events it displays. This selection usually affects the status
byte and the first data byte of the event. The second data
byte then contains the adjustable value, which is represented by the height of the beam. For example, in an event
definition line, the value of a controller or the velocity
value of a note is shown as a beam. Don’t worry if this
seems a bit confusing at first: when setting up these parameters, MAGIX midi studio generation 6 helps you by
providing pull-down menus containing written definitions of the status byte and (to the furthest extent possible)
the first data byte. There is an even simpler way: you can
automatically create event definitions for selected events.
Example: In a given drum edit line the Velocity values of a
note are displayed as bars.
There are many ways of altering the way the beams are displayed, and adjusting them to the particular event types.
You can also use a grid to align the display of existing
events, and add new events. This grid can be set separately
for each event definition. The height of the lines is adjusted using the Drum Edit window’s vertical zoom function.
Selecting the Event Definition: As with tracks in the Arrange window, you can select an event definition by clicking on the name column. This allows you to view its parameters in the event definition parameter box. Unlike with
arrange tracks, however, it is possible to make a multiple
selection.
Creating an Event Definition: When you choose Drum >
Create Event Definition a new event definition is added, at
the position of the currently selected event definition. Initially, it has the same parameters. The event definitions
beneath it are moved downwards.
Automatically Creating Event Definitions: If you select an
event in another opened editor window you can automatically create an equivalent event definition by checking the
Auto Define checkbox.If an event definition exists which
corresponds to the type of the selected event, MAGIX midi
studio generation 6 does not create a superfluous double
definition. Instead this event definition is moved to the
visible area.
Don’t forget to switch off Auto Define immediately after
completing the input.
Deleting an Event Definition: Choose Drum > Delete
Event Definition to remove the selected event definition.
228
The Drum Editor
Drum Sets: Copying Event Definitions: Select
the
event definition that you want to copy and choose Drum >
Copy Event Definition. Switch to the destination Drum
Set and choose Drum > Paste Event Definition. You can
paste the event definition as often as you like. These functions are especially helpful to copy event definitions between Songs: If for example you disfigured your “GM
Drum Kit” so badly that you just want to restore your good
old version of it, you simply create an empty Song, call up
the Drum Editor, select all Event Definitions and, via
Drum > Copy/Paste Event Definition, copy them back into
your Song.
Sorting Event Definitions: To change the vertical order of the various event definitions, just grab the event
definition you want to move by its name column, and drag
it to the desired position.
Event Definition Parameter Box
The event definition parameter box is where you make the
settings for the currently selected event definition line.
The most important parameters are Status and -1- (page
231).
Opening the event definition parameter box. You can show
(or hide) the entire left parameter area by checking (or unchecking) View > Parameters. You can close or open the
parameter box by clicking the triangle in the top left corner.
Name of the Event Definition: By clicking the name next to
the triangle you can determine what appears in the name
column. If you define a named MIDI controller via the
Status and -1- parameters the relevant name will be offered
as a preset.
Display and Editing Grid: The Grid parameter is set via the
typical pull-down quantization menu. New events can
then be added at the set grid positions. The positions of existing events are not affected.
If you want to quantize the positions you can do so using
event quantization (see page 99).
The same quantization templates are available as for the
playback parameters.
When editing complex drum rhythms, it can be useful to
create several definitions for one drum note, each with a
different quantization grid. For example, if there are two
lines for a snare drum, one with a 1/16 and the other with
a 1/96 grid, you can use the pencil to add individual hits in
the coarser grid and rolls in the finer grid.
X
229
The Drum Editor
Beam Width: You can set the width of the event beams
from 1—16 using the Pen-width parameter. Regardless of
the beam width, the exact event position is always marked
by the left edge of the beam.
When set to the maximum value (Penwidth = 16) note
events are displayed with their actual length.
Beam Display: The Style parameter allows you to choose
from four different color display variations for the beams.
Styles 5 to 8 are the same as 1 to 4, but the selected events
flash to highlight them.
230
Delay: The Delay parameter can be used to delay (with positive values) or advance (negative values) all the events in
an event definition line by an adjustable number of ticks.
The change in position is visible immediately. Even new
events are offset from the grid positions by the Delay
value. If you click between the word Delay and the parameter value you can use a pull-down menu to enter note values (e.g. 1/16 etc.) directly.
Unlike the sequence playback parameters’ Delay option,
this affects only individual event types or note numbers,
which is very useful for drum programming.
In general, it is useful to transmit controller data slightly
before or after the exact grid positions to improve the timing of the notes lying on the grid positions.
Length of Notes to be Added: You can use the Length parameter to set the length of notes to be added, measured in
divisions (the left number) and ticks (the right number).
To guarantee optimum timing when drum programming,
you should ensure that note off events are never transmitted at the same time as note on events. Use note lengths
The Drum Editor
which are not close to straight note values, e.g. 100 ticks
(1/48 note = 80 ticks, 1/32 note = 120 ticks). Very small
tick values are also unsuitable, because the note off events
may sometimes be transmitted at the same time as note
on events at the same position.
Event Status: If you grab the right side of the Status line a
pull-down menu opens where you can determine the
event status for this event definition line.
MIDI Channel: Next to Cha there is a checkbox and to the
right of this you can set a MIDI channel number. If you
check this box, the display is restricted to events on the set
channel. If the box is unchecked, the channel parameter is
ignored, and matching events on all channels are displayed.
First Data Byte: In the bottom line is the -1- parameter
where you can determine the first data byte of the displayed event.
For example, if Note is set as the event status you can determine here which pitch (note #) should be displayed in
this event definition line.
As with the MIDI channel, the checkbox determines
whether (if checked) only events with the defined first data
byte should be displayed, or whether (if unchecked) the
setting should be ignored. In the case of note events the
velocity values of all notes (regardless of pitch) would be
displayed in the relevant event definition line.
If Control is set as the event status you can use a pull-down
menu to determine the controller type (controller #).
With channel aftertouch (status C-Press) or program
change events (status Program) the setting of the -1- parameter is always ignored, since the first data byte is displayed as a beam height. With pitch bend data (status
PitchBd) the setting is also ignored, because both data
bytes are used to display the beam height.
Making Different Definitions Simultaneously: Like
the parameters in several sequences you can set the parameters of several event definitions simultaneously. Select
several event definitions in the name column by holding
down shift and clicking on them. You can also use Drum
> Select All Event Definitions to select all event definitions
and then deselect some of them by holding down shift and
clicking on them.
Any alterations which you make in the event definition parameter box affect all selected event definitions absolutely.
231
The Drum Editor
Hi-Hat Mode
In hi-hat mode event definitions can be gathered together
in groups within which a only one event from each group
can be played at any time position. A typical use is collecting different hi-hat notes (open, closed, pedal…) into a
group.
To define a hi-hat group, click in any of the lines at the left
edge of the name column. Click here once again to switch
hi-hat mode off for that line. All lines in a hi-hat group
must be vertically adjacent to each other.
If you add an event within a hi-hat group all existing
events at this time position are deleted.
You can create as many hi-hat groups as you want, but
they must all be separated by at least one line in which hihat mode is switched off.
Operation
The grid defined by the Grid parameter in the event definition parameter box is very important:
– During selection all events within a grid section are
selected,
– When you change the values of existing events, all
events within a grid section are altered, and
– New events are added at the grid positions, in accordance with the value set as the Delay parameter
Selection Techniques
You can use any of the usual selection techniques, as described in the section Selection Techniques from page 93
onwards. However, there are the following differences:
– To select individual events hold down shift, as you
would when selecting several events that are scattered
across the screen, and;
– When making a rubber band selection hold down shift
(be careful not to click any events).
Moving and Copying Events: When moving selected
events, you also have to hold down shift.
To copy events, use ctrl as usual.
With both operations, you can move events to other event
definition lines. The events will be automatically converted.
Altering Event Values
You can alter individual values by grabbing the event
beam (with the mouse pointer or pencil). As you change
the event value, the current value is shown in the top line.
232
The Drum Editor
Altering Several Events:
If several events are selected, you can alter all the values
relatively, by grabbing just one of these event beams. The
absolute differences between the event values remain the
same. If one of the beams reaches the top or bottom, you
will not be able to go any further in that direction.
However, if you hold down ctrl as well, you can keep raising or lowering the values of the selected event group, until the event beam which you have grabbed reaches the top
or bottom.
Setting up a manual series:
Existing Events: Draw the events with the mouse pointer
while holding down the mouse button.
233
The Drum Editor
Creating New Events: Draw the events with the pencil
while holding down the mouse button. The pencil is preset as the second tool (right mouse button).
Setting up a linear series:
– Select the crosshair tool.
– Click anywhere in the beam display area and hold down
the mouse button.
– Keep an eye on the display showing the exact position
and event value in the top line. Move the mouse to the
start point of the line you want.
– Release the mouse button.
– Move the mouse to the desired end point of the line (to
the right or left). You can also keep an eye on the position and event value in the top line.
– Click to align the event beams along the line.
If there were already events in the area between the start
and end points, they are aligned along the line.
If there were no events in the region new events are created at the grid positions (in accordance with the Grid parameter).
If you definitely want to create new events, hold down ctrl
when you click for the last time.
This creates one event at every grid value. With very flat
slopes, or very fine grids, the individual grid positions always remain unoccupied if the value to be added there is
the same as the value of the previous event. This reduces
the data-flow along the MIDI bus without reducing the
resolution of the controller.
When defining the Grid parameter to add successions of
controllers use the motto, “as coarse as possible and as
fine as necessary” to keep down the data output. MAGIX
midi studio generation 6 can deal with very large amounts
of data but unfortunately the same cannot be said of
MIDI.
Linear Series in Sections: The last time you click (regardless of whether or not you hold down ctrl to add new
events) if you also hold down shift you can immediately
draw another line from the end point of this line.
234
The Drum Editor
Adding Individual Events
Use the pencil to add individual events. You can alter the
added value even before you release the mouse button.
The pencil is preset as the second tool (right mouse button).
Fix Value: If you place a check in the Fix Value checkbox,
you can prevent the height of any event beam being altered with the mouse pointer or pencil.
When adding events with the pencil, all the added events
are given the value of the previously-selected event. This
allows you to draw a succession of events with the same
value.
By selecting an event with the pencil, you can adopt this
value as a preset, because in fix value mode it is impossible
to alter the value by clicking on it.
When adding events with the crosshair tool, the preset
value is always used as the start point of the line.
235
The Matrix Editor
The Matrix Editor
The Matrix Editor is used to graphically edit note events.
Its advantage over the other editors is its ability to provide
a more precise display of the length, position and velocity
of the notes. The Matrix Editor is designed for fine-tuning
the positions and lengths of notes.
X
Opening the Matrix Editor: To open a Matrix Editor
window showing the contents of the selected sequence, select Windows > Open Matrix Edit or a self-defined key
command (Open Matrix Editor).
You can also double-click a sequence while holding down
ctrl.
Display
Only notes are shown in the Matrix Editor. The beams
(and the way they can be edited) are very similar to the sequences in the Arrange window.
Pitch/Note Names: The pitch is indicated by the vertical
keyboard on the left side. To help you with positioning
there are horizontal lines running across the screen between notes B and C and notes E and F.
Remember that you can adapt the octave numbering to
Roland/Korg devices (page 285).
Position: You can read the position of a note in the bar
ruler. The background is marked by vertical lines to assist
with positioning:
– A straight line at every bar,
– A dashed line at every beat, and
236
The Matrix Editor
– A dotted line at every division (you can alter the division
value in the Transport window or up on the left in the
parameter area).
Other Display Options: All other display options are
covered in the section Display Functions from page 100 onwards. In the Matrix Editor, you will often want to move
the visible section (using the scroll bars), and alter the display zoom (with the telescope buttons and magnifying
glass).
Editing Notes
You can use the same intuitive editing functions as for the
sequences in the Arrange window.
There are also some editing options which are available in
all editor windows. These are covered in the section Edit
Functions from page 97 onwards.
Creating Notes
To create a note, click with the pencil at the desired point
in the background.
Duplicating Notes: To copy an existing note to another
position or pitch, first click the original note with the pencil (near the middle).
Now, any notes which you create by clicking the background will have exactly the same length and velocity as
the original note.
Moving Notes
You can move selected notes by grabbing them (near the
middle) and dragging them. If you move notes vertically
they will be transposed, and if you move them horizontally
they will be moved in time. While you keep the mouse button held down, the target position and pitch are shown in
the info line at the top.
237
The Matrix Editor
When you move notes horizontally, they snap onto the division positions (you can alter the division setting whenever you want).
Remember that you can limit movement to one direction
to avoid accidentally transposing notes when moving
them vertically (and vice versa). (Options > Settings > Global Preferences…: Limit Dragging to one direction in Matrix
and Score).
Setting a finer Grid: When moving notes in the Matrix
window you can make fine adjustments at a high resolution by holding down alt as you drag. The exact resolution
you use depends on the current Zoom setting of the window.
If you hold down alt shift, you can move the notes in tick
steps, completely independently of the Zoom setting and
the time grid.
Copying Notes
Hold down ctrl as you move the notes.
.Of course you can also copy (Edit > Copy or ctrl c) or move
(Edit > Cut or ctrl x) the notes onto the clipboard, and then
add them at the current song position with the original
pitch (choose Edit > Paste or ctrl v; see page 95).
Altering Lengths
To alter the length of a note, grab it by its bottom righthand corner and drag it to the required length. While you
are altering the length, the info line will keep you informed of the precise length of the note.
Altering the Lengths of Several Notes Simultaneously: You can adjust the lengths of several selected
notes at once (e.g. a chord) simply by altering the length of
238
The Matrix Editor
one of them. This will alter the lengths relatively among
the selected notes.
Making Notes the Same Length: If you want to make
several selected notes the same length hold down ctrl shift
(as in the Event List, when making several parameters the
same value).
What Tools to Use
When altering note lengths, you can use either the mouse
pointer or the pencil. However, it is better to use the
pointer, because you might accidentally draw new notes
with the pencil.
With very short or small notes it can sometimes be difficult to grab the bottom right corner. In this case, you
should use the index finger tool which allows you to grab
notes anywhere, and alter their length.
Altering the Velocity
To alter the velocity value, click on the note with the V tool.
The info line will then indicate the velocity value of the
note you have clicked on.
If you hold down the mouse button, you can alter the velocity by vertically moving the mouse. If the MIDI Out
function is switched on, the note will be output every time
you alter the velocity.
Altering the Velocity of Several Notes: All selected notes can
be altered simultaneously; the differences in the velocity
values will be retained. If the velocity value of one of the
selected notes reaches an extreme value (0 or 127) you
can’t go any further. However, by simultaneously pressing
alt you can carry on altering the velocity values until the
clicked note reaches an extreme value.
To give all the notes the same velocity value, hold down alt
shift as you alter the value.
Deleting
You can delete selected notes by pressing delete, or clicking on them with the eraser.
Selection Techniques
In addition to the usual selection options you can select all
notes of the same pitch throughout the whole sequence by
clicking one of the keys on the screen keyboard.
239
The Matrix Editor
If you hold down the mouse button, you can also draw
(rubber- band) a pitch range over the screen keyboard and
select all the notes within it.
Don’t forget the specialized selection options available via
the Edit menu (or key commands). These are covered on
page 95.
Functions
For a description of all the other functions of the Matrix
Editor, such as automatic length correction, and selective
deleting /copying, please refer to the section General Functions of the Editors from page 96 onwards.
240
Score Edit Window
Score Edit Window
This chapter is all about editing your sequences using conventional notation. Although the Event and Matrix Editors
have features that are designed for specific tasks (such as
velocity and note length editing), if you read music, there’s
nothing like being able to work directly on the stave.
Opening the Score Editor
The Score Editor is opened choosing Windows > Open
Score.
The standard elements in the Score Editor
As a reminder of what’s available, here are the elements
listed:
– The buttons Catch, Link, MIDI Out, Zoom
– A toolbox
– The bar ruler
The operation of these elements should be familiar to you
by now.
The parameter box: The Options menu is where you can
hide the parameter box from view. This is useful if you use
a small monitor as it gives more room to the staves.
When you first open the Score Editor it defaults to the
middle zoom level.
Justifying the display
The default display quality is generally quite sufficient
when just editing notes, as one is more concerned with efficiency and speed than with wanting to perfect a score for
printing. However, it can become necessary to adjust
some of the display parameters to better accomodate the
musical material being edited. You’ll find the display parameters in the display parameter box that’s described in detail in the section Layout and Printing from page 244 onwards.
Click the little box next to the sequence name to open the
display parameter box for that sequence.
“Style”: The Score Styles in MAGIX midi studio generation 6 are pre-programmed standard settings for specific
instruments. Whether it’s piano or bass or transposing instruments such as saxophone—the Style contains,
amongst other things, the right clef, octave range and
transposition. Selecting a Style automatically adjusts the
display of the notes in the sequence.
241
Score Edit Window
Display Quantization: The display quantization is for
choosing the correct rhythmic format for the musical material in hand. You should set the “Qua” value to the smallest note value that appears in the music.
If a sequence’s smallest notes are sixteenths, set it to “1⁄16”
and nothing smaller, as too fine a display quantize setting
can make the music unreadable:
Graphik
The “Qua” value is too small
Display quantization affects the display only, not the MIDI
events represented by the display. Do not confuse this
“Qua” parameter with the one in the Arrange window or
the one in the Event Editor.
The other display parameter functions are discussed in
the section Layout and Printing from page 244 onwards.
Editing notes
Selecting: Individual notes are selected by clicking as
usual. To select a group of notes, such as the notes in a
chord, drag a lasso around them. To select notes incongruously, press shift while clicking.
The Info Line: The Score Editor’s Info Line is displayed
just under the window’s title bar whenever you are copying or moving an object. The Info Line provides accurate
up-to-date information about the events position
and,when applicable, length. It is therefore very useful to
monitor it during an edit operation.
The Event Parameter Box
This box is located below the display parameter box and
provides data on the selected object(s). The actual parameters displayed vary depending on the object. When a
note or notes are selected, the parameters are Pitch, Velocity and Length. These parameters can be edited and applied to more then one event at a time.
The parameters function similarly to the way they do in
the Event Editor. If the selected notes’ values are different
from one another, the relevant parameter shows an asterisk. In this case, changing one of the values changes them
all by the same amount, relatively.
242
Score Edit Window
EXAMPLE: if you select a chord the Pitch parameter will
show an asterisk. If you click-hold this and move the
mouse, all the chords’ notes will move.
If you hold ctrls while changing the values, the parameter
is set to the same value for all selected objects. This can be
useful for example when you want to change the lengths
of all the notes in a chord to the same value.
You can also transpose the whole sequence or track—depending on the level—by using “Select All” from the local
Edit menu.
Moving and transposing: To move or transpose notes,
select them and drag them to the desired position; the Info
Line will appear under the window’s title bar and show the
current position of the mouse pointer, both in terms of
pitch and time. Time-wise, the resolution of the steps is
defined by the Transport window’s display format.
Copying: To copy notes, select and drag them to the desired position while keeping ctrl pressed. You can also use
the local Edit menu’s Copy and Paste functions.
Inserting: Notes can be created using the pen tool. Simply click-hold the pen tool at the desired position. Once the
Info Line is showing the desired pitch and location, release the mouse button and MAGIX midi studio generation 6 will create a new note whose length is equivalent to
the note value of the note selected in the partbox.
“Insert Defaults”
If you click in an empty part of the Score area, the event
parameter box switches to showing the caption “Insert Defaults”. The values set when it is in this mode will determine the default values for newly inserted events as follows.
Channel
This is the MIDI channel the note is
assigned to. In the Score Editor the channel is relevant
only when you have double staves or polyphonic notation,
where MAGIX midi studio generation 6 allocates notes to
staves according to their channels. It’s important to have
selected the correct Score Style, such as “Piano 1/3” or
“Organ”.
Velocity
Inserted notes acquire this velocity value.
This affects only how they sound, not how they appear in
the notation.
243
Score Edit Window
Lyrics
Here you can set whether text which is to
be inserted with the Text Tool should be normal text (Off)
or Lyrics (On). (Please read also section Text from page
256 onwards).
Diatonic Insert
When Options > Diatonic Insert is active, notes will be entered only at the pitches of the current key signature.
Those pitches that don’t occur in that key (e.g. chromatic
ones) are ignored. Diatonic Insert is very useful for
quickly entering conventional notation as it’s very “forgiving” as to where you click the mouse on the stave.
Deleting
To delete notes, select them and
– click them with the eraser, or
– choose Edit > Clear, or
– press delete.
Layout and Printing
In this chapter you will learn how to layout and print your
Songs (or parts of it) using the layout and display functions of MAGIX midi studio generation 6.
Playback and Visual Appearance
MAGIX midi studio generation 6 automatically creates a
notation display from the MIDI events that are in the sequences.
So far as the interpretation of pitches and positions is concerned, it is always 100% accurate. This does not imply
that the display is immediately 100% readable, since the
length of the notes plays a big role in their ultimate display. MAGIX midi studio generation 6 allows quite a tolerance in the interpretation of the display which means
that additional editing is often required to produce the desired results.
The following illustration shows a typical example of how
sixteenths can appear on the stave before any additional
editing is applied:
Graphik
How MIDI is interpreted in notation form if the wrong display
quantization is selected…
244
This display may well be correct, but it’s unreadable. Why
is that?
MIDI note events contain very precise information about
where a note begins, its length and pitch, and this must be
exactly reproduced on playback. The “feel” of the groove
can be altered if the notes are all a little under a sixteenth
Score Edit Window
long. If this were to be accurately displayed in the notation, it would be unreadable, as in the above illustration.
Also, pure MIDI events have no way of communicating
whether the gap between two notes is a real rest, what the
key is, which notes are to be tied and which not, and how
the dynamics of the piece should be treated. That’s why
the automatic conversion of MIDI to notation is always to
a greater or lesser extent different from what is expected.
Fortunately, MAGIX midi studio generation 6 offers a
range of automatic and manually controllable functions
that are designed to render a readable score with the minimum fuss. These make a big difference, as you can see
from the illustration below, which shows how the above
example will look after applying a few of these settings:
Graphik
…and how it should look
The layout and scoring functions set out in this chapter…
– optimize the conversion of the MIDI events into notation ready for printing,
– offer dynamics signs, clefs, slurs and many other
symbols to complete the notation,
– offer text with definable fonts for musical comments,
titles, instrument names, and so on,
– offer a printing preview feature for further WYSIWYG
layout and printing.
Preparing the notation for printing
While one of MAGIX midi studio generation 6’s goal’s is
to provide a readable score without changing the MIDI
performance this is not always realistic. An example of
this is where you need to alter note lengths so that the display shows the correct note value or rest; this type of editing would of course affect the playback. For this reason,
we generally recommend that you have two versions of
your song, one for sequencing and the other for the layouting/printing. This allows you to alter the MIDI events
while you are preparing the score for printing without
worrying about how this will affect playback.
The parameter area
The parameter area that occupies the left-hand side of the
Score window has the following elements:
– The track filter
– The display parameter box
– The event parameter box
– The toolbox
245
Score Edit Window
– The part box in two sections
We came across the display and event parameter boxes
and the toolbox in the previous chapter. The new elements
are primarily used in the configuring of the notation layout, ready for printing.
Switching levels
As in the Event Editor, the Score Editor lets you select between two levels: the sequence and the song levels.
The sequence level: When you open the Score Editor it
starts by displaying a single sequence.
Graphik
The sequence level
The song level: When you’re working on the layout and
printing of your score, you may prefer to view the entire
track, or all of the song’s tracks. In this case, switch from
the sequence to the song level.
To get from the sequence to the song level, click the Levels
button in the Score Editor window. You can also doubleclick in an empty space in the Score area.
Graphik
The song level
Use the song level to view and edit the notation of the different sections of your song as various extracts from the
score. This allows you to do things like visually check
whether a bass note is in the same place as a kick drum,
246
Score Edit Window
etc. Notes that occur at the same time are shown directly
one above the other.
To jump back into the sequence level, double-click the
stave of a single track, or, if Link mode is active and you’re
in an Arrange window or Event Editor that’s also open,
click the sequence.
The Track Filter
Even if you’re on the song level, you can restrict yourself to
viewing a single track. Below the Mode buttons there’s a
flip menu field: on the sequence level it simply says “single seq.” and cannot be opened. On the song level it says
“ALL TRACKS”.
This means that the song level starts by showing all the
available tracks. To view a specific track open the flip
menu and select the track. This is how to quickly toggle
between the tracks you are editing without changing levels. This option is also important because it allows you to
see multiple sequences on a single track as one continuous staff of music.
The track filter also affects the printout, allowing you to
produce score extracts for specific instruments.
The display parameter box
Its parameters help you optimize the notation for printing.
Name: The text input field is available here for naming the
sequence: click a note before clicking the name.
“Style”: MAGIX midi studio generation 6 offers preset
Score Styles. These are defaults for the display of notation,
and can be compared with the standard paragraph formats
that you find in word processing programs such as Microsoft Word. The Style affects the clef, transposition
and—with the Piano and Organ Styles—the number of
staves. The advantage is that you don’t need to manually
set these parameters for standard instruments such as
trumpets or cello, but simply select the corresponding
Style.
Note Assignment in Multi-Stave Score Styles
MAGIX midi studio generation 6 offers multi-stave score
styles for piano and organ notation. The assignment of
notes to one of the staves is determined by the MIDI channel of the note events.
Mouse Input: When you insert notes with the mouse
from the Partbox into a multi-staff system, they will automatically get the proper MIDI channel. After insertion,
247
Score Edit Window
also the channel for these notes can be edited. Please be
careful only to use channels 1 or 3. Notes with other channels will not be displayed when using the Piano 1/3 style. If
you do accidentally assign a note to a channel other than 1
or 3, you can change the channel back for the note in the
Event List.
Display: In these multi-stave systems, MAGIX midi studio generation 6 only shows the notes carrying the MIDI
channel of the Style or the stave, respectively. As an example, in Style Piano 1/3 you would only see an empty stave if
all contained notes had MIDI channel 4.
Score Style Piano 1/3: In this style the MIDI channel of
each note determine s which staff that note will belong to:
All notes with channel 1 will be written in the upper staff,
all notes with channel 3 in the lower staff/bass clef. However, this does not mean that you have to adjust the MIDI
channel of every individual note: When you record a sequence, the notes will initially get channels 1 or 3 according to their pitch. Notes equal to or above middle C will get
channel 1, notes below middle C will get channel 3. After
the sequence is recorded, the MIDI channel of each note
can be edited in order to assign that note to the other staff.
To change the MIDI channel of a note, select it and
change the channel setting in the Event Parameter Box.
This also works for several notes at once (use the rubber
band method for selecting more than one note). Here is an
example:
Graphik
Here you see the same sequence twice, displayed with different Score Styles. On the left side the regular Piano
Score Style is used: Notes with pitch B2 (= B below middle
C) are displayed in the bass clef staff. However, since
those notes clearly belong to the chords played with the
right hand, they should be displayed in the upper staff. To
achieve this, the Piano 1/3 style has been used in the right
example, the MIDI channel of the three notes with pitch
B2 has been changed to channel 1.
248
Score Style Organ 1/1/5: This Score Style combines the
regular Piano style with an additional pedal staff for organ
music. Channel 1 notes go to the upper two staves and are
Score Edit Window
split between treble and bass clef using middle C as a split
point (as in the regular Piano Style). Notes with channel 5
will be written on the lowest staff.
Graphik
As with the Piano and Piano 1/3 styles, however, it will be
necessary in many musical situations to use the Organ 1/
3/5 style when writing music for organ.
Score Style Organ 1/3/5: This Style is a variation of the
Organ 1/1/5 Style: In this case the allocation of notes is
solely determined by their MIDI channel: Channel 1 for
the top (treble clef) staff, channel 3 for the middle (bass
clef) staff and channel 5 for the bottom staff (bass clef for
organ pedal).
Hiding the Parameter display: If you want to use the
whole window for the score display, you can switch off the
Parameter area using View > Parameters.
Display Quantization
The Score Editor has an additional quantization setting
which affects the notes’ behaviour in the notation. It has
no effect on the MIDI output, only on what you see. For
this reason it is referred to as “display”quantization.
The display quantization also offers duple/triplet hybrid
resolutions such as 16⁄12 or 16⁄24. Choose these when the
passage contains a combination of duple and triplet values, for example, 16th notes as well as 16th note triplets.
(1/24th note).
GraphikPassage mit binären und triolischen Werten
A passage containing strict-time and triplet values
The above illustration shows the same passage under sixteenths quantization (top) and 16⁄12 (bottom).
249
Score Edit Window
“Interpretation”: This controls the automatic rests and
tie-correction algorithm. In a way, it functions like a display only length quantize. When it’s on, MAGIX midi studio generation 6 displays rests and ties in such a way as to
make the best possible musical sense; it does not affect the
playback. You’ll find more details in the section Layout
and Printing from page 244 onwards.
Graphik
The same passage without (top) and with Interpretation
Interpretation also applies to notes that are created from
the part box with the mouse (see below).
“Syncopation”: This option affects the way syncopated
notes are displayed. When it is on, it will generally display
syncopations as independent notes instead of as smallvalue tied notes. This can help improve the readability of
the score.
Graphik
The same passage without (top) and with Syncopation
Syncopation often only makes sense when used in combination with “Interpretation ON”.
“No Overlap”:
The same passage without (left) and with No Overlap
This function suppresses the display of ties where notes
overlap their neighbours. This often happens when a passage was played legato.
250
Score Edit Window
“Max. Dots”: This setting determines the maximum
number of dots in the display of dotted notes. When it’s at
“0”, MAGIX midi studio generation 6 shows no dots at all.
Max. Dots = 3 (top) and 1
In normal use you can leave the value at “1”. The number
of dots that are shown are also affected by the display
quantization and the Interpretation and Syncopation
modes.
Inserting symbols from the partbox
A complete score needs more symbols (slurs, dynamic
signs, fermata and so on) and other notation signs than
the program is able to automatically create from its interpretation of the MIDI events you record. These symbols
can all be inserted from the partbox using the mouse.
Clefs, time signatures and key signatures can also be
dragged in from this partbox.
The majority of these symbols have no effect on the MIDI
playback, only on the display.
The symbols are all in the partbox and can be dragged
from there onto the staves.
If you cannot see the partbox, check that “Hide/Show Parameters” in the local Options menu is active. Otherwise,
make the window taller and/or minimize the Display and
Event Parameter boxes. The width of the partbox can be
varied by horizontally dragging the vertical dividing line
between the parameter area and the Score area.
As you can see from the diagram (left), the partbox width
adapts itself to the width of the parameter area. This is so
you can adjust it to the size of your screen.
The partbox comprises two sections:
The top section contains buttons that select the overall
symbol “families”. Click a button and the corresponding
family moves to the top of the partbox section below. The
bottom section contains the symbol fields. The displayed
symbols depend on which family of symbols you selected.
Inserting symbols: Symbols are inserted the same way
as notes: click the pen tool (right mouse button) in the
stave. Use the eraser tool to delete them, and the normal
arrow tool for moving or copying them (pressing ctrl). You
251
Score Edit Window
can also drag symbols (including notes) out of the partbox
with the mouse arrow.
Assigning a symbol to several notes: To assign the
same symbol to more than one note—such as staccato
dots—select the notes, then insert the symbol onto one of
the notes.
Selecting Symbols:
Here is an overview of the symbol groups. The following
groups are available (which will be covered individually
below): notes, pedal signs, clefs, dynamics, note heads, articulations, slurs, lines and arrows, keys, time signatures, repeats
and section symbols, trills and text mode.
Notes: Select the value of note you want to insert with the
mouse. MAGIX midi studio generation 6 offers all the binary, triplet and dotted forms of whole notes through to
1
⁄32 triplets.
To create chords, it is easier to insert the first note, then to
copy (with ctrl) it to create the other notes.
Pedal signs: The pedal signs represent the sustain pedal
on/off and MIDI Control Change 64 (sustain pedal).
When you insert a pedal sign, its corresponding MIDI
event is also inserted and therefore affects what you hear.
Clefs: MAGIX midi studio generation 6 offers three clefs:
violin, bass and tenor.
MAGIX midi studio generation 6 distinguishes between
two types of clef: the basic clef, and the clef change. The
basic clef is always displayed in the first bar or at the beginning of each stave, and is determined by the Style.
A partbox clef is interpreted as a clef change, and can be
inserted anywhere, even in the middle of bars. Clefs are
deleted by using the eraser tool.
Clef changes can be inserted anywhere
252
Dynamics: There is a complete range of dynamic symbols
available. The dynamic signs have no effect on the MIDI
output.
Score Edit Window
Note-heads: MAGIX midi studio generation 6 defaults to
giving each note the note-head that corresponds to its
value. The partbox note-heads relate to percussion and can
be manually assigned to existing notes: select one or more
notes and insert the desired note-head onto anyone of
them.
Articulation signs: These signs are assigned to individual
notes. Any change to a note (e.g. transposition) affects its
sign as well. MAGIX midi studio generation 6 automatically positions the sign relative to the note: select one or
more notes and insert the desired note-head onto any one
of them.
Dim/Cresc, slurs, lines and arrows: These symbols can be
placed anywhere in the notation and are freely
editable. If you insert a slur or select it on the stave, little
“grab boxes” appear which allow you to change its shape.
To move the symbol as a whole, drag it using the spaces
between the “grab boxes”.
Key signatures: Keys can be entered where you like in a
stave: they then apply to all the song’s staves from that
point. If you have defined a Style for a transposing instrument, its transposition relative to the new key is assured.
To enter a new key, choose the corresponding letter, and
the program will automatically convert that into the necessary flats and sharps.
The one at the earliest time position is taken as the basic
key signature.
Existing key changes can be edited as follows: double-click
the signature to open the dialog box in which you can
choose a new key signature. You can select between major
or minor key signatures. Alternatively you can insert the
new key from the partbox by placing it on top of the old
one.
To delete a key signature, click it with the eraser tool.
Time signatures: MAGIX midi studio generation 6 distinguishes between the basic time signature and time signature changes. The basic signature is the one that comes
first. Time signature changes can be placed where you like
in a stave and have no effect on the playback. They apply to
all the staves in the song from that point and are automatically shown in all the staves.
The time signature affects the following parts of MAGIX
midi studio generation 6:
– The display format in the Transport window
– Any position or length display
– The bar ruler
– The metronome click and count-in.
253
Score Edit Window
Repeats and section symbols: These symbols include start,
end and repeat symbols plus a final stroke and a section
stroke. You can also add these symbols within a bar. However before you do so there must be notes already there.
These symbols are global, i.e. they apply to all sequences.
You can delete these symbols by clicking them with the
eraser.
Trills: This gives you a range of the most common trill
symbols which you can position where you want.
Text mode: As an alternative to using the Cursor tool, you
can add Text and Lyrics by dragging the corresponding
symbols from the partbox.
The symbols as seen in the Event Editor
A non-MIDI symbol is shown as a “Meta event” in the
Event List. This type of event is also shown in the Info Line
when it’s inserted in the Score Editor. Theoretically, Meta
events are editable in the Event Editor, though it’s more
natural to do this in the Score Editor.
Manipulating the notation
The following functions serve only to manipulate the notation and do not affect the MIDI playback. Nevertheless,
they are vital for creating a score that’s readable and ready
to print.
Enharmonic shifting: MAGIX midi studio generation
6 automatically shows accidentals according to the current key signature. There are situations, though, where
you need to change the accidental representation for certain notes to improve readability. This is done manually
using the following menu operations.
To shift the enharmony of one or more notes, select them
and choose one of the following items from the local
Functions menu:
– enharmonic shift # converts “b” accidentals into “#”
accidentals
– enharmonic shift b converts “#” accidentals into “b”
accidentals.
– default accidentals restores the note to how it was
before.
Graphik
Enharmonic shifting
254
Score Edit Window
You can apply these functions more than once to create
double flats or sharps.
Note stems:
You are able to determine the stem direction of selected
notes, thereby overriding MAGIX midi studio generation
6’s automatic display. Select the notes and choose one of
the following items from the menu Attributes > Stems > …
(their operation is self-explanatory):
– Default
– Up
– Down
Manual beaming: You are able to determine the beamed
grouping of selected notes, thereby overriding MAGIX
midi studio generation 6’s automatic display. The following illustration shows automatic beaming (top) after it has
been manually edited (bottom).
Graphik
Beaming
To beam a group of notes, select them and choose Functions>Beam selected.
To remove the beam from a group of notes, select them
and choose Functions>Unbeam selected.
To restore the beaming to how it was originally, choose
Funcitons>Default beams.
These functions apply to selected notes only. To restore a
whole sequence’s worth of alterations to their former situation, select the whole sequence.
Moving staves vertically: Each stave can be moved vertically: click-hold in the area of the basic clef in the empty
space between two leger lines. The leger lines dim and the
Info Line says “Move Stave”.
Now simply drag the stave to where you want it.
255
Score Edit Window
Multi-staves: When you are using a piano or organ multistave Score Style, you can move it as a whole as well as
change the distance between the individual staves.
– To move the entire multi-stave, drag it by the top stave.
– To alter the distance between the individual staves, drag
the lower ones. This will not affect the multi-stave’s
overall position.
Graphik
Expanding a double-stave
Text
MAGIX midi studio generation 6 allows you to introduce
text into the score for naming staves, giving your song a title, or naming the composer and so on. Text is shown as
Meta events in the Event List.
Selecting a font: MAGIX midi studio generation 6 lets
you choose any of the fonts you have installed in your
computer for displaying and pringint text in your score.
MAGIX midi studio generation 6 prefers to work with
Truetype fonts; these are able to be shown on-screen in
any size. You can recognize Truetype fonts by the TT symbol that comes before the font name in the fonts window.
To select the font in MAGIX midi studio generation 6
choose Font>Score Font and a window opens in which
you can choose the font, its style and size.
The font applies to all the text within a song. If you change
the score text font after entering text, this reformats the
entire song’s text, often with undesirable consequences. It
therefore makes sense to choose the final font before you
start work.
Inserting text: Choose the text-cursor tool from the toolbox. Click it at the location you want to enter text. This
opens a text input field and the Info Line.
Type the text and finish by pressing return. The text remains selected and blinks. You can now use the mouse arrow to fine-tune its position. Once you click in an empty
space the text is fixed in position. To edit existing text, either click it with the text-cursor tool or left-click it.
256
Positioning text: Text can be dragged in the same way
as other events, using the mouse arrow. It’s also possible
Score Edit Window
to move the text numerically using the event parameter
box’s parameters. This method can also be used to assign
text to a different stave as follows:
Stave
This value is relevant only with Piano and
Organ Styles and defines the stave number the text
belongs to. You can instantly shift text from one stave to
the other by simply changing the stave number. If you
enter a stave number that exceeds the number of available
staves, the text disappears.
vert. pos
The vertical position of the bottom of the
text relative to the top leger line, in pixels.
hor. pos
The horizontal position of the left-hand
end of the text relative to the earliest position at which a
note can be entered on the stave, in pixels.
Lyrics: You can enter note-referenced lyrics in the Note
Editor. Lyrics have special features compared to normal
text (e.g. title or composer):
– The words are directly assigned to the notes and can be
moved together (to do this, you have to select both the
note and the corresponding text), and
– The note spacing adapts to fit the word lengths.
To enter lyrics:
1. First choose the letter “A” in the Part box.
2. Click “Lyrics” and with the mouse button held down
drag the mouse pointer below the first note where
you want to assign lyrics.
Lyrics.bmp
A flashing text cursor appears along with the Info Line.
3. Enter the text for the first note,
4. Press tab to jump to the next note,
5. To complete the entry press return.
Lyrics can be edited, copied or moved just like normal text.
257
Score Edit Window
Page Edit
You may have come across the “Page Edit” concept in
word processing or DTP programs. MAGIX midi studio
generation 6 calculates the contents of a whole side of paper and shows these on the screen as they will appear in
print using the WYSIWYG principle.
Page Edit and the normal display: You can swap between the two by clicking the “Page Edit” button that’s
next to the MIDI Out button.
Page Edit is not just for manipulating the score prior to
printing (e.g. titles, text), but can be used for editing a long
passage of music. Indeed, all the editing commands we’ve
covered so far apply in Page Edit mode, too. The “wordwrapping” (or more correctly “stave-wrapping”) means
you can see appreciably more bars on the screen at the
same time.
Scrolling the Page Edit display: The vertical scroll bar
is used to “turn the pages” of the Page Edit display. The
page number is shown at the top left of the score.
Page Edit and printers: You must install your printer
and have it correctly set up before you start manipulating
the layout of your final score. What you see in the Page
Edit display depends on the printer installed and its paper
format and resolution settings. The advantage is that Page
Edit is then exactly able to show how the printout will look.
For more information on setting up the printer, see the
section below.
258
Score Edit Window
Printing the score
The print parameters are relatively simple to prepare as
MAGIX midi studio generation 6 mainly uses the standard Windows settings for printers. This means that
MAGIX midi studio generation 6 is able to function with
any printer that you’ve installed in the Windows Control
Panel under “Printer”.
Before you start to print, you must activate your printer
and select the correct paper format under File > Page
Setup…. The Score Editor window showing the Page Edit
display must be the active window, i. e. must be on top of
all others. You start the printout via File > Print. Following
this command a print dialogue appears, Depending on the
printer or printer driver, there are several different options, e. g. number of pages, number of copies, etc.
The result of the printout always matches exactly what you
see in the Page Edit display. However, the following
screen elements will not be printed:
– The green lines marking the top/bottom and left/right
page margins
– The mouse pointer and the Song Position Line (SPL)
– The coloration of the currently selected sequence and of
the margins.
Printers use to have a resolution much higher than the
monitor you are working on. Therefore, when fine positioning the symbols and the text, you should work in a
highly detailed zoom display. Hint: Using the Zoom Tool
you can easily switch between normal size and extreme
magnification of the corresponding detail.
259
Tempo
Tempo
Tempo Display
If your song has a tempo that stays the same throughout,
you can set this constant tempo in the Transport window.
The current tempo will always be displayed here, even if
you are using programmed tempo changes or external
synchronization.
Tempo Track
Tempo changes are controlled by tempo events, which are
stored in a special tempo track. This track is not visible in
the Arrange window.
The tempo track applies to the whole song.
The tempo track also determines the relationship between
incoming time code, and the current song position (see
page 270).
Overview
Information on changing song tempo: The
easiest
way to set individual tempo changes is from the Tempo List
(see page 260). The Tempo List is a specialized Event List
editor for tempo events.
Another way is to record tempo changes with the mouse,
from the Transport window, or you can do this more accurately using the Graphic Tempo editor (see page 262). The
Graphic Tempo editor is a Drum Editor, with a fixed event
definition for tempo events, and is really useful for editing
existing tempo changes by hand (see page 262).
To find out how to lock a particular bar of a song to a particular SMPTE time frame (for all of you out there who are using MAGIX midi studio generation 6 to synchronize music to picture), read the section Positioning Bars to Frames
from page 269 onwards.
Tempo List Editor
X
260
You can open the Tempo List by clicking and holding on
the Transport’s Sync button with the mouse. A pull-down
menu will appear, from which you select Open Tempo
List… or, you can simply select Options > Tempo > Tempo
List Editor….
Tempo
The layout, and way you use the Tempo List are very similar to those of the Event List (see page 216).
Creating Tempo Changes
– Set the song position to the required point.
– Click Create.
A tempo event appears showing the current tempo. You
can alter the tempo in the tempo column.
Or, with the pencil tool selected, click on the word
“Tempo” on an existing tempo event. A new tempo event
appears, with an input box for the position. Enter the required bar position and press return.
Deleting Tempo Changes: You can delete tempo events
by clicking them with the eraser, or pressing delete.
Copying The Tempo Changes from a Passage
– Set the locators to the passage containing the correct
tempo change.
– Choose Edit > Select > Select Inside Locators.
– Copy the tempo events onto the clipboard (ctrl c).
– Deselect all tempo events (by clicking Start of Eventlist/
End of Eventlist or the background).
– Paste the tempo events from the clipboard (ctrl v).
– A position input box appears at the first tempo event,
where you can alter the bar position. If the first tempo
change is not at the start of the bar in the passage, be
sure to alter the number of the bar and leave the “fractional values” unaltered.
– Press return. The copied tempo changes are selected,
and you can undo the operation if necessary.
Other Functions
The entries in the tempo list interact with, and affect each
other. For details, please refer to the section Positioning
Bars to Frames from page 269 onwards. You can also
make several synchronization settings here. All other
261
Tempo
functions are identical to those in the Event List (see page
216).
The Graphic Tempo Editor
The Graphic Tempo editor is a specialized Drum Editor,
that only allows you to draw and edit tempo events.
To open the Graphic Tempo editor, grab the Sync button
in the transport panel and choose Open Graphic Tempo…
from the pull-down menu. Or, select Options > Tempo >
Tempo Graphic Editor….
Creating Continuous Tempo Changes
– Choose the Crosshair tool.
– Click on the required section in the working area, and
hold down the mouse button.
– Keep an eye on the info line at the top of the window
which tells you the exact position and tempo. Set the
start (or end) of the tempo change.
– Release the mouse button.
– Now set the end (or start) of the tempo change. If you
want to create new tempo events (instead of altering
existing ones) hold down ctrl.
– Click the mouse button.
Remember that the time width of the added tempo events
depends on the setting of the Grid parameter.
In most cases, the 1/16 note setting is enough to create the
impression of a continuous tempo change.
Other Functions: The operation of other functions are
identical to those of the Drum Editor (see page 228).
Tempo Functions
Recording Tempo Changes
Go to Options > Settings > Recording Options, and activate the Allow Tempo Change Recording checkbox. All tempo
alterations which you make during the recording will now
be recorded as tempo events on the tempo track. You can
then edit them in one of the tempo editors.
262
Synchronization
Synchronization
Synchronization Window
You can open this window from the Arrange window via
Options > Settings > Synchronisation Settings… or via a
long click on the Sync button in the Transport window.
At the top edge you can switch pages: General, Audio,
MIDI.
X
General
This page of the synchronization window contains the major synchronization parameters for running MAGIX midi
studio generation 6 as a slave.
Sync Mode: This parameter defines the master to which
MAGIX midi studio generation 6 is to be synchronized:
Internal: MAGIX midi studio generation 6’s internal
timer. MAGIX midi studio generation 6 is the master. External devices can be synchronized via MIDI Clock or
MTC (the relevant settings are made on the “MIDI” page).
MTC: “MIDI Time Code”. MAGIX midi studio generation
6 runs as a slave. The MIDI Time Code can either arrive at
a MIDI In port, or be generated by a MIDI interface from
“translated” incoming SMPTE code.
MIDI Clock: MIDI Clock and Song Position Pointer.
MAGIX midi studio generation 6 runs as a slave. Clock
and SPP can be received at any MIDI input.
Auto Enable external Sync: When this option is activated, MAGIX midi studio generation 6 runs as the master (Sync Mode Internal), until it receives a synchronization signal—either in the form of MTC, or Clock/SPP, or
from the tempo interpreter.
MAGIX midi studio generation 6 automatically locks to
the first received synchronization signal. Please be sure
that different synchronization signals don’t arrive simultaneously—because there can be only one time code master.
External Stop ends Record Mode: This option means
that during external synchronization, recording stops
whenever the time code ceases.
If the option is switched off, MAGIX midi studio generation 6 stops, but remains in record mode (Record +
Pause).
Frame Rate: This is where you set the frame rate (in “fps”,
frames per second). This frame rate applies to both transmitted and received timecode.
263
Synchronization
Frame rate Typical applications
24
Video
25
Audio (Europe) and PAL Video
(30 d)
30
29.97 d
29.97
Unusable (not real-time)
Audio (USA) and NTSC Video (s/w)
Audio (USA) and NTSC Video (color)
Extremely rare (not real-time)
“d” stands for “drop frame”. In “drop frame” formats, certain frames are left out according to a regular pattern. To
distinguish between them, formats without drop frame
are sometimes referred to as “nd” or “non drop”.
Auto Detect Format of MTC: With this option the incoming timecode is analyzed and the correct frame rate is
set automatically. In general you should leave this option
switched on.
Please note that it is not possible to automatically distinguish between MTC frame rates 29.97 and 30, because;
1. the MTC standard does not allow a distinction, and
2. a measured rate of 30 fps could also be 29.97 fps
timecode running too fast, and vice versa.
MAGIX midi studio generation 6 automatically interprets
frame rates with “approx. 30 fps” as either 29.97 df or 30
nd, depending on whether or not the drop frame format is
used. This interpretation will usually be correct, because
only these two formats are actually used as a standard.
“Auto Detect…” only switches to 29.97 df or 30 nd if, previously one of the other conventional formats was set. If
you want to synchronize MAGIX midi studio generation 6
to one of the unconventional frame rates, you have to define the format manually. This setting will not be altered
by “Auto Detect…”.
SMPTE Offset: This is where you set the SMPTE offset
for the song. Because songs do not always have to start
precisely at bar 1 you can select any bar position to be
played at the set SMPTE time.
The preset is 1/1/1/1 at 1:00:00:00. The SMPTE offset
1:00:00:00 is normally used, because it allows you to prerun some timecode.
Audio
264
This page of the synchronization dialog window contains
all the relevant parameters for synchronizing Audio and
MIDI.
Synchronization
Nominal Sample Rate: This is where the selected nominal sample rate is shown.
You can change the sample rate via Audio > Sample Rate,
if your hardware supports several different sample rates.
MTC [Hz]: This display shows the deviation between the
incoming MTC, and its nominal frame rate.
If the deviation is too large, please check that you have set
the right frame rate (on the “General” page of the synchronization window). If in doubt, set the frame rate to 24 fps
and switch on “Auto Detect format of MTC”.
If the frame rate is correct, you can use this display to adjust the tape speed of the master machine to the nominal
value (i.e. the same speed as used when the time code was
recorded). Adjust the varipitch control on the master machine, until the vertical yellow line is exactly in the middle.
Sample Rate: This display shows the deviation of the
sample rate from its nominal value.
Bear in mind that some audio hardware will not allow any
variation in the sample rate.
Deviation: This display shows the current phase deviation of the word clock from the timecode master, in other
words, the deviation between audio and MIDI.
With varying timecode you can see in this display how
MAGIX midi studio generation 6 Audio regulates the
sample rate of the hardware in “MTC continuous” sync
mode. Even with large timecode variations, there is no deviation between audio and MIDI. Your audio hardware
must be capable of continuously variable sample rate, for
this to function.
Small deviations between audio and MIDI are unavoidable, because MIDI can (and should) follow the timecode
master directly.
Sync Mode: This is where you define how the audio hardware should be synchronised to an external timecode master.
Depending on its design, not all audio hardware can work
in every sync mode described below. This depends particularly on whether or not the hardware’s sample rate can be
controlled.
MTC Trigger: Audio regions are started in sync, but are
then played with a constant sample rate, regardless of any
variations in the timecode master. MAGIX midi studio
265
Synchronization
generation 6 Audio always uses the set nominal sample
rate (44.1 or 48 kHz).
This mode is suitable when it is vital to retain the absolute
pitch of a recording. If the speed of the timecode master
deviates from the nominal value, you have to split long regions into shorter sections.
In MAGIX midi studio generation 6, this mode is available with any audio hardware. It allows far better synchronization than with software not capable to synchronize the
start points of regions to the external Time Code Master in
real time.
External/Free: MAGIX midi studio generation 6 has no influence on the sample rate. The audio hardware has to ensure that the position and sample rate of the audio regions
match.
MIDI
This page is where you monitor all the settings sent by
MAGIX midi studio generation 6 via MIDI when the sequencer is running. This enables you to synchronize external devices as slaves to MAGIX midi studio generation
6, which acts as the master.
Transmit MIDI Clock: The switch on the right activates
transmission of MIDI Clock. In the display next to it you
can choose the port (MIDI Out Driver) from which MIDI
Clock is sent.
Every time you start, “Song Position Pointer” (SPP) is also
sent.
Because not all devices can process SPP the real-time message “Continue” is also sent. The exception to this is when
you start at position 1/1/1/1. In this case, the real-time
message “Start” is sent, instead of “Continue”.
MIDI Clock to all Ports (All Ports): Both MIDI Clock and
MTC can be sent to all ports simultaneously: select “All
Ports”.
MIDI Clock can easily be sent via a bus along with other
normal MIDI events (notes, controllers). With multiport
MIDI interfaces like Unitor8 MkII, it is better for timing
reasons to send MIDI Clock via all ports rather than via
several individual ports.
If MIDI Clock is transmitted via all ports, the events are
sent only once from the computer to the interface. If you
address individual ports, one event has to be sent for each
individual port, which worsens the timing for all ports.
266
Allow Song Position Pointer while playing: According to the MIDI Standard, Song Position Pointer is nor-
Synchronization
mally only sent when you start. This option means that
SPP can also be sent while the sequencer is running. The
advantage is that external devices can also follow MAGIX
midi studio generation 6 in Cycle mode.
If the external devices cannot process SPP, you should
switch off this option. This improves the timing when cycling.
Transmit MTC (MIDI Time Code): The switch to the
right activates transmission of MIDI Time Code. In the
display next to it, you can define the port (MIDI Out
Driver) to which MTC is transmitted.
It is not advisable to send MTC to all ports. Unlike MIDI
Clock, if you want to send MTC (which is very data-intensive), use a MIDI port which is not being used for anything else.
Transmit MTC Delay: This parameter allows you to delay the transmitted MIDI Time Code. Negative values
mean that the MTC is transmitted earlier. This enables
you to compensate for any reaction delays in the external
MTC slaves.
Special Functions
Switching on external sync
Switching on the sync button on the Transport causes
MAGIX midi studio generation 6 to synchronize to the
sync source you’ve chosen.
You can use the Sync button to turn off the external sync at
any time, without changing your selected sync source.
This allows you to remove MAGIX midi studio generation
6 temporarily from the sync master’s time axis. This could
prove useful if, for example, you need to quickly edit a sequence while the external sync source (tape machine, VTR
etc.) is still running.
Recording with external synchronization: When
“Record” is pressed during external sync, MAGIX midi
studio generation 6 goes into MIDI Record mode, but
does not start until it encounters external time code.
Incoming MIDI Time Code Display: The flashing dot
on the transport window’s sync button indicates that
MAGIX midi studio generation 6 is receiving error-free
MIDI time code.
If the dot “sticks”, an error has occurred. Although
MAGIX midi studio generation 6 is capable of dealing
267
Synchronization
with many MTC errors itself, you should nevertheless
check the quality of your SMPTE signal, as well as other
potential sources of error.
MTC Interpretation: Because the MIDI standard only
supports four of the possible six time code formats (the 30
fps and 29.97 fps formats cannot be differentiated),
MAGIX midi studio generation 6 has to decide which format is “intended”, when it encounters incoming time
code:
incoming MTC format
is interpreted as
24 fps
24 fps
25 fps
25 fps
30 drop fps
29.97 drop fps
30 fps
30 fps
In other words, the much more commonly used 29.97 fps
and 30 drop fps formats are used in preference to the uncommon 30 fps and the virtually-unheard-of 29.97 drop
fps formats.
However, you can manually set the format from the
Tempo List editor to whatever you like: for example to convert material to 30 fps for black and white TV transmission in the NTSC format.
268
Receiving MIDI Clock/SPP: Sync via MIDI Clock/SPP
is the most accurate method, if MAGIX midi studio generation 6 is being synchronized to a bar-referenced master.
MIDI Clock has a resolution of 24 PPQN (pulses per quarter note), while MAGIX midi studio generation 6 has an
internal resolution of 960 PPQN (some 40 times more accurate!). For this reason, MAGIX midi studio generation 6
has to interpolate the 39 steps between two incoming
clock impulses itself.
If you are bothered by small variations in timing between
master and slave, you can improve the relationship when
in external sync, by entering the expected tempo changes
from the master into MAGIX midi studio generation 6’s
internal tempo list as well.
Even if you don’t take this step, the sync should hold up
fairly well, as long as you avoid large deviations, such as an
internal setting of 200 bpm , with an external tempo of 40
bpm.
Continue Event: When a MIDI Continue Event is received,
MAGIX midi studio generation 6 doesn’t leap to the last
Synchronization
valid position received via MIDI Clock. Instead, playback
recommences from the current song position. This allows
you to change the song position manually while the sequencer is halted, and restart from the new position, with
a MIDI Continue command.
Positioning Bars to Frames: If you want to arrive at a
position in the song at a specific SMPTE time, you have to
alter the tempo of the preceding passage. You don’t want
to do this by trial and error.
– Open the Tempo List (page 260).
– Create a tempo event at the relevant bar position (page
261).
– Set the desired time position for this tempo event in the
SMPTE-Position column. The preceding tempo event is
automatically adjusted to generate the correct bar and
time position for the “auxiliary tempo event”.
– You can then delete the “auxiliary tempo event” if you
want to keep the same tempo for the following passage.
Synchronizing Video Files
AVI
MAGIX midi studio generation 6 lets you open videos in
the Video for Windows (*.AVI) format.
You can run these videos in a MAGIX midi studio generation 6 window synchronized to the song. Wherever you
move the song position, the video follows. You can write
video music, or attach sound effects to individual frames.
To ensure smooth playback, you should try to play the Audio files, and the video material from different hard disks,
if possible.
Opening a Movie: If you select Options > Video Player…,
the file selector opens, and you can select an *.AVI video
from your hard disk.
X
Setting an Offset: Following the path Options > Video
Settings… a small window opens. There, just above the entry SMPTE Start, you can set the video start-point.
Enable Audio of Video: In the window you open via Options > Video Settings… you can choose whether you want
to hear the audio track of the video.
269
Synchronization
The Basics
Summary
If you want to synchronize MAGIX midi studio generation 6 to a second sequencer system (workstation, drum
machine) please use MIDI Clock/SPP.
For all other situations where you use external synchronization (tape machine, stand-alone hard disk recorder,
video recorder) use MTC. To synchronize MAGIX midi
studio generation 6 to a SMPTE signal you need a “synchronizer”, which converts SMPTE into MTC. This can be
done by nearly all interfaces with multiple MIDI ports.
Timecode and Clock synchronization
270
synchronization involves ensuring that several devices
run absolutely in time with each other. This doesn’t just
mean that the devices start at the same point, and run at
the same speed. To set exactly the same speed would require infinite precision (even with digital devices). Instead, synchronization means that while the devices are
running, every point along the time axis of all the devices
must be linked.
This requires that the devices to be constantly “connected”
to each other. This is only possible if one of the devices
acts as the “master”, defining the current position, while
the all other devices act as “slaves” and constantly try to
follow this position as closely as possible.
There are two different ways of doing this, depending on
the type of devices being used:
1. With devices like sequencers or drum machines, the
positional information shared is expressed in bar positions—in other words, they use “bar-referenced synchronization”.
2. Devices like tape machines or hard disk recorders
usually use “time-referenced synchronization”—the
positional information shared by these devices is time
information, in the form of so-called time code. Devices that use time-referenced sync include tape machines for video signals, like VTRs (video tape
recorders) and VCRs (video cassette recorders). With
time-referenced sync, the tape speed or sampling rate
is not dependent on the musical tempo of the recorded song.
Bar-referenced synchronization is only appropriate if you
are using devices from the first category. As far as devices
from the second category are concerned, time-referenced
sync really ought to be used. A single tape machine could
theoretically control several devices from the first category, by playing recorded bar-referenced time code. How-
Synchronization
ever, for various reasons, most professionals would work
using time-referenced code. For one thing, this is the only
way to sync additional machines up to the tape later.
A sequencer synchronized to tape has to calculate the bar
position from the time position, using its tempo track.
Bar-Referenced synchronization: First, a quick trip
down memory lane…
Pulse Clock and FSK (historical)
The original method of synchronizing analog sequencers,
or drum machines to each other was by transferring electrical impulses (clock signals) at specific intervals. The
norm was 24 ppqn (pulses per quarter note), which is
equivalent to a resolution of 1/96 note. However, some
companies used 48 (Korg, Linn), 64 (PPG), 96 (Oberheim) or 384 ppqn (Fairlight). By way of comparison,
MAGIX midi studio generation 6 has a resolution of 960
ppqn).
By encoding these impulses as the “shift between two
pitches” (FSK code, frequency shift keying), it was possible to record this kind of code onto tape. It was mainly
used to synchronize drum machines to tape machines.
There were plenty of disadvantages to it, however
– FSK code laid down a fixed tempo.
– It was impossible to program intros/outros later.
Both Pulse Clock and FSK had two further disadvantages:
– If any impulses were lost through signal dropouts, the
synchronized devices would run constantly out of sync
from that point onwards.
– Because there was no position indicator, you always
had to start the song from the beginning (FSK 2 or
Smart FSK overcame this by encoding the song position as well).
These disadvantages eventually killed off clock and FSK,
neither is now used professionally.
MIDI Clock / SPP: With the advent of the MIDI Standard,
an equivalent to clock impulses was incorporated into the
command protocol: MIDI Clock. MIDI Clock events are
transmitted by the master 24 times per quarter note. To
avoid having to start songs from the beginning every time,
a further MIDI command is also transferred: song position
pointer. This transmits 1/16 notes from the beginning of
the song. Because two data bytes are available for encoding (14 bit), it is possible to distinguish a maximum of
16384 different 1/16 notes or 1024 bars. The slave recog271
Synchronization
nizes the current song position within this region, and
synchronizes to it.
Modern devices always use a combination of MIDI Clock
and song position pointer.
If a sequencing program has a higher timing resolution
than 1/96 note, the positions between must be interpolated. The resolution of MAGIX midi studio generation 6
is 1/3840 notes.
Time-Referenced synchronization: Time-referenced
synchronization originates from the field of video synchronization, but nowadays it is also used for audio work.
This is why it divides a second not into tenths and hundredths, but into frames. One frame was originally the
time it took for a single frame of video (i.e. one image) to
pass through a video camera, or projector.
Unfortunately, the number of frames used per second varies according to country, norm and usage. For video, the
international norm is 24 frames per second (fps). American black and white television uses 30 fps. With the introduction of color television, the frame rate of the NTSC
norm, used in America and Canada had to be reduced to
29.97 fps for technical reasons. In Europe, a lower frame
rate of 25 fps was used from the start, and with the introduction of color television this was adopted by the European PAL TV standard, as used in Europe today.
The original reason for the differing video rates, incidentally, derives from the different rates of alternating current
used on the different continents (USA: 60Hz, Europe: 50
Hz), which corresponds to the number of half-frames of
video passing through a camera/projector per second.
SMPTE/EBU: It was the American Society of Motion Picture and Television Engineers (SMPTE) which first laid
down a norm for encoding the individual frames. This
designates exactly 80 bits per frame for encoding the hour
(0—23), minute, second, and frame (frame number
within the second). Some of the surplus bits are used to indicate the frame rate, i.e. the number of frames per second. This encoded data stream of 80 bits per frame is
known as SMPTE time code. Because the individual bits
themselves have a definite time spacing, they are also used
as a further subdivision of a frame, called a “subframe”.
This code was adopted without alteration by the European
Broadcasting Union (EBU), for use with the European
frame rates, and renamed “EBU Time Code”. In practice
this time code is usually referred to as SMPTE time code,
or just SMPTE (pronounced: “simptee”).
272
Synchronization
Drop Frame (df): One technical problem was the frame
rate of 29.97 fps. Only whole frames can be counted, but
counting up to the 30th frame in every second would
cause a deviation between the time code time, and the actual time (a difference of about 5.4 seconds for a typical
feature video). So, the following trick was employed: in every minute 2 frames are left out (“dropped”), except in
minutes that can be divided by 10.
This may sound complicated, but is actually simpler than
“one leap-year every 4 years except in years divisible by
100, apart from those also divisible by 400”!
To describe this method, “drop” or “df” is added after the
frame rate. Because it is used so often with 30 fps, it is
more common to indicate non-usage by adding “non
drop”, “nd” or “ndf” to avoid confusion.
The 29.97 nd format is seldom used (just like the pointless 30 df), because the timecode time “drifts” from “real”
time.
Frame Rates: The SMPTE frame rate must be set the same
for all connected devices; you can’t have different frame
rates in one system. The diagram below shows the various
frame rates with the respective duration of a frame, or subframe:
Frame Rate [fps] Frame [ms] Bit [µs]
Source
24
41.67
520.8
Video
25
40
500
29.97 drop
33.37
417.1
—
29.97
33.37
417.1
NTSC color
30 drop
33.33
416.7
—
30
33.33
416.7
NTSC S/W
PAL
In Europe 25 fps is used both in the audio field and for synchronizing television or video productions.
American audio productions use mainly 30 fps, but with
video the frame rate is nearly always 29.97 df.
International audio productions are recorded with 25 fps,
and 30 fps on different tracks.
LTC / VITC: The 80 bits per frame of the SMPTE time
code can be stored in two different forms:
– As a sound signal on a sound track. This is called longitudinal time code (LTC).
– As a signal in the scanning gap of the video picture.
(The complete picture information is transferred
slightly quicker than the duration of a frame. There is a
short gap, while the electronic beam of the cathode ray
273
Synchronization
tube travels from the end of the bottom line, back to the
beginning of the top line. Because the beam is temporarily switched off, time code transferred during this
gap does not interfere with the picture.) This is called
vertical interval time code (VITC).
LTC is used for all audio productions, and often for video
synchronization as well. Tape duplication plants can
record LTC onto one of the audio tracks, usually track 2.
The SMPTE time can also be written onto the picture. Because of the almost universal use of LTC for audio work,
the term “SMPTE” is used synonymously with it.
With video synchronization LTC can only be output during playback at normal speed. VITC (pronounced “vitzi”)
has the advantage that it can be output while fast-forwarding, or rewinding. This is very useful when creating
frame-synchronized sound effects, or musical phrases.
Emagic’s networkable 8x8 MIDI interface “Unitor8 MkII”
has a synchronizer that can read and write both LTC and
VITC.
MIDI Time Code (MTC): MTC is a “translation” of the
SMPTE bits into the MIDI Standard, and contains the
time and frame rate information. This requires one status
byte and eight data bytes. MTC defines only 24, 25, 30 df
and 30 ndf.
Synchronizers: A professional synchronizer is a device
which can write and read SMPTE signals. It is connected
to a master, and one or more slave tape machines, and can
also control their transport functions.
In computer MIDI interfaces, built-in synchronizers generally have just a SMPTE input and output. SMPTE signals arriving at the input are automatically passed on to
the computer by the interface, in the form of MTC.
Which device should be the Master, and which the Slave? As
a general rule, the slowest machine should be used as the
master, to reduce waiting times for the slaves when rewinding or forwarding. Since a sequencer naturally
“winds” much faster than even the quickest tape machine,
it always acts as the slave.
Synchronization Procedure: The following steps apply to external equipment, rather than MAGIX midi studio generation 6.
Recording SMPTE: If you want to synchronize a computerbased sequencer to a tape machine, the first thing to do is
record a SMPTE signal onto one of the outside tracks (the
outside tracks on analog tape machines are of a marginally
274
Synchronization
lower quality, because of the (very slight) “fluttering” of
the tape, but they are perfectly adequate for time code).
Connect the SMPTE out of the interface with the input of
the tape machine (or the input of the mixing desk, if you
want to route the time code, and set a level). It is customary to use the track with the highest number. Set the level
of the time code to −10 VU. Avoid recording stationary
time code by starting the time code generator before the
recording. For several reasons—for example to avoid
drop-outs which can lead to gaps or jumps in the time
code, and to give you the option of extending a song
later,—it is a good idea to record the time code throughout
the whole tape (this is known as “striping” the tape). It is
also customary to set a SMPTE code start time of just under one hour (01:00:00:00). The first song on a tape then
always begins at exactly one hour. Other tapes of the same
project can be given SMPTE times with consecutive
hours, which means the SMPTE time can be used to
clearly identify a tape, if the tape boxes get mixed up.
Synchronizing Sequencers to Tape: Connect the output of
the time code track to the SMPTE input of the computer.
To minimize crosstalk, it is better to make a direct connection rather than routing the signal via the mixing desk.
The computer does not have to begin bar 1 at a SMPTE
time of 0 hours, 0 minutes, 0 seconds and 0 frames
(00:00:00:00), you can set an “offset”, to make the sequencer wait for the correct SMPTE position, before it
starts the song. If the second song on tape begins at (say)
01:04:50:00, you need to set the SMPTE offset to match.
Make a note of the SMPTE offset on the track sheet for the
song, or next to the song title on the tape box.
The bar position which is reached at a specific SMPTE
time position depends on the tempo of the sequencer. If
you have begun to record onto tape, you won’t be able to alter the tempo without disrupting the synchronization.
You should, therefore, also make a note of the precise
tempo on the track sheet.
The SMPTE offset and tempo settings are saved with the
song, but it is not unheard of for the song file and the tape
to be separated.
Synchronizing Several Sequencers: If you want to synchronize several sequencer programs with a tape machine acting as the master, you should try at all costs to synchronize
just one sequencer via SMPTE or MTC. You can then synchronize the other sequencers to this one, via MIDI
Clock/SPP. When synchronizing several sequencers (with
no tape machine) you should only use MIDI clock/SPP.
275
Synchronization
This avoids deviations in the bar position, since otherwise,
each sequencer has to calculate this independently, from
the time information using its own tempo track.
Click Track: It is common practice to record a click track,
i.e. a metronome sound, to run throughout any song at the
correct tempo, in addition to the time code. This is partly
due to possible deviations in the positional calculation of
different sequencers from the recorded SMPTE code. It
also allows overdubs in studios without MIDI equipment,
although nowadays, such studios are few and far between.
When recording a click track or other signal onto the track
next to the SMPTE code, it is better to set a fairly low
record level. Crosstalk from a high-level signal onto the
SMPTE track can corrupt the SMPTE track, and interfere
with smooth synchronization.
If you have Sync Problems
276
… you may find some useful advice here …
Faulty Digital synchronization: If MAGIX midi studio generation 6 is synchronized to an external wordclock (Audio
Sync Mode: External /free), you must ensure that a valid
digital signal is always available. If you are getting error
messages like “Sample Rate 13,x kHz recognized” it may
be that the DAT recorder (or whatever clock source you
have connected to your audio hardware’s digital input)
does not transmit wordclock in stop or pause mode (or has
switched itself off).
Faulty synchronization to an External Tape Machine: Create a new song, make a new recording and see if that does
the trick. Why? If an old recording on tape was not properly synchronized to timecode you will not be able to use
it. One basic rule: the playback situation must be identical
to the recording situation.
If everything is working fine with the new recording, this
means the present setup is o.k. Next, check whether anything has changed in your global setup. Has the frame rate
changed? Has the tape speed changed? If you have
changed a 30 fps setting, try variations such as 30 drop or
29.97.
If MIDI and Audio are not synchronized: Go to the Audio
page of the synchronization dialog window and under Audio Sync Mode, select MTC Trigger. If your audio hardware
does not support this operating mode, you should cut extremely long regions into shorter sections.
If MIDI and SMPTE are not synchronized: Check all the
frame rate settings. The frame rate of all connected devices must be identical, including the timecode on the
tape machine, the synchronizer, and in MAGIX midi stu-
Synchronization
dio generation 6 itself. Some synchronizers encode the
wrong frame rate in MTC. In this case open the Tempo
Editor, switch off the Detect option, and set the correct
frame rate manually.
Note for America: try out the different kinds of 30 fps (30
drop, 29.97 fps).
In Europe, a frame rate of 25 fps is almost always used.
277
Song Settings and Preferences
Song Settings and Preferences
Both the Song Settings and the Preferences… can be
reached via Options > Settings > …. Both consist of a dialog box which allows you to access various different subpages. Some of these pages can also be reached directly
from MAGIX midi studio generation 6’s local menus (for
example in the Score window), or from the transport buttons, via pop-up menus.
The Song Settings and Preferences are where you can define some of MAGIX midi studio generation 6’s basic operating parameters. This section explains each of these
windows’ menu items individually. Unless indicated otherwise, the descriptions of the various options are the ones
that apply when the checkbox next to the option is crossed
(in other words, when it’s active).
Song Settings
Song settings are saved independently with each song,
which means that different songs can have different song
settings. You can save all of your standard settings in a
template song. This way, you can start each MAGIX midi
studio generation 6 session with your preferred working
setup.
Recording Options
X
278
This page can be reached via Options > Settings > Recording Options…, or via Recording Options… in the metronome switch pull-down menu on the Transport bar.
The settings here determine how MAGIX midi studio
generation 6 responds in record mode. If this page is
open, you can enable/disable some of the checkboxes via
the computer keyboard using the keys indicated in brackets after the function. While this page is open, any key
commands normally assigned to these keys will be temporarily deactivated.
Merge New Recording With Selected Sequences: After each
recording, all newly-recorded data is merged with all the
selected sequences on the recorded track, to form one sequence. At the same time, the following function is automatically activated (see below).
Merge only New Sequences in Cycle Record (n): When recording with Cycle Mode enabled, this function merges all
data recorded during later cycles to the sequence recorded
during the first cycle. It can be used independently of
Merge New Recording With Selected Sequences.
Auto Mute in Cycle Record (m): If recording with Cycle
Mode enabled, this function creates a new sequence for
Song Settings and Preferences
every cycle during which there is any data input. All sequences made during previous cycles are automatically
muted. If the Auto Create Tracks in Cycle Record function
(described next) is not active, all the sequences are layered
onto one track. This function deactivates both the merge
functions.
Auto Create Tracks in Cycle Record: While recording with
Cycle Mode enabled, this option creates a new track with
each new cycle, when there is data input. The recorded sequences from earlier cycles are pushed down to the tracks
below, so the “oldest” tracks end up at the bottom. This
function deactivates both the merge functions. This function is useful when, for example, you are doing multiple
takes of a solo, while cycling a section of music. Recordings made during each repetition of the cycle will appear
on their own track, making it easy to sort through them
when you have finished recording.
Allow Tempo Change Recording: All tempo changes made
in record mode are recorded. For details on how to edit
these “tempo recordings”, please see the section Tempo
from page 260 onwards.
MIDI Data Reduction: Controller events are thinned out
during the recording, to lessen the data load on the MIDI
bus during playback. This improves the timing of dense
arrangements on interfaces with fewer MIDI ports. The
function actually reduces the duration of controller events,
using an intelligent algorithm which retains the value at
the end of a succession of controller data.
Click while recording: The metronome click is automatically switched on for recording. This is the same as activating the metronome switch in the transport panel during
the recording.
Click while playing (p): The metronome click is automatically switched on for playback. This is the same as activating the metronome button in the transport panel during
playback.
Polyphonic Clicks: The MIDI metronome sends all notes
defined and activated for bars, beats and divisions. For example, at the beginning of each measure, two or three
notes may be sent simultaneously. If the option box is not
checked, then the metronome only ever transmits one
note at a time.
Speaker Click: This sends the metronome click to the computer loudspeaker.
MIDI Click: The metronome click is sent out as a MIDI
note.
279
Song Settings and Preferences
Bank Select: If your sound module accepts Bank Select
(please refer to the manual of your sound module), with
this message you can switch to any bank of 128 sounds
each (maximum). For this function to work correctly, via
this flip menu you must tell MAGIX midi studio generation 6 which kind of Bank Select message your instrument will expect. Please refer to section Program Change
Events from page 222 onwards) on how to actually select
the Bank.
Count-In: This pull-down menu is where you set the
count-in that precedes a recording.
Wait for Note MAGIX midi studio generation 6 keeps
running in a “symmetrical” loop of one beat, centered
around the start point of the recording, until MIDI events
are input. Since the loop starts half a beat before the start
point, you are allowed up-beat notes of up to half the value
of the bar denominator (e.g. with n/4 time, a maximum of
1/8 notes).
No count-in
the recording begins with no count-in.
1-9/4 Bar count-in
in.
1 bar of count-in up to 9/4 bars count-
Click only during Count In (Record): When this option is
active, the record click sounds only during the count in
and is then switched off.
MIDI Options
This page can be reached from the Arrange window by selecting Options > Settings > MIDI Options… These settings determine how the MIDI inputs and outputs behave.
Input Filter: The input filter switches are for filtering out
certain event types at the input of the sequencer. The symbols correspond to those in the Event List. When a switch
is dark grey, it will filter out the corresponding events.
Note Events
Program Change Events
Pitch Bend Events
Controller Events
Aftertouch oder Channel Pressure Events
Polyphonic Key Pressure Events
System Exclusive Events
Sysex with MIDI Thru function: SysEx
messages
are
passed through the computer along with other MIDI thru
data. This is particularly important when using hardware
280
Song Settings and Preferences
programmers as only then will you be able monitor the
changes to the sound immediately. If you just want to
record SysEx dumps don’t select the checkbox. It hardly
ever makes sense to divert dumps through the computer,
unless you want to record a dump, and simultaneously
transmit it to a second device of the same make.
Transmit MIDI Clock: MAGIX midi studio generation 6
transmits MIDI Clock with Song Position Pointer. For
more about these terms, please see the section Receiving
MIDI Clock/SPP from page 268 onwards. The MIDI output is selected to the right of this option (see the next paragraph).
Transmit MTC (MIDI Time Code): MIDI Time Code is
transmitted when this is enabled.You may set the MIDI
output port in the input area at the right of this option. Select the port by click-holding on the box.
Auto Sync In: When this option is activated, MAGIX
midi studio generation 6 runs as Master (sync mode Internal), until any synchronization signal will be received—either MTC or Clock/SPP.
MAGIX midi studio generation 6 synchronizes automatically to the sync signal that will be received first. Please be
sure that you are either; a) only using one external synchronization source or; b) certain that MAGIX midi studio
generation 6 will not receive sync data from more than
one source at a given time.
Chase Events
This page is for making settings relating to the “Chase
Events” function described on page 117. You can reach this
page following the path Options > Settings > Chase
Events…
Message Type Switches: These switches are used to select the event types for which event chasing applies. The
symbols are the same as the ones in the Event List Editor.
If a button is gray, it means chase events is deactivated for
that event type.
Notes: When this button is switched off, the following
three options are not available.
Chase sustained Notes: This checkbox is used to search
around the current play-start point for any notes which
should still be playing, because of a held-down sustain
pedal.
Chase Notes in ‘No Seq Trp’ Instruments: This means that
even notes are searched, that are played by drum tracks
281
Song Settings and Preferences
(whose check box No Seq Trp in the track parameter box of
the Waveplayer window is checked).
Chase Notes on Cycle Jump: When activated, the chase
function will also chase notes, if a cycle jump occurs. This
parameter is only available when ‘Chase on Cycle Jump’ is
active.
Program Change: The last program change command
before the current play-start point is sent. Keep in mind
that a sound module will usually take a short while to respond.
Pitch Bend Events: Pitch bend data are searched for.
Controller Events: If this switch is active, you can
switch three controller groups on and off individually:
Chase Control 0—15: Controller numbers 0—15 are
searched. These include the following controllers: modulation wheel, breath, foot, volume, pan, portamento time,
balance and expression, plus the MSB for data entry and
bank select.
Chase Control 64—71: Switch controllers 64—71 are
searched. These include sustain, sostenuto, hold 2, soft
pedal and portamento.
Chase all other Controls: All other controller numbers are
searched.
Aftertouch or Channel Pressure Events: Aftertouch
data generated by the pressure sensor under the whole
keyboard is searched for. Aftertouch is also called „Channel Pressure“.
Polyphonic Key Pressure Events: Polyphonic
Aftertouch data, generated by pressure sensors under the individual keys of is searched for.
System Exclusive Events: The last SysEx messages in
the sequences before the current play-start point are transmitted. If the sequence contains the recorded data of a SysEx fader, the fader will be set to its correct state at the start
point.
Please keep in mind that chase events cannot always fully
restore the correct state of SysEx data at the start-play
point. To do so would involve not just searching for, but
also analyzing all SysEx messages in the whole song, both
before and after the play-start point. Because of the non282
Song Settings and Preferences
standardized data structure of SysEx messages, this is
completely impossible.
If even a couple of sound parameters have been recorded,
each with separate SysEx faders, at differing settings before the play-start point, there will be deviations in the
sound. To get around this, try recording controller data to
remote-control the SysEx faders during playback instead.
Since chase events searches all the different controller
numbers separately, the SysEx settings for the sound parameters will all be correct at the play-start point. Another
advantage to this method is that controller events can be
edited graphically in the Drum Editor, or using Hyper
Draw.
Chase sep. channels in ‘All Cha’ instruments: This option
affects tracks whose Cha parameter is set to All (i.e. which
play events with their recorded MIDI channel). All defined
event types in sequences started part-way through are then
searched separately for each MIDI channel.
Chase on Cycle Jump: Switches on the Chase Events function for cycle jumps. When this function is activated, in
the check box below you may exclude notes fromthe Chase
Events function.
Send full MIDI Reset before Chasing: Before
chasing
events, corresponding to the settings in the Preferences a
MIDI Reset will be sent (see section Reset Messages from
page 285 onwards).
Preferences
The Preferences are saved together with the key command
assignments as a separate file called “MAGIX midi studio
g6.prf” in the Windows directory. These settings are valid
for the whole Song.
Opening The Preferences: This Preferences window
can be reached from the main menu by selecting Options
> Settings > Global [resp. Display, Score, Reset] Preferences…
Although the settings you make in the Preferences affect
the way MAGIX midi studio generation 6 deals with all
the songs it opens, you still have to open a song before you
can alter the Preferences. You can’t open the “MAGIX
midi studio g6.prf” file directly.
Initializing The Preferences… If you erase the “Magix
midi studio g6.prf” file in your PC’s Windows folder ,
MAGIX midi studio generation 6 will create a new Prefer283
Song Settings and Preferences
ences file next time you launch. All parameters will then
be reset to their default values.
When you erase the Preferences file, you also lose all your
custom key commands.
Global
284
This page contains the global presets.
When Opening a song, ask to ‘Close current Song(s)?’:
Whenever you load a new song before closing the old one,
MAGIX midi studio generation 6 will ask whether the current song should be closed.
Add ‘Last Edit Function’ to sequence name: After performing any edit operation (e.g. cutting), the description of the
edit operation is added to the name of the arrange object
(or resulting objects).
Disable safety alert for ‘Undo’: This means that no safety
alert appears when you call up the undo function.
Enable Catch when sequencer starts: Every time you start
the sequencer (start or pause), the catch function is automatically switched on, in all windows (see page 91).
Enable Catch when moving song position: The
“Enable
Catch when moving SPL” option means that whenever
you move the SPL, the Catch function (screen view follows
SPL) is switched on.
Allow Content Catch by Position if Catch and Link enabled:
If the catch and content catch functions are active, the contents of the sequence at the current song position are what
is shown. If there is no check in the box, the window view
still follows the song position within the displayed sequence, but does not update to show the contents of subsequent sequences when they become the current sequence (see page 92).
Limit Dragging to one direction in Matrix and Score: In the
Matrix or Score Editors, you can only move notes in one
direction, per operation. This means that a note may be either transposed or moved in time, but not both at once.
This prevents accidental alteration of the other parameter.
Limit dragging to one direction in Arrange: This
restricts
the direction you can move sequences in the Arrange window, in a similar way to, and for the same reasons, as the
option above.
Hide Windows of inactive Songs: If this check box is
checked, the display looks much better when several
Songs are open at the same time.
‘Export MIDI File…’ saves single sequences as Format 0: If
only one sequence is selected when you choose File > Export Selection as MIDI File… the contents of the sequence
are saved in MIDI file format 0.This file format is guaran-
Song Settings and Preferences
teed to be compatible with every MIDI file player (more on
this on page 288).
Double Click Sequence to open… In this flip menu you can
determine, which Editor opens when double-clicking a sequence in the Arrange window.
Display
This page contains two display options and your preferred
language setting.
Wide Song Position Line: A thicker Song Position Line is
used.
Display Middle C as C3 (Yamaha): This option affects the
description of notes in the editors.Bottom C on a five-octave keyboard (note # 36) is labeled C1 and middle C (#60
or c’) is labeled C3. According to this standard, the lowest
MIDI note (# 0) is called C-2. This is the official standard
and is used by most manufacturers.
If there is no check in the checkbox, bottom C on a five-octave keyboard is labeled C2 and middle C is labeled C4.
Using this standard, the lowest MIDI note is C-1.
Language selection: In this flip menu you may set your preferred language. This setting will be active after the next
program launch.
Score
This page of the Preferences can also be reached via the
Score window’s local menu by selecting Options > Score
Preferences….
Dashed Song Position Line: The song position line in the
Score Editor is dashed. If the box is not checked, the line is
solid.
Show sequence selection colored: If you switch on this option, in the Score window on Song level the selected sequence will be displayed in blue color.
Fast (Lower Resolution) Curves on Screen: The screen redraw rate is accelerated by using a slightly coarser display
of braces and slurs.
Reset Messages
This is where you define which controllers are sent as a reset message.
A MIDI Reset is transmitted when:
– the sequencer is halted by pressing Stop twice, in quick
succession;
– you click on the MIDI Out display in the Transport
window;
– you make use of the Full Panickey command;
– or automatically when a new Song is opened or activated (regardless of the chase settings—see the section
Chase Events from page 281 onwards).
285
Song Settings and Preferences
Smart Reset: The reset has been optimized for use with the
following controllers, to minimize data congestion at cycle
jumps, or when the sequencer is stopped:
1. Pitch Bend
2. Channel Pressure
3. Modulation wheel (Control 1)
4. Sustain Pedal (Control 64)
MAGIX midi studio generation 6 handles these messages
separately for each track. As soon as MAGIX midi studio
generation 6 is halted, or its position altered, the above
MIDI messages will be transmitted to the relevant tracks,
and no others.
Send Used Instrument Settings On Reset: When this option
is switched on, all currently used instrument parameters
will be transmitted, whenever a MIDI Reset occurs.
Audio
286
Warning before closing Sample Edit: If you have executed a
destructive edit command in the Sample Editor, e.g. Normalize or Fade Out etc., when you close the window you
will be asked if you want to Undo this edit. Of course, once
you are used to editing audio data in the Sample Edit window, you may begin to find this alert box irritating, so this
is where you can get rid of the warning.
Warning before process Function in Sample Edit (Key): Before you carry out a destructive edit in the Sample Editor
using a key command, a warning appears giving you the
opportunity to cancel it, before altering the data.
You can define key commands for all the destructive edit
commands in MAGIX midi studio generation 6, which
will then be valid only if the Sample Edit window is active
(active title bar). Depending on what key commands and
window combinations you are using, there is a danger of
executing edit commands accidentally. Thus, MAGIX
midi studio generation 6 is preset so that an alert box appears first. If you feel confident that you won’t accidentally
process a file, you can switch of the alert here.
Warning before process Function in Sample Edit (Menu):
This option is functionally almost identical to the previous
one, the only difference being that the warning appears
whenever you use a menu to execute a destructive command in the Sample Edit window.
Once you are more experienced, you may not need this
alert box when you call up an edit command via a menu,
so you can switch it off here.
Create Undo file for “Normalize”: Storing the “Undo” files
for destructive edits of audio data can take up a lot of time
and memory, depending on the length of the audio data.
Song Settings and Preferences
Normalize is generally a safe, and usually beneficial type
of data edit. Switch this option off, if you want to remove
the Undo option for the normalize function.
Display Color in Audio Window: If audio regions in the Arrange window are very brightly colored, it can sometimes
be difficult to make out the waveform display in the Audio
window. You can, therefore revert to a black and white display here.
Release Audio in Background if Stopped: When you switch
on this option, MAGIX midi studio generation 6 releases
the audio hardware whenever playback stops. This allows
you to switch to another program , like a Sample Editor,
which also needs to use the audio hardware, without having to quit MAGIX midi studio generation 6 first.
Prepare Audio Playback when Stopped: Normally at the
start of a recording—or playback—all audio files at the
song position are prepared for playback. Depending on
the number of tracks, and type of system, this can take
anywhere from a fraction of a second, to over a second. In
some situations, you might prefer to bypass this preparation of all the playback tracks, to allow you to start recording immediately. In such a case, you should switch on this
option. Recording (and MIDI playback) can then begin
straight away, although the audio tracks will not start playing until a few seconds later.
Create overview after recording: Creating the overviews is
time-consuming. If you don’t want to waste time directly
after recording, you can deactivate this check box.
Global Instrument Tune: With this parameter you can tune
all audio instruments plug-ins at once. Unit is cent, which
is 1/100 of a semitone, and the range is ± 50 cents.
Audio Drivers
On the pages Audio Driver and Audio Driver 2 you can activate and deactivate the audio engine of MAGIX midi studio generation 6. Uncheck the boxes left of each driver to
effectively turn MAGIX music studio generation 6 into a
MIDI only application which can run on computers with
less RAM. Remember that any alterations made will not
become valid until the next program startup.
287
Standard MIDI Files
Standard MIDI Files
Basics
Standard MIDI Files are not specific to a particular sequencer program or type of computer. They contain the
following information:
– MIDI events with their time positions and channel
assignments,
– Names of the individual tracks,
– Tempo changes.
MAGIX midi studio generation 6 supports the importing
and exporting of Standard MIDI File formats 0 and 1:
– Format 0 can contain one track,
– Format 1 can contain multiple tracks.
Neither format recognizes any division of a track (e.g. into
several sequences).
Loading Standard MIDI Files
To load a Standard MIDI File, select File > Open. In the
file selector, select MIDI File in the “Files of Type” box.
Bank Select: When you open Standard MIDI Files, program change and controller events occurring at the same
position are moved by one tick, so that they will remain in
their intended order. This prevents MAGIX midi studio
generation 6 from reversing the transmission order of the
events. The reason for this is that certain MIDI devices
will not respond properly to program change and bank select events that do not occur in the correct order.
This guarantees that there will be no timing problems, because the transmission of a MIDI event always lasts longer
than 1 tick.
Via Drag and Drop: MIDI files may also be opened via
Drag and Drop. Being in a window of the Windows Explorer or the desktop, just drag the MIDI file onto an open
Arrange windows of MAGIX midi studio generation 6.
Saving Standard MIDI Files
If you want to play a MAGIX midi studio generation 6
song on another sequencer, you can do so by saving the selection as a Standard MIDI File. Consult the other sequencer’s instruction manual to see which Standard
MIDI File formats it can read. All sequencers should be
able to interpret at least the type 0 file format.
Preparing the Song: Because of the limitations of the
Standard MIDI File format, you should make the following preparations to your MAGIX midi studio generation 6
song:
288
Standard MIDI Files
– Neutralize all playback parameters with the normalize
function (select them all by pressing ctrl a, then choose
Functions > Sequence Parameter > Normalize
Sequence Parameters),
– Convert all playback quantization with the fix quantize
function (ctrl a, Functions > Sequence Parameter > Fix
Quantize,
– Convert all loops into real copies (ctrl a, Functions >
Sequence Parameter > Turn Loops to Real Copies),
– Convert all sequences on each track into a continuous
sequence: Click on a track, so that all objects of this
track are selected. Select the glue tool from the tool box
and click on one of the tracks’s objects. Now all
sequences of the track have been merged into a single
sequence. Repeat this procedure for all of your Song’s
MIDI tracks containing sequences.
Additional preparations for file format 0: Since
Standard
MIDI File type 0 format files can only save one sequence,
you must also merge all sequences into one (press ctrl a,
take the glue tool and click a sequence).
Saving a Song as a Standard MIDI File: Select all of
the required sequences and choose File > Save Selection
as MIDI File… You can now enter the destination directory.
In File Format 0: See whether under Options > Settings >
Global Preferences… the parameter “Export MIDI File…”
save single Sequences as File Format 0 is checked. If it is,
choosing File > Export MIDI File… when only one sequence is selected means that file format 0 will be automatically used.
289
Glossary
Glossary
290
ADAT: Abbreviation for Alesis Digital Audio Tape. The
ADAT (supported by Alesis, Studer, and Fostex) is a digital
multitrack cassette recorder with eight audio tracks using
an S-VHS video tape, with 16 or 20 Bit quantization. The
optical port allows the parallel transmission of all eight audio channels.
Aftertouch: Also known as pressure. MIDI data-type generated by pressure on keys after they have been played.
There are two types; channel aftertouch, whose value is
measured by a sensor stretching along the whole keyboard
and whose data apply to the whole MIDI channel, and
polyphonic aftertouch (rare) which is individually measured and transmitted for every key.
AIFF: Abbreviation for Audio Interchange File Format.
Data format for audio files in the Macintosh operating system.
Autodrop, Auto Punch: Automatic drop-in recording with
adjustable drop-in/out positions.
Bar ruler: Ruler at the top edge of the screen, divided into
bar units.
BBS: Abbreviation for Bulletin Board System. An electronic mailbox.
Catch: Function for making the section of the song currently displayed in the window reflect the current song position.
Cha: Abbreviation for channel or MIDI channel
Check box: A small box. Placing a check in it (by clicking
on it) activates an option.
Click: Metronome, or metronome sound.
Clock: Electrical synchronization impulse, transmitted every 1/96 note. Was used in older drum machines before
the advent of MIDI. (i.e. MIDI Clock).
Controller, control change: MIDI data type, e.g. for sliders,
pedals, switches or standard parameters like volume and
panning. The type of command is encoded in the first
databyte, the value in the second databyte.
Count-in: Beats which sound prior to the start of a recording.
C-Press: Channel pressure or aftertouch.
Cueing: Monitoring while fast-forwarding or rewinding.
Cycle: Function which constantly repeats the passage between the locator positions.
Data bytes: These define the content of a MIDI message.
The first data byte represents the note, or controller number; and the second the velocity, or controller value.
Glossary
Default, default value: The preset parameter value.
Delay: An object that can create a series of repeats. In the
Arrange window, a playback parameter which can delay or
advance a selected Track by a given number of milliseconds.
Dialog, Dialog box: A window containing a query or message. It must be cancelled or replied to before it will disappear and allow you to continue.
DIMM: Abbreviation for Double Inline Memory Module.
Type of RAM chip.
Display Format Value: Adjustable note value for the grid
used in displays and operations. Third number in the position indicator.
Drag & Drop: Grabbing objects with the mouse, moving
them, and releasing them.
Driver: In MAGIX midi studio generation 6: specialized
support for audio hardware. The part of MAGIX midi studio generation 6 which allows you to address and use this
hardware.
Drop, drop-in, drop-out (Punch in/out): Going into and out
of record to record over a section of an existing recording.
Edit: Local menu with clipboard functions.
Editor: Window for editing MIDI Events.
Envelope, Envelope Generator: This term comes from the
analogue synthesizer technique. Produces a change of
voltage over time after triggering (e. g. by hitting a key on
the keyboard).
EQ, Equalizer: Used to boost or cut frequencies within a
sound spectrum.
Erase: Delete
Event definition: Parameter for defining the display of a
line in the Drum Editor.
File: In MAGIX midi studio generation 6 the two most important types of file are: 1. Song files containing all the
MIDI events and parameter settings in a song (including
mixer automation data) plus information about which audio files are to be played; 2. Audio files containing the actual recordings of guitar, vocals, etc. (not actually stored in
the song files).
Flip menu: See Pull-down menu.
Float window: Window with special status which always
“floats” on the surface above all the other windows, but
can only be operated with the mouse.
Font: Character printing style.
Frame: Unit of time. A second in the SMPTE standard is
divided into frames, corresponding to the frames in a
movie or video.
291
Glossary
GM (General MIDI): Standard for MIDI sound modules,
including standardized instrument sounds on the 128
program numbers, a standardized key assignment for
drum and percussion sounds on MIDI channel 10, 16-part
multi-timbral and at least 24-voice polyphony.
Grab (an object): Placing the mouse pointer on the object,
pressing the mouse button and keeping it held down.
GS: Extended GM standard developed by Roland Inc.
Hierarchical menus: Structured menus where highlighting
an individual entry opens yet another menu.
Icon: Small graphic symbol. In MAGIX midi studio generation 6 an icon may be assigned to the tracks in the Arrange window.
Info Line: Display at the top of the window which tells you
the position of objects when using the mouse tools.
Insert: Point on a mixer where you can patch in an effect
(Plug In). The effect objects on MAGIX midi studio generation 6’s track and audio mixers have inserts for effects.
Key command: Function which can be executed by pressing a specific key.
Legato: Method of musical performance that smoothly
connects one note to the next.
Local menu: Menu in a window containing functions
which are relevant to only that particular window.
Local Off: Operating mode on a MIDI synthesizer with a
keyboard where the keyboard (local) does not directly play
its own integrated sound generator. This is useful when
using it as a master keyboard in a MIDI setup with a sequencer.
Locators (left and right): Two programmable song positions which set the cycle limits in the Transport window.
The Locators also can be used to define the area to be edited for certain functions.
Loop: Constant repetition of an object, up to the next object in the same track, or to the end of the song (whichever
comes first).
Merge: Mix, combine together.
Meta event: Type of event in the Event List. Contains nonMIDI events that can control special MAGIX midi studio
generation 6 features, like text or screenset configurations.
MIDI (Musical Instrument Digital Interface): Standardized, asynchronized, serial and event-oriented interface
for electronic musical instruments.
MIDI Clock: Short MIDI message for clock signals. See
also: SPP.
292
Glossary
MIDI Event: Individual MIDI command, such as a note
on command. Continuous controller movements (e.g.
modulation wheel) produce a quick succession of individual events with absolute values.
MIDI Message: A message transmitted via MIDI consisting of 1 status byte and none, one, two or (with system exclusive commands) many data bytes. See MIDI Event.
MIDI Multi Mode: Multi-timbral operating mode on a
MIDI sound module in which different sounds can be
controlled polyphonically on different MIDI channels. A
multi mode sound module behaves like several polyphonic sound modules. General MIDI prescribes a 16part multimode, (i.e. the ability to control 16 different
parts individually). Most modern sound generators support multi mode. In MAGIX midi studio generation 6,
multi mode sound modules are addressed via multi instruments.
MIDI System Exclusive Message: Also SysEx. System exclusive data forms the top tier in the hierarchy of MIDI commands. These messages are tagged with an identification
number for each manufacturer (the Sys Ex Manufacturer’s ID number). The actual contents of these MIDI
commands is up to the manufacturer. They are used for
transferring whole sound programs and/or system settings, and for addressing individual parameters used in
sound generation or signal processing. Editor software
transmits and receives MIDI system exclusive messages
from MIDI devices, allowing you to program these MIDI
devices on your computer.
Modifier (Special keys): Computer keyboard keys used together with “normal” keys to change their function: shift
ctrl alt.
Modulation: Generally, a slight, continuously varying
pitch change. The MIDI standard is controller no. 1, transmitted on keyboards by the non-centered control wheel (or
by moving the joystick vertically).
Moving: Grabbing an object, moving it with the mouse button held down and releasing it at the target position.
MTC (MIDI Time Code): “Translation” of a SMPTE signal into the MIDI Standard.
Mute: Switch off (a sound or track).
Normalize: 1) This function applies the settings of the current playback parameters to the selected events (by altering
the actual events themselves), and clears the playback parameter settings.
293
Glossary
2) (Audio): This function raises the volume of a recorded
audio file to the maximum digital level without altering
the dynamic content.
Note number (Note #): Pitch of a MIDI note, controlled by
the first data byte of a MIDI note event.
Object: General term for sequences, Events or a Mixer’s
channel.
Option: Alternative function, often in the form of a checkbox, sometimes also as a menu entry to be ticked.
Parameter box: Field on the left side of the screen where
you can adjust the parameters of the selected object.
Paste: Add. The command ctrl v adds the contents of the
clipboard—i.e. whatever you copied with ctrl c or cut with
ctrl x—to the position of the cursor, or song position line.
Pitch Bend Message: MIDI message transmitted by a keyboard’s pitch bend wheel.
Pitch Bend Wheel: Hand wheel for generating pitch bend
messages.
Pixel: One matrix dot on the computer screen. Short for
“picture element.”
Play parameters: The parameters for quantization, transposition, velocity, compression and delay which do not alter the stored data but merely affect how the events are
played back.
Position indicator: Units: bars, beats, sub-divisions (often
written simply as divisions in this manual) and ticks.
Post Fader: Positioned after the fader in the signal flow, i.e.
the level of a signal routed post fader to an auxiliary
changes when the fader is moved. Post fader aux sends are
normally used for effects (such as reverb) so that the reverb level changes with the channel level, and the ratio of
original and effect signal remains constant
P-Press: Polyphonic key pressure, also known as polyphonic aftertouch. Rare and very data-intensive type of
command, measuring the pressure exerted on each individual key. Very few keyboards have sensors for poly pressure.
Pre Fader: Positioned before the fader in the signal flow,
i.e. the level of a signal routed pre fader to an auxiliary
does not change when the fader is moved. Pre fader aux
sends are normally used for monitor mixes, so that the
mix on stage or in the studio headphones does not change
when the levels are altered in the control room.
Preferences: Storable settings for a program.
Pull-down menu: Selection menu which opens when you
grab the parameter input box. Occasionally referred to in
this manual as a flip menu.
294
Glossary
Punch, punch-in, punch-out (Drop in/out): Going into and
out of record to record over a section of an existing recording.
Quantization: Time-correction of note positions by moving them to the nearest point on a selectable grid.
Region: Chosen area of an audio file which is registered in
the Audio window for use in the song and, can be placed
in the Arrange window on the audio tracks, just like a sequence can be placed on the MIDI tracks. The region
could be the whole length of the audio file, or any portion
thereof. A region is created automatically after every audio
recording.
Replace: Operating mode where a new recording deletes
the previous one (like a tape machine).
Rubber band: Technique for selecting items by click-holding the mouse, and lassoing it over a group of adjacent
items.
Scroll bars and scroll box: Gray beam at the edge of a window with a movable box inside it for adjusting the section
of a song displayed in the window.
Screenset: Storage location for the layout of the various
MAGIX midi studio generation 6 windows. Each MAGIX
midi studio generation 6 song may store up to 90
Screensets.
Scrubbing: On tape machines: manually moving the tape
across the tape head. In a sequencer: manually moving the
song position line through the song, triggering playback of
the MIDI events.
Selecting: Choosing. Selected objects are displayed in inverted colors.
Sends: Abbreviation for auxiliary sends (used for effect or
monitor sends).
Sequence: A collection of MIDI events which is shown in
the Arrange window as a horizontal beam with a name on
it.
SMPTE: Standard for time coding in a specialized sound
signal used for synchronizing different devices. There are
six formats. Acronym for the Society of Motion Picture
and Television Engineers. Specifies the “counter position”
of a “SMPTE clock”. Composed of hours, minutes, seconds and frames. The MIDI variation of SMPTE is MIDI
Time Code (MTC).
Song Position Line: Vertical line in the Arrange, Matrix and
Score windows which indicates the current song position.
It can be grabbed with the mouse and moved (see scrubbing).
295
Glossary
Sound source: General term for MIDI-controllable synthesizer, sampler, drum machine, digital piano, etc.
SPP, song position pointer: A specific type of MIDI message which gives the distance from the song start in 1/16
notes, and is transmitted along with MIDI clock.
SMF (Standard MIDI File): Standard file format for exchanging songs between different sequencers or MIDI
file players.
Status byte: First byte in a MIDI message, which determines the type of message.
Subframe: A sub-division of a SMPTE frame, corresponding to the individual bits of a SMPTE frame. One frame
consists of 80 bits.
Swing: Parameter which alters the rigid timing of a quantization grid by delaying every other note of a specified
sub-division by a definable amount.
Synchronization: Method for keeping several recording/
playback devices locked together timing-wise.
Synchronizer: Unit for centrally controlling the synchronization of several devices.
Tick, plural = ticks: The smallest unit of timing resolution
in a sequencer. In MAGIX midi studio generation 6 this is
1/3840 note.
Timing: Measure of the ability to play notes at the right
time.
Toggle: Switches backwards and forwards between two
states (windows, parameter values, etc.)
Track column: Situated to the left of the working area of
the Arrange window. Displays the instruments assigned
to various tracks.
Undo: Function which reverses the previous operation.
Update: 1. New revised and improved version of a program. 2. Mixer automation mode in MAGIX midi studio
generation 6, where the old automation data is replaced by
new recordings of existing controllers.
VCA: This term has its roots in the analogue synthesizer
technique. The abbreviation stands for Voltage Controlled
Amplifier. The level of a signal passing through a VCA
will be controlled by a voltage. Usually, this voltage is been
taken from an envelope generator.
VCF: This term has its roots in the analogue synthesizer
technique. The abbreviation stands for Voltage Controlled
Filter. The frequency content of a signal passing through a
VCF will be controlled by a voltage. Usually, this voltage is
been taken from a filter envelope generator.
Velocity: Force with which a MIDI note is struck; controlled by the second data byte of a note event.
296
Glossary
View: Local menu with display options.
Virtual memory: Area of the hard disk which can be used
by the PC as an extension of the RAM memory. The disadvantage in using it is its very slow access time.
WAV File: Audio file format in the Windows operating
system. Uses the file extension, “.WAV”.
Window class: Status of the window as a float window or a
normal window. Float windows are not hidden by normal
windows in the same program.
Work area: The area of a window in which you edit objects
(sequences or events).
WYSIWYG: “What You See Is What You Get”. The ability
of a program to accurately display the forthcoming printout on the screen, e.g. Page View mode in MAGIX midi
studio generation 6’s Score window.
XG: Extended General MIDI standard from Yamaha,
compatible with Roland GS.
Zoom function: Shrinking or enlarging the display in
MAGIX midi studio generation 6 windows.
297
Glossary
298
Part 3
Tutorial
audio
studio
New features in the generation 6
version
– The maximum number of tracks is now 24 for MAGIX
audio studio and 48 for MAGIX audio studio deLuxe.
– Direct Internet connection: Via FTP connection you can
use the internet as a boundless image and sample pool
and load audio samples or songs from the World Wide
Web directly into your arrangement. The MAGIX web
publishing area is for the publishing of your work – one
mouse click takes you into the charts. Every surfer is
entitled to vote, the best songs and videos will receive
attractive prices...
– The menu structure of the program has been completely
overhauled. The numerous menu commands and
dialogues have been regrouped and are now easier to
locate.
– MP3 files – like wave files – can be downloaded
directly, processed, arranged and enhanced with real time
effects. For MP3 export, the audio studio has a QDesign®
limited encoder for MP3 files valid for 20 applications.
After that an upgrade can be bought.
– All supported media formats can be downloaded directly
and processed; no separate conversion is required.
– There are two new mouse modes: time stretching can
now be processed via the object tabs directly in the VIP.
For hard disk projects (HDPs), a freehand mode is
available with which crackling etc. can easily and quickly
be eliminated from the audio material.
– The equaliser, echo/reverb and compressor effects have
been improved.
– The transport control contains a Jog & Shuttle Wheel,
which can be ‘scrubbed’ across the files.
300
Quickstart
When you have installed MAGIX audio studio generation
6, a soundcard and a Windows driver, make use of the following example to get to know the MAGIX audio studio
process.
Start the audio studio by double clicking the icon in the
start menu in the MAGIX directory.
The first recording
We will record two stereo tracks for our initial test.
Let’s assume that you are using an audio source like a microphone or a musical instrument. Connect this with the
help of the appropriate cable to the soundcard input.
Preliminary settings
First create a 4-track multi-track project. After the program
start you will see a dialogue in which you can select the
creation of a multi-track project. (If not, select the option
‘New multi-track project’ (VIP) in the file menu.)
This will open the dialogue window “Setup for a new VIP”.
– Now please enter the following settings:
– 4 tracks (you can use the menu “Edit at any time to extend the number of tracks in your arrangement)
– Sample rate: 44.1 kHz (for a CD quality recording).
MAGIX audio studio opens a new, empty project with four
stereo tracks.
The Project window can be enlarged to screen size by pressing the enter key.
301
Quickstart
The first track in your VIP (Virtual Project) is activated for
recording. This is made visible by the red REC button for
the first track.
All tracks within a project can be used for recording.
The first track
Record
1. Click the small box at the top right of the record button
in the transport console, which is activated as a standard.
(Otherwise, you can activate it via the Window menu). You
can now enter various settings in the newly opened dialogue “Record Parameter”.
Small box for the Record
Parameter dialogue
In it you can make several selections as far as your recording settings are concerned. For the time being we are not
concerning ourselves with any settings and leave the default settings in place.
2. Activate the Monitor button.
This option allows you to preview the audio prior to actually recording it. Start the audio source to monitor the
strength of the audio signal. You might need to adjust the
volume with either an external mixing console or by using
the sound card’s audio utilities to adjust the input volume.
If the levels are at the desired volume you can move on to
the next step.The LED peakmeters will show you whether
your audio is coming in too loud as well. If you see a ‘Clip’
indicator, please reduce the volume of the audio signal.
3. Restart the audio again and click on the Record button
in the Record Parameter dialog or press ‘R’ on the keyboard.
302
MAGIX audio studio generation 6 will now start recording
your audio and will indicate the length and progress of the
recording in the Record Time field. During the recording
Quickstart
the monitor LED peakmeters might actually react a little
bit sluggish depending on the computer speed of your system. This is because MAGIX audio studio monitors the
audio signal that is recorded from the buffers, which are
lagging behind to ensure that the recording process takes
top priority.
4. At the desired length click the Stop button.
MAGIX audio studio stops the recording and display a dialogue that basically asks you to confirm the recording.
You have a choice to redo your recording at this point. If
you click on the Delete button, you return to the Record
Parameter window and you can redo your recording all over.
If you click on the OK button, MAGIX audio studio will
insert a new object at the beginning of the first track.
The second track
Now that we have successfully recorded the first track, we
can move on to record the second track. Depending on
whether you have one of the sound cards that allow for
simultaneous playback and record, you will be able to monitor the first track while you record the second track.
To record the second track:
1. Disable the REC button on the first track .
2. Click on the REC button on the second track.
3. Click on the Record button in the toolbar.
The REC button on the second track
The Record Parameter dialogue appears on the screen and
allows you to make further choices. Since we want to
monitor the already existing track, we will need to enable
the option Playback while Recording.
Note: This requires that you have a sound card that is
capable of simultaneously recording and playing back audio.
If you do not have such a card and your system, MAGIX
audio studio will generate a error display indicating that
there is some problem with your sound card. This is normal as MAGIX audio studio is not able to address the card
for the simultaneous playback and record functionality, also
referred to as full-duplex.
4. Click on the Monitor button.
5. Start the audio for the second track or sing into the
microphone. If the levels need to be adjusted again,
please do so now.
6. Click on the Record button or press the ‘R’ key.
303
Quickstart
MAGIX audio studio generation 6 now starts recording the
second audio track and at the same time will playback the
contents of the first track.
7. Click the Stop button at the desired location.
The confirmation dialogue appears on the screen. If you
click on OK. MAGIX audio studio inserts another object
into the second track. If you decide to delete the audio, you
have another chance to record the audio over again.
Note: You can add additional tracks at this point by
repeating the above steps. Depending on the system
configuration and power of your computer system, you may
be able to record a number of additional tracks. However,
if MAGIX audio studio starts to skip the audio playback
during the recording process, it is time to reduce the
number of playback tracks. The skipping of the audio is an
indication that either your buffer settings are too low or
your computer system cannot carry all the load. If you run
into problems while recording additional tracks, please see
the chapter on Problems and Solutions.
The first arrangement
Every recording produces an object that can be processed
and arranged on the tracks in various ways. In order to move
or delete objects on the track, click the lower half of the
object with the mouse button. By keeping the mouse button
depressed you can now move the object to any position and
track you select. The Del button deletes the object from the
track.
VIPs and Waves
A so-called wave project is set up for every object that you
can see in the arranger. You can work essentially with two
different project types: arrangements (VIPs) – i.e. multitrack projects with different objects – or wave projects – i.e.
the audio material used in the VIPs.
When you delete an object in an arrangement, the audio
material and corresponding wave project remain in tact.
You can access the wave project used in the current
arrangement (VIP) via the window menu. Move across to
the wave project of your recording! As your recording is
saved directly onto the hard disk, the corresponding wave
project is allocated the suffix HDP (hard disk project). When
you open the HDP you will see a wave presentation of the
audio materials in large format.
304
Quickstart
In wave projects you can process your material directly. You
can cut, enhance with effects etc. This alters the audio
material. VIP processing is different: Here you work
‘virtually’ – positioning, cutting and many effects are
calculated in real time; the original material undergoes no
change.
Now move back to your VIP! The tracks in a virtual project
support recording of several tracks simultaneously or in
sequence and downloading of audio material. You can
therefore set up different tracks for drums, bass and guitar,
for example. When you record or download, these tracks
will then contain virtual objects of the new material.
Download audio material
Audio material can be downloaded from various sources
and in various file formats. You can use audio CDs, MP3
files from the Internet, sample CDs (like the MAGIX
soundpool series) or other audio files. You can use all
supported formats on any track within a project.
There are several ways to download material. The ‘Open’
option in the file menu offers all supported data formats.
Audio CD tracks must first be copied separately to the hard
disk (‘grabbed’). To do this, select the appropriate option in
the file menu (or in the CD menu of the deLuxe version).
The simplest method is to download audio material directly
from the Windows Explorer. Just open the Windows Explorer, organise the Explorer and audio studio windows in
such a way that both are accessible, access the directory in
Explorer that contains the audio material and pull the desired files across to your audio studio with the simple drag
& drop function.
Position objects
All files are displayed as objects in the arranger and can be
moved to any track and arranged. The tool bar contains a
separate bar with buttons for various mouse modes. If this
is not visible, you can activate it via the menu
‘Window>Mouse Mode Bar’. Normally, you will work in
universal mode, which makes very comprehensive possibilities available to you. To move an object in universal
mode, click the lower half of the object. If you keep the
mouse button depressed, you can move the object.
If you click the upper half of the object, you expand various
areas (“ranges”) that are displayed in inverted format. These
areas can be played separately and edited (e.g. enhanced
with effects).
305
Quickstart
Volume
Fade
Length
Handles (Tabs)
All objects in VIP can be shortened or looped, simply lead
the mouse to one of the lower corners of the object until
the mouse pointer becomes a stretch symbol. Now the object can be compressed. If the option ‘Create looped object’
is activated in the ‘Object’ menu, the object can be stretched
via the lower right tab. This allows you to create entire
rhythm tracks from short drum samples simply by stretching!
At the two upper corners there are two fade tabs, which are
pulled towards the inside in order to fade the object in or
out. The upper middle tab adjusts the volume of the object.
Processing
All objects can be cut into several objects. To do this, select
the option ‘Cut object’ in the ‘Process’ menu or ‘Separate
objects’ in the mouse mode. The mouse pointer becomes a
scissors and you can cut the objects into as many smaller
objects as you like.
Multiple objects can be consolidated as a group, e.g. to prevent inadvertent movement within the group. The first step
here is to mark individual objects.
Single objects can be marked simply by clicking the lower
half with the mouse button in standard mouse mode. The
three upper object tabs of a marked object become grey to
indicate their selection. Multiple objects can be marked by
keeping the Shift key depressed. If you click with the mouse
next to an object on the lower half of track, you can draw a
rectangle with the depressed mouse button. All objects
within the rectangle are then marked (‘rubber band selection’).
Export
The destination for all arrangements and processes is normally an audio file. There are a number of different export
formats, which can be selected via the File menu. In the
deLuxe version, the arrangement can be burned directly
onto an audio CD. All export calculations are independent
of the play performance . If the computer experiences replay difficulties due to an excessive number of objects and
effects, the export file will nevertheless calculate correctly.
In the event of computer overload, it is recommendable
here to move already completed passages of complex arrangements by export or mix-down function into a single
file.
306
Terminology
The following lists some specific terms that where defined
to describe components of MAGIX audio studio generation
6 that are mentioned frequently throughout the
documentation. Even if you were somewhat familiar with
some of the particulars, we would like to encourage you to
read the definitions for the individual terms. The terms are
specific context related and are not further covered in the
rest of the documentation. PC typical terms such as button,
window, and file requester are not explained here. Please
refer to a PC or Windows™ manual for further details on
those terms.
Overview
1. Your recordings will be saved as individual Wave projects.
You can edit those projects as a unit or only parts of it
(ranges).
2. Multiple Wave projects or different ranges of Wave
projects can be arranged as Virtual projects (VIPs).
3. In virtual multi-track projects, audio tracks will be
positioned and displayed as objects. Within those objects
you can select ranges, edit them and switch between the
different views.
4. Important working functions for audio are the Clip and
the VirtClip that function as a temporary saving space
for Wave projects and Virtual projects.
5. Important graphical tools are the handles, marker,
section and the play cursor. With the use of the handles
and markers you can change and position the objects.
In the section you can edit different ranges of the project.
The play cursor shows and marks the play-back position.
Terms in alphabetic order:
Clip
Clip for Audio Data (Wave Projects)
The Clip is a storage place for samples from Wave projects,
which are copied from a Wave project window and can be
inserted in the same Wave project or a different one. In
addition, the content of the Clip can also be mixed with
that of another Wave project window. The Clip always takes
on the attributes of the originating project (Bit Rate, Sample
Rate, Mono, L&R, or Stereo Mode). The Clip is represented
on the screen with a window that contains the word ‘Clip’
in its title bar. Otherwise, the Clip is like any other project
that can be played back, edited and saved with a different
name.
307
Terminology
VirtClip for Virtual Projects
While the Clip is responsible for transferring material from
and to Wave project windows, the VirtClip does this with
data from Virtual projects. Likewise, the window is not
initially opened and displayed.
Handle
Volume
Handles are the five little rectangles that appear on the
outline of a selected object.
Fade
Length Handle: Lower right and left-hand handles. These can be used to change the object length.
Fade Handle: Upper right and left-hand handles. These
handles change the fade in and fade out of an object.
Length
Volume Handle: Upper middle handle. This handle sets
the volume for the selected object or object group. The level
is displayed in the upper left-hand corner of the VIP
window.
Marker
Markers are used to store specific time locations. They are
indicated on the upper edge of the sample display by small
triangles and show any assigned name or number. These
markers can be moved with the left mouse button.
Any project can have an unlimited number of markers. Up
to 10 of these markers can be accessed through the number
keys. A marker that has been assigned to one of the number
keys carries the name ‘1’ through ‘10’. The menu option
Range>Store Marker>Other can be used to store markers
with specific names. These names are displayed next to the
marker in the project window.
If you click the right mouse button in the area where the
markers are displayed, a context sensitive pop-up menu is
displayed, which contains additional commands to
manipulate markers.
Use the Marker Manager (Menu ‘Tools’ or Marker Context
menu) to manage and rename markers.
To select a range between two markers, click on the triangle
of the first marker to activate it, followed by holding the
Shift key and clicking on the second marker.
Objects
308
Audio data is displayed in Virtual projects via rectangles,
which are located in multiple tracks. These are the so-called
Objects. An object is a representation of sample material
Terminology
from an audio file. In other words: An object references or
links to audio data contained in a Wave project.
Additional information about objects is available in the
definition list for Virtual Projects .
Play-Cursor
The Play Cursor or the Position Line is the vertical moving
line during playback and shows the current playback
position.
The start position of the Play Cursor (playback start) is set
by clicking the left mouse button into the project window.
(Click next to an object for virtual objects.) This deselects
any previous range.
Range
If you edit sound and multi-tracks in MAGIX audio studio
generation 6, you’ll mostly work with different ranges in
your Wave- and Virtual projects.
1. Ranges are used to specify the sections that you want to
edit (cut, paste, normalize, fade in/out, volume controls,
effects and delete).
2. Ranges define the loops considered in the playback of
the projects.
3. Ranges define the outlines (edge) of the section of the
graphical display of the object (rectangle).
Especially the upper and lower edges may be analyzed
during editing, which is not the case with some of the
function groups!
A range can be selected with the mouse. Ranges can be
played back with the Spacebar. It is defined by the beginning
and end (horizontal) and by the upper and lower limits
(vertical).
Every project can have an unlimited number of ranges
defined. Up to 10 ranges can be accessed directly through
the function keys. Additional ranges can be accessed with
the Range Manager. The vertical range borders can be
locked with the function Fix Vertically (Menu ‘View’). This
will set the height of the range to a maximum value, which
is the default setting for Virtual projects.
Section
MAGIX audio studio generation 6 offers the possibility of
displaying any project window in up to three sections. This
enables you to show the complete sample in one section
while displaying smaller sections in one or two other
309
Terminology
sections. Each section can be accessed and edited in
separately.
Active Section when using Zoom Levels
If Zoom commands are used on one of the display sections,
such as the buttons on the Positionbar, it is important to
designate the section that is to be zoomed. Click on the left
or right scrollbar of a section to activate it.
Virtual Projects (VIPs)
VIP with two objects
Virtual projects are the centerpiece of MAGIX audio studio generation 6! In Virtual projects you can arrange objects taken from multiple Wave projects and arrange complex audio projects. All cut operations, volume level changes,
fades, and more are completely virtual, meaning that the
audio material is not destroyed! This allows you to select
the proper cut position, cut length, volume level, effect setting, etc. by experimenting without loosing audio material
or alter it.
Detailed information about working with Virtual projects
can be found in the electronic Reference Manual.
Even if the present audio hardware can only play back up
to 2 channels of audio (Stereo), multiple tracks beyond a
stereo pair can be played back in a Virtual project.
The display of the Virtual project can be switched between
two definitions. The Tab key allows you to switch between
the two modes. The key combination Shift + Tab displays
the Editor dialog for the Virtual project display preferences.
Attributes such as displaying only a single graphic form
for Stereo tracks can be chosen next to whether you want
text displayed in the objects.
Buttons on the left side of each track in VIPs
Mute: Mute: Mutes the corresponding track.
Solo: Only this track is played back when this button is
active (independent from any Mute button assignments).
Lock: Objects on this track can no longer be moved.
Vol: Activates the volume automation curve for the track.
Pan: Activates the panorama automation curve for the track.
Rec: Arms the track for recording.
310
S-Button: activates the track info dialogue where you can
activate the surround mode for each track.
Terminology
Snapshot Buttons in VIPs
The four buttons in the lower left-hand section of the Virtual
project window allow you to save four setups incl. ZoomLevel, Display-Position, and Display Mode. To store a setup,
hold the Shift key and click on one of the buttons. A single
click on the button without holding the Shift key recalls
the stored setup or zoom level. Any changes applied to the
windows will return to the state saved to the button.
Wave projects
A Wave project contains audio data. Access to the Wave
project is obtained by selecting the corresponding Wave
project window. The title bar of the window displays the
name of the Wave project, the bit resolution, the length of
the sample, and the resulting storage requirement. To activate the window, simply click into the project window.
MAGIX audio studio generation 6 can work with an unlimited number of Wave project window displayed on the
screen.
Working in a Wave project window works much the same
as with conventional sample editing programs and you may
already be used to those conventions.
To perform destructive editing, it is necessary to select a
range with the left mouse button.
Clicking the right mouse button opens a context sensitive
pop-up menu. The menu displays the most important
functions for working with destructive processing.
Wave projects feature five mouse modes, which can be selected in Options>Program Preferences>Wave Project
Mouse Mode or via the mouse mode toolbar.
For additional information see Effects. Please keep in mind
that destructive editing is also possible in most cases in an
object oriented fashion in Virtual projects.
RAM and HD Wave Projects
The RAM Wave project load their complete content into
the RAM memory of the computer.
When working with RAM Wave projects, you can decide at
the end, whether you want to keep the changes or whether
you want to discard them by simply not saving the changes
to the file stored on the hard disk. Since the material is
completely loaded into the RAM memory of the computer,
any changes will be lost unless they are saved to the file
stored to the hard disk (Shortcut: ‘s’).
This method of editing and processing is equivalent to the
computer’s native behavior. However, with large data
content as is the case with audio files, the computer suffers
from extreme speed loss since the operating system starts
311
Terminology
to transfer the memory contents to the virtual memory file
on the hard disk.
Any editing or processing applied to HD Wave projects are
immediately written back to the hard disk file, as is the
case with conventional tape recorders. Prudence is suggested when using the editing options in the menu Effects
and any commands in the Edit menu to prevent any accidental loss of audio material.
For test or preview purposes, please follow the outlined
below:
First, work on a copy of the audio material. To accomplish
this, copy the selected range into the Clip (Shortcut: ‘c’).
Open or activate the Clip window and select the complete
contents of the window (Shortcut: ‘a’). Any processing can
now be applied to the Clip contents.
Mono, L&R, and Stereo Wave Projects
Mono: Contains mono audio data.
Stereo: Stereo audio with a standard one-channel graphical
display (combined display of both stereo channels).
Contains stereo audio data. The sample values for the right
and left channels are contained in the same file in successive
order.
It is also possible to display both stereo channels. To switch
the display select View > VIP Display Mode > Definition >
Stereo in 2.
L&R: Stereo audio with two-channel graphical display (separate display of both tracks). Contains two mono samples
(mono audio data) for both stereo tracks.
Using L&R projects in MAGIX audio studio is only
necessary as a transitional step to convert a stereo Wave
project into two mono projects and vice versa.
All types of Wave projects (Mono, L&R, Stereo) can be used
in the same VIP. To play back L&R Wave projects in stereo,
the parameters for the two (mono) tracks need to be set to
‘left’ and ‘right’ respectively.
312
Virtual Editing Concepts
Working with Objects
Integrating an audio file as a VIP Object
Method 1: Loading a File into a VIP
Mark a range in the VIP and load the WAV file with
File>Open Project>Audio File. The file is inserted at the
beginning of the selected range as an object. The range
also denotes the track into which the WAV file is inserted.
Method 2: Drag & Drop from the Explorer
You may use the Windows Explorer to drag & drop audio
files into the VIP. The program automatically creates objects
and their associated HD Wave projects.
Integrating a WAV File Range as a VIP Object
Open a Wave Project. Mark a range, which is to be incorporated into a Virtual project (Complete Range: key ‘a’). Create a new Virtual project with File>New Multi Track Project
(Shortcut: ‘e’) or with the corresponding button in the
toolbar. Tile the open windows by pressing the ‘Enter’ key.
Drag the selected range in the Wave project into the Virtual project by clicking the left mouse button into the range
and dragging the range into a VIP track. A new object is
created in the VIP at the position the mouse button was
released.
313
Virtual Editing Concepts
Accessing Audio Material in an Object
Select any object. In the menu Object, select ”Destructive
Editing”. (The same menu option is available from the context sensitive menu when clicking the right mouse button
on the object.) This opens the corresponding Wave project
window. The marked range represents the audio material
that is used in the VIP object.
Selecting an Object with the Mouse
Clicking the left mouse button selects the desired object.
Prerequisite for this is the selection of the correct Mouse
Mode: Object Mode, Object & Curve Mode, and Universal
Tool Mode all offer this functionality. In the Universal Tool
Mode, the object is selected by clicking on the lower half of
the object.
The five handles on the outline of the objects identify any
selection of objects. While the mouse button is held clicked,
the outline of the object is also displayed.
Clicking the mouse button outside of the object confines
deselects any object selection.
Also, see the information in Details about the Individual
Mouse Modes .
Selecting Multiple Objects with the Mouse
If the Shift or Ctrl key is pressed in addition to a mouse
click, additional objects are selected without undoing any
previous object selection.
Prerequisite for this is the selection of the correct Mouse
Mode: Object Mode, Object & Curve Mode, and Universal
Tool Mode all offer this functionality. In the Universal Tool
Mode, the object is selected by clicking on the lower half of
the object.
Another method of selecting multiple objects is the use of
the Object Lasso. Simply click the left mouse button at an
empty VIP track pane location to the left of the desired
objects and drag a marquee (Object Lasso) around the object
you would like to select. Once the mouse button is released,
the object covered by the Object Lasso will be selected.
Also, see the information in Details about the Individual
Mouse Modes .
Moving and Duplicating Objects
Any object selection can be moved (dragged) along the horizontal time line or vertically into different tracks by clicking
and holding the left mouse button on one of the selected
objects. After releasing the mouse button, the objects appear
at the new location.
314
Virtual Editing Concepts
If multiple objects situated in independent tracks are
selected, the complete group can only be moved within the
confines of the VIP track pane. In other words, all objects
need to stay within the vertical and horizontal track borders.
If the Shift key is pressed while moving the object selection,
the horizontal time position is maintained. The object
selection can only be moved vertically (to different tracks).
If the Ctrl key is pressed while moving the object selection,
a copy of the object selection is created. In this case, the
copy of the original object selection is placed at the
destination. The original objects maintain their position.
Prerequisite for this is the selection of the correct Mouse
Mode: Object Mode, Object & Curve Mode, and Universal
Tool Mode all offer this functionality. In the Universal Tool
Mode, the object is selected by clicking on the lower half of
the object.
Also, see the information in Details about the Individual
Mouse Modes .
Changing Object Borders in Virtual Projects
The lower object handles of a selected object can be used to
alter the object borders. The mouse can be used to change
the object beginning or end. The object length can only be
changed within the confines of the physical Wave project
window. This means that the beginning of the object can
not be extended beyond the beginning or end of the
corresponding Wave project. Conversely, the end of the
object can not be extended beyond the beginning or end of
the corresponding Wave project.
Prerequisite for this is the selection of the correct Mouse
Mode: Object Mode, Object & Curve Mode, and Universal
Tool Mode all offer this functionality. In the Universal Tool
Mode, the object is selected by clicking on the lower half of
the object.
Also, see the information in Details about the Individual
Mouse Modes .
Fade-In / Fade-Out and Object Volume
The object handle in the upper middle can be used to set
the object volume. The exact volume level in dB during the
change is visible in the pop up window at the object.
The upper left and right-hand handles of the object change
the fade-in and fade-out settings of the object.
Since these changes are applied in real-time, during
playback of the project, the original audio material is left
intact. This allows easy set up of fades and volume levels
without having to fear data loss.
315
Virtual Editing Concepts
Prerequisite for this is the selection of the correct Mouse
Mode: Object Mode, Object & Curve Mode, and Universal
Tool Mode all offer this functionality. In the Universal Tool
Mode, the object is selected by clicking on the lower half of
the object.
Also, see the information in Details about the Individual
Mouse Modes .
Overlapping Objects
A track (channel) can only play back one object at a time. If
one object is moved over another object, the previous object
is partially or completely taken out of the playback list much
like one sheet of paper covers another partially or
completely. The invisible part of a covered object will not
be audible. By moving the covering object out of the way,
the covered section or the complete object can be made
audible again. To create a crossfade between two objects
that are intersecting each other, the Crossfade Editor in the
menu Edit can be used.
Working with Ranges
Selecting the Correct Mouse Mode
Initially, the correct mouse mode needs to be selected, since
the mouse is the center point of any range manipulation.
In Virtual projects, the Range mode and the Universal Tool
mode (upper track pane) are available. In Wave projects,
the Range mode can be used to select and manipulate
ranges.
Selecting a Range
A range can be selected from any position to the next by
clicking with the left mouse button into the waveform.
Hold the mouse key and move the cursor within the range/
waveform.
The selected range will appear as an inverse rectangle. Release now the mouse button. In the Textile right under the
header of the project window you will see the horizontal
edges of the selected range.
If you want to select a different range, just click into the
area next to the inverse rectangle, but still within the
waveform. The previous range will disappear and you are
able to select a new range.
Adjusting a Range
316
Click into the inverse rectangle if you want to extend or
shorten the size of the selected range. Move the cursor (hold
the mouse key down) into the direction in which you want
to extend to. As soon as you slide over the edge of the
Virtual Editing Concepts
rectangle, the selected range will follow your mouse
movements. When you are done with the adjustments,
release the left mouse button. In this way you can move
one edge only to the desired position while maintaining
the correct limits.
If the entire waveform is already selected and you still want
to adjust only one edge of the rectangle then you have two
possibilities:
Either you have another area that is not within the selected
range and you can click in there. The previously selected
range disappears and a very small range will appear. Now
you can define a new area within the previously selected
range.
Another way is to press the key 7 (Home) or 1 (End) on the
numeric key block on your keyboard. Those are the shortcut
commands to place the marker to the start and end of a
range. The previously selected reange disappears and you
can select a new one.
You can also find those functions in the menu Range. In
addition to that you can use key 4 (cursor left) and key 6
(cursor right) to scroll the range to the left or right.
De-Selecting a Range
If you want to select a different range or want to deactivate
the current range selection, click the mouse button once
into the project window. The previous range disappears and
the window can be used to select a new range.
Changing a Range
If you want to change an already selected range outline
(beginning, end, upper, and lower border), simply click the
left mouse button into the range and while holding the
button, move the mouse in the direction you want to extend
or shorten the range. As soon as the mouse pointer crosses
over the current range border, the program picks up the
border and snaps it to the mouse pointer. You now can
move the range border to the new point and release the
mouse button.
Moving a Range Horizontally
Hold the Ctrl or Shift key while clicking inside a range.
Next, hold the left mouse button clicked and move the range
to the new position. Release the mouse button to place the
range at the new location.
Saving Ranges and Special Range Commands
Ranges and markers can be saved with the help of menu
functions or keyboard shortcuts.
317
Virtual Editing Concepts
MAGIX audio studio generation 6 can store an unlimited
number of ranges and markers. These and other special
functions to define, change, and use ranges can be found
in the menu Ranges.
To manage saved ranges, use the Range Manager (Menu
‘Tools’).
Moving of Ranges in Small Increments (Keyboard
Shortcuts)
By holding the Shift key and using the cursor keys, ranges
can be moved in small increments. An overview of all
keyboard shortcuts can be found in the Shortcuts section.
Changing Range Ends in Increments Using the
Mouse
This is most often needed when searching for optimized
loop borders in Wave projects. The sections can be split
with a keyboard shortcut (Shortcut: ‘b’) or with Range>Split
Range. All range borders are displayed with a highresolution zoom level.
Using Shift + b returns the display to a single section.
Playback of a range
Simply press the space key to playback selected samples.
There are 3 different types of playback. You can control
with the 3 buttons in the top tool bar.
The first one plays the sample or range once,
the second plays the sample or range looped,
the third plays the sample from the beginning and plays
into a loop which is very handy for testing of instrumental
loops. If a certain range is selected, that selection will be
played back again and again.
When you adjust the range (while playback) it will play the
new range immediately. If only a marker is set but not a
range, it will only play from the start of the marker to the
end of the sample. When you set a marker within a range,
it will play a loop from the marker to the end of the range.
You can stop the playback with the space key. The All bit
resolutions can be reflected immediately. Conversion of the
data works in real-time meaning while playback. That
means also a high CPU activity, and sometimes the CPU is
overloaded or not able to process the request at once and
the system stops and/or doesn’t react to any regular stop
and play commands. In this case, you can press ESC to
interrupt the conversion process.
318
Virtual Editing Concepts
Shortcuts for range editing
– Cursor left, right: The active range scrolls to the left or
right
– Cursor left + shift: The edge or the active range will be
moved smoothly to the left.
– Cursor right + shift: The edge or the active range will be
moved smoothly to the right.
– Cursor left + Ctrl: Zoom into the active range
– Cursor right + Crtl: Zoom out of the active range
– Cursor left + shift + Ctrl: The selected range will be
doubled to the left. This function is very handy when
you search for Drumloops: When you have selected a
bar in a Rhythm sample, you can use this function to
select the previous bar. This will also easier the use of
the Virtual projects.
– Page Up: The beginning of the range will be adjusted to
the next smaller volume leve (to avoid glitch/disturbing
noises).
– Page Up + shift
Volume
The volume levels of objects and tracks/channels can be
changed at various stages. Here is an overview of the different possibilities:
Wave Project Level
The volume level changes are applied to the audio material
with Effects>Normalize>Normalize File or with Fade In/
Out.
The audio data is changed. The computer usage is not
affected during playback.
Object Level
Every object can have an independent setting for its volume
level. This can be performed by changing the upper handles
of the object or with Effects>Amplitude/
Normalize>Normalize Object.
The audio data is not changed. The calculations are
performed in real-time during playback.
Track Level
The volume of every track can be changed dynamically with
the volume automation curve and the volume fader in the
Mixer or the VIP.
The audio data is not changed. The calculations are
performed in real-time during playback.
319
Virtual Editing Concepts
Also, see Effect Calculations and Signal Manipulations in
Effects.
Output modus
You can setup the output modus in the Playback parameter
dialog (key P).
With the sample rate option you can choose a different
sample rate as playback. With Device you can select the
desired playback device (if you have more then one active
soundcard).
Please note that some soundcards are not be able to playback
all sample rates.
320
Tips & Tricks
A few tricks that help make working with MAGIX audio
studio generation 6 easy:
Working in Projects
– The a key will select the complete sample as a range.
– With the keys Home and End you can set the play cursor
to the beginning or end; all selected ranges will disappear.
– A range can be selected from one exact marker position
to the next by clicking on the marker above the waveform.
Next, hold the Shift key and click on the second marker.
– Using the Shift + mouse click a range can be moved
horizontally.
– Shift + Ctrl + Cursor keys will flip a range to the right or
left. This is a great way of testing a loop at a different
position.
– Objects in Virtual projects can be displayed in two different modes. By pressing the Tab key you alternate
between the modes. Pressing Shift + Tab will open a
dialog window in which you can set the parameters of
the display modes.
– Using Ctrl + mouse click on an object copies the object.
– Double-clicking the mouse button on the volume curve
you can create and delete volume handles. Activate the
volume automation curve with the V-button in each track
of the VIP!
– Change the function of the mouse buttons in VIPs with
the menu Preferences>Mouse Mode or use one of the
Mouse Mode buttons in the Mouse Mode toolbar!
– The function Lock Objects allows you to lock objects to
prevent for example accidental movement. This is
especially useful for multi track recording when the
individual tracks need to stay in sync with each other.
– To determine the tempo of a selected range (BPM), open
the Snap Definition dialog (Shift + ‘r’) and select the
number of beats the selected range represents (for
example: 4) in the Section Free Bar Snap. Next, click on
the button Get Range in the section Free Bar Snap to
retrieve the length of the selected range. The BPM display
in the Fixed Bar Snap section now displays the BPM of
the audio section.
– Try the right mouse button on various components of
the VIP window! A context sensitive pop-up menu is
displayed, which features useful functions depending on
the window component you clicked on. Among them
are objects, Record and Mute buttons, and the scrollbars.
321
Tips & Tricks
– The Delete key deletes markers when the Play Cursor
(real-time cursor) is located exactly on the marker. The
same key deletes any selected objects and deletes ranges
that are selected.
– The key t separates a selected object at the position of
the Play Cursor. If a range is selected within the object,
the object is separated on the range borders, which results
in three objects. If the Auto Crossfade mode is active
while the separation takes place, MAGIX audio studio
adds smooth crossfades at the separation points. These
crossfades can later be edited for further refinement. Use
the Crossfade Editor to change the crossfade aspects.
– Multiple zoom levels can be saved to the four Z buttons
in the lower left-hand corner of the Virtual project
window. Use the Shift + left mouse click to store a zoom
level to a specific preset button. When clicking on a
previously assigned preset button, the zoom level is
recalled. The S preset buttons can be used with the Shift
+ left mouse click to store a complete window
configuration set. This includes the scroll position of the
window and the Mute/Solo assignments for the tracks.
This offers four Mute/Solo groups that can be quickly
recalled.
– Multiple objects can be selected by holding the Ctrl key
and individually clicking on the desired object.
– Objects between two points can be selected by holding
the Shift key and clicking the mouse button behind the
last object you want to select.
– WAV, HDP, and RAP Projects, as well as stored objects
can be opened with the Windows Explorer by dragging
them from the Explorer window to the MAGIX audio
studio window. A special menu option is available to open
the Explorer from within MAGIX audio studio with
Tools> Explore the HDP Directory. The default folder
opened in Explorer is the same as the HD-Project setting
in the System dialog (Shortcut:‘y’).
– Shift + Tab can be used to display the VIP Display Mode
dialog. This dialog allows you to change the VIP Display
aspects such as the VIP window behavior when an object
or range is moved toward the confines of the currently
displayed window borders (VIP Border Scroll).
– When pressing the Return key, all open windows are
tiled on the MAGIX audio studio screen. This is a good
starting point when using drag & drop functionality to
move ranges and objects between individual project
windows.
322
Tips & Tricks
– Use the menu option Edit>Edit Tracks to manipulate
complete tracks. This includes adding new tracks,
inserting tracks and rearranging tracks.
Mixer
– Clicking the right mouse button on a Mixer effect control
knob or element opens the associated effect dialog.
– A double click on the middle of a control knob or element
returns it to the passive default setting. Another double
click resets the element to the previous position.
– Clicking on the left or right outer limits of a control knob
changes the setting in individual increments.
– In the Mixer window, multiple channels can be soloed
simultaneously. When holding the Shift key and clicking
on a Solo button, all previously soloed channels are unsoloed and the single channel is soloed.
– The Master Normalization function in the Mixer window
can be used to instantaneously adjust the output level to
0 dB, no matter how loud or soft the master output signal
is.
Performance
– It often helps to run two copies of MAGIX audio studio
at the same time (simply start it twice from the Desktop).
This allows you to work on an extensive effect processing,
a longer recording, the creation of a CD, or any other
unattended procedure, while working on another aspect
of a second VIP or project. When working on dual
processor systems in Windows NT, both instances use
the full capacity of one of the processors. Even under
Windows 95 this technique can be used to work more
effectively. Make sure you disable the option Check Space
Bar for Play Back… in the System dialog (Shortcut: ‘y’) to
prevent the program in the background to stop any
process.
– After installation, the VIP Buffer size is set to 16,000
Stereo samples (System Dialog – Shortcut: ‘y’). This
setting enables all effects in the Master section of the
Mixer window with an optimum hard disk performance.
If you only work with a small number of VIP tracks and
do not use the FFT Filter in the Master section of the
Mixer, you may reduce the buffer size up to the
minimum of 2,000 Stereo samples. The Start/Stop
responds much faster and the Scrubbing (using the
keypad ‘0’ key) works much smoother.
323
Tips & Tricks
Recording/Playback
– The Recording window can be displayed by pressing the
shortcut key r. The recording can be started with the key
r and stopped with the key s when the Recording window
is displayed and active.
– The playback can be started and stopped with the
Spacebar. When stopping, the Play Cursor returns to the
original position. If the playback is stopped with the 0
key on the numeric keypad, the cursor will stop at the
current playback position. Continuing to hold the 0 key,
while moving the mouse (Scrubbing) can alter the exact
position.
324
The Effects
This section covers detailed information about the signal
path and combination of effects in MAGIX audio studio
generation 6.
MAGIX audio studio includes a selection of infinitely variable high-end effects. With some effect combinations,
controlled volume or panorama fades, Cross-fading or the
external DirectX-plug-ins you are able to adjust and fine
tune the sound to every desired result.
Effects in the VIP
For each VIP (menu ‘Effects’ or click right mouse button):
– You can use the effects for sound editing: With the
graphical and the parametrical equalizer you can define
the high, middle and low frequency range of the audio
files.
– Dynamic effects: the compressor will align the volume
level. Compressor effects are usually used for vocals and
bass recordings to avoid unwanted volume changes. The
sound becomes then more compressed and intense. Expanders on the other hand extent the dynamic differences
between the top peaks and the lower sequences. The gater
function suppresses the signal once it is over the defined
level.
– Hall, echo/delay and distortion: Those are the most
common infinitely variable effects used in MAGIX audio
studio generation 6.
– Effects for the reduction of unwanted noises (deLuxe
version only): the de-clipping reduces digital distortion
or clipping on badly cut loops. Noise reduction will
reduce any kind of unwanted background noises.
– Timestretching and Resampling: with time stretching
you can adjust the tempo (BPM= beats per minute) to a
recorded sample. With resampling you can change the
key of a sample. It will change the key and the length of
the sample proportionally. Please note that you should
take this step by step; otherwise you’ll end up with a
„Mickey Mouse“ or „Darth Vader“ effect on voices.
– Surround: Each channel of a stereo tracks will be rotated
180 degree within a phase when you use the surround
mode. This means for the playback on a surround system
that the middle frequency (mono part) of the stereo signal
will play from the back. If both channels of a stereo track
are identical, the entire track will be played from the back.
You should experiment with identical tracks and cross-
325
The Effects
fadings. When you cross-fade two identical stereo tracks
and one track will be played in surround mode you can
fade the middle tone part slowly from the front to the
back speakers. You can activate the surround mode via
the track info dialogue at the left end of each track.
Mixer-Effects
Im mixer window you will find more real-time effects for
your mastering:
– a graphical three-band equalizer for each track
– a stereo enhancer for editing the stereo pans, echo
– a FFT-filter to filter selected frequencies in order to edit
the sound fields.
Effect Calculations and Signal Manipulations
When working with MAGIX audio studio generation 6,
audio material manipulation can be performed on five
levels. The signal flows through these five levels in
sequence:
1. Wave Editing (Destructive Editing),
2. Manipulations on the object level in Virtual projects
(Real-time Processing),
3. Volume and panorama automation, including track
volume fader in the Mixer or VIP (Real-time Processing),
4. Real-time effects in the Mixer tracks (Real-time
Processing),
5. Real-time effects in the Mix Master section (Real-time
Processing).
Significance fo the Effect Processing and Signal Manipulation Order
The sequence of the effect processing and other
manipulations (volume and panorama automation) often
affects the result. Some effects depend on the input signal
level.
When working with volume, panorama, and filter
manipulations, the sequence is not important. For example,
it is of no significance whether you first apply a filter
function and then change the volume or vice versa. Even
when working with a multiple of effects, the input signal
level is unimportant. Among them are the Reverb, the Delay
(Echo), Resampling and Timestretching, or Pitch Shifting.
However, all Dynamics functions and those that remove or
reduce noise (Dehisser and Noise Reduction) are dependent
on the input signal level and in some cases on the frequency
response of the input signal. If you have found an optimal
326
The Effects
setting for the parameters, you should not apply other
changes to effect blocks that precede these types of effects.
Destructive Processing of Effects (Wave
Editing)
The audio material is physically altered.
Destructive processing should always be the first among
many editing steps. This means that level-changing
destructive editing should always be performed before any
real-time effects or dynamic functions are applied.
Real-Time Effects in the Mixer Tracks
The following effects can be applied to individual tracks.
They are processed in the following order:
1. Track Volume and Panorama (linked to the volume and
panorama automation curves in the VIP),
2. DirectX Plug-Ins,
3. Equalizer,
4. Echo (Delay).
Real-Time Effects in the Mix Master Section
When not working in Multi-card mode, the Master section
effects can be used for special mastering tasks.
The effects are processed in the following order:
1.
2.
3.
4.
FFT-Filter,
DirectX Plug-Ins,
Volume,
Equalizer.
327
Internet-Functions
MAGIX audio studio generation 6 is equipped with a direct Internet connection for down- and uploads of songs
and audio files.
Web Publishing (Upload)
MAGIX web publishing area
Online radio
Online monitor
328
You can very easily publish your own songs in the Internet,
so that they can be heard by all Internet users around the
world. The only prerequisite is perfectly normal Internet
access – modem, ISDN or DSL.
As soon as you have created a good personal song with
MAGIX music studio, you can ‘upload’ it with Web Publishing Wizard and tell all your friends that they can listen
in via the MAGIX Web Publishing Area! Everyone can vote;
the votes submitted are used to generate a chart list, and
the most successful titles stand to win prizes and maybe
even contracts...
If you exclusively use material from the MAGIX soundpool
CDs for your song, the song will be available immediately
in the Internet in the MAGIX Web Publishing Area. If other
material is contained, e.g. own recordings, a check must
first be run to ensure that publication is legally permissible
– then it can take a few hours before your song is online. It
is expressly prohibited to upload copyright protected material, specifically music from commercial CDs, for example!
If you have completed a good arrangement, save it before
you do anything else. Then select the option ‘Publish to
web’ in the file menu.
The first window of the ‘Publishing Wizard’ will open and
accompany you through the process. You must agree to
the licence stipulations displayed prior to continuation of
the process.
On the second page, enter your name and a song title –
these will be used later for the online search process. It is
also useful to add a style type (genre), so that one can select
a favourite style when listening to songs. Then enter you email address, in case there are any questions or comments
about your song.
Your name, the song title, the genre and your e-mail address are important details for the inclusion of your song
in the Web Publishing Area, so thy must be correctly and
carefully entered. You can decide whether you e-mail address should be published in the Internet or not.
On the next page, you enter the optimum Internet download
speed for the song. The pre-set is 56 kbit/seconds, which
represents the right rate for most modems and ISDN cards.
Internet-Functions
For slower modems one should set 28 kbit, but this will
negatively impact the quality.
Optimum quality is achieved with a setting of 128 kbit Dual
Channel ISDN for anyone with a fast Internet connection,
supporting the best sound experience. Ideally, one activates
all 3 speeds – then 3 versions of the song are created and
uploaded, so that the right version is available for every
Internet connection type. Then you move on to the button
‘Finish’ – and your arrangement is compressed in the selected format and uploaded to the MAGIX server. This will
require Internet connection when prompted.
And that is all! Just open your web browser with the MAGIX
Web Publishing Area and your chosen genre is selected.
FTP Download
You can access the Internet directly from the program, allowing you to download and process songs and audio files
from the farthest corners of the World Wide Web into your
arrangement. The option ‘FTP Download’ in the file menu
opens the FTP selection dialogue; here you can enter the
name or IP number of the desired Internet FTP server. The
pre-set address is the MAGIX Entertainment server, on
which you will always find new sounds and effects.
Once you have selected the FTP server, you will see the
basic directory in the dialogue box. Here you can select audio
files and download them to the hard disk via the download
button.
Depending on the speed of your Internet access,
downloading can of course take somewhat longer than from
a local CD-ROM. However, FTP servers will generally offer
compressed sounds e.g. in the popular MP3 audio format,
which can then be used directly in the audio studio. These
sounds then need only about 5-10% of the transfer time of
uncompressed waves while still delivering almost full sound
quality. Typically, a 2 second loop can be downloaded in 24 seconds, so that the delay remains within acceptable limits.
Prerequisite to a successful FTP connection is, of course,
access to the Internet. Your PC must be connected to a
provider via modem or ISDN card. If providers with proprietary access software are used, it is recommendable to
establish the Internet connection with this software first
and then to set up the FTP connection in MAGIX music
maker generation 6.
For types of Internet access that can be access directly via a
correctly installed Windows® telecommunications network,
the dial-in will be processed automatically on setting up
the FTP connection.
329
Burning of CDs (deLuxe version only)
This chapter introduces you into the basics of burning audio
CDs, and the functionality of the burning functions of
MAGIX audio studio generation 6.
RedBook
To standardize the data structure of CDs and to make them
compatible with the CD drives, Sony and Philips laid down
individual standards for the various types of CDs. The
names simply arose from the color of the books in which
these standards were recorded. Besides of the RedBook for
audio CDs, e.g. there is one YellowBook for CD-ROMs or
one WhiteBook for video CDs with MPEG format.
Among others, a sampling rate of 44.1 kHz and 16 bit
resolution were laid down, and these are supported by CD
players as well as by audio CDs. The audio CDs,
furthermore, must consist of 1-99 tracks that can be directly
jumped to by CD players. Information on number and
length of tracks and pauses are copied from the CD to the
player via special subchannels.
Thanks to MAGIX audio studio generation 6 you may
directly master and burn audio CDs from any multitrack
and any wave project in RedBook standard. Besides the
actual tracks, all required subchannels and data information
is created on the CD blank as well.
Data Transfer
Burning CDs means making special demands on the data
transfer from the hard disk to the CD recorder. The data
must stream continuously to the recorder. If, at any time
during writing, the temporary memory of the recorder
should be left without data, a so called buffer underrun
error will occur that will render the CD unserviceable. This
necessitates the use of a fast SCSI or IDE hard disk. The
mean access time should be 15 ms or better, and the permanent data transfer rate should not be less than 800 Kbyte
per second.
Burning CDs in MAGIX audio studio
330
Some years ago, there was but a small number of select
studios in a position to carry out CD mastering. Today,
writing of audio CDs is nothing exceptional any longer, and
permanently dropping prices for CD-R burners and media
are within everyone’s reach.
On the CD the audio material is stored digitally, and these
data are read by the CD player and transformed back to the
Burning of CDs (deLuxe version only)
analog plane. While in action, track indexes show the CD
player which song starts at what position.
MAGIX audio studio can write an audio CD directly out
from the program too. Before the write process starts, the
track indexes are directly set in the VIP window. Then
MAGIX audio studio converts stereo sum and indexes into
a data stream that is fed to the CD burner.
The CD-R drive modifies an assigned layer of the medium
by means of a laser such that an audio CD player can read
this information as digital audio data later on.
1. In order to write an audio CD the VIP window must at
first contain audio material. You may either record it new
or import existing wave files into the virtual project.
In theory, multiple-track projects might be written in any
number of tracks onto the CD in realtime. Reality sets a
limit that is determined by the capacity of the computer. If
the computer produces intermittent faults this may be an
indication that the writing process onto the CD won’t
function in realtime any longer too. In this case create a
single stereo file by trackbouncing first, import it into a
new VIP window, and there you set the track indexes now.
2. Mix your recordings by means of the realtime functions
of the VIP window and the mixer window. The CD will
later sound exactly like you will hear the playback via a
stereo sound card. All settings for the playback will be
audible on the CD too.
You may arrange the individual tracks or objects by the
equalizer, compressor or delay, and upgrade the stereo sum
with master effects such as the stereo enhancer. You may,
furthermore, adjust sound conditions by means of the
automation curves.
3. Set the track indexes to mark the starting position of
each song. The track indexes show the CD player which
sing starts at what position. Since the track indexes are a
special kind of markers they can be edited like them. As
an example, they may be moved afterwards.
If the VIP window contains but one stereo track in which
each song is created as separate object, you may cause
MAGIX audio studio to create indexes by means of the
button ”automatic indexes”. This will cause an index to be
positioned at the beginning of each object. Tracks and
indexes may be arranged in MAGIX audio studio at
331
Burning of CDs (deLuxe version only)
discretion. Thus pause intervals may be continuously
adjusted, and indexes may be set without any pause either.
MAGIX audio studio is one of the few audio programs
permitting this.
One click on the button ”track marker” on the toolbar will
set a track index at the current playback position. Place, by
a mouse click, the position line at the position where you
want the track index be positioned, and then click onto the
button.
According to the RedBook standard the minimum pitch
between two track indexes is 4 seconds. Due to the fact that
track indexes mark the beginning of a song as a rule, there
won’t be problems by that in practise. However, if you try
nevertheless to create track indexes with a lesser pitch then
you will receive an error message.
4. With the indexes set the CD may be written. This requires
a CD-R drive supported by MAGIX audio studio to be
connected to the computer, and an empty CD-R in the
drive.
Now click onto the button ”create CD” in the toolbar or
select ” CD > create CD” in the menu.
This dialog offers two options:
– Write ”on the fly”. In this mode, all effects are calculated
in realtime.
– Create complete new files. MAGIX audio studio creates
an new stereo file that contains all information on the
multiple-track project.
The first option would be a much more simple and
convenient method to burn a CD.
One click onto the button ”OK” starts the writing process,
and MAGIX audio studio starts searching for available CDR drives. If several drives are connected to the system you
will be asked to select the drive desired. Before burning,
the writing process can be simulated. You may check by
that whether the capacity of the computer is sufficient for
the writing process. Once started it cannot be stopped no
more.
DSP Display
332
During the writing process on CDs in realtime the system
capacity is of the essence. Once the writing process started
it cannot be stopped no more. The whole CD becomes
unserviceable upon an abnormal termination due to a
system not fast enough. When ”on the fly” is selected the
Burning of CDs (deLuxe version only)
computer must calculate the playback with all realtime
functions and simultaneously write the data onto the CD.
The DSP display is a fine expedient to assess possible
problems when writing onto the CD. The below table gives
you a clue for the maximum possible writing speed.
Individual deviations may result due to the configuration
of your system and the speed of its components.
DSP Display and Writing Speed
nearly 100 percent
up to 50 percent
up to 25 percent
single speed
double speed
fourfold speed
Particularly when first using a new and unknown computer
system it is recommended to simulate the writing process
at first to check the limit performance of the system. Should
the system become overloaded, a reduction of the number
of tracks or realtime effects will help by combining parts of
the VIP window by trackbouncing.
The offline variation of the writing process offers another
possibility. At first, it creates a new stereo file that will be
the basis for the writing process.
333
The Individual Mouse Modes
Universal Mode
Right Mouse Button: Displays context sensitive popup menu.
Left Mouse Button:
Upper Track Pane:
Range: Selecting ranges and moving ranges (with Shift
key).
Play Cursor: Single click sets the real-time cursor
anywhere in the track.
Zoom: Double click outside of a selected range (or no
range) zooms out. Double click inside a selected range
zooms in.
Lower Track Pane:
Selecting Objects: Single click selects objects (or group
of objects.) Single click + Shift selects multiple objects,
including all objects between the two clicks. Single click
+ Ctrl selects multiple single objects.
Moving Objects: Dragging moves objects or object
groups. Dragging + Shift moves objects or object
groups up or down the track list without changing the
time position. Dragging + key ‘k’ move the object under
the mouse pointer, plus all objects behind on the same
track.
Duplicating Objects: Dragging + Ctrl duplicates one or
more objects. Dragging + Shift + Ctrl duplicates one or
more objects, while allowing the objects to be moved
up or down the track list without changing the time
position.
Lasso Function: Clicking next to an object while right
dragging the marquee (lasso) across multiple objects
selects the objects within the marquee. Clicking next
to an object while left dragging the marquee (lasso)
selects multiple volume or panorama curve events.
334
Complete Track:
Object Handles: The upper handle changes the object
volume. The changed level is shown in dB in the upper
left-hand corner of the VIP. The upper left and right
handles change the fade-in and fade-out of the object.
Fade curve parameters can be set in the Crossfade Editor. The lower handles resize the object.
Volume and Panorama Automation Curves: Double
click on the automation curve creates a new curve event.
Another double click on the same curve event deletes
The Individual Mouse Modes
the event. Single click on an event selects the
automation curve event.
Selecting Events: Single click + Ctrl allows selection of
multiple events.
Dragging of a curve event moves the selected event.
Dragging + Ctrl moves several events.
To delete events, select the events and use Edit->Delete
… Handle.
Range Mode (Secure Mode)
Right Mouse Button: Displays context sensitive popup menu.
Left Mouse Button:
Range: Selecting ranges and moving ranges (with Shift
key). Objects or automation curves can not be changed
by accident (therefore called ‘Secure Mode’).
Play Cursor: Single click sets the play cursor anywhere
in the track.
Zoom: Double click outside of a selected range (or no
range) zooms out.
Double click inside a selected range zooms in.
Select Object Mode temporarily: Using the ‘.’ (Period
key) temporarily switches to the object mode, which
allows moving of objects.
Select Curve Mode temporarily: Using the ‘-‘ (Minus
key) temporarily switches to the curve mode, which
allows moving and manipulating of automation curve
events.
Draw Volume Mode
Right Mouse Button: Displays context sensitive popup menu.
Left Mouse Button:
Draws volume automation curves into VIP tracks. The
‘V’ button for a respective track needs to be active prior
to drawing the volume curve.
Draw Panorama Mode
Right Mouse Button: Displays context sensitive popup menu.
Left Mouse Button:
Draws volume automation curves into VIP tracks. The
‘P’ button for a respective track needs to be active prior
to drawing the panorama curve.
335
The Individual Mouse Modes
Curve Mode
Right Mouse Button: Context menu
Left Mouse Button: The left mouse key offers
following functions:
Volume and Panorama rubber band
When you click into the track near by an object, you
can, by pulling the mouse to the left or right, spread a
rectangle with the mouse key kept depressed. This will
select all volume and panorama points contained
within.
Volume and Panorama graduations for the whole
track
By means of the panorama and volume curves, volume
and stereo panorama graduations can be graphically
recorded. For this purpose sizing handles which are
moved are created on the curve.
A double click on the volume or panorama curve creates
a new handle, and a further double click will clear it.
Selected handles may also be cleared by selecting the
option ”clear handles” in menu ”edit”.
You may select a volume or panorama handle by a single click. You will select further handles by holding the
Ctrl key while clicking.
When you click into the track on the right besides an
object, you can spread a rectangle with the mouse key
kept depressed. This will select all volume and
panorama points contained within (rubber band
function).
You may move selected volume and panorama handles
with the mouse. To move several handles the Ctrl key
must be kept depressed while pulling.
Context Help mode
Right Mouse Button: Context menu
Left Mouse Button: Click onto the object or subject
for which you request further information.
Cut mode
RightMmouse Button: Context menu
Left Mouse Button: You can use the mouse cursor
like a pair of scissors to crop objects.
Zoom mode
Right Mouse Button: Zooms out of the project
Left Mouse Button: Zooms into the project
336
The Individual Mouse Modes
Object separator mode
Right Mouse Button: Context menu
Left Mouse Button: You can use the mouse pointer like a
scissors in order to cut objects.
Pitch-shift/Time stretch mode
Right Mouse Button: Context menu
Left Mouse Button: The lower right tab allows compression or stretching of an object. A time stretching effect is
created: The object is not played as a loop or shorter version, but simply in a different play tempo.
Using the centre tab, the pitch can be altered using pitch
shifting.
Draw wave mode (only wave projects)
Right Mouse Button: Context menu
Left Mouse Button: Free-hand drawing function for the
wave format.
337
Shortcuts
Below are the default MAGIX audio studio generation 6
shortcuts for the program. You may change the shortcuts
at any time with Options>Program Preferences>Edit Keyboard Shortcuts.
General
A
Range all
Ctrl-A
Redo
B Split
range into 3 views
Shift-B
Display gets 1 view
C or Ctrl-C Copy range
Shift-C
Copy As
Alt-C
Copy and Clear (VIP)
E
New VIP
F
Fade In/Out
G
Synchronization
H
Close all Windows
I
Project Information
Ctrl-I
Import Sample
L
Load RAM-project
Shift-l
Load HD-project
M
Open Mixer
N
Normalize (virtual)
Shift-N
Normalize (destructive)
O
Load Virtual project
P
Play parameter
R
Record Dialog
Ctrl-R
Grid on/off
Shift-R
Grid definition
Q
switch Grid off
S
Save project
Shift-S
Save project with new name
T
Split objects
Ctrl-T
Trim objects
Ctrl-V or V Insert Clipboard
Alt-V
Overwrite with Clip (VIP)
W
Load wave
X or Ctrl-X Cut range
Y
System preferences
Ctrl-Z
Undo
Tab Toggle object draw mode
Tab + Shift Define object draw mode
Space
Playback on/off
Enter
Arrange windows
338
Shortcuts
Esc
Del
Del + Ctrl
Backspace
Insert
+ Ctrl
+ Shift
Numeric 0
Numeric ‘,’
# Switch
Abort playback, recording & physical
sample manipulations
Delete range
Delete selected objects
Restart Playback
Overwrite with Clip
Copy into Clip
Insert Clip
Scrubbing
2 Views
Grid on/off
Range
Cursor left or 4
on numeric pad:
+ Ctrl
+ Alt
+ Shift + Ctrl
Cursor right or 6
on numeric pad:
+ Ctrl
+ Alt
+ Shift + Ctrl
Home
+ Shift
End
+ Shift
PgUp
+ Shift
PgDn
+ Shift
Cursor up
+ Ctrl
Cursor down
+ Ctrl
/ * - + Keys on
numeric pad:
Scrolling left
Zoom In
Play Cursor to beginning of the range
Flip range left
Scrolling right
Zoom Out
Play Cursor to end of range
Flip range right
Play Cursor to beginning of project
range to beginning of project
Play Cursor to end of project
Range to end of project
Range start to next zero crossing
Range start to previous zero crossing
Range end to next zero crossing
Range end to previous zero crossing
Scroll up
Zoom in vertically in VIPs
Scroll down
Zoom out vertically in VIPs
Move range borders dependent on
zoom level
Function keys
1-10
+ Shift
+ Shift + Ctrl
Get range 1-10
Store range 1-10
Get range length
Store range with new name
F11
Keypad 0-9
(not numeric block!): Get Marker 1...10
+ Shift
Store Marker 1 bis 10
339
Shortcuts
+ Alt
?
Store Marker while playback
Store Marker with new name
Mouse
For a full description of the mouse shortcuts, please see
the section on Details about the Individual Mouse Modes
Microsoft® Intellimouse
Middle mouse click:
Wheel:
+ Ctrl
+ Shift
+ Ctrl + Shift
340
Playback Start/Stop
Scroll horizontally
Zoom In/Out horizontally
Zoom In/Out vertically
Scroll vertically in VIPs
Button overview
Upper Toolkit bar
When the program is first started, only the tools and mouse
mode bars are opened in the upper right corner of the
monitor. All further ones may be added via menu
”windows”.
All toolbars may be placed on the screen at discretion, and
they are automatically arranged in the upper part of the
screen by a double click onto the header line.
Tools bar
1 2
3
4
5
6 7
8
9 10 11 12
13 14
1 – New multi-track project
2 – Open VIP
3 – Open WAV file/HD-Wave project
4 – Store project
5 – Crop
6 – Copy
7 – Insert
8 – Screen active
9 – Auto crossfade mode
10 – Crossfade editor
11 – Form group
12 – Cancel group
13 – Mixer
14 – Transport console
Mouse Mode bar
1
2
3
4
5
6
7
1 – Universal mode
2 – Range mode
3 – Cut mode
4 – Pitchshift/Timestrech mode
5 – Curve mode
6 – Draw Volume mode
7 – Draw panorama mode
8 – Draw wave mode
9 – Zoom mode
10 – Scrubbing mouse mode
11 – Context Help mode
8
9
10 11
341
Button Overview
CD bar (deLuxe version)
1
2
3
4
5
6
7
1 – Set track marker
2 – Set Sub index
3 – Set pause index
4 – Set auto marker
5 – Clear index
6 – Clear all indexes
7 – Write CD
Lower toolbars
Positioning bar (left)
1 2 3 4 5 6 7
1 – Cropping at start
2 – Cropping to left
3 – Half cropping to left
4 – Half cropping to right
5 – Half cropping to right
6 – Cropping at end
7 – Object edge left
8 – Object edge right
9 – Range to last marker
10 – Range to next marker
11 – Zoom in
12 – Zoom out
13 – Zoom all
14 – Range as clipping
15 – 1:1 presentation
8 9
10
11 12 13 14 15
Positioning Bar (right)
16
17 18 19 20
21
16 – Zooming range 1 sec, 10 sec, 60 sec or 10 min
17 – Zoom in vertically
18 – Zoom out vertically
19 – Zoom all vertically
20 – Range as vertical clipping
21 – Waveform zoom in/out
342
Button Overview
Range bar
1
2
3
4
5
1 – Play cursor to start of range
2 – Play cursor to end of range
3 – Fold range to the left
4 – Fold range to the right
5 – Range editor
343
Problems & Solutions
The following are solutions to some common problems.
I see markers with the letter ‘E’ in my physical
audio file and interruptions occur at those
spots. What are they?
MAGIX audio studio generation 6 creates these markers
automatically if during the recording the program runs out
of resources and recording interruptions take place. This
can happen if the computer is overloaded or not fast enough
to do the processing of multiple tracks. Look at the ‘pops
and clicks’ section for some solutions to the problem.
I want to back up all my project files. What
needs to be included?
When backing up project files all files need to be included
that are associated with the VIP project! These files may
include any of the following: *.hdp, *.h0°, *.h1°, *.vip, *.wav,
*.s0°, *.s1°.
To keep files organized we suggest that for each project or
song you are working on, you create a sub-directory before
you start working with the project and save/record all files
into that directory. This can be done from the Record Parameter dialog.
I have pops and clicks in my material when I
play back any audio.
344
Pops and clicks can sometimes occur with certain sound
cards and system configurations. If it happens, it is most
often during the recording of audio tracks.
Especially when using MAGIX audio studio generation 6
in Windows 95 there are several things that can be done to
remedy the problem:
Make sure you use the latest driver for the sound card. You
might need to contact the manufacturer of your sound card
for an updated driver.
Check to see that there are no IRQ or DMA conflicts with
other devices in your system. The Device Manager in the
Control Panel in Windows 95 might help you diagnose
problems.
The audio caching setting in Windows 95 might need to be
adjusted. To do this bring up the Control Panel and select
Multimedia from the options. Next, click the Advanced tab
and select the Media Control Devices option. In the Media
Control Devices look for Audio Control Device and call up
the Properties. The following setting can be adjusted to solve
some pops and clicks problems.
Problems & Solutions
Some problems with pops and clicks can be solved by
editing the SYSTEM.INI file in the Windows directory. Look
for a [Vcache] section and add the following lines:
maxfilecache=4096
This should effectively solve the problem. The values for
the parameters are Kbytes of file cache and can be adjusted
depending on your RAM size.
By disabling virtual memory a problem with pops and clicks
or other playback or recording problems can sometimes be
solved. Please refer to your Windows manual for
instructions on how to disable the virtual memory.
As a rule of thumb: If the status bar in MAGIX audio studio
does not indicate any errors during playback or recording,
the problem most likely has to do with the sound card driver
or settings for the sound card.
I get no audio during recording or playback.
If you hear no audio during either recording or playback,
check on the following items:
Make sure that all cable connections are made properly and
that none of the cables is defective.
If the sound card has a mixer program, make sure that none
of the mute options are turned on and that the volume faders
are sufficiently turned up.
Check to see whether you have the proper driver installed
for your sound card. You can do this in the Windows Control
Panel.
If you don’t hear any audio in MAGIX audio studio
generation 6 and would like to check your sound card, use
the sound card’s own sound utilities to diagnose the card.
Also, many sound cards come with their own set of playback
software for digital audio. Follow the instructions in the
sound card’s manual for testing digital audio with the card’s
utilities.
Make sure that your external mixer/amplifier is turned on
and has a sufficient volume setting.
These are the most common problems you would be dealing
with when having audio problems.
Note: The Digital Audio Labs CardD+ approaches
monitoring the recorded signal during the recording a little
bit different than other sound cards. It is perfectly normal
to have the incoming audio signal missing on the outputs
of the card as you are recording the audio.
The CardD+ will not ‘feed’ the audio signal on the inputs
of the card to the outputs during the recording. You will
need to monitor the recorded signal externally during the
recording phase. All other tracks in MAGIX audio studio
generation 6 will play back just fine.
345
Problems & Solutions
My VIP volume appears to be too low. How can I
fix that?
MAGIX audio studio generation 6 has a sophisticate way
to deal with digital audio clipping which can occur when
you add audio tracks in the VIP. Depending on how strong
the audio signals are in each of the tracks, by the time you
add audio in tracks 5 or 6, you actually might encounter
digital clipping.
Since digital audio volume processing deals with
mathematical addition of volume values it can easily happen
that the resulting volume for combined tracks is beyond a
sound card’s capabilities to deal with the audio volume.
This is when digital clipping would be introduced.
In MAGIX audio studio you can set a ‘master volume’ for
each VIP. This setting can be different depending on the
audio material in the VIP.
This setting can be found in File>Properties>Project Info.
You will need to have a VIP open to get to the Project Info
dialog. You can adjust the overall volume setting for the
VIP in the Volume section of the dialog. By default, MAGIX
audio studio will assign a setting of -12dB which can be too
low for some projects. You can easily increase the volume
setting to 0 dB for example. When you encounter digital
clipping, you may want to reduce the volume setting at that
point.
You may also change the overall volume setting in the Mixer window in the Master Volume + Image section.
MAGIX audio studio display some sort of
‘SYSTEM’ error when I try to do simultaneous
record and playback with my sound card. What
could be the problem?
Unfortunately, you may be dealing with a sound card that
is not capable of working in the ‘full-duplex’ mode needed
for simultaneous record and playback. Some sound card
are only ‘half-duplex’ sound cards, meaning that you can
either play back your audio or record audio, but not both at
the same time.
You will either need to install a second sound card and
record with one card while you play back audio tracks with
the other. Or you will need to replace your sound card with
a full-duplex sound card. Check with the manufacturer of
your card to verify the capabilities.
346
Problems & Solutions
Whenever I start playback or recording my
system hangs or displays an error message.
This many times is an indication that an IRQ or DMA and
possibly an address conflict is present. You will need to
make sure that no other component in your computer
system uses the same hardware settings as your sound card.
If it does, the system may hang or even crash.
Under Windows 95 and NT 4.0 you may use the Device
Manager to find free IRQ, DMA and address settings. Refer
to your Window manual for instructions on using the Device
Manager to diagnose your system. There are also a number
of commercial diagnostics tools available that may assist
you with finding free settings. In some cases
reconfiguration of already existing components is necessary
and sometimes even replacing components with ones that
allow you more configuration choices.
When I try to do something with my mouse it
doesn’t respond or does something erroneous.
Make sure that the correct mouse mode is selected. You
may need to set the mode back to it’s default setting by
selecting the Universal Mouse Mode from the mouse mode
toolbar. You may also change the mouse mode in
File>Preferences>VIP Mouse Mode.
Why can’t I close a Wave project even though
all references (objects), using the Wave project
contents, in the VIP are gone?
Trying to close a Wave project usually only works if there
are no objects in a VIP that may use ranges from the Wave
project (HDP or RAP). This is due to the fact that the VIP
needs the Wave project for playback of material in the
object(s). If all VIP objects in the VIP window are deleted
that make use of the Wave project, the Undo list still may
have references to the Wave project open in case you need
to undo any editing step associated with the VIP window.
If you are really convinced that the material in the Wave
project is not needed anymore, simply delete the Undo
Levels with Edit, Delete Undo Levels. After this you will be
able to close the Wave project since all references in the
Undo list are gone.
Note: MAGIX audio studio generation 6 will only allow
you to delete the Undo Levels when a VIP window is active
(click on the title bar of the VIP window).
347
Problems & Solutions
Synchronization
There are various aspects to synchronizing MAGIX audio
studio generation 6 with the outside world.
Synchronization is used when you need to synchronize
MAGIX audio studio with a tape based recorder, video
machine, external sequencer or other equipment which will
send sync signals to MAGIX audio studio. Most of these
situations will work best by setting up MAGIX audio studio
as the slave and the external sync source as the master.
Once the setup has been made for MAGIX audio studio to
expect the synchronization signals at a particular interface
port, you do not need to do anything else in MAGIX audio
studio to start the playback or the recording. Once MAGIX
audio studio detects the incoming signal, it will attempt to
locate the song position pointer and jump to that location.
Playback is started automatically.
The same holds true if you need to record in MAGIX audio
studio while synching up to an external device. Simply open
up the Record Parameter window and make all necessary
adjustments. Now, press the Record button. Once you have
made the needed changes in the window, simply start the
external device. MAGIX audio studio will lock up to the
incoming signal and will start the recording process. It’s
that simple!
There are several things to consider when working with an
external sync source:
Make sure that the synchronization interface can convert a
SMPTE signal into MTC code. A software utility should let
you do this easily, or the card’s device driver might do it for
you automatically.
When striping analog or digital tape with a SMPTE track,
make sure that the signal is strong enough to feed a
continuous, uninterrupted sync signal. MAGIX audio
studio will stop the playback or recording as soon as a drop
out occurs.
You might need to work with the offset settings in MAGIX
audio studio when working with a sync source that starts
in the middle of a tape for example.
Make sure you are using the proper sync protocol.
348
Part 4
Reference
audio
studio
Menu File
The project menu contains wide-range functions for generating, managing, loading and saving projects.
New Multitrack Project
A new virtual project is opened, you can choose the track
and select a name for the new VIP.
Track Number: Sets the number of tracks for the virtual
project. The maximum number of tracks in MAGIX audio
studio generation 6 is 24 (deLuxe: 48).
Sample Rate: Sets the sample rate of the virtual project.
Name: Each new VIP can be named here.
Grid: Activates the grid display.
Units of Measurement: Select from six different display
types for the grid.
Snap to Objects: Activates the Object grid. Objects will be
snapped together sample exact when this option is active.
Lock Recorded Objects: Recorded objects are immediately
locked once they are placed into a VIP track. This prevents
accidental moving and is especially helpful for multi-track
projects.
Project-patterns: Projects (arrangements) can also be
saved as patterns in the File-Menu. The patterns are empty
350
Menu File
arrangements that contain all of the settings (f. ex. of the
VIP-display) of another project.
Auto-Crossfade-Mode: see Edit-Menu
Keys: e
Open > Virtual Project
Multi-track project in MAGIX audio studio, which makes
use of Wave projects.
When loading a virtual project, all associated Wave projects
(RAM and HD Wave projects) are opened if they were not
open prior to loading the VIP. The windows of the individual Wave projects remain minimized to prevent cluttering of the screen. They are initially only visible as icons.
Once the Wave projects are loaded, the VIP project window is displayed.
Keys: o
for virtual projects
Open > Audio file
When opening an audio file, MAGIX audio studio automatically creates an associated HD Wave project. The HD
Wave project file contains additional information about the
audio file, such as marker positions. Once the audio file
file has been opened once in MAGIX audio studio, it can
be loaded as a HDP from that point on.
Please note that direct editing of audio files from a CDROM is not possible. Please use “Import Sample” instead.
Note: If a VIP is the active window, all loaded HD projects
are immediately turned into objects in the VIP. Any selected range (range beginning) determines the position and
track where the object is created.
Keys: w
for WAV files
Open > RAM Wave (RAP)
RAM Wave projects contain audio data in MAGIX audio
studio’s proprietary format. These files are loaded into the
RAM memory of your computer, including their associated graphic files, marker position information, etc.
Keys l
for RAM projects
Open > HD Wave (HDP)
HD Wave projects contain audio data, which is directly
loaded from the hard disk, together with the graphical in-
351
Menu File
formation, marker position information, etc. The audio
format used for these files is the WAV format.
Keys: SHIFT+l
for HD Wave projects
Open > Object
Contains playback instructions (link to a Wave project, track,
time position, parameters, etc.) for audio data. Objects are
used in virtual projects.
Open > Session
A previously saved MAGIX audio studio session can be
loaded with this command. All projects and their related
windows are arranged on the screen the way they were saved
to the session.
Keys: ALT+sfor Sessions
Load Audio CD Track(s)...
This option is located in the menu “CD” in the deLuxeversion.
This function allows you to import audio data from most
CD ROM drives and CD-Writers in the digital domain, without any loss in quality. Please contact our technical support for the latest list of supported drives.
The HD Wave projects are recorded as WAV files and can
therefore be edited with other audio editing programs without having to convert them first.
To do this, please follow these steps:
1. Open the drive list dialog and select your desired CDROM drive, if you have more than 1 drive
2. Click the “Track List” Button
3. In the CD track list dialog select one or more tracks in
the list box
4. Click on “Copy Selected Track(s)..”
5. Select a filename for the new WAV file or HD Wave
project and click O.K.
6. Now the audio data is copied from the CD-ROM to your
hard disk as a new WAV file.
7. Close the tracklist dialog and the drive list dialog, in your
VIP appear one or more new objects, containing the
audio data from your CD.
352
Menu File
Features of the Drive List Dialog
Track List: This button opens the track list dialog for selecting several audio tracks of your CD.
Configuration: This button opens the drive configuration
dialog, where you can select special copy modes and SCSI
IDs...
Reset: Restores the standard drive settings.
Add Drive: Creates a new drive entry in the list for editing
the configuration data.
Delete: Deletes the selected drive entry from the drive list.
Save Setup: Saves the drive list and all configuration data
in a *.cfg file.
Load Setup: Loads the drive list and all configuration data
from a *.cfg file.
Features of the Track List Dialog
353
Menu File
Copy selected Track(s): This button starts the audio data
copy process, all selected tracks from the list are copied
into one WAV file.
Play: Starts audio playback of the first selected track in the
list.
Stop: Stops audio playback.
Pause: Stops audio playback for later resuming.
Resume: Resumes playback if previously paused.
Select all tracks: Selects all tracks of the CD for copying
the complete volume. You can select multiple tracks with
Ctrl + mouse click or with Shift/Alt + Cursor keys!
Deselect tracks: Closes the drive door of the CD ROM
drive.
Features of the CD ROM Drive Configuration Dialog
Drive Name: Lets you edit the name of the drive in the list.
This is useful if you create more than one entry accessing
the same physical drive.
Host Adapter Number: Lets you specify the number of
your SCSI adapter – normally 0.
354
Menu File
SCSI-ID: Lets you set the ID of your CD ROM drive. Be
sure to set the correct ID, there is no error checking!
SCSI-LUN: Select the SCSI LUN parameter, normally 0.
Alias: Lets you select a manufacturers type of your CD ROM
drive.
Copy Mode Normal: Copies the audio data without any
software correction.
Copy Mode Sector Synchronization: Copies the audio
data using a software correction algorithm. This is useful,
because some CD ROM drives cannot seek exactly to the
same position between two read accesses but MAGIX audio
studio can correct these differences using this algorithm.
Copy Mode Burst: Optimizes the speed of the copy process,
no software correction is done.
Sectors per Read: Defines the number of audio sectors
per read cycle, the higher the number the faster the copy
process will be. Not all SCSI adapters support more than
27 sectors!
Sync Sectors: Defines the number of audio sectors used
for the Sector Synchronization. A higher number results
in a better synchronization but also in a slower copy process.
Save Project
The current project is saved with the name displayed in the
project window. If you previously have not specified a name
for your project, MAGIX audio studio will ask you to do so.
Keys: s
Save Project as
You can define the path and name of the new project you
want to save your work under. RAM projects and virtual
projects will be saved with the new names (the source file
remains untouched). HD Wave projects are renamed on
the hard disk. MAGIX audio studio will not generate a copy
of it for reasons of conserving space on your hard drive.
Keys: SHIFT + s
355
Menu File
Save complete VIP to
This function in menu “Project” allows saving a VIP with
all needed Wave projects (*.RAP., *.HDP) into a specified
directory. This makes it easy to copy all files of a VIP to a
backup disk etc.
Save Project as “Base Project”
This option allows you to create project-patterns, where all
project settings such as the number of tracks or the type of
grate are maintained and saved without the objects and
HDPs. These patterns can be loaded when you are creating
a new multi-track project (Menu File > New Multitrack
Project).
Save in Format
With this function, you have the possibility to convert
projects between the different MAGIX audio studio Wave
project formats. This is useful if, for example, a RAM Wave
project is to be converted into a HD Wave project or a L&R
Wave project (two linked mono files). Another option is
the conversion to and from stereo Wave projects to mono
Wave projects.
Save Object
This function allows you to save a single object. This is
especially helpful if you want to transfer material between
VIP projects or want to preserve certain parts of a VIP by
saving them to single objects. Another use is the creation
of a sound effects library. Please keep in mind that you can
use the Windows Explorer to drag & drop multiple objet
files into a VIP for easy access.
The default file extension for object files is *.obj.
To save an object, select any object in the VIP and click on
File->Save Object.
Save Session
This will let you save a complete session in MAGIX audio
studio. This includes information about all just opened
projects and their respective window positions etc.. This is
useful to be able to continue later at the same place without
having to load the individual projects first.
If a session is stored with the name “startup.sam”, this
session is automatically loaded at the next start of MAGIX
audio studio.
356
Menu File
Import Sample
Import Sample as Dump
MAGIX audio studio gives you the option of importing
Wave, AIFFor Sample Dump files into a MAGIX audio
studio project. You will need to specify which type the
project is going to be, a RAM Wave Project, or a HD Wave
project.
Difference between Open->WAV and Import
Sample->WAV:
The command Open->WAV opens an already existing WAV
file and edits the file as a HD Wave project. MAGIX audio
studio automatically creates a HDP file and the corresponding graphic file in the source folder.
When importing a WAV file, the complete file is copied.
Additional hard disk space is needed and the process takes
much more time, since the audio file has to be copied with
Open Project->WAV. Import Sample->WAV has to be used
when intending to use the WAV file as a RAM Wave project.
Convert > Unlink Project
Sometimes it is necessary to split a 2 channel stereo project
(two joined mono projects (L&R Wave project) into two independent mono projects. With this menu option, you can
terminate the static connection between the projects.
If you would like to join the projects again, simply select
“Link Projects” from the “Special” menu (see below).
Convert > Link Projects
Two mono projects are linked to one L&R Wave project.
This is a convenient way of editing joined mono samples
with the same operations.
Make sure that the windows of the two projects to be linked
are open. Select one of the objects as the current object
(click on the lower half with the left mouse button) and call
up the “Link Projects” menu option. Next, click on the project you want to join. MAGIX audio studio will link the two
projects.
MAGIX audio studio will automatically match the sample
length of the two projects but not the bit resolution.
Convert > Append Projects
With this function a project can be appended with another
project, i.e. the material of one project is copied directly
behind the material of the first.
357
Menu File
You need to first select the object you want to append. Then
you activate the menu and click on the project you want to
add to the first.
A particular use of this option is the “cleaning up” of VIP’s
that contain numerous physical samples.
Convert > Change Bit Resolution
When using this function, MAGIX audio studio lets you
select the bit resolution of a Wave project.
Notes for Working with 8-bit Wave Projects
Lower resolution audio files are often used for multimedia
applications. A reduction of the resolution to 8-bit is useful,
since the storage requirements are also reduced.
A drawback of lower bit resolutions is the decline of the
signal to noise ratio (SNR). The quantization noise increases
with the lower resolution. The quantization noise is not of
a steady type. In fact, it is modulated by the signal and
appears especially annoying.
By the way, the bit resolution of a project file is always displayed in the title bar of the project window. Bit resolutions between 1 and 8 bits use 1 Byte (8 Bit) per sample
value. Resolutions between 9 and 16 bits use 2 Bytes (16
Bit).
If you need to perform multiple processing steps on an 8bit Wave project, convert the audio file into a 16-bit project
before starting the processing. Any calculation inaccuracies
occur in the 16-bit realm and are therefore minimized. Also,
some functions in the Effects menu only work with 16-bit
samples. After your are done processing the audio, convert
it back to an 8-bit audio file.
Convert > Mono
The current L&R Wave project is converted into a mono
mode. If it was a stereo project before, both channels will
be mixed. The previous samples are first added with 100%
of their image and then divided by two to prevent over
modulation (distortion). This is an equivalent of reducing
the volume by 6 dB.
Convert > Stereo
The original mono Wave project is duplicated and converted
into a single L&R Wave project with the same sample in
both channels.
358
Menu File
Export audio> Wave
The audio material is exported as a standard Wave file. This
is the standard format for further use on PCs running in a
Windows environment. These files are not compressed and
contain the full quality of your arrangement.
If you want a lower resolution or a lower sample rate you
can select that via the “Format Settings” button.
Export audio> MP3
Exports the arrangement in MP3 format. This is the extension for MPEG Layer 3 coded audio files, used for high quality audio material off the internet (Off-line Playback).
20 free encodings are available.
Encoder upgrade: For the upgrade of the QDesign® encoder you just select the option “Upgrade QDesign MP3
Coder” in the menu “Options”.
Export audio> MPEG
Exports the arrangement in MPEG format. This is the extension for MPEG-Layer 2 coded audio files, used for high
quality audio material off the internet (Off-line Playback).
Export audio> MS Audio File (deLuxe version)
This is the internet format from Microsoft. It makes the
continuous playback of audio files through the internet
possible. However, for this format you will need to use a
suitable codec that prevents file rates from getting to high
for an on-line playback (“Format Settings”).
Export audio> Real Audio (deLuxe version)
This is a format specifically optimized for internet purposes.
It reaches a very high compression rate, and the sound
quality is noticeably lower. However, this format is very
useful if e.g. audio on-line has to be played through the
359
Menu File
internet (Streaming Audio). After selecting the file name
you can choose the bit range of the transferring speed (Modem, ISDN etc.). This should still play audio files without
interruption.
Format Settings
Here you can select presettings for the quality of the audio
material.
Target groups: Here you select at which band width the
video is to be created, i.e. on which data line it can be played
(‘streamed’) in real time. The setting you select here may
possibly restrict the other selection possibilities, as a file
for a 28k-modem cannot be generated in high-quality.
Multirate file (real server): The streaming of videos
requires a server application which must have been installed
on the server from which the video is to be played
(‘streamed’) in real time. If this application does not exist,
only a download is possible. ‘Real server’ is a server application which makes it possible to stream videos in real video
format.
If you activate this option, you can create a multirate file
which basically contains several videos of different band
widths. It is thus possible to select several ‘target groups’.
Export audio> AIFF file with Quicktime
(deLuxe version)
360
Exports the arrangement in AIF format, compressed with
the Quicktime coder. This is a format specifically optimized
for internet purposes.
Menu File
Export audio> 16 Bit AIFF (deLuxe version)
Exports the arrangement in AIF format. This is the audio
format used with Apple Macintosh. These files are not compressed and contain the full quality of your arrangement.
Export audio> Export as Dump
Exports the arrangement as a dump file e.g. for external
samplers connected to the computer via MIDI.
Rename Project
The “Rename Project” command will let you rename a
project file rather than save it to a different file. For RAM
Wave projects, only the internal names are changed (without
being saved). But all corresponding files are renamed
immediately in the case of HD Wave projects.
RAM Wave projects need to be saved after renaming the
project.
Export as PlayR-File
The arrangements can be exported in the MAGIX playRtables format (MKS-format), a special format for the liveremix-program MAGIX playR. All you need is an arrangement with 8 audio-tracks, that can then be exported to the
playR-format and directly opened and played back using
the playR.
The MAGIX playR includes a CD and a MP3 player, a fully
equipped DJ-control desk and multimedia remix-software.
You can start up to 16 samples simultaneously on your 2
turntables, using a mouse, the keyboard or a joystick; A
crossfader and a mixer provide you with the live-mix facilities. The MAGIX music maker can be used for creating
and editing the playR-songs. A smaller version of the
playR – the MAGIX playR jukebox – is included in this
package!
Connect to the Internet
opens the dialup connection to the Internet.
Publish to Web
It‘s really easy to publish your own songs and videos on the
web so that all internet-users worldwide can listen to them
and enjoy them immediately.
All you need is a normal internet-connection for your computer – using a Modem, ISDN or ADSL.
However, it is forbidden to upload material that is protected
by copyright laws, for example songs from commercial CDs.
This will be checked every time you upload material, so it
361
Menu File
may actually take a few hours for your song to appear online.
If you‘ve just created a nice arrangement, save it first using
the ”File > Save as”-option. Then click on ”Publish to Web”
and follow the instructions of the Publishing Wizard.
See chapter “Web Publishing” for further details!
FTP-Download
This option allows you to build up a direct connection to
any FTP-server on the internet in order to download audio
material directly into your music studio so that you can
edit it there. The pre-set server is the MAGIX Server, where
you will always find new sound-material. Once again, the
only thing you need is a working internet connection.
Delete Wave Project(s) (HDP)
HD Wave projects are deleted from the hard disk. Use this
command with caution, as all corresponding files are lost.
(If you wanted to delete a HD Wave project (HDP) from a
file manager such as Windows Explorer, it would also be
necessary to delete the graphic files related to the project
files.)
Close Project
closes the arrangement.
Exit
closes MAGIX audio studio.
362
Menu Edit
This menu contains all functions, which are similar to cutting on a tape machine.
In virtual projects, you can select track sensitive ranges, so
only the selected tracks are manipulated.
Activate cutting and copy also makes a project named Clip
activated. The window for this project will appear if doubleclick on the icon.
Some of the functions are only available for Wave projects.
Others only for virtual projects (VIP), while some of the functions will work in all types of projects.
When working with a virtual project (VIP) a selected range
is always required for the cut functions. The beginning and
end of the selected range determine the start and ends of a
cut. The vertical position indicates which tracks are affected
by the edit.
It is recommended to use the Auto-crossfade function to
achieve smooth transitions between the edit points. This will
automatically create fades at the object edges.
Please note that these functions are processed for both channels when working with stereo and L&R Wave projects. (If
only one channel is to be edited, you will need to convert the
Wave project into two mono Wave projects. After editing the
two mono Wave projects can be merged again.)
Undo
MAGIX audio studio offers you a comfortable way of tracking
your changes in virtual projects. Up to 100 changes can be
kept in memory and traced backwards.
That means, virtual processes can be reversed (undone).
Range and marker manipulations can also be undone using
the “Undo” feature.
Thanks to this extremely efficient feature, critical operations
can simply be tried and then reversed to return to the original status if the results are not satisfactory.
MAGIX audio studio offers a convenient undo option for
VIP objects. A maximum of 100 undo steps can be retraced.
This number can be configured in File/Preferences/Undo
Definition.
No undo is available for physical Wave projects.
Keys: CTR+z
Redo
Redo revokes the latest undo command.
363
Menu Edit
Keys: CTRL+a
Cut
Wave Projects:
The audio data in the selected range are copied from the
current Wave project into the Clip. The material behind
the removed range is merged with the material in front of
the removed range to close the gap. The complete Wave
project becomes shorter.
Please keep in mind that the Clip always contains the same
attributes as the Wave project the material was copied or
removed from.
If you cut material from a mono Wave project, the Clip
becomes a mono Wave project. If material from a stereo
Wave project is cut or copied to the Clip, the Clip becomes
a stereo Wave project. Another attribute adopted is the bit
resolution and the sample rate of the originating Wave
project.
The previous contents of the Clip are deleted.
After a successful removal of the selected material, MAGIX
audio studio drops a marker at the position the removed
range previously started. This allows you to insert the contents of the Clip into the Wave project at the exact same
spot if you accidentally removed the material. Use the function Edit->Paste/Insert Clip to insert the Clip contents.
Virtual Projects (VIP):
In virtual projects the selected range is copied to the VirtClip
and is removed from the current VIP project. The VirtClip
does not contain actual audio information, only the links
to the audio files. The VirtClip also contains as many tracks
as the removed range.
The material behind the removed range is appended to the
material in front of the removed range. The VIP project
becomes shorter if the selected range did cover all tracks.
This way you can shorten Vips which contain empty space
behind the last object.
As with the Wave projects, a successful removal of the selected range drops a marker at the position the removed
range previously started. This allows you to insert the removed material with Edit->Paste/Insert Clip.
Keys: CTRL + x or x
Delete
364
The data of the current range is deleted. The sample data
after the deleted range is added at the position the deleted
range started. The sample length becomes shorter.
Menu Edit
Please note that this command will not save the deleted
data to the Clip. If you want to preserve the deleted sample
data, use the “Cut” command. Using this the “Delete”
command will delete the data from the current sample and
preserve the contents of the Clip.
Keys: Del
Clear
The data of the current range is replaced with silence.
Please note that this command will not save the deleted
data to the Clip. If you want to preserve the deleted data,
use the Cut or Copy command. Using the Delete command
will delete the data from the current project and preserve
the contents of the Clip.
Keys: Alt + Del
Copy
The current range is copied into the Clip but not deleted in
the project. The sample length is not varied. Please note
that the former Clip contents are deleted. The Clip again
has the same attributes as the project.
Keys: CTRL + c oder c
Copy and Clear
The current range is copied into the Clip and cleared in the
project. The project length is not changed. Please note that
the previous Clip contents are deleted.
Keys: Alt + c
Copy as
The current range of a Wave project (HDP or RAP) is copied
into a new file. A file requester appears to select the name
of the new project.
Paste/Insert Clip
The contents of the Clip are inserted into the current project
behind the position of the play cursor or the beginning of
the currently selected range. The data or objects that are
located behind the insert position are moved out of the way
to make room for the Clip contents. The samples or audio
tracks become longer. The Clip remains unchanged during
the procedure. If the Clip was empty, an error message is
displayed.
365
Menu Edit
After inserting the contents, the program selects a range
over the inserted area. If you select Edit->Delete , the inserted contents are removed and the project is returned to
the original state.
In virtual projects using selected ranges, the program
utilizes the beginning position and relative track position
as the insert point for the VirtClip or Clip contents.
The following table shows how MAGIX audio studio
responds in the case the clip and the project have different
channel numbers:
Clip Project > Clip Channel
Mono
> Mono
Stereo
> Stereo
Mono
> Stereo
Stereo
> Mono
>Project Channel
> Channel 1 Channel 1
> Channel 1 Channel 1
> Channel 2 Channel 2
> Channel 1 Channel 1
> Channel 1 Channel 2
> Channel 1 Channel 1
Keys: CTRL +v oder v
Overwrite with Clip
The current range is replaced with the Clip contents. The
overall sample length remains unchanged. The data that
occupied this position before cannot be recalled. The Clip
contents are not changed. The assignment of the Clip
channels follows the table mentioned above.
In virtual projects, the selected range determines the
position and track in which the Clip is inserted.
Shortcut:
Keys: Alt +v or Insert Key
Extract
This function is the counter part of the ‘Cut’ function.
Wave Projects:
The current range remains unchanged only the sections
before and after the selected range are permanently
deleted. The audio file becomes shorter. The contents of
the Clip are unchanged.
Virtual Projects (VIP):
366
The selected range determines the material from all VIP
tracks that remains in the project after using the function
no matter whether the selected range spans all tracks or
not. This means that this function does not operate track
Menu Edit
selectively. The objects before and after the selected range
are deleted from the project. The contents of the VirtClip
remain unchanged.
The virtual project is expanded by one empty track.
Mix with Clip
The range contents and the Clip contents are mixed.
Channel assignment between project and Clip follows the
table above (See “Insert” function). The contents of the Clip
are not altered.
Since either component is combined with their full sample
values, make sure that no over-modulation takes place. This
function is performed by way of addition. This assures on
one hand, that the project sample remains free of a sudden
volume decrease. On the other hand, modification of the
amplitude might need to be performed before the mix to
keep the resulting sample from clipping and distorting. For
information on amplitude modification, see “Editing Menu”.
Insert Workspace
The “Insert Workspace” option will insert “blank” data at
the current play cursor position or the position of the
currently selected range. Size and position of the inserted
blank space will depend on the length of the range selected
before.
The blank space will actually contain data with zero value.
The data following the insertion point will be added to the
end of the blank space. The defined range is maintained,
the length of the inserted space extends the overall sample.
If you do not have sufficient memory to insert the workspace
(i.e. with RAM projects), MAGIX audio studio will display
an error message.
Add one Track
This option adds a new empty track. The maximum number
of tracks is 24 (deLuxe: 48).
Crossfade Editor
Wave Projects (RAM or HD):
The section before the current play cursor position or the
selected range is merged with the contents of the Clip in a
way to create a crossfade section. Two separate cuts are
needed:
1) Copy a range into the Clip.
2) Set the play cursor on the desired position and then call
up the crossfading function.
367
Menu Edit
Virtual Projects (VIP):
This option offers a convenient way of adding a real-time
crossfade to two objects in a VIP track. Both objects need
to be selected. The best way to select the two objects is with
the Object Lasso. The Object Lasso is used when starting
the selection in an empty area and dragging a marquee over
the two objects. The next step is to display the Crossfade
Editor with Edit->Crossfade Editor.
The length of the crossfade can be specified in different
length units or can be transferred from the selected range.
Make sure that enough material is available before and after
the object borders to create the desired crossfade length.
Available fade-in and fade-out curve types are Linear,
Logarithmic, Exponential, and Sine/Cosine.
If a range is selected over the crossfade section, the crossfade can be previewed with the Play/Stop button. This also
works while making adjustments in the editor dialog and
allows you to audition the crossfade parameters in real-time.
Please keep in mind that long crossfades employ twice the
processing power compared to playback of single tracks.
Two samples are played at the same time in real-time and
increase the processing requirements. In critical cases
increase the VIP Buffer size in File->Preferences->System.
Linear crossfades do not take as much processing power as
non-linear crossfade curves.
The buttons “+”, “/” and “-” change the length of the crossfade section in default increments.
The Crossfade Position: can also be moved with the +
and – buttons.
368
The button Crossfade Off: deactivates the crossfade for
the selected Object.
Menu Edit
Global Set: The currently selected settings for the crossfade can be used as default setting for newly created crossfades.
Global Get: Restores the global crossfade settings as
parameters for the Editor configuration.
The special functions and shortcuts in the menu Object->
Object/Crossfade Editing are very helpful when editing
crossfades in VIP projects.
Get Range: The length of the currently selected range is
used for the length of the crossfade.
Auto Crossfade active
If this option is turned on, all newly recorded or cut material
in a VIP or material that is copied from a Wave project into
a VIP track has an automatic crossfade applied to it.
Global settings for fade-in and fade-out parameters are
assigned to the object. These settings can be changed with
the crossfade editor in the Edit->Crossfade Editor.
If two objects are overlapped that had an automatic crossfade applied to them a real-time crossfade is the result.
The auto crossfade mode is an excellent tool to easily perform a linear cut of a spoken voice track, jingle track etc.,
which requires a soft passage without the unwanted “pops”.
If needed, each crossfade can be edited in the editor or by
manually manipulating the handles.
Delete Volume Handle
This function deletes volume curve events, which have been
previously selected. Individual volume events can be deleted
by selecting the Object and Curve Mode mouse mode
and double clicking the left mouse button on a volume curve
event. However, when deleting several curve events, the
“Delete Volume Handle” function is the best tool. Use the
Curve Mode and Grab Tool to select multiple curve
events.
Delete Panorama Handle
This function deletes panorama curve events, which have
been previously selected. Individual events can be deleted
by selecting the Object and Curve Mode mouse mode and
double clicking the left mouse button on a volume curve
event. However, when deleting several curve events, the
“Delete Panorama Handle” function is the best tool. Use
the Curve Mode and Grab Tool to select multiple curve
events.
369
Menu Edit
Delete Undo Levels
This feature will delete the Undo levels of a virtual project.
This is useful, if for example certain Wave projects are left
in the Undo chain, but do not exist in the VIP anymore.
You won’t be able to process or delete the Wave project if
the Undo chain still contains a reference. After deleting
the Undo levels, these projects are available again.
370
Menu View
This menu contains tools for manipulating the display of
MAGIX audio studio.
Rebuild Graphic Data
Display inaccuracies after complicated sample processing
can be fixed by using this menu option. The screen (window) will be cleared and redrawn to display the project properly.
Sections
MAGIX audio studio allows the optional display of one,
two or three sections of the samples belonging to one Wave
project or the VIP itself. Other audio editing applications
usually show only one window of a sample.
If you select “2”, MAGIX audio studio will display the same
sample in two window sections. Each section can be handled
separately. It is possible, for example, to represent the complete sample in one section and a zoomed in version of a
certain range in the other.
The mode “3 sections” is especially useful for searching for
loop points in Wave projects.
The whole sample can be shown in the upper section, while
the section on the lower left displays the beginning of the
loop range and the section on the lower right the end of the
range. Use the split range function for this purpose (key
b).
Go back to 1 view with Shift b!
This is only an example of the mode “3” view. All sections
can be handled independently.
You can also drag ranges over the section bounds. Establish the starting point of a range by clicking, then keep the
mouse button pressed, and change over to another section.
MAGIX audio studio will show you the size of the range
and at the desired location release the left mouse button to
determine the end of this range.
Fix vertically
Ranges can be dragged (pulled) in MAGIX audio studio
horizontally and vertically as well. If this option seems too
strange to you, you can fix the upper edge of a range(s) to
the maximum value and the lower end to the minimum
value. Thus, you get the usual representation in range dragging. However, a trade-off is, that you will not be able to
define the vertical extension of a section by choosing the
vertical range button.
371
Menu View
Show Grid
This menu function will display the grid on the project
window. The units of measurement defined in “Units of
Measurement” will appear in the upper sections of the grid.
Keys: #
Grid Setup
With this option, you can define the type of grid that is
used for the Show Grid option. Select between several line
styles.
Units of Measurement
With this function you can define the unit of measurement
for the grid, for the display of start and length of the selected range and for the position of the play cursor.
Snap to Grid
This function switches the Grid on and off.
When working with virtual objects the Virtual Grid becomes
available. Objects can only be shifted to the beginning, the
end, or the hot spot of another object. The reference point
is usually the beginning of the object to be shifted to. A hot
spot when defined will be used as a reference point as well.
If several objects have been selected, the move is performed
in lining up the beginning of the last selected object in the
sequence with the reference object or Grid point. All selected
objects remain their position to each other.
This option can be used to easily rearrange objects with
their audio patterns and gain sample-exact connections.
Keys: r
Snap Setup
Object: Activates the object grid.
372
Range: Activates the range grid and enables the use of the
current selected range as grid base (by clicking on the but-
Menu View
ton “Get Range”). This option is very useful if you have
found the perfect location defining a particular music bar
in the sample. To transfer the range into the grid, use the
command “Get Range”.
Bar Snap: Activates a grid, this is based on bars and beats.
You can specify the speed of the measure by entering the
BPM (Beats Per Measure) value in the dialog box. By
clicking on the “Bar Definitions” button you have more
options to specify the parameters for this option such as
the time signature.
If a complete 4/4 measure is selected the number of beats
in the measure would be 4. The length of the range would
determine the speed in BPM that is needed to play the
sample in the selected time frame.
Bar Definitions: This dialog lets you specify the bar
settings, e.g. Numerator / Denominator, the speed in beats
per minute and the timer resolution in peaks per quarter
note.
Keys: SHIFT + r
Key for switching the two modes: Tab
VIP Display Mode
The Display Preferences were designed to help you define
the two alternative display modes possible in MAGIX audio
studio when working with virtual projects.
Usually you choose mode 1 for detailed drawing of samples
with all information displayed and mode 2 for a quick
drawing without graphics. Switching between the two
modes is possible by pressing the Tab-key.
The menu option will provide you with another window in
which you can specify the details of the two different display
modes.
Definition
This will allow you to set the following configuration options
for the VIP display. Settings can be made for the to display
modes.
373
Menu View
Sample / Halve: The graphical representation of the audio
material can be displayed as a whole waveform or half the
form for higher definition. Checking this box will display
the waveform with half its information.
This mode is recommended, because the grid function (key
#) and the vertical zoom functions (Ctrl + cursor up/down)
are perfectly adapted to this draw mode.
Background: Each object in the VIP track can be assigned
with a color. The color is displayed if this option is checked.
Otherwise, the same background color is used as for the
track background.
Object Name: Objects in VIP windows can have their own
name. If this option is checked, the object name is displayed.
Project Name: MAGIX audio studio also allows you to
display the audio file name in each object. This is especially
useful if you quickly want to identify the Wave project used
in an object. Checking this option will display the file name
in the object.
Object Properties: This shows you which object releated
effects are applied the the object, e.g. EQ for equalizers,
DYN for dynamics etc...
Group Number: Objects in VIP windows can be grouped
together. When grouping objects it is helpful if the group
number is displayed in the object. This option allows you
to display that information in the object.
374
Menu View
Buttons/Slider: By default, MAGIX audio studio displays
the buttons and sliders for each track. However, on smaller
displays it may be desirable to turn the display for the buttons
and sliders off. By unchecking this option, they are not
displayed.
Peak Meters: Every track in a virtual project has its own
LED meter to allow exact volume level display. However,
they are only visible up to a certain vertical zoom level.
The LED meters also work during recording and contain a
peak hold function that remembers the maximum input
level. This allows you to adjust the input levels.
When working with a large number of tracks, the peak
meters can slightly increase the processing load.
Change Mouse: This option causes the mouse pointer to
change when moving it over certain areas. For example,
moving the mouse pointer over an object handle, the mouse
pointer is changed into a directional pointer. This option is
only useful for mouse modes that combine several functions.
New Object Mode: This mode allows moving of objects
on the second click, rather than the first click. The first
click selects the object, but disables simultaneous accidental replacement.
Show Border: Decides if a border is drawn between tracks
in a VIP. Switch it off to save space for VIPs with lots of
tracks on small displays!
Separate Stereo: If this option is active, stereo tracks in
VIP projects are displayed with a two-channel display. This
allows you to expand the display to both channels rather
than displaying just one composite channel display. Please
keep in mind that this will also affect the Wave project display for stereo Wave projects.
Active: Allows you to determine which mode is to be used.
This can also be done with the TAB key from the VIP window without having to call up the VIP Display Definitions
dialog.
Keys: SHIFT + Tab
375
Menu View
Store / Get position and zoom level
This function does the same as the snapshot-buttons at the
bottom left of the VIP. The four buttons in the lower lefthand section of the Virtual project window allow you to
save four setups (S1…S4, incl. Zoom-Level, Display-Position, and Display Mode). To store a setup, hold the Shift
key and click on one of the buttons. A single click on the
button without holding the Shift key recalls the stored setup
or zoom level. Any changes applied to the windows will
return to the state saved to the button.
Horizontally
This menu contains all the functions of the horizontal (red)
position bar.
376
Menu View
Vertically
This menu contains all the functions of the vertical (blue)
position bar.
377
Menu Object
Contrary to the menu Edit all functions in this menu exclusively manipulate selected objects in virtual projects. Selected ranges have no effect with these functions. Ranges
are used to determine insertion points or cut positions of
objects. When inserting material into a virtual project, the
range beginning has the same function as the play cursor
– the material is inserted at the range beginning.
New Object
Use this function to create a virtual object. The current range
in the Wave project will be inserted into the virtual project
at the play cursor position. It will also be the currently selected object. This is the same procedure as the drag&drop
method explained earlier in this chapter.
The object is inserted at the actual range position in the
VIP.
Mute objects
The selected objects will be muted.
Cutting Objects > Cut Objects
The currently selected object is replaced with empty space
and copied to the VirtClip. The length of the current project
remains and all other non-selected objects remain in their
positions. The previous contents of the VirtClip are replaced
with the cut object.
If a range is selected, all active objects are separated on the
range edges.
Cutting Objects > Copy Objects
To place a copy of the currently selected object into the
VirtClip select this option. The contents of the VirtClip can
then be inserted into the project using the “Insert Objects”
option (see below). The previous contents of the VirtClip
are replaced.
Cutting Objects > Insert Objects
Objects in the VirtClip can be inserted in the project at the
current play cursor position. The other objects in the project
maintain their positions. Please note that the newly inserted
object might cover portions of the already existing objects.
Simply drag the new object to a different set of tracks or
reposition the object on the same tracks.
378
Menu Object
Cutting Objects > Delete Objects
The selected objects are deleted from the current project.
The length of the current project however remains the same.
Previously unselected objects keep their positions. The contents of the VirtClip remain unchanged.
Keys: CTRL + Del
Cutting Objects > Extract Objects
All objects not currently selected are deleted. Please note
that the function Edit->Extract works similar. However, the
Edit menu function requires a previously selected range!
Cutting Objects > Duplicate Objects
All selected objects are duplicated and pasted to the same
position as the original objects. The original object is overlaid with the copied object. The duplicate object can easily
be shifted to a desired position by using the mouse. If several
objects have been selected before the duplication, press the
shift key before shifting to ensure that all objects remain in
selected status and are shifted together.
This option does not make use of the VirtClip, so all contents
of the VirtClip remain unchanged.
This function is also available using your mouse. Press and
hold the Ctrl-key, click on the object you want to duplicate
and drag the copy to a new position in the project.
Another option is to use the Drag&Drop functionality for
the Object or Universal Mouse Mode:
If multiple objects are selected, press the Ctrl key and drag
the selected objects to the new position. This allows you to
duplicate the selected objects easily and without using the
VirtClip.
Cutting Objects > Duplicate Objects multiple
This function duplicates multiple objects and places them
in sequence. Another dialog is displayed, which allows you
to determine how many copies of the selected objects are
to be duplicated, the separating distance and the overall
length of the duplication.
This is also another way of building Loop-Objects!
The following parameters are available:
Number of Objects: Determines the number of objects
that are created.
Group created Objects: When checked, all created objects
are grouped together.
379
Menu Object
Delta Time: This determines the relative position of each
created object to the next (from the beginning of one object
to the beginning of the next). The default setting is the
length of the selected object. At the default setting the
duplicated objects line up without a gap between them, this
creates a seamless loop.
Duration: As an alternative, the duration can be specified,
which are the combination of time difference and the
number of duplicated objects.
Cutting Objects > Split Objects on Marker
position
This function splits or separates selected objects so that
individual object sections can be further manipulated. All
selected objects are separated at the current marker position,
which results in two independent objects.
Split Objects
This function splits or separates selected objects so that
individual object sections can be further manipulated. All
selected objects are separated at the current play cursor
position, which results in two independent objects.
If a range is selected, the cut occurs on both range borders.
It is not necessary to select objects prior to choosing the
range and calling the Split Objects function. If an underlying
object is separated, the newly created object covers the original underlying object.
Keys: t
Trim Objects
This function trims the object borders to the currently selected
range borders. The selected range needs to be located within
the confinements of the object you want to trim.
Keys: Ctrl+t
Lock Objects > Lock Objects
To protect objects from unintended shifting use this option.
First, select the objects you want to “lock” in place and
activate the lock function. A diagonal line is placed across
the locked object.
Lock Objects > Unlock Objects
380
Locked objects are unlocked and made available for shifting.
Make sure you have selected the object(s) you want to unlock
prior to activating the unlock function.
Menu Object
Lock Objects > Lock Definitions
Here you can select, which options should be disabled:
Disable Moving: Disables moving of objects (default). This
is useful in multi-track projects to avoid delays between
several tracks.
Disable Volume changes: The volume handles are
disabled.
Disable Fade In/Out: The fade handles are disabled.
Disable Length changes: The length handles are disabled.
Object to Playcursor Position
This moves the selected object to the acutal playcursor
position.
Object to Original Position
This moves the selected object to the original position where
the material was originally recorded. This is often helpful
if an object was accidentally moved.
Set New Original Position
The current object position is used to reset the Original
Position attribute for the object. This is also used in the
Take Manager.
Build Loop Object
With this function, a loop can be defined within an object.
An area, which indicates the loop length, must be selected
in the object first.
The object then becomes the loop object. That means that
the number of loops can simply be “raised” with the “length
handlers” at the bottom of the object.
Such generated loop objects are ideal for generating long
drum sequences from only one drum loop! Loop objects
381
Menu Object
also help to save memory, since in the VIP only one object
is handled rather than multiple objects or copies of the same
material or very long samples!
Set Hotspot
The current play cursor position is turned into a reference
point for the snap function. Instead of the object’s beginning, the hot spot is now used when the object is snapped
to the grid.
Stroked vertical lines illustrate hot spots. Hot spots may
stand outside an object (in front of or behind the object).
This function is very useful for a case where the portion of
an object to be synchronized does not line up with it’s
beginning.
Select Objects
To select all objects located partially or entirely in the
selected range, or at the current play cursor position.
Switch Selection
To select all objects located partially or entirely in the
selected range, or at the current play cursor position.
Group Objects
All selected objects are grouped together. All operations
are applied to the whole group.
Ungroup Objects
Selected objects are ungrouped. Individual objects are
available for processing after that.
Object Background Color
Sometimes it is necessary to distinguish certain objects
from others. MAGIX audio studio will let you specify different colors for selected objects. Once you have selected one
or more objects, choose “Object Background Color” from
the “Object” menu and specify a different background color
for the objects. After clicking on OK, all selected objects
will have the specified background color.
Object Foreground Color
The foreground color (such as sample data displayed) can
be changed as well. After selecting the desired color, all
selected objects in the project will have the same foreground
color.
382
Menu Object
Object Name
Another way to distinguish certain objects is to give them a
different name. MAGIX audio studio will let you specify a
name (such as “Verse”) with this option. Please note that
the name only shows up if you enabled this option in the
“Object Drawmode” definition window (available from the
“Setup” menu or by pressing Shift+Tab when the object is
selected).
Object-Editor
The object editor lets you adjust some of the most important features of your objects.
Object-position: Here you can change the position of the
objects in the VIP, typing in a value.
Object-length: Change the length of the object.
Sample-color: Adjust the foreground color of the sample.
Background-color: You may also change the background
color of the sample.
Play/Stop: Starts or stops playback in the actual area. The
area should be placed on the object or on a part of it before
you open the Object-Editor so that the object-effects can be
heard immediately while editing!
Object-name: Name your object. This name will then be
displayed in the VIP.
Pitch/Time-stretching: In this section you’ll be able to
edit the pitch and the length of an object by typing in new
383
Menu Object
values. We recommend the time/pitch-mouse-mode for
more intuitive editing.
Volume/Pan: You can also assign your object a certain volume level and an exact position in the stereo-pan.
Keys: right + left mouse button or left double-click on the
object
Take Manager
The Take Manager is another powerful feature of MAGIX
audio studio. It is especially for those who work with many
different recording takes and need to manage them.
MAGIX audio studio registers the VIP position of the
recorded audio material. This time stamp is stored to the
HD or RAM Wave project and offers the option to always
return the recorded object to its original position.
Application Examples:
– Selection of the best take after five loop-punch recording
passes.
– Locating the best material between bars 32 and 34 of 12
takes from a classical production.
– A clear overview of all available takes during a SMPTE
time of 30:00 to 35:00.
Basis for working with the Take Manager is a selected object. This could be the last created object after using punchin recording. This object is referenced in the take list with a
colored “O”.
384
Menu Object
Attention: The Take Manager does not work if objects
are used in a VIP, which are not created by recording material into MAGIX audio studio. This would be the case for
any material imported through the WAV Import or CD
Track features!
When objects are present that where not created through
recording, a manual time stamp can be assigned to the
objects by using the function Object->Set New Original
Position. Once completed, the Take Manager will list the
objects in the take list.
Display Filter
Same File Only: Only those takes are displayed that belong
to the same audio file as the selected object.
Same Track Only: Only those takes are displayed that a
positioned in the same track as the selected object.
Match Time: Only those takes are listed that match the
original time position of the selected object.
Play: Starts the playback. Before opening the Take Manager set the play cursor to the desired playback position.
Replace!: This replaces the selected object with the currently
chosen takes from the Take List.
Statistic (Verbose): Creates a new VIP with the currently
shown takes from the Take List. Every take is listed in a
new track. The VIP can be used to audition the individual
takes with the Solo and Mute functions of each track.
Statistic (Brief): Creates a new VIP with the currently
chosen takes from the Take List. All takes are lined up on
the same track.
Destructive Editing
The corresponding Wave project window for a VIP object
is opened. This Wave project contains the audio material
that is referenced in the VIP object. The selected range in
the displayed Wave project is the material used in the VIP
object. The Wave project allows you to conduct any destructive editing (Wave editing).
When using destructive editing, simple editing procedures
such as cut and copy functions can be used, as well as very
elaborate effect processing.
385
Menu Object
Using destructive editing may not necessarily be the best
method of editing. For example, if you have duplicated an
object several times, all of the objects would contain the
same destructive editing effect after changes are applied
directly to the Wave project window.
Please keep in mind that editing functions such as cut, copy,
fades, crossfades, and others, can all be applied to the audio
material in a non-destructive way in the virtual project.
Also, remember that if you work extensively with WAV files,
MAGIX audio studio has the perfect solution for Wave
oriented editing. By using a 1-track virtual project, you can
complete all editing steps faster and more convenient than
any other Wave editing application! For example, any type
of cutting and rearranging of audio segments can be
performed in a non-linear, non-destructive, and extremely
fast way in the virtual project. The Track Bouncing option
in the Special menu allows you to take any material in a
VIP and turn it into a WAV file.
386
Menu Effects
This menu will let you add high-grade effects to Wave
projects.
Important tips regarding the effects functions
The following effects can be directly applied to VIP Objects:
Normalizing, Switch Channels, DirectX Plug-Ins, Parametric EQ, Graphic EQ, Reverb, Declipping, Remove DC Offset, Get Noise Sample (needs selected range in VIP)
Noise Reduction.
– Please note that in Wave projects most functions are only
available for selected ranges. If the complete audio file
is to be processed with the DSP function, the whole file
needs to be selected as a range in the Wave project (also
see Menu Range->Range All).
– Selected objects in VIP projects are processed with their
complete content, no matter which range is selected in
the Wave project. (An exception is the function Get Noise
Sample.)
If you don’t want to alter the whole object, you would
first need to cut the object apart (select a range over the
desired length and press the key “T”). We suggest turning
on the Auto-Crossfade-Mode (menu Edit->Auto crossfade active) to prevent pops during the object transitions.
– It is even possible to apply an effect to multiple selected
objects. If several objects are selected in the VIP, the effect
is applied to each individual object and its corresponding
audio material in the physical audio file(s).
– A suggestion regarding the differences between RAM
and HD Wave projects: With RAM Wave projects you
can decide after an applied edit whether you want to keep
the current version. Since the audio material is only
processed in the computer memory, it is possible to
simply close the Wave project and not saving the changes
to the hard disk. To keep the changes, the project would
need to be saved to the hard disk (shortcut: “S”). In HD
Wave projects, the changed audio material is immediately
saved to the file on the hard disk.
– To preview or test a processing step the following
methods are suggested: Use the Preview options in the
effect dialogs. You can also work with a copy of the audio
material for test purposes. To accomplish this, copy the
selected range in the Wave project to the clipboard
(shortcut: “C”). Next, open the Clip window (this window
is iconized at first) and select the complete contents of
the Clip window (shortcut: “A”). The effect can now be
387
Menu Effects
experimented with on the temporary copy of the audio
material.
– A tip: To edit ranges in a VIP, the object first needs to be
separated (selecting a range over the desired length and
pressing “T”). We suggest to turn on the Auto-Crossfade mode (Menu Edit->Auto Crossfade active) to smooth
the transitions and prevent pops. If the complete HDP
needs to be saved, the separated object will need to be
merged into a new audio file (HDP). This can be accomplished by selecting a range over the three object parts
resulting from the separation (Suggestion: Use the Grid
to assist with the creation of the range.) Next, use the
Track Bouncing function (Menu Tools->Track Bouncing,
Setting: Only Selected Range) to merge the objects in
the range to create a new HD Wave Project.
– The real time effects dialogs in the Mixer window can
also be accessed by clicking the right mouse button on
the respective effects knob of a channel. The corresponding effects dialog will appear, which can be used to make
detailed adjustments to the settings.
Amplitude/Normalize > Normalize File (phys.)
This function modifies the sample’s overall amplitude. The
data is altered so that the maximum amplitude occurring
in a specified range is set to 100% (or any other value between 1-400%). MAGIX audio studio will first attempt to
detect the maximum and relate it to the percentage chosen.
Then all other values are weighted with the new factor.
The Normalize function is designed to fully modulate or
over-modulate samples. A particular application is processing that is done before a conversion from a higher
sample resolution to a lower resolution takes place. Since
the dynamic range of the low resolution is smaller, it still
can be fully utilized by applying the Normalize function.
If working with sounds from one single instrument, you
should set the factor to 100%.
If, however, your audio material has background percussion
for example, you will be able to over-modulate the sample
to 120% to 200%. This will only cut off the new percussion
peaks. The same method allows you to alter the sound of
natural instruments by over-modulating them.
As preparation for further physical processing, such as
filters, reverb, dynamic compression etc., a level reduction
of 50-70% is suggested. This should avoid clipping during
post processing.
388
An important reselect: If the volume level during the
recording is relatively low and the material is later norma-
Menu Effects
lized, the result will not be of the same quality if the recording level is maximized to its fullest range. If for example
the volume level was only set to 50% of the possible range,
the audio material will be in 15-bit quality. Even normalizing
the material to 100% will not change this aspect.
Keys: Shift + n
Amplitude/Normalize > Normalize Object
(virt.)
This function will perform real-time normalizing on the
selected objects. This is different than the physical normalizing, which will restructure the audio file.
The real-time normalizing will look for the peaks in your
audio material and adjust the volume so that the peaks
represent 0 dB. The rest of the audio material is scaled
accordingly.
Keys: n
Amplitude/Normalize > Amplitude / 2
This function divides the amplitude of all sample values by
a factor of 2. The same could be achieved by a fade-in/fadeout with parameters ranging from 50% to 50%. However,
this function is much faster since computing time is greatly
reduced.
Amplitude/Normalize > Amplitude * 2
The same holds true for the “Amplitude * 2” function.
However, sample amplitude values are multiplied by a factor
of 2, thus corresponding with a fade-in/fade-out process
with parameters ranging from 200% to 200%.
Amplitude/Normalize > Set Zero
Sample data values in a selected range are set to zero (no
data). Noise and imperfections in a sample can thus be
eliminated.
Amplitude/Normalize > Fade in/out
This function allows sample ranges to be faded in or out.
The amplitude is varied in its time characteristic from the
start value of the beginning to the final value at the end of
the range. When the function has been called, a window
appears in which you can specific parameters for this operation.
A simple fade-in operation would be performed with the
parameters from 0% to 100%, whereas normal fade-out
requires the specification from 100% to 0%.
389
Menu Effects
The fade curve can be adjusted from linear to exponential
or logarithmic.
Notice that real time fading is applied to virtual projects
only (with handles). For all other projects (RAM and HD),
the sample data is physically altered.
Keys: f
DirectX Plug-Ins
This function allows you to use Microsoft DirectX
compatible plug-ins with MAGIX audio studio. This
complements the already existing superb effects with an
unlimited number of 3rd-party effects.
The Mixer in MAGIX audio studio is also compatible with
plug-ins, which can be used as real-time effects. However,
the plug-ins have to be able to process the audio data blocks
immediately and completely, without changing the length
of the material. This is the case for most plug-ins (i.e. Wave
Native Powerpack, Power Technology DSP FX, Arboretum
Hyperprism, TC Native Reverb and others). Other algorithms will fail, such as time stretching plug-ins, since they
are based on changing the length of the material.
The menu Effects does not pose these limitations. All
available plug-ins should work, even if they change the
length of the audio material or temporarily off-load the data
blocks (i.e. Sonic Foundry Acoustic Modeler).
Working with the Plug-Ins
390
After opening the plug-in dialog, a list of installed DirectX
Plug-Ins is visible. Double clicking on a specific plug-in
moves the plug-in to the left side of the dialog. The left side
shows the active plug-ins. At the same time the plug-in is
moved into the active plug-in list, the dialog for the chosen
plug-in is displayed. The DirectX plug-in dialog allows you
to make further settings for the effect. Additional double
clicks on entries in the right-side list add other plug-ins to
the active plug-in list on the left side. Please make sure that
Menu Effects
the chosen plug-ins are compatible with each other. For
example, mono and stereo plug-ins can not be used simultaneously – an error message is displayed.
The last plug-in loaded into the active plug-in list can be
deleted with the button “Delete last Entry”.
Test: This button activates the real-time preview of the active
plug-in listed on the left side of the display. This function
is ideal for testing of the chosen plug-in settings if the realtime calculation operates sufficiently.
Preview: This function calculates a short segment of the
audio material with the active plug-in settings and plays
back the audio segment. Use this option if your system
does not seem to be able to sustain the real-time preview
(button “Test”). The length of the off-line preview can be
determined with the setting System (shortcut: y).
Parametric Equalizer
This dialogue contains a 3-Band parametric equalizer. You
can adjust the sound of your sample activating filters on
three independent frequency bands. This allows you to raise
the bass and treble in a broad spectrum as well as making
very specific corrections in the dynamic frequency spectrum.
However, you will first have to highlight an area of the current project or the entire project with the a-key (waveprojects).
Don‘t forget that the mixer (m-key) also includes one equalizer per channel that works in real time and does not modify
the saved audio-material! (non-destructive manipulation
process).
391
Menu Effects
Frequency: Adjust the middle frequencies of the different
filters between 10 Hz and 24 kHz using these switches. As
your choice is completely unrestricted, you can also set various filters to the same frequencies in order to obtain more
pronounced effects.
Spectrum: Here you can set the frequency-spectrum of
each filter between 10 Hz and 10 kHz.
Decibel: These switches control the activity and intensity
of each filter. If the switch is set to 0, the filter we be inactivated, saving system resources.
Volume: This button controls the general volume should
the filters produce an extreme increase or decrease of the
individual levels.
Test: This button activates the real time demo-function. If
the demo-function can‘t be stopped using this button (due
to work-overload) you can stop playback using the spacebar. Maybe you should then choose a bigger real time buffersize in the “Setup > System”-menu!
The effect of the equalizers can be enhanced by using it
repeatedly on the same sample. This enables you to make
any manipulation you want on the dynamic frequency spectrum!
Graphic Equalizer
This editor contains a 5-band graphic equalizer. You can
activate filters on five pre-set frequency bands in order to
adjust the sound of your sample.
392
Menu Effects
Again, an area of the current project or the whole project
has to be highlighted using the a-key.
Please don‘t forget, that the mixer (m-key) also features one
equalizer per channel, which works in real time and does
not modify your saved audio-material! (non-destructive
manipulation process).
Equalizer: Using the 5 switches you can lower or raise the
different frequency bands individually. If the button is set
to 0, the corresponding filter will be inactivated, saving system resources.
Volume: This button controls the general volume. Use it if
the individual filters increase or decrease too much.
Test: This button activates the real time demo function. If
you can’t stop the demo function by means of this button
(due to work-overload) you can stop playback by using the
space-bar. Try to choose a bigger real time buffer-size in
the “Setup > System”-menu!
Compressor / Expander/ Gate / Distortion
With this Editor you can work on the dynamics of a sample.
Processing is carried out in the same way as on high-quality studio equipment “previewing”, i.e. there is no peak overriding, or other artefacts, as the algorithm can never be “surprised” by peak levels. All of the functions can be pre-heard
in real-time (Test-Button).
393
Menu Effects
The following functions are available:
Compressor/Expander
The dynamics of a work are restricted, loud passages stay
loud, quiet passages become louder. Compression is often
used to give material more power and assertiveness. The
compression level is set with the Ratio Control, the application level is determined by the Threshold. Build-up and
fade-out times can be influenced by Attack and Release.
An Expander is the functional opposite to the compressor:
the differences between the peak levels and quiet passages
become greater.
Gate
Very quiet passages (under the Threshold Level) are suppressed or drawn down to zero. This effectively enables the
noise level even in the pauses between individual takes to
be suppressed, but even at high compressions levels (Ratio
> 5) the Gate function is useful, to avoid over-raising of the
quietest passages and thereby the background noise.
Distortion
With this set-up audio material can be distorted by means
of a non-linear transfer identification line; the signal become louder and additional harmony waves are created. By
influencing the application point of the distortion (Threshold) a soft, analogue sounding distortion (Overdrive) can
be generated (Threshold e.g. on -40 dB), or a hard, digital
sounding distortion (Threshold on 0 dB). With Ratio the
strength of the distortion can be set precisely.
Parameters for the Compressor/Gate/Distortion Editor:
Ratio: This parameter controls the strength of the given
effects, 1.0 means no effect.
Threshold: Here the application threshold can be set,
above or below that of the given effect.
Attack: Here the time can be set in which the algorithm
reacts to increasing levels.
Release: Here the time can be set in which the algorithm
reacts to decreasing levels.
Gate Level: This parameter determines under which
amounts the level should be set to 0.
394
Menu Effects
Reverb
This function generates high quality reverb in 3 different
types.
Type: Here you can switch between short, medium and long
reverb.
Mix: This slider lets you adjust the level of the dry signal
and the reverb sound.
Volume: Here you can adjust the output level of the audio
material.
Test: This button calculates a short buffer of audio material
with reverb and starts playback for previewing the results.
Echo
This editor allows you to include echo-effects in your samples. In order to avoid overriding, leave a certain margin
for adjustments, in other words, the sample data should
not reach the maximum or minimum values. That can be
achieved (if necessary) by using the Normalising-function
(around 70%).
Again, you should keep in mind that the mixer (m-key) features one echo effect per channel, which is generated in
real time so that your saved audio material will remain
unharmed!
Delay ms: This button indicates the delay in ms between
the single echoes or the original sound and the first echo.
The preset value is 500 ms, or half a second if you prefer.
Note that the delay depends on the sampling rate, there-
395
Menu Effects
fore any changes in the sampling rate after introducing the
echoes will produce changes in the echo delays.
Decay %: This button adjusts the dumping values (percentage) between the individual echoes. A value close to
100 % produces slowly decaying echoes, whereas a value
below 40% produces echoes that disappear rapidly.
1 Delay: This just adds a delay to the original.
Feedback: This option produces an echo with feedback.
Multi-Tap: The Multi-Tap produces a series of echoes of
different intensities and delays.
Wet-/ Dry Balance %: Adjust the damping between the
individual echoes. A percentage close to 100 % produces
slowly decaying echoes, whereas a percentage below 40%
produces rapidly disappearing echoes.
Resonance: In this option you can adjust the size of the
virtual resonance room and the color of the resonance by
typing in values or using the scroll bars.
Declipping
MAGIX audio studio contains a function to remove digital
or analog clipping. Anybody who records audio has
encountered this one before. The perfect live recording
contains clipping at the most important moment. This alone
may render the recording unusable!
MAGIX audio studio uses high-grade algorithms to interpolate the passages containing the clipping. The algorithm
uses the material before and behind the clipping as a
reference point.
The declipping algorithm is especially useful for material
that contains obvious clipping, such as a piano or voice recording. Distorted drumbeats are normally not salvageable.
396
Minimal Level of Clipped Samples: This setting determines the volume level the algorithm considers offending
material. There are sound cards that exhibit different
Menu Effects
clipping behavior and this setting becomes an important
issue. Some DAT recorders have an analog protection
mechanism so that the level never reaches the digital
maximum signal. In these cases a setting of –0.5 dB or
lower make most sense.
By entering a value of –6 dB all samples above half of the
digital maximum are considered “distorted” and are
recalibrated. Even analog distorted material can be improved
with the algorithm.
Remove DC offset
This function in menu “Effects” removes a DC offset in
the selected range of a Wave project (RAP or HDP). Some
sound cards produce such a DC offset while recording, so
it is useful, if you can remove it!
Get Noise Sample (deLuxe version)
This mode uses a noise sample to reduce the unwanted
sound.
Noise Reduction (deLuxe version)
The Noise Reduction function can be used to effectively
remove annoying noise material from the audio with very
little or almost no discoloration of the original audio. For
this function the algorithm needs an example of the noise
print that needs to be removed. This function works best
with types of noises such as a constant occurrence of a
ground loop, air conditioner, hum, tape hiss or feedback.
397
Menu Effects
Please note that this algorithm was not necessarily developed to remove pops and clicks from audio material.
However, a typical click noise floor such as vinyl recordings
can still be successfully treaded with this function.
The algorithm can also work without a noise sample – then
only white noise is reduced, such as tape hiss or microphone
amplifier hiss.
Mark a range over the audio material you want to be reduced
in the recording! Then create the noise sample before
opening the Noise Reduction dialog using the menu “Effects
> get Noise Sample”!
Without Noise Sample: Use this mode if you do not have
a noise sample and you only want to reduce white noise
(dehissing).
Type Noise: Here you can select between different noise
types.
Type Audio: Here you can select between Music and Voices
to control the denoising algorithm.
Absorption: This parameter lets you adjust the level of
noise to be reduced. Please adjust this level carefully – it
controls the quality of the complete noise reduction
algorithm! If the level is too low you still hear noise and
artificial high tones. If the level is set too high you may
loose high frequencies of your audio material.
Reduction: Here you can adjust the balance between original signal and denoised signal. In most cases is is useful
to keep a certain amount of original (non denoised) material
– e.g. with a setting of -12 dB. This keeps as much of the
natural color of the audio material as possible.
Test Realtime: This button starts the realtime preview
function of the actual settings on fast PCs.
Test Offline: This buttons starts the preview funtion for
slower PCs – small parts of audio material are calculated
and played back.
Remove DC offset
This function in menu ‘Effects’ removes a DC offset in the
selected range of a Wave project (RAP or HDP). Some sound
cards produce such a DC offset while recording, so it is
useful, if you can remove it!
398
Menu Effects
Resample / Timestretching / Pitchshifting
Important: If you want to change the sample rate of a whole
audio file (e.g. from 48 kHz to 44.1 kHz) please use the
separate function “Change Sample Rate” in the Effects
menu!
All algorithms in this dialog only use the parameter factor
(upper left edit control) to set the amount of effect. All the
other input fields in the parameter group simply control
this factor. This makes it easy to specify the factor by typing
in the new length, pitch or tempo in bpm. Press “Refresh
Display” to calculate the actual factor if needed!
The following algorithms can be used:
Resampling:
When using a factor lower than 1.0 the material becomes
faster and higher. This is very similar to an analog tape
deck, which runs at a higher or lower speed. Also samplers
and pcm-synthesizers use this type of algorithm for transposing the samples or waveforms. Use this mode to correct
the pitch and speed of any audio material, which may
change its length.
If the factor is lower than 1.0, the re-sampling process is
performed without a quality loss.
Otherwise, the re-sampling process will result in a loss of
high frequencies. If for example the length of a 44.1 kHz
sample is doubled, the resulting frequency response of the
processed sample is limited to 11.025 kHz.
Pitch Shifting:
The pitch of the sample is changed, maintaining the length.
Use this mode to transpose an audio object without changing the length.
Time Stretching:
The length of the sample is changed, maintaining the pitch.
Use this mode for example to change the tempo of a drum
loop without changing the pitch.
399
Menu Effects
Time Stretching and Pitch Shifting are no loss-less procedures - depending on the factor there can occur short delays or other artifacts in the sample. To minimize these
artifacts you have the choice between 3 internal algorithms:
Loops/Songs: Use this mode for factors in the range of
0.9...1.1. This algorithm keeps the original phase even of
stereo material, but it produces more artifacts when using
with large factors.
Loops/Songs/Speech: This mode uses a much more complex algorithm, which needs more time that is calculating.
But it gives in most cases better results when using large
factors. The phase of the material is changed to get a
“smoother” sound. If you were for example dealing with
speech, vocals, or orchestral instruments this would be no
problem. More complex spectrums, such as a mix of different instruments or completed mix problems, may develop
problems.
Solo Instruments: This mode uses the same algorithms
as the last one, but uses more of the smoothing component. This makes it ideal for solo instrumental sounds like
piano samples or vocals.
Beat Marker-Mode: This is a additional Timestretch Mode.
It is made for pure Drumloops. Basically it works like this:
Through activating the option “Find Beat Marker” the algorithm tries to find and mark Beats in the Audio material.
Only these points will be used for timestretching by moving the autio material at the markers ahead or back.
Increasing the tempo will superimpose some beats, slowing down generates short pauses between the beats. That
mostly sounds better than the older algorithms.
A threshold value for beat detection can be set by using the
sensitivity control.
Furthermore you are able to set the beat markers manual
before you open the Timestretching dialog.
Just set the markers short of the beats (key: shift + 1 ... 0 )
If a Wave Project is open and visible, you can follow the
process of setting beat markers on the screen.
400
Test Realtime: This is a new function for the beat marker
mode. Herewith it is easy to test the effect before you let
Music Editor calculate the whole sample.
Irrespective of the tempo, the pitch of the loop can be adjusted using the pitch control in the upper left region of
the dialog.
Menu Effects
Change Sample Rate
Use this function to change the sample rate of a whole audio
file. This may be needed to convert a DAT recording at 48
kHz to 44.1 kHz for use on an audio CD.
After choosing the new sample rate you can select a
filename for the new project.
If the resolution is increased the sample rate change will
take place without any quality loss – the sample material
will not experience fidelity reductions. (The needed hard
disk space will increase though.)
If the resolution is reduced, the overtones or high frequencies may be lost during the sample rate change. For example, if the resolution of a 44.1 kHz sample is reduced to
22.05 kHz, the frequency response of the resulting sample
is reduced to 11.025 kHz. The frequency response is always
half of the resolution specified. For a conversion from a 48
kHz sample to 44.1 kHz, this loss in quality is not significant, since the human ear only recognizes frequencies up
to 20 kHz. (A resolution of 48 kHz is often only used because the digital to analog conversion can take place with
much higher precision without expensing a lot of effort.)
Please note that resampling to 44.1 kHz can also be done
while recording in real-time.
The Playback Parameter window (Shortcut: p) contains a
Varispeed option for real-time resampling during playback.
The Record window (Shortcut: r) lets you resample to 44.1
kHz in real-time from any of the selected sampling rates.
Sample manipulation > Sampledata / 2
Every second sampling value is removed and the complete
sample is reduced to half its length. The audible pitch is
doubled, i.e. raised by one octave. When halving the sampling rate you will notice that the corresponding upper harmonics are missing.
The frequency range is divided (i.e. 0-22.05 kHz @ 44.1
kHz Sample Rate -> 0-11.025 kHz @ 22.05 kHz).
Sample manipulation > Sampledata * 2
This function inserts a new value between two neighboring
sampling values. It is the average of the two sampling values.
The complete sample changes to twice it’s length and the
resulting pitch of the sample is cut in half. You must then
double the playing rate to achieve the former pitch.
You should note that the higher sample rate does not lead
to new upper harmonics – the frequency range of the audio
material stays the same.
401
Menu Effects
Sample manipulation > Reverse
The sample data in the selected range is reversed along the
time axis. The playback of the sample data happens from
the end to the beginning. This allows for very interesting
effects, not to mention the “hidden messages” frequently
referred to in various songs.
This function is reversible: if you do not select a new range,
calling this function once more leads to the original
material.
Build Physical Loop
This function utilizes a complex algorithm for optimizing
loops in Wave projects. It is useful when samples are to be
used for instrumental sounds as well as wave table synthesizer.
Before you can process a sample you need to select a range
in your sample that already defines the rough edges of the
sample loop. Remember that you can shift and vary a range
during playback to find the best loop position. A comfortable
way to look at the loop positions is by activating the split
range mode by pressing “b”. The sample will be displayed
in 3 sections.
To gain an interruption-free loop the outer limits of the
range will be set to zero. By applying a crossfade to the
material at the loop end containing the sample data in front
of the loop beginning, MAGIX audio studio will create a
‘smooth’ transition between loop end and loop beginning.
When a marker is set in front of the selected range, the
range between the marker and the beginning of the loop
will be used for the crossfade. This offers you a feature found
in professional hardware samplers. To achieve a short crossfade set the marker close to the loop beginning. To receive
a long crossfade position the marker further away from the
loop beginning.
Notice that the distance between marker and beginning of
the loop range needs to be smaller than the loop range itself
to make a crossfade possible.
Switch Channels
With this function you can switch left and right stereo
channel. This is useful to correct recordings with switched
channels.
402
Menu Effects
Invert Phase
The sample data within the selected range is inverted along
the amplitude axis. This phase inversion means that negative values become positive and vice versa. This function,
too, is reversible.
The “Invert” function permits samples with different phases
to be matched.
Along with the available mixing functions (which are, from
a mathematical viewpoint, adding functions) you can
actually subtract samples by applying this function to the
selected sample.
403
Menu Range
MAGIX audio studio offers a convenient way of working with
ranges. The “Range” menu will let you use these options.
Range all
The range will cover the complete sample. This command
comes in handy if you want to apply changes to the entire
sample with functions that normally only address certain
ranges.
Keys: a
Move Play Cursor > to beginning
Sets the start position of the play cursor to the beginning of
the project.
Keys: Home
Move Play Cursor > to end
Sets the start position of the play cursor to the end of the project.
Keys: End
Move Play Cursor > to range start
Sets the start position of the play cursor to the beginning of
the currently selected range.
Keys: Alt + cursor right
Move Play Cursor > to range end
Sets the start position of the play cursor to the end of the
currently selected range.
Keys: Alt + cursor left
Edit Range > Range to beginning
The beginning of the range will be extended toward to the
beginning of the project.
Keys: SHIFT + Home
Edit Range > Range to end
The end of the range will be extended toward the end of the
project.
404
Keys: SHIFT + End
Menu Range
Edit Range > Flip Range left
The current range is shifted left by the length of the range.
Its end will be its former beginning. If there is not enough
room to place the range, the command will not be executed.
Keys: CTRL + SHIFT + left
Edit Range > Flip Range right
The current range is shifted right by the length of the range.
Its beginning will be its former end. Keep in mind that if
there is not enough room to place the range, the command
will not be executed.
Keys: CTRL + SHIFT +right
Edit Range > Beginning of Range > 0
This function shifts the beginning of range to the right of
the next zero position. The function can be called from the
keyboard by pressing the left Shift + Alt keys and “6” on
the numeric keypad at the same time. You can also press
the PgUp key.
Keys: Page Up
Edit Range > End of Range > 0
This function shifts the end of the range to the right of the
next zero position (change in polarity). “Zero position” is
the next sample value with zero value or the boundary
between a positive and a negative sample value (or vice
versa). This is particular useful for searching for loop points.
The function can be called from the keyboard by pressing
the right Shift + Alt keys and “6” on the numeric keypad or
the PgDn keys.
Keys: Page Down
Edit Range > Beginning of Range < 0
This function shifts the beginning of the range to the left
of the next zero position. The function can be called from
the keyboard by pressing of the left Shift + Alt keys and “4”
on the numeric keypad. You can also press the PgDn key.
Keys: SHIFT + Page Up
Edit Range > End of Range < 0
This function shifts the end of the range to the left of the
next zero position.
405
Menu Range
The function can be called from the keyboard by simultaneously pressing the right Shift + Alt keys and “4” on the
numeric keypad or by pressing the Shift + PgDn keys.
Keys: SHIFT + Page Down
Edit Range > 0> Range < 0
This function shifts the beginning of the range to the left
and the end of the range to the right of the next zero position.
Keys: Clear
Range length to
This command lets you set the range length to 1, 2, 4, 8,
and 16 bars. You can set the tempo in BPM with menu
View->Snap Setup.
Split Range
This function is in particular useful for working with loops.
If not already displaying in Split Range Mode the project is
first switched to this mode displaying three sections on the
screen.
The upper section displays the whole sample. The section
located at the bottom left displays the data near the
beginning of the range. The section at the bottom right
displays the data near the end of the range.
The boundaries of the range can be exactly positioned in
the lower sections, while the upper section will display the
location of the entire range. You can also define ranges
across several sections.
Keys: b
Split Range for Video
406
This function is in particular useful for working with AVI
Videos.
The upper section displays the whole sample. The section
located at the bottom left displays the data near the
beginning of the range. The section at the bottom right
displays the data near the end of the range.
Both lower sections are zoomed down to single frame
accuracy.
The boundaries of the range can be exactly positioned in
the lower sections, while the upper section will display the
location of the entire range. You can also define ranges
across several sections.
To undo the split, the display has to be returned to a 1 section
display with Shift + b or View->Sections->1.
Menu Range
Store Range
Another powerful feature of MAGIX audio studio is the
option of defining and saving different ranges for future
retrieval. An unlimited number of ranges can be defined.
You can for example specify different loops and compare
them while you recall their ranges.
All ranges of a project can be seen in menu Tools->Range
Manager. There all ranges can be renamed or played.
When selecting this menu option, the selected range needs
to be stored by entering a numerical value the range is
associated with.
Keys: SHIFT + F2 ... F10
You can define more ranges by using the submenu “Other”.
You will need to specify a name for the range selected.
Keys: SHIFT + F11
Get Range
By selecting this option, you can choose one of the defined
ranges as the current range.
MAGIX audio studio even lets you choose a range while
playing. The specified range becomes the current one and
is audible. Using this method, you can change between two
ranges comparing them with each other. Ranges can also
be named and recalled with the Range Manager (Tools
menu).
Keys: F2 ... F10
Get Range Length
By selecting this option you can choose the length of one of
the defined ranges as the current range.
MAGIX audio studio even lets you choose a range length
while playing. The specified range becomes the current one
and is audible. Using this method you can change between
two range length comparing them with each other.
Keys: Ctrl + Shift + F2 ... F10
Store Marker
You can store an unlimited number of markers wherever
the play cursor is placed at.
Keys: SHIFT + 1 ... 0
407
Menu Range
Using the submenu “Other”, you can define more markers
with a desired name. Defined markers can be seen above
the sample data section of the project window and can be
moved with the mouse.
Keys: SHIFT + [
Get Marker
By selecting this menu option, you can easily locate marker
points. Simply specify the desired marker location and
MAGIX audio studio will position the play cursor at that
location.
You can even select a new play cursor location during
playback of the project.
You should keep in mind that, whenever a marker has been
defined, the range between the marker and the end of the
sample is played.
Keys: 1 ... 0
Markers on Range Borders
This function sets two markers to the beginning (S) and
the end (E) of a selected range.
Set Markers on Silence
This function sets markers on silent regions in the sample
(only in Wave projects - HDP or RAP). You can choose the
minimal length of the pause, a threshold level, the start
number and a prefix for the marker name.
This is very useful to select the regions of sample CDs etc...
408
Min. Time (ms): This is the minimum length in ms of a
”silent” area.
Menu Range
Threshold (dB): This is the maximum volume of a ”silent” area. The level of the area in the project will be set on
the level of the threshold in the graphic display!
Starting number: The markers will start to count from
the number you type in this dialogue box.
Prefix: This allows you to insert additional symbols (letters would be appropriate), which will be placed in front of
the marker-numbers. By doing this, you will able to distinguish between new and older markers.
Delete marker
The selected marker will be deleted.
Delete all markers
All markers of the project will be deleted.
Recall last range
Get the last selected range. This is useful if you have clicked
Range Editor
The beginning, the end and length of a selected range can
be numerically changed in different units of measurement.
This function will let you specify minute details of a
particular range you need to set.
If you change any of the values in the “Range Start”, “Range Length” or “Range End” sections, all other values will
automatically be updated with the exceptions below:
Change values in the Range Start section:
The end will be maintained.
Change values in the Range End section:
The start will be maintained.
Change values in the Range Length section:
The start will be maintained.
Please note the format of the “Bar” dialog box. The format
is displayed as a 4/4 beat with 96 clicks per quarter.
Displayed are the bar, beat, and clicks.
The number of beats per minute (BPM) can be set in the
BPM dialog box in View->Snap Setup.
409
Menu CD (deLuxe-version)
MAGIX audio studio deLuxe allows you to create audio CDs
directly from virtual projects and any Stereo Wave project,
regardless how many tracks are in the VIP. The requirement
is a sample rate of 44.1 kHz for the project. 24-bit objects
are converted to 16-bit during the burning of the CD or the
CD Track Bouncing function.
Single-track virtual projects (so-called CD VIPs) are
especially useful, if WAV files or Wave projects are ready
to be turned into a CD. The VIP treats the loading of the
Wave project different than for multi-track VIPs. Regardless
of any selected range, the Wave projects are loaded by
automatically inserting a pre-determined space between the
songs or objects. The distance can be set with CD->Set Pause Time.
If a completed VIP represents a single track on the CD, use
the Track Bouncing function to turn the multiple tracks
into a single Wave project. This Wave project can then be
loaded as a “Track Object” in a new CD VIP to properly
place it among other track objects.
Load audio CD track(s)
See menu „File“!
Set Track
Use this function to set a track marker (Index Marker) on
the current play cursor position. All markers behind the
insertion point will be renumbered.
Each track on your CD needs a track marker, typically set
after a short pause at the beginning of the next title.
Use the function “Track markers on object edges” to create
the markers automatically on the borders of the sample
objects!
To manage the markers or to rename them use the Marker
/ CD Track Manager in the menu “Tools”.
Set Sub-index
Use this function to set a sub-index marker on the current
play cursor position. All sub-index markers behind the
insertion point will be renumbered.
Sub indices are not necessary for your CD but useful for
selecting several regions in one track.
Set Pause
410
Use this function to set a pause marker on the current play
cursor position. This lets the CD player switch the output
Menu CD (deLuxe-version)
to absolute silence while continuing playback until to the
next track index/marker is encountered.
Set Track Indices on Silence
If you are inserting a longer audio-file containing various
titles (for example a live-take or recordings on DAT), you
can automatically insert track-markers between the titles
using this function.
Min Time: Time interval detected as silence
Threshold db: Maximum volume detected as silence
Starting number: The number of the marker that will be
the starting point for the automatic indexing procedure.
Prefix: You can add additional symbols (letters) to the
marker numbers which will be displayed in front of them.
This allows you to distinguish new markers from already
existing markers.
Delete prefixed Markers: All markers that are labeled
with the same prefix will be deleted.
Delete all Markers: Deletes all markers
Set Track Indices on Object Edges
This function sets track markers (Index Markers) automatically to the beginning of each VIP object in the first
VIP track.
Prior to using the function, execute Remove All Indices
to delete any possible track markers.
If there are multiple objects that make up a single track or
title, you may want to use the Bouncing function to
combine the objects to ensure proper track assignments.
Remove Index
Use this function to remove a previously set track or subindex marker. First, click on the marker (the small rectangle
below the number), then activate this function to delete it!
411
Menu CD (deLuxe-version)
Keys: Delete
Remove all Indices
Use this function to remove all previously set track or subindex markers. This can be helpful before calling the
function “Set track markers on object edges”!
Make CD
This dialog starts the CD writing process. MAGIX audio
studio contains high-grade CD creation routines that are
constantly updated. The software code is licensed from
Point Software & Systems.
MAGIX audio studio creates a TOC (Table of Contents)
file prior to starting the CD creation. The name of the
current VIP is used and the extension *.tcx is added to the
file. The TOC file is located in the same folder as the current
VIP. It is therefore important to save the VIP to the hard
disk prior to starting the burning process.
Burn “On the Fly”
Use this extremely powerful mode if you want to create the
CD directly from within the VIP. All necessary calculations
are performed in real-time during the burning process. The
following real-time tasks are calculated during the process:
– volume and panorama settings
– Fades and crossfades
– Mixing of tracks
– Mixer track effects
– Mixer Master section effects
412
To get a good idea whether your system is able to sustain
the real-time processing needed for this functionality, try
this:
Menu CD (deLuxe-version)
Play back the VIP sections that contain the largest number
of tracks and/or where the most real-time effects are used.
Watch the DSP meter (bottom left-hand). Below are the
expected performances at the different DSP values:
–
–
–
–
Below 25%: CD creation with up to 4x mode
Below 50%: CD creation with up to 2x mode
Below 90%: CD creation with up to 1x mode
Above 90%: Real-time creation is not possible, use the
second mode (Bouncing)
Generate a complete new file
Use this option if your system is not fast enough to sustain
the real-time creation of the CD (see above). This mode
calculates all WAV files, including fades, crossfades, and
volume automation into a new audio file. Any other realtime processing is also part of the newly created audio file.
Make sure that you have sufficient hard disk space prior to
starting the process (approx. 700 MB for a complete CD).
The original WAV files used in the VIP remain unchanged.
This makes this procedure non-destructive!
Use Uni Code for TOC
This is the default setting and is used for the internal CD
creation process as well as the 32-bit version of Point
CDAudio.
Use ASCII Code for TOC
This format should only be chosen when using the 16-bit
version of Point CDAudio.
Print TOC
This starts the external TOC Printer application. This
convenient tool allows you to print the contents information
of the current CD. You may choose between a text style
format to print the production documentation and a
formatted printout for the CD jewel case. Please refer to
the on-line help for the TOC Printer for more specific
information!
Show TOC
This button opens a text window, which shows the contents
of the current TOC. The “Copy” function can be used to
copy the contents to the Windows Clipboard for use with
other text editing applications.
413
Menu CD (deLuxe-version)
Show CD-R Drive Information
This dialog shows you information about the active CD-R
drive(s).
Among the information displayed is the manufacturer, drive
name, hardware revision, cache size, and the features
supported by the drive mechanism.
The feature “Disc At Once” is extremely important, since it
is needed to produce Red Book compatible Audio CDs that
are accepted as masters by pressing plants
Show CD-R Disc Information
This dialog shows information about the currently inserted
CD-R media.
The most important information is the maximum length
that can not be exceeded during the production (i.e. 74
minutes and 5 seconds).
CD Track Options
The CD Track dialog shows all CD tracks and sub-indexes
used in the current VIP.
Every track can be assigned with a name, which is also
displayed in the VIP.
Other settings such as Preemphasis, Copy Protection, and
Second Generation Protection Flags can be set for each of
the tracks.
The button Set All allows you to use the current flags to set
all tracks to the chosen settings.
Other settings are the ISRC Codes for every CD track.
CD Disc Options
This dialog configures settings for the current CD. Among
them are:
CD Title
The title is written to the CD and is used in the TOC Printer
application to print the CD information.
UPC/Ean Code
This code is also written to the CD and can be requested by
special CD players that work with this format.
Number of first CD Track
414
Under certain circumstances, such as writing with TrackAt-Once, the number of the first track can be determined
with this setting. When using the Disk-At-Once mode this
setting does not have any significance. The CD will always
start with track 1 in this mode.
Menu CD (deLuxe-version)
Set Pause Time
Use this function to set the length of the default pause
between two tracks. These pause length is needed for the
grid function, which lets the sample objects snap to the
edges of other objects + this pause time. Normally a pause
time of 2 seconds is used.
Set Start Pause Time
Use this function to set the length of the default pause
before the first track.
Normally a start pause time of 2 seconds is used.
Special CD Arrange-Mode
If you activate this menu feature, MAGIX audio studio will
arrange the next objects introducing a Red Book-StandardPause between them.
The following procedure highly recommended:
– Open a new VIP, with 4 tracks for example, so that you
may reedit it later on
– Activate the Special CD Arrange Mode in the CD Menu
– Open a new VIP
– Load wave files, audio tracks or make a recording using
the microphone
– You will notice gaps in the VIP between the individual
objects which represent the inserted breaks. You can
adjust the length of the included pauses in the dialogue
”Adjust Pause Length” if you want.
Bouncing (Internal Mixdown)
Use this function to convert the objects within a selected
range to a new WAV file. The selected objects in the VIP
are replaced with the track-bounced version. This is very
useful to combine multiple objects into a single object so
that the function to create track markers automatically can
be used.
415
Menu Tools
Track Bouncing
The current virtual multi-track project (VIP) can be converted into a WAV file or MAGIX audio studio HD Wave
project and saved with a new name. All tracks in the VIP
are mixed and all real-time processing, cuts, crossfades, all
Mixer settings, Mixer effects, DirectX Plug-Ins, Volume
automation and Panorama automation are included in the
bounced version.
The function “Track Bouncing” may require a large amount
of storage, depending on the length of the VIP.
Four track projects are internally mixed to combine two
tracks for playback on each channel. To prevent clipping,
an amplitude reduction of 6 dB is applied (which corresponds with a 50% representation of the source material).
For eight track projects, the reduction is normally 12 dB.
However, you can change the value in Options-> Project
Info (shortcut: i).
416
Menu Tools
There are two variations for the track bouncing implementation:
Only selected Range: MAGIX audio studio uses any selected range in a VIP for the track bouncing. This command
does not work track selected, meaning that the number of
tracks that are spanned by the selected range does not matter. The track bouncing will always use all tracks for the
period of the selected range.
Complete Project: The complete contents of the VIP project are used.
Calculate Maximum Amplitude: When check, this option
displays the peak level of the mixed WAV file in dB. Further processing of the bounced audio file can use the specs
to make precise adjustments. After the track bouncing
process, MAGIX audio studio displays a dialog with the
maximum amplitude value.
Remove unused Samples
This function removes all material from Wave projects
belonging to the current VIP that is not used by any of the
VIP objects. The objects in the VIP will point to the proper
audio ranges in the linked audio files. This leaves the VIP
itself unchanged.
Using this function can conserve a lot of storage space.
However, the downside of using this option is that object
length changes are possible only in a limited form. Object
can be made short, but they cannot be extended.
Tip: If you need the complete contents of the audio files for
other production projects, it is recommended to archive the
finished project in the following way. Save the complete
project to a new folder (File->Save Complete Project to).
The VIP is now located with the complete contents, in
other words all the audio files, in an unaltered form (WAV,
RAP, etc.) in the same folder that the VIP was saved to.
Next, use the command Remove Unused Samples. The
same folder will now only contain the audio data or samples
that are actually used by the archived VIP. The contents
can be easily back up to any backup medium such as CDROM, Data DAT, and others.
Waveform Generator
This dialog contains a powerful generator of several test
tones. Please be sure to have activated a Wave project (HDP
or RAP) before opening this dialog!
The generated waveform is stored in the Clipboard with
417
Menu Tools
the same properties as the opened wave project. Please
rename the Clip after generating the wavefom, so it can be
easily included into other projects without naming conflicts.
You can adjust type, frequency, and length in samples of
the created waveform.
The generated samples are always fully amplified. The
volume level can be easily reduced with the normalizing
function (Normalizing).
The following types can be selected:
Square, pulse, triangle, sine, saw up, saw down and white
noise.
Range Manager
The Range manager is a window illustrating all ranges of
the current project. The current range is selected by a
colored bar. The range bounds are selected by clicking on
the range name. The range name can be changed in the
lower line. Ranges can be deleted and new ranges can be
saved.
With the Play Once button you can playback the actual
range once, with Play Loop it is played as a loop. This way
you can use the range manager as a simple jingle player!
Marker / CD Track Manager
All currently saved markers of the active project are shown
with their name and position in this dialog.
The play cursor is moved to the respective marker position
by clicking on the dialog entry of the desired marker.
You can also change the marker names and create new
markers. In addition, the dialog lets you delete individual
or all markers of a project.
Object Manager
In the object manager all objects used in a VIP are indicated
in sequence of their temporal appearance. With this option
the object manager features a function which is often
offered in other programs with “Play Lists”.
418
Menu Tools
In the object manager objects can be selected, which are
also activated in the VIP. Small objects can be identified
and manipulated easily.
Ctrl + a mouse click will select several objects; Shift + a
mouse click will select all objects between two selects (like
in the Windows Explorer).
Especially productive is the search function in the object
manager:
With it you can look for certain objects in full text mode
rather than just the graphical representation of the objects.
An example would be to look for all HD Wave projects with
the name “XYZ.HDP” or all objects that contain the name
“Intro”. You simply enter the search criteria in the text field
and click on “Search”. All found objects will be selected
and are available for further processing.
Take Manager
see Menu “Object”!
External Program 1, 2
This menu item in menu “Special” runs an external program with the actual project as parameter. This makes it
easy to export a MAGIX audio studio project to another
audio software for special edits.
Use the ?-button to select the external program you want to
run. After editing and saving the file in the external program you can load it back to MAGIX audio studio using
the recent file list in menu “Project”.
This function works only with HDPs in Mono or Stereo
Wave format!
419
Menu Playback
Play once
The project or the range is played once.
Keys: Space
Play loop
The project or the range is played in a loop.
Keys: Space
Play in Range
If you have specified a range selecting this menu option
(or button) will start the playback of the sample from the
beginning, enter the range and continue to loop through
the range until you press the stop key (button). This mode
is very useful when testing loops for instrument samples.
Keys: Space
Play with Preload
All buffers are loaded and the playback is ready to be started.
Another window will appear with which playback can be
started at your convenience. No delays will occur. This function is useful on slower systems and if a synchronization
must be started in manual mode and an exact start has to
be performed.
Keys: Shift + Space
Stop
The playback is stopped for all projects types.
Keys: Space
Stop and go to current position
The playback is stopped; the play cursor goes to the current
position.
Change Play Direction
The playback direction can be changed even during the
actual playback.
420
Menu Playback
Restart Play
Playback will start at the beginning even during the actual
playback.
Keys: Backspace
Playback Options
The Play Parameter window which appears after selecting
this menu option is designed to quickly enter playback parameters. Below is an explanation of the options available in
this window.
Sample Rate: The sample rate can be changed here as long
as the soundcard supports the new rate (some soundcards
even support changing the rate while playing the sample!).
This is especially useful to hear notes in a sample range
played in a different octave. When selecting half the sample
rate the pitch should be the same. It would be played one
octave lower.
Device: To specify the driver of the sound card use this
dialog box. This is necessary if playback takes place through
a single sound card device. This is especially important if
multiple output devices are located in the computer.
Autoscroll
The “Autoscroll” section will let you activate the autoscroll
feature. It is especially useful when working with long disk
files. The HD Wave project window will follow the play
cursor during playback.
When working in “2” or “3” section display mode, the
autoscroll feature will cause the individual sections to follow
the play cursor as well. If you have zoomed into one of the
sections, the play cursor will move through the section faster
resulting in more screen redraws.
421
Menu Playback
There are two alternatives in auto scrolling:
1. The “Soft” option performs a smooth scrolling of the
whole waveform, the play cursor stays in the center of the
display. This mode needs a fast graphics board, because
the complete screen is scrolled between the marker steps.
2. The “Page” option performs a page by page scrolling.
Please note, that the auto scrolling requires certain processing power based on your processor, graphic card and
the resolution of the display. For this reason you might encounter small interruptions in playing the audio files.
Should this occur simply disable the auto scroll feature or
raise the buffer size (select “Setup” menu and click on “System”).
Scrubbing
While pressing the 0 key on the numeric block (Numlock
active) and moving the mouse you can perform scrubbing.
MAGIX audio studio starts playback at a very low speed,
the mouse position relative to the start play cursor controls
the speed.
There are two scrubbing modes (in playback parameter window - key p):
Note: When working with smaller buffer sizes (4000, 2000
samples) the scrolling becomes “softer”. Please verify the
performance of your computer system and smaller buffer
sizes to not produce playback interruption.
Relative: The distance between the play cursor and the
mouse sets the playback speed.
Absolute: The position of the mouse in the window sets
the playback speed - at the left border playback speed is
200% backward, at the right border speed is 200 % forward,
in the middle of the window the speed is 0.
There is a real time resampling performed for changing
the playback rate without changing the sample rate of the
sound card. For best performance, use small play buffer
sizes and a fast processor (Pentium recommended)!
A Tip Using Scrubbing: The scrolling becomes “softer“
when using small buffer sizes (2000, 4000 samples). You
may need to test your system for error free playback with
these small settings. Combined with the Soft Scroll mode,
editing becomes very convenient on faster computers.
422
Menu Playback
Varipitch
MAGIX audio studio supports smooth changes of the pitch
while playback, even in multi track projects (vertical slider
in playback parameter window - key p). Activate the Varispeed mode with the “active” button, then you can change
the playback speed in various kinds:
Vertical slider: Changes the playback speed from -200%
to +200%
Pitch Factor: Lets you specify a certain pitch factor manually
Halftones: Lets you specify a value of halftones. The playback will be transposed the number of halftones.
Internal Rate: Here you can set a sample rate for the
varipitch calculation. If you want to play a WAV file with a
sample rate of 48 KHz but your sound card can only play
rates up to 44.1 KHz simply set the internal rate to 48 and
activate varispeed. You hear the same result as playing back
with real 48 KHz! This function is also very useful for digital playback to DAT with 44.1 KHz samples and and vice
versa!
BPM: Here you can type in the original bpm value of your
material and a destination bpm value, which is reached
using the varipitch.
Important: Varipitch works also while recording! So you
can set the pitch to -2 halftones, sing a song into the
computer, then switch off the varipitch – your track is
transposed two halftones higher!
There is a real time resampling performed for changing
the playback rate without changing the sample rate of the
sound card. For best performance use small play buffer
sizes and a fast processor (Pentium recommended) !
Keys: p
Punch In > Punch In Mode active
This option activates the Punch mode. Punch-In and PunchOut are a process automating the recording start and end
of an audio segment. Once the Punch mode is active, the
Punch-In Record can be used to record audio segments
without stopping the playback.
Requirements for this mode is an armed Record track. Use
the “REC” button on each track to select it for punch recording!
423
Menu Playback
Punch Recording can be done in two ways:
1. Punch-In/Out “On-The-Fly”
This allows you to start the recording (punch in) at any
time during the playback. Once the recording commences,
it can be stopped at any time (punch out), while the playback continues.
This is very similar to tape based multi-track recorders,
which allow you to correct mistakes during previous
recording takes by overwriting segments of the tape.
Simply start the playback with the Spacebar. The Punch-In
recording can be started by clicking on the Punch Record
button in the toolbar. The same button punches out of the
recording mode, while the playback continues. To stop the
playback, press the Spacebar.
2. Punch-In/Out with Markers
The second method is the punching in and out of recording
using special markers. This is a more automated way of
dealing with punch-in/out recording. This is useful when
specific punch-in and punch-out points are determined and
you don’t want to take any risks in possible punching in or
out of the recording. Don’t panic though! The punching in
and out with markers lets you specify the exact points the
recording is to start and stop. Since you are working in a
non-linear, non-destructive environment, any mistake or
unwanted take can be removed or undone without any
problems. The previous material in the track would still be
there!
This is simply a very convenient way when it’s midnight
and your fingers are getting tired!
To operate in this mode, a range has to be selected, which
defines the beginning and end of the recording. The
functions Set Punch-In Marker and Set Punch-Out
Marker are used to tell MAGIX audio studio where to
punch in and where to punch out. Next, set the play cursor
to an appropriate position prior to the punch-in point and
start the playback/recording with the Punch Record
button in the Punch Toolbar.
424
Important: When working with the punch in/out
functionality, make sure that the Auto Crossfade mode is
activated, by clicking on the corresponding button in the
MAGIX audio studio toolbar. The auto crossfade will create
smooth transitions between the takes. This helps to prevent
little pops and clicks!
There is also a way to perform looped punch-in recording! Simply select a range over the desired punch region.
Menu Playback
The range is played back until you stop the playback with
the Spacebar. Each time the program loops through the
range, new takes are recorded at the punch markers. To
find the best take after the recording is completed, use the
Take Manager!
Punch In Record: This function/button starts and stops
the punch-in recording.
Set Punch In Marker: This function/button sets the
punch-in marker.
Set Punch Out Marker: This function/button sets the
punch-out marker.
Remove Punch Markers: This function/button deletes the
punch-in and punch-out markers.
Punch In > Punch In Record
This function/button starts and stops the punch-in recording.
Punch In > Set Start Marker
This function/button sets the punch-in marker.
Punch In > Set End Marker
This function/button sets the punch-out marker.
Punch In > Remove Punch In / Punch Out
Markers
This function/button deletes the punch-in and punch-out
markers.
Live Input Mode
This is another very powerful feature of MAGIX audio
studio – the Live Input Mode! When working with this
mode, MAGIX audio studio lets you use the real-time Mixer to mix live inputs from the sound card with recorded
audio material.
This turns MAGIX audio studio into a full-scale digital realtime effects device, including DirectX Plug-Ins!
The Basics:
The Live Input Mode basically functions similar to recording
audio material – without writing it to disk! A channel that
is to be used for live mixing has to be armed for recording.
Once the playback of the VIP is started with the Spacebar,
the live signals on the input of the audio device(s) are routed
425
Menu Playback
through the Mixer. Use the controls in the Mixer window
to create a mix. In addition, any VIP object is also played
back while the live inputs are processed.
Latency
The audio processing in MAGIX audio studio obviously
takes time. This may lead to small delays at the outputs
versus the incoming signal. This delay is very much dependent on the VIP Buffer size. The latency can be reduced
by using smaller VIP buffer settings. Use settings that
enable the program to process the real-time audio without
introducing any errors. A setting of 4 buffers at a buffer
size of 8000 stereo samples creates a delay of 0.7 seconds.
A buffer size reduction to 2000 samples results in a delay
of only 0.2 seconds. Experiment with the buffer settings to
find the optimal settings for your system!
The latency may not make it possible to use the Live Input
Mode to replace an analog effects device. However, it leaves
room for some very interesting application aspects.
MAGIX audio studio as Live Effect Processor
If you are looking for fancy effects that are not offered by
effect units in your rack, try to use some of the integrated
effects in MAGIX audio studio. A live signal can be processed with the FFT Filter, the Eqs and the Stereo Enhancer.
You may also use the many DirectX Plug-Ins available.
There is no limit to your creativity!
Record
Strarts recording.
Record Parameter
This menu option opens the Record window. All necessary
settings for the recording can be performed here.
Record mode: Select between Stereo and Mono, whether
you want to record the audio into a RAM Wave project or to
the hard disk as a HD Wave project.
Preload: The Preload option allows you to load all the
buffers before the recording actually begins. This enables
you to an immediate recording once you click the recording
button. Otherwise MAGIX audio studio will load the buffers
and depending on the size of the buffers and the overall
computer speed this may take a little bit of time.
426
Sample Rate: Select the sample rate of the audio file. Make
sure that your sound card supports the chosen sample rate.
Menu Playback
Resampling to 44.1 kHz: Some MAGIX audio studio versions can perform a real-time sample rate conversion to
44.1 kHz if you are recording with a different sample rate.
For example, many times a DAT tape is recorded at 48 kHz
but the tape needs to mastered and prepared for Red Book
audio CD processing, which needs to be in 44.1 kHz.
MAGIX audio studio allows you to automatically convert
the audio during the recording, eliminating the additional
sample rate conversion step after the recording.
Device: This selects the desired device driver you want to
use for the recording. If you have more than one sound
card installed in your system, this window will let you specify
which card to use. Make sure the sound card is properly
installed in Windows and is operational. If you do not see
an entry in this window, check whether a device driver has
been installed for your sound card. This usually is done
during the software installation for your sound card.
? (Device): By clicking on the “?” button you can check on
the record capabilities of the selected sound card. It shows
you information on the sound card driver and it’s capabilities.
Playback while Recording: Simultaneous record and
playback is especially important when wanting to monitor
existing tracks while recording a new track. This option
allows you to turn the feature on. To conserve system resources and keep the recording error free on slower systems,
you may need to turn this feature off.
427
Menu Playback
Note: If you only have one sound card in your system and
want to use this feature, you will need a full-duplex capable
sound card. Check the capabilities of your sound card for
this functionality. MAGIX audio studio will generate an
error message if your sound card is not capable of working
in this mode.
Also, this option is grayed out until the first track is recorded.
Virtual Working: MAGIX audio studio allows you to
choose whether you want to automatically create objects in
a VIP once you are done with the recording. If you check
this box a new object is created for every recording take
and inserted at the play cursor location and in the track(s)
you enabled for the recording.
If the box is unchecked MAGIX audio studio will not create
an object but rather open the Wave project with the contents
of the recorded audio material.
Monitor: This checkbox activates the VU meters. Most
sound cards also allow you to preview the audio signal you
are about to record and depending on the features of the
sound card, you will be able to monitor the recorded signal
during the recording.
To keep the system requirements down, you may wish to
disable the monitor function if it is not crucial to the recording you are doing. This will lower demand on the
computer system, which may be required if you are working
on a slower system.
During the recording, the meters will react more slowly
due to the priority level change. The most important task is
to keep the recording error free. For this reason, MAGIX
audio studio will switch the updating of the VU meters to a
lower priority to not overload the computer system.
This results in a slower reaction time of the meters. The
levels are still shown with the correct values. Also, if you
use lower buffer settings, the meters are updated in faster
intervals.
Corel/Osci: A oscilloscope view can be opened to display
the wave form in a scaleable window. When activating the
Phase check the phase correlation of a stereo signal can be
displayed.
A vertical line represents a mono signal, a horizontal line
represents a signal with a phase inversion, which is not
wanted in most cases.
428
Menu Playback
Record Time: This counter indicates the length of the actual
recording in minutes, seconds, and milliseconds.
Disk Space: This counter shows you the available disk space
in total track minutes for the selected sample rate and record
mode. This counter does not decrease during the recording.
It is updated after the recording takes place.
Record Offset: This option allows you to specify an offset,
which is calculated in samples. Sometimes it is necessary
to compensate for any delays due to processing speed and
other factors, such as your sound card’s ability to switch
between playback and recording mode. Delays can occur
between the recording and the playback of audio when the
Playback while Recording feature is turned on. This option
allows adjustments if this occurs. Good values to start with
are in the 20-2000 sample range.
Help: This brings up the context sensitive help system with
information on the features in the Record Parameter dialog.
New (Button 1): The path to the left of the button indicates
the location of the audio file that is to be recorded. If you
click on the New button you may enter a new name for the
audio file or a new location. This is an easy way to target
specify directories or hard disks as destinations for the new
audio files. If you select a new name, the Wave project is
renamed as well.
New (Button 2): The path to the left of the button indicates
the location of the VIP file you are working with. You may
reassign the VIP to a new location on a hard disk or in
another directory. If you specify a new VIP name, a new
VIP is generated with only one track of the same type as
the mode that is specified in the Record Mode section in
the Record Parameter dialog.
Set Marker 1: You can drop markers into the project. The
current position of the play cursor is used to drop a marker
at positions you want to select for later clean-up or similar
tasks.
Media: This option allows you to link a media file with the
recording. Files that can be linked include MIDI, AVI and
WAV files. Please refer to MIDI/Video Link in the Properties section for a detailed description of available features.
429
Menu Playback
Linking media files is often needed for editing of audio for
AVI films or when needing to synchronize a MIDI file to
add digital audio tracks to it.
Record: Starts recording by activating this button.
Stop: Stops the recording process. MAGIX audio studio
will ask you whether you wish to keep the recording or delete
it.
Should the computer become overloaded due to swapping
data or hard disk access for example, simply interrupt the
recording with a click of the right mouse button or the space
key.
OK: Closes the Record Parameter dialog.
Key:
430
r (second r starts recording)
Menu Options
Project Properties > Playback Options
See menu “Playback“!
Project Properties > Media link
This is one of the most powerful features of MAGIX audio
studio. With this option you have the opportunity to
synchronize media files such as MIDI files or AVI files.
These can be complete MIDI songs or sequences (*.MID
files), Video clips (*.AVI files) or other files for which a
MCI driver is installed in Windows.
Synchronizing MAGIX audio studio projects with
MIDI songs
Since MAGIX audio studio offers synchronization with
media files, you can set audio tracks to a already existing
MIDI song. Certain audio effects in VIP’s can be perfectly
positioned on MIDI material (e.g. drum loops, scratches
etc.). Otherwise, a project recording can be synchronized
with the MIDI file, so that MIDI and audio material will
play simultaneously. Please note that the MIDI file is always
played through the selected MIDI device in the Windows
Control Panel.
Synchronizing of MAGIX audio studio projects with
Video-for-Windows movies (AVI)
With this capability MAGIX audio studio is an excellent
tool for film music arrangements. Film and video clips are
recorded as AVI files. A MAGIX audio studio virtual project
431
Menu Options
can then be synchronized with it. The music, original sound,
voice tracks, effects and much more can be adjusted on the
time line and played with the AVI video simultaneously.
As the final step, the audio signal can be recorded back to
the video tapes original audio tracks or mixed for broadcasting.
File Name: Here you can specify the file name and directory
where the media file is located. By clicking on the “?” button
you will receive a file requester dialog that allows you not
only to look for the location on your hard disk(s), but also
let’s you specify which media file type you are looking for.
Once you have found the media file, simply click on OK
and MAGIX audio studio will make the link.
SMPTE Offset: The Offset allows you to specify a different start time for the media file. The default is a zero
position, which means that the media file would be started
at exactly 0 position, which is the beginning of the file. If
the offset is different than the 0 position the playback of
the media file starts at the position you entered. Here is an
example:
Let’s assume that we are working on the audio for an AVI
file and the audio section does not appear until 15 minutes
into the AVI file. It would be unnecessary to create 15
minutes of empty space at the beginning of the VIP in order
to line up the AVI frames and the audio. Instead we can
specify an offset of 15 minutes and the AVI file would start
playback at 15 minutes into the video file. However, all the
audio in MAGIX audio studio would start at position 0.
It makes good sense to write down the offsets you are specifying for the individual projects you are working with.
This way you can easily identify offset references for your
work.
Play Always: This checkbox allows you to specify whether
MAGIX audio studio is to play the media file every time
you start playback or recording in MAGIX audio studio. If
you uncheck the option MAGIX audio studio will not play
back the media file. This is a quick way to turn off the playback of the media file.
432
Load Always New: If this option is checked, MAGIX audio
studio will always load the media file for every playback or
recording of your VIP or Wave project. If the box is not
checked the playback of the media file is performed with the
contents of the memory. If the media file is too large for the
buffers, the playback is performed from the hard disk.
Menu Options
On faster computers, the real-time preview can be used.
Using the preview, a specific setting can be easily examined
before it is written back to the sample. On a Pentium with
90 MHz or higher, all 3 bands can be calculated in realtime and played back simultaneously!
Extract audio from AVI: If the file type is an AVI file
with video and audio data, audio streams are extracted from
all other information and the audio information itself is
put into a Wave project. This allows you to extract and edit
the audio apart from the rest of the contents in the imported
file.
Replace Audio in existing AVI: This option performs a
track bouncing of the current VIP into 1 WAV file. This file
is merged into the selected AVI file, so the AVI gets a new
audio track.
Create AVI / Audio Copy: This option performs a track
bouncing of the current VIP into 1 WAV file. The AVI file
is copied to a new file, which contains the new audio track.
This option keeps the original AVI.
Play Video without sound: This option applies for AVI
files only. If the AVI file contains audio the playback of the
AVI file and it’s audio could interfere with the audio playback in MAGIX audio studio. For this reason, it is suggested
that you turn the audio playback for the AVI file off.
Video in MAGIX audio studio window: This option also
applies to the AVI file playback only. Normally, the AVI
file is played back in a completely independent window.
This means, that if you run the MAGIX audio studio
window enlarged you will not see the playback of the AVI
window. You would need to minimize the MAGIX audio
studio window or scale the window in order to display both
windows on the screen. However, by checking this option
you can display the AVI window as another MAGIX audio
studio related window, which always stays on top during
playback. This allows you to display the AVI movie at any
time the playback or recording in MAGIX audio studio takes
place.
Show Video Track: This is a new feature in MAGIX audio
studio! With this option, you can display a video track in
the VIP window, which shows individual frames of the AVI
file. In the upper left-hand corner of the VIP window, the
current frame is displayed when clicking the play cursor at
433
Menu Options
a particular location in the VIP tracks. This allows you to
position audio events and material at exact frame positions.
If you zoom into the window, the video track is also
enlarged, showing the video frames at a lower zoom level
as well. If you select to display the window at its lowest
zoom level, each frame is shown in the video track.
FX: The FX option allows the adjusting of small delays that
can occur on slower computer systems for example. The
linking of media files with VIP or Wave projects is based
on two playback processes, one for the MAGIX audio studio
window and one for the media file window. No synchronizing of material takes place during the playback process.
This means that on computers that have timing problems
due to insufficient system resources or speed the digital
audio tracks and the media file may run “out of sync”. With
the FX option you can specify a factor that is used to do
internal sample rate conversion. How does that work?
Since we can not influence the playback speed of the media
file, we need to adjust the playback speed of the digital audio
tracks. Imagine that a normal playback speed is represented
with a factor of 100. If the digital tracks play ahead of the
media file, the playback needs to be slowed down. This
would be accomplished by multiplying the regular playback
speed of 100 with a FX factor just a little below 1, for example
0.998. This would result in a playback speed of 99.8, which
is a little bit slower than the regular speed. This way we
would align the digital tracks with the media file.
On the other hand, if the digital audio tracks lag behind the
media file playback, a factor higher and 1 would need to the
entered. A value of 1.002 would be an example.
Rule of thumb for this factor is to use small value increments. The values should stay around 1. You will need
to experiment with this setting, since there is no hard rule
about the system performance of an individual computer
system.
If you do not have any problems with the digital audio tracks
and the media file playback staying in sync, you should not
enter any values in this field!
Remove Link: This button will unlink the media file from
the MAGIX audio studio window. This effectively stops all
association with the media file. If you do not need any further referenced to the media file, you may use this option.
434
Preview: The Test button allows testing of the current link.
By clicking the button the playback of the media file should
commence. If no playback is visible in a MAGIX audio stu-
Menu Options
dio window, you may need to check the Video in MAGIX
audio studio window option for AVI files. Other media files
should be playing back through the Windows multimedia
extension, such as the MIDI file player.
Project Properties > CD arrange mode
(deLuxe version)
See “Menu CD (deLuxe version)”!
Project Properties > Text Comments
You can enter text comments to the current project via a
simple text editor. This text can be displayed at each new
opening of the project. This will preserve important
information about the project together with the audio
material.
Project Properties > Units of Measurement
Project Properties > Snap Setup
See “Menu View”!
Project Information
This will show you information on the current project. This
includes creation date, memory size, path and file names.
For virtual projects, a list of all included physical files is
displayed.
Virtual projects also display a list of linked Wave projects.
Volume Reduction in Virtual Projects:
The Project Information dialog features a setting for the
volume attenuation in 6 dB steps. This setting allows you
to adjust the main volume output of virtual projects.
Theoretically, each track of a 4 track stereo project must be
reduced by 2 bit’s (12 dB). In the real world application,
tracks are often not recorded or played back at the maximum
level so that the reduction can be adjusted accordingly.
However, raising the volume reduction setting may result
in clipping.
Please keep in mind that MAGIX audio studio reduces the
volume of Wave projects to the setting in the virtual project
that uses the Wave project. This allows you to switch between the VIP and the Wave project without the usual
encounter of volume differences between the project types.
If a Wave project is opened by itself (without using the Wave
project in a VIP), MAGIX audio studio automatically uses
the maximum volume playback.
Key:
i
435
Menu Options
Synchronization (deLuxe-version only)
MAGIX audio studio deLuxe will slave to SMPTE/MTC/
MC and can act as the master for MIDI Clock and MIDI
Time Code. Please note, that in most cases the slave sync
functions work more stabile under Windows95 than the
master mode!
To run MAGIX audio studio in multitasking with a
sequencer a MIDI connection must exist between the
sequencer and MAGIX audio studio. That can be done
through simple connection of a MIDI input to a MIDI
output with for example a MIDI interface of a soundcard.
Better is an internal combination of the programs through
a Multi MIDI driver (available as shareware software, e.g.
Hubis MIDI Loopback), which connects the output of one
program to the input of another one. Keep in mind that
one program will need to act as the “master”, while the
other takes the position of the “slave”. Select the modes in
the programs accordingly. Starting and stopping is done
from within the “master”. If possible MAGIX audio studio
should be the slave!
If MAGIX audio studio needs to be synchronized to a tape
machine, such as a video recorder or a multi-track recorder,
a SMPTE interface with Windows driver is necessary.
Internally the computer interfaces process the SMPTE code
as MIDI Time Code (MTC). You can also use an external
436
Menu Options
SMPTE to MTC converter and feed the MTC signal to a
MIDI input port on a MIDI interface in the computer.
MAGIX audio studio supports real chase lock sync (MIDI
Clock and MIDI Time Code/SMPTE). This means, that the
internal sample rate of MAGIX audio studio’s playback or
recording is varied in small steps, so that MAGIX audio
studio can follow little timing changes of the sync master.
This is very useful when using sync between a tape or video
recorder (master) and MAGIX audio studio (slave), because
most tape machines always produce small pitch changes,
which results in delays between the tape and MAGIX audio
studio, when not using chase lock sync. If the timing
changes are too big, MAGIX audio studio produces heavy
pitch changes, which may be reduced by entering smaller
values for the Sync Velocity in the sync dialog. Try values
of 200 or more, when you need fast pitch changes in sync
mode! In the lower right status bar you can read the actual/
maximal pitch change in cents ( 1 cent = 1/100 halftone).
Please know, that the chase lock sync performs a real time
resampling (if not using ARC44/88 sound cards), which
needs a certain processing power, so be carefully on slow
machines!
When receiving SMPTE/MTC you can start and stop
playback with the space key – MAGIX audio studio will
always be in sync!
MIDI Clock Input Device: Here the driver must be selected from which MAGIX audio studio will receive MIDI
Clocks for the synchronization.
BPM: Here the tempo must be entered, with which the
MIDI Clocks should be received.
SMPTE/MTC Input Device: Select the device driver
through which MAGIX audio studio will receive the
SMPTE/MTC signal.
MTC Output Device: Select the device driver through
which MAGIX audio studio will send the MIDI Time Code
master signal.
Type: Select the proper frame rate. Use 24 frames for
cinematic synchronization, 25 frames for PAL video, and
audio synchronization, 30 frames for NTSC video.
Preroll-Frames: You can specify, how many frames
MAGIX audio studio is to ignore before the synchronization
starts. Here you can account for the fact, that certain ana-
437
Menu Options
log instruments need time to reach the correct speed. In
order to have MAGIX audio studio link up to the proper
time values, a certain pre-roll frame count can be specified.
Sync Velocity: You can specify how fast MAGIX audio
studio follows a pitch change of the sync master. A value of
100 is good for normal purposes. If you need faster pitch
changes, try 200 or 300. If you want to reduce the pitch
changes in MAGIX audio studio try a setting of 50 or 30!
SMPTE-Offset: The SMPTE offset is indicated in
milliseconds and in SMPTE frames. The offset is removed
from the incoming SMPTE time code signal to line up
differences between tape material and recorded samples in
MAGIX audio studio. With an offset of “60:00:00”
milliseconds (1 hour) a tape that was previously stripped
can be synchronized, if the start point for the recording/
playback starts at 1 hour. MAGIX audio studio will, however,
start at the correct beginning position.
FX: With this parameter, possible inaccuracies during the
positioning of long samples can be equalized. Requirement
is a flawless synchronization at the sample beginning.
Follow the instructions in the chapter “Problem Solutions”.
Shortcut:
key g
Program Preferences > Undo Definitions
The depth of undo can be specified when working with
VIP’s. A value of “20” means that the last 20 changes can
be undone.
438
Menu Options
Program Preferences > VIP Mouse Mode
This submenu makes the following selections available.
(These are also accessible via the Mouse Modes Toolbar.):
Universal Mode: This is the default mode in MAGIX audio
studio. All necessary functions can be executed with the
left mouse button. The right mouse button accesses a context sensitive pop-up menu.
The vertical position within each VIP track determines
between Object handling or marker and range manipulation.
The upper half of a track lets you select ranges and set the
position of the play cursor. The lower half of the track makes
object selection and manipulation possible. Object handles,
and volume and panorama curve events take precedence and
can be modified at any position within the track.
Range Mode (Secure Mode): This mode lets you only
modify the ranges and the play cursor position. Using two
special keys, additional functionality is available:
If the period key is pressed, MAGIX audio studio changes
temporarily into the Object Mode. Once in the Object Mode
you can easily select and manipulate objects.
Pressing the Minus Key “-” key, MAGIX audio studio
temporarily changes into the Curve Mode. In the Curve
Mode, you can change the volume and panorama automation curves.
These special functions provide a way to quickly reach all
of the important functions, while protecting an object from
accidental moving. This is why this mode is also called
“Secure Mode”!
Cut Mode: You can use the mouse cursor like a pair of
scissors to crop objects.
Pitchshift-/Timestrech mode: The lower right tab allows
compression or stretching of an object. A time stretching
effect is created: The object is not played as a loop or shorter
version, but simply in a different play tempo.
Using the centre tab, the pitch can be altered using pitch
shifting.
Curve Mode: The Curve mode allows you to manipulate
existing volume and panorama automation curves.
Draw Volume Mode: The left mouse button draws volume
automation curves. Before using this mode, make sure the
“V” button for the desired track is active.
439
Menu Options
Draw Panorama Mode: The left mouse button draws
panorama automation curves. Before using this mode,
make sure the “P” button for the desired track is active.
Scrubbing mode: You can listen to the spot in an arrangement at which the mouse is currently located in this mouse
mode by pressing the mouse button. The replay cursor
therefore follows the mouse movements.
Zoom mode:
Right mouse key:
Left mouse key:
Zooms out of the project
Zooms into the project
Context Help mode: Click onto the object or subject for
which you request further information.
Program Preferences > Wave Mouse Mode
You can select between two draw modes for Wave projects
(HD and RAM Wave projects):
Ranges Mode: The left mouse button is used to set the
real-time cursor, select ranges, and markers (default).
Draw Wave: In this mode you can use “freehand drawing”
to manipulate the waveform. This is useful to correct single samples, small distortion peaks, clicks etc... Please use
a zoom level of 1:1 or larger for exact handling!
Draw Volume: In this mode you can draw the volume of
the sample, e.g. to create a special fade curve.
The middle of the display is volume 100%, the lower border is volume 0%, and the upper corner is volume 200%.
Program Preferences > Object Lock
Definitions
See “Menu Object > Lock objects > Lock Definitions”!
Program Preferences > Edit Keyboard
Shortcuts
This dialog allows you to customize the keyboard shortcuts
for all menu functions in MAGIX audio studio. This makes
it possible to assign your popular commands to specific
keys and key combinations for a quick recall.
The shortcut settings are saved to the file “MusStu40.ini”
in the Windows directory when exiting the program. The
next time the program is loaded, the customized shortcuts
will be retained.
440
Menu Options
The most important aspect of the dialog is the display of
the MAGIX audio studio menu tree. You can select which
menu option is to be reassigned a new key. To accomplish
this, simply click on the desired menu option in the tree
and then on the “New Shortcut” box. Next, press the new
key or key combination and press or click on the “Assign
new Shortcut” button. Any possible combination of Shift,
Alt, and Ctrl with other keys is possible. Please do not use
the space bar, ESC, or the Insert key. These functions are
hardcoded into MAGIX audio studio and can not be
changed!
Restore default: This will return the shortcut assignments
to the default settings of MAGIX audio studio.
Show Shortcut list: This opens another dialog that will
show a complete list of current shortcut assignments. This
list can be copied to the Windows Clipboard with the Copy
button for further processing with a text editor to print a
hardcopy of the list.
Load Shortcuts: Previously loaded shortcut assignments
can be loaded with this button.
Save Shortcuts: The current shortcut assignments are
saved to a new file name with the extension “*.ssc”.
441
Menu Options
Delete: Deletes the selected shortcut.
Assign new Shortcut: This will assign the value in the
“New Shortcut” box as the new shortcut for the respective
menu function.
Program Preferences > Change Toolbar style
You can change the style of the toolbars into 3-D or a flat
look. You have to restart MAGIX audio studio if you changed
the toolbar style.
Program Preferences > Enable VIP Tooltips
ToolTips are small information windows that open up automatically if the mouse pointer stops briefly on a button
or some other area. They provide information about the
button’s function. These information boxes can be switched
off or on with this option.
Program Preferences > Colors
MAGIX audio studio lets you specify the color for various
areas of the screen. Use this menu option if you want to
change the default color to another one.
Program Preferences > Grid Setup
See “Menu View>Snap setup”!
Program Preferences > Video Height
MAGIX audio studio allows you to link to an AVI file. The
AVI movie is played back whenever the VIP or Wave project
is played back or recorded into. If the option to display the
AVI frames in the VIP window, the height of the AVI
pictures is determined with this setting.
Program Preferences > Font Selection
MAGIX audio studio will also let you specify the font used
for text display in the various objects.
Program Preferences > Font for Time Display
This option lets you select the display font for the Time
Display (Window->Time Display).
442
Menu Options
System
In the “System” menu, you have options to fine-tune
MAGIX audio studio. You can specify parameters such as
paths and play and recording buffers.
A principal rule about buffers: the larger the buffer, the
more reliability you gain in playing back audio files (especially on slow systems or in full 16-track mode). However,
if you increase the buffer size too much, the computers
processing time becomes longer and delays might be
introduced in the overall command handling. You will need
to find a compromise between these two factors for each
individual computer system.
Im/Export: To enter the default path for wave import and
export. Click on the “?” button to bring up another window
to look for a specific directory in case you do not know the
full path.
HD Wave Projects: To adjust the default path for HD Wave
projects.
443
Menu Options
RAM Wave Projects: To adjust the default path for RAM
Wave projects.
Virtual projects: To adjust the default path for virtual
projects.
Sessions: The path for sessions is set.
Play/Record Buffer: This setting determines the buffer
size for the playback and recording of audio files. Larger
buffer settings may lead to a more stable playback on slower
systems or at full CPU load. The number of simultaneous
playback tracks increases. However, the response of the
computer slows down, which may have an adverse effect
on real-time effect editing. We therefore suggest finding
an optimal compromise for your individual system.
For simultaneous playback and record (Record while Play)
the buffer settings for the HD Record and HD Buffer needs
to be the same.
RAM Buffer: The default setting is 4000 Samples. This
buffer is used for playback of RAM Wave projects. If you
want a faster response time when playing back RAM Wave
projects, experiment with smaller settings!
HD Buffer: The default setting is 8000 Samples. This
buffer is used for the playback of HD Wave projects. To
gain faster response times, try smaller settings.
VIP Buffer: Default setting is 16000 Samples. The buffer
is used for the playback of virtual projects. Since an error
free playback is more important than fast response times,
we suggest using a setting between 16000 and 32000 when
working with a large number of tracks. This setting is the
most important setting when working with virtual projects
and the real-time Mixer. Any of the other buffer types and
settings are not utilized in VIPs and the Mixer window!
Real Time Buffer: The default setting is 8000 Samples.
This buffer is only used for the real-time preview in the
Effect menu dialogs. (The real-time effects in the Mixer
window do not use this buffer. The VIP Buffer is used for
those functions.)
444
Buffer Number: This setting determines how many of the
above buffers are to be utilized (values between 2 and 9). A
higher setting for Buffer Number secures a more stable
operation. However, the memory requirement increases
Menu Options
and the response time decreases. The actual buffer
utilization can be monitored with the status bar in the lower
right-hand of the MAGIX audio studio screen.
HD Record Buffer: The default setting is 16000 Samples.
This buffer is used during the recording of audio material
and determines the length of the data block that is written
to the hard disk.
Disable menus and buttons if function is not available: When checking this option, only those menu options
appear in the menu selection, which are actually available
with the type of project window.
Open VIP and Record window on program start: A new
default VIP and the Record window are displayed when
first starting MAGIX audio studio.
Check the Spacebar for Playback Stop in the Background: The spacebar is used for playback start and stop.
If MAGIX audio studio is playing in the background,
(another Windows application takes the focus), this option
determines whether the spacebar is monitored to stop
playback in MAGIX audio studio.
Preview Time: This determines the length of preview for
the non real-time preview in the Effects menu dialogs. The
non real-time preview is used for very processing intensive
effects in the destructive Wave editing portion of MAGIX
audio studio (Menu “Effects”).
Keys: y
Draw Setup
See “Menu View > VIP Display Mode > Defintition”!
Upgrade QDesign MP3 Coder
The included MP3-Encoder from QDesign allows you to
use the program 20 times for free. After that, you may want
to use the Upgrade-Option of the program.
In the upgrade-dialogue your personal ID-code will be displayed. If you indicate this code to MAGIX® you will receive the code for unlocking your MP3-Encoder for only
19,90 DM (149 ÖS / 19,90 CHF / 9 EUR). You just have
to type in the code in the corresponding dialogue-box, confirm and then you can encode, encode, encode...
445
Menu Options
Just inform us about your wish to upgrade via internet link
of the upgrade dialogue, by phone, fax or mail:
Europe (UK):
Phone: +49 (0)5741 3455 0
Fax: +49 (0)5741 310 768
Mail: MAGIX Entertainment Products GmbH,
Borsigstrasse 24, 32312 Lübbecke, GERMANY
US:
Phone: 1.888.866.2449
Fax: 310 656 0234
Mail: MAGIX Entertainment Corp., 429 Santa Monica Blvd.
#120, Santa Monica, CA 90401
Please don’t forget to name the information as follows:
– Key word: QDesign-Upgrade
– ID code
– Address
– In case of payment by credit card: Credit card number
and date of validity
– In case of payment in advance: Stamped transfer bill
– In case payment by check: Signed nonnegotiable check
446
Menu Window
Cascade
This function arranges all open windows in a cascade style.
Tile
All open windows are moved next to each other, making
use of the whole display area. This is useful when dragging
physical sample ranges into VIP’s.
Keys: Return/Enter
Untile
This function will return the window order to the previous
state.
Shortcut is Shift + Return.
Arrange Icons
All icons are rearranged along the lower portion of the
screen.
Toolbar
Shows or hides the upper tool bar .
Statusbar
Shows or hides the status bar on the lower portion of the
display.
Positionbar
Shows or hides the positioning bar on the lower portion of
the display.
Rangebar
Shows or hides the range bar on the lower portion of the
display.
447
Menu Windows
CD bar (deLuxe version)
Shows or hides the CD bar on the display of the deLuxeversion.
Mixer
This option opens the very powerful real-time Mixer.
Note: Depending on the number of tracks, certain processing power is needed for the real-time effects. Please
use the Preferences Profiling tool to check the DSP power
of your machine during playback! Well-configured Pentium
Pro starting at 166 MHz or faster systems normally have
no problems to perform all the effects.
For the new mastering effects in MAGIX audio studio (FFT
Filter...), we recommend a Pentium II system. Using multiple processing intensive DirectX Plug-Ins may also
necessitate a Pentium II configuration.
Channel Settings (Mixer)
AUX1: Adjusts the send level to AUX1 bus
AUX2: Adjusts the send level to AUX2 bus
448
Echo: Adjusts echo decay, right mouse button opens echo
dialog
Menu Windows
Hi: Adjusts high EQ band, right mouse button opens EQ
dialog
Mid: Adjusts medium EQ band, right mouse button opens
EQ dialog
Low: Adjusts low EQ band, right mouse button opens EQ
dialog
Pan: Adjusts the panorama position. When using stereo
files only one panorama knob of both tracks can be used.
Mute: Mute the selected track. Note: This button is independent from the Mute button in VIPs!
Solo: Solo the selected track. Note: This button is independent from the Solo button in VIPs!
DirX: This button lets you insert DirectX Plug-Ins into
the signal path for the channel. (More about it below.)
Link: Links two mono tracks. All controllers are edited
across the linked channels. (If you activate this feature for
two stereo tracks, the parameters of both stereo channels
are altered simultaneously. This may not necessarily be
desired.)
Volume Fader: Adjusts the volume of the selected track.
Master AUX Sends (Mixer)
AUX1: Adjusts the master level on the AUX1 bus
AUX2: Adjusts the master level on the AUX2 bus
DirX: This inserts DirectX Plug-Ins into the signal chain
of the AUX Sends. (More about it below.) To use you will
need to click on the DirX button. It is necessary to activate
the Intern mode when using Plug Ins.
Extern: The auxiliary send signal is routed to the selected
playback device (button “?” selects the device).
?: If you are using the AUX Sends with external playback
devices, you will need to select the appropriate output device.
Make sure that a different device than that of the Master
output is used (check with keyboard shortcut “p” to display
the Playback Parameter dialog).
449
Menu Windows
If only a single stereo device is installed in the system, the
AUX Sends will not be available.
Master Effects (Mixer)
Master Equalizer
Low: Adjusts low EQ band, right mouse button opens EQ
dialog
Mid: Adjusts medium EQ band, right mouse button opens
EQ dialog
Hi: Adjusts high EQ band, right mouse button opens EQ
dialog
Master FFT Filter
The control knob adjusts the damping of the filtered signal.
The FFT Filter section enables you to make precise Master
EQ adjustments. Simply draw the required frequency response into the graphic window of the FFT filter dialog. The
complete FFT Filter section can be bypassed with the button
next to the control knob in the Master section.
Stereo Enhancer
The base width can be changed with the control knob. The
settings range from “0” (Mono) to “200” (variance signal,
the mid-section is removed).
The complete effect can be bypassed with the button next
to the control knob in the Master section.
Master Volume (Mixer)
Volume Faders: Adjusts the master volume.
Norm: This is the Master Normalization. When the button
is clicked, the volume faders are adjusted in a way, so that
the loudest sections in the signal represent 0 dB.
Requirement for this function is the locating of the loudest
section in the VIP and playing it back. The maximum level
is displayed during the playback. While clicking on the
Norm button, the program adjusts the master level in a
way to reference the signal at that exact location to 0 dB. To
display the maximum values after other changes in the
effects are made, use the Peak Reset button to clear the
peak meters.
DirX: This allows you to insert DirectX Plug-Ins into the
signal chain. (More about it below).
450
Link: Links the master section faders to a stereo fader.
Menu Windows
?: The Playback Parameter window is opened. This is where
settings for the playback device for the Master mode are
made.
Global Control Elements (Mixer)
Play/Stop: Start/Stop playback.
Mute AUX: Mutes all AUX sends.
Mute FX: Mutes all EQ, Compressors and Delays.
Reset AUX: Resets all AUX send levels to standard settings.
Reset FX: Reset all EQ, Compressors, and Delays to
standard settings.
Reset (Mono): Resets complete mixer to standard settings
for use with mono or L&R Wave projects.
Reset (Stereo): Resets complete mixer to standard settings
for use with stereo Wave projects.
Osci/Corel.: Opens the Oscilloscope/Phase Correlation
display
Peak Reset: Resets the peak meters.
Input Att.: Dampens the input signals by 6, 12, or 18 dB.
This may help prevent internal distortion, which can occur
when working with the 16-bit precision. This setting can
also be changed with the Project Information for the virtual
projects.
Tips and Tricks (Mixer)
– Clicking the right mouse button on any of the effect
control knobs opens the corresponding effect dialog.
– Double clicking on the middle position of a Mixer control
knob returns the knob to the default setting. Another
double click resets the knob to the original active position.
– Control knob values can be changed in small increments
by clicking on the left and right outer limits of the knob
without the fear of invoking a double click.
– The Mixer window allows you to solo multiple channels
simultaneously. When multiple channels are soloed,
holding the Shift key while clicking on a Solo button of a
451
Menu Windows
channel deselects the previous solo assignments and
solos the single channel.
– The Master Section in the Mixer window contains a convenient feature, the Normalizing function. The master
output level can be quickly set to 0 dB by clicking on the
“Norm.” button. If the Limiter in the Master section is
active, the signal is also monitored to prevent any exceeding signal level.
Using DirectX Plug-Ins in the Mixer (deLuxe-version)
Right clicking on the DirX button opens the DirectX
Plug-In menu for the DirectX section.
Simply select the needed Plug In from the list and select it.
The Plug In properties dialog is opened - you can adjust all
needed parameters.
Close the dialog when all adjustments are done.
To re-open the Plug IN dialog choose again the marked
Plug Ins from the menu.
To select another Plug in simply click on ist name in the
menu.
To clear the Plug In choose the first entry “No Effect” from
the menu!
Transport Control
With the new transport control you can easily start and stop
playback, start record and punch recording.
Also the cursor position and range langth can be seen in
the transport control.
An output peakmeter is shown in the lower line.
Control Elements
Play: Here you can read the play or range start position
L: This shows the langth of the actual range.
E: This shows the end position of the marked range
Scroll bar: This lets you move the play cursor through
the project.
Sync (deLuxe version only): Opens the SynchronizationDialog in the deLuxe version.
452
Menu Windows
Loop: switches the Loop Playback Mode
Punch: Activates the Puhch Record Mode, starting record
now begins the punch recording process.
In: Sets the Punch IN Marker
Out: Sets the Punch OUT Marker
Jog & Shuttle Wheel: The transport controls features a
jog & shuttle-wheel, which allows you to ”scrub” over the
files. The scrubbing-function is similar to the edit mode of
a tape recording machine. In this mode, both motors are
switched off but the tape stays in contact with the head.
Moving the tape slowly by hand allows you to locate exactly
certain sequences.
Scrubbing is more difficult in a digital system, as there are
no moving mechanical devices. The controls of the scrubbing-function in the audio studio is similar to the tape recording machine, as playback follows the movements of
your mouse. Quick mouse moves produce a higher playback speed, whereas slow moves produce slower playback
speeds.
Mouse Mode Toolbar
Shows or hides the mouse mode toolbar with buttons to
select different mouse modes in VIPs.
Time Display
Shows or hides the time display window.
This window always shows the actual time position in the
actual format.You can change this format with the menu
“Units of Measurement”. We recommend the SMPTE format:hours:minutes:seconds:frames. The colors and the font
for the display can be changed in the File->Preferences. You
can zoom the window to any size and position it anywhere
on the screen!
453
Menu Windows
Visualizer
A visualizer can be opened to display the wave form in a
scaleable window.
Setup: You can select several views and options for the
waveform display.
Close all Windows
Closes all opened projects. Before closing a window/project,
MAGIX audio studio will ask you whether you would like
to save the project.
Hide all physical projects
This function will hide all Wave projects to make room for
the display of the virtual projects.
Iconise all physical projects
This function will reduce all Wave projects to their icons to
make room for the display of the virtual projects.
Half Height
The MAGIX audio studio screen is shown in the upper half
of the display.
This is useful, when using a sequencer program in multitasking. So you can switch between MAGIX audio studio
and the sequencer without the need of complete screen
redraws.
1, 2, ...
Choose active window from the list.
454
Menu Help
This menu contains the context sensitive online help
functions of MAGIX audio studio.
Help
Use this command to show the contents of the help.
Help Index
Use this command to show the index of the help.
About Help
Use this command for getting informations about the online help system.
Context Help
Use this command, to get help about any part of MAGIX
audio studio.
System Information
A window is displayed, containing information about the
memory status and other parameters.
Particularly useful is the display of the free storage on all
connected disk drives, the used system resources utilized
by MAGIX audio studio and the memory usage. Make sure
the parameter for system memory used by MAGIX audio
studio never grows larger than the displayed overall system
memory available (physical RAM). If this happens, the
performance of MAGIX audio studio is reduced caused by
page swapping (virtual memory) done to compensate for
the missing memory.
About MAGIX audio studio
Copyright notices and version numbers are displayed.
Online registration
Here you can register online as a MAGIX networker.
455
456
INDEX–MIDI STUDIO
A
Accelerando 262
Add
Audio File 191
Region 187
Aftertouch Event 224
Altering Values
absolutely 219
numerically 220
of events 219
relatively 219
Anchor 146
moving 187
protecting 204
Arrange Window
Inserting Events 131
tracks 120
ASCII Input 83
Attack Phase Compensation 134
Audio
arming ~ Track 150
Autodrop recording 151
Digital Mixdown 153
List 183
recording 149
recording with count-in 150
Release in Background 287
Stereo Object 178
Audio File 189
adding 191
copying 192
Destructive Editing 205
exchanging ~s & Regions between Songs 186
finding 194
Formats 180
locating 194
moving 193
Overview 184
reassigning 193
removing 192
selecting 185
Audio Region 142
Anchor 146
changing start and end points 145
457
copying 143
creating 142
cutting 142
Delay 146
erasing 142
fine-tuning 144
Loop 145
moving 143
moving numerically 144
Name 145
Parameter box 145
Audio window 180
Edit commands 186
Link mode 182
opening 180
Selection techniques 185
Undo 186
Auto Create Tracks in Cycle Record 115
Auto Define 228
Auto Mute in Cycle Record 115
Autodrop 116, 151, 290
Button 110
Cycle 116
defining ~ region 116
Autoload 104
Automatic Scrolling 91
AVI 269
B
Background Windows 90
Balance 176
Bank Select 125
Bar
Position Display 107
positioning ~ to Frame 269
Bar Ruler 111, 290
display 111
Positioning directly 112
Song Position Line 111
Beam Width 230
Beaming 255
Bypass 163
C
458
Catch 91, 96
Enable when SPL is moved 284
switching off automatically 91
switching on automatically 91
Change Background 141
Chase Events 117, 281
SysEx 282
Checkbox 82, 290
Chorus 159
Clefs 252
Click 110, 279
only during count-in 114
Clip Detector 175
Clipboard 95
Clipscan 153
Concealing the Parameters 89
Contents
Catch 92
Link 92
Copy 95
File(s) 192
Notes in Score Editor 243
Count-In 114
Crosshair Tool 86
Cut 95
Cycle 112
button 110
Chase Events 283
defining the region 113
Numeric Display 107
switching on 112
D
Damaged Song 104
Default 291
Delay 134, 160, 291
for single event types 230
of Audio Regions 146
Delete 96
File(s) 186, 192
Note in Score Editor 244
Deselect all 95
Dialog Boxes 90
Diatonic Insert 244
Digital Mixdown 153
Disable safety alert for Undo 95
Disarming all tracks 150
Display
bar numerator 108
bar/SMPTE 107
denominator 108
459
division value 108
Format 128, 129
Locators 107
MIDI Events 108
parameter box 247
quantization 242
Song End 109
Song Position 107
song title 109
tempo 108
Division value 108
Dots 251
Double-clicking 82
Double-time 128
Drag and Drop of MIDI Files 288
Drop 291
Drum Editor 227
Beam Display 230
Beam Width 230
Beams 228
Changing Event Values 232
Changing several Event Values 233
Creating new Events 234
Event Definition 227, 228
Grid 228, 229
Length of Notes 230
Linear Series 234
Open 227
Selection Techniques 232
Setting Events with fixed Values 235
Style 230
Dynamics 133
Dynamics signs 252
E
EBU 272
Edit
Control via MIDI Output 96
Repeat Objects 127
via MIDI Input 98
Edit Operations 95
Copy 95
Cut 95
Delete 96
Paste 95
Undo 95
Editor
460
Contents Catch 92
Contents Link 92
Drum Editor 227
Event List 216
Matrix Editor 236
Score Editor 241
Enable Catch when Sequencer starts 91
Enharmonic Shift 254
Enlarging 88
Entering Numbers 83
Equalizer (EQ) 158
Eraser 85
Event
~ Types 222
Add 218, 235
Aftertouch ~ 224
Alter ~ Value 219
Chase ~s 281
Control Change ~ 223
Convert 232
Copy 232
Data Byte 220
Delete 97
Display 108
Duplicate 219
Float Window 225
Input Filter 280
Insert 131
Meta ~ 225, 254
MIDI Channel 220
Move 219, 232
Note ~ 222
Paste 219
Pitch Bend ~ 223
Poly Pressure ~ 224
Position 220
Program Change ~ 222
Quantization 98
Relative Position 220
Event Definition 228, 230
Beam Width 230
Create 228
Create ~ automatically for selected Events 228
Editing different ~s simultaneously 231
Erase 228
Event Status 231
First Data Byte 231
461
Grid 229, 232
Hi-Hat Mode 232
MIDI Channel 231
Note Name 229
Parameter Box 229
Select 228
Sorting 229
Event List
Arrange Level 221
Display Filter 217
Length/Info 221
Meta Event 254
Monitoring Events 218
Open 216
Scroll 217
Selecting Events 218
Event Parameter Box 242
External Sync
Enable 267
F
Fader 176
Feedback 159
Filtering Events 280
Finding Key Commands 102
Fix
Quantize 135
Value 235
Fixed Key Commands 89
Flanger 159
Float Windows 90
Font 256
Forward 110
Frame 291
Rate 263, 273
Frequency Range 158
G
Gate Time 133
Glue Tool 85
Goto
Position 112
Selection 98
Grid 229
H
462
Half-time 128
Hand Tool 86
Hanging Notes 108
Hardware Programmers 280
Help 103
Hide
Unused Key Commands 102
Used Key Commands 102
Hierarchical Menus 89
Hi-Hat Mode 232
Horizontal Selection 94
Hyper Draw 137
Colour 139
Deactivating 138
Defining MIDI Channel 138
Fine-tuning Values 139
Inserting a new Curve Point 139
Making ~ visible 138
Moving a Curve Point 139
Quick Delete 138
Tips 140
I
Input Filter 280
Insert
Defaults 243
Notes in Score Editor 243
Interpretation mode 250
J
Jump 112
K
Key Commands 100
~ Window 101
Assign 101
Check 102
Delete 102
Find 102
Hide 102
Learn Key 101
Special Keys 100
L
Layout 244
Tool 86
Legato 133
Level
adjusting 176
Meter 175
463
Link 92, 163
Locators
Numeric Display 107
Setting by Objects 96
Loop 132, 292
of Audio Regions 145
Turning ~s into real Copies 132
LTC 273
Lyrics 257
M
Magnifying Glass 86
Matrix Editor 236
Change Note Length 238
Change Velocity 239
Copy Note 238
Create Note 237
Delete Note 239
Duplicating Note 237
Functions 240
Move Note 237
Note Display 236
Open 236
Selection Techniques 239
Max Dots 251
Menus 89
Merge
New recording with selected sequences 115
Only new Sequences in Cycle Record 115
Meta Event 225, 254, 292
~ switches Screenset 93
Metronome 110, 279
MIDI
Control Change Event 223
Control Output via ~ 96
Event Display 108
In switch 97
Monitor 108
Options 280
Out Switch 96
Step Edit 98
MIDI Clock 271
Interpolation 268
Transmit 266
MIDI File 288
Bank Select 288
Format 284, 288
464
Load 288
Open via Drag and Drop 288
Save 288
Save in Format 0 289
MIDI Monitor 108
MIDI Thru
Parameter Box 131
SysEx 280
MIDI Time Code 274
Delay 267
Format Interpretation 268
Send 267
Transmit 281
Trigger 265
Mode Buttons 110
Modify Object Borders 128
Monitoring 182, 201
~ from a Position 182
~ Output 183, 202
Cycle 183
Stereo ~ 183
Whole Region 182
Mouse 82
as slider 83
Pointer 85
Move 82
File(s) 193
Note in Score Editor 243
Selected Objects to Track 121
MTC 274
Multi ~ 256
Multi Stave 247, 256
Mute 130, 176
Tool 86
Track 122
N
Names 247
Input ~ 84
With Numbers 84
New Song 103
Next/Previous Object 94
No Overlap 250
Normalize 293
Sequence Parameters 134
Notation 241
Note
465
~ End as absolute Position 221
~ Event 222
~ Head 253
~ Name for Event Definition 229
~ Names in Matrix Editor 236
~ Symbol Families 252
Beaming 255
Change ~ Length 97, 238
Change ~ Length with Sequence Parameters 133
Change Velocity 239
Copy 237, 238
Copy ~ in Score Editor 243
Create 237
Delete 239
Delete ~ in Score Editor 244
Editing via MIDI In 98
Insert ~ in Score Editor 243
Move 237
Move ~ in Score Editor 243
Quantize ~ individually 99
Stem Direction 255
transposing in Score Editor 243
Noten
Symbolgruppe 252
Num 220
Numerical
Input 83
Value Input 220
O
Object 294
Colors 103
Snap ~ 128
Solo listening 110
Online Help 103
Open 104
Original Event Position 135
Overview Calculation 184
Aborting 185
Accelerating 185
Automatic 184
Start manually 184
Overview Display 198
P
466
Page
Edit 258
Scroll 258
Up/Down/Left/Right 87
Page Edit 258
Pan 125, 176
Insert ~ Event 125
Panic Function 108, 141
Parameter Box 294
Partbox 251
Paste 95
At original Position 96
Paste at Original Position 144
Pause 109
Peak Hold 175
Pedal
~ in Step-Time Recording 97
Sign 252
Pen Width 230
Pencil 85
Pitch Bend Event 223
Play 109
Play parameters 294
Plug-In Window 163
Pointer 85
Poly Pressure Event 224
Preferences
Audio 286
Audio Extensions 287
Display 285
Global 284
Initializing 283
Reset 285
Score 285
Print 259
Program Change 125, 222
Insert ~ Event 125
Pull-down menus 83
Q
Q Tool 99
Qua 136
Quantization 135
Display ~ 249
Event ~ 98
Fix 136
How it works 135
in Sequence 136
Mixed ~ 136
Odd ~ 136
467
Triplet ~ 136
Quantize again 99
Quick Record 287
R
Record 114
Arm ~ 176
Autodrop 116
Button 109
Change a Track 114
Choose a track 114
Count-In 114
Cycle & Autodrop 116
Cycle & Replace 115
Erase ~ 143
in Cycle Mode 115
in Replace Mode 115
in Step Time 97
Merge & Replace 115
Options 115
Pause 109
Predefining ~ Length 190
Setting a ~ Path 189
Time 190
Toggle 115
Recording Options 278
Rec-Ready Switch 176
Region
Add to Arrangement 189
Altering Limits 187
Copy 187
Create 143, 187
Cycle 183
Delete 187
Drag Tool 189
Fine Adjustments 203
Protect 188
Rename 188
Select 186
Show/Hide 183
Waveform Display 184
Regions
Individualize ~ in Arrange 143
Relative Value Alteration 219
Remove Overlaps 128
Repeat Objects 127
Replace 110
468
Reset 141
Controller 141
Panic 141
Volume 141
Rest Correction 250
Reverb 160, 163
Revert to Saved 104
Rewind 110
Ritardando 262
Rubber-Banding 94
S
Sample Editor
Absolute Position 201
Catch Mode 199
Change Gain 206
Cut, Copy, Paste, Clear 204
Fade In 207
Fade Out 207
Invert 208
Layout 198
Link mode 199
Normalize 205
Open 197
Overview functions 199
Relative Position 200
Remove DC Offset 209
Reverse 208
Silence 207
Trim 208
Warning before Closing 286
Sample Rate
choosing 195
convert 209
Save 104
Save as… 104
Scissors 85
Score Editor 241
Arrows 253
Articulation signs 253
Crescendo 253
Decrescendo 253
Diminuendo 253
Info Line 242
Key Signature 253
Lines 253
Lyrics 257
469
Multi Stave 247
Open 241
Overlap Correction 250
Partbox 251
Print 244, 259
Slurs 253
Speed up Screen Redraw Rate 285
Text Font 256
Screenset 92, 295
Copy 93
Number 92
Protect 93
Sequencer-controlled Switching 93
Store 92
Switch 93
Scroll 87
to SPL 96
Select
All Objects 95
Alphabetically 94
Following Objects 95
Horizontally 94
In Score Editor 242
Next Audio File 185
Previous Audio File 185
Rubber-Banding 94
Several Objects at once 94
Single Objects 94
Unselected Items 94
Unused 186
Used 186
within the locators 95
Selection 93
Toggling 94
Send Fader Values after loading 281
Sequence 126, 295
~ Playback Parameters 131
Adjust Length to fit 128
Automatic Naming 284
Change Length 127
Change Tempo 128
Copy 127
Create 126
Create empty ~ 126
Create with Clipboard Events 131
Cut 129
Cut several Times 129
470
Delete 126
Demix by Event Channel 130
Finer Grid 128
Fix Playback Parameters 134
Hyper Draw 137
Inserting Events 131
Join and Mix 129
Loop 132
Make Contents visible 141
Move 126
Moving the Start 127
Mute 130
Name 130
Quantization 136
Repeat 127
Soloing 130
Sequence Parameter 132
Change several ~s at once 131
Default 131
Delay 134
Dynamics 133
Gate Time 133
Loop 132
Normalize 134
Open ~ Box 132
Qua 136
Sequencer Positions as List 221
Sequences
Round Length to Bars 128
Set Locators
by Objects 96
Set Optimal Object Sizes 128
Show
Contents 92
Silence 207
Size
of Display 88
of Window Elements 88
Tool 86
Slider Input 83
SMPTE 272
Drop Frame 273
Frame Rate 273
LTC/VITC 273
Offset 264
Position Display 107
Recording Time Code 274
471
Snap Objects 128
Solo 130
Button 110
Lock 110
Tool 130
Solo Tool 86
Song
Autoload ~ 104
Check/Repair 104
End 109
Load 104
New 103
Revert to saved Version 104
Store 104
Switch between ~ 104
Song Position
Catch 91
Display 107
Jump graphically 112
Jump numerically 112
Song Position Line 111, 295
Catch 91
Wide ~ 285
Song Position Pointer 266, 271
Song Settings 278
Chase Events 281
MIDI options 280
Recording Options 278
recording options 278
Song Title Display 109
SPL 111, 295
SPP 271
Staccato 133
Standard MIDI File 288
Start/Stop with Bar Ruler 112
Stave 256
Move ~ vertically 255
Step-Time Recording 97, 98
Keyboard Controls 98
Stereo Objects 178
Stop 109
Style 241, 247
Swing 296
Symbol groups 252
Sync
Button 110
Mode 265
472
Synchronization
~ of Sequencers to Tape 275
~ of several Sequencers at once 275
Bar-Referenced 271
Basics of ~ 270
Click Track 276
MIDI 266
MIDI Clock 271
Problem solving 276
Procedure 274
Pulse Clock/FSK 271
SMPTE/EBU 272
Song Position Pointer 271
Status Display 260
Time-Referenced 272
Synchronizers 274
Syncopation 250
SysEx
MIDI Thru 280
T
Telescopes 88
Tempo 260
display 108
events 260
Graphic Tempo Editor 262
List Editor 260
Overview 260
recording tempo changes 262
Spur 260
Tempo Changes
continuous - creating 262
copying from a musical passage 261
creating 261
deleting 261
Text
~ in Score Editor 256
lyrics 257
positioning ~ 256
Text Input 84
Text Mark 85
Text mode 254
Tie Correction 250
Tie Objects 128
Time Code (TC) 272
Time Signature and Divisions 108
Time Signature Changes 253
473
creating 108
editing 108
erasing 108
Toggle Selection 94
Toolbox
at the mouse position 85
Toolbox (see Tools) 84
Tools 85
crosshair 86
effective range 84
eraser 85
glue tool 85
hand 86
Layout ~ 86
magnifying glass 86
Mute ~ 86
pencil 85
Pointer 85
Q tool 99
scissors 85
selecting 85
Size Tool 86
solo tool 86
text mark 85
two at once 84
voice splitter 86
Top Window 90
Track 124
Filter in Score Editor 247
Icon 124
Mute 122
Pan 125
Program Change Event 125
Selecting Banks 125
Selecting Programs 122
Setting MIDI Channels 124
Setting MIDI Port 124
sorting 120
Volume 125
Track Column 296
Tracks 120
changing 120
creating 120
deleting 121
selecting 120
Transfer
MIDI File 288
474
Transport
in window 88
Transport Bar 106
buttons (lower) 108
buttons (upper) 107
time signature and divisions 108
Transport Function Keys 109
Transport Window 106
Autodrop 110
changing the display 106
cycle 110
Forward 110
large SMPTE or bar display 107
legend 106
Locators 107
metronome 110
MIDI monitor 108
moving 106
opening 106
panic function 108
part display 107
Pause 109
Play 109
position display 107
position slider 106
pull-down menu 106
Record 109
Replace 110
Rewind 110
smaller/larger 106
solo 110
Solo Lock 110
Stop 109
sync 110
tempo 108
Transposing
notes in Score Editor 243
Trill symbols 254
TrueType Fonts 256
Turn Loops to Real Copies 132
U
Undo 95
Audio window 186
im Sample Editor 204
Safety Alert 284
Unused Blocks 104
475
Update File Information 194
V
V Tool 239
Val 220
VCA 212, 213
VCF 212, 214
Velocity
Compressing 133
tool 239
Vertical Selection 95
Video for Windows 269
View
parameters 100
transport 100
VITC 273
Voltage Controlled Amplifier 213
Voltage Controlled Filter 214
Volume 125
Insert ~ Event 125
W
476
Waveform
Absolute Time Axis 201
Change Gain 206
changing selection 202
Detailed display 200
Editing commands 204
fading in 207
fading out 207
moving selection 202
normalizing 205
Phase inversion 208
Relative Time Axis 200
selecting 202
Selection Parameter Box 203
To digital Zero 207
X and Y axis 200
WavePlayer 211
Wide Song Position Line 111
Window
Drum Editor 227
Event List 216
hiding those of inactive songs 284
Matrix Editor Window 236
Windows
Arrange 119
autocatch 91
Background ~ 90
Catch 91
changing the elements present 88
close box 87
concealing the parameters 89
concealing the Transport 88
contents catch 92
Event Float Windows 225
Float Windows 90
functions 86
Graphic Tempo Editor 262
Hierarchical Menus 89
Key Commands 101
Link 92
main menu 91
maximizing 87
menus 89
minimizing 87
opening 87
relationships between 91
screensets 92
scrolling 87
selecting the working area 87
selective zoom 88
Show Contents Mode 92
size 87
Tempo List Editor 260
top window 90
Transport window 106
types 90
zooming 88
WYSIWYG 258
X
X/Y Element 87
Z
Zoom 88
selective 88
Zoom Function 297
477
478
INDEX - AUDIO STUDIO
A
About MAGIX audio studio 455
Absorption 398
Accessing Audio Material 314
Active Section when using Zoom Levels 310
Add one Track 367
Adjusting a Range 316
Amplitude 388, 389, 417
Amplitude * 2 389
Amplitude / 2 389
Append Projects 357
Apple Macintosh 361
Application Examples 384
Arrange Icons 447
Assign new Shortcut 442
Attack 394
Audio data 308, 311
Audio file 351
Auto Crossfade active 369
Auto-Crossfade-Mode 351
Autoscroll 421
AUX1 448, 449
AUX2 448, 449
B
Background 374
Background-color 383
Bar Definitions 373
Basics 425
Beat Marker-Mode 400
Beginning of Range < 0 405
Beginning of Range > 0 405
Bouncing 415, 416
BPM 423, 437
Buffer 444
Buffer Number 444
Buffer size 323
Build Loop Object 381
Build Physical Loop 402
Burn “On the Fly” 412
Burning of CDs (deLuxe version) 330
Button Crossfade Off 368
Button overview 341
Buttons/Slider 375
479
Index - audio studio
C
Calculate Maximum Amplitude 417
Cascade 447
CD arrange mode 435
CD bar 342, 448
CD Disc Options 414
CD ROM Drive Configuration Dialog 354
CD Title 414
CD Track Manager 418
CD Track Options 414
Change Bit Resolution 358
Change Mouse 375
Change Play Direction 420
Change Sample Rate 401
Change Toolbar style 442
Changing a Range 317
Changing Object Borders 315
Channel Settings 448
Clear 365
Clip 307
Close all Windows 454
Close Project 362
Colors 442
Complete Project 417
Compressor 325, 393, 394
Connect to the Internet 361
Context Help 455
Context Help mode 336, 440
Convert > Mono 358
Convert > Stereo 358
Copy 365
Copy and Clear 365
Copy as 365
Copy Mode Burst 355
Copy Mode Normal 355
Copy Mode Sector Synchronization 355
Copy Objects 378
Corel 428, 451
Create Audio Copy 433
Create AVI 433
Create complete new file 332
Crossfade Editor 322, 367
Crossfade Position 368
Curve Mode 336, 439
Cut 364
Cut mode 336, 440
Cutting Objects 378, 379, 380
Index - audio studio
D
Data Transfer 330
De-Selecting a Range 317
Decay % 396
Decibel 392
Declipping 325, 396
Delay 325
Delay ms 395
Delete 364
Delete all Markers 409, 411
Delete Marker 409
Delete Objects 379
Delete Panorama Handle 369
Delete prefixed Markers 411
Delete Undo Levels 370
Delete Volume Handle 369
Delete Wave Project(s) (HDP) 362
Delta Time 380
Destructive Editing 314, 326, 385
Destructive Processing 327
Device 421, 427
DirectX Plug-Ins 390, 452
DirectX plug-ins 327
DirectX-plug-ins 325
DirX 449, 450
Disable Fade In/Out 381
Disable Length changes 381
Disable Moving 381
Disable Volume changes 381
Disk Space 429
Display Filter 385
Distortion 325, 393, 394
Download audio material 305
Drag & Drop 313
Draw Panorama Mode 335
Draw Volume 440
Draw Volume Mode 335, 439
Draw Wave 440
Draw wave mode (only wave projects) 337
Drive List Dialog 353
DSP display 332
Duplicate Objects 379
Duplicate Objects multiple 379
Duplicating Objects 314
Duration 380
Index - audio studio
E
Ean Code 414
Echo 325, 395, 448
Edit Keyboard Shortcuts 440
Edit Range 404, 405, 406
Effect Calculations and Signal Manipulations 326
Effects 325
Effects in the VIP 325
Enable VIP Tooltips 442
End of Range < 0 405
End of Range > 0 405
Enhancer 326, 450
Equalizer 325, 393
Expander 325, 393, 394
Export 306
Export as PlayR-File 361
Export audio> 16 Bit AIFF 361
Export audio> AIFF file with Quicktime 360
Export audio> Export as Dump 361
Export audio> MP3 359
Export audio> MPEG 359
Export audio> MS Audio File 359
Export audio> Real Audio 359
Export audio> Wave 359
Extern 449
External Program 1, 2 419
Extract 366
Extract audio from AVI 433
Extract Objects 379
F
Fade Handle 308
Fade in/out 381, 389
Fade-In / Fade-Out 315
Feedback 396
FFT Filter 323, 326, 327, 450
Fix vertically 371
Fixed Bar Snap 373
Flip Range left 405
Flip Range right 405
Font for Time Display 442
Font Selection 442
Frequency 392
FTP Download 329, 362
Full-duplex 303
FX 434, 438
Index - audio studio
G
Gate 393, 394
Gater 325
Generate a complete new file 413
Get Marker 408
Get Noise Sample 397
Get position 376
Get Range 369, 407
Get Range Length 407
Global Control Elements 451
Global Get 369
Global Set 369
Graphic Equalizer 392
Graphic Refresh 371
Grid 350
Grid Setup 372, 442
Group created Objects 379
Group Number 374
Group Objects 382
H
Half Height 454
Halftones 423
Hall 325
Handle 306, 308
HD Buffer 444
HD Record Buffer 445
HD Wave (HDP) 351
HD Wave Project 351
HD Wave project 312
HD Wave Projects 443
HDP 322
Help Index 455
Hide all physical projects 454
High EQ 449, 450
Horizontally 376
Host Adapter Number 354
I
Iconise all physical projects 454
Import Sample 357
Import Sample as Dump 357
Individual Mouse Modes 334
Insert Objects 378
Insert Workspace 367
Integrating a range 313
Integrating a WAV File 313
Index - audio studio
Internal Mixdown 415
Internet-Functions 328
Invert Phase 403
L
L&R Wave Project 312
Lasso Function 334
Latency 426
LED peakmeters 302, 303
Length changing 381
Length Handle 308
Link 449, 450
Link Projects 357
Live Effect Processor 426
Live Input Mode 425
Load Always New 432
Load Audio CD 352, 410
Load Shortcuts 441
Lock Definitions 381
Lock Objects 321, 380, 381
Lock Recorded Objects 350
Loops / Songs / Speech 400
Low 450
Low EQ 449
Lower toolbars 342
M
Make CD 412
Marker 308
Marker Manager 308, 418
Markers on Range Borders 408
Master AUX Sends 449
Master Effects (Mixer) 450
Master Equalizer 450
Master FFT Filter 450
Master Normalization 323
Master Volume 450
Match Time 385
Maximale Spurenanzahl 300
Media 429
Media link 431
Medium EQ 449, 450
Menu CD (deLuxe version) 410
Menu Edit 363
Menu Effects 387
Menu File 350
Menu Help 455
Menu Object 378
Index - audio studio
Menu Options 431
Menu Playback 420
Menu Range 404
Menu Tools 416
Menu View 371
Menu Window 447
Microsoft® Intellimouse 340
MIDI Clock 437
MIDI Clock Input Device 437
MIDI Time 437
MIDI Time Code 436
Mix Master Section 327
Mix with Clip 367
Mixer 323, 327, 448
Mixer-Effects 326
MKS-format 361
Monitor 302, 303, 428
Mono 358
Mono Wave Project 312
Mouse 340
Mouse Mode 439, 440
Mouse Mode bar 341
Mouse Mode Toolbar 453
Move Play to beginning 404
Move Play to end 404
Move Play to range end 404
Move Play to range start 404
Moving 381
Moving a Range Horizontally 317
Moving Objects 314
MTC Output Device 437
Multirate file 360
Mute 449
Mute AUX 451
Mute FX 451
Mute objects 378
N
New features in the generation 6 version 300
New Multitrack Project 350
New Object 378
New Object Mode 375
Noise Reduction 397
Noise reduction 325
Noise Sample 398
Normalize 388, 389
Normalize File (phys.) 388
Normalize Object (virt.) 389
Index - audio studio
Number of first CD Track 414
Number of Objects 379
O
Object 352
Object and Curve Mode 314
Object Background Color 382
Object Foreground Color 382
Object Lasso 314
Object Lock Definitions 440
Object Manager 418
Object Mode 314
Object Name 374, 383
Object Properties 374
Object to Original Position 381
Object to Playcursor Position 381
Object Volume 315
Object-Editor 383
Object-length 383
Object-position 383
Objects 334
Offset 432
On-The-Fly 412, 424
Online registration 455
Open Project 351, 352
Osci 451
Oscilloscope 428
Output modus 320
Overlapping Objects 316
Overwrite with Clip 366
P
Panorama 449
Panorama Draw Mode 440
Parameters for the Compressor 394
Parameters for the Distortion Editor 394
Parameters for the Gate 394
Parametric Equalizer 391
Paste/Invert Clip 365
Peak Meters 375
Peak Reset 451
Performance 323
Pitch Factor 423
Pitch Shifting 399
Pitch-shift/Time stretch mode 337
Pitch/Time-stretching 383
Play 385, 451
Play Always 432
Index - audio studio
Play Buffer 444
Play Cursor 335
Play in Range 420
Play loop 420
Play once 420
Play Video without sound 433
Play with Preload 420
Play-Cursor 309
Play/Stop 383
Playback 324
Playback of a range 318
Playback Options 421, 431
Playback while Recordin 427
Position objects 305
Positionbar 447
Positioning bar 342
Prefix 411
Preload 426
Preview 434
Print TOC 413
Problems & Solutions 344
Program Preferences 438, 439, 440, 442
Project Information 435
Project Name 374
Project Properties 431, 435
Project window 301
Project-patterns 350
Publish to Web 361
Punch In 423, 425
Punch In Mode active 423
Punch In Record 425
Punch Out Markers 425
Punch-In/Out 424
Punch-In/Out with Markers 424
Q
QDesign 359, 445
Quickstart 301
R
RAM Buffer 444
RAM Wave (RAP) 351
RAM Wave project 311
RAM Wave Projects 444
Range 309, 335
Range, <0, 0> 406
Range all 404
Range bar 343
Index - audio studio
Range Commands 317
Range Editor 409
Range length to 406
Range Manager 418
Range Mode (Secure Mode) 335, 439
Range to beginning 404
Range to end 404
Rangebar 447
Ranges Mode 440
RAP 322
Ratio 394
Real Time Buffer 444
Real-Time Effects 327
Real-time Processing 326
REC-Button 302
Recall last range 409
Record 426, 430
Record Buffer 444
Record button 302
Record mode 426
Record Offset 429
Record Parameter 426
Record Time 429
Recording 324
Recording/Playback 324
RedBook 330
Redo 363
Reduction 398
Release 394
Remove all Indices 412
Remove DC offset 397, 398
Remove Index 411
Remove Link 434
Remove Punch In 425
Remove Punch Markers 425
Remove unused Samples 417
Rename Project 361
Replace 385
Replace Audio in existing AVI 433
Resampling 325, 399
Resampling to 44.1 kHz 427
Reset (Mono) 451
Reset (Stereo) 451
Reset AUX 451
Reset FX 451
Resonance 396
Restart Play 421
Reverb 395
Index - audio studio
Reverse 402
S
Same File Only 385
Same Track Only 385
Sample / Halve 374
Sample manipulation 401, 402
Sample Rate 350, 421, 426
Sample-color 383
Sampledata * 2 401
Sampledata / 2 401
Samplerate 301
Save complete VIP to 356
Save in Format 356
Save Object 356
Save Project 355
Save Project as 355
Save Session 356
Save Shortcuts 441
Saving Ranges 317
Scrubbing 324, 422
Scrubbing mode 440
SCSI-ID 355
SCSI-LUN 355
Section 309
Sections 371
Secure Mode 335
Select Objects 382
Selected Range 417
Selecting a Range 316
Selecting an Object 314
Selecting Multiple Objects 314
Selecting the Correct Mouse Mode 316
Separate Stereo 375
Session 352, 444
Set End Marker 425
Set Hotspot 382
Set Markers on Silence 408
Set New Original Position 381
Set Pause 410
Set Pause Time 415
Set Punch In Marker 425
Set Punch Out Marker 425
Set Start Marker 425
Set Start Pause Time 415
Set Sub-index 410
Set Track 410
Set Track Indices on Object Edges 411
Index - audio studio
Set Track Indices on Silence 411
Set Zero 389
Shortcuts 338
Shortcuts for range 319
Show Border 375
Show CD-R Disc Information 414
Show CD-R Drive Information 414
Show Grid 372
Show Shortcut list 441
Show TOC 413
Show Video Track 433
Signal Manipulations 326
SMPTE code 436
SMPTE Offset 432, 438
SMPTE/MTC Input Device 437
Snap Setup 372, 435
Snap to Grid 372
Snap to Objects 350
Snapshot Buttons in VIPs 311
Solo 449
Solo Instruments 400
Special CD Arrange-Mode 415
Spectrum 392
Split Objects 380
Split Objects on Marker position 380
Split Range 406
Split Range for Video 406
Starting number 411
Statistic 385
Statusbar 447
Stereo 358
Stereo Enhancer 450
Stereo Wave Project 312
Stop 420, 451
Stop and go to current position 420
Store Marker 407
Store Range 407
Surround 325
Switch Channels 402
Switch Selection 382
Sync Velocity 438
Synchronization 348
Synchronization (deluxe-version only) 436
Synchronizing MAGIX Audio Studio projects 431
System 443
System Information 455
Index - audio studio
T
Take Manager 384, 419
Target groups 360
Terminology 307
Test Offline 398
Test Realtime 398, 400
Text Comments 435
Threshold 394
Threshold db 411
Tile 447
Time Display 453
Time Stretching 399
Time stretching 325
Timestretching 399
Tips & Tricks 321
Tips and Tricks (Mixer) 451
Toolbar 447
TOOLS bar 341
Track Bouncing 416
Track Delay 396
Track List Dialog 353
Track Number 350
Transport Control 452
Trim Objects 380
Type Audio 398
Type Noise 398
U
Undo 363
Undo Definitions 438
Ungroup Objects 382
Units of Measurement 350, 372, 435
Universal Mode 334, 439
Universal Tool Mode 314
Unlink Project 357
Unlock Objects 380
Untile 447
UPC 414
Upper Toolkit bar 341
Use ASCII Code for TOC 413
Use Uni Code for TOC 413
V
Varipitch 423
Vertical slider 423
Vertically 377
Video Height 442
Index - audio studio
VIP Buffer 444
VIP Display Mode 373
VIP Mouse Mode 439
VirtClip 308
Virtual Editing Concepts 313
Virtual Projects 310, 351, 364, 366, 368, 444
Virtual Projects (VIPs) 310
Virtual Working 428
Visualizer 454
Volume 319, 392, 393
Volume changing 381
Volume Fader 449, 450
Volume Handle 308
Volume/Pan 384
W
Wave Mouse Mode 440
Wave Projects 351, 364, 366, 367
Wave projects 311
Wave-Projects 311
Waveform Generator 417
Web Publishing (Upload) 328
Wet-/ Dry Balance % 396
Working in Projects 321
Working with Objects 313
Working with Ranges 316
Working with the Plug-Ins 390
Write ”on the fly” 332
Writing Speed 333
Z
Zoom 335
Zoom levels 310, 322, 376
Zoom mode 336, 337, 440