Download EPSON AcuLaser C4000
Transcript
EPSON AcuLaser C4000 Quick Reference
Control Panel Operation
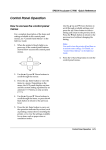
The control panel is made up of three
elements: a liquid crystal display (LCD)
panel, indicator lights, and buttons. The
LCD panel and indicator lights tell you the
current status of the printer, and you can use
the control panel buttons to make printer
settings, check consumable products, and
print status sheets. However, settings made
in your application and in the printer driver
usually override settings made at the control
panel.
6
7
1
2
3
4
9
5
8
6
9
10
1
LCD panel:
8
7
Displays printer status
messages and control
panel menu settings.
2, 3, Up/Enter/Down/ Use these buttons to
4, 5 Back buttons:
access the control
panel menus, where
you can make printer
settings and check the
status of consumable
products. For
instructions on how to
use each button, see
“Using the control
panel buttons.”
10
Job Cancel button: Press once to cancel
the current print job.
Press down for more
than two seconds to
delete all jobs from the
printer memory,
including jobs the
printer is currently
receiving, saving to
the Hard Disk Drive,
or printing.
Start/Stop button: Switches the printer
between ready and
offline status.
When the error light is
flashing, pressing this
button clears the error
and switches the
printer to ready status.
Ready light:
On when the printer is
ready, indicating that
the printer is ready to
receive and print data.
When the printer is not
ready, this light is off.
Error light:
On or flashes when an
error has occurred.
Data light:
On when print data is
stored in the print
buffer (the section of
printer memory
reserved for receiving
data) but not yet
printed.
Flashing when the
printer is processing
data.
Off when no data
remains in the print
buffer.
(1/22)
EPSON AcuLaser C4000 Quick Reference
How to access the control panel
menus
Using the control panel buttons
Once you have accessed the menus, the
control panel buttons function as shown
below.
This section explains how to access, use, and
exit the control panel menus. Refer to the
illustrations below for an overview of the
control panel button functions, and see the
steps later in this section for detailed
instructions.
For a complete description of the items and
settings available in the control panel
menus, see “Control Panel Menus” in the
Reference Guide.
1
2
3
Accessing the control panel menus
When the Ready light is on, pressing any of
the control panel buttons shown below
accesses the control panel menus.
4
1. Up/Down buttons: Scroll through menus,
items, and settings on
the current level.
* Press any button to access menus.
2. Enter button:
Advance to the next
level, carry out
indicated operations,
and activate settings.
3. Back button:
Return to the previous
level.
4. Start/Stop button:
Exit the control panel
menus from any level.
(2/22)
EPSON AcuLaser C4000 Quick Reference
How to use the menus
1. Make sure the Ready light is on, then
press any of the buttons indicated above
to access the menus.
2. Use the
Up and
Down buttons
to scroll through the menus.
3. Press the
Enter button to view the
items in a menu. Depending on the
menu, the LCD panel displays an item
and the current setting separated by an
asterisk (YYYY*ZZZZ), or only an item
(YYYY).
4. Use the
Up and
Down buttons
to scroll through the items, or press the
Back button to return to the
previous level.
5. Press the
Enter button to carry out
the operation indicated by an item, such
as printing a status sheet or resetting the
printer; or to view the settings available
for an item, such as paper sizes or
emulation modes.
Use the
Up and
Down buttons
to scroll through available settings, and
press the
Enter button to select a
setting and return to the previous level.
Press the
Back button to return to
the previous level without changing the
setting.
Note:
You need to turn the printer off and then on
to activate some settings. For details, see
“Control Panel Menus” in the Reference
Guide.
6. Press the N Start/Stop button to exit the
control panel menus.
(3/22)
EPSON AcuLaser C4000 Quick Reference
Status and Error Messages
This section contains a list of error messages
shown on the LCD panel, giving a brief
description of each message and suggestions
for correcting the problem. Note that not
every message shown on the LCD panel
indicates a problem.
Calibrating Printer
The printer automatically calibrates itself
when any of its covers are opened and when
there is no paper jammed inside. This is not
an error message, and will clear itself within
one minute. While the printer displays this
message, do not open the covers or turn off
the printer.
Cancel All Print Job
The printer is canceling all print jobs in the
printer memory, including jobs the printer is
currently receiving or printing. This
message appears when the q Job Cancel
button has been pressed down for more than
two seconds.
Cancel Print Job
The printer is canceling the current print job.
This message appears when the q Job Cancel
button has been pressed and released within
two seconds.
Can’t Print Duplex
The printer has encountered problems
during duplex printing. Make sure you are
using an appropriate type and size of paper
for the duplex unit. The problem could also
be a result of incorrect settings for the paper
source you are using. Pressing the N
Start/Stop button will print the rest of the
print job on only one side of the paper. Press
the q Job Cancel button to cancel the print
job.
Check Transparency
You have loaded media other than
transparencies when the Paper Type setting
in the printer driver is Transparency, or
transparencies are loaded when the Paper
Setting in the printer driver is not set to
Transparency. Paper is jammed at the MP
tray.
Remove the paper from the MP tray and
remove the jammed paper from the MP tray.
Open and close cover A to clear the message
on the LCD panel, then reload the paper. The
printer resumes printing from the page that
jammed.
Check Paper Size
The paper size setting is different from the
size of paper loaded in the printer. Check to
see if the correct size of paper is loaded in the
specified paper source.
To clear this error, select Clear Warning
from the control panel’s Reset Menu. For
instruction about accessing the control panel
menus, see “How to access the control panel
menus.”
Check Paper Type
The media loaded in the printer does not
match the paper type setting in the printer
driver. Media that matches only the paper
size setting will be used for printing.
To clear this error, select Clear Warning
from the control panel’s Reset Menu. For
instruction about accessing the control panel
menus, see “How to access the control panel
menus.”
C Toner Cart Out
See “XXXX Toner Cart Out.”
(4/22)
EPSON AcuLaser C4000 Quick Reference
Clean Sensor
Open cover A and remove the transfer unit
temporarily. Wipe the transparent plastic
window at the back of the transfer unit with
a soft cloth, then reinstall the transfer unit.
Close cover A to clear this error.
If the error still remains, replace the transfer
unit with a new one.
Collate was disabled
Printing by specifying the number of copies
is no longer possible due to a lack of memory
(RAM) or free disk space on the optional
Hard Disk Drive. If this error occurs, print
only one copy at a time.
To clear this error, select Clear Warning
from the control panel’s Reset Menu. For
instruction about accessing the control panel
menus, see “How to access the control panel
menus.”
C Toner Low
See “XXXX Toner Low.”
C Toner Out
See “XXXX Toner Out.”
Duplex Mem Overflow
There is not enough memory for duplex
printing. The printer prints only on the front
and ejects the paper. To clear this error,
follow the instructions below.
If Off is selected as the Auto Cont setting on
the control panel’s Setup Menu, press N
Start/Stop to print on the back of the next
sheet, or press the q Job Cancel button to
cancel the print job.
If On is selected as the Auto Cont setting on
the control panel’s Setup Menu, printing
continues automatically after a certain
period of time.
Face Down Full
The output tray is full of printouts, and the
printer has stopped printing. Remove the
printouts from the output tray, and press the
N Start/Stop button to continue printing.
The output tray can hold up to 250 sheets.
Form Data Canceled
Unable to store form overlay data on the
printer’s optional Hard Disk Drive. Either
the drive is full, or the maximum number of
form overlay files has been reached. Delete
any form overlay files you no longer need,
then try storing the new overlay again.
To clear this error, select Clear Warning
from the control panel’s Reset Menu. For
instruction about accessing the control panel
menus, see “How to access the control panel
menus.”
Form Feed
Hold down the N Start/Stop button for more
than two seconds when the printer is offline
to print the data that remains in the printer.
Format Error ROM A
An unformatted ROM module has been
inserted. If the ROM module has been
formatted, but is still unreadable, format it
again. If the ROM is still unreadable after
reformatting, take the module to your dealer
for repair or replacement.
To clear this error, either press the N
Start/Stop button or turn off the printer and
remove the ROM module.
(5/22)
EPSON AcuLaser C4000 Quick Reference
Hard Disk Full
The optional Hard Disk Drive is full and you
cannot save any data. Delete the
unnecessary data from the Hard Disk Drive.
To clear this error, select Clear Warning
from the control panel’s Reset Menu. For
instruction about accessing the control panel
menus, see “How to access the control panel
menus.”
HDD Check
The printer is checking the Hard Disk Drive.
HDD Format ***%
The HDD is being formatted. The progress
of the format is shown as ***%.
Image Optimum
There is insufficient memory to print the
page at the specified print quality. The
printer automatically lowers the print
quality so that it can continue printing. If the
quality of the printout is not acceptable, try
simplifying the page by limiting the number
of graphics or reducing the number and size
of fonts.
To clear this error, select Clear Warning
from the control panel’s Reset Menu. For
instruction about accessing the control panel
menus, see “How to access the control panel
menus.”
Turn the Image Optimum setting off on the
control panel’s Printing Menu if you do not
want the printer to automatically lower the
print quality to continue printing.
You may need to increase the amount of
printer memory to be able to print at the
desired print quality for your document. For
more information on adding memory, see
“Memory Modules” in the Reference Guide.
Install Fuser
There is no fuser unit installed or the fuser
unit is not installed properly. Turn off the
printer and install the fuser unit if it is not
installed.
If a fuser unit is already installed, turn off the
printer, open cover A, then open cover D.
Then close cover A and open cover B.
Remove the fuser unit, then reinstall it
properly. Close covers D and B. The error
clears automatically if the fuser unit is
properly installed.
If the error is not cleared, the fuser unit is out
of order. Replace it with a new fuser unit.
Install LC1
The paper tray of the standard paper cassette
is not installed, or not installed properly.
Install the paper cassette correctly to clear
this error.
Install LC2
The paper trays of the optional Large
Capacity Paper Unit are not installed, or not
installed properly. Install the paper trays
correctly to clear this error.
Install Photoconductor
There is no photoconductor unit installed or
the photoconductor unit is not installed
properly. Turn off the printer and install the
photoconductor unit if it is not installed.
If a photoconductor unit is already installed,
turn off the printer, open cover A, then open
cover D. Remove the photoconductor unit,
then reinstall it properly. Close covers D and
A. The error clears automatically if the
photoconductor unit is properly installed.
(6/22)
EPSON AcuLaser C4000 Quick Reference
Install TransferUnit
There is no transfer unit installed or the
transfer unit is not installed properly. Turn
off the printer and install the transfer unit if
it is not installed.
If a transfer unit is already installed, turn off
the printer, open cover A, and remove the
transfer unit. Then reinstall the unit properly
and close cover A. The error clears
automatically if the transfer unit is properly
installed.
Jam XXX
Paper is jammed at the location indicated by
XXX.
If a paper jam occurs at two locations
simultaneously, both locations are
displayed. The following table shows the
possible variations of this message.
Location
Description
Jam AB
Paper is jammed at the fuser unit. For
instructions on how to remove jammed
paper at the fuser unit, see “Jam AB
(covers A and B).”
Jam A
Paper is jammed at cover A. For
instructions on how to remove jammed
paper at cover A, see “Jam A (cover
A).”
Jam AC
Paper is jammed where it feeds into the
printer, or at the paper cassettes. For
instructions on clearing this type of
paper jam, see “Jam AC (cover A and
paper cassettes).”
Jam B
Paper is jammed inside the duplex unit.
For instructions on clearing this type of
paper jam, see “Jam B (cover B).”
Jam
ABC
Paper is jammed where it feeds into the
printer or at the paper cassettes, and
inside the duplex unit. For instructions on
clearing this type of paper jam, see
“Jam ABC (cover A, paper cassettes
and cover B).”
Invalid AUX I/F Card
The printer cannot communicate with the
installed optional interface card. Turn off the
printer, remove the card, then reinstall it.
Invalid HDD
Either the optional Hard Disk Drive is
damaged or it cannot be used with this
printer. Turn off the printer and remove the
Hard Disk Drive.
Invalid IPDS
Turn off the printer and replace the IPDS
module.
Invalid PS3
An optional PostScript 3 ROM module that
cannot be used on this printer. Turn off the
printer and remove the module.
Invalid ROM A
The printer cannot read the installed
optional ROM module. Turn off the printer
and remove the ROM module.
K Toner Cart Out
See “XXXX Toner Cart Out.”
K Toner Low
See “XXXX Toner Low.”
K Toner Out
See “XXXX Toner Out.”
To clear this error, select Clear Warning
from the control panel’s Reset Menu. For
instruction about accessing the control panel
menus, see “How to access the control panel
menus.”
(7/22)
EPSON AcuLaser C4000 Quick Reference
Manual Feed xxx
The manual feed mode is specified for the
current print job. Make sure the paper size
indicated by xxx is loaded, then press the N
Start/Stop button.
For details on the manual feed mode, see
“Manually feeding paper” in the Reference
Guide.
Mem Overflow
The printer has insufficient memory to
execute the current task. Press the N
Start/Stop button on the control panel to
resume printing. Or press the q Job Cancel
button to cancel the print job. To prevent this
problem from happening again, decrease the
printing resolution or add more memory to
your printer as described in “Memory
Modules” in the Reference Guide.
Need Memory
The printer has insufficient memory to
complete the current print job. Cancel
printing by deleting it from the print queue
on your computer, or by pressing the q Job
Cancel button on the printer.
To clear this error message, select Clear
Warning from the control panel’s Reset
Menu. For instruction about accessing the
control panel menus, see “How to access the
control panel menus.”
To prevent this problem from happening
again, add more memory to your printer as
described in “Memory Modules” in the
Reference Guide.
Offline
The printer is not ready to print. Press the N
Start/Stop button.
Menus Locked
This message appears if you try to change
the printer’s settings through the control
panel when the buttons are locked. You can
unlock them by using the EPSON WinAssist
or WebAssist utility. Refer to the
Administrator’s Guide for information.
M Toner Cart Out
See “XXXX Toner Cart Out.”
M Toner Low
See “XXXX Toner Low.”
M Toner Out
Optional RAM Error
The read/write error occurs when the
printer is checking the optional memory
module in the memory slot S1. The access
speed of the memory module is too slow or
the memory module might be broken.
To clear this error, turn the printer off and
remove the optional memory module, then
turn the printer on.
Paper Out XXX YYY
There is no paper in the specified paper
source (XXX). Load paper of the indicated
size (YYY) into the paper source.
See “XXXX Toner Out.”
(8/22)
EPSON AcuLaser C4000 Quick Reference
Paper Set XXX YYY
The paper loaded in the specified paper
source (XXX) does not match the required
paper size (YYY). Replace the loaded paper
with the correct size paper and press the N
Start/Stop button to resume printing. Or
press the q Job Cancel button to cancel the
print job.
If you press N Start/Stop button without
replacing the paper, the printer will print on
the loaded paper even though it does not
match the required size.
Printer Open
Cover A, cover B, cover D, or some
combination of these covers are open. To
clear this error, close all covers.
To clear this error, select Clear Warning
from the control panel’s Reset Menu. For
instruction about accessing the control panel
menus, see “How to access the control panel
menus.”
RAM Check
The printer is checking the RAM.
Ready
The printer is ready to receive data and print.
Replace Photoconductor
Printing has stopped to avoid damage to the
engine. Turn off the printer, then replace the
photoconductor unit with a new one. See
“Photoconductor Unit” in the Reference
Guide for instructions.
Print Overrun
The required time to process the print data
exceeded the print engine speed because the
current page is too complex. Press the N
Start/Stop button to resume printing. Or
press the q Job Cancel button to cancel the
print job. If this message appears again,
select On as the Page Protect setting in the
control panel’s Setup Menu.
If you continue to receive this message when
printing a particular page, try simplifying
the page by limiting the number of graphics
or reducing the number and size of fonts.
You can also add more memory to the
printer as described in “Memory Modules”
in the Reference Guide.
The error clears automatically after you
replace the unit and close all printer covers.
The photoconductor service life counter is
reset automatically.
Replace TransferUnit
The transfer unit has reached the end of its
service life. Turn off the printer, then replace
the transfer unit with a new one. See
“Transfer Unit” in the Reference Guide for
instructions.
The error clears automatically after you
replace the unit and close all printer covers.
The transfer unit service life counter is reset
automatically.
PS3 Hard Disk full
The memory allocated for writing PostScript
3 commands on the optional Hard Disk
Drive is full.
(9/22)
EPSON AcuLaser C4000 Quick Reference
Reserve Job Canceled
The printer cannot store the data of your
print job using the Reserve Job function. The
maximum number of print jobs stored in the
printer’s Hard Disk Drive has been reached,
or the drive has no more memory available
to store a new job. To store a new print job,
delete a previously stored job. Also, if you
have any Confidential Jobs stored, printing
those jobs will make more memory
available.
To clear this error, select Clear Warning
from the control panel’s Reset Menu. For
instruction about accessing the control panel
menus, see “How to access the control panel
menus.”
Service Req xyyy
A controller error or a print engine error has
been detected. Turn off the printer. Wait at
least five seconds and then turn it back on. If
the error message still appears, write down
the error number listed on the LCD panel
(xyyy) and turn off the printer, unplug the
power cord, and contact a qualified service
representative.
Standby
The printer is in the standby mode. The
printer switches to the online mode
automatically when the printing data is sent
to the printer.
Unable Clear Error
Reset
The printer’s current interface has been reset
and the buffer has been cleared. However,
other interfaces are still active and retain
their settings and data.
Reset All
All printer settings have been reset to the
default configuration, or to the last settings
that were saved.
Reset to Save
A control panel menu setting was changed
while the printer was printing. Press the N
Start/Stop button to clear this message. The
setting will become effective after printing
has finished.
ROM Check
The printer is checking the ROM.
Self Test
The printer is performing a quick internal
check.
The printer cannot clear an error message
because the error status still remains. Try
solving the problem again.
Worn Fuser
This message indicates that the fuser unit has
reached the end of its service life. Printing
after this message appears is not guaranteed.
Turn the printer off, then replace the fuser
unit with a new one. See “Fuser Unit” in the
Reference Guide for instructions.
The error clears automatically after you
replace the unit and close all printer covers.
Worn Photoconductor
This message indicates that the
photoconductor unit has reached the end of
its service life. Printing after this message
appears is not guaranteed. Turn the printer
off, then replace the photoconductor unit
with a new one. See “Photoconductor Unit”
in the Reference Guide for instructions. The
error clears automatically after you replace
the unit and close the printer covers.
(10/22)
EPSON AcuLaser C4000 Quick Reference
Worn TransferUnit
This message warns you that the transfer
unit is near the end of its service life. You can
continue to print until the Replace
TransferUnit error message appears, but
early replacement is recommended to
maintain high print quality.
To clear this warning message and continue
printing, select Clear Warning from the
control panel’s Reset Menu. For instruction
about accessing the control panel menus, see
“How to access the control panel menus.”
Write Error ROM A/Write Error ROM P
This message indicates an internal error in
the printer. Reset the printer. If this error
persists, consult your dealer.
Wrong Photoconductor
An inappropriate photoconductor unit is
installed. Install only the photoconductor
unit listed in “Consumable products” in the
Reference Guide.
See “Photoconductor Unit” in the Reference
Guide for instructions on replacing the
photoconductor unit.
XXXX Toner Cart Out
The indicated toner cartridges are not
installed in the printer. (The letters C, M, Y,
or K appear in place of XXXX and indicate
the colors Cyan, Magenta, Yellow, and Black
respectively.)
Install the indicated cartridges. See “Toner
Cartridges” in the Reference Guide.
XXXX Toner Low
The indicated toner cartridges have less than
10% of toner remaining. (The letters C, M, Y,
or K appear in place of XXXX and indicate
the colors Cyan, Magenta, Yellow, and Black
respectively.)
You can continue to print until the XXXX
Toner Out error message appears. Waiting
until this message appears before replacing
the toner is recommended as toner may spill
during replacement if toner remains in the
cartridge. When printouts become faint, see
“Toner Cartridges” in the Reference Guide for
instructions.
Note:
❏ Do not replace the toner cartridge when the
XXXX Toner Low message appears. Toner
remaining in the toner cartridge may spill
out if you remove the toner cartridge to
replace it. Replace the toner cartridge when
the XXXX Toner Out message appears.
❏ If you replace the toner cartridge before the
XXXX Toner Out message appears, it is not
detected as a new toner cartridge and the
XXXX Toner Low warning may not be
cleared.
To clear this error, select Clear Warning
from the control panel’s Reset Menu. For
instruction about accessing the control panel
menus, see “How to access the control panel
menus.”
XXXX Toner Out
The indicated toner cartridges are out of
toner and need to be replaced. (The letters C,
M, Y, or K appear in place of XXXX and
indicate the colors Cyan, Magenta, Yellow,
and Black respectively.)
See “Toner Cartridges” in the Reference Guide
for instructions.
(11/22)
EPSON AcuLaser C4000 Quick Reference
Y Toner Cart Out
See “XXXX Toner Cart Out.”
Y Toner Low
See “XXXX Toner Low.”
Y Toner Out
See “XXXX Toner Out.”
(12/22)
EPSON AcuLaser C4000 Quick Reference
Printing and Deleting Reserve Job Data
Print jobs stored on the printer’s Hard Disk
Drive using the Re-Print Job, Verify Job, and
Stored Job options of the Reserve Job
function can be printed and deleted using
the control panel’s Quick Print Job Menu.
Jobs saved using the Confidential Job option
can be printed from the Confidential Job
Menu. Follow the instructions in this section.
Using the Confidential Job Menu
Follow these steps to print or delete
Confidential Job data.
1. Make sure the LCD panel displays Ready
or Standby, then press the
Enter
button to access the control panel menus.
2. Press the
Down button repeatedly
until ConfidentialJobMenu appears on
the LCD panel, then press the
Enter
button.
Using the Quick Print Job Menu
Follow these steps to print or delete Re-Print
Job, Verify Job, and Stored Job data.
3. Use the
Down or
Up button to
scroll to the appropriate user name, then
press the
Enter button.
1. Make sure the LCD panel displays Ready
or Standby, then press the
Enter
button to access the control panel menus.
4. Enter your 4-digit password by using the
corresponding buttons, as shown below.
2. Press the
Down button repeatedly
until Quick Print Job Menu appears on
the LCD panel, then press the
Enter
button.
3. Use the
Down or
Up button to
scroll to the appropriate user name, then
press the
Enter button.
4. Use the
Down or
Up button to
scroll to the appropriate job name, then
press the
Enter button.
2
3
4
1
5. To specify the number of copies you
want to print, press the
Enter
button, then use the
Down and
Up buttons to select the number of
copies.
To delete the print job without printing
any copies, press the
Down button
to display Delete on the LCD panel.
6. Press the
Enter button to start
printing or to delete the data.
Note:
❏ Passwords are always 4 digits.
❏ Passwords consist of numbers from 1
through 4.
(13/22)
EPSON AcuLaser C4000 Quick Reference
❏ If no print jobs have been saved with the
password you entered, Password
Error appears briefly on the LCD panel
then the printer exits the control panel
menus. Confirm the password and try
again.
5. Use the
Down or
Up button to
scroll to the appropriate job name, then
press the
Enter button.
6. To specify the number of copies you
want to print, press the
Enter
button, then use the
Down and
Up buttons to select the number of
copies.
To delete the print job without printing
any copies, press the
Down button
to display Delete on the LCD panel.
7. Press the
Enter button to start
printing or to delete the data.
(14/22)
EPSON AcuLaser C4000 Quick Reference
Clearing Jammed Paper
When paper is jammed in the printer, the
printer’s LCD panel and EPSON Status
Monitor 3 display alert messages indicating
the location of the jam.
Read the general precautions below, then
find the title in this section that corresponds
to the alert message on your LCD panel and
follow the instructions to clear the jammed
paper.
Precautions for clearing jammed
paper
Be sure to observe the following points when
you clear jammed paper:
❏ Do not forcibly remove jammed paper.
Torn paper can be difficult to remove
and might cause other paper jams. Pull
it gently in order to avoid tearing.
❏ Remove jammed paper with both hands
to avoid tearing it.
w
Warning:
❏ Be careful not to touch the fuser,
which is marked CAUTION HIGH
TEMPERATURE, or the surrounding
areas. If the printer has been in use,
the fuser and the surrounding areas
may be very hot.
❏ Do not insert your hand deep into the
fuser unit as some components are
sharp and may cause injury.
Jam AB (covers A and B)
When there is paper jammed around the
fuser unit, the LCD panel displays the Jam
AB error message.
Follow these steps to clear the jammed
paper.
1. Press the latch on cover A and open the
cover.
❏ When jammed paper is torn and remains
in the printer or when paper is jammed
in a place not mentioned in this section,
contact your dealer.
❏ Make sure that the paper type that is
loaded is the same as the Paper Type
setting in the printer driver.
(15/22)
EPSON AcuLaser C4000 Quick Reference
2. Turn the inner green levers of the fuser
unit outward, and gently remove any
jammed paper with both hands.
5. Raise the outer green knobs to open the
paper path, and remove the jammed
paper.
Note:
If paper is torn, be sure to remove all torn
pieces.
3. Close cover A.
4. Press the latch on cover B and open the
cover.
6. Close cover B.
When the paper jam is cleared completely
and the covers are closed, printing resumes
from the page that jammed.
(16/22)
EPSON AcuLaser C4000 Quick Reference
Jam A (cover A)
3. Open cover D.
Follow these steps to clear paper jams at
cover A.
1. Press the latch on cover A and open the
cover.
4. Grasp the handle of the photoconductor
unit firmly and remove the unit from the
printer.
2. Remove any jammed paper gently with
both hands.
(17/22)
EPSON AcuLaser C4000 Quick Reference
5. Remove any jammed paper.
6. Reinstall the photoconductor unit,
making sure the posts on the sides of the
unit slide into the slots.
7. Close covers D and A.
When the paper jam is cleared completely
and the covers are closed, printing resumes
from the page that jammed.
Jam AC (cover A and paper
cassettes)
When there is paper jammed at the place
where paper feeds into the printer, or in the
paper cassettes, the LCD panel displays the
Jam AC error message.
Follow these steps to clear the jammed
paper.
1. Remove the paper cassette from the
printer and discard any crumpled paper.
(18/22)
EPSON AcuLaser C4000 Quick Reference
Note:
The illustration shows the standard paper
cassette. If the optional Large Capacity Paper
Unit is installed, check the unit’s paper
cassettes in the same way.
2. Gently remove any paper that has fed
part way into the printer.
Note:
Confirm that the jammed paper is not still deep
inside the printer.
3. Remove the stack of paper from the
cassette, tap it on a flat surface to even
the edges, then reinsert it into the paper
cassette. Be sure the paper is evenly
aligned and the top of the stack is below
the metal retaining clip and the
maximum paper mark.
4. Reinsert the paper cassette into the
printer.
(19/22)
EPSON AcuLaser C4000 Quick Reference
5. Press the latch on cover A and open the
cover.
❏ When a paper jam occurs repeatedly at
the paper cassettes (Jam AC or Jam
ABC), jammed or crumpled paper may
still be inside the paper cassettes.
Remove the paper cassettes, then remove
the black unit that is located on the top
part of the inside of the cassette slot, and
check whether any jammed paper is
there.
6. Remove any jammed paper gently with
both hands. Be careful not to tear the
jammed paper.
z
When the paper jam is cleared completely
and cover A is closed, printing resumes from
the page that jammed.
Note:
❏ Always try to remove jammed paper
with both hands to avoid tearing it.
❏ If paper is torn, be sure to remove all torn
pieces.
(20/22)
EPSON AcuLaser C4000 Quick Reference
Jam B (cover B)
When there is paper jammed at the duplex
unit, the LCD panel displays the Jam B error
message.
Follow these steps to clear the jammed
paper.
1. Press the latch on cover B and open the
cover.
w
Warning:
Do not touch the fuser, which is
marked CAUTION HIGH
TEMPERATURE, or the surrounding
areas. If the printer has been in use,
the fuser and the surrounding areas
may be very hot.
3. Close cover B.
2. Gently remove any jammed or crumpled
paper.
When the paper jam is cleared completely
and cover B is closed, printing resumes from
the page that jammed.
Note:
❏ Be sure to remove the jammed paper by
pulling it upward.
❏ If paper is torn, be sure to remove all torn
pieces.
(21/22)
EPSON AcuLaser C4000 Quick Reference
Jam ABC (cover A, paper
cassettes and cover B)
When there are paper jams where paper
feeds into the printer or in the paper
cassettes, and at the duplex unit, the LCD
panel displays the Jam ABC error message.
To clear the paper jam, first clear the jammed
paper where paper feeds, as described in
“Jam AC (cover A and paper cassettes).”
Then, clear the jammed paper at the duplex
unit as described in “Jam B (cover B).”
Note:
When a paper jam occurs repeatedly at the paper
cassettes (Jam AC or Jam ABC), jammed or
crumpled paper may still be inside the paper
cassettes. Remove the paper cassettes, then
remove the black unit that is located on the top
part of the inside of the cassette slot, and check
whether any jammed paper is there.
Jam in the MP tray
When there is paper jammed at the MP tray,
the LCD panel displays the Check
Transparency error message.
Remove the paper from the MP tray and
remove the jammed paper from the MP tray.
Open and close cover A to clear the message
on the LCD panel, then reload the paper. The
printer resumes printing from the page that
jammed.
Note:
❏ When using transparencies, load them in the
MP tray and set the Paper Type setting to
Transparency in the printer driver.
❏ When the Paper Type setting in the printer
driver is set to Transparency, do not load
any other type of paper except
transparencies.
(22/22)


